1
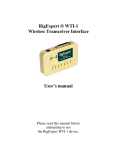
®
RigExpert TI-7
USB Transceiver Interface
User’s manual
Please read this manual before
attempting to use
the RigExpert TI-7 device.
-
-2-
Table of contents
1. What is a RigExpert TI-7?.................................................................................... 4
2. Specifications ....................................................................................................... 6
3. Front and rear panels ............................................................................................ 7
4. Transceiver and computer connection .................................................................. 8
4. Installing the virtual serial port drivers and the Navigator software .................... 10
5. Setting up the Navigator software....................................................................... 11
6. Checking the serial ports .................................................................................... 13
7. Updating the firmware........................................................................................ 13
8. Setting up programs for operating phone, CW and digital modes ....................... 14
-3-
1. What is a RigExpert TI-7?
RigExpert TI-7 is a device for operating phone, CW and digital modes using
personal computer with USB port. It provides:
• Transceiver audio interface
Analog audio interface is a connection to transceiver audio output (external
speaker connector or line output) and transceiver audio input (microphone
connector or line input). Audio interface enables operating digital modes,
recording and playing voice, as well as other useful functions (such as
measuring levels of a signal from the air) by using a computer.
• Input (main and sub channels) and output volume levels are adjusted by
potentiometers on the front panel of the device.
• CAT interface for various transceiver models
CAT (Computer Aided Transceiver) system provides control of transceiver
frequency, operating mode and other functions by computer software.
Normally, modern transceivers have serial (with various signal levels) link
providing CAT interface.
A virtual COM port is created for the CAT system so the computer software
can communicate to the transceiver.
• FSK output
FSK (Frequency Shift Keying) is a popular method of transmitting digital
messages over radio primarily used in radioteletype (RTTY) mode. Most
transceivers provide FSK modulator feature to make the RTTY signal stable
and clear.
A separate virtual COM port is created for the FSK function.
• PTT and CW output functions
-4-
Transceivers provide PTT (Push To Talk) and CW (Continuous Wave) keyer
inputs to allow setting the transmitter on or off and operating CW using
external device (PTT pedal, CW bug or paddle, terminal node controller, or
personal computer).
A separate virtual COM port is created for PTT/CW outputs.
• Squelch input
Some software, such as EchoLink, requires the interface to provide a squelch
input to detect if the radio channel is busy.
In RigExpert TI-7, the squelch input is assigned to the DCD line of the virtual
COM port used for PTT and CW outputs.
-5-
2. Specifications
• CAT serial port
• General features
Transceiver audio interface for
operating digital modes, voice
recording and playback
CAT (Computer Aided
Transceiver) system
FSK output
PTT and CW outputs
Squelch input
Baudrate: 300-115200 baud
Electrical compatibility: RS-232,
CI-V, TTL or inverted-TTL
(Yaesu, Icom, Kenwood, TenTec, Elecraft and JRC
transceivers)
• PTT/CW outputs
• Computer connection
PTT output: open collector and
TTL-level
CW output: open collector
Maximum current is 500 mA
USB (Universal Serial Bus)
connector
Powered from the USB port
(consuming 100 mA maximum)
No external power supply needed
• FSK output
Baudrate: 45-1200 baud
Open collector output
• Transceiver connection
Single 25-pin connector for
transceiver cable
Various transceiver models
supported
• System requirements
Desktop or laptop computer with
USB 1/2/3 compliant port
Windows 2000/XP/2003/Vista/7/8
(32 or 64-bit) operating system
No USB drivers required
The RigExpert Navigator software
is provided free of charge
• Audio interface
Insulated from digital nets
Maximum input/output amplitude
is 1V
Input/output samplerate: 8 to 48
kHz
True 16-bit DAC/ADC used
Volume levels are adjusted by the
front panel potentiometers
Dimensions: 11 x 13 x 4 cm
Weight: 0.3 kg
-6-
3. Front and rear panels
Front panel:
1. ON. Lights when the RigExpert TI-7 device is plugged to the computer.
2. CW. Shows transmissions in CW mode.
3. PTT. Indicates when the transceiver transmits.
4. CAT. Monitors CAT data exchange between transceiver and computer.
5. FSK. Lights when RigExpert TI-7 is sending FSK data.
6. Main. Input level, main receiver audio.
7. Sub. Input level, sub receiver audio.
8. TX. Output level, audio to the transmitter.
Rear panel:
9. TRANSCEIVER. 25-pin transceiver connector.
10. USB. Connect to the computer USB port.
-7-
4. Transceiver and computer connection
The connection to your transceiver is made by using a specialized cable. A specific
type of the cable depends on the manufacturer and the model of the transceiver.
Please watch the marking to make sure all plugs are inserted properly to
corresponding sockets located on your transceiver.
Notice: you may either order a transceiver cable with your TI-7 or assemble it
yourself. See the schematic diagrams on our website, www.rigexpert.com .
A number of analog and digital signals are router between your transceiver and
RigExpert TI-7. Cables for most modern rigs (Icom, Kenwood, Yaesu, Ten-Tec,
Elecraft) are available; future rigs are supported by design of the universal 25-pin
connector of RigExpert TI-7.
Notice: the squelch connection is not available in all cables manufactured by our
company. The user has to add this connection, if necessary.
-8-
Use a standard USB A-B cable (up to 5 meters long) to connect your RigExpert TI-7
to a USB port of your computer. It is recommended to use USB sockets located at
the back panel of the PC.
Once the cable is connected, computer detects a new device. “HID” and “Audio
class” device drivers are installed automatically; the user does not have to interact at
this step. Please wait a few seconds until the drivers are installed.
The drivers are invisible for the user; however, they provide three serial ports (CAT,
PTT/CW and FSK) as well as a sound card interface necessary for various radio
amateur programs.
-9-
4. Installing the virtual serial port drivers and the
Navigator software
Start the SetupRETI7.exe file from the installation CD (you may also download the
latest version from the Downloads section of our website) and follow on-screen
instructions.
Once the setup program is finished, the virtual serial port drivers and the Navigator
software is automatically started. The Navigator program is necessary for the
RigExpert TI-7 to function. Please watch the RigExpert Navigator icon in the
system tray of your Windows desktop: normally, the program should stay
minimized. The Navigator is started automatically, and will stay in the system until
you uninstall the TI-7 software.
- 10 -
5. Setting up the Navigator software
The Navigator program lets you configure virtual serial ports. These ports are
needed for other software to communicate to your transceiver. Double click the
Navigator icon in the system tray to open the main window.
Initially, no ports are created, so you will see Not selected instead of port numbers.
Press Add port and select serial port numbers for CAT, PTT/CW and FSK ports.
For instance, assign port numbers COM7, COM8 and COM9 for these functions.
Do not forget to press the Create/update button.
- 11 -
A few seconds later the virtual serial ports will be created and you will see the port
numbers at the Status tab.
You may press the Hide button to put the program in the system tray. Use the Test
buttons to test PTT and CW outputs of your RigExpert TI-7.
- 12 -
6. Checking the serial ports
To diagnose various problems related to virtual serial ports, please run the Check
serial ports utility from the Start – All Programs – RigExpert TI-7 menu.
7. Updating the firmware
Open the Firmware tab in the Navigator program, and then check the current version
of the firmware:
You may find latest firmware updates at the Downloads section of the website,
www.rigexpert.com. Download a firmware update file to your computer, then click
“Select a file…” in the Navigator program. Press the Update button to start updating.
This process is fail-safe: in case of a problem, just start over.
- 13 -
8. Setting up programs for operating phone, CW and
digital modes
RigExpert TI-7 is designed to work with various programs, such as MixW,
MMTTY, MMSSTV, MMVARI, HRD, WinTest and many others. In general, the
following hardware-related settings should be done in the software:
• Choose an audio device for audio input and output, should be “Line in
(RigExpert TI-7)“ and “Speakers (RigExpert TI-7)”. Please notice that the
exact names of audio devices depend on the version and the language of your
operating system.
• Select a serial port number for the CAT system. In this example, COM7.
Select baud rate and other parameters according to your transceiver manual.
(Please notice: all Yaesu transceivers require 2 stop bits.)
• Select a serial port number for PTT and CW outputs (PTT is attached to the
RTS wire, and CW is attached to the DTR wire). In this example, COM8.
• If you program is using FSK output, select a serial port for the FSK function.
In this example, COM9. (You may also need to check/uncheck the FSK
reverse check-box at the Settings tab of the Navigator program.)
You may then open the Status tab at the Navigator’s main window to see which
program is using virtual serial ports and to check serial port parameters:
To set up a specific program, please refer to the Software Setup examples.
- 14 -
- 15 -
Copyright © 2014 Rig Expert Ukraine Ltd.
http://www.rigexpert.com
RigExpert is a registered trademark of Rig Expert Ukraine Ltd.
RigExpert TI-7 USB Transceiver Interface
is made in Ukraine.
Printed in Ukraine
09-Jul-2014
- 16 -