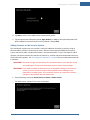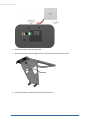
1
TouchScreen User Guide
Technicolor TCA203 Android
Release 5.1 Hawaii SU1
December 19, 2012
TouchScreen User Guide
© 2006, 2007, 2008, 2009, 2010, 2011, 2012, 2013 iControl Networks, Inc., the iControl logo, uControl, Inc.
the uControl logo, OpenHome, and Converge and all other uControl products and technology names are
trademarks or registered trademarks of iControl Networks, Inc. All other products or services mentioned
herein are trademarks of their respective companies.
2
Contents
Welcome to the TouchScreen
Understanding Security Network Components
Understanding the Security Zone Types
Understanding Alarms
Configuring the TouchScreen
Subscriber Portal
5
5
6
8
8
10
Using the TouchScreen
Understanding the TouchScreen Controls
Understanding the Screen
Security Status Header
System & Zone Trouble Header
Content Area
Low Power Mode
Show Security Cameras and Live Video
11
11
12
13
14
20
21
22
Managing Your System Security
Understanding Arming Modes
Arm Away Mode
Arm Stay Mode
Arm Night Mode
Understanding Your Protection Against Smash & Grab Attacks
Arming and Disarming the System
Arming the System from the TouchScreen
Disarming the System & Understanding What Happens During an Alarm
To disarm the system from the TouchScreen:
Sending an Emergency Alarm
Testing Your Alarms
Managing Connectivity Between the TouchScreen and the Central Monitoring Stations
Viewing Signal Strength
Testing Your Connectivity
Managing the Passcodes in your Security System
Managing your Keypad Codes
Managing Your Secret Word
Managing Connectivity between Your Home Devices and the Internet
View Your Security Account Information
Managing Sensors
Disable a Sensor
Viewing Your Zone Event History
Changing the Order that Security Zones are Listed in the TouchScreen
Managing Cameras
Adding Cameras to the Security System
Adding Key Fobs to the Security System
Editing Key Fobs
24
24
25
25
26
26
27
27
30
31
32
33
36
36
37
37
37
40
41
45
45
45
46
47
48
51
58
62
Managing Environmental Devices
Managing Lights
Managing Thermostats
63
63
66
Managing Wi-Fi Repeaters
68
3
TouchScreen User Guide
4
Maintaining & Configuring the TouchScreen Device
Reboot the TouchScreen
Understanding and Configuring Screen Brightness & Screen Dimming
Configuring the Screensaver
Configuring the Tones and Volume Levels
Cleaning the TouchScreen Screen
Viewing Technical Specifications of Your TouchScreen
71
71
71
74
74
76
76
Appendix A: TouchScreen Installation and Maintenance
Installing the Technicolor TouchScreen
Battery Requirements
Replacing the Battery
Recommendations for Sensor Installation and Placement
Evacuation Plan
Additional Emergency Preparations
81
81
85
86
88
90
90
Appendix B: Using the Key Pad
Checking System Status
Arming the System
Arm Away Mode
Arm Stay
Disarming the System
Sending an Emergency Police Alarm
Mounting the Key Pad
Changing the Batteries in the Key Pad
To Reset the Key Pad to Default
92
92
92
92
92
93
93
93
94
94
Appendix C: Wi-Fi Repeater Placement
95
Appendix D: Quick Reference Tables
96
Welcome to the TouchScreen
Welcome to the TouchScreen
The purpose of this document is to explain how to do the following in the OpenHome Converge system:
Understand and operate the TouchScreen device
Arm and disarm your security system
Send a panic alarm
View system status and arm/disarm the system
Manage connectivity between the TouchScreen and the Central Monitoring Stations
Manage pass codes
Manage security zones
Manage emergency dispatch contact information
View history logs
View account information
Understanding Security Network Components
Your security network is made up of devices that consist of anything that communicates with the
TouchScreen, such as Door/Window sensors, lighting devices, thermostats, Panel Interface devices, key
pads, and key fobs. The TouchScreen communicates with sensors by radio frequency. Optional cameras
communicate with the security network router wirelessly. The TouchScreen maintains communication
with the system servers through the Internet and by cellular.
The following graphic shows how the network is set up.
5
TouchScreen User Guide
Figure 1: Security Network
The following table describes the equipment that may be included with your security system.
Table 1: Security Network Components
Description
Security Network Router
This is the hub of your security network. This device is installed between your broadband modem and your home network router.
TouchScreen
The device used to interface with your security system.
Sensors
Multiple types of sensors are available:
Doorway/window sensors monitor the opening and closing of potential entry
and exit points.
Motion detectors monitor movement within the premises.
Carbon monoxide sensors trigger if carbon monoxide is detected.
Flood sensors trigger if water comes in contact with the sensor.
Glassbreak sensors trigger if a window is broken.
Smoke detectors trigger when smoke is detected.
Cameras
Up to six cameras can be installed in your security system. Cameras can be configured
to take a series of pictures if a particular sensor is faulted.
Panel interface
This device connects to a traditional home security system and allows you to control
its components from the TouchScreen.
Thermostats
This device is used to remotely control the indoor temperature of the premises.
Lights
These devices can be remotely controlled using the security system.
Wi-Fi
Repeater
This device extends the range of the security network router to connect to devices that
require Wi-Fi connectivity.
Siren
Repeater
This device is used to connect to sensors and devices that require RF connectivity. It
also functions as a siren.
Understanding the Security Zone Types
Security zones are the sensors that detect movement and the opening and closing of doors and
windows. The sensors communicate wirelessly with your TouchScreen. Security zones are added to the
system and configured by your installer. You can enable and disable each security zone using the
Security app.
The following table describes the security zone types available.
Table 2: Security Zones
Security Zone Function
Description
Sensor Types
Entry/exit
For doorways that are used to enter and exit the premises
and windows.
Door/Window
6
Welcome to the TouchScreen
Security Zone Function
Description
Sensor Types
When the system is armed, faulting this type of sensor
starts an Entry Delay countdown rather than sending an
immediate alarm.
During Exit Delay, this zone can be repeatedly faulted.
Doorways can be configured to be entry/exit or nonentry/exit.
Note:
Perimeter
For more information on Entry/Exit delays, see
" Managing Your System Security" on page 24
If faulted when the system is armed or during an Entry/Exit Door/Window
delay, an alarm is tripped.
sensor
Motion
detector
Glass break
detector
Interior Follower
Monitors the internal living spaces of the premises and
Motion
triggers an immediate alarm if the system is armed in Away detector
mode.
Not armed when the system is in Armed Stay mode.
Interior with Delay
Provides an entry delay if the motion sensor is tripped
Motion
when the TouchScreen is armed. Entry Delay begins
detector
whenever the motion sensor detects motion, regardless of
whether an entry/exit delay zone was tripped first.
Interior Follower Arm
Night
Allows the use of a motion detector in Arm Night mode.
Motion
The alarm trips immediately if motion is detected. This
Detector
zone should be assigned to motion detectors that are
placed in areas of low traffic, such as attics, basements, and
garages.
Interior Delay Arm Night Provides a delay equal to the entry delay when the
detector is tripped. This zone can be used in a high-traffic
area.
24-Hour Inform
Motion
Detector
When this security zone is tripped, there is never an alarm. Door/Window
However, an event is recorded in the history, and the
sensor
TouchScreen emits a configured sound.
Motion
detector
Glass break
detector
24-Hour Fire
Generates an immediate fire alarm if triggered.
Smoke alarm
Silent 24-Hour
Usually assigned to a zone containing an emergency
Door/window
sensor
7
TouchScreen User Guide
Security Zone Function
Description
Sensor Types
button. Sends a report to the central station, but provides
no keypad display or sound.
Audible 24-Hour
Usually assigned to a zone containing an emergency
Door/window
button. Sends a report to the central station and provides sensor
an alarm sound at the keypad as well as an audible external
alarm.
Trouble Day/Alarm Night Provides an instant alarm if faulted when armed in Alarm
Away mode.
Door/window
sensor
Understanding Alarms
When an alarm is tripped an audible alert is sounded. From that point, you have a specific amount of
time (default: 30 seconds) to enter your keypad code or an alarm will sound. If a valid keypad code is not
entered within a specific time of the audible alarm sounding, a message is sent to a central monitoring
station. See "Disarming the System & Understanding What Happens During an Alarm" on page 30 for
more information.
The central monitoring station will attempt to contact the persons listed on the account. When they
reach a person listed on the account, they will ask for the Secret Word to affirm whether a genuine
emergency is occurring. If no one on the list can be contacted, or if the person contacted gives the wrong
Secret Word, the central monitoring station immediately dispatches police or other appropriate
emergency personnel.
If the alarm is not cleared within 4 minutes, the system resets so it can monitor additional alarm events.
If a sensor is faulted too many times resulting in alarms, no more alarms will be sent to central
monitoring for 48 hours or until the security system is disarmed.
Configuring the TouchScreen
You can use the Settings app to access a variety of operations to configure and maintain your security
system.
Note:
You cannot access the Security app if the security system is armed.
To access the Settings app:
1. From the Home screen (see page 20) tap the Settings app.
The Keypad screen is displayed.
8
Welcome to the TouchScreen
2. Tap the numbers to enter your keypad code.
The Settings menu is displayed.
From the Settings app you can do the following:
Manage the way sensors are listed in TouchScreen reports and tools (page 46)
Manage your cameras (page 48)
Test your alarms (page 33)
View and test the TouchScreen’s connectivity to the central monitoring stations (page 41)
Manage your keypad codes and secret word (page 37)
View your account information (page 45)
Manage your TouchScreen device settings (page 74)
View technical information about your TouchScreen device (page 76)
9
TouchScreen User Guide
Subscriber Portal
The Subscriber Portal is a web-based tool that allows you to remotely connect to your security system.
You can access the Subscriber Portal from a PC or mobile Internet device. Many operations that can be
done from the TouchScreen can also be performed from the Subscriber Portal. Some operations such as
managing which apps are accessible from your TouchScreen can only be performed from the Subscriber
Portal.
Your installer has provided you with the URL address of the Subscriber Portal as well as a username and
password to access it.
See the Subscriber Portal User Guide for more information.
10
Using the TouchScreen
Using the TouchScreen
The Technicolor TCA203 TouchScreen is the center of your home security system. This Androidpowered device allows you to perform actions such as arming and disarming your security system,
monitoring the status of your security sensors, and sending emergency alarms.
For detailed information about operating an Android device, refer to the Android documentation
provided by Google.
Warning: The rechargeable battery that came with your TouchScreen is only available through your
service operator. If your battery needs to be replaced, contact your service operator to arrange for
replacement.
Understanding the TouchScreen Controls
The following diagram shows the major components of the TouchScreen:
Each button is described in the following table:
Figure 2: TouchScreen Device & Home Screen
Button
Description
Home button. Press this button to go to the Home (main) screen in the TouchScreen screen.
11
TouchScreen User Guide
Button
Description
Android menu button. Press this button to display the Android configuration menu.
Back button. Press this button to return to the previous screen.
Emergency Alarm button. Press this button to icons for fire, medical, or police service. Tap
one of these icons to immediately send an alarm to the appropriate call center. The button
is located at the bottom right in front of the device. When A/C power is available, this
button is lit. See page 32 for more information.
Sleep mode button. Press this button, which is located on the right side, to darken the
TouchScreen. Tap the TouchScreen to return to the normal state.
Volume switch. Press this button to adjust the volume of the TouchScreen.
Understanding the Screen
The TouchScreen communicates with your security system. It combines security and home controls on a
graphical interface, providing:
A real-time view of the system statuses
Tools to manage your security system
Additional optional applications such as news and weather
The first screen displayed is the Home screen. It is from this screen that you navigate through menus by
tapping buttons to access the function you desire. If the screen is black (showing nothing) this is because
the system is not receiving A/C power or the display is powered off to conserve battery life.
The screen is divided into the following operational sections:
Security Status Header (see page 13)
System & Zone Trouble Header (see page 14)
Content Area (see page 20)
12
Using the TouchScreen
Security Status Header
The Security Status header displays in the upper left hand of the TouchScreen. It tells you whether the
system is armed or disarmed and other information. Tap this header to arm or disarm the system.
Also, during troubles that would prevent arming (such as a monitored door or window being opened) an
announcement replaces the Arm/Disarm status.
If you tap this header at that time, the TouchScreen presents the Arm System tab of the Security app.
During the Exit Delay, the header changes to announce the number of seconds until the system is armed.
During the Entry Delay, the header changes to announce the number of seconds before the alarm
sounds.
13
TouchScreen User Guide
System & Zone Trouble Header
The System & Zone Trouble header displays in the upper right hand of the TouchScreen. It only displays
when there is a connectivity (cellular, broadband, etc.) or power problem with the TouchScreen, when a
sensor goes down (such as due to a battery failure), or a sensor is being tampered with (such as the cover
being opened).
When the system reports a trouble, it sounds an audible alert regularly to ensure that you are aware of
the problem.
When a System & Zone header is displayed, tap it to show the Troubles list which displays all the current
troubles with the TouchScreen and sensors.
Tap the text next to the
14
to view help on resolving that trouble (resolution information).
Using the TouchScreen
Tap
to mark the trouble as acknowledged
. An acknowledged trouble mutes the audible alerts
for twelve hours. After that time, the trouble begins the alert again. You must acknowledge it by tapping
the OK button again to silence the alerts.
From the resolution information, you can:
Tap Return to view the Troubles list again where you can choose to acknowledge the current trouble or view the resolution information for other troubles.
Tap Acknowledge Problem to acknowledge the current trouble immediately and return to the
Troubles list.
The following table lists messages that can be displayed in the trouble header .
15
TouchScreen User Guide
Table 3: System & Zone Trouble Header Messages
Message
Cause
Resolution
AC Power
Disconnected
TouchScreen is not receiving A/C
power.
Confirm that the power adapter is plugged
into the TouchScreen.
The system is in Low Power Mode (see
page 21).
Confirm that the power adapter is plugged
into an un-switched outlet.
Confirm that the un-switched outlet has
power.
Plug the power adapter into another outlet.
Alarm
TouchScreen is not accessing the
Restore Internet connectivity as soon as
communication Internet through the local network, nor possible.
failed
does it have cellular connectivity.
If the lack of cellular connectivity persists,
contact Customer Care.
Battery failure
Backup battery for the TouchScreen is
dead, and there is a loss of external
power.
When AC Power is restored the battery will
recharge. If not, have the battery
connection checked.
After external power is restored, it
takes approximately 21 hours for the
battery to be fully charged.
Battery Low
See Sensor Battery Low.
Confirm that the power adapter is plugged
into an un-switched outlet.
If A/C power is connected but the
TouchScreen has been off for an extended
period, the battery could still be charging.
Battery
Removed
Battery for the TouchScreen has
become detached.
Open the battery cover and check the
battery connection.
Broadband
Connection
Lost
TouchScreen is not accessing the
Restore Internet connectivity as soon as
Internet through the local network, but possible.
the device still has cellular connectivity.
Cellular connectivity allows only enough
communication with central monitoring to
communicate major events such as alarms.
Camera
Connection
Failed
TouchScreen cannot communicate with Ensure that the camera is powered on, and
one of your IP cameras.
that it is in range of the Wi-Fi router. The
power indicator light on the camera should
be on solid.
Cellular
TouchScreen cannot communicate
Communication over the cellular network.
Lost
If this problem persists, contact Customer
Care.
Communication TouchScreen has detected an attempt
Jammed
This could be a burglary in progress.
16
Using the TouchScreen
Message
Cause
Resolution
to jam its communication with the
sensors.
Most likely, someone is using a device
designed to scramble the radio
frequency (RF) signal of the sensors.
Lost Power
External power for the sensor or device Restore power to the sensor or device as
named in this alert is not connected.
soon as possible to avoid draining the
Only applicable to devices that require battery.
external power.
Low Battery
Detected
Battery for the identified sensor is low.
Replace the battery as soon as possible.
Needs Cleaning
Sensor named in this alert is dirty or
dusty.
Clean the identified sensor.
Network
Connection
Lost
No broadband or cellular connectivity
to the TouchScreen.
Restore Internet connectivity as soon as
possible.
Sensor Battery
Low
The battery in the sensor is getting low. Replace with a battery of the same size and
capacity as soon as possible.
Contact Customer Care to report the loss of
cellular connectivity.
A low battery report is issued when the If you cannot replace the battery
battery reaches 2.75 volts for sensors. immediately, you can choose to
acknowledge the problem (tap OK in the
Troubles list) for now so you can arm your
system.
If after replacing the battery the problem
persists, contact Customer Care.
Sensor
TouchScreen cannot communicate with Replace the sensor.
Communication the identified sensor.
OR
Failure
The most common cause for a sensor
communication failure is a low battery. Replace the battery immediately with a
battery of the same size and capacity.
The TouchScreen checks its
If you cannot replace the battery at this
communication integrity with the
time, you may choose to acknowledge the
sensors every 27 minutes. This
problem for now so that you can arm your
message is posted when the sensor
system. If after replacing the battery the
does not respond within 6 hours.
problem persists, contact Customer Care.
Sensor
TouchScreen’s communication with the This could be a burglary in progress.
Communication identified sensor is being jammed.
Jammed
17
TouchScreen User Guide
Message
Cause
Resolution
Most likely, someone is using a device
designed to scramble the radio
frequency (RF) signal of the sensors.
Sensor Lost
Power
External power for the identified sensor Restore power to the sensor or device as
or device is not connected.
soon as possible to avoid draining the
battery.
Sensor Needs
Cleaning
Identified smoke detector is dirty or
dusty.
Sensor Tamper
Detected
Cover of the identified sensor has been Make sure that the sensor cover on the
removed.
sensor is securely attached to the sensor
base.
Clean the identified smoke detector.
For smoke detectors, ensure the cover is
securely in the twist-lock position on the
base.
If the problem persists, you can choose to
acknowledge the problem (tap Acknowledge
Problem) to be able to arm your system
until Customer Care can provide a
permanent solution.
Sensor Test
Test button for the identified sensor
Button Pressed was pressed.
If a sensor test is not in progress, check the
identified sensor.
System Battery
Low
TouchScreen has lost A/C power and is Check the A/C adapter.
on battery backup. The battery voltage
is 3.7 volt with about 5% remaining
Restore A/C power to the TouchScreen as
power. Complete loss of power to the soon as possible.
TouchScreen is imminent.
System not
ready to Arm
Door or window is open.
Open the Security app and check the
security zones, door or window might be
open.
System Power
Lost
TouchScreen has lost A/C power and is
on battery backup.
Check the A/C adapter.
Restore A/C power to the TouchScreen as
soon as possible.
System
Upgrade in
Progress
Message
Firmware update currently in progress. No action required.
System will not
Arm
User entered an invalid keypad code
when attempting to arm the system.
Message will go away when the update is
completed.
Reattempt to enter the security code.
Use the Settings app to add, edit, and delete
18
Using the TouchScreen
Message
Cause
Resolution
keypad codes.
If the problem persists, you can choose to
acknowledge the problem (tap Acknowledge
Problem) to be able to arm your system
until Customer Care can provide a
permanent solution.
Tamper
Detected
Cover of the identified sensor or device Make sure that the sensor cover on the
has been removed.
sensor is securely attached to the sensor
base.
For smoke detectors, ensure the cover is
securely in the twist-lock position on the
base.
If the problem persists, you can choose to
acknowledge the problem (tap Acknowledge
Problem) to be able to arm your system
until Customer Care can provide a
permanent solution.
Unknown
Trouble
An unknown condition occurred.
Contact Customer Care.
Zone Swinger
Shutdown
A sensor has been triggered too many
times resulting in alarms (default is one
time). No more alarms will be sent to
central monitoring for 48 hours or until
the security system is disarmed.
Disarm the system to stop the swinger
shutdown.
The Swinger Shutdown feature helps
prevent a runaway TouchScreen from
tying up the central station.
Contact Customer Care to find out the
maximum number of alarms sent to central
monitoring before Swinger Shutdown for
your system.
19
TouchScreen User Guide
Content Area
The Content area contains the interactive functionality of your TouchScreen. The TouchScreen apps are
displayed here. When you use or modify an app, this is where the menus and tools are displayed.
Figure 3: Content Area
Home Screen
The Home screen is the default interface when the user accesses the TouchScreen. Return to this screen
at any time by pressing the Home button
.
The TouchScreen provides additional apps when cameras, lighting devices, and thermostats are added
to the system.
The Home screen displays a maximum of 10 TouchScreen apps at a time. They are like the apps installed
on a smart phone. If you have more than 10 apps installed on the TouchScreen, the additional apps are
displayed on additional screens.
The screen buttons under the apps denotes the number of screens the TouchScreen is currently
employing to accommodate all the installed apps. In Available App Screens, the presence of the two
indicators mean the TouchScreen has two screens to accommodate its installed apps.
Figure 4: Available App Screens
20
Using the TouchScreen
You should think of the multiple screens as residing next to each other in a line. The indicator represents
the screen currently displayed.
To access another screen of TouchScreen apps:
1. Swipe your finger across the TouchScreen from right to left. The screen is dragged over to reveal
the next screen to the right.
2. To return to a previously viewed screen, sweep your finger over the screen from left to right.
Low Power Mode
The TouchScreen is powered by a back-up battery and A/C power. When A/C power is lost, the
TouchScreen places itself in Low Power mode.
WARNING: Low Power Mode is an emergency backup mode designed to ensure that your security
system continues to communicate alarms during unforeseen power outages. During Low Power Mode,
your system loses remote control functionality and only broadcasts major system events such as alarms.
When the A/C power to the TouchScreen is lost, the following occurs:
1. The lights on the buttons go dark.
2. The TouchScreen stops communicating over broadband with the central monitoring station and
the system servers (if the premise has lost power the router will be down as well).
3. The TouchScreen stops sending heartbeat signals to the system servers over cellular.
4. The TouchScreen reports an AC Power Loss trouble in the Trouble Header.
5. The TouchScreen tries to send an AC Power Loss message to the system servers over cellular if connectivity is available. If the system servers receive the message, the Subscriber Portal and other
mobile devices report an AC Power Loss trouble, and will never report a Connectivity Loss trouble
messages for as long as Low Power Mode continues.
Note:
The Subscriber Portal and mobile devices eventually might report a loss of broadband
and cellular connectivity if the AC Power Loss message was not received for some
reason. In this case, they will not report an AC Power Loss trouble.
6. Fifteen seconds after the attempt to send the message, the screen of the TouchScreen goes dark.
7. While in Low Power Mode:
When the screen is tapped, the TouchScreen “wakes up” temporarily to display the Home
screen, but you cannot use any TouchScreen apps that communicate with remote sources.
For example, you are not able to use the News app or Sports app at all.
The TouchScreen stays awake only enough to continue communicating with the sensors
and monitoring for other events.
Most non-alarm events are not sent to the system servers or the central monitoring station, although you can view them in the History (page 46) on the TouchScreen only. The
exceptions are the following:
21
TouchScreen User Guide
Alarms
Arming the system
Disarming the system
When the back-up battery power drops below the required operational levels, the following
occurs:
The screen does not wake up when it is tapped.
There is no broadband or cellular connectivity.
Otherwise the TouchScreen is still operational. It continues to communicate with sensors
and peripherals so it might produce sounds based on security zone events. When the
TouchScreen is in this state, 90 seconds after A/C power is restored, the device is rebooted
automatically .
8. Just before the TouchScreen goes completely dead due to the loss of battery power, it attempts
to sends a “Loss of Power” message to the system servers over cellular. Show Security Cameras and Live Video
From the TouchScreen, you can display an overview of all the cameras in your security system.
You also can control other aspects of the cameras and video from the TouchScreen. See "Managing
Cameras" on page 48 for how to:
Modify the video quality displayed by a camera.
Change the name label on the camera.
Associate the camera with a zone so that it takes a series of pictures when the zone initiates an
alarm.
Turn the camera LED on or off.
To display the images or live video from your cameras:
1. From the Home screen, tap the Camera app.
2. Images of all the camera views are displayed (updated every five seconds).
22
Using the TouchScreen
Note:
If there is only one camera attached to the security system, the camera view displays
live video.
3. Tap an image to view live video from that camera.
4. If the TouchScreen loses connectivity with the camera while displaying live video from it, the following message is displayed.
The system is having trouble connecting to your camera. Press OK to try to reconnect. If the
issue persists, check that the camera is powered on and in range of your router.
5. When power and network connection is restored, tap OK to close the message.
23
TouchScreen User Guide
Managing Your System Security
The section describes the important concepts and management operations for your security system.
This section explains:
The various arming mode options (see page 24)
Your system’s protection against Smash & Grab intrusions (see page 26)
As described in this section, you can:
Arm and disarm your security system (see page 27)
Send an Emergency Alarm (see page 32)
Test your alarm system (see page 33)
Manage the connectivity between the TouchScreen and the monitoring station (see page 36)
Manage the connectivity between your personal home network and the Internet (see page 41)
Manage the passcodes in your security system (see page 37)
View your security account information (see page 45)
Manage your security sensors (see page 45)
Manage your cameras (see page 48)
Manage your environmental devices such as lights and thermostats (see page 63)
Understanding Arming Modes
You can arm the system for multiple scenarios:
Arm Away—Everybody leaving
Arm Stay—People active inside (see page 25)
Arm Night—Everybody going to bed (see page 26)
Different arming modes use different rules for when sensors are tripped and for Entry/Exit delays. An Exit
delay is a short period of time after the system is armed for you to leave the premises (default 60
seconds). Entry delay gives you time to disarm the system when you reenter the premises (default 30
seconds). You must enter a valid keypad code within the Entry delay period to avoid sounding an alarm.
Consult with your installer or Customer Care representative to customize the Entry/Exit delays on your
system.
Note:
24
After the alarm is faulted the Alarm Transmission Delay period starts (see page 30).
Managing Your System Security
In the Armed state and during the Entry Delay period, if the central system loses all connectivity with
your TouchScreen, an alarm is immediately sent to the central monitoring station. This prevents an
intruder from attempting to stop an alarm by destroying the TouchScreen. See "Understanding Your
Protection Against Smash & Grab Attacks" on page 26 for more information.
Arm Away Mode
The Arm Away mode is used when everyone is leaving the house. The following rules apply:
Alarm trips immediately if a monitored Perimeter zone (non-entry/exit door or window) is opened.
Interior motion detectors are armed.
Entry/Exit zones start an Entry Delay.
Exit Delay starts when the system is armed.
For the Arm Away mode, the following Entry/Exit Delay rules apply:
When armed, the system audibly beeps once per second announcing that the system is in the Exit
Delay period. During the last 10 seconds of the Exit Delay state, the system audibly fast beeps (two
beeps per second).
A numerical countdown timer on the TouchScreen indicates how much time remains in the Exit
Delay.
If an entry/exit zone is faulted, restored and then faulted again prior to the end of the exit delay
then the Exit Delay is restarted. This only occurs once.
If no Entry/Exit Zone opens and closes during the Exit Delay, the Arming Mode reverts to Armed
Stay.
After Exit Delay, the Security Status header is relabeled Armed Away and sounds 2 short beeps.
If an Entry/Exit zone is opened the Entry Delay period starts with an audible beep each second.
The system beeps twice per second in the last 10 seconds of the Entry Delay period. The keypad
code must be entered during this period to avoid sounding an alarm. During the Entry Delay
period, the motion detectors will not log events.
Arm Stay Mode
The Arm Stay mode is used to arm the system when there are people in the premises. The following rules
apply:
Alarm trips immediately if a monitored Perimeter zone (non-entry/exit door or window) is opened.
Interior motion detectors are not armed.
Entry/Exit zones start an Entry Delay.
Exit Delay starts when the system is armed.
Exit Delay does not beep and is twice the length of Alarm Away mode.
25
TouchScreen User Guide
For the Arm Stay mode, the following Entry/Exit Delay rules apply:
When an entry/exit zone is opened, the Entry Delay period sounds an audible beep each second.
The system beeps twice per second in the last 10 seconds of the Entry Delay period. The keypad
code must be entered during this period to avoid sounding an alarm.
When the system is armed, the Exit Delay period starts, BUT there is no audible beep during the
Exit Delay period (as there is in Arm Away). The Exit Delay period is the time between the system
being armed and the alarms actually being activated. This gives the user time to leave through an
entry/exit security zone.
The Exit Delay period is twice as long as for the Arm Away mode, and there is no audible alert
during the countdown.
A numerical countdown timer indicates how much time remains in the Exit Delay period.
If an entry/exit zone is faulted, restored and then faulted again prior to the end of the exit delay
then the Exit Delay is restarted. This only occurs once.
After the Exit Delay, the Security Status header is relabeled Armed Stay and sounds 3 short beeps.
Arm Night Mode
The Arm Night mode, is used when everyone is going to bed.
This mode works the same as Arm Stay except that there is no Entry Delay period. If an entry/exit zone is
opened, an alarm sounds immediately.
Note:
There is still an Alarm Transmission Delay period (see page 30).
Note:
There is still an Exit Delay period that works the same as in Arm Stay mode.
Understanding Your Protection Against Smash & Grab Attacks
Your security system communicates continuously (via broadband and cellular) with the monitoring
servers. There is always the possibility that an intruder will attempt to defeat your security system by
breaking in to the premises and destroying the TouchScreen. But this is the most futile method they
could use. Central monitoring contacts the authorities if the TouchScreen does not send an alarm or
disarm notification after an Entry Delay.
The system detects a Smash & Grab event when it receives an Entry Delay event from a TouchScreen but
does not receive an associated Alarm event or Disarm event within the configured window.
Mere connectivity loss during the Entry Delay period does not trigger a Smash & Grab as long as the
Disarm or Alarm event was received by the server. Finally, it does not matter whether the TouchScreen
has connectivity to the server only over the broadband or cellular channel.
26
Managing Your System Security
Arming and Disarming the System
The Security status of your security system is displayed in the Security Status header.
The message that the Security Status header displays when the
status is “Disarmed”.
Tap to arm the system.
The message that the Security Status header displays when the
status is “Armed”.
Tap to disarm the system.
Arming the System from the TouchScreen
To arm the system with a key pad device, see page 93.
To arm the system from the TouchScreen:
1. Tap the Security Status header when it is in Disarmed state.
The Security Options screen is displayed with a keypad and the Arm System tab open.
2. Tap an arming mode (Arm Stay, Arm Away, or Arm Night) and enter your security code.
3. The Security Status header changes to display a countdown message.
The text of the message will vary, depending on which arming mode you selected.
Special Rules:
27
TouchScreen User Guide
If you selected the Arm Away mode, you have until the Exit Delay is over to exit the
premises.
Otherwise, the system is automatically armed in Arm Stay mode. There is still an Exit Delay
period for the other Arming modes as well, but they do not require that the door open and
close during the period.
If you open and shut an Entry/Exit door during the Exit Delay and then re-enter the
premise, the Exit delay restarts at 120 seconds for Arm Stay and Arm Night or 60 seconds
for Arm Away. It will only do this one time. If the wrong code is entered, the countdown
timer resets to 60 or 120 seconds.
If an Entry/Exit door is left open at the end of Exit Delay, the Entry Delay immediately starts
and, if the system is not disarmed, an alarm will sound.
Bypassing Zones
To arm the system, the TouchScreen requires that a sensor zone be turned off (bypassed), if it has any of
the following troubles:
Sensor Tamper Detected
Tamper Detected
Sensor Communication Failure
It is NOT necessary to bypass for any other troubles. Instead, you must acknowledge the trouble before
arming the system.
Note:
Fire/smoke and carbon monoxide sensors cannot be bypassed.
Cancelling the Arming Process
If you arm the system in Arm Away or Arm Stay mode, the Security Status header displays a countdown
of the number of seconds until the Exit Delay is over. You can choose to cancel the arming process.
To cancel the arming process:
1. Tap the Security Status header while it is displaying a countdown.
The Security app is displayed with a keypad and the Disarm System tab active. The view from the
camera(s), if any, is displayed.
28
Managing Your System Security
2. Enter your security code to stop the arming process.
Setting Audible Feedback for the TouchScreen
By default, the TouchScreen makes a sound any time you provide input by tapping it. This audible
feedback can be disabled.
To configure audible feedback:
1. From the Settings app (see "Configuring the TouchScreen" on page 8), select Touchscreen>
TouchScreen Audible Feedback.
The Audible Feedback screen is displayed.
2. Select No from the Provide Audible drop-down menu to disable feedback sounds or Yes to enable
them.
29
TouchScreen User Guide
Disarming the System & Understanding What Happens During an Alarm
When you enter an armed premises, an Entry Delay period starts:
During the Entry Delay, the header changes to announce the number of seconds before the alarm
goes off.
The Security app screen displays either the camera associated with the security zone where you
entered the premises or the default camera, if no camera is associated with that zone.
The TouchScreen beeps audibly once every second, until the last 10 seconds when it beeps twice a
second.
If a valid keypad code is not entered by the end of the Entry Delay period, an alarm sounds. From the
time an alarm sounds (or starts silently), for most reasons, you have 30 seconds (default) to enter a valid
keypad code to disarm the system and prevent an alarm being sent to the central monitoring station.
This is called the Alarm Transmission delay or the Abort Window.
The Alarm Transmission Delay is a required period that prevents a report to the central station if an alarm
was triggered innocently.
IMPORTANT: Emergency alarms (see page 32) and smoke alarms are reported without an Alarm
Transmission delay or an Entry Delay. Consult Customer Care to understand the
number of seconds configured for the Alarm Transmission Delay on your system.
After the Alarm Transmission Delay period, you still have 5 minutes to disarm the system. If you do this
and a monitoring operator has not contacted you yet, central monitoring is notified that you have
canceled the alarm.
When the Alarm Transmission delay period ends, monitoring operator will attempt to contact the
persons on your Emergency Dispatch list in the order you have determined. This list is maintained in the
Subscriber Portal. The monitoring operator will ask for the secret word to ensure the person is a valid
Emergency Dispatch contact.
30
Managing Your System Security
Depending on the procedures determined by your service provider, the monitoring operator might
attempt to contact you through the TouchScreen device itself. In this case, there will be a series of ring
tones, and then you will hear the voice of a monitoring operator through the TouchScreen device. A
dialog is displayed in the screen, alerting you that an open call is active on your TouchScreen.
To disarm the system from the TouchScreen, see page 31.
To disarm the system with a key pad device, see page 93.
To disarm the system from the TouchScreen: 1. Tap the Security Status header when it is in Armed state.
The Security app is displayed with a keypad and the Disarm System tab active. If the sensor that
was tripped is associated with a camera, the view from that camera is displayed. If the sensor is
not associated with a camera, the view from the default camera is displayed.
2. Enter your security code.
If the alarm was triggered, the camera view and alarm history are displayed.
31
TouchScreen User Guide
Sending an Emergency Alarm
You can manually trip an alarm in the event of an emergency by clicking the Emergency button.
Emergency alarms are reported without an Entry delay or Alarm Transmission delay.
To manually trip an alarm:
1. Press the Panic button on the lower front of the TouchScreen.
The Emergency screen is displayed.
2. Tap Fire to send an alarm for emergency fire assistance.
The TouchScreen sounds a repeating, high-pitched chime.
Tap Medical to send an alarm for emergency medical assistance.
The TouchScreen sounds an audible, repeating, triple beep signal.
Tap Police to send an alarm for police assistance.
By default the TouchScreen will not issue an audible signal. The TouchScreen displays a Police
Panic In Progress alert on the TouchScreen. Tap the alert to sound an audible, continuous, high-
32
Managing Your System Security
pitched chime.
Testing Your Alarms
You must test your security system at least once per week to ensure that it is working dependably.
Once per month, it is imperative that you do the following:
Test your alarm capability
Review the signal strength of the TouchScreen to your Internet router and the cellular receivers
(see page 36)
Test your connectivity to the Internet and cellular servers (see page 41)
When testing your alarms, you can choose to report your alarms to central monitoring to ensure end-toend integrity. By default, the system lets you test the reliability of your alarms without sending a signal to
central monitoring.
To test your alarms:
1. From the Settings app (see "Configuring the TouchScreen" on page 8),
tap Security > Alarm Test.
The Alarm Test screen is displayed.
2. To have your test alarms reported to central monitoring, tap Disabled.
The button changes to Enabled. Your test alarms will be sent to central monitoring.
33
TouchScreen User Guide
Note:
If the Enabled button is already displayed, tap Enabled to choose to have your test
alarms NOT sent to central monitoring.
IMPORTANT: If you enable Send Test Alarm Messages, contact your central monitoring station
and tell them you are testing your system.
3. Tap the Next button.
The Alarm Test Checklist is displayed.
4. Ensure all the security zones are unfaulted (that is, doors and windows are closed, motion detectors are not showing motion, etc.).
When the security zones are ready for testing, “Ready to Arm” is displayed under the Arm
button.
5. Tap Arm.
Your security system is armed in the special Test mode. The Exit Delay is only 10 seconds long.
Motion sensors are turned off (not tripping alarms but recording events) until an Entry/Exit
security zone is faulted.
The Arm button changes to a System Armed notice.
6. Tap Next.
The Alarm Test screen is displayed.
34
Managing Your System Security
7. Open and close an Entry/Exit door.
The Entry Delay period starts (default 30 seconds). The TouchScreen begins beeping once per
second. The beeping speeds up to twice per second in the last 10 seconds of the Entry Delay
period. The motion detectors are turned on.
Note:
To mute the siren, tap Mute Siren. This is not recommended. Ensuring that your siren
is in working order is an important part of the test.
After the end of the Entry Delay period ends, the siren sounds (unless you muted it) and the
Entry/Exit zone you faulted is marked with an alarm tag.
8. Fault each additional alarm and ensure that it is marked as alarm. The following table shows the
types of tests to perform.
35
TouchScreen User Guide
Table 4: Sensor Testing Operations
Sensor
Testing Process
Door/Window
Open and close the door or window.
Motion
Detector
Avoid the motion detector’s view for three minutes after arming the system,
then walk in front of it.
Smoke
Detector
Press and hold the sensor’s “Test” button until the siren sounds,
approximately 10 seconds.
Glass Break
Detector
Use a glass break simulator.
Key Fob
Arm and disarm system with the key fob.
Key Pad
Arm and disarm system with the key pad.
The TouchScreen notes that each sensor communicated an event to the TouchScreen and
initiated an alarm.
Managing Connectivity Between the TouchScreen and the Central Monitoring
Stations
The TouchScreen is constantly communicating with central monitoring stations. It connects via your
service provider using broadband. It also connects to a cellular network if your internet connectivity goes
down. The TouchScreen can connect to your service provider’s modem through a cable or Wi-Fi
(wirelessly).
Viewing Signal Strength
To view the current signal strength of the TouchScreen’s Wi-Fi connection to your service provider’s
modem:
1. From the Settings app (see "Configuring the TouchScreen" on page 8), tap Advanced Settings >
Connectivity > Wi-Fi & Cellular Signal Strength.
The Wi-Fi and Cellular Signal Strength screen is displayed, graphically displaying the detected
signal strength of the Wi-Fi connection to the router and the GPRS/EDGE connection to the
cellular network.
36
Managing Your System Security
2. If your Wi-Fi connection is weak, try moving the TouchScreen closer to the Internet router. If your
cellular signal is weak, try moving the TouchScreen to another part of the house where it can
obtain a stronger signal.
Testing Your Connectivity
The TouchScreen can test its connectivity to the Internet and cellular networks.
To test the TouchScreen connectivity:
1. From the Settings app (see "Configuring the TouchScreen" on page 8), tap Advanced Settings >
Connectivity.
The Connectivity menu is displayed.
2. Tap Test Connectivity.
The Connectivity Test screen is displayed.
.
3. Tap Next to start the test. This can take as little as 30 seconds or as long as four minutes.
Managing the Passcodes in your Security System
Your security system provides the following default keypad codes:
Master
Guest (a “Guest” permission-level)
Duress (see Understanding the Duress Keypad Code on page 39)
The Master keypad code allows you to add, modify, and delete codes. See Keypad Code Permission
Levels on page 39for keypad code types.
Managing your Keypad Codes
To manage your keypad code:
From the Settings menu (see "Configuring the TouchScreen" on page 8), tap Security > Manage Keypad
Codes.
The Manage Keypad Codes screen is displayed.
37
TouchScreen User Guide
From this screen you can modify your keypad codes or add new ones.
To add a new keypad code:
1. From the Manage Keypad Codes screen, tap Add Keycode.
The Add Keypad Code screen is displayed.
2. Tap Name to enter a name or description of who will be using the keypad code.
3. Tap 4-digit code to enter the keypad code. You will be required to enter the code twice to validate
the code.
4. You can optionally disable the keypad code for certain days of the week. Active days are displayed
in blue. Inactive days are displayed in gray.
5. Specify a permission level for this keypad code. The following table describes each permission
level.
38
Managing Your System Security
Table 5: Keypad Code Permission Levels
Arming
Level
Description
Guest
User can arm and disarm the system.
Arm
Only
User can only arm the system.
Standard User can create, edit, and delete keypad codes, as well as arm and disarm the system. This
level is provided with the system and cannot be added.
Duress
User is granted full access to the TouchScreen including arming/disarming and system settings. If entered, the TouchScreen sends a silent alarm to the central monitoring station, and
the police are dispatched. This level is provided with the system and cannot be added.
To modify a keypad code:
1. From the Manage Keypad Codes screen, tap Edit.
The Edit Keypad Code screen is displayed.
Note:
You cannot change the Permissions level of a keypad code.
Understanding the Duress Keypad Code
The Duress keypad code is used to if an intruder forces you to arm/disarm your system or access your
security settings. Rather than entering your keypad code, enter the Duress keypad code. When you do
this, you will be granted full access to your TouchScreen, but a silent alarm is immediately sent to the
central monitoring station and police are dispatched.
By default, the Duress Code is disabled.
To enable and manage your Duress keypad code:
1. From the Settings menu (see "Configuring the TouchScreen" on page 8), tap Security > Manage
Keypad Codes
The Manage Keypad Codes screen is displayed.
From this screen you can modify your keypad codes or add new ones.
39
TouchScreen User Guide
Managing Your Secret Word
When an alarm is sent to a central monitoring station, they will attempt to contact you to verify that a
true emergency is occurring. When you answer, they will ask for your secret word as an additional
verification.
To view and modify your secret word:
1. From the Settings menu (see "Configuring the TouchScreen" on page 8), tap Advanced Settings >
Security Secret Word.
The Get Security Secret Word screen is displayed.
2. Tap Next.
The secret word is displayed for editing.
3. To change the secret word, tap the Secret Word field (square area).
A keyboard is displayed that enables you to change the secret word.
40
Managing Your System Security
4. Tap Done to save your changes.
The Set Security Secret Word screen is displayed again.
Managing Connectivity between Your Home Devices and the Internet
Your home network accesses the Internet through your security network router DMZ. The router’s DMZ
selectively exposes your home network to the Internet.
By default, your home network can access the Internet, but entities in the Internet cannot access
computers and devices in your home network. This can be a problem for certain types of computing and
also for using entertainment systems to watch movies, play games, etc.
41
TouchScreen User Guide
Figure 5: Security Network Router Blocks Access to Your Home Network from the Internet (Default)
You can choose to have your security network router expose your home network to devices in the
Internet (see Security Network Router Can Permit Access to Your Home Network from the Internet).This
will not change your security network’s protection from outside entities.
If your home network is exposed to Internet entities, you can choose to hide it (see page 44).
Figure 6: Security Network Router Can Permit Access to Your Home Network from the Internet
To permit access to your home network router from the Internet:
1. From the Settings app (see "Configuring the TouchScreen" on page 8), tap Advanced Settings >
Connectivity> Expose Personal Router to Internet.
The Expose Personal Router to Internet screen is displayed.
42
Managing Your System Security
2. Tap Next.
The Personal Router Setup screen is displayed.
3. Tap Next.
The Search for Devices screen is displayed. When an available router is located that is connected
to the security network router by an Ethernet cable, the Located Devices screen is displayed.
Note:
The available routers are listed by MAC address.
4. Tap the MAC address of the router that needs to be exposed to the Internet.
43
TouchScreen User Guide
5. Tap Next.
The Configured Router screen is displayed. The TouchScreen configures the security network
router to expose the selected router (and the home network devices connected to it) to the
Internet.
To hide access to your home network router from the Internet:
See Security Network Router Blocks Access to Your Home Network from the Internet (Default) on page
42.
1. From the Settings app (see "Configuring the TouchScreen" on page 8), tap Advanced Settings >
Connectivity > Hide Personal Router from Internet.
The Hide Personal Router from Internet screen is displayed.
2. Tap Next.
The Configured Router screen is displayed.
44
Managing Your System Security
The TouchScreen re-configures the security network router DMZ to hide any connected router
from access by entities in the Internet.
View Your Security Account Information
To view your account information:
1. From the Settings app (see "Configuring the TouchScreen" on page 8), tap Advanced Settings >
Account Information.
The Validate Account Information screen is displayed.
2. Go to the Subscriber Portal to view your account information, or contact Customer Care to modify
it.
3. Tap Return to Menu to return to the Settings menu.
Managing Sensors
You cannot add or delete the sensors in your security system, but you can control how they appear in
reports, your TouchScreen and the Subscriber Portal.
You can:
Have a sensor not monitored when the system is armed (see page 45)
View your security zone event history (see page 46)
Change the order that security zones are listed in the TouchScreen (see page 47)
Disable a Sensor
You can turn a zone off, which means the zone is not monitored when the system is armed. This is useful
during periods when a sensor is being repaired. You can turn a zone off only when the system is
disarmed.
The system continues to log the activity of zones that are turned off in the Event History (see Viewing
Your Zone Event History on page 46).
45
TouchScreen User Guide
To turn zones off:
1. Disarm the system (see "Arming and Disarming the System" on page 27)
2. Tap the Security icon on the Home screen (see page 20).
The Arm System tab is displayed.
3. Tap the Turn Zone Off button for the zone to turn off the zone.
Tap the Turn Zone On button for the zone to be monitored for alarms.
The buttons are toggled between Turn Zone On and Turn Zone Off as you tap them.
Note:
If some zones are turned off, the Security Status header reports this when the system
is disarmed.
Viewing Your Zone Event History
When something occurs at a zone, whether or not the system is armed, or the zone is turned off, the
security system logs an event.
To view the Zone Event History:
1. Tap the Security app on the Home screen.
The Arm System tab is displayed.
46
Managing Your System Security
2. Tap the History tab.
The Zone Event History is displayed.
Table 6: Zone Activity Events
Icon
Description
An Open/Closed doorway
/
An Open/Closed window
/
Motion detected / no motion since last detected motion
/
Changing the Order that Security Zones are Listed in the TouchScreen
If you have a lot of sensors, you might have to scroll down to see them all in screens that manage and
report on security zones such as the Arm System tab and the Dashboard tab of the Security app. You can
designate more important sensors to always be listed first.
47
TouchScreen User Guide
To change the order that zones are listed in the TouchScreen screens:
From the Settings app (see "Configuring the TouchScreen" on page 8), tap Sensors & Zones > Change
Zone Order.
The Change Zone List Order screen is displayed.
From this screen you can move items up and down in all lists that display order. For example, if you
tapped To Top in the zone Window, that zone would move from the bottom of the list to the top.
Managing Cameras
You can have up to six cameras connected to a TouchScreen at a time. For each camera you can:
Assign a name to it when it is added.
Enable or disable the camera LED for some brands of cameras.
Choose the video quality used by each camera based on the quality of the Wi-Fi between the camera and your security network.
Note:
From the Subscriber Portal you can manually take pictures from a selected camera.
IMPORTANT: The camera images are accessible to the TouchScreen device and (for one of the
cameras) to the Subscriber Portal. Service Provider tools do not have access to these
images.
To modify the details of a camera:
1. From the Settings app (see "Configuring the TouchScreen" on page 8), tap Home Devices.
The Home Devices menu is displayed.
2. Tap Cameras > Edit a Camera.
The Edit a Cameras screen is displayed showing icons of each installed camera.
3. Tap the image or label of the camera to select it.
The details of the selected camera are displayed.
48
Managing Your System Security
Table 7: Edit Camera Options
Arming
Description
Mode
Modifiable?
Model
No
Make and model ID for the camera
Camera Name assigned to camera device
Name
Yes
Video
Level of video detail captured by the camera
Quality
Yes
Enable
LED
Yes, for some
brands of cameras.
This field is not
displayed if this
value cannot
be modified.
On/Off
If set to On, the camera LED light is lit or
blinks to note whether the camera is communicating with the router. If set to Off,
the camera LED does not light.
4. Tap the Camera Name fields to display a keyboard screen and rename the Camera zone. Tap Done
to accept your changes.
Tap the Enable LED field to turn the camera LED on or off.
Tap the Video Quality field to test the upload network speed and determine the best video
quality level for the current camera (see page 49).
5. Tap Next.
The Cameras screen is displayed again.
6. Tap a camera image to modify additional cameras or tap the Home icon to return the main screen.
To modify the video quality displayed by a particular camera:
When you modify the video quality, the system lets you choose to display live video in three levels based
on the camera’s connection speed to the system servers.
49
TouchScreen User Guide
1. Access the details of a camera for editing as described starting on page 48.
The Edit a Camera screen is displayed showing a label and a captured image of all the camera
views.
2. Tap the Video Quality field to determine the ideal level of video detail to be captured by the
device.
The Adjust Camera Video Quality screen is displayed.
3. Tap Run Speed Test to have the TouchScreen upload a file to the system servers and gauge the
amount of time it takes to receive an acknowledgement. This allows the TouchScreen to
recommend video quality level.
50
Managing Your System Security
4. Tap Next to return to the Adjust Camera Video Quality screen.
5. Tap the appropriate video quality based (High, Medium, or Low) on the measured speed of the
Wi-Fi between the camera and your security network, and tap Next.
Adding Cameras to the Security System
The TouchScreen supports up to six cameras. A camera is added to the security system by using an
Ethernet cable to connect it to the security router. After the camera has been added to the security
system, remove the cable, and place the camera in the desired location. If your home requires a Wi-Fi
repeater, the camera must be connected to the router first, and then moved to the desired location on
the far side of the repeater. See "Managing Wi-Fi Repeaters" on page 68 for more information about WiFi repeaters.
IMPORTANT: The camera images are accessible to the TouchScreen device, the Subscriber Portal,
and mobile apps. The Service Provider does not have access to these images.
IMPORTANT: If you need to update the firmware on any camera before adding it to the security
system, you must reset the camera to factory defaults before adding it to the
OpenHome Converge system. This is essential so that it can receive the necessary
changes to communicate with the TouchScreen.
1. From the Settings menu, tap Home Devices >Cameras > Add a Camera.
The Add Camera – Network Test screen is displayed.
51
TouchScreen User Guide
2. Tap Next.
The TouchScreen uploads a binary file multiple times to the system servers to determine the
security system’s upload speed. The screen displays the current calculated upload speed. The
Upload Speed is used by the system to set the default video quality for the camera.
3. Tap Next.
The Hardware Setup screen is displayed.
Figure 7: Camera: Hardware Setup Screen
4. Perform the steps described on the Hardware Setup screen. The steps vary, including connecting a
camera to the TouchScreen’s router with an Ethernet cable and rebooting the camera, and then
tap Next.
IMPORTANT: The Camera Hardware Setup screen does not apply to Sercomm iCam
installations. If you are installing an iCam, refer to the Sercomm iCamera
Installation Guide.
The Locating Camera screen is displayed. The system locates the camera that is connected to the
TouchScreen’s router with an Ethernet cable, and displays its details.
52
Managing Your System Security
Figure 8: Camera: Locating Camera Screen
5. Tap Accept to pair the camera with the TouchScreen.
After the system finishes, the Configuring Camera field is marked “Done”. During the Configuring
Camera step, the system upgrades the camera firmware if needed. This can take up to 15
minutes.
Figure 9: Camera: Configuring Camera Screen
6. Tap Next.
The Edit New Camera screen is displayed.
53
TouchScreen User Guide
Figure 10: Camera: Edit New Camera Screen
Table 8: Edit New Camera Options
Field
Description
Model
Model ID for the new camera. The camera manufacturer and model information are sent to the server and logged for inventory reporting and tech
support purposes.
Can Be
Modified?
No
Camera Name previously assigned to the camera device.
Name
Yes
Video
Level of video detail captured by the camera.
Quality
Yes
7. Tap the Camera Name fields to display a keyboard screen and rename the Camera zone to something that clearly differentiates it from any other camera. Tap Done to accept your changes.
8. Tap the Video Quality field to modify the level of video detail captured by the device.
a. Tap High, Medium or Low. Use a value with a network upload speed that is less than the
recommended upload network speed.
The Adjust Camera Video Quality screen is displayed.
54
Managing Your System Security
b. To update the upload network speed, tap Run Speed Test.
The TouchScreen uploads a file to the system servers to measure the time until it receives
an acknowledgement.
c. Tap Next to return to the Adjust Camera Video Quality screen.
d. Tap the appropriate video quality based on the measured speed, and tap Next.
Figure 11: Camera: Adjust Camera Video Quality Screen
9. Tap Next.
55
TouchScreen User Guide
The Camera Wi-Fi Connection Test screen is displayed.
Figure 12: Camera: Camera Wi-Fi Connection Test Screen
10. To have the camera connected to the TouchScreen wirelessly, follow the instructions in the Camera Wi-Fi Connection Test screen (including disconnecting the camera from the TouchScreen
router and rebooting the camera) and tap Locate Camera.
11. When the camera has been paired wirelessly to the TouchScreen, tap Next.
The Adjust Camera screen is displayed.
Figure 13: Camera: Adjust Camera Screen
12. Point the camera as needed.
13. Tap Next.
The Add Additional Camera screen is displayed.
56
Managing Your System Security
Camera: Add Additional Camera Screen
14. Tap Add Another to add an additional camera. Repeat the steps as directed.
Tap Next to return to the Install Zones and Home Devices screen is displayed with the Cameras
marked done.
57
TouchScreen User Guide
Table 9: Troubleshooting the Camera Installation
Issue
Description
Unable to pair the camera to the TouchScreen Confirm that the camera is plugged into the security
router during configuration and has been restored to
factory defaults.
Perform the following procedure:
1. Reset the camera to factory defaults (hold the
reset button for 30 seconds).
2. Reboot the camera.
Located but not able to Secure
Compare the MAC address on the screen with the MAC
address on the back of the camera. They should
match.
Poor picture, slow refresh in live-view, Wireless Camera Strength, no IP found (no LED
light on front of camera)
Relocate or reposition camera and then re-test.
Intermittent connectivity
Confirm good Wi-Fi connectivity.
Tapping on an upgrading camera in the camera widget produces an error dialog.
The camera images are halted while the camera is
upgraded. When the upgrade is finished, the images
become available.
The camera image is replaced by an icon.
In the camera widget on the TouchScreen, an upgrade
icon is displayed in place of the thumbnail image while
a camera is upgraded.
Adding Key Fobs to the Security System
A key fob is a mobile tool that allows you to arm and disarm your system with the press of a button. A
key fob is often attached to a set of keys.
Note:
This step can be performed after Activation.
IMPORTANT: If you need to update the firmware on any key fob before adding it to the security
system, you must reset the key fob to factory defaults before adding it to the
OpenHome Converge system. This is essential so that it can receive the necessary
changes to communicate with the TouchScreen.
1. From the Settings menu, tap Home Devices > Key Fobs > Add Key Fob.
The Locating Key Fobs screen is displayed.
58
Managing Your System Security
Figure 14: Key Fobs: Locating Key Fobs Screen
2. Tap Next to begin searching for key fobs to add.
A Stop button is displayed on the Locating Key Fobs screen. The TouchScreen searches for key
fobs that are available to be added (defaulted and in Search mode).
3. Default a key fob and place it in Search mode.
When a key fob is found, an icon is displayed for it.
4. Press the star button to pair the found key fob.
The key fob is paired with the TouchScreen. 59
TouchScreen User Guide
5. Repeat this procedure for each key fob with the TouchScreen. When all the key fobs have been
found and paired, tap Stop.
The Wireless Key Fobs Located screen notes the number of key fobs found and paired.
Figure 15: Key Fobs: Wireless Key Fobs Located Screen
6. Tap Next.
The Configure Wireless Key Fobs screen is displayed.
Figure 16: Key Fobs: Configure Wireless Key Fobs Screen
7. Tap each key fob icon to configure the name that is used for it in the TouchScreen and Subscriber
Portal.
The Edit Key fob screen is displayed.
60
Managing Your System Security
8. Tap the Key Fob Label to display a keyboard.
9. Enter a name for the key fob. Tap Done.
10. Tap the arrow to enable or disable the panic button.
11. Tap Done to return to the Configure Wireless Key Fobs screen
61
TouchScreen User Guide
12. After all the key fobs are configured, tap Next.
The Install Zones and Home Devices screen is displayed with the Key Fobs marked done.
Editing Key Fobs
To edit a key fob
1. From the Settings app, tap Home Devices > Key Fobs.
2. Tap Edit Key Fob to display the key fob settings.
From this screen, you can change the name of the key fob, and you can enable or disable the key
fob panic button.
62
Managing Environmental Devices
Managing Environmental Devices
You can manage lights and thermostats from the TouchScreen and Subscriber Portal.
Managing Lights
You can have up to 30 lighting devices connected to a TouchScreen at a time. Each lighting device has a
name assigned to it when it is added and is designated as dimmable or not.
To dim or turn off a light:
1. From the Home Screen, tap the Lights app.
The Lighting screen displays controls for each of your installed lights.
2. Tap the light icon to turn the light on or off.
Tap to turn on the light.
Note:
Tap to turn off the light.
If the lighting device is Energy Management enabled, when the light is on, the
TouchScreen displays a leaf icon, and how many watts are being used.
63
TouchScreen User Guide
3. If the light is dimmable, select the power level. The top box indicates full power, and each box
below it decreases the power level by 20 percent.
You can also perform the following operations:
Modify lighting devices (page 64)
Add lighting devices (page 65)
Delete lighting devices (page 65)
Use the following method to:
Change the name of a lighting device as it appears in reports on the TouchScreen and in the Subscriber Portal.
Set the light to be dimmable or not
To modify the details of your lights:
1. From the Settings app (see "Configuring the TouchScreen" on page 8), tap Home Devices.
The Home Devices menu is displayed.
2. Tap Edit Lights.
The Configure Lighting Devices screen is displayed showing icons of each installed light.
64
Managing Environmental Devices
3. Tap the icon for a lighting device to modify it.
The details of the selected lighting device are displayed.
4. Tap the Light Name field to display a keyboard screen to change the label of the Lighting device.
5. Tap the Dimmable field to choose (Yes or No) to use the dimming features of the lighting device if
available.
6. Tap Next.
The Choose the Light Device You Wish to Modify screen is displayed again.
To add a lighting device:
IMPORTANT: If you need to update the firmware on any sensor before adding it to the security system,
you must reset the sensor to factory defaults before adding it to the OpenHome Converge system. This
is essential so that it can receive the necessary changes to communicate with the TouchScreen.
1. From the Settings app (see "Configuring the TouchScreen" on page 8), tap Home Devices.
The Home Devices menu is displayed.
2. Tap Lighting > Add Lights.
The Locating Lighting Devices screen is displayed.
3. Tap Next.
4. Plug the lighting device into a wall socket. Secure it with a screw, if applicable.
The lighting devices should be unpaired when they are removed from their packaging. When it is
installed in the socket, the LED flashes three times every five seconds indicating that it is in Search
mode and ready to pair with a TouchScreen.
Note:
If you have problems pairing a lighting device, refer to the lighting documentation for
information about resetting the device to factory defaults.
As lighting devices are found, an icon is displayed for that device.
5. When all the lighting devices are found, tap Done.
The system notes the number of devices that were found and paired.
6. Tap Next.
The Configure Lighting Devices screen is displayed.
7. Tap a lighting device to configure it as described on page 64.
To remove a lighting device from the TouchScreen:
1. From the Settings app (see "Configuring the TouchScreen" on page 8), tap Home Devices.
The Home Devices menu is displayed.
65
TouchScreen User Guide
2. Tap Lighting > Delete Lights.
The Settings screen is displayed showing an icon for each connected lighting device.
3. Tap the icon of the lighting device you want to remove.
A confirmation is displayed:
Deleting a light device cannot be undone. Are you sure you want to delete the [lighting device
label].
4. Tap Yes.
Managing Thermostats
You can have up to 4 thermostats connected to a TouchScreen at a time.
To control your thermostats:
1. From the Home Screen, tap the Thermostats app.
In the Thermostat app, you can set the mode to Cool, Heat, or Off.
2. Toggle the Hold button to maintain the mode you set and ignore any other programming configured on the thermostat device.
IMPORTANT: Rules for a thermostat on Hold will not run.
3. Toggle the Fan button to turn the blower either on or off.
66
Managing Environmental Devices
Figure 17: Thermostat Display
You can use the increment buttons in the Thermostat app on your TouchScreen to change the
temperature beyond these settings.
67
TouchScreen User Guide
Managing Wi-Fi Repeaters
A Wi-Fi repeater extends the range of the iControl security router to enable communication between the
TouchScreen and other iControl Wi-Fi peripheral devices. Currently, cameras are the only supported WiFi devices. Use a RF range extender to increase the range of ZigBee sensors, lights, and other devices.
Perform the operations in this section to manage Wi-Fi repeaters:
Add a Wi-Fi repeater
Delete a Wi-Fi repeater (page 69)
To add a Wi-Fi repeater to the security system:
The Wi-Fi repeater must be connected to the router with an Ethernet cable during the installation
process. After the TouchScreen configures the repeater, place the router in its final location. Keep the
following in mind when determining where to place the repeater:
Place the repeater an equal distance between the security router and the device that is furthest
from the router. If the repeater broadcasts stronger signals and is placed too close to the router,
the repeater could cause the router to stop transmitting signals. As a result, the customer would
need to restart the security router often. The optimal distance will differ in each home. Some
experimentation may be required to determine placement.
If the customer has a home Wi-Fi repeater, avoid placing the security repeater nearby, if possible.
Note:
The security system supports only one Wi-Fi repeater.
1. From the Settings menu, tap Home Devices > Wifi Repeater > Add a Wifi Repeater.
The Wifi Repeater Connection Checklist screen is displayed.
2. Follow the directions displayed on the screen. When the repeater has been set up as directed, tap
Next.
68
Managing Wi-Fi Repeaters
The TouchScreen locates the repeater and updates the repeater's firmware, if necessary. The
repeater is also configured to use the same communication channel and have the same SSID as
the security router.
Note:
If the system cannot find the repeater, reset the repeater to its factory settings, then
restart it. Tap Back, then try again when the status indicator on the repeater is green.
3. When the configuration is complete, tap Next. The repeater has been added successfully.
Immediately disconnect the repeater from the security router and power off the repeater. Then
determine where the repeater will be placed and power on the repeater.
To delete a security Wi-Fi Repeater
When a repeater is deleted, any connected devices can communicate with the security router directly, if
they are within range.
1. To delete the repeater from the security system, tap Home Devices > Wifi Repeater > Delete a
Wifi Repeater.
The Delete Wi-Fi Repeater screen is displayed.
69
TouchScreen User Guide
2. Tap Next. The TouchScreen deletes the repeater from the security system. To add this router back
to the security system, you must reset factory settings as directed by the repeater's documentation.
70
Maintaining & Configuring the TouchScreen Device
Maintaining & Configuring the TouchScreen Device
You can configure the way the TouchScreen device displays your security information.
Reboot the TouchScreen
Occasionally, a problem might arise that could be solved by rebooting the TouchScreen.
To turn the TouchScreen off and on:
1. From the Settings menu (see "Configuring the TouchScreen" on page 8), tap Advanced Settings >
Reboot Touchscreen.
The Reboot TouchScreen screen is displayed.
2. Tap Reboot TouchScreen.
The TouchScreen turns itself off and back on.
Understanding and Configuring Screen Brightness & Screen Dimming
There are several options for configuring the TouchScreen’s screen brightness:
Set the default brightness level of the TouchScreen from level 10 (the brightest and the default setting) to level 1 (the dimmest). See page 72
Have the screen dim automatically to a preconfigured setting after a configured period of inactivity
(see page 72
Have the screen and the TouchScreen LEDs dim completely automatically each day at a set time,
and then brighten at a set time (see page 73). This is called Night Mode.
Note:
The Night Mode screen brightness setting is not the same as Arm Night Mode as
described on page 26.
To manually place the TouchScreen in Night Mode:
Press the Night Mode button, which located on the right side of the TouchScreen. When a user touches
the screen, it brightens to the default brightness level.
71
TouchScreen User Guide
Configuring the Screen Brightness Settings
To configure the default screen brightness:
From the Settings menu (see "Configuring the TouchScreen" on page 8), tap TouchScreen > Screen
Configuration > Screen Brightness.
A control allows you to set the brightness level from 1-10 (default 10).
Configuring Automatic Screen Dimming and Night Mode Dimming
You can choose to have the screen dim to a set level after a period of inactivity (this can be used instead
of a screensaver or in conjunction with a screen saver). See Configuring the Screensaver on page 74 for
how to configure a screensaver to be displayed after a period of inactivity.
Additionally, you can choose to have the screen dim completely during configured hours, called Night
Mode (see page 73). During this time, the buttons on the front of the TouchScreen darken completely.
The TouchScreen will not enter Night Mode when it is Armed.
Note:
The Night Mode brightness setting is not the same as Arm Night Mode as described on page
26.
To configure the screen to dim after a period of inactivity:
Note:
When a user touches the screen, it will brighten to its default brightness level.
From the Settings menu (see "Configuring the TouchScreen" on page 8), tap TouchScreen > Screen
Configuration > Automatic Screen Dimming.
A couple of controls are provided that allow you to set automatic dimming level and the amount of idle
time for the TouchScreen to wait before dimming.
The Idle Timeout maximum is 30 minutes. It decreases in increments of 5 minutes.
To have the screen never dim due to inactivity, set the Dimming Level to 10. This also requires that the
Backlight off at night setting is No.
72
Maintaining & Configuring the TouchScreen Device
To configure the screen to dim completely during a set time period (Night Mode):
Note:
When a user touches the screen, it will brighten to its default brightness level.
Note:
At the set time range, the screen will dim to its lowest setting (1).
1. From the Settings menu (see "Configuring the TouchScreen" on page 8), tap TouchScreen >
Screen Configuration.
The Screen Configuration menu is displayed.
2. Tap Screen Nighttime Settings.
Some backlight controls are provided.
Table 10: Screen Night Mode Settings Controls
Control
Description
Backlight
Yes
off at night No
The screen will dim during the configured time range.
The screen will not dim during the configured time period. If it is configured to dim after a period of inactivity, that will still happen.
Backlight
off time
Time that the screen automatically dims to level 1.
Backlight
on time
Time the screen automatically brightens to default level.
73
TouchScreen User Guide
Configuring the Screensaver
You can configure the TouchScreen to display a screen saver after the device has been inactive for some
period of minutes.
See also "Understanding and Configuring Screen Brightness & Screen Dimming" on page 71 for how to
have the screen dim to a configured level after a period of inactivity. This can be used instead of a
screensaver or in conjunction with a screensaver.
To configure the TouchScreen screensaver:
1. From the Settings menu (see "Configuring the TouchScreen" on page 8), tap TouchScreen >
Screensaver Configuration.
The Screensaver Configuration screen is displayed.
2. Tap the Start Screensaver arrow buttons to choose the number minutes of inactivity before the
TouchScreen will start the screensaver. The options are in five minute increments. The maximum
number of minutes is 30 and the least is 5.
3. In the Select Screensaver App menu, tap the app that will be used as a screensaver.
Table 11: Commonly Used Screensavers
Control Description
None
The screen never goes to screensaver.
Security Screen displays the Arm System tab from the Security app.
Camera Displays stills of the cameras attached to the security system (updated every 5 seconds). If
there is only one camera attached to the security system, it displays live video.
Clock
Displays the current time in digital or analog.
Blank
Displays a blank screen
Photos
Displays a slideshow of photos from your Flickr account.
Configuring the Tones and Volume Levels
You can configure the sounds the TouchScreen plays when a security zone is faulted or cleared.
74
Maintaining & Configuring the TouchScreen Device
You can also configure the volume at which the TouchScreen sounds are played.
To set the tones that the TouchScreen uses when zone events occur:
1. From the Settings menu (see "Configuring the TouchScreen" on page 8), tap
TouchScreen > Sound Configuration > Hometone Configuration.
The Sound Settings Configuration screen is displayed.
Red icons(for example
faulted.
for door being opened) designate the sound played when a zone is
Green icons (for example
cleared.
for a door being closed) designate the sound played when a zone is
2. Tap a field to display a menu of sounds to play when a zone is faulted or cleared.
3. Tap Silence to have the TouchScreen never play a tone when the associated security zone is
faulted.
To set the volume of a tone:
1. From the Settings menu (see "Configuring the TouchScreen" on page 8), tap
TouchScreen > Sound Configuration > Volume Configuration.
75
TouchScreen User Guide
The Volume Settings Configuration screen is displayed.
2. Tap the right and left arrow keys until you reach the appropriate volume level.
Cleaning the TouchScreen Screen
The TouchScreen can be hard to clean without accidentally pressing buttons; even accidentally arming or
disarming the system.
To clean the TouchScreen screen:
1. From the Settings menu (see "Configuring the TouchScreen" on page 8), select Touchscreen >
Clean Screen.
The Clean Screen is displayed.
2. Tap Clean Screen to display the Cleaning screen for 30 seconds.
You have 30 seconds to clean the TouchScreen without fear of pressing buttons. At the end of 30
seconds you can choose to finish or have more time to continue cleaning.
Viewing Technical Specifications of Your TouchScreen
From the Settings menu (see "Configuring the TouchScreen" on page 8), tap About.
Note:
You might need to scroll down to display the About option.
The About This TouchScreen screen displayed.
76
Maintaining & Configuring the TouchScreen Device
Table 12: About This TouchScreen Details
Arming
Mode
Description
Version
Current firmware version installed on your TouchScreen.
Wi-Fi IP
Address
Internet Protocol address assigned to your TouchScreen by your router to communicate
with it wirelessly.
Note: This value might change if you reset your router to factory defaults.
Ethernet IP Internet Protocol address assigned to your TouchScreen by your Internet Service
Address
Provider’s modem to communicate with it directly (not wirelessly).
Note: This value might change if you reset your modem to factory defaults.
CPE ID
Unique identification code for your TouchScreen.
Wi-Fi MAC
Address
Media Access Control address of the adapter your TouchScreen uses to wirelessly
connect to your Internet Service Provider.
Ethernet
MAC
Address
Media Access Control address of the adapter your TouchScreen uses to connect directly
(not wirelessly) to your Internet Service Provider.
Cellular SIM Unique identification code used by your TouchScreen’s cellular service provider to
Card Id
connect your device to the central monitoring stations when broadband service is
unavailable.
Zigbee
Module
Firmware
The modules installed in the TouchScreen. These communicate with sensors and home
devices.
Managing TouchScreen Apps
The TouchScreen apps are applications that provide additional functionality through the TouchScreen.
The Security and Settings apps are required apps. The Cameras, Thermostats, and Lights apps are
automatically installed if you have those devices connected to your system. All other apps can be fully
managed from the TouchScreen using the Settings app:
Select the Security app to view options related to
arming/disarming the system, enabling/disabling
security zones, viewing history logs, and recent
security zone events.
Select the Thermostats
app to view the current
state of all your
thermostats.
Select the Settings app to access tools to modify
the TouchScreen configurations.
Select the Lights app to
view the current state of
all your light control
devices.
Select the Cameras app to view a live feed of all
the cameras in your security system.
77
TouchScreen User Guide
For more information about managing apps, see:
Install available apps to the TouchScreen (see page 78)
Reposition the order that apps are displayed in the Home screen (see page 79)
Uninstall apps from the TouchScreen (see page 79)
Installing TouchScreen Apps
You can choose to install custom apps to your TouchScreen.
To install an app to the Touchscreen:
1. From the Settings app (see "Configuring the TouchScreen" on page 8), tap Apps> Add App.
A list of apps available to be installed is displayed.
Tap the Up and Down arrows on the scrollbar to reveal additional apps.
2. Tap the app to install and then tap Next.
The app to be added is displayed, including a view of the initial screen of the app.
3. Tap Next.
4. The TouchScreen displays the following confirmation:
78
Maintaining & Configuring the TouchScreen Device
The [name] app was installed successfully.
5. Tap Next to again display the list of apps available to be installed.
Note:
Your updates will not be received by the TouchScreen if your device does not
currently have broadband access. When broadband access is restored, the new apps
are installed.
Reordering Apps on the Home Screen
System apps and device apps are always displayed in the Home Screen first. The custom apps are
displayed —by default—in the order they were installed. The Home screen can only accommodate 10
apps. Additional apps are displayed on subsequent screens. By default, the apps are displayed in the
Home screen according to the order they were installed.
To change the order of the apps as they are displayed in the Home screen:
1. From the Settings app (see "Configuring the TouchScreen" on page 8), tap Apps> Reorder Apps.
A list of installed apps is displayed.
2. Tap the Up and Down arrows on the scrollbar to reveal additional apps.
3. Tap Up to move the app higher in the sequence of displayed apps, or Down to move it lower. If
you tap To Top, the app appears first in the list of sortable apps.
4. When the apps are in the order you like, tap Save Apps Order.
5. Tap Return to Menu to return to the Settings screen.
Uninstalling Apps
Custom apps can be uninstalled from the TouchScreen. System apps (Security and Settings) and device
apps (such as Cameras, Lights, or Thermostats) cannot be uninstalled.
To uninstall an app:
1. From the Settings app (see "Configuring the TouchScreen" on page 8), tap Apps > Remove App.
A list of installed apps is displayed.
79
TouchScreen User Guide
Tap the Up and Down arrows on the scrollbar to reveal additional apps.
2. Tap the app to uninstall and then tap Next.
The app being removed is displayed.
3. Tap Next.
4. The TouchScreen displays the following confirmation:
The [name] app has been removed.
5. Tap Next to display the list of installed apps again.
80
Appendix A: TouchScreen Installation and Maintenance
Appendix A: TouchScreen Installation and Maintenance
Installing the Technicolor TouchScreen
1. Remove the TouchScreen from its packaging.
2. Use a P1 Phillips screwdriver to remove the (1) screw from the battery cover of the TouchScreen,
and detach the cover.
3. Unwrap the 4.0 volt battery from its packaging and install it in the battery compartment.
Warning: The rechargeable battery that came with your TouchScreen is only available through
your service operator. If your battery needs to be replaced, contact your service operator to
arrange for replacement.
4. Position the battery and cables inside the battery compartment so the cables lie along the top of
the battery.
5. Align and connect the battery’s pins to the battery connector so that the wire order is (top-tobottom) BLACK, BLACK, WHITE, RED, RED.
81
TouchScreen User Guide
6. Replace the battery cover and the screw.
7. Place the AC power cable through the holes on the sides of the TouchScreen stand.
8. Connect the adapter cable to the back of the TouchScreen.
82
Appendix A: TouchScreen Installation and Maintenance
9. Connect the stand to the back of the TouchScreen. Insert the longest peg into the Tamper Switch
hole, which is the top right hole on the back of the TouchScreen. Slide the stand downward until
the pegs lock in place.
10. Position the TouchScreen near an un-switched wall outlet (not controlled by a light switch).
11. If the installation plan does not involve the TouchScreen connecting to the customer’s network
wirelessly, then connect an Ethernet cable to the TouchScreen and the iControl-dedicated router.
12. Insert the AC adapter into the bracket as shown.
83
TouchScreen User Guide
Table 13: AC
Power Supply
Ratings
Rating
Value
Voltage 100 120V
Current 0.5A
Frequency 60 Hz
13. Remove the center screw from the wall outlet.
14. Plug the TouchScreen’s AC adapter into the TOP plug of the wall outlet, and replace the center
screw through the bracket hole.
After a few seconds, the Installation Welcome screen is displayed on the TouchScreen.
84
Appendix A: TouchScreen Installation and Maintenance
Figure 18: Activation: Installation Welcome Screen
Note:
If the TouchScreen does not display the Installation Welcome screen, you must reset it to
factory default.
Battery Requirements
Table 14: Device Batteries
Device
Device Type
Batteries
TouchScreen
Central Controller GSP055771 4 volt Lithium Polymer 1
4400mAh (16.28WH)
Door/ Window Sensor
Sensor
CR2
3 volt Lithium
1
Motion Detector Sensor
CR123A
3
Glass Break Detector
CR123A
1
Smoke/Heat Detector
CR123A
2
85
TouchScreen User Guide
Replacing the Battery
Warning: The rechargeable battery that came with your TouchScreen is only available through your
service operator. If your battery needs to be replaced, contact your service operator to arrange for
replacement.
1. Use a P1 Phillips screwdriver to remove the (1)
screw from the battery cover of the TouchScreen, and detach the cover.
2. Lift the battery out of the receptacle and disconnect the battery from the TouchScreen by
gently pulling the base of the connector.
3. Unwrap the battery from its packaging and
install it in the battery compartment.
86
Appendix A: TouchScreen Installation and Maintenance
4. Position the battery and cables inside the battery compartment so the cables lie along the
top of the battery.
5. Align and connect the battery’s pins to the battery connector so that the wire order is (topto-bottom) BLACK, BLACK, WHITE, RED, RED.
6. Replace the battery cover and the screw.
87
TouchScreen User Guide
Recommendations for Sensor Installation and Placement
Door/Window Sensors and Glass Break Detectors
Install door/window sensors and/or glass break detectors at every possible location of entry, both
upstairs and down.
Glass Break Detectors
For best detector performance, select a mounting location that is:
Within 7.6 m (25 ft) of the protected glass
Within clear view of the protected glass
On the same wall as the protected glass
At least 2 m (6.5 ft) from the floor
At least 1 m (3 ft) from forced-air ducts
At least 1 m (3 ft) from sirens or bells greater than 5 cm (2 in.) in diameter
On a window frame if any heavy window covering is present
Avoid mounting the detector in the following locations:
In a corner
On free standing post or pillars
In rooms with noisy equipment such as air compressors, bells/ door bell, and power tools
In bathrooms (a slamming toilet seat will easily fault a glass break detector)
Motion Detectors
When placing motion detectors, anticipate traffic patterns:
The lanes of traffic most used by people in your home are also those most likely to be used by
intruders.
Foyers, stairways, hallways, and entrance-ways are excellent locations for a motion detector.
Do not place motion detectors at the end of hallways where an intruder will be walking directly
toward or away from the detector. For best coverage, mount the motion so that the likely direction of intruder motion is across the motion detector’s pattern.
A motion detector facing the following can cause false-alarms or failures in detection:
Direct sunlight
Cold drafts
Windows
88
Appendix A: TouchScreen Installation and Maintenance
Uninsulated walls
Heat sources such as fireplaces and heating vents
Moving objects such as fans
Air conditioning vents
Glass furniture
Obstructions such as curtains, plants, large furniture, doors
Note:
Free roaming pets pose special problems for motion detectors. Your installer has been
trained to help you configure your installation to address your specific pet needs.
89
TouchScreen User Guide
Evacuation Plan
Develop an emergency evacuation plan for use in the event of fire. Here are some recommendations
from the National Fire Protection Association.
Make an evacuation plan for how to leave your home in the case of fire or other emergency.
Sketch a map of your home that shows all the doors and windows. Discuss the plan with everyone
in your home so that everyone will know what to do.
Have at least two ways to exit each room. Make sure that windows and doors open easily.
Discuss with your family and agree on a single meeting location outside your home.
In the event of fire, get out and stay out. Don’t go back inside for people, pets or possessions.
Do not open a door if the handle is hot.
If there is smoke stay low to the ground and go under the smoke.
Escape your home before calling the fire department. Call the fire department and police from the
outside meeting place using your cell phone or call from a neighbor’s phone.
Practice your home evacuation plan.
Additional Emergency Preparations
Do not wait until an emergency occurs to make a plan. Talk to each other about what each person
should do in different types of emergency.
Learn your security system. Get to know how to arm and disarm it and what to do when the
authorities or central monitoring calls.
Make sure everyone (who should know) knows the Secret Word, when to use it, and that it
should not be shared.
Understand the difference between your keypad code and the duress code.
Understand that you should never enter the premises if you hear an alarm. Call police from a cell
phone or a neighbor’s phone.
90
Appendix A: TouchScreen Installation and Maintenance
Smoke Detector Installation Recommendations
The National Fire Protection Association (NFPA) recommends the following for the number and
placement of smoke detectors.
Place smoke alarms as follows:
In every bedroom, in hallways, and on every level of the premises, including the attic and basement.
High on a wall or on a ceiling (because smoke rises).
If a smoke detector is placed on a ceiling, position at least 4 inches (10.2 cm) from the wall.
Be careful about placing smoke detectors within 20 feet of a cooking appliance.
Smoke alarms are an important part of a home fire escape plan.
For maintaining your smoke detector:
Test alarms at least monthly by pushing the test button.
Replace batteries in all smoke alarms at least once a year. If an alarm “chirps,” warning the battery
is low, replace battery right away.
Replace all smoke alarms when they are ten years old or sooner if they do not respond properly
when tested.
Additionally we recommend:
Maintain a 3 foot (about 1 meter) distance from air supply and return vents.
DO NOT install smoke detectors in a garage or near furnaces.
Install at least 6 m (20 ft) away from kitchens or other areas where combustion particles are
present.
Install smoke detectors at least 2.5 m (8 ft) away from bathrooms.
DO NOT install in dirty, dusty, or insect infested areas.
DO NOT install near areas fresh air inlets or returns or excessively drafty areas. Heating and air conditioning vents, fans, and fresh air intakes can drive smoke away from smoke detectors.
Remember that dead air spaces may prevent smoke from reaching a smoke detector.
Camera Installation Recommendations
Camera views are accessible to TouchScreen users and family members who log into the Subscriber
Portal. When placing cameras, consider whether what they are monitoring poses any privacy issues.
91
Appendix B: Using the Key Pad
Appendix B: Using the Key Pad
A key pad is a wireless peripheral that lets you perform certain TouchScreen
functions in additional locations in your premises. For example, you could install a
key pad near a less-used entry or in an upstairs bedroom to ensure its Emergency
Alarm feature is always readily accessible. The following TouchScreen functions can
be performed from the key pad:
Check the current system status (armed, disarmed, or “not ready”)
Arm the system in Arm Away mode or Arm Stay mode (see the TouchScreen
User Guide for an explanation of arming modes)
Disarm the system
Send a Panic alarm for police assistance.
Checking System Status
Press the
button to light the LED to show the current status of the security system. The
lights to show the current status of the security system.
button
Green for three seconds if the system is disarmed.
Red for three seconds if the system is armed.
Orange for three seconds if the system is not ready to be armed (for example, a door is open.)
Arming the System
From the key pad, you can arm your system in Arm Away mode or Arm Stay. Arm Night mode must be
performed from the TouchScreen or Subscriber Portal.
Arm Away Mode
Enter a valid keypad code followed by the
button to arm the system in Arm Away mode (no one still
in the premises). See the TouchScreen User Guide for an explanation of this arming mode.
The
button turns red for 3 seconds to indicate that the Exit Delay has started (default 30 seconds—
TouchScreen beeps during this period). If the system is not ready (because, for example, a door or
window is opened) the button flashes orange seven times.
Arm Stay
Enter a valid keypad code followed by the button to arm the system in Arm Stay mode (there are still
people within the premises). See the TouchScreen User Guide for an explanation of this arming mode.
92
TouchScreen User Guide
The
button turns red for 3 seconds to indicate that the Exit Delay has started (twice as long as the
period configured for Arm Away—up to 120 seconds with no beeping from the TouchScreen). If the
system is not ready (because, for example, a door or window is opened) the button flashes orange seven
times.
Disarming the System
Enter a valid keypad code followed by the
button to disarm the system.
The
button turns green for 3 seconds to indicate that the system has been disarmed. There is no
Entry Delay period.
Sending an Emergency Police Alarm
Press and hold the shield and asterisk button for 2.5 seconds to send an audible panic alarm to the
central monitoring station for police assistance.
The LED flashes red to indicate that the alarm has been sent. Additionally, contact persons will receive
email and SMS notifications if they are configured to do so.
Mounting the Key Pad
To mount a key pad to the wall:
1. Use a Phillips screwdriver to remove the faceplate from the front of the
key pad (Remove the faceplate).
Behind the circuit board, four holes are visible at the back of the device.
Figure 19: Remove the
faceplate
2. Place the key pad on the wall where you want it located and use a pen to mark the location of the
four holes.
3. Install four screws in the locations marked on the wall. Do not screw them in all the way.
4. Affix the key pad to the installed screws.
5. Replace the faceplate to the front of the key pad.
93
Appendix B: Using the Key Pad
Changing the Batteries in the Key Pad
To replace the batteries in the key pad:
1. With a Phillips screwdriver, remove the screw from the battery cover in the back
of the key pad and remove the cover.
2. Find the two supplied CR2 3-volt lithium batteries and install them positive end
up.
3. Replace the battery cover.
To Reset the Key Pad to Default
When a key pad is originally removed from its packaging, it is already in factory default mode. When you
install the battery as described on page 94, it will immediately begin searching for a TouchScreen with
which it can pair.
To reset a key pad that has already been added to a TouchScreen and place it in Search mode, delete it
from the TouchScreen, then press the
button.
In the rare event that you need to reset a key pad to factory default that is not paired to a nearby
TouchScreen:
1. Remove the batteries.
2. Press the 2 and 8 buttons and hold them as you insert a battery.
The LED lights green.
3. Release the buttons immediately.
4. Replace the rest of the batteries.
94
Appendix C: Wi-Fi Repeater Placement
Appendix C: Wi-Fi Repeater Placement
A Wi-Fi repeater (also called a Wi-Fi range extender) extends the range of the iControl security router to
enable communication between the TouchScreen and other iControl Wi-Fi peripheral devices. Currently,
cameras are the only supported Wi-Fi devices. Use a RF range extender to increase the range of Zigbee
sensors, lights, and other devices.
If you to move the repeater to a different location, note the following:
Place the repeater an equal distance between the security router and the camera that is furthest
from the router. If the repeater broadcasts stronger signals and is placed too close to the router,
the repeater could cause the router to stop transmitting signals. As a result, you would need to
restart the security router often. The optimal distance will differ in each home. Some experimentation may be required to determine placement.
If you have a home Wi-Fi repeater, avoid placing the security repeater nearby, if possible.
The repeater has the same name (SSID) as your security router. There is no way to determine whether
the TouchScreen is communicating with a camera through the repeater or the security router. In
addition, there is no way to test signal strength between a camera and the repeater.
95
Appendix D: Quick Reference Tables
Appendix D: Quick Reference Tables
This section provides tables that list the ranges and default settings for features in your security system.
The tables are grouped in the following categories:
System & Security settings
TouchScreen device settings (99)
Advanced system settings (99)
96
TouchScreen User Guide
Table 15: System & Security Settings, Ranges, and Defaults.
Feature
Comments
Ranges & Defaults
Exit Delay
The time allotted for the customer to exit the
premises when the security system is armed.
The Exit Delay for Arm Stay and Arm Night modes is
twice the configured Exit Delay up to 120 seconds.
Default: 60 seconds
Range: 45 seconds to 240
seconds
Exit Delay Progress
Annunciation
TouchScreen beeps once per second. Twice per
second during the last 10 seconds.
Disabled for Arm Stay &
Arm Away.
This feature is not
configurable.
Exit Delay Restart
Entry/Exit zone is faulted, restored and then faulted One time only.
again prior to the end of the exit delay, then Exit
This feature is not
Delay restarts.
configurable.
Exit Error
If an Entry/Exit door is left open at the end of Exit
Delay, the Entry Delay starts and, if the system is
not disarmed, an alarm sounds.
This feature is not
configurable.
Unvacated Premises During Arm Away, if no Entry/Exit Zone opens and
closes during the Exit Delay, the Arming Mode
reverts to Armed Stay.
This feature is not
configurable.
Entry Delay
Default: 30 seconds
Range: 30 to 240 seconds
The time allotted for the customer to disarm the
system after tripping an Entry/Exit security zone. Entry Delay Progress TouchScreen beeps once per second Twice per
Annunciation
second during the last 10 seconds.
This feature is not
configurable.
Disarm
This feature is not
configurable.
Enter a keypad code to disarm the system.
Control Buttons
Home button
The functions of these
buttons cannot be
Emergency Alarm button changed.
Emergency Alarms
(aka manual alarms)
TouchScreen:
Press to access
Emergency Alarm
options
Alarm Transmission Length of time after an alarm sounds for the
Delay
customer to enter a valid keypad code to prevent
(aka Abort Window) alarm from being sent to central.
Disarming During
the Alarm
Transmission Delay
The functions of these
buttons cannot be
changed.
Default: 30 sec.
Range: Minimum is 15 sec.
and the maximum is 45
sec.
System disarmed by entering a valid keypad code in This feature is not
the TouchScreen or a key pad. If invalid keypad
configurable.
code entered, alarm restarts.
When alarms are
If system is disarmed within the Alarm Transmission By default, verify contacts
successfully aborted Delay period, no alarm transmission occurs.
are notified by SMS and
97
Appendix D: Quick Reference Tables
Feature
Comments
Ranges & Defaults
(that is, disarmed
during the Alarm
Transmission Delay
period)
Contacts can opt not to receive SMS and/or email
messages notifying them when an alarm was
aborted and that central monitoring was not
notified.
email when an alarm is
disarmed during the Alarm
Transmission Delay
period.
Cancel Window
For 5 minutes after the end of the Abort Window,
customer can disarm system to send an Alarm
Cancel to central monitoring.
This feature is not
configurable.
Duress Code
A four digit code that sends silent alarm
immediately when used to arm or disarm the
system. Otherwise, works the same as the Master
keypad code.
Default: Duress Code is
disabled.
Initiating Emergency This is a two-step action from the TouchScreen.
Alarms (aka manual
alarms)
Not configurable.
Cross Zoning
Two security zones that only trip an alarm if they
are both faulted within a configured period of time.
Can only be created after the security zones have
been added in a separate step.
Default: 10 seconds
Range 1 second to 999
seconds.
Swinger Shutdown
After the TouchScreen has sent an alarm the set
number of times (trips) to central monitoring, no
more alarms will be sent to central monitoring for
48 hours or until the security system is disarmed.
Default: 2 trips
Range: 1 to 6 trips
Fire Alarm
Verification
When enabled, central only contacts the authorities Default: Disabled
when multiple smoke detectors are faulted OR a
detector is in an alarm for 60 seconds or more.
Call Waiting
Old-fashioned security systems use phone lines to send alarms to central
monitoring, so they require a caution included with their control panels alerting
the installer that call waiting features can prevent successful connection to the
central station.
Since the TouchScreen connects to central monitoring over broadband and
cellular, this alert is not required.
System Test
Perform the system test as described on page 33.
Communications
Test the security system to ensure that it is in proper communication with
central monitoring as described in on page 37.
Test In Progress
The titles of all alarm test process screens begin with Not configurable.
“Alarm Test”.
Automatic
Termination of Test
There are no conditions that would result in the automatic termination of Test
mode. The user must tap the Disarm button on the Alarm Test screen to end the
alarm test.
Screen Brightness
The relative brightness of the TouchScreen screen.
Default: 10 (brightest)
Range: 1 to 10
98
TouchScreen User Guide
Table 16: Screen Settings, Ranges, and Defaults
Feature
Comments
Ranges & Defaults
Automatic Screen
Dimming
Idle Timeout
Default: 30 minutes
Range: 5 minutes to 30
minutes
(in 5 minute increments)
Dimming Level
Default: 10 (brightest)
Range: 1 to 10
Backlight off at night
Default: No
Range: Yes or No
Backlight off time
Default: 12:00 .A.M.
Backlight on time
Default: 12:00 .A.M.
Screensaver
Configuration
Minutes Inactive before screensaver becomes
active.
Default: 30 minutes
Range: 5 minutes to 30
minutes
(in 5 minute increments)
Sound Configuration
Volume control
Default: 13 (loudest)
Range: 0 (mute) to 13
Screen Nighttime
Settings
Table 17: Advanced Settings Range and Defaults
Feature
Comments
Default
Expose Personal
Router to Internet
Whether the retail router connected to the security system
router is exposed to the Internet.
Default: Not
exposed
99