1
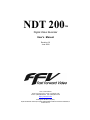
NDT 200
™
Digital Video Recorder
User’s Manual
Revision 2.0
June 2008
Fast Forward Video
1151 Duryea Avenue, Irvine, CA 92614, USA
Phone: (949)852-8404 FAX: (949)852-1226
http://www.ffv.com
The design of the NDT 200™ is proprietary.
No part of the NDT 200™ manual may be copied or modified without the written consent of Fast Forward Video, Inc.
Printed in the U.S.A.
TABLE OF CONTENTS
OVERVIEW.................................................................................................................................................................................. 4
STANDARD FEATURES ................................................................................................................................................................ 4
SPEEDY GET-STARTED MANUAL ........................................................................................................................................ 5
FRONT BEZEL BUTTONS AND FUNCTIONS ...................................................................................................................... 6
PUSHBUTTON OPERATION ......................................................................................................................................................... 6
LCD / TOUCH PANEL OPERATION....................................................................................................................................... 7
OPTIONAL FEATURE DESCRIPTION ................................................................................................................................ 10
REAR AND SIDE PANEL CONNECTIONS .......................................................................................................................... 11
LED OPERATION..................................................................................................................................................................... 12
USB OPERATION ..................................................................................................................................................................... 12
EXTERNAL TRIGGER OPERATION (RECORD / STOP FUNCTION)........................................................................... 12
FIRMWARE UPDATE PROCEDURE.................................................................................................................................... 13
SPECIFICATIONS .................................................................................................................................................................... 14
MAINTENANCE........................................................................................................................................................................ 15
LIMITED WARRANTY............................................................................................................................................................ 16
REVISION HISTORY ............................................................................................................................................................... 16
NDT 200™ Manual, Fast Forward Video, Inc.
2
(This page intentionally blank)
NDT 200™ Manual, Fast Forward Video, Inc.
3
Overview
The NDT 200™ is a standalone, handheld, digital video recorder with exceptional image quality, featuring
scalable motion JPEG compression at an outstanding 720 x 480 pixel image resolution. The dvr records
up to 26 hours at a 20:1 compression with readily available SATA hard drives. The recorder is equipped
for downloadable files via an on-board USB 2.0 port and is powered by the supplied 9V power supply.
The NDT 200™ is designed to develop and evolve as the industry changes. New features are
implemented regularly, most of which can be easily implemented by updating the DVR’s firmware,
downloadable via the support page of FFV’s Web site, http://www.ffv.com (see page 8 for instructions).
Some features are paid options available at additional cost.
The M-JPEG compression settings are user selectable from 4:1 to 20:1. In practice, it is advisable to set
the compression to correspond with the best quality to storage ratio. A setting of 4:1 is a good setting for
Digi-Betacam images, 7:1 for general purpose Betacam images, 10:1 for S-VHS, 15:1 for VHS. The rule
of thumb for minutes of storage generally available is compression ratio times gigabytes available;
example: 10:1 compression ratio x 0.8 = 8 Minutes/GB * 4 gigabytes = 32 Minutes recording time.
Standard Features
o
Analog Composite & Y/C Inputs & Outputs
o
USB 2.0 File Download Port
o
Scalable Motion JPEG compression
o
USB Control / Configuration
o
PC Viewable Files
o
2 Line Audio Channels In / Out
o
Touch Pad Configuration
o
LCD Status Display and LED Output
o
NTSC or PAL Video Resolution
o
Bezel Controls
Optional Features: Functional Descriptions available on pages 11 and 12.
Record – Time-Lapse, Single frame, Loop, Instant Startup, Pre-Event, External Record Trigger
Play – Variable Speed (Selected Speeds or Fully Variable)
Other – Real-Time Clock, User Data Fields, Data Overlay, NTSC-J, Instant Startup
NDT 200™ Manual, Fast Forward Video, Inc.
4
Speedy Get-Started Manual
The NDT 200™ startup is very straightforward.
Install drive - Open the drive door, slide the SATA drive into the unit and close the door.
Apply Power - Plug the power adapter into a wall socket and connect it to the power input on the rear
panel. Press the green power switch to start the unit. The LCD should power up and the LED should
start blinking “Red”.
Parameter Configuration - Configuration from the factory is “Default”. Configuration is available via the
LDC and touch panel on the unit. See Unit Configuration section of manual for these settings.
When the configuration is complete, the user should “Delete All Video”. This will format the new drive
and prepare the drive to store video.
Connect inputs – Connect Video to either the Composite or S-Video (Y/C) input; this should match the
configuration setting for Video Input. Connect the audio mono to left or stereo to left and right inputs.
Record – Press the red “REC” button to start recording and Stop + REC to stop recording.
Playback – Press the LIST soft button to list the clips (Clips are listed in newest clip first order).
Scroll down to the desired clip and press LOAD. Press EXIT to go to the main display screen.
Press ► to start playback. The DVR will stop playing at the end of the loaded clip (if loop playback is
Off) or continue from the first frame (if loop play is On).
Moving video to computer via USB –Install the CP210x driver from the CD – Note where the files are
installed. The hardware installer needs to be directed to install the driver from this location. Connect the
NDT 200™ USB port to the computer USB port. Once the hardware installer has completed (it will go
through the process twice). Enter the Setup screen, scroll to the Connect Disk to PC setting. Press the
OK soft button. The drive will appear as a drive on the computer. This will allow the video files,
CLIPXXXX XXXXXX.MOV to be transferred to the computer for playback or archiving. To disconnect the
disk from the PC, follow the instructions on the unit’s display.
Clearing the files – This process should always be performed using the DVR operating system. The
computer does not perform all of the tasks required to allow the DVR to record video onto the drive.
Enter the settings menu and press the “DELETE” soft button twice. The FAT32 format takes up to 1
minute to complete, the LCD shows “Formatting Disk” with an operation progressing bar while the disk is
being formatted.
Individual clips may be deleted by selecting INFO in the LIST screen and then DELETE and follow the
instructions on the LCD.
Turn Off NDT 200™ - Press green power button for 5 seconds to turn unit off.
More complete feature descriptions are included in the remainder of this User’s Manual and in the Serial
Protocol Document, available on the Technical Support page of www.ffv.com.
NDT 200™ Manual, Fast Forward Video, Inc.
5
Front Bezel Buttons and Functions
POWER Switch: The green pushbutton is the power button, press and release to start the NDT 200™.
When the unit is “On”, pressing the power button for 5 seconds will turn the unit “Off”.
PASS-THRU: The LED below the power switch will flash red once per second indicating that it is in
digital pass-thru mode, which indicates the D.V.R. is record ready. The status line of the LCD panel will
also display PASS-THRU at this time.
Pushbutton Operation
Function
Start Record
Stop Record
Change to Pass-Thru
Play forward – 1x
Pause
Step Fwd 1 frame
Step Rev 1 frame
Seek to end of loaded
clip
Seek to start of loaded
clip
Scan Fwd – 5x
Scan Fwd – 30x
Scan Rev – 5x
Scan Rev – 30x
Req. State
Keys
Any but Record
Record
Play or Stop
Stop
Play
Play or Stop
Play or Stop
REC
■ + REC
■ + REC
►
■
■+
■+
Hold Stop and tap Record
Hold Stop and tap Record
Hold Stop and tap Fast Fwd
Hold Stop and tap Rewind
Play or Stop
Play or Stop
Play ≠ 5x
Play = 5x
Play ≠ -5x
Play = -5x
►+
►+
►+
►+
+
Clear Disk
Notes
Any but Record
NDT 200™ Manual, Fast Forward Video, Inc.
Hold Play and tap Fast Fwd
Hold Play and tap Fast Fwd
Hold Play and tap Rewind
Hold Play and tap Rewind
, then , then press REC
Push and hold
+REC and release all three (LED flashes red and
green quickly), then press and hold REC for 5
seconds. LED will flash fast red, until last two
seconds of format - it changes to fast green
blink. Returns to slow red blink when ready to
record.
6
LCD / Touch Panel Operation
The NDT 200™ LCD and Touch panel provide user interface to enable feedback from the unit during
operation, unit configuration, and clip management.
System Status Screen – This screen comes up at power-up. It shows Folder and Clip information,
Motion State and Time Code of the unit, Audio levels, Disk Space remaining and Compression Ratio.
Soft buttons in Record or Pass-Thru (LED is Red) are Setup and List.
SETUP – Displays a list of Unit Configuration settings available from the LCD / touch panel.
LIST – Displays a list of the recorded Video Clips. Function described in Video Clip Management.
Soft buttons in Play (LED is Green) are JOG/SCRUB, SCRUB/SCAN, SETUP and LIST. Buttons change
depending on state selected.
Another change from Record to Play - Disk Available is replaced by JOG, SCRUB, or SCAN.
JOG – Rotations in the touch pad circle move the video very slowly.
SCRUB – Rotation in the touch pad circle move the video based on the speed of the rotation.
SCAN – Rotation in the touch pad circle changes the play direction and speed.
Speeds are Stop, 1X, 5X, and 30X in each direction.
SETUP or Unit Configuration – Allows configuration of operational parameters of the NDT 200. Scroll to
highlight and press proper soft key for action. Some optional features may not be installed on every unit.
Displayed action will be enabled if button is pressed; NOT current setting.
Delete All Clips – Format new drives or deletes all recorded video.
DELETE to confirm or EXIT to Cancel.
Connect Disk to PC – Controls USB access to the hard drive from the PC.
OK to Connect or EXIT to disconnect or leave screen. Disconnect allows the unit to retake control
of the hard drive and may take a moment to be ready to act.
Set Loop Playback – OFF/ON or EXIT
OFF or ON indicates what the setting will change to when button is pressed.
Set Playback (Film) Speed – Dual Option – SELECT to enter setting screen.
INCR, DECR, SET, EXIT; plus a list of speeds in a scrollable list.
INCR – Press to increase the speed by 1 frame per second.
DECR – Press to slow the speed by 1 frame per second.
SET – Press to set selected speed and exit the screen.
Select Video Input – COMP/S-VIDEO, EXIT
COMP or S-VIDEO indicates what the setting will change to when button is pressed.
Set Compression Level – Sets video compression level for subsequent recording.
SELECT to enter screen; INCR - Increment, DECR - Decrement, SET, EXIT
Set Single Frame Recording – Option – Allows user to record a single frame each time the REC button is
pressed. If each frame should be in a separate file, Stop and Restart recording after each frame.
OFF or ON indicates what the setting will change to when button is pressed.
Set Loop Recording – Option – DVR records over all empty space at the time recording starts,
overwriting the first video of this clip when drive space is full until Recording is stopped.
OFF or ON indicates what the setting will change to when button is pressed.
NDT 200™ Manual, Fast Forward Video, Inc.
7
Set External Trigger Mode – Option – Only displayed when both External Trigger and Pre-Event
Recording options are installed. See External Trigger option description for more information.
“REC” or “EVENT” indicates what the setting will change to when the button is pressed.
Set Pre-Event Recording – Option – Setting is 00 (Off) to 15 minutes.
INCR, DECR, SET, EXIT
INCR – Press to increase the duration by 1 minute.
DECR – Press to reduce the duration by 1 minute.
SET – Press to set selected time and exit the screen.
EXIT – Exit without setting a new speed.
Set Time Lapse Recording – Option – Setting is four-field time code format.
NOTE: Requires that Single-Frame recording be set ON to function!
INCR, DECR, SET, EXIT; plus scroll to change between fields.
INCR – Press to increase the duration by 1 (H,M,S,F).
DECR – Press to reduce the duration by 1 (H,M,S,F).
SET – Press to set selected interval and exit the screen.
EXIT – Exit without setting a new speed.
Set Instant Startup Mode – Option – Setting is Off or On; On has two modes.
NOTE: Setting On from Off will Delete All Video from disk!
On – Formats disk and Sets Instant Startup - Record mode
Off – Disables Instant Startup Feature.
Rec – Enables recording mode.
Play – Enables playback mode.
Set Screen Overlay – Option – SELECT to get Overlay menu or EXIT.
Overlay menu:
Overlay State – SELECT, OFF, BACKGROUND, EXIT
SELECT – Toggles through Overlay items to put on output video stream.
OFF/ON – Toggles Selected Item to State Indicated before button press.
BACKGROUND – Toggles background between Transparent and Black.
EXIT – Returns to Configuration menu.
Display Format – The soft buttons depend on the overlay state.
If Time Overlay is ON, the first button toggles Frames# On/Off in Time format.
If Date Overlay is ON, the second button toggles Date Format (M/D/Y or D/M/Y).
If Date Overlay is ON, the third button toggles leading 0’s On/Off - NO 0 or SHOW 0.
Horizontal Position – SELECT, LEFT, RIGHT, EXIT
SELECT – Toggles between setting Time, Date or User Data Fields position.
LEFT – Moves the adjusted overlay to the left one position.
RIGHT – Moves the adjusted overlay to the right one position.
Vertical Position – SELECT, UP, DOWN, EXIT
SELECT – Toggles between setting Time, Date or User Data Fields position.
UP – Moves the adjusted overlay up one position.
DOWN – Moves the adjusted overlay down one position.
Enter User Data – Option – FIELD, CLEAR, SELECT, DONE.
FIELD – Toggles between User Data Fields as indicated.
CLEAR – Clears current data from field. (Visible on overlay only).
SELECT – Inserts the highlighted character in the User Data String.
DONE – Saves data string changes and exits screen.
NDT 200™ Manual, Fast Forward Video, Inc.
8
Time and Date – Set unit Time and Date for Real Time Clock and File Date/Time stamp.
SELECT to enter screen; INCR - Increment, DECR - Decrement, SET, EXIT
Scroll to change between fields. SET when finished with all fields.
Set Video Format – NTSC/PAL, EXIT.
NTSC or PAL indicates what the setting will change to when button is pressed.
Firmware Version and Update – SELECT, EXIT
Select enters screen to display firmware versions and unit serial number.
Soft keys in screen are: 9600, 38400, 57600, EXIT
Specific number keys initiate firmware update at specified speed using HyperTerminal or equiv.
Remove power input when complete.
LIST or Video Clip Management – When LIST is pressed, NDT 200™ shows a list of the clips recorded,
in the reverse order recorded (last recorded is first in the list) and a “Play All Clips” option. Soft buttons
are INFO, LOAD, and EXIT. The soft buttons act on the clip highlighted. Scroll to highlight clip.
INFO – Brings up the information window about the specified clip
Shows Folder and clip name, duration, and when recorded (time / date must be set)
Soft keys are RENAME, DELETE, EXIT
RENAME – Shows rename screen with present name at the top and alpha-numeric keyboard.
Soft keys are CLEAR, BACKSP, SELECT, DONE
Clear – Clears namespace.
Backsp(ace) – Moves “cursor” back one position, erasing the character or space.
Select – Appends character currently highlighted to the namespace location.
Done – Changes soft keys to SET to change name and ABORT to keep unchanged.
DELETE – Screen shows “Press DELETE to delete this clip or EXIT to Abort.
EXIT – Returns to clips list.
LOAD – Loads the clip for playback. “Load” = Set the play list In and Out points to the start and end of
this clip. This makes the DVR act like this is the only video recorded on the DVR.
UNLOAD – If a clip has been loaded, the key changes to UNLOAD. This Clip must be unloaded before
all other video on unit is available.
Automatic Clip Naming with User defined name - To get the NDT 200™ to increment using your clip
name, rename the LAST recorded clip on the unit(first in the LIST), leaving a numerical at the end of the
clip. When the clip has been renamed and saved, cycle power on the unit. It will load the directory and
name future clips incrementally from the last recorded clip, which is the first clip in the LIST on the NDT
200™.
NDT 200™ Manual, Fast Forward Video, Inc.
9
Optional Feature Description
Time Lapse Recording – Skips a user-defined number of frames (set as time code format) between the
captured frames. This is useful to extend record time when every frame is not absolutely critical or to
capture a long-term event at a specified interval over time. The unit will indicate “Record”, but the Time
Code will change only when a frame is saved.
The following examples are for NTSC – normal frame rate approx. 30 frames per second.
An interval of 00:00:00:02 will record every other frame; yielding 15 frames per second.
An interval of 00:00:00:05 will record every 5th frame; yielding 6 frames per second.
An interval of 00:00:00:15 will record every 15th frame; yielding 2 frames per second.
An interval of 00:00:01:00 will record one frame per second.
An interval of 00:01:00:00 will record one frame per minute.
An interval of 01:00:00:00 will record one frame per hour.
Requires Single-Frame Recording be set ON to function.
Single-Frame Recording – Records a single frame each time Record button is pressed. If user desires
each frame to be in a separate file, stop record between each frame. Otherwise, leave unit “Record”ing,
and press the Rec button to capture a frame.
Loop record – Continuously records material over the available space on the drive at the time the
recording starts. The loop never overwrites video on the drive prior to the start of a recording. Once the
empty space has filled, video is overwritten in the order recorded until recording is stopped.
Pre - Event Recording – EVENT mode allows the user to have the recorder recording video, see
something that they want to record, press the external trigger (see below) and save only the video from
the set number of minutes prior to the trigger input until the recording is stopped. If no trigger is received
between the Record and Stop commands, the video recorded will not be saved.
Example: User has a test that takes two minutes to determine if the results are worthy of
recording. Rather than starting and stopping the recorder and erasing unimportant video, the user sets
the unit pre-event time to 3 minutes, starts recording, starts the test. If the results warrant saving, the
user presses the trigger and waits for the completion of the test to stop the recording. Any video
recorded prior to 3 minutes before the trigger is discarded when the recording stops.
External Trigger – The external trigger input is located above the Y/C connectors in the side of the NDT
200™. The jack is a 3.5mm stereo audio jack. Tip is the trigger input, Ring is Record LED output, Shank
is ground. LED flashes when unit is in pass-thru mode, it is on continuously when recording. The
external trigger has two operating modes, depending on the feature installed… If both are installed,
Normal Record Mode is the default, but it becomes a user choice in the menu – Set External Trigger.
REC(ord) mode - A toggle switch should be used – Recording starts when the switch closes and
stops when it opens.
EVENT mode - A momentary switch should be used – the trigger is sensed when the switch is
closed for longer than 100msec (1/10th of a second).
External trigger option is not required for EVENT trigger operation.
Variable Speed Playback (Selected Speeds) – Selectable Fixed speeds settings are 6,12, 24, 25, 30,
33, 60, 90, 120, 150, 180, 240 frames per second. Video played recorded at 30fps and played at 6fps
will play 5 times faster than normal. The same video played at 150fps will play at 1/5 speed.
Variable Speed Playback (Fully Variable) – The fully variable feature allows the user to increment or
decrement the setting to play at any, up to 360, integer frames per second.
Real-Time Clock – Allows user to have Time/Date stamps on video files or to have Time or Date in
Overlay on video to be viewed in QuickTime.
NDT 200™ Manual, Fast Forward Video, Inc.
10
User Data Fields – (4) Fields for users to add character information to be included in an overlay on the
video. (2) fields are (16) character length and (2) fields are (4) character length for a total of (40)
characters. Overlay must be ON for data to display on monitor during setup.
Data Overlay – Allows user to destructively or non-destructively overlay Time, Date and/or User Data
from the User Data Fields into the video. Destructive overlay occurs when the overlay is ON during
recording. This is necessary to see the overlay when playing using QuickTime viewer. It is called
“destructive” because part of the video will be destroyed when the characters are written. This is
minimized when using the transparent background, but characters may not be visible if the video
background is very light. Non-destructive overlay occurs if overlay is Off during recording but On during
Playback on the DVR. The video is overwritten during play, but the overlay could be turned off and
replayed to see the original video undamaged.
Instant Startup Mode – Allows DVR to be ready to record very quickly following power-on. Without this
feature set on, the startup time will get longer as more video is recorded on the disk. This is usually only
an issue when using the DVR for automated security applications.
CAUTION: When this mode is enabled from disabled, the NDT 200 will format the disk!
Record mode – records video and stores end of recorded video address in Flash memory so NDT
200 initializes without setting up clip directory upon startup. Since the directory was not initialized at
startup, the NDT 200 will only play clips recorded since power-on. Also, the clip names start at the
default, CLIP0000, for the first recording each time power is applied to the unit.
Play mode – (Disables Recording) - NDT 200 initializes clip directory to enable user to select clip
from entire source list for playback.
Rear and Side Panel Connections
1. USB Port – Type “B” on Rear Panel - Used for:
6
a. Serial Communications for configuration and control.
5
b. Access video files from hard drive. (When connected to PC & software enabled).
2. Power Connector - +7V to +40Vdc.
3. Composite Video – In (Top)/ Out (Bottom) – Standard RCA connectors
4. Audio – Left Channel - In (Top)/ Out (Bottom) – Standard RCA connectors
5. Audio – Right Channel - In (Top)/ Out (Bottom) – Standard RCA connectors
6. Y/C Video – In (Left)/ Out (Right) – Standard S-VHS connectors
7. Trigger Input – 3.5mm Stereo jack - Tip = Record Trigger; Ring = LED output; Shank = GND.
NDT 200™ Manual, Fast Forward Video, Inc.
11
LED Operation
The action described below occurs immediately when the button is pressed.
LED Operation
MODE
ACTION
LED
Pass-Thru
Pause
Red
High - 0.1 Sec. per Sec. - Single short blink per second.
Pass-Thru
Record
Red
High Output - LED On.
Playback
Stop
Green
High - 0.1 Sec. per Sec. - Single short blink per second.
Playback
Play (1:1)
Green
High Output - LED On.
Forward - non 1:1
Green
LED high in a pattern short, short, long, short
Playback
Reverse - non 1:1
Confirm Video Delete
Green
R&G
LED high in a pattern short, long, short
Alternate short blinks.
Playback
Delete
While deleting
Red
Delete
Finished Deleting
Green
DISPLAY
Fast Red Blinking
Fast Green Blinking for 2 seconds.
USB Operation
The USB connection has two uses in the NDT 200, File Download and Remote Control/Configuration.
File Download allows the user to view recorded video using the QuickTime player on a computer.
The drivers are included in Windows 2000 and Windows XP for the connection. The drive should show
up as an external drive when the USB cable is connected, the DVR is powered On, and the “Set USB
Disk Connection” setting is set to CONN, unless the unit is in Record. The DVR will not allow USB
access when recording since all data on the drive could be damaged / deleted by doing so. Connecting
the USB cable during Play will change the Motion State to Pass-Thru, since the DVR and the USB cannot
access the drive simultaneously.
The files containing video will have long filenames the same as the clip title and this numerical
information to separate multiple files of the same clip: AAAABB, where the ‘AAAA’ and ‘BB’ are
hexadecimal numbers; the digits ‘BB’ increment from lower to higher for as many files as are in one clip.
All other files on the drive are not video files, and therefore, are not playable. The FAT32 format limits file
size to 2 GB. Long video clips will span file boundaries.
Video requires a fast computer to play smoothly in real time. If your video does not play smoothly,
QuickTime Pro has a setting under the Movie tab to “Play All Frames”. This slows the video to the speed
of the computer, but shows all of the frames recorded.
Audio in QuickTime files is Single Channel from the Left Input.
Remote Control / Configuration requires the user to load a driver for the USB to Serial IC. Following
this installation, DVR Master software connects to the NDT 200™ via a USB port to allow the user to
configure and control the unit using the computer. User can write control code using Serial Protocol.
External Trigger Operation (Record / Stop function)
Trigger input is held high in the unit. When pulled low, unit records. When low is removed, unit stops
recording. See Option Description for more information.
NDT 200™ Manual, Fast Forward Video, Inc.
12
Firmware Update Procedure
New firmware for the NDT 200™ is posted to our website as it becomes available. Our customers have
access to this firmware for the lifetime of the product. Please check this site regularly to implement the
newest changes.
Firmware updates are located at www.ffv.com in the Support page.
Locate the latest revision of firmware for the video board (NDTXXX.fud). Download the *.zip file and unzip
it to get the NDTXXX.fud firmware file. Use either DVR Master or Microsoft’s Hyperterminal to send the
firmware to the NDT 200™ DVR.
Hook up the NDT 200™ to your computer:
Connect a USB cable from the DVR to a USB port of your computer. The computer will request a driver
for the USB to Serial IC. This is available from the CD that shipped with the DVR or the support page of
www.ffv.com. The self-extracting file will put files in specific location. Please point the installer to this
location to install the USB to Serial IC driver.
Using DVR Master software to update NDT 200™ firmware:
Start DVR Master with a USB cable connected between the computer and the NDT 200™ and the NDT
200™ powered On. When DVR Master software has started, click the “Rev” button in the lower right
corner, click Update, select the new *.fud file and “Send”. DVR Master will send the file and provide
status. When completed, remove power input to the NDT 200, wait about 5 seconds, reconnect power
and turn power On to start using the new firmware.
Using Hyper Terminal to update firmware – HyperTerminal Set-up:
On your host computer, open up the Hyper Terminal folder from the Start Menu, there should be an icon
for setting up a new control called Hyperterm.
1.
CONNECTION DESCRIPTION: FFV, choose an Icon, OK
2.
PHONE NUMBER: Enter any phone number, choose a communication device, OK
3.
CONNECT: Cancel
4.
CONFIGURE /CONNECTION / CONNECTION PREFERENCES: (Pick one speed)
BAUD RATE: 9,600
DATA BITS: 8
PARITY: None
STOP BITS: 1
BAUD RATE: 38,400
DATA BITS: 8
PARITY: ODD
STOP BITS: 2
BAUD RATE: 57,600
DATA BITS: 8
PARITY: None
STOP BITS: 1
FLOW CONTROL: NONE
5.
FILE / PROPERTIES / SETTINGS:
FUNCTION: terminal keys, EMULATION: ANSI, BACKSCROLL BUFFER LINES: 500
Download:
Set up Hyperterminal as shown above and “Connect” to the COM port. Using the NDT 200™ front panel,
go to SETUP, “Firmware Version and Update” & “Select”, then press the soft key for the speed
Hyperterminal is configured for. The unit should send:
“Firmware Update Utility (Protected-Mode), Revised Aug 30 2006
Begin your xmodem-CRC transfer now...” Once per second, a “C” will be sent to the screen…
User should select “Transfer”, “Send File”, Browse for the file, Verify protocol is Xmodem, and Send.
Firmware file should be sent and ultimately a “Success…” message should come back.
Disconnect power to the NDT 200™, wait about 5 seconds, reconnect and restart unit.
NDT 200™ Manual, Fast Forward Video, Inc.
13
Specifications
VIDEO INPUT
Analog Input:
Levels:
Standards:
MEMORY
Composite and S-Video(Y/C).
1.0Vp-p, 75 ohms
525/60 (NTSC) or 625/50 (PAL)
Multi-port Frame Buffer:
HARD DRIVE
SATA - 2.5” Laptop
VIDEO OUTPUT
Analog Output:
Horizontal Resolution:
Levels:
Standards:
Connections:
VIDEO INPUT DECODER
Format:
Digital Color Space:
Sampling:
Pixel Resolution:
S/N Ratio:
Bandwidth:
Differential Gain:
Differential Phase:
ADC Differential Linearity:
ADC Integral Linearity:
Composite and S-Video (Y/C).
550 TV lines (at 5:1 compression)
1.0Vp-p, 75 ohms
525/60 (NTSC) or 625/50 (PAL)
Multi-pin for component
Digital 4:2:2 YCrCb
60 fields per second NTSC
50 fields per second PAL
YUV
13.5 MHz
720 x 486 pixels (525/60)
720 x 576 pixels (625/50)
50 dB
7 MHz (-3 dB)
2%
2 deg.
+/- 0.7 LSB
+/- 1.0 LSB
VIDEO OUTPUT ENCODER
Digital Color Space:
Digital 4:2:2 YCrCb
Analog Bandwidth:
Y: 6.75 MHz
C: 1.3 MHz
Composite:
4.5 MHz (NTSC)
5.0 MHz (PAL)
DAC Resolution:
10 bits x 3
S/N Ratio:
60 dB
VIDEO COMPRESSION
Codec:
Method:
Compression Ratio:
Zoran
JPEG (Joint Photographic Experts
Group)
Variable - 4:1 to 30:1
32 MB DRAM
MICROPROCESSOR
Type:
Clock Speed:
Local ROM/EPROM:
Local SRAM:
Hitachi - 20 TO 250GB
Intel 80386EX
40 MHz
1MB Flash EEPROM
1MB 0 wait state
COMMUNICATIONS INTERFACE
USB 2.0 (COM Port)
Requires driver to enable
COM port. Conforms to
Sony “Remote (9 pin)”
protocol via USB.
AUDIO SPECIFICATIONS
Resolution:
Sampling Rate:
Channels:
Dynamic Range:
Total Harmonic Distortion:
Intermodulation Distortion:
Crosstalk:
Interchannel Gain Mismatch:
Input Voltage:
Input Impedance:
Input Programmable Gain Span:
Full Scale Output Voltage:
Output Impedance:
Output Attenuation Range:
Passband:
Passband Ripple:
16 bits
48 KHz
2 in, 2 out
80 dB
022%, -73 dB
90 dB
-80 dB
+/- 0.5dB
1 VRMS, 2.0V p-p
20K Ohms
22.5 dB
0.707 VRMS, 2.0V p-p
600 ohms
94.5 dB
045 FS
+/- 0.1 dB
GENERAL
Size:
Power Consumption:
Input Voltage:
Warranty:
5.25” W x 5.15” L x 2” D
7 Watts
7 to 30 Volts DC
1 year
Specifications subject to change without notice
NDT 200™ Manual, Fast Forward Video, Inc.
14
MAINTENANCE
Cleaning
The Housing should only require dusting with a soft cloth.
Operation and Storage Environment
Precautions
The NDT 200™ DVR has been built to meet the demands of a professional environment, however, the
hardware is subject to the same dangers from static as any other electronic device. Use care when
connecting or disconnecting cables.
IMPORTANT:
Take care not to introduce any moisture into the unit.
Electronic assemblies are sensitive to static electricity, due to the electrostatic sensitive devices used within
the circuitry. All semiconductors, as well as some resistors and capacitors, may be damaged or degraded by
exposure to static electricity.
The video card must receive adequate ventilation, and be kept as cool as possible.
If you experience any problems with the unit please call Fast Forward Video’s service department. DO
NOT ATTEMPT to repair or modify the unit as this might cause (further) damage, voiding the warranty.
A technician can determine whether your problem is caused by a faulty component, and whether you need
to return it for evaluation and/or repair.
PACKAGE CONTENTS (May vary depending on model)
1
NDT 200™ DVR
1
CD (DVR Master Software, USB to Serial Driver, NDT 200™ and Software Manuals)
1
Mating Power Connector
PLEASE RETAIN THE ORIGINAL SHIPPING CARTON AND FOAM INSERTS If you need to return the unit for
service or upgrade it is STRONGLY recommended that you use the original carton and foam, which were
specifically designed to protect it from damage while in transit. IF RETURNED IN A REGULAR CARTON, CARTON
WILL BE REPLACED AT A FEE FOR THE RETURN SHIPMENT.
FCC Information to the user:
This device complies with part 15 of the FCC rules. Operation is subject to the following two conditions: (1) This device may not
cause harmful interference, and (2) this device must accept any interference received, including interference that may cause
undesired operation. This equipment has been tested and found to comply with the limits for a class A digital device, pursuant to
part 15 of the FCC rules. These limits are designed to provide reasonable protection against harmful interference when the
equipment is operated in a commercial environment. This equipment generates, uses, and can radiate radio frequency energy
and, if not installed and used in accordance with the instruction manual, may cause harmful interference to radio
communications. Operation of this equipment in a residential area is likely to cause harmful interference, in which case, the user
will be required to correct the interference at their expense.
Notice to the end user: This device has been designed to use interconnect cables with an installed length of three (3) feet or
less. Use of cables of greater length may cause undesired behavior.
NDT 200™ Manual, Fast Forward Video, Inc.
15
Limited Warranty
12 – MONTH LIMITED WARRANTY
Fast Forward Video, Inc. warrants to the original purchaser that the product (Hardware and components) shall be
free from defects in material and workmanship for a period of 1 year from the date of purchase, If a defect covered
by this warranty occurs during this 1 year period, Fast Forward Video, Inc. will repair or replace the defective
product or component, at its option, free of charge.
WARRANTY LIMITATIONS
THIS WARRANTY SHALL NOT APPLY IF THIS PRODUCT: (a) IS DAMAGED BY NEGLIGENCE, ACCIDENT,
MISUSE, OR BY OTHER CAUSES UNRELATED TO DEFECTIVE MATERIALS OR WORKMANSHIP; OR (b) HAS
HAD THE SERIAL NUMBER ALTERED, DEFACED, OR REMOVED.
ANY APPLICABLE IMPLIED WARRANTIES ARE HEREBY LIMITED IN DURATION TO THE WARRANTY
PERIOD DESCRIBED ABOVE. IN NO EVENT SHALL FAST FORWARD VIDEO, INC. BE LIABLE FOR
CONSEQUENTIAL OR INCIDENTAL DAMAGES RESULTING FROM THE BREACH OF ANY IMPLIED OR
EXPRESS WARRANTIES. SOME STATES DO NOT ALLOW LIMITATIONS ON HOW LONG AN IMPLIED
WARRANTY LASTS OR EXCLUSION OF CONSEQUENTIAL OR INCIDENTAL DAMAGES, SO THE ABOVE
LIMITATIONS MAY NOT APPLY TO YOU.
This warranty gives you specific legal rights and you may also have other rights, which vary from state to state.
REVISION HISTORY
Rev. 0.0 – Pre-release document distributed for comment.
Rev. 1.0 – Initial Release
Rev. 1.1 – Added Trigger operation; power button – Off; and other download protocol settings.
Rev. 1.2 – Clarified power off during normal operation and firmware update.
Rev. 1.3 – First Prod. Release. Feature set and screen menu settings updated. Delete Native vs. BVW-75 info.
Rev. 1.4 – Added more feature information. Changed operating instructions per new functionality.
Rev. 1.5 – Added external trigger selection.
Rev. 1.6 – Added fully variable playback speed upper limit.
Rev. 1.7 – Removed Audio Input and Instant Startup Recording Mode from Options list. These are not offered.
Rev. 1.8 – Removed User Manual and Reference card from package contents, since they are no longer shipped.
The user manual is a *.PDF file on the CD and the keystroke information is in the manual.
Rev.1.9 – Changed General specifications
Rev. 2.0 – Added Instant Startup Mode setting information and operation details.
NDT 200™ Manual, Fast Forward Video, Inc.
16