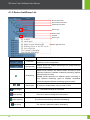
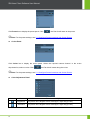
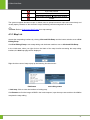
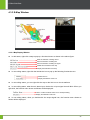
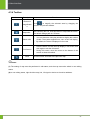
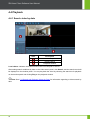
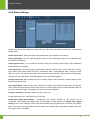
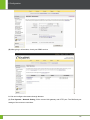
1
重要申明 ZKiVision Client Software User Manual Document version: 3.3 Software version: 4.2 Date: Sep. 2014 Overview This document describes the installation, functions, user interface and operations of ZKiVision Client Software. 1 Important Claim Important Claim Firstly, thank you for purchasing this terminal, before use, please read this manual carefully to avoid the unnecessary damage! The company reminds you that the proper user will improve the use affect and authentication speed. No written consent by our company, any unit or individual isn’t allowed to excerpt, copy the content of this manual in part or in full, also spread in any form. The product described in the manual maybe includes the software which copyrights are shared by the licensors including our company, Except for the permission of the relevant holder, any person can’t copy, distribute, revise, modify, extract, decompile, disassemble, decrypt, reverse engineering, leasing, transfer, sub-license the software, other acts of copyright infringement, but the limitations applied to the law is excluded. Due to the constant renewal of products, the company cannot undertake the actual product in consistence with the information in the document, also any dispute caused by the difference between the actual technical parameters and the information in this document. Please forgive any change without notice. i ZKiVision Client Software User Manual Contents 1 Overview ................................................................................................................................................. 1 1.1 Function.......................................................................................................................................... 1 1.2 Operating Environment .................................................................................................................. 1 1.3 Procedure for Use of ZKiVision ..................................................................................................... 1 1.4 Conventions ................................................................................................................................... 2 2 Installation and Removal ...................................................................................................................... 3 2.1 Installation ...................................................................................................................................... 3 2.2 Removal ......................................................................................................................................... 5 3 Quick Start Guide .................................................................................................................................. 7 4 User Interface ........................................................................................................................................ 8 4.1 Preview........................................................................................................................................... 8 4.1.1 System Button Bar ................................................................................................................ 9 4.1.2 Tab Bar ................................................................................................................................. 9 4.1.3 Device List/Group List......................................................................................................... 10 4.1.4 Control Panel ...................................................................................................................... 11 4.1.5 Preview Window ................................................................................................................. 15 4.1.6 Event Panel......................................................................................................................... 18 4.2 Login/Logout ................................................................................................................................ 19 4.3 E-map ........................................................................................................................................... 20 4.3.1 Map List .............................................................................................................................. 21 4.3.2 PTZ Control Panel .............................................................................................................. 24 4.3.3 E-Map Window.................................................................................................................... 25 4.3.4 Toolbar ................................................................................................................................ 27 4.4 Playback ....................................................................................................................................... 28 4.4.1 Search video by date .......................................................................................................... 28 4.4.2 Search Remote Video by Date ........................................................................................... 31 4.4.3 Video Backup ...................................................................................................................... 32 4.5 Event Query ................................................................................................................................. 33 4.5.1 General Event ..................................................................................................................... 33 4.5.2 Access Event ...................................................................................................................... 35 4.5.3 Face Event .......................................................................................................................... 38 4.5.4 Face Searching ................................................................................................................... 40 4.5.5 System Event ...................................................................................................................... 43 4.6 Settings ........................................................................................................................................ 45 4.6.1 Search ................................................................................................................................. 46 4.6.2 Group Management ............................................................................................................ 68 4.6.3 System Settings .................................................................................................................. 69 4.6.4 Storage Management ......................................................................................................... 71 4.6.5 User Management .............................................................................................................. 73 I Contents 4.6.6 Alarm Settings..................................................................................................................... 75 4.6.7 Access Management .......................................................................................................... 76 4.7 Access Management ................................................................................................................... 78 4.8 Face Function .............................................................................................................................. 78 4.8.1 Face Registration................................................................................................................ 80 4.8.2 User Management .............................................................................................................. 86 4.8.3 Parameter Setting ............................................................................................................... 87 4.9 Logout .......................................................................................................................................... 89 5 Configuration ....................................................................................................................................... 90 5.1 Search for and Add a Camera to an Area ................................................................................... 90 5.2 Manually Add a Device to the System ......................................................................................... 91 5.3 Modify Local Device Information.................................................................................................. 92 5.4 Group Cameras............................................................................................................................ 93 5.5 Modify Network Parameters of a Camera ................................................................................... 94 5.6 Set Scheduled/ Planned Videotaping .......................................................................................... 96 5.7 Set Motion Detection .................................................................................................................... 96 5.8 Enable Arming.............................................................................................................................. 97 5.9 Set Alarm Linkage ........................................................................................................................ 97 5.10 Set Email Alarm Linkage.......................................................................................................... 102 5.11 Configure Preset Locations and Cruise Routes ...................................................................... 104 5.12 Search and Playback Videos by Date ..................................................................................... 105 5.13 Back Up Videos........................................................................................................................ 106 5.14 Create a New User .................................................................................................................. 107 5.15 Modify User Information or Authority ....................................................................................... 108 5.16 Back Up and Recover Configuration Data............................................................................... 108 5.17 Set Wireless Network ............................................................................................................... 109 5.18 Search for System Logs........................................................................................................... 110 5.19 Playback Associated Videos through Alarm Logs ................................................................... 112 5.20 Apply for and Use a Dynamic Domain Name for Visiting IPC on Internet ...................................... 112 5.21 Set Audio and Video Parameters Appropriate for Your Network ............................................ 118 5.22 How to Set E-map .................................................................................................................... 118 5.23 How to Set and Apply Face Function ...................................................................................... 120 5.24 How to Use Vendors DDNS for Visiting Surveillance Device on Internet .................................... 122 6 FAQ ..................................................................................................................................................... 125 6.1 No Image at Preview .................................................................................................................. 125 6.2 No Audio at Preview .................................................................................................................. 125 6.3 No Audio in Playback ................................................................................................................. 126 6.4 Failure to Enable Manual Recording ......................................................................................... 126 6.5 Failure to Disable Videotaping at Preview ................................................................................. 126 6.6 Pan-Tilt Abnormality ................................................................................................................... 126 6.7 Failure to Implement Audio Intercom ......................................................................................... 127 6.8 Failure to Play Back Videos Displayed on the Timeline Panel after a Video Search ............... 127 6.9 Failure to Search for Video Files ............................................................................................... 127 II ZKiVision Client Software User Manual 6.10 Failure to Set the Motion Detection Area................................................................................. 127 6.11 Failure to Achieve Alarm Linkage ............................................................................................ 128 6.12 Failure to Display the Alarm Window after Enabling Arming ................................................... 128 6.13 Video Image Exception at Preview .......................................................................................... 129 6.14 Incorrect System Time ............................................................................................................. 129 6.15 Audio Settings .......................................................................................................................... 130 7 Others ................................................................................................................................................. 132 III 1 Overview 1 Overview 1.1 Function ZKiVision Client Software is a piece of network video surveillance software provided by ZK Technology free of charge. It supports multiple functions such as monitoring, videotaping, and alarm linkage of multiple IP cameras over the LAN and Internet. As the video surveillance device is complex, it is strongly recommended to read the corresponding user manual before the first use of this software and confirm the device can be visited by browser on the LAN and Internet. This document describes how to use ZKiVision client software for video surveillance. 1.2 Operating Environment Operating system: Windows 2000/ Windows XP/ Windows 2003/ Windows Vista/ Windows 7 (32 bit). Windows XP is recommended. CPU: Inter Pentium 4 or above, 2.6 GHz or above is recommended. Video adapter: Resolution of 1024*768 pixels or above. Minimal memory of 256MB, ATI (AMD) video adapter with 1Gmemory or above is recommended. Memory: Minimal capacity of 1GB. 2G or above is recommended. Hard disk: Minimum free capacity of 80GB (depending on the number of devices and video configuration). As a better computer can bring better effect of surveillance, it is recommended to use a better computer for video surveillance. 1.3 Procedure for Use of ZKiVision Before using, proceed as follows: Perform planning and installation of all IP cameras used for surveillance. Change the IP addresses and ports of the IP cameras through the search software on the CD. Access the IP camera from the browser and set the user name, password, alarm trigger mode (external alarm or motion detection), and system time for these IP cameras. If you intend to access these IP cameras over the Internet, set dynamic domain names for them and perform port mapping on the corresponding routers. The following takes the super user as an example to describe the use of the software. The operation procedures vary with users of different operation authorities. Users only need to operate the items displayed on the operation interface by following the procedure below. 1 ZKiVision Client Software User Manual Step 1: Run this client software. Step 2: Log in to the system as a super user (Admin and its default password 123456) and change the default password. Step 3: Search and add devices to the system. Step 4: Modify device parameters (including device information and network parameters). Step 5: Set code stream. Step 6: Set arming (alarm linkage settings and storage management). Step 7: Preview the image. Step 8: Set users (assign authorities). 1.4 Conventions To simplify the description in this manual, the following conventions are made: Network video surveillance software is called software/system for short. Click indicates left click of mouse button. Double click indicates double left click of mouse button. Right click indicates click with the right button of the mouse. Some of the figures in this manual are for reference only. 2 2 Installation and Removal 2 Installation and Removal 2.1 Installation Step 1: Insert the delivery-attached CD in the CD drive. Double-click the installation package ZKiVision Client Software.exe. Choose the installation language, and then click OK to continue. Step 2: Click Next when the Install Shield Wizard interface pops up. Step 3: Set the installation path. The default path is C:\Program Files\ZKTechnology\ZKiVision Client Software\. Click Next. Step 4: Select and install face identification, and then click Next. 3 ZKiVision Client Software User Manual Step 5: Select Additional Tasks, and then click Next. Note: If the installation folder already exists, there will be a prompt box pops up. If you want to install to the existed folder, there will be an additional selection "cover database". Select it to use new database, or use the original database. Step 6: For reconfiguration, please click Back, click Install to begin the installation process. 4 2 Installation and Removal Step 7: After installation is completed, click Finish to exit. 2.2 Removal If you do not need to use anymore, you can delete it in the following two ways. Close all the related programs before deletion. Mode 1: Choose Start > All programs >ZKTechnology> ZKiVision Client Software > Uninstall to delete related documents. Mode 2: Open the system control panel and choose ZKiVision Client Software. Click Delete to delete related documents. 5 ZKiVision Client Software User Manual Notes: (1) The above two modes are not available for deleting all the documents. Deleting related documents under installation directory is necessary. (2) When the software is uninstalled, the database and user's setting will be kept. 6 3 Quick Start Guide 3 Quick Start Guide By means of the following procedures, you can perform a fast setting on the client software. 1. Install the client software and the Monitor client icon is displayed on the desktop. 2. Double-click the Monitor client icon to enter the system. 3. Choose Settings > Device Management > Search. Click to display the Search interface. 4. Click Search all device to search all camera devices produced by our company on the LAN. 5. Choose camera in the search list. Change the remote device information (such as IP address and device port) on this interface. 6. In the search list, select one or more cameras or tick off Select All to select all cameras. 7. Click OK to finish adding cameras to the system. 8. Choose camera channel in the device list on the Search interface to modify the local device information (device names and user names). Partition the device. 9. Enter Preview interface. Double-click the camera channel in the device list or drag the channel into the preview cell to connect the device. Then the video can be previewed. 10. Choose Video from the shortcut menu or click to start the videotaping. 11. For more information of other functions such as user configuration, video playback, and alarm linkage configuration, sees 5 Configuration. 7 ZKiVision Client Software User Manual 4 User Interface The user interface of ZKiVision is easy to operate. It is divided into the following 9 working areas, which switch over in tag page: Lock user, Preview, E-map, Playback, Event Search, Setting, Access Management, Face Function and Exit. 4.1 Preview Open to enter the Preview interface by default. The description of software interface is shown in the following table: Area Description Area Description Button bar Control panel Tab bar Device list/Group list Preview window Event list When the device is added to the system, it will automatically display in the device tree on the preview page. After the parameter setting is completed, you can operate video monitoring, camera preset and color conditioning on the preview page. 8 4 User Interface 4.1.1 System Button Bar Icon Name Help button Minimize button Exit button Function description Click to display user manual. Click to minimize the window to the system tray. Click to pop up the exit prompt. 4.1.2 Tab Bar Icon Name Function description / Lock/Unloc k It is used for locking, unlocking, current operator modification, or password modification. Preview Click to display the Preview interface. It is used for camera and video surveillance, control, and management. E-map Click to enter the E-map interface and you can watch live pictures of a passage while viewing its location. The e-map also supports viewing multi-passages and pan tilt zoom of live pictures. Playback Click to display the Playback interface. It is used for video search and playback. Event Search Click to display the Event Search interface. You can set different conditions for querying common events, access controller events and system events. Setting Click to display the Setting interface. It is used for device management, audio video settings, and alarm linkage settings. Access Manageme nt Click to display the Access Management interface. You can add access controller to the system and associate the camera with the access controller. Face Function Click to display the Face Function interface. You can register faces, manage user information and set parameters for face detection. Exit User profile Click to exit the interface. It is used for displaying the current user name and current date and time on the system. 9 ZKiVision Client Software User Manual 4.1.3 Device List/Group List Primary area name Second-level area name Third-level area name Device type Device name Channel Device type Area right-click menu Icon / 10 Name Function description List mode Display area, device, and channel according to the list hierarchy of user configuration. Group mode Display group and channel according to the group hierarchy of user configuration. Area/Group Area: Divide cameras into different areas according to their different locations to facilitate centralized monitoring against different areas for users. Group: Divide cameras into different groups according to their different monitoring types to facilitate centralized monitoring against different monitoring types for users. Device type IP camera / NVR(network video recorder) / MTS (Blue triangle) The camera channel is connected. (Red square) There is an alarm message from the camera. (Green square) The camera is performing scheduled videotaping. (Red circle) The camera is performing alarm videotaping. 4 User Interface Right-click the area name to pop up the following function menu: All enabled channels start display. pictures. All enabled channels stop display. Enable alarm linkage of all enabled channels in the area. Disable alarm linkage of all enabled channels in the area. All enabled channels in the area display pictures with original proportions. All enabled channels in the area display full split cell. All enabled channels in the area start videotaping. All enabled channels in the area stop videotaping. Calibrate the time on all devices in the area to the software system time. Right-click the device name to pop up the following function menu: Right-click the channel to pop up the following function menu: Display image. Enable alarm linkage. Display image in original proportions. Note: For related devices added, device name modification and partition, see 5.1 Search for and Add a Camera to an Area. 4.1.4 Control Panel Blacklist 11 ZKiVision Client Software User Manual Unfold the blacklist panel of face detection by clicking the Blacklist bar and the system will display in the blacklist the blacklist users that it identifies: On the left are face images that it detects and on the right are reference images at registration, as shown in the above figure. Note: For the setting and application of face identification, see 5.23 How to Set and Apply Face Function. Output Control Unfold the output control panel by clicking Output Control, select the camera channel from which the output is to be controlled. The output actions that can be controlled will display in the panel: If this camera is not associated with the access controller, only the Assistant Output of the camera can be controlled; if it is associated with the access controller, both the Assistant Output of the camera and Open the Door by the access controller can be controlled. Double-click the action to be controlled and a confirmation box will display, as shown in the following figure: Note: For the association of the IP camera and the access controller, see 4.6.7 Access Management. 12 PTZ control panel 4 User Interface Icon Name Function description Direction control Control the rotation direction of the Pan-tilt by following the arrows (up, upper right, upper left, left, right, lower right, lower left, and down). Click to control the automatic horizontal rotation of the Pan-tilt. Cancel this operation by another click. Narrow aperture Click to stop down if the camera lens has a power driven aperture control function. Widen the aperture Click to widen the aperture if the camera lens has a power driven aperture control function. The focal distance becomes smaller. Click to make the camera zoom in on distant pictures to implement monitoring if the camera lens has a power zoom function. The focal distance becomes larger. Click to make the camera zoom in on nearby pictures to implement monitoring if the camera lens has a power zoom function. Focus forward Click to make focus forward to obtain a clear picture if the camera lens has a power focus function. Focus backward Click to make focus backward to obtain a vague picture if the camera lens has a power focus function. Pan-tilt speed Drag the slider left to slow down the pan-tilt speed or drag the slider right to accelerate the pan-tilt speed. Light Click to open the light when the external light devices are connected in a dark lighting condition. Close the light by another click. Windscreen wiper Click to enable the windscreen wiper when the cover is dirty. Disable the windscreen wiper by another click. It is recommended to adopt this function to avoid scrape on the lens when it is rainy or the cover is wet. Note: The above functions are available only when they are supported by camera lens and external devices. Preset Panel 13 ZKiVision Client Software User Manual Click Preset bar to display the preset panel. Click , the Pan-tilt will rotate to the preset. Note: For the preset settings, see 5.11 Configure Preset Locations and Cruise Routes. Cruise Panel Click Cruise bar to display the cruise panel. Select the required camera channel. In the cruise drop-down list, select a cruise. Click , the Pan-tilt will rotate along the cruise. Note: For the preset settings, see 5.11 Configure Preset Locations and Cruise Routes. Color Adjustment Panel Icon 14 Name Function description Brightness The picture turns brighter from a left drag to a right drag (0~255). Saturation The picture turns brighter from a left drag to a right drag (0~255). 4 User Interface Contrast Chromaticity Shutter Sensitivity The picture contrast can be enhanced from a left drag to a right drag. HD camera: 0~6. SD video camera: 0~255. The picture color turns darker from a left drag to a right drag. This function is only applicable to the SD video camera (0~255). 1. When a monitored object is moving fast, a greater shutter value will reduce the blurring effects. 2. Applicable only to wide dynamic devices (0~255) 1. In poor lighting conditions, the camera with a higher sensitivity will be more sensitive to light. 2. Applicable only to wide dynamic devices (0~255) 1. Illumination 2. In poor lighting conditions, better video effects will be achieved by adjusting to a greater value. Applicable only to wide dynamic devices (0~255) Click to restore the brightness, saturation, contrast, shutter, and sensitivity to the default value 80, 50, 0, 1, 17 respectively for WDR HD device. Click to restore the picture brightness, saturation, and contrast to the default value 80, 50, and 0 respectively for HD device. Click to restore the picture brightness, saturation, contrast, and chromaticity to the default value 120, 150, 140, and 255 respectively for SD device. 4.1.5 Preview Window In the device list, double-click channel or drag the channel into the cell when a device is need to be connected. Double-click to display the cell in the preview window. Another double-click can restore the cell to its original size. The blue box indicates the current selected The Logo will display in the cell with device preview cell. disconnected. 15 ZKiVision Client Software User Manual Right-click the cell in list mode to pop up the following function menu: Full screen display of the Preview window. Automatically adjust the picture to its original size. Opening the door is the output action of the access controller associated with this IP device. After choosing the Enable face function, Disable face function will be automatically displayed. After ticking this option, face will be collected and displayed on the face event panel only when its template quality is higher than template quality threshold. When registering user online, enable this option because quality of faces collected this way will be higher. Snapshoot the current picture. Videotape the current picture. Disconnect the device. Click the camera channel or drag the channel to the picture to reconnect the device and display pictures. Right-click the cell in group mode to pop up the following function menu: Icon Function description Electronic magnificatio n Click to magnify the selected area by dragging the mouse in the preview window. Sound on/off / / 16 Name Click to open the audio and click channel or a picture is selected. to close the audio after a Videotape/ Videotaping After a channel or a picture is selected, click to start videotaping on the current channel. Click in the lower right corner of the selected picture to stop videotaping. The created video file is H.264 format file. The initial default storage path is D:\MediaRecord\. Snapshot Click Snapshot to automatically snapshoot the current picture. The default storage path is C:\Picture after a channel or a picture is selected. 4 User Interface / Enable intercom/Dis able intercom Click to enable the intercom. Click to close it. The sound of only one camera channel can be turned on sometimes. Turn off the sound of the last camera before turning on the sound of the next camera. Choose a picture You can select split screen preview mode. ZKiVision supports one full screen, and 4, 6, 8, 9and 16 split screens. The default mode is 4 split screens. Full screen Click to display the picture in full screen. Exit by another click. When the picture is displayed in full screen, move the cursor to the lowest part of the screen will display the toolbar. The system displays videos in pages if more than 25 channels of videos are connected. You can select the desired page number from the drop-down list. / Last group Click to jump to the last page when the window channels are more than the screen split numbers in the list mode. Click to jump to the last group of windows in the group mode. Next group Click to jump to the next page when the window channels are more than the screen split numbers in the list mode. Click to jump to the next group of windows in the group mode. Group polling Click to start group polling display against the user configuration in the group mode. Exit by another click. Expand/Fol d Surveillance Face recognition Video recording Sound playing Audio collection Click to fold the preview window. Click preview window. to expand the Surveillance is enabled on the channel. The face recognition function is enabled on the channel. A video is being recorded on the channel. The sound playing function is enabled on the channel. The audio collection function is enabled on the channel. For example: There are 3 groups (group 1-[1], group 2-[6], and group 3-[16]) in the current configuration. The cycling time is set to 5s. Select 6-split-cell display. 16 camera channels are connected in total. List mode: The first page of preview window displays CH1~CH6 cells. Click second page on which displays CH7~CH12 cells. to switch to the Group mode: Click to display one full screen, to display 6-spit-cell picture after 5s, and to display 16-split-cell after another 5s. The 6-split-cell display will jump to the 16-split-screen display when you 17 ZKiVision Client Software User Manual click . Note: (1) If you need to set the video storage disk, choose Settings>Local settings>Storage management. (2) If you need to modify the format or storage location of the capturing pictures, choose Settings> Local settings>System settings. (3) Dividing cameras into different groups is a prerequisite to group switching, see 5.4 Group Cameras for details. (4) If you need to modify the group polling time, choose Settings> Local settings>System settings. 4.1.6 Event Panel 4.1.6.1 System Event Event information is color coded: • Red > Alarm event • Blue > General event • Black > Already browsed information Source: The names of cameras that the message comes from Time: The time at which events occur Event: Brief description of event type Icon Description / Connection succeeded / Connection failed Alarming Alarm stopped 18 4 User Interface 4.1.6.2 Face Event The system can display detected faces on the face event information panel. If the face it identifies is that of a registered user, user name and face identification marks will be displayed under the face image; if the face is that of an unregistered user, a question mark (?) will be displayed under the image. You can tick any or all face images and add them to the face registration list. Click Pause to suspend the rolling display of the face identification results and the button automatically switches over to Play. After pause, you can manually tick the detected images or tick Select all to select all the images displayed in the identification results. Click this button to add the ticked images to the face registration list. 4.2 Login/Logout On this page, you can switch over from user to user and modify user password. User: Select the user name for login system. User password: Type in the user password. If it is selected, the user name and password are remembered. You do not need to enter the password if you log in to the system from the same computer. Click Login to log in to the system after selecting the user name and typing in password. Click Exit to exit the Login interface. 19 ZKiVision Client Software User Manual Click Modify P.W. after selecting an existing user name to modify the password. Old password: Type in the old password. New password: Type in the new password. Confirm password: Type in the new password again. Click OK to submit the new password. Click Delete to cancel this operation. Note: Super user Admin exists in the system by default and the default password is 123456.This super user cannot be deleted and his user level cannot be modified. 4.3 E-map Region Description Map List 20 4 User Interface PTZ Control Panel E-Map Window Map Display Window Video Play Window Toolbar The system supports electronic maps. It allows users to upload electronic maps and conveniently and visually deploy cameras on the electronic maps, facilitating unified management of devices. Note: Refer to 5.22 How to Set E-map for e-map settings. 4.3.1 Map List Access the map editing interface by clicking Click and Edit Emap and the button switches over to End Editing Emap. Click End Editing Emap to exit emap editing and the button switches over to Click and Edit Emap. In the initial state, when you right click on the blank of the map list after accessing the map editing interface, the Add map page will be displayed. Right-click the name of map to pop up the following functional menu: Edit Status non-editing status 1. Add map: Click to enter the interface of adding map. Click Browser to find the images in BMP in the local computer, input the map name and then click OK to complete the map adding. 21 ZKiVision Client Software User Manual Note: It only supports the images in BMP. 2. Add device: Click to enter the interface of adding device. You can mark the location of a device on the map by adding the device icon on the map. Select the device to be linked, set the name and appearance of the device, etc., and then click to complete the adding. When adding device succeeds, the chosen visual icon for the device will be displayed on the map. You can drag the location of the device icon by moving the mouse cursor to the device icon, pressing and holding the left button of the mouse. Exit editing. After the device is armed, the device icon will blink when there is an alarm input signal. You can double-click the device icon or drag the icon to the video play window to play the video in real time. 3. Add link: Click to enter the interface of adding link. By adding link icon on a map, a user can conveniently and expediently enter and check the map whenever he wants to. Select the map to be linked, set the name and appearance of the link, etc., and then click complete the adding. 22 to 4 User Interface After successfully adding link, the selected icon of link appearance appears on the map. Move the cursor to the icon, and hold down the left button to move the location of link icon. After exiting the condition of editing, double-click the icon to enter the linked e-map. 4. Add I/O Signal: Click to enter the interface of adding I/O signal. When an alarm input device is connected to the IP camera or to the access controller associated with the camera, auxiliary input will be generated and when an alarm output device or an exit switch is connected to the IP camera or to the access controller associated with the camera, auxiliary output signals will be generated. By adding input-output signal icons, you can mark on the map the locations of the devices that are connected to the IP camera or the access controller. After selecting the devices to be connected, the signal type, setting signal name and signal appearance, click OK to finish the adding. When adding signals succeeds, the chosen visual icons for the signals will be displayed on the map. You can drag the locations of the signal icons by moving the mouse cursor to the signal icons, pressing and 23 ZKiVision Client Software User Manual holding the left button of the mouse. Exit editing. After the device is armed, the input signal icon will blink when an external alarm signal comes in. After confirming on site, the security guard can right click the icon to confirm the alarm. Then the icon will stop blinking. The guard also can double-click the output signal icon to control the output. 5. Delete all devices/links: Click to delete all device icons and map icons linked on the map. 6. Delete the map: Click to delete the map. 7. Attribute: Click to display the attributes of the map. The attributes cannot be edited in the no edit status. 4.3.2 PTZ Control Panel Note: For details, see 4.1.4 Control Panel. 24 4 User Interface 4.3.3 E-Map Window 4.3.3.1 Map Display Window In edit status, right-click a map to pop up a functional menu as shown in the above figure: Enter the interface of adding device Enter the interface of adding link Enter the interface of adding I/O signal Delete all icons linked to the map Display the attributes of the map In non-editing status, right-click the link/device icon to pop up the following functional menu: Delete the icon Display the attribute of the icon In non-editing status, you can right click the map or the link icon to view its attribute. In non-editing status, when there is alarm input, the device or input signal icon will blink. When you right click, the function menu shown as follows will be displayed: Click to confirm the alarm and the icon will stop blinking Display the attributes of this icon In non-editing status, when you double-click the output signal icon, the function menu shown as follows will be displayed: 25 ZKiVision Client Software User Manual 4.3.3.2 Video Play Window The blue box indicates the current selected cell. Double-click to display the cell in the video play window. Another double-click can restore the cell to its original size. The Logo will display in the cell with device disconnected. You can double-click the device icon or drag the icon to the video play window to play the video in real time. Right click on the play cell, the function menu shown as follows will be displayed: Automatically adjust the image to its original size. Capture the current image Disconnect the device. Double-click the device icon or drag the icon to the cell to reconnect the device and display image. 26 4 User Interface 4.3.4 Toolbar Icon Description Function Electronic magnificatio n Click to magnify the selected area by dragging the mouse in the preview window. Snap-shot After choosing the cell, click this button to snap-shot the scene. The default storage path is C:\Picture. 1. Select cells 2. 1. Full Screen Back 2. You can choose a video play window to display the number of cells. The system supports one-, two- or four-cell display. By default, the video is displayed in four cells. Click the button to have the map display in full screen, and click again to exit the full screen. During full screen, move the cursor to the bottom of the screen to show the toolbar. Click the button and back to the previous map. Notes: (1) The setting of map must be performed in edit status, and the map cannot be edited in non-editing status. (2) In non-editing status, right-click the map, link, I/O signal or device to check its attributes. 27 ZKiVision Client Software User Manual 4.4 Playback 4.4.1 Search video by date Area Description Video search panel Timeline panel Playback window Local videos: indicates video files stored in the local computer or server. After setting search conditions by date on the video search panel, click Search, and the search result will be displayed on the timeline panel. You can play back the video by choosing the start time for playback on the timeline panel and clicking Play on the playback window. Note: See 5.12 Search and Playback Videos by Date for information regarding to video search by date. 28 4 User Interface 4.4.1.1 Video Search Panel 1. Tick off camera channels of the video to search for (at most 4 channels). 2. Choose a videotaping type to search for: All videos, Planned videos, Manual videos or Alarm videos. 3. Click to choose the date to search videos (in green box) Date on which videos were made in this month (on blue background) (Shown after searching) Current date (in green characters) 4. Click Search 4.4.1.2 Timeline Panel The search results are displayed on Timeline panel after you choose the date on which the videos were made. Icon Name Zoom out Zoom in Leftward Rightward CH0~CH3 Channel Function description Click to scale down the timeline in Timeline panel and display the video records in a long period of time. Click to scale up the timeline in Timeline panel and display the video records in a long period of time. Click to move the timeline leftward when the timeline ratio is displayed. Click to move the timeline rightward when the timeline ratio is displayed. ZKiVision supports concurrent search and video playback in four channels. 29 ZKiVision Client Software User Manual 00:00~24: 00 Temporal scale Divide the time of the day into 48 equal portions, and the minimum scale is half an hour. The time point of the current position will be displayed on the Timeline panel when you move the mouse on the timeline. Click the time point to accurately position the video. Manual video Planned video Alarm video The starting point of video playback. 4.4.1.3 Playback Window Icon Name / Sound on/off Volume / Play/Pause Stop Single-frame play 30 Function description After the camera is connected, click click to turn the sound on, and again to turn the sound off. Drag the volume slider left to turn down the volume or drag the volume slide right to turn up the volume (1-100). After you a camera channel is selected, click video, and click Click to play back the again to pause the video. to stop the video during the video playback. Click to perform a single-frame play during the video playing. Each frame image will be displayed by every single click. Replay Click to replay the video in the current channel. All replay Click to replay all the videos in four channels. Image capture Click to capture the image and save it to hard disks. 4 User Interface Play speed Expand/Fold / Drag the speed slider left to slow down the play speed or drag the volume slide right to accelerate the play speed (1-100). Speed adjustment range includes -2 (1/4 speed), 0 (normal speed), and 2 (2 times speed). The device uses normal speed (0) by default. Click expand it. to fold the Playback window, and click to 4.4.2 Search Remote Video by Date Remote videos: indicates video files stored in remote devices such as the NVR or DVR. After specifying search conditions on the remote video search panel, click Search. Then, search results are displayed on the time axis panel. Select the playback start time on the time axis panel and click Play in the playback window to play back a remote video. Notes: (1) The remote video search and playback page is similar to the local video search and playback page. For details, see 4.4.1 Search video by date. (2) The remote video search and playback operations are similar to the local video search and playback operations. For details, see 5.12 Search and Playback Videos by Date. 31 ZKiVision Client Software User Manual 4.4.3 Video Backup After setting search conditions by date on the video search panel, click Add to backup list, and the search results will be displayed on the backup file list. Click the video to be backed up on the backup file list, set the backup path, and click Start to back up the video. : Click the button after selecting the camera and the search time. If there is a video from the selected camera for the set search time, the search results will be displayed in the backup list on the right. : Select one message in the backup list, and click the button to delete the message. : Click the button to delete all the messages in the backup list. : Tick this option to back up the media player during video backup. : Click the button to select the backup catalogue. : Click the button to start backup. : Click the button to pause backup. : Click the button to cancel backup. : Click once to select a disk in the disk list, and click the button to format the selected 32 4 User Interface disk. : Click to refresh the disk information. Note: Refer to 5.13 Back Up Videos for how to back up the video. 4.5 Event Query After setting search conditions on the log search panel, click Search or Query, and the search results will be displayed on the log list. You can query or play back the associated video. 4.5.1 General Event 33 ZKiVision Client Software User Manual Area Description Log search panel Log list Playback window 4.5.1.1 Log Search Panel 1. Tick off the camera channels of alarm log to search for. 2. Choose a videotaping type to search for: All alarms, Motion detection alarm, or External alarm. 3. Click to choose the date to search videos (in green box) Current date (in green characters) 4. Click [Search]. 4.5.1.2 Log List Different colors indicate different types of log: •Red -- Alarm log with associated video •Black -- Alarm log without associated video 34 4 User Interface 4.5.1.3 Playback Window Note: For details about the icon and functions of the playback window, see 4.4.1.3 Playback Window. 4.5.2 Access Event Area Description Log search panel Log list Playback window Access event: records and stores access event logs after the access control and video linkage function is configured. For example, the access event sets whether to start video recording linkage based on the alarm setting for alarm linkage and door opening linkage. The access event also displays video-contained events in red. You can double-click a log to play the contained video. 35 ZKiVision Client Software User Manual 4.5.2.1 Log Search Panel To search access controller event logs, you can set several filtering conditions, such as time, IP camera, access controller, alarm pattern, user ID and verification mode. Note: The combination of various filtering conditions will filter the search results. If none of the filtering conditions is enabled, then all the current day's logs of all the devices will be searched by default. Enable Time Filter After ticking Enable Time Filter, you can set the start time and end time for log searching. Enable Camera Filter After clicking Enable Camera Filter, you can select the IP cameras of which the logs are to be searched for. Enable Access Filter After clicking Enable Access Filter, you can select the access controllers of which the logs are to be searched for. 36 Enable Alarm Filter 4 User Interface After ticking Enable Alarm Filter, you can select types of alarm log to be searched for. Enable User Filter After clicking Enable User Filter, you can search for logs by user ID. Enable Verification Mode Filter After clicking Enable Verify Mode Filter, you can search for logs by verify mode. 4.5.2.2 Log List Note: The log list of access controller events is the same as that of common events. For details, see 4.5.1.2 Log List. 4.5.2.3 Playback Window Note: The playback window of access controller events is the same as that of common events. For details, see 4.4.1.3 Playback Window. 37 ZKiVision Client Software User Manual 4.5.3 Face Event Area Description Log search panel Log list Playback window Face event: records and stores face event logs after the face recognition function is enabled. For example, the face event sets whether to start video recording linkage based on the alarm setting for unrecognized faces, common users, and blacklisted users. The face event also displays video-contained events in red. You can double-click a log to play the contained video. 4.5.3.1 Log Search Panel To search for face event logs, you can set several filtering conditions, such as time, IP camera, door controller, alarm pattern, user ID and verification mode. Note: The combination of various filtering conditions will filter the search results. If none of the filtering conditions is enabled, then all the current day's logs of all the devices will be searched for by default. 38 Enable Time Filter 4 User Interface After ticking Enable time filter, you can set the start time and end time for log searching. Enable Camera Filter After clicking Enable camera filter, you can select the IP cameras of which the logs are to be searched for. Enable Alarm Filter After ticking Enable alarm filter, you can select types of alarm log to be searched for. Enable User Filter After clicking Enable user filter, you can search for logs by ID of face registered user. 4.5.3.2 Log List Note: The log list of face events is the same as that of common events. For details, see 4.5.1.2 Log List. 4.5.3.3 Playback window Note: The Playback window of face events is the same as that of common events. For details, see 4.4.1.3 Playback Window. 39 ZKiVision Client Software User Manual 4.5.4 Face Searching Area Description Log search panel Face list Playback window You can widely search for videos of all people that ever appear on the recording screen and specify query conditions to search for videos quickly and accurately, making face recognition to be applied more widely. 4.5.4.1 Log Search Panel When searching for faces, you can specify multiple filter conditions: time, network camera, alarming mode, user, search method, and face recognition score. Note: Search results are filtered based on multiple added filter conditions. If no filter condition is specified, all faces in videos of all devices on the current day are searched out by default. 40 Filter by time 4 User Interface After selecting Enable Time Filter, you can set the start time and end time for log search. Filter by camera After selecting Enable Camera Filter, you can select the network camera for log search. Filter by alarm After selecting Enable Alarm Filter, you can set the type of alarm logs for search. Filter by user After selecting Enable User Filter, you can enter the user ID for log search. Filter by search method 41 ZKiVision Client Software User Manual After you select Precise search of key faces from the drop-down list, all faces that ever appear in videos will be searched accurately and comprehensively. After you select Quick search of key faces from drop-down list, faces that ever appear in videos will be searched quickly. Filter by face recognition score The value of Recognize Score Threshold affects the rate of faces that can be searched out. The larger the value is, the more accurately faces are searched and the fewer faces can be recognized. The default value is recommended. If Key frame filter threshold is set to a larger value, the system filters out faces with great similarities, and consequently fewer faces are searched out. 4.5.4.2 Face List Face images that are searched out from videos are displayed in the face list. If it is clicked, face search is paused. 42 4 User Interface If it is clicked, face search is cancelled. If it is clicked, search results are sorted by face recognition score in descending order. Enter a number in the box, and click the bottom to directly jump to this page. If it is clicked, the search results on the previous page are displayed. If it is clicked, the search results on the next page are displayed. If it is clicked, selected faces will be added to the template of faces to be registered. 4.5.4.3 Playback Window Note: The playback window of face search is similar to the playback window of common events. For details, see 4.4.1.3 Playback Window. 4.5.5 System Event Area Description Log query panel Device list/User list Log list Query mode: Query logs based on a specified type of data. Query all logs: Query all logs of all devices. Query based on device: Select a device from the device list to query its logs. 43 ZKiVision Client Software User Manual Query based on user: Select a user with operation logs from the user list. Log type Log Type Description Sub-log Type Network preview Voice intercom Guard Operation log Record all operation information of a user. PTZ control Remote setting Time calibration Others Disk full alarm All logs: Record all information of the system. Video loss alarm Motion detection alarm Alarm log Record the alarm information of a device. Hard disk read/write error alarm Standard mismatch alarm External alarm Others Login System log Record information such as user login, logout and related information. Logout Local settings Others Start date: Indicates the start time of a log search. End date: Indicates the end time of a log search. Query: Select a camera channel from the device list, or a user from the user list. Then set query conditions on the Log query panel and click the Query button. Eligible results are displayed in the log list. Previous page: View the query results on the previous page. Next page: View the query results on the next page. Total log number: Indicates the number of all log query results. 44 4 User Interface 4.6 Settings The Settings menu contains 7 submenus and allows settings of multiple devices (for example, the IP cameras). Common operations and icon functions in the Settings menu Camera selection: Select a channel in the device list by clicking the channel name. Camera connection: Connect a camera by double-clicking the channel name in the device list. Icon Function description Add devices/areas/groups/camera presets/cruise paths/users. Save modified parameters or switch to modification state. Delete existing devices/areas/groups/camera presets/cruise paths/users. Synchronize the modified parameters with the remote device. Restore the parameters to their values in the last saving. Restore parameters to their default values 45 ZKiVision Client Software User Manual Test whether the device can be connected properly Save the modified information to local database Cancel modification Copy the setting to other devices 4.6.1 Search 4.6.1.1 Area Management Area Information Area Name: The name of the upper level area of the currently chosen area. Area name: Areas that can be set. Area Maintenance Add Area: Enter Area Name (Unrepeatable), and then click [Add] button to add area, shown as the following figure: 46 4 User Interface Modification Area: Click Area Name to select an area, input a new area name in Edit Area, and then clicks the [Modify] button to save. Deletion Area: Click Area Name to select an area and click the [Delete] button in Edit Area to delete the selected area. Note: When deleting areas, all devices under the corresponding areas will be deleted directly. Please operate with caution. 4.6.1.2 Add Device Click button to enter the Search interface: : Search all devices over the LAN. : Search new devices over the LAN. 47 ZKiVision Client Software User Manual : Select all devices in the search list. Adding Devices to the Software 1. Among the device lists found out, tick and select the devices needed to be added to the software (multiple options allowed). 2. Click the [OK] button to return to the Search window. And then the selected devices will be displayed in the list of "Unpartitioned devices" as shown in the following figure: Then the Device Information column will show the relevant selected information including Device Names, Device Types, IP addresses, Ports, and User names. Selection Area: Click the button and select areas to which the devices belong in the drop-down list. (For more details about the area settings, please refer to the area maintenance in 4.6.1.1 Area Management.) Password: Input the device communication password. Devices will be connected successfully and added only when the password is correct. (You can click [Default] to set this password as the default device password.) 3. Click the [Test] button to check if it can be connected to devices successfully. Only when devices are successfully connected, they can be added to the software. 4. Click the [Add] button to add the selected devices to this software. Note: 48 4 User Interface (1) After successfully adding devices, you can change IP addresses, gateways, subnet masks or ports where necessary and click the [Modify] button to save. (2) For information regarding to device remote parameters (IP address and port) modification, see 5.5 Modify Network Parameters of a Camera. 4.6.1.3 Device Information Management (Local) Device Information Device name: Device names displayed in the software. After the Device name is set, the device list displays only the device name rather than the device IP address. Device type: Includes IP camera, access control device or NVR/DVR. Select areas: The area where the device belongs to. IP address/Domain name: The device cannot be connected successfully unless the device IP and domain name are consistent with that in the remote device. Port: The device’s communication port. The device cannot be successfully connected unless the device communication port is consistent with that in the remote device. User name: The user name that used to visit the front-end device. The device cannot be successfully connected unless you enter a correct user name. Password: The password that is used to access front-end device, and the device cannot be successfully connected unless you enter a correct password. Default: The password is used as the default password for connections if Default is ticked. Note: (1) There are at most 128 areas can be added. (2) After device search is completed, the camera cannot videotape or capture images unless it is added to an area. An un-partitioned device cannot be used. Remote Settings The Remote Settings interface is decided by device type. The final display interface is subject to the actual display interface Type 1 Click Device Name in the Device List, and then click button, the Config window will pop-up: 49 ZKiVision Client Software User Manual System Information You can set and modify all parameters of the NVR in the Config window. System Info: It allows you to view version information, disk information, and logs of the system. Version Info: It allows you to view the firmware version information and port information of the NVR. Disk Info: It allows you to view the disk partitions, disk status, free space, and total space. Log: It allows you to search for, view, and back up logs of the NVR. System Setting You can set the NVR time, language, format, decoding mode, recording mode, serial port, network, alarm, video, PTZ, and backup parameters. 50 4 User Interface Common Setting: It allows you to set the video format and system time/date, synchronize the system time/date with that of the PC, select voice versions supported by the system, and set the handling methods when hard disks are full. Decoder Config: It allows you to search for and add devices and set decoding policies for the channels. Video-out Config: It allows you to adjust the top, bottom, left, and right edge spacing for video display. Video-out Mode: It allows you to determine whether to display the time, channel, alarm state, and record state on a video. Record Setting: It allows you to set the length of record files and pre-record time. The record dates and time periods are displayed in a graph based on record types (Timer, Motion, and Alarm). Net Setting: It allows you to set the device name, IP address, subnet mask, gateway, alarm reception mail box, DDNS, UPNP, PPPoE, IP privilege, NTP, and RTSP. PTZ Setting: It allows you to set the channel connected to the PTZ, PTZ protocol, PTZ address, baud rate, data bits, stop bits, and parity. The default values are as follows: PELCOD, 1, 9600, 8, 1, and None. Config/Default: It allows you to restore all or part of the default values. You can restore the alarm setting, record setting, motion detection setting, serial port setting, output mode setting, exception handling mode, name setting, network setting, alarm setting, PTZ setting, and channel name. You can export or import configuration parameters. AutoReg: It allows you to set the connection mode of the platform to be registered, IP address and port ID of the server, user name and password for accessing the platform, and unified device identifier. Alarm Function 51 ZKiVision Client Software User Manual Alarm Input: It allows you to set the event types for alarm input, alarm time, anti-dither time, output channel, PTZ action, and beep alarm. Video Detect: It allows you to set motion detection areas in a channel and configure actions with alarms. Decoder Alarm: It allows you to set actions with decoder alarms. Alarm Out: It allows you to set the display of the alarm output status. Exception Deal: It allows you to set the exception event types, alarm delay, and exception handling methods, for example, screen prompts, emails, and beep alarms. Access linkage (optional): Set the following items: Alarm Input, Span, Anti-dither, Alarm Output, PTZ Action, Beep Alarm, Tour Channel, and Snapshot. Note: Access event records and pictures are generated by means of access linkage. Access Function is optional and available only to some NVRs. To enable the function on your devices, please consult our commercial representatives or pre-sale technical support engineers. Advance Option You can set record and maintenance parameters. 52 4 User Interface Multi Views and Tour: It allows you to set single-screen or multi-screen display and configure multi-screen tours. Disk Manage: It allows you set the read/write, read only, and redundancy properties for hard disks, clear data, and recover hard disks from errors. Upgrade: It allows you to upgrade the system by using a local upgrade file. Record Control: It allows you to the recording mode to Always, Config, or Close for all channels or part of the channels. User Account: It allows you to ad users, modify users, delete users, modify passwords, add groups, modify groups, and delete groups. Auto Maintenance: It allows you to set the restart time for maintenance and determine whether to delete old files. Note: The detail of procedure, please see the Web Server User Manual, which is available on the disk delivered with the software. Type 2 Click Device Name in the Device List, and then click button, the following Remote Settings window will pop-up: Device Information View 53 ZKiVision Client Software User Manual Click to restart the camera. Click to restore the camera parameters to its factory defaults. Audio and Video Parameter Settings Click the Audio/Video Settings menu on the Remote Settings window to enter the Audio/Video Settings window, shown as below: Video Parameter Settings Resolution: Resolution is a standard to measure the image definition (unit: pixels). The higher the value is, the clearer the image is. The main stream definition of HD cameras is 720P (1280*720 pixels), and the secondary stream definition is QVGA (320*420 pixels). For the main stream definition of HD cameras, you can choose one 54 4 User Interface from D1, CIF, and QCIF. For the secondary stream definition of HD cameras, you can choose one from CIF and QCIF. D1 image resolution: 704*576 pixels, CIF image resolution: 352*288 pixels and QCIF image resolution: 176*144 pixels. Bit rate: Indicates the transmission of data traffic per second. Generally bit rate is the multiple of 128 Kbit/s. The higher the bit rate is, the clearer the definition is. You can set an appropriate bit rate based on the network condition. Frame rate: indicates the number of pictures displayed on the screen per second. Frame rate can be set, and the higher the frame rate is, the better the video effect is. Generally, a frame rate that exceeds 24 frames per second is called all real-time images. Main frame interval: An image would be used as the main image in video compression. The rest images will be compared with this one and only the different images will be saved. When videotaping scenes with fast moving objects, shorten the frame interval to avoid blurred streaks or motion blur. When videotaping scenes with slow moving objects, lengthen the frame interval to reduce the data volume and improve the compression ratio. Video coding control: You can select Fixed stream for a scenario in which surveillance activities are gentle, and the video encoder shall encode as the stream velocity set in the stream settings. You can select Variable bit rate for a scenario in which surveillance activities are intense, and the video encoder can operate at a variable bit rate without losing image quality. Encode based on the set stream velocity, but the encoding will not follow this velocity completely. Video encoding quality You can choose any video encoding quality from 1 to 6. The smaller the value is, the better the image quality is, and the greater the stream control is. Audio Parameter Settings Audio acquisition Enable: indicates that transmitting audio signals is available. Disable indicates that transmitting audio signals is unavailable. Audio format: You can choose G711 or G726 as the audio format. Format Code rate Sound quality Application condition G711 Larger Higher The network is in good condition G726 Medium Intermediate The network is in intermediate condition Audio input mode: When a microphone is functioned as the external audio acquisition device, choose Microphone input to use an external amplification device to amplify the audio signal because the microphone has a low output power. When the recording volume and the output power of the audio acquisition device are high, choose Linear input to get a better recording effect. Color Adjustment See the Color Adjustment panel in 4.1.4 Control Panel for details. Scene Settings 55 ZKiVision Client Software User Manual Image up/ down rotation: Select it to rotate the image up and down. This is only for HD cameras. Image left/right rotation: Select it to rotate the image right and left. This is only for HD cameras. OSD Settings Name Overlap: Select it to overlap the camera name to the upper left corner of the video. Time Overlap: Select it to overlap the camera time to the upper right corner of the video. OSD name: The camera name, with a maximum number of characters of 17 that can be entered. PTZ Parameter Settings Click the PTZ Parameter Settings menu on the Remote Settings window to enter the PTZ Parameter Settings window, shown as below: PTZ Control See the PTZ control panel in 4.1.4 Control Panel for details. Pan-tilt Settings Address code: It is used to distinguish various pan-tilts. The address code of the pan-tilt can be modified by using pan-tilt internal code. Please set the address code to match it with the pan-tilt address code. Protocol: You can choose PELCO-D or PELCO-P as the communication protocol of pan-tilt motor control. This protocol must be consistent with the pan-tilt internal control protocol. Baud rate: For the transmission frequency of RS-485 signal, the higher the baud rate is, the faster the transmissions speed is, and the error rate rises accordingly. The baud rate must be consistent with that of the internal pan-tilt. Data bits, stop bits, and calibration: The transmission parameters of RS-485 protocol must be consistent with that of the internal pan-tilt. 56 4 User Interface Note: (1) Due to different production standards of manufactures, when the incomplete match of the address codes occurs, try to add 1 or minus 1 to implement complete match. (2) For pan-tilt related parameters, see Pan-tilt User Manual. Preset and Cruise When the motion pan-tilt arrives at the place you focused on. Click and choose the preset number in the preset list. Set the preset name and click [Add] to add the preset. After adding two or more presets to the camera channel, you can configure a cruise based on the presets. After setting the cruise, click [Add] to add a cruise. Click and select a Preset in the preset list, Select the cruise that will be added to from the drop-down list, click cruise. Click and choose the unnecessary preset. Click to add this preset to the selected to delete it from the cruise. After saving the cruise path, click [Test] to test the cruise path. Network Settings IP address: The default IP address is 192.168.1.88. It can be modified as needed. Subnet mask: The default subnet mask is 192.168.1.88. It can be modified as needed. Gateway: The default gateway is 192.168.1.1. It needs to be reset if the device and the PC are not in the same network segment. DNS acquisition mode: Domain Name Server (DNS) can translate the domain name into an IP address. In Manually set the DNS mode, you need to enter the primary and secondary DNS addresses manually. When select Automatically obtain the DNS, the DNS address will be obtained automatically when the 57 ZKiVision Client Software User Manual camera is connected with the LAN. Primary DNS: The primary DNS is 192.168.1.88 by default. It can be modified as needed. Secondary DNS: The system will connect the secondary DNS when the connection failure or error of the primary DNS occurs. HTTP port: The device port number is 80 by default. To modify it, contact the network administrators or network professionals. The camera will restart after the port is successfully modified. RTSP Port: 554 by default. If a player that supports RTSP Protocol is needed to connect the device and play videos, input the URL address rtsp://IP address/stream code. If the RTSP port is modified, input rtsp://IP address: port/stream code. The device is restarted after successful modification of the port. Parity If you select Open, you need to login to connect the device when using a player that supports RTSP Protocol; if you select Close, you do not need to login. Wi-Fi Settings Start Using Wi-Fi: Select Enable to allow Wi-Fi connection; select OFF to disable Wi-Fi connection. SSID: is the login name (case sensitive) for WLAN authentication. Only users who pass authentication can access Wi-Fi. Click [Search], and a Wi-Fi webpage will pop up to list all available Wi-Fi. Access Point Mode: includes two options. Router mode corresponds to a star structure network, and Point-to-point mode corresponds to a point-to-point peer-to-peer network. Select a network in the Wi-Fi search results to automatically obtain the access point mode of the network. Security Type: is set in the router, including five types: none, WEP64, WEP128, WPA-PSK and WPA2-PSK. Select a network in the Wi-Fi search results to automatically obtain the security type of the network. Encryption Method: is used for wireless connection, including TKIP and AES. Select a network in the Wi-Fi search results to automatically obtain the encryption method of the network. Key: Input the key if it is set in the router. 58 4 User Interface Confirm Key: Input the key again to confirm. Check Wi-Fi Settings: Click [Check] to check whether the Wi-Fi settings are correct. Note: (1) Only a device with built-in wireless module can support Wi-Fi connection. Before configuring the Wi-Fi network, please verify whether the device has the built-in wireless module. (2) When the device is connected with a network cable and enables Wi-Fi connection, wired connection is the first choice when the device is started. If wired connection fails, wireless connection is selected. The IP address and port for wireless connection are the same as those for wired connection. (3) To ensure network security, it is strongly recommended the security settings be enabled and that the encryption method of WPA-PSKWPA2-PSK AES be used. (4) Please see the WEB Server User Manual > 4.11 How to Configure Wi-Fi. Domain Name Settings Register a domain name for use in constantly IP changing environment such as ADSL. After Dynamic Domain Name Settings are enabled, select the Service Provider that provides DDNS service, and input the service provider's user name and password applied in the server. Vendors DDNS Settings Dynamic Domain Name Settings: Click Enable to enable Vendors DDNS; click OFF to disable Vendors DDNS. Service Provider: Provides DDNS service. DDNS Port: Is 80 by default, and cannot be modified if Vendors DDNS is used. User Name: Is the service provider's user name applied in the server. 59 ZKiVision Client Software User Manual Password: Is the service provider's password applied in the server. Third-party DDNS Settings Dynamic Domain Name Settings: Click Enable to enable Third-party DDNS; click OFF to disable Third-party DDNS. Service Provider: provides DDNS service. Dyndns.org, 3322.org and Dynddns. us are supported. User Name: is the service provider's user name applied in the server. Password: is the service provider's password applied in the server. Host Name: is the domain name assigned in the server. UPnP Port Mapping UPnP Port Mapping: UPnP refers to Universal Plug-n-Play. If UPnP is enabled, the device automatically communicates with the router in the LAN upon being connected to the LAN, and makes the router open a port to map with its port. So you do not need to login the router for port mapping. Note: (1) To use the UPnP function, first confirm UPnP is enabled in the router. (2) Because routers have various models, not all of them can support UPnP well. Please test whether UPnP can work with the matched router. Otherwise, UPnP is not recommended. According to the current test, UPnP can work well with the TP-LINK router. ONVIF Settings Our network surveillance device supports the ONVIF function. Once the function is enabled, the client software that supports ONVIF Protocol can be used for monitoring, recording and PTZ control of the network surveillance device. ON ONVIF: Select Open to enable ONVIF; select Close to disable ONVIF. 60 4 User Interface ONVIF Port: is 8080 by default. Please do not modify the ONVIF port if not necessary. The device is restarted after successful modification of the port. ONVIF Permission Calibration: If you select Open, you need to login to connect the device when using the client software that supports ONVIF Protocol; if you select Close, you do not need to login. Note: (1) ONVIF port, HTTP port and RTSP port shall not be the same! (2) ONVIF settings take effect after the device is restarted. Alarm Settings Double-click a camera channel in the device tree, and set the audio and video parameters after connection. Motion Detective To monitor a specific area and ensure the alarm can be automatically activated when abnormal motion occurs, you can select and activate motion detection. Double-click the camera channel in the device tree and set the motion detection of the camera after connection. The camera supports 4-motion-detection-area setting. Tick off the option box on the right side of the interface to activate the corresponding options. Detection area: Tick off the option box on the right side of the interface to activate the corresponding options. The 4-motion-detection-area setting is supported on the camera. After an area is activated, the area box and the area number will be displayed on the screen. Move the mouse into the area box. Left-click the mouse to drag the area box into any place on the image. You can also move the mouse to the lower right corner of the area box. Left-click the mouse to adjust its size. Sensitivity: The sensitivity ranges from 0 to 100. The larger the number is, the higher the sensitivity is. External Alarm 61 ZKiVision Client Software User Manual If the device is equipped with an external alarm input device, check Alarm Input to enable external alarm input. If the alarm input device is a normally open device, select NO; if the alarm input device is a normally close device, select NC. Alarm Linkage Once an alarm is triggered, several modes of alarm are available: Email Alarm: is to send an alarm email to the preset mailbox; click Email Settings to enter the Email Settings interface. 62 4 User Interface SMTP Server: is the IP address of SMTP server. See your mailbox settings for details. Port: Is 25 by default. To modify the port, please contact your network administrator or consult professionals. SSL: Check the option to enable secure connection. See your mailbox settings for details. Parity: If you select Open, you need to input the user name and password for communications upon successful authentication; if you select Close, you do not need to input the user name and password for authentication. User Name: is the name of email. Password: is the password of email. Receiver's Email: is the email address to receive alarm emails. Please input at least one address. Sender's Email: is the address displayed in the alarm emails. Theme: is the subject of the alarm emails. Message: is the content of the alarm emails and only supports English input. Note: (1) The SMTP server should support POP3 Protocol. Because may mail servers disable this protocol to strength security and reduce spam mails, you need to verify whether your selected SMTP server supports POP3, or email sending may fail. (2) Check the SSL option for some mail servers with SSL certification. (3) Set correct DNS in the Network Settings interface to send emails successfully. Send Picture: is to send captured pictures to the preset email. 63 ZKiVision Client Software User Manual Save Video to FTP Server: is to transmit video caches in the storage card to the FTP server (only available if the storage card is inserted); click FTP Settings to enter the FTP Server Settings interface. FTP Server: is the IP address or domain name of FTP server. Port: Is 21 by default. To modify the port, please contact your network administrator or consult professionals. User Name: is the user name applied in the FTP server. Password: is the password applied in the FTP server. Passive Mode: Data connection is initiated by the client program under this mode. Select Open to open the passive mode; select Close to close the passive mode. Path: Add any subfolder path in the FTP server (the subfolder must be created in the FTP server in advance). Test FTP Settings: Click Test to see whether the FTP server can be successfully connected. Note: To use the FTP function, apply for a user name and password in the FTP server and for a storage space. The user must have permission to write in and create a subdirectory in the storage space. Save Video to Storage Card: Record a 30s video and save it to the storage card (including a 5s clip before the alarm). Save Picture to Storage Card: Save snapshot pictures to the storage card. Relay Output: Close the relay to enable alarm output. The optional alarm durations are 5s, 10s, 20s or 30s. Note: The function of Save Video to FTP Server can be enabled only when the storage card is inserted into the device, and the function of Save Video to Storage Card is enabled at the same time. Advanced Settings Timed Capture 64 4 User Interface Periodic Capture: Set an interval for timed capture. Picture Remote Storage Method: Check Save Picture to Storage Card to save captured pictures to the storage card; check Send Picture to Email to send captured pictures to the preset email. Storage Card Management Storage Card Management: Click Browse Storage Card to browse the storage card on the device; click Stop Storage Card to stop the storage card; click Format Storage Card by FAT32 to format the storage card. Note: The system supports the storage card up to 32G. Please format the storage card to FAT32. Storage cards made by some manufactures may not be compatible with the device. Please test the storage card before usage. Type 3 65 ZKiVision Client Software User Manual Click Device Name in the Device List, and then click button, the Remote Setting window will pop-up: PTZ Control See the PTZ control panel in 4.1.4 Control Panel for details. Pan-tilt Settings Address code, Protocol, Baud rate, Data bits, stop bits, and calibration: not being settable. Preset and Cruise When the motion pan-tilt arrives at the place you focused on. Click and choose the preset number in the preset list. Set the preset name and click [Add] to add the preset. After adding two or more presets to the camera channel, you can configure a cruise based on the presets. After setting the cruise, click [Add] to add a cruise. Click and select a Preset in the preset list, Select the cruise that will be added to from the drop-down list, click cruise. Click and choose the unnecessary preset. Click to add this preset to the selected to delete it from the cruise. After saving the cruise path, click [Test] to test the cruise path. Type 4 Click Device Name in the Device List, and then click window will pop-up: 66 button, the Device Config 4 User Interface Note: In the Device config interface, you can do the following operation: Record Settings, Alarm Settings, System Setting, Advanced Setting and check the System Information. The specific methods of operation, please see the device user manual, will not be reiterated here. 67 ZKiVision Client Software User Manual 4.6.2 Group Management Group type: Choose group type (according to picture quantities), including single picture, 4-picture, 6-picture, 8-picture, 9-pictureor 16-picture. Group name: Set group names. In the device list, select the device to be grouped. In the group list, click the group that will be added to. Click to add the device to this group. In the group list, select the device that will be deleted, and then click device from this group. Note: (1) The device only can be operated after partition. (2) There are at most 20 groups can be added. 68 to delete the 4 User Interface 4.6.3 System Settings Time Settings Date format: It includes year-month-day, month-day-month, or day-month-year. The default format is year-month-day. Time format: It includes 12 hours or 24 hours. The default format is 24 hours. Auto-calibration time: Select it to calibrate the time of all connected devices during the given time, that is, synchronize the time of all devices with the PC. Auto-calibration time: Calibrate the time automatically. Group switch time: The time interval of group switching. The group switch time is 20s by default. It can be set from 5s to 60s. Log storage time: The logs can be saved for a week, half a month, or a month. The default storage time is a week. Auto run: The software automatically starts upon computer startup after this option is selected. Stream Mode Double Stream Mode: When the preview window displays screens of multiple channels, the watched 69 ZKiVision Client Software User Manual video, snapshot, and recorded video are sub-stream images. If you double-click one video for magnification, the watched video, snapshot, and recorded video are all main stream images. Single Stream Mode: If sub-stream image is set in the video recording setting, the watched video, snapshot, and recorded video are sub-stream images; if main stream image is set in the video recording setting, the watched video, snapshot, and recorded video are main stream images regardless of whether videos of one or more channels are displayed in the preview window. Save Flow Mode: When the preview window displays screens of multiple channels, the watched video, snapshot, and recorded video are sub-stream images. If you double-click one video for magnification, the watched video, snapshot, and recorded video are all main stream images and they are all in flow saving mode. Note: If you select Single Stream Mode, enter Setting>Local Setting>Storage Management interface to set the stream mode of videos. Capture Settings Image format: The formats of system captured pictures include JPEG and BMP. The default format is JPEG. Image storage path: The default storage path of the captured pictures is C:\Picture. Alert Settings Disconnect Alert: Alert is generated when the device is disconnected. Full HDD Alert: Alert is generated when the hard disk is full. Failure Alert: Click Test to choose a sound for failure alerts. Linkage Alert: Click Test to choose a sound for linkage alerts. 70 4 User Interface 4.6.4 Storage Management Double-click a camera channel in the device tree and complete the video recording configuration after successful connection. Time management Enable: If Enable is selected, video recording is enabled on the channel. If it is deselected, none of alarm video recording, manual video recording, and planned video recording can be enabled. Sub-stream/Mainstream: Set the stream format of videos. Sunday~Saturday: Indicates a week (unit: day). 0~23: Indicates one day (unit: half an hour). Left-click the mouse and drag the mouse up to make a green box (as shown in the preceding figure). The scope of the green box indicates the time range during which the schedule videotaping is activated. Copy Copy enable: If this option is selected, the video recording enabling status of the channel is copied. 71 ZKiVision Client Software User Manual Copy stream type: If this option is selected, the stream type of the channel is copied. Copy schedule: If this option is selected, the planned video recording schedule of the channel is copied. Use planned videos: If this option is selected, the video recording planned in the schedule in green in the Time management area is enabled. Video storage path: After Surveillance client software is installed, it will automatically detect the computer disk and displays the test results in the list. The default storage path is D:\MediaRecord\. When the space of the first selected disk is less than 5G, the second selected disk will begin to videotape. Alarm duration: The duration of the alarm videotaping is 5s by default. It can be set from 5s to 60s. Alarm pre-recording duration: The pre-recording duration of the alarm videotaping is 5s by default. It can be set from 1s to 15s. Pre- Post- alarm alarm Alarm Pre-recording Duration: 5s Alarm Video Alarm trigger Duration: 2mins Video cyclic cover: If you select it, the system will automatically overwrite the earliest videotaping when all the configured videotaping disk spaces are less than 5G. If you clear it, the Disk cleanup interface will pop out when all the configured videotaping disk spaces are less than 5G. As long as one of the configured videotaping disk spaces is more than 5G, the scheduled videotaping will restart. 72 4 User Interface 4.6.5 User Management User list ID: User list number. The serial number of the newest user in the system is 1. User name: The user name used to log in to the system. User level: Users with different operating authorities. User level Default permission Super user Possesses all permissions and can perform any settings Customize user Select the permission in the permission list on the right side. Common user Only such functions as preview, PTZ control, capture, and intercom can be operated. User status Allow indicates: that the user can log in to the system. Prohibit indicates that the user cannot log in to the system. Click Add to add new users. For super users, they can add super users, customize users or common users. For custom users with "user management" permission, they can add common users. Choose a user and click Modify to modify the user information. Choose a user and click Delete to delete the user information. Note: 73 ZKiVision Client Software User Manual (1) Super user Admin exists in the system by default and the default password is 123456. This super user cannot be deleted and his user level cannot be modified. (2) Up to 10 users can be added in the system. Modification User name: User name cannot be modified. Current password: Enter the current password. New password: Enter the new password. Confirm password: Enter the new password again. User grade: Modify the user level. Permission: Select or delete the actionable items in the permission list on the right side. Save the modified information. Restore the data to its last saved value. Temporarily prohibit the user from logging in to the system, after this button is clicked. Automatically take effect after modification saving. Note: (1) On this interface, only the current user can modify the password and they cannot delete their accounts. (2) Only the founder of the users can modify their user grades. (3) Any system login passwords of existing users can be modified on the Login/Logout interface. 74 4 User Interface 4.6.6 Alarm Settings Double-click the camera channel on the device tree. When the connection is successful, set the alarm linkage items. Enable input alarm: Ticking this option will enable alarm input signals of the camera. Input signal name: You can enter the specific name of the auxiliary input signal. The modification will be effective immediately. Output signal name: You can enter the specific name of the auxiliary output signal. The modification will be effective immediately. Input signal list: List of input signals that generate alarms: auxiliary input, motion detection, auxiliary input, alarm upon tearing down the device, intimidation alarm,anti-passback alarm, closing the door after you go out, leaving the door open, the door being closed, the door being opened unexpectedly, checking on work attendance, checking departure from work and fingerprint. Linkage action list: Alarm linkage action list: auxiliary output, video recording, window display, alarm bell and opening the door. Input signal State: There are two status options for auxiliary input signals: Normal Open and Normal Close. Select Normal Open for alarm input devices of normal open type and select Normal Close for those of normal close type. This setting is invalid for other input signals. Sunday - Saturday: Indicating a week, with day as the unit. 0 ~ 23: Indicating a day, with half an hour as the unit. Enable input signal alarm linkage: Double-click the camera channel on the device list for connection. After setting the linkage items corresponding to input signals, tick Enable input signal setting. Then on the schedule, click the left mouse button to drag a green block, as shown in the above figure. The scope of the green block is the time period for enabling input signal alarm linkage. When the time period is set, click Save. 75 ZKiVision Client Software User Manual Disable input signal alarm linkage: Cancel ticking Enable input signal setting and click Save; or cancel the green block on the schedule and click Save. Cancel the green block: You can cancel the green block by clicking the left mouse button on the green block and dragging the mouse cursor. Copy input signal alarm linkage: If the input signal alarm linkage actions for B are the same as those for A, you can select B input signals from the dropdown list of Copy to all input terminals after setting A input signals, click Copy and Save. If the linkage actions and linkage time for all the input signals are the same, you only need to set for one signal, then select Copy to all input terminals, and click Copy and Save. In this way, alarm linkage is set to all input signals of the camera. Notes: (1) Only when the camera is associated with the access controller, the alarm input signals of the access controller will be generated on the input signal list, and the output action of the access controller, opening the door, will be generated on the output signal list. For the setting of the association of the camera with the access controller, see 5.9 Set Alarm Linkage. (2) The alarm linkage of all signals will work only after the device (the camera) is armed. If the device is disarmed, it cannot produce alarm linkage. (3) If new alarm messages are generated during the alarm period, the alarm period will be extended accordingly. 4.6.7 Access Management Double-click the camera channel on the device tree. After the connection is successful, you can associate the camera with the access controller. After associating the device with the access controller, you can set input signal alarm linkage for the associated access controller on the alarm linkage setting page. Associate the camera with the access controller: Double-click the camera channel on the device tree. After the connection is successful, click to select access controllers (you can select more than one) to be 76 4 User Interface associated with. Click the Save button on the lower right corner to save the setting. Access list: Access controllers added to the system will be displayed on this list. Access signal list: After you click an access controller on the access controller list, signals of this access controller will be displayed on this list. Signal name: After clicking a certain signal on the access controller signal list, you can set signal name. Add Access Device 1. Click > or directly click icon to enter the Access Management interface. 2. Type in the Access Name, IP Address and Port, shown as the following figure: Access Name: You can set names for access controllers. IP address: Manually type the IP address of the access controller. Port: Manually fill in the communication port between the access controller and the camera. 3. Click the [Test] button to check if it can be connected to devices successfully. Only when devices are successfully connected, they can be added to the software. 4. Click the [Add] button to add the selected devices to this software. 77 ZKiVision Client Software User Manual Notes: (1) You have to add access controllers to the system manually. (2) After successfully adding devices, you can change IP addresses, gateways, subnet masks or ports where necessary and click the [Modify] button to save. (3) The port you fill in here must be consistent with the actual port of the access controller. The default port is 4370 and generally needs no change. If the actual port of the access controller is not the default 4370, please contact your access controller supplier for the actual port number. (4) For associating the IP camera with the access controller, see 5.9 Set Alarm Linkage. 4.7 Access Management Click to quickly access interface Access Management. Note: For details, see 4.6.7 Access Management. 4.8 Face Function Note: (1) Software with Charged Version of Face Identification outperforms software with Free Version of Face Identification in identification speed, accuracy and stability. (2) Before using the face identification function of the software with Charged Version of Face Identification, exit the software, connect a dongle, and activate the license. (3) Before using the face identification function (including all face-related operations such as face registration and alarm linkage setting of face events) of the software with Charged Version of Face Identification, connect a dongle. To activate the license, proceed as follows: 1. Find the ZKTeco LicenseMng file on the bundled software CD, and double-click it to enter the file directory: 2. Choose a license to be installed based on your operating system (take the 32Bit Windows_XP system as an example), and double-click it to enter the Windows_XP_WIN7_32Bit file directory: 78 4 User Interface 3. Double-click and run LicTool, and the system will detect whether a dongle is connected as shown in the figure below: 4. After dongle detection succeeds, the following prompt will display on the screen: 5. Click [Next] to start license activation. The following interface will display: 6. After license activation succeeds, the following interface will display (click [X] to close the window): 79 ZKiVision Client Software User Manual Description of the icon functions in the Face Function working area Icon Function Description Add face user Save modified information Delete the ticked users Restore parameters to the default values. Save modified parameters Cancel the modification 4.8.1 Face Registration You can register a user in two ways: collecting a photo on line and manually importing a picture. Registering by Collecting a Photo online 1. Run and login the software 2. Connect the camera for which the face identification function is to be enabled. For detail, please see 4.6.1.2 Add Device. 3. Click icon to enter the Preview interface, right click the device name and then click and choose Display All. The software will display all channels monitor pictures of the device. Shown as the following figure: 80 4 User Interface 4. [Click Face Event, switch to the Face Event information panel] > [Right click the Channel monitor picture] > [Click and choose Enable Facial Identification sub-menu], the IPC will collect facial information automatically. Note: (1) Face identification function is available for a maximum of one video device. (2) For the configuration and application of face identification function, see 5.23 How to Set and Apply Face Function. 5. After enable the Facial Identification function, the identified facial will display in the Face Event bar. Click Pause to suspend the rolling display of the identification results. 81 ZKiVision Client Software User Manual 6. Tick the face images to be registered, or tick Select all to select all the images on the face event information panel, and then click [Add registering faces] The following prompt box wills pop-up: 7. Click [OK] button to switch to face registering page. Face Template List After right clicking Enable Facial Identification on the Preview page, you can add the detected faces to this list, or you can manually import face pictures to this list. The system will extract a face template from the ticked picture on the template list and use it as the face template for the currently registered user. 82 4 User Interface Currently ticked face images The blue cell indicates currently chosen position or face image : Tick all the pictures on the list. : The previously detected face images are used as face templates. The system can store a maximum of 500 real-time face images. If there are more than 500 face images, the earliest ones will be replaced. (Note: Only the Charged Version of Face Identification software has Real time face function.) : You can manually import local face pictures. The picture must be in the JPG format and its size must be the multiple of 16, for example, 320*480. There can only be one face in the picture and the face should be as regular as possible. : If you click this button, the currently chosen face picture (in blue cell) will be used as the reference picture for the currently registered user. : Delete currently ticked pictures. 8. Click and select a facial picture, and then click [As ref face] button to set as a reference picture for the currently registered user, shown as below: 83 ZKiVision Client Software User Manual User Information User ID: It is the ID of a user; the IDs that have already been added to the system cannot be changed; the unregistered IDs can be added to the system. User name: It is the name of a user, which can be changed according to actual circumstances. User gender: Female or male. User native place: It is the native place of a user, which can be changed according to actual circumstances. ID type: ID card, passport, driving license or other certificates. Certificate number: The certificate number can be changed according to actual circumstances. Blacklist user: Ticking this option, you can set this user as a blacklist user. : Click to access the registered user list. Click to select one user on the registered user list, click Confirm and this user’s face registration information will be displayed on the face registration page. Now you can modify this user’s information. Click Modify to save the modification. : After setting face registration information, click this button to register the user. 9. Enter the User Information and then click [Register] button to register user, shown as below: After register succeed, the following prompt box will pop-up (Click [OK] button to close the box): 84 4 User Interface 10. After operations, click [Preview] icon to enter the Preview interface > [Click the device name to select device] > [Right click the channel monitor picture], and then click Disable Facial Identification sub-menu to stop collecting facial, shown as below: Note: When facial identification is enabled, click [Play] under Face Event, and the system will automatically compare the current face image captured by IPC with the reference in the system and display a corresponding score. Users on the blacklist will display in the Black List pane as shown in the figure below: Note: Only the Charged Version of Face Identification software will show the contrast bar . 85 ZKiVision Client Software User Manual Registering by Manually Importing a Picture 1. Access the Face Function > Face Registration page. 2. On the face template list, tick to select the location to which you want to import the picture. 3. Click Import Face to manually import face pictures. 4. Tick the face images to be registered or tick Select all to select all the pictures on the list. 5. Click to select one picture on the list as a reference picture for the currently registered user. 6. Fill in the user information and set whether the user is a blacklist user or not. 7. Click Register to add the user to the system, and the registration is finished. 4.8.2 User Management Display blacklist users only: If you click this option, only blacklist users will be displayed on the user list. User ID: It is the ID of the user; the IDs that have already been added to the system cannot be changed; the unregistered IDs can be added to the system. User name: It is the name of a user, which can be changed according to actual circumstances. 86 4 User Interface User gender: Female or male. User native place: It is the native place of a user, which can be changed according to actual circumstances. ID type: ID card, passport, driving license or other certificates. Certificate number: The certificate number can be changed according to actual circumstances. Blacklist user: Ticking this option, you can set this user as a blacklist user. 4.8.3 Parameter Setting Threshold value for face identification marks: It is the similarity threshold value of a detected object compared with the user face template in the database. A smaller threshold value makes it easier for the system to identify a face; however, misjudgment is apt to occur. A greater value ensures a more accurate identification of a face, but it is possible that the system cannot identify the face. So a moderate value is recommended. Face detection quality threshold value: It is the similarity threshold between the detected object and the face. A smaller threshold value makes identification more sensitive, but it is likely for the system to identify a similar face as the exact face. A greater value makes it possible for the system to miss detecting faces. So a moderate value is recommended. Template quality threshold value: It is the threshold value for face features. A greater threshold value ensures a clearer contour of a detected face. Min face size: The minimum size of captured face images. Charged Version of face identification Recognition Score Threshold Face Detecting Threshold Template Quality Threshold Default: 120 Range: 1 ~ 200 Default: 45 Range: 10 ~ 200 Default: 50 Range: 1 ~ 200 87 ZKiVision Client Software User Manual Face Width Minimum Face Size Face Height Default: 160 Range: Greater than 160 Default: 200 Range: Greater than 200 Free Version of face identification Default: 80 Recognition Score Threshold Range: 1 ~200 Default: 45 Face Detecting Threshold Range: 10 ~200 Default: 50 Template Quality Threshold Range: 1~ 200 Face Width Minimum Face Size Face Height 88 Default: 160 Range: Greater than 160 Default: 200 Range: Greater than 200 4 User Interface 4.9 Logout Back up and exit: The system backs up the configuration and exits. The default backup path is Installation Path\Database_Backup. Exit: The system exits directly if you click Exit. Cancel: The system cancels exiting if you click Cancel. Note: Only super users and the custom users with a system shutdown authority can exit the client software. 89 ZKiVision Client Software User Manual 5 Configuration 5.1 Search for and Add a Camera to an Area 1. Choose 2. Click 3. Click > Search > Search. to display the Search interface. or to search for the desired devices. 4. In the search list, select one or more cameras or tick off Select All to select all cameras. 5. Click 90 to finish camera search. 5 Configuration 6. Click a parent area in the device list. 7. Set the area name. 8. Click to put this area under the parent area. 9. Click an unpartitioned camera channel in the device list. 10. Set the area under monitoring of this camera in the Device info pane. 11. Click to add this camera to the area. Note: (1) Up to 128 areas can be added. (2) After device search is completed, the camera cannot videotape or capture images unless it is added to an area. Unpartitioned devices cannot be used. 5.2 Manually Add a Device to the System 1. Choose > Device Management > Search. 2. Click a parent area in the device list. 3. Manually fill in information about the to-be-added device in the Device info pane. 4. Click to check whether connection succeeds. 91 ZKiVision Client Software User Manual 5. After confirming the connection succeeds, click to add the camera to the system. Note: If a device has no fixed IP address on a public network, you can gain access to this device by using a domain name provided by the domain name supplier. In this case, you must manually add this device to the system. For details of domain name registration and device configuration, see 5.24 How to Use Vendors DDNS for Visiting Surveillance Device on Internet. 5.3 Modify Local Device Information 1. Choose > Device management > Search. 2. Click a camera channel in the device list. 3. Modify the device information in the Device info pane. 4. Click or to save modification. Notes: (1) After a device name is set, the device list displays only the name instead of the IP address of the device. (2) This section describes the procedure for modifying related local device information. For details of modifying remote device parameters (such as IP addresses and port numbers), see 5.5 Modify Network Parameters of a Camera. 92 5 Configuration 5.4 Group Cameras 1. Choose > Device management > Group management. 2. Set the group type and group name and click to add a new group. 3. Click a camera channel in the device list. 4. Click a group in the group list. 5. Click to add the selected camera channel to this group. Note: Up to 20 groups can be added. 93 ZKiVision Client Software User Manual 5.5 Modify Network Parameters of a Camera 1. Choose > Device management > Search. 2. Select a camera from the search result list. 3. Click and then modify the remote device information of this camera. 4. Enter a correct admin password and click to save your settings. Note: You can also modify network parameters of a camera in the following two methods. Method 1: Select device, and then click 94 button to enter the Config interface. 5 Configuration Method 2: Access a camera through browser and choose Network settings>Network settings to modify network parameters of the camera in the Network settings pane. For details, see Network Settings in the User Manual--Using Browser for Video Surveillance in the delivery-attached CD. 95 ZKiVision Client Software User Manual 5.6 Set Scheduled/ Planned Videotaping 1. Choose > Local settings> Storage management. 2. Click a camera channel in the device list. 3. Tick off the Enable planned videos option. 4. Press and hold the left mouse button and move the mouse to a desired direction to set a time segment for scheduled videotaping (0~23 indicates one day; unit: half an hour). To cancel the setting, move the mouse to an opposite direction. 5. Click to save your settings. 6. Deactivate scheduled videotaping: Clear the Use planned videos option and click Save, or clear green boxes in the schedule and click Save. Note: To set the same videotaping time for all devices, you only need to set one of them and select Copy to all cameras. Then click and to save your settings. The schedule videotaping function is activated on all devices. 5.7 Set Motion Detection The detail operations, please see 4.6.1.3 Device Information Management > Remote Settings >Alarm Settings > Motion Detection. 96 5 Configuration Note: You can also access a camera through BROWSER and choose Alarm >Motion Detection to set motion detection parameters. For details, see Motion Detection in the User Manual--Using Browser for Video Surveillance in the delivery-attached CD. 5.8 Enable Arming The alarm linkage of all signals will work only after the device (the camera) is armed. If the device is disarmed, it cannot produce alarm linkage. Enter Preview interface, right click on the area name in the device list, and choose All Arming in the function menu to enable all alarm linkage of all devices in this area. Right click on the device name in the device list, and choose Arming in the function menu to enable all alarm linkage of all channels in this device. 5.9 Set Alarm Linkage 1. In the Access Management window, double-click the camera in the Video Device List. 2. In the Access List, select the access device requiring alarm linkage, as shown in the following figure. 97 ZKiVision Client Software User Manual 3. Click Save. A prompt as shown in the following figure will display. 4. Click OK to confirm and save the current data. A prompt as shown in the following figure will display after the data is successfully saved. (You can click OK to close the prompt.) 5. Click to access the Alarm Setting window. 6. Double-click the camera in the Video Device List, click to select an alarm input signal in the Input Signal List area (take Open door normally as an example), and click to select linkage actions in the Linkage Action List area, as shown in the following figure. 98 5 Configuration 7. Click Save. A prompt as shown in the following figure will display. 8. Click OK to confirm and save the current data. A prompt as shown in the following figure will display after the data is successfully saved. 9. Click OK to close the prompt. 99 ZKiVision Client Software User Manual 10. Set the storage location and time length for the alarm linkage video. (1) Access the > Local Settings > Storage Management interface to set alarm linkage video. (2) Tick the storage location for the video (After the installation, the software will automatically detect the hard disks of the computer and display them on the list). (3) Set Alarm last duration and Alarm prerecord time: the lasting time of the alarm and the time for pre-recording an alarm. (4) If you tick Video cyclic cover, then when all the space of the disk is occupied, the earlier 5G video file will be deleted. If you cancel the tick, then when the disk is full, the video recording will stop. (5) Click Save to save the setting. 11. You can select other camera channels and click Copy to copy the alarm linkage setting to other cameras. Note: After arming, an alarm will trigger the alarm linkage options. 12. Click the Preview icon to access the Preview window. 13. Right-click the camera, and choose All arming in the shortcut menu, as shown in the following figure. 100 5 Configuration When the alarm triggered, a linkage alarm popup window will show and it will start video recording accordingly: Note: Users can click the Events Search icon and then the button to view the video recording. For detailed operations, refer to 4.5.2 Access Event. 101 ZKiVision Client Software User Manual 5.10 Set Email Alarm Linkage 1. Click > Local Device Manager to enter the Local Device Manage interface. Select device in the Local Area List, and then click button to enter the Remote Settings window. 2. Shift to Alarm Linkage. 3. Select Email Alarm to enable email alarm function. 4. After enabling the email alarm function, select Send Picture to send the captured pictures to the preset email. 5. Click Email Settings to directly enter the email settings interface linked to this interface. 6. Set the following items based on actual needs. SMTP Server: is the IP address of SMTP server. See your mailbox settings for details. Port: Is 25 by default. To modify the port, please contact your network administrator or consult professionals. SSL: Select the box to enable secure connection. See your mailbox settings for details. Parity: If you select Open, you need to input the user name and password for communications upon successful validation; if you select Close, you do not need to input the user name and password for validation. User Name: is the name of email. Password: is the password of email. Receiver's Email: is the email address to receive alarm emails. Please input at least one email address. Sender's Email: is the address displayed in the alarm emails. 102 5 Configuration Theme: is the subject of the alarm emails. Message: is the content of the email. 7. After finishing the settings, click to save the email settings, and click X to exit from the email settings interface. 8. Click to enable the email alarm linkage settings. To send an alarm email or picture to a specified mailbox in the case of an alarm, gain access to a camera through BROWSER and choose Alarm > Alarm Linkage. In the Alarm Linkage pane, select the Email alarm option and perform email settings. For details, see Set Email Alarm Linkage in the User Manual--Using Browser for Video Surveillance in the delivery-attached CD. 103 ZKiVision Client Software User Manual 5.11 Configure Preset Locations and Cruise Routes 1. Click > Local Device Manager to enter the Local Device Manage interface. Select device in the Local Area List, and then click button to enter the Remote Settings window. Shift to PTZ parameter settings. 2. Adjust the camera to the desired location. 3. Select the ID of a preset location. 4. Set the name of the preset location. 5. Click to add the preset location. 6. Set the name of a cruise route. 7. Click to add the cruise route. 8. Click a preset location in the preset location list. 9. Select a cruise route from the Cruise route drop-down list. 10. Click to add the preset location to this cruise route. 11. Click to save your settings. 104 5 Configuration 5.12 Search and Playback Videos by Date 1. Click to enter Playback interface. 2. Select devices based on date type. 3. Select a video type from the drop-down list. 4. Select a date. 5. Click to search for videos and the search results are displayed on the Timeline panel. 6. Click on the Timeline panel as the start point for playback. 7. Click to start playing back videos. Note: (1) A maximum of four channels can be selected for video search and playback by date. (2) When replaying a video, the replay will be stopped if changing the page. 105 ZKiVision Client Software User Manual 5.13 Back Up Videos 1. Enter Playback interface and click Backup to enter the page of video backup. 2. Tick the cameras for video search. 3. Set the specific period. 4. Select the date 5. Click to add the searched videos to the backup list. 6. Tick the videos to be backed up. 7. Select whether to back up the media player. 8. Click the button to set the path of backup. 9. Click the button to start the video backup. Notes: (1) The total files to be backed up should not be larger than 8G every time. (2) The path of backup should be neither the system disk, e.g. disk C, nor the video storage disk. (3) You can also access a camera through BROWSER and choose Alarm > Linkage alarm and select the Save Video to Storage Card option to back up the video to a storage card or select the Save Video FTP Server option to back up the video to an FTP server and a storage card concurrently. For details, see Alarm Linkage in the User Manual--Using Browser for Video Surveillance in the delivery-attached CD. 106 5 Configuration 5.14 Create a New User 1. Choose > Local settings> User management. 2. Click . 3. Set a user name, a password, and a user level. 4. Set the user authority. 5. Click to save the profile of the new user. 107 ZKiVision Client Software User Manual 5.15 Modify User Information or Authority 1. Choose > Local settings > User management. 2. Select a user from the user list and the user state automatically shifts to a modification state. 3. Modify the user name, password, and user level. 4. Modify the user authority. 5. Click to save the modified user profile. 5.16 Back Up and Recover Configuration Data To back up or recover configuration data, access to a camera through browser and choose System > System Settings to perform system settings. For details, see System Settings in the User Manual--Using Browser for Video Surveillance in the delivery-attached CD. 108 5 Configuration 5.17 Set Wireless Network Before enabling the wireless network, use network cable to connect the device with the network. Enter the > Search > Select Device > Click > Network Settings > Wi-Fi Settings submenu, and double-click a camera channel to connect it. Please configure Wi-Fi connection by following the steps as follows: 1. Start using Wi-Fi. 2. Click to search available Wi-Fi. 3. Select a Wi-Fi network in the pop-up WI-FI list. All the parameters of the selected Wi-Fi will be automatically filled in each parameter bar (such as the access point mode and way of encryption). 4. If a key is set to the router, input the key. 5. Click to check if the Wi-Fi is connected normally. 109 ZKiVision Client Software User Manual 6. After successful connection, click to enable the settings. 7. Pull up the network cable, and restart the device. 8. Access the camera by the browser, and enter the Settings > System > Device Info interface, you can see the network connection type displayed as Wireless Connection. To enable wireless connection to a camera, access to the camera through browser and choose Network settings>Wi-Fi Settings and perform Wi-Fi settings. For details, see Wi-Fi Settings in the User Manual--Using Browser for Video Surveillance in the delivery-attached CD. 5.18 Search for System Logs 1. Click the button. 2. Select a data type. 3. Select the log type, sub-log type, start date and end date. 110 5 Configuration 4. Select a camera channel or a user. 5. Click to query the logs of a specified type within the defined time period. 6. Query results are displayed in the log list. Drag the scroll bar on the rightmost side or at the bottom of the interface to view the details. Click or to view the query results on the previous or next page. 7. To modify the log saving time, date format, or time format, choose > Local settings > System settings. 8. In the Time settings pane, modify the log saving time, date format, or time format. 9. Click to save your settings. 111 ZKiVision Client Software User Manual 5.19 Playback Associated Videos through Alarm Logs 1. Click the button. 2. Click the Alarm tab to search for videos based on alarm type. 3. Select the camera channels for query. 4. Select an alarm type. 5. Select a date. 6. Click to find out the alarm logs on that date. Query results are be displayed in the log list. 7. Select one of the alarm logs in the log list. 8. Click to play the associated videos of this alarm log. Note: The video playback will stop if you change the page. 5.20 Apply for and Use a Dynamic Domain Name for Visiting IPC on Internet If it is necessary to visit a camera on the internet, set the dynamic domain name of the camera and enable the port mapping on the corresponding router. Firstly, there must be a router with DDNS (Dynamic Domain Name Service). The following is an example of TP-Link router. 1. Apply the dynamic domain username and host name for the camera. 112 5 Configuration Currently our company's IPC supports the dynamic domain name by Dyndns.org, 3322.org and Dynddns.us. Before applying the dynamic domain name, register an email address to receive the verification email. For example, the application for a Dyndns dynamic domain names is in the following procedure: (1) Log in http://www.dyndns.org, click the "Create Account". (2) Input all information and follow step by step with DynDNS. 113 ZKiVision Client Software User Manual (3) Log in with new account and click Account > My Hosts > Add Host Services. (4) Type domain in the Hostname field and select sub-domain. 114 5 Configuration (5) After typing in information, check your DDNS service. 2. Visit and configure the camera through browser. (1) Enter System > Network Setting, fill the correct LAN gateway and HTTP port. The DNS and port settings of the router are used here. 115 ZKiVision Client Software User Manual (2) Enter System > Domain Name Setting, and configure the domain name of the camera. 3. Login and configure the router (1) Enter the Dynamic DNS setting of the router, set and enable the DDNS. 116 5 Configuration (2) Port Mapping: Enter Forward Rules > Virtual Server Setting, click Add a new link, add the IP address of the IPC in LAN and the corresponding port number, and enable the function. The port setting of the camera is used here. (3) Configure DNS address: Enter Network Parameters > WAN Port Setting and manually set the DNS address of the router. The DNS setting of the camera is used here. 117 ZKiVision Client Software User Manual 4. Use the domain name to check whether can visit the IP camera on internet. Choose > Device management > Search. Click to choose a parent area, manually add this IP camera to the system. Click , then the "Connection succeeded" dialog window pops up. Or type in http://domain name: port number in the address bar of browser, http://ipcamera123.dysdns.org:1025, and log in the system to browse the videos of the IPC. e.g. 5.21 Set Audio and Video Parameters Appropriate for Your Network Set audio and video parameters. See 4.6.1.3 Device Information Management> Remote Settings > Audio/Video Setting. 5.22 How to Set E-map 118 5 Configuration 1. Access the E-Map tag page. 2. Click Edit E-Map to access the map editing page. 3. Click the right mouse button on the map list and choose Add to add e-maps. 4. If you want to add multi-level scenario maps, first choose the upper level map on the map list, and right click to choose Add E-map. Then set the attributes for the map that you want to add. 5. If you want to deploy a camera on the map, first choose the map on the map list, and right click to choose Add devices. Then set the attributes for the device that you want to add. Or you can right click the map on the map display window and choose Add devices. 6. Drag the mouse cursor to the device icon, press the left button and drag the device icon to where you want to place it. 7. If you want to add link on the map, first choose the map on the map list, and right click to choose Add link. Then set the attributes for the link that you want to add. Or you can right click the map on the map display window and choose Add link. 8. Drag the mouse cursor to the link icon, press the left button and drag the link icon to where you want to place it. 9. If you want to add input-output signals on the map, first choose the map on the map list, and right click to choose Add I/O Signals. Then set the attributes for the input-output signals that you want to add Or you can right click the map on the map display window and choose Add I/O Signals. 10. Drag the mouse cursor to the signal icon, press the left button and drag the signal icon to where you want to place it. 11. Click End Editing E-map to exit map editing. 12. After the device is armed, when an external alarm signal comes in, the input signal icon will blink. After confirming the alarm on site, the security guard can right click the icon to confirm the alarm and then the icon will stop blinking. 13. You can access the linked e-map by clicking the link icon on the map. 119 ZKiVision Client Software User Manual 14. You can double-click the device icon or drag the icon to the video play window to play the video in real time. 15. You can control the output by double-clicking the output signal icon on the map. Notes: (1) The alarm linkage of all signals will work only after the device (the camera) is armed. If the device is disarmed, it cannot produce alarm linkage. For arming the device, see 5.8 Enable Arming. (2) For setting signal alarm linkage, see 5.9 Set Alarm Linkage. 5.23 How to Set and Apply Face Function The detail operation description of Face Registration, please see 4.8.1 Face Registration. 1. Set face identification parameters. Set face identification parameters. For description of parameters, see _4.9.3_Parameter_Setting. 2. Set face event alarm linkage. (1) Access the > Alarm Settings page. (2) Double-click the camera for which face identification function is enabled. When the connection is successful, set alarm linkage items for face events. For details, see 5.9 Set Alarm Linkage. (3) Click Preview to start arming the device. For details, see 5.8 Enable Arming. 120 5 Configuration 3. You can implement video surveillance on the Preview page. If the system identifies a face, the system will perform alarm linkage actions according to the alarm linkage settings; if it identifies a blacklist user, the user will be displayed on the Blacklist. 4. Search for face events and play back the linkage video. (1) Access the Event Query > Face Events page. (2) Set query conditions, click Search, and the search results will be displayed on the log list. (3) View the log, double-click the log with associated video (font in red), and the associated video will be played in the playback window. 5. You can also search for and play back face videos. (1) Choose Event Search > Face Searching. (2) Specify query conditions and click Search. (3) Double-click a face image that is searched out. Then, the playback window plays the video associated with the face image. 121 ZKiVision Client Software User Manual Note: The system will extract a face template from the ticked picture on the template list and use it as the face template for the currently registered user. When you register a user, it is recommended that you tick a number of face images for this user to improve the accuracy of the face template. 5.24 How to Use Vendors DDNS for Visiting Surveillance Device on Internet Notes: (1) Ensure that the router can access the Internet before performing port mapping. For details about how to configure Internet access for the router, see the user manual of the router. (2) The default port used by the router is port 80. Use ports ranging from 1024 to 49151 for port mapping. 1. Use a browser to access a device. Open the Network Settings page. Set the DNS address of the device (this DNS address must be consistent with the one set on the router) and the HTTP port. 122 5 Configuration 2. Use the browser to access the router. Open the Forward Rules > Virtual Server Setting page. Click Add a new link. Add the IP address of the device in a LAN and the corresponding service port, and enable this function. The settings here must be consistent with the settings of the IP address and HTTP port of the device. 3. Use the browser to access the device. Open the Network Settings > Domain Name Settings page. Set the Vendors DDNS. 123 ZKiVision Client Software User Manual 4. Use the dynamic domain name to access the device. (e.g.: access the device by a mobile phone) 124 6 FAQ 6 FAQ 6.1 No Image at Preview Possible causes: 1. Incorrect device information such as the user name and password 2. MAC address conflicts between the camera and other devices 3. Too many users connected to the camera 4. Camera hardware failure Solutions: 1. Choose > Device management > Search. Correct the device information such as the user name and password. Click Test until the connection succeeds. 2. Choose > Device management>Search. Click and then . On the search list, check whether the camera has a MAC address that conflicts with that other devices. If such a conflict exists, consult professionals or our technical support team. 3. Access to the camera through browser. Choose System > Device information to view the number of connected videos (a camera can support a maximum of four users to browse main stream videos at the same time or ten users to browse secondary stream videos at the same time). When the maximum number of video connections is reached, wait for a few minutes until the number falls below the maximum, and then try connecting again. After these operations, you can properly play the videos. 4. Contact our commercial personnel or technical support team. 6.2 No Audio at Preview Possible causes: 1. No external audio collecting devices 2. Incorrect audio/video parameter settings Solutions: 1. Connect an audio collecting device to the camera before connecting the camera to your PC to make sure that you can properly hear the audio. 2. Choose > Remote settings> A&V parameter settings. On the A&V parameter settings interface, set Audio collection to Open. 125 ZKiVision Client Software User Manual 6.3 No Audio in Playback Possible cause: The audio collection function is disabled when you videotape the images. 6.4 Failure to Enable Manual Recording Possible causes: 1. Equipment disconnected 2. Disk space insufficient Solutions: 1. Choose > Device management>Search. Click Test until the connection succeeds. 2. Choose > Local settings>Storage management. Tick off Disk full cover. Then the video files of the earliest date will be deleted when all disk space is less than the preset reclaimable space. Or you can enter the video storage path and manually delete unwanted videos to free up the disk space. 6.5 Failure to Disable Videotaping at Preview Possible causes: 1. The device performs scheduled videotaping within a specified period. 2. The device performs linkage alarm videotaping within a specified period. 6.6 Pan-Tilt Abnormality Abnormal conditions: 1. Lighting out of order 2. Wiper out of order 3. Pan-tilt out of order (1) The device has no built-in pan-tilt. (2) The device cannot work with a pan-tilt. Solutions: 1. Check whether any external light fixtures are connected. This function applies when there are external fixtures. 2. Check whether any external wipers are connected. This function applies when there are external 126 6 FAQ wipers. 3. (1) An external pan-tilt is required. (2) Choose >Remote Settings > PTZ Parameter Settings. Set PTZ parameters such as the address, baud rate, and stop bit on the PTZ Parameter Settings interface. Ensure that these parameter settings are consistent with the PTZ settings. 6.7 Failure to Implement Audio Intercom Possible cause: The device has no external audio input devices or no headsets or microphones are connected to the PC. Solution: Connect an external audio input device to the device and connect a microphone headset to the PC. 6.8 Failure to Play Back Videos Displayed on the Timeline Panel after a Video Search Possible cause: The video files are missing or the user has manually deleted the video files within a specified period. 6.9 Failure to Search for Video Files Possible cause: The video file for this time period has been deleted or has been overwritten by circulating video recording. 6.10 Failure to Set the Motion Detection Area Possible causes: 1. When Resolution is set to QCIF, the system does not respond your request for motion detection area settings. 2. If you log in to the front-end device with a non-admin account, the system does not respond your request for motion detection area settings. Solutions: 1. Choose >Remote Settings>A&V Parameter Settings. In the Video parameters settings pane, set the resolutions on the Main stream and Secondary stream tab pages separately. 2. Switch to log in to the front-end device as a super user, and then set the motion detection area. 127 ZKiVision Client Software User Manual 6.11 Failure to Achieve Alarm Linkage Possible cause: The Arming function is not enabled. Solutions: 1. On the equipment list of the preview interface, right-click a desired area and choose All arming from the shortcut menu. Then the guard function is enabled for all devices in this area. 2. On the equipment list of the preview interface, right-click a desired device and choose Arming from the shortcut menu. Then the guard function is enabled for this device in this area. 6.12 Failure to Display the Alarm Window after Enabling Arming Possible causes: 1. The Pop up video window option is not selected. 2. No alarm signals are detected. 3. When Resolution is set to QCIF, the system does not support motion detection alarms. 4. If you log in to the system as a non-admin user (namely, a super user), the system does not support motion detection alarms. Solutions: 1. Choose 128 >Linkage Alarm>Alarm Settings. In the Alarm linkage pane, select Pop up Window. 6 FAQ 2. Check the motion detection area and input alarm settings. For relevant motion detection settings, see 5.7 Set Motion Detection. For relevant external alarm inputs, see 5.9 Set Alarm Linkage. 3. Choose Set > Remote settings> A&V parameter settings. In the Video parameters settings pane, set the resolutions on the Main stream and Secondary stream tab pages separately. 4. Switch to log in to the system as a super user. 6.13 Video Image Exception at Preview Possible causes: 1. Incorrect video parameter settings 2. Unstable camera connection Solutions: 1. Choose > Remote settings > A&V parameter settings. In the Video parameters settings pane, set parameters on the Main stream and Secondary stream tab pages according to actual bandwidth. 2. Check to ensure that the camera is properly connected. 6.14 Incorrect System Time Solution: Choose > Local settings > System settings. Tick off Auto-calibration time and set the calibration time. When the calibration time arrives, the system automatically calibrates the time. 129 ZKiVision Client Software User Manual 6.15 Audio Settings To enable the audio function, perform the following steps: Access Audio/Video Settings, set Sub-stream and set Stream Audio to Enable in the Audio Settings area, and click Apply. Then, restart the camera. You can restart the camera after the modification on the client or web server. 1. Click Setting > Local Device Manager, select device in the Local Device List, and then click button to enter the Remote Settings interface. 2. Shift to Audio/Video Settings > Sub-stream > Stream Audio > Enable the Stream Audio > Click button to apply settings. 3. Restart the IP camera. 130 6 FAQ 2. Enable the audio icon. 131 ZKiVision Client Software User Manual 7 Others 1. To monitor the devices in a centralized manner, enable Task Manager to check the CPU usage. The CPU may function improperly with more than 80% resources occupied. See 5.21 Set Audio and Video Parameters Appropriate for Your Network to decrease the device bit rate, or lower the resolution. 2. Check the manufacturer website regularly for the latest software version. 3. Know the factory default parameters of cameras produced by our company. 132 IP Acquisition Mode Manual settings IP Address Subnet Mask Gateway HTTP Interface UPnP DNS Acquisition Mode Primary DNS Motion Detection Alarm Input Wireless User name Password 192.168.1.88 255.255.255.0 192.168.1.1 80 Disabled Manual settings 192.168.1.1 Disabled Disabled Disabled admin admin 7 Others 133