Download SIRIM Online Application For Certificate of Approval For Importation
Transcript
SIRIM Online Application For Certificate of Approval For Importation of Goods. IRON & STEEL User Guide Trader Module Version 1.0 12 August 2011 Dagang Net Technologies Sdn. Bhd. Tower 3, Avenue 5, The Horizon Bangsar South, No. 8, Jalan Kerinchi, 59200 Kuala Lumpur Tel: +603-2730 0200 Fax: +603-2713 2121 For SIRIM COA Table of Contents Contents Introduction ............................................................................................................................................ 3 Conventions ............................................................................................................................................ 4 1 Getting Started With ePermit........................................................................................................... 5 1.1 Logging In…………………………………………………………………………………………………………. .................... 5 2 1.2 Logging Out……………………………………………. ............................................................................. 7 1.3 Trader Profile…………………....................................................................................................... 8 Permit Application ............................................................................................................................ 9 2.1 Apply Import Permit ............................................................................................................... 9 2.2 Additional Details section ..................................................................................................... 19 2.2.1 Industry Sector ......................................................................................................... 19 2.2.2 Type of Application ................................................................................................... 20 2.3 Save Application and Proceed .............................................................................................. 68 2.4 Add Import Item………….. ...................................................................................................... 70 2.5 Supporting Document .......................................................................................................... 84 2.6 Edit Permit Application ......................................................................................................... 98 2.7 Copy Permit Application ..................................................................................................... 100 2.8 Delete Permit Application .................................................................................................. 102 2.9 Submit Permit Application.................................................................................................. 103 2.10 View Permit Application ..................................................................................................... 104 3 Advance Search and Navigation ................................................................................................... 106 IRON & STEEL User Guide for Trader 2 For SIRIM COA Introduction ePermit is a web-based value-added service provided by Dagang Net Technologies Sdn Bhd (DNT). It enables importers and appointed forwarding agents to apply for permit from Other Government Agencies (OGA) or commonly known as Permit Issuing Agencies and obtain the approval online via the internet. Approved permits from OGA will be transmitted to Sistem Maklumat Kastam (SMK) electronically for validation and cross reference purposes against Customs declaration. ePermit is designed to accommodate the specific requirements of each OGA, for example consignment details, quota details, grading summary and product database. There are three modules assigned to different groups of users such as Importers, Forwarding Agents and Other Government Agencies. 1 Trader (Importer) Module Enabling importers to apply for permit online and submit their applications for approval via the Internet. 2 Forwarding Agent Module Enabling appointed forwarding agents to apply for permit online on behalf of the importers and submit their applications for approval via the Internet. 3 OGA Module Enabling OGA to investigate, verify, approve and reject the permit applications received and send the updated status of permit applications electronically via the Internet. The module also includes OGA Admin to maintain database information, to manage archive permits and to generate daily statistical reports online and offline. In this guide, you will have a deeper understanding of eCOA SIRIM Iron & Steel system with step by step help. By the end of this guide, you will benefit from the system as it reduces turnaround time, easy to use, convenient and offers multi-tasking. User The targeted user of this user manual is the Trader. IRON & STEEL User Guide for Trader 3 For SIRIM COA Conventions Icon IRON & STEEL User Guide for Trader Description Function Edit Profile To edit profile Help To view quick guide Search Text Box To search for application Show To show filtered search result Apply To apply import/export permit Submit To submit permit application Add To add item Reset To undo changes or clear fields Delete To delete item Close To exit Copy To copy application Cancel To exit/return Save To save changes Checkbox To check/uncheck application Previous To go to previous page of a list Next To go to next page of a list 4 For SIRIM COA 1 Getting Started With ePermit 1.1 Logging In Before logging in, you must ensure that you have the correct username and password for Single Sign-On (SSO) at myTradeLink. You may login via www.mytradelink.gov.my or epermit.dagangnet.com. To login using epermit.dagangnet.com portal, please follow the steps below: Step 1 Launch Internet Explorer Browser Figure 1-1 Launch Browser Internet Explorer In your PC desktop, double click the Internet Explorer (IE) to launch it. Step 2 Enter URL (Uniform Resource Locator) At Address Bar Figure 1-1.1 Enter URL at address bar Enter Address In Internet Explorer, go to address bar. Enter: http://epermit.dagangnet.com Step 3 Disabling Pop-up Blocker Figure 1-1.2 Disabling Pop-up Blocker Turn-off Pop-up Blocker From the toolbar, select Tools > Pop-up Blocker > Turn Off Pop-up Blocker to disable the Pop-up Blocker. IRON & STEEL User Guide for Trader 5 For SIRIM COA Step 4 Enter Username And Password Figure 1-1.3 Enter your username and password Enter Username Enter Password Login Button 1 Enter Username and Password. 2 Click on the checkbox Remember Password to disable automatic logout if there were no activity above 30 minutes. 3 Click on the 4 The system will display the main screen. button to access the system. Figure 1-1.4 Main screeen of eCOA SIRIM Iron & Steel IRON & STEEL User Guide for Trader 6 For SIRIM COA 1.2 Logging Out Once done with permit application, you are advised to logout from ePermit. To logout, please follow the steps below: Step 1 Logging Out Figure 1-2 Log out from ePermit system Logout Button Click the IRON & STEEL User Guide for Trader button to logout from ePermit. 7 For SIRIM COA 1.3 Trader Profile In your first successful log in, you may edit your personal information, contact information and authentication information at the Edit Profile screen. To edit profile, please follow the steps below: Step 1 Edit Profile Figure 1-3 Edit your profile Edit Profile Button 1 To edit your profile, click on the 2 Enter the necessary information into the field. button. NOTE: Item labeled with * are compulsory. 3 To change your password, enter new password in the Password field. Figure 1-3.1 Enter new password 4 Enter the new password again in the Confirm Password field to confirm your password. Figure 1-3.2 Reconfirm your password 5 Click on the IRON & STEEL User Guide for Trader button to submit the profile once done. 8 For SIRIM COA 2 Permit Application The system allows you to apply, edit, copy, delete and submit: • Import Permit It also allows you to view an application and search for applications. 2.1 Apply Import Permit To apply for an import permit, please follow the steps below: Step 1 Apply Permit Figure 2-1 Main screen of eCOA SIRIM Iron & Steel Apply Button 1 Step 2 Click button to apply for a permit. Select Permit Type Figure 2-1.1 Select Permit type Select Permit Type 1 Select Permit Type; e.g. Import Permit. 2 Click IRON & STEEL User Guide for Trader button. 9 For SIRIM COA 3 Apply Import Permit screen appears. Figure 2-1.2 Apply Import Permit screen 4 This is a standard Permit Application screen for all OGAs . NOTE: Items labeled with ‘*’ are compulsory Step 4 Select OGA Branch Figure 2-1.5 Select OGA Branch 1 Click to select OGA Branch; e.g. Kuching, Sarawak 2 Sample of select branch as shown as below; Figure 2-1.6 Select Branch Kuching, Sarawak IRON & STEEL User Guide for Trader 10 For SIRIM COA Step 5 Consignor Details Section Figure 2-1.7 Fill in Consignor Details Section Click to Search 1 Fill in Exporter Details or click to search for ROC/ROB data updated in Trader Admin Module previously. 2 Consignor pop-up window appears. Figure 2-1 .8 Select consignor’s name Select Consignor 3 Click Consignor Name hyperlink. Figure 2-1.9 Consignor details section will be automatically appear. 4 All fields in Consignor Details section will be loaded automatically. IRON & STEEL User Guide for Trader 11 For SIRIM COA Step 6 Consignee Details Section Figure 2-1.10 Consignee Details screen 1 Consignee Details will be loaded by default. It is your company details and cannot be changed. Step 7 Agent Details Section Figure 2-1.11 Fill in Agent details section Click to Search 1 Agent Details is the Forwarding / Shipping Agent information details. NOTE : This section is not compulsory. Step 8 Applicant Details Section Figure 2-1.12 Fill in applicant details section Click to Search 1 Fill in Applicant Details or click IRON & STEEL User Guide for Trader hyperlink to search for Applicant data 12 For SIRIM COA updated in Admin Module previously. 2 Applicant pop-up window appears. Figure 2-1.13 Select Applicant name by select the hyperlink Select Applicant 3 Click Applicant Name hyperlink. Figure 2-1.14 Applicant details will automatically appear 4 Step 9 All fields in Applicant Details section will be loaded automatically. Mode of Transport Figure 2-1.15 Select Mode of transport 1 Mode of Transport refers to how the goods are being imported to Malaysia. NOTE: Mode of Transport types are Maritime - 1, Rail - 2, Road - 3, Air - 4 and Post - 5. Figure 2-1.16 Mode of transport will be selected 2 Click dropdown IRON & STEEL User Guide for Trader button to select Mode of Transport; e.g. Maritime. 13 For SIRIM COA Step 10 Purpose of Import Figure 2-1.17 Select Puppose of import 1 Purpose refers to the purpose of importing the goods to Malaysia. NOTE: Types of Purpose are Private, Business, Research, Exhibition and Others. Figure 2-1.18 Purpose be selected 2 Click dropdown button to select Purpose; e.g. Business Step 11 Country of Origin Figure 2-1.19 Select search button to select country of origin 1 Click 2 Country Codes pop-up window appears. Click to Search button to search for Country of Origin. Figure 2-1.20 Select Country Codes hyperlink Select Country Code 3 Enter Country Name or Country Code at the text box. Click 4 Click Country Code hyperlink. button. Figure 2-1.21 Select country of origin by click the hyperlink 5 Country of Origin field will be loaded automatically. IRON & STEEL User Guide for Trader 14 For SIRIM COA Step 12 Place of Origin Figure 2-1.22 Select country of origin 1 Click 2 Port Codes pop-up window appears. Click to Search button to search for Place of Origin. Figure 2-1.23 Port Codes hyperlink Select Port Code 3 Enter Port Name or Port Code at the text box. Click 4 Click Port Code hyperlink button. Figure 2-1.24 Click Port Code hyperlink 5 Place of Origin field will be loaded automatically. Step 13 Consigned From Figure 2-1.25 Select consigned from hyperlink 1 Click Click to Search hyperlink to search for Consigned From. NOTE: Consigned From refers to country of transit before consignment reaches the final destination. If there is none, then it is the same as Country of Origin. 2 Country Codes pop-up window appears. IRON & STEEL User Guide for Trader 15 For SIRIM COA Figure 2-1.26 Country pop-up window appears Select Country Code 3 Click Country Code hyperlink. Figure 2-1.27 Consignes from be selected 4 Consigned From field will be loaded automatically. Step 14 Ports/Place of Import Figure 2-1.28 Select Ports/ Place of import 1 Ports / Place of Import refers to the Entry Point. It should tally with Mode of Transport. NOTE: If Mode of Transport is ‘Maritime’, Place of Import should be a sea port. Figure 2-1.29 Ports/ Place of import be selected 2 Click dropdown button to select Ports/Place of Import; e.g. Senari, Sarawak. IRON & STEEL User Guide for Trader 16 For SIRIM COA Step 15 Location Figure 2-1.30 Select location by click the hyperlink 1 Location field refers to you office or warehouse. Figure 2-1.31 Location be selected 2 Click dropdown to select the Location. Step 16 Customs Station Figure 2-1.32 Select customs station 1 All permit applications will be registered at Sistem Maklumat Kastam. 2 This is an auto default station. NOTE: Do not change to other Customs Station. Step 17 Reference No. and Remarks Field Figure 2-1.33 Enter referrence No. and remarks field 1 Enter Trader Reference No. field. NOTE: Your reference number to represent this permit application. Figure 2-1.34 Enter Trader remarks 2 Enter Trader Remarks field. NOTE: Free remarks by you. IRON & STEEL User Guide for Trader 17 For SIRIM COA Step 18 Save Application And Proceed Figure 2-1.35 Click save button to save a transaction See section 2.2 Click to Save 1 Click click 2 button to save the aplication or click Click to Cancel button to proceed or to abort. Import Permit Saved message window appears. Figure 2-1.36 Import permit saved message alert 3 Click button to save the transaction. NOTE: The highlight bold BOX will explain details on next section. IRON & STEEL User Guide for Trader 18 For SIRIM COA 2.2 Additional Details section 2.2.1 Industry Sector There are various Industry Sectors in SIRIM Iron & Steel that need to choose; • Building / Manufacturer • Agriculture • Furniture • Structure • Transportation • Automotive • Mining • Mechanical Engineering and Fabrication • Refining • Oil and Gas • Others To select whichever Industry Sector, please follow the steps below: Step 1 Figure 2-2.1 Select Industry Sector Click to Select 1 Click dropdown button to select Industry Sector. 2 Then, you need to select type of application method below. Note: The remark “*” field are compulsory. IRON & STEEL User Guide for Trader 19 For SIRIM COA 2.2.2 Type of Application There is various type of application method that needs to choose; • Method 1 (A) – Normal Consignment • Method 1 (B) – Consignment with Special Condition • Method 1 (C) – Consignment by Road (Cross Border Partial Shipment) • Method 2 (A) – Consignment with Full Type Test Available • Method 2 (B) – Consignment with Full Type Report by Third Party Inspection Body • Method 2 (C) – Consignment with Patented Material • Method 3 (A) – Consignment with Product Certification License and Special Condition • Method 3 (B) – Consignment with Product Certification License • Method 4 – Local Sales (From Bounded Warehouse / LMW / FCZ / FIZ • Method 5 – Exemption (From Certificate of Approval) To edit an import permit application, please follow the steps below: Figure 2-2.2 Select type of application Click to Select 1 Click dropdown 2 Click button to select Type of Application. hyperlink to know more information on methods. Note: The remark “*” field are compulsory. 3 Information of the methods pop–up window message will appear as shown; IRON & STEEL User Guide for Trader 20 For SIRIM COA Figure 2-2.3 Information of the methods IRON & STEEL User Guide for Trader 21 For SIRIM COA a) Method 1(A) : Normal Consignment Figure 2-2.4 Select Method 1 (A) Normal Consignment as yor request Click to Select 1 Click dropdown button to select the Method 1(A): Normal Consignment. 2 New section will appear at below screen. Figure 2-2.5 New section of method 1A appear at below screen Note: The remark “*” field are compulsory. IRON & STEEL User Guide for Trader 22 For SIRIM COA Step 1 Manufacturer’s Information Section Figure 2-2.6 Manufacturer’s Information section 1 Enter Manufacturer Name field. 2 Enter Address field. 3 Enter fields for Email Address, Contact Person, Phone No. and Fax No. Figure 2-2.7 Sample of Manufacturer’s information Note: The remark “*” field are compulsory. Step 2 Consignor Additional Information Figure 2-2.8 Consignor Additional Information section 1 Enter fields for Contact Person, Email Address, Phone No. and Fax No. field. 2 Sample of consignor’s additional information as shown as below; Figure 2-2.9 Sample of Consignor’s Additional Information IRON & STEEL User Guide for Trader 23 For SIRIM COA Step 3 Information of Consigment Figure 2-2.10 Information of Consigment section 1 Enter Name of Vessel / Flight / Conveyance field. 2 Enter Invoice No. field. 3 Enter Bill of Landing No. field. 4 Enter Packing List No. field. Figure 2-2.11 Select ETA date Select Date 5 Click dropdown button to select ETA date. Figure 2-2.12 Select Port Location Select Port 6 Click dropdown button to select Port Location. NOTE: Only user for Port Kelang need to select their port location. Figure 2-2.13 Sample of Information of consigment section Note: The remark “*” field are compulsory. IRON & STEEL User Guide for Trader 24 For SIRIM COA Step 4 Consignment Verification and Product Sampling Information Figure 2-2.14 Consignment verification and product sampling information section 1 Tick on the checkbox to Combine Permit. 2 New section of consignment will appear as shown below; Figure 2-2.15 Tick the checkbox if you need to combine with previous permit application. Tick if Combine Click to Search 3 Click hyperlink to select combination Permit No. 4 Permit No. screen will appear as shown as below; Figure 2-2.16 Select permit no. Click to Search 5 Permit No. will automatically loaded to combination Permit No. field. Figure 2-2.17 Permit No. will automatically loaded to combination permit no. NOTE: Please take note, only Permit No. with status approved are acceptable. 6 Untick on the checkbox to uncombined permit. 7 Click dropdown IRON & STEEL User Guide for Trader to select Date of Verification & Sampling field. 25 For SIRIM COA Figure 2-2.16 Select date of verification & sampling and time of verification & sampling Select Date 1 Enter Time of Verification & Sampling field. 2 Enter Location and Address for Verification field. 3 Sample of Consignment Verification and Product Sampling Information; Figure 2-2.17 Sample of consignment verification and product sampling information Note: The remark “*” field are compulsory. IRON & STEEL User Guide for Trader 26 For SIRIM COA Step 5 Importer’s Representative Figure 2-2.18 Importer’s Representative section 1 Enter Phone No. field. 2 Enter HandPhone No. field. 3 Enter Fax No. field. 4 Enter Contact Person field. 5 Sample of Importer’s Representative as shown below; Figure 2-2.19 Sample of Importer’s Representative Note: The remark “*” field are compulsory. Step 6 Agent Information Figure 2-2.20 Agent Information section 1 Enter Phone No. and Fax No. field. 2 Sample of Agent information as shown as below; Figure 2-2.21 Sample agent information Note: The remark “*” field are compulsory. IRON & STEEL User Guide for Trader 27 For SIRIM COA Step 7 Service Provider Information Figure 2-2.22 Service Provider information section 1 Click dropdown to select Testing Lab field. E.g: SIRIM Figure 2-2.23 Select testing lab Select Testing Lab 2 Click on hyperlink to know more information. 3 Terms & Condition pop up window alert appear as shown as below; Figure 2-2.24 Read all Terms & Condition 3 Click dropdown to select Cutting Samples field. Figure 2-2.25 Select cutting samples Select Date 4 If you are selecting Others then, you need to specify the things. Figure 2-2.25 Please specify others. IRON & STEEL User Guide for Trader 28 For SIRIM COA 5 Click dropdown list to select Machining / Samples Preparation. Figure 2-2.26 Select Machining / Samples Preparation Select Date 6 Sample of Service Provider Information as shown as below; Figure 2-2.27 Samples of Service Provider Information Note: The remark “*” field are compulsory. b) Method 1 (B) : Consigment with Special Condition Figure 2-2.28 Method 1(B) Consignment with special condition Select Method 1 Click dropdown button to select the Method 1 (B): Consignment with Special Condition. 2 New section will appear at below screen. IRON & STEEL User Guide for Trader 29 For SIRIM COA Figure 2-2.28 Method 1B new section appear at below screen Note: The remark “*” field are compulsory. IRON & STEEL User Guide for Trader 30 For SIRIM COA Step 1 Manufacturer’s Information Section Figure 2-2.29 Manufacturer’s Information section 1 Enter Manufacturer Name field. 2 Enter Address field. 3 Enter fields for Email Address, Contact Person, Phone No. and Fax No. Figure 2-2.30 Sample of Manufacturer’s information Note: The remark “*” field are compulsory. Step 2 Consignor Additional Information Figure 2-2.31 Consignor Additional Information section 1 Enter fields for Contact Person, Email Address, Phone No. and Fax No. field. 2 Sample of consignor’s additional information as shown as below; Figure 2-2.32 Sample of Consignor’s Additional Information IRON & STEEL User Guide for Trader 31 For SIRIM COA Step 3 Information of Consigment Figure 2-2.33 Information of Consigment section 1 Enter Name of Vessel / Flight / Conveyance field. 2 Enter Invoice No. field. 3 Enter Bill of Landing No. field. 4 Enter Packing List No. field. Figure 2-2.33 Select ETA date Select Date 5 Click dropdown button to select ETA date. Figure 2-2.34 Select Port Location Select Port Location 6 Click dropdown button to select Port Location. NOTE: Only user for Port Kelang need to select their port location. Figure 2-2.35 Sample of Information of consigment section Note: The remark “*” field are compulsory. IRON & STEEL User Guide for Trader 32 For SIRIM COA Step 4 Consignment Verification and Product Sampling Information Figure 2-2.36 Consignment verification and product sampling information section 1 Tick on the checkbox to Combine Permit. 2 New section of Consignment will appear as shown below; Figure 2-2.37 Tick the checkbox if you need to combine with previous permit application 1 Click hyperlink to select combination Permit No. 2 Permit No. screen will appear as shown as below; Click to Search 3 Permit No. will automatically loaded to combination Permit No. field. NOTE: Please take note, only Permit No. with status approved are acceptable. 3 Untick on the checkbox to uncombined permit. 4 Click dropdown IRON & STEEL User Guide for Trader to select Date of Verification & Sampling field. 33 For SIRIM COA Figure 2-2.38 Select date of verification & Sampling and time of verification & sampling Select Date 5 Enter Time of Verification & Sampling field. 6 Enter Location and Address for Verification field. 7 Sample of Consignment Verification and Product Sampling Information; Figure 2-2.39 Sample of Consignment Verification and Product Sampling Information Note: The remark “*” field are compulsory. Step 5 Special Condition Details Figure 2-2.40 Special Condition Details section 1 Once read all the special condition, please tick on the checkbox whichever applicable on your request. Tick if others request Figure 2-2.41 Tick Other’s checkbox if you request others special condition 2 Tick on Others checkbox if your need none of the above. 3 Untick on the checkbox if no need a special condition. IRON & STEEL User Guide for Trader 34 For SIRIM COA Step 6 Importer’s Representative Figure 2-2.42 Importer’s Representative section 1 Enter Phone No. field. 2 Enter HandPhone No. field. 3 Enter Fax No. field. 4 Enter Contact Person field. 5 Sample of Importer’s Representative as shown below; Figure 2-2. 43 Samples of Importer’s Representative Note: The remark “*” field are compulsory. Step 7 Agent Information Figure 2-2.44 Agent Information section 1 Enter Phone No. and Fax No. field. 2 Sample of Agent information as shown as below; Figure 2-2.45 Samples of Agent information Note: The remark “*” field are compulsory. IRON & STEEL User Guide for Trader 35 For SIRIM COA Step 8 Service Provider Information Figure 2-2.46 Service Provider Information section 1 Click dropdown to select Testing Lab field. E.g: SIRIM Figure 2-2.47 Select testing Lab Select Testing Lab 2 Click on hyperlink to know more information. 3 Terms & Condition pop up window alert appear as shown as below; Figure 2-2.48 Read all the Term and Condition 4 Click dropdown to select Cutting Samples field. Figure 2-2.25 Select cutting samples Select Date 1 If you are selecting Others then, you need to specify the things. Figure 2-2.25 Please specify others. IRON & STEEL User Guide for Trader 36 For SIRIM COA 5 Click dropdown list to select Machining / Samples Preparation. Figure 2-2.50 Select Machining / Samples Preparation Select Machining 6 Please tick on the checkbox if agree with term and conditions. Figure 2-2.51 Tick the checkbox once you read all term & condition. Tick the checkbox 7 Sample of Service Provider Information as shown as below; Figure 2-2.52 Samples of Service Provider Information Note: The remark “*” field are compulsory. c) Method 1 (C): Consignment by Road ( Cross Border Partial Shipment) Figure 2-2.53 Method 1 (c) type of Application selected Select Method 1 Click dropdown button to select the Method 1 (C): Consignment by Road (Cross Border Partial Shipment). 2 New section will appear at below screen. IRON & STEEL User Guide for Trader 37 For SIRIM COA Figure 2-2.54 Method 1C new section appear at below screen Note: The remark “*” field are compulsory. Step 1 Manufacturer’s Information Section Figure 2-2.55 Manufacturer’s Information section 1 Enter Manufacturer Name field. 2 Enter Address field. 3 Enter fields for Email Address, Contact Person, Phone No. and Fax No. IRON & STEEL User Guide for Trader 38 For SIRIM COA Figure 2-2.56 Sample of Manufacturer’s information Note: The remark “*” field are compulsory. Step 2 Consignor Additional Information Figure 2-2.57 Consignor Additional Information section 1 Enter fields for Contact Person, Email Address, Phone No. and Fax No. field. 2 Sample of consignor’s additional information as shown as below; Figure 2-2.58 Sample of Consignor’s Additional Information Step 3 Information of Consigment Figure 2-2.59 Information of Consigment section 1 Enter Name of Vessel / Flight / Conveyance field. 2 Enter Invoice No. field. 3 Enter Bill of Landing No. field. 4 Enter Packing List No. field. IRON & STEEL User Guide for Trader 39 
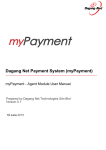
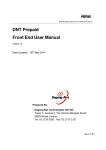
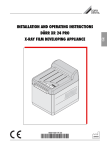
For SIRIM COA Figure 2-2.60 Select ETA date Select Date 5 Click dropdown button to select ETA date. Figure 2-2.61 Select Port Location Select Port Location 6 Click dropdown button to select Port Location. NOTE: Only user for Port Kelang need to select their port location. Figure 2-2.62 Sample of Information of consigment section Note: The remark “*” field are compulsory. Step 4 Importer’s Representative Figure 2-2.62 Importer’s Representative section 1 Enter Phone No. field. 2 Enter HandPhone No. field. 3 Enter Fax No. field. 4 Enter Contact Person field. 5 Sample of Importer’s Representative as shown below; IRON & STEEL User Guide for Trader 40 For SIRIM COA Figure 2-2.63 Sample of Importer’s Representative Note: The remark “*” field are compulsory. Step 5 Agent Information Figure 2-2.64 Agent Information section 1 Enter Phone No. and Fax No. field. 2 Sample of Agent information as shown as below; Figure 2-2.65 Samples of Agent Information Note: The remark “*” field are compulsory. Step 6 Service Provider Information Figure 2-2.46 Service Provider Information section 1 Click dropdown to select Testing Lab field. E.g: SIRIM Figure 2-2.47 Select testing Lab Select Testing Lab 2 Click on IRON & STEEL User Guide for Trader hyperlink to know 41 For SIRIM COA more information. 3 Terms & Condition pop up window alert appear as shown as below; Figure 2-2.48 Read all the Term and Condition 4 Click dropdown to select Cutting Samples field. Figure 2-2.25 Select cutting samples Select Date 5 If you are selecting Others then, you need to specify the things. Figure 2-2.25 Please specify others. 7 Click dropdown list to select Machining / Samples Preparation. Figure 2-2.26 Select Machining / Samples Preparation Select Date 8 Sample of Service Provider Information as shown as below; Figure 2-2.27 Samples of Service Provider Information Note: The remark “*” field are compulsory. IRON & STEEL User Guide for Trader 42 For SIRIM COA d) Method 2(A) : Consignment with Full Type Test Available Figure 2-2.65 Method 2 (A) type of Application selected Select Method 1 Click dropdown button to select the Method 2(A): Consignment with Full Type Test Available. 2 New section will appear at below screen. Figure 2-2.66 Method 2A new section appear at below screen Note: The remark “*” field are compulsory. IRON & STEEL User Guide for Trader 43 For SIRIM COA Step 1 Manufacturer’s Information Section Figure 2-2.67 Manufacturer’s Information section 1 Enter Manufacturer Name field. 2 Enter Address field. 3 Enter fields for Email Address, Contact Person, Phone No. and Fax No. Figure 2-2.68 Sample of Manufacturer’s information Note: The remark “*” field are compulsory. Step 2 Consignor Additional Information Figure 2-2.69 Consignor Additional Information section 1 Enter fields for Contact Person, Email Address, Phone No. and Fax No. field. 2 Sample of consignor’s additional information as shown as below; Figure 2-2.70 Sample of Consignor’s Additional Information IRON & STEEL User Guide for Trader 44 For SIRIM COA Step 3 Information of Consigment Figure 2-2.71 Information of Consigment section 1 Enter Name of Vessel / Flight / Conveyance field. 2 Enter Invoice No. field. 3 Enter Bill of Landing No. field. 4 Enter Packing List No. field. 5 Enter Full Type Test Report field. Figure 2-2.72 Select ETA date Select Date 6 Click dropdown button to select ETA date. Figure 2-2.73 Select Port Location Select Port Location 7 Click dropdown button to select Port Location. NOTE: Only user for Port Kelang need to select their port location. Figure 2-2.74 Sample of Information of consigment section Note: The remark “*” field are compulsory. IRON & STEEL User Guide for Trader 45 For SIRIM COA Step 4 Consignment Verification and Product Sampling Information Figure 2-2.75 Consignment Verification and Product Sampling Information 1 Tick on the checkbox to Combine Permit. 2 New section of Consignment will appear as shown below; 3 Click hyperlink to select combination Permit No. 4 Permit No. screen will appear as shown as below; Click to Search 5 Permit No. will automatically loaded to combination Permit No. field. NOTE: Please take note, only Permit No. with status approved are acceptable. 6 Untick on the checkbox to uncombined permit. 7 Click dropdown IRON & STEEL User Guide for Trader to select Date of Verification & Sampling field. 46 For SIRIM COA Figure 2-1.77 Select date of verification & sampling and time of verification & sampling Select Date 8 Enter Time of Verification & Sampling field. 9 Enter Location and Address for Verification field. 10 Sample of Consignment Verification and Product Sampling Information; Figure 2-2.78 Consignment Verification and Product sampling information section Note: The remark “*” field are compulsory. Step 5 Importer’s Representative Figure 2-2.79 Importer’s Representative section 1 Enter Phone No. field. 2 Enter HandPhone No. field. 3 Enter Fax No. field. 4 Enter Contact Person field. 5 Sample of Importer’s Representative as shown below; Figure 2-2.80 Sample of Importer’s Representative Note: The remark “*” field are compulsory. IRON & STEEL User Guide for Trader 47 For SIRIM COA Step 6 Agent Information Figure 2-2.81 Agent Information section 1 Enter Phone No. and Fax No. field. 2 Sample of Agent information as shown as below; Figure 2-2.83 Samples of Agent Information Note: The remark “*” field are compulsory. IRON & STEEL User Guide for Trader 48 For SIRIM COA e) Method 2(B) : Consignment with Full Type Report by Third Party Inspection Body. Figure 2-2.81 Method 2 (B) type of Application selected Select Method 1 Click dropdown button to select the Method 2(B): Consignment with Full Type Report by Third Party Inspection Body. 2 New section will appear at below screen. Figure 2-2.81 Method 2B new section appear at below screen Note: The remark “*” field are compulsory. Please refer step Method 2(A): Consignment with Full Type Test Available for more details. IRON & STEEL User Guide for Trader 49 For SIRIM COA f) Method 2(C) : Consignment with Patented Material. Figure 2-2.82 Method 2 (C) type of Application selected Select Method 1 Click dropdown button to select the Method 2(C): Consignment with Patented Material. 2 New section will appear at below screen. Figure 2-2.83 Method 2C new section appear at below screen Note: The remark “*” field are compulsory. Please refer step Method 2(A): Consignment with Full Type Test Available for more details. IRON & STEEL User Guide for Trader 50 For SIRIM COA g) Method 3(A) : Consignment with Product Certification License and Special Condition. Figure 2-2.84 Method 3 (A) type of Application Select Method 1 Click dropdown button to select the Method 3(A): Consignment with Product Certification License and Special Condition 2 New section will appear at below screen. Figure 2-2.85 Method 3A new section appear at below screen Note: The remark “*” field are compulsory. IRON & STEEL User Guide for Trader 51 For SIRIM COA Step 1 License’s Information 1 Enter License Name field. 2 Enter Address field. 3 Enter Email Address, Contact Person, Phone No. and Fax No. field. Note: The remark “*” field are compulsory. Step 2 Manufacturer’s Information Section Figure 2-2.86 Manufacturer’s Information section 1 Enter Manufacturer Name field. 2 Enter Address field. 3 Enter fields for Email Address, Contact Person, Phone No. and Fax No. 4 Enter Product Certification License No. field. Figure 2-2.87 Sample of Manufacturer’s information Note: The remark “*” field are compulsory. IRON & STEEL User Guide for Trader 52 For SIRIM COA Step 3 Consignor Additional Information Figure 2-2.88 Consignor Additional Information section 1 Enter fields for Contact Person, Email Address, Phone No. and Fax No. field. 2 Sample of consignor’s additional information as shown as below; Figure 2-2.89 Sample of Consignor’s Additional Information Step 3 Information of Consigment Figure 2-2.90 Information of Consigment section 1 Enter Name of Vessel / Flight / Conveyance field. 2 Enter Invoice No. field. 3 Enter Bill of Landing No. field. 4 Enter Packing List No. field. Figure 2-2.91 Select ETA date Select Date 5 Click dropdown IRON & STEEL User Guide for Trader button to select ETA date. 53 For SIRIM COA Figure 2-2.92 Select Port Location Select Port Location 6 Click dropdown button to select Port Location. NOTE: Only user for Port Kelang need to select their port location. 7 Enter Location of Storage field. Figure 2-2.93 Select proposed date of verification Select Date 8 Click dropdown button to select Proposed Date of Verification. 9 Sample of Information of consignment as shown below; Figure 2-2.94 Sample of Information of consigment section Note: The remark “*” field are compulsory. Step 4 Consignment Verification and Product Sampling Information Figure 2-2.95 Consignment verification and product sampling information 1 Click dropdown IRON & STEEL User Guide for Trader to select Date of Verification & Sampling field. 54 For SIRIM COA Figure 2-2.96 Select date of verification & sampling and time of verificaton & sampling Select Date 2 Enter Time of Verification & Sampling field. 3 Enter Location and Address for Verification field. 4 Sample of Consignment Verification and Product Sampling Information; Note: The remark “*” field are compulsory. Step 5 Special Condition Details 1 on the checkbox whichever applicable on your request. Select Date Step 6 Once read all the special condition, please tick 2 Tick on Others checkbox if your need none of the above. 3 Untick on the checkbox if no request a special condition. Importer’s Representative 1 Enter Phone No. field. IRON & STEEL User Guide for Trader 55 For SIRIM COA 2 Enter HandPhone No. field. 3 Enter Fax No. field. 4 Enter Contact Person field. 5 Sample of Importer’s Representative as shown below; Note: The remark “*” field are compulsory. Step 7 Agent Information 1 Enter Phone No. and Fax No. field. 2 Sample of Agent information as shown as below; Note: The remark “*” field are compulsory. h) Method 3(B) : Consignment with Product Certification License. Figure 2-2.16 Method 3 (B) type of Application Select Method 1 Click dropdown button to select the Method 3(B): Consignment with Product Certification License. 2 New section will appear at below screen. IRON & STEEL User Guide for Trader 56 For SIRIM COA Figure 2-2.17 Method 3B new section appear at below screen Note: The remark “*” field are compulsory. Step 1 License’s Information Figure 2-2.4 Manufacturer’s Information section 1 Enter License Name field. 2 Enter Address field. 3 Enter Email Address, Contact Person, Phone No. and Fax No. field. IRON & STEEL User Guide for Trader 57 For SIRIM COA Figure 2-2.4 Manufacturer’s Information section Note: The remark “*” field are compulsory. Step 2 Manufacturer’s Information Section Figure 2-2.4 Manufacturer’s Information section 1 Enter Manufacturer Name field. 2 Enter Address field. 3 Enter fields for Email Address, Contact Person, Phone No. and Fax No. Figure 2-2.5 Sample of Manufacturer’s information Note: The remark “*” field are compulsory. Step 3 Consignor Additional Information Figure 2-2.6 Consignor Additional Information section 1 Enter fields for Contact Person, Email Address, Phone No. and Fax No. field. IRON & STEEL User Guide for Trader 58 For SIRIM COA 2 Sample of consignor’s additional information as shown as below; Figure 2-2.7 Sample of Consignor’s Additional Information Step 4 Information of Consigment Figure 2-2.8 Information of Consigment section 1 Enter Name of Vessel / Flight / Conveyance field. 2 Enter Invoice No. field. 3 Enter Bill of Landing No. field. 4 Enter Packing List No. field. Figure 2-2.9 Select ETA date Select Date 5 Click dropdown button to select ETA date. Select Port Location 6 Click dropdown button to select Port Location. NOTE: Only user for Port Kelang need to select their port location. 7 Enter Location of Storage field. IRON & STEEL User Guide for Trader 59 For SIRIM COA Select Date 8 Click dropdown button to select Proposed Date of Verification. 9 Sample of Information of consignment as shown below; Figure 2-2.10 Sample of Information of consigment section Note: The remark “*” field are compulsory. Step 5 Importer’s Representative 1 Enter Phone No. field. 2 Enter HandPhone No. field. 3 Enter Fax No. field. 4 Enter Contact Person field. 5 Sample of Importer’s Representative as shown below; Note: The remark “*” field are compulsory. IRON & STEEL User Guide for Trader 60 For SIRIM COA Step 6 Agent Information 1 Enter Phone No. and Fax No. field. 2 Sample of Agent information as shown as below; Note: The remark “*” field are compulsory. i) Method 4 : Local Sales (from Bonded Warehouse / LMW /FCZ / FIZ) Figure 2-2.16 Method 4 type of Application Select Method 1 Click dropdown button to select the Method 4: Local Sales (from Bonded Warehouse / LMW / FCZ /FIZ) 2 New section will appear at below screen. Figure 2-2.17 Method 4 new section appear at below screen IRON & STEEL User Guide for Trader 61 For SIRIM COA Note: The remark “*” field are compulsory. Step 1 Manufacturer’s Information Section Figure 2-2.4 Manufacturer’s Information section Click Submit 1 Enter Master Permit No. and click button to load all data. Note: Please take note, only approved Permit No. that applies Method 1A will be successful selected. Note: The remark “*” field are compulsory. 7 Manufacturer’s Information, Consignor’s Additional Information and Information of Consignment’s data will be loaded based on Permit data previously. IRON & STEEL User Guide for Trader 62 For SIRIM COA Figure 2-2.5 Data loaded on a method 4 Note: The data can’t be edit or delete. Step 2 Local Sales information 1 Enter Company Name field. 2 Enter Contact Person field. 3 Enter Address field. 4 Enter Contact No. field. 5 Enter Contact Person No. field. 6 Enter Master Permit No. field. 7 Sample of Local Sales Information as shown as below; NOTE: The remark “*” field is compulsory. IRON & STEEL User Guide for Trader 63 For SIRIM COA j) Method 5 : Exemption (from Certificate of Approval) Figure 2-2.16 Method 4 type of Application Select Method 1 Click dropdown button to select the Method 5: Exemption (from Certificate of Approval). 2 New section will appear at below screen. Figure 2-2.17 Method 4 new section appear at below screen Note: The remark “*” field are compulsory. IRON & STEEL User Guide for Trader 64 For SIRIM COA Step 1 Information of Consigment Figure 2-2.8 Information of Consigment section 1 Enter Name of Vessel / Flight / Conveyance field. 2 Enter Invoice No. field. 3 Enter Bill of Landing No. field. 4 Enter Packing List No. field. Figure 2-2.9 Select ETA date Select Date 5 Click dropdown button to select ETA date. Select Port Location 6 Click dropdown button to select Port Location. NOTE: Only user for Port Kelang need to select their port location. 7 Sample of Information of consignment as shown below; Figure 2-2.10 Sample of Information of consigment section Note: The remark “*” field are compulsory. IRON & STEEL User Guide for Trader 65 For SIRIM COA Step 2 Reason for Exemption 1 If you are selecting , you need to enter BG / ATA Carmet No. field. 2 While if you selecting , you need to enter Spare Part Description field. 3 While if you are selecting , you need to select whichever Type of Sector option. IRON & STEEL User Guide for Trader 66 For SIRIM COA Step 3 Importer’s Representative 1 Enter Phone No. field. 2 Enter HandPhone No. field. 3 Enter Fax No. field. 4 Enter Contact Person field. 5 Sample of Importer’s Representative as shown below; Note: The remark “*” field are compulsory. Step 4 Agent Information 1 Enter Phone No. and Fax No. field. 2 Sample of Agent information as shown as below; Note: The remark “*” field are compulsory. IRON & STEEL User Guide for Trader 67 For SIRIM COA 2.3 Save Application and Proceed To save application, please follow the steps below: Step 1 Save Application And Proceed Figure 2-3.1 Save application and proceed Click to Next Click to Save IRON & STEEL User Guide for Trader Click to Cancel 68 For SIRIM COA 1 Click to proceed or click to save the aplication or click to abort. 2 Import Permit Saved message window appears. Figure 2-3.2 Import permit saved message screen 3 Click button to proceed to Import Item screen. NOTE: Please complete all fields marked with asterisk * before clicking the NEXT button. Figure 2-3.3 Import item screen appear See Section 2.4 See Section 2.5 IRON & STEEL User Guide for Trader 69 For SIRIM COA 2.4 Add Import Item Please take noted, Add Product screen will display differently based on “Method” that you are applied. To show the differently view on applying add product, please follow the steps below: a) Add Import Item ; a) Method 1(A): Normal Consignment b) Method 1 (B) : Consigment with Special Condition c) Method 1 (C) : Consignment by Road (Cross Border Partial Shipment) d) Method 2 (A) : Consignment with Full Type Test Available e) Method 2 (B) : Consignment with Full Type Report by Third Party Inspection Body f) Step 1 Method 4 : Local Sales (from Bonded Warehouse / LMW / FCZ / FIZ) Figure 2-4.1 Import Item product Click to Add 1 Click button to add Import Item. 2 Add Product pop-up window appears. NOTE: Items labeled with ‘*’ are compulsory. NOTE: Add Product screen will display differently based on “Method” that you are applied Figure 2-4.2 Add product screen display IRON & STEEL User Guide for Trader 70 For SIRIM COA Click to Search 3 Click hyperlink to search for Tariff Code. Figure 2-4.5 Tariff Code & Product Profile pop-up screen Click to Select 4 Click on Tariff Code hyperlink to select an item 5 Add Import Item automatically will be loaded as shown as below; Figure 2-4.6 Add Import Item automatically will be loaded IRON & STEEL User Guide for Trader 71 For SIRIM COA 6 Enter Quantity of Consignment field. 7 Enter Foreign Currency with Exchange Rate field. 8 Enter Unit Cost C.I.F (MYR) field. 9 Total (MYR) will automatically count the amount. Figure 2-4-6 Total (MYR) automatically count the amount 10 Enter Product Name field. 11 Enter Standard No. field. 12 Enter Type field. 13 Enter Grade field. 14 Enter Size (mm) field. IRON & STEEL User Guide for Trader 72 For SIRIM COA 15 Enter Mill Certificate Reference field. 16 Click 17 If you click to save or click to clear fields or click to exit. button, Import Item Added message window appears. Figure 2-4.7 Import Item Added message screen 18 Click button to proceed. Figure 2-4.8 Add import item for method 1( C ) & 2(A) NOTE: See Step (D) for Edit and Delete import product. IRON & STEEL User Guide for Trader 73 For SIRIM COA b) Add Import Item ; a) Step 1 Method 2(C): Consignment with Patented Material Figure 2-4.1 Import Item product Click to Add 1 Click 2 button to add Import Item. Add Product pop-up window appears. NOTE: Items labeled with ‘*’ are compulsory. NOTE: Add Product screen will display differently based on “Method” that you are applied. Figure 2-4.2 Add product screen display Click to Search 3 Click hyperlink to search for Tariff Code. Figure 2-4.5 Tariff Code & Product Profile pop-up screen IRON & STEEL User Guide for Trader 74 For SIRIM COA Click to Select 4 Click on Tariff Code hyperlink to select an item 5 Add Import Item automatically will be loaded as shown as below; Figure 2-4.6 Add Import Item automatically will be loaded 6 Enter Quantity of Consignment field. 7 Enter Foreign Currency with Exchange Rate field. 8 Enter Unit Cost C.I.F (MYR) field. 9 Total (MYR) will automatically count the amount. Figure 2-4-6 Total (MYR) automatically count the amount IRON & STEEL User Guide for Trader 75 For SIRIM COA 10 Enter Product Name field. 11 Enter Standard No. field. 12 Enter Type field. 13 Enter Grade field. 14 Enter Size (mm) field. 15 Enter Mill Certificate Reference field. 16 Click 17 If you click to save or click to clear fields or click to exit. button, Import Item Added message window appears. Figure 2-4.7 Import Item Added message screen 18 Click button to proceed. Figure 2-4.8 Add import item for method 1( C ) & 2(A) NOTE: See Step (D) for Edit and Delete import product IRON & STEEL User Guide for Trader 76 For SIRIM COA c) Add Import Item ; a) Method 3 (A): Consignment with Product Certification License and Special Condition b) Method 3 (B) : Consigment with Product Certification License Step 1 Figure 2-4.9 Import Item product Click To Add 19 Click button to add Import Item. 20 Add Product pop-up window appears. NOTE: Items labeled with ‘*’ are compulsory. NOTE: Add Product screen will display differently based on “Method” that you are applied. Figure 2-4.10 Add product screen display Click to Search Step 2 License Information IRON & STEEL User Guide for Trader 77 For SIRIM COA 1 Enter your License No. field. Figure 2-4.11 Select expiry date Select Date 2 Click button to select Expiry Date field. 3 Sample of License Information as shown as below; Figure 2-4.11 Samples of License Information NOTE: Items labeled with ‘*’ are compulsory. Step 3 Product Information Figure 2-4.11 Product information section Select Date 1 Click IRON & STEEL User Guide for Trader hyperlink to search for Tariff Code. 78 For SIRIM COA Figure 2-4.12 Tariff Code & Product Profile pop-up screen Click to Select 2 Click on Tariff Code hyperlink to select an item 3 Add Import Item automatically will be loaded as shown as below; Figure 2-4.13 Add Import Item automatically will be loaded 4 Enter Quantity of Consignment field. 5 Enter Foreign Currency with Exchange Rate field. 6 Enter Unit Cost C.I.F (MYR) field. 7 Total (MYR) will automatically count the amount. Figure 2-4.14 Total (MYR) automatically count the amount 8 Enter Product Name field. 9 Enter Standard No. field. IRON & STEEL User Guide for Trader 79 For SIRIM COA 10 Enter Type field. 11 Enter Grade field. 12 Enter Size (mm) field. 13 Enter Mill Certificate Reference field. 14 Click 15 If you click to save or click to clear fields or click to exit. button, Import Item Added message window appears. Figure 2-4.15 Import Item Added message screen 16 Click button to proceed. Figure 2-4.16 Add import item for method 3(A) & 3(B) NOTE: See Step (D) for Edit and Delete import product c) Add Import Item ; Method 5: Exemption (from Certificate of Approval) Step 1 Figure 2-4.17 Import Item product Apply Button 1 Click button to add Import Item. 2 Add Product pop-up window appears. NOTE: Items labeled with ‘*’ are compulsory. NOTE: Add Product screen will display differently based on “Method” that you are IRON & STEEL User Guide for Trader 80 For SIRIM COA applied. Figure 2-4.18 Add product screen display Click to Search 3 Click hyperlink to search for Tariff Code. Figure 2-4.19 Tariff Code & Product Profile pop-up screen Click to Search 4 Click on Tariff Code hyperlink to select an item 5 Add Import Item automatically will be loaded as shown as below; Figure 2-4.20 Add Import Item automatically will be loaded 6 Enter Quantity of Consignment field. 7 Enter Foreign Currency with Exchange Rate field. IRON & STEEL User Guide for Trader 81 For SIRIM COA 8 Enter Unit Cost C.I.F (MYR) field. 9 Total (MYR) will automatically count the amount. Figure 2-4.21 Total (MYR) automatically count the amount 10 Click 11 If you click to save or click to clear fields or click to exit. button, Import Item Added message window appears. Figure 2-4.22 Import Item Added message screen 12 Click button to proceed. Figure 2-4.23 Add import item for Method 5 NOTE: See Step (D) for Edit and Delete import product IRON & STEEL User Guide for Trader 82 For SIRIM COA d) Edit or Delete Import Item Figure 2-4.24 Edit or Delete Import Item Click to Delete Click Hyperlink To Edit Tick Checkbox to Delete 1 Click Item hyperlink to edit Import Items or tick checkbox and click button to remove Import Items. IRON & STEEL User Guide for Trader 83 For SIRIM COA 2.5 Supporting Document Please take noted, Attachment of Supporting Document screen will display differently based on “Method” that you are applied. To show the differently view attach supporting, please follow the steps below: a) Attachment of Supporting Document for; 1 Method 1 (A) : Normal Consignment 2 Method 1 (B): Consignment with Special Condition 3 Method 4: Local Sales (from Bonded Warehouse / LMW / FCZ / FIZ) Step 1 Figure 2-5.8 Supporting Document section for 1A & 1B Click to Attach 4 Click button to attach supporting document. 5 Attachments screen appears as shown. Figure 2-5.9 Attach the supporting document Click to Browse 6 Click button to select the suppporting documents file from your PC for attachment. 7 There is 3 compulsary document that need you attach together: • Packing List Document • Bill of Lading Document • Invoice Document Figure 2-5.10 Choose file to upload IRON & STEEL User Guide for Trader 84 For SIRIM COA Click to Select Click to Upload 8 Select the file to be attached. Figure 2-5.11 Attach the supporting document Click to Attach NOTE: Items labeled with ‘*’ are compulsory. 9 Click button to attach the supporting document. 10 Attachment screen to attach file(s) appears as shown. Figure 2-5.12 Wait the attachment being attach 11 If a message screen appears as below, the file you have attached is not in the listed format. Figure 2-5.13 Message alert show to attach the file format 12 Your file(s) must be in the listed format before you can proceed any further. IRON & STEEL User Guide for Trader 85 For SIRIM COA 13 Attach the correct format file to proceed. E.g : .PDF 14 Import Item screen automatically field with the supporting document. Figure 2-5.14 Only 4 document can be attach NOTE: Only 3 document (Bill Of Lading, Invoice and Packing List) is compulsary to attach. IRON & STEEL User Guide for Trader 86 For SIRIM COA b) Attachment of Supporting Document for; a) Method 1 (C) : Consignment by Road (Cross Border Partial Shipment) b) Method 2 (C) : Consignment with Patented Material Figure 2-5.1 Supporting Document section Click to Attach 1 Click Step 1 button to attach supporting document. 2 Attachments screen appears as shown. Figure 2-5.2Attachment screen appear Click to Browse 3 Click button to select the suppporting documents file from your PC for attachment. 4 There is 3 compulsary document that need you attach together: • Packing List Document • Bill of Lading Document • Invoice Document 5 Choose file to upload screen appear. Figure 2-5.3 Choose file to upload IRON & STEEL User Guide for Trader 87 For SIRIM COA Click to Select Click to Upload 6 Select the file to be attached. Figure 2-5.4 Attach the supporting document Click to Attach 7 Click 8 Attachment screen to attach file(s) appears as shown. button to attach the supporting document. Figure 2-5.5 Wait the attachment being attach 9 If a message screen appears as below, the file you have attached is not in the listed format. Figure 2-5.6 Message alert pop up . 10 Your file(s) must be in the listed format before you can proceed any further. IRON & STEEL User Guide for Trader 88 For SIRIM COA 11 Attach the correct format file to proceed e.g: .PDF 12 Import Item screen automatically loaded with the supporting document. Figure 2-5.7 4 type document being attach NOTE: Only 3 document (Bill Of Lading, Invoice and Packing List) is compulsary to attach. IRON & STEEL User Guide for Trader 89 For SIRIM COA c) Attachment of Supporting Document for; a) Method 3(A): Consignment with Product Certification License and Special Condition Step 1 b) Method 3 (B) : Consignment with Product Certification License Figure 2-5.15 Supporting Document section for 3A & 3B Click to Attach 1 Click button to attach supporting document. 2 Attachments screen appears as shown. Figure 2-5.16 Attach the supporting document Click to Browse 3 Click button to select the suppporting documents file from your PC for attachment. 4 There is 4 compulsary document that need you attach together: • Packing List Document • Bill of Lading Document • Invoice Document • Product Cert. License Document 5 Choose file to upload screen appear as shown as below; Figure 2-5.17 Choose file to upload IRON & STEEL User Guide for Trader 90 For SIRIM COA Click to Select Click to Upload 4 Select the file to be attached. Figure 2-5.18 Attach the supporting document Click to Attach NOTE: Items labeled with ‘*’ are compulsory. 5 Click button to attach the supporting document. 6 Attachment screen to attach file(s) appears as shown. Figure 2-5.19 Wait the attachment being attach 7 If a message screen appears as below, the file you have attached is not in the listed format. Figure 2-5.20 Message alert show to attach the file format 8 Your file(s) must be in the listed format before you can proceed any further. IRON & STEEL User Guide for Trader 91 For SIRIM COA 9 Attach the correct format file to proceed. E.g : .PDF 10 Import Item screen automatically field with the supporting document. Figure 2-5.21 Only 1 document can be attach NOTE: Only 4 document (Bill of Lading, Invoice, Packing List and Product Cert license) is compulsary to attach. IRON & STEEL User Guide for Trader 92 For SIRIM COA d) Attachment of Supporting Document for; Method 5 : Exemption (from Certificate of Approval Figure 2-5.15 Supporting Document section for 3A & 3B Click to Attach Step 1 1 Click button to attach supporting document. 2 Attachments screen appears as shown. Figure 2-5.16 Attach the supporting document Click to Browse 3 Click button to select the suppporting documents file from your PC for attachment. 4 There is only 1 compulsary document that need you attach together: • Bank Guarantee / ATA Carnet 5 Choose file to upload screen appear as shown as below; Figure 2-5.17 Choose file to upload Click to Select Click to Upload 5 Select the file to be attached. Figure 2-5.18 Attach the supporting document IRON & STEEL User Guide for Trader 93 For SIRIM COA Click to Attach NOTE: Items labeled with ‘*’ are compulsory. 6 Click button to attach the supporting document. 8 Attachment screen to attach file(s) appears as shown. Figure 2-5.19 Wait the attachment being attach 9 If a message screen appears as below, the file you have attached is not in the listed format. Figure 2-5.20 Message alert show to attach the file format 11 Your file(s) must be in the listed format before you can proceed any further. 12 Attach the correct format file to proceed. E.g : .PDF 13 Import Item screen automatically field with the supporting document. Figure 2-5.21 Only 1 document can be attach IRON & STEEL User Guide for Trader 94 For SIRIM COA NOTE: Only 1 document (Bank Gurantee / ATA Carnet) is compulsary to attach. IRON & STEEL User Guide for Trader 95 For SIRIM COA Step 2 Covenant of Consignee Figure 2-2.64 Covenant of consignee section 1 Enter Name field. 2 Enter Designation field. 3 Enter IC No. field. NOTE: The remark “*” field are compulsary. Step 3 Submission To SIRIM eCOA Figure 2-2.65 Submission to SIRIM eCOA Click to Submit 1 Click 2 Permit Submitted message window appears. IRON & STEEL User Guide for Trader button to submit. 96 For SIRIM COA Figure 2-5.66 Permit Submitted message alert 3 Step 4 Click button to proceed. Check Permit Application Status After Submission Figure 2-5.67 Check Permit Appplication status after submisssion Check Status 1 You can check Permit Application Status at View Permits screen in the status column. IRON & STEEL User Guide for Trader 97 For SIRIM COA 2.6 Edit Permit Application You can edit import permit application if changes are required. You can only edit permit application with “Draft” status. To edit an import permit application, please follow the steps below: Step 1 Select Permit Application Figure 2-6.1 Main screen of Ecoa Iron & Steel Select Application 1 Select an application and click Application ID hyperlink. 2 Edit Import Permit screen appears. IRON & STEEL User Guide for Trader 98 For SIRIM COA Step 2 Edit Import Permit Screen Figure 2-6.2 Edit Import Permit screen 1 Please refer to Applying Import Permit Application for details. IRON & STEEL User Guide for Trader 99 For SIRIM COA 2.7 Copy Permit Application For your convenience, you can copy information from previous permit application to apply for a new permit application. To copy a permit application, please follow the steps below: Step 1 Select Permit Application Figure 2-7.1 Select Permit Application Click to Copy Tick Checkbox 1 Select a permit application and tick the checkbox. Click button to proceed. 2 Copy Import Permit screen appears. Step 2 IRON & STEEL User Guide for Trader 100 For SIRIM COA Copy Import Permit Screen Figure 2-7.1 Copy Import permit screen 1 Repeat steps in Import Permit Application. 2 Please refer to Import Permit Application for details. IRON & STEEL User Guide for Trader 101 For SIRIM COA 2.8 Delete Permit Application You can only delete permit applications with ‘Draft’ status. To delete a permit application, please follow the steps below: Step 1 Select Permit Application Figure 2-8.1 Select Permit Application Click to Delete Tick Checkbox 1 Select a permit application and tick 2 Click the checkbox. button to proceed. 3 Delete confirmation window appears to confirm deletion of the application. Figure 2-8.2 Confirm delete message alert 4 Click IRON & STEEL User Guide for Trader to proceed or to abort. 102 For SIRIM COA 2.9 Submit Permit Application Please refer to section 2.1 on apply import application. Follow the steps provided in the sections before submitting the permit application. Step 1 Submission To SIRIM eCOA Figure 2-9.1 Submission to SIRIM eCOA Click to Submit 4 Click 5 Permit Submitted message window appears. button to submit. Figure 2-9.2 Permit Submitted message alert 1 Click IRON & STEEL User Guide for Trader button to proceed. 103 For SIRIM COA 2.10 View Permit Application You may view submitted permit applications. To view permits, please follow the steps below: Step 1 View Permit Application Figure 2-10.1 View Permit Application Select Application 1 Select an application and click Application ID hyperlink. 2 View Import Permit screen appears. NOTE: You can only view Import Permit details. Figure 2-10.2 View Import permit details IRON & STEEL User Guide for Trader 104 For SIRIM COA 3 Click IRON & STEEL User Guide for Trader to return to View Permits screen . 105 For SIRIM COA 3 Advance Search and Navigation Figure 3-1 Advance Search And Navigation No.of Search TextBox Filter Status Filter By Application Date Filter By Permit Show Button Filter by OGA Apply Copy Button Delete Button Next Page No. Of Transaction Page Selection You may search for a permit application by one of the following methods; a) Filter Status e) Search Item b) By Application Date f) Page Selection c) By Permit Type g) Column Header d) By OGA a) Filter Status Figure 3-1.1 Filter Status Select Status 1 Click on Filter Status to view status. 2 Select a status; e.g: Awaiting OGA Approval. IRON & STEEL User Guide for Trader 106 For SIRIM COA 3 Click button to view search result. Figure 3-1.2 View search result Application ID b) Status By Application Date Figure 3-1.3 By Application Date Select Date 1 Click to select “From” date; e.g: 02/02/2011 Figure 3-1.4 Select date Select Date 2 Click to select “To” date; e.g: 02/08/2011 3 Click button to view search result. IRON & STEEL User Guide for Trader 107 For SIRIM COA Figure 3-1.5 View Search result Application ID c) Application Date By Permit Type Figure 3-1.6 By Permit Type Select Permit Type 1 Click 2 Click to select Permit Type; e.g: Import. button to view search result. Figure 3-1.7 View Search Result Application ID Permit Type IRON & STEEL User Guide for Trader 108 For SIRIM COA d) By OGA Figure 3-1.7 By OGA Select OGA 1 Click to select OGA; e.g: SIRIM CERTIFICATEOF APPROVAL 2 Click 3 OGA Code for SIRIM COA Iron & Steel ; SRC1012011000154 button to view search result. Figure 3-1.8 View search result Application ID e) OGA Code Search Item Figure 3-1.9 Search Item 1 Enter search item into the Search text box; e.g. SRC1012011000154 IRON & STEEL User Guide for Trader 109 For SIRIM COA NOTE: Allows to search by way of an Application ID, a Permit No. or an OGA Reference No. 2 Click button to view search result. Figure 3-1.10 View Search result Application ID f) Page Selection Figure 3-1.11 Page Selection Select Number of Result Click to Show Page Selection 1 Select a number from the drop down list box. You may choose the number of result to be shown; e.g: 10. 2 Click on button to display search result as follows: Figure 3-1.12 Display search result No. Of Transaction IRON & STEEL User Guide for Trader 110 For SIRIM COA g) Column Header Figure 3-1.13 Column Header Ascending Order 1. Click once at the header of Application Date column, the transactions will be displayed in ascending Descending order; click TWICE and it will be displayed in order as follows; the other columns work in the same manner. IRON & STEEL User Guide for Trader 111