1
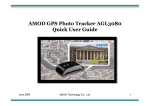
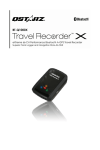
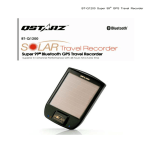
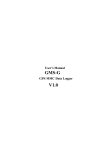
AMOD GPS Photo Tracker AGL3080
Quick User Guide
March, 2008
AMOD Technology Co., Ltd.
1
Turn the AGL3080 ON by pressing the
Power ON/OFF button until all three LED’s
blink simultaneously once
When the Green LED is blinking, indicating it
has started tracking the GPS satellites and
logging the GPS data
LOG GPS DATA Take AGL3080
along on your photo
taking trip
A hanging strip is provided to make carrying
the AGL3080 more convenient and
comfortable
During normal operation, if you see the
Green LED not blinking (i.e., constant ON),
adjust the orientation and position of
AGL3080 until the Green LED is blinking
again – to ensure good reception of GPS
signals
When you are in-doors or inside a tunnel, the
Green LED will be constantly on when the
GPS signal strength is too low or there is no
GPS signal to track – this is normal and you
do not need to do anything
March, 2008
AMOD Technology Co., Ltd.
2
Download picture photos to your PC
[Please follow instructions from your
DSC regarding picture download]
Plug AGL3080 to your PC’s USB port
DOWNLOAD –
Download both the
GPS log (from
AGL3080) and photo
images (follow DSC
instructions)
Run the accompanying GPS Photo
Tracker software to import the GPS
log from AGL3080
[The GPS Photo Tracker Software
must be installed in your PC first. It is
very easy to use. For installation and
usage, please refer to the AGL3080
GPS Photo Tracker User Manual.]
March, 2008
AMOD Technology Co., Ltd.
3
Preview the picture photos
Locate where the picture was
taken by displaying it on Google
Map
HAVE FUN –
Run the Photo Tracker
software to tag the
photos and display
them on internet map
(such as Google Map)
Save the GPS tag of your picture
photos for future use or do nothing
GPS logs from AGL3080 also
works with many other photo
organizing software
AGL3080 also works with those
photo organizing software such as
JetPhoto Studio on Apple’s MAC
operating system
March, 2008
AMOD Technology Co., Ltd.
4
MARK/TAG – Depress the Mark / Tag
button after taking the picture can create a
tag for the picture in the GPS log.
Many extremely
useful functions
GPS RESET – When the stored GPS
satellite information is out of date or out of
view, the AGL3080 may take longer time
to obtain position fix. When this happens,
depress the MARK/TAG button for about 5
sec. to perform the GPS Reset function.
This can help the GPS position fix and is
very helpful when travel from places to
places
Use it as a USB flash storage device
when needed
March, 2008
AMOD Technology Co., Ltd.
5
Enter Set Up Mode by holding POWER
and MARK key simultaneously for 5
seconds until three LEDs are lit constantly
Press mark key to set logging mode
To clear storage area, press the POWER
and MARK keys simultaneously for about
10 sec
Various logging
mode at your finger
tip
Different setting mode as below
March, 2008
LED Status
Output Format
Mode 1
Memory Full Led
ON
Mode 2
Mode 3
Memory Full Led
Flash
GPS Led ON
GGA/GSA/RMC/VTG->1
sec
GSV -> 5 sec
Only RMC->1 sec
Mode 4
Mode 5
GPS Led Flash
Battery Low Led ON
Mode 6
Battery Low Led
Flash
GGA/GSA/RMC/VTG->5
sec
Only RMC->5 sec
GGA/GSA/RMC/VTG->10
sec
Only RMC->10 sec
AMOD Technology Co., Ltd.
Minimum
Records
260,000
Minimum
Operation Hours
72 hours
1,040,000
288 hours
260,000
360 hours
1,040,000
260,000
1440 hours
720 hours
1,040,000
2880 hours
6
AGL3080 GPS Photo Tracker Summary of Operations and Functions
Turn ON
Func
Depress the ON/OFF button until all three LED’s simultaneously blink
once, then the Green (GPS Status) LED will be on, indicating the
device starts to search for GPS satellite signal
Stat
When the device obtains a position fix, the Green (GPS Status) LED
begins to blink
Stat
The Green (GPS Status) LED has two states – position fix (blinking)
and no position fix (constant on)
Turn OFF
Func
Depress the ON/OFF button until all three LEDs simultaneously goes
on and then off, indicating the device is turned off
Mark / Tag
Func
Depress the Mark (icon) button briefly – the RED (Storage Status)
LED will blink once, indicating the last position fix has been tagged
GPS Reset
Func
Depress the Mark (icon) button for about (3 ~ 5 seconds) and release
– the GPS will do the position fix by researching GPS satellite [so
that the satellite Ephemeris will be updated]
Clean Up Storage
Func
To turn on the device, depress ON/OFF (amber) and MARK (red)
buttons simultaneously – the three LED’s will blink once and then
start to – indicating the disc clean up is underway – the LED’s will
stop blinking and then only the GPS status LED (green) will be on,
indicating the device has been turn ON with storage being cleaned
up
March, 2008
AMOD Technology Co., Ltd.
7