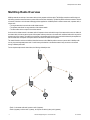
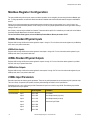
1
MultiHop Radio Product Manual
151317 Rev 0 8/29/2011
Contents
Contents
MultiHop Radio Overview
.........................................................................................................................4
MultiHop Application Modes ................................................................................................................................................5
Transparent Mode .......................................................................................................................................................5
Modbus Mode .............................................................................................................................................................5
Setting up the Network
.............................................................................................................................8
Configure the Devices .........................................................................................................................................................8
Wiring for MultiHop Radios .........................................................................................................................................8
Setting the MultiHop Radio (Slave) ID
................................................................................................................................9
Binding MultiHop Radios to Form Networks ........................................................................................................................9
Slave and Repeater LED Behavior
..........................................................................................................................10
Master LED Behavior
...............................................................................................................................................10
Conduct a Site Survey .......................................................................................................................................................11
Conducting a MultiHop Site Survey from the LCD Menu ..........................................................................................11
Installing Your SureCross™ Radios
................................................................................................................................12
Mounting SureCross Devices Outdoors ....................................................................................................................13
Other Installation Requirements
..............................................................................................................................15
Installation Quick Tips
..............................................................................................................................................15
Basic Remote Antenna Installation ...........................................................................................................................16
Modbus Register Configuration
............................................................................................................22
40000s Standard Physical Inputs ......................................................................................................................................22
40400s Extra Inputs ..................................................................................................................................................22
40500s Standard Physical Outputs ...................................................................................................................................22
40900s Extra Outputs ...............................................................................................................................................22
41000s Input Parameters ..................................................................................................................................................22
Switch Power Input Parameters ................................................................................................................................23
42000s Output Parameters ................................................................................................................................................24
42950s Default Output Parameters ...................................................................................................................................25
43000s Discrete Input Parameters ....................................................................................................................................25
43300s Analog Input Parameters ......................................................................................................................................25
43500s Counter Input Parameters .....................................................................................................................................27
43600s H-Bridge Output Parameters ................................................................................................................................28
43600s Switch Power Output Parameters ................................................................................................................28
43700s Discrete Output Parameters .................................................................................................................................29
44000s Analog Output Parameters ...................................................................................................................................29
44150s Initialization Controls .............................................................................................................................................30
44400s Output Flash Pattern Parameters .........................................................................................................................30
44500s M-GAGE Parameters ............................................................................................................................................30
44800s Ultrasonic Input Parameters .................................................................................................................................32
46050s Battery Monitoring Parameters
............................................................................................................................33
51000s SDI-12 Parameter Descriptions ............................................................................................................................33
Configuration Examples .....................................................................................................................................................34
Configuring an Analog IN to use SP3 .......................................................................................................................34
Configuring for Acclima SDI-12 Sensors ..................................................................................................................35
Configuring for Decagon 5T3 SDI-12 Sensors .........................................................................................................35
Manufacturer Parameter Registers ....................................................................................................................................36
Device and System Parameters ........................................................................................................................................37
48200s Sample On Demand .....................................................................................................................................37
Agency Certifications
.............................................................................................................................38
FCC Certification, 900 MHz, 1 Watt Radios ......................................................................................................................38
FCC Certification, 2.4GHz .................................................................................................................................................39
2
151317 Rev 0
Contents
Certified For Use in the Following Countries
.....................................................................................................................40
Dimensions ..............................................................................................................................................43
Advanced Setup ......................................................................................................................................45
MultiHop Radio Menu System ...........................................................................................................................................45
Create the MultiHop Network by Manually Binding the Radios (using Menu Navigation) .................................................46
Conducting a Site Survey using Modbus Commands .......................................................................................................47
Using 10 to 30V dc to Power the MultiHop Radio and a Gateway ....................................................................................47
Using the Solar Supply to Power the MultiHop Radio and a FlexPower Gateway ............................................................48
3
MultiHop Radio Product Manual
MultiHop Radio Overview
MultiHop networks are made up of one master radio and many repeater and slave radios. The MultiHop networks are self-forming and
self-healing networks constructed around a parent-child communication relationship. The MultiHop Radio architecture creates a hierarchical network of devices to solve the most challenging wireless applications. A MultiHop Radio is either a master radio, a repeater radio, or
a slave radio.
• The single master device controls the overall wireless network.
• The repeater mode allows for range extension of the wireless network.
• The slave radios are the end point of the wireless network.
At the root of the wireless network is the master radio. All repeater or slave radios within range of the master radio connect as children of
the master radio, which serves as their parent. After repeater radios synchronize to the master radio, additional radios within range of the
repeater can join the network. The radios that synchronize to the repeater radio form the same parent/child relationship the repeater has
with the master radio: the repeater is the parent and the new radios are children of the repeater.
The network formation continues to build the hierarchical structure until all MultiHop radios connect to a parent radio. A MultiHop radio
can only have one designated parent radio. If a radio loses synchronization to the wireless network it may reconnect to the network
through a different parent radio.
For the simple example network shown below, the following relationships exist:
1
2
3
4
5
6
• Radio 1 is the master radio and is parent to radio 2 (repeater).
• Radio 2 (repeater) is child to radio 1 (master), but is parent to radios 3 (slave) and 4 (repeater).
4
www.bannerengineering.com - tel: 763-544-3164
151317 Rev 0
MultiHop Radio Product Manual
• Radio 4 (repeater) is child to radio 2 (repeater), but is parent to radios 5 and 6 (both slaves).
On the LCD of each device, the parent device address (PADR) and local device address (DADR) are shown.
MultiHop Master Radio. Within a network of MultiHop data radios, there is only one master radio. The master radio controls the overall
timing of the network and is always the parent device for other MultiHop radios. The host system connects to this master radio.
MultiHop Repeater Radio. When a MultiHop radio is set to repeater mode, it acts as both a parent and a child. The repeater receives
data packets from its parent, then re-transmits the data packet to the children within the repeater’s network. The incoming packet of
information is re-transmitted on both the radio link and the local serial link.
MultiHop Slave Radio. The slave radio is the end device of the MultiHop radio network. A radio in slave mode does not re-transmit the
data packet on the radio link, only on the local serial (wired) bus.
MultiHop Application Modes
The MultiHop radios operate in Modbus mode or transparent mode. Use the internal DIP switches to select the mode of operation. All
MultiHop radios within a wireless network must be in the same mode.
Transparent Mode
Use transparent mode for communication protocols other than Modbus. In transparent mode, the MultiHop radio packetizes data received
from the hardwired serial connection and transmits the packet to all radios within range. A wireless system by definition is a lossy link. It
is up to the host system protocol to guarantee the data integrity.
For reliable packet transmission, follow all rules for packet size and inter-character timing listed in the specifications and allow sufficient
time between packets to avoid overloading the MultiHop radio network. The time between packets varies based on the size of the network.
Modbus Mode
Modbus application mode provides additional functionality to optimize RF packet routing performance and allows register-based access
and configuration of various parameters on the MultiHop radio. Modbus application mode requires that the system host device be running
a Modbus master program and that the master radio is connected directly to the host.
Packet Routing
In Modbus application mode, the master radio first discovers all connected Modbus slaves in the network, then uses the Modbus slave ID
contained in the incoming Modbus message to wirelessly route the packet only to the radio attached to the target Modbus slave. The
packet is then passed via the radio’s serial interface to the Modbus device where it is processed. This is entirely transparent to the user.
Direct packet by packet routing offers an advantage over broadcast addressing with MultiHop paths because each hop in the path can be
retried independently in the event of a packet error. This results in significantly more reliable packet delivery over MultiHop paths.
Modbus Slave IDs 01 through 10 are reserved for slaves directly connected to the host (local I/O). As such, polling messages addressed
to these devices are not relayed over the wireless link. Use Modbus Slaves IDs 11 through 61 for remote Modbus slaves — devices
serially connected to a data radio — allowing a maximum of 50 attached devices.
The figure below illustrates a basic wireless network operating in Modbus application mode. Slave devices may be any Modbus slaves,
including Banner's DX85 Modbus RTU Remote I/O devices or DX80 Gateways.
151317 Rev 0
www.bannerengineering.com - tel: 763-544-3164
5
MultiHop Radio Product Manual
Slave ID
05
Master radio
Host System
Slave ID
01
S2
Slave ID
14
S1
Slave ID
12
Slave ID
13
MultiHop Radio Registers and Radio IDs
The Modbus application mode also enables the host to access a radio’s internal Modbus registers to access radio configuration and
status information.
To enable access of a radio’s internal Modbus registers, the radio itself must be assigned a Modbus Slave ID, or MultiHop Radio ID,
using the rotary dials on the front of the device. The left rotary dial acts as the tens unit while the right rotary dial acts as the ones unit. To
set the slave ID to 12, set the left dial to 1 and the right dial to 2.
SureCross Radio Rotary Dials
1. Left dial - Represents the tens unit of the slave or device ID.
2. Right dial - Represents the ones unit of the slave or device ID.
When a Modbus message is received by the radio, the packet’s slave ID is compared to its own rotary dial address. If it matches, the
radio accesses its internal Modbus registers. If it does not match, the radio delivers the packet to the serial interface thereby interrogating
a connected Modbus slave. The range of acceptable Modbus Slave/MultiHop Radio IDs is from 11 to 61; a Slave ID setting of 0xFF
disables access to the MultiHop radio’s internal registers but still delivers addressed messages to Modbus slaves that are serially connected to the radio. Detailed information about the contents and functions of the radio’s Modbus registers is provided in table 2.
All MultiHop Radio internal registers are defined as 16-bit holding registers (4xxxx). To access the internal registers, set the radio to
operate in Modbus mode (using the DIP switches) and set a valid MultiHop Radio ID (11 through 61).
*Note: The radio’s rotary dial address must not be a duplicate of an attached Modbus slave ID.
• Rotary dial positions 11 through 61. Valid wireless Modbus Slave IDs or MultiHop Radio IDs
• Rotary dial position FF. Devices set to FF are not directly addressed by the Modbus host system but can deliver the message to the
serially connected Modbus slaves
This example host system is connected to three hardwired devices: DX85 Remote I/O Modbus slave 01, DX85 Remote I/O Modbus slave
05, and the master MultiHop Radio.
Host messages for Modbus slaves 01 through 10 are ignored by the master radio. Messages for Modbus Slaves or MultiHop Radios 11
through 61 are sent out the wireless network.
6
www.bannerengineering.com - tel: 763-544-3164
151317 Rev 0
MultiHop Radio Product Manual
Slave ID
05
DX85 Remote
I/O
MultiHop Radio Master
(Radio ID 11)
Host System
Slave ID
01
DX85
MultiHop Radio Slave
(Radio ID 16)
MultiHop Radio Slave
(Radio ID 14)
Slave ID
15
DX85 Remote I/O
Slave ID
13
Slave ID
12
DX85
DX80 Gateway
DX80 Node
DX80 Node
151317 Rev 0
www.bannerengineering.com - tel: 763-544-3164
7
MultiHop Radio Product Manual
Setting up the Network
1
2
3
4
5
1
Rotary dials
Sets the Modbus Slave ID when operating in Modbus
mode. (Not used on the Ethernet Data Radio.)
2
Push button 1
Single-click to advance across all top-level data radio
menus. Single-click to move down interactive menus,
once a top-level menu is chosen. (See MultiHop Radio Menu System.)
3
Push button 2
Double-click to select a menu and to enter manual
scrolling mode. Double-click to move up one level at
a time. Triple click to enter binding mode.
4
LED 1 and 2
Provide real-time feedback to the user regarding RF
link status, serial communications activity, and the error state.
5
LCD display
Six-character display provides run mode user information such as the number of packets sent and received. This display allows the user to conduct a site
survey.
6
5-Pin M12 Euro-style The Euro-style power is used for serial connections
quick-disconnect port and power. (Not available on the Ethernet Data Radio.)
6
Configure the Devices
MultiHop Radios use the master device identification number to form groups of radios that communicate with each other. Follow the
procedure outlined below for binding radios to a particular master radio.
Accessing the DIP Switches
1. Disconnect the power to all MultiHop radios.
2. Unscrew the four screws that mount the cover to the bottom housing.
3. Remove the cover from the housing without damaging the ribbon cable or the pins the cable plugs into.
Setting the DIP Switches
1. Using DIP switches 7 and 8, set one unit to be the master radio (Sw 7 = OFF, Sw 8 = ON). By default, the MultiHop radios ship
from the factory configured to be repeater radios.
2. Using DIP switches 7 and 8, set the other data radios to be repeaters or slaves.
3. Set any additional DIP switches now. (See the DIP Switches section in the data sheet for the positions and descriptions.) By default, the MultiHop radios ship from the factory in Modbus mode. If you need the radio to be in Transparent mode, configure that
DIP switch now.
4. Power the devices to activate the DIP switch changes.
Wiring for MultiHop Radios
Connecting dc power to the communication pins will cause permanent damage. For FlexPower devices, do not apply more than 5.5V to
the gray wire.
The FlexPower Multihop radios will operate equally well when powered from the brown or gray wire. It is not necessary to supply both.
The power for the sensors can be supplied by the radio's SPx terminals or from the 10 to 30V dc used to power the radio.
8
www.bannerengineering.com - tel: 763-544-3164
151317 Rev 0
MultiHop Radio Product Manual
Wire No. Wire Color
10 to 30V dc (RS-485)
FlexPower (RS-485)
FlexPower (RS-232)
1
Brown
10 to 30V dc
10 to 30V dc
10 to 30V dc
2
White
RS-485 / D1 / B / +
RS-485 / D1 / B / +
RS-232 Tx
3
Blue
dc common (GND)
dc common (GND)
dc common (GND)
4
Black
RS-485 / D0 / A / -
RS-485 / D0 / A / -
RS-232 Rx
5
Gray
-
3.6 to 5.5V dc
3.6 to 5.5V dc
Setting the MultiHop Radio (Slave) ID
On a MultiHop radio, use the rotary dials to set the device’s MultiHop Radio ID. By factory default, Modbus Slave IDs 01 through 10 are
reserved for slaves directly connected to the host (local I/O). Polling messages addressed to these devices are not relayed over the
wireless link.
Use Modbus Slave IDs 11 through 61 for MultiHop master, repeater, and slave radios. Up to 50 devices (local slaves and remote slaves)
may be used in this system.
With the left dial acting as the left digit and the right dial acting as the right digit, the MultiHop
Radio ID can be set from 01 through 61.
Binding MultiHop Radios to Form Networks
To create your MultiHop network, bind the repeater and slave radios to the designated master radio.
Binding MultiHop radios ensures all MultiHop radios within a network communicate only with other radios within the same network. The
MultiHop radio master automatically generates a unique binding code when the radio master enters binding mode. This code is then
transmitted to all radios within range that are also in binding mode. After a repeater/slave is bound, the repeater/slave radio accepts data
only from the master to which it is bound. The binding code defines the network, and all radios within a network must use the same
binding code.
For Q45 Wireless Sensors, refer to the Q45 datasheet for binding and Slave ID instructions. For MultiHop M-HE models, refer to the MHE datasheet to set the Slave ID before following the binding instructions.
Step 1. Apply power to all MultiHop radios and place the MultiHop radios configured as slaves or repeaters at least two meters away
from the master radio.
Step 2. On the MultiHop master radio, triple click button 2. For MultiHop master radios with only one button, triple click the button.
For the two LED/button models, both LEDs flash red and the LCD shows *BINDNG and *MASTER. For single LED/button models, the
LED flashes alternatively red and green.
Step 3. On the MultiHop repeater or slave radio, triple click button 2. For repeaters or slaves with only one button, triple click the button.
The child radio enters binding mode and searches for any Master radio in binding mode. While searching for the Master radio, the two
red LEDs flash alternately. When the child radio finds the Master radio and is bound, both red LEDs are solid for four seconds, then both
red LEDs flash simultaneously four times. For M-GAGE Nodes, both colors of the single LED are solid (looks orange), then flash. For
Q45 radios, both the green and red are solid, then flash. After the slave/repeater receives the binding code transmitted by the master, the
slave and repeater radios automatically exit binding mode.
Step 4. Set the Slave ID. On MultiHop radios with rotary dials, use both rotary dials to assign a decimal MultiHop Radio ID between 11
and 61. The left rotary dial represents the tens digit (1–6) and the right dial represents the ones digit (0–9) of the MultiHop Radio ID.
For MultiHop M-HE* models, see the Setting the Slave ID instructions.
151317 Rev 0
www.bannerengineering.com - tel: 763-544-3164
9
MultiHop Radio Product Manual
Step 5. Repeat steps 3 through 4 for as many slave or repeater radios as are needed for your network.
Step 6. When all MultiHop radios are bound, exit binding mode on the master by double-clicking button 2. All radio devices begin to form
the network after the master data radio exits binding mode.
Child Radios Synchronize to the Parent Radios
The synchronization process enables a SureCross radio to join a wireless network formed by a master radio. After power-up, synchronization may take a few minutes to complete. First, all radios within range of the master data radio wirelessly synchronize to the master
radio. These radios may be slave radios or repeater radios.
After repeater radios are synchronized to the master radio, any radios that are not in sync with the master but can "hear" the repeater
radio will synchronize to the repeater radios. Each repeater “family” that forms a wireless network path creates another layer of synchronization process. The table below details the process of synchronization with a parent. When testing the devices before installation, verify
the radio devices are at least two meters apart or the communications may fail.
Slave and Repeater LED Behavior
All bound radios set to slave or repeater modes follow this LED behavior after powering up.
Process Response
Steps
Two Button/LED Models
Single Button/LED
Models
LED 1
LED 2
LED
1
Apply power to the radio
-
Solid yellow
(briefly)
Red and green
2
The slave/repeater searches for a parent device.
Flashes red
-
Flashes red (1 per 3
sec)
3
A parent device is detected. The slave/repeater searches Solid red
for other parent radios within range.
-
Solid red
4
The slave/repeater selects a suitable parent.
-
Solid yellow
Solid red and green
(looks yellow/orange)
5
The slave/repeater attempts to synchronize to the selected parent.
-
Solid red
Solid red
6
The slave/repeater is synchronized to the parent.
Flashes green
-
Flashes green
7
The slave/repeater enters RUN mode.
Solid green, then
flashes green
Serial data packets begin transmitting between the slave/ repeater and its parent radio.
Solid green, then flashes green
Flashes yellow
Flashes red and green
(looks yellow/orange)
Master LED Behavior
All bound radios set to operate as masters follow this LED behavior after powering up.
Process Response
Steps
1
10
Apply power to the master radio
Two Button/LED Models
Single Button/LED
Models
LED 1
LED 2
LED
-
Solid yellow
Red and green
www.bannerengineering.com - tel: 763-544-3164
151317 Rev 0
MultiHop Radio Product Manual
Two Button/LED Models
Single Button/LED
Models
LED 1
LED 2
LED
The master radio enters RUN mode.
Flashes green
-
Flashes green
Serial data packets begin transmitting between the master and its children radios.
-
Flashes yellow
Flashes red and green
(looks yellow/orange)
Process Response
Steps
2
Conduct a Site Survey
A site survey analyzes the radio signal between a MultiHop child radio and its parent and reports the number of data packets missed or
received at relative signal strengths.
Conducting a MultiHop Site Survey from the LCD Menu
Perform the site survey before permanently installing your network to pre-screen a site for its radio communication potential, compare link
quality in different locations in a factory, or assist with final antenna placement and aiming.
Site surveys can be conducted from either the master, repeater, or slave radios. A master radio is always a parent and the slave radios
are always children radios within the radio communication relationship. A repeater radio, however, may be both a child radio to the master or another repeater and a parent radio to other repeater or slave radios. For a more detailed description of the parent-child relationships, refer to the device data sheets.
Site Survey
MultiHop Master Radio
Site Survey
MultiHop Repeater Radio
MultiHop Slave Radio
Other radios bound within the same network remain synchronized to the network, but are blocked from sending data while the site survey
is running. The site survey analyzes the signal strength between the selected child and its parent radio only. Disable site survey on one
radio before initiating it from another.
Radios in site survey mode have a solid green LED for the duration of the site survey and the LCD display scrolls the results. Because
the statistics represent the lesser of the round-trip results, one person can ascertain the link quality from either device.
Single-click button 2 to pause or resume autoscrolling the site survey results. While paused, button 1 single-step advances through the
four signal strength categories: green, yellow, red, and missed. Double-click button 2 to exit the results display. (Refer to the data sheet
for the menu structure.)
1
On a data radio device, press button 1 until the display reads *SITE.
When the site survey runs, serial and I/O data radio communication between that parent and its children stops.
2
Single-click button 2 to enter the Site Survey menu.
Master radio: The displays reads CHLDRN. Repeater radio: The display reads PARENT. Slave radio: The display reads PARENT.
3
From the Master
From the Repeater
Single-click button 2 to display the Single-click button 1 to cycle between PAchild radio’s device address. (A ra- RENT and CHLDRN.
151317 Rev 0
www.bannerengineering.com - tel: 763-544-3164
From the Slave
Single-click button 2 to display PARENT.
11
MultiHop Radio Product Manual
dio’s device address is displayed
under its *RUN menu).
Single-click button 2 to select PARENT or
CHLDRN.
Single click button 1 to scroll between all the master radio’s children. When you reach the child radio you want to run the site survey
with, single-click button 2.
If conducting the site survey with one of the repeater’s children, single-click button 1 to scroll
among a repeater’s children radios. (Each data radio’s device address is displayed under its
*RUN menu.)
Single-click button 2 to begin the site
survey.
Single-click button 2 at the device address
screen to select the child or parent and begin
the site survey.
The site survey begins. LED 2 on both the parent and child radios flash for every received RF packet. To indicate the parent
is in site survey mode, LED 1 is a solid green. The data radio analyzes the quality of the signal between the parent and child
by counting the number of data packets received and measuring the signal strength (green, yellow, and red).
4
Examine reception readings (G, Y, R, M) of the devices at various locations. M displays the percent of missed packets while
G, Y, and R display the percent of received packets at those signal strengths. These values are continuously updated as long
as the site survey is running.
GRN = GREEN excellent signal strength; YEL = YELLOW good signal strength; RED = RED marginal signal strength; MIS =
Percentage of missed packets. When possible, install all devices to optimize the percentage of YELLOW and GREEN data
packets received.
5
While the site survey is in process, single-click button 2 to pause or resume autoscrolling the site survey results. While
paused, button 1 single-step advances through the four signal strength categories: green, yellow, red, and missed. Doubleclick button 2 to exit the results display.
6
Double-click button 2 on either the child or the parent device.
Site survey ends and the devices automatically resume operation.
Interpreting the MultiHop Site Survey Results
Site survey mode works by having two radios (one child and one parent) repeatedly exchange data packets. For every round-trip exchange of data, the child data radio keeps track of the weaker of the two paths. Both units report the statistics as a percentage on their
LCD display.
The reports consists of sorting the data into one of four categories: Green, Yellow, Red, or Missed Packets.
•
•
•
•
Green indicates strong signal,
Yellow is less strong but still robust,
Red means the packet was received but has a margin of less than 15 dB, and
A missed packet means the data did not arrive or contained a checksum error. (During normal operation, missed packets are re-tried
until they are received without errors. During a site survey, missed packets are not re-tried.)
For applications with only a few hops, the system can tolerate up to 40% missed packets without serious degradation, but situations with
more missed packets should be reviewed for proper antenna selection and placement, cabling, and transmit power levels. If your application includes many hops, modify the installation and antenna placement to reduce the missed packet count.
Any radio can initiate a site survey. Other radios on the same network ID remain synchronized to the network, but are blocked from
sending data while the site survey is running. In installations with multiple child radios, the site survey analyzes the signal strength between the selected child and its parent radio only. Disable site survey on one radio before initiating it from another.
Radios in site survey mode have a solid green LED for the duration of the site survey and the LCD display scrolls the results. Because
the statistics represent the lesser of the round-trip results, one person can ascertain the link quality from either device.
Installing Your SureCross™ Radios
The following are some recommendations for installing your wireless network components.
12
www.bannerengineering.com - tel: 763-544-3164
151317 Rev 0
MultiHop Radio Product Manual
Mounting SureCross Devices Outdoors
Mounting SureCross Devices Outdoors
Use a Secondary Enclosure. For most outdoor applications, we recommend installing your
SureCross devices inside a secondary enclosure.
For a list of available enclosures, refer to the Accessories list.
Point Away From Direct Sunlight. When you are not using a secondary enclosure, minimize the damaging effects of ultra-violet radiation by mounting the devices to avoid facing
intense direct sunlight.
• Mount under an overhang or other source of shade,
• Install indoors, or
• Face the devices north when installing outside.
For harsh outdoor applications, consider installing your radio inside a secondary enclosure.
For a list of available enclosures, refer to the Accessories list.
Mount Vertically to Avoid Collecting Rain. When possible, mount the devices where rain
or snow will drain away from the device.
• Mount vertically so that precipitation, dust, and dirt do not accumulate on permeable
surfaces.
• Avoid mounting the devices on flat or concave surfaces, especially if the display will be
pointing up.
Moisture and Condensation. If condensation is present in any device, add a small desiccant packet to the inside of the radio.
To help vent the radios, Banner also sells a vented plug (model number BWA-HW-031) for
the 1/2" NPT port of the SureCross radios.
Vented plug for the 1/2" NPT port.
Watertight Glands and NPT Ports
Watertight Glands and Plugs
To make glands and plugs watertight, use PTFE tape and follow these steps.
151317 Rev 0
www.bannerengineering.com - tel: 763-544-3164
13
MultiHop Radio Product Manual
To make the glands watertight:
1. Wrap four to eight passes of polytetrafluoroethylene (PTFE) tape around the
threads as close as possible to the hexagonal body of the gland.
2. Manually thread the gland into the housing hole. Never apply more than 5 inlbf of torque to the gland or its cable clamp nut.*
Seal any unused PG-7 access holes with one of the supplied black plastic plugs. To install a watertight PG-7 plug:
1. Wrap four to eight passes of PTFE tape around the plug’s threads, as close as possible to the flanged surface.
2. Carefully thread the plastic plug into the vacant hole in the housing and tighten using a slotting screwdriver. Never apply more than
10 in-lbf torque to the plastic plug.
* This is not a lot of torque and is equivalent to the torque generated without using tools. If a wrench is used, apply only very light pressure. Torquing these fittings excessively damages the device.
Watertight NPT Plugs
Seal the 1/2” NPT port if it is not used. To install a watertight NPT plug:
1. Wrap 12 to 16 passes of PTFE tape evenly across the length of the threads.
2. Manually thread the plug into the housing port until reaching some resistance.
3. Using a 9/16” crescent wrench, turn the plug until all the plug’s threads are engaged by the housing port or until the resistance
doubles. Do not overtighten as this will damage the SureCross unit. These threads are tapered and will create a waterproof seal
without overtightening.
* This is not a lot of torque and is equivalent to the torque generated without using tools. If a wrench is used, apply only very light pressure. Torquing these fittings excessively damages the device.
Replacing the Rotary Dial Access Cover
Check the rotary dial access cover o-ring every time the access cover is removed. Replace the o-ring when it is damaged, discolored, or
showing signs of wear.
The o-ring should be:
• Seated firmly against the threads without stretching to fit or without bulging loosely, and
• Pushed against the flanged cover.
When removing or closing the rotary dial access cover, manually twist the cover into position. Do not allow cross-threading between the cover and the devce's face.
Once the cover is in place and manually tightened, use a small screwdriver (no longer than
five inches total length) as a lever to apply enough torque to bring the rotary dial access
cover even with the cover surface.
Replacing the Main Body Gasket
Check the main body gasket every time a SureCross™ device is opened.
14
www.bannerengineering.com - tel: 763-544-3164
151317 Rev 0
MultiHop Radio Product Manual
Replace the gasket when it is damaged, discolored, or showing signs of wear.
The gasket must be:
• Fully seated within its channel along the full length of the perimeter, and
• Positioned straight within the channel with no twisting, stress, or stretching.
Other Installation Requirements
Reduce Chemical Exposure
Before installing any devices in a chemically harsh environment, contact the manufacturer for more information regarding the life-expectancy. Solvents, oxidizing agents, and other chemicals will damage the devices.
Minimize Mechanical Stress
Although these radio devices are very durable, they are sophisticated electronic devices that are sensitive to shock and excessive loading.
• Avoid mounting the devices to an object that may be shifting or vibrating excessively. High levels of static force or acceleration may
damage the housing or electronic components.
• Do not subject the devices to external loads. Do not step on them or use them as handgrips.
• Do not allow long lengths of cable to hang from the glands on the Gateway or Node. Cabling heavier than 100 grams should be
supported instead of allowed to hang from the housing.
It is the user’s responsibility to install these devices so they will not be subject to overvoltage transients. Always ground the devices in
accordance with local, state, or national regulations.
Installation Quick Tips
The following are some quick tips for improving the installation of wireless network components.
Create a Clear Communication Path
Wireless communication is hindered by radio interference and obstructions in the path between the transmitter and receiver. To achieve
the best radio performance, carefully consider the installation locations for the Gateways and Nodes and select locations without obstructions in the path.
For more information about antennas, please refer to the Antenna Basics reference guide, Banner document p/n 132113.
Increase the Height of the Antennas
Position the external antenna vertically for optimal RF communication. If necessary, consider changing the height of the SureCross radio,
or its antenna, to improve reception. For outdoor applications, mounting the antenna on top of a building or pole may help achieve a lineof-sight radio link with the other radios in the network.
151317 Rev 0
www.bannerengineering.com - tel: 763-544-3164
15
MultiHop Radio Product Manual
Line of sight
Node
Gateway
No line of sight
Avoid Collocating Radios
When the radio network’s master device is located too close to another radio device, communications between all devices is interrupted.
For this reason, do not install a Gateway device within two meters of another Gateway or Node.
Be Aware of Seasonal Changes
When conducting the initial Site Survey, the fewest possible missed packets for a given link is better. However, seasonal changes may
affect the signal strength and the total signal quality. Radios installed outside with 50% missed packets in the winter months may have
80% or more missed packets in the summer when leaves and trees interfere with radio reception.
Node
Gateway
A good signal strength in winter doesn’t
always mean you’ll get the same signal
strength the rest of the year.
Node
Gateway
During spring and summer, leaves may
block more of the radio signal.
Basic Remote Antenna Installation
A remote antenna system is any antenna system where the antenna is not connected directly to the radio. These systems typically use
coaxial cable to connect the antenna to the radio. When installing a remote antenna system, always include a lightning arrestor or coaxial
surge suppressor in the system. Remote antenna systems installed without surge protection invalidate the warranty of the radio devices.
Surge suppressors should be properly grounded and mounted at ground level near where the cabling enters a building. Install the surge
suppressor indoors or inside a weatherproof enclosure to minimize corrosion or component deterioration. For best results, mount the
16
www.bannerengineering.com - tel: 763-544-3164
151317 Rev 0
MultiHop Radio Product Manual
surge suppressor as close to the ground as possible to minimize the length of the ground connection and use a single-point ground
system to avoid creating ground loops.
For more detailed information about how antennas work and how to install them, refer to Antenna Basics, Banner document 132113 (also
included as a chapter within the product manual).
1. Antenna mounted remotely from the radio device.
1
2. Coaxial cable
3. Surge suppressor
4. Ground wire to a single-point ground system
2
3
4
I/O Isolation. When connecting analog and discrete I/O to external equipment such as VFDs (Variable Frequency Drives), it may be
appropriate to install interposing relays and/or loop isolation devices to protect the DX80 unit from transients, noise, and ground plane
interference originating from devices or the environment. Contact Banner Engineering Corp. for more information.
Weatherproofing Remote Antenna Installations
Prevent water damage to the cable and connections by sealing the connections with rubber splicing tape and electrical tape.
Step 1: Verify both connections are clean and dry before connecting the antenna cable to the antenna or other cable and hand-tightening.
Step 2: Tightly wrap the entire connection with rubber splicing tape.
Begin wrapping the rubber splicing tape one inch away from the connection and continue wrapping until you are one inch past the other
end of the connection. Each new round of tape should overlap about half the previous round.
Step 3: Protect the rubber splicing tape from UV damage by tightly wrapping electrical tape on top of the rubber splicing tape. The
electrical tape should completely cover the rubber splicing tape and overlap the rubber tape by one inch on each side of the connection.
Antenna Installation
Always install and properly ground a qualified surge suppressor when installing a remote antenna system. Remote antenna configurations installed without surge suppressors invalidate the manufacturer's warranty.
151317 Rev 0
www.bannerengineering.com - tel: 763-544-3164
17
MultiHop Radio Product Manual
Always keep the ground wire as short as possible and make all ground connections to a single-point ground system to ensure no ground
loops are created. No surge suppressor can absorb all lightning strikes. Do not touch the SureCross™ device or any equipment connected to the SureCross device during a thunderstorm.
Mounting an RP-SMA Antenna Directly to the Cabinet
This antenna mounts directly to the outside of the box, with the SureCross device mounted inside the box.
This situation may be used either inside or outside the building.
1
2
3
4, 5
Model Number
Description
BWA-9O2-C
Antenna, Omni, 902-928 MHz, 2 dBd, Rubber Swivel, RP-SMA MALE
BWA-2O2-C
Antenna, Omni, 2.4 GHz, 2 dBd, Rubber Swivel, RP-SMA MALE
BWA-2O5-C
Antenna, Omni, 2.4 GHz, 5 dBd, Rubber Swivel, RP-SMA MALE
BWA-2O7-C
Antenna, Omni, 2.4 GHz, 7 dBd, Rubber Swivel, RP-SMA MALE
2
BWC-LMRSFRPB
Surge Suppressor, Bulkhead, RP-SMA Type, 900 MHz/2.4 GHz
3
BWC-1MRSFRSB02
RG58 Cable, RP-SMA TO RP-SMA Female Bulkhead, 0.2 m
BWC-1MRSFRSB1
RG58 Cable, RP-SMA TO RP-SMA Female Bulkhead, 1 m
BWC-1MRSFRSB2
RG58 Cable, RP-SMA TO RP-SMA Female Bulkhead, 2 m
BWC-1MRSFRSB4
RG58 Cable, RP-SMA TO RP-SMA Female, Bulkhead, 4 m
1
18
www.bannerengineering.com - tel: 763-544-3164
151317 Rev 0
MultiHop Radio Product Manual
Model Number
Description
4
DIN-35-105
DIN Rail section, 105 mm long, 35 mm design
5
SMBDX80DIN
DIN Rail Bracket Assembly for DX70 and DX80 models.
Mounting an RP-SMA Antenna Remotely
This antenna mounts remotely from the box, with the SureCross device mounted inside the box.
This situation may be used either inside or outside the building, though a Yagi antenna is usually used in outdoors applications while an
omni-directional antenna may be used either inside a building or outside.
1
2
3
4
5, 6
7, 8
9
Model Number
Description
BWA-9O2-C
Antenna, Omni, 902-928 MHz, 2 dBd, Rubber Swivel, RP-SMA MALE
BWA-9O5-C
Antenna, Omni, 902-928 MHz, 5 dBd, Rubber Swivel, RP-SMA MALE
BWA-2O2-C
Antenna, Omni, 2.4 GHz, 2 dBd, Rubber Swivel, RP-SMA MALE
BWA-2O5-C
Antenna, Omni, 2.4 GHz, 5 dBd, Rubber Swivel, RP-SMA MALE
BWA-2O7-C
Antenna, Omni, 2.4 GHz, 7 dBd, Rubber Swivel, RP-SMA MALE
BWC-1MRSFRSB02
RG58 Cable, RP-SMA TO RP-SMA Female Bulkhead, 0.2 m
BWC-1MRSFRSB1
RG58 Cable, RP-SMA TO RP-SMA Female Bulkhead, 1 m
BWC-1MRSFRSB2
RG58 Cable, RP-SMA TO RP-SMA Female Bulkhead, 2 m
BWC-1MRSFRSB4
RG58 Cable, RP-SMA TO RP-SMA Female, Bulkhead, 4 m
3
BWC-LMRSFRPB
Surge Suppressor, Bulkhead, RP-SMA Type, 900 MHz/2.4 GHz
4
BWC-1MRSFRSB02
RG58 Cable, RP-SMA TO RP-SMA Female Bulkhead, 0.2 m
1
2
151317 Rev 0
www.bannerengineering.com - tel: 763-544-3164
19
MultiHop Radio Product Manual
Model Number
Description
BWC-1MRSFRSB1
RG58 Cable, RP-SMA TO RP-SMA Female Bulkhead, 1 m
BWC-1MRSFRSB2
RG58 Cable, RP-SMA TO RP-SMA Female Bulkhead, 2 m
BWC-1MRSFRSB4
RG58 Cable, RP-SMA TO RP-SMA Female, Bulkhead, 4 m
5
DIN-35-105
DIN Rail section, 105 mm long, 35 mm design
6
SMBDX80DIN
Bracket Assembly, DIN Rail, for DX80
7
BWA-EF14128
Fiberglass enclosure, 14”x 12” x 8”
8
BWA-PA1412
Internal panel, 14” x 12”
9*
DX81
DX81 FlexPower Battery Supply Module
DX81P6
DX81P6 FlexPower Battery Supply 6-Pack
PS24DX
Power Supply, 24V dc, 200 mA
PS24DXSR
Power Supply, 24V dc, 200 mA, Solid State Relay
* This example image depicts a DX80 radio with a PS24x power supply. The example installation may also work with the DX70 radios or
MultiHop radios. However, the DX81 and DX81P6 FlexPower Battery Supply Modules can only power FlexPower devices. The battery
supply modules cannot be used with any 10-30V dc-only powered devices and cannot be used with the DX70 radios.
Mounting N-Type Antennas Remotely
This antenna mounts remotely from the box, with the SureCross device mounted inside the box.
This situation may be used either inside or outside the building, though a Yagi antenna is usually used in outdoors applications while an
omni-directional antenna may be used either inside a building or outside.
2
3
1
4
5, 6
7, 8
9
20
www.bannerengineering.com - tel: 763-544-3164
151317 Rev 0
MultiHop Radio Product Manual
Model Number
Description
BWA-9Y6-A
Antenna, Yagi, 900 MHz, 6.5 dBd, N Female
BWA-9Y10-A
Antenna, Yagi, 900 MHz, 10 dBd, N Female
BWA-9O6-A
Antenna, Omni, 900 MHz, 6 dBd, Fiberglass, N Female
BWA-9O5-B
Antenna, Omni, 900 MHz, 5 dBd/7.2 dBi, With ground plane, N Female
BWA-2O8-A
Antenna, Omni, 2.4 GHz, 8.5 dBi, N Female, Fiberglass 24”
BWA-2O6-A
Antenna, Omni, 2.4 GHz, 6 dBi, N Female, Fiberglass 16”
BWC-4MNFN3
LMR400 Cable, N-Male to N-Female, 3 Meters
BWC-4MNFN6
LMR400 Cable, N-Male to N-Female, 6 Meters
BWC-4MNFN15
LMR400 Cable, N-Male to N-Female, 15 Meters
BWC-4MNFN30
LMR400 Cable, N-Male to N-Female, 30 Meters
3
BWC-LFNBMN
Surge Suppressor, Bulkhead, N-Type, 900 MHz/2.4 GHz
4
BWC-1MRSMN05
LMR200 Cable, RP-SMA to N-Male, 0.5 Meters
BWC-1MRSMN2
LMR200 Cable, RP-SMA to N-Male, 2 Meters
5
DIN-35-105
DIN Rail section, 105 mm long, 35 mm design
6
SMBDX80DIN
Bracket Assembly, DIN Rail, for DX80
7
BWA-EF14128
Fiberglass enclosure, 14”x 12” x 8”
8
BWA-PA1412
Internal panel, 14” x 12”
9*
DX81
DX81 FlexPower Battery Supply Module
DX81P6
DX81P6 FlexPower Battery Supply 6-Pack
PS24DX
Power Supply, 24V dc, 200 mA
PS24DXSR
Power Supply, 24V dc, 200 mA, Solid State Relay
1
2
* This example image depicts a DX80 radio with a PS24x power supply. The example installation may also work with the DX70 radios or
MultiHop radios. However, the DX81 and DX81P6 FlexPower Battery Supply Modules can only power FlexPower devices. They battery
supply modules cannot be used with any 10-30V dc-only powered devices and cannot be used with the DX70 radios.
151317 Rev 0
www.bannerengineering.com - tel: 763-544-3164
21
MultiHop Radio Product Manual
Modbus Register Configuration
The factory default settings for the inputs, outputs, and device operations can be changed by the user through the device Modbus registers. To change parameters, the data radio network must be set to Modbus mode and the data radio must be assigned a valid Modbus
slave ID.
Generic input or output parameters are grouped together based on the device input or output number: input 1, input 2, output 1 etc.
Operation type specific parameters (discrete, counter, analog 4 to 20 mA) are grouped together based on the I/O type number: analog 1,
analog 2, counter 1, etc.
Not all inputs or outputs may be available for all models. To determine which specific I/O is available on your model, refer to the Modbus
Input/Output Register Maps listed in the device's data sheet.
For more information about registers, refer to the MultiHop Product Manual, Banner part number 151317.
40000s Standard Physical Inputs
Registers x0001 through x0016 are the results registers for inputs 1 through 16. For a list of the active results registers for your MultiHop
radio, refer to your product's data sheet.
40400s Extra Inputs
Registers x0401 through x0500 are the results registers for extra inputs 1 through 100. For a list of the active results registers for your
MultiHop radio, refer to your product's data sheet.
40500s Standard Physical Outputs
Registers x0501 through x0516 are the results registers for outputs 1 through 16. For a list of the active results registers for your MultiHop radio, refer to your product's data sheet.
40900s Extra Outputs
Registers x0901 through x1000 are the results registers for extra outputs 1 through 100. For a list of the active results registers for your
MultiHop radio, refer to your product's data sheet.
41000s Input Parameters
Data radio inputs have the following generic parameters. These are not global parameters but are associated only with a particular input.
There are currently 16 separate inputs possible; the factory default settings are defined in the I/O specifications.
Parameters for Input 1 are at 41001 through 41008. Parameters for input 2 are at 41051 through 41058. Each following input is offset
from the previous one by 50 registers.
Input Parameters
22
4xxxx Registers
Parameters
Input 1
1001–1008
1xx1 Enable
Input 2
1051–1058
1xx2 Sample Interval (high word)
Input 3
1101–1108
1xx3 Sample Interval (low word)
Input 4
1151–1158
1xx8 Out-of-Sync Enable
Input 5
1201–1208
Input 6
1251–1258
Input 7
1301–1308
www.bannerengineering.com - tel: 763-544-3164
151317 Rev 0
MultiHop Radio Product Manual
4xxxx Registers
Input 8
1351–1358
Input 9
1401–1408
Parameters
1xx1 Enable. A 1 enables the input and a 0 to disable the particular input.
1xx2 Sample Interval (High Word). The sample interval (rate) is a 32-bit value (requires two Modbus registers) that represents how
often the data radio samples the input. The register value is the number of time units. For example, a Modbus register value of 125 (for a
900MHz device) represents a sample interval of 5 seconds (125 x .040 seconds = 5 seconds). A unit of time for a 900 MHz data radio is
40 milliseconds. A unit of time for a 2.4 GHz data radio is 20 milliseconds.
1xx3 Sample Interval (Low Word). See Sample Interval (High Word).
1xx4 through 1xx7. See Switch Power Input Parameters.
1xx8 Out-of-Sync Enable. Set to one (1) to enable the input to continue operating when the device is out of sync with the master radio.
Set to zero (0) to disable the input when the device is not synchronized to the master radio. The default value is one (1).
Switch Power Input Parameters
These are not global parameters but are associated only with a particular input. There are currently 16 separate inputs possible; the
factory default settings are defined in the I/O specifications.
Parameters for Input 1 are at 41001 through 41007. Parameters for input 2 are at 41051 through 41057. Each following input is offset
from the previous one by 50 registers.
Switch Power Input Parameters
4xxxx Registers
Parameters
Input 1
1004–1007
1xx4 Switch Power Enable
Input 2
1054–1057
1xx5 Switch Power Warm-up
Input 3
1104–1107
1xx6 Switch Power Voltage
Input 4
1154–1157
1xx7 Extended Input Read
Input 5
1204–1207
Input 6
1254–1257
Input 7
1304–1307
Input 8
1354–1357
Input 9
1404–1407
1xx4 Switch Power Enable Mask. The bit mask can select any number of switch power outputs 1 through 4. Switch power enable works
with the warm-up and voltage parameters to define the switch power output. Some devices have only two switch power outputs. Refer to
your model's data sheet to confirm which switch power outputs are active for your MultiHop radio.
Value
Switch Power #
0x0
None
0x1
SP1
0x2
SP2
0x3
SP1 and SP2
0x4
SP3
0x8
SP4
0xC
SP3 and SP4
151317 Rev 0
www.bannerengineering.com - tel: 763-544-3164
23
MultiHop Radio Product Manual
1xx5 Switch Power Warm-up. When the data radio supplies power to external sensors, the Switch Power Warm-up parameter defines
how long power is applied to the external sensor before the input point is examined for changes. The register value is the number of time
units. A unit of time for a 900 MHz data radio is 40 milliseconds. A unit of time for a 2.4 GHz data radio is 20 milliseconds.
1xx6 Switch Power Voltage. The Switch Power Voltage parameter defines the output voltage of the switch power output. This parameter applies only to inputs using switched power. If switch power is not used with an input, use the Continuous Voltage parameter to
control the voltage.
Output Voltage
Parameter Value
0V
255
5V
204
7V
125
10V
69
15V
32
20V
12
24V
03
1xx7 Extended Input Read. The Extended Input Read is a bit field parameter that allows multiple inputs to be sampled with the same
switch power parameters. If the bit field is set to 0x000F, the first four inputs are sampled after the switch power parameters are satisfied.
If this parameter is set in the input 1 configuration registers, set inputs 2 through 4 to zero.
42000s Output Parameters
The following characteristics are configurable for each output. Parameters for Output 1 start at 42001 through 42004. Parameters for
output 2 start at 42051 through 42054. Each following output is offset from the previous one by 50 registers.
4xxxx Registers
Parameters
Output Parameters Output 1
2001–2004
2xx1 Enable
Output 2
2051–2054
2xx2 Flash Output Enable
Output 3
2101–2104
2xx3 Flash Index
Output 4
2151–2154
2xx4 Out of Sync Enable
Output 5
2201–2204
Output 6
2251–2254
Output 7
2301–2304
Output 8
2351–2354
Output 9
2401–2404
2xx1 Enable. Set to 1 to enable the output; set to 0 to disable the output.
2xx2 Flash Output Enable. The Flash Output Enable, Flash Index, and Output Flash Pattern registers are all used to set up flashing
patterns for indicator lights connected to the data radio. Set the Flash Output Enable register to 1 to enable the ability to select an output
flash pattern; set to 0 to disable this feature. Select the output pattern using the Flash Index and Output Flash Pattern registers.
2xx3 Flash Index. The Flash Index can have values 1, 2, 3, or 4. For a particular output, the Flash Index 1 through 4 select a certain
output pattern as defined in registers 44401, 44411, 44421, or 44431.
2xx4 Out of Sync Enable. Set to one (1) to enable the output to continue operating when the device is out of sync with the master radio.
Set to zero (0) to disable the output when the device is not synchronized to the master radio. The default value is one (1).
24
www.bannerengineering.com - tel: 763-544-3164
151317 Rev 0
MultiHop Radio Product Manual
42950s Default Output Parameters
Several device conditions may be used to send outputs to their default state. Use these properties to define the device’s default output
conditions.
2951 Enable Default Out Of Sync. When a radio is “out of sync,” it is not communicating with its parent radio. Set this value to 1 to
enable the default condition when the device is not communicating with its parent radio. Set to 0 to disable.
2952 Enable Default Communication Timeout. A “communication timeout" refers to the communication between the host system and
this radio. Set this register to 1 to enable the default condition when the host has not communicated with this radio for the period of time
defined by the Communication Default IO Timeout.
2953 Communication Default I/O Timeout (100 ms/Count). This parameter defines the host timeout period in 100 millisecond increments. If a host does not communicate within this timeout period, the device outputs are set to the default values.
2954 Enable Default on Power Up. Setting this parameter to 1 sends the device outputs to their default condition when the radio is
powered up. Set to 0 to disable this feature.
43000s Discrete Input Parameters
The Discrete Input Configuration parameters configure certain aspects of the data radio’s discrete inputs. Parameters for Discrete Input 1
start at 43001 through 43004. Parameters for Discrete Input 2 start at 43021 through 43024. Each following input is offset from the previous one by 20 registers.
Discrete Input Parameters
4xxxx Registers
Parameters
Discrete IN 1
3001–3009
30x1 PNP/NPN
Discrete IN 2
3021–3029
30x2 Sample High
Discrete IN 3
3041–3049
30x3 Sample Low
Discrete IN 4
3061–3069
30x4 Enable Latch on Change of State
30x7 Enable Discrete Input Time Active Counter
30x8-30x9 Discrete Input Time Active Count
3xx1 PNP or NPN. Set to 1 to define the input as a PNP (sourcing) input. Set to 0 to define the input as an NPN (sinking) input.
3xx2 Sample High. The default value is 0, which disables this feature. The value range is 1 through 255. The Sample High parameter
refers to the number of samples (1 through 255) a discrete input must be detected high (1) before it is considered to be a change of state.
3xx3 Sample Low. The default value of 0 disables this feature. The value range is 1 through 255. The Sample Low parameter refers to
the number of samples (1 through 255) a discrete input must be detected low (0) before it is considered to be a change of state.
3xx4 Enable Latch on Change of State. Writing a 1 to this register causes a data "push" (data transmitted to the master radio) on
Change of State.
3xx7 Enable Discrete Input Time Active Counter. The time active counter counts the time a discrete input is in the active state. Set to
one (1) to enable the time counter; set to zero (0) to disable the counter. By default, this counter is enabled.
3xx8 and 3xx9 Discrete Input Time Active Count. These two registers contain the counter value. Register 3xx8 contains the high
portion of the active counter and 3xx9 contains the low portion of the active counter. The counter stores a time value in 100 ms increments. This value is reset to zero when the power cycles off.
43300s Analog Input Parameters
The following characteristics are configurable for each of the analog inputs. Analog Input parameters for Input 1 start at 43301 through
43307. Analog Input parameters for Input 2 start at 43321 through 43327. Each following input is offset from the previous one by 20
registers.
151317 Rev 0
www.bannerengineering.com - tel: 763-544-3164
25
MultiHop Radio Product Manual
Analog Input Parameters
4xxxx Registers
Parameters
Analog IN 1
3301–3320
33x1 Max Analog Value
Analog IN 2
3321–3340
33x2 Min Analog Value
Analog IN 3
3341–3360
33x3 Enable Register Full Scale
Analog IN 4
3361–3380
33x4 Degrees C/F
33x5 Temperature Double
33x6 Thermocouple Type Select
33x7 Temperature Resolution Select
33x8 Threshold
33x9 Hysteresis
33x0 Delta
33x6 Sample High
33x7 Sample Low
33x8 Change of State Push Enable
33x9 Median Filter Enable
33x0 Tau Filter Settings
33x1 Maximum Analog Value. The Maximum Value register stores the maximum allowed analog value. The specific units of measure
apply to the register value. For example, the register may contain 20000, for 20 mA, or for a voltage input the register may contain 8000,
for 8 volts.
33x2 Minimum Analog Value. The Minimum Value register stores the minimum allowed analog value. The specific units of measure
apply to the register value. For example, the register may contain 4000, for 4 mA, or for a voltage input the register may contain 2000, for
2 volts.
33x3 Enable Register Full Scale. Set to 1 to enable a linear range from 0 to 65535 for specified input range. For a 4 to 20 mA input, a
value of 0 represents 4 mA and 65535 represents 20 mA. Set this parameter to 0 to store input readings in unit-specific data. For example, the register data representing a 15.53 mA reading is 15530. For units of current (0 to 20 mA inputs), values are stored as µA (micro
Amps) and voltage values are stored as mV (millivolts).
33x4 Select Degrees F or Degrees C. Set this parameter to 1 to represent temperature units in degrees Fahrenheit. Set this parameter
to 0 to represent temperature units in degrees Celsius. (Only used for thermocouple inputs.)
33x5 Temperature Scaling. Set to 1 to store temperatures the same way as the DX80 devices (measured temp × 20) represent temperature. Set to 0 to store temperature values in tenths of a degree (measured temp × 10). For example, if the measured temperature is 20.5
degrees, using temperature scaling set to 1 would store the temperature value as 410; using temperature scaling set to 0 would store the
temperature as 205. (Only used for thermocouple inputs.)
33x6 Select Thermocouple Type. Write the listed value to this register to select a thermocouple type. (Only used for thermocouple
inputs.)
Value
Thermocouple
Type
Value
Thermocouple Type
Value
Thermocouple Type
0
B
5
J
10
P
1
C
6
K
11
R
2
D
7
L
12
S
3
E
8
M
13
T
4
G
9
N
14
U
26
www.bannerengineering.com - tel: 763-544-3164
151317 Rev 0
MultiHop Radio Product Manual
33x7 Select Temperature Resolution. Thermocouples and RTDs may record temperatures in either high resolution (tenths of a degree)
or low resolution (whole degree). Write a 0 to select high resolution (default) or a 1 to select low resolution. Choosing high or low resolution changes the range of temperatures that can be written to the register. (Only used for thermocouple inputs.)
33x8 and 33x9 Hysteresis and Threshold. Threshold and hysteresis work together to establish the ON and OFF points of an analog
input. The threshold defines a trigger point or reporting threshold (ON point) for a sensor input. The hysteresis value establishes how
much below the active threshold (ON point) an analog input is required to be before the input is considered OFF. A typical hysteresis
value is 10% to 20% of the unit’s range.
In the example shown graphically, the input is considered on at 15
mA. To consider the input off at 13 mA, set the hysteresis to 2 mA.
The input will be considered off when the value is 2 mA less than
the threshold.
Input Value
ON point
Threshold
Hysteresis
Input
OFF point
Time
33x0 Delta. The delta parameter defines the change required between sample points of an analog input before the analog input reports a
new value. To turn off this option, set the Delta value to 0.
33x6 and 3xx7 Sample High and Sample Low. For analog inputs, the sample high parameter defines the number of consecutive samples the input signal must be above the threshold before a signal is considered active. Sample low defines the number of consecutive
samples the input signal must be below the threshold before a signal is considered deactivated. The sample high and sample low parameters are used to avoid unwanted input transitions. The default value is 0, which disables this feature. The value range is 1 through 255.
33x8 Change of State Push Enable. Set to one (1) to enable push registers for this input. When the analog input changes state, the
register value will be pushed to the master radio if this register is configured to be a push register.
33x9 Median Filter Enable. Set to zero (0) to turn off the median filter. Set to one (1) to turn on the median filter.
33x0 Tau Filter. Set to zero (0) to turn off the tau filter. Set to 1 (weakest filter) through 6 (strongest filter) to turn on the tau filter. (In the
DX80 products, the Low Pass Filter is a combination of the median filter and the tau filter.)
43500s Counter Input Parameters
The following characteristic is configurable for the counter input. Counter Input parameters for Counter Input 1 start at 43501 through
43505. Counter Input parameters for Counter Input 2 start at 43521 through 43525. Each following counter input is offset from the previous one by 20 registers.
Counter Input Parameters
Counter IN 1
4xxxx Registers
Parameters
3501–3505
35x1 Frequency/Event Counter
35x2 Enable Read Counter State
35x3 Set Preset Value
35x4 and 35x5 Counter Preset Value
35x1 Enable Frequency/Event Counter. A counter input can be defined to calculate the frequency of the input in hertz or as a counter
that increments with every input change (event counter) from 0 to 1 (for PNP inputs). Set this parameter to 1 to configure the input to
calculate frequency. Set to 0 to configure the counter to count input changes, e.g. an event counter or totalizer. Because the counter is
reset to zero when power is cycled to the device, it is up to the host system to save count data.
35x2 Enable-Read Counter State. Manufacturing/test register only
151317 Rev 0
www.bannerengineering.com - tel: 763-544-3164
27
MultiHop Radio Product Manual
35x3 Set Preset Value. Writing this value to 1 signals the data radio to preset the counter with the value stored in Modbus registers
43504 and 43505. When the task is complete, the value is written to 0.
35x4 and 35x5 Counter Preset Value. Registers 43504 (high word) and 43505 (low word) contain the 32-bit value for presetting the
counter. Write the ‘Counter Preset Value’ registers first, then use the ‘Set Preset Value’ register to execute the counter preset.
43600s H-Bridge Output Parameters
The Power Output Configuration parameters provide the basic operation for each power output. These parameters are not associated to
specific inputs. Parameters for H-bridge 1 start at 43604 through 43609. Parameters for H-bridge 2 start at 43624 through 43629. Each
following switch power is offset from the previous one by 20 registers.
H-Bridge Output
Parameters
H-Bridge 1
4xxxx Registers
Parameters
3604–3609
36x4 Enable H-Bridge
36x5 H-Bridge Warmup Cap Time
36x6 H-Bridge Active Current Time
36x7–36x8 H-Bridge Switches
36x9 H-Bridge Booster Enabled When Active
36x4 Enable H-Bridge. Enable (1) or disable (0) the h-bridge inputs as needed. Disable the h-bridge inputs when using SDI-12 devices.
36x5 H-Bridge Warm Up Cap Time. Similar to the switch power warm up time, the h-bridge capacitor warm up time is the time allotted,
in 40 millisecond increments, to charge the capacitor used to activate the h-bridge and latching solenoid.
36x6 H-Bridge Active Current Time. Set how long, in 40 millisecond increments, the capacitor is switched into and supplying power to
the solenoid circuit.
36x7-36x8 H-Bridge Switches. Use these two parameters as a bit mask to set the ON and OFF conditions of the h-bridge switch.
DO4
DO3
DO2
DO1
SP4
SP3
SP2
SP1
36x7 Rising Switch (ON)
0
0
1
0
0
0
0
1
36x8 Falling Switch (OFF)
0
0
0
1
0
0
1
0
36x9 H-Bridge Booster Enabled When Active. To use this parameter, contact the applications engineers at Banner Engineering Corp.
This parameter leaves the boost voltage on while the capacitor discharges into the solenoid. While this can supply more power to the
solenoid circuit, it may also brown-out the radio device.
43600s Switch Power Output Parameters
Efficient power management technology enables some FlexPower devices to include an internal power supply, called switch power (SP),
that briefly steps up to power sensors requiring 5, 10, or 15V power (ideally, 4–20 mA loop-powered sensors). When the switch power
output cycles on, the voltage is boosted to the voltage needed to power the sensor for a specific warmup time. This warmup timedenotes
how long the sensor must be powered before a reliable reading can be taken. After the warmup time has passed, the input reads the
sensor, then the switch power shuts off to prolong battery life. The switch power voltage, warm-up time, and sample interval are configurable parameters.
The Power Output Configuration parameters provide the basic operation for each power output. These parameters are not associated to
specific inputs. Parameters for SP 1 start at 43601 through 43603. Parameters for SP 2 start at 43621 through 43623. Each following
switch power is offset from the previous one by 20 registers.
Switch Power Out- SP1
put Parameters
SP2
28
4xxxx Registers
Parameters
3601–3603
36x1 Continuous Voltage Setting
3621–3623
36x2 Default Output Voltage
www.bannerengineering.com - tel: 763-544-3164
151317 Rev 0
MultiHop Radio Product Manual
4xxxx Registers
Parameters
SP3
3641–3643
36x3 Hold Last Voltage Enable
SP4
3661–3663
36x1 Continuous Voltage Setting. Use this voltage parameter to set the output voltage when supplying continuous power through the
SP# terminals (not associated with inputs). The Continuous Voltage parameter cannot be used if any input uses switch power. To set a
continuous voltage on the SP output, also turn on the default output condition “default on power up.” This will turn on this continuous
voltage output when the radio powers up.
Output Voltage
Parameter Value
Output Voltage
Parameter Value
0V
255
15V
32
5V
204
20V
12
7V
125
24V
03
10V
69
36x2 Default Output State. The Default Output State parameter represents the default condition of the switch power output. When communication is lost to the host or the wireless link is lost for the I/O data radio, the data radio can set the outputs and switch power outputs
in this default state. When set to 0, the switch power is turned off. When set to 1, the switch power is set to the voltage established by the
Continuous Voltage Setting.
36x3 Hold Last State Enable. Set Hold Last State Enable to 1 to set the switch power output to its last known value when communications are lost. Set this parameter to 0 to disable the Host Last State Enable and use the Default Output State settings.
43700s Discrete Output Parameters
The following characteristics are configurable for each of the discrete outputs. Parameters for Output 1 start at 43701 through 43703.
Parameters for Output 2 start at 43721 through 43723. Each following input is offset from the previous one by 20 registers.
Discrete Output
Parameters
4xxxx Registers
Parameters
Output 1
3701–3703
3xx1 Default Output State
Output 2
3721–3723
3xx2 Hold Last State Enable
Output 3
3741–3743
3xx3 Enable Switch Power Logic
Output 4
3761–3763
3xx1 Default Output State. The Default Output State parameter represents the default condition of the discrete output. When an error
condition exists, the outputs are set to this user-defined output state, either a 0 or a 1.
3xx2 Hold Last State Enable. Set the Hold Last State to 1 to set the output to its last known value before the error occurred. Set this
parameter to 0 to disable the Hold Last State and use the Default Output State setting during an error condition.
3xx3 Enable Switch Power Logic.
44000s Analog Output Parameters
The following characteristics are configurable for each of the analog outputs. Parameters for Analog Output 1 start at 44001 through
44005. Parameters for Analog Output 2 start at 44021 through 44025. Each following input is offset from the previous one by 20 registers.
151317 Rev 0
www.bannerengineering.com - tel: 763-544-3164
29
MultiHop Radio Product Manual
4xxxx Registers
Parameters
Analog Output Pa- Output 1
rameters
Output 2
4001–4005
40x1 Maximum Analog Value
4021–4025
40x2 Minimum Analog Value
Output 3
4041–4045
40x3 Enable Register Full Scale
Output 4
4061–4065
40x4 Hold Last State Enable
40x5 Default Output State
40x1 Maximum Analog Value. The Maximum Analog Value register stores the maximum allowed analog value. The specific units of
measure apply to the register value. For example, the register may contain 20000, for 20 mA, or for a voltage output the register may
contain 8000, for 8 volts.
40x2 Minimum Analog Value. The Minimum Analog Value register stores the minimum allowed analog value. The specific units of
measure apply to register value. For example, the register may contain 4000, for 4 mA, or for a voltage output the register may contain
2000, for 2 volts.
40x3 Enable Register Full Scale. Set to 1 to enable a linear range from 0 to 65535 for specified input range. For a 4-20 mA output, a
value of 0 represents 4 mA and 65535 represents 20 mA. Set this parameter to 0 to store readings in unit-specific data. For example, the
register data representing a 15.53 mA reading is 15530. For units of current (0-20 mA outputs), values are stored as µA (micro Amps)
and voltage values are stored as mV (millivolts).
40x4 Hold Last State Enable. Set the Hold Last State to 1 to set the output to its last known value before the error occurred. Set this
parameter to 0 to disable the Hold Last State and use the Default Output State setting during an error condition.
40x5 Default Output State. The Default Output State parameter represents the default condition of the analog output. When an error
condition exists, the outputs are set to this 16-bit user-defined output state.
44150s Initialization Controls
x4151 Reset Device. Write a 1 to this register to trigger a device reset of the parameters selected by the next three registers.
x4152 Default I/O Configuration. Returns all I/O configuration parameters to their factory default settings.
x4153 Default System Parameters. Returns all system-level parameters to their factory default settings.
x4154 Initialize Variables from the Serial Number. Returns all variables that are normally calculated (or seeded) from the serial number to values seeded from the serial number.
44400s Output Flash Pattern Parameters
Setting the flash pattern establishes an on and off pattern that can be used for a discrete output or switch power. Flash patterns are
established by selecting specific timeslots to turn the output on or off. While originally the flash pattern was designed to turn on and off an
indicator light, the flash pattern can be set for any discrete output or switch power.
Each slot represents one frame size, which may vary from radio to radio. The default frame is 40 milliseconds. Users may configure up to
four different flash patterns.
4401-4408 Flash Pattern Index 1.
4401-4408 Flash Pattern Index 2.
4401-4408 Flash Pattern Index 3.
4401-4408 Flash Pattern Index 4.
44500s M-GAGE Parameters
The following characteristics are configurable for the M-GAGE devices.
30
www.bannerengineering.com - tel: 763-544-3164
151317 Rev 0
MultiHop Radio Product Manual
x4501 Set Baseline. Write a 1 to this register to set the baseline. The baseline function of the M-GAGE stores the ambient magnetic field
values of the X, Y, and Z axes as a baseline value. Once this baseline is established, any deviation in the magnetic field represents the
presence of a ferrous object and will be reflected in the M-GAGE register. The more disruption in the magnetic field, the larger the MGAGE register value.
x4502 Disable Axes. A bit-wise register (0000). Write a one to disable the selected axis where bit 0 is the x axis, bit 1 is the y axis, and
bit 2 is the z axis.
x4503 Disable Compensation Median Filter. Write a 1 to this register to disable the compensation median filter.
x4504 Disable Sensing Median Filter. Write a 1 to this register to disable the sensing median filter.
x4505 Low Pass Filter. The filters T0 through T6 are parameter settings that define the degree of input digital signal filtering for analog
inputs. T0 is the least amount of filtering. T6 is the highest filter setting and has the least amount of fluctuation between readings. Write
the following values to select a low pass (tau) filter.
Low Pass (Tau) Filter
Register Value
Low Pass (Tau) Filter
Register Value
T0
0
T4
4
T1
1
T5
5
T2
2
T6
6
T3
3
x4506 Sample High. The sample high counter parameter defines the number of consecutive samples the input signal must be above the
threshold before a signal is considered active. The default value is 0, which disables this feature. The value range is 1 through 255. The
Sample High parameter refers to the number of samples (1 through 255) a discrete input must be detected high (1) before it is considered to be a change of state.
x4507 Sample Low. The default value of 0 disables this feature. The value range is 1 through 255. The Sample Low parameter refers to
the number of samples (1 through 255) a discrete input must be detected low (0) before it is considered to be a change of state.
x4509 Delta. Rate of change filter.
x4510 Threshold and x4511 Hysteresis. Threshold and hysteresis work together to establish the ON and OFF points of an analog input.
The threshold defines a trigger point or reporting threshold (ON point) for the M-GAGE™ input. The hysteresis value establishes how
much below the active threshold (ON point) an analog input is required to be before the input is considered OFF. A typical hysteresis
value is 10% to 20% of the unit’s range.
The M-GAGE’s threshold and hysteresis ranges are 0 to 65,535.
The factory default threshold setting is 150 and default hysteresis is 30 (the sensor detects an OFF condition at threshold minus hysteresis, or 150 - 30 = 120). With the default settings, once the magnetic field reading is above 150, an ON or “1” is stored in the lowest
significant bit (LSB) in the Modbus register. When the M-GAGE reading drops below the OFF point (threshold minus hysteresis), the LSB
of the Modbus register is set to “0.”
To determine your threshold, take M-GAGE readings of the test objects at the distance they are likely to be from the sensor. For example, if a car reads 150, a bicycle 15, and a truck reads 250, setting the threshold to 200 will detect only trucks of a specific size. Magnetic
field fluctuations vary based on the amount of ferrous metal present and the distance from the sensor.
x4512 Baseline (Drift) Filter Time. Baseline filter time. When the Baseline Filter is on and the magnetic field readings are below the
baseline filter threshold setting, an algorithm is used to slowly match the device’s baseline to the current ambient magnetic field. This
helps to account for the natural fluctuations in the magnetic field.
x4513 Baseline (Drift) Filter Threshold. Baseline filter threshold is used with the baseline filter time to account for the natural fluctuations on the magnetic field.
x4514 Baseline (Drift) Filter Tau. Baseline filter's low pass filter.
x4521 Baseline Difference Signal Value Total. A combination of the x-, y-, and z-axis baseline different signal values.
x4522 Baseline Difference Signal Value [x-axis]. The difference between the ambient magnetic field and the current magnetic field
reading for the x axis.
151317 Rev 0
www.bannerengineering.com - tel: 763-544-3164
31
MultiHop Radio Product Manual
x4523 Baseline Difference Signal Value [y-axis]. The difference between the ambient magnetic field and the current magnetic field
reading for the y axis.
x4524 Baseline Difference Signal Value [z-axis]. The difference between the ambient magnetic field and the current magnetic field
reading for the z axis.
x4525 Baseline Value [x-axis]. Ambient magnetic field reading for the x axis.
x4526 Baseline Value [y-axis]. Ambient magnetic field reading for the y axis.
x4527 Baseline Value [z-axis]. Ambient magnetic field reading for the z axis.
x4528 Raw Signal Value [x-axis]. The actual magnetic field reading for the x axis.
x4529 Raw Signal Value [y-axis]. The actual magnetic field reading for the y axis.
x4530 Raw Signal Value [z-axis]. The actual magnetic field reading for the z axis.
44800s Ultrasonic Input Parameters
The following characteristics are configurable for the Ultrasonic input devices.
x4810 Max Scale Value. The Maximum Value register stores the maximum allowed analog value. The specific units of measure apply to
the register value. For example, the register may contain 20000, for 20 mA, or for a voltage input the register may contain 8000, for 8
volts.
x4811 Min Scale Value. The Minimum Value register stores the minimum allowed analog value. The specific units of measure apply to
the register value. For example, the register may contain 4000, for 4 mA, or for a voltage input the register may contain 2000, for 2 volts.
x4812 Enable Register Full Scale. Set to 1 to enable a linear range from 0 to 65535 for specified input range. For a 4 to 20 mA input, a
value of 0 represents 4 mA and 65535 represents 20 mA. Set this parameter to 0 to store input readings in unit-specific data. For example, the register data representing a 15.53 mA reading is 15530. For units of current (0 to 20 mA inputs), values are stored as µA (micro
Amps) and voltage values are stored as mV (millivolts).
x4813 Threshold and x4814 Hysteresis. Threshold and hysteresis work together to establish the ON and OFF points of an analog input.
The threshold defines a trigger point or reporting threshold (ON point) for a sensor input. The hysteresis value establishes how much
below the active threshold (ON point) an analog input is required to be before the input is considered OFF. A typical hysteresis value is
10% to 20% of the unit’s range.
Input Value
ON point
Threshold
Hysteresis
Input
In the example shown graphically, the input is considered on at 15
mA. To consider the input off at 13 mA, set the hysteresis to 2 mA.
The input will be considered off when the value is 2 mA less than
the threshold.
OFF point
Time
x4815 Delta. The delta parameter defines the change required between sample points of an analog input before the analog input reports
a new value. To turn off this option, set the Delta value to 0.
x4816 Sample High and x4817 Sample Low. For discrete inputs, the sample high parameter defines the number of consecutive samples the input signal must be high before a signal is considered active. Sample low defines the number of consecutive samples the input
signal must be low before a signal is considered low. The sample high and sample low parameters are used to create a filter to avoid
unwanted input transitions. The default value is 0, which disables this feature. The value range is 1 through 255.
x4818 Change of State Push Enable. Set to one (1) to enable push registers for this input. When the analog input changes state, the
register value will be pushed to the master radio if this register is configured to be a push register.
x4819 Median Filter Enable. Set to zero (0) to turn off the median filter. Set to one (1) to turn on the median filter.
32
www.bannerengineering.com - tel: 763-544-3164
151317 Rev 0
MultiHop Radio Product Manual
x4820 Low Pass (Tau) Filter. Set to zero (0) to turn off the tau filter. Set to 1 (weakest filter) through 6 (strongest filter) to turn on the tau
filter. (In the DX80 products, the Low Pass Filter is a combination of the median filter and the tau filter.) Write the following values to
select a low pass (tau) filter.
Low Pass (Tau) Filter
Register Value
Low Pass (Tau) Filter
Register Value
T0
0
T4
4
T1
1
T5
5
T2
2
T6
6
T3
3
46050s Battery Monitoring Parameters
Use the battery monitor parameters to monitor and set a threshold based on the incoming device voltage (on some models). The incoming voltage is approximately 3.6V dc from a battery input or 4.2V dc from the 10 to 30V dc input. These parameters allow users to determine which power source is powering the MultiHop device.
6051 Enable Battery Read. Set to zero to disable the battery read function. Set to 1 to enable the battery read function.
6052 Battery Read Sample Interval. Use this parameter to set the time interval at which the incoming voltage is read. Sample Interval
(in seconds) = 0.040 seconds × 2^RegValue. Default register value: 9 (20 seconds).
6053 Battery Voltage Threshold. Use this parameter to define the incoming voltage threshold at which register 4061 will be set to a
zero or one. Set this value in number of 100mA increments. The default value is 38 (or 3.8V).
6054 Hardware Reference Select. Use this parameter to allow for the correct calibration reference for different hardware platforms. Set
to zero for 3.0V PCB Vcc. Set to one for 3.3V PCB Vcc. Default value is zero.
6061 Battery Threshold Reading. When zero (0), the incoming voltage is below the threshold defined by parameter 6053 (powered by
battery). When one (1), the incoming voltage reading is above the defined threshold (powered by a solar panel or 10 to 30V dc).
6062 Battery Voltage Reading. Actual incoming voltage reading in units of 100mV.
51000s SDI-12 Parameter Descriptions
The following characteristics are configurable for the SDI-12 devices. Device A refers to the first SDI-12 device and device B refers to the
second SDI-12 device. We are using A and B instead of numbers to avoid confusion with the actual assigned device IDs of the SDI-12
devices.
11001 SDI-12 Device Address for Device A. Assign the SDI-12 device address for the first SDI-12 device to register 11001.
11201 SDI-12 Device Address for Device B. Assign the SDI-12 device address for the second SDI-12 device to register 11201.
An SDI-12 Device Address may be an alphanumeric value of 0 through 9, ‘a’ through ‘z,’ or ‘A’ through ‘Z.’ For this reason, store its ASCII
value in the Device Address register. For example, an SDI-12 address of 0 is stored as its ASCII value of 0x30.
11002 SDI-12 Mode Select for Device A. By default, the code supports the M! command. Enter a one (1) to support the C! command.
11202 SDI-12 Mode Select for Device B. By default, the code supports the M! command. Enter a one (1) to support the C! command.
Configuration Registers for SDI-12 Devices
There are nine registers for each SDI-12 device. The parameters are used to configure the properties of the information coming back
from the SDI-12 device.
Parameter numbering for the first SDI-12 device (device A) begins at 11011, with each Modbus register number offset from the previous
one by 20 Modbus registers. For example, the first parameter for the first SDI-12 register begins at Modbus register 11011. The first
parameter for the second SDI-12 register begins at Modbus register 11021.
Parameter numbering for the second SDI-12 device (device B) begins at 11211. The registers for the second SDI-12 device are offset
from the first device by 200.
151317 Rev 0
www.bannerengineering.com - tel: 763-544-3164
33
MultiHop Radio Product Manual
Configuration Registers for SDI-12 Device A
Register Enable
Decimal Point
Move
Move Right or Left
Signed or Unsigned
16 or 32 bit
Register 1
11011
11012
11013
11014
11015
Register 2
11021
11022
11023
11024
11025
Register 3
11031
11032
11033
11034
11035
Register 4
11041
11042
11043
11044
11045
Register 5
11051
11052
11053
11054
11055
Register 6
11061
11062
11063
11064
11065
Register 7
11071
11072
11073
11074
11075
Register 8
11081
11082
11083
11084
11085
Register 9
11091
11092
11093
11094
11095
11xx1 Register Enable. Use this register or enable (1) or disable (0) each register.
11xx2 Decimal Point Move. Enter a value from 0 to 7 to indicate the number of places to move the decimal point to convert from the
SDI-12 value to an integer.
11xx3 Move Right or Left. Write a 0 to move the decimal point to the right; write a 1 to move the decimal point to the left.
11xx4 Signed or Unsigned. Write a 1 for a signed value; write a 0 for an unsigned value.
11xx5 16-bit or 32-bit Registers. Write a 0 for a 16-bit value; write a 1 for a 32-bit value.
Configuration Examples
Configuring an Analog IN to use SP3
Example 1: Enable the first analog input to power an external sensor using switched power 3 and change the parameters based on the
requirements of the external sensor.
This data radio model has analog 1 associated to input 5.
The parameters to adjust and their Modbus registers are:
• Sample interval (reg 1202 hi word, 1203 low word): Change from factory default of 1 second to 15 minute sample interval
• Switch Power Enable (reg 1204): Turn on switch power 3 for this input, using the bit mask
• Switch Power Warm-up (reg 1205): Based on the sensor requirements, turn on the switched power for a certain time before it is
sampled.
• Switch Power Voltage (reg 1206): Set the voltage for the sensor operation.
The values to set in the registers are:
•
•
•
•
Sample Interval: 15 min, (900 seconds)
Switch Power Enable: 0x4
Switched Power Warm-up: 1 second
Switched Power Voltage: 15 Volts
Set the following registers to the values shown.
Modbus Register
Value
1202
0
34
Description
www.bannerengineering.com - tel: 763-544-3164
151317 Rev 0
MultiHop Radio Product Manual
Modbus Register
Value
Description
1203
22,500
This register contains the number of 40 ms time units. 900 seconds ÷ 0.040 seconds =
22,500
1204
4
Enable switch power 3 for this input, see parameter description for bit mask.
1205
25
Set warm-up time to 1 second, the register contains the number of 40 ms time units. 1 seconds ÷ 0.040 seconds = 25
1206
32
Set switch power voltage to 15V. Value from table next to parameter description.
Configuring for Acclima SDI-12 Sensors
Use the following configuration for Acclima SDI-12 devices.
Use the following parameters for Acclima SDI-12 sensors.
SDI-12 Device Register (Acclima)
Register Ena- Decimal Point
ble (1)
Move (0-7)
Move Right (0)
or Left (1)
Signed (1) or
Unsigned (0)
16 bit (0) or 32
bit (1)
1
Volumetric water content
ON
2
Left
Unsigned
32 bit
2
Temperature
ON
1
Left
Signed
32 bit
3
Soil Permittivity
ON
2
Left
Unsigned
32 bit
4
Soil Conductivity
ON
2
Left
Unsigned
32 bit
Results Registers (high:low)
Integer Conversion Multiplier
Sample Reading
Actual Value
Results Registers
Acclima Register No.
1
Volumetric water content
11101:11102
×100
0:124
1.24%
2
Temperature
11103:11104
×10
0:238
23.8°C
3
Soil Permittivity
11105:11106
×100
0:402
4.02
4
Soil Conductivity
11107:11108
×100
0:123
1.23 dS/m
Configuring for Decagon 5T3 SDI-12 Sensors
Use the following configuration for Decagon 5T3 SDI-12 devices.
Use the following parameters for Decagon 5T3 SDI-12 sensors.
SDI-12 Device Register (Decagon 5T3)
Register Ena- Decimal Point
ble (1)
Move (0-7)
Move Right (0)
or Left (1)
Signed (1) or
Unsigned (0)
16 bit (0) or 32
bit (1)
1
Volumetric water content
ON
2
Left
Unsigned
32 bit
2
Soil Conductivity
ON
2
Left
Unsigned
32 bit
3
Temperature
ON
1
Left
Signed
32 bit
Results Registers (high:low)
Integer Conversion Multiplier
Sample Reading
Actual Value
11101:11102
×100
0:124
1.24%
Results Registers
Decagon Register No.
1
Volumetric water content
151317 Rev 0
www.bannerengineering.com - tel: 763-544-3164
35
MultiHop Radio Product Manual
Decagon Register No.
Results Registers (high:low)
Integer Conversion Multiplier
Sample Reading
Actual Value
2
Soil Conductivity
11103:11104
×100
0:123
1.23 dS/m
3
Temperature
11105:11106
×10
0:238
23.8°C
Manufacturer Parameter Registers
The following are the device-specific and manufacturer parameters for the MultiHop radio devices. These registers are all within the
4xxxx range.
44100s Manufacturing Information
Address
Name
Format
4101–4104
Serial number, digits 1–8
ASCII, read only
4111–4113
Model number, digits 1–6
ASCII, read only
4121–4123
Production date, digits 1–6
ASCII, read only
Address
Name
Format
4201–4209
Name characters 1-18
ASCII
Address
Name
Format
4301–4303
RF firmware p/n
ASCII, read only
4304–4305
RF firmware version
ASCII, read only
4306–4308
RF EEPROM part number, digits 1–6
ASCII, read only
4309–4310
RF EEPROM version number, characters
1–3
ASCII, read only
4311–4313
LCD firmware p/n
ASCII, read only
4314–4315
LCD firmware version
ASCII, read only
4316–4318
LCD EEPROM part number, digits 1–6
ASCII, read only
4319–4320
LCD EEPROM version number, characters
1–3
ASCII, read only
Address
Name
Format
6401
Device address
Hex
6402
Parent address
Hex, read only
44200s Device Name
44300s Software Information
46400s Message Parameters
Strings stored in ASCII format are read as two characters per Modbus register. The lower numbered Modbus register contains the rightmost characters in the string. Within a given Modbus register, the upper byte contains the ASCII character that goes to the right of the
character in the lower byte.
36
www.bannerengineering.com - tel: 763-544-3164
151317 Rev 0
MultiHop Radio Product Manual
Storing a Model Number
For example, the model number 148691 is stored as shown below.
Address (4xxxx)
Name
Modbus Register Value (in
hex)
Character Representation
4111
Model number digits 6-5
0x3139
19
4112
Model number digits 4-3
0x3638
68
4113
Model number digits 2-1
0x3431
41
Parameters Stored as Numbers
Parameters stored as number values (not ASCII) read out directly as 16-bit values. Examples of parameters of this type include the
Parent Address or Device Address.
Address (4xxxx)
Name
Value (in hex)
Value (decimal)
6401
Device address
0x002A
42
6402
Parent address
0x0023
35
Device and System Parameters
48200s Sample On Demand
To Sample on Demand is to trigger inputs to immediately sample. A host system triggers this sampling by writing a specific value to the
Sample on Demand registers. After the selected inputs are sampled, the MultiHop device resets the Sample on Demand register(s) back
to zero. It is up to the host system to retrieve the value of the sampled input.
There are two ways to trigger a Sample on Demand.
1. Write a value to register x8201, or
2. Write a one (1) to any of the individual input's registers x8221 (input 1) through x8236 (input 16).
Do not write to both register x8201 and the registers x8221 through x8236.
x8201 Input 1-16 Sample on Demand Latch (bit field). Use this bit field register to trigger a sample on demand to more than one input
using a single register. For example, to trigger a sample on demand for inputs 1 and 5, write 0000 0000 0001 0001 (0x0011) to this
register.
x8221 Input 1 Sample on Demand Latch. Write a one (1) to this register to sample input 1.
x8221 Input 2 Sample on Demand Latch. Write a one (1) to this register to sample input 2.
...
x8236 Input 16 Sample on Demand Latch. Write a one (1) to this register to sample input 16.
151317 Rev 0
www.bannerengineering.com - tel: 763-544-3164
37
MultiHop Radio Product Manual
Agency Certifications
FCC Certification, 900 MHz, 1 Watt Radios
The DX80 Module complies with Part 15 of the FCC rules and regulations.
FCC ID: UE3RM1809 This device complies with Part 15 of the FCC Rules. Operation is subject to the following two conditions: (1) this
device may not cause harmful interference, and (2) this device must accept any interference received, including interference that may
cause undesired operation.
FCC Notices
IMPORTANT: The radio modules have been certified by the FCC for use with other products without any further certification (as per FCC
section 2.1091). Changes or modifications not expressly approved by the manufacturer could void the user’s authority to operate the
equipment.
IMPORTANT: The radio modules have been certified for fixed base station and mobile applications. If modules will be used for portable
applications, the device must undergo SAR testing.
IMPORTANT: If integrated into another product, the FCC ID label must be visible through a window on the final device or it must be
visible when an access panel, door, or cover is easily removed. If not, a second label must be placed on the outside of the final device
that contains the following text: Contains FCC ID: UE3RM1809.
Note
This equipment has been tested and found to comply with the limits for a Class B digital device, pursuant to Part 15 of the FCC Rules.
These limits are designed to provide reasonable protection against harmful interference in a residential installation. This equipment generates, uses, and can radiate radio frequency energy and, if not installed and used in accordance with the instructions, may cause harmful interference to radio communications. However, there is no guarantee that interference will not occur in a particular installation. If this
equipment does cause harmful interference to radio or television reception, which can be determined by turning the equipment off and
on, the user is encouraged to try to correct the interference by one or more of the following measures:
•
•
•
•
Reorient or relocate the receiving antenna,
Increase the separation between the equipment and receiving module,
Connect the equipment into an outlet on a circuit different from that to which the receiving module is connected, and/or
Consult the dealer or an experienced radio/TV technician for help.
Antenna WARNING: This device has been tested with Reverse Polarity SMA connectors with the antennas listed in Table 1 Appendix A.
When integrated into OEM products, fixed antennas require installation preventing end-users from replacing them with non-approved
antennas. Antennas not listed in the tables must be tested to comply with FCC Section 15.203 (unique antenna connectors) and Section
15.247 (emissions).
FCC Approved Antennas
WARNING: This equipment is approved only for mobile and base station transmitting devices. Antenna(s) used for this transmitter must
be installed to provide a separation distance of at least 20 cm from all persons and must not be collocated or operating in conjunction
with any other antenna or transmitter.
DX80 Module may be used only with Approved Antennas that have been tested with this module.
Model Number
Antenna Type
Maximum Gain
Minimum Required Cable/Connector Loss
-
Integral Antenna
Unity gain
0
BWA-9O1-x
Omni, 1/4 wave dipole
≤2 dBi
0
38
www.bannerengineering.com - tel: 763-544-3164
151317 Rev 0
MultiHop Radio Product Manual
Model Number
Antenna Type
Maximum Gain
Minimum Required Cable/Connector Loss
BWA-9O2-C
Omni, 1/2 wave dipole, Swivel
≤2 dBi
0
BWA-9O6-A
Omni Wideband, Fiberglass Radome
≤8.2 dBi
2.2 dB
BWA-9O5-B
Omni Base Whip
≤7.2 dBi
1.2 dB
BWA-9Y10-A
Yagi
≤10 dBi
4 dB
FCC Certification, 2.4GHz
The DX80 Module complies with Part 15 of the FCC rules and regulations.
FCC ID: UE300DX80-2400 This device complies with Part 15 of the FCC Rules. Operation is subject to the following two conditions: (1)
this device may not cause harmful interference, and (2) this device must accept any interference received, including interference that may
cause undesired operation.
FCC Notices
IMPORTANT: The DX80 Modules have been certified by the FCC for use with other products without any further certification (as per FCC
section 2.1091). Changes or modifications not expressly approved by the manufacturer could void the user’s authority to operate the
equipment.
IMPORTANT: The DX80 Modules have been certified for fixed base station and mobile applications. If modules will be used for portable
applications, the device must undergo SAR testing.
IMPORTANT: If integrated into another product, the FCC ID label must be visible through a window on the final device or it must be
visible when an access panel, door, or cover is easily removed. If not, a second label must be placed on the outside of the final device
that contains the following text: Contains FCC ID: UE300DX80-2400.
Note
This equipment has been tested and found to comply with the limits for a Class B digital device, pursuant to Part 15 of the FCC Rules.
These limits are designed to provide reasonable protection against harmful interference in a residential installation. This equipment generates, uses, and can radiate radio frequency energy and, if not installed and used in accordance with the instructions, may cause harmful interference to radio communications. However, there is no guarantee that interference will not occur in a particular installation. If this
equipment does cause harmful interference to radio or television reception, which can be determined by turning the equipment off and
on, the user is encouraged to try to correct the interference by one or more of the following measures:
•
•
•
•
Reorient or relocate the receiving antenna,
Increase the separation between the equipment and receiving module,
Connect the equipment into an outlet on a circuit different from that to which the receiving module is connected, and/or
Consult the dealer or an experienced radio/TV technician for help.
Antenna Warning WARNING: This device has been tested with Reverse Polarity SMA connectors with the antennas listed in Table 1
Appendix A. When integrated into OEM products, fixed antennas require installation preventing end-users from replacing them with nonapproved antennas. Antennas not listed in the tables must be tested to comply with FCC Section 15.203 (unique antenna connectors)
and Section 15.247 (emissions).
FCC Approved Antennas
WARNING: This equipment is approved only for mobile and base station transmitting devices. Antenna(s) used for this transmitter must
be installed to provide a separation distance of at least 20 cm from all persons and must not be collocated or operating in conjunction
with any other antenna or transmitter.
DX80 Module may be used only with Approved Antennas that have been tested with this module.
151317 Rev 0
www.bannerengineering.com - tel: 763-544-3164
39
MultiHop Radio Product Manual
Model Number
Antenna Type
Maximum Gain
Integral antenna
Unity gain
BWA-2O2-C
Omni, 1/2 wave dipole, Swivel
≤2 dBi
BWA-2O5-C
Omni, Collinear, Swivel
≤5 dBi
BWA-2O7-C
Omni, Coaxial Sleeve, Swivel
≤7 dBi
Certified For Use in the Following Countries
The SureCross radio devices are approved for use in the following countries.
Model Families
Country
Frequency
DX80
Australia
2.4 GHz
x
x
Austria
2.4 GHz
x
x
x
x
x
Bahamas, The
900 MHz
x
x
x
x
x
Bahamas, The
2.4 GHz
x
x
x
x
x
Bahrain (Kingdom of)
2.4 GHz
x
x
x
x
x
Belgium
2.4 GHz
x
x
x
x
x
Brazil
2.4 GHz
x
x
x
x
Bulgaria
2.4 GHz
x
x
x
x
x
Canada
900 MHz
x
x
x
x
Canada
2.4 GHz
x
x
x
x
x
Chile
2.4 GHz
x
x
x
x
China (People's Republic of)
2.4 GHz
x
x
Colombia
900 MHz
x
x
x
x
x
Colombia
2.4 GHz
x
x
x
x
x
Cyprus
2.4 GHz
x
x
x
x
x
Czech Republic
2.4 GHz
x
x
x
x
x
Denmark
2.4 GHz
x
x
x
x
x
Estonia
2.4 GHz
x
x
x
x
x
Finland
2.4 GHz
x
x
x
x
x
France
2.4 GHz
x
x
x
x
x
Germany
2.4 GHz
x
x
x
x
x
Greece
2.4 GHz
x
x
x
x
x
Hungary
2.4 GHz
x
x
x
x
x
Iceland
2.4 GHz
x
x
x
x
x
40
DX80 1
Watt
x
www.bannerengineering.com - tel: 763-544-3164
DX70
x
DX70 1
Watt
DX91
DX99
DX80D
R
x
x
x
151317 Rev 0
MultiHop Radio Product Manual
Model Families
Country
Frequency
DX80
India
2.4 GHz
x
Ireland
2.4 GHz
Israel
DX91
DX99
DX80D
R
x
x
x
x
x
x
x
x
x
2.4 GHz
x*
x
x*
x
Italy
2.4 GHz
x
x
x
x
x
Latvia
2.4 GHz
x
x
x
x
x
Liechtenstein
2.4 GHz
x
x
x
x
x
Lithuania
2.4 GHz
x
x
x
x
x
Luxembourg
2.4 GHz
x
x
x
x
x
Malta
2.4 GHz
x
x
x
x
x
Mexico
900 MHz
x
x
x
Mexico
2.4 GHz
Netherlands
2.4 GHz
x
x
New Zealand
2.4 GHz
x
x
Norway
2.4 GHz
x
x
x
x
x
Panama
900 MHz
x
x
x
x
x
Panama
2.4 GHz
x
x
x
x
x
Poland
2.4 GHz
x
x
x
x
x
Portugal
2.4 GHz
x
x
x
x
x
Romania
2.4 GHz
x
x
x
x
x
Saudia Arabia (Kingdom of)
2.4 GHz
x
x
x
x
x
Singapore
2.4 GHz
x
Slovakia
2.4 GHz
x
x
x
x
x
Slovenia
2.4 GHz
x
x
x
x
x
South Africa
2.4 GHz
x
x
Spain
2.4 GHz
x
x
x
x
x
Sweden
2.4 GHz
x
x
x
x
x
Switzerland
2.4 GHz
x
x
x
x
x
Taiwan
2.4 GHz
x**
x
Thailand
2.4 GHz
x
United Arab Emirates
2.4 GHz
x
x
x
x
x
United Kingdom
2.4 GHz
x
x
x
x
x
United States of America
900 MHz
x
x
x
x
United States of America
2.4 GHz
x
x
x
x
151317 Rev 0
DX80 1
Watt
x
DX70
x
DX70 1
Watt
x
x
x
x
x
x
x
x
x
x**
x
x
www.bannerengineering.com - tel: 763-544-3164
x
x
x
41
MultiHop Radio Product Manual
Bulgaria - Authorization required for outdoor and public service use.
Canada- This Class A digital apparatus meets all requirements of the Canadian Interference Causing Equipment Regulations. Operation
is subject to the following two conditions: (1) this device may not cause harmful interference, and (2) this device must accept any interference received, including interference that may cause undesired operation.
Cet appareil numérique de la classe A respecte toutes les exigences du Règlement sur le matériel brouiller du Canada. Le present appareil numérique n’emet pas de bruits radioélectriques dépassant les limites applicables aux appareils numeriques de le Classe A préscrites dans le Reglement sur le brouillage radioélectrique édits par le ministere des Communications du Canada.
France - In Guyane (French Guiana) and La Réunion (Reunion Island), outdoor use not allowed.
* Israel - DX80 and DX99 models are certified for the external antenna models only.
Italy - If used outside of own premises, general authorization is required.
Luxembourg - General authorization is required for public service.
** Taiwan - Taiwan is certified to operate specific DX80 and DX99 models. For a list of specific models, refer to the certificate.
Additional Statements - 900 MHz
This device has been designed to operate with the antennas listed on Banner Engineering’s website and having a maximum gain of 9
dBm. Antennas not included in this list or having a gain greater that 9 dBm are strictly prohibited for use with this device. The required
antenna impedance is 50 ohms.
To reduce potential radio interference to other users, the antenna type and its gain should be so chosen such that the equivalent isotropically radiated power (EIRP) is not more than that permitted for successful communication.
Transmit Power Levels
The SureCross wireless products were certified for use in these countries using the standard antenna that ships with the product. When
using other antennas, verify you are not exceeding the transmit power levels allowed by local governing agencies.
42
www.bannerengineering.com - tel: 763-544-3164
151317 Rev 0
Dimensions
MultiHop Radio, Low Profile Housing
65.0
[2.56”]
65.0
[2.56”]
7.9
[0.31”]
80.3
[3.16”]
109
[4.29”]
7.65
[0.30”]
42
[1.65”]
14.67
[0.578”]
80.8
[3.18”]
MultiHop Radio with I/O
151317 Rev 0
www.bannerengineering.com - tel: 763-544-3164
43
MultiHop Radio Product Manual
65.0
[2.56”]
22.2
[0.875”]
7.9
[0.31”]
30.65
[1.21”]
65.0
[2.56”]
19
[0.75”]
80.3
[3.16”]
127
[5”]
7.65
[0.30”]
60
[2.36”]
14.67
[0.578”]
80.8
[3.18”]
120
[4.72”]
44
www.bannerengineering.com - tel: 763-544-3164
151317 Rev 0
Advanced Setup
MultiHop Radio Menu System
When power is applied, the MultiHop radio begins running. The display screen autoscrolls
through the *RUN menu and communication between the devices is enabled. Autoscrolling
through the *RUN menu is the normal operating mode for all devices on the wireless network.
Access the menu system using the push buttons and the LCD.
Single-click Button 1 to advance through menu
Data
(DEST)
Radio
XXXXXX
*
(DEV)
MASTER
<RCVD>
XX
<SENT>
**
(DR9M
S/N)
XXXXXX
(BICD)
XXXXXX
XX
Master
Repeater
CHLDRN
Single-click B1
PARENT
XXXXXX
XXXXXX
Single-click B2
Slave
CHLDRN
XXXXXX
(DR9M
MODEL)
XXXXXX
(DR9M
PDATE)
XXXX
AUTO
DISPLAY
LOOP
AUTO
DISPLAY
LOOP
GRN XX
GRN XX
YEL XX
YEL XX
RED XX
MIS XX
PARENT
Single-click B2
RED XX
MIS XX
-BIND
-DEST
-FMPCT
Single-click B2
Hold button 2
AUTO
DISPLAY
LOOP
XXXXXX
Device
(NETA)
**
SAVES
DISPLAYED
VALUE
GRN XX
YEL XX
RED XX
MIS XX
Double-click B2
(NAME)
(DEV)
MASTER
Initiate the Site Survey
(from a child radio)
Single-click B1
(DADR)
XXXXXX
**
Single-click
Button 2
Single-click
Button 2
AUTO
DISPLAY
LOOP
Double-click B2
(DEV)
MASTER
DVCFG
*Device
Config
Single-click B2
Repeater and slave only
(PADR)
XXXXXX
*SiteSITE
Survey
Double-click B2
AUTO
DISPLAY
LOOP
AUTO
DISPLAY
LOOP
*FCTRY
Factory
Double-click B2
*DINFO
Device Info
Single-click B2
*RUN
(RADIO
* or BRDCST
** Master, repeater, or slave
FMP/N)
XXXXXX
(RADIO
FMVER)
V X.XX
(RADIO
EEP/N)
XXXXXX
(LCD
FMVER)
V X.XX
(RADIO
EEVER)
V X.XX
(LCD
FMP/N)
XXXXXX
(LCD
EEP/N)
XXXXXX
(LCD
EEVER)
V X.XX
From the *RUN Menu (or any menu), single-click button 1 to advance through the top-level menus. Top-level menus are displayed on the
LCD with an asterisk (*) in front of the menu name.
Double-click button 2 to pause or resume the auto display loop. Use button 1 to advance through the items in that menu. (Enter “auto
scrolled” menus by double clicking button 2. Enter the other menus by single clicking button 2.)
151317 Rev 0
www.bannerengineering.com - tel: 763-544-3164
45
MultiHop Radio Product Manual
RUN
The RUN menu displays the network ID, parent address, device address, current destination address, operational mode (master, repeater, slave), and the number of received and sent data packets.
PADR. Parent’s device address, a unique number based on the parent device’s serial number and assigned by the factory. The PADR is
the 6-digit serial number minus 65535.
DADR. Device address, a unique number based on the serial number and assigned by the factory. The DADR is the 6-digit serial number
minus 65535.
DEST. The current destination address to route messages. When this displays BRDCST, the device is either in transparent mode and is
broadcasting the messages to all devices, or the device is in the early stages of Modbus mode and is broadcasting messages to determine the paths to specific device addresses.
RCVD. The number of serial messages received.
SENT. The number of serial messages sent.
DINFO (Device Info)
The DINFO menu displays the device information.
(NAME). An 18-character name users may assign to the device.
(NETA). Network Address (display only).
(BICD). Binding Code (display only).
FCTRY (Factory)
The FCTRY menu displays the factory information about the device, including the model, dates of manufacture, and version numbers.
S/N. The device’s serial number.
Model #. The DX80DR9M family model number.
PDate. Production date.
Radio FMP/N. Firmware part number.
SITE (Site Survey)
Single-click button 2 to pause/resume the auto display loop. While paused, use button 1 to advance through the GRN, YEL, RED, and
MIS displays.
DVCFG (Device Configuration)
Single-click button 2 to enter this menu. Use button 1 to move through the options in this menu.
-BIND. Binding Code. Single click button 2 to manually set the binding code. Once in the binding code command, use button 2 to select
the digits; use button 1 to increment the selected digit. Press and hold button 2 to save the new binding code. The device asks if you
want to save the new setting (button 2) or discard the new setting and reselect (button 1).
-DEST. Destination Address. To force message routing when operating in transparent mode, set a specific destination address.
-FMPCT. Formation percentage, default value of 50%. This device will not form a parent/child relationship with a parent radio that misses
more than 50% of the timing beacons (approximately a 25% site survey link value). If the only option for a child is a parent with a less
than a 25% site survey link value, change this value.
Create the MultiHop Network by Manually Binding the Radios (using
Menu Navigation)
To quickly replace radios or create ready-to-go spares in an existing network, use the manual binding feature to preset the binding code.
Binding MultiHop radios ensures all MultiHop radios within a network communicate only with other radios within the same network. The
MultiHop radio master automatically generates a unique binding code when the radio master enters binding mode. This code is then
46
www.bannerengineering.com - tel: 763-544-3164
151317 Rev 0
MultiHop Radio Product Manual
transmitted to all radios within range that are also in binding mode. After a repeater/slave is bound, the repeater/slave radio accepts data
only from the master to which it is bound. The binding code defines the network, and all radios within a network must use the same
binding code.
DVCFG
*Device
Config
To manually enter a binding code:
-BIND
-DEST
-FMPCT
Hold button 2
SAVES
DISPLAYED
VALUE
Double-click B2
Single-click B1
Single-click
Button 2
Normally, all devices are bound together before they are physically installed. In a replacement situation, the master device may not always be accessible. Using the manual binding
process eliminates the need to put the master device into binding mode and allows the wireless network to remain operational.
1. Single click button 1 to advance to the *DVCFG menu.1.
2. Single click button 2 to enter the DVCFG menu.2. -BIND displays on the screen as the
first option under DVCFG.
3. Single click button 2 to display the binding code. Record this number if this is the binding code you are copying.3.
4. To change this binding code, use button 1 to increment the blinking digit. Use button 2
to advance, from left to 4. right, to the next digit.
5. When you are finished making changes, press and hold down button 2 to save your
changes. When the screen 5. reads SAVE, release button 2.
6. The device confirms your request to save. Press button 1 to reject your changes. Press
button 2 to save your 6. changes.
7. Double-click button 2 to exit the DVCFG menu.
Conducting a Site Survey using Modbus Commands
When triggering a site survey from a Modbus master/host system, only the child radio is used to start the site survey. While the site
survey is running, you will not be able to communicate with the radio slave. To trigger a site survey using a Modbus master/host-controlled system, follow these steps:
1. Write zeros (0) to the child radio's Site Survey Results registers: 46452 through 46455.
2. Write a one (1) to the child radio’s External Site Survey Control register: 46451
The site survey between the child radio and its parent radio begins. Unlike other site survey processes, this method of triggering a
site survey results in only 100 packets sent between the parent and child.
3. Wait about 10 seconds for the site survey to complete.
After the 100 packets are sent, the site survey shuts down automatically.
4. Read the child radio’s results registers.
Register 46452 contains the green signal strength results. Register 46453 contains the yellow signal strength results. Register 46454
contains the red signal strength results. Register 46455 contains the number of missed packets.
Using 10 to 30V dc to Power the MultiHop Radio and a Gateway
When using 10 to 30V dc to power both the MultiHop radio and a Gateway, use the 4-pin Euro-style splitter cable to avoid damaging the
Gateway or MultiHop radio.
151317 Rev 0
www.bannerengineering.com - tel: 763-544-3164
47
MultiHop Radio Product Manual
1
CSB-M1240M1241. Splitter cable, 4-pin Euro-style QD, No trunk
male, two female branches, yellow. Use to connect the Data Radio to
the 10–30V dc DX80 Gateway.
2
DX80DR9M-Hx. MultiHop Data Radio
3
DX80 Gateway, powered by 10-30V dc
Using the Solar Supply to Power the MultiHop Radio and a FlexPower
Gateway
When using the FlexPower Solar Supply to power both the data radio and the FlexPower Gateway, use the 5-pin Euro-style splitter cable.
48
1
CSRB-M1250M125.47M125.73. Splitter cable, 5-pin Euro-style QD,
No trunk male, two female branches, black. Most commonly used
with solar and other FlexPower devices.Splitter cable, 5-pin Eurostyle QD, No trunk male, two female branches, black. Most commonly used with solar and other FlexPower devices.
2
DX80DR9M-Hx. MultiHop Data Radio
3
DX80 FlexPower Gateway
www.bannerengineering.com - tel: 763-544-3164
151317 Rev 0
Index
A
analog input parameters 25
analog output parameters 29
antenna
direct installation 18
remote installation 19, 20
antenna installation
remote 16
warning 17
weatherproofing 17
B
baseline 31
baseline drift filter 31
binding 9
C
certification
FCC 39
certified countries 40
chemical exposure 15
child radio 4, 11
collocation 16
communication timeout 25
compensation median filter 31
continuous voltage 24, 29
counter input parameters 27
counter preset value 28
D
default output 25
default output state
analog output 30
switch power 29
delta 31
DIP switches 8
discrete input parameters 25
E
electrical tape 17
enable frequency or event counter 27
enable h-bridge 28
enable input 23
enclosure 13
extended input read 24
F
factory default settings
returning to 30
flash index 24
flash output 24
forming networks 9
151317 Rev 0
full scale
analog output 30
G
gasket
main body 15
glands and plugs 13
ground 15
ground wire 17, 18
H
hold last state
analog output 30
switch power 29
hose timeout 25
hysteresis
M-GAGE 31
I
I/O isolation 17
inter-character timing 5
L
latch on change of state 25
LEDs 11
lightning arrestor 16
low pass filter 31
M
M-GAGE baseline 31
M-GAGE baseline drift filter 31
M-GAGE compensation median filter 31
M-GAGE delta 31
M-GAGE low pass filter 31
M-GAGE parameters 30
manufacturer parameter registers 36
master radio 4, 5, 8, 11
maximum analog value
output 30
maximum value 26, 32
mechanical stress 15
minimum analog value
output 30
minimum value 26, 32
Modbus mode 5
Modbus register
switch power output 28
Modbus registers
analog output 29
counter input 27
default output parameters 25
discrete input 25
49
discrete output 29
extra inputs 22
extra outputs 22
H-Bridge outputs 28
I/O parameters 22
input parameters 22
M-GAGE 30
manufacturer parameters 36
output flash pattern 30
output parameters 24
sample on demand 37
SDI-12 33
standard inputs 22
standard outputs 22
switch power 23
Modbus Slave IDs 5
model number register 37
MultiHop Radio ID 6, 9
MultiHop Radio IDs 6
MultiHop Slave ID 9
rubber splicing tape 17
S
network formation 4
NPT port 14
NPT ports 14
sample high
M-GAGE 31
sample high/low 25
sample interval 23
sample low
M-GAGE 31
sample on demand registers 37
sample rate 23
SDI-12 registers 33
seasonal changes 16
single-point ground 18
site survey
interpreting results 12
slave radio 4, 5, 11
sunlight exposure 13
surge supressors 16
switch power 28
switch power inputs 23
switch power output 28
switch power voltage 24
switch power warm-up 24
O
T
N
out of sync 25
outdoor installations 13
output flash pattern parameters 30
overvoltage transients 15
P
packet routing 5
packet size 5
parameters
I/O 22
output 24
parent radio 4, 11
PG-7 14
PNP or NPN
selecting 25
PTFE tape 14
temperature resolution 27
temperature scaling 26
thermocouple type 26
threshold
M-GAGE 31
transparent mode 5
V
vibration 15
W
warmup time 28
water exposure 13
watertight 13
R
repeater radio 4, 5, 11
Warranty: Banner Engineering Corporation warrants its products to be free from defects
for a period of one year. Banner Engineering Corporation will repair or replace, free of
charge, any product of its manufacture found to be defective at the time it is returned to
the factory during the warranty period. This warranty does not cover damage or liability
for the improper application or installation of Banner products. This warranty is in lieu of
any other warranty either expressed or implied.