1
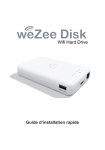
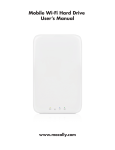
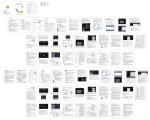
RAVPower® Multi-Functional Wi-Fi Disk with Built-in Power Bank (Model#:
RP-WD01) --For PC / Laptop / Tablet and Smartphone with iOS & Android System
Content
1
Features ------------------------------------------------------------------------------------------------------------1
2 Specifications -----------------------------------------------------------------------------------------------------1
3 How to Use --------------------------------------------------------------------------------------------------------2
3.1 Product Diagram------------------------------------------------------------------------------------------------2
3.2 Minimum Hardware Requirements -----------------------------------------------------------------------3
3.3 Storage Installation --------------------------------------------------------------------------------------------3
3.3.1 SD Memory Card ------------------------------------------------------------------------------------3
3.3.2
USB External Storage-------------------------------------------------------------------------------4
3.4 Software /APP Installation-----------------------------------------------------------------------------------5
3.4.1
PC Client-----------------------------------------------------------------------------------------------5
3.4.2
Mobile Device----------------------------------------------------------------------------------------5
3.4.2.1 iOS Client App Installation-------------------------------------------------------------------5
3.4.2.2 Android Client App Installation-------------------------------------------------------------6
3.5 Wireless Connecting Your Device---------------------------------------------------------------------------7
3.5.1
PC Client-----------------------------------------------------------------------------------------------7
3.5.2
iOS Client----------------------------------------------------------------------------------------------8
3.5.3
Android Client----------------------------------------------------------------------------------------9
3.6 User Login-------------------------------------------------------------------------------------------------------10
3.6.1
PC Client----------------------------------------------------------------------------------------------10
3.6.2
iOS Client --------------------------------------------------------------------------------------------14
3.6.3
Android Client--------------------------------------------------------------------------------------14
3.7 Basic Function--------------------------------------------------------------------------------------------------16
3.7.1
iOS Client--------------------------------------------------------------------------------------------16
3.7.2
Android Client--------------------------------------------------------------------------------------31
3.8 Web Function--------------------------------------------------------------------------------------------------45
3.8.1
Explorer Function----------------------------------------------------------------------------------46
3.8.2
Context Menu--------------------------------------------------------------------------------------46
3.8.3
Keyboard Shortcuts-------------------------------------------------------------------------------48
3.8.4
Drag and Drop--------------------------------------------------------------------------------------49
3.8.5
Information------------------------------------------------------------------------------------------49
3.8.6
Basic Setting-----------------------------------------------------------------------------------------50
3.8.7 Network Setting------------------------------------------------------------------------------------51
3.8.8
Internet Setting------------------------------------------------------------------------------------53
3.8.9 Network Service-----------------------------------------------------------------------------------54
3.8.10 System Setting--------------------------------------------------------------------------------------55
3.8.11 Firmware Update----------------------------------------------------------------------------------57
3.8.12 Resetting to Factory default--------------------------------------------------------------------58
3.8.13 About Setting---------------------------------------------------------------------------------------59
4
DownLoad-----------------------------------------------------------------------------------------------------60
5
Product Warranty & Problem Solving------------------------------------------------------------------60
1
6
7
Notice------------------------------------------------------------------------------------------------------------60
Contact Us-------------------------------------------------------------------------------------------------------60
2
RAVPower® Multi-Functional Wi-Fi Disk with Built-in Power Bank (Model#:
RP-WD01)
--For PC / Laptop / Tablet and Smartphone with iOS & Android System
Thank you for purchasing the RAVPower® RP-WD01 Wi-Fi Disk, which helps your PC / Laptop
/ Tablet and Smartphone to read and transfer the data (photo, music & movies) from
external storage devices via Wi-Fi. Its compact and multi-functional design will bring you
unprecedented mobile experience!
1. Features:
●
●
●
●
●
Wi-Fi SD Card / USB External HDD Reader
- Enable you to read the data on SD card or USB External HDD/SDD by your
iPhone, iPad, Smartphone, tablet or computer with Wi-Fi connectivity
(802.11 b/g/n).
- Two-way data transmission between RP-WD01 your iPhone, iPad,
Smartphone, tablet or computer with Wi-Fi connectivity (802.11 b/g/n).
- Available iOS and Android mobile App with search utility function to find and
locate specific data file.
3000mAh Power Bank / External battery Charger
- Emergency backup battery for emergency charging. At least a full charge to
the battery life of most mobile phones.
- Supply the power needed for itself while used as a Wi-Fi SD Card / USB
External HDD Reader
Portable WLAN Hot Spot
Bypass your Internet access to your existing Wi-Fi router, so you may access any
data in the SD or HDD while surfing the Internet simultaneously.
Share with Friend & Family
Allow 5 maximum connections at the same time for data sharing, or connecting
to the internet service.
Light weight and Slim Design
Lightweight and multifunctional design makes RP-WD01 much more portable. It is a great
couple for travelers.
2. Specifications:
Model:
CPU
Wi-Fi
RP-WD01
Model:
Ralink RT5350
Frequency:
MIPS24KEc 350MHz
Standard:
802.11b/g/n
Frequency:
2.4 GHZ
Speed:
72 Mbps at 20MHz / 150 Mbps at 40MHz
1
Battery
Power
Consumption
Capacity:
3000 mAh
Max Input:
1.5A (support 0.5A,0.8A&1.5A Input)
Output:
1A
SD Card Read/Write*
2W
Stand-by(HDD sleep Mode)
1.5W
SD Card Read/Write Speed
Read: 3 MB / S Write: 3.5MB/S
USB Interface:
Micro USB 2.0 for data transfer and charging
Working Temperature:
5-35°C
Storage Temperature:
0-60°C
Dimension(L*W*T):
118mm*77mm*13mm
Weight:
124g
3.How to Use:
3.1 Product Diagram
Micro USB Interface: Micro USB 2.0 Interface can connect to the computer to transmit and
charge the device.
Power Button:
SD Slot: Insert SD card for Wi-Fi accessing.
Reset Button: Set the device to Default Factory configuration.
USB Host: Connect USB memory, external USB potable hardisk for Wi-Fi accessing, Or connect
smartphone, mobile devices to charge.
LED Indicator:
Battery Level LED:
Green Steady Light
Battery power is >30%
2
Red Steady Light
Battery power is >30%
Red Fast Flash
Battery power is low and will soon shut down
Green Slow Flash (every 2 seconds)
Battery is charging
Green Slow Flash (every 1.5 seconds)
Device is shutting down
Green Slow Flash (every 1.5 seconds)
Device is powered off
Wi-Fi LED:
Blue LED shows the system initiation state. It starts flashing in the process of initiation, and it
stops flashing when the system initiation completes.
Blue Steady Light
WiFi is ready
LED off
Device is on, but the WiFi signal is unsteady
Device is off
Device is in Mobile HDD Mode and the WiFi is off
Internet LED:
Green Steady Light
WiFi signal is good
No Light
Not connected to the Internet
R/W LED:
On WiFi disk mode
Card reader mode
Blue Steady Light
Memory connection is successful
Blue Flashing Light
Memory is reading or writing
Blue Steady Light
Memory is reading or writing
Blue Flashing Light
Connected to USB2.0 and is reading or writing
3.2 Minimum Hardware Requirements
Internet Connection
PC Operating System
Requirements
PC Web Browser
Windows:
XP/Vista/Windows 7
Mac:
OS X 10.5.0 and higher version
Others:
Fedora 12 (Linux) and higher version
Windows:
Supports Internet Explorer 7.0 and higher version
Mac:
Supports Safari 3.0 and higher version
Others:
Firefox 3.5 and higher version
Router or Switch
3.3 Storage Installation
3.3.1 SD Memory Card
3
1> Locate the SD memory card slot.
2> Simply insert the memory card as seen on the image below.
3> Gently push the memory card all the way in until it locks into its place.
4> Press the power button to switch on the device.
5> Wait for few seconds to complete the initialization process and your SD
memory card is ready to use
Do not touch the exposed connectors on your SD memory card. Prior to
installing the SD memory card, make use the Wi
Wi-Fi
Fi SD/USB device is switched off and
no USB external storage is connected.
Note:
3.3.2 USB External Storage
1> Locate the USB port on the device.
2> Simply insert the USB connector into the USB port of the device as seen
the image below.
3> Press the power button to switch on the device.
4> Wait for few seconds to complete the initialization process and your USB
external storage is ready to use.
use the Wi-Fi
Fi SD/USB
Note: Prior to installing your external USB Storage, make u
device is switched off and no SD memory card installed.
4
3.4 Software /APP Installation
3.4.1 PC Client
1> Download
double-click
click on the “NAS Client Login Utility
2> To install the software, simply double
v2.2 Setup” executable file and follow the on
on-screen instructions.
3>
Once the installation is complete, double
double-click
click on the “NAS Client Login
Utility V2.2” icon on your desktop to launch the software utility.
3.4.2 Mobile Device
3.4.2.1 iOS Client App Installation
1> Click on the “App St
Store”
ore” icon on the desktop as seen on the image below.
Search and locate the free “MobileFun” app and follow the on-screen
on
installation instructions.
2> Once the installation process has been completed, the “MobileFun” app
can be found on the desktop as seen on the image below.
5
3> Turn-on
on the Wi
Wi-Fi
Fi SD/USB. Wait for few minutes to complete the
initialization process. The blue Wi
Wi-Fi
Fi LED on the device should remain
solid indicating that the initialization process has been completed.
4> Click on the “Settings” icon o
on
n the desktop as seen on the screenshot
below.
“Wi-Fi”. Inside the Wi-Fi
Fi Networks, the “WifiDisk-XXXX”
“WifiDisk
5> Click on the “Wi
should appear on the list. Click on the “WifiDisk
“WifiDisk-34BA”
34BA” as seen on the
image below. The “34BA” part of the SSID is the last 4 digits of the
th
device MAC Address.
6> Once the “Wifidisk
“Wifidisk-XXXX”
XXXX” is selected, a check mark will appear before the
SSID and the Wi
Wi-Fi
Fi logo will appear after the device name on the top left
of the display.
3.4.2.2 Android Client App Installation
1> Download th
the
e Client App called “MobileFun” from the official website
as seen on the screenshot below.
6
2> Click on the “Install” button and follow the on-screen instructions.
3> Once the Client App is successfully installed, the “MobileFun” icon can
be found on your desktop as seen on the image below.
3.5
Wirelessly Connecting Your Device
3.5.1 PC Client
1> Switch-on the Wi-Fi SD/USB by pressing the power button at the front
panel.
2> Wait for few minutes until the Wireless LED has remained lit.
3> Enable the Wi-Fi feature on your PC and open the Wireless Network
Connection.
7
4> Select the WiFiDisk wireless connection (default wireless SSID: WiFiDisk
and with no password).
5> Once you have successfully connected to your Wi
Wi-Fi
Fi SD/USB, you may now
run the
he “NAS Client Log In Utility V2.2” to search for your device and
complete the configuration process.
3.5.2 iOS Client
1> Turn-on the Wi-Fi
Fi SD/USB. Wait for few minutes to complete the
initialization process. The blue Wi
Wi-Fi
Fi LED on the device should remain solid
indicating
dicating that the initialization process has been completed.
2> Click on the “Settings” icon on the desktop as seen on the screenshot below.
3> Click on the “Wi-Fi”.
Fi”. Inside the Wi
Wi-Fi Networks, the “WifiDisk--XXXX” should
appear on the list. Click on the “WifiDis
“WifiDisk-34BA”
34BA” as seen on the image
below. The “34BA” part of the SSID is the last 4 digits of the device MAC
Address.
4> Once the “Wifidisk
“Wifidisk-XXXX”
XXXX” is selected, a check mark will appear before the
SSID and the Wi-Fi
Fi logo will appear after the device name on the top left of
the display.
8
3.5.3 Android Client
1> Turn-on the Wi-Fi SD/USB. Wait for few minutes to complete the
initialization process. The blue Wi-Fi LED on the device should remain solid
indicating that the initialization process has been completed.
2> Click on the “Settings” icon on your desktop as seen on the screenshot
below.
3> Switch the Wi-Fi to ON position. Inside the Wi-Fi networks, the
“WifiDisk-XXXX” should appear on the list. Click on the “WifiDisk-34BA” as
seen on the image below. The “34BA” part of the SSID is the last 4 digits of
the device MAC Address.
9
4> The word “Connected” will appear under the SSID name of which is an
indication that the Android Device is connected to the Wi-Fi SD/USB.
3.6 User Log in
3.6.1 PC Client
3.6.1.1 PC Client Login Utility
1> Double-click the “Client Log In Utility V 2.2” icon on your desktop. The
software utility will search all the connected devices in your network as seen
on the screenshot below.
2> If you do not find the WiFiDisk on the list of devices connected in your
network, click on the “Refresh” button to refresh the device list.
3> Select the WiFiDisk on the list, then click on the “Log In” button to enter the
web interface as seen on the image below.
10
4> Type the default User Name as admin and leave the User Password as blank.
Click on the “Log In” button to access the Web Management Interface.
5> If you choose to click on the “My Storage” button, enter the admin login
name and password to gain access to the Wi-Fi SD/USB. Once successfully
logged-in, it automatically mounts the storage area of the Wi-Fi SD/USB
onto your desktop
3.6.1.2 Wi-Fi SD/USB Configuration using PC
Once your Wi-Fi enabled-PC is successfully connect to the Wi-Fi SD/USB,
using the “NAS Client Login Utility V2.2” will allow you to access our built-in
Web Management Interface and configure your device.
1> During the initial setup, our Wizard will automatically run and will guide you
through the step-by-step process on configuring the Wi-Fi SD/USB as seen
on the screenshot below. You may cancel this process by clicking on the “X”
at the top right corner of the window. If you cancel the Wizard, it will keep
the factory default settings of your Wi-Fi SD/USB.
2> Click on the “Next” button. By default, the Access Point (AP)+Client is
selected.
11
Note: There are two available Internet Access options –
A. Access Point (AP) + Client. Connecting the Wi-Fi SD/USB to another wireless
device to have the internet access.
B. WAN. Directly connecting the Wi-Fi SD/USB to the available port on the back
the router.
3> Selecting the AP+Client Option
- SSID. Type-in the SSID name or click on the “Rescan” button to
automatically search for the available wireless network connections.
- Password. Type-in the correct password to join the wireless network
connection selected.
- IP Address. Select either DHCP or Manually assign an IP address
- By selecting DHCP, the host will provide an automatic IP address to
connect to the internet
- By selecting Manual, you have to manually assign an IP address to
connect to the internet
4> Selecting the WAN Option - By selecting the WAN option, the Dynamic IP is
selected as the default setting. You can manually assign your own IP
address by clicking on the green arrow and select the Static IP option.
5> Click on the “X” button if you wish to cancel and exit this window.
6> Click on the “Next” button. The next step is to configure the Wi-Fi Disk.
12
Note:
- SSID: Type-in the combination of letters and numbers only. 32
characters is the maximum allowable SSID length
- Channel: The default setting is set to Auto. There are 14 available
channels to choose from.
- Modes: The default setting is 11b/g/n. You can also manually set the
modes to 11Mbps (802.11b), 54MBPS (802.11G), and 150Mbps (802.11n).
- Security: The default is set to NONE. The WPA-PSK, WPA2-PSK , Mixed
WPA/WPA2-PSK are available.
- Password: WPA-PSK , WPA2-PSK , Mixed WPA-PSK/WPA2-PSK: Minimum
8 (Maximum 63) characters.
- IP Address: The default IP address is set to 10.10.10.254 with subnet
mask of 255.255.255.0. The IP address can be changed.
7>
Click on the “Next” button. The next step is to change the admin default
password. Click on the “Next” button once the password has been
modified. You may click on the “Skip” button to keep the default password.
8> The system will start rebooting. This process will take approximately 5
minutes as seen on the image below.
13
step wizard can be canceled at anytime. Click on the “X”
9> The step-by-step
located at the top right of the window as sseen
een on the image below. Click
on the “OK” button to exit or “Cancel”.
3.6.2 iOS Client
1> Click on the “MobileFun” icon to launch the app as seen on the image
below.
2> Enter the Admin password that you assigned during the configuration
configura
process. The password is only required during the first login. The device
remembers the password and there is no need to enter it again the second
time you login.
14
3> Once the password has been entered correctly, you will be automatically
connected into
o the “My WiDisk”. The “My WiDisk” is the Wi
Wi-Fi
Fi SD/USB
Storage.
3.6.3 Android Client
1>
Click on the “MobileFun” icon to launch the app as seen on the image
below.
2> Enter the Admin password that you assigned during the configuration
process.
s. The password is only required during the first login. The device
remembers the password and there is no need to enter it again the second
time you login.
15
3> Once the password has been entered correctly, you will be automatically
connected into the “My WiDisk”. The “My WiDisk” is the Wi-Fi SD/USB
Storage.
3.7 Basic Function
3.7.1 iOS Client
3.7.1.1 Introduction
Once you have successfully connected to the Wi-Fi SD/USB, by default, you
will be inside the “My WiDisk”. The “My WiDisk” is the Wi-Fi SD/USB and
the “My Device” is the device that you are using to access the Wi-Fi SD/USB.
Few buttons that can be found inside the Main Screen as listed below.
My Device Main Screen View – By default, the Documents folder, Music
folder, Photos Folder, Videos folders and iPad (or iPhone) folder are available
to easily organize your files inside the My Device.
16
My WiDisk Main Screen View –
Home Button – back to the main screen.
View Button - change to List or Thumbnail view.
Setting Button – change the Wi
Wi-Fi SD/USB configuration.
Back Button – back to previous screen
Share Button – to share, copy, delete, and upload files functions
Search Box – to search for specific file name and/or extension.
My WiDisk – the Wi-Fi
Fi SD/USB or the Remote Storage.
17
My Device – the device that you are using to access the Wi-Fi
Wi
SD/USB or the Local Storage
Status Button – to view the download/upload status list.
Tip:
3.7.1.2 Playing Music / Audio
- It is highly recommended to create a folder or folders where to copy all
your movie files into the Wi-Fi
Fi SD/USB for ease of use and file
organization.
- The Music or Audio files can be played regardless if you are inside the “My
WiDisk” (or “My Wifi Disk for Android) or “My Device.
- Simply locate the music or audio file that you would like to play.
pl
Click on
the file and your music will automatically play.
Note: Please consult your device manual to check whether it will support the
music/audio files that you would like to play.
- When clicked, the current music that is playing will restart at 0.00. Clicked
twice, it will play the previous music.
- When clicked, it will play the next music
- When clicked, it will start playing the music or audio file. Click again, the
will pause/stop playing the music.
- When clicked, it will exit the music player interface.
Five play-modes:
- Play current song: the current music that is playing will be stopped, and playing
progress will back to 0.00.
18
- Repeat current song: the player will always play the current song, and it will
only stop playing when the
button is clicked.
- Shuffle all songs: the music or the audio files will be played randomly.
- Play current list: the music or the audio files will be played sequentially.
- Repeat All songs: the music or the audio files will be played in sequence,
sequ
and it
will only stop playing when the
button is clicked.
fast
or
Tip: You can click and hold, then slide the music progress button to fast-forward
rewind the music.
Tip: You can exit the Music Player Interface at any time and will continue to play the
music or audio file in the background.
3.7.1.3 Playing Movie / Video
- It is highly recommended to create a folder or folders where to copy all
your movie files into the Wi
Wi-Fi
Fi SD/USB for ease of use and file
organization.
- The movie or video files can be played regardless if you are inside the “My
WiDisk” (or “My Wifi Disk for Android) or “My Device.
- Simply locate the movie or video file that you would like to play. Click on
the file and your movie will automatically play as seen on the screenshot
below.
Note: Please consult your device manual to check whether it will support the
movie or video files that you would like to play.
19
By default, the video playback is in the landscape mode. See the button
functionalities below.
- When clicked, the mov
movie
ie that is currently playing will stop and will exit the
Movie Player Interface.
- When clicked, this will scale your movie according to the screen size.
- Click, hold and slide the progress button to fast
fast-forward
forward or rewind
the movie.
nd slide the volume control to increase or lower the
- Click, hold aand
volume.
Press and hold to fast
fast-rewind the movie while playing.
Press and hold to fast
fast-forward the movie while playing.
When clicked, it will start playing or resume playing the movie.
When clicked,
d, it will pause the movie from playing.
3.7.1.4 Viewing / Playing Photos
- It is highly recommended to create a folder or folders where to copy all
your pictures into the Wi
Wi-Fi
Fi SD/USB for ease of use and file organization.
Note: The Wi-Fi
Fi SD/USB currently supports .jpg, tiff, gif and .bmp images.
- The supported images can be viewed as thumbnails or as a list as seen on
the screenshot below. Any images that are not supported can be viewed
as a generic thumbnail or icon.
20
-
Click on any pictures or images and it will automatically play as a slide
show as seen on the screen shot below.
Note: There are few functions are available to control the slideshow. You can swipe
your finger across the screen to manually view the pictures or images or click the
th
button, to automatically play the slideshow.
•
Click the
playing.
button to pause the slideshow from playing and press again to continue
•
Click the
button to restart or to replay the slideshow.
•
Click the
button to play the slideshow once and it will stop at the last image or
photo.
•
Click the
•
Background music can be added while playing the sslideshow.
lideshow. Click the
button to return from the previous screen.
as seen on the screenshot below.
21
button
•
Stop/Continue playing button - to stop or continue playing the background music.
Select button - search and locate the file or files that you would like to play as the
background music.
•
Click on the
•
Repeat button – the background music will continue playing the same music when it
is switched-on.
on. By default, this option is switched
switched-off.
to return to the slideshow as seen on the screenshot below.
3.7.1.5 Sharing Photos / Image
There are
re few options to share photos/image to your friends and family; by
email, saving to the device Photo Album and upload to Facebook.
Note: Internet connection is required to share photos/images via email or accessing
any social media network.
•
Click on the
button located at the top right of the screen to show the three
22
options available to share your photos/images. Click the
button to return
from the previous screen.
1)E-Mail button – when clicked, the default email app will automatically launch and
the selected photo/image as an attachment.
2)Add to photo – when clicked, the selected photo/image will be saved into the
Photo Album of the device.
3)Upload to Facebook – when clicked, you will be directed to the Facebook login
screen. The Facebook app must be installed on your device. Facebook login and
password is required.
3.7.1.6 Opening / Viewing Document
1> The device client app ssupports
upports keynote, numbers, page, Excel, Word,
Wor .pdf, .txt
and ppt files.
2> To open or view any documents, simply click on the file. This will automatically
open the supported file. Click the
button to return from the previous
23
screen or click the
button to send the file via email as seen on the
th
screenshot below.
Note: Internet connection is required to send emails.
3> Click the “E-Mail”
Mail” button, the default email app will launch automatically and the
selected document will be sent as an attachment.
4> Once the email is sent, there will be a messa
message
ge “Mail Sent” located at the
lower-left
left corner of the screen. This is an indication that the email was sent
successfully.
24
5> “Mail Canceled” message will appear at the lower
lower-left
left corner of the screen
when the email is canceled. See the screen shot below
below.
6>
3.7.1.7 Copy, Delete, Download, Upload Function
1> You may click on the
at anytime to share, copy, delete, download, and
upload files. As seen on the screenshots below, the
top as part of the menu once the
will appear at the
is clicked.
2> At the bottom of the screen, there are new icons.
functions.
See below for their
3>
- Click once, all the files will be selected. The icon will turn into blue
color and a check mark will appear on every file.
4>
- Click once again, all the files will be unselected. The check
ch
marks will
no longer visible.
Tip: You may select a single or multiple files by clicking on the thumbnail. As
well, you may click and hold on the thumbnail for few seconds and drag it to
icon to download, or
file or files.
icon to upload or to
25
icon to delete a
5>
- From the My WiDisk (or My WiFi Disk), the file or files may be
downloaded to the local drive or to My Device. The down arrow indicates that
you are currently in the My WiDisk (My WiFi Disk).
6>
- From the My Device, when clicked, the file or files may be uploaded to
the remote storage or to My WiDisk (or My WiFi Disk). The up arrow indicates
that you are currently in the My Device.
7>
- When clicked, the list of files that are in queue for uploads/downloads
will appear as well as the list of files that were copied/transferred successfully.
8>
- When clicked, any selected files will be deleted.
3.7.1.8 Copy / Transferring file to my Device
Once you get connected into the Wi-Fi SD/USB, you can only copy/transfer
a single or multiple files into the local storage (My Device).
1>
Click on the
.
2> Use your index finger to select a single or multiple files or you may use the
to select all files to be copied/transferred.
3> Click on the
.
4> Select and click the folder where you want the file or files to be copied or
transferred.
26
5> A new folder may be created to copy/transfer the selected file or files. To create a
new folder, simply click on the “New Folder” button.
6> Enter the new folder name inside the box and click the “Create” button as seen
on the screenshot below.
7> The folder name can be minimum 2 characters in length and maximum of 26
characters.
8> Click the “Cancel” button to exit.
9> Click on the “Select” button to start copying/transferring files as seen on the
screenshot below.
27
Note: Successfully copied/transferred file or files will be listed below inside the
“Recent” window as seen on the screenshot above. Click on the “Clear” button to
remove or clear the list.
10> Click anywhere on the screen and you will return to the previous screen.
11> Once done, click on the
to exit.
3.7.1.9 Copy / Transferring file to my WiFiDisk
Make sure you are in the “My Device”.
1> Click on the
.
2> Use your index finger to select a single or multiple files or you may use the
to select all files to be copied/transferred.
3> Click on the
.
4> Select and click the folder where you want the file or files to be copied or
transferred.
28
5> A new folder may be created to copy/transfer the selected file or files. To
create a new folder, simply click on the “New Folder” button. Enter the new
folder name inside the box and click the “Create” button as seen on the
screenshot below. The folder name can be minimum 2 characters in length
and maximum of 26 characters. Click the “Cancel” button to exit.
6> Click on the “Select” button to start copying/transferring files as seen on the
screenshot below into the “My WiDisk”.
29
7> Click anywhere on the screen and you will return to the previous screen.
Once done, click on the
to exit.
3.7.1.10
Delete / Erasing a single or multiple files
A single or multiple files can be easily deleted/erased whether you are in
“My Device” or in “My WiDisk”
1> To delete file or files, click on the
.
2> Use your index finger to select a single or multiple files.
the
You may click on
to Select All files to delete/erase.
3> Click on the
to delete or erase the selected file or files. A warning
message will appear on the screen to confirm file deletion as seen on the
screenshot below. Click OK to continue deleting files.
3.7.1.11
Upload / Download History and Status
If you have uploaded or download multiple files from/to the Wi-Fi- HDD
toyour local storage (My Device), simply click the
to check the files on
the queue or files that were successfully copied/transferred. You may also
click on the
on the main screen to check on the status.
3.7.1.12
Existing MobileFun APP
- To exit from using the MobileFun on iPhone/ iPad devices, simply press
the Home key on your Apple Device.
- To reset the app, click on the Home key twice and the list of app will
appear at the bottom of your device. Click and hold the application icon
until the minus “-“ sign appears at the top corner of the app icon. Click
on the minus “-“ sign to remove the app as seen on the screenshot below.
30
3.7.1.13
Uninstall MobileFun APP
- To uninstall the app from yyour
our Apple Mobile Devices, click and hold the
MobileFun app for few seconds. An “X” mark will appear on all the icons
on your mobile device as seen on the screenshot below. Simple click on
the “X” located at the top
top-left
left corner of the MobileFun icon and this
t will
remove the app from your Apple device.
3.7.2 Android Client
3.7.2.1 Introduction
Once you have successfully connected to the Wi
Wi-Fi
Fi SD/USB, by default, you
will be inside the “My WiFi Disk”. The “My WiFi Disk” is the Wi
Wi--Fi SD/USB and
the “My Device” is the device that you are using to access the Wi-Fi
Wi SD/USB.
Few buttons that can be found inside the Main Screen as listed below.
31
My Device Main Screen View – By default, the Documents folder, Music
folder, Photos Folder, Videos folders and SDCard folder are available to easily
organize your files inside the My Device.
My WiFi Disk Main Screen View –
Home Button – back to the main screen.
View Button - change to List or Thumbnail view.
Setting Button – change the Wi-Fi SD/USB configuration. This feature only
32
appears when switched to the “My WiFi Device”.
Back Button – back to previous screen
Share Button – to share, copy, delete, and upload files functions
Search Box – to search for specific file name and/or extension.
My WiFi Disk – the Wi-Fi SD/USB
D/USB or the Remote Storage
My Device – the device that you are using to access the Wi-Fi
Wi
SD/USB or the Local Storage
Status Button – to view the upload/downalod status, current song/video playing
and to exit the app.
3.7.2.2 Playing Music / Audio
- It is highlyy recommended to create a folder or folders where to copy all
your movie files into the Wi
Wi-Fi
Fi SD/USB for ease of use and file
organization.
- The Music or Audio files can be played regardless if you are inside the “My
WiDisk” (or “My Wifi Disk for Android) o
or “My Device.
- Simply locate the music or audio file that you would like to play. Click on
the file and your music will automatically play.
Note: Please consult your device manual to check whether it will support the
music/audio files that you would llike to play.
- When clicked, the current music that is playing will restart at 0.00. Clicked
33
twice, it will play the previous music.
- When clicked, it will play the next music
- When clicked, it will start playing the music or audio file. Click again,
a
the
will pause/stop playing the music.
- When clicked, it will exit the music player interface.
Five play-modes:
- Play current song: the current music that is playing will be stopped, and playing
progress will back to 0.00.
- Repeat current song:
g: the player will always play the current song, and it will
only stop playing when the
button is clicked.
- Shuffle all songs: the music or the audio files will be played randomly.
- Play current list: the music or the audio files will be played sequentially.
sequent
- Repeat All songs: the music or the audio files will be played in sequence, and it
will only stop playing when the
button is clicked.
fast
or
Tip: You can click and hold, then slide the music progress button to fast-forward
rewind the music.
Tip: You can exit the Music Player Interface at any time and will continue to play the
music or audio file in the background.
3.7.2.3 Playing Movie / Video
- it is highly recommended to create a folder or folders where to copy all
your movie files into the Wi
Wi-Fi SD/USB for
or ease of use and file
organization.
- The movie or video files can be played regardless if you are inside the “My
WiDisk” (or “My Wifi Disk for Android) or “My Device.
- Simply locate the movie or video file that you would like to play.
- Click on the file and the list of movie player will appear as seen on the
screenshot below.
34
Note: The control panel will vary depending on the movie player installed on your
Android devices. Please consult the movie player’s user guide on how to control
the movie.
3.7.2.4 Viewing
ewing / Playing Photos
- It is highly recommended to create a folder or folders where to copy all
your pictures into the Wi
Wi-Fi
Fi SD/USB for ease of use and file organization.
Note: The Wi-Fi
Fi SD/USB currently supports .jpg, tiff, gif and .bmp images.
- The supported
rted images can be viewed as thumbnails or as a list as seen on
the screenshot below. Any images that are not supported can be viewed
as a generic thumbnail or icon.
- Click on any pictures or images and it will automatically play as a
slideshow as seen on the screen shot below.
-
There are few functions that are available to control the slideshow. You
can swipe your index finger across the screen to manually view the
pictures or images or click the
slideshow.
35
button, to automatically play the
-
button to pause the slideshow from playing and press again
Click the
to continue playing
playing.
-
Click the
button to restart or to replay the slideshow.
-
Click the
button to play the slideshow once and it will stop at the
last image or photo.
-
Click the
button to return from the previous screen.
3.7.2.5 Sharing Photos / Image
- Sharing photos/images us
using
ing your Android device will vary depending on
the apps installed on your device.
Note: Internet connection is required to share photos/images via email or
accessing any social media networks.
- Click the
button to return from the previous screen or to exit.
- Click the
button located at the top right of the screen to show the
three options available to share your photos/images.
1) Share button – when clicked the, a list of app installed on your Android
will appear as seen on the screenshot below. You may select from the
list which app to launch.
36
2)Save Photo button - when clicked, the selected photo/image will be
saved into the device Photo Gallery.
3.7.2.6 Opening / Viewing Document
- To open/view a document using your Android device, simply click on the
file that you wish to open/view. This will automatically open the file using
the default viewer or the installed app on your Android device as seen on
the screenshot below.
Note: Internet connection is required to send emails.
-
To send the document as an attachment, click on the
button at the
top right of the screen. Click on the “File”, then “Send”. Once the
“Send” button is clicked, a list of installed app will appear on your screen.
You may select from the list of app that you wish to use to send or share
the selected document. See the screenshot below.
37
3.7.2.7 Copy, Delete, Download, Upload Function
1> You may click on the
at anytime to share, copy, delete, download, and
upload files. As seen on the screenshots below, the
top as part of the menu once the
will appear at the
th
is clicked.
2> At the bottom of the screen, there are new icons. See below for their functions.
3>
- Click once, all the files will be selected. The icon will turn into blue
color and a check mark will appear on every fil
file.
4>
- Click once again, all the files will be unselected. The check marks will
no longer visible.
Tip: You may select a single or multiple files by clicking on the thumbnail. As
well, you may click and hold on the thumbnail for few seconds and drag it to
t
icon to download, or
file or files.
icon to upload or to
icon to delete a
5>
- From the My WiDisk (or My WiFi Disk), the file or files may be
downloaded to the local drive or to My Device. The down arrow indicates that
you are currently in the My WiDisk (My WiFi Disk).
6>
- From the My Device, when clicked, the file or files may be uploaded to
the remote storage or to My WiDisk (or My WiFi Disk). The up arrow indicates
that you are currently in the My Device.
7>
- When clicked, the list of files th
that
at are in queue for uploads/downloads
will appear as well as the list of files that were copied/transferred successfully.
8>
- When clicked, any selected files will be deleted.
38
3.7.2.8 Copy / Transferring file to my My Device
Once you get connected into the Wi-Fi SD/USB, you can only copy/transfer a
single or multiple files into the local storage (My Device).
1> Click on the
.
2> Use your index finger to select a single or multiple files or you may use the
to select all files to be copied/transferred.
3> Click on the
.
4> Select and click the folder where you want the file or files to be copied or
transferred.
5> A new folder may be created to copy/transfer the selected file or files. To
create a new folder, simply click on the “New Folder” button.
6> Enter the new folder name inside the box and click the “Create” button as
seen on the screenshot below.
39
7> The folder name can be minimum 2 characters in length and maximum of 26
characters.
8> Click the “Cancel” button to exit.
9> Click on the “Select” button to start copying/transferring files as seen on the
screenshot below.
Note: Successfully copied/transferred file or files will be listed below inside the
“Recent” window as seen on the screenshot above. Click on the “Clear” button to
remove or clear the list.
10> Click anywhere on the screen and you will return to the previous screen. Once
done, click on the
to exit.
3.7.2.9 Copy / Transferring file to my WiFiDisk
Make sure you are in the “My Device”.
1> Click on the
.
2> Use your index finger to select a single or multiple files or you may use the
40
to select all files to be copied/transferred.
3> Click on the
.
4> Select and click the folder where you want the file or files to be copied or
transferred.
5> A new folder may be created to copy/transfer the selected file or files. To
create a new folder, simply click on the “New Folder” button. Enter the new
folder name inside the box and click the “Create” button as seen on the
screenshot below. The folder name can be minimum 2 characters in length
and maximum of 26 characters. Click the “Cancel” button to exit.
41
6> Click on the “Select” button to start copying/transferring files as seen on the
screenshot below into the “My WiDisk”.
7> Click anywhere on the screen and you will return to the previous screen. Once
done, click on the
to exit.
3.7.2.10
Delete / Erasing a single or multiple files
A single or multiple files can be easily deleted/erased whether you are in
“My Device” or in “My WiDisk”
1> To delete file or files, click on the
.
2> Use your index finger to select a single or multiple files. You may click on the
to Select All files to delete/erase.
3> Click on the
to delete or erase the selected file or files. A warning
message will appear on the screen to confirm file deletion as seen on the
screenshot below. Click OK to continue deleting files.
42
3.7.2.11
Upload / Download History and Status
If you have uploaded or download multiple files from/to the Wi-Fi- HDD to
your local storage (My Device), simply click the
to check the files on the
queue or files that were successfully copied/transferred. You may also click
on the
on the main screen to check on the status.
3.7.2.12
Existing MobileFun APP
To exit from using the MobileFun Android mobile devices, simply click on
the
and select the “Exit” button. A warning “Are you sure you want to
exit this applet?” message will appear. Click “OK” to continue existing or click
“Cancel”.
3.7.2.13
Uninstall MobileFun APP
To uninstall the MobileFun app from your Android mobile devices, see the
instructions below.
Note: Uninstalling app on the Android devices will vary. Please consult your mobile
device manual prior to removing any application.
1> Click on the Settings icon from your desktop.
2> Go into the application manager.
3> Locate and select the MobileFun app.
43
4> Click on the “Uninstall” button.
44
5> A warning “MobileFun. This application will be uninstalled.” Click the “OK”
button to continue uninstalling the app or click on the “Cancel” button.
3.8 Web Function
Our built-in Web Management software is a unique web-based utility stored
inside our Wi-Fi SD/USB product. No software is needed to install on your
Personal Computer to use this utility. Simply launch our “Client Login Utility
V2.2” or open your web browser and enter the 10.10.10.254 IP address.
Allows the user to make changes on the admin password.
Provides information of the Internal hard disk drive.
Networking Settings allow the user to make modifications and changes
to Host Name, Wi-Fi and LAN, DHCP Server, Internet and DDNS.
Allows the users to enable and disable the Win File and Ext Net
Services.
Allows the user to make changes on the Power Off/Reset option.
Allows the user to make modifications and changes to the Time
Settings, Create System Backup, Firmware Upgrade and Resetting to the factory
default setup.
This will guide the user through a step-by-step process to configure
45
the device.
3.8.1 Explorer Function
Our user-friendly web based utility allows the user to upload files to the
device, create folders, copy, cut, delete and rename folders and file names.
We provide similar functionalities as the windows explorer of which makes our
interface much easier to use.
Refresh button - to refresh the display
Upload button - to upload file or files into a specific folder.
Create Folder - to create a new folder. Maximum folder name is 26
characters in length.
Copy button - to copy file or files and paste them into another folder.
Move button - to move a file or files from one location to another
Download button - to download a file or files into a specific location. If the
software installed on your computer supports a specific file type, this file will
automatically open otherwise, it will ask you to download the file into a specific
location. Downloading a folder or folders is currently not supported.
Delete button - to delete a file or files.
Renaming button - to make name modification or changing the file name.
3.8.2 Context Menu
1. On the file level, you can right-click using your mouse and a pop-menu will
46
appear. You may Copy, Cut, Delete, Rename or Download as seen on the
screenshot below.
2. On the folder level, you can right
right-click
click using your mouse and a pop-up
pop
menu
will appear. You may Open, Copy, Cut, Delete or Rename the folder as seen on
the screenshot below.
3. Selecting multiple file
files and right-click
click on the mouse will allow the user to
either Copy, Cut or Delete the files as seen on the screenshot below.
4. Right-clicking
clicking at the bottom of the window as seen below will allow the user
to either Paste, Create or Upload file or files.
47
◆Open Command – Select a folder and right-click. Inside the pop-up menu, select
“Open” to view the contents or open the folder.
◆Copy Command - Select a folder or a file and then right-click. Inside the pop-up
menu, select “Copy” to make a copy of the entire folder or a file and paste into
another location or folder.
◆Cut Command- Select multiple files or folders and then right-click. Inside the
pop-up menu, select “Cut” and then paste the files or folders into another folder.
◆Paste Command – After using the Cut or Copy command, right-click to launch the
pop-up menu and then select “Paste” to place the file or folder into another location.
◆Delete Command – Right-click and then select “Delete” to erase a single, multiple
files or folders.
◆Create Command - Right-click on the blank area inside the window and a pop-up
menu will appear. Select “Create”. Enter the folder name inside the Create Folder
window and click on Save.
◆Rename Command – Right-click on the folder or the file name and select
“Rename”. This allows the user to make changes on the folder or file name. Click on
the “Save” after the name has been changed.
◆Upload Command - Right-click the empty area inside the window. Select “Upload”
inside the pop-up menu and browse for the file to be uploaded inside the current
location.
◆Download Command – Select and right-click on the file to be downloaded. From
the pop-up menu, select “Download”. The file will automatically open if any of the
software installed on the computer supports this file type otherwise, it will ask you
to download the file into a specific location. Downloading a folder or folders is
currently not supported.
3.8.3 Keyboard Shortcuts
Our built-in Web Management Interface supports keyboard commandsand
shortcuts such as the following:
Tab Key, Enter Key, Home Key, PGUP, PGDN,, End Key, Up Arrow, Down Arrow, Left,
Arrow Right Arrow, and Delete Key
Windows – Ctrl+C = Copy; Ctrl+V = Paste
Mac – CMD+C = Copy; CMD+V = Past
48
3.8.4 Drag and Drop
A single file drag and drop is supported by our built-in
in Web Management
Interface, simply click and hold on the file inside the main window and drag it to
any folders available inside the Folders tree.
3.8.5 Information
Provides detail information regarding the hardware condition, network status
and storagee information.
3.8.5.1 Device Information
Provides information such as the Host Name, Device Serial Number,
Manufacturer Name, Model Number and CPU utilization as seen on the
screenshot below.
3.8.5.2 Storage Information
Provides information regarding the inter
internal
nal storage such as the total
capacity, hard drive manufacturer and available storage as seen on the
screenshot below.
3.8.5.3 Network Information
Provides detailed information regarding the current network settings such
as the connection to access the interne
internet,
t, WiFi SSID and IP Address as seen on
the screenshot below.
49
3.8.6 Basic Setting
3.8.6.1
Admin User
Click on the “User” thumbnail This window will allow you to modify the
admin password as seen on the screenshot below. The password should be
at minimum of 5 characters to maximum 32 characters in length. Click on
the “Save” button the password has been changed.
The default User Name is admin and no password is assigned. Click on the
“X” to cancel and exit.
3.8.6.2
Disk
Click on the “Disk” thumbnail. This window provides information
regarding the internal hard drive as seen on the screenshot below. It
provides detailed information including firmware version, serial number, disk
total capacity, temperature, and more.
50
As seen on the screenshot below, the Volume screen provides information
regarding the File System used to format the internal hard disk drive, total
and available capacity.
Click on the “X” to exit.
3.8.7
Network Setting
3.8.7.1 Hostname
The Hostname is a name that is assigned to a device connected to a
computer network. The Hostname can be modified to whatever name that
will fit your needs. It must begin with a letter and followed by a
combination of letters and numbers. Required minimum 2 characters to
maximum 8 characters in length.
51
Click on the “Save” button after making any changes. Click on the “X” to
exit and cancel.
3.8.7.2 Wi-Fi & LAN
The settings inside the WiFi & LAN can be modified based on your needs.
See the screenshot below for the available options.
•
•
•
•
•
•
SSID: Type-in the combination of letters and numbers only. 32 characters is the
maximum allowable SSID length
Channel: The default setting is set to Auto. There are 14 available channels to
choose from.
Modes: The default setting is 11b/g/n. You can also manually set the modes to
11Mbps (802.11b), 54MBPS (802.11G), and 150Mbps (802.11n).
Security: The default is set to NONE. The WPA-PSK, WPA2-PSK, Mixed
WPA/WPA2-PSK are available.
Password: WPA-PSK , WPA2-PSK , Mixed WPA-PSK/WPA2-PSK: Minimum 8
(Maximum 63) characters.
IP Address: The default IP address is set to 10.10.10.254 with subnet mask of
255.255.255.0. The IP address can be changed.
Click on the “Save” button after made any change. Click on the “X” to exit and
cancel.
3.8.7.3 DHCP Server
The DHCP or Dynamic Host Configuration Protocol is a network protocol
that enables a server to automatically assign an IP address to a computer
connected into a network. By default, the DHCP Server option is enabled.
This option can be disabled if needed and the IP address can be manually
assigned.
52
Click on the “Save” button after making any changes. Click on the “X” to
exit and cancel.
Click on the “DHCP List” button and it will provide a list of all the
computers and devices connected to your Wi-Fi SD/USB Device. Please see
the screenshot below.
3.8.8 Internet Setting
There are two available Internet Access options –
A. Access Point (AP) + Client. Connecting the Wi-Fi SD/USB to another wireless device
to have the internet access.
B. WAN. Directly connecting the Wi-Fi SD/USB to the available port on the back the
router.
-
Selecting the AP+Client Option
SSID. Type-in the SSID name or click on the “Rescan” button to automatically
53
search for the available wireless network connections.
- Password. Type-in the correct password to join the wireless network connection
selected.
- IP Address. Select either DHCP or Manually assign an IP address
o By selecting DHCP, the host will provide an automatic IP address to connect to the
internet
o By selecting Manual, you have to manually assign an IP address to connect to the
internet
Selecting the WAN Option
By selecting the WAN option, the Dynamic IP is selected as the default setting. You
can manually assign your own IP address by clicking on the green arrow and select
the Static IP option.
3.8.9 Network Service
Windows sharing and network services are available to access the Wi-Fi
SD/USB
3.8.9.1 Windows
Sharing Service
Data sharing and accessing the Wi-Fi HD product makes it simple by
enabling the Windows File Services. By default, this feature is already
enabled as seen on the screenshot below.
54
3.8.9.2 Power Setting
Data sharing and accessing the Wi-Fi HD product makes it simple by
enabling the Windows File Services. By default, this feature is already
enabled as seen on the screenshot below.
3.8.10 System Setting
3.8.10.1 Time Setting
1> The time settings can be changed based on the region on earth you are
located. You can choose to synchronize time with the Internet or the
time on your PC.
2> Click on the drop-down list and select the region you are located and
switch-on the “Automatically synchronize with an Internet Time Server”.
This will automatically update the time when the Wi-Fi SD/USB is
connected to the internet.
3> The “Time Sync Frequency” can be set to everyday, every 2 days, every 3
days, up to every 7 days.
4> The automatic time synchronization can be switched-off and apply the
PC time instead. Applying the PC time will automatically adjust the
time and date based on the PC time. See the image below.
5> Click on the “X” button to exit and cancel the Time Settings.
55
3.8.10.2 Backup Setting
1> Creating a backup as seen on the screenshot below can save the Wi-Fi
SD/USB system configuration. Please note that this process will not
create a backup of the Wi-Fi SD/USB contents.
2> Simply click on the “Save” button create the backup.
This process will
create a .bin.gz or .bin file of which can be used to restore the current
settings of the Wi-Fi SD/USB.
3> Click the “Save” button to save the backup file on your computer as seen
on the screenshot below.
4> To restore the backup, click the folder icon.
Locate and select the .bin
or .bin.gz file. The backup file will appear below the folder as seen on
56
the screenshot below. Click on the “Save” button to restore.
5> A warning message will appear as seen on the screenshot below.
6> The device will reboot automatically once the restore process has been
completed and will return to login screen.
3.8.11 Firmware Update
1> The device firmware can be upgraded by following the simple steps below.
2> Download and save the latest firmware version on your computer.
3> Click on the folder icon, search and locate the firmware file on your
computer and then click on the “Open” button as seen on the screenshot
below.
57
4> The latest firmware update file will appear at the bottom of the folder.
Click on the “Save” button to continue updating the firmware.
5> Once the firmware has been installed, the warning message as seen on the
screenshot below will appear and the device will automatically reboot and
will go back into the login screen.
3.8.12 Resetting to factory default
1> Resetting to factory defaults will reset all your customized settings or
whatever changes you made back to its original settings.
58
2> Simply click on the radio button after the “Restore to Factory Default
Settings:” Click on the “Save” button to continue.
3> The Warning Message window will appear. The Wi-Fi SD/USB will
automatically reboot once the restoring to the factory default settings have
been completed. See the screenshot below.
Note: This process will reset the Wi-Fi SSID, and the password including
the admin password.
3.8.13 About Setting
The About screen provides information such as the HostName, Device Serial
Number and Model Number, MAC address, CPU and Memory utilization as seen
on the screenshot below.
4 Download
Please download the software / detail user manual from following url:
59
http://www.ravpower.com/ - Support – Download
5 Product Warranty & Problem Solving
RP-WD01 Wi-Fi Disk offers one-year limited product warranty by RAVPower
Customer Care team. If your device can’t be charged, please check first whether you
select the compatible charging cables for your device, and then make sure all the
connectors and cables are connected to the right place tightly. Also please check
whether your power bank runs out of power and needs to be recharged. If you still
can’t solve the problem, please reach us via the following contact info:
6 Notice:
1. The RP-WD01 can support almost all the SD Card and USB External HDD in
the market (SD Card is up to 128G, USB External HDD 2.5TB, however, due to
the structure limitation of RP-WD01, We suggest to use the USB External HDD
less than 9.5mm thickness).
2. You have to connect the RP-WD01 with your existing Wi-Fi router to have
internet service. Otherwise and you can only read and transfer the data on
your SD Card or USB External HDD.
7 Contact us
Website: www.ravpower.com
Facebook: www.facebook.com/RAVPower
Tel: 1-888-456-8468#3
Phone Hour: 8:00am – 5:00pm PT, Monday – Friday
Address: 2228 Junction Ave, San Jose, CA 95131
Email: [email protected] (Worldwide)
[email protected] (United Kingdom)
[email protected] (France)
[email protected] (Germany)
[email protected] (Italy)
60