1
PORTA ® ONE Porta Billing100 ® Maintenance Release 9 User Guide, Part II www.portaone.com PortaBilling Guide Part II Copyright notice & disclaimers Copyright (c) 2000-2004 Porta Software Ltd. All rights reserved. PortaBilling100 User Guide Part II V.1.9.1 June 2004 Please address your comments and suggestions to: Sales Department, Porta Software Ltd., 902 – 2181 W. 38 Ave., Vancouver, BC V6M 1R8 Canada Changes may be made periodically to the information in this publication. Such changes will be incorporated in new editions of the guide. The software described in this document is furnished under a license agreement, and may be used or copied only in accordance with the terms thereof. It is against the law to copy the software on any other medium, except as specifically provided in the license agreement. The licensee may make one copy of the software for backup purposes. No part of this publication may be reproduced, stored in a retrieval system, or transmitted in any form or by any means, electronic, mechanical, photocopied, recorded or otherwise, without the prior written permission of Porta Software, Ltd. The software license and limited warranty for the accompanying product are set forth in the information packet supplied with the product, and are incorporated herein by this reference. If you cannot locate the software license, contact your Porta Software Representative for a copy. All product names mentioned in this manual are for identification purposes only, and are either trademarks or registered trademarks of their respective owners. (c) 2000-2004 Porta Software Ltd. All rights Reserved. www.portaone.com 1 PortaBilling Guide Part II Table of contents Preface ............................................................................................................................ 3 4. Setting up a Wholesale IP Telephony Company..................4 Typical business case................................................................................................. 5 Setting up your network components.................................................................. 6 Billing configuration.................................................................................................... 8 5. Statistics and Monitoring Tools .............................................. 28 Billing servers health monitoring ......................................................................... 29 VoIP network performance statistics ................................................................. 31 Billing statistics........................................................................................................... 34 6. How to …....................................................................................... 40 Charge my calling card customers XX/min extra when they call toll-free line .................................................................................................................................. 41 Authorize and bill my customers by the phone number they are calling from (ANI-based billing) ......................................................................................... 41 Bill my customers who are connected via T1/E1 directly to some port on my gateway........................................................................................................... 43 Authenticate and bill my customers by the IP address of their gateway ......................................................................................................................................... 44 Use volume-based billing........................................................................................ 45 Charge reseller for incoming calls ....................................................................... 47 Deal with technical prefixes and numbering formats................................... 49 Troubleshoot incorrectly billed call ..................................................................... 50 Create a custom TCL application......................................................................... 53 Make a custom report from PortaBilling ........................................................... 54 Use ODBC to connect to PortaBilling.................................................................. 54 Using redirect-number feature ............................................................................. 60 Isolate network of “Big client”, so you do not have to track their individual gateways .................................................................................................. 61 Isolate your network................................................................................................ 64 Configure outgoing connection to vendor, if I send calls using gatekeeper, so remote IP address is not known in advance .................... 66 Force PortaBilling to disconnect after a customer talks over his credit limit................................................................................................................................. 67 Create accounts be to used for SIP services................................................... 67 Integrate PB logins in your web site .................................................................. 67 Configure Web Subscription .................................................................................. 68 7. Maintenance................................................................................. 71 Configuration files ..................................................................................................... 72 Replication repair....................................................................................................... 76 (c) 2000-2004 Porta Software Ltd. All rights Reserved. www.portaone.com 2 PortaBilling Guide Part II Preface This document provides PortaBillling100 user with the most common examples and guidelines on setting up a VoIP network. The last section of the document answers the most frequent questions users encounter after running PortaBilling100 for the first time. Where to Get the Latest Version of this Guide The hard copy of this guide is updated at major releases only, and does not always contain the latest material on enhancements occurring inbetween minor releases. The online copy of this guide is always up-todate, integrating the latest changes to the product. You can access the latest copy of this guide at: www.portaone.com/solutions/billing/docs. Conventions This publication uses the following conventions: Commands and keywords are in boldface Terminal sessions, console screens, or system file names are displayed in fixed width font Caution means ‘reader be careful’. You are capable of doing something that might result in program malfunction or loss of data. NOTE: Means reader take note. Notes contain helpful suggestions or references to materials not contained in this manual. Timesaver means the described action saves time. You can save time by performing the action described in the paragraph. Tips Means the following information might help you solve a problem. (c) 2000-2004 Porta Software Ltd. All rights Reserved. www.portaone.com 3 Setting up a Wholesale IP Telephony Company 4. Setting up a Wholesale IP Telephony Company Wholesale voice is a growth market, with service providers building new capacity and launching new services. The primary wholesale service is long-distance transport and aggregation, with the key advantage that country-specific features and domestic calling regulations are not required. The principal beneficiaries are developing countries, where, in many cases, the quality of VoIP is superior to that of traditional PSTN service. (c) 2000-2004 Porta Software Ltd. All rights Reserved. www.portaone.com 4 Setting up a Wholesale IP Telephony Company Typical business case Central to the delivery of wholesale voice services are voice points-ofpresence (POPs), which are interconnected to other service providers. Minutes Aggregation and Resale (Including ASP Termination) service allows wholesale network providers to collect traffic from multiple originating providers, then aggregate and deliver it to termination providers they select. Customer1 A1 PSTN B PSTN gw-example Vendor PBX Customer2 A2 The provider in this scenario is the owner of termination node (POP) gwexample1. It is a typical example of a VoIP network where Customers pay the provider to terminate traffic at point (An), and the provider himself pays the Vendor for the traffic at point (B). The provider makes its profit on difference between: Tariff he charges his customer (An), and Tariff he is being charged by the vendor (B). (c) 2000-2004 Porta Software Ltd. All rights Reserved. www.portaone.com 5 Setting up a Wholesale IP Telephony Company Setting up your network components Configuring NAS gw-example1 1. Basic router configuration It is highly recommended to use the latest telephony IOS and DSP firmware, and to set the hostname the same as the h323-id. hostname <h323_id> ip domain name <default domain> NOTE: VSA h323-gw-id=”hostname.domain” 2. NTP NOTE: it is very important to have reliable time services. ntp server <name/IP> ……. ntp server <name/IP> ntp master 5 clock timezone <your time zone> 1 clock summer-time <your summer time zone> recurring <your rules> NOTE: It is important that you only use well-known time zone abbreviations which are supported by the billing engine. If unsure, use the UTC time zone. 3. AAA aaa aaa aaa aaa new-model authentication login h323 group radius authorization exec h323 group radius accounting connection h323 stop-only group radius 4. VoIP interface interface <your interface to the world> h323-gateway voip interface h323-gateway voip id <gatekeeper id> ipaddr <IP> <port> h323-gateway voip h323-id <h323_id> NOTE: if you want to use a virtual interface then add the line: h323-gateway voip bind srcaddr <IP> 5. Enable gateway functionality gateway 6. Enable gateway accounting For older IOS versions: (c) 2000-2004 Porta Software Ltd. All rights Reserved. www.portaone.com 6 Setting up a Wholesale IP Telephony Company gw-accounting h323 vsa For newer IOS versions (12.2T or 12.3): gw-accounting aaa acct-template callhistory-detail NOTE: VSA does not work for all platforms. 7. Radius IMPORTANT NOTE: Ports 1645/1646 are the traditional Radius ports used by many vendors without obtaining an official IANA assignment. The official assignment is now ports 1812/1813 and users are encouraged to migrate when possible to these new ports. Cisco notes: “radius-server” commands will be available only after issuing “aaa new-model” command. UDP port for RADIUS accounting server - default is 1646 (see note above) UDP port for RADIUS authentication server - default is 1645 (see note above) Keep in mind: Default ports for Cisco are 1645/1646 Defaults in /etc/services are 1812/1813 radius-server radius-server radius-server radius-server host <name/IP> acct-port 1812 auth-port 1813 key <key> vsa send accounting vsa send authentication 8. voice-card 9. controller 10. voice-port Dependant on your hardware configuration 11. call application voice & deal-peer’s call application voice remote_ip ftp://…./remote_ip_authenticate.1.1.1.tcl ! dial-peer voice 10 pots destination-pattern . port 0:D ! dial-peer voice 11 voip application remote_ip incoming called-number . NOTE: There is an “Advanced remote authenticate” application available at http://store.portaone.com. It contains many extra features beyond the default Cisco application, and so we recommend using it instead of that application. (c) 2000-2004 Porta Software Ltd. All rights Reserved. www.portaone.com 7 Setting up a Wholesale IP Telephony Company Billing configuration Please see the PortaBilling Administrator Interface PDF file for detailed instructions how to navigate and operate on the web interface and for detailed explanation of particular fields. Initial configuration of the PortaBilling The following steps normally are performed only once, after the system is installed. This includes: • Visit the Company Info from the main menu. Enter information about your company and set up base currency. This of course does not limit your operations to only this currency. However on the reports such as cost/revenue different currencies will be converted to the one you specify here. • From the main admin menu choose Users and create login entries for users who will be working with the system. It is not recommended to use the default PortaBilling root user (pb-root) for any other operations except initial set up. • Make sure you are able to login as a newly created user and change the password for the pb-root user. NOTE: It is possible that you will require assistance from the PortaBilling support personnel in the future. In order to provide support they will need access to the web interface. So when you submit a problem report please either provide them with a new password for the pb-root user, or create a special user for them. • If you plan to do billing in more than one currency, define these in the Currencies and specify exchange rates in the Exchange Rates Create destinations This step is only required if you have not define necessary destinations before. There are two ways to insert new destination into the system: • One-by-one, using Add functionality on the web interface • Bulk update, by uploading destinations from the file NOTE: There is a file with the default destination set supplied with the PortaBilling. You can download it and then upload it to the server. However it might be possible that your business requires different types of prefixes, so please check the data in the file before the upload. Creating destinations in “one-by-one”: 1. In the Management section of Admin-Index choose Destinations (c) 2000-2004 Porta Software Ltd. All rights Reserved. www.portaone.com 8 Setting up a Wholesale IP Telephony Company 2. Click on the Add button. 3. Fill the required information. This includes the phone prefix and the country. Country subdivision is optional. You can use the Description column to store some extra information about the destination (for example if it is mobile or fixed number). 4. Click Save 5. Repeat steps 2-4 for each additional destination Uploading a set of destinations from the file 1. In the Management section of the Admin-Index choose Destinations 2. Click on the Get default set to download set of destinations as a CSV (Comma-Separated Values) file 3. Open this file in Microsoft Excel or any other suitable program. Edit the data if required. 4. Save the file and close it in Excel 5. Switch back to the PortaBilling web interface, and click the Upload on the Destinations screen. 6. Type in the filename of the file you have edited or click on the Browse button and select the file. 7. Click Save&Close (c) 2000-2004 Porta Software Ltd. All rights Reserved. www.portaone.com 9 Setting up a Wholesale IP Telephony Company Create Nodes This step is only required if you have not entered all of your gateways into the system before. Now you have to enter your gateways as nodes. PortaBilling requires some key information about your network equipment such as the IP address, h323-id, Radius shared secret, etc. NOTE: Only your own gateways have to be entered as nodes. Remote gateways which belong to the customer or the ones which legally belong to you but are solely used by customer are not considered as nodes. 1. In the management section of the Admin-Index page choose Nodes. 2. In the Node management window click the Add icon. 3. Fill in the New Node form: o Node name – some short descriptive name for this node (will be used in the select menus). (c) 2000-2004 Porta Software Ltd. All rights Reserved. www.portaone.com 10 Setting up a Wholesale IP Telephony Company o H323-ID – h323-id (recommended hostname.domainname) o H323 Password – If you plan to use default Cisco remote IP authentication script, put cisco here. o NAS-IP-Address – IP address of the h323 interface. o Auth. Translation rule – use to converts dialed number in the desired format. o Type – VoIP node type, select VOIP-GW. o Manufacturer - Select Cisco or Quintum. o Radius Client – Check this if this node will be communicating with the billing. o Radius Key – If this node is a radius client, put the shared secret here; it must be same as configured on the NAS as a key in the configuration of the radius server. o Radius Source IP – Unless your gateway has multiple network interfaces, the value here should be the same as NAS-IP-Address 4. Click Save&Close. 5. Repeat steps 2-4 until all of your nodes are entered. NOTE: There is some propagation delay between the database and the Radius server configuration file; no more than 15 minutes. Create Tariff A tariff is a single price list for calling services. A tariff combines: Conditions, which are applicable for every call regardless of the called destination. Per destination rates. Normally you need a separate tariff for each of your customers. 1. In the Management section of the Admin-Index choose Tariffs 2. On the Tariff Management page choose Add 3. Fill in the New Tariff form: o Name – the short name for tariff object. This is the name you will see later in the select menus. o Currency – indicates in which currency the pricing information is defined. All pricing information for a single tariff must be defined in the same currency. NOTE: Currency for the tariff is chosen only once, and you cannot change it later. o Type – if you plan for this tariff to be used for your wholesale customer’s accounts, so that the customer himself can edit rates in this tariff, choose “Managed by NNN”, where NNN is the customer’s name. Otherwise, if this tariff is for the retail customer’s accounts or for your termination costs to the vendor, choose Managed by None here. o Off-peak Period – defines the off-peak period. Click on the Offpeak period wizard icon ( ) to summon the wizard, which will (c) 2000-2004 Porta Software Ltd. All rights Reserved. www.portaone.com 11 Setting up a Wholesale IP Telephony Company help you to construct the correct period definition. Click Help to get more information on period format definition. If you do not differentiate between peak and off-peak rates, just leave this field blank. o Off-Peak Description – a description of the off-peak period, automatically filled in by the off-peak period wizard. You do not have to fill in this field. o Destination group set – if you wish to enter rates in the tariff not for every individual prefix, but for a whole group of prefixes at once, you should create a destination group set and destination groups beforehand. Leave this select menu empty for now. o Free seconds – the number of free seconds granted for each call. In order to claim free seconds, the length of the call must be at least one billing unit (first interval; see the ‘Enter Rates’ section above) o Post Call Surcharge – percentage of the amount charged for the call o Login Fee – amount to be charged immediately after the first user authentication (i.e. after user enters his PIN) o Connect Fee – amount to be charged for each connected call (calls with a non-zero duration) o Short Description – a short tariff description. This will be shown in the rate lookup on the admin interface and the self-care pages for your accounts and customers. For example, you can have a tariff named cust-ABC-Easy Call-1800, and the short description will provide better information for your wholesale customer ABC, who will be using this tariff, such as: EasyCall – via a toll-free number. This field is mandatory; if unsure what to enter here, just use the same value as for the name of the tariff. o Description – extended tariff description 4. Click Save (c) 2000-2004 Porta Software Ltd. All rights Reserved. www.portaone.com 12 Setting up a Wholesale IP Telephony Company (c) 2000-2004 Porta Software Ltd. All rights Reserved. www.portaone.com 13 Setting up a Wholesale IP Telephony Company Enter Rates Rates are per-destination prices. Please refer to the System Concepts chapter for more details on the billing parameters. Managing rates online Managing rates online is very convenient for maintenance of existing rate tables and for reference purposes. For new price lists or for major updates, the offline method is better. 1. When you are on the Tariff management page and you see the list of the available tariffs, click the Rates icon next to the name of the tariff. When you are in the Tariff management for a particular tariff – then click on the Rates in the toolbar. 2. When in the Edit Rates screen click Add 3. Fill in required information: o Destination – destination prefix, may be entered directly, e.g. 47 for Norway, or you can access destinations directory by clicking the Destination link (in the column header). In the destinations directory you can find the desired prefix by country name. NOTE: The phone prefix you are trying to create a rate for has to exist already in the Destinations. Interval First – first billing unit in seconds Interval Next – next billing unit in seconds Price First – per minute price for first interval Price Next – per minute price for next interval Off-peak Interval First – first billing unit in seconds for off peak time o Off-peak Interval Next – next billing unit in seconds for offpeak time o Off-peak Price First – per minute price for first interval for offpeak time o Off-peak Price Next – per minute price for next interval for off-peak time o o o o o (c) 2000-2004 Porta Software Ltd. All rights Reserved. www.portaone.com 14 Setting up a Wholesale IP Telephony Company NOTE: Off-peak fields appear only if off-peak period has been defined for tariff. o Formula – launches the wizard for creating a custom rating formula o Effective from – if you want this rate to take effect sometime in the future, you can either type a date manually or use a calendar (click on the DD-MM-YYYY link). Click on the Stop Watch icon to make the rate effective immediately. NOTE: When using the calendar, you can specify that the date you entering is in the different time zone than your current one. PortaBilling will automatically adjust the time then. o Hidden, Forbidden or Discontinued flags are optional 4. Click Save button in the toolbar, or icon on the left side of the row 5. Repeat if you need more rates to be entered Managing rates offline NOTE: There are Templates available in the PortaBilling - powerful tool for uploading rates from the custom format data files. However for this particular example we would assume that you prepare data in the default format of PortaBilling. The rates table may be prepared with spreadsheet processor (i.e. Microsoft Excel) and imported into PortaBilling easily. This is very convenient if you are going to make many changes. For example, you might increase all the prices by 10%. 1. If you are not on the Tariff Management for your tariff, go to the main menu, click on the Tariffs, and then click on the tariff name 2. In the Edit Tariff window move mouse over the Download button and hold it there until popup menu will appear. Choose Now menu item and click on it. This will download the current set of rates (empty), but will also provide you with an overview of the file structure. 3. You will see File download dialog and will be prompted if you would like to save the file or open it from the current location. We (c) 2000-2004 Porta Software Ltd. All rights Reserved. www.portaone.com 15 Setting up a Wholesale IP Telephony Company recommend you to save file into some folder you will be using in future for storing tariff data files, and then open it in the Excel. 4. You should see something similar to the screenshot below: 5. Edit the file by adding more rows with the rate data, so it looks similar to the screenshot below. 6. Note that columns Country and Description are only for reference purposes and are ignored during the import. Also, when using the default template you have to fill out the data in the Offpeak columns even if your tariff does not have an off-peak period (use the clipboard to easy copy the values of 4 peak columns). 7. Also note that you may use only those phone prefixes which you already have defined as destinations (see Create destinations step above) 8. Save the file in Excel. You will probably get a warning from the Excel that your file “may contain features that are not compatible with CSV (Comma delimited)”. Ignore this, and choose Yes to keep the CSV format. 9. Close the file in Excel. If you performed step 6, then disregard message “Do you want to save the changes you made”, because it is only caused by the fact your format is not in the native Excel XLS format. 10. Go back to the PortaBilling web interface, to the Edit Tariff screen. 11. Click on the Upload button. 12. Either enter the name of your file manually, or click Browse … and choose the file. 13. Click Save&Close. You should return to the Edit Tariff screen, and a message will tell you the status of the import. Also you will receive an email confirmation about the tariff upload. If any operation (c) 2000-2004 Porta Software Ltd. All rights Reserved. www.portaone.com 16 Setting up a Wholesale IP Telephony Company has failed you will receive the portion of data which was not uploaded as an attachment so you can try to import them later. You can verify your work using the Edit Rates feature. After you have done so, go to the Main menu (by clicking on the Home icon). Create all required tariffs Repeat the Create Tariff and Enter Rates steps, until you have created: • A tariff for each account billing scheme. For the wholesale termination business model, you will usually need one tariff per customer, which will be used to charge all of the customer’s accounts. • A tariff with the termination costs for each of your termination partners. • If you have resellers, you must also create the tariffs that you will use for charging each of them. Do not create the tariffs, which will be applied to subscribers of your resellers yet. First create the customers, then return to this step. Make sure that, when creating these subscriber tariffs, you choose “Managed by NNN” in the Type menu, where NNN is the name of the corresponding reseller. Create Product Each of the remote customer gateways will be represented as an account and will be billed accordingly. Hence, we need to create a product which this account will have, so it will have a defined way to bill the account. If you have per-customer specific rates/tariffs then you will need a product for each customer. 1. In the Management section of the Admin-Index page choose Products 2. On the Product management page click Add icon 3. Fill in the “Add product” form: o Product name – the product object name o Currency – Product currency. Only tariffs which have the same currency will be permitted in the accessibility list o Managed by - if you plan for this product to be used for your reseller’s accounts, so that the reseller himself can change the parameters of this tariff and create new accounts with this product, choose the customer’s name from the menu. Otherwise choose None here. o Breakage – Balance left over which is considered “useless” (for statistical purposes). Accounts with a balance below the breakage will be counted as depleted. This does not affect account authentication or authorization, so the account can still make calls if there is enough money left to cover at least the first interval. (c) 2000-2004 Porta Software Ltd. All rights Reserved. www.portaone.com 17 Setting up a Wholesale IP Telephony Company o Maintenance period – surcharge application interval; will be reflected in call history as separate line each time when charged. Charged at the end of a specified period. o Maintenance fee – surcharge amount o Account default ACL – the access level assigned by default to new accounts created with this product. The ACL determines which operations may be performed by accounts on the self-care pages. The default value is “Account self-care” (pre-defined ACL), which allows all possible operations. o Description – your description of the intended use of this product. 4. Click Save Click on the Accessibility tab to edit this product’s accessibility (c) 2000-2004 Porta Software Ltd. All rights Reserved. www.portaone.com 18 Setting up a Wholesale IP Telephony Company Enter Node and Tariff into accessibility list of the product For the incoming VoIP traffic normally we do not really need different accessibility entries, only one row with ANY node and a tariff should be enough. However, if, for example, for some customer you want to let him send traffic to your gateway A but not gateway B – this can be achieved by using the accessibility entries. 1. When Accessibility tab is selected, click on the Add icon 2. Choose ANY as a node, choose tariff with which you want to bill your customer, and leave the CLD field empty. 3. Click Save to save this accessibility entry. Create Vendors This step is only required if you have not entered information about your vendors into the system before. Vendors are your termination partners or providers of the incoming toll-free lines. 1. In the Management section of the admin interface choose Vendors. 2. On the Vendor Management page choose Add. 3. Fill in the New Vendor form. Please note that there are two tabs available on the screen. The most important fields are: Main form (top) o Vendor Name – short name for the Vendor object, will be used on the web interface o Currency – in which currency this customer will be billed. o Opening balance – starting balance for the customer, default is zero Additional info o Billing period – split period for vendor statistics. User-Interface o Time zone – the time zone which the vendor uses for his billing period. Statistics will be divided by periods according to this time zone. 4. Click Save&Close. 5. Repeat steps 2-4 to add all of your vendors (c) 2000-2004 Porta Software Ltd. All rights Reserved. www.portaone.com 19 Setting up a Wholesale IP Telephony Company (c) 2000-2004 Porta Software Ltd. All rights Reserved. www.portaone.com 20 Setting up a Wholesale IP Telephony Company Define connections This step is only required if you have not entered information about your vendors into the system before. Vendors are your termination partners or providers of the incoming toll-free lines. 1. In the Management section of the admin interface choose Vendors. 2. Click on the Connections icon next to the vendor name. 3. Choose type of the connection PSTN to Vendor, VoIP to Vendor, etc., by clicking on the corresponding tab. 4. Press Add to add a new connection. 5. Fill in the connection information. If you send traffic to vendor via telephony, choose node and enter optional port pattern. If you send traffic via VoIP, enter the remote IP address. Choose tariff which defines your termination costs for this connection/vendor. For all connection types Description and Capacity are mandatory. 6. The translation rule is necessary if you send calls to the vendor in a format different from the one you use (e.g. the number 420296111222 is sent to the vendor as 004202111222), so that you can convert the phone number to the correct format. Outgoing rule is only present if PortaSIP is installed, and is used to convert the number into the vendor-specific format. 7. Click Save. (c) 2000-2004 Porta Software Ltd. All rights Reserved. www.portaone.com 21 Setting up a Wholesale IP Telephony Company 8. Repeat steps 3-5 to add more connections to the same vendor, then click Close to exit to the Vendor Management screen. 9. Repeat steps 2-7 to add connections for other vendors. Create a Customer A Customer is an owner of Accounts. The Customer’s contact information is used to distribute generated accounts data and account usage information. In the Management section of the Main Menu choose Customers. On the Customer Management page choose Add. Fill the New Customer form. Please note that there are several tabs available on the screen with the extra information. The most important fields are: (c) 2000-2004 Porta Software Ltd. All rights Reserved. www.portaone.com 22 Setting up a Wholesale IP Telephony Company Main form (top) o Name – a short name for the Customer object, will be used on the web interface o Currency – in which currency this customer will be billed. o Opening balance – the starting balance for the customer; default is zero o Type – is it a reseller or retail (direct) customer? (Normally, most of your customers would be retail customers. Only if a customer is reselling your services, and you are providing services and billing to his subscribers, would he be created as a reseller). Address info tab (c) 2000-2004 Porta Software Ltd. All rights Reserved. www.portaone.com 23 Setting up a Wholesale IP Telephony Company o Email – email address for distribution of accounting information. After the billing period is over, a list of CDRs and other statistics will be sent to this address o Bcc – blind carbon copy in email; may be used for debug and archiving purposes o Summary only – distribute summary only, do not attach details file; might be useful when amount of calls is very large. Additional info tab o Billing period – frequency of accounting information distribution. Available billing periods: - Daily – one day, midnight to midnight, sent on the next day - Weekly – [Mon-Sun] inclusive – sent on Monday - Bi-weekly – [1-15] inclusive – sent on the 16th day of the month and [16-last day] inclusive - sent on the 1st of the following month - Monthly – [1-last day] inclusive – sent the 1st of the following month Payment info tab o Credit limit – if left empty, then there is no credit limit for this customer o Balance Warning Threshold – customer can be notified by the email, when his balance is dangerously close to the credit limit, and his service will be blocked soon. Here you can enter the value for the warning threshold. It can be entered - In percents (e.g. 90%). Warning will be send when customer balance will exceed that percentage of his credit limit. So if credit limit is 1000.00 and threshold is 90%, warning will be sent as soon as the balance is over 900.00. Only applicable when customer has positive credit limit. - As absolute value. Warning will be sent as soon as the balance is over the specified value. User Interface Time zone – this parameter serves two purposes. First of all, it defines in which time zone customer will see his CDRs. It also defines which time zone will be used to separate the customer’s billing periods. For example, if you choose America/New York with a monthly billing period here, the customer’s invoice will cover the period starting at 00:00 EST on the 1st of every month. Web Interface Language – the language to be used on the customer self-care web interface. (c) 2000-2004 Porta Software Ltd. All rights Reserved. www.portaone.com 24 Setting up a Wholesale IP Telephony Company Click Save&Close to save your work. See PortaBilling Administrator Interface for more information. Create Accounts NOTE: before generating accounts for a production system, read section “Provisioning of prepaid accounts”. 1. If you are not yet in the Customers screen (the one which contains a list of customers) – enter there. It should look like the screenshot below. 2. Next to the customer name click on the icon (the one in the Accounts column), it will take you to the account management for that customer. 3. After you are in the account management form, click on the 4. Fill out the “Add account” form: (c) 2000-2004 Porta Software Ltd. All rights Reserved. www.portaone.com Add 25 Setting up a Wholesale IP Telephony Company o Account ID – Identification of the account (value which will be sent in the User-Name attribute). For the account which represents remote gateway it is normally an IP address. o Product – choose the product which you would like your accounts to use. o Blocked – check this if you want to create this account as initially blocked. o Opening balance –the initial balance on the card. For the credit accounts opening balance normally is a zero. Account info tab: o Account type – account type, select credit. o Credit limit – Maximum allowed credit. o VoIP Password – password for authentication/authorization. If you are using default Cisco remote_ip_authenticate script, put cisco here. o Batch – batch is a management unit for accounts. Batch name is alphanumeric. You can type a new name here or use the existing name in order to generate more accounts for same batch Additional Info tab: o Preferred language – this is a custom attribute which is transferred to the IVR. Leave English here if you are not sure if your IVR supports it. o Redirect number – redirect number (discussed in the Advanced features section), leave it empty. Life Cycle tab: o Activation date – account activation date. o Expiration date – account expiration date. o Life time – relative expiration date, account will expire on “first usage date” + “life time” days. If you do not want to use this feature, leave the field blank User Interface tab: o Login – login name this account will use to access the self-care page. This can be the same as the account ID, or choose something different for increased security. This field is mandatory. o Password – Password for self-care pages. o Time zone - when an account owner accesses the web self-care pages to view the list of his calls, the time can be shown in the time zone most appropriate for him. o Web Interface Language – the language to be used on the customer self-care web interface. (c) 2000-2004 Porta Software Ltd. All rights Reserved. www.portaone.com 26 Setting up a Wholesale IP Telephony Company 5. Click Save&Close, you’ll get confirmation popup saying that the account has been created. 6. Repeat steps 3-5 if customer has more than one remote gateway. (c) 2000-2004 Porta Software Ltd. All rights Reserved. www.portaone.com 27 Statistics and Monitoring Tools 5. Statistics and Monitoring Tools (c) 2000-2004 Porta Software Ltd. All rights Reserved. www.portaone.com 28 Statistics and Monitoring Tools Billing servers health monitoring Entire system load These statistics are accessible from the main admin menu via System load link in the Statistics section. This graph shows number of calls registered by a production system every 15 minutes. Normal calls with duration>0 (green areas) and calls with zero duration (red line). The most recent information appearing on the right-hand of the graphs is up to an hour old. Figure 5-1 Number of calls If the disconnect time on the CDR does not lie within the past 15 minutes, the call may not be finished and will not be reflected in the graph. (See picture below, call types 3 and 4.) Zero duration calls The graph can also display possible problems in our system, such as unexpectedly high number of failed calls. By default this graph displays statistics for the last 30 hours Total minutes statistics The graph below gives you the ability to monitor how the call volume in your system changes each day. (c) 2000-2004 Porta Software Ltd. All rights Reserved. www.portaone.com 29 Statistics and Monitoring Tools Master and slave MySQL servers statistics These statistics are accessible from the main admin menu via Database link in the Statistics section. Figure 5-2 These two graphs show values from status of our MySQL servers. The green line indicates the number of queries processed by server every 15 minutes, blue indicates number of threads running on the server. Queries. The graph indicates how many times clients are querying the database. On recommended hardware the value can be more then 200 without any problems. High peaks with number of requests over 2000 can indicate wrong configuration of the system or temporary problems. Also these peaks can appear when replication was restored after a system fault. Threads. Normal values for these graphs are: for the Master server <=2 for the Slave server >=1 and <=3 Normally these values depend on processes that run on the server, such as the Radius daemon, the Apache httpd server, statistics collection tools, etc. Greater values can indicate other client connections to the server. If the number of threads on the slave name server is 0, it means the replication process is down and requires administrator attention (see 2.4 for details). (c) 2000-2004 Porta Software Ltd. All rights Reserved. www.portaone.com 30 Statistics and Monitoring Tools VoIP network performance statistics Connection load You can monitor load and quality parameters of the individual connections. To see list of the available connections, from the Statistics section in the main menu follow Connections link. After you will pick a vendor and particular connection, you can see it’s load graph This graph shows the node load, setup time and ASR (Average Success Rate) statistics. The green area indicates node load, red shows relative setup time and the blue line indicates ASR. Information appears on this graph with a one hour delay. 1 2 3 4 Now -900 Now (0) Time, sec Assumptions: calls with duration more then 3600 seconds are rare and don’t affect our statistics very much; zero duration calls need an average duration of 10 seconds to be processed by the router. (c) 2000-2004 Porta Software Ltd. All rights Reserved. www.portaone.com 31 Statistics and Monitoring Tools Connection load calculations For better understanding of the calculations performed, consider the following diagram: 1 2 3 4 Now -900 Now (0) Time, sec The total duration must be calculated for all calls processed by the system fitting the interval between “now - 1 hour 15 minutes”, and “now - 1 hour”. Four different call types are recognized in the above diagram; an additional call type is that of zero duration: 1. 2. 3. 4. 5. Sum of durations of all these calls. Sum of durations between t0 and disconnect_time. Sum of durations between connect_time and t1. Calculate sum as number of calls * 900 seconds. Calculate sum as number of calls * 10 sec. Maximum value of seconds which a connection can hold in the 900 sec. interval is calculated as capacity * 900sec. The load of the connection is calculated as the sum of durations for all call types divided by the Maximum value in seconds. The result will be shown as percentage value (multiplied by 100). ASR calculations Assumption: connection load less than 5% is not representative for ASR calculating. The ASR is calculated as the number of type 5 calls divided by the total number of calls. The result is shown as a percentage value (multiplied by 100). Relative setup time calculations Relative setup time calculated as a ratio between total setup time of all calls during the period and maximum value of seconds (capacity * 900sec). ASR statistics From the Statistics section in the main menu follow ASR link. (c) 2000-2004 Porta Software Ltd. All rights Reserved. www.portaone.com 32 Statistics and Monitoring Tools You can download pre-calculated statistics in .CSV format (for previous days) or obtain data online using Custom Query. For pre-calculated statistics click on the vendor on the left side, and then choose statistics period in the calendar. Pre-calculated statistics will look similar to the example below The following data is available: • Total number of calls • Number of calls with non-zero duration (Billable calls) • ASR • Total calls duration • Average Length of Call (ALOC) Numbers are aggregated per destination prefix, with sub-total per country and total for all calls. In case if you need statistics for today, or report with some other parameters (for example split by hour, so you see how did the ASR evolve during the day) – you can use Custom query report. It extracts data directly from the database, so use with caution in order to do not overload the server. (c) 2000-2004 Porta Software Ltd. All rights Reserved. www.portaone.com 33 Statistics and Monitoring Tools Note that on the Custom Query report both ASR and Cost/Revenue parameters are shown. Billing statistics Customers CDRs List of all customers’ CDR are calculated daily, and are split into files according to the customer’s billing period. These pre-calculated statistics could be automatically mailed to customer. Also they are available for download by customer on the customer self-care pages and for your staff on admin interface. Different types of CDR files are available, depending on the type of customer: CDR files for retail customers • • Invoice – calls made by the credit accounts of this customer. These calls will be included on the customer’s invoice for the corresponding billing period. Debit – calls made by the debit accounts of this customer. Since debit accounts are prepaid, calls made by them do not affect the customer’s balance or invoice. Therefore, they are included in a separate file, so that the customer can easily monitor activities on his debit accounts. CDR files for resellers • • Wholesale – CDRs calculated using the reseller’s wholesale tariff. These are the charges applied to the reseller and reflected on the his invoice. Retail – calls made by an account of this customer and charged using the account’s tariff. This allows a wholesale customer to monitor the charges applied to his accounts. (c) 2000-2004 Porta Software Ltd. All rights Reserved. www.portaone.com 34 Statistics and Monitoring Tools NOTE: Since now there are sub-customers under the reseller, with statistics for each of them calculated individually, this type of statistics is now obsolete. This item has been left here only for backward compatibility, so that you can download statistics for the previous billing periods. Choose customer and then click on the calendar to choose statistics for desired period. CSV file will have structure as shown below: The following data is available: • Account ID (if applicable; not available for a wholesale customer’s CDRs, but available for his account’s CDRs) • CLI or ANI (From) • CLD or DNIS (To) • Country and description of the destination • Call start time • Charged time (in minutes:seconds) NOTE: When browsing data in Microsoft Excel, extra trailing zeros might be added, for example 345:37 (three hundred forty-five minutes and thirty-seven seconds) will (c) 2000-2004 Porta Software Ltd. All rights Reserved. www.portaone.com 35 Statistics and Monitoring Tools be shown as 345:37:00. Use proper call formatting in Excel to eliminate this problem. • • Charged time (in seconds) Charged amount NOTE: Call duration shown in the file is based on the charged duration for the call and not the actual call duration. So, for instance, if you bill by 6 seconds intervals, total call duration here will be higher than the actual duration of the calls. Vendor CDRs It is very useful to have detailed list of call for specific vendor in case of dispute over amount of terminated traffic. These statistics are calculated daily, and are split into files according to the vendor’s billing period. Choose vendor and then click on the calendar to download statistics for desired period. CSV file will have structure as shown below: (c) 2000-2004 Porta Software Ltd. All rights Reserved. www.portaone.com 36 Statistics and Monitoring Tools The following data is available: • CLI or ANI (From) • CLD or DNIS (To) • Country and description of the destination • Call start time • Charged time • Charged amount Cost/Revenue statistics These are essential tool for monitoring your business growth. Working with different partners, different currencies and different prices it is very easy to make a mistake and start carry out non-profitable calls. Cost/Revenue reports allow you to monitor this and stay out of troubles. To access Cost/Revenue reports, follow Cost/Revenue reports link from the Statistics section of the main menu. (c) 2000-2004 Porta Software Ltd. All rights Reserved. www.portaone.com 37 Statistics and Monitoring Tools There are five variants of pre-calculated reports • Inbound by Country – information is split by customer and destination and sorted by country. • Inbound by Customer – information is split by customer and destination and sorted by customer. • Outbound by Country – information is split by vendor and destination and sorted by country. • Outbound by Vendor – information is split by vendor and destination and sorted by vendor. • Inbound - information is split only by destination. The following data is available: • Name of customer/vendor • Destination prefix • Country and description of destination (c) 2000-2004 Porta Software Ltd. All rights Reserved. www.portaone.com 38 Statistics and Monitoring Tools • • • • • • Total number of successful calls Gross margin – difference between total revenue and the cost for this destination Rated, sec. – sum of the time charged for all calls to this destination, in seconds Rated, min. – sum of the time charged for all calls to this destination, in minutes. This is the same value as in the previous column, only expressed in different units. So, for instance, if Rated, sec contains 180, here 3.0 will be shown. Total Cost – summary of the amount charged for all the vendor’s CDRs for this destination. If the vendor uses a currency different than your base one, this will be converted using the current exchange rate. Total Revenue – summary for the amount charged for all the customer’s CDRs for this destination. If the customer uses a currency different than your base one, this will be converted using the current exchange rate. Note that, in the case of wholesale customers, we use the value of the customer’s CDR, not the account’s, since your revenue is what is invoiced to the wholesale customer. In addition you can use Custom Query report, which is identical to the Custom Query report in the ASR statistics. (c) 2000-2004 Porta Software Ltd. All rights Reserved. www.portaone.com 39 How to … 6. How to … (c) 2000-2004 Porta Software Ltd. All rights Reserved. www.portaone.com 40 How to … Charge my calling card customers XX/min extra when they call toll-free line This is very easy to accomplish using the PortaBilling Accessibility feature. 1. Create two tariffs – one with your normal rates (for example 0.13 dollar/min for calls to Czech Republic) and the other one with the “toll-free” rates, including your toll-free cost there (for example 0.17 dollar/min for calls to Czech Republic). TIP: When calculating the price for the toll-free line it is not enough to add together your ordinary price and costs of 1 minute of the toll-free line. In order to make a 3 minutes call, customer will spend about 4 minutes on the line while listening to voice prompts, entering PIN / destination and waiting for an answer. Additionally, the situations where a customer will enter the incorrect PIN or is unable reach his party at all should be taken into account. So usually: TollFree_ Price = Ordinary_Price + X*Toll_FreeCost where X is a ratio between the total duration of your incoming toll-free calls and the total duration of the outgoing calls. 2. Make sure your IVR script supports “PortaBilling Original CLD feature” 3. Create a product for your calling cards and put two entries into the Accessibility: • One with CLD equal to your toll-free number and “Toll-free tariff” • Another one with CLD equal to your local access number and “Ordinary tariff” Authorize and bill my customers by the phone number they are calling from (ANIbased billing) PortaBilling gives you great flexibility in choosing how you would like to authorize and bill your customers. For the ANI-based billing you just have to 1. Create a tariff (or tariffs) and a product. Note: If you are providing both prepaid cards and ANI-based billing, take measures to prevent frauds (e.g., someone could dial to your IVR and enter their neighbor’s home phone number as the PIN). When creating accessibility for the ANI-based billing product, separate it from the prepaid cards (by using a different access phone number, a different node or different PIN lengths for the prepaid cards). (c) 2000-2004 Porta Software Ltd. All rights Reserved. www.portaone.com 41 How to … 2. On your gateway use the corresponding application to handle the call. You can use one of the Cisco default applications (clid_*) or create your own. The only important thing is that ANI (CLI) must be in the User-Name attribute in the AAA requests which go into the billing. Cisco gateways usually have a number of ANI (CLI) authentication TCL scripts embedded into IOS. The application set may be slightly different on different platforms. The richest set available at the time of this writing is shown below. Router#show call application voice summary name description session Basic app to do DID, or supply dialtone. fax_hop_on Script to talk to a fax redialer clid_authen Authenticate with (ani, dnis) clid_authen_collect Authenticate with (ani, dnis), collect if that fails clid_authen_npw Authenticate with (ani, NULL) clid_authen_col_npw Authenticate with (ani, NULL), collect if that fails clid_col_npw_3 Authenticate with (ani, NULL), and 3 tries collecting clid_col_npw_npw Authenticate with (ani, NULL) and 3 tries without pw DEFAULT Default system session application session.t.old Session Application in TCL fax_hop_on.t.old Script to talk to a fax redialer clid_authen.t.old Authenticate with (ani, dnis) clid_authen_collect. Authenticate with (ani, dnis), collect if that fails clid_authen_npw.t.ol Authenticate with (ani, NULL) clid_authen_col_npw. Authenticate with (ani, NULL), collect if that fails clid_col_npw_3.t.old Authenticate with (ani, NULL), and 3 tries collecting clid_col_npw_npw.t.o Authenticate with (ani, NULL) and 3 tries without pw prepaid flash:debitcard.1.1.3.tcl prepaid_v2 flash:app_debitcard.2.0.0.tcl test_v1 flash:test_api_v1.tcl test_v2 flash:test_api_v2.tcl Use the clid_* application that corresponds to your authentication configuration, or develop your own. From the billing point of view, this is transparent as it uses ANI (CLI) as User-name. Configuration example: aaa new-model aaa authentication login h323 group radius aaa authorization exec h323 group radius aaa accounting connection h323 stop-only group radius ! gw-accounting h323 vsa ! dial-peer voice 1 pots application clid_authen_npw incoming called-number . port 1:D ! gateway ! 3. Create a customer who will own those accounts. 4. Create accounts with the Account ID equal to the phone number from which the service will be used. (c) 2000-2004 Porta Software Ltd. All rights Reserved. www.portaone.com 42 How to … TIP: check in which format ANI (CLI) numbers are reported by your gateway. For example, for the phone number +420 2 1234567 might be reported as “21234567”, “021234567”, “42021234567” or may be something different. You have to use exactly the same format for the Account ID (or change your application to convert it to the desired format). Bill my customers who are connected via T1/E1 directly to some port on my gateway Typically for such “port-based billing” you do not use authentication or authorization, since you are always sure that you customer is on the other end of the physical line. It might be a good idea though to implement call authorization, so you may control which destinations customer is allowed to call – but we leave it out of this example. For the port-based billing you just have to: 1. For each of such customers, create a tariff that you want bill your customer and a product. Only one row in the accessibility is necessary with the node “ANY” and the tariff which you have created. 2. Now we have to make sure that each call made by that customer is tagged as belonging to him. On your gateway use the corresponding application to handle the call. You can use the Cisco application app_session_name or create your own. The often difficult part in gateway configuration is to design dial-peers for matching certain voice ports. Dial-peers should like the following configuration example: dial-peer voice 1 pots application client_on_port_1 direct-inward-dial port 1:D They will be listed as having an operation status of down as the port specification must be accompanied with a number matching a specification, for example: dial-peer voice 1 pots application client_on_port_1 incoming called-number . direct-inward-dial port 1:D This dial-peer is not adequate for our needs because any number matching the specification will prefer the port specification. This dial-peer will match any port. The solution is to use a number matching scheme which will not match any number. dial-peer voice 1 pots application client_on_port_1 incoming called-number A direct-inward-dial port 1:D (c) 2000-2004 Porta Software Ltd. All rights Reserved. www.portaone.com 43 How to … The solution may be considered a “hack” but is functional and secure. For increased security you may specify a 32 character string with a random sequence of “ABCD” characters. The probability of receiving such number is near zero. So the configuration should look like the following: aaa new-model aaa authentication login h323 group radius aaa authorization exec h323 group radius aaa accounting connection h323 stop-only group radius ! call application voice client_on_port_1 flash:app_session_name.2.1.0.tcl call application voice client_on_port_1 user-name abc_ltd ! call application voice client_on_port_2 flash:app_session_name.2.1.0.tcl call application voice client_on_port_2 user-name xyz_inc ! gw-accounting h323 vsa ! dial-peer voice 1 pots application client_on_port_1 incoming called-number A direct-inward-dial port 1:D ! dial-peer voice 2 pots application client_on_port_2 incoming called-number B direct-inward-dial port 2:D ! gateway ! 1. Create customers who will own these accounts. 2. Create accounts with the Account ID equal to the name you put in the configuration of the applications (abc_ltd and xyz_inc in our example) Authenticate and bill my customers by the IP address of their gateway This is another example of how easy you can implement different billing schemes with PortaBilling. For the IP-based billing you just have to: 1. Create a tariff and product. Since “Node” and “CLD” only make sense for the incoming telephony calls – for the IP-based billing product set node to “ANY” and leave CLD blank. 2. On your gateway use the corresponding application to handle the call. You can use the Cisco application remote_ip_authenticate or create your own. The only important thing is that the IP address of the remote GW is in the User-Name attribute in the AAA requests which will go into the billing. Here is an example of the configuration: (c) 2000-2004 Porta Software Ltd. All rights Reserved. www.portaone.com 44 How to … aaa new-model authentication login h323 group radius aaa authorization exec h323 group radius aaa accounting connection h323 stop-only group radius ! gw-accounting h323 vsa ! call application voice remote_ip tftp://…./remote_ip_authenticate.1.1.1.tcl ! dial-peer voice 11 voip application remote_ip incoming called-number . ! 3. Create a customer who will own these accounts. 4. Create accounts with the Account ID equal to the IP address of the remote gateway. Use volume-based billing When you define the rate in a volume-based tariff and assign a volume lot to it, it will decrease with every call. Note that the volume lot data is associated with the tariff, so normally you will need a separate volumebased tariff for each of your volume-based customers. When the volume lot parameter of the rate reaches zero, the rate will be marked as discontinued, so that some other rate (which has not been discontinued and has an Effective From date in the past) can be used instead. Thus, usually some “normal” (non-volume-based) rates are first created in the tariff, and these define policy in the event that all the volume rates are used up. Let’s look at how to implement the most typical volume-based services. Volume threshold If you would like to give your customer 100 minutes of calls to the US & Canada for free, and after that charge him 0.07/min: 1. Create a new volume-based tariff (choose Volume Based in the Type menu in the Add tariff form). 2. Enter the default rates. These rates should not be volume-based (keep the Volume Time column empty); rather, they are the rates to be used if the volume lot has been used up. So, in our example, we will enter a rate for destination 1 with a price of 0.07/min. 3. Now create another rate for prefix 1. This rate will be volumebased, thus we enter 100 in the Volume Time. The volume-based rate we have created will be now effective, so if a call is made to the US or Canada, it will be subtracted from the volume lot, but will not affect the customer’s balance. This will continue until all of the 100 minutes are used up. After that, this rate will be discontinued, and, if (c) 2000-2004 Porta Software Ltd. All rights Reserved. www.portaone.com 45 How to … another call is made, it will be charged according to the 0.07 rate, and so will be reflected in the customer’s balance. If the customer is to receive more prepaid minutes, you will simply create another volume-based rate. Or, if you wish to give him 100 minutes every month, simply create volume rates for 100 minutes effective from the 1st of February, the 1st of March, etc. Wholesale volume lot Let us suppose a customer buys from you 50,000 minutes to the Czech Republic and 30,000 minutes to Prague. Since he has prepaid you for these minutes, you want to make sure that, as soon as his lot to the given destination is used up, no further service is provided. 1. Create a new volume-based tariff (choose Volume Based in the Type menu in the Add tariff form) 2. Enter the default rates. These rates should not be volume-based (keep the Volume Time column empty), as they are the rates to be used if the volume lot is used up. So, in our example, we will enter the rate for destinations 420 and 4202, marking them Forbidden. 3. Now create a rate for prefix 420 with volume lot 50,000 and a rate for prefix 4202 with volume lot 30,000. So now the customer can make calls to both the Czech Republic and Prague. If he tries to call 4202123456 and his lot for Prague is used up, the Forbidden rate will be applied during authorization, thus the call will be rejected. At the same time, however, he can still call the rest of the Czech Republic. (c) 2000-2004 Porta Software Ltd. All rights Reserved. www.portaone.com 46 How to … Have reliable cost/revenue figures if volumebased billing is used If, in addition to the volume lot, you want to include price parameters in the rate, then this will not be used to create a CDR for the customer, and the customer’s CDR will still show zero as the charged amount. It will, however, be used to calculate your estimated revenue, and will be stored in the vendor’s CDR so it can be used for cost/revenue calculations. For example, suppose you sold a volume lot of 50,000 minutes to Prague, Czech Republic, to a customer, and he has now used it all up. If you created his volume-based rate with price 0, and your termination cost to the Czech Republic is 0.08/min, then your cost/revenue report will show –4000, which is incorrect. However, if you configured your rate as shown below and entered an average price per minute, the cost/revenue statistics would show the actual figure of +1500. Charge reseller for incoming calls This is a very common situation: You provide your reseller with the billing, gateways and other required components. When the end-user makes a call, you charge the reseller according to your wholesale rates. But now the reseller wishes to give his subscribers the ability to use either a local access line or a toll-free line to access the service. The reseller can use the accessibility feature to charge subscribers by different tariffs, depending on the access number. But what about the amount you charge the reseller? Obviously when somebody calls a toll-free line and then calls China your cost is higher than when somebody calls a local access line and then calls the same number in China. This fact should be reflected in the reseller charges. PortaBilling allows you to charge your reseller not just for outgoing calls, but also for incoming ones. This is done when the call is crossing PSTN from the vendor connection. In order to implement this, follow these instructions: 1. Create a tariff which defines your incoming line costs. 2. Create a separate tariff which will describe charges for the incoming access numbers you would like to apply to your reseller (for instance, incoming calls to 1800 numbers will cost your (c) 2000-2004 Porta Software Ltd. All rights Reserved. www.portaone.com 47 How to … reseller 0.02/min, while calls to 1718 and 1206 numbers will be free). 3. Activate the “incoming charges” feature (disabled by default). • On the PortaBilling master, edit the /home/portabilling/etc/porta-billing.conf and make sure the following line is present in the [Features] section: ChargeCustomerForIncomingCalls=yes • On the PortaBilling slave, edit the /home/portaadmin/etc/porta-admin.conf and make sure the following line is present in the [Customers] section ChargeCustomerForIncomingCalls=1 4. Define a PSTN from vendor connection, which will describe the point when calls are delivered to your network from the vendor – and therefore have costs associated with them. Associate the tariff created in step 1 with this connection. 5. Edit your reseller information. Now, on the Additional Info tab, you will see a new select menu – Incoming tariff .Choose the tariff you created in step 2, then click Save&Close. So now, when an account belonging to the reseller makes a call to the tollfree number 18001234567 (and there is a matching PSTN from the vendor connection), then makes an outgoing call to the Czech Republic 42021234567 and hangs up, the following charges will be applied: • The account will be charged for an outgoing call to 42021234567 according to his rates to the Czech Republic; a CDR will be written to the database. • For the vendor who terminated this call to the Czech Republic, a CDR will be written which describes our termination cost. • For the vendor who provided the toll-free line, a CDR will be created which describes our incoming call cost. • For the reseller, two CDRs will be created (and his balance will be modified accordingly): o For the call to 42021234567, according to his “outgoing” tariff (wholesale rates) o For the call to 18001234567, according to his “incoming” tariff Please note that these two calls will usually have a different duration. The incoming call will be longer, because the customer needs time to enter the prompts, wait to be connected, and so on. In this case we charge the reseller for the actual incoming call duration, i.e. exactly the same duration we are charged by the toll-free line vendor. (c) 2000-2004 Porta Software Ltd. All rights Reserved. www.portaone.com 48 How to … Deal with technical prefixes and numbering formats Different termination partners often require you to send number to them in some specific format. For example your termination partner might require usage of the technical prefix 58901# (so you have to send him 58901#42021234567 instead of 42021234567), and your local phone provider requires that for outgoing calls numbers will be dialed without country code (so a call to 42021234567 has to be dialed as 21234567). The more partners you have, the more likely it is you will run into these problems with the different number formats. Of course it is better to use single numbering format internally. Our recommendation is to use E.164 format in billing and on your network. E.164 compliant number is such number which consists of <countrycode><areacode><phone#>. Examples of valid E.164 numbers are 42021234567 and 16049876543. The following numbers are not valid E.164 numbers: 6049876543 (NANP format), 01142021234567 (US overseas dialing format), 021234567 (local format). PortaBilling provides you with a powerful tool to convert all such strange numbers into the unified format to be used in billing. For every connection to vendor you can specify translation rule, which will convert number into the E.164 format. Here are some ready to use examples of the translation rules: • Convert NANP (North America Numbering Plan) phone number (area code + phone number, e.g. 604 888 7766) into the E.164: s/^/1/; • Convert European international dialing format (00 + country code + area code + phone number, e.g. 00 1 604 888 7766) into the E.164: s/^00//; • Convert North-America international dialing format (011 + country code + area code + phone number, e.g. 011 1 604 888 7766) into the E.164: s/^011//; • Convert Australian international dialing format (0011 + country code + area code + phone number, e.g. 0011 1 604 888 7766) into the E.164: s/^0011//; • Convert tech prefix format (tech prefix + country code + area code + phone number, e.g. 6789# 1 604 888 7766) into the E.164: s/^6789#//; • Convert European domestic dialing format (0 + area code + phone number, e.g. 0 5 888 7766) into the E.164 (assuming that the country code is 44): s/^0/44/; Always test your translation rules before inserting them into the billing. There is a special test window available on the web interface, in order to access it click on the test icon next to the translation rule field. (c) 2000-2004 Porta Software Ltd. All rights Reserved. www.portaone.com 49 How to … It will let you check if your translation rule has a proper syntax and also you can immediately see if it does the translation you need. Troubleshoot incorrectly billed call 1. Make sure that someone in your organization is subscribed to the PortaBilling mail alerts (especially “Missing critical information”). This will help you detect problems early. 2. Find the h323-conf-id of this call. This is unique ID (string of four hex numbers), generated by the gateway when the call was started, and it will help you to exactly identify this particular call among the others. You can find this ID by either: • See statistics on your gateway • Go to the radius details directory (/var/log/radacc), enter the subdirectory for the corresponding gateway and use program like more or less to browse the file. You can search by the number you dialed, account (PIN) number or just browse records near the end of the file. • Browse the PortaBilling log (/var/log/portabilling.log) – search by the number you dialed, account (PIN) number or just browse records near the end of the file. 3. Look in the PortaBilling log (/var/log/porta-billing.log) or use View logs on the web interface and find all of the information there about the call processing. Note: Normally we receive information about each of the call legs separately, so it is necessary that you check log entry for processing all of the call legs and the final call clean up. 4. Typical error situations are: • Call was not billed at all. It was considered as “onnet” call, because we did not detect that it went to any (c) 2000-2004 Porta Software Ltd. All rights Reserved. www.portaone.com 50 How to … • • • of the vendors. Check that you have correctly defined connections to your vendors. Call was billed only to vendor, but not to an account or customer (and when you received email alert). The billing engine needs Account ID in the User-Name attribute to correctly identify account and customer. Check the logs and see what was in the User-Name attribute. Typical situations are: 1. Incorrect value in User-Name (for example phone number instead of the IP address of the remote gateway). Cause: Required application was not used to handle the call. Remedy: check that application is configured, and associated with the corresponding incoming dial-peer. 2. On some of the call legs there is correct value in the User-Name, on others there is some IP address. In the situation when call is originated on your gateway A and is terminated on your gateway B – then we will have “real” username only on the accounting from the gateway A. On the gateway’s B accounting username will be the IP address of the gateway A, because gateway A had to authenticate itself before being able to make a call. This is perfectly normal situation. PortaBilling recognizes this situation and will replace username equal to the node’s ID (IP address) with a “real” username from the other call legs. 3. Value in the User-Name is correct, but it says “Did not find account/customer”. Check accessibility for the account’s product. It might be that even if you have such account, accessibility is incorrect. Call was billed, but the phone number I see in the billing is incorrect (not in the E.164 format) and I get “Mismatch in rates or destinations” error. Cause: missing or incorrect translation rule on the connection to the vendor. Remedy: Assign translation rule, read the Charge reseller for incoming calls This is a very common situation: You provide your reseller with the billing, gateways and other required components. When the end-user makes a call, you charge the reseller according to your wholesale rates. But now the reseller wishes to give his subscribers the ability to use either a local access line or a toll-free line (c) 2000-2004 Porta Software Ltd. All rights Reserved. www.portaone.com 51 How to … to access the service. The reseller can use the accessibility feature to charge subscribers by different tariffs, depending on the access number. But what about the amount you charge the reseller? Obviously when somebody calls a toll-free line and then calls China your cost is higher than when somebody calls a local access line and then calls the same number in China. This fact should be reflected in the reseller charges. PortaBilling allows you to charge your reseller not just for outgoing calls, but also for incoming ones. This is done when the call is crossing PSTN from the vendor connection. In order to implement this, follow these instructions: 6. Create a tariff which defines your incoming line costs. 7. Create a separate tariff which will describe charges for the incoming access numbers you would like to apply to your reseller (for instance, incoming calls to 1800 numbers will cost your reseller 0.02/min, while calls to 1718 and 1206 numbers will be free). 8. Activate the “incoming charges” feature (disabled by default). • On the PortaBilling master, edit the /home/portabilling/etc/porta-billing.conf and make sure the following line is present in the [Features] section: • ChargeCustomerForIncomingCalls=yes On the PortaBilling slave, edit the /home/portaadmin/etc/porta-admin.conf and make sure the following line is present in the [Customers] section ChargeCustomerForIncomingCalls=1 9. Define a PSTN from vendor connection, which will describe the point when calls are delivered to your network from the vendor – and therefore have costs associated with them. Associate the tariff created in step 1 with this connection. 10. Edit your reseller information. Now, on the Additional Info tab, you will see a new select menu – Incoming tariff .Choose the tariff you created in step 2, then click Save&Close. So now, when an account belonging to the reseller makes a call to the tollfree number 18001234567 (and there is a matching PSTN from the vendor connection), then makes an outgoing call to the Czech Republic 42021234567 and hangs up, the following charges will be applied: • The account will be charged for an outgoing call to 42021234567 according to his rates to the Czech Republic; a CDR will be written to the database. • For the vendor who terminated this call to the Czech Republic, a CDR will be written which describes our termination cost. • For the vendor who provided the toll-free line, a CDR will be created which describes our incoming call cost. (c) 2000-2004 Porta Software Ltd. All rights Reserved. www.portaone.com 52 How to … • For the reseller, two CDRs will be created (and his balance will be modified accordingly): o For the call to 42021234567, according to his “outgoing” tariff (wholesale rates) o For the call to 18001234567, according to his “incoming” tariff Please note that these two calls will usually have a different duration. The incoming call will be longer, because the customer needs time to enter the prompts, wait to be connected, and so on. In this case we charge the reseller for the actual incoming call duration, i.e. exactly the same duration we are charged by the toll-free line vendor. • Deal with technical prefixes and numbering formats chapter. • Call was billed and the phone number I see in the billing is correct but I get “Mismatch in rates or destinations” error. Cause: missing rate for that phone prefix in the tariff. Remedy: Create a rate for this destination in the tariff. 5. If you are unable to solve the problem by yourself, submit problem report to [email protected]. Please make sure that you include in your email: • Detailed description of the call flow and what seem to be incorrect. • H323-conf-id of the call • Relevant pieces from the porta-billing.log Create a custom TCL application Sometimes you need special call handling or IVR functionality which is not available in the applications you already have. For example, you need a prepaid card IVR which will try to do ANI authentication prior to the PIN authentication. First of all, check TCL applications available as a part of Cisco TCLWare package, perhaps what you are looking for (or something similar) is already there. If you find some application similar to what you need, you can use it as template. FastIVR There is a productivity tool for the TCL IVR development available from the Porta Software Ltd. FastIVR is an emulator of Cisco in regard to the script execution, TCL API, VoIP-related IOS commands. You can find more information at http://www.portaone.com/solutions/fastivr. (c) 2000-2004 Porta Software Ltd. All rights Reserved. www.portaone.com 53 How to … Make a custom report from PortaBilling PortaBilling provides you with an open data model. ER-diagram of the database structure is not included in this document, but available from the Porta Software Ltd upon request. If you want to prepare custom reports on your workstation or some non-PortaBilling server you will need to: • Make sure the remote computer has installed database drivers to access the PortaBilling database. Normally you would use native MySQL connectivity on the Unix-based hosts and ODBC on the Windows-based hosts. • For any data-mining solutions (extracting data from the database) use only slave database. • Use some tool like Crystal Reports, Microsoft Access or custom application to retrieve data from the database, process it and present to user. Use ODBC to connect to PortaBilling ODBC (Open Database Connectivity) provides a way for client programs to access a wide range of databases or data sources. If you need extended customized reporting not available in PortaBilling, you can do it using external tools such as MS Access or Crystal Reports. Create a MySQL user to be used for reports 1. Login into your Portabilling slave server using ssh 2. Start MySQL command tool andrew@demo:/home/porta-admin$mysql -u root mysql Reading table information for completion of table and column names You can turn off this feature to get a quicker startup with -A Welcome to the MySQL monitor. Commands end with ; or \g. Your MySQL connection id is 42122 to server version: 4.0.17log Type 'help;' or '\h' for help. Type '\c' to clear the buffer. mysql> 3. Create a new user using GRANT command: mysql> grant ALL PRIVILEGES on `porta-billing`.* to 'reports'@'192.168.0.5' identified by 'pod23uk'; Query OK, 0 rows affected (0.02 sec) mysql> NOTE: The command above will give access to all of the tables in the database. It is provided just as an example, modify it accordingly to your actual needs. (c) 2000-2004 Porta Software Ltd. All rights Reserved. www.portaone.com 54 How to … 4. Flush the privileges mysql> FLUSH PRIVILEGES; Query OK, 0 rows affected (0.07 sec) Installing the MySQL ODBC driver 1. Download and run the installation package from the http://www.mysql.com 2. Press Next on the information screens (c) 2000-2004 Porta Software Ltd. All rights Reserved. www.portaone.com 55 How to … (c) 2000-2004 Porta Software Ltd. All rights Reserved. www.portaone.com 56 How to … 3. Press Finish Configuring ODBC Before configuring data source, create MySQL user on slave DB with read-only permissions. Please consider the following document on how to add new user accounts to MySQL: http://www.mysql.com/doc/en/Adding_users.html 1. Control panel -> Administrative tools -> Data sources (ODBC) 2. Select myodbc3-test and click Configure…”Fill out the configuration form: (c) 2000-2004 Porta Software Ltd. All rights Reserved. www.portaone.com 57 How to … Important parameters are: • Host/Server Name (or IP) – hostname (or IP address) of your slave server • Database Name – porta-billing • User, Password – username and password of the MySQL user you have created for the report purposes • Port – the port on which the database service is accessible; enter 3307 here. Note: This port number differs from the one used by default. (c) 2000-2004 Porta Software Ltd. All rights Reserved. www.portaone.com 58 How to … Using ODBC At MS Access 1. Create a blank database 2. Right-click in the table design view, and choose Link tables… 3. Choose ODBC databases from “Files of type…” list 4. Select Machine data source 5. Select PortaBilling and press OK 6. Select desired tables At Crystal Reports 1. Create a New Report 2. In Data Explorer open ODBC branch 3. Select PortaBilling 4. Select desired tables (c) 2000-2004 Porta Software Ltd. All rights Reserved. www.portaone.com 59 How to … Using redirect-number feature Each Account in PortaBilling has redirect number field. If field is not empty, PortaBilling will include an h323-redirect-number in each authorization confirm message and use an h323-return-code of 52. How to proceed in this case is determined by the gateway. The account owner is allowed to modify the redirect number using customer self-provisioning web. There are no scripts for any redirect number functionality in the Cisco TCL package. You may desire to implement this functionality in-house, or Porta Software may be able to assist you. Customer support number PortaBilling allows you to enter the redirect number during the process of account generation so that you may specify different redirect numbers for different account batches. Different batches may be distributed in different regions and only a slight modification to the prepaid card script can make it more intelligent about how to choose a customer support center. IP telephony private line auto ringdown In the case of the combination of ANI (CLI) authentication and immediate call forward, you may map phone lines from one world region to another. This is advantageous as you will require only one local access number. The mapping is dependant on the ANI (CLI). Know which H323 proxy is right for me There are two possible implementations of the H323 proxy: hardware and software. Hardware is a VoIP gateway with some of the voice ports connected to the others (or two back-to-back gateways can be used). Software proxy is a Cisco router (no DSP or voice ports required) with certain IOS extensions. Hardware solution advantages: Simplicity, out of the box functionality In most cases there is only one option for negotiating heterogeneous protocols Rapid deployment Almost no maintenance is necessary Hardware solution disadvantages: It is expensive Unnecessary protocol translations Late problem detection, it is always necessary to place a call first (c) 2000-2004 Porta Software Ltd. All rights Reserved. www.portaone.com 60 How to … Software solution advantages: Cost efficient In the case of network interconnection, running the same protocol it is a native solution with maximum interoperability and transparency Early problem detection, the system is aware of the remote network state Software solution disadvantages: There is the potential need for protocol translation More complex Both parties’ software versions must be synchronized Isolate network of “Big client”, so you do not have to track their individual gateways If the client has more than one gateway, it is possible to enter all gateways into the PortaBilling as separate accounts. Each of them will be billed separately, and Customer who owns them will carry a total balance. Usually this is fine if all gateways are owned and provisioned by your client for himself, or, in other words, if the client is the “end user”. This case could be outlined as: Low and stale number of gateways Stable gateway configuration Stable billing relationships If your client is the service provider then your case may look more like this: A large number of unstable gateways (service installation and cancellation) Unstable gateways configuration (IP, h323_id) Different billing procedures for different gateways In this case it is possible to isolate client’s network by using H.323 proxy. All of the customer’s gateways send traffic to the proxy, and then it resends traffic to your network. So for you and for the Portabilling it looks like customer has a single gateway, which sends all the traffic. (c) 2000-2004 Porta Software Ltd. All rights Reserved. www.portaone.com 61 How to … Sample network gw-clientof-client 5 gk-client gk-directory 1 2 4 3 6 7 8 proxy-client gw-termination 9 10 PORTA 11 Billing ® PortaBilling100 owner's network In the example above gw-termination belongs to you (PortaBilling owner), the rest belongs to your client or your client’s client. If gateway gw-client-of-client in Zone gk-client wants to call gateway gwtermination in gk-directory, the following sequence of events occurs: 1. gw-client-of-client asks gk-client for permission to call certain destination. 2. gk-client locates gk-directory as the gatekeeper for that destination. gk-client asks gk-directory for address of the termination gateway. 3. gw-directory responds with gw-termination address. 4. gk-client knows that to get to gw-termination, the call must go through proxy.client, hence gk-client returns proxy.client address to gw-client-of-client. 5. gw-client-of-client calls proxy.client. 6. proxy.client consults gk-client to discover the true call's destination (which is gw-termination in this example). 7. gk-client instructs proxy.client to call gw-termination. 8. proxy.client completes the call to gw-termination. 9. gw-termination asks PortaBilling to authenticate proxy.client IP address. 10. Assuming that there is an account with Account ID equal to this IP address, PortaBilling sends authentication confirm message. 11. Upon call completion gw-termination sends the stop accounting record to PortaBilling with User-Name = proxy.client IP, and account with such Account ID is billed for the call. (c) 2000-2004 Porta Software Ltd. All rights Reserved. www.portaone.com 62 How to … We would recommend a single proxy configuration in this case. Installation must be done in cooperation with the client, and include gatekeeper and proxy installation on the client network, and PortaBilling configuration. No gatekeeper or any other H.323 server reconfiguration in your network is necessary. (Today this should not be an issue as current Cisco gatekeeper/proxy/gateway software can be executed on the same box). Client gatekeeper & proxy configuration Provided below are important sample configurations. NOTE: all 3 logical instances in this sample could be configured on single Cisco chassis. Sample “client of the client” gateway interface description VoIP ip address 1.1.1.1 255.255.255.0 h323-gateway voip interface h323-gateway voip id gk-client ipaddr 2.2.2.2 1718 h323-gateway voip h323-id gw-client-of-client Gatekeeper gatekeeper zone local gk-client client.domain 2.2.2.2 zone remote gk-directory your.domain 3.3.3.3 1719 zone prefix gk-directory * use-proxy gk-client remote-zone gk-directory outbound-from gateway use-proxy gk-client remote-zone gk-directory outbound-from terminal no shutdown H323 proxy (shown on the same chassis as gatekeeper) hostname proxy ip domain-name client ! proxy h323 ! interface ip address 2.2.2.2 255.255.255.0 h323 interface h323 h323-id proxy.client h323 gatekeeper ipaddr 2.2.2.2 Your termination gateway and PortaBilling Configuration is the same as in case of billing by remote IP address, see Authenticate and bill my customers by the IP address of their gateway and Setting up a Wholesale IP Telephony Company. (c) 2000-2004 Porta Software Ltd. All rights Reserved. www.portaone.com 63 How to … Make sure your customers do not know who your real termination partners are and never communicate directly with them See Isolate your network below. Isolate your network Two carriers interested in interconnecting will desire a single interconnection point, which is convenient for management and billing. Another reason why you might need this is to make sure that your clients do not directly send traffic to your termination partners, since they might try to avoid billing in this way or get a direct contract with the termination partner. Sample network We assume that gk-directory and proxy belong to you (PortaBilling owner), gk-operator and gw-termination belong to your termination partner and gw-client is either your own gateway, or your customer’s. If gateway gw-client in Zone gk-directory wants to call gateway gwtermination in gk-operator, the following sequence of events occurs: gw-client 5 gk-directory gk-operator 1 2 4 3 6 Vendor 7 gw-termination 8 proxy 10 9 Billing 1. gw-client asks gk-directory for permission to call certain destination. 2. gk-directory locates gk-operator as the gatekeeper handling that destination. 3. gk-directory asks gk-operator for address of the termination gateway. gw-operator responds with gw-termination address. 4. gk-directory knows that to get to gw-termination, the call must go through proxy, hence gk-directory returns proxy address to gwclient. (c) 2000-2004 Porta Software Ltd. All rights Reserved. www.portaone.com 64 How to … 5. gw-client calls proxy. 6. proxy consults gk-directory to discover the true call's destination (which is gw-termination in this example). 7. gk-directory instructs proxy to call gw-termination. 8. proxy completes the call to gw-termination. 9. Upon call completion gk-directory sends a stop accounting record to PortaBilling with h323-gw-id = gw-client h323-id (NOT hostname.domain) 10. Upon call completion proxy sends a stop accounting record to PortaBilling WITHOUT h323-remote-ip Network components configuration Provided are sample configurations. NOTE: all 3 logical instances could be configured on single Cisco chassis. Sample “client” gateway interface description VoIP ip address 1.1.1.1 255.255.255.0 h323-gateway voip interface h323-gateway voip id gk-directory ipaddr 2.2.2.2 1718 h323-gateway voip h323-id gw-client Common part for Gatekeeper and Proxy aaa new-model aaa authentication login h323 group radius aaa authorization exec h323 group radius aaa accounting connection h323 stop-only group radius ! radius-server host PortaBilling.your.domain radius-server key your-top-secret radius-server vsa send accounting radius-server vsa send authentication Gatekeeper gatekeeper zone local gk-directory your.domain 2.2.2.2 zone remote gk-operator operator.domain 3.3.3.3 1719 zone prefix gk-operator * accounting vsa lrq forward-queries use-proxy gk-directory remote-zone gk-operator outbound-from gateway use-proxy gk-directory remote-zone gk-operator outbound-from terminal no shutdown H323 proxy (shown on same chassis as gatekeeper) hostname proxy ip domain-name client ! gw-accounting h323 vsa (c) 2000-2004 Porta Software Ltd. All rights Reserved. www.portaone.com 65 How to … proxy h323 ! interface ip address 2.2.2.2 255.255.255.0 h323 interface h323 h323-id proxy.client h323 gatekeeper ipaddr 2.2.2.2 PortaBilling configuration If Gw-client is a client’s gateway, it should be entered as an account (see Setting up a Wholesale IP Telephony Company, otherwise (if it your own gateway) it should be entered as a node. If the Gk-directory is separate from the proxy, it should be entered as a node, make sure type is “H323GK”. Proxy should be entered as a node with type “H323-GW”. The last and the most important thing is to create a “Proxied VoIP to vendor connection” with proxy node. Restrictions Only total proxy traffic accounting is possible. If you will have more than one operator behind the proxy, it will not be possible separate accounting information. This is a Cisco limitation and may be resolved in a future IOS revision. As a temporary solution, it is suggested to use a separate proxy instance for each operator. The origination point (gw-client) must be the gateway (not the terminal). In the case of an FXS port dial peer, use “no register e164”. Configure outgoing connection to vendor, if I send calls using gatekeeper, so remote IP address is not known in advance In this situation you indeed cannot use VoIP to Vendor connection, since IP address of the remote gateway will be assigned dynamically. Solution in this case is to set up h323-proxy and send traffic to this vendor via proxy. See Isolate your network chapter above. Then you can create Proxied VoIP to Vendor connection. If you only have one such vendor, where termination IP address is unknown beforehand, and you are sure that everything, which goes to the unknown IP address goes to this vendor – you can use a special feature in PortaBilling to handle this situation. You can create a “VoIP to Vendor” connection and put ANY as a remote IP address. Any outgoing VoIP call, which goes neither to one of your trusted nodes nor IP addresses explicitly defined in other connections will match this connection. This method can be used as quick solution, but has a few disadvantages comparing to using h323-proxy. The most important is the fact that using (c) 2000-2004 Porta Software Ltd. All rights Reserved. www.portaone.com 66 How to … h323-proxy you can bill traffic, which goes directly from your customer’s GW to your vendor’s GW. Force PortaBilling to disconnect after a customer talks over his credit limit There is no need for the PortaBilling to do this, because gateway is able to do it by itself. When gateway authorizes account to make a call in the PortaBilling, in case of successful authorization PortaBilling returns maximum credit time (in the h323-credit-time RADIUS attribute). When gateway connects the call, it starts the timer and when timer hits the zero, it automatically disconnects the call. Create accounts be to used for SIP services There are no special requirements how such accounts should be created. For all services, supported by PortaBilling (H323, SIP) you use the same interface to create and manage accounts. After that, accounts can use H323, SIP or SIP & H323 services, depending on their product’s accessibility. So if you plan that accounts with the certain product should be able to login to SIP server and make outgoing calls – make sure you will include the PortaSIP node with the appropriate tariff into the Accessibility for this product. Integrate PB logins in your web site You can include the login form on your website using the following HTML code. <form name=log method=post action=https://pb.mycompany.com/login.html> Login <input type="text" name="user" value=""> Password <input type="password" name="password" value=""> <input type=button value="Login" onClick="submit()"> <input type=hidden name="redirectOnLoginError" value="www.myweb.com"> </form> "redirectOnLoginError" – in case if unsuccessful login, PortaBilling will redirect the browser to the URL specified in the value attribute. (c) 2000-2004 Porta Software Ltd. All rights Reserved. www.portaone.com 67 How to … Configure Web Subscription Typical steps of Web Subscription configuration: • • • • Decide where you going to host your Web Subscription page. (It could be your corporate web site for instance). Find out, what is the URL of the page which will submit request for creating an account in PortaBilling. You will need to put it into the “Subscription HTTP_REFERER” field. You will need https server and digital certificate in order to secure credit card transactions. Create Web Subscription HTML form using example provided with PortaBilling and put it to your web site. You can add or remove some fields in order to achieve the functionality you need i.e. you can request to enter account ID if you are doing ANI based service or may not if you are in debit card business etc. In the configuration file of the web server: /usr/local/etc/apache/porta.httpd.conf, uncomment the section about the virtual host for the web subscription; by default it runs on port 8500. Create a validation module or use the one provided with PortaBilling. By customizing the validation module, you can implement the advanced restrictions you require (e.g. allow creation of accounts with a balance of 10, 20 or 50 dollars only, or ensure that lifetime is no more than 180 days). Place this module somewhere on the web server so that it will be accessible for mod_perl; for example, in: /usr/local/lib/perl5/site_perl. Thus, if you decided to name your module: My::PortaValidation::ResellerABC, the actual program code would reside in: /usr/local/lib/perl5/site_perl/My/PortaValidation/Reselle rABC.pm NOTE: Make sure that you restart the web server (apachectl restart) after making changes in the module. • • • • Create Wholesale Customer Create Product/Tariff set managed by Wholesale Customer Fill in the form on the Product “Web Subscription” Tab Login into customer self-provisioning interface and enter merchant account data (Company Info -> Merchant Account tab) (c) 2000-2004 Porta Software Ltd. All rights Reserved. www.portaone.com 68 How to … How it works: • • • • • • • • • • • To start using your services a person must open your web site and proceed to the subscription page Once the subscription form is completed, the data will be posted to PortaBilling server. After receiving the subscription form data PortaBilling searches for “Subscription HTTP_REFERER”, and accepts it only if the host is found in the database. If not found then transaction is rejected. PortaBilling associates the Subscription Host with the product for the account that is being created. PortaBilling will use the appropriate validation module to check if the supplied data are correct. Validation module will check the data, fill any non-mandatory fields and return the data along with the acquired status to PortaBilling If status is indicating an error then registration is rejected and browser is redirected using “Continue URL” If status is OK then PortaBilling proceeds with registration and executes credit card transaction If status is indicating an error then registration is rejected and browser is redirected using “Continue URL” If status is OK then PortaBilling creates an account and redirect browser using “Continue URL” Each time when browser is redirected using “Continue URL” PortaBilling provides a comprehensive set of parameters. List of “Continue URL” parameters and possible values: • • • • “OK”, “ERROR” message “CC rejected” session_id – unique session ID supplied by the web subscription server account_id – generated account ID status Sample files: (c) 2000-2004 Porta Software Ltd. All rights Reserved. www.portaone.com 69 How to … Can be found on your PortaBilling installation in the following directories: ~porta-admin/apache/subscription/subscription.html ~porta-admin/apache/subscription/subscription_result.html ~porta-admin/site_lib/Porta/Subscription.pm Web Subscription HTML form can be found at the following URL https://myPortaBilling.myCompany.com:8500/subscription.html where myPortaBilling.myCompany.com is URL of your PortaBilling Web Interface, and 8500 is the port on which the subscription virtual host is running. (c) 2000-2004 Porta Software Ltd. All rights Reserved. www.portaone.com 70 Maintenance 7. Maintenance (c) 2000-2004 Porta Software Ltd. All rights Reserved. www.portaone.com 71 Maintenance Configuration files There are two separate configuration files, one for the billing engine (master server) and one for the web interface (slave server) Billing engine The configuration file is called the porta-billing.conf and located in the /home/porta-billing/etc directory. It is automatically created by the installation program and populated with the initial configuration. You do not have to edit it unless you want to alter the default behavior. porta-billing.conf: # Only full qualifyed email addresses, no local aliases please # [Global] [email protected] In case critical condition is detected (e.g. radius server is down) who should receive the email alert [email protected] What should be in the From: field of the email alerts Suspicious_Time_Threshold_sec=86400 Maximum acceptable difference in time, sent by gateway and current time on server. Default is 24 hours. SQL_Trace=0 If all SQL queries and their results should be logged to the PortaBilling log file. Use with caution and only when detailed debug is necessary, since it produces a huge log files. [Master] DSN=DBI:mysql:database=porta-billing User=root Password=xxxxx Connect parameters for the master database # Simultaneous login prevention for debit accounts # [Fraud_Detection] Active=Yes Turn the fraud protection on. Test_Mode=No Turn the fraud detection on. Debit account will be allowed to login more than once, but email alert will be sent. Recovery_Time_sec=1800 After debit account is successfully authenticated, how log this information should be kept in the memory. Default is 30 minutes. Longer recovery time will increase amount of memory, required by the billing engine. # Node IP Cache # [Node IP Cache] Cache_Cleanup_Time_sec=600 How often information about nodes and connections should be updated from the database. You can force nodes/connections reload by sending HUP signal to radius daemon. # Email flood prevention. # [Email] (c) 2000-2004 Porta Software Ltd. All rights Reserved. www.portaone.com 72 Maintenance Max_Sequential_Emails=5 Look_Behind_sec=450 If within Look_Behind_sec interval Max_Sequential_Emails already have been sent, any extre email alert will be blocked. This is done to protect email flood. Mail_Templates_Dir=Mail_Templates # radcheck.pl # [Self Test] Timeout_sec=5 Test_Frequency_sec=60 Errors_Before_Restart=3 Path_To_Lock_File=/var/run/radcheck.pid NAS-IP-Address=127.0.0.1 Shared_Secret=SecretKey User-Name=127.0.0.1 Password=cisco This sections defines parameters for the PortaBilling self-test suite. Periodically script sends authentication request to the radius server, and expects positive answer. # radcheck.pl & porta-clients.pl # [Radius] Host=127.0.0.1 Path_To_radius.sh=/home/porta-billing/radius_scripts/radius.sh Path_To_Config=/var/db/raddb Path_To_PID_File=/var/run/radiusd.pid General parameters of radius server, required by scripts like self check. [Log] # Where logs should go. Possible values are: # Syslog, File and Console Log_To=File This would write PortaBilling log to the file on disk. This is the default option, and normally it is sufficient for both production and debugging. Use other ways of logging only for special debug purposes. # For logging to file, give the filename. # For logging to the syslog, give description in # form of syslog:<facility>:<priority> Log_Dest=/var/log/porta-billing.log Path to log file. Default is /var/log/porta-billing.log #Log_Dest=syslog:daemon:warn #NAS=13.232.103.106 #Username=0007777777 [Call_Cleanup] Parameters in this section configure life time on the calls in the call cache. Radius_Retransmits=5 Radius_Timeout=3 In order to know, when we should no expect any more packets, we should know what is the maximum possible delay that the request can be delivered to the Radius (last possible retransmit) Alive_Interval=60 If we bill by the keep-alive requests, we need to know what is the interval between them. Incoming_Session_Lifetime=10 Call lifetime after incoming call leg was disconnected. Default_Lifetime=120 Default lifetime of the call. [Suggestions] No_Remote_IP_Auth=no (c) 2000-2004 Porta Software Ltd. All rights Reserved. www.portaone.com 73 Maintenance If PortaBilling should not warn you when it seems that your gateways do not authenticate incoming VoIP sessions. Admin server and web interface The configuration file is called the porta-admin.conf and located in the /home/porta-admin/etc directory. It is automatically created by the installation program and populated with the initial configuration. You might want to edit, so system will better suite your needs. porta-admin.conf: [Global] System_Name=MyBilling Put some distinctive name of your system here sendmail=/usr/sbin/sendmail ZIP=/usr/local/bin/zip UNZIP=/usr/local/bin/unzip TempDir=/var/tmp/porta maintainer=PortaBilling <[email protected]> What shall be in the From: address of the outgoing emails Time_Zone=America/New_York Default timezone (when creating new objects such as user, customer, etc.) Debug=0 Check_Age=2 Pager=30 How many entries per page should be shown in tables. This is master parameter, can be altered for the individual forms. [Porta_Realm] admin=443 accounts=8445 cc_staff=8446 customer=8444 Ports that different web interface parts are using [Master] DSN=DBI:mysql:database=porta-billing;host=porta-billing-master User=root Password=xxxx PrintError=1 Connect parameters for the master database [Slave] DSN=DBI:mysql:database=porta-billing;mysql_socket=/tmp/mysqlslave.sock User=root Password=xxxxx PrintError=1 Connect parameters for the slave database [Backup] Keep=1 [X-Rates] # Max age (days) Max_age = 60 Pager = 25 (c) 2000-2004 Porta Software Ltd. All rights Reserved. www.portaone.com 74 Maintenance Base_Currency = USD [Web] # Login expiration (seconds) Login_expire=172800 # Login expire if not used (seconds) Passive_expire=86400 [Currency] Pager = 25 # Default values for Card generator Default values for “Account generator” # Billing_model={Debit| Credit | Voucher} # Preferred_language=<2-chars language name from iso-639-1> [Cardissue] Amount=1000 Balance=10 Life_time=90 Length=12 Default PIN length Billing_model=Debit Preferred_language=en # Default values for 'Add card manually' # Billing_model={Debit| Credit | Voucher} # Preferred_language=<2-chars language name from iso-639-1> [Addcard] Balance=0 Life_time=90 Batch= Billing_model=Credit Preferred_language=en # Default values for Rates # Pager Lines per page # Cleanup_Interval -- interval for cleanup in days [Rates] Pager=50 Cleanup_Interval=90 How long old (not effective) rates should be kept [CustomerWeb] Pager=50 Interval=1 [AccountWeb] Interval=1 Pager=50 [TraceCall] Pager=50 Interval=1 [Invoice] Pager=50 Interval=1 [Stats] GrossMargin_Interval=1 # GrossMargin_Measure = day | month GrossMargin_Measure=day # GrossMargin_MaxAge = max age in days (c) 2000-2004 Porta Software Ltd. All rights Reserved. www.portaone.com 75 Maintenance GrossMargin_MaxAge=1000 ASR_days = 90 ASR_weeks = 52 ASR_month = 10 [RRD] It is not recommended to change these parameters without deep understanding of the RRD principles Load_delay_seconds = 3600 Zero_call_length = 10 Load_delay_interval = 900 # % when ASR graph appears ASR_Threshold = 5 [StatCalc] Interval=0 Mask=% [OnlinePayment] PassFile=/home/porta-admin/etc/passphrase.txt Encryption key for merchant account passwords Pager=25 [CDR] How long CDRs should be kept in the database Keep_month=2 Keep_month_failed=2 Replication repair For better understanding of the following material it is highly recommended to read the "Replication in MySQL" chapter from www.mysql.com, or follow the link: http://www.mysql.com/doc/R/e/Replication.html. In the most common situation, recovering the replication process after a fault resembles setting up replication from scratch. You should follow the instructions in the "How to Set up Replication" chapter of MySQL documentation. But in our case, master database shouldn't be stopped. Let's go through the procedure step by step: 1. Make sure slave database has stopped the slave thread Logon to the MySQL slave database using the the mysql command. At the slave server shell command prompt enter following command: mysql -uroot -p<mysql root password> porta-billing (c) 2000-2004 Porta Software Ltd. All rights Reserved. www.portaone.com 76 Maintenance After that you will see the mysql command prompt. Query the slave server status by entering command: show slave status; MySQL displays the table with a status of slave replication. Important: You should see ‘No’ as a value in the ‘Slave_Running’ column. If You see 'Yes', stop the replication process using this command: slave stop; 2. Make master database snapshot The MySQL distribution provides a special tool for this: 'mysqlhotcopy'. To use this tool, logon to the master server and at command prompt enter: mysqlhotcopy --flushlog -u root -p <root password> portabilling After the program completes, you can find the porta-billing_copy database in your mysql data directory. Normally, the data directory is located at /usr/local/var or /var/db/mysql, but may vary by installation. Consult your mysql.conf or system administrator if unsure. Now you have a fresh snapshot of your database. 3. Make archive of snapshot and copy it to the slave server As root user, go to the mysql data directory. Enter the following command: tar czvf porta-billing.tgz porta-billing_copy/ This command creates an archive of the snapshot. Now it can be copied to the slave server. The best way of doing that is by using the secure copy tool 'scp': scp porta-billing.tgz porta-admin@<slave server name>: You will be prompted for the 'porta-admin' user password, and then the archive will be copied into the porta-admin user home directory on the slave server. With a provided username and password the archive can be stored in any user home directory. In a single server configuration, the secure copy tool is not necessary. The regular copy command can be used instead. (c) 2000-2004 Porta Software Ltd. All rights Reserved. www.portaone.com 77 Maintenance 4. Remember the master binary logs position Login to the master MySQL server and enter the command: show master logs; Remember the last log_name -- you will need it to start replication on the slave server later. 5. Restoring database from archive on the slave server Logged in as ‘root’ on the slave server, unpack the archive file to the mysql data directory. To do this, simply cd to the mysql data dir and enter command: tar xvzf <path to>/porta-billing.tgz If you used the scp copy command as described earlier the <path may be replaced by the ~porta-admin. Delete old database stored in porta-billing directory: to> rm -rf porta-billing and then rename newly created porta-billing_copy to porta-billing mv porta-billing_copy porta-billing Check the permissions on the unpacked files. Normally all files and the porta-billing directory must be owned by the 'mysql' user. In a single server configuration it will be the 'porta-admin' user. Note: The above described action doesn’t completely agree with MySQL documentation, which instructs the user to dump the whole database to sql statements and then restore it on the slave machine. Performing such an action on the production database with a large amount of traffic could result in significant latency. Resume replication Logon to the slave mysql server using the mysql command: mysql -uroot -p<root password> porta-billing Recall log_name from the previous step and use it in the following statement: CHANGE MASTER TO MASTER_LOG_FILE='<log_name>', MASTER_LOG_POS=4; (c) 2000-2004 Porta Software Ltd. All rights Reserved. www.portaone.com 78 Maintenance At this point the mysql server must be restarted for replication to continue. Following are the commands to stop and start mysql on a typical FreeBSD system. /usr/local/etc/rc.d/mysql.server stop ; /usr/local/etc/rc.d/mysql.server start On RedHat Linux systems the commands may be: /usr/etc/init.d/mysql stop ; /usr/etc/init.d/mysql start The location may vary depending on operating system. If in doubt, ask your system administrator. To ensure replication has resumed, logon to the server and check slave status: show slave status; In the second row of 'Slave_Running' column you will see 'Yes'. (c) 2000-2004 Porta Software Ltd. All rights Reserved. www.portaone.com 79


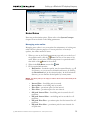
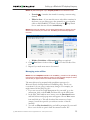
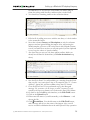


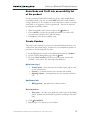
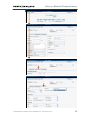
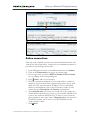


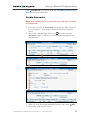
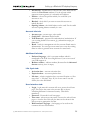


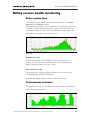

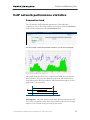


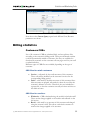

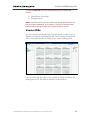

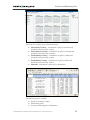

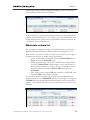


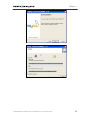
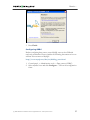


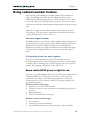
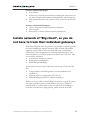
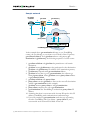

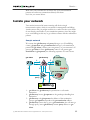

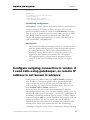


![[TCDView Settings] section](http://vs1.manualzilla.com/store/data/005709836_1-de45231247391792cf649ab0ba1e76b6-150x150.png)