1
ProWriterTM F20 Operations Manual
Safety
2. Safety Interlocks
2. Safety Interlocks
Any part of the protective housing that must be opened, removed or displaced during
normal operation of the laser must be interlocked to prevent access to laser radiation.
[21 CFR 1040.10(f)(2) and EN 60825,4.3].
No interlocks are required. It is not necessary to open or remove any part of the laser
marking head assembly during normal operation.
3. Remote Interlock Connector
3. Remote Interlock Connector
A Class IV laser must have a means to shut down the laser from a remote interlock.
[21 CFR 1040.10(f)(3) and EN 60825, 4.4].
The remote interlock connector on the ProWriterTM F20 allows connection of external
interlock circuits or switches for the control unit which can shutdown the laser. See Chapter
4, Installation for installation instructions.
4. Master
4. Master Key Control
Each Class IV laser must be provided with a keyswitch which will prevent operation of
the laser when the key is removed. The key must be removable only in the OFF
position, and must disable the laser when removed. [21 CFR 1040.10(f)(4) and EN
60825, 4.5].
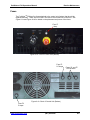
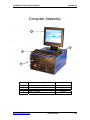
The master key control for the ProWriterTM F20 is located on the main control panel (see
Figure 1-3.)
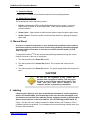
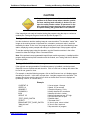
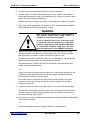
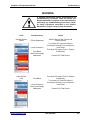
WARNING
The master key to operate the ProWriterTM F20
should be given only to personnel authorized by the
Laser Safety Officer. The laser should never be left
unattended while running or while the key is in the
laser.
5. Emission Indicator
An emission indicator is required to provide visible signal during emission of laser
radiation, and sufficiently prior to emission to allow a person to avoid exposure to
laser radiation. [21 CFR 1040.10(f)(5) and EN 60825, 4.6].
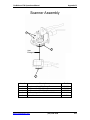
There are two emission indicators on the ProWriterTM F20, one on the main control panel
and a second on the laser marking head assembly. Both indicators light when the keyswitch
is turned to the CONTROL ON position indicating the laser is being activated. The indicators
remain on until the keyswitch is turned to the POWER OFF position. The keyswitch must be
turned to the POWER ON position to activate the power supply that activates after a few
seconds delay.
www.controllaser.com
(407) 926-3500
1-5