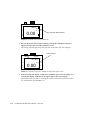
1
Sun StorEdge™ LW GBIC
Service Manual
Sun Microsystems, Inc.
901 San Antonio Road
Palo Alto, CA 94303-4900 USA
650 960-1300
Fax 650 969-9131
Part No. 806-1528-10
May 1999, Revision A
Send comments about this document to: [email protected]
Copyright 1999 Sun Microsystems, Inc., 901 San Antonio Road • Palo Alto, CA 94303-4900 USA. All rights reserved.
This product or document is protected by copyright and distributed under licenses restricting its use, copying, distribution, and
decompilation. No part of this product or document may be reproduced in any form by any means without prior written authorization
of Sun and its licensors, if any. Third-party software, including font technology, is copyrighted and licensed from Sun suppliers.
Parts of the product may be derived from Berkeley BSD systems, licensed from the University of California. UNIX is a registered trademark in
the U.S. and other countries, exclusively licensed through X/Open Company, Ltd.
Sun, Sun Microsystems, the Sun logo, StorEdge, AnswerBook2, docs.sun.com, and Solaris are trademarks, registered trademarks, or service
marks of Sun Microsystems, Inc. in the U.S. and other countries. All SPARC trademarks are used under license and are trademarks or registered
trademarks of SPARC International, Inc. in the U.S. and other countries. Products bearing SPARC trademarks are based upon an architecture
developed by Sun Microsystems, Inc.
The OPEN LOOK and Sun™ Graphical User Interface was developed by Sun Microsystems, Inc. for its users and licensees. Sun acknowledges
the pioneering efforts of Xerox in researching and developing the concept of visual or graphical user interfaces for the computer industry. Sun
holds a non-exclusive license from Xerox to the Xerox Graphical User Interface, which license also covers Sun’s licensees who implement OPEN
LOOK GUIs and otherwise comply with Sun’s written license agreements.
RESTRICTED RIGHTS: Use, duplication, or disclosure by the U.S. Government is subject to restrictions of FAR 52.227-14(g)(2)(6/87) and
FAR 52.227-19(6/87), or DFAR 252.227-7015(b)(6/95) and DFAR 227.7202-3(a).
DOCUMENTATION IS PROVIDED “AS IS” AND ALL EXPRESS OR IMPLIED CONDITIONS, REPRESENTATIONS AND WARRANTIES,
INCLUDING ANY IMPLIED WARRANTY OF MERCHANTABILITY, FITNESS FOR A PARTICULAR PURPOSE OR NONINFRINGEMENT, ARE DISCLAIMED, EXCEPT TO THE EXTENT THAT SUCH DISCLAIMERS ARE HELD TO BE LEGALLY INVALID.
Copyright 1999 Sun Microsystems, Inc., 901 San Antonio Road • Palo Alto, CA 94303-4900 Etats-Unis. Tous droits réservés.
Ce produit ou document est protégé par un copyright et distribué avec des licences qui en restreignent l’utilisation, la copie, la distribution, et la
décompilation. Aucune partie de ce produit ou document ne peut être reproduite sous aucune forme, par quelque moyen que ce soit, sans
l’autorisation préalable et écrite de Sun et de ses bailleurs de licence, s’il y en a. Le logiciel détenu par des tiers, et qui comprend la technologie
relative aux polices de caractères, est protégé par un copyright et licencié par des fournisseurs de Sun.
Des parties de ce produit pourront être dérivées des systèmes Berkeley BSD licenciés par l’Université de Californie. UNIX est une marque
déposée aux Etats-Unis et dans d’autres pays et licenciée exclusivement par X/Open Company, Ltd.
Sun, Sun Microsystems, le logo Sun, StorEdge, AnswerBook2, docs.sun.com, et Solaris sont des marques de fabrique ou des marques déposées,
ou marques de service, de Sun Microsystems, Inc. aux Etats-Unis et dans d’autres pays. Toutes les marques SPARC sont utilisées sous licence et
sont des marques de fabrique ou des marques déposées de SPARC International, Inc. aux Etats-Unis et dans d’autres pays. Les produits portant
les marques SPARC sont basés sur une architecture développée par Sun Microsystems, Inc.
L’interface d’utilisation graphique OPEN LOOK et Sun™ a été développée par Sun Microsystems, Inc. pour ses utilisateurs et licenciés. Sun
reconnaît les efforts de pionniers de Xerox pour la recherche et le développement du concept des interfaces d’utilisation visuelle ou graphique
pour l’industrie de l’informatique. Sun détient une licence non exclusive de Xerox sur l’interface d’utilisation graphique Xerox, cette licence
couvrant également les licenciés de Sun qui mettent en place l’interface d’utilisation graphique OPEN LOOK et qui en outre se conforment aux
licences écrites de Sun.
CETTE PUBLICATION EST FOURNIE "EN L’ETAT" ET AUCUNE GARANTIE, EXPRESSE OU IMPLICITE, N’EST ACCORDEE, Y
COMPRIS DES GARANTIES CONCERNANT LA VALEUR MARCHANDE, L’APTITUDE DE LA PUBLICATION A REPONDRE A UNE
UTILISATION PARTICULIERE, OU LE FAIT QU’ELLE NE SOIT PAS CONTREFAISANTE DE PRODUIT DE TIERS. CE DENI DE
GARANTIE NE S’APPLIQUERAIT PAS, DANS LA MESURE OU IL SERAIT TENU JURIDIQUEMENT NUL ET NON AVENU.
Please
Recycle
Contents
1.
2.
Sun StorEdge™ A5000 LW GBIC Installation Checklist
1-1
1.1
Defining System Hardware Configuration
1.2
Unpacking and Positioning Hardware
1.3
Installing Host-side Components at Local and Remote Sites
1.4
A5x00 Power-On Checks
1.4.1
Table-Top, Single A5x00 Per Host Connection
1.4.2
Rack Configurations Using Hubs
1.4.3
Daisy-Chained Configuration (SW GBICs Only)
Checking Cable Loss
1-6
1.6
Configuring the Host
1-6
1.6.1
Not Booting From the A5x00
1.6.2
Booting From the A5x00
1.7
Checking the Configuration
1.8
Testing the Installation
1-2
1-2
1-3
1-4
1-6
1-7
1-8
1-8
Fiber Optic Cable Plant Test Procedures
2.2
1-1
1-2
1.5
2.1
1-1
Required Personnel and Equipment
2.1.1
Required Personnel
2.1.2
Required Equipment
2.1.3
Connector Types
2-1
2-1
2-1
2-1
2-2
Fiber Optic Tester Description
2-4
Contents
iii
2.3
Fiber Optic Tester Calibration
2.3.1
2.4
2.5
2.6
3.
Fiber Optic Tester Calibration Procedure
Test Procedures
2.4.1
Passive Cable Plant Loss Test
A.3
Set the Reference Value on Each Fiber Optic Tester
2.4.1.2
Identify the Fiber
2.4.1.3
Testing for Fiber Loss
2.4.2
LW GBIC Launch Power Test
2.4.3
Minimum Power Receive Test
Test Procedure Summary
2-10
2-13
2-14
2-15
2-16
2.5.1
Fiber Identification Test
2.5.2
Passive Cable Plant Loss Test
2-16
2.5.3
LW GBIC Launch Power Test
2-17
2.5.4
Minimum Receive Power Test
Troubleshooting Information
2-16
2-17
2-17
3-1
A-1
LW GBIC
A-2
A.1.1
Laser Safety
A.1.2
Optical Characteristics
A.1.3
Mechanical Specifications
A.1.4
Available Power Budget for Passive Plant
A-2
A-3
A-4
Single Mode Cable With Duplex SC Connectors
A-4
A-4
A.2.1
Environmental and Safety Specifications
A.2.2
Optical Connector and Cable Characteristics
Single Mode Cable Plant
A.3.1
iv
2-7
2.4.1.1
A. Specifications
A.2
2-6
2-7
Maintaining Fiber Optic Cables
A.1
2-6
A-6
Single Mode Optical Fiber Specifications
Sun StorEdge LW GBIC Service Manual • May 1999
A-4
A-6
A-5
2-8
CHAPTER
1
Sun StorEdge™ A5000 LW GBIC
Installation Checklist
This chapter gives a detailed procedure for installing Sun StorEdge A5x00 disk
arrays and long wave gigabit interface converters (LW GBICs) at sites where host
systems are present or also being installed.
1.1
Defining System Hardware
Configuration
The system configuration must be outlined before beginning any equipment
installation. There are only specific configurations which are supported and will
function when LW GBICs are used.
Before installation of the LW GBICs, the installed cable plant must be certified to
meet the EIA/TIA492CAAA cable plant specification. See Section A.3, “Single Mode
Cable Plant.”
1.2
Unpacking and Positioning Hardware
● Unpack and position hardware at all sites that have host systems and A5x00 disk
arrays.
1-1
1.3
Installing Host-side Components at
Local and Remote Sites
1. Install host bus adaptors (HBAs) in the host I/O board(s).
2. Install short and long wave GBICs.
a. Install short wave GBIC(s) and connect it/them to associated array(s) or hubs(s).
b. Install long wave GBICs, but do not connect them to the single-mode cable
plant at this time.
Connection of the LW GBICs to the single-mode cable plant will be performed
after the cable has been checked for loss.
1.4
A5x00 Power-On Checks
1.4.1
Table-Top, Single A5x00 Per Host Connection
1. Power on the A5x00(s). Wait until the A5x00(s) complete the power-on self-test
(POST).
2. Check and/or set enclosure names.
To avoid confusion, be sure all enclosures have different names. A temporary name
can be assigned now, for example, A, B, C, and so forth; and then these temporary
names can be changed to final names after the system boots. It is easier to assign an
enclosure name using luxadm than on the FPM.
3. Check the box IDs.
If the enclosures are single-connected, that is, if there is only one enclosure per loop,
the box ID should be set to zero (0).
4. Verify that all drives are up and spinning.
5. Check the status of all power supplies and fans.
6. Check the loop topology (split or full).
There is no split loop configuration support with LW GBICs.
1-2
Sun StorEdge LW GBIC Service Manual • May 1999
7. Check for the correct node count per loop.
A node is a drive, an IB, or a host.
a. To see the node count, press the “A0 B0 B1 A1” line at the top of the loop view
on the FPM.
8. Check the A5x00 IB firmware level using the front panel module or luxadm.
Note – IB Firmware 1.09 is required to support the LW GBIC.
9. Note any A5x00 with down-rev firmware for later upgrading.
Release 6 of the Software/Firmware Matrix is required for using LW GBICs.
1.4.2
Rack Configurations Using Hubs
1. Power on the A5x00(s). Wait for the A5x00(s) to complete the POST.
2. Check and/or set enclosure names.
To avoid confusion, be sure all enclosures have different names. A temporary name
can be assigned now, for example, A, B, C, and so forth; and then these temporary
names can be changed to final names after the system boots. It is easier to assign an
enclosure name using luxadm than on the FPM.
3. Check the box IDs.
From top to bottom, the box IDs must be set as follows withing a rack:
TABLE 1-1
Enterprise Expansion Cabinet, 1422 mm/56 in.
Box ID
Location
0
Top
1
2
3
Bottom
Chapter 1
Sun StorEdge™ A5000 LW GBIC Installation Checklist
1-3
TABLE 1-2
Sun StorEdge Expansion Cabinet, 1828 mm/72 in.
Box ID
Location
0
Top
1
2
0
1
2
Bottom
4. Verify that all drives are up and spinning.
5. Check the status of all power supplies and fans.
6. Check the loop topology (split or full).
For rack configurations using hubs, all loops must be “full.”
7. Check for the correct node count per loop.
A node is a drive, an IB, or a host.
a. To see the node count, press the “A0 B0 B1 A1” line at the top of the loopview
on the FPM.
If the count is incorrect, begin a process-of-elimination troubleshooting sequence.
8. Check the IB firmware level.
Note – IB Firmware 1.09 is required to support the LW GBIC.
9. Note any A5x00 with down-rev firmware for later upgrading.
Release 6 Revision 1.16 of the Software/Firmware Matrix is required for using
LW GBICs.
1.4.3
Daisy-Chained Configuration (SW GBICs Only)
■
Daisy chaining currently is supported with short wave (SW) GBICs only.
■
Daisy chaining with long wave (LW) GBICs is not currently supported.
Check to see that your configuration is supported.
1-4
Sun StorEdge LW GBIC Service Manual • May 1999
1. Power on the A5x00 closest to the host. Wait for the A5x00 to complete the POST.
2. Check and/or set enclosure names.
To avoid confusion, be sure all enclosures have different names. A temporary name
can be assigned now, for example, A, B, C, and so forth; and then these temporary
names can be changed to final names after the system boots. It is easier to assign an
enclosure name using luxadm than on the FPM.
3. Check the box IDs.
From the closest-to-the-host to the furthest-from-the-host, the box IDs are set as
follows:
TABLE 1-3
Box IDs and Distance to the Host
Box ID
Location
0
Closest to Host
1
2
3
Furthest from Host
4. Verify that all drives are up and spinning.
5. Check the status of all power supplies and fans.
6. Check the loop topology (split or full).
For daisy-chain configurations using hubs, all loops must be “full.”
7. Check for the correct node count per loop.
A node is a drive, an IB, or a host.
a. To see the node count, press the “A0 B0 B1 A1” line at the top of the loopview
on the FPM.
If the count is incorrect, begin a process-of-elimination troubleshooting sequence.
8. One at a time, power on the next A5x00 in the chain and repeat steps 2 through 7
of these procedure. Verify that the node count increases appropriately as each
A5x00 is added to the chain.
Chapter 1
Sun StorEdge™ A5000 LW GBIC Installation Checklist
1-5
1.5
Checking Cable Loss
To ensure that the customer’s installed cable plant meets or exceeds the cable loss
specification for use with LW GBICs, use the following procedure. This procedure
enables you to quickly check the customer’s 9/125 micron single mode cable plant
for optical loss characteristics.
● Use the passive cable loss procedure and measure each fiber in the cable plant for
loss. See Section 2.4.1, “Passive Cable Plant Loss Test.”
The cable loss for any one fiber must not be greater than 8.2 dB. If any fiber fails the
cable loss test, the customer must contact his/her cable plant supplier and have the
set of fibers re-tested.
1.6
Configuring the Host
1.6.1
Not Booting From the A5x00
1. Install the Solaris™ operating environment, if needed.
2. Halt the system and connect all the A5x00 cables. Boot the system with boot -r .
3. After the system boots, use luxadm to display and verify that all A5x00s are
present.
4. Set the enclosure names to facilitate configuration.
5. Install all appropriate software patches, including IB firmware, HBA fcode, and
disk drive firmware, if needed. Be sure to consult all patch READMEs before
beginning patch installations.
6. Reboot the system.
1-6
Sun StorEdge LW GBIC Service Manual • May 1999
1.6.2
Booting From the A5x00
1. Verify that the IBs, HBAs, and disk drives are at the latest firmware level before
installing Solaris.
If it is necessary to upgrade the firmware level of any of these, it is much easier to do
when the boot disk is not an A5x00.
2. Connect only the boot A5x00 to the system.
3. Install Solaris, if needed. Select the “No Reboot” option of suninstall. After
Solaris is completely installed, use luxadm set_boot_dev to set the boot device
to an A5x00 disk.
4. Halt the system and connect all remaining A5x00 cables, if appropriate. Boot the
system with boot -r .
5. After the system boots, use luxadm to display and verify that all A5x00s are
present.
6. Set the enclosure names to facilitate configuration.
7. Install all appropriate patches, including the IB firmware, HBA fcode, and disk
drive firmware, if needed. Be sure to consult all patch READMEs before beinning
patch installations.
8. If you have to upgrade the IB firmware, HBA fcode, or disk drive firmware to the
boot device path components, you must shut down the system. Firmware
downloads cannot be done with I/Os going to the target device. Use the following
procedure to perform such upgrades:
a. Copy the appropriate file(s) to some other location not on the boot path.
If such a device is not available, boot off the CD-ROM. This temporarily mounts
the boot disk and copies the file(s) to /tmp .
b. Halt the system and boot in single-user mode from the CD-ROM or the
network.
c. Mount the disk used to store the file(s) and peform the appropriate upgrade
commands.
d. Reboot the system.
Chapter 1
Sun StorEdge™ A5000 LW GBIC Installation Checklist
1-7
1.7
Checking the Configuration
1. Re-check that all A5x00s are present using luxadm probe and luxadm display.
2. Verify that all ses devices in the /dev/es directory are linked properly, taking
into account multiple paths.
3. Verify that all disk drive device links in /dev/dsk and /dev/rdsk are present,
taking into account multiple paths.
1.8
Testing the Installation
● Run the StorTools 3.0 installation verification for at least 6 hours to verify the
installation.
1-8
Sun StorEdge LW GBIC Service Manual • May 1999
CHAPTER
2
Fiber Optic Cable Plant Test
Procedures
2.1
Required Personnel and Equipment
2.1.1
Required Personnel
Two qualified system support engineers are required. They must be trained in the
use of the EXFO FOT-30A fiber optic tester. These engineers must read and
understand the test procedures presented herein.
2.1.2
Required Equipment
See TABLE 2-1 for the required equipment for each test.
2-1
TABLE 2-1
2.1.3
Required Fiber Optic Cable Plant Test Equipment
Quantity
Description
2
EXFO FOT-30A (Part No. FOT-32A-02BL-54)
2
FOT power supplies
2
1-meter (SC to SC) 9-micron test cable (single fiber)
2
Photo detector SC converter (black plastic device included with FOT)
4
Female-to-female SC connectors
2
SC to SC—Single Mode fiber cable
2
Telephone located near fiber termination points at both sites
1
FC-AL 7 port hub
Connector Types
Note – The customer’s cable plant may be terminated with connectors other than
SC connectors. This section shows some of the possible connector types that you
may see. The customer must supply the correct fiber cabling to connect the cable
plant to the LW GBIC.
FIGURE 2-1
2-2
SC Connectors
Sun StorEdge LW GBIC Service Manual • May 1999
FIGURE 2-2
ST Connectors—Bayonet
FIGURE 2-3
FC Connectors—Threaded
FIGURE 2-4
SC Adapters—SC Female-to-Female
Chapter 2
Fiber Optic Cable Plant Test Procedures
2-3
2.2
Fiber Optic Tester Description
Photo detector
SC connector
1310 nm laser source
SC connector
SOURCE
METER
nm
1310
AC
9V
dBm 2kHz
auto
off
low
bat
FIBER-OPTIC TESTER
FOT-30A
SOURCE
on/off
CW
2kHz
SOURCE
POWERMETER
λ
select
dBm
W
EXFO
FIBER-Optical Engineering
FIGURE 2-5
2-4
CW
EXFO Fiber Optic Tester
Sun StorEdge LW GBIC Service Manual • May 1999
ref
Power meter wavelength in nm
Incoming 2-kHz signal
Reference value in dBm
Source wavelength
SOURCE
AC Operation
AC
9 volt battery
operation
9V
Low Battery
Indicator
low
bat
1310
METER
1310
nm
Signal emitted by
the source
CW
dBm 2kHz
auto
off
Auto shut off
Power reading in dBm or µW
Referenced reading in dB
FIGURE 2-6
EXFO Fiber Optic Tester Display Description
Toggles source between
2-kHz or continuous wave
operation
SOURCE
Powers the FOT
on or off
on/off
CW
2kHz
SOURCE
Toggles source on or off
POWERMETER
Selects the
power meter
wavelength
λ
select
dBm
W
Accesses referenced
(dB) mode
ref
Accesses absolute
mode (dBm or µW)
FIGURE 2-7
EXFO Fiber Optic Tester Keypad Description
Chapter 2
Fiber Optic Cable Plant Test Procedures
2-5
2.3
Fiber Optic Tester Calibration
Both fiber optic testers must be calibrated before any of the test procedures are
performed.
Note – The calibration procedure must be performed each time the fiber optic tester
is used.
2.3.1
Fiber Optic Tester Calibration Procedure
Use the following procedure to calibrate both fiber optic testers.
1. Be sure that the thumbscrew cap is on the photodetector.
This is the large black cap on the fiber optic tester.
2. Turn on the fiber optic tester using the on/off button.
3. Press and hold the λ select button until the CAL message appears on the display.
This will take about 10 seconds. After calibration, the unit will display a dashed line
indicating a reading below range. The fiber optic tester is now calibrated.
FIGURE 2-8 shows the fiber optic tester after calibration.
SOURCE
AC
9V
METER
1310
2-6
CW
dBm 2kHz
low
bat
FIGURE 2-8
nm
auto
off
Fiber Optic Tester After Calibration
Sun StorEdge LW GBIC Service Manual • May 1999
Note – Err 1 indicates that the thumbscrew is not fitted properly. Press any key to
remove the error message, then secure the thumbscrew cap on the detector and
repeat the calibration procedure.
2.4
Test Procedures
2.4.1
Passive Cable Plant Loss Test
This test measures the passive cable plant loss of each fiber in the cable plant. The
test ensures that the cable loss budget is not exceeded due to:
■
■
■
■
bad cable splices
incomplete fiber connections
exceeded fiber bend radius
dirty connectors
This procedure requires that both fiber optic testers be references to each other at a
single site and then be moved to the cable plant termination points. See FIGURE 2-9.
The reference value is obtained from the laser source that will be used for
measurement.
Cable Plant
db
0.00
EXFO
db
0.00
EXFO
EXFO
Reference testers at a single location
FIGURE 2-9
EXFO
Move to fiber end points
Fiber Optic Testers Referenced to Each Other
Chapter 2
Fiber Optic Cable Plant Test Procedures
2-7
TABLE 2-2
2.4.1.1
Procedure Overview
Task
Description
1.
Calibrate both fiber optic testers according to section 2.3.1.
2.
Set the reference value for each fiber optic tester.
3.
Move the fiber optic testers to the end points of the cable plant.
4.
Identify the correct fibers in the cable plant.
5.
Test for passive cable plant loss.
Set the Reference Value on Each Fiber Optic Tester
Note – Before taking attenuation measurements, you must reference the power
meters to a laser source. The attenuation test shows how much light was lost as it
travels through a fiber from a light source.
Set the reference on both fiber optic testers with the source from the companion fiber
optic tester by doing the following.
1. Connect the light source on each of the fiber optic testers with the photo detector
on the companion fiber optic tester. Use a 1-meter single mode fiber cable to
connect both fiber optic testers to each other as shown in FIGURE 2-10.
SOURCE
AC
9V
low
bat
FIGURE 2-10
2-8
METER
nm
1310
SOURCE
CW
dBm 2kHz
auto
off
AC
METER
9V
low
bat
Setting the Reference Value on Both Fiber Optic Testers
Sun StorEdge LW GBIC Service Manual • May 1999
nm
1310
CW
dBm 2kHz
auto
off
2. After both fiber optic testers are connected, turn on both laser sources by selecting
the source button.
“1310” is indicated in the upper left portion of the liquid crystal display of both
testers, and a vertical marker will appear next to the “CW” marker. This indicates
that the source is turned on and sending a continuous wave signal from the laser
source. See FIGURE 2-11 for the tester display after the laser source has been turned
on.
SOURCE
AC
1310
9V
METER
nm
1310
CW
dBm 2kHz
auto
off
low
bat
FIGURE 2-11
Fiber Optic Tester With 1310 nm Continuous Wave Laser Source Turned On
3. Be sure that the fiber optic tester is in the absolute mode (power meter
wavelength, in nm, must be displayed in the upper right portion of the display).
If not, use the “dBm/W” key to set it to this mode.
SOURCE
AC
1310
9V
low
bat
FIGURE 2-12
Fiber optic tester
in absolute mode
METER
nm
1310
CW
dBm 2kHz
auto
off
Fiber Optic Tester in the Absolute Mode
4. Set the operating wavelength of each fiber optic tester to 1310 nm to match the
source wavelength, using the λ select key.
5. Press the “ref” key on each fiber optic tester to set each tester to the referenced
mode.
A reference value (in dBm) will appear in the upper right portion of the display.
Chapter 2
Fiber Optic Cable Plant Test Procedures
2-9
AC
SOURCE
METER
1310
-6.75dBm
9V
low
bat
dB
0.00
FIGURE 2-13
CW
2kHz
auto
off
Fiber Optic Tester With Reference Value Set
6. Press and hold the “ref” button until the display shows 0.00 db loss and a new
reference value appears in the upper right portion of the display.
7. The fiber optic tester is now “zeroed out.”
This is the reference value that will be used to test for overall fiber loss.
2.4.1.2
Identify the Fiber
It is possible to get a power reading that seems correct, but is conncted to the wrong
set of fibers. This is because the fiber optic tester will be receiving light from a source
that is originating from a GBIC and not the light source on the fiber optic tester.
Because it is easy to make a cabling mistake when there are a large number of fibers
installed in the cable plant, use the following cable identification procedure.
Identify the fiber by sending a 2 kHz signal out from the laser source on one of the
fiber optic testers and check for the 2 kHz signal on the other fiber optic tester. If the
2 kHz signal is detected, a two-second beep will indicate that the fiber is connected,
and that the correct fiber has been identified. FIGURE 2-14 shows how the testers are
connected for this purpose.
2-10
Sun StorEdge LW GBIC Service Manual • May 1999
Cable Plant
2000
2000
EXFO
FIGURE 2-14
EXFO
Testers Connected to Identify the Fiber
The following steps require that the two fiber optic testers be moved to the
termination points of the installed cable plant.
1. Install the black plastic SC socket connector on the photodetector of each fiber
optic tester.
2. Establish telephone contact with each site and confirm which cable will be
connected to the source and the photodetector at each end of the cable plant.
3. Connect each fiber optic tester to the fiber plant using the yellow 15-meter singlemode fiber that ships with the LW GBIC.
4. Connect both the source and photodetector of both fiber optic testers to the
termination point of the cable plant on the fibers that you want to test for fiber
loss. The source on one tester must connect to the fiber that is connected to the
photodetector on the companion tester. See FIGURE 2-14.
5. On each fiber optic tester, press and hold the source button until a bar appears on
the right side of the tester indicating “CW” (continuous wave).
This indicates that the source is turned on. See FIGURE 2-15.
Chapter 2
Fiber Optic Cable Plant Test Procedures
2-11
AC
SOURCE
METER
1310
-6.75dBm
9V
low
bat
dB
0.00
FIGURE 2-15
CW
2kHz
Continuous Wave selected
auto
off
1310 nm Laser Source Turned On
6. On each fiber optic tester, select 2 kHz by pressing the “CW/2kHz” button to
toggle between 2 kHz and CW (continuous wave).
The setting will be displayed on the right side of the fiber optic tester display.
2 kHz selected
AC
SOURCE
METER
1310
-6.75dBm
9V
low
bat
dB
0.00
FIGURE 2-16
CW
2kHz
auto
off
1310 nm Laser Source Turned On and 2 kHz Signal Active
7. If the receiving unit detects a 2 kHz tone, both fiber optic testers will beep for 2
seconds and display “2000 Hz” in the upper right corner of the display.
This indicates that you have a working set of fibers with which to perform a fiber
loss measurement. See FIGURE 2-17.
2-12
Sun StorEdge LW GBIC Service Manual • May 1999
SOURCE
AC
1310
METER
2000 Hz
9V
low
bat
dB
0.00
FIGURE 2-17
CW
2kHz
auto
off
Tone Detection Display
8. If you do not have the correct fiber selected, go back to step 4. Locate the correct
set of fibers and repeat steps 4 through 8.
2.4.1.3
Testing for Fiber Loss
After you have located the correct set of fibers, you are ready to test each fiber
strand for passive fiber loss.
1. Press the “ref” button on the fiber optic tester and a reading will appear. If the
reading is equal to or greater than 8.2 db, then the fiber is “O.K.”
AC
SOURCE
METER
1310
-6.75dBm
9V
low
bat
FIGURE 2-18
dB
4.2
CW
2kHz
auto
off
Cable Loss Measurement Display on Fiber Optic Tester
2. Switch the source and photodetector at both ends of the cable plant and check the
fiber loss in the reverse direction.
The fiber loss readings should be within 0.5 db of each other.
Chapter 2
Fiber Optic Cable Plant Test Procedures
2-13
3. If any of the tests in steps 1 and 2 are failed:
a. Re-seat all connectors that are in the path that you are testing and re-test for
loss.
b. Clean the fiber connection and re-test for loss.
c. Check that no part of the cable has exceeded the bend radius.
d. Call in the cable plant provider and have the provider re-test the cable plant.
2.4.2
LW GBIC Launch Power Test
7.5
dBm
EXFO
FIGURE 2-19
LW GBIC Launch Power Test
The LW GBIC launch power test measures the absolute launch power of the laser
source in the LW GBIC. FIGURE 2-19 shows the cabling diagram for the LW GBIC
launch power test.
In this test you will measure the source strength of the laser in the LW GBIC. The
IBM LW GBIC specification defines laser launch power to between -9 dBm and
-3 dBm at 1310 nm. If the laser source power is below or above this specification, the
LW GBIC must be replaced.
Note – The IBM LW GBIC specification defines laser launch power to be between
-9 dBm and -3 dBm at 1310 nm.
2-14
Sun StorEdge LW GBIC Service Manual • May 1999
Launch power can only be determined when a GBIC is measured from a FC-AL hub
port. Do not try to measure launch power from an Interface Board (IB) on an A5x00
or the host bus adapter (HBA) on the I/O board. You will find that the laser source
is cycling off and on every few seconds. Because of this it is not possible to get an
accurate power reading on the fiber optic tester.
1. Insert an LW GBIC into an open port on an FC-AL hub. Be sure that there is
power applied to the hub. Connect the 1-meter single mode cable between the
lower port on the GBIC (this is the laser source) and the photodetector on the fiber
optic tester.
2. Turn on power to the fiber optic tester and push the λ select key until the upper
right corner displays “1310 nm”.
3. Push the “dBm/W” button until the middle right side displays “dBm”.
4. Use the fiber optic tester to take a power launch reading.
The reading must be between -9 dBm and -3 dBm.
Note – LW GBIC launch power must be between -9 dBm and -3 dBm.
5. Replace the LW GBIC if it is not within this range.
2.4.3
Minimum Power Receive Test
Cable Plant
dBm
11.5
EXFO
FIGURE 2-20
Measuring Minimum Receive Power
Chapter 2
Fiber Optic Cable Plant Test Procedures
2-15
This test is similar to the GBIC launch power test, but measures the absolute receive
power at the far end of the cable plant using the laser source from the LW GBIC.
Power measurements are taken after the laser source from the GBIC has traveled
through the cable plant. Minimum receive power must be greater than -17.7 dBm.
FIGURE 2-17 shows the cabling for the minimum receive power test.
1. Insert an LW GBIC into an open port on an FC-AL hub at the remote location. Be
sure that there is power applied to the hub. At the local end, connect the 15-meter
single mode cable between the cable plant termination point and the
photodetector on the fiber optic tester.
Note – To ensure that you have selected the correct cable, follow the procedure in
Section 2.4.1.2, “Identify the Fiber” on page 2-10.
2. Turn on power to the fiber optic tester and push the λ select key until the upper
right corner displays “1310 nm”.
3. Push the “dBm/W” button until the middle right side displays “dBm”.
4. Use the fiber optic tester to take a power launch reading.
The reading must be greater than -17.7 dBm.
5. If the reading is below -17.7 dBm, re-seat all connectors in the fiber path and
re-test. If the reading is still below -17.7 dBm, replace the LW GBIC and re-test.
2.5
Test Procedure Summary
2.5.1
Fiber Identification Test
■
■
2.5.2
Passive Cable Plant Loss Test
■
2-16
Send a 2 kHz signal between two fiber optic testers.
Listen for a 2-second tone and “2000 Hz” to be displayed on the LCD.
The cable loss budget must not exceed 8.2 db.
Sun StorEdge LW GBIC Service Manual • May 1999
2.5.3
LW GBIC Launch Power Test
■
2.5.4
Minimum Receive Power Test
■
2.6
LW GBIC launch power must be between -9.0 dBm and -3.0 dBm.
The absolute minimum receive power must be greater than -17.7 dBm.
Troubleshooting Information
■
The same methods using STORtools to troubleshoot the A5x00 also apply when
the LW GBIC is used to connect the A5x00.
Chapter 2
Fiber Optic Cable Plant Test Procedures
2-17
2-18
Sun StorEdge LW GBIC Service Manual • May 1999
CHAPTER
3
Maintaining Fiber Optic Cables
Caution – Follow these guidelines to avoid causing damage to fiber optic cables.
■
The minimum bend radius for fiber optic cable is 3 centimeters (1.2 inches).
■
Be sure to grasp the connector when disconnecting a fiber optic cable. Never
disconnect a fiber optic cable by pulling on the cable.
■
To avoid damage due to contamination or abrasion, always put dust covers on the
fiber optic cable connectors when the cable is disconnected.
■
Dirty fiber optic cable connectors can impede data transfer.
■
Before replacing a fiber optic cable, be sure that the connectors on the cable and
LW GBIC are clean.
1. Disconnect the fiber optic cable.
2. Lightly dip a cotton swab in a solution of pharmaceutical-grade isopropyl alcohol.
Note – The cotton swab must be of optical grade. It is not provided by Sun.
3. Use the swab and clean the inside of both connectors, as well as the insides of the
LW GBICs and other connectors.
4. Reconnect the connectors.
If the fiber optic cable still registers as being faulty, replace the fiber optic cable.
3-1
3-2
Sun StorEdge LW GBIC Service Manual • May 1999
APPENDIX
A
Specifications
This appendix contains specifications for the following components:
■
LW GBIC—page A-2
■
Single Mode Cable With Duplex SC Connectors—page A-4
■
Single Mode Cable Plant—page A-6
A-1
A.1
LW GBIC
This section contains specifications for the LW GBIC. The LW GBIC meets or exceeds
the Fiber Channel Standard 100-SM-LC-L specification.
A.1.1
Laser Safety
The LW GBIC is Class I Laser safe under single fault conditions for the when used
with Sun-approved power sources at the operating temperatures specified in
Section A.1.2 “Optical Characteristics” on page A-3.
TABLE A-1
Laser Safety Standards
Parameter
References
International Standards
IEC825-1 and IEC 825-2
FDA Standard
CDRH 21 CFR Ch1. Sub J Part 1040.10
Class 1 Laser Product
Luokan 1 Laserlaite
Klasse 1 Laser Apparat
Laser Klasse 1
FIGURE A-1
A-2
Laser Compliance Label
Sun StorEdge LW GBIC Service Manual • May 1999
A.1.2
Optical Characteristics
TABLE A-2
Link
Parameter
Min
Max
Nominal bit rate (B)
1062.5±200 PPM Mb/s
Operating range (L)
2m
Loss budget
10.5 dB1
Typical fiber core diameter (MFD)
8.5
10 Km
9.8
1. Available power for power cable plant = 8.2 dB at 10 km.
TABLE A-3
Transmitter
Parameter
Min
Max
Spectral center frequency (l)
1285 nm RMS
1345 nm RMS
Spectral width (∆l)
Launched power (P)
2.5 nm RMS
-9.5 dBm
-3 dBm
Relative intensity noise (RIN)
Extinction ratio (Ex)
-120 dB/Hz
9 dB
OE deterministic jitter (DJ)
0.20 UI1 (pk-pk)
OE total jitter (TJ)
0.43 UI (pk-pk)
Optical rise and fall time2
320 ps
1. 1 UI=941 pico-seconds
2. The optical rise and fall time is 20%-80% unfiltered. If a 4th order Bessel Thompson filter is used, the
unfiltered rise and fall time would be:
TRise/Fall = √ ((Trise/fall measured)2 - (Trise/fall filter)2)
TABLE A-4
Receiver
Parameter
Min
Max
Received power
-20 dBm
-3 dBm
Operating wavelength
1270 nm
1355 nm
Receiver power for Ber 1E-12
-17.7 dBm
Return loss of receiver (RL)
12 dB
OE deterministic jitter added (DJ)
0.17 UI (pk-pk) added by the converter only.
OE total jitter added (TJ)
0.15 Ui (pk-pk) added by the converter only.
Appendix A
Specifications
A-3
A.1.3
Mechanical Specifications
TABLE 3-1
Mechanical Specifications
Parameter
Specification
Optical Connector Insertion
250 times1
LW GBIC Insertion
100 times2
1. The number of times SC Duplex connector can be inserted/removed into the LW GBIC.
2. The number of times a LW GBIC unit can be inserted/removed in to the mating assembly.
A.1.4
Available Power Budget for Passive Plant
The fiber channel allowed loss budget at 10 km is 2.7 dB.
A.2
Single Mode Cable With Duplex SC
Connectors
Cable assemblies comply with the EIA/TIA 492CAAA specification. The single
mode cable color is yellow, and the LW GBIC casing is blue. These colors implement
fiber channel adapted color coding.
A.2.1
Environmental and Safety Specifications
TABLE A-5
Environmental and Safety Specifications
Parameter
Min
Max
Storage temperature (at 5% to 95% RH)
-40˚ C
80˚ C
Operating temperature (at 10% to 90% RH)
-10˚ C
70˚ C
Flame retardance (OFNR)1
1666
Cable material minimum rating (UL-94)
V-1
1. UL specification for cable flame retardation.
A-4
Sun StorEdge LW GBIC Service Manual • May 1999
A.2.2
Optical Connector and Cable Characteristics
TABLE A-6
Optical and Mechanical Characteristics of the Connector
Parameter
Min
1
Mean optical connector loss
Optical connector loss + 3
0.25 dB
1
0.5 dB
Connector optical return loss (RL)2
Fiber tensile proof test
Cable bend radius
-30 dB
100 Kpsi
3
30 mm
Ferrule end radius
10 mm
Connector apex offset
25 mm
50 mm
4
Connector axial retention
90 N
Insertion/withdrawal force
Off axial rotational pull
Max
4
80 N
20 N
Cable/connector pull strength
90 N
Mating durability/insertion
500
1. Verified with OFSTP-7 method.
2. Verified with FOTP-107 method.
3. Excess loss is less than 0.5 dB if the fiber is wrapped around a 30-mm radius Mandrel once.
4. Maximum optical loss variation is less than 0.5 dB.
Appendix A
Specifications
A-5
A.3 Single Mode Cable Plant
All cable plants must meet or exceed the requirements of EIA/TIA 492CAAA and
use approved single mode optical fibers such as Corning SMF-28 or Lucent
equivalent.
A.3.1
Single Mode Optical Fiber Specifications
TABLE A-7
Single Mode Optical Fiber Specifications
Parameter
Min
Max
Mode field diameter (MFD)
8.8 µm
9.3 µm
(core diameter)
Cladding diameter
124 µm
126 µm
Cladding non-circularity
1%
Cable cutoff wavelength
Fiber attenuation at 1310 nm
1260 nm
1
0.4 dB/Km
1
0.05 dB/Km
Excess attenuation
Zero dispersion wavelength (λ0)
1301.5 dB/Km
Zero dispersion slope (S0)
1. For temperature range of -10˚ C to 85˚ C and 4% to 98% RH.
A-6
Sun StorEdge LW GBIC Service Manual • May 1999
1321.5 dB/Km
0.092 ps/(nm2•Km)