1
MAC 2000 Wash Service Manual
Zoom lens assembly, replace
screw through the first hole in the rail.
Fasten with an M3 nut.
1 Lock the head in the horizontal, top
up position.
When removing the zoom car, do
not remove the slide from the rail.
1
CMYC module, install
2 Move the wire bundles forward and
out of the way.
Remove the zoom module. (p. 3)
2 Remove the belt clamp screws.
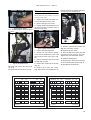
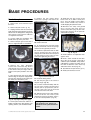
(Fig. 10)
3 Remove the 4 screws that fasten
the zoom car to the zoom slide. Do not
remove the slide from the rail.
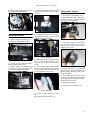
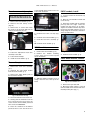
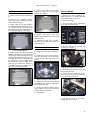
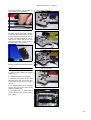
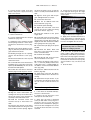
Fig. 19 Zoom slide stop
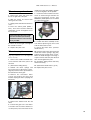
7 Install the zoom lens car stop. (Fig.
18)
8
3 Orient the module with the junction
print up and to the right. Lower the
module into the chassis at an angle.
Square the module with the flaps over
the chassis and slide it back as far as it
will go. Align the screw holes and fasten
at the top and bottom.
Install the color wheel module. (p. 7)
9 Install the zoom lens assembly. (p.
5)
10 Install the zoom module. (p. 3)
CMYC module, remove
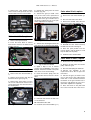
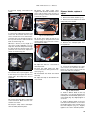
Fig. 17 Do not remove slide from rail
4 Fasten the replacement zoom lens
assembly to the slide.
5
Fasten the belt clamp.
6
Install the zoom module. (p. 3)
1
Remove the zoom module. (p. 3)
2 Remove the module fastening
screws: there are two on the top and
two on the bottom.
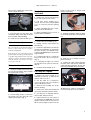
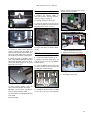
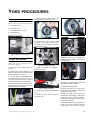
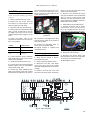
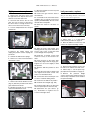
Fig. 21 Insert module at an angle
4
Install the zoom module. (p. 3)
Color wheel module, remove
Zoom rail, replace
1
1 Remove the zoom lens assembly.
(p. 5)
2
2 Separate the color wheel module
from the zoom module. (p. 5)
3 Remove the white plastic plate at
the back of the module.
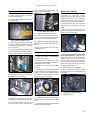
Fig. 20 1 of 4 CMYC module screws
3 Slide the module forward as far as it
will go, then lift it out of the top of the
head.
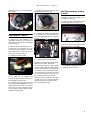
Fig. 22 Color wheels 1 & 2
1
Remove the top head shell.
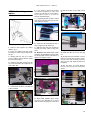
2 Disconnect plugs 28/29, 9, and 10
from the inside row of the left-side zoom
module junction print. (Fig. 1)
Fig. 18 Zoom lens car stop
4
Unscrew and remove the zoom rail.
5 Starting with the third hole from the
front, fasten the new zoom rail to the
zoom module with 5 M3x6 panhead
Torx screws, P/N 08050702.
6 Place the stand-off on the M3x12
panhead Torx screw and insert the
5