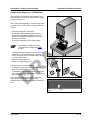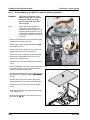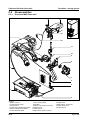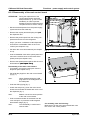
1
Service Manual
DR
AF
T
Cafitesse 110
Cafitesse 120
Next Generation
DRAFT Version August 2009
T
AF
DR
© 2009 Douwe Egberts Coffee Systems International
DRAFT Version August 2009
Installation / Putting into operation
Cafitesse 100 Next Generation
Contents
Installation / putting into operation
2.1
2.2
2.3
2.4
2.5
2.6
2.7
2.8
D
R
A
FT
Transport / handling of the dispenser during transport
Space and connection requirements
Technical specification
Checklist: instructions for the customer
Transfer of the dispenser to the customer
External options
Unpacking
Installation of the dispenser
2
August 2009 2-
Cafitesse 100 Next Generation
2
Installation / Putting into operation
Installation / putting into operation
2.1 Transport / handling of the dispenser during transport
Dimensions of the dispenser including packaging:
Dispenser type
Cafitesse 110 NG
Cafitesse 120 NG
Height:
980 mm / 38.6 in
1055 mm / 41.5 in
Width:
395 mm / 15.6 in
395 mm / 15.6 in
Depth:
595 mm / 23.4 in
595 mm / 23.4 in
FT
Original packaging by the manuafacturer:
• European pallets (1200 mm x 800 mm / 47.2 in x 31.5 in):
8 Cafitesse 100 NG dispensers (2 piles with 4 dispensers)
• Small European pallets (600 mm x 800 mm / 23.6 in x 31.5 in):
4 Cafitesse 100 NG dispensers (2 piles with 2 dispensers)
• USA pallets (1200 mm x 1000 mm / 47.2 in x 39.4 in):
10 Cafitesse 100 NG dispensers (2 piles with 5 dispensers)
will be added
A
Information on the packaging of the dispenser:
D
R
Storage and transport in general:
ATTENTION:
• Transport the dispenser carefully.
• Do not throw the dispenser or handle it incorrectly.
• Do not transport several dispensers on top of each other unless they are fixed to
a pallet as shown in the following section.
• Only transport the dispenser in an upright position.
• When storing the dispenser, ensure that it is only stored indoors and take
precautions against parasites.
• Protect the dispenser from the influence of unusual odors.
• The dispenser must be stored in dry and frostproof ambient conditions, and
must not be exposed to sunlight.
• Completely drain the water from the boiler prior to storage and transport, in
order to prevent damage due to frost. Remove any residual water from hoses
and valves.
• If there is the danger of damage due to frost, when the dispenser is reinstalled
after a longer period of storage, check and replace boiler, hoses and valves.
Carry out a functional test.
2 - August 2009
Installation / Putting into operation
Cafitesse 100 Next Generation
Transport due to location change
When you transport a used dispenser to a new
location:
• Remove the product pack(s) (BIBs).
• Disconnect the mains plug.
• Disconnect the dispenser from the water supply.
Completely drain the water from
the boiler prior to storage and
transport, in order to prevent
damage due to frost. Remove
any residual water from hoses
and valves.
• Drain the boiler
WARNING:
FT
ATTENTION:
Hot water!
There is danger of being scalded.
D
R
A
• Tilt the dispenser forwards in order to drain the
residual water.
• Pack the dispenser in such a manner that a
safe transport is guaranteed. Use the original
packageing if possible (fig. 1, 2).
• The dispenser must have been cleaned correctly
before you store it for a longer period of time.
• When used dispensers are stored for a long
time,
- the inlet valve of the water supply hose
towards the boiler
as well as
- the cold water inlet valve (option cold water /
café cool)
and
- the respective inlet hoses
must be disconnected in order to ensure that the
hoses are empty. In this way future spoiling fo
the tast is avoided.
Fig. 1
WARNING:
August 2009 Fig. 2
If there is the danger of
damage due to frost, when the
dispenser is reinstalled after a
longer period of storage, check
and replace boiler, hoses and
valves. Carry out a functional
test.
2-
Cafitesse 100 Next Generation
Installation / Putting into operation
2.2 Installation requirements
Electrical supply:
Customer:
• A grounded connection is required.
• The mains connection must match the dispenser
output.
• The dispenser must be protected individually.
• Recommendation:
Use a fault current safety switch and an all poles
controlling contact breaking device.
• European version:
When a fixed power supply is used for the
dispenser (not via mains plug), a separation
device with contact openings of at least 3 mm
for each pole must be installed. The ground
connection must be connectied tightly.
FT
Dispenser:
• Length of the electical supply cable: 1.80m / 70.8in
• Use a national adapter for the mains plug if
required
• European 3-phase version:
The power supply cable has 5 cores, which
enables fixing a power supply plug for 3-phase
operation
Water supply:
Customer:
• Water supply line:
- dynamic pressure of
min. 0.8 bar at 10 liters / minute -
min 11.6 psi at 2.6 USgal / minute
- static pressure of max. 10 bar / 145 psi
- temperature of max. 60°C / 140°F
• Use a stop valve and a non return valve
• Hot water connection:
For the connection of the dispenser to a hot
water supply (higher than 60°C / 140°F) a
hot water inlet valve must be installed in the
dispenser (option)
• Hot water connection:
- possible with a special inlet valve
- temperature:
more than 60°C / 140°F, max. 75°C / 167°F
- use only copper pipes
• Additional cold water or café cool dispensing:
- Install a pressure limiter or
- a pre-cooling unit, which includes a pressure
limiter.
• Additional cold water and café cool dispensing
- an additional water supply line is required,
- dynamic pressure of
min. 0.8 bar at 12 liters / minute - min. 11.6 psi at 3.2 USgal / minute
D
R
A
Dispenser:
• Connections for hoses:
3/4“ - 5/8-18 UNF
• National connection pieces are included in the
corresponding country kits
• Install a water filter (delivered with the dispenser
for some countries)
• Requirement for USA:
The dispenser must be installed with an
adequate return flow stop, which complies with
the legal regulations.
ATTENTION:
• Check the drinking water quality before installation, especially when
installing the cold water / café cool option or water tank for manual
filling. A drinking water filter should always be installed
• When new water pipes are installed, flush them sufficiently before the
installation of the dispenser.
Read local regulations carefully, when you choose water suppy lines.
Use only neutral material with respect to taste,
Additional requirements:
Installation surface:
Walls and ceiling:
2 - even, nonskid floor
dustfree and clean
August 2009
Installation / Putting into operation
Cafitesse 100 Next Generation
Space requirements Cafitesse 110NG:
260 mm / 10.2 in
117 mm / 4.6 in
FT
R
783 mm / 30.8 in
D
13 mm / 0.5 in
A
210 mm / 8.3 in
260 mm / 10.2 in
770 mm / 30.3 in
453 mm / 17.8 in
/ 10.2 in
521 mm / 20.5 in
260 mm
50 mm
2.0 in
260 mm / 10.2 in
power
cord
water supply hose
August 2009 2-
Cafitesse 100 Next Generation
Installation / Putting into operation
Space requirements Cafitesse 120NG:
260 mm / 10.2 in
260 mm / 10.2 in
210 mm / 8.3 in
117 mm / 4.6 in
850 mm / 33.5 in
FT
863 mm / 34.0 in
13 mm / 0.5 in
D
R
A
453 mm / 17.8 in
/ 10.2 in
521 mm / 20.5 in
260 mm
50 mm
2.0 in
260 mm / 10.2 in
power
cord
water supply hose
2 - August 2009
Installation / Putting into operation
Cafitesse 100 Next Generation
2.3 Technical Specification
Description
Value
Energy
Min.
Unit
Max.
xxx Wh
Idle Phase measurement (IM) *
xxx Wh/h
Idle Phase measurement (in energy saving mode) (IM) *
xxx Wh/h
Vending Phase measurement (VM) *
xxx Wh
Average Drink Volume measurement (DV) *
xxx Ltr
Average Drink Temperature measurement (DT) *
xxx °C
Energy Consumption per liter (ECPL) *
xxx Wh/Ltr
FT
Heat-up phase measurement (HU) *
Potential savings when using energy saving mode
(based on 10hrs saving mode time per 24hrs)
Wake-up functionality present from Energy saving mode ?
xxx Wh/24hr
Yes, takes x minutes
Length power cable Europe / North America
Sound Level (stand-by,1m distance)
Boiler (capacity)
A
* with x.x kW heating element
Maximum consumed power
Boiler contents
-
1.80 / 5 m / ft
xx dB (A)
(1-phase)
(3-phase)
x.x
x.x
kW
9 / 2.4
Ltr / USgal
x.x
kW
x.x / x.x /x.x
Heating Elements (at 240V, USA)
x.x / x.x / x.x
kW
Heating Elements (at 208V, USA)
x.x / x.x / x.x
kW
Heating Elements (at 120V, USA)
x.x
Boiler temperature
96 / 205
°C / °F
Boiler temperature energy saving mode
63 / 145
°C / °F
Hourly capacity (coffee) at max. heating power
xx
xx
Ltr/h
xxx
xxx
Cups/h
D
R
Heating Elements (at 230V)
-
kW
Peak capacity
x.x / x.x
Recovery time
x
Recommended capacity based on 125ml cup volume
up to 200
x 1000
cups/year
Recommended number of consumers
minimum 25
-
Possibility to increase capacity (pre-heating ?)
Yes (with pre-heating) ??
-
Cooling (capacity)
Normal
Normal cooling compartment temperature
x / xx.x
Cooling capacity
~x (standby)
Continuous cooling performance (delta T @ Tambient of
32° C / 90° F, 90 %RH)
Power consumption compressor
August 2009 x (standby)
Ltr / USgal
x
Min.
Maximum
°C / °F
~xx (on)
W
xx / xx
°C / °F
xx (on)
W
2-
Cafitesse 100 Next Generation
Installation / Putting into operation
Description
Value
Unit
Ingredient containers
Type
Bag in box
Number of containers per machine
1
Volume of ingredient containers
1.25 or 2
liter
Capacity
x
liter
Drink dispense times
CFT 110 NG
CFT 120 NG
Black coffee, 125ml
x
x
sec
Café crème normal / Café crème fast, 125ml *
x/x
sec
Espresso normal / Espresso fast, 50ml *
x/x
sec
x
sec
xx
xx
sec
xx
xx
sec
x
x
sec
Chocolate, 125ml **
Pot black coffee, 1ltr
Pot black coffee, 1,5ltr
Tea 125 ml
FT
Drip tray
* standard setting: normal **when option ‚chocolate delivery‘ is installed
A
Dispensing point(s) measurements
117 / 4.6
mm / in
Clearance between drink outlet and cup tray
210 / 8.3
mm / in
Max. clearance with drip tray removed
260 / 10.2
mm / in
Clearance between drink outlet and drip tray with air pot
extension kit
xxx
mm / in
Max. clearance with drip tray removed
xxx
mm / in
Max. pot diameter
xxx
mm / in
Number of outlets
2
Cup sensor
no
Cup illumination
no
Machine weight + sizes
CFT 110 NG
CFT 120 NG
Weight empty
31.0 / 68.3
34.0 / 75.0
kg / lbs
Weight full
42.0 / 92.6
45.0 / 99.2
kg / lbs
Sizes machine
See separate drawings
Height with drain kit
xxx
mm / in
Height with air pot extension kit
xxx
mm / in
Width of machine and payment side module together
xx
mm / in
D
R
Clearance between drink outlet and cup tray
2 - August 2009
Installation / Putting into operation
Cafitesse 100 Next Generation
Description
Value
Machine Packaging
CFT 110 NG
Type of packaging
Carton box
Weight carton packaging
xx / xxx
Sizes packaging
height
width
depth
980 / 38.6
395 / 15.6
595 / 23.4
Weight machine including packaging
xx / xxx
kg / lbs
Number of machines per pallet
European pallet
small European pallet
USA pallet
8
4
10
Machines
Machines
Machines
2
Machines
Connections / installation
Connection Water pressure
A
Connection water temperature
CFT 120 NG
kg / lbs
1055 / 41.5
395 / 15.6
595 / 23.4
FT
Allowed stacking height
Unit
Minimum
Maximum
0.8 dynamic
at 10 ltr/min.
10 static
mm / in
mm / in
mm / in
Bar
11 dynamic at 140 static
2.6 USgal/min
Psi
>0
°C / °F
60 / 140
Hot water connection > 60°C or pre heater connection
Requires use of “pre heater kit”.
Water supply line
1/2” or 3/8” supply line with 3/4” BSP connecting piece
5 / 41
32 / 90
Operating conditions: ambient humidity
10 %
70 %
Rated power Europe: 230-240 VAC 1 phase (16 A fuse)
Max. 3.5
kW
Rated power Europe: 400 VAC 3 phase (3 x 16 A fuse)
Max. 9.1
kW
Rated power USA: 120 VAC ( 20 A fuse)
Max. 1.4
kW
Rated power USA: 120/240 VAC ( 50 A fuse)
Max. 9.4
kW
°C / °F
D
R
Operating conditions: ambient temperature
Approvals
VDE, CE, UL, cUL, NSF
The dispenser is radio-shielded complying with EN 55014/VDE 0875, T14.
The dispenser is marked with the CE label - the directive about electrical equipment of low voltage, the
directive about electromagnetic compatibility and the machinery directive are applied.
August 2009 2-
Cafitesse 100 Next Generation
Installation / Putting into operation
D
R
A
FT
2.4 Checklist: instructions for the customer
2 - 10
August 2009
Installation / Putting into operation
Cafitesse 100 Next Generation
2.5 Transfer if the dispenser to the customer
D
R
A
FT
(incl. HACCP - Hazard And Critical Control Points)
August 2009 2 - 11
Cafitesse 100 Next Generation
Installation / Putting into operation
2.6 External options
D
R
A
FT
to be used by MSUs and distributors for national information (e.g. on external filters)
2 - 12
August 2009
Installation / Putting into operation
Cafitesse 100 Next Generation
2.7 Unpacking
2.7.1
Unpacking the dispenser
• Carefully remove the fastener from the
cardboard box. Do not use sharp utensils to
avoid scratching the dispenser.
• Remove the cardboard box clamps.
• Open the cardboard box.
• Take the inner box, which includes the additional
parts and the country specific items.
List of all items, that are supplied with the dispenser
FT
2.7.2
• Remove the lid stuffing and the lateral stuffing.
• Pull the dispenser with the foil bag out of the
cardboard box, remove the foil and place the
dispenser upright.
• Check, if all items are included (see below).
Contents of the inner cardboard box:
Additional items:
Country specific items:
• Cleaning brush
• Flush bin
• Pre-selection blind buttons (for respective
dispenser types
• Operator USB-key (except for USA)
• Operator manual
- electronic version on operator USB-key
- printed version for USA
A
• Sticker sheet including drink name stickers and
preselection stickers in the language of the
country
For USA only:
• Connection pieces for US mains water supply
• Water filter kit
Disposal of packaging and dispenser at the end of their service life
D
2.7.3
R
For Cafitesse 120 NG dispensers only:
• Mixing bowl exchange kit
Used packaging:
Packaging:
Material:
Outer cardboard box:
Inner packaging:
Corrugated board
Corrugated board
Composition:
Liner:
Kraft liner, GSM substance 150 g/m², marbeled color
Fluting paper: Wave substance, GSM substance 105 g/m², brown color
Inner paper:
Duplex, GSM substance 170 g/m², brown color
Disposal of the packaging and dispenser:
The disposal of the material must always be done in accordance with
• country specific requirements,
• legal requirements,
• safety requirements, and
• environmental requirements!
August 2009 2 - 13
Cafitesse 100 Next Generation
Installation / Putting into operation
2.8 Installation of the dispenser
2.8.1
Prepare the installation
Tools for the installation
Prepare the following tools for the installation:
required for
• Service USB-key or
• Windows based
service device with
USB connector
the programming of
customer specific
settings
• Several screw drivers
the installation of
customer specific kits
• Pressure gauge
the measuring of the
water pressure
A
Use adapter cables for the connection to European mains sockets that are
different from the German / French safety plug socket.
D
R
• Adapter cables
FT
Tools
2 - 14
August 2009
Installation / Putting into operation
Cafitesse 100 Next Generation
Type plate and dispenser type coding
1
WITTENBORG
4
C120NG
TOTAL
6
HEIZUNG . HEATING
CHAUFFAGE
7
3
230-240 V~
3,5
kW
3,3
kW
16
A
ATM
HZ/CPS.
KÜHLUNG,REFRIGERATION
REFROIDISSMENT
COMPRESSOR
COMPRESSEUR
KESSELINHALT, BOILER CAP.
CAPACITE DE BUILLOIRE
50/60
115
W
0,5
A
9
L.
8
9
Refrigerant: R134 a: 0,085kg
bar
N&W Global Vending
Bar
10
Min. dyn. line pres. 0,8bar, Max. st. line pres. 10 bar
IPX1
IPX1
Contains greenhouse emissions fluorinated gases regulated by the Kyoto protocol
Contiene gas fluorurati ad effetto serra disciplinati dal protocollo di Kyotol
Hermetically sealed
Ermeticamente sigillato
FT
11
1
2
3
050911 123456
/S2LP1-MKT
EINGESTELLTE WERTE
SELCT VALUES.
E3
VAEURS SELCTIONNEES
VOLT
5
2
C120NG - dispenser type
Dispenser type coding, see table below
Serial number - first 4 digits indicate month
and year of production
A
X
1
2
D
Power pack and heating:
Lock:
Pre-selections:
Dispenser color
Branding
August 2009 no foam mixing
foam mixing unit installed
Y
S
C
K
R
Main version:
Electrical connection values
Water pressure indication
Approvals
C1 X 0NG/ Y Z A B C DE
Dispenser type code:
Foam mixing:
4-9
10
11
Standard version
Cold water version
Café cool version
Z
1
2
3
4
5
6
7
8
Europe 3-phase
Europe 1-phase 3500 W
Europe 1-phase 2700 W
Europe 1-phase 2200 W
North America version (UL, cUL)
Japan 1-phase 2500W
Japan 1-phase 1900W
Japan 1-phase 1500W
A
O
L
without lock
lock included
B
P
N
pre-selection included
no pre-selection available
C
1
silver
DE
10
any 2-digit numbering
2 - 15
Cafitesse 100 Next Generation
Installation / Putting into operation
Power supply and power supply cable
Measuring the water pressure
The 3-phase European version of the dispenser is
delivered with a European 5-core mains cable.
This cable can be equipped with different adapters
(e.g. for Denmark, Great Britan, or Switzerland).
• Install the required adapter, if necessary.
• Change the power supply plug, when connecting
to a 3-phase current rotary supply.
FT
• Observe the specifications on the rating plate
(see page 2-14).
• Check the monophase plug and ensure that the
national voltages and tolerances are provided.
• Ensure that the fuse of the group, to which the
dispenser is connected, is in accordance with
the national regulations.
• Contact the local power supply company to ask
for the voltage values and tolerances, if required.
• Measure and check the supply voltage.
R
A
• Check the static and dynamic water pressure by
using the measuring device, which is available
as a service part (fig. 1).
• Check the pressure under the most unfavorable
conditions, e.g when all remaining water
consuming locations are opened (dynamic) and
when all are closed (static).
• Connect the pressure gauge to the water
pipe with a pressure hose and one of the 4
connection pieces A, B, C, or D, which are
supplied with the measuring device (fig. 1).
D
You can use the hose, which serves
for connecting the dispenser later.
ATTENTION:
The pressure gauge must be
installed behind the drinking
water filter.
• Close the water tap located on the pressure
testing device and open the stop valve in the
water pipe completely.
• Hold the outlet of the pressure testing device into
a container and open the tap.
A
B
C
D
Fig. 1
• Read the dynamic pressure on the pressure
gauge. The pressure should always be higher
than 0.8 bar (11.5 psi).
• Close the tap and read the static line pressure in
the pressure gauge.
The value should be less than 10 bar / 145 psi.
If the outlet needs to be extended, use
a hose with an interior diameter of at
least 15 mm / 0.59 in.
2 - 16
August 2009
Installation / Putting into operation
Cafitesse 100 Next Generation
Connect the dispenser / initialization
The dispenser is suitable for the installation on a
flat horizontal counter, table, base stand or a table
against a wall (fig. 2).
At the rear of the dispenser, a minimum free space
of 50mm / 2.0 in is necessary to ensure sufficient
cooling.
FT
• Place the dispenser on the table.
• If required, install customer specific kits, e.g.
a payment side module. Please refer to the
respecitive installation instructions, which are
delivered with the kit.
• Connect the dispenser to the water supply.
Ensure that the water stop valve
connected to the supply line seales
properly.
Fig. 2
A
• If the dispenser is equipped for the delivery of
cold drinks or cold water (option), install the
water connection for the cold water inlet valves,
use a pressure limiter.
• Open the water tap (fig. 3).
• Plug in the mains plug (fig. 3).
D
R
The dispenser now starts operation:
• The water is running into the boiler until it is
filled. This takes about 1 minute.
• The display of the dispenser starts, you can see
the highlighted ‚TEMPERATURE‘-icon (1) on the
dark background (fig. 4).
The dispenser heats up the water in the boiler.
Depending on the heating capacity of the
dispenser type, the heating up takes 20 minutes or
more.
Fig. 3
Fig. 4
August 2009 1
2 - 17
Cafitesse 100 Next Generation
Installation / Putting into operation
Insert pre-selection buttons or dummy
buttons
Depending on the request of the customer, replace
dummy buttons below the display of the dispenser
by preselection buttons or vice versa.
The following description shows the replacement
of a dummy button (2) by a preselection (3) button
(fig. 5).
2
3
Fig. 5
5
4
FT
• Push the service tool (4) at the longer side
behind the dummy button (5) to release the snap
fits and remove the dummy button. (fig. 6).
• Insert the preselection button (6) (fig. 7).
Fig. 6
R
A
6
Fig. 7
D
Fix the stickers to the drink buttons and
the pre-selection buttons
Take care that the surface of the push
buttons and the pre-selection buttons
is clean and dustfree. Clean the
plastic parts with denatured alcohol, if
necessary.
• Peel off the respective stickers (7) from the
sticker sheet and fix them onto the push buttons
(8) and onto the preselection buttons (9) (fig. 8).
Take care to align the sticker
accurately to the longer side of the
push button. The sticker may not
overlap the frame.
7
8
9
Fig. 8
2 - 18
August 2009
Installation / Putting into operation
Cafitesse 100 Next Generation
Set date and time of the dispenser
When the water in the boiler is heated up, it may
be necessary to do the date/time settings on the
dispenser (fig. 9).
• Please refer to the operator manual or to chapter
‚Programming the dispenser‘ of the service
manual.
• Do the date and time settings on the disenser.
Fig. 9
Flush the dispenser
Fig. 10
10
11
FT
• Start the flushing program, if the dispenser does
not automatically after the date and time settings
(fig. 10).
• Put the flush bin under the outlets of the
dispenser and carry out the flushing procedure.
Start drink dispensing
D
R
A
• Start the service programming mode and do
drink settings according to the customer‘s
request.
• Open the dispenser door (10) and insert a
product pack (11) into the cooling compartment
(fig. 11)
The dispenser is now ready for drink dispensing,
the ‚Aroma-Lady‘ icon is shown on the display (fig. 12).
• Place a cup or pot under the drink outlets and
start some deliveries.
• Check taste, aroma and temperature of the
delivered drink.
August 2009 Fig. 11
Fig. 12
2 - 19
Installation / Putting into operation
D
R
A
FT
Cafitesse 100 Next Generation
2 - 20
August 2009
Cafitesse 100 Next Generation
Errors
Contents
Errors
Errors water system
Errors cooling system
Errors product delivery system
Errors hygiene system
Errors hardware and network
Errors payment system
1)
3)
3
3.1
3.2
3.3
3.4
3.5
3.6
Errors are reset by pressing the Lock/clear button in cleaner-, operator-, service- or development mode is shown
Valid for Cafitesse 120 NG only
August 2009 2)
Not valid for Cafitesse 100 NG
3-
Cafitesse 100 Next Generation
Errors
3.1 Errors water system
No.
Description
Over- Set condition
rules
Reset condition
10
Overboil safety
has tripped
21
Automatically
when software
detects that safety is manually
reset
Software detects
the over boil has
tripped.
Temp 80 °C
(178 °F)
Remarks
Cause
Remedy
Priority
1. Overboil sensor defective
1. Check the overboil sensor
120
or heating is ON for too long:
2. Temperature sensor defective
3. Heating or safety relays defective
or
2. Check the temperature sensor
and wiring.
3. Check and the heating or safety relays and wiring.
or there is a boiler overflow:
4. High level sensor is defective.
5. Inlet valve does not close.
or
4. Check the high level sensor
and wiring.
5. Check, if the inlet valve is not
leaking.
6. Check the MCB and wiring.
Replace components if necessary.
11
Boiler water level
is too low
Low level sensor
= dry
Reset by repowering the
dispenser
1. Water supply tap not open or
blocked
2. Water pressure is too low
3. Inlet valve is defective
4. Overflow hose is blocked
5. Low level sensor defective
6. Wiring incorrect or
connections defective
7. MCB defective
1)
3)
Errors are reset by pressing the Lock/clear button in cleaner-, operator-, service- or development mode is shown
Valid for Cafitesse 120 NG only
August 2009 2)
1. Open or clean tap
120
2. Check water pressure (see
chapter 2)
3. Check / replace inlet valve
4. Check and clean/replace overflow hose
5. Check / replace low level
sensor
6. Check wiring and replace connections
7. Replace MCB (see chapter 5K)
Not valid for Cafitesse 100 NG
3-
Cafitesse 100 Next Generation
Over- Set condition
rules
Errors
No.
Description
12
Boiler level sensors not detected
Contact bridge in
lever sensor
connector is not
detected
Automatically
when hardware
detects the
contact bridge
1. Wiring incorrect or sensor con- 1. Check wiring or replace sensor 120
nections defective
connections (see chapter 5K)
2. Replace MCB (see chapter 5K)
2. MCB defective
17
Leaking outlet
valves (small
leak)
The refill cycles
have occurred
5 times without
dispensing
Lock/clear
1)
button
Leaking outlet valves
1. Check the outlet valves
2. Check on other leakages
18
Leaking outlet
valve (severe
leak)
More than 5
refill cycles have
occurred without
dispensing
Lock/clear
1)
button
After the
reset
condition
the timer
restarts
Leaking outlet valves
1. Check the outlet valves
2. Check on other leakages
101
19
Refilling boiler
takes too long
Inlet valve was
open for 2
minutes
Lock/clear
button
On reset
1. Water supply tap not open or
the refilling
blocked
starts
2. Water filter clogged or defecagain
tive
3. Water pressure too low
1. Open or clean tap
100
(17)
Reset condition
1)
Remarks
Cause
Remedy
4. Inlet valve defective
5. Hoses clogged or
defective
21
1)
3)
Boiler water heating is defective
Heating was con- Lock/clear
1)
tinuously on
button
for 45 minutes
May occur
after ERR
10 and
ERR 11
2. Clean or replace water filter
3. Check water pressure (see
chapter 2)
4. Replace inlet valve
5. Clean or replace hoses
1. Wiring incorrect or connections 1. Check wiring or replace con115
defective
nections (see chapter 5K)
2. Temperature sensor defective 2. Replace temperature sensor
(see chapter 5A)
3. MCB defective
3. Replace MCB (see chapter 5K)
4. Heating elements or relays
4. Replace heating elements or
defective
relays (see chapter 5A)
Errors are reset by pressing the Lock/clear button in cleaner-, operator-, service- or development mode is shown
Valid for Cafitesse 120 NG only
August 2009 Priority
2)
Not valid for Cafitesse 100 NG
3-
Cafitesse 100 Next Generation
No.
Description
24
Water temp. too
low
25
26
1)
3)
Over- Set condition
rules
Errors
Reset condition
Remarks
Cause
Temperature sensor reading: Water temperature
below hygiene
block setting
Automatically
when temperature rises above
reset temperature
Error
visible on
display
Heating element circuit defective. 1. Check wiring or replace con105
nections (see chapter 5K)
2. Replace temperature sensor
(see chapter 5A)
3. Replace MCB (see chapter 5K)
4. Replace heating elements
Water temp. sensor defective
Reading out of
limits
Automatically
when temperature reading is
within limits
1. Temperature sensor
defective
2. Incorrect wiring or connections
defective
3. MCB defective
1. Replace temperature sensor
120
(see chapter 5A)
2. Check wiring or replace connections (see chapter 5K)
3. Replace MCB (see chapter 5K)
Boiler scaled up
Software timers
plus calculation
Reset via service
device
Boiler is calcified
Decalcify boiler
Errors are reset by pressing the Lock/clear button in cleaner-, operator-, service- or development mode is shown
Valid for Cafitesse 120 NG only
August 2009 Remedy
2)
Priority
Not valid for Cafitesse 100 NG
3-
Cafitesse 100 Next Generation
Errors
3.2 Errors cooling system
No.
Description
30
Cooling box temperature too
high for too long
Over- Set condition
rules
Reset condition
Temperature sen- Lock/clear
1)
sor reading plus button
timer above 7 °C
Remarks
Cause
Remedy
The compressor is not switched
on:
1. Temperature sensor is not in
place
2. Temperature sensor is defective
3. MCB defective
31
32
1)
3)
Cooling box temperature is
too low for too
long
Cooling box
temp. sensor
defective
Temperature
sensor reading
plus timer below
- 1 °C
30,
31
Lock/clear
1)
button
Temperature sen- Automatically
sor reading <-10 when sensor
°C or > 100 °C
readings are
within limits
The compressor is not switched
off:
1. Compressor is defective
2. Temperature sensor is defective
3. MCB defective
10
1. Check the positioning of the
temperature sensor
(see chapter 5F)
2. Replace the defective temperature sensor (see chapter 5F)
3. Check and replace MCB
(see chapter 5K)
10
1. Replace compressor
2. Check and replace temperature sensor (see chapter 5F)
3. Check and replace MCB
(see chapter 5K)
1. Wiring incorrect or connections 1. Check wiring or replace con60
defective
nections (see chapter 5K)
2. Temperature sensor defective 2. Replace temperature sensor
(see chapter 5F)
3. MCB defective
3. Replace MCB (see chapter 5K)
Errors are reset by pressing the Lock/clear button in cleaner-, operator-, service- or development mode is shown
Valid for Cafitesse 120 NG only
August 2009 Priority
2)
Not valid for Cafitesse 100 NG
3-
Cafitesse 100 Next Generation
No.
Description
40
1BIB: BIB empty
>1BIB: Left BIB
2)
empty
41
Reserved
42
Reset condition
Remarks
Cause
BIB Empty sensor
Automatically
when the sensor
detects
that the BIB is
not empty
Error visible on all
machine
versions.
The beep
of this
error is
also generated
when the
error is
reset
1. Float in B2 dosing unit defec1. Replace the product pack
tive
2. Wiring incorrect or connections 2. Check wiring or replace
defective
conntections
(see chapter 5K)
3. Empty sensor defective
3. Replace empty detection assembly (see chapter 5F)
4. MCB defective
4. Replace MCB
(see chapter 5K)
>1BIB; right BIB
2)
empty
BIB Empty sensor
Automatically
when the sensor
detects
that the BIB is full
The beep
of this
error is
also generated
when the
error is
reset
1. Float in B2 dosing unit defec1. Replace the product pack
55
tive
2. Wiring incorrect or connections 2. Check wiring or replace
defective
conntections
3. Empty sensor defective
(see chapter 5K)
4. MCB defective
3. Replace empty detection assembly (see chapter 5F)
4. Replace MCB (see chapter 5K)
43
1BIB: B2 defective
>1BIB: left B2
2)
defective
B2 current too
high or too low
Lock/clear
1)
button
(locking
1. Wiring incorrect or connections 1. Check wiring or replace conerror:
defective
nections
remains
(see chapter 5K)
active after 2. MCB defective
2. Replace MCB
it occurred)
(see chapter 5K)
3. B2 coil defective
3. Replace B2 coil
(see chapter 5C)
44
Reserved
1)
3)
Over- Set condition
rules
Errors
Errors are reset by pressing the Lock/clear button in cleaner-, operator-, service- or development mode is shown
Valid for Cafitesse 120 NG only
August 2009 Remedy
2)
Priority
55
100
Not valid for Cafitesse 100 NG
3-
Cafitesse 100 Next Generation
No.
Description
45
>1BIB: right B2
defective
50
Reserved
51
Reserved
52
Reserved
1)
3)
Over- Set condition
rules
B2 current too
high or too low
Errors
Reset condition
Lock/clear
1)
button
Remarks
Cause
1. Wiring incorrect or connections 1. Check wiring or replace condefective
nections
(see chapter 5K)
2. MCB defective
2. Replace MCB
(see chapter 5K)
3. B2 coil defective
3. Replace B2 coil
(see chapter 5C)
Errors are reset by pressing the Lock/clear button in cleaner-, operator-, service- or development mode is shown
Valid for Cafitesse 120 NG only
August 2009 Remedy
2)
Priority
100
Not valid for Cafitesse 100 NG
3-
Cafitesse 100 Next Generation
Errors
3.3 Errors product delivery system
No.
60
61
62
1)
3)
3)
3)
2)
Description
Over- Set condition
rules
Reset condition
1BIB: MAD console is not (correctly) in place
MAD console
sensor and
mixing bowl in
pace sensors
Automatically
when the sensor
detects
all is in place
again
1BIB: MAD diverting system
defective or mixing bowl is not
detected
>1BIB: left MAD
diverting
system defective
or left mixing
bowl is not detected
Cam shaft drive
cannot find
home position
Automatically:
mixing bowl
Lock/Clear button:
cam shaft motor
Remarks
The beep
of this error is also
generated
when the
error is
reset
Cause
Remedy
1. MAD console incorrectly positioned
2. Wiring incorrect and connections defective
3. MAD console sensor not in the
correct position or defective
4. MCB defective
1. Position MAD console correctly 110
1. Whipper jammed or defective
1. Replace whipper
100
(see chapter 5C)
2. Check and correct MAD console assembly or replace parts
(see chapter 5C)
3. Replace seal
4. Replace mixer motor
(see chapter 5C)
5. Check wiring or replace light
barrier
6. Replace MCB
(see chapter 5K)
2. MAD console assembly
3. Seal defective
4. Mixer motor defective
5. Wiring incorrect or light barrier
defective
6. MCB defective
Priority
2. Check wiring or replace connections (see chapter 5K)
3. Position MAD console sensor
correctly or replace it
4. Replace MCB (see chapter 5K)
Reserved
Errors are reset by pressing the Lock/clear button in cleaner-, operator-, service- or development mode is shown
Valid for Cafitesse 120 NG only
August 2009 2)
Not valid for Cafitesse 100 NG
3-
Cafitesse 100 Next Generation
No.
63
2)
Description
>1 BIB: Right
MAD diverting
system defective
or right mixing
bowl is not detected
Over- Set condition
rules
Cam shaft drive
cannot find
home position
Errors
Reset condition
Remarks
Cause
Remedy
Automatically:
mixing bowl
The beep
of this error is also
generated
when the
error is
reset
1. Whipper jammed or defective
1. Replace whipper
100
(see chapter 5C)
2. Check and correct MAD console assembly or replace parts
(see chapter 5C)
3. Replace seal
4. Replace mixer motor
(see chapter 5C)
5. Check wiring or replace light
barrier
6. Replace MCB
(see chapter 5K)
Lock/Clear button:
cam shaft motor
2. MAD console assembly
3. Seal defective
4. Mixer motor defective
5. Wiring incorrect or light barrier
defective
6. MCB defective
1)
3)
Errors are reset by pressing the Lock/clear button in cleaner-, operator-, service- or development mode is shown
Valid for Cafitesse 120 NG only
August 2009 2)
Priority
Not valid for Cafitesse 100 NG
3-
Cafitesse 100 Next Generation
Errors
3.4 Errors hygiene system
No.
Description
71
Flushing was not
executed in
time
Timer
73
Cleaning was not
executed in
time
Timer
74
Water throughput
limit exceeded
Software:
Reset of hot
incremental volu- water throughput
me counter
counter
1)
3)
Over- Set condition
rules
Reset condition
Remarks
Cause
Remedy
Priority
Flushing program
was executed
correctly
-
Reset by executing flushing program, adjust CLEANING
TIME and/or DATE/TIME if required
70
Cleaning program was executed correctly
-
Reset by executing flushing program, adjust CLEANING
TIME and/or DATE/TIME if required
71
Water throughput counter not
reset
Replace water filter
10
Errors are reset by pressing the Lock/clear button in cleaner-, operator-, service- or development mode is shown
Valid for Cafitesse 120 NG only
August 2009 2)
Not valid for Cafitesse 100 NG
3 - 10
Cafitesse 100 Next Generation
Errors
3.5 Errors hardware and network
No.
Description
Cause
Remedy
81
UI error
No response or
error reported
Reset on recovery
1. Wiring incorrect or defective
2. UIB defective
3. MCB defective
1. Check and correct wiring
2. Replace UIB
3. Replace MCB
82
Payment module
error
No response or
error reported
Lock/clear
1)
button
1. Payment system enabled, but
not connected.
2. Wiring incorrect or defective
3. Coin/card/waiter system not
connected or defective
4. Power issue in payment system
5. Control board payment system
defective
6. MCB defective
1. Check and correct payment
settings
2. Correct or replace wiring
3. Check and connect/replace
coin/card/waiter system
4. Check power unit in payment
system and wiring
5. Replace control board payment
system
6. Replace MCB
83
Flavor module
error
No response or
error reported
Lock/clear but1)
ton
not active
not active
84
Foamino module
error
No response or
error reported
Lock/clear but1)
ton
not active
not active
85
Cold module
error
No response or
error reported
Lock/clear but1)
ton
not active
not active
90
Check sum error
parameter
.field 1
Software
Lock/clear
1)
button , after
initialization has
indicated that the
checksum is OK
The memory test of the MCB
detected a memory
failure.
Replace the MCB.
210
91
Check sum error
parameter
.field 2
Software
Lock/clear
1)
button , after
initialization has
indicated that the
checksum is OK
The memory test of the MCB
detected a memory
failure.
Replace the MCB.
210
1)
3)
Over- Set condition
rules
Reset condition
Remarks
Errors are reset by pressing the Lock/clear button in cleaner-, operator-, service- or development mode is shown
Valid for Cafitesse 120 NG only
August 2009 2)
Priority
Not valid for Cafitesse 100 NG
3 - 11
Cafitesse 100 Next Generation
No.
Description
92
Data file missing in flash file
system
Software
RTC not running
Software
95
97
Push button is
stuck
Over- Set condition
rules
Software
Errors
Reset condition
Remarks
Cause
Remedy
Priority
Lock/clear
1)
button , after
initialization has
indicated that the
checksum is OK
1. Flash file system is not available
1. Reload the CBX file via download file from the PC service
tool
2. Replace the MCB circuitboard.
209
Reset when time Can
and date is set in besetup
RTC
in cleaner
mode or
higher.
1. Installation sequence not executed
2. MCB defective
1. Set time
150
Lock/clear but1)
ton
Locking of
the stuck
buttons
1. Mechanically damaged push
button caps or door
2. Incorrect placement of the user
interface PCB
3. Screws not tightened correctly
4. Micro switches on user interface PCB defective
1. Check button caps and door
and replace them if necessary
2. Correct placement of user
interface PCB
3. Tighten screws
4. Replace user interface PCB
(see chapter 5K)
100
Reset condition
Remarks
Cause
Remedy
Priority
2. MCB circuit board is defective.
2. Replace MCB (see chapter 5K)
3. Set the RTC (cleaner, operator
3. MCB was too long un-powered
or service mode)
4. RTC defective
4. Replace the MCB
3.6 Errors payment system
No.
Description
200
Reboot
1)
3)
Over- Set condition
rules
Errors are reset by pressing the Lock/clear button in cleaner-, operator-, service- or development mode is shown
Valid for Cafitesse 120 NG only
August 2009 2)
Not valid for Cafitesse 100 NG
3 - 12
Cafitesse 100 Next Generation
Programming
Contents
Programming
General
Start the programming via service interface
Programming via service interface
Start the programming via Windows Based Service Device
Software settings
August 2009 4
4.1
4.2
4.3
4.4
4.5
4-
Cafitesse 100 Next Generation
Programming
4. Programming
4.1 General
The Cafitesse 100 NG software provides two kinds
of service programming for the dispenser:
• Programming via Service Interface using the
USB service stick and the operating panel of the
dispenser
• Programming via Windows Based Service Device (WBSD)
This manual contains the following descriptions:
• Programming via Service Interface
• Entry of the WBSD programming
• Overview of the software settings
For the programming via WBSD please refer to a
separate programming manual.
The service authorization level overrules the operator authorization level, i.e. the service technician
can enable or disable functions for the operator.
4.2 Start the programming via
service interface
• Insert the USB service key (1) into the USB connector (2) of the dispenser. (Fig 1)
This immediately starts the service programming
mode, which offers a series of functions.
Operating panel in the service mode (fig. 2):
a. Display
b. Three preselection buttons
c. Arrow button ‚UP‘ scroll up or increase input values
d. Arrow button ‚DOWN‘ scroll down or decrease input values
e. Input button
confirms or activates the input
f. STOP button navigate back or hold down for 2 seconds to
display the start menu
1
2
Fig. 1
a.
f.
Up
b.
c.
Down
d.
Enter
e.
Fig. 2
4-
August 2009
Cafitesse 100 Next Generation
Programming
4.3. Programming via service interface
4.3.1
Upgrading and downgrading
platform packages
The Cafitesse NG software allows you to upgrade
and downgrade platform package versions after
inserting a USB stick with service access.
You can synchronize the platform packages from
the USB-stick to the dispenser and vice versa.
• Insert a USB stick with service access into the
USB connection on the dispenser (fig. 2).
Upgrading
The service mode invokes automatically on the display after inserting the USB stick (fig. 3). When the
USB stick version is more recent than the resident
package version the following text will scroll in the
message line:
«PRESS
TO UP
TO UPGRADE»
1. Press the input button. The following message
appears on the display:
«PRESS
PRESS
Fig. 3
TO START UPGRADE»
PRESS
TO DO
2. Press the input button. The upload starts.
Downgrading
The service mode invokes automatically on the
display after inserting the USB stick (fig. 4). When
the USB stick version is older than the resident
package version the following text will scroll in the
message line:
«PRESS
Fig. 4
TO DOWNGRADE»
1. Press the input button. The following message
appears on the display:
«THE NEW VERSION IS OLDER, ARE YOU SURE?
PRESS
FOR YES»
2. Press the input button. The following message
appears on the display:
«PRESS
TO START DOWNGRADE»
3. Press the input button. The upload starts.
August 2009 4-
Cafitesse 100 Next Generation
4.3.2
Programming
Menu navigation
Seven menus are available. They are named as
follows (fig. 5):
• COUNTERS - read out counter levels
• VOLUME - change volume per cup
• STRENGTH - change drink strength
• DATE / TIME - set time
• CLEANING DAYS - set cleaning intervals
• ECO SETTINGS - optimize power consumption
• TELEPHONE # - enter telephone numbers for
service and operator
COUNTERS
VOLUME
STRENGTH
DATE/TIME
CLEANING DAYS
ECO SETTING
TELEPHONE #
Fig. 5
When the service mode has started, the menu
«COUNTERS» is displayed in the message line
(fig. 6).
a. Service mode is active.
b. Arrow buttons
can be used to activate the
menus before and after the current menu.
c. Display of the currently activated menu. Enter
the menu by pressing the input button .
Fig. 6
When you have entered a menu, a message text
on the display shows the next steps.
Note:
4.3.3
If the text is too long, it will scroll
from left to right through the message line.
Counter readings
In the «COUNTERS» menu, you have various
possibilities to read out the drink counters, e.g.:
• Total number of drinks
• Subtotals per drink button
• Subtotals „VOLUME“ and „ICED“ per drink
button
• Total number of „ICED“ and „HOT“ drinks
Total number of drinks
• In the service mode, press the input button
to enter the «COUNTERS» menu (fig. 7).
COUNTERS
VOLUME
STRENGTH
DATE/TIME
CLEANING DAYS
ECO SETTING
TELEPHONE #
Fig. 7
On the display appears the total number of drinks
TOTAL DRINKS
1234567
in turn with the message
SELECT DRINK
4-
August 2009
Cafitesse 100 Next Generation
For more detailed counter readings you can now
press:
• a drink button, e.g. „coffee“ to display the counter reading of all coffee drinks
• a preselection button, e.g. „VOLUME“ to display
the counter reading of all small, medium, or large
drinks
Subtotals per drink button
• In the «COUNTERS» menu, press a drink button, e.g. ‚coffee‘.
The number of deliveries for the selected drink
button, e.g. ‚coffee‘, appears on the display.
COFFEE
543210
You now have the choice to press:
• the STOP button to go back to the higher level of
the «COUNTERS» menu.
• another drink button to display the respective
counter reading for this button
to scroll through the re• the input button
spective counters readings of all available drink
buttons
• a preselection button („VOLUME“ or „ICED“) for
a more detailed counter readings, e.g. the number of large coffee drinks.
Subtotals „VOLUME“ and „ICED“ per drink
button
1. In the «COUNTERS» menu, press a drink button, e.g. ‚coffee‘.
The number of deliveries for the selected drink
button, e.g. ‚coffee‘, appears on the display:
COFFEE
543210
2. Press the preselection button „VOLUME“
The cup icon and the counter reading for the
‚small‘ variation of the drink, e.g. small coffee,
appear on the display.
Programming
3. Press the preselection button „ICED“
The „ICED“ icon and the counter reading for the
‚iced‘, ‚small‘ variation of the drink, e.g. iced small
coffee, appear on the display:
COFFEE
23456
Note:
If you continue to press the preselection button „ICED“, the display
shows cyclic counter reading for
the hot, total, and iced drinks in
combination with the respective
volume selection.
Or you have the choice to press:
• the STOP button to go back to the higher level of
the «COUNTERS» menu.
• another drink button to display the respective
counter readings for this button.
• the input button
to scroll through the respective counter readings of all available drink
buttons.
Total number of iced and hot drinks
1. In the «COUNTERS» menu, press the preselection button „ICED“
The „ICED“ icon and the counter reading for the
total number of iced drinks appear on the display:
TOTAL
789012
2. Press again the preselection button „ICED“
The „HOT“ icon and the counter reading for the
total number of hot drinks appear on the display:
TOTAL
345678
3. Press the preselection button „ICED“ again to
return to the total counter reading of all drinks.
COFFEE
87654
Note:
August 2009 If you continue to press the preselection button „VOLUME“, the
display shows cyclic counter readings for the middle, large, total,
and small drinks
4-
Cafitesse 100 Next Generation
4.3.4
Programming
Changing cup volumes
In the «VOLUME» menu, you can change the cup
volumes for each type by max. +10% or -10%.
1. Press the input button
ME» menu (fig. 8).
to enter the «VOLU-
The following messages appear in turn on the
display:
DRINK VOLUME
and
COUNTERS
VOLUME
STRENGTH
DATE/TIME
CLEANING DAYS
ECO SETTING
TELEPHONE #
Fig. 8
SELECT DRINK
2. Press a drink button for a volume change of the
respective drink, e.g. coffee
The name of the drink and the current volume
setting will be shown on the display:
VOLUME COFFEE
+8%
3. Increase or decrease the cup volume using
the arrow buttons.
4. Confirm the required value with the input button
. The new cup volume will be accepted immediately for the selected drink.
Preselection „ICED“
1. In the «VOLUME» menu, press a drink button
for a volume change of the respective drink, e.g.
coffee
2. Then press the preselection button „ICED“
The „ICED“ icon and the current volume setting for
will be displayed:
VOLUME COFFEE
+8%
3. Increase or decrease the cup volume using
the arrow buttons.
4. Confirm the required value with the input button
. The new cup volume will be accepted immediately for the selected drink.
Note:
4-
The preselection button „ICED“
has a toggle function in the
«VOLUME» menu.
August 2009
Cafitesse 100 Next Generation
4.3.5
Programming
Changing drink strength
In the «STRENGTH» menu, you can change the
cup volumes for each type by max. +10% or -10%.
1. Press the input button
to enter the
«STRENGTH» menu (fig. 9).
The following messages appear in turn on the
display:
DRINK STRENGTH
and
COUNTERS
VOLUME
STRENGTH
DATE/TIME
CLEANING DAYS
ECO SETTING
TELEPHONE #
Fig. 9
SELECT DRINK
2. Press a drink button for a change of drink
strength for the respective drink, e.g. coffee
The name of the drink and the current strength
setting will be shown on the display:
DRINK STRENGTH COFFEE
+8%
3. Increase or decrease the drink strength
using the arrow buttons.
4. Confirm the required value with the input button
. The new recipe will be accepted immediately
for the selected drink.
Preselection „ICED“
1. In the «STRENGTH» menu, press a drink button
for a change of drink strength for the respective
drink, e.g. coffee.
2. Then press the preselection button „ICED“
The „ICED“ icon and the current strength setting
will be displayed:
VOLUME COFFEE
+8%
3. Increase or decrease the drink strength
using the arrow buttons.
4. Confirm the required value with the input button
. The new recipe will be accepted immediately
for the selected drink.
Note:
August 2009 The preselection button „ICED“
has a toggle function in the
«STRENGTH» menu.
4-
Cafitesse 100 Next Generation
4.3.6
Setting date and time
You can set the date with month/day/ year and
time in the «DATE / TIME» menu. (The time setting
needs to be adjusted at the start and end of the
daylight saving time.)
Note:
Programming
If the dispenser has been shut
down for longer periods, the date
and time must be reset, so that the
dispenser and the programmed
cleaning cycles are reactivated.
COUNTERS
VOLUME
STRENGTH
DATE/TIME
CLEANING DAYS
ECO SETTING
TELEPHONE #
Fig. 10
1. Press the input button
to enter the «DATE /
TIME» menu (fig. 10).
2. The date and time settings are shown on the
display. The option «MONTH» is active and
flashing:
JUN 29 2007
10:10
2. Use the arrow buttons
to select the correct
month (JAN - DEC).
3. Confirm with the input button .
The option «MONTH» stays lit and the option
«DAY» starts to flash:
JUL 29 2007
10:10
4. Use the arrow buttons
to select the correct
day (1-31).
5. Confirm with the input button .
The option «DAY» stays lit and the option «YEAR»
starts to flash:
JUL 06 2007
10:10
6. Use the arrow buttons
to select the correct
year.
7. Confirm with the input button .
The option «YEAR» stays lit and the option
«HOUR» starts to flash:
JUL 06 2009
10 :10
8. Use the arrow buttons
to select the correct
hour.
9. Confirm with the input button .
4-
The option «HOUR» stays lit and the option «MINUTES» starts to flash:
JUL 06 2009
13: 10
10..Use the arrow buttons
to select the correct
minutes.
11..Confirm with the input button .
The new settings for date and time will now be
displayed continuously (without flashing) on the
display:
JUL 06 2009
13:48
August 2009
Cafitesse 100 Next Generation
4.3.7
Programming
Setting the cleaning days
It is necessary to clean the dispenser at least once
a week. Use the «CLEANING DAYS» menu to
set which weekday you want to clean or flush the
dispenser. The flushing settings are optional.
In the «CLEANING DAYS» main menu, two submenus can be selected using the arrow buttons
:
• «CLEAN»
• «FLUSH»
Press the input button
DAYS» menu (fig. 11).
to enter the «CLEANING
COUNTERS
VOLUME
STRENGTH
DATE/TIME
CLEANING DAYS
ECO SETTING
TELEPHONE #
Fig. 11
Set the day(s) for „CLEAN“
to navigate to
1. Use the arrow buttons
submenu«CLEAN».
The status of the selected cleaning days is shown
on the display:
Sun Mon Tue Wed Thu Fri
Sat
CLEAN:
2. Press the input button
submenu.
The status of the selected cleaning days is shown
on the display:
to enter the «CLEAN»
The weekdays Sun - Sat are displayed. The cursor
icon for cleaning
is positioned under Monday
and flashes:
Sun Mon Tue Wed Thu Fri
Sat
CL. SET:
3. Use the arrow buttons
to navigate to the
weekday on which cleaning should take place.
4. Press the input button
to select the activated
(flashing ) day for cleaning.
The cursor icon under the selected day will be
displayed continuously.
Note:
Set the day(s) for „ FLUSH“
1. Use the arrow buttons
to navigate to
submenu«FLUSH».
When you press the input
button
again, the day will be
deselected and the cursor icon
moves to the next day.
Sun Mon Tue Wed Thu Fri
FLUSH
2. Press the input button
submenu.
August 2009 When you reenter the «CLEAN»
submenu, the previous day for
cleaning is no longer selected. The
default Monday is activated and
selected, in case you leave the
menu without setting.
to enter the «FLUSH»
The weekdays Sun - Sat are displayed. The cursor
icon for flushing
is positioned under Monday
and flashes:
Sun Mon Tue Wed Thu Fri
Sat
FL. SET:
3. Use the arrow buttons
to navigate to the
weekday on which flushing should take place.
4. Press the input button
to select the activated
(flashing ) day for flushing.
The cursor icon under the selected day will be
displayed continuously.
Note:
5. Select another weekday if requested by repeating steps 3. and 4.
Note:
Sat
When you press the input
button
again, the day will be
deselected and the cursor icon
moves to the next day.
5. Select another weekday if requested by repeating steps 3. and 4.
Note:
Several days for flushing can be
defined in sequence.
4-
Cafitesse 100 Next Generation
4.3.8
ECO settings
You can optimise the power consumption of the
dispenser in the menu «ECO SETTING». You can
reduce the temperature of the boiler. These settings only apply to those times when the dispenser
is not used (e.g. overnight). In the «ECO SETTING» menu, you can select four sub menus using
the arrow buttons
:
•
•
•
•
Programming
«ECO ENABLE/DISABLE»
«ECO START»
«ECO END»
«ECO TEMPERATURE»
• Press the input button
SETTING» menu
(fig. 12).
COUNTERS
VOLUME
STRENGTH
DATE/TIME
CLEANING DAYS
ECO SETTING
TELEPHONE #
Fig. 12
to enter the «ECO
Enable/disable energy saving mode (ECO)
The status (ENABLED/DISABLED) is shown on
the display, e.g.:
ECO DISABLED
1. Press the input button
to enter the «ECO
ENABLE/DISABLE» sub menu.
The status (ENABLED/DISABLED) is flashing on
the display:
ECO DISABLED
2. Use the arrow buttons
to select the status
«ENABLED» or «DISABLED».
3. Press the input button
to select the required
status.
The selected status will be displayed continuously,
e.g. ENABLED:
ECO ENABLED
4. Press the STOP button to return to the main
menu.
4-10
August 2009
Cafitesse 100 Next Generation
Setting the start time
• status: «ECO ENABLED»
1. Use the arrow buttons
to navigate to submenu «ECO START».
The ECO START time is shown on the display.
2. Press the input button
to enter the «ECO
START» sub menu.
The option „Hour“ flashes and is active:
ECO START
21 :15
3. Use the arrow buttons
to select the correct
time (hours).
4. Press the input button
to confirm.
The option „hours“ stays lit and the option „minutes“ starts to flash:
ECO START
22: 15
5. Use the arrow buttons
to select the correct
time (minutes).
6. Press the input button
to confirm.
The new time setting will now be displayed continuously on the display.
• Press the input button
again, if you would like
to restart the setting.
Setting the end time
• status: «ECO ENABLED»
1. Use the arrow buttons
to navigate to submenu «ECO END».
The ECO END time is shown on the display.
2. Press the input button
to enter the «ECO
END» sub menu.
Programming
The new time setting will now be shown continuously on the display.
again, if you would like
• Press the input button
to restart the setting.
Setting the temperature
• status: «ECO ENABLED»
to navigate to sub
1. Use the arrow buttons
menu «ECO TEMP».
The ECO TEMPERATURE is shown on the display.
ECO TEMPERATURE
63 °C / 145 °F
2. Press the input button
TEMP» sub menu.
The temperature setting then flashes on the display:
ECO TEMPERATURE
63 °C / 145 °F
to select the desired
3. Use the arrow buttons
temperature.
4. Confirm with the input button .
The new temperature will be shown continuously
on the display, e.g.:
ECO TEMPERATURE
75 °C / 167 °F
• Press the input button
to restart the setting.
Note:
The option „Hour“ flashes and is active:
ECO END
05 :55
to enter the «ECO
again, if you would like
When the energy saving mode
is active, the start display shows
«ECO».
ECO
3. Use the arrow buttons
to select the correct
time (hours).
4. Confirm with the input button .
The option „hours“ stays lit and the option „minutes“ starts to flash:
ECO END
06: 55
5. Use the arrow buttons
to select the correct
time (minutes).
6. Confirm with the input button .
August 2009 4-11
Cafitesse 100 Next Generation
4.3.9
Programming
Setting telephone numbers
You can set the telephone numbers of operator
and service in the «TELEPHONE #» menu.
You can also select whether the numbers should
be shown on the display. In this case the operator
and service numbers are shown, if e.g.
• cleaning is required
• the product pack is empty
• there are errors
In the «TELEPHONE #» main menu, four sub-menus can be selected using the arrow buttons
:
• «���������������������
SHOW OPERATOR NUMBER�
»
• «��������������������
SHOW SERVICE NUMBER�
»
• «����������������
OPERATOR NUMBER�
»
• «���������������
SERVICE NUMBER�
»
• Press the input button
PHONE #» menu
(fig. 13).
COUNTERS
VOLUME
STRENGTH
DATE/TIME
CLEANING DAYS
ECO SETTING
TELEPHONE #
Fig. 13
to enter the «TELE-
The status OPERATOR NUMBER is shown on the
display:
OPERATOR NR : 030123457
Activate/deactivate operator number
1. Use the arrow buttons
to navitate to the sub
menu «������������������
SHOW OPERATOR NR��
».
2. Press the input button
to enter the sub menu.
The display shows the settings for «Y» (Yes) or
«N» (No).«Y» or «N» flashes and is active:
SHOW OPERATOR NR : N
3. Use the arrow buttons
to select «Y» to
activate the number display or «N» to deactivate
the number display.
4. Confirm with the input button .
The new setting will then be displayed continuously
on the display, e.g.:
SHOW OPERATOR NR : Y
• Press the input button
to restart the setting.
4-12
again, if you would like
August 2009
Cafitesse 100 Next Generation
Programming
Activate/deactivate service number
1. Use the arrow buttons
to navigate to the sub
menu «�����������������
SHOW SERVICE NR��
».
2. Press the input button
to enter the sub menu.
The display shows the settings for «Y» (Yes) or
«N» (No).«Y» or «N» flashes and is active:
Enter the service number
to navigate to the
1. Use the arrow buttons
sub-menu «SERVICE NR».
to enter the sub menu.�
2. Press the input button
The display shows the operator telephone number.
The first digit is active and flashes:
S: 3 18051234567
SHOW SERVICE NR : N
3. Use the arrow buttons
to select «Y» to
activate the number display or «N» to deactivate
the number display.
4. Confirm with the input button .
The new setting will then be displayed continuously
on the display, e.g.:
SHOW SERVICE NR : Y
• Press the input button
to restart the setting.
again, if you would like
Enter the operator number
1. Use the arrow buttons
to navigate to the
sub-menu «OPERATOR NR».
2. Press the input button
to enter the sub menu.�
The display shows the operator telephone number.
The first digit is active and flashes:
Note:
O = operator, S = service
3. Enter the first digit using the arrow buttons
4. Confirm with the input button .
.
The first digit is displayed continuously, the second
digit is activated and starts flashing.
S: 0 1 8051234567
5. Repeat steps 3. and 4. until you have input the
last digit of the telephone number.
6. Confirm the complete telephone number with the
input button .
• Press the input button
again, if you would like
to restart the setting.
O: 0 301234567
Note:
O = operator, S = service
3. Enter the first digit using the arrow buttons
4. Confirm with the input button .
.
The first digit is displayed continuously, the second
digit is activated and starts flashing.
O: 5 3 01234567
5. Repeat steps 3. and 4. until you have input the
last digit of the telephone number.
6. Confirm the complete telephone number with the
input button .
• Press the input button
again, if you would like
to restart the setting.
August 2009 4-13
Cafitesse 100 Next Generation
Programming
4.4 Start the programming via Windows Based Service Device
Using the service interface of the Cafitesse 100
dispenser, the service technician makes the necessary settings for running the dispenser. He configures the operator interface, runs different tests,
makes the dispenser-specific settings, etc.
• Insert the USB plug (1) of the Windows Based
Service Device into the USB connector (2) of the
dispenser (fig. 14).
The dispenser immediately starts the Service programming mode with the WBDS (fig. 15).
The following chapter shows the possible settings you can do using the WBDS, such as recipe
settings, settings for the operator access, date and
time settings, and payment settings.
1
2
Fig. 14
Fig. 15
4.5 Software settings
Main Menu overview
+
+
+
+
+
+
+
+
+
Errors
Counters
Drink settings
Time & events
Water system
General settings
Display options
Payment settings
Testing
4-14
August 2009
Cafitesse 100 Next Generation
Drink settings
+
+
+
+
+
+
+
+
+
+
+
+
+
+
+
+
+
+
+
+
+
+
+
+
+
+
+
+
+
+
+
+
+
+
+
Button selection screen
Drink button
Drink type
Hot recipe
Volume small
Volume medium
Volume large
Volume ratio 1
Ingredient ratio 1 - mild
Ingredient ratio 1 - normal
Ingredient ratio 1 - strong
Volume ratio 2
Ingredient ratio 2
Flavorit A
Flavorit A delay
Flavorit A volume
Flavorit B
Flavorit B delay
Flavorit B volume
Cold recipe
Volume small
Volume medium
Volume large
Volume ratio
Ingredient ratio 1 - mild
Ingredient ratio 1 - normal
Ingredient ratio 1 - strong
Volume ratio 2
Ingredient ratio 2
Flavorit A
Flavorit A delay
Flavorit A volume
Flavorit B
Flavorit B delay
Flavorit B volume
August 2009 possible settings
Programming
factory setting
enable / disable
portioned / free flow
Coffee, ....
0 ml......10000 ml
0 ml......10000 ml
0 ml......10000 ml
20 %..........100 %
2.6, 3.2, 5........99
2.6, 3.2, 5........99
2.6, 3.2, 5........99
20 %......80 %
2.6, 3.2, 5........99
0, 1, 2, ......., 8
0 %.......100 %
0 %........5 %
0, 1, 2, ......., 8
0 %.......100 %
0 %........5 %
Coffee...
0 ml......10000 ml
0 ml......10000 ml
0 ml......10000 ml
20 %..........100 %
2.6, 3.2, 5........99
2.6, 3.2, 5........99
2.6, 3.2, 5........99
20 %......80 %
2.6, 3.2, 5........99
0, 1, 2, ......., 8
0 %.......100 %
0 %........5 %
0, 1, 2, ......., 8
0 %.......100 %
0 %........5 %
4-15
Cafitesse 100 Next Generation
Time & Events
+
+
+
+
+
+
+
+
+
+
+
+
+
+
+
+
+
Current date
Current time
Format time representation
Cleaning moment
+
Cleaning mode
+
Sunday
+
Monday
+
Tuesday
+
Wednesday
+
Thursday
+
Friday
+
Saturday
+
Sunday
+
Flavorit
+
Clean shot
+
Standby time
ECO moment
+
ECO mode
+
Start time
+
End time
+
Boiler ECO temperature
General settings
+
+
+
+
+
+
+
+
+
+
+
+
+
+
+
+
+
possible settings
Programming
factory settings
01-jan-2009 .... 31-dec-2049
00:00 - 12:00 or - 23:59
12 h / 24 h
show / compulsory
enable / disable
enable / disable
enable / disable
enable / disable
enable / disable
enable / disable
enable / disable
enable / disable
weekly / monthly
enable / disable
00:00 - 12:00
disable / enable
00:00 - 12:00 or - 23:59*
00:00 - 12:00 or - 23:59*
0 °C - 96 °C
possible settings
factory settings
Dispenser configuration
01-jan-2009 .... 31-dec-2049
Operator access
+
Adjust drink counters
disable / enable
+
Adjust RTD ratio
disable / enable
+
Adjust RTD volume
disable / enable
+
Adjust date & time
disable / enable
+
Adjust cleaning moment disable / enable
+
Adjust ECO moment
disable / enable
Adjust telephone number disable / enable
+
Language
Operator telephone number
Service telephone number
Switch over function
disable / enable
Single / double drink
disable / enable
EVA-DTS data
disable / enable
Store / retrieve dispenser profile
Upgrade / downgrade dispenser software
4-16
August 2009
Cafitesse 100 Next Generation
Display options
+
+
+
+
+
+
+
+
+
+
Volume unit
Temperature unit
Show time
Show cooling temperature
Show hot warning
Show operator tel. numbers
Show service tel. numbers
Cold preselection option
Strength preselection option
Volume preselection default
Payment settings
+
Payment
Normal operation
Free vend key switch
+
Type
+
Parallel - coin acceptor
MDB - coin changer
MDB - E-cash
Waiter system
+
+
+
+
+
Programming
possible settings
factory settings
ml / l, oz / gal
°C / °F
disable / enable
disable / enable
disable /enable
disable / enable
disable / enable
disable / enable
disable / enable
disable, small, medium, large
possible settings
factory settings
disable / enable
free vend mode / paid mode
disable / enable
parallel - coin acceptor,
MDB - coin changer,
MDB - E-cash, waiter system
disable /enable
disable / enable
disable / enable
disable / enable
Payment settings
possible settings
factory settings
+
+
+
+
+
+
+
+
+
+
+
+
+
+
+
+
+
+
+
+
Parallel - coin acceptor
+
Button selection screen
+
Price volume small-hot
+
Price volume medium-hot
+
Price volume large-hot
+
Price volume small-cold
+
Price volume medium-cold
+
Price volume large-cold
+
Audit info
+
Collect cashbox money
+
Coin value line 1
+
Coin value line 2
+
Coin value line 3
+
Coin value line 4
+
Coin value line 5
+
Coin value line 6
+
# decimal in UI
+
Decimal point
Inhibit coins
+
0.....999
0.....999
0.....999
0.....999
0.....999
0.....999
inhibit, 0.05, 0.10, 0.20, 0.50, 1.00, 2.00
0.05, 0.10, 0.20, 0.50, 1.00, 2.00
0.05, 0.10, 0.20, 0.50, 1.00, 2.00
0.05, 0.10, 0.20, 0.50, 1.00, 2.00
0.05, 0.10, 0.20, 0.50, 1.00, 2.00
0.05, 0.10, 0.20, 0.50, 1.00, 2.00
0, 1, 2, 3
0.000, 00.00, 000.0. 0000
0.......64
+
August 2009 4-17
Cafitesse 100 Next Generation
Payment settings
Programming
possible settings
factory settings
+
+
+
+
+
+
+
+
+
+
+
+
+
+
+
+
+
+
+
+
+
+
+
+
MDB - coin changer
+
Button selection screen
+
Price volume small-hot
+
Price volume medium-hot
+
Price volume large-hot
+
Price volume small-cold
+
Price volume medium-cold
+
Price volume large-cold
+
Audit info
+
Manual coins filling
+
Dispense coin manually
+
Collect cashbox money
+
# decimal in UI
+
Decimal point
+
Display
+
Vend mode
+
Max. coin credit
+
Max. change
+
Low change inhibit
+
Inhibit coins
+
Buttons on coin system
+
Force vend
Pay out change
+
0.....999
0.....999
0.....999
0.....999
0.....999
0.....999
0, 1, 2, 3
0.000, 00.00, 000.0. 0000
none, local
single, multi
0....1000000
0....1000000
0....255
0....255
disable / enable
disable / enable
to overpay / keep in credit
+
Payment settings
possible settings
factory settings
+
+
+
+
+
+
+
+
+
+
+
+
+
+
+
+
+
MDB - E-cash
+
Button selection screen
+
Price volume small-hot
+
Price volume medium-hot
+
Price volume large-hot
+
Price volume small-cold
+
Price volume medium-cold
+
Price volume large-cold
+
Audit info
+
# decimal in UI
+
Show E-cash credit
+
Vend mode
+
Decimal point
+
Display
+
Mode
Refundability
+
0.....999
0.....999
0.....999
0.....999
0.....999
0.....999
0, 1, 2, 3
No, Yes
single, multi
0.000, 00.00, 000.0. 0000
none / local
real / index
enable / disable
+
4-18
August 2009
Cafitesse 100 Next Generation
Payment settings
Programming
possible settings
factory settings
+
+
MDB - E-cash
+
CCI mode
+
Price line button 1-1
+
Price line button 1-2
+
Price line button 1-3
+
Price line button 2-1
+
Price line button 2-2
+
Price line button 2-3
+
Price line button 3-1
+
Price line button 3-2
+
Price line button 3-3
+
Price line button 4-1
+
Price line button 4-2
Price line button 4-3
+
August 2009 debit / credit
1.....100
1.....100
1.....100
1.....100
1.....100
1.....100
1.....100
1.....100
1.....100
1.....100
1.....100
1.....100
4-19
Cafitesse 100 Next Generation
4-20
Programming
August 2009
Functions / Overview of assemblies
Cafitesse 100 Next Generation
Contents
Overview of the dispenser and the components
5.1
5.2
D
R
A
FT
Overview of the Cafitesse 110NG dispenser
Overview of the Cafitesse 120NG dispenser
5
August 2009 5-
Cafitesse 100 Next Generation
Functions / Overview of assemblies
5.1 Overview Cafitesse 110NG dispenser
3
4
D
R
5
6
7
A
2
FT
1
17
16
8
15
9
10
14
11
13
12
Legend:
1 Dispenser cover
2 Dispenser door
3 Lock incl. key
4 Display
5 STOP button
6 Preselection buttons
5 - 7 Drink buttons
8 USB connector
9 Drink outlets
10 Cup tray
11 Drip tray and drip grid
12 Dispenser door - open
13 Power pack
14 Main Control Board - MCB
15 Fluid treatment parts
16 Boiler
17 Cooling compartment, tilt up
August 2009
Functions / Overview of assemblies
Cafitesse 100 Next Generation
5.2 Overview Cafitesse 120NG dispenser
1
3
4
5
6
7
D
R
8
A
2
FT
17
16
15
9
10
14
11
12
Legend:
1 Dispenser cover
2 Dispenser door
3 Lock incl. key
4 Display
5 STOP button
6 Preselection buttons
August 2009 7 Drink buttons
8 USB connector
9 Drink outlets
10 Cup tray
11 Drip tray and drip grid
12 Dispenser door - open
13
13 Power pack
14 Main Control Board - MCB
15 MAD foam unit
16 Boiler
17 Cooling compartment, tilt up
5-
Functions / Overview of assemblies
D
R
A
FT
Cafitesse 100 Next Generation
5 - August 2009
Cafitesse 100 Next Generation
A
Functions - water system
Water system
A.1 Adjustments
Outlet valves
Open all outlet valves completely and calibrate them.
Calibration via software
Water temperature
Adjustable via software
August 2009 5A-1
Cafitesse 100 Next Generation
Functions - water system
A.2 Disassemblies
A.2.1 Overview water system
5
4
1
2
3
15
16
17
6
18
7
19
8
20
14
9
13
10
12
11
Legend:
1 Boiler lid
2 Inlet hose
3 Level sensor
4 Heating elements
5 Temperature sensor
6 Cable harn. heating elements
5A-2
7 Boiler housing
8 Overboil sensor
9 Inlet valve
10 Power pack
11 Cable harn. MCB power pack
12 Main Control Board
13 Cable harn. boiler
14 Outlet valve
15 Plunger incl. lip seal
16 Holder water coil
17 Water coil incl. cable harness
18 Sealing ring
19 Plunger fit incl. nozzle
20 Convection hose
August 2009
Cafitesse 100 Next Generation
Functions - water system
A.2.2 Draining the water out of the boiler
WARNING:
The water in the boiler is hot.
Beware of the risk of scalding.
Keep your hands and other
parts of your body away from
the hot water.
• Disconnect the dispenser from the power supply
system and close the water tap.
• Remove the cuptray and the driptray and o����
pen
the dispenser door.
• Remove the product pack from the cooling compartment and store it in the refrigerator.
Only if you serve a cafitesse 110 NG dispenser:
• Unscrew the 2 releasable rivets (1) on the cover
coolbox (2) (fig. 1)
1
2
Fig. 1
• Pull down the cover fluid treatment (3) (fig. 2).
• Undo 2 releasable rivets (4) at the splash panel
(5) and remove the overflow hose (6) on the
inside of the splash panel ���������
(fig. 2).
• Remove the splash panel (5) together with the
cover fluid treatment ���������
(fig. 2)�.
6
4
3
• Take the boiler drain tube (7) out towards the
front of the dispenser (fig. 3).
• Place a sufficiently large container (capacity of at
least 12 litre / 3.2 US Gal.) underneath (fig. 3).
• Remove the plug (8) on the drain tube and let
the water flow into the container (fig. 3).
ATTENTION:
After draining the water carefully
replug the drain tube of the
boiler. Once all service and/or
maintenance work has been
completed replace the drain
tube by fastening it.
Note:
Due to the high temperatures of the
boiler‘s components, it is advisable
to allow the boiler to cool down for
several minutes or to rinse the boiler
by refilling cold water and draining it
before commencing any work.
5
Fig. 2
7
On assembly, note the following:
Take care to put the overflow hose back into the
slot of the splash panel.
8
Fig. 3
August 2009 5A-3
Cafitesse 100 Next Generation
Functions - water system
A.2.3 Disassembly of the outlet valves and the overboil sensor
WARNING:
Note:
The water in the boiler is hot.
Beware of the risk of scalding.
Keep your hands and other
parts of your body away from
the hot water.
2
Due to the high temperatures
of the boiler‘s components, it is
advisable to allow the boiler to cool
down for several minutes or to rinse the boiler by refilling cold water
and draining it before commencing
any work.
• Disconnect the dispenser from the power supply
system and close the water tap.
1
• Remove the cuptray and the driptray and o����
pen
the dispenser door.
• Remove the product pack from the cooling compartment and store it in the refrigerator.
Only if you serve a cafitesse 110 NG dispenser:
• Unscrew the 2 releasable rivets on the cover
coolbox (see chapter A.2.2).
Fig. 1
3
• Pull down the cover fluid treatment (see chapter
A.2.2).
• Undo 2 releasable rivets at the splash panel and
remove the overflow hose on the inside of the
splash panel (see chapter A.2.2)�.
• Remove the splash panel together with the cover
fluid treatment and drain the boiler �������������
(������������
see chapter
A.2.2��
)�.
Fig. 2
• Unscrew the door stop (1) at the top (fig. 1).
• Undo the 3 screws (2) on the dispenser cover
plate ���������
(fig. 1��
)�.
• Remove the dispenser cover plate (fig. 1��
)�.
On assembly, note the following:
Hook the dispenser cover plate at the rear into the
corresponding grip (3) (fig. 2).
Tilt up the cooling compartment
• Undo the 2 screws (4) on the front of the cooling
compartment �������������
(5) (fig.
���������
3)�.
• Tilt up the complete cooling compartment (fig. 3).
4
5
Fig. 3
5A-4
August 2009
Cafitesse 100 Next Generation
Functions - water system
• Extract the 2 bolts (6) from the cavity on each
side of the inside wall and place it in the adjacent
hole to support the cooling compartment (fig. 4).
Disassembly of the outlet valves
• Unplug the cable harness (7) of the respective
outlet valve at the intermediate connection (fig.
5).
• Remove the convection hose (8) beneath the
respective outlet valve (fig. 6).
• Pull off the breather hose (9) from the boiler lid
(fig. 6).
• Pull off the outlet hoses (10) of the respective
outlet valve (fig. 6).
6
Fig. 4
• Turn the respective valve (11) counterclockwise
and downwards and take it out of the bracket
(fig. 7).
7
Fig. 5
8
9
11
10
Fig. 7
August 2009 Fig. 6
5A-5
Cafitesse 100 Next Generation
• Turn the valve upside down and let the plunger
fall into your hand (15) (fig. 8).
Functions - water system
15
12
• Loosen the clips (12) to unfix the water coil (13)
(fig. 8).
ATTENTION:
Do not use tools with sharp
edges for disassembling the
o-ring. The seat of the ring can
be damaged, this results in
leakage.
13
14
• Remove the o-ring (14) from the plunger fit (15)
(fig. 8).
On assembly, note the following:
ATTENTION:
To avoid overflow take care that
the convection hose (8) (fig. 6) is
connected back to the respective outlet valve.
Make sure to align the slot (16) of the fixation (17)
with the extrusion on the valveflange (fig. 8).
Disassembly of the overboil sensor
• Undo the flat connectors from the overboil
sensor (18) (fig. 9).
16
17
Fig. 8
18
• Rotate the overboil sensor counterclockwise and
then remove it (fig. 9).
Note:
The reassembly is carried out in
reverse order.
Fig. 9
Fig. 9
5A-6
August 2009
Cafitesse 100 Next Generation
Functions - water system
A.2.4 Disassembly of the temperature sensor and the level sensor
WARNING:
The water in the boiler is hot.
Beware of the risk of scalding.
Keep your hands and other
parts of your body away from
the hot water.
Note:
Due to the high temperatures of the
boiler‘s components, it is advisable
to allow the boiler to cool downfor
several minutes or to rinse the boiler
by refilling cold water and draining it
before commencing any work.
1
2
• Disconnect the dispenser from the power supply
system and close the water tap.
• Remove the cuptray and the driptray and �����
o����
pen
the dispenser door.
• Remove the product pack from the cooling compartment and store it in the refrigerator.
Fig. 1
3
• Unscrew the door stop at the top (see chapter
A.2.3).
• Undo the 2 screws on the dispenser cover plate
(�������������������
see chapter A.2.3).
• Remove the dispenser cover plate (������������
see chapter
A.2.3).
On assembly, note the following:
Hook the dispenser cover plate at the rear into the
corresponding grip (�������������������
see chapter A.2.3��
).
Removal of the temperature sensor
• Undo the 2 flat connectors (2) (fig. 1) and pull
the temperature sensor (3) out of its seal (fig. 2).
Fig. 2
Removal of the level sensor
Note:
On assembly, make sure that the
electrodes are placed in the position, see below. Otherwise the water
level can not be correctly detected.
4
• Undo the cable connection of the level sensor
(1) (fig. 1) and pull the 3 electrodes (4) with the
electrode bridge out of the boiler lid (fig. 3).
Note:
August 2009 The reassembly is carried out in
reverse order.
Fig. 3
5A-7
Cafitesse 100 Next Generation
Functions - water system
A.2.5 Disassembly of the boiler lid and the heating elements
WARNING:
The water in the boiler is hot.
Beware of the risk of scalding.
Keep your hands and other
parts of your body away from
the hot water.
Note:
Due to the high temperatures
of the boiler‘s components, it is
advisable to allow the boiler to cool
down for several minutes or to rinse the boiler by refilling cold water
and draining it before commencing
any work.
1
• Disconnect the dispenser from the power supply
system and close the water tap.
• Remove the cuptray and the driptray and o����
pen
the dispenser door.
• Remove the product pack from the cooling compartment and store it in the refrigerator.
Only if you serve a cafitesse 110 NG dispenser:
• Unscrew the 2 releasable rivets on the cover
coolbox (see chapter A.2.2).
• Pull down the cover fluid treatment (see chapter
A.2.2).
• Undo 2 releasable rivets at the splash panel and
remove the overflow hose on the inside of the
splash panel (see chapter A.2.2)�.
Fig. 1
2
• Remove the splash panel together with the cover
fluid treatment and drain the boiler �������������
(������������
see chapter
A.2.2��
)�.
• Remove the plug(s) of the cable harness(es)
heating elements (1) from the power pack (fig 1).
• Unscrew the door stop at the top (see chapter
A.2.3).
• Undo the 3 screws on the dispenser cover plate
(see chapter A.2.3)�.
• Remove the dispenser cover plate and turn up
the frame (2) (fig.
���������
2)�.
Fig. 2
5A-8
August 2009
Cafitesse 100 Next Generation
Functions - water system
• Undo the 2 screws on the front of the cooling
compartment (see chapter A.2.3)�.
4
5
• Tilt up the complete cooling compartment (����
see
chapter A.2.3��
).
• Extract the 2 bolts from the cavity on each side
of the inside wall and place it in the adjacent
hole to support the cooling compartment (����
see
chapter A.2.3��
).
• Pull the cable harness(es) heating elements
upwards to the boiler lid (fig. 1).
• Undo the 2 flat connectors of the temperature
sensor (see chapter 2.4).
4
• Remove the connector from the level sensor
(see chapter 2.4).
Disassembly of the boiler lid
• Undo the 4 screws (4) on the boiler lid (fig. 3).
Fig. 3
• Remove the hose clamp and undo the water
inlet hose (5) from the boiler lid (fig. 3).
• Unfix the 2 clamps on the boiler lid and remove
the boiler lid.
August 2009 5A-9
Cafitesse 100 Next Generation
Functions - water system
Disassembly of the heating element
• Undo nut (6), lock washer (7) and ground cable
(8) from the earthing sheet heating element (fig.
6).
6
7
8
• Undo the black cables from the plug with the
special tool (fig. 7).
6
7
• Remove the heating element (9) and pull the
black cables (10) through the boiler lid (11) (fig.
8).
On assembly, note the following:
Make sure that you do not forget to install the tube
washed (12) with the expansion pipe (fig. 8).
Fig. 6
Hook the dispenser cover plate at the rear into the
corresponding grip (see chapter A.2.3).
Note:
The reassembly is carried out in
reverse order.
Fig. 7
10
11
12
9
Fig. 8
5A-10
August 2009
Cafitesse 100 Next Generation
Functions - water system
A.2.6 Disassembly of the complete boiler
WARNING:
The water in the boiler is hot.
Beware of the risk of scalding.
Keep your hands and other
parts of your body away from
the hot water.
Note:
Due to the high temperatures
of the boiler‘s components, it is
advisable to allow the boiler to cool
down for several minutes or to rinse the boiler by refilling cold water
and draining it before commencing
any work.
• Disconnect the dispenser from the power supply
system and close the water tap.
• Remove the cuptray and the driptray and o����
pen
the dispenser door.
• Remove the product pack from the cooling compartment and store it in the refrigerator.
Only if you serve a cafitesse 110 NG dispenser:
• Unscrew the 2 releasable rivets on the cover
coolbox (see chapter A.2.2).
• Pull down the cover fluid treatment (see chapter
A.2.2).
• Undo 2 releasable rivets at the splash panel and
remove the overflow hose on the inside of the
splash panel (see chapter A.2.2)�.
• Remove the splash panel together with the cover
fluid treatment and drain the boiler (see chapter
A.2.2��
)�.
• Unscrew the door stop and undo the 3 screws
on the dispenser cover plate ������������������
(see chapter 2.3��
)�.
• Remove the dispenser cover plate (see chapter
2.3��
)�.
• Turn up the frame (�������������������
see chapter A.2.5��
).
• Undo the 2 screws on the cooling compartment
and �����������������������������������������
tilt up the complete cooling compartment
(�������������������
see chapter A.2.3��
)�.
• Undo the cable harnesses of the outlet valves at
the intermediate plugs and disconnect the outlet
hoses from the valves (see chapter 2.3).
• Undo the flat connectors from the overboil sensor (see chapter A.2.3).
August 2009 5A-11
Cafitesse 100 Next Generation
Functions - water system
• Remove the overflow hose (fig. 1).
• Disconnect the plugs (1 to 3) of the heating
elements from the power supply and pull the cables upwards out of the dispenser (see chapter
A.2.5).
• Undo the 2 flat connectors of the temperature
sensor and the cable connection of the level
sensor at the boiler lid (see chapter 2.4).
• Remove the water inlet hose and take the cable
harness boiler out of the clamp at the boiler lid
(see chapter A.2.5).
ATTENTION:
Take care not to damage the
silicone hose during the disassembly of the boiler.
Note:
Draw the hose out of the bottom
part of the machine so that it
doesn‘t get caught when lifting the
boiler out of the dispenser (fig. 2).
Fig. 1
• Pull the complete boiler together with the drain
tube upwards out of the housing and then place
it on a plane surface (fig. 3).
Note:
The reassembly is carried out in
reverse order.
Fig. 2
Fig. 3
5A-12
August 2009
Cafitesse 100 Next Generation
August 2009 Functions - water system
5A-13
Cafitesse 100 Next Generation
Functions - water system
A.3 Electric circuit diagrams
Fig. 1 Inlet
Fig. 2 Outlet
Fig. 2 Outlet
Fig. 3 Security
5A-14
August 2009
Cafitesse 100 Next Generation
C
Functions - dosing system
Dosing system
C.1 Adjustments
WHAT
HOW
Mixer time
Adjustment via software
Mixer delay
Adjustment via software
Test – dosing of drink or concentrate
Adjustment via software
Pause
Adjustment via software
Ratio
Adjustment via software
August 2009 5C-1
Cafitesse 100 Next Generation
Functions - dosing system
C.2 Disassemblies
C.2.1 Overview MAD foam unit
16
15
14
13
1
12
11
10
9
8
2
7
6
5
3
4
Legend:
1 MAD console
2 Cable haress mixer
3 Power Pack
4 Cable harn. MCB power pack
5 Main Control Board MCB
6 Cable harness MAD
5C-2
7 Front mixing bowl
8 Impeller
9 Rear mixing bowl incl hoses
10 Mixermotor
11 MAD valves
12 Mini switch ‚MAD in place‘
13 CAM shaft
14 Mini switch ‚front bowl‘
15 CAM shaft motor
16 Light barrier
August 2009
Cafitesse 100 Next Generation
Functions - dosing system
C.2.2 Overview cooling system
14
1
13
12
2
3
4
11
10
9
8
5
7
6
Legend:
1 Condenser grid
7 Main Control Board
13 Insulation cooling compartment
2 Compressor
8 Cable harness cooling comp. 14 Fixing parts cooling comp.
3 Cable harness compressor
9 Cooling plate with damping ring
4 Bottom insulation cooling comp 10 B2-coil
5 Power pack
11 Temperature sensor
6 Cable harn. MCB-power pack 12 Cooling compartment
August 2009 5C-3
Cafitesse 100 Next Generation
Functions - dosing system
C.2.3 Disassembly of the B2 coil
• Disconnect the dispenser from the power supply
system and close the water tap.
• Remove the cuptray and the driptray and o����
pen
the dispenser door.
• Remove the product pack from the cooling compartment and store it in the refrigerator.
Only if you serve a cafitesse 110 NG dispenser:
• Unscrew the 2 releasable rivets on the cover
coolbox (see chapter A.2.2).
• Pull down the cover fluid treatment (see chapter
A.2.2).
• Undo 2 releasable rivets at the splash panel and
remove the overflow hose on the inside of the
splash panel (see chapter A.2.2)�.
• Remove the splash panel together with the cover
fluid treatment �������������
(�������������������
see chapter A.2.2��
�������
)�.
• R���������������������������������������������
emove the dispenser cover plate (������������
see chapter
A.2.3)�.
• T���������������������������������������������
ilt up the complete cooling compartment (����
see
chapter A.2.3�����������
) (fig. 1).
Fig. 1
2
1
3
Fig. 2
• Undo the plastic screw with washer (1) (fig. 2).
• Pull off the insulation bottom (2) (fig. 2).
• Undo the fastening screw of the cooling plate
extension (3) underneath the cooling box (fig. 2).
B2 coil and empty detection
• Undo the cable harness B2 coil at the intermediate connector.
• Undo the 3 screws on the cooling plate (4) (fig.
3).
• Remove the cooling plate and push out the damping ring (5) if it is damaged (fig. 3).
4
5
Fig. 3
6
7
• Take off the complete B2 coil (6) including empty
detection (7) (fig. 4).
Fig. 4
5C-4
August 2009
Cafitesse 100 Next Generation
Functions - dosing system
Temperature sensor
• Undo the cable harness temperature sensor at
the intermediate connector.
• Draw off the temperature sensor (8) on the left
side below the coil (fig. 5).
Note:
The reassembly is carried out in
reverse order.
On assembly, note the following:
Hook the dispenser cover plate at the rear into the
corresponding grip (�������������������
see chapter A.2.3)�.
Take care to insert the damping ring before assembling.
August 2009 8
Fig. 5
5C-5
Cafitesse 100 Next Generation
Functions - dosing system
C.2.3 Disassembly of the mixing unit (only for Cafitesse 120 NG)
• Disconnect the dispenser from the power supply
system and close the water tap.
1
• Remove the cuptray and the driptray and o����
pen
the dispenser door.
• Remove the product pack from the cooling compartment and store it in the refrigerator.
• Pull down the cover fluid treatment (see chapter
A.2.2).
The cafitesse NG 120 is not
equipped with a cover coolbox.
Note:
Fig. 1
• Undo 2 releasable rivets at the splash panel and
remove the overflow hose on the inside of the
splash panel (see chapter A.2.2)�.
• Remove the splash panel together with the cover
fluid treatment �������������
(�������������������
see chapter A.2.2��
�������
)�.
• Pull the locking device (1) to release the complete mixing console (fig. 1).
2
Fig. 2
• Rotate the mixing bowl (2) counterclockwise to
release it and remove it with the sealing ring
(fig. 2).
3
4
• Undo the 2 screws (3) at the mixing cover console (4) and remove the cover console. (fig. 3).
• Remove the outlet hose (5) on the right side and
the 2 outlet hoses (6) on the left side (fig. 3)
• Press the switch (7) on the right side to unhook
the mixing unit and take it out (fig. 4).
• Use a screwdriver to unhook the mixing console
at the snap-fits (8) on both sides and pull the
mixing console out of the guide rails (fig. 4).
• Undo the cable harness from the from the connector (9) and the cable harness from the micro
switch (10) (fig. 5).
9
5
6
Fig. 3
7
10
8
Fig. 5
5C-6
Fig. 4
August 2009
Cafitesse 100 Next Generation
Functions - dosing system
Disassembly of the gear motor
• Loosen the clamps at the CAM support (11) and
take off the CAM support together with the gear
motor (12) (fig. 6).
12
• Pull off the counter bearing (13) and the light
barrier (14) (fig. 6).
• Remove the CAM shaft (14) (fig. 7).
11
• Pull off the submini switch (16) (fig. 7).
13
• Undo the plug by pressing the snap-fits (17) (fig.
7).
• Undo the 3 screws (19) on the CAM support (20)
and remove the gear motor (18) (fig. 7).
On assembly, note the following:
Attend to the flat at the CAM for correct positioning.
21
22
Disassembly of the valve unit
• Push the 2 snap-fits (22) together to release the
valve unit (21) and than take it out upwards (fig.
6).
23
• Pull off the membranes (25), tappet rods (23)
and springs (24) come undone for the respective
valve (fig. 6).
On assembly, note the following:
Do not forget the springs when you reintegrate the
valves.
24
25
Fig. 6
17
16
14
15
18
19
20
Fig. 7
August 2009 5C-7
Cafitesse 100 Next Generation
Functions - dosing system
Disassembly of the valve seal and impeller
• Use a screwdriver to loosen the 5 dump bells
(26) from the valve seat (27) and remove the
seat (fig. 8).
27
• Remove the sealing (28).
26
• Use a screwdriver to undo the impeller (29)
through the bottom opening of the rear mixing
bowl (30) (fig. 9).
28
Disassembly of the mixing unit motor
• Unhook the snap-fit (31) of the mixer motor
mounting flange �����������
(fig. 10)��.
• Turn the mixer motor (32) counterclockwise and
take it off from the rear mixing bowl (fig. 10).
• Undo the 3 screws (33) and remove the mixer
motor (fig. 11).
• Push the mixing unit motor seal (34) through the
rear mixing bowl (fig. 11).
Note:
Fig. 8
The reassembly is carried out in
reverse order.
29
30
Fig. 9
31
32
33
34
Fig. 11
5C-8
Fig. 10
August 2009
Cafitesse 100 Next Generation
Functions - dosing system
C.3 Electric circuit diagrams
Fig. 1 MAD foam
Fig. 2 Cooling system
August 2009 5C-9
Cafitesse 100 Next Generation
5C-10
Functions - dosing system
August 2009
Cafitesse 100 Next Generation
G
Functions - housing
Housing
G.1 Adjustments
Not available here.
August 2009 5G-1
Cafitesse 100 Next Generation
G.2 Disassemblies
Functions - housing
G.2.1 Overview door and USB connector
15
14
13
1
2
3
4
5
12
11
6
7
10
9
8
Legend:
1 Door inlay incl. insulation
2 User interface board
3 Flat band cable harness
4 Push button board
5 Icon display
6 Cable harness door
5G-2
7 Main control board
13 Door button
8 Cable harness USB connector 14 Door snap
9 Push button
15 Actuator ‚Error Clear‘ switch
10 STOP button
11 Preselection button
12 Lock incl. key
August 2009
Cafitesse 100 Next Generation
Functions - housing
G.2.2 Disassembly of the dispenser door including circuit board
• Disconnect the dispenser from the power supply
system and close the water tap.
• Remove the cuptray and the driptray and o����
pen
the dispenser door.
• Undo 2 releasable rivets at the splash panel and
remove the overflow hose on the inside of the
splash panel (see chapter A.2.2)�.
• Remove the splash panel together with the cover
fluid treatment �������������
(�������������������
see chapter A.2.2��
�������
)�.
• Unscrew the door stop on the top and remove
the cover plate of the dispenser (see chapter
A.2.3)
• T���������������������������������������������
ilt up the complete cooling compartment (����
see
chapter A.2.3��
).
1
2
3
• Push the nozzle (2) through the hole (3) (fig. 1).
• Unplug the cable harness door from the main
control board (4) and pull it through the hole (fig
1).
4
Fig. 1
• Undo 4 screws (1) and pull the door out of the
hinges (fig. 1).
• Remove the door and put it on a soft mat to
avoid scratches.
• The reassembly is carried out in reverse order.
Disassembly of the circuit boards
ATTENTION:
During the replacement of the
circuit boards always work with
ESD-protection (e. g. use an ESD
wristband), in order to prevent
damage to the PC boards and their
components due to electric charge.
Fig. 2
5
• Undo 7 screws on the door and remove the door
inlay. (fig. 2)
6
• Undo 2 screws (5) of the user interface board (6)
(fig. 3).
• Undo the 2 flat strip cables (7) (fig. 3).
• Undo the foil cable (8) and take off the user
interface board (fig. 3).
8
7
Fig. 3
August 2009 5G-3
Cafitesse 100 Next Generation
Functions - housing
• Undo the power cable and the data cable (9) (fig.
4).
• Take the icon display (10) and 2 push button
panels (11) out of the snap-fits (fig. 4).
Note:
9
10
The reassembly is carried out in
reverse order.
11
On assembly, note the following:
Please note that the slots on the push button
panels are arranged on the top left.
Fig. 4
5G-4
August 2009
Cafitesse 100 Next Generation
K
Functions - power supply and control system
Power supply unit and control system
K.1 Adjustments
WHAT
HOW
Heating capacity
- via change over switch on the power pack or
- via contact bridges inside the power pack or
- heating capacity not adjustable
depending on the dispenser type - see chapter 2. ‚Installation‘
August 2009 5K-1
Cafitesse 100 Next Generation
Functions - power supply and control system
K.2 Disassemblies
K.2.1 Overview
5K-2
August 2009
Cafitesse 100 Next Generation
Functions - power supply and control system
K.2.2 Disassembly of the power pack including mains plug and circuit board
ATTENTION:
During the replacement of the
circuit boards always work with
ESD-protection (e. g. use an ESD
wristband), in order to prevent
damage to the PC boards and their
components due to electric charge.
• Disconnect the dispenser from the power supply
system and close the water tap.
1
2
• Remove the cuptray and the driptray and o����
pen
the dispenser door.
• Remove the product pack from the cooling compartment and store it in the refrigerator.
Only if you serve a cafitesse 110 NG dispenser:
• Unscrew the 2 releasable rivets on the cover
coolbox (see chapter A.2.2).
Fig. 1
• Pull down the cover fluid treatment (see chapter
A.2.2).
• Undo 2 releasable rivets at the splash panel and
remove the overflow hose on the inside of the
splash panel (see chapter A.2.2)�.
• Remove the splash panel together with the cover
fluid treatment �������������
(�������������������
see chapter A.2.2��
�������
)�.
3
4
Disassembly of the power pack
• Undo the 2 screws on the rear cover (1) of the
dispenser and remove the rear cover (fig. 1).
• Undo the nozzle (2) and pull the plug through the
rear cover (fig. 1).
• Undo all plugs on the front of the power pack (3)
(fig. 2).
• Unlock the snap lock (4) from the power pack
(fig. 2).
Fig. 2
• Lift the power pack and pull it out from the dispenser (fig. 2).
On assembly, note the following:
All plugs are coded and have to be positioned
correctly into the connectors of the power pack.
August 2009 5K-3
Cafitesse 100 Next Generation
Functions - power supply and control system
Disassembly of the mains plug
• Unfix the 2 clamps on the front and at the rear of
the power pack and tilt up the lid (fig 3).
USA/1 phase
Note:
On assembly, make sure that the
main cable is placed correctly
in the same position and that all
plugs are positioned correctly into
the connectors of the board.
• Remove the grey wire (6) and the black wire (5)
out of the WAGO clamps (fig. 4).
• Unscrew the wire earthing (7) (fig. 4)
Fig. 3
• Pull off the mains cable.
The assembly procedure is carried out in the reverse order of steps.
On assembly, note the following:
Make sure to insert the strain-relief.
Note:
It is possible to retrofit the USA
1-phase power pack into a USA
2-phase power pack. This kind of
modification must be done by an
approved UL-workshop.
EUR/3 phase
Note:
On assembly, make sure that the
main cable is placed correctly
in the same position and that all
plugs are positioned correctly into
the connectors of the board.
Fig. 4
7
6
5
Fig. 4
• Undo 5 cable connections from the mains cable
(green, blue, red, white and black) (fig. 5)
• Pull off the mains cable.
• The assembly procedure is carried out in the
reverse order of steps.
EUR/1 phase
Note:
On assembly, make sure that the
main cable is placed correctly
in the same position and that all
plugs are positioned correctly into
the connectors of the board.
Fig. 5
• Undo 3 cable connections from the mains cable
(blue, green, brown) (fig. 6)
• Pull off the mains cable.
Note:
5K-4
The reassembly is carried out in
reverse order.
August 2009
Cafitesse 100 Next Generation
Functions - power supply and control system
Disassembly of the switch mode power pack
ATTENTION:
During the replacement of the
circuit boards always work with
ESD-protection (e. g. use an ESD
wristband), in order to prevent
damage to the PC boards and their
components due to electric charge.
• Undo 1 screw on the side of the switch mode
power pack (fig. 7).
• Remove the switch mode power pack together
with the cooler sheet.
Fig. 6
• Undo the connector (8) of the switch mode power pack. (fig 8).
• Undo the 2 screws (9) and remove the SMPP
board from the spacers (fig. 7).
Disassembly of the multi relais board
• Pull the multi relais board out off the spacers (fig.
9).
• Undo the connector of the multi relais board.
9
Fig. 7
8
Fig. 8
Fig. 9
August 2009 5K-5
Cafitesse 100 Next Generation
Functions - power supply and control system
K.2.3 Disassembly of the main control board
ATTENTION:
During the replacement of the
circuit boards always work with
ESD-protection (e. g. use an ESD
wristband), in order to prevent
damage to the PC boards and their
components due to electric charge.
1
2
• Disconnect the dispenser from the power supply
system and close the water tap.
3
• Remove the cuptray and the driptray and o����
pen
the dispenser door.
• Remove the product pack from the cooling compartment and store it in the refrigerator.
Only if you serve a cafitesse 110 NG dispenser:
• Unscrew the 2 releasable rivets on the cover
coolbox (see chapter A.2.2).
• Pull down the cover fluid treatment (see chapter
A.2.2).
Fig. 1
• Undo 2 releasable rivets at the splash panel and
remove the overflow hose on the inside of the
splash panel (see chapter A.2.2)�.
• Remove the splash panel together with the cover
fluid treatment �������������
(�������������������
see chapter A.2.2��
�������
)�.
Disassembly of the main control board
• If necessary, remove the power pack from the
dispenser (see chapter K.2.2).
• Pull off all the plugs from the main control board
(2) (fig. 1).
Note:
When dissassembling the USB
plug watch to the arrangement of
the USB poles�.
• Undo the USB (3) plug (fig. 1).
Fig. 2
• Unlock the snap lock (1) from the main control
board cover and take the board with cover out of
the dispenser (fig. 1).
Note:
Make a note of the correct position
of the main control board.
• Undo 4 screws and take off the board from the
cover and put it on protective surface against
electrostatic charge (fig. 2).
Note:
5K-6
The reassembly is carried out in
reverse order.
On assembly, note the following:
Make sure to fix the main control board back onto
the cover in the correct position.
August 2009