1
Ta’b1.eof Cont’ents
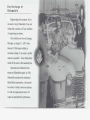
The Heritage of Oldsmo’bile.
8 Customer
Assistance
Information
. .
. ,,
. .
. 251
Includes “Reporting SafetyDeficts” on page 254.
9 Index.
. . . . . .. . . . . . . . 263
Service StationInformation
1 9 94
CUTLASSSUP.REME
O W N E R ’ S
MANUAL
First Edition
. . . . .
L
i
Last Page
Important Notes
About this Manual
Please keepthis
Note to Canadian
Owners
For vehicles first sold in
For Canadian Owners
Who Prefer a French
language Manual
manual in your
Oldsmobile, so it will be
there if you everneed it
when you’re on the
road. If you sell the
vehicle, please leave this
manual in it so the new
owner can use it.
Canada, substitute the
name “GeneralMotors
of Canada Limited for
Oldsmobile Division
whenever it appears in
this manual.
Aux proprietaires
canadiens: Vous
This manual includes
the latest informationat
the time it was printed.
We reserve the right to
make changesin the
product after that time
without further notice.
pouvez vous procurer
m exemplaire de ce
guide en francaischez
votre concessionaire ou
au DGN Marketing
Services Ltd., 1500
BonhiU Rd., Mississauga,
Ontario L5T 1C 7.
Published by
Oldsmobile Division
General Motors Corporation
920 Townsend Street
Lansing, Michigan 48921
The wordOldsmobik and the
Oldsmobile rocket emblem
are registered trademarksof
General Motors Corporation.
The wordDelco is a
registered trademarkof
General Motors Corporation.
0 Copyright 1993 General MotorsCorporation, Oldsmobile Division. All rights reserved.Printed in USA.
.:
p;
T h eS e c u r i t y o f
Owner Satisfaction
The quality we built into your new
3. Oldsmobile gives us the confidence to
J. D. Rock
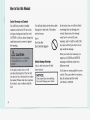
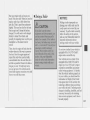
How to Use this Manual
MANY PEOPLE READ THEIR OWNJ3R’S
manual from beginningto end when
they firstreceive their new vehicle.
This will help you learn about the
features and controls for your
vehicle.
In this manual, you’ll find that
pictures and words work together
to explainthings quickly.
There are nine parts with thumbtabbed pages in this manual.
Each part beginswith a brief list of
contents,.so you can usually tell at a
glance if that part contains the
information you want.
You can bend themanuaI slightly to
reveal thetabs thathelp you find a
part.
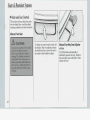
Part 1: Seats & Restraint Systems
This part tells you how to use your
seats andsafety belts properly.
Part 2: Features & Controls
T h s part explains how to start and
operate yourOldsmobile.
Part 3: Comfort Controls & Audio Systems
This part tells you how to adjust the
ventilation and comfort controls and
how to operate your audio system.
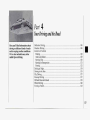
Part 4: Your Driving and the Road
Here you’ll find helpful information
and. tips about the road
and how to
drive under different conditions.
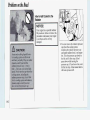
Part 5: Problems on the Road
This part tells you what to do if you
have a problem while driving, such as
a flat tire or engine overheating.
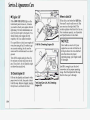
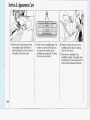
Part 6: Service & Appearance Care
Here the manual tells
you how to keep
your Oldsmobile running properly and
looking good.
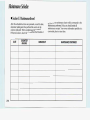
Part 7: Maintenance Schedule
This part tells you when to perform
vehicle maintenance and whatfluids
and lubricantsto use.
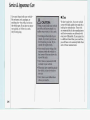
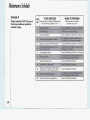
Part 8: Customer Assistance Information
This part includes important
information about reporting safety
defects and gives you details about
the “Roadside Assistance” program.
You will also findcustomer
satisfaction phone numbers
(including customer satisfaction
numbers for the hearing and speech
impaired) as well as the mediation/
arbitration procedure.We’ve also
included ordering information for
service publications in this part.
Part 9: Index
Here’s an alphabetical listing
of
almost every subjectin this manual.
You can use it to quickly find
something you want to read.
Service Station Information:
This is a quick referenceof service
information. You can find it on the
last pageof this manual.
7
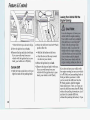
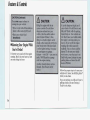
How to Use this Manual
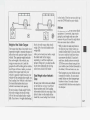
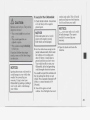
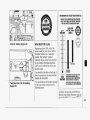
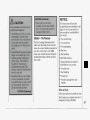
Safety Warnings and Symbols
You wdl find a number of safety
cautions int h s book. We use a box
You will also fiid a circle witha slash
through it in this book. This safety
symbol means:
with gray backgroundand theword
CAUTION to tell you about things that Don’t
could hurtyou if you were toignore
Don’t do this
the warning.
Don’t /etthis happen
8
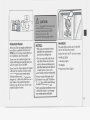
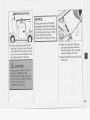
Wehide Damage Warnings
Also, in this book you will find
r
these notices:
In the gray caution area,
we tell
you what the hazardis. Then we tell
you what to do to help avoid or reduce NOTICE:
These mean there is something
the hazard. Please read these cautions. that could damageyour vehicle.
If you don’t, you or others could be
hurt.
~~
8
In the notice area, we tell you about
something that can damage your
vehicle. Many times, this damage
would not be coveredby your
warranty, andit could be costly. But
the notice will tell you what to do to
help avoid the damage.
When you read other manuals,you
might see CAUTION and NOTICE
warnings indifferent colors or in
different words.
You’ll also see warning labelson your
vehicle. They use yellow for cautions,
blue for notices and the words
CAUTION or NOTICE.
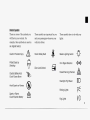
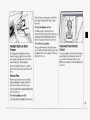
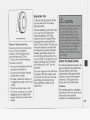
Wehicle Symbols
These are someof the symbolsyou
will find on your vehicle.For
on
example, these symbols are used
an original battery:
Caution Possible Injury
A
Protect Eyes by
Shielding
Spark or Flame
Could Explode Battery
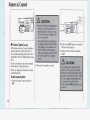
These symbols haveto do with your
lights:
Fasten SafetyBelts
Master Lighting Switch
Door LocklUnlock
Caustic BatteryAcid
Could Cause Burns
Avoid Sparks or Flames
These symbols are importantfor you
and your passengers whenever your
vehicle is driven:
8
a
Turn SignalDirection
HazardWarningFlashers
A
Headlight High Beam
Parking Lights
Fog Lights
$0
9
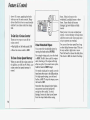
How to Use this Manual
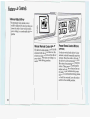
These symbols areon some of your
controls:
These symbolsare used onwarning
and indicator lights:
Here are some other symbols
you
may see:
Windshield Wipers
Engine Coolant
Temperature
Fuse
Windshield Washer
w
Battery Charging
System
Lighter
Windshield Defroster
Fuel
Rear Window Defogger
Ventilating Fan
Power Window
10
Trunk or LiftgateRelease
3f
Engine Oil Pressure
Anti-Lock Brakes
I
n
Horn
Speaker
Hood Release
1+1
e
#
I
Part
!
~
I
Seats & Restraint Systems
Seats andSeat Controls
This section tells you about the seatshow to adjust them-and also about
reclining seatbacltsand head restraints.
1
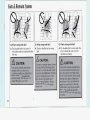
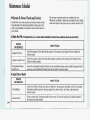
Manual Front Seat
To adjust the seat forward or back, lift
the handle. After it’s adjusted, release
the handle and try to move the seat to
be certain it has locked into place.
12
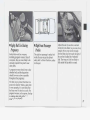
Manual Four-Way Seat Adjuster
(OPTION)
To tilt the whole seat forward or
backward, squeeze the lever. Position
the seat where you would like it, then
release the lever.
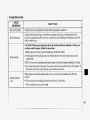
Reclining Front Seatback
Lift the lever to release the seatback,
then tilt the seatback forward or
backward, as desired. Release the lever
to lock the seatback in place.
But don'thave a seatback reclined if
your vehicle is moving.
14
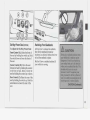
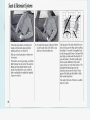
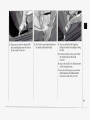
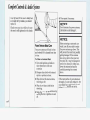
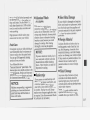
Head Restraints
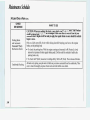
Seatback Latches
Slide the head restraint up or down so
that the topof the restraint is closest to
the topof your ears.
This position reduces the chance of a
neck injuryin a crash.
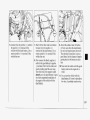
In 2-door Oldsmobiles,the frontseat
folds forwardto let people getinto the
back seat.
Your seatback will moveback and forth
freely, unless you come to a sudden
stop. Then it will lock in place.
There’s one time the seatback may not
fold without some helpfrom you. That’s
if your vehicleis parked facing downa
fairly steep hill.
To folda seatback forward, push the
seatback toward the rear as you lift this
latch. Then the seatback will fold
forward. Thelatch must be downfor
the seat to work properly.
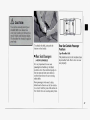
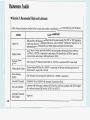
And it explains the Suppleniental
Matable,'Restraint,2of "air bag'' system.
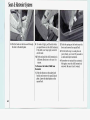
.Seats& Restraint Systems
.I
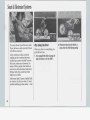
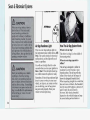
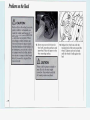
You never know if you’ll be ina crash.
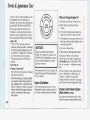
Why Safety Belts,Work
If you do have a crash, you don’t lmow
When you ride in or on anything, you
if it will be a bad one.
go as fast as it goes.
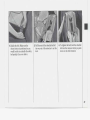
A few crashes are mild, and some
1. For example, if the bikeis going 10
crashes can be so serious that even
mph (16 km/h), so is the child.
bucklkd up a person wouldn’t survive.
But most crashes are inbetween. In
many of them, people who buckle up
can survive and-sometimes walk away.
Without belts they could have been
badly hurt or lulled.
After more than 25 years of safety belts
in vehicles,the facts are clear. In most
crashes buckling up does matter... a lot!
2. When the bike hits the block, it
stops. But the child keeps going!
I
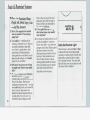
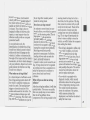
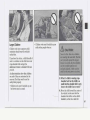
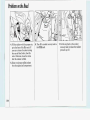
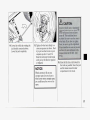
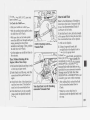
3. Take the simplest vehicle. -Sappose 4. Put someone on it.
it’s jasta seat- on- wheels.
5..Get it up to speed. ,Then
stop the
vehicle. The rider doesn’t.stop.
I
...
6. The person keeps going-until stopped7. or the instrument panel
by something.
Irm a rea! vehicle, it could be the
windshield...
8. or the safety belts;:
With safety belts, you slow down as the
vehicle dogs.You get more time tostop.
You stop over more distance, and your
strongest bones take theforces. That’s
why safety belts make such good sense.
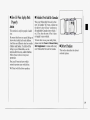
Seats & Restraint Systems
have to buckle up toget the most
protection. That’s true not only in
frontal collisions, but especially in
side and other collisions.
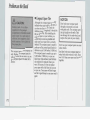
Q: If I’m a good driver, and I never
drive farfrom home, why shouldI
wear safety belts?
A: You may be an excellent driver,but if
you’re in an accident - even one
that isn’t yourfault -you and your
passengers can be hurt. Being a good
driver doesn’t protect you from
things beyond your control, such as
bad drivers. Mostaccidents occur
within 25 miles (40 lun) of home.
And the greatest number of serious
injuries and deaths occur at speeds
of less than 40 mph (65 lun/h).
Safety belts are for everyone.
18
FASTEN )i
BELTS
*-
Safety Belt Reminder Light
When the key is turned to Run or Start,
a chime will comeon for about eight
seconds to remind people to fasten their
safety belts, unless the driver’s safety
belt is already buckled. The safety
belt
light will also comeon and stay on until
the driver’s beltis buckled.
IHow
To Wear Safety Belts
Properly
Adults
This section is onlyfor people of adult
size.
Be aware that there are special things to
know about safety belts and children.
And there aredifferent rules for smaller
children and babies. If a child will be
riding in your Oldsmobile, see the
section after this one, called ChiZdren.
Follow those rules for everyone’s
protection.
First, you’ll want toknow which
restraint systems your vehiclehas.
We’ll start with the driver position.
Khicles First .SoldIn Canada
Was your Oldsmobilefirst sold, when
new, in Canada? (If it was, a sticker on
the driver’s door will say “conforms to
all applicableCanada motor vehicle...”
etc.) If so, then therest of Part 1does
not apply to your vehicle.
To learn how to use your safety belts,
please read the Owner’s Manual Safety
Belt Supplement.It comes with every
I
new Oldsmobile first soldin Canada.
This section describes the driver’s
restraint system.
Driver Position
19
Seats & Resbaint Systems
Automatic Lap-ShoukkrBelt
This safety Belt is called “automatic”
because you don’t have to buckle up
when you get into.yourvehicle.
And yuu don’t haveto ubuclde when
you get out.
Just get into your vehicle.‘Then close
and lock the door. Adjust the seat (to
see how, see Seat Controls in the
Index) so you can sit up straight.
[t’spossible that an auto-mticbelt
muld keep.you from fully opening a
door. That can happienif the doorw-as
slammed shut very h a d , Just close the
ioor all the way, then slowly open it. If
I
that doesn’t fix it, thenyour Oldsmobile
needs service.
We hope you’ll alwayskeep your
automatic belt buckled. However, you
may need to unbuckle it in an
emergency. And you would need to
unbuckle it to let someone get into the
center front seatposition, if your
vehicle has one.
I
I
I
To unbuckle the automaticb.elt, just
push the button on the
buckle.
To reattach the automaticbelt:
1. Close and lock the door.
2. Adjust the seat (to see how, see Seat
Controls in theIndex) so you can sit
up straight.
3.Pick up the latchplate and pull the
belt across you. Don’t let it get
twisted.
4.Push the latch plate into thebuclde
until it clicks. Pullup on thelatch
plate to make sure it is secure.
21
Seats & Restraint Systems
3
-/
i
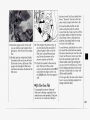
Q: What’s wrong with this?
A: The shoulder belt is too loose. It
won’t give nearly as much protection
this way.
22
Q: What’s wrong with this?
Q: What’s wrong withthis?
A: The belt is buckledin the wrong
A: The shoulder belt isworn under the
place.
arm. It should beworn over the
shoulder at all times.
1
1
1
1
1
1
1
1
1
1
1
1
3: What’s wrong with this?
9: The belt is twisted acrossthe body.
Supplemental Restraint
System (Air Bag)
This section explainsthe driver’s
Supplemental Restraint (SRS) system,
commonly referred to as an air bag.
Here are themost important things to
lalow:
23
L
Seats &Restraint Systems
I
I
I
24
AIRBAO
CHECK
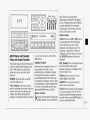
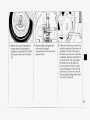
9ir Bag Readiness Light
How The Air Bag SystemWorks
rhere is an air bag readiness light on
;he instrument panel, which showsAIR
BAG. The system checks for electrical
nalfunctions, and thelight tells youif
;here is a problem.
fou will seethis light flash for a few
;econds when you turn your ignitionto
Run or Start. Then the light should go
)ut, which means the system is ready.
Xemember, if the air bag readiness light
ioesn’t come on when you start your
rehicle, or stayson, or comes on when
~ O Uare driving, yourair bag system
nay not work properly. Have your
rehicle serviced right away.
Where is the air bag?
The driver’s air bag is in the middle of
the steering wheel.
When is an air bag expected to
inflate?
The air bag is designedto inflate in
moderate to severe frontal or nearfrontal crashes. The air bag will only
inflate if the velocity of the impact is
above the designed threshold level.
When impacting straight into a wallthat
does not move or deform,the threshold
level for most GM vehicles is between 9
and 15 mph (14 and 23 ltrn/h).
However, this velocity threshold
depends on the vehicle design and may
be several miles-per-hourfaster or
L
Seats & Restraint Svsterns
Let only qualified technicians work
on your air bag system. Improper
service can mean that your air bag
system won’twork properly. See your
dealer for service.
NOTICE:
If you damage the cover forthe
driver’s air bag, it may not work
properly. You may have to replace
the air bag on thesteering wheel.
Do not open or break the air bag
cover.
26
Is the smoke from an air bag inflation
harmful?
The particles emitted during air bag
inflation are not harmful to most
people. Some peoplewith respiratory
ailments may experience difficulty
breathing if they stayin the vehicle with
the windows closed afterair bag
inflation. So, if your air bag inflates, you
and any passengersshould exit the
vehicle if and when it is safeto do so. If
you or your passengerscan’t get out of
the vehicle, try to get freshair by
opening a window, turning on the fan,
or opening a door.
Servicing Your Air Bag-Equipped
Oldsmobile
The air bag affects how your
Oldsmobile should be serviced.There
are parts of the air bag systemin several
places around your vehicle.You don’t
want the system to inflate while
someone is working on your vehicle.
Your Oldsmobile dealerand the 1994
Cutlass Supreme Service Manual have
information about servicing your
vehicle and the air bag system.The air
bag system doesnot need regular
maintenance.
I
Right FrontPasertger
Position
The right front passenger’s safetybelt
works the same way,% thedriver’s
safety belt. See Driver Position, earlier
.n this part.
how, see Seat
Adjust the seat (to see
Controls .in the Index) so you can situp
straight. Move yourseat far enough
forward that your feet touch the part of
the car thatis called the “toeboard”
(A). That,wayyou’d be less likely
to
slide u:nder the lap belt in a crash.
Seats & Restraint Systems
Center Passenger Position
lap Belt
[f your vehiclehas a bench seat,
someone can sitin the center position.
When you sit in a center seating
position, you have a lap safety belt,
which has no retractor.
28
To make the belt longer, tiltthe latch
plate and pullit along the belt.
To make the belt shorter, pull its free
end as shown until the belt is snug.
Buckle, positionand release it the same
way as thelap part of a lap-shoulder
belt. If the belt isn’t longenough, see
Safety Belt Extender at theend of this
section.
Make sure therelease button on the
buckle is positionedso you would be
able to unbuckle the safety belt quickly
if you everhad to.
Rear Seat Passengers
(2-DOOR OLDSMOBILES)
It’s very important for rear seat
passengers to buckle up! Accident
statistics show that unbelted people in
the rear seat are hurt more often in
crashes than those who are wearing
safety belts.
Rear passengerswho aren’t safety
belted can be thrown outof the vehicle
in a crash. And they can strike others in
the vehicle who are wearing safety belts.
Rear Seat Outside Passenger
Posifions
Lap-Shoulder Belt
The positions next to thewindows have
lap-shoulder belts. Here’s how to wear
one properlv.
. Pick up
thelatch plate and pull the
belt across you. Don’t let it get
twisted.
I. Push thelatch plate into thebuckle
until it clicks.
29
If the belt stops beforeit reaches the
buckle, tilt the latch plate and keep
pulling until you can buckle it.
Pull up on thelatch plate to make sure
it is secure.
If the belt isnot long enough, seeSafety
Belt Extender at theend of this section.
Make sure the release button on the
buckle is positionedso you would be
able to unbuckle the safety belt quickly
if you ever hadto.
3. To makethe lap part tight, pull down The lap partof the belt should beworn
low and snug on thehips, just touching
on thebuckle end of the belt as you
the
thighs. In a crash, this applies force
pull up on the shoulder part.
to thestrong pelvic bones. And you’d be
less likely to slide underthe lap belt. If
you slid under it, thebelt would apply
force at your abdomen. This could
cause serious or even fatal injuries. The
shoulder belt shouldgo overthe
shoulder and across the chest. These
parts of the body are best ableto take
belt restraining forces.
The safety belt locksif there’s asudden
stop or a crash.
I
1
To unlatch the belt, just push the
button on thebuckle.
4.RearSeat Passengers
(4-DOOR OLDSMOBILES)
It’s very important for rear seat
passengers to buckle up! Accident
statistics show that unbelted people in
the rear seat are hurtmore often in
crashes than thosewho are wearing
safety belts.
Rear passengers who aren’t safety
belted can be thrown outof the vehicle
in a crash. And they can strike others in
the vehicle who are wearing safety belts.
Pear Seat Outside Passenger
Dositions
Lap-Shoulder Belt
The positions next to thewindows have
ap-shoulder belts. Here’s how to wear
me properly.
31
Seats & Restraint Systems
1. Pick up the latch plate and pull the
belt across you. Don’t let
it get
twisted.
2. Push the latch plate into the buckle
until it clicks. Pullup on thelatch
plate to make sure it is secure. When
the shoulder belt is pulledout all the
way, it will lock. If it does, let it go
back all the way and startagain.
If the belt is not long enough, see Safety
BeZt Extender at theend of this section.
Make sure the release button onthe
buckle is positioned so you would be
able to unbuckle the safety belt quickly
if you ever hadto.
32
I
3.To make the lap part tight, pull down
on thebuckle end of the belt as you
pull up on theshoulder part.
The lap part of the belt should beworn
ow and snug on thehips, just touching
:he thighs. In a crash, this applies force
:o the strong pelvic bones. And you’d be
ess likelyto slide under the lap belt. If
JOU slid under it, thebelt would apply
iorce at your abdomen. This could cause
;erious or even fatal injuries.The
;houlder belt shouldgo over the
;houlder and across the chest. These
?arts of the body are best ableto take
lelt restraining forces.
The safety belt locksif there’s a sudden
;top or a crash.
To unlatch the belt, just push the button
on the buckle.
Seats & Restraint Systems
2. Slide the guide under andpast the
belt. The elastic cord must be under
the belt. Then, place the guide over
the belt, and insert the two edges of
the belt into the slots of the guide.
3.Be sure that thebelt is not twisted
and it lies flat.The elastic cord must
be under the belt and theguide on
top.
4. Buckle the belt around thechild, and
make sure thatboth the lap belt and
the shoulder belt are secured
properly. Makesure that theshoulder
belt crosses the shoulder. See Safety
Belts, Rear Seat Passengersin the
Index.
To remove and store thecomfort
guides, just perform these steps in
reverse order. Squeeze the belt edges
together so you can take them out from
the guides. Pullthe guide upward to
expose its storage clip,and then slide
the guide onto theclip. Rotate the guide
and clip inwardand in betweenthe
seatback and theinterior body, leaving
only the loop of elastic cordexposed.
34
-
Smaller Children and Babies
Children
Everyone in a vehicle needsprotection!
That includes infants .and all children
smaller than adult size. In fact, the law
in every state in the United States and
in every Canadian province says
children up to some agemust be
restrained while in a vehicle.
35
Seats & Restmint Systems
Where to Put the Restraint
Child Restraints
Be sure.to follow.the instructionsfor
the restraint.You may find these
instructions on the restraintitself or in
a-booklet, 'or both. These restraints use
the belt system inyour vehicle,but the
child alsohas to be secured within.the
restraint tu help reduce the chance of
personal injury. The instructions that
come with the infant or child restraint
will show you howt o do that.
36
Accident .statistics show that children
are safer if they are restrained in the
rear rather than the front seat.
We at
General Motors therefore recommend
that you put your child restraint in the
rear seat unless the child is an infant
and you're the only adult in the vehicle.
In that case, you might want to secure
the restraint in the front seat
where you
can keep an eye on the baby.
Wherever you install it, be sure to
secure the child restraint properly.
Keep in mind that anunsecured child
restraint can'move around aincollision
or sudden stop and
.injurepeople inthe
vehicle. Be sure to properly secure any
child restraint in your vehicle- even
when no child is init.
Top Strap
If your child restraint has a top strap,it
should be anchored.
If you need to have an anchorinstalled,
you can ask your Oldsmobile dealerto
put it in foryou. If you want to install
an anchoryourself; your dealercan tell
you how to do it.
For cars first sold in Canada, child
restraints with a.top strapmust be
anchored according to Canadian Law.
Your dealercan obtain the hardware kit
and install it for you, or you may install
it yourself usingthe instructions
provided in thekit.
Use the tetherhardware kit available
from the dealer. The hardware and
installation instructions were
specifically designed forthis vehicle.
around therestraint. The child
restraint will show you how. Tilt the
latch plate to adjust the belt if
needed. If the shoulder belt goes in
front of the child’s faceor neck, put it
behind the child restraint.
Securing a Child Restraint ina
Rear Outside Position’- 2-Door
Oldstnobiles
4.Buckle the belt. Make sure the
release button is positioned so.you
would be able to unbuckle the safety
belt quickly if your ever hadto.
You’ll be using the lap-shoulder belt.
See the earlier section about the top
strap if the child restraint has one.
1. Put the restraint on theseat. Follow
the instructions for the child
restraint.
2. Secure the child in the child restrain1
as the instructionssay.
3. Pick up thelatch plate, and run the
lap andshoulder portions of the
vehicle’s safety beltthrough or
37
Seats & Restraint Systems
5. To tighten the belt, pull up on the
shoulder belt while youpush down
on thechild restraint.
38
6. Push and pull the child restraint in
different directionsto be sure it is
secure.
To remove the child restraint, just
unbuckle the vehicle’s safety belt and
let it go back all the way. The safety belt
will move freely againand be ready to
work for an adult or larger child
passenger.
Securing a Child Restraint in a
?ear Outside Position- 4-Door
lldsmobiles
(ou’11 be using the lap-shoulder belt.
See the earlier section about the top
‘trapif the child restraint has one.
I . Put the restraint on theseat. Follow
the instructions for thechild
restraint.
!. Secure the child in the child restraint
as the instructions say.
1. Pick up thelatch plate, and run the
lap and shoulder portions of the
vehicle’s safety beltthrough or
around therestraint. The child
restraint will show you how.
4.Buckle=the belt. Male sure the
release button is positioned so you
would be able to unbncklethesafety
belt quickly if you ever had to.
5. Pull 'the rest afthe-shoulder belt all
the way out of theretractor toset the
lock.
6. To tighten the-belt,feed the shoulder
belt into theretractor while youpush
down on the child restraint.
7. Push and pull the child restraint in
different directionsto be sure it is
secure.
To remove the child restraint, just
unbuckle the vehicle’s safety beltand
let it go back allthe way. The safety belt
will move freely again and be readyto
work foran,adult orlarger child
passenger.
40
Securing a Child Restraint inthe
Senter Rear Seat Position
1. Make the belt as long as possible by
tilting the latch plate and pulling it
along the belt.
Xhen you secure a childrestraint in a
:enter seating position, you’ll be using 2. Put therestraint on theseat. Follow
the instructions for the child
.he lap belt.
restraint.
See the earlier section about the top
3. Secure the child in the child restraint
;trap if the child restraint has one.
as theinstructions say.
4.Run the vehicle’s safety beltthrough
or around therestraint. The child
restraint instructions will show you
how.
7. Push and pull the child restraint in
5. Buckle the belt. Make sure the
release button is positioned so you
would be ableto unbuckle the safety
belt quickly if you ever hadto.
6. To tighten the belt, pull its free end
while you push down on thechild
restraint.
different directions.to be sure it is
secure. If the child restraint isn’t
secure, turn thelatch plate over an(d
buckle it again. Then see if it is
secure. If it isn’t, secure the restraint
in adifferent place inthe vehicle and
contact the child restraint maker for
their advice about how to attach the
child restraint properly.
To remove the child restraint, just
unbuckle the vehicle’s safetybelt. It will
be ready to work for an adult or larger
child passenger.
Securing a Child Restraint inthe
Right Front Seat
To use a child restraint here, you will
need a special infant/child seat
attaching belt and the hardware that
goes with it. See the earlier section
about the top strapif the child restraint
has one.
41
Your dealer can get these
and install the
hardware for you. It’s free. The special belt
is GM Part Number 12340286. Your
dealer can find
the correct hardwarein the
accessory sectionof the GM Parts Catalog.
Once the special hardware is installed,
please follow the instructions with it
and these steps:
1. Unbuckle the automatic lap-shoulder
belt by pushing the buttonon the
buckle.
It will stay on the door, ready to be
rebuckled for useby adults or older
children.
2. Snap one hook of the infant/child
seat attaching belt near the floor at
the door side of the seat.
3. Put the belt’s speciallatch plate into
the vehicle’s safety beltbuckle.
4. You can make the belt longerby
tilting the buckle and pulling it along
the belt.
5. Put the restraint on theseat. Follow
the instructions for the child
restraint.
6. Secure the child in the child restraint
as theinstructions say.
7. Run the belt through or around the
child restraint. The child restraint
instructions will show you how.
43
Seats & Restraint Systems
8. Put thehook on thefree end through
the slot in the latch plate.
1. To make it tight, pull the belt while
you push down on thechild restraint.
If the belt won’t stay tight, switch it
end for end.
IO. Push andpull the child restraint in
different directions to be sure it is
secure.
To Remove the Infant/Child Seat
testraint:
. Push the button on thesafety belt
buckle and remove the special latch
plate. Leavethe latch plate on the
special belt.
2. Push the spring on thehook near the
door and remove the special belt.
3. Put the belt away in a safe placein
your vehicle,so it won’t fly around in
a crash and injure someone.
4.Remember to reattach the automatic
belt again, once the child restraint is
removed. Be sure it isn’t twisted.
45
-
Wherever the child sits.,the lap -portion
of the belt should beworn low and snug
on the hips, just touching the child’s
thighs. This appliesbelt.force to the
child’s p e l ~ bones
c
in a crash. See Rear
SafetyBelt ComfortGuides in the Index.
you will needto have safety belt orseat
parts repaired or replaced. New parts
and repairs may be necessary evenif the
belt wasn’t being used at the time of the
collision.
Replacing Safety Belts After
a Crash
If you’ve had a crash, do you need new
belts?
After a very minor collision, nothing
may benecessary. But if the belts were
stretched, as they would be if worn
during a more severe crash, thenyou
need newbelts.
If you ever see a label on a right front
safety belt in 4-dOOr Oldsmobiles that
says to replace the belt, be sure todo so.
Then the new belt willbe there tohelp
protect you in an accident. You would
see this label on thebelt near the door
opening.
If belts are cut or damaged, replace
them. Collision damage also may mean
Q: What’s wrong with this?
A: The belt is torn.
Torn or frayed belts maynot protect you
in a crash. They can rip apart under
impact forces. If a belt istorn or frayed,
get a new one right away.
47
.
-
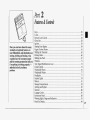
Part 2
Features & Controls
Here you can learn about the many
standard and optional features
on
your Oldsmobile. and information on
starting. shifting and braking.Also
explained are the instrument panel
and the warning systems thattell you
if everything is working properlyand what to doif you have a
problem.
Keys .................................................................................................... ......................... 50
Loclts ................................................................................................... ....... ................. 51
Remote LockControl ................................................................................................ 52
Glove Box.................................................................................................................. 58
Ignition ...................................................................................................................... 59
Starting Your Engine................................................................................................ 59
Engine Coolant Heater . . . . . . . . . . . . . . . . . . . . . . . . . . . . . . . . . . . . . . . . . . . . . . . . . . . . . . . . . . . . . . . . . . . . . . . . . . . . . . . . . . . . . . . . . . . . . . . 61
Shifting the Transaxle ............................................................................................... 62
Parking Brake ............................................................................................................ 66
Shifting into Park ...................................................................................................... 67
Windows .................................................................................................................... 71
72
Turn Signal/Multifunction Lever .............................................................................
Cruise Control ........................................................................................................... 74
Windshield Wipers.....................................................................................................
76
Windshield Washer ................................................................................................... 77
Headlights.................................................................................................................. 77
Interior Lights ........................................................................................................... 79
Mirrors ....................................................................................................................... 81
Storage Compartments ............................................................................................. 83
Ashtrays and Lighter ................................................................................................. 85
Sunroof ...................................................................................................................... 86
Luggage Carrier .......................................................................................................... 87
Instrument Panel ....................................................................................................... 88
Warning Lights, Gagesand Indicators ..................................................................... 91
Head-Up Display ....................................................................................................... 98
49
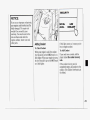
Keys
The ignition keys are for theignition
only.
When a new Oldsmobile is delivered,
the dealer removes the plugs from the
door keys, and gives them to thefirst
owner.
Each plug has a code on it that tells
your dealer ora qualified locltsmith
how to make extra door keys. Keepthe
plugs in a safe place.If you lose your
door keys, you’ll be ableto have new
ones made easily usingthese plugs.
The ignition keysdon’t have plugs.
Your Oldsmobile dealer or Roadside
Assistance has the code for your keys. If
you need a new ignition key,contact
your Oldsrnobile dealer. Inan
emergency, contact the Oldsmobile
Roadside Assistance program at
1-800-442-OLDS (6537).
NOTICE:
The door keys are for the doors and all
Ither loclts.
Your Oldsmobile hasa number of
new features that can help prevent
theft. But you can have a lot of
trouble getting into your vehicleif
you ever lock your keysinside. You
may even haveto damage your
vehicle to get in. So be sure you
have extra keys.
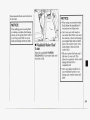
Door Locks
~~
~
~~
There areseveral ways to lock and
unlock-your -vehicle.
From the Outside:
Use your door key or Remote Lock
Control, if your vehiclehas this option.
From the Inside:
To lock the door, push dowmthe
locking lever.To tmlock, push th'elever
UP.
Features & Controls
Power Door Locks
You can lock or unlock alldoors of your
vehicle fromthe driver or passenger
door lock switch.
On 4-dOOr models, the switch on each
rear door works onlythat door’s lock. It
won’t lock (orunlock) all of the
doors-that’s a safetyfeature.
Leaving Your Vehicle
If you are leaving the vehicle, open your
door and set the locks from inside,then
get out and close the door.
Automatic Door Locks
Just close yourdoors and turn on the
ignition. All of the doors will lock when
you move your shift lever
out of P
(Park) or N (Neutral). Each time you
close yourdoors and turn on the
ignition, the doors will lock
automatically. If someone needsto get
out while the vehicle is running, have
that person use the manual or power
lock. Whenthe door is closed again, it
will lock automaticallyas long as the
shift lever isout of P (Park) or N
(Neutral). All doors will automatically
unlock whenthe ignition is turned off.
If you don’t want thedoors to
automatically unlock when youturn the
ignition off, youcan remove the Lock
Control fuse in theComponent Center.
See the Index under Fuses G Circuit
Breakers .
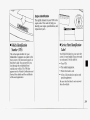
Remote Lock Conlrol (OPTION)
If your Oldsmobilehas this option, you
can lockand unlock your doorsor
unlock yourtrunk from up to 30 feet
(9 m) away usingthe key chain
transmitter supplied with your vehicle.
Your Remote Lock Control operateson
a radio frequency subject
to Federal
Communications Commission (FCC)
Rules.
This device complies withPart 15 of the
FCC Rules. Operation is subject to.
the
following two conditions: (1)Thi.s
device may not cause harmful
interference, and (2) This device must
accept any interference received,
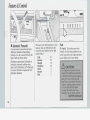
including interferencethat may cause
undesired operation.
DOOR within 16 secondls, the interior
lights w
ill go off.
Press
to unlock the trunk.Your
interior lights will not come on.
a
Matching Transmiiter(s)To Your
Vehlcle
Features & Controls
2. Attach one end of the grounding wire
If it doesn’t have ascrew, pop the
cover off by inserting a dime (or
similar object) in theslot between the
covers and twisting.
2. Lift the front cover off, bottom half
first.
3.Remove and replace the two batteries
(2016).
4. Reassemble the transmitter.
5. Check the transmitter operation.
54
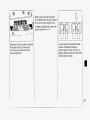
Programming the Module
You will needto program your Remote
Lock Control module if any of the
Eollowing things occur:
You replace your Remote Lock
Control transmitter;
You add a second transmitter;
Something grounds the dataencoder
connector in the trunk;
You replace the Remote Lock Control
module.
To program the module, you’ll needthe
transmitter and a short length of wire,
about 3 feet (1m) long. Then follow
these steps:
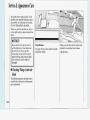
1. Open the trunkand locate the data
encoder connector (A). It’s on the
right side, abovethe wheel well.
to thestud inside the data encoder
connector terminal.
3.Attach the other end of the wire to a
ground (B).
4. Press any button on the transmitter
once. Wait forthe loclts to fully cycle.
If you have a second portable
transmitter, press any button on it,
once, also. Wait for the loclts to fully
cycle. Your module is now
programmed.
5. Disconnect the wire fromthe data
encoder connector and the ground.
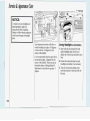
Vehicle theft is bigbusiness, especially
in some cities. Although your
Oldsmobile has a numberof theft
deterrent features, we lmowthat
nothing we put on it can make it
impossible to steal. However, there are
ways you can help.
Key in the Ignition
If you walk awayfrom your vehicle.with
the keys inside,it’s an.easy target for
Lock allthe doors except the driver’s. The ignition key must be clean and dry
joy riders or professional thieves - so
before it’sinserted in the ignition or the
don’t do it.
Then take the door key with you.
engine may not start.If the engine does
When you park your Oldsmobileand
not startand the SECURITY light is
open the driver’s door, you’ll hear a
on, thekey may be dirty or wet. Turn
tone reminding you to remove yourkey
the ignition off.
from the ignition and take it with
you.
Your vehicle is equippedwith the
Clean and dry the ltey. Waitabout three
Always do this. Your steering wheel will PASS-ICey@II(Personalized
minutes and try again. The security
be locked, and so will your ignition and Automotive Security System) theft
light
may remain on during this time. If
transaxle. And remember to lock the
deterrent system. PASS-ICey@II isa
the starter still won’t work, and the
ltey
doors.
passive theft deterrent system. This
appears
to
be
clean
and
dry,
wait
about
means you don’t have to do anything
different to arm or disarm the system. It three minutes and try the other ignition
Parking atNight
ltey. Atthis time, you may also want to
worlts when you insert or remove the
Park in a lighted spot, close all windows ltey fromthe ignition. PASS-I<ey@II
check the fuses (see Fuses G Circuit
and lock your vehicle. Rememberto
in theIndex). If the starter
Breakers
uses a resistor pellet in the ignition key
keep your valuables out of sight. Put
that matches a decoder in your vehicle. won’t work with the other ltey, your
them in a storage area, or take them
vehicle needs service.If your vehicle
When the PASS-Keys11 systemsenses
with you.
does start, thefirst ignition key may be
that someone is usingthe wrong ltey, it
faulty. See your Oldsmobile dealeror a
shuts down the vehicle’s starter andfuel
locksmith who canservice the PASSParking Lots
systems. For about threeminutes, the
I<ey@II.
If you park in a lot where someone will
starter won’twork and fuel won’t go to
If you accidentallyuse a ltey that has a
be watching your vehicle,it’s best to
the engine. If someone tries to start
damaged
or missing resistor pellet, the
lock it up and takeyour keys. Butwhat
your vehicle againor uses another key
starter won’t work, and
the
if you haveto leave your ignition key? during this time, the vehicle willnot
SECURITY
light
will
come
on. But you
What if you haveto leave something
start. This discourages someone from
don’t
have
to
wait
three
minutes
before
valuable in your vehicle?
randomly trying different keys
with
different resistor pellets in an attempt to trying one of the other ignition keys.
Put your valuables in a storage area,
make a match.
like yourtrunk or glove box.
PASS-Key@ll
55
Features & Controls
\
56
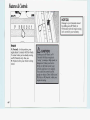
Lock Finder
Trunk Lock
On 2-door models only, pull the driver’s
door handle to light the door lock for a
few seconds. This helps you findthe
lock when it’s dark.
To unlock the trunkfrom the outside,
insert the door key and turn it.
Remote Trunk Release(OPTION)
Convenience Net (OPTION)
Press the yellow trunk release button
located under the instrumentpanel on
the driver's side.
Your automatic transaxlemust be in
P (Park).
Refiember thatyour trunk canbe
opened at any time using the lock
release. Be sure to lock yourdoors.
Your vehiclemay have a convenience
net. You'll see it just inside the back
wall of the trunk.
Put small loads, like grocery bags,
behind the net. Itcan help keep them
from fdling.over during sharp turnsor
quick starts andstops.
The netisn't for larger, heavierloads.
Store them in the trunkas far forward
as you can.
You can unhook the net
so that it will
lie flat when you're notusing it.
57
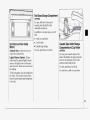
Features & Controls
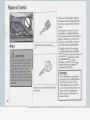
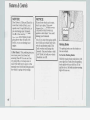
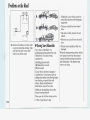
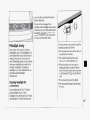
4 New
‘vehicle ‘Break=In”
NOTICE:
4-Door Models:
To allow easier accessto the trunk
area
when the convenience net isnot being
used, push the netdown and hook itunder the retaining screws as shown.
58
I Glove Box
To open, turn theknob clockwise. Push
the lid down to close.
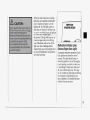
Your modern Oldsmobile doesn’t
need an elaborate “break-in.” But it
will performbetter in the long run
if you follow these guidelines:
Don’t drive at any one speed fast or slow -for the first 500
miles (804 l m ) . Don’t make fullthrottle starts.
Avoid making hard stops for the
first 200 miles (322 km) or so.
During this time yournew brake
linings aren’t yet broken in. Hard
stops with new liningscan mean
premature wear and earlier
replacement. Follow this
“brealing-in” guideline every
time you get new brake linings.
ACCES
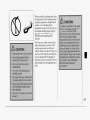
U
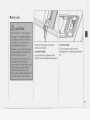
I Ijyzition
Switch
NOTICE:
If your ltey seems stuck in Lock
and you can’t turn it,be sure it is
all the way in. If it is, then turn the
steering wheel leftand right while
you turn thekey hard. But turn the
ltey only with your hand. Using a
tool to force it could break the ltey
or the ignition switch. If none of
this worlcs, then your vehicle needs
service.
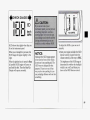
7ith the ignition key in theignition
vitch, you can turn theswitch to five
ositions:
ccessory: An ‘‘on”position in which
3u can operate your radio and
windshield wipers. Press in the ignition
switch as you turn the topof it toward
you.
Lock: The only position in which you
can remove the ltey. This locks your
steering wheel, ignition and transaxle.
Off Unloclts the steering wheel,
ignition, and transaxle, but does not
send electrical powerto any accessories.
Use this position if your vehiclemust be
pushed or towed, but never try to pushstart your vehicle.
Run: An “on” position to which the
switch returns after you start your
engine and release the switch. The
switch stays in the Run position when
the engine isrunning. But evenwhen
the engine isnot running, you can use
Run to operate your electrical power
accessories, and to display some instrument panel warning lights.
Start: Starts the engine. When the
engine starts, release the ltey. The
ignition switch will return toRun for
normal driving.
Note that even if the engine is not
running, the positions Accessory and
Run are “on” positions that allow you
to operate your electricalaccessories,
such as theradio.
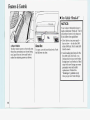
Starting Your Engine
Engines start differently. The 8th digit
of your Vehicle Identification Number
(VIN) shows the code letter or number
for yourengine. You will find the VIN
at the topleft of your instrument panel.
(See Vehicle Identification Number in
the Index.) Follow the proper steps to
start theengine.
Move your shift leverto P (Park) or N
(Neutral).Your engine won’t start in
any other position - that’s a safety
feature. To restart when you’re already
moving, use N (Neutral) only.
NOTICE:
Don’t try to shift to P (Park) if your
Oldsmobile is moving.If you do,
you could damagethe transaxle.
Shift to P (Park) only when your
vehicle is stopped.
59
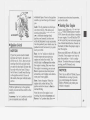
To start your engine:
1. Without pushing the accelerator
pedal, turn your ignition key to Start.
When the engine starts, let go of the
key. The idle speed will godown as
your engine getswarm.
NOTICE:
Holding yourkey in Start for longer
than 15 seconds at a time will cause
your battery to be drained much
sooner. And the excessive heat can
damage yourstarter motor.
2. If your engine.won’t start (or starts
but then stops),it couldbe flooded
with too much gasoline. Trypushing
your accelerator pedal allthe way to
the floor and holding it there as you
hold the key in Start for about three
seconds. If the vehicle starts briefly
but then stops again, do the same
thing, but this time keepthe pedal
down for five or sixseconds. This
clears the extra gasoline. fromthe
engine.
60
NOTICE:
Your engine is designedto work
with the electronics in your vehicle.
If you add electrical parts or
accessories, you could changethe
way the fuel injection system
operates. Before adding electrical
equipment, check with your dealer.
If you don’t, your engine mightnot
perform properly.If you ever have
to have your vehicletowed, see the
part of this manual that tells how to
do it without damaging your
vehicle. See Towing Your Vehicle
in theIndex.
Driving Through Deep
Standing Water
NOTICE:
If you drivetoo quicldy through
deep puddles or standing water,
water can come in through your
engine’s air intake and badly
damage your engine.If you can’t
avoid deep puddles or standing
water, drive through them very
slowly.
.,
N0T:ICE:
After you’ve used the coolant
heater, be sureto store the cord as
it was before to keep it away from
moving engine parts. If you don’t, it
could be damaged.
..
Features & Controls
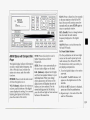
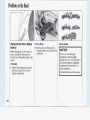
Automatic Transaxle
Your automatic transaxle may have a
shift lever locatedon the steering
column or on theconsole betweenthe
seats. Both are shown above.
R
Maximum engine speedis limited
on
automatic transaxle vehicles when
you're in D (Overdrive) orN (Neutral),
to protect drivelinecomponents from
improper operation.
62
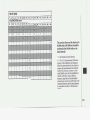
There are seven shift positions. Inthis
manual, these are referred to by the
commonly used symbols inthe right
column below:
Park
P
Reverse
Neutral
N
Overdrive
D
Third
3
Second
2
First
1
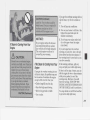
Park
P (Park): This locks your front
wheels. It's the best position to use
when you start yourengine because
your vehicle can't move easily.
I
Reverse
r
R (Reverse): Use this gear to back up.
~~
NOTICE:
Shifting to R (Reverse) while your
vehicle is moving forward could
damage yourtransaxle. Shift to R
only after your vehicleis stopped.
To rock your vehicle back
and forth to
get out of snow, ice or sand without
damaging yourtransaxle, see the Index
under If You're Stuck: In Sand, Mud,
Ice or Snow.
63
I
I'
I
Features & Controls
NOTICE:
NOTICE:
Don’t drive in 2 (Second Gear) for
more than 5 miles (8 km) , or at
speeds over55 mph (88 k w h ) , or
you can damage yourtransaxle.
Use D or 3 as much as possible.
Don’t shift into 2 unless you are
going slowerthan 65 mph (105
krn/h), or you can damage your
engine.
If your front wheels can’trotate,
don’t try to drive. This might
happen if you were stuck in very
deep sand or mud or were up
against a solid object.You could
damage yourtransaxle.
Also, if you stop when going uphill,
don’t hold your vehiclethere with
only the accelerator pedal. This
could overheat and damage the
transaxle. Use yourbrakes or shift
into P (Park) to hold. your vehicle.
in position on a hill.
1 (First Gear): This position gives you
even more power(but lower fuel
economy) than 2. You can use it on
very steep hills, or in deep snow or
mud. If the shift leveris put in1, the
transaxle won’t shift into first gearuntil
the vehicle is going slowlyenough.
Parking Brake
The parkingbrake uses the brakes on
.the rear wheels.
To Set the Parking Brake:
Hold thexegular brake pedal downwith
your right .foot.Push down the parking
brake pedal with your leftfoot. If the
ignition ison, the brake systemwarning
light will comeon.
Features & Controls
Leaving Your Vehicle With the
Engine Rumina
* Move the lever up as far as it will go.
3. Move the ignition key to Lock.
4. Remove the key and take it with you.
If you can walk away from your
vehicle withthe ignition Bey in your
hand, your vehicle is inP (Park).
Console Shiff
1. Hold the brake pedal downwith your
right footand set the parking brake.
68
2.Move the shift lever into theP (Park)
position likethis:
Hold in the button on the
lever.
Push thelever all the way toward
the frontof your vehicle.
3. Move the ignition key to Lock.
4.Remove the key and take it with you.
If you can walk away from your
vehicle with the ignition key in your
hand, your vehicle is inP (Park).
If you have to leave your vehiclewith
the engine running, be sure your vehicle
is in P (Park) andyour parking brakeis
firmly set before you leaveit. After
you’ve movedthe shift lever into the
P (Park) position, hold the regular
brake pedal down. Then, see if you can
move the shift lever away fromP (Park)
without first pulling it toward you (or, if
you have the console shift lever,
withwt first pushingthe button).If you
Engine Exhaust
can, itmeans that theshift lever wasn’t
fully lockedinto P (Park).
Torque Lock
If you are parking on a hill and you
don’t shift your transaxle into P (Park)
properly, the weight of the vehicle may
put toomuch force on theparking pawl
in the transaxle. You-mayfind it
difficult to pull the shift lever out.of P
(Park). This is called “torque lock.” To
prevent torque lock, set the parking
brake and thenshift into P (Park)
properly before you leave
the driver’s
seat. To find out how, see Shifting Into.
P (Park) in the.Index.
When you are ready to drive; movethe
shift lever out of P (Park) BEFORE you
release the parking brake.
If “torque lock” does occur, you may
need to have another vehicle push yours
a little uphill to take some of the
pressure from the transaxle, so you can
pull the shift lever out of P (Park).
Parking Over Things.That
Burn
69
L
W?unning.burEngine’While
bu’re Parked
It’s better not topark with the engine
running. But if you ever have to, here
are some things to lmow.
Follow the proper steps to be sure your
vehicle won’t move. See Shifting Into P
(Park) in theIndex.
If you are parking on a hilland if you’re
pulling a trailer, also. seeTowing a
Trailer in the Index.
Horn
Tilt Steering Wheel
Windows
You can sound thehorn by pressing the
horn symbols on your steering wheel.
A tilt steering wheel allows youto
adjust.the steering wheel beforeyou
drive.
You can also raise it to thehighest level
to give your legs more roomwhen you
exit and enter thevehicle.
To tilt the wheel, hold the steering
wheel and pull the lever. Move the .
steering wheel to a comfortable level,
then release the lever to lock the wheel
in place.
On a vehicle with manual.windows, use
the window crank to open .and close
each window.
71
Fmtures di ConlroZs
.,>,>.+..:%,***,:
.......%i%*,Y,.-.lr.= .,.,
Passenger Lockout Switch
On 4-door models,this switch disables
all passenger power windows.Push the
switch to LOCK to disable the window
switches on all doors except the
driver’s. Push theswitch to NORMAL
for normal power windowoperation.
72
.‘-*cz-.=-.-
.‘?..
;
,
~
;
n
.
*
.
.
.
*
i
.
.
.
?
i
?
?
s
7
9
r
s
Turn SignallMuiiifinctiort
Lever
The lever on the left side of the steering
column includes yaur:
Turn Signal and Lane Change
Indicator
Cruise Control (Option)
*’WindshieldWipers
Windshield Washer
Headlight High-Low Beam
Flash-to-Pass
A
~
~
MPI
A warning chime will remind you if you
have left yourturn signal on for more
than ‘/2 mile ( 3 km) of driving.
V
rum Signal and Lane Change
Indicator
The turn signal has two upward (for
Right) and two downward (for Left)
positions. These positions allow youto
signal a turn or a lane change.
To Signal a Turn:
Move the lever all the way up or down.
When the turnis finished, the lever will
return automatically.
A green arrow on the instrumentpanel
win flash in thedirection of the turnor
lane change.
To signal a lane change, just raise or
lower the lever until the green arrow
starts toflash. Hold it thereuntil you
complete your lane change. The lever
will return by itself when you release it.
As you signal a turn or a lane change, if
the arrows don’t flash but just stay on, E
signal bulb may beburned out and
other drivers won’t see yourturn signal.
If a bulb is burned out, replace it to heir
avoid an accident. If the green arrows
don’t go on at all when you signal a
turn, check the fuse (see theIndex
under Fuses G Circuit Breakers) and
for burned-out bulbs.
73
Cruise Control(OPTION)
Nith cruise control, you can maintain a
;peed of about 25 mph (40 ltm/h) or
nore without keeping your footon the
kccelerator. Thiscan really help on long
rips.
h i s e control does not work at speeds
)elow about 25 mph (40 ltm/h),
Vhen you apply yourbrakes, the cruise
:ontrol shuts off.
To Sef Cruise Control
I . Move the cruise control switch to
ON.
74
3.Push in theSET button at theend of
the lever and release it.
4. Take your footoff the accelerator
pedal.
2. Get upto the speed you want.
To Res.ume a Set Speed
Suppose you set your cruise control at a
desired spee-dwith the SET button and
then you applythe brake. This, of
zourse, shuts off the cruise control. But
you don’t need to reset it. Once you’re
going about 25 mph (40 l W h ) or more,
you can move the cruise control switch
€romON to R/A (which stands for.
Resume/Accelerate) for about half a
second.
You’ll go right back up to your chosen
speed and stay there.
If you shift into P (Park) after you set a
cruise control speed, you’ll erase the
system’s memory- Movingthe switch to
R/A won’t restore the speed you set.
To Increase Speed Wh,ile Using
Cruise Confro;l
To Reduce Speed While Using
Cruise Control
There are two ways to go to a higher
speed. Here’s the first:
1. Use the accelerator pedal to.get to
the higher speed.
2. Push the button at the
end of the
lever, then release the button- and
the
accelerator pedal.
You’ll now cruise at thehigher speed.
Here’s the second wayto go to it higher
speed:
1. Move. the cruise switch fromON to
There are two ways to reduce your
speed while using cruisecontrol:
Push in the button at theend of the
lever until you reachthe lower speed
you want, thenrelease it.
*-Toslow down in very small amounts,.
push the.button for less than half a
second. Each time youdo this,you’ll
go 1mph (1.6 ltm/h) slower.
R/A :
Hold it there until.youget up to the
speed you want, and thenrelease the
switch.
2. To increase your speedin very small
amounts, move the switch to R/A for.
less than half a second and then
release it. Each time you do this, your
vehicle will goabout 1 mph
(1.6 lcm/h) faster.
The accelerate feature will only work
after you turn onthe cruise control by
pushing the SET button.
Passing AnafherVehicle.While
Using Cruise Control
Use the accelerator pedal to increase
your speed. When youtake your foot off
the pedal, your vehicle will slow down
to thecruise control speed youset
earlier.
Using Cruise Control on-Hills
How well your cruisecontrol will work
on hills depends upon your speed, load,
and the steepness of the hills. When
going up steep hills, you may have to
step on theaccelerator pedal to
maintain your speed. When going
downhill, you may have to brake or
shift to a lower gearto keep your speed
75
/1
Features & Controk
down. Of course, applying the brake
takes you .outof cruise control. Many
drivers findthis to be too much trouble
and don’t use cruise control on steep
hills
*
To Get Out of Cruise Control
There are two ways to turnoff the
cruise control:
Step lightly on thebrake pedal; OR
Move the cruise switch to OFF.
To Erase Cruise SpeedMemory
When youturn off the cruise control or
the ignition, or shift into P (Park), your
cruise control set speed memory is
erased.
76
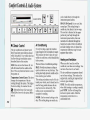
Pulse Windshield. Wipers
You control the windshield wipersby
turning the band marked WIPER.
For a single wiping cycle,
turn the band
to MIST. Hold it there until the wipers
start, thenlet go. The wipers willstop
after one cycle. If you want more cycles,
hold the band on MIST longer.
For steady wipingat low speed, turn the
band away from youto theLO position.
For high-speedwiping, turn theband
further, toHI. To stop thewipers, move
the band to OFF.
Remember that damaged wiper blades
may prevent you from seeing well
enough to drive safely.To avoid
damage, besure toclear iceand snow
from the wiper blades before using
them. If they’re frozen to.the
windshield, carefully loosenor thaw
them. If your bladesdo become
damaged, get new blades or blade
inserts.
Heavy snow or ice can overload your
wipers. A circuit breaker will stop them
until the motor cools. Clear awaysnow
or ice to prevent an overload.
You can set the wiper speedfor a long
or short delay between wipes. This can
be very usefulin light rain or snow.
Turn the band tochoose the delay time.
The closerto LO, the shorter the delay.
^^
Headlights
The main lightcontrols areon the left
side of the instrumentpanel..
Rotate theknob to PC to turn onyour:
Parking Lights
Running Lights
Taillights
Instrument Panel Lights
'0
77
-:a-
1Rotate the knob to
to turn on the
1zeadlights, together &th the:
Parking Lights
Running Lights
‘Taillights
Instrument Panel Lights
13otate the h o b to
to turn the
1ights off.
b
attention before you op~eratethese
lights.
For example, somejurisdictions may
require that you operate your fog lamps
only when your lower beam headlights
are also on, or that‘headlightsbe turned
on whenever you must .use your
windshield wipers.In addition, mo.st
jurisdictions prohibit driving solelywith
parking lights, especiallyat dawn or
dusk. It is recommended that you check
with your own state or provincial
highway authority for applicable
lighting regulations.
I
I
D
I
b
O E F .
-
78
If you open the door while leavingthe
lights on, you will hear a warning tone.
9perafion.of Lights
Daytinre.Rurmjng DgMs
Although your vehicle’s lightingsystem(headlights, parlung lights, fog lamps,
side marker lights and taillights) meets
i311 applicable federal lighting
Irequirements, certain states and
1provinces may apply thek own lighting
1:egulations that may require special
(CANADA ONLY)
4
,
L i g k On Reminder
I
.The Canadian Federal Government has
decided that “Daytime Running Lights”
(DRL) are a useful feature, in that DRL
can make your vehicle more visible
to
pedestrians and other drivers during
daylight hours. DRL are required on
.new vehicles soldin Canada.
Your DIU work with a light sensor on
top of the instrument panel. Don’t
cover itup.
The low :beam headlights will
come on
at reduced brightness in daylight when:
The ignition is on
*‘ The head,light switch is off, and
‘Theparking brake is released.
At dusk, the exteriorlightswill comeon
automatically and the low beams will
change to full brightness. At dawn, the
exterior lights will go out and the low
beams will changeto the reduced
brightness of DRL (if the headlight
switch is off).
Of course, you may still turn on the
headlights any time you need
to.
To idle your vehiclewith the DRL, off,
set the parlingbrake while the ignition
is in the Off or Loch position. Then
start thevehicle. The DRL will
stay off
until you: release the parking brake.
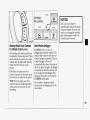
Headlight High-Low Beam
Changer
To change the headlights from low
beam to high or high to low, pull the
turn signal/multifunction lever all the
way toward you. Then release it:
When the high beams are on,a blue .
light on the instrument panel also will
be on.
They’ll stayon aslong as you hold the
lever there. Release the lever to turn
them off.
If Your Headlights areOn:
No flash-to-pass. Use the lever to
change between high and low beams, as
explained under Headlight High-Low
Beam Changer earlier in this section.
If You Have Fog Lights:
They gooff whenever the high beams
are on. When the high beams go off, the
fog lights will comeon again, if the fog
light switch is on.
Instrument Panel Intensity
Control
You can brighten or dim the instrument
panel lightsby rotating the control. If
you rotate thecontrol all-theway t o .
INT your courtesy or interior lights will
come on.
Flash-to-Pass
Flash-to-pass lets you use your high
beam headlights to signal a driver in
front of you that you want topass;
To use it, pullthe turn signaVmu1tifunction
lever toward you.
If Your Headlights areOff
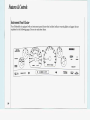
Your high beamheadlights will turn on.
79
I
Features & Controls
I
I
I \ \
Use your fog lights for better vision in
foggy or misty conditions.
To turn fog lights on, push the switch.
Push the switch againto turn thefog
lights off.
When using foglights, the parking
lights or low beamheadlights must be
on.
The fog lights will go
off whenever the
high beam headlights comeon. When
the high beamsgo off, the fog lightswill
come on again.
I
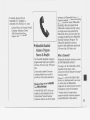
bonf ReadingIMap.Lights
Rear Reading lights
rhese lights are part of the rearview
nirror. They go on when you open the
ioors. When the doors are closed, turn
:hem on and off with the switch.
ro avoid draining your vehiclebattery’s
?ewer, be sure to turnoff all front and
:ear reading lightswhen leaving your
rehicle.
These lightsgo on when you open the
doors. To turn on thereading lights
when the doors are closed, push the
button in. Push the buttonagain to turn
the light off.
Illuminated Enfry
Your courtesy lights will come on and
stay on for a predetermined time
whenever you:
Open a door.
Press the UNLOCK button on the
Remote Lock Control (if equipped).
Press the power door UNLOCK
switch.
If you open a door, the lights wiIl stay
on while it’s open and then turn off
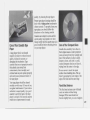
Inside Manual,DaylNight
Rearview Mirror
To reduce glare from lights behind you,
pull the lever toward you to thenight
position.
:onvex OutsideMirror
’our rightside mirror is convex. A
onvex mirror’s sursface is cwved so you
an see more fromthe driver’s seat
81
Features & Controk
Manual Adjust Mirror
The passenger side outside mirror
should be adjusted by hand so that you
just see the side of your vehicle when
you are sitting in a cornfortable driving
position.
I
I
82
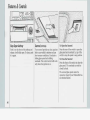
Manual Remote ConfrolMirror.
Power Remote Confrol Mirrors
The driver's side outside mirror can be
adjusted with the control lever on the
armrest so that you just see the side of
your vehiclewhen you are sitting in a
comfortable driving position.
(OPTION)
A selector switch on thedriver's door
armrest controls both outside rearview
mirrors. Move the switch to L to select
the driver's side rearview mirror, or to
R to select the passenger side rearview
mirror. Then press the control pad to
adjust each mirror so that you just see
the side of your vehicle when youare
sitting in a comfortable driving position.
To lock the controls, leave the selector
switch in themiddle position.
Fold-Down Storage Compartment
(OPTION)
Sun Visors and Visor Va.nity
Mirrars
Standard Mirror: Open the cover to
expose the vanity mirror.
Lighted Mirrors-(Option): If your
vehicle has theoptional lighted vanity
mirrors, the .lightscorne on whenyou
open the cover. These can even be used
for reading.
To block out <glare, youcan swing down
the visors,.YOUcanalso remove them
from the center mount and swing them
to the-side.
To open, fold down the armrest
console, press the latch on the
underside and pull up.
In addition,to storage space, you will
find:
A-fold-out cup holder.
A coin holder.
Cassette tape storage.
To close, push down on thelid.
Cassette Tape HotderlStwage
.CompaHmentand Cup Holder
(OPTION)
You may store cassette tapes in the
slots at thebottom. To open, press the
latch on the underside of the center
armrest console and pull up.
To close, push down on the lid.
You also havea fold-out cup holder.
83
Features & Controls
...
84
J
Coin Holder (OPTION)
Rear Seat Console (OPTION)
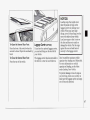
Trunk Access Panel
Use your coin holderto store nickels,
dimes and quarters. Itlifts out for
loading coinsor cleaning.
To use the rear seat storage
compartment and cup holders, pull the
strap on theback of the console
forward.
If you have split rearseats, you may
have a trunk access panel forstoring
long objects like skis.Pull your rear
armrest down usingthe strap.Then pull
the latch on the trunk access panel
towards you to open the panel.
To closethe access panel liftthe latch.
Ashtrays and Lighter
To clean the ashtrays, open them
fully
and lift out the ashtray
by pulling on the
snuffer.
To use the lighter, just push it in all the
way and letgo. Whenit’s ready, it will
pop backby itself.
NOTICE:
NOTICE:
Don’t hold a cigarette lighter in
with your hand while it is heating.
If you do, it won’t be able to back
away from the heating element
when it’s ready.That can make it
overheat, damaging the lighter and
the heating element.
Don’t put papers and otherthings
that burn intoyour ashtrays. If you
do, cigarettes or other smoking
materials could set them onfire,
causing damage.
85
Easy-Open Ashtray
Push in on t.he front of the ashtray and
release; it will slide open. To close, push
it in again.
86
Sunroof (OPTION)
To Open theSunroof.
Your sunroof providesan airy, spacious Press the rear of the switch to open the
glass panel and sunshade. Let go.of the
feel to your vehicle's interior and can
switch to stop thepanel in any position.
also increaseventilation. It includes a
sliding glass paneland a sliding
To Close the Sunroof: .
sunshade. The control switch will ,work
Press the front of the switch to close the
only when the ignition ison.
glass panel. The sunshade can only be
closed by hand.
The sunroof glass panelcannot be
opened or closed if your Oldsmobilehas
an electrical failure.
I
NOTICE:
To Open the Sunroof Rear Vent:
Press the frontof the switch when the
sunroof is closed.Open the sunshadeby
hand.
To Close the Sunroof Rear Vent:
Press the rear of the switch.
Luggage Carrier (OPTION)
If you have the optional luggage carrier,
you can load things on thedeck lid of
your vehicle.
The luggage carrier has slats attached to
the deck lid,a rear rail, and tiedowns.
Loading cargothat weighs more
than 50 pounds (23 kg) on the
luggage carrier may damage your
vehicle. When you carry large
things, never let them hang over the
rear or the sides of your vehicle.
Load your cargoso that it rests on
the slats and does not scratch or
damage the vehicle. Put thecargo
against the rear rail and fasten it
securely to theluggage carrier.
Don’t exceed the maximum vehicle
capacity when loading your Oldsmobile.
For more informationon vehicle
capacity and loading, seethe Index
under Loading Your Vehicle.
To prevent damage or lossof cargo as
you’re driving, check nowand then to
make sure the luggage carrier and cargo
are still securelyfastened.
87
The Instrument PanelYour Information System
4.Instrument Cluster
Your instrument panel is designedto let
5. Hazard Warning Flashers Switch
you lmow at a glance how your vehicle 6. Ignition Switch
is running. You’ll h o w how fast you’re
7. Gearshift Lever
going, how much fuel you’reusing, and
8.Audio System
.many other things you’ll needto drive
safely and economically.
9.Glove Box/Fuse Panel
The main components of your
IO. Vents
instrument panel are:
1 1. Vents
1. Light Controls
12. Climate Control/Rear Window
2. Tilt Steering Wheel Lever
Defogger
3. Horn
13.Ashtray and Lighter
14.Vents
15.Audio System Steering Wheel
Touch Controls
16.Remote Trunk Release (Option)
17.Parking Brake
18.Climate Control Steering Wheel
Touch Controls
19.Turn Signal/Multifunction Lever
20. Hood Release (on floor by driver’s
door)
Instrument PanelCluster
Your Oldsmobile is equipped with an instrument panel cluster that includes indicator warning lightsand gages that are
explained on thefollowing pages. Be sure to read about these.
90
When one of the warning lights comes
on and stays on when you are driving,
or when one of the gages shows there
may
be a problem, check -thesection
This section describes the warning
that tells you what to do about it. Please
lights and gages that may be on your
follow the manual’s advice. Waitingto
vehicle. The pictures will kelp you
do repairs can be costly - and even
locate them.
dangerous. So please getto know. your
Warning lightsand gages can signal that -warninglights and gages. They’rea big
something is wrong before it .becomes
help.
serious enough to cause an expensive
repair or replacement. Paying attention
to your warning lights and-gages could
also save you. or others,frominjury.
Warning lights go on when theremay
be or is a problem with one of your
vehicle’s functions..As you will see in
the details on thenext few pages, some
warning lights come on briefly when
you turn the.ignition key just to let you
know they’re worlting. If you are
familiar with this section, you should
not be alarmed when this happens.
Gages can indicate when theremay be
or is a problem with one of your
vehicle’s functions. Often gages and
warning lights .work together to let you
know when there’s a problem with your
vehicle.
I.
Warning Lights, Gages .and
l..icdors
\
MPH
km/h
7
Your speedometer lets you see your
speed.in.both miles p,erhour (mph) and
kilometers per hour (lun/h) .
91
Features & Controls
be. But if it can’t, then it’s set at zero
and a labelmust be put on the driver’s
door to show the old mileage reading
when the new odometer was installed.
RPMXIOOO.
Tachometer
/
e
The tachometer displays the engine
speed in revolutions per minute (rpm).
NOTICE:
Do not operate the engine with the
tachometer in thered area, or
engine damagemay occur.
I
Fuel Gage
Your fuel gage tells youabout how
much fuel you haveleft, when the
ignition is on. When the indicator nears
E (Empty), you still have a little fuel left,
but yonshouldget more soon.
Here arethree things that some owners
ask about. None of these show a
problem with your fuel gage:
At the gas station, with your ignition
on, thegas pump shuts off before the
gage reads F (Full).
It takes a little more or less fuel to fill
up than thegage indicated. For
example, the gage may haveindicated
the tank was half full, but itactually
took a little more or less than half the
tank’s capacity to fill the tank.
The gage movesa little when you turn
a corner or speed up.
For yourfuel tank capacity, see Service
Station Information on thelast page of
this manual.
qBAG
1PES.
\
/
Engine Coolant Temperafure
Gage
You have a gage that shows the engine
coolant temperature. If the gage pointer
moves into thered area, your engine is
too hot!
That reading means the same thing as
the warning light. It means that your
engine coolant has overheated. If you
have been operating your vehicle under
normal driving conditions you should
pull off the road, stop your vehicle and
turn off the engine as soon as possible.
HOT COOLANT CAN BURN YOU
BADLY!
In Problems on the Road,.
this manual
shows what to do. See the Index under
Engine Overheating.
93
NOTICE:
,w0I.L
P
EVEL
LOW
COOLANT
I
LOW 'OIL .
LEV-EL;
COOLA
I
Low Coolant Wa-mjng Light
If this light comes on, your system is
low on coolant and the engine may
overheat.
See .theIndex.under Engine Coolant.
and haveyour vehicle serviced as.soon
as you can...
94
Low Engine Oil- Level Warning
Light (omorv)
Your enginemay be equippedwith an
oil level monitoring system. When.
the
ignition key is turned on, theLOW OIL
LEVEL light will briefly flash.If the
light stayson, stop thevehicle on a level
surface and turn theengine off. Check
the oil level usingthe engine oil
dipstick. (See the Index under Engine
Oil.) If the light doesnot flash, havethe
low oil level sensor system repairedso it
will be ready to warn you if there's a
problem.
The oil.leve1 monitoring system
only checks oil level duringthe
brief period betweenkey on and
engine crank. Itdoes not monitor
engine oil level whenthe engine is
running. Additionally, an oil level
check is only performedif the
engine has been turned off for a
considerable peri.odof time
allowing the oil normallyin
circulation to drain back into the
oil pan.
."
-2
h n \\ rnn\
Oil Pressure lndicafor
NOTICE:
Damage to your engine from
neglected oil problemscan be costly
and is not covered by your
warranty.
c
This indicator tells you if there could be
a problem with your engine oil pressure.
The pointer should be abovethe red
zone when the engine is running.
Readings in thered area tell you that
the engine is lowon oil, or that you
might have some other oil problem. See
the Index under Engine Oil.
Volfmefer
When the engine is running, the gage
shows the condition of the charging
system. Readings between the red
warning zones indicate the normal
operating range.
Readings in either red warning zone
indicate a possible problem in the
electrical system.Have your vehicle
serviced immediately.
When yourengine is not running, but
the ignition is on (in theRun position),
the gage shows yourbattery's state of
charge.
95
Features & Controh
s
1
BRAKE
96
(a)(@)
closer to thefloor. It may take lang-er-to
stop. Ifthe light is 'still-on,or-if.theantilock brake system warning light is
flashing, havethe vehicle towed.far
service. (SeeAnti-Lock Brake System
WarningLight .andTowilzg .Your
Vehicle inthe Index.)
If the anti-lock brake system warning
light stays on longer than normal after
you’ve started your engine, turn the
ignition off. Or, if the light comes on
and stays on whenyou’re driving, stop
as soon as possible and turn theignition
off. Then start the,engineagain to reset
the system. If the light still stays on, or
comes on again while you’re driving,
your Oldsmobile needs service. If the
light is on but notflashing and the
regular brake system warning light isn’t
on, you still havebrakes, but you don’t
have anti-lock brakes.
SERVICE
ENGINE SOON
Malfunction. IndicatorLamp
(Service Engine Soon Light)
A computer monitors operation of your
fuel, ignition and emission control
systems. This light should come on
when the ignition is on, but the
engine
is not running, as a check to show you
it is working.If it does not come on at
all, haveit fixed right away. If it stays
on, or it comes on while you are driving,
the computer is indicating that you
have a problem. You should take your
vehicle in for service soon.
97
Features & Controls
NOTICE:
If you keep driving your vehicle
with this light on, after a while the
emission controlswon’t work as
well, your fuel economywon’t be as
good and your enginemay not run
as smoothly. This could leadto
costly repairsnot covered by your
warranty.
CHECK
GAGES
1
ANTI-
Check Gages Light
When this light comes on it means one
of these four things:
You have approximately 3 gallons
(12 L) or less of fuel remaining in
your tank. Check your fuel gage.
Your oil pressure is low. Check your
oil pressure indicator.
Your engine istoo hot. Check your
coolant temperature gage.
There is a problem withthe charging
system.
98
Head-Up Displcly ( O P ~ O N J
If you have the optional Head-Up
Display (HUD),you can see the
speedometer reading, in English or
metric units, displayed “through” the
windshield. The HUD also shows:
Turn signal indicator lights.
A high beam indicator symbol.
A CHECK GAUGES message. (For
low oil pressure, high coolant
temperature, high or low battery
voltage, and low fuel.)
I
DIM
CHECK GAUGES
AW
MAX
MIN
OFF
UP
ON
HUD CONTROL
I
,:...>:.,.:.,;<.,.: .,,. r..,,.:
I'
..n'..i..i.i
.,.I
.... ...-..*zIL5b .,.. ...,. ....,......:.,,.. "...._.._.....
:.*....._.:..
.........,
i...;
"(
HUD shows these lights when they are
lit on the instrument panel.
When you sit straight in your seat, the
HUD image willappear slightly to the
right.
When the ignition key is turned to Run,
all possible HUD images will comeon
and look lilce this. Thenthe Head-Up
Display willoperate normally.
NOITICE:
'Although the HUD image appears
to be near the front of the vehicle,
do not use it as a parking aid. The
HUD was not designed forthat
purpose. If you try to use it that
way, such.as in a parking lot, you
may misjudge distance and run into
something.
~
~
!I....
-&
To adjust the HUD so you can see it
properly:
1. Start your engine and slide the HUD
dimmer control (1ocate.d belowthe
climate controls) all the way to M A X .
The brightness of the .HUD image is
determined by whether the headlight
switch is on or off, and where you
have set the HUD dimmer control.
99
Features & Controls
HUD's brightness using the HUD
dimmer control. Polarizing sunglasses
could makethe HUD image harder
to see.
~.*.,.
:..~~.,,~..~.,.~.
;,~,!~~.
~ ~ ~ ~ . . . .:.~:~........:.*,:~
,......
.r..,..,~.~...:.1/2~~:1~.~.,~::,:.-..~~.':,lr'\..:.'..,,iC.~..;.~'...;:...::..:.:
....,
4;
...,.,:*-&
2. Adjust the seat, if necessary, before
setting the height control.
Rotate the HUD image height control
all the way up, raising the image as
far as possible. Then rotate the HUD
image height control downward so
the image is as low as possible but in
full view.
3. Slide the dimmer control toward
OFF until the HUD image isno
brighter than necessary. To turn the
HUD off, slide the HUD dimmer
control to OFF.
If the suncomes out, or it becomes
cloudy, or if you turn on your
headlights. vou mav need to adiust the
100
I
r
r
.\
Pushing the ENG/MET rocker switch
on thecenter console will switch the
HUD speedometer from English
(conventional) to metric units, or back
again.
Some vehicles maynot be equipped
with the ENG/MET switch.
Care of the Head-Up Display
Clean the inside of the windshield as
needed to remove any dirt or film that
reduces the sharpness or clarity of the
HUD image.
To Clean theHUD:
Spray household glass cleaner on a soft,
clean cloth. Wipe the HUD lens gently,
then dry it. Donot spray cleaner
directly on the lens, because the cleaner
fluid could leak insidethe unit if you do.
If You Can’t See the HUD Image
When the Ignitionis On:
Is anything covering the HUD unit?
Is the HUD dimmer control close
enough to MAX?
Is the HUD image adjusted to the
proper height?
Still no HUD image? Check the fuse
in the CLSTR position in the glove
box fuse panel. See the Index under
Fuses G Circuit Breakers.
If the HUD Image is Not Clear:
It could be too bright. Move the HUD
dimmer control closer to OFF.
You may need to clean the windshield
and HUD lens.
Your windshield is part of the HUD
system. If you ever haveto have a new
windshield, be sure to get one designed
for HUD. If you don’t, the HUD image
may lookblurred and out of focus.
Notes
102
Part 3
Comfort Controls& Audio Systems
In this part you’ll find out how to
operate the comfort control systems
and audio systems offered with your
Oldsmobile. Be sure to read about
the particular system suppliedwith
your vehicle.
103
Comfort Controls&Audio Systems
I.
I/
*/I
I
CLIMATE CONTROL
IClimate Control
The air conditioner and heater work
)est if you keep your windows closed
vhile usingthem. Your vehicle alsohas
:he flow-throughventilation system
iescribed later in this section.
3FF: Press to turn theblower off. Air
vi11 still come fromthe outletsat the
loor. Press anyfunction button to turn
.he systemon.
remperature Control Lever: This lever
:hanges the temperature of the air
:oming through the system. The higher
.he leversetting, the warmer the air.
Selects the force of air you want.
Press LO to lower the fan speed, HI to
raise it.
8:
104
[El
Air Conditioning
On very hot days, open the windows
long enough to let hot inside air escape.
This reduces the time it takes for your
vehicle to cool down, which should help
fuel economy.
There are threeair conditioning settings:
MAX: Provides maximum coolingor
quick cool-downon very hot days. This
setting also helps preventoutside odors
from entering your vehicle.
This setting recirculates much of the air
inside your vehicle,and it should not be
used for long periods because
the air
may become too cold and dry. This
setting is not recommended if an
occupant is smoking.
NORM: Use for normal coolingon hot
days. Thissetting brings in outside air,
cools it and directs it through the
instrument panel outlets.
BI-LEV (Bi-Level): Use on cool, but
sunny days. This setting bringsin
outside air, butdirects it in two ways.
The cool airis directed to theupper
portion of your bodythrough the
instrument panel outlets, but most
warmed air is directed through the
heater ducts anda little to thedefrost
and side window vents. At times this
temperature difference may be more
apparent than others.
Heating and Ventilation
When you don’t need to cool the
outside air, use these next settings. You
can leave the air as it is or heat it.
The air conditioner compressor doesn’t
run in these settings. This reducesthe
engine load, resulting in improved fuel
economy (gas mileage).
VENT: For mild outside temperatures,
when little heatingor cooling is needed,
push VENT. Air flow isthrough the
instrument panel outlets. Slide the
temperature control leverto a
comfortable level.
HEAT: When outside temperatures are
cold, push HEAT. Slide the
temperature control lever to a
comfortable level.For maximum
heating, slide it all the way to theright.
This setting will send most of the
heated air through the ducts near the
floor. The restwill comeout of the
defroster vents and side window
defogger vents.
There are two settings for clearing your
windows. For each setting, adjust-the
temperature control as desired. The air
conditioner compressor will run in
these settings to remove,moisture fromthe airwhen the temperature is above
freezing.
This setting allows half of
8Qjfl the air to flow to thefloor
heater ducts,and half to go
to the~windshield andside window
vents located in the windshield pillars.
Use this setting to warm passengers
while keeping the windshield clear.
The DEF setting directs 90% of the air
through the defroster vents and the side
window vents, and10% to thefloor.
To rapidly defrostthe windshield, slide
the temperature control .lever allthe
way to WARM and press the DEF
button.
Adjust the fan to thehighest speed.
105
1
Comfort Controls &AudioSvstems
J
$"'
Your vehicleis equipped with side
window defoggervents located on the
window pillar. Foradditional side
window defogging, push the BI-LEV
button, set the fan control on high and
aim the side vents on theinstrument
panel toward the side windows. For
increased air flow to the side vents,
close the center vents.
Rear Window Defogger
The rear window defogger usesa
warming grid to remove fog fromthe
rear window. Press R DEFOG to turn
on. The defogger willturn off
automatically afterabout 10 minutes of
use. If you turn it on again, the defogger
will operate for about five minutes only.
You can also turn thedefogger off by
turning off the ignition or pressingthe
R DEFOG button again.
Do not attach a temporary vehicle
license across the defogger grid on the
rear window.
I
NOTICE:
Don't usea razor blade or something
else sharp on the inside of the rear
window. If you do, you could cut or
damage the warming grid,and the
repairs wouldn't be
covered by your
warranty.
ELECTRONIC
CLIMATE CONTROL
0
1Electronic
Climate Control
(OPTION)
This system allows youto set the
temperature you want. It also lets you
choose automatic air flow and direction
control, or air flow and direction
settings you select. Your vehicle also
has the flow-through ventilation system
described later in this section.
The digital screen displays the outside
temperature, the inside temperature
setting and the fan speed.
When you selectthe AUTO mode, the
air conditioner compressor w
lioperate
if the outside temperature is above
freezing.
The air conditioner compressor also
operates in DEFOG, DEF (Defrost)
n
0
0
0
and BI-LEV (Bi-Level) when the
outside temperature is above freezing.
COOL/WARM: Sets the interior
temperature you want. Press COOL to
lower the inside temperature setting;
press WARM to raise the setting. The
temperature you set will be displayedon
the digital screen.
Once you set thetemperature, the
system willtry to maintain the set
temperature, whether.you are using the
heating or cooling controls.
Your system has an interior
temperature sensor that dete.cts
increased interior temperature caused
by sunlight. To keep youcomfortable,it
reduces the interior temperature by as
much as 5°F (3°C) below the setting on
the digital screen.
AUTO: To allow the system to
automatically control the temperature,
air distribution and fan speed:
1. Set the temperature you want with
the COOL/WARM switch.
2. Press the AUTO switch. The AUTO
symbol will appear on thedigital
screen.
The system will approach the
temperature you select as quickly as
possible. For most efficient operation,
just set the system temperature where
you would like it and drive away.
You may notice a delay of three or four
minutes before the blower comes on.
OUTS TEMP: Press to have the
outside temperature displayed on the
digital screen. Press again to return to
the inside temperature setting.
If the system is leftin the outside
temperature mode, the outside
temperature will be displayed except
when changing the inside temperature
setting using the COOL/WARM
switch. The display willreturn to the
outside temperature setting in about
five seconds.
107
Comfort Controls &Audio Systems
Use the following controls when the
system isnot set on AUTO:
Press.the topof the switch to raise
the fan speed, the bottom of the switch
to lower the fan speed. The fan symbol
and bar graph willbe displayed on the
digital screen.
When the AUTO switch is pressed, the
fan symbol will goout andthe fan will
return toautomatic operation.
If the Fahrenheit (F") or Celsius (C")
symbol begins to flash, or flashes when
you turn on theignition, it indicates an
electrical problemwith your air
conditioning system. The flashing will
continue for about two minutes. It
means you should have your system
serviced.
8:
instrument panel outlets, but most
warmed air is directedthrough the
heater ducts and a little to thedefrost
and side window vents. At times this
temperature difference may be more
apparent than others.
You may notice a delay of three or four
minutes before the blower comes on.
UPPER: Press to direct air flow
through the instrument panel outlets
only.
LOWER Press to direct 90% of the air
flow through the heater ducts, and 10%
of the air flow through the windshield
defroster vents.
DEFOG: Press to direct half the air to
the windshield, and the other half
through the heater ducts.
DEF (Defrost): Press to direct 90% of
the air to thewindshield and side
window vents, and 10% to thefloor.
The fan will automatically goto high.
For a lower fan speed, press the fan
switch.
OFF: Press to turnoff the system.
Some air will still come fromthe outlets
at the floor.
Directional Controls
108
When the following buttons are pressed,
an indicator light will glow abovethe
button.
BI-LEV (Bi-Level):Use on cool, but
sunny days. Thissetting brings in the
outside air, but directs it in two ways.
The cool air is directed to theupper
portion of your bodythrough the
I
b
ECTRONIC
TE CONTROL
Steering WheelTouch Controls
for Climate Control(OPTION)
Some heating and cooling controls can
be adjusted at thesteering wheel. These
touch controls also operate some audio
controls. See the Index under Steering
Wheel Touch Controls for Audio
System.
FAN: Press the upper part of the
control to increase the fan speed; press
the lower part to reduce the fan speed.
TEMP: Press the upper part of the
control to raise the inside temperature
setting; press the lower part to lower
the setting.
Il W 1 ,
NOTICE:
Don’t use a razor blade or
something else sharp on the inside
of the rear window. If you do, you
could cut or damage the warming
grid, and therepairs wouldn’t be
covered by your warranty.
Rear Window Defogger
R.DEFOG: Press to warm the
defogger grid on therear window. The
indicator light will glow whilethe rear
window defogger is operating. The rear
window defogger will turn off
automatically after about 10 minutes of
use. If you turn it onagain, the defogger
will operate for about five minutes only.
You can also turn thedefogger off by
turning off the ignition or pressingthe
R. DEFOG switch again.
Do not attacha temporary vehicle
license across the defogger grid on the
rear window.
109
Comfort Controls &Audio Systems
I
‘Flow-ThroughVenfilafiun System
Your 01dsmbde’:s flow-though
ventilation systemsupgfiies miside air
into.the vehicle when it is moving
Outsideair will also enter the vehicle
when the heater ~OTthe air conditi,oning
fan is running.
NOTICE:
Before you add any sound
equipment to your vehicle- like a
tape player, CBradio, mobile
telephone or two-way radio -be
sure you can add what you want. If
you can, it'svery important to do it
properly. Added sound equipment
may interfere with the operation of
your vehicle's engine, Delco@ radio
or other systems, and even damage
them. And,your vehicle's systems
may interfere with the operation of
sound equipment that has been
added improperly. So, before
adding sound equipment, check
with your dealer and be sure to
check Federalrules covering mobile
radio and telephone units.
I
I OBlCD I
I
AUTO REVERSE
~
Setting the Clock
No matter which audio system you have
in your vehicle,setting the clock is easy.
For Radios with SCAN and One
SEEK Button:
1. With the radio off and theignition
on, press SET. The SET indicator
will appear on thedigital screen for
five seconds.
2. During those five seconds, you can
set the clock to thecorrect hour and
minute by depressing the SEEK and
SCAN buttons. For some radios
SEEK will set the hour,for others it
sets the minute. For some radios,
SCAN will set the hour,for others it
sets the minute.
For Radios with SCAN and SEEKA
and SEEKY:
1. With the radio off and theignition
on, press SET. The SET indicator
will appear on the digital screen for
five seconds.
2. Press and hold SCAN until the
correct hour appears on thedisplay.
3. Press SET again.
4.Press and hold SEEK A or SEEKv
until the correct minute appears on
the display.
111
Comfort Controls &AudioSystems
I
VOLUME
TUNE
TREB
BASS
I
SCAN
SEEK
I
”
)
II I
I/ I
1
9MIFM Sfereo Radio
1
2
3
4
SET
lol
I II
Il
I
TUNE: This lmob has two functions.
Turn
it tothe.left or right to tune in
The digital displayindicates information
radio
stations (the radio station
on time or radio station frequency, the
frequency will be .displayed
on the
AM or FM radio band, whether the
digital
screen).
Press
this
h
o
b to
station is in stereo, and other radio
change between the AM and FM bands.
€unctions.
The control ring behind the TUNE
VOLUME: Turn the upper knob to
knob adjusts the front/rear speaker
turn the radio on or off, or to adjust
balance.
volume. Press it to change the display
between the clock and the radio station TREB (Treble): Slide this lever up to
increase treble, or down to decrease it.
frequency when the radio is on.
BASS: Slide this lever up to increase
The control ring behindthe VOLUME
bass, or down to decrease it.
knob adjusts theleft/right speaker
Jalance.
112
SCAN: Press to listen for a few seconds
to thenext station on theAM or FM
band; the scan will continue every few
seconds until you press SCAN again to
stop on a particular station. You can
also press the upper h o b (VOLUME )
to stop thescan.
SEEK: Each time you pressSEEK, you
will tune in thenext station higher on
the radio band.
To Preset Radio Stations:
Using the fourpushbuttons numbered
1-4, you can set upto 14 radio stations
(seven AM and seven FM).
1. Use the lower knob (TUNE) to tune
in the stationyou want.
2. Press SET. The SET indicator will
appear on thedigital screen for five
seconds.
3.While the SET indicator is displayed,
press one of the four pushbuttons.
4.Repeat steps 1-3 for each of four AM
and four FM stations.
Up to threeadditional stations on each
band may be preset by “pairing”
pushbuttons:
1. Tune in the desired station.
2. Press SET, and within five seconds
press any two adjacent pushbuttons
at thesame time.
3. The stationcan be tuned inwhen the
same two pushbuttons are pressed at
the same time.
f
VOLUME
TREB
TUNE
BASS
I/
STEREO
AUTO REVERSE
-
TUNE: This knob has two functions.
Turn it to theleft or right to tunein
radio stations (theradio station
The digital displayindicates information frequency .will be displayedon the
on time or radio station frequency, the
digital screen). Press this knob to
AM or FM radio band, whether the
change between the AM and FM bands.
station is in stereo, and otherradio
The control ring behind the TUNE
functions.
knob adjusts the fronthearspeaker
VOLUME: Turn theupper knob to
balance.
turn theradio on or off, or to change
TREB (Treble): Slide this lever up to
volume. Press it to change the display
increase
treble, or down to decrease it.
between the clock and the radio station
BASS: Slide this lever up to increase
frequency when the radio is on.
bass,
or down to decrease it.
The control ring behind the VOLUME
SCAN: Press to listen for a few seconds
knob adjusts the lefthight speaker
:to thenext station on theAM or FM
balance.
AMIFM Stereo Radio with
Cassette Player
113
Comfort Controls&Audio Systems
band; the scan will continue every few
seconds until you press SCAN again to
stop on a particular station. You can
also press the upper knob (VOLUME )
to stop the scan.
SEEK Each time you press SEEK, you
will tune in the next station higher on
the radio band.
To Preset Radio Stations:
Using the four pushbuttons below the
digital display, youcan set up to 14
radio stations (seven AM and seven
FM).
1. Use the lower h o b (TUNE) to tune
in thestation you want.
2. Press SET. The SET indicator will
appear on thedigital screen for five
seconds.
3.While the SET indicator is displayed,
press one of the four pushbuttons.
4.Repeat steps 1-3for each of four AM
and four FM stations.
Up to threeadditional stations on each
band may be preset by “pairing”
pushbuttons:
1. Tune in the desired station.
2. Press SET, and within five seconds
press anytwo adjacent pushbuttons
at the same time.
3.The station can be tuned in when the
same two pushbuttons are pressed at
the same time.
To Play a Cassette Tape:
With the power on, insert a tape into
the cassette door. Using tapes that are
longer than 90 minutes (45 minutes on
each side) is not recommended.
When the right indicator arrow is lit,
selections listed on thebottom side of
the cassette are playing. Whenthe left
arrow is lit, selections listed on the top
side of the cassette are playing. To
change sides of the tape,press the
upper control h o b (VOLUME)while
the cassette is playing. The tape player
automatically begins playingthe other
side when it reaches the end of the tape.
Fast Forward:Press the buttonwith
the arrow pointing in the same direction
that thetape is playing. To stop fast
forward, press the STOP-EJECT
button.
Reverse: Press the buttonwith the
arrow pointing in the opposite direction
that the tapeis playing.To stop reverse,
press the STOP-EJECTbutton.
STOP-EJECT:To stop playing a tape,
fully press this button.The cassette will
be partiallyejected, and the radio will
begin playing.
l
9MlFM Stereowith Cassette
Dlayer and Music Search
The digital display indicates information
In time or radio station frequency, the
4M or FM radio band, whether the
;tation is in stereo, and other radio
:unctions.
POWER: Turns the uniton and off
when the ignition is on.
VOL (Volume): Press the topof the
;witch to increase the volume. Press the
Jottom of the switch to decrease the
Jolume. The volume setting will be
%splayed.To quickly reduce the volume
;o a low level, pressthe center of the
VOL button.
BASS: Adjusts the bass level.
TREB (Treble):Adjusts the treble
level.
Press the topof each switch to increase
the level, or the bottom to decrease the
level. Press the center of each switch for
preset levels.
Balance Controls
Adjusts the lefthight and fronthear
speaker balance to your individual
taste. When you change either
adjustment, thebottom of the digital
screen will displaythe point of balance
you have selected. For the normal
b
setting preset at thefactory, press the
left and right or top and bottom buttons
at thesame time.
Radio Controls
The band you select will be displayedon
the digital screen. The frequencyof the
station will also be displayed,and if the
station is in stereo, the STEREO
indicator.will also be displayed.
RCL (Recall): Press to change between
the clock and the radio station
frequency displayon thedigital screen,
when the radio is on.
AM:. Press to select,the AM band.
FM:-Press to select the FM band.
SEEKA : Press to tunein the next
station higher on the band.
SEEKT: Press to tune in the next
station lower on the band.
SCAN: Press to listen for a few seconds
to thenext station on theAM or FM
band; thescan will continue every few
seconds until you press SCAN again to
stop on aparticular station.
TUNE: Press this control to tunein
stations higher or lower on theAM or
FM radio band.
115
Comfort Controls & Audio.Systems
To PresetRadio Stations:
You can preselect up to10 radio
stations (five AM and five FM) and
tune toany of them by pushing a single
button. Here’s how.
1. Tune to a desired station with the
lower knob.
2.Press SET.
3.Within about five seconds, press one
of the five numbered pushbuttons.
The station you selected will be
automatically tuned whenever you
press this button again.
4. Repeat forup to four more stations
on the same band, and up tofive on
the other band.
To Play a Cassette Tape:
Your cassette tape player is designed to
work best with tapes that play for30 to
45 minutes per side. Tapes that run
longer than that are so thin they may
not work well in this player.
With the unit on,press a cassette into
the slot marked AUTO REVERSE,
tape side first. Adjust volume, balance,
fade and tone asdescribed earlier.
Here .are your other tape player
controls:
PROG (Program): Press to switch
from one side of the tapeto theother.
The unit switches automaticallyat the
end of a side.
CR02: Press to adjust the.unit for high
bias chrome or metal tapes. For
standard bias tapes, press againto
return to the factory-preset adjustment.
REV (Reverse): Press to rewind the
tape rapidly. The tape will stop at the
end, or when you press REV or PROG
lightly. The radio will play while the
tape is rewinding.
FWD (Forward): Press to advance the
tape rapidly. Thetape will stop at the
end, or when you pressFWD or PROG
lightly. The radio will play whilethe
tape is advancing.
SEEK: Press to advance to thenext
selection or passage. The tape will fastforward and stopeither at thefirst four-
second quiet spot or when you press
SEEK again (or PROG).
REPT (Repeat):Press to repeat a
selection. The tape will rewindto the
first four-second quiet spot or until you
press REPT (or PROG) again.
EJCT: Press to remove the tape.
250Hz 3.5KHz
lKHz lOKHr
60Hz
AMIFM Stereo with Cassette
Player and Graphic Equalizer
The digital display indicates information
on time or radio station frequency, the
AM or FM radio band, whether the
station is in stereo, and other radio
€unctions.
POWER Turns the uniton and off
when the ignition is on.
VOL (Volume): Press the topof the
switch to increase the volume. Press the
bottom of the switch to decrease the
volume. The volume setting will be
displayed. To quickly reduce the volume
to a low level,press the center of the
VOL button.
Equalizer Controls
Boost the bass, emphasize a voice in a
song, brighten the treble -your
equalizer gives you freedom to adjust
five separate frequencies of sound to
your individual taste. Move a lever up
to emphasize a frequency, move it down
to de-emphasize. It's best to begin with
the levers in the middle position, then
adjust individual leversas you like.
Balance Controls
Adjusts the lefthight andfronthear
speaker b.alanceto your individual
taste. When you change either
adjustment, the bottom of the digital
screen will displaythe point of balance
you have selected. For the normal
setting preset at thefactory, press the
center of the balance control.
Radio Controls
AM/FM: Press the AM or FM buttons
to select either the AM or FM radio
band. The band you select willbe
displayed on thedigital screen. The
frequency of the station will also be
displayed, and if the stationis in stereo,
the STEREO indicator will also be
displayed.
RCL (Recall): Press to change between
the clock and the radio station
frequency display on the digital screen,
when theradio is on.
SEEKA : Press to tune in the
next
station higher on theband.
SEEKV: Press to tunein the next
station lower on theband.
SCAN: Press to listen for a few seconds
to thenext station on theAM or FM
band; the scan will continue every few
seconds until you press SCAN again to
stop on a particular station.
117
Comfort.Controls&Audio Systems
TUNE: Press this control to tune in
stations higher or lower on the AM or
FM radio band.
To Preset Radio Stations:
The five pushbuttons (numbered 1-5)
can be used to preset up to tenradio
stations (five AM and five FM).
1. Tune the digital display to thestation
you want.
2. Press SET. The SET indicator will
appear on the digital screen for five
seconds.
3.While the SET indicator is displayed,
press one of the five pushbuttons.
4. Repeat steps 1-3for each of five AM
and five FM stations.
Tape Player
This audio system has automatic Ix7
Dolby B NR@to reduce background
noise on Dolby encoded.tapes. Dolby@
Noise Reduction is manufactured under
license from DolbyLaboratories
Licensing Corporation. Dolby@and the
00 symbol are trademarks of Dolby
Laboratories Licensing Corporation.
Press POWER to turn theradio on.
Then push a cassette into thecassette
entry door. (the tape side goes in first).
Using tapes that are longer than 90
minutes (45 minutes on each side) is
not recommended.
FWD (Fast Forward): Press to
advance the tape rapidly; press againto
play. (The radio plays while a tape is
fast forwarding.)
REV (Reverse): Press to reverse the
tape rapidly; press againto play tape.
(The radio plays while a tape is
rewinding.)
SEEK: Press to advance the tape to the
beginning of the next selection.
REPT (Repeat): Press to rewind the
tape to thebeginning of a selection.
PROG (Program): Press to change.the
side of tape being played. Whenthe
arrow pointing up is lighted, the
selections listed on the topside of the
tape are played. Whenthe arrow
pointing down islighted, selections
listed on the bottom side of the tape are
played. The tape player automatically
begins playing the other side whenit
reaches the end of the tape.
CRO,: This button sets tape bias. When
playing high bias chromeor metal tapes,
press the button to turn the button
light
on. When playing standard tapes, press
again to turn thelight off.
EJCT: Press to have the cassette tape
ejected (the radio will then play).
9M/FM Stereo with Compact Disc TUNE: Press this switch to tune in
higher frequencies and lower
Player
The digital display indicates information
on time or radio station frequency, the
AM or FM radio band, whether the
station is in stereo, and other radio
functions.
POWER:-Press to turn theunit on and
off when theignition is on.
VOL (Volume):Adjusts the volume up
or down, and the bottom of the digital
screen displays the setting.For a normal
listening level preset at thefactory,
press the center of the switch.
frequencies.
SEEK: Press to tune automatically to
the next station higher on theband.
BAL (Balance):Adjusts the lefthight
and fronthear speaker balance to your
individual taste. When you change
either adjustment, thebottom of the
digital screen will display the point of
balance you have selected. For the
normal setting preset at thefactory,
press the left and right or front and rear
buttons at thesame time.
SCAN: Press to listen for a few seconds
to thenext station onthe AM or FM
band; the scan will continue every few
seconds until you press SCAN again to
stop on a particular station.
RCL (Recall): Press to change between
the clock and the radio station
frequency displayed on thedigital
screen.
AM/FM: Press to switch between the
AM and FM bands.
To Preset Radio Stations
The five pushbuttons in the lower right
corner can be used to preset up to ten
radio stations (five AM and five FM) .
The buttons have other uses when you
are playing a compact disc.
1. Tune thedigital display to thestation
you want.
2. Press SET. The SET indicator will
appear on the digital screen for five
seconds.
3. While the SET indicator is displayed,
press one of the five pushbuttons.
4. Repeat steps 1-3for each of five AM
and five FM stations.
119
Comfort Controls&Audio Systems
To Play a Compact Disc:
seconds to see how long yourselection
has
been playing. The track number
Many of the controls far the radio also
also will be displayedwhen the.volume
have functions for. thecompact ,disc
is
changedor a newtrack starts to play.
player, as explained here.
PREV (Previous): Press to play a track
Don’t use mini-discs that arecalled
singles. Theywon’t eject. Use only full- again. If you hold the PREV button, the
disc will keep backingup to previous
size compact discs.
tracks.
1. Press POWER to turn theunit on.
NEXT: Press when you want to hear
2. Insert a disc part-wayinto theslot,
the next track. If you hold the NEXT
with the label side up. Theplayer will button, thedisc will keep advancingto
pull it in. In a fewseconds, the disc
other tracks.
should play.
REV (Reverse): Press and hold to
If the disc comes backout:
rapidly backup to a favorite passage.
The disc may beupside down.
Release to resume playing.
The disc may be dirty, scratched or
FF (Fast Forward):Press and hold to
wet.
rapidly advance the disc. Releaseto
resume
playing.
There may be too much moisture in
the air (wait about one hour and try
COMP (Compression):Depressing
again).
this button makes softand loud
The player may betoo hot,or the road passages more equalin volume. Press
again to resume normal play.
may betoo rough forthe disc to play.
While a discis playing, the CD indicator When Finished withthe Compact
Disc Player:
is displayed on thedigital screen, as is
the clock.
If you press POWER or turn off the
RCL (Recall): Press once to see which ignition, the disc will stayin theplayer
and startagain when you turn on the
track is playing. Press again within five
!20
ignition or power switch. The disc will
begin playing at thepoint where it had
been stopped.
ST/PL (Stop/Play): Press to stop the
disc player;the radio will play..Press
again to play the disc (the player will
start playing the disc where it was
stopped earlier).
EJCT (Eject): Press to eject the disc;
the radio will play.
CD Player Anti-Theft Feature
Delco LOC 11s
is a securityfeature that
can be used or ignored. If you ignore it,
your system will play normally.If you
use it, your systemcannot be turned on
if it is stolen. These instructions will tell
you how to enter a secret code into your
system. Then, if battery power is lost for
any reason, the secret code must be
entered again beforethe system can be
turned on.
To Set:
1. Write down any six-digit numberand
keep it in a safe place.This is your
secret code.
" appears, the
is secure. If "Run.
steps were not successful and you
must
repeat the entireprocedure.
3. Press the POWER button to turn the
radio off.
To Disable the Anti-Theft System:
4. Press the PREV and FF buttons at
Enter your secret code by following
the same time and hold until "-" these steps (you will have only15
shows on the display. You now have
seconds between each step).
only 15 seconds between each of the
1. Turn theignition to Accessory or
following steps.
Run and the radio off, then press the
5. Press SET and 000 appears on the
PREV and FF buttons of the station
display.
presets. SEC will appear, showing
the radio is secure.
6. Press and hold SEEK until the first
digit of your code appears.
2. Press SET and 000 appears on the
display.
7. Press and hold SCAN until the
second and third digits of your code
3. Press and hold SEEK until the first
appear.
digit of your secret code appears.
8. Press AM/FM (000 appears).
4.Press and hold SCAN until the
second and-third digits of your code
9. Press and hold SEEK until the fourth
appear.
digit of your code appears.
IO. Press and hold SCAN until the fifth 5. Press AM/FM (000 will appear on
the display).
and sixth digits of your code appear.
6. Press and hold SEEK until the fourth
11. Press AM/FM (rEP will appear for
digit of your code appears.
five seconds, then 000 ) .
7. Press and hold SCAN until the fifth
12. Repeat steps 6 through 10. Then
and sixth ,digitsof your code appear.
press the AM/FM button again.
SEC will appear, indicating that
8. Press AM/FM. If the display shows
Delco-Loc 11sis set, andyour radio
"-"
the radio is unsecured and will
2. Turn theignition to Accessory or
play again. If the display shows SEC:
the steps were not successful and the
numbers did not match the secret
code.
If you loseor forget yourcode, see your
dealer.
If you lose battery power, when the
battery is reconnected, the system will
not 'turn.on and LOC will appear.
Follow steps 1-8 for disabling your
system (the time will appear if you are
successful). If SEC appears, the
numbers did not match and your unit i:
still locked.
121
Comfort Controls&Audio Systems
switch to mute the audio system. Press
any switchto return toyour original
volume level.
SEEK: Each time you pressthe switch,
you willtune ina radio station higher
on the AM or FM band.
With a CD player, pressingSEEK will
advance the tracks.
Sfeering Wheel Touch Controls
For Audio System(OPTION)
Some audio system functions described
n the previous pages can also be
Iperated with the Steering Wheel
rouch Controls option. These touch
:ontrols also operate some climate
:ontrols. Seethe Index under Steering
Wheel Touch Controls for Climate
Zontrol.
PROG (Program):Press to hear
;tations which you havepreset on your
radio.
VOL (Volume): Press the top of the
switch to increase volume or the botton
to decrease it. Press the middle of the
122
Understanding Radio Reception
FM Stereo
FM Stereo will give you the best sound,
but FM signals will reach only about 10
to 40 miles (16 to 65 km) . Tall buildings
or hills can interfere with FM signals,
causing the sound to come and go.
AM
The range for mostAM stations is
greater than forFM, especiallyat night.
The longer range, however, can cause
stations to interfere with each other.
AM can also pick upnoise from things
like storms and power lines. To lower
this noise, try reducingthe treble level.
AM Stereo
Your Delco@ system may be able
to
receive C-Quam@stereo broadcasts.
Many AM stations around the country
use C-Quam@to produce.stereo,
though some do not. C-Quam@ isa
registered trademark of Motorola, Inc.
If your Delco@ system
can get CQuam@signals, yourstereo indicator
light will comeon when you are
receiving it.
Fixed Mast Antenna
The fixed mast antenna can withstand
most car washes without being
damaged. If the mast should ever
become slightlybent, you can straighten
123
Comfort Con&ols & Audio Systems
it out by hand. If the mast is badly bent,
as it might beby vandals, you should
replace it.
Check every once in a while to be sure
the mast is still tightened to thefender.
6. Then repeat if necessary.
I
NOTICE:
Don't lubricate the power.antenna.
Lubrication could damage it.
NOTICE:
Power Antenna.Mast ,Care
Your power antenna will lodlr~itsbest
and work wellif it's cleaned from time
to time.
To Clean the Antenna Mast:
1. Turn on the
ignition and radio to
raise the antenna tofull mast
extension.
2. Dampen a clean cloth with dneral
spirits or equivalent solvent.
3.Wipe cloth over the mast sections,
removing any dirt.
4.Wipe dry with clean cloth before
retracting.
5. Make the antennago up anddown by
turning theradio or ignition on and
Off.
124
Before entering an automatic car
wash, turn off your radio to make
the power antenna go down. This
will prevent the mast from possibly
getting damaged.If the antenna
does not go down when you turn
the radio off, it may be damaged or
need to be cleaned. In either case,
lower the antennaby hand by
carefully pressingthe antenna
down.
If the mast portion of your antenna is
damaged, you can easily replaceit. See
your dealer for a replacement lit and
follow the instructions in the kit.
Part 4
Your Driving and the Road
Here you’ll find information about
driving on different kinds of roads
and in varying weatherconditions.
We’ve also. included many other
useful tips on driving
.
Defensive Driving....................................................................................................
Drunken Driving ....................................................................................................
Control of a Vehicle
Braking .................................................................................................................
Anti-Lock Brakes .................................................................................................
Steering Tips ........................................................................................................
Steering in Emergencies ......................................................................................
Passing .................................................................................................................
Driving at Night .......................................................................................................
Driving.in. theRain ..................................................................................................
City
..............................................................................................................
Driving
Freeway Driving .....................................................................................................
Hill and Mountain Roads .......................................................................................
Winter Driving ........................................................................................................
Towing aTrailer.......................................................................................................
126
126
128
129
130
131
132
134
135
137
137
139
140
143
125
Your Driving,andthe,Road
Defensive Driving
The best advice anyone can give about
driving is: Drive defensively.
Please start with a very important safety
device in your Oldsmobile: Buckleup.
(See Safety BeZts in theIndex.)
Defensive driving reallymeans “be
ready foranything.” On city streets,
rural roads, or freeways, it means
“always expectthe unexpected.”
Assume that pedestriansorother
drivers are going to be careless and
make mistakes. Anticipate what they
might do. Be ready fortheir mistakes.
Rear-end collisionsare about the most
preventable of accidents. Yet they are
common. Allow enough following
distance. It’s the best defensive driving
maneuver, in both city and rural
driving. You never know when the
vehicle in front of you is going to brake
or turn suddenly.
Drunken Driving
Death and injury associated with
drinking and driving is a national
tragedy. It’sthe number one contributor
to thehighway death toll, claiming
thousands of victims every year.
Alcohol takes away three things that
anyone needs to drive a vehicle:
Judgment
Muscular Coordination
Vision
Police records show that almost half of
all motor vehicle-related deaths involve
alcohol - a driver, a passenger or
someone else, such as a pedestrian, had
been drinking. In most cases, these
deaths are the result .of someone who
was drinking and driving. About 20,000
motor vehicle-related deaths occur each
year because of alcohol, and thousands
of people are injured.
Just how much alcoholis too much if a
person plans to drive? Ideally, no one
should drink alcohol and then drive.
But if one does, then what’s “too
much”? It can be a lot less than many
might think. Although it depends on
each person and situation, here is some
general informationon theproblem.
The Blood Alcohol Content (BAC) of
someone who isdrinking depends upon
four things:
+
How much alcohol isin the drink.
The drinker’s body weight.
The amount of food that is consumed
before and during drinking.
The length of time it has taken the
drinker to consume the alcohol.
100
L
140 160 180 200
BODY WELGHT IN POUNDS
I20
220
240
Sometimes, as when you’re driving on
snow or.ice, it’s easy to ask more of
those ecmtrol systems than the tires and
ro:ad can Wovidg. That means you can
lose control of your vehicle.
I
Braking
Br&ng:action involves perception
time and .reactiontime.
First, you have to dedde~ push
to on the
CHECK
GAQES
\
I
Your Driving andthe Road
Braking in Emergencies
it possible forthe vehicle to change its
path
when you turn thefront wheels. If
Use your anti-lock braking system
when
no traction, inertia will keep the
there’s
you need to. With anti-lock, you can
vehicle goingin thesame direction. If
steer and brake at thesame time. In
you’ve evertried to steer a vehicle on
many emergencies, steeringcan help
wet ice, you’llunderstand this.
you more than even the very best
The traction you can get in a curve
braking.
depends on the condition of your tires
and the road surface, the angle at which
the curve isbanked, and your speed.
You can steer around the obstacle while
While
you’rein a curve, speed is the one
Power Steering
braking hard.
factor you can control.
If you lose powersteering assist
As you brake, your computer keeps
Suppose you’re steeringthrough a
because the engine stops or the system
receiving updates on wheel speed and
sharp curve. Then you suddenly
is not functioning, you can steer but it
controls braking pressure accordingly.
accelerate. Both control systems will take much more effort.
Remember: Anti-lockdoesn’t change
steering and acceleration - have to do
the time you need to get yourfoot up to
their work where the tires meetthe
the brake pedal. If you get too close to
Steering Tips
road. Adding the sudden acceleration
the vehicle in front of you, you won’t
can demand too much of those places.
Driving on Curves
have timeto apply yourbrakes if that
You can lose control.
vehicle suddenly slowsor stops. Always It’s important to take curves at a
What should you do if this ever
reasonable speed.
leave enough room up ahead to stop,
happens? Ease up on theaccelerator
even though you have anti-lock brakes. A lot of the “driver lost control”
pedal, steer the vehicle the way you
accidents mentioned on thenews
To Use Anti-Lock
want
it to go, and slow down.
happen on curves. Here’s why:
Don’t pump the brakes. Just hold the
Speed limit signs near curves
warn that
Experienced driveror beginner, each of
brake pedal down and let anti-lock
you
should
adjust
your
speed.
Of
us is subject to thesame laws of physics
work for you. You may feel the system
course, the posted speeds are based on
working, or you may notice some noise, when driving on curves. Thetraction of good weather and road conditions.
the tires against the road surface makes
but this is normal.
Steering
130
Your Oldsmobile can perform verywell:
in emergencies likethese. First apply
your brakes. It is better toremove as
much speed as you can from a possible
collision. Then steer around the
131
Your Driving andthe Road
Passing
m-Road Recovery
You may find sometimethat your right
wheels have dropped off the edge of a
road onto theshoulder while you’re
driving.
If the level of the shoulder is only
slightly belowthe pavement, recovery
should be fairly easy. Easeoff the
accelerator and then, if there is nothing
in theway, steer so that your vehicle
straddles the edge of the pavement. You
can turn thesteering wheel up to 1/4
turn until the right front tire contacts
the pavement edge.Then turn your
steering wheel to go straight down the
roadway.
132
The driver of a vehicle about to pass
another on a two-lane highwaywaits for
just the right moment, accelerates,
moves around the vehicle ahead, then
goes back into the right lane again. A
simple maneuver?
Not necessarily! Passinganother vehicle
on a two-lane highwayis a potentially
dangerous move, since the passing
vehicle occupiesthe same lane as
oncoming trafficfor several seconds. A
miscalculation, an error in judgment, or
a brief surrender to frustration or anger
can suddenly put the passing driver face
to face with the worst of all traffic
accidents -the head-on collision.
So here are some tips for passing:
“Drive ahead.” Look down the road,
to the sides, and to crossroads for
situations that might affect your
passing patterns. If you have any
doubt whatsoever about making a
successful pass,wait for a better time.
Watch for traffic signs, pavement
markings, and lines. If you can see a
sign up ahead that might indicate a
turn or an intersection, delay your
pass. A broken center line usually
indicates it’s all right to pass
(providing the road ahead is clear).
Never cross a solid lineon your side
of the lane or a double solidline, even
if the road seems emptyof
approaching traffic.
Do not get too close to the vehicle
you want to pass while you’re
awaiting an opportunity. For one
thing, following too closely reduces
your area of vision, especiallyif you’re
following a larger vehicle. Also,you
won’t have adequate space if the
vehicle ahead suddenly slowsor
stops. Keep back a reasonable
distance.
When it looks likea chance to pass is
coming up, start toaccelerate but stay
in the right lane and don’t get too
dose. Time your moveso you will be
increasing speedas thetime comesto
move into the other lane. If the way is
clear to pass, you will have a “running
start” thatmore than makes up for
the distance you would lose by
dropping back. And if something
happens to cause you to cancel your
pass, you need only slow downand
133
Your Driving andthe Road
steering, acceleration, or braking
(including engine braltingby shifting to
a lower gear). Any sudden changes
could cause the tires to slide. You may
not realize the surface is slippery until
your vehicle isskidding. Learn to
recognize warning clues- such as
enough water, ice or packed snow on
the road to make a “mirrored surface”
- and slow downwhen you have any
doubt.
Remember: Any anti-lock braking
system (ABS) helps avoid only
the
braking skid.
134
up only so much road ahead.
In remote areas, watch for animals.
If you’re tired, pull off the road in a
safe place and rest.
Night Vision
Driving at Night
Night driving is moredangerous than
day driving. One reason is that some
drivers are likely to be impaired-by
alcohol or drugs, with night vision
problems, or by fatigue.
Here are some tips on night driving.
Drive defensively.
Don’t drink and drive.
Adjust your inside rearview mirror
to
reduce the glare from headlights
behind you.
Since you can’t seeas well, you may
need to slow downand keep more
space betweenyou and other vehicles.
Slow down, especially on higher
speed roads. Your headlightscan light
No one can see as well at night as in the
daytime. But as we get olderthese
differences increase. A 50-year-old
driver may require at least twice as
much light to see the same thing at
night as a 20-year-old.
What you do in thedaytime can also
affect your night vision. For example,if
you spend the day in brightsunshine
you are wise to wear sunglasses. Your
eyes will have lesstrouble adjusting to
night. But if you’re driving,don’t wear
sunglasses at night. They may cut down
on glare from headlights,but they also
make a lot of things invisible.
You can be temporarily blindedby
approaching lights. It can take a second
or two, or even severalseconds, for
your eyes to readjust to thedark. When
you are faced with severe glare(as from
a driver who doesn’t lowerthe high
beams, or a vehicle with misaimed
i
headlights), slow down a little. Avoid
staring directly into theapproaching
lights.
Keep your windshield and all the glass
on your vehicleclean - inside and out.
Glare at night is made much worse by
dirt on theglass. Eventhe inside of the
glass can build up a film caused by dust.
Dirty glass makes lights dazzle and
flash more than clean glasswould,
making the pupils-of your eyes contract
repeatedly.
Remember that your headlights light up
far less of a roadway when you are in a
turn or curve. Keep your eyes moving;
that way, it’s easier to pick out dimly
lighted objects. Just as your headlights
should be checked regularlyfor proper
aim, so should your eyes beexamined
regularly. Some drivers suffer from
night blindness -the inability to see in
dim light- and aren’t even aware of it.
It’s wiseto keep yourwiping equipment
in good shape and keep your windshield
washer tank filled. Replace your
windshield wiperinserts whenthey
show signs of streaking or missing areas
on the windshield, or when stripsof
rubber start to separatefrom the
inserts.
Driving inthe Rain
Rain and wet roads can mean driving
trouble. On a wet road you can’t stop,
accelerate or turn as well because your
tire-to-road traction isn’t as good as on
dry roads. And, if your tires don’t have
much tread left, you’ll get even less
traction. It’s always wise to go slower
and be cautious if rain startsto fall
while you are driving. The surface may
get wet suddenly when your reflexes are
tuned for drivingon dry pavement.
The heavier the rain, theharder it is to
see. Even if your windshield wiper
blades are in good shape, a heavy rain
can make it harder to see road signs and
traffic signals,pavement markings, the
edge of the road, and even people
walking.
135
I Your Driving and the Road
Hydroplaning
Hydroplaning isdangerous. So much
water can build up under your tires that
they can actually ride on the water. This
can happen if the road is wet enough
and you’re goingfast enough. When
your vehicle is hydroplaning, it has little
or no contact with the road.
Hydroplaning doesn’t happen often.
Driving too fast through large water
But it can if your tires haven’t much
puddles or even goingthrough some car tread or if the pressure in one or more is
washes can cause problems, too. The
low. It can happen if a lot of water is
water may affect yourbrakes. Try to
standing on theroad. If you can see
avoid puddles.But if you can’t, try to
reflections fromtrees, telephone poles,
slow down before youhit them.
or other vehicles, and raindrops
“dimple”the water’s surface, there
could be hydroplaning.
Hydroplaning usuallyhappens at higher
speeds. Therejust isn’t a hard and fast
rule about hydroplaning; Thebest
advice is to slow down when it is
raining.
Some .OtherRainy Weather Tips
Turn on your low-beam headlightsnot just your parlcing lights -to help
make you more visibleto others.
136
Besides slowing down, allow some
extra following distance. And be
especially carefulwhen you pass
another vehicle. Allow yourself more
clear roomahead, and be prepared to
have your view restrictedby road
spray.
Have good tires with proper tread
depth. (See Tires in the Index.)
Treat a green lightas a warning
signal. A traffic light isthere because
the corner is busy enough to need it.
When a light turns green, and just
before you start tomove, check both
ways for vehicles that have not
cleared the intersection or may be
running thered light.
..
City Driving
One of the biggest problemswith city
streets is the amountof traffic on them.
You'll want to watch out for what the
other drivers are doing and pay
attention totraffic signals.
Here are ways to increase your safetyin
city driving:
IOnow the best way to get to where
you are going. Get a city map and
plan your trip into an unknown part
of the city just as you would for a
'cross-country trip.
Try to use the freeways that rim and
cris.scross most large cities. You'll
save time and energy. (See the next
section, Freeway Driving.)
4 Freeway Driving
Mile for mile, freeways(also called
thruways,~parkways, expressways,
turnpikes, or superhighways) are the
safest of all roads. But they havetheir
own special rules.
The most important advice on freeway
driving is: Keepup with traffic and keep
to the right. Drive at the same speed
most of the other drivers are dtiving.
roo-fast or too-slow dri,vingbreaks a
smooth traffic flow.Treat the left lane
on akeeway as a passing lane.
At the entrance there is usuallya ramp
that leads to thefreeway. If you have a
clear viewof the freeway as you drive
along the entrance ramp, you should
begin to check traffic.Try to determine
where you expectto blend with the
-
L
a
Your Driving and the Road
The exit spleed is usu.alllJ posted.
Reduce yourspeed according to your
speedometer, not to your sense of
motion. After driving for anydistance at
higher speeds, you may tend to think
you are going slowerthan you actually
are.
4 Before
Leaving on a Long
Trip
Make sure you’re ready.Try to be well
rested. If you must start when you’re
not fr&- such asafter a day’s work
- don’t plan to make too many miles
that first part of the journey. Wear
comfortable clothingand shoes you can
easily drivein.
Is your vehicle ready fora long trip? If
you keep it serviced and maintained, it’s
ready to go. If it needs service, haveit
done before starting out. Of course,
you’ll find experienced and able service
experts in Oldsmobile dealerships all
across North America. They’ll be ready
and willing to help if you need it.
Here are some things you can check
before atrip:
Windshield WasherFluid: Is the
reservoir full? Are all windows clean
inside and outside?
Wiper Blades:Are they in good
shape?
Fuel, Engine Oil, Other Fluids: Have
you checked all levels?
Lights: Are they all working? Arethe
lenses clean?
Tires: They are vitally impartant to a
safe, trouble-freetrip. Is the tread
good enough far long-distance
driving? Arethe tiresall inflated to
the recommended pressure?
Weather Forecasts:What’s the
weather outlook along yourroute?
Should you delay yourtrip a short
time to avoid a major storm system?
Maps: Do you have up-to-date maps?
IHighway Hypnosis
Is there actually such a condition as
“highway hypnosis”?Or is it just plain
falling asleep at the wheel? Callit
highway hypnosis,lack of~awareness,or
whatever.
There is something about an easy
stretch of road with the same scenery,
along with the humof the tires on the
road, the drone of the engine, and the
rush of the wind against the vehicle that
can make you sleepy.Don’t let it
happen to you! If it does, your vehicle
can leave the road in less than a
second, and you could crash and be
injured.
What can you do about highway
hypnosis? First, be aware that it can
happen.
Then here are some tips:
Make sure your vehicle is well
ventilated, with a comfortably cool
interior.
Keep your eyes moving. Scan the road
ahead and to thesides. Check your
rearview mirrors and your
instruments frequently.
If you get sleepy, pull off the road into
a rest, service, or parking area and
take a nap, get some exercise, orboth.
For safety,treat drowsiness on the
highway as an emergency.
Hill and MountainRoads
Driving on steep hills or mountains is
different from drivingin flat or rolling
terrain.
If you drive regularlyin steep country,
or if you’re planning to visit there, here
are some tips that can make your trips
safer and more enjoyable.
Keep your vehicle in good shape.
Check all fluid levelsand also the
brakes, tires, cooling systemand
transaxle. These parts can work hard
on mountain roads.
Know how to go down hills.The most
important thing to lmow isthis: let
your engine do some of the slowing
down. Shift to a lower gearwhen you
go down a steep or long hill.
I h o w how to go uphill. You may
want to shift down to a lower gear.
The lower gearskelp cool your engine
139
'
Your Driving and the Road
and transaxle, and you can climb the
hill better.
Stay in your own lane when driving
on two-lane roads in hills or
mountains. Don't swing wide orcut
across the center of the road. Drive at
speeds that let you stay in your own
lane.
As you go over the topof a hill, be
alert. There could be something in
your lane, like a stalledcar or an
accident.
You may see highway signs on
mountains that warnof special
problems. Examplesare long grades,
passing or no-passing zones, a falling
rocks area, or windingroads. Be alert
to these and take appropriate action.
IWinter
Driving
Here are some tips for winter driving:
Have your Oldsmobilein good shape
for winter. Be sure your engine
coolant mix- is correct.
You may want to putwinter
emergency supplies in your trunk.
Include an ice scraper, a small brush or
broom, a supplyof windshield washer
fluid, a rag, somewinter outer clothing,
a small shovel, a flashlight, red
a cloth,
and a coupleof reflective warning
triangles. And, if you will be driving
under severe conditions, include a s m a l l
bag of sand, a piece of old carpet or a
couple of burlap bags to help provide
traction. Be sure you properly secure
these items in your vehicle.
Driving on Snowor Ice
Most of the-time, those places where
your tires meet the road probably have
good traction.
However, if there is snow or ice
between your tires and the road, you
can have a very slippery situation.
You’ll havea lot less traction or “grip”
and will need to be very careful.
What’s the worst time for this? “Wet
ice.” Very cold snow or ice can be slick
and hard to drive on. But wet ice can be
even moretrouble because it may offer
the least traction of all. You can get
“wet ice” when it’s about freezing
(32°F; O’C) and freezing rain begins to
fall. Tryto avoid drivingon wet ice until
salt and sand crews can get there.
Whatever the condition - smooth ice,
packed, blowing or loose snow - drive
with caution. Accelerate gently. Trynot
to break the fragile traction. If you
accelerate too fast, the drive wheelswill
spin and polish the surface under the
tires even more.
Your anti-lockbrakes improve your
ability to make a hard stop ona slippery
road. Even though you have the antilock braking system, you’ll want to
begin stopping sooner than you would
on dry pavement. See Anti-Lock Brakes
in the Index.
Allow greater following distance on
any slippery road.
Watch for slippery spots. The road
might befine until you hit a spot
that’s covered with ice. On an
otherwise clear road, ice patches may
appear in shaded areas where the sun
can’t reach: around clumps of trees,
behind buildings, or under bridges.
Sometimes the surface of a curve or
an overpass may remain icy when the
surrounding roads are clear. If you see
a patch of ice ahead of you, brake
before you are on it. Try not to brake
while you’re actuallyon theice, and
avoid sudden steering maneuvers.
141
Your Driving and the Road
mats - anything you can wrap around
yourself or tuck under your clothingto
keep warm.
You can run theengine to keep warm,
but be careful.
If You’re Caught in a Blizzard
If you are stopped by heavy snow, you
could bein a serious situation. You
should probably stay with your vehicle
unless you know forsure thatyou are
near help and you can hike through the
snow. Here are some things to do to
summon helpand keep yourself and
your passengers safe:Turn onyour
hazard flashers. Tiea red cloth to your
vehicle to alert police that you’ve been
stopped by the snow. Put on extra
clothing orwrap a blanket around you.
If you have no blankets or extra
clothing, make bodyinsulators from
newspapers, burlap bags, rags, floor
142
Towing a Trailer
I
I-
i
E
7
t
C
I
r
s
7
7
.<
f
7
I
t
3
145
L
Your Driving and the Road
Safety Chains
You should always attach chains
between your vehicleand your trailer.
Cross the safety chains under the
tongue of the trailer so that thetongue
will not drop to theroad if it becomes
separated from the hitch. Instructions
about safety chains may be providedby
the hitch manufacturer or by the trailer
manufacturer. Follow the
manufacturer’s recommendation for
attaching safety chains. Always leave
just enough slackso you can turn with
your rig. And, never allow safety
chains
to drag on the ground.
Trailer Brakes
with the feel of handling and braking
with the added weightof the trailer.
And always keepin mind that the
vehicle you are driving is nowa good
deal longerand not nearly so responsive
as your vehicle isby itself.
Before you start, check the trailer hitch
and platform, safetychains, electrical
connector, lights, tires and mirror
adjustment. If the trailer has electric
brakes, start your vehicleand trailer
moving and then apply the trailer brake
controller by hand to be sure the brakes
are working. Thislets you check your
electrical connection at thesame time.
During your trip, check occasionallyto
be sure that theload is secure, and that
the lights and any trailer brakes are still
working.
Because you have anti-lockbrakes,
don’t try to tapinto your vehicle’s brake
system at all. If you do, both brake
Following Distance
systems won’t work well or at all.
Stay at least twice as f a r behind the
vehicle ahead as you would when
Driving with a Trailer
driving your vehiclewithout a trailer.
Towing a trailer requires a certain
This can help you avoidsituations that
amount of experience. Before setting
require heavy brakingand sudden
out for the open road, you’ll want to get turns.
to laowyour rig. Acquaint yourself
146
Passing
You’ll need more passingdistance up
ahead when you’re towinga trailer.
And, because you’rea good deal longer,
you’ll needto go much farther beyond
the passed vehicle before youcan return
to your lane.
Backing Up
Hold the bottom of the steering wheel
with one hand. Then, to move the
trailer to theleft, just move that hand to
the left. To move the trailer to theright,
move your hand to the right. Always
back up slowly and, if possible, have
someone guideyou.
Making Turns
When you’returning with a trailer,
make widerturns thannormal. Do this
so your trailer won’t strike soft
shoulders, curbs, road signs, trees, or
other objects. Avoid jerky or sudden
maneuvers. Signal well in advance.
Turn Signals When Towing a
Trailer
When you tow a trailer, your vehiclehas
to have a different turn signal flasher
and extrawiring. The green arrows on
your instrument panel will flash
whenever you signal a turn or lane
change. Properly hooked up, thetrailer
lights will alsoflash, telling other
drivers you’reabout to turn,change
lanes or stop.
When towing a trailer, the green arrows
on your instrument panel will flash for
turns even if the bulbs on thetrailer are
burned out. Thus,you may think
drivers behind you are seeing your
signal whenthey are not.It’s important
to check occasionallyto be sure the
trailer bulbs are still working.
Driving On Grades
Reduce speed and shift to a lower gear
before you start down a long or steep
downgrade. If you don’t shift down, you
might haveto use your brakes so much
that they would gethot and nolonger
work well.
On a long uphill grade, shift down and
reduce your speed to around 45 mph
(70 ltm/h) to reduce the possibility of
engine and transaxle overheating.
If you are towing a trailer and you have
an automatic transaxle with Overdrive,
you may want to drive in 3 instead of D
(or, asyou need to, a lower gear).
4.Reapply the regular brakes. Then
apply your parkingbrake, and then
shift to P (Park).
5. Release the regular brakes.
When You Are Ready to Leave
After Parking on a Hill
1. Apply your regular brakesand hold
the pedal down whileyou:
Start your engine;
You really should not park your vehicle,
Shift into a gear; and
with a trailer attached, ona hill. If
something goes wrong, your rig could
Release the parking brake.
start to move. Peoplecan be injured,
2.Let up on thebrake pedal.
and bothyour vehicleand thetrailer
3.Drive slowlyuntil the trailer is clear
can be damaged.
of the chocks.
But if you ever haveto park your rig on
4.Stop andhave someone pickup and
a hill, here’s howto doit:
store thechocks.
1. Apply your regularbrakes, but don’t
shift into P (Park) yet.
2. Have someone place choclts under
the trailer wheels.
3.When the wheel chocltsare in place,
release the regular brakes until the
choclts absorb the load.
Parking on Hills
147
Mainfenance When Trailer Towing
Your vehicle will need service :nore
often when you’re pullinga trailer. See
the Maintenance Schedule for more on
this. Things that are especially
important in trailer operation are
automatic transaxle fluid (don’t
overfill), engine oil,belts, cooling
system, and brake adjustment. Each of
these is covered in this manual, and the
Index will help you findthem quickly. If
you’re trailering, it’s a good idea to
review these sections before you start
your trip.
Check periodicallyto see that all hitch
nuts and bolts are tight.
Part 5
Problems on the Road
Here you’ll find what to do about
some problems that can occuron the
road.
Hazard Warning Flashers .......................................................................................
Jump Starting ..........................................................................................................
Towing Your Oldsmobile .......................................................................................
Engine Overheating ................................................................................................
If a Tire Goes Flat ...................................................................................................
Changing a Flat Tire ...............................................................................................
Compact Spare Tire ................................................................................................
If You’re Stuck: In Sand. Mud. Ice or Snow .........................................................
150
150
154
158
165
166
172
173
c
149
Problems on the Road
4 Jump Starting
If your battery hasrun down, you may
want to use another vehicle and some
jumper cablesto start your Oldsmobile.
But please followthe steps below to do
it safely.
4 Hazard Warning Flashers
Your hazard warning flashers let you
warn others. They also let police know
you have a problem. Yourfront and real
turn signal lights will flashon and off.
Slide the switch up to make your front
and rear turn signal lights flashon and
off.
Your hazard warning flashers work no
matter what position yourkey is in, and
even if the key isn't in.
To turn off the flashers, slidethe switch
down.
When the hazard warning flashersare
on, your turn signals won't work.
4 Other Warning Devices
If you carry reflective triangles, you can
set one up at theside of the road about
300 feet (100 m) behind your vehicle.
150
To Jump Start Your Oldmob!le:
1. Checkthe otber vehicle..It musthave
a 1.2-voltbattery with a negative
ground system,
NOTICE:
1
,
Ifthe other system isn’t a 12-vdt
.systemwith a negative grouad,
both vehicles can be. damagd.
4.Open the h0od.s and locate the
batteries.
Before you connect the cables, here
are some basicthings you should
know. Positive (+) will go to positive
(+) and negative (-) will go to
negative (-) or a metal enginepart.
Don’t connect (+) to (-) or you’ll get
a short thatwould damagethe
battery and maybe other parts, too.
Find the positive (+) and negative
(-) terminals on each battery. Your
Oldsmobile has a remote positive (+)
jump starting terminal. The terminal
is on the same side of the engine
compartment as your battery.
You should always use the remote
positive (+) terminal instead of the
positive (+) terminal on your battery.
To uncover the remote positive (+)
terminal, lift the red plastic cap.
5. Check that thejumper cables don’t
have looseor missing insulation. If
they do, you could get ashock. The
vehicles could be damaged,too.
6. Connect the red positive (+) cable to
the positive (+) terminal of the
vehicle with the dead battery. Use a
remote positive (+) terminal if the
vehicle has one.
7. Don’t let the other end touch metal.
9. Attach the cable at least 18 inches
Connect it to thepositive (+)
terminal of the good battery. Use a
remote. positive(+) terminal if the
vehicle has one.
8. Now connect the black negative (-)
cable to thegood battery’s negative
(-) terminal. Don’t let the other end
touch anything until the next step.
The otherend of the negative cable
doesn’t go to thedead battery. It goes
to a heavy unpainted metal part on
the engine of the vehicle with the
dead battery.
(45 em) away fromthe dead battery,
but notnear engine parts that move.
The electrical connection is just as
good there, but thechance of sparks
getting back to thebattery is much
less.
10. Now start thevehicle with the good
battery and run theengine for a
while.
11. Try to startthe vehicle with the
dead battery. If it won’t start after a
few tries, it probably needs service.
153
Problems on theRoad
12. Remove the cables in reverse order
to prevent electrical shofiing, Take
care-thatthey don’t touch each
other-or my other metal.
154
ITowing Your OUsmobile
When your vehicle is beingtowed, have
the ignition key off. The steering wheel
should be clamped in a straight-ahead
position, with a clamping device
designed for towing service.Do notuse
the vehicle’s steering column lock for
this. The transaxle should be in N
(Neutral) and theparking brake
released.
Don’t have your vehicle towedon the
front wheels, unless you must. If the
vehicle must be towed on thefront
wheels, don’t go more than 35 mph (56
ltm/h) or farther than 50 miles (80 ltm)
or your transaxle will be damaged.If
these limits must be exceeded, then the
front wheels haveto be supported on a
dolly.
c
155
Problems on the Road
rowing from the Front-Vehicle
Hook-up
Before hooking up toa tow truck, be
sure to read all the information on
rowing Your Oldsmobile earlier in this
section.
Qll Models
1. Attach T-hook chains into theside
slots in the cradle in front of the
wheels, on both sides.
156
J
4-Door Models
2. Position a 4x4 wood beam across
sling chains against the bottom of the
cradle horns.
.Door Models
NOTICE:
Do not tow with sling-type
equipment or fascia/fog light
damage will occur. Use wheel-lift or
car carrier equipment. Additional
ramping may be required forcar
carrier equipment.
Use safety chains and wheel straps.
NOTICE:
Towing a vehicle overrough
surfaces could damage a vehicle.
Damage can occur from vehicle to
ground or vehicle to wheel-lift
equipment. To help avoid damage,
install a towing dolly and raise
vehicle until adequateclearance is
obtained between the ground
and/or wheel-lift equipment.
Do not attachwinch cables or Jhooks to suspension components
when using car carrier equipment.
Always use T-hooks inserted in the
T-hook slots.
AN Models
3.Attach a separate safety chain around
the outboard end of each lower
control arm.
157
~~
~
WTICE:
your enghe'catches fire because
you keep driving with no coolant,
your vehicle can be badly damaged..
The costly repairs would not be
covered-by your warranty.
. I f
1
I
If the coolant inside the coolant
recovery tank is boiling, don’t do
anything else until itcools down.
Cooling System
When you decideit’s safe to lift the
hood, here’s what you’ll see:
(A) Coolant recovery tank
(€3)Radiator pressure cap
(C) Electric enginefans
160
The coolant level should beat or above
the COLD mark. If it isn’t, you may
have a leak in theradiator hoses, heater
hoses, radiator, waterpump or
somewhere elsein the cooling system.
NOTICE:
In cold weather, watercan freeze
and crack the engine, radiator,
heater core and other-parts.Use the
recommended coolant.
2. Then keep turning thepressure cap,
but now push down as you turn it.
Remove the pressure cap.
3.After the engine cools, open the
coolant air bleed valveor valves.
3100 V6 (VIN Code M): There are
two bleed valves.One is located on
the thermostathousing. The other is
located on the thermostatbypass
tube.
3.4L V6 (VINCode X): There are
two bleed valves. Theyare located on
the thermostathousing and heater
inlet pipe.
163
Problems on the Road
4. Fill the radiatotwith the prapermix,
.up to thebase of the filler neck. If
you see a stream af coolant coming
from.an air bleed valve, closethe
valve. Otherwise.,close.the valves
&er the radiator is filled.
5. Rinse or wip*e
any spilled coolant
from the engine
compartment,
'
164
6. Then fill the coolant recovery tank to
the COLD mark.
7. Put thecap back on the coolant
recovery tank, but.leave the radiator
pressure cap off.
8. Start the engine and let it run until
10. Then replace the pressure cap. At
you can feel the upper radiator hose
getting hot. Watch out for the engine
fans.
9. By this time the coolant level inside
the radiator filler neck may belower.
If the level is lower, add more of the
proper mix through the filler neck
until the level reaches the base of the
filler neck.
any time during this procedure if
coolant begins to flow out of the
filler neck, reinstall the pressure
cap. Be sure the arrows on the
pressure cap.line uplike this.
11. Check the coolant in the recovery
tank. Thelevel in the coolant
recovery tanlcshould be at theHOT
mark when the engine ishot or at
the COLD mark when the engine is
cold.
Ifa Tire Goes Flat
leak out slowly. But if you should ever
have a “blowout,” here are a few tips
about what to expect and what to do:
If a front tire fails, the flat tire will
create a drag that pulls the vehicle
toward that side. Take your foot off the
accelerator pedal and grip the steering
wheel firmly. Steer to maintain lane
position, then gently brake to a stop
well out of the traffic lane.
A rear blowout, particularly on a curve,
acts much like a slid and may require
the same correction you’d use in a skid.
In any rear blowout, remove your foot
from the accelerator pedal. Get the
vehicle under control by steering the
way you want thevehicle to go. It may
be very bumpy and noisy, but you can
still steer. Gently brake to a stop, well
off the road if possible.
If a tire goes flat, the next section shows
how to use your jackingequipment to
change a flat tire safely.
It’s unusual for a tire to “blow out”
while you’re driving, especially if you
maintain your tires properly. If air goes
out of a tire, it’s much more likelyto
165
Problems on the Road
Changing a Flat Tire
If a tire goes flat, avoid further tire and
wheel damage by driving slowlyto a
level place.Turn onyour hazard
warning flashers.
The following steps will tell-youhow to
use the jack and change atire.
The equipment you’ll need is in the
trunk.
1. Pull the carpeting from the floor of
the trunk.
2. Turn the center retainer bolt on the
compact spare tire housing
countercloclmise to remove it, then
lift the tire cover.
3.Remove the wing nut securing the
compact spare tireand spacer by
turning it countercloclwise. Then lift
off the spacer and remove the spare
tire.
4.Remove the bolt securing the jack
and wrench by turning it
countercloclwise. Then remove the
jack and wrench.
5. If there is a wheel cover, remove it by
using the wedge end of the wrench to
pry gentlyin a notch at theedge.of
the center cap. Do not use a tool that
is narrower, such as a screwdriver, to
pry in this notch. You may damage
the wheel cover or the center cap.
You may also have plastic nut caps.
Loosen the plastic nut caps with the
wheel wrench. They won’t come off.
Then pry along the edge of the wheel
cover until it comes off.
167
Problems on the Road
6. If your vehiclehas exposed wheelnut
caps, remove them using the wheel
nut wrench.
7. Using the wheel wrench, loosen all
the wheel nuts. Don’t remove them
yet.
3. Remove the band around the jack.
Turn the jack handle clockwise to
raise the jack head a few
inches.
NOTICE:
9. Position the jack and raise the jack
head until it fits firmly into th’e notch
in thevehicle’s-framenearest theflat
tire. Do not raise the vehicle yet.-Put
the compact spare tire near you.
IO. Raise the vebideby rotating the
jack han8dleclockwise. Raisethe
jack far enough so there’s enough
room for the spare tire to fit.
11. Remove allwheel nutsand take off
the flat tire.
Probkms on the Road
12. Remove any rust or dirt from the
wheel bolts, mounting surfaces and
spare wheel. Placethe spare on the
wheel mounting surface.
1 70
13. Replace the wheel nuts with the
rounded end of the nutstoward the
wheel. Tighten each nut by hand
until the wheel is held against the
hub.
14. Lower the vehicle by rotating the
jack handle counterclockwise.
Lower the jack completely.
15. Tighten the wheel nuts firmly in a
cr&cross sequence as shown. Don’t
try to put the
wheel cover on your
compact spare tire. It won’t fit.
Store the wheel cover in the trunk
until you have the flat tire repaired
or replaced.
NOTICE:
Wheel coverswon’t fit on your
compact spare. If you try to put a
wheel cover on your compact spare,
you could damagethe cover or the
spare.
16. Store the flat tire as far forward in
the trunk aspossible. Store the jack
and the wheel wrench in their
compartment in the trunk.
171
The compact spare is. for temporary use
only. Replace the compact spare tire
with a full-size tire ass o m a s you 'can.
later in this
See Compact Spare -Tire
section.
Part 6
Service &Appearance Care
175
Service &Appearance Care
AC'
1-1
Doing Your Own Service Work
If you want to.do some of your own
service work, you'llwant.to get the
proper Oldsmobile ServiceManual. It
tells you much.more about how to
service yowr Oldsmobile than this
.manual can. To order the proper service
176
manual, see ServicePublications in the
Index.
Your vehiclehas an air bag system.
Before attempting todo your own
service work, see Servicing Your Air
Bag-Equipped .Oldsmobile in the Index..
You should keep a record with all parts
receipts and list the mileage and the
date of any service work you perform.
See Maintmance Record in the Index.
NOTICE:
If you try to do yourown service
work without lmowing enough
.about it, your vehicle could be
damaged.
I
Fuel
Be sure the posted.octaneis at least 87.
I€the octane is less than 87, you may
get a heavy knocking noise when you
drive. If it's bad enough, it .can damage
your engine.
-I77 ,
Gasolines for Cleaner Air
Your use of gasoline with deposit
control additives willhelp prevent
deposits from formingin your engine
and fuel system. That helps keep your
engine intune and your emission
control system working properly. It’s
good for your vehicle,and you’ll be
doing yourpart for cleanerair.
Many gasolinesare now blended with
oxygenates. General Motors
recommends that you use gasolines
with these blending materials, such as
MTBE and ethanol. By doing so, you
can he€pclean the air, especially in
those partsof the country that have
high carbon monoxide levels.
In addition, some gasolinesuppliers are
now producing reformulated gasolines.
These gasolines are specially designed
to reduce vehicle emissions.General
Motors recommends that you use
reformulated gasoline.By-doingso, you
can help clean the air, especially in
those parts of the country that have
high ozone levels.
You should ask your service station
operators if their gasolines contain
1 78
deposit control additives and
oxygenates, and if they have been
reformulated to reduce vehicle
emissions.
Fuels in Foreign Countries
llou can also write usat thefollowing
iddress for advice. Just tell us where
{ou’re goingand give your Vehicle
Identification Number (VIN) .
General Motors Overseas Distribution
Corporation
North American Export Sales (NAES)
1908 Colonel Sam Drive
Oshawa, Ontario LIH 8P7
Filling Your Tank
Fuel Capacity:
16.5 U.S. Gallons (62 L). Use unleaded
fuel only.
The cap isbehind a hinged door on the
left side of your vehicle.
While refueling; hang the cap.inside the
fuel door.
To take off the cap, turnit slowly to the
left (countercloclwise).
1 79
Service &Appearance Care
Be careful not tospill gasoline. Clean
gasoline from painted surfaces as soon
as possible. See Cleaning the Outside
of Your Oldsmobile in the Index.
When you put thecap back on, turn it
to the rightuntil you hear atleast .three
cliclcs.
If you need a new cap, be sure to
get the right type. Your dealercan
get one for you. If you get the
wrong type, it may not fit or have
proper venting, and your fuel tank
and emissions system might be
damaged.
Hood Release
To open the hood, first pullthe handle
inside thevehicle.
Then go to the frontof the vehicle and
release the^ secondary hood release.
Lift the hood.
Checking Things Under the
Hood
The following sections tell you howto
check fluids, lubricants and important
parts underhood.
180
I
Before closingthe hood, be sure all the
filler caps are on properly. Then just
pull the hood down and close it firmly.
181
Service & Appearanctr Care
3700 V6 Engine (CODE M).
When you open the hood, you’ll see:
1. Power Steering Fluid Reservoir
2. Engine Oil Fill Cap
3. Automatic Transaxle Fluid Dipstick
4.Brake Fluid Reservoir
5. Windshield Washer Fluid Reservoir
6. Battery
7. Air Cleaner
8. Engine Oil Dipstick
9. Radiator Pressure Cap
IO. Engine Coolant Reservoir
Twin Dual Cam (DOHC) 3.4L V6
Engine (CODE x)
When you open the hood, you’ll see:
1. Power Steering Fluid Reservoir
2. Automatic Transaxle Fluid Dipstick
3. Brake Fluid Reservoir
4.Windshield Washer Fluid Reservoir
5. Battery
6. Air Cleaner
7. Engine Oil Fill Cap
8. Engine Oil Dipstick
9. Radiator Pressure Cap
IO. Engine Coolant Reservoir
183
Service & Appearance Care
Engine Oil
If the LOW OIL LEVEL light on the
instrument panel comes on, it means
you need to check yourengine oil level
right away. For more information, see
Low Oil Level Light in the Index. You
should check your engine oil level
regularly; this is an added reminder.
It’s a good ideato check your engine .oil :
3100 V6: Checking Engine Oil
every time you get fuel.In order to get
an accurate reading, the oil must be
warm and the vehicle must be on level
ground.
Turn off the engine and give the 0il.a
few minutes to drain back into theoil
pan. If you don’t, the oil dipstick might
not show the actual level.
To Check EngineOil
Pull out thedipstick and clean it with-a
paper towel orcloth, then push it bzck
in all the way. Remove it again, keeping Twin Dual Cam 3.4L V6: Checking
Engine Oil ’
the tiplower, and check the level.
When to Add Oil
If the oil is at orbelow the ADD line,
then you’ll need to addsome oil. But
you must use the right kind. This
section explains what kind of oil to use.
For crankcase capacity, seeCapacities
and Specificationsin theIndex.
NOTICE:
Don’t add too much oil. If your
engine has so much oil that theoil
level gets abovethe cross-hatched
area that shows the proper
operating range, your engine could
be damaged.
Just fill it enough to put the
level
somewhere in theproper operating
range. Push thedipstick allthe way
back in when you’re through.
RECOMMENDED SAE VISCOSITY GRADE ENGlNE OILS
FOR BEST FUEL ECONOMY AND COLD STARTING,
SELECT THE LOWEST SAE VISCOSITY GRADE OIL
FOR THE EXPECTED TEMPERATURE RANGE.
LOOK FOR
HOT
ONE OF THESE
LABELS
WEATHER
3100 V6: Adding Engine Oil
c
’TwitEDual .Cam3.4L V6: Adding
Engine Oil
What Kind of Oil to Use
Beginning midyear1993, oils of the
proper quality for your vehicle will be
identified with thisnew “starburst”
symbol. The “starburst” symbol
indicates that theoil has been certified
.by the American Petroleum Institute
(API), and is preferred foruse in your
gasoline engine.
You should look forthis on the frontof
the oil container, and useonly oils that
display this new symbol.
You should also use the proper viscosit:
oil for your vehicle, as shown in the
following chart.
1
SAE 5W-30
PREFERRED
COLD
WEATHER
IF NEITHER SAE 5W-30 NOR SAE 1OW-30
GRADE OILS ARE AVAILABLE, SAE 30
GRADE MAY.BE USED AT TEMPERATURES
ABOVE 40 DEGREES F (4 DEGREESC).
DO NOT USE SAE 1OW-40, SAE 2OW-50 OR
ANY OMER GRADE OIL NOT RECOMMENDED.
4s shown inthe chart,SAE 5W-30 is
3est for your vehicle. However,
you can
Ise SAE 1OW-30 if it’s goingto be 0°F
185
L
1
Service & Appearance Care
(-18°C) or above. These numberson an
oil container show its viscosity, or
oils,
thickness. Do not use other viscosity
such as SAE 1OW-40 or S A E 20W-50.
If you cannot find oils with the new
“starburst” symbol on the front of the
container, you should look forand use
oils containing the following three things:
SH or SG
“SH” or “SG” must be on theoil
container, either by itself or combined
NOTICE:
with other quality designations, such
If you use oils that do not have
as “SH/CD,” “SH,SG,CD,”“SG/CD,”
either the “starburst” symbol or an
etc. Theseletters show American
SH or SG designation, you can
API
Petroleum Institute (API) levels of
cause engine damagenot covered
quality.
by your warranty.
SAE 5W-30
Energy ConservingI1
GM Goodwrench* oil (in Canada, GM
Oils with these words on thecontainer
Engine Oil) meets all the requirements
will help you save fuel.
for your vehicle.
These three things are usually included
on
in a doughnut shaped logo (symbol)
Engine Oil Additives
most containers.If you cannot find oils
with the “starburst” symbol, you should Don’t add anything to your oil. Your
look for oils with the doughnut shaped
Oldsmobile dealer is readyto advise if
symbol, containingthe three things
you think something should beadded.
noted above.
186
When to Change Engine Oil
See if any one of these is true for you:
Most trips are less than 4 miles
(6 km) .
It’s below freezing outside and most
trips are less than 10miles (16 ltm).
The engine isat low speed most of the
time (as in door-to-door delivery, or in
stop-and-go traffic).
You tow a trailer often.
Most trips are through dusty places.
If any one of these is true for your
vehicle, then you need to change your
oil and filterevery 3,000 miles (5 000
k m ) or 3 months -whichever comes
-first.
If none of them is true, change the oil
every 7,500 miles (12 500 l m ) or 12
months -whichever comes first.
Change the filter at thefirst oil change
and at every other oil change afterthat.
Engine Coolant Heater (Engine
Block Heater) (omoN)
An engine coolantheater can be a big
help if you have to park outside in very
cold weather, 0°F (-18°C) or colder. If
your vehiclehas this option,see Engine
Coolant Heaterin the Index.
What to Do wifh Used Oil
Did you know that used engine oil
contains certainelements that may be
unhealthy for yourskin andcould even
cause cancer? Don’t let used oil stay on
your skin for very long. Clean yourskin
and nails with soap and water,
or a
good hand cleaner. Wash or properly
throw away clothing or ragscontaining
used engine oil..(See themanufacturer’s
warnings about theuse and disposal of
oil products.)
Used oil can be areal threat to the
environment. If you change your own
oil, be sure to drain all free-flowing oil
from the filter beforedisposal. Don’t
ever dispose of oil byputting it in the
trash, pouring it on the ground, into
sewers, or into streamsor bodies of
water. Instead,recycle it by taking itto
a place that collects used oil. If you
have a problem properlydisposing of
your used oil, ask your dealer, a service
station or a local recyclingcenter for
help.
Air Cleaner
Refer to theMaintenance Schedule to
determine when to replace the airfilter
and thecrankcase ventilation filter.
See Scheduled Maintenance Services 3i
the Index.
To Check or Replace theAir Filter:
1. Remove the four screws and pull off
the cover.
NOTICE:
If the air cleaner is off, a backfire
can cause a damaging enginefire.
And, dirtcan easily getinto your
engine, which will damage it.
Always havethe air cleaner in place
when you’re driving.
187
Service & Appearance Care
Automatic Transaxk Fluid
When fo Check and Change
A good timeto check yourautomatic
transaxle fluid level is whenthe engine
oil is changed. Refer to the Maintenance
Schedule to determine when to change
your fluid. SeeScheduled Maintenance
Services in the Index.
2. Remove the air cleaner filter.
3.Be sure toinstall the air cleaner filter
and replace the cover tightly.
How to Check
Because this operation can be a little
difficult, you may chooseto have this
done at an Oldsmobile dealership
Service Department.
If you do ityourself, be sure tofollow
all the instructions here, or you could
get a false reading onthe dipstick.
NOTICE:
Too much or too.little fluid can
damage yourtransaxle. Too much
can mean that some of the fluid
could come out and fall on hot
engine parts or exhaust system,
starting afire. Be sure toget an
accurate reading if you check your
transaxle fluid.
Wait at least 30 minutes before
checking the transaxlefluid levelif you
have been driving:
When outside temperatures are
above
90°F (32°C).
At high speedfor quite a while.
In heavy traffic- especially in hot
weather.
While pullinga trailer.
To get the right reading, the fluid
should be at normal operating
2OOpF
temperature, which is 18O"F-to
(82°C to 93T).
Get the vehicle warmedup by driving
about 15miles (24 lun)'when outside
temperatures areabove 50°F (10°C).If
3100 V6: Checking Auto'matic
Transaxle Flmulid
Twin Dual Cam3.4L V6: Checking
Automatic Tmnsaxle Fluid
IEngine .Coolant
Twin Dual Cam 3.4L V6: Ad,ding
Automatic Transaxle Fluid
coolant flush andrefill. If you use this
mixture, you don’t need to add anything
The follciwing explains your cooling
else.
system and how to add coolant when it
is low. If you have a problem with
engine overheating or if y0.u need to add
coolant to your radiator, see Engine
Overheating in the Index.
The proper coolant for your Oldsmobile
will:
Give freezingprotection down to-34”F
(-37°C).
Give boilingprotection up to 262°F
(128°C).
Protect againstrustand corrosion.
Help keep the proper engine
temperature.
Let the warning lights work as they
should.
What to Use
Use a mixture of one-half dean-water
(preferably distilled)and one-half
antifreeze that meets “GM Specificatkm
1825-M,”which won’t damage
aluminum parts. You can also usea
recycled coolant conforming to GM
Specification 1825-M with a complete
1 SECURITY
I
w OIL
EVEL
I
NOTICE:
If you use an improper coolant mix,
your engine could overheat and be
badly damaged.The repair cost
wouldn’t be covered by your
warranty. Too much water in the
mix can freeze and crack the
engine, radiator, heater core and
other parts.
P
Adding Coolant
To Check Coolant
When your engine is cold,the coolant
level should be at the COLD mark or a
little higher. When your engineis warm,
the level should be up to theHOT mark
or a little higher.
LOW
COOLANT
If this light comes on, it means you’re
low on engine coolant.
To Add Coolant
If you need morecoolant, add the
proper mix at the coolant recovery
tank.
If the coolant recovery tank is
completely empty, add coolant to the
radiator. (See Engine Overheating in
the Index.)
191
Service & Appearance Care
Radiator Pressure Cap
NOTICE:
Your radiator cap is a 15 psi
(105kPa) pressure-type cap and
must be tightly.installed io prevent
coolant loss and possible engine
damage from overheating. Be sure
the arrows on the cap line up with
the overflow tube on theradiator
neck. filler
I
L
When you replace your radiator
premre
cap, an AC@cap is recommended.
Add coolant mix at the recovery tank,
but be careful not to spill it.
Thermostat
Engine coolant temperature is
controlled by a thermostat in the engine
coolant system. The thermostat stops
the flow of coolant through the radiator
until the coolant reaches a preset
temperature.
When you replace yourthermostat, an
AC@thermostat is recommended.
IPower Steering Fluid
How To Check Power Steering
Fluid
Unscrew the cap and wipe the dipstick
with a clean rag. Replacethe cap and
completely tighten it. Then remove the
cap againand look at thefluid level on
the dipstick.
When the engine compartment is hot,
the level should be at the H mark.
When the engine compartment is
cool, the level 'should beat theC
mark.
What to Add
Refer to theMaintenance Schedule to
determine what kind of fluid to use. See
192
Recommended Fluids and Lubricants
in theIndex.
NOTICE:
NOTICE:
When adding power steering fluid
or making a complete fluid change,
always use the proper fluid. Failure
to use the proper fluid can cause
leaks and damage hoses and seals.
Windshield Washer Fluid
To Add
Open thecap labeled WASHER
FLUID ONLY. Add washer fluid until
the bottle is full.
When using concentrated washer
fluid, follow the manufacturer’s
instructions for adding water.
Don’t mix water with ready-touse washer fluid. Water can cause
the solutionto freeze and damage
your washer fluid tank and other
parts of the washer system. Also,
water doesn’t clean as well as
washer fluid.
Fill yourwasher fluid tank only %
full when it’s very cold.This
allows for expansion, which could
damage the tankif it is
completely full.
Don’t use radiator antifreeze in
your windshieldwasher. Itcan
damage yourwasher system and
paint.
.
193
are worn,then you'll have.too much
ffuid when you get new brake linings.
brake fluid reservoir cap before
removing it.
YOUshould add (or remove) brake
fluid, as necessary, onlywhen work is
done on the brake hydraulic system.
When your brakefldd falls to alow
level, yourbrake warning light will
come on. See Brake Syste-mWarning
Light in the Index.
What to Add
When you do needbrake fluid, useo.nly
DOT-3 brake fluid - such as Delco
Supreme 11s (GM Part No. 1052535).
Use new brake fluid from a sealed
container only,.and always clean the
194
Brake Wear
Your Oldsmobilehas four-wheel disc
brakes.
Disc brake pads havebuiltin wear
indicators that make a high-pitched
warning sound when the brake pads are
worn and new pads are needed. B e
sound may come and go or be heard all
the time your vehicleis moving (except
when you are pushing on. the brake
pedal firmly).
Brake Pedal TravelSee yourdealer if the brake pedal does
not return to normal height, or if there
is a rapid increase in pedal travel. This
could be a sign of brake trouble.
Brake Adjustment
NOTICE:
Continuing to drive with worn-out
brake pads could result in costly
brake repair.
Some drivingconditions or climates
may cause a brake squeal when the
brakes are first applied or lightly
applied. This does not mean something
is wrong with your brakes.
Brake linings should always be replaced
as complete axle sets.
Every time you male a moderate brake
stop, your discbrakes adjust for wear. If
you rarelymake a mo.derate or heavier
stop, thenyour brakes might not adjust
correctly. If you drive in that way, then
-very carefully- make a few
moderate brake stops about every 1,000
miles (1600 km), so your brakes will
adjust properly.
have to have new ones put in - be sure
you get newgenuine GM replacement
parts. If you don’t, your brakes may no
longer work properly. For example, if
someone puts.in brake linings that are
wrong for your vehicle,the balance
between your front and rear brakes can
change, for the worse; The braking
performance you’ve cometo expect can
change in many other ways if someone
puts in thewrong replacement brake
parts.
Replacing Brake System Parts
The braking system on a modern
vehicle is complex. Its many parts have
to be of top quality and work well
together if the vehicle is to have really
good braking. Vehicles we design
and
test have top-quality GM brake parts in
them, as your Oldsmobile does when it
is new. When you replace parts of your
braking system -for example, when
your brake linings weardown and you
195
set atthe factory and should need no
further adjustment.
If your vehicle is damaged
in an
accident and theheadlight aim seemsto
be affected, see your Oldsmobile dealer.
Headlights on damaged vehiclesmay
require recalibration of the horizontal
aim by your Oldsmobiledealer.
I
I
Hedlight.Airning
This section is for owners of 2-door
Oldsmobiles only.The headlights on 2door Oldsmobiles can be checked and
aimed by the owner. If you have a 4door Oldsmobile, pleasesee your dealer
when your headlight aim needs to be
checked or adjusted. Toreplace a
headlight on a 4-dOOr Oldsmobile, see
the Index under Headlight
Replacement.
Checking Headlight Aim
(2-DOOR MODELS)
To checkthe aim, the vehicle should be
properly prepared as follows:
The vehicle must have allfour tires on
a perfectly levelsurface.
The vehicle should nothave any
snow, ice, or mudattached to it.
There should not be any cargoor
loading of vehicle, except it should
have a full tank of gas and one person
or 160 pounds (75 kg) on thedriver’s
seat.
Tires should be properly inflated.
The horizontal indicatorshould read
0 (zero).
Your vehiclehas the55 x 135 miniquad headlight system. These
headlights have horizontal andvertical
aim indicators. The aim has been pre-
197
Service,& Appearance Care
I
NOTICE:
To makesure your headlights are
aimed properly,read all the
instructions before beginning.
Failure to follow these instructions
could cause damage to headlight
parts.
n
-
/ J
Statekpection stations will allow a
vertical reading of up plus .76 degrees
or down minus .76 degrees for the
center of the bubble.
It is recommendedthat theupper limit
not exceed up plus .4 degrees forthe
Icenter of the bubble. There may be an
increased chance of being flashedif
adjustment is much above up plus .4
degrees.
I
I
198
Aiming Headlights( 2 . ~ 0 MODELS)
0~
1. Start with the horizontal (left and
right) headlight aim.Don’t try to
adjust the vertical (up and down) aim
first.
2. Check the horizontal aim for each
headlight and adjust it as necessary.
3.Turn the horizontal aiming screw
until the pointer is lined up with the
0 (zero).
I \I
I
I\
kWl/
\“v
‘
4. Now adjust the vertical aim. Check
the vertical aimfor each headlight
and adjust it asnecessary.
5. Turn thevertical aiming screwuntil
the bubble in thelevel is centered at C
(zero).
To Replace a Headlight
(2-DOOR MODELS)
Before replacinga headlight that does
not light, check to make sure that the
wiring connector is securelyfastened to
it.
See the Index under Replacement
Bulbs to check the size and type of
headlight you need to use before you
begin to replace the headlight. You
must replace a headlight with one that
is exactly the same.
1. Pry up theplastic pins and remove
the headlight cover.
2. Remove the Torx@head screws at the
end of the aiming ring. The aiming
ring will swingopen like a gate.
3. Remove the aiming ring fromthe
assembly.
Service & Appearance Care
4.Remove the wiring connector fkom
the headlight s~ocltet
by lifting the
plastic locking tabs on theconnector
and pulling it from the socket.
5. Check the new headlight again. The
number on the topof the light (A)
must match the number on the
headIight being replaced. The
letter,
U or L, must also match.
5. Plug the wiring connector into the
headlight s-oclcet.Snap the locking
tabs ontothe socket.
7. Place the new headlight in the
headlight assembly. The socket must
be pointing-in the same direction the
socket an the burned-out bulb was.
Tires should be properly inflated.
The horizontal indicator should read
0 (zero).
If your vehicle is damagedin an
accident and the headlight aim seemsto
be affected, see your Oldsmobile dealer.
Headlights on damaged vehicles may
require recalibration of the horizontal
aim by your Oldsmobile dealer.
8. Insert the tabs on theaiming ring
into theslots in the headlight
assembly.
9. Holding the aiming ring closed,insert
the screws at theend of the ring.
Tighten the screws until the aiming
ring touches the plastic nuts on both
the top andbottom. Do not
overtighten. Do not damage the
vertical aiming bubble.
To check the aim, the vehicle should be
properly prepared as follows:
The vehicle must have allfour tires on
a perfectly level surface.
The vehicle should not have any
snow, ice or mud attached to it. There should not be any cargo or
loading of vehicle, except it should
have a full tank of gas and oneperson
or 160 pounds (75 kg) on the driver’s
seat.
I
201
~~~~~~
.. .
.Headlfght Replacement
2. Pull out thebulb assembly.
Taill[ght BulbReplacement
(4-DOOR MODES)
3. Disconnect the bulb wiring harness
from the socket bulb assemblyby
.lifting the plastic lockingtab.
4.Snap. a new bulb assemblyinto the
wiring harness.
-5.Replace the bulb .assembly by
reversing step one.
(2-DOOR MODES)
See thelndm under Replacement
Bulbs to check thetype of bulb to use.
To Replace a Bulb:
1. Turn the-Lshapedbulb assembly
counterclockwise M turn until the
flanges-alignwith theslots in the
retainer ring, You may needto twist
it back and forth slightly to loosen it.
For the type of bulb, see the Index
under Replacement Bulbs.
1. Remove the two large plasticScrews
and pull the carpet away fromthe
rear corner of the trunk.
2. Press the bulb housing release lever
and turn thehousing M turn
countercloclnvise to remove it.
3. To remove the bulb, pull it from the
Taillighf Bulb Replacement
assembly.
4. Push in a new bulb.
5. Reverse all steps to reassemble the
taillight housing.
(4-DOOR MODELS)
For the type of bulb, see the Index
under Replacement Bulbs.
1. Remove the two large plastic screws
and pull the carpet away from the
rear corner of the trunk.
203
..
I
.Service.&Appeurance Care
NOTICE:
.
,
Your warranty does not mvex parts
or components that f
d because of
overloading.
i
:
L
’
206
If you put things inside yourvehiclelike suitcases, tools, packages, or
anything else-they will go as fast as
the vehicle goes.If you have to stop or
turn quicltly, or.if there is a crash,
they’ll keep going.
Tires
We don’t make tires. Your new vehicle
comes with high qualitytires made by a
leading tire manufacturer. These tires
are warranted by the tire manufacturers
and their warranties are delivered with
every new Oldsmobile.If your spare tire
is a different brand than your road tires,
you will havea tire warranty folder from
each of these manufacturers.
NOTICE:
Inflation - Tire Pressure
The Tire-Loading Information label
which is on theinside of the trunklid
shows the correct inflation pressures for
your tires, when they’re.cold. Cold
means your vehiclehas been sitting for
at least three hours or driven no more
than a mile.
Don’t let anyone tell you that
underinflation or overinflation is all
right. It’s not. If your tires don’t
have enough air (underinflation)
you can get:
Too much flexing
Too much heat
Tire overloading
Bad wear
Bad handling
Bad fuel economy.
If your tires have too much air
(overinflation),you can get:
Unusual wear
Bad handling
Rough ride
Needless damage from road
hazards.
When to Check
Check yourtires once a month or more.
Don’t forget your compactspare tire. It
should be at 60 psi (420 1tPa).
207
How to Check
Use a good quality pocket-type gageto
check tire pressure. Simply lookingat
the tires will not tell you the pressure,
especially if you have radial tires which may look properly inflated even
if
they’re underinflated.
If your tires have valve caps, be sure to
put them back on. They help prevent
leaks by keeping out dirt and moisture.
~
Tire lnspection and Rotation
To make yourtires last longer, have
them inspected and rotated at the
mileages recommendedin the
Maintenance Schedule. See Scheduled
Maintenance Services in theIndex.
Use this rotation pattern.
After the tires have beenrotated, adjust
the front and rear inflation pressure as
shown on the Tire-Loading Information
label. Makecertain that all wheelnuts
are properly tightened. See Wheel Nut
Torque in the Index.
208
Service & Appearance Care
test course. For example, atire graded
when tested under controlled
150 would wear one and a half (1 1/2)
conditions on a specifiedindoor
times as well on thegovernment course laboratory test wheel. Sustained high
as a tire graded 100. The relative
temperature can cause the material of
performance of tires depends upon the
the tire to degenerate and reduce tire
actual conditions of their use, however, life, and excessive temperature can lead
and may depart significantly fromthe
to sudden tire failure. The grade C
norm due tovariations in driving habits, corresponds to a level of performance
service practicesand differences in road which all passenger cartires must meet
characteristics and climate.
under the Federal Motor Vehicle Safety
Standard No. 109. Grades B and A
Traction - A, B, C
represent higher levelsof performance
The traction grades, from highestto
on the laboratory test wheel than the
lowest are: A, B, and C. They represent minimum required by law.
the tire’s abilityto stop onwet
pavement as measured under controlled Warning: The temperature grade for
conditions on specified governmenttest this tire is established for atire that is
properly inflatedand not overloaded.
surfaces of asphalt and concrete. A tire
Excessive speed, underinflation, or
marked C may havepoor traction
excessive loading, either separately orin
performance.
combination, can cause heat buildup
Warning: The traction grade assignedto and possible tire failure.
this tire is based on braking (straightThese grades are molded on the
ahead) traction tests and does not
sidewalls of passenger cartires.
include cornering (turning) traction.
While the tires available as standard or
Temperature - A, B, C
optional equipment on General Motors
The temperature grades are A (the
vehicles may vary with respect to these
highest), B, and C, representing the
grades, all such tires meet General
tire’s resistance to thegeneration of
Motors performance standards and
heat and its ability to dissipate heat
have beenapproved for use onGeneral
Motors vehicles.All passenger type (P
Metric) tires must conform to Federal
safety requirements in addition to these
grades.
Wheel Alignment and Tire
Balance
The wheels on your vehiclewere
aligned and balanced carefully at the
factory to give you the longest tire life
and best overall performance.
In most cases, you will not need to have
your wheels aligned again. However,
if
you notice unusual tire wear or your
vehicle pulling one way or the other, the
alignment may needto be reset. If you
notice your vehicle vibratingwhen
driving on a smooth road, your wheels
may need to be rebalanced.
Wheel Replacement
Replace any wheel that is bent, cracked
or badly rusted. If wheel nuts keep
coming loose, the wheel, wheelbolts,
and wheel nuts should be replaced. If
the wheel leaksair, replace it (except
original equipment parts.This way, you
willbe sure tohave the right wheel,
wheel bolts, and wheel nuts for your
Oldsrnobile model.
Tire Chains
NOTICE:
If your Oldsmobilehas P215/60R16,
P225/60R16 or P245/50ZR16 size
tires, don’t use tire chains; they can
damage your vehicle.If you have
other tires, use tire chains only
where legal and only when you
must. Use only SAE Class“S” type
chains that are the proper size for
your tires. Install them on the front
tires and tighten them as tightly as
possible with the ends securely
fastened. Drive slowly and follow
the chain manufacturer’s
instructions. If you can hear the
chains contacting your vehicle,stop
and retighten them. If the contact
continues, slow down until it stops.
Driving too fast with chains on will
damage your vehicle.
IAppearance Care
Remember, cleaningproducts can be
hazardous. Some are toxic. Others can
burst intoflame if you strike a match or
get them on a hot part of the vehicle.
Some are dangerous if you breathe their
fumes in a closed space. When you use
anything from a container to clean your
Oldsmobile, besure to follow the
manufacturer’s warnings and
instructions. And always open your
doors or windows when you’re cleaning
the inside.
Never use these to clean your vehicle:
Gasoline
Benzene
Naphtha
Carbon Tetrachloride
Acetone
Paint Thinner
Turpentine
Lacquer Thinner
Nail Polish Remover
They can all be hazardous - some
more than others - and they can a111
damage your vehicle,too.
.
NOTICE:
Don’t use any of these unless this
manual says you can. In many uses,
these will damage your vehicle:
Laundry Soap
Bleach
Reducing Agents
ICleaning
the Insideof lbur
Oldsmobile
Use a vacuum cleaner often to get rid of
dust and loose dirt. Wipe vinylor
leather with a clean,damp cloth.
Your Oldsmobile dealerhas two GM
cleaners, a solvent-type spot lifter and a
foam-type powdered cleaner. They. will
clean normal spots and stains very well.
Do not use them on vinyl or leather.
Here are some cleaning tips:
Always read the instructions on the
cleaner label.
Clean up stains as soon as you can before they set.
Use a clean cloth orsponge, and
0
Rinse the section with aclean, wet
sponge.
Wipe off what's left with aslightly
damp paper: towelor clsth.
Then dry it immediately with a blow
dryer ora heatlamp.
.NOTICE:
Ek careful with a hair dryer orheat
lamp. You could scorch the fabric.
Wipe with a.cleancloth.
Using:SolvenbType Cleaner on
Fabric
First, see if you have to use solvent-type
dearrer at all; Some spots and stains
.will clean off.better with just water and
mild soap.
If you need to use a solvent:
Gently scrape excess soil 'from the
trim material with ,a clean, dull knife
or scraper. Use very little cleaner,
light pressure and clean cloths
(pre€erablycheesecloth). Cleaning
should start at theoutside of the
0
Service &Appearance Care
fruit, fruit juice, milk, soft drinks, wine,
vomit, urine and blood.
Carefully scrape off excess stain, then
sponge the soiled area with cool
water.
If a stain remains, follow the foamtype instructions described earlier.
If an odor lingersafter cleaning vomit
or urine, treat thearea with a
waterbaking soda solution: 1
teaspoon (5 ml) of baking soda to 1
cup (250 ml) of lukewarm water.
If needed, clean lightlywith solventtype cleaner.
Combination Stains
Such as candy, ice cream, mayonnaise,
chili sauce and unknown stains.
Carefully scrape off excess stain, then
clean with cool water and allow to
dry* If a stain remains, clean it with
solvent-type cleaner.
Cleaning Vinyl
Use warm water and a cleancloth.
Rub with a clean, dampcloth to
214
remove dirt. You may haveto do it
more than once.
Things liketar, asphalt and shoe
polish willstain if you don’t get them
off quickly. Use a clean cloth and a
solvent-type vinylcleaner.
Cleaning Leather
Use a soft cloth with lukewarm water
and a mild soap or saddle soap.
For stubborn stains, use a mild
solution of 10% isopropyl alcohol
(rubbing alcohol) and 90% water.
Never use oils, varnishes, solventbased or abrasivecleaners, furniture
polish or shoe polish on leather.
Soiled leather should be cleaned
immediately. If dirt is allowedto work
into finish, it can harm the leather.
Cleaning the Top of the
Instrument Panel
Use only mildsoap and water to clean
the topsurfaces of the instrument
panel. Sprays containing silicones or
waxes may cause annoying reflections
in the windshield and even make it
difficult to see through the windshield
under certain conditions.
Care of Safety Belts
Keep belts clean and dry.
Glass
Glass should be cleaned often. GM
Glass Cleaner (GM Part No. 1050427)
or a liquid household glass cleaner will
remove normal tobacco smoke and dust
films.
Don't use,abrasivecleaners on glass,
because they may cause scratches.
Avoid placing decalson the inside rear
window, since they may have.to be
scraped-off later. If abrasive cleaners are
used on theinside of the rearwindow,
an electric defogger element may be
damaged. Anytemporary license should
not be attached across the defogger
grid.
Pull the bulb out toreplace. Push ina
Center High-Mounted 4. new
bulb.
Stoplight ( 2 ~ 0MODELS)
0 ~
5. Clip the bulb carrier back into place.
1Inside
For the type of bulb, see the Index
under Replacement Bulbs.
If you would liketo clean the inside
surface of the rear window or need to
replace a bulb, you can remove the
stoplight housing by followingthese
steps:
1. Remove the two Phillips-head screws
from the cover.
2. Remove the cover.
3. Unclip the bulb carrier.
.6. To remove the stoplight lens to clean
the window, remove the two nuts on
either side of the housing.
7. Replace the cover.
215
Service & Appearance.Care
1
Inside Center High-Mounted
Stoplight ( 4 . ~ 0 MODELS)
0~
For the type of bulb, see the Index
under Replacement Bulbs.
If you would liketo clean the inside
surface of the ,rearwindow or need to
replace a bulb., youcan remove the
stoplight housing by following these
steps:
1 Remove the two Phillips-head screws
from the cover.
2. Pull down the cover.
3.Unclip the bulb socket from .the
housing;
4. Pull the bulb out to
replace. Push ina
.new bulb.
5. Press the bulb socket back into the
housing.
6. Remove the lens to clean the window
by pressing in on-the endsof the-lens.
7. Replace the cover.
Ckaning the-Outsideof the
Windshield and WiperBlades
If the windshield isnot clear after using
the windshield washer, or if the wiper
blade chatters when running, wax or
other material may be.on.theblade or
windshield.
Aluminum Wpzeek
(IF SO.EQUlPPf D)
Weatherstrips
NOTICE:
Machine compounding or aggressive
polishing on a basecoat/clearcoat
.paint finish may dull the finish or
leave s w i r l marks.
Silicone grease on weatherstripswill
make themlast longer, seal better, and
not stick-or squeak. Apply silicone
grease with aclean cloth atleast every
six months. During very cold,damp
weather more frequent application .may
be required. (See Recommended Fluids
G Lubricants in the,Index.)
21 7
I Chemical
NOTICE:
I
Don't use corrosiveor acidic.
cleaning agents, engine degreasers,
aluminum cleaning agents or other
harsh solv'ents to clean fiberglass
springs; they'll damagethe springs.
1
Paint Spotting
Engine Identification
The eighth character in your VIN isthe
engine code. This code will help you
identify your engine,specifications, and
replacement parts.
WehickIdentification
Number
m)
This is the legal identifierfor your
Oldsmobile. It appears on a plate in the
front corner of the instrumentpanel, on
the driver’s side. You can see it if you
look through the windshield from
outside your vehicle.The VIN also
appears on theVehicle Certification anc
Service Parts labels and thecertificates
of title and registration.
Service PartsIdentijcation
Label
You’ll find this label on your spare tire
:over. It’s very helpful if you ever need
to order parts. Onthis label is:
Your VIN,
The model designation,
Paint information, and
A list of all production options and
special equipment.
Be sure that this label is not removed
€romthe vehicle.
219
Service & Appearance Care
Add-on Electrical
Equijment
h
Another set of fuses is located in the
component center, under the
instrument panel.
Additional fuses are located in the
underhood electrical centers on the
right and left sidesof the engine
compartment.
NOTICE:
Don’t add anything electrical to
your Oldsmobileunless you check
with your dealerfirst. Some
electrical equipment can damage
your vehicle and the damage
wouldn’t be coveredby your
warranty. Some add-on electrical
equipment can keep other
components from working as they
should.
Your vehiclehas an air bag system.
Before attempting to add anything
electrical to your Oldsmobile,see
Servicing Your Air Bag-Equipped
Oldsrnobile in the Index.
.. ...- . . . . . . . . . . . . . . . . . _..
1Fuses & Circuit
,
1
Breakers
The wiring circuits in your vehicle are
protected from short circuits by a
combination of fuses, circuit breakers,
and fusible thermal links in the wiring
itself. This greatlyreduces the chance of
damage caused by electrical problems.
Some fuses are located in a fuse block
in the glove boxas shown.above.To
locate the fuse block, liftout thestorage
bin inside the glove box. Seethe
diagram later in this section.
Place the wide end of the fuse puller
over the plastic end of the fuse. Squeeze
the endsover the fuse and pull it out.
To identify and check fuses, refer to the
charts on thefollowing pages.
Spare fuses and afuse puller are located
in the glove box lid.To remove the
cover, press in on both endsof the
cover and pull it off.
U
,ook at the silver-colored band inside
.hefuse. If the band is broken or
nelted, replace the fuse. Be sure you
*eplacea bad fuse with anew one of the
dentical size and rating.
221
Service & Appearance Care
Fuse
Glove Box Fuse Block
1
2
Rating
Circuitry
(AMP)
10
Radio & Clock
10
RearDefoggerTimerRelay;
n
I
I
1111211311
RADIO
INDlC
BLMTR
I
WIPER
T/SIG
STOP
I
20
25
10
15
10
1411511611
8
CTSY
ARBGI
VATS
C/LTR
' u u '
w
ELEC
CLSTR
DRLKS
I
HVAC
I
b
j
i
I
ABS
I
ARBGP
9
10
11
12
13
14
15
16
17
18
Instrument Cluster; Chime
Module; Cruise Control; DIU Module (Canada);ABS
Lamp Driver Module; SIR
Blower
Motor
Windshield
Wiper & Washer
Turn Signals/Flasher
Brake
Lights
Courtesy, GloveBox, Underhood, Trunk, Header
Lights; Lighted Inside Rearview Mirror
15
SIR
20
Door
Locks
15
Cigarette
Lighter
5VehicleAnti-TheftSystem(Pass-I<ey@
11)
15
Blower Control Switch; Solenoid
15
Radio & Clock;Passive Restraint Lockout, Passive
Restraint Timer; Chime Module; ABS;VATS
15
Cluster; HVAC Controls; HUD; DRL
5
ABS Control Module
10
PowerDoorLock Switch; Seat Belts;Power Outside
Mirrors; Power Antenna
Not Used
5
SIR (crank)
~
~~
Component Center
Fuse
Rating
(AMP)
1
2
3
4
5
6
30
30
30
7
8
9
10
20
Circuitry
Defogger Timer Relay
Air Conditioner Blower Relay (HI) (ElectronicAC only)
Air Conditioner Blower Relay (LO) (ElectronicAC only)
Rear Defogger Circuit Breaker
Power AccessoriesCircuit Breaker
Power Windowsand Sunroof Circuit Breaker
Not Used
Lock Control
Chime Module
Hazard Flasher
Service & Appearance, Care
Passenger Side Underhood Electrical Center
Fuse
1
2
60
3
60
60
4
5
6
7
8
9
10
11
1
224
Circuitry
Ratin
(AMP7
Instrument Panel
60.
12
13
20
15
15
15
15
15
1-5
15
Instrument Panel
Cooling Fan
Instrument Panel
ECM; Fuel Pump
Trunk Release
Not Used
Cruise Control; Air Conditioner (3.4L Only)
Engine Emission Controls
Transmission Torque Converter Clutch
Electronic Ignition System
ECM
Fuel Injectors
Relay
Circuitry
14
15
Air Conditioner Compressor
Fuel Pump
Not Used
Driver Side Engine Cooling
Fan Control
Passenger Side Engine
Cooling FanControl
16
17
18
mmm
FOGLPS
PARKLPS
HORN
Driver Side Underhood Electrical Center
Fuse
Rating
Circuitry
(AMP)
1
60
2
30
3
40
4
40
5
6
7
8
9
10
11
12
13
15
25
10
ABS
Headlamp Circuit Breaker
Ignition Switch
Ignition.Switch
Not Used
Not Used
Not Used
Horn
Park Lamps
Fog Lamps
Not Used
Not Used
Not Used
Relay
Circuitry
14
Horn
Fog Lamps
ABS
15
16
Service &Appearance Care
Headlight Wiring
Windshield Wipers
Power Windows and Other Power
The windshield wiper motor is protected Options
The headlight wiring is protected
by a
circuit breaker in the component center. by a circuit breaker and a fuse. If the
An electrical overload will causethe
motor overheats due to heavy snow,
lights to go on and off, or in some cases etc., thewiper will stop until the motor
to remain off. If this happens, have your cools. If the overload is causedby some
headlight system checked right away. electrical problem, have it fixed.
Circuit breakersin the fuse panel
protect the power windowsand other
power accessories. Whenthe current
load istoo heavy, the circuit breaker
opens and closes, protectingthe circuit
until the problem is fixed.
Capacities & Specifications
Engine Crankcase
3100 V6 ............................................................................................ 4 quarts
Twin Dual Cam (DOHC) 3.4L V6 ..................................................
5 quarts
When changing filter,up to 0.50 quarts (0.50L) more oil may be needed.
Automatic Transaxle
When draininglreplacing converter,more.fluid may be needed.
Pan Removal and Replacement .......................................................
4 quarts
After Complete Overhaul .................................................................
7 quarts
Automatic Transaxle with Overdrive
When draininglreplacing converter, morefluid may be needed.
Pan Removal and Replacement .......................................................
After Complete Overhaul .................................................................
Cooling System
3100 V6
With4-Speed Automatic Transaxle .............................................
Twin Dual Cam (DOHC) 3.4L V6
With4-Speed Automatic Transaxle .............................................
!
i
3.8 L
4.8 L
3.8 L
6.6 L
6 quarts
8 quarts
5.8 L
7.5 L
12.5 quarts
11.8 L
12.7 quarts
12.0 L
Service & Appearance Care
Refrigerant (R-l34A), Air Conditioning ...........................................
Not all air conditioning refrigerants are
the same. I f the air
2.0 Dounds
0.91 kg
conditioning system-inyour vehicle needs refrigerant,be sure
the proper refrigerant is used.If you%e not sure,ask your
Oldsmobile dealer.For additional information, see your
“Warrantyand Owner Assistance Information
” booklet.
FuelTank ............................................................................................ 16.5 gallons 62.0 L
Power Steering
Pump Only ....................................................................................... 2 pints
0.925 L
WheelNutTorque .............................................................................
100 lb. ft.
(140 Nem)
Battery Size
3100 V6 ............................................................................................ 525 CCA
Twin Dual Cam (DOHC) 3.4L V6 ..................................................
690 CCA
FIuids & Lubricants
ITEM
NUMBER
PARTAPPLICATION
GM
SIZE
1 gal. (3.8 L)
Year-round antifreeze for ...........................lo52753
coolant mixtures
14 oz. (397 g)
General chassis lube, etc. ...........................1052497
16 oz. (0.5L)
Brake System ............................................. 1052535
Automatic Transaxle
.................................................................... 12346143
32 oz. (1.OL)
.................................................................... 12345881
32 oz. (1.OL)
Engine lubrication ..................................... See the Index under Engine Oil.
16 oz. (0.5 L)
See yourdealer for advice ......................... 1052367
Hood, trunk anddoor hinges
Windshield washer fluid
Power Steering System ............................. 1050017
32 oz. (1.O L)
1052884
16 oz. (0.5 L)
1 oz. (28 g)
Silicone Grease ....................................... Weatherstrips ............................................ .12345579
4.5 oz. (127 g)
Spray-A-Squeak SiliconeLubricant ....... General purpose silicone lubricant ...........lo52276 (aerosol)
12 oz. (0.35.L)
1052277
Antifreeze Coolant...................................
(Ethylene Glycol Base)
Chassis Lubricant (Grease Gun Insert) ..
Delco Supreme 11sBrake Fluid ............
Automatic Transmission Fluid. ...............
DFXRONB-I11 .....................................
DEXRONa-IIE .....................................
Engine Oil................................................
GM Engine OilSupplement (E.O.S.) .....
Engine Oil ...............................................
Windshield Washer Solvent....................
Power Steering Fluid ..............................
229
Service & Appearance Care
Replacement Bulbs
OUTSIDE LIGHTS
BULB
Back-up Lights ....................................................................................
Front Parking/Turn Signal Lights ......................................................
License Plate Light ..............................................................................
Center High-Mounted Stoplight
Inside Vehicle, 2-Door Models ........................................................
Inside Vehicle, 4-DOOr Models ........................................................
Luggage Carrier Mount ....................................................................
Halogen Headlights
2-Door Models
Low Beam ......................................................................................
High Beam .....................................................................................
4-DOOr Models
Low Beam ......................................................................................
High Beam .....................................................................................
Fog Lights ............................................................................................
Side Marker Lights
Front
2-Door Models ...............................................................................
4-DoOr Models ...............................................................................
Stop/Tail/Turn Signal Lights .............................................................
Luggage Compartment ........................................................................
3057
2358NA
194
2355
891
891
H4351 (L)
H4352 (U)
9006
9005
885
24
24NA
3057
920
INSIDE LIGHTS
BULB
Ashtray ................................................................................................
Center Instrument Cluster ..................................................................
Courtesy Lights
Door ..................................................................................................
Rear ...................................................................................................
Reading Lights
Front .................................................................................................
Inside Rearview Mirror ....................................................................
Rear ...................................................................................................
Glove Box Light ..................................................................................
Heater & A/C Control ........................................................................
High Beam Indicator ...........................................................................
Indicator Lights ...................................................................................
Turn Signal Indicators ........................................................................
Visor Vanity Light...............................................................................
194
168. 194
12864
2 12-2
561
192
212-2
194
37
74
PC161
PC161
124
I
231
Service & Appearance Care
Engine Specificafions
3100 V6
VIN Engine Code .............................................................................
M
Type ..................................................................................................
V6
Displacement ....................................................................................
3.1L (191 CID)
9.6: 1
Compression Ratio ...........................................................................
Firing Order ......................................................................................
1-2-3-4-5-6
Thermostat Temperature ................................................................. 195°F (91°C)
Valve Arrangement ..........................................................................
In-Head
Twin Dual Cam
(DOHC) 3.4L V6
X
V6
3.4L (207 CID)
9.25:l
1-2-3-4-5-6
195°F (91°C)
In-Head
Normal -MaintenanceReplacement Parts
Air Cleaner Element
3100 V6 ........................................................................................
Twin Dual Cam (DOHC) 3.4L V6 ..............................................
Engine Oil Filter
3100 V6 ........................................................................................
Twin Dual Cam (DOHC) 3.4L V6 ..............................................
PCV Valve
3100 V6 ........................................................................................
Twin Dual Cam (DOHC) 3.4L V6 .............................................
Spark Plugs
3100 V6 .......................................................................................
AC Type A-905
AC Type A-1129 C
AC Type PF-47
AC Type PF-51
AC Type CV-899C
AC Type CV-881C
AC Type R44LTSM6
Gap: 0.060 inch (1.52 mm)
Twin Dual Cam (DOHC) 3.4L V6 ............................................. AC Type eR42LTSM
Gap: 0.045 inch (1.14 mm)
Batteries
Remote Lock Control Transmitter .............................................
2016 (2)
Notes
234
Part 7
Maintenance Schedule
This part covers the maintenance
required for your Oldsmobile.Your
vehicle needs these services to retain
its safety, dependability andemission
control performance.
Have you purchased the
GM Protection Plan?
The Plan supplements your new
vehicle warranties. See your
Oldsmobile dealer for details.
Section
Introduction
A WordAbout Maintenance ................................................................................
236
Your Vehicle and the Environment ..................................................................... 236
How This Part is Organized ................................................................................ 236
A. Scheduled Maintenance Services
Using YourMaintenance Schedules.................................................................... 237
Selecting the Right Schedule ...............................................................................237
238
Schedule I .............................................................................................................
Schedule I1............................... ............................................................................ 240
Explanation of Scheduled Maintenance Services ............................................... 242
B. Owner Checks and Services
At Each Fuel Fill................................................................................................... 244
At Least Once a Month ........................................................................................244
At Least Once a Year ........................................................................................... 245
C. Periodic Maintenance Inspections..................................................................
247
D. Recommended Fluids &Lubricants
............................................................... 248
E. Maintenance Record........................................................................................
250
235
How This Part is,Organhed
The remainderof this part is divided in!to
five sections:
“Section A: Scheduled MaintenanceServices” shows what to have done .and
of these.servicesam be
how often.- Some
complex, so unless you are technidy
qualified and have.thenecessary
.equipment,you should kt!tyour dealer’s
service departmentor another qualified
service Centerdo these jobs.
when you should schedule them. Your
inspections that your Oldsmobile
Oldsmobile dealer knows your vehicle
dealer’s servicedepartment or another
qualified servicecenter should perform. best and wantsyou to be happy with it.
If you goto your dealerfor your service
“Section D: Recommended Fluids&
needs, you’ll h o w that GM-trained and
Lubricants” lists some products GM
supported service people will perform
recommends to help keep your vehicle
the
work using genuine GM parts.
properly maintained. These products, or
These schedules are for vehicles that:
their equivalents, should be used
whether you do the work yourself or
carry passengers and cargo within
have it done.
recommended limits. You will find
these limits on your vehicle’s Tire“Section E: Maintenance Record”
Loading Information label. See
provides a placefor you to record the
Loading Your Vehicle in the Index.
maintenance performed on your vehicle.
Whenever any maintenance is
are driven on reasonable road
performed, besure to write it down in
surfaces within legal driving limits.
this section. This will.help you
use the recommended unleaded fuel.
determine when your next maintenance
See Fuel in the .Index.
should be done. In addition, it is a good
idea to keep your maintenance receipts. Selecting fheRight Schedule
They may beneeded to qual@ your
First you’ll needto decide which of the
vehicle forwarranty repairs.
two schedules is right for your vehicle.
Here’s how to decide which schedule to
A:
follow:
Schedule I
Using YourMaintenance
Is any one of these truefor your
Schedule
vehicle?
This section tells youthe maintenance
Most trips are less than 4 miles (6 lm).
services you should have done and
Most trips are less than 10 miles (16
lun) when outside temperatures are
below freezing.
The engine is at low speed most of the
time (as in door-to-door delivery, or in
stop-and-go traffic).
You operate your vehicle in dusty
areas.
You tow a trailer. (With some models,
you should never tow a trailer. See
Towing a Trailer in theIndex.)
If any one (or more) of these is true for
your driving, followSchedule I.
Schedule I1
Follow Schedule I1 only if none of’the
above conditions is true.
Section Scheduled
Maintenance Services
237
L
Maintenance Schedule
Schedule l
ITEM
TO BE SERVICED
Follow ScheduleI if your vehicle is
See
Explanation
of Scheduled Maintenance
Nom Services following
Schedules I and 11.
MAINLY driven under one or more of
the following conditions:
When most trips are less than 4 miles I 2 ILubrication
Chassis
I
(6 lun) .
When most trips are less than 10
I 4 I EngineAccessoryDriveBelt Inspection* I
miles (16 ltm) and outside
temperatures remain below freezing.
When most trips include extended
I 6 I Cooling
System
Service"
I
idling and/or frequent low-speed
operation, as instop-and-go traffic.
When towing a trailer. (With some
I
I 8 I Spark Plug Replacement*
models, you should never tow a
trailer. See Towing a Trailer in the
Index.)
When operating in dusty areas.
Schedule I should also be followed
if
the vehicle is usedfor delivery service, I 12 I Fuel Tanlc, Cap and Lines Inspection*+ I
police, taxi or other commercial
applications.
238
WHEN TO PERFORM
Miles (kilometers) or Months
(whichever occurs first).
Everychange.
other oil
I
Every 30,000 Miles (50 000 lun) or 24 Months.
I
Every 30,000 Miles (50 000 lun) or 24 Months. I
Every 30,000 Miles (50 000 km).
~
Every 30,000 Miles (50 000 lun).
I
I
I
The services shownon this chart up to
60,000 miles (100 000 km) should be
performed after 60,000 miles at the
same intervals.
= An Emission
Control Service.
t = The U.S. Environmental Protection
Agency or the California Air Resources
Board has determined that the failure to
perform this maintenance item will not
nullify the emission warranty or limit
recall liability prior to the completion of
vehicle useful life. General Motors,
however, urges that all recommended
maintenance services be performed at the
indicated intervals andthe maintenance
be recorded in Section E: Maintenance
Record.
239
--
~~
~
Maintenance Schedule
Schedule I1
Follow Schedule I1 ONLY if none of
the driving conditions -specified in
Schedule i apply.
.
TO BE SERVICED
WHEN
Explanation of Scheduled Maintenance
No' SeeServices
following Schedules I and 11.
ITEM
TO PERFORM
Miles (kilometers) or Months
(whichever occurs.first).
I
I
I
I
I
I
I
I
I
I
I
I
I
I
I
Maintenance Schedule
Explanation of~scheduled
Mainfenance Services
Following are explanations of the
services listed in Schedule I and
Schedule 11.
The proper fluids and lubricants to use
are listed in Section D. Make sure
whoever services your vehicleuses
these. All parts should be-replacedand
all necessary repairs done before you or
anyone else drivesthe vehicle.
ITEM
SERVICE
NO.
1 . Engine Oil and Filter Change*-
Always use SH or SG Energy
Conserving I1 oils of proper viscosity.
The “SH” or “SG” designation may
be shown alone or in combination
with others, such as “SH/CD,” “SH,
SG, CD,”“SG/CD,”etc. To
determine the preferred viscosity for
your vehicle’s engine (e.g., SAE
5W30 or SAE 10W-30),see Engine Oil
in theIndex.
242
~
2. Chassis Lubrication - Lubricate
suspension and steering linkage.
Lubricate the transaxle shift linkage,
and parking brake cable guides,
underbody contact points and
linkage.
3. Tire and Wheel Rotation and
Inspection - For proper wear and
maximum tire life, rotate your tires
following the instructions in this
manual. See Tires, Inspection6
Rotation in theh d e x . Check the
tires for uneven wear or damage.If
you see irregular orpremature wear,
check the wheel alignment. Check for
damaged wheels also.
4. Engine Accessory Drive Belt
Inspection *‘- Inspect the belt for
cracks, fraying, wearand proper
tension. Replace as needed.
5. Camshaft Timing Belt Inspection
(3.4L Code X engine only)* Inspect for cracks, wear or oiliness.
Check tensioner for proper operation.
See the service manual. (To purchase
a servicemanual, see Service
Publications in the Index.) Replace
parts asneeded.
6. Cooling System Service*- Drain,
flush and refill the system with new
or approved recycled.coolant
conforming to GM Specification
1825M. Keepcoolant at theproper
mixture as specified. See Coolant in
the Index. This provides proper
freeze and boil protection, corrosion
inhibitor level and maintains proper
engine operating temperature.
Inspect hoses and replace if they are
cracked, swollen or deteriorated.
Clean the outside of the radiator and
air conditioning condenser. Wash the
pressure cap and neck.
To help ensure proper operation, we
recommend apressure test of both
the cooling systemand the pressure
cap.
7. Transaxle Service - Change both
the fluid and filter .every15,000 miles
(25 000 l m ) if the vehicle is mainly
driven under one or more of these
c.onditions:
In heavy city trafficwhere the
outside temperature:
regularly
reaches 90°F (32°C) or higher.
In hilly or mountainous terrain.
When doing frequent trailertowing.
(With somemodels, you shouldn’t
ever tow a trailer. See Towing a
Trailer in the Index.)
Uses such as.found in taxi,police
car or delivery service.
If-youdo not use your vehicleunder
any of these conditions,change both
the fluid and filter every 100,000
miles (166 000 km) .
8. Spark PIug~Replacement*
Replace spark plugs with theproper
type. See Replacement-Partsin the
Index.
9. Spark Plug Wire Inspection*T-
-10.Exhaust Gas Recirculation (EGR)
System Inspection(3.4LCode X
engine only)*? - Conduct the
EGR system service-asdescribed in
the service manual. To purchase a
service manual, see Service
Publications in the Index.
1 1 . Air Cleaner Filter Replacementgc
Replace every30,000 miles
(50 000 lun) or more often under
dusty conditions. Ask your dealer
for the proper replacement intervals
for your driving conditions.
12. Fuel Tank, Cap and Lines
Inspectiong‘t- Inspect fuel tank,
cap and lines (including fuel rails
and injection assembly). for damage
or leaks. Inspect fuel cap gasket for
an even fillerneck imprint or any
damage. Replace parts asneeded.
Periodic replacement of the fuel
filter isnot required.
NOTE: To determine your engine’s
displacement and code,see Engine
Identification in the Index.
* = An Emission Control Service.
f = The U.S. Environmental Protection
Agency or the CaliforniaAir Resources
Board has determined that the failure to
perform this maintenance item will not
nullify the emission warranty or limit
recall liability prior to the completion of
vehicle useful life. General Motors,
however, urges that all recommended
maintenance services be performed atthe
indicated intervals andthe maintenance
be recorded in “SectionE: Maintenance
Record.”
Inspect for burns, .cracksor other
damage. Checkthe boot fit at the
coils and atthe spark plugs. Replace
wires as needed.
243
Maintenance Schedule
Section B: Owner Checks and Services
Listed beloware owner checks and services which.should
be performedat the intervals specified to help ensure the
safety, dependabilityand emission control performance of
your vehicle.
At Each Fuel Fill -(Itis important
Be sure any necessary repairs are completed at once.
Whenever any fluids or lubricants are added to your vehicle
make sure they are the proper ones, as shown in Section D.
foryou or a service station attendantto perform these underhood checks
at each fuel fill.)
I
CHECK
OR SERVICE
WHAT TO DO.
Check the engine oil leveland add the proper oil if necessary. See Engine Oilin the Index for
further details.
Check the engine coolant level and add the proper coolant mix if necessary. SeeCoolant in the
Index for further details.
Engine Oil Level
Engine
Windshield Washer Check
FluidLevelnecessary.
the windshield washer fluid level in the windshield washer tank and add the proper fluid if
See Windshield Washer Fluid in the Index for further details.
At Least Once Month
CHECK
OR SERVICE
WHAT TO DO
Check tire inflation. Make sure they are inflated to thepressures specified on the Tire-Loading
Information label located on the rear edge of the driver’s door. See Tires in the Index for
further details.
Tire Inflation
Cassette Deck
244
I
Clean cassette deck. Cleaning should be done every 15 hours of tape play, SeeAudio Systems in
the Index for further details.
I At Least Once a Year
I
~~
CHECK
OR SERVICE
WHAT TO DO
~.
~
.
Key Lock Cylinders
Lubricate the key lock cylinders withthe lubricant specified in Section D.
Body Lubrication
Lubricate all bodydoor hinges. Also lubricate all hinges and latches, including those for the
hood, rear compartment, glove box door, console doorand any foldingseat hardware. SectionD
tells you what to use.
Starter Switch
CAUTION: When you.are doing this check, the vehicle could move suddenly.
If it does, you
or others could be injured. Follow.the steps below.
1. .Before youstart, be sure you have enough roomaround the vehicle.
2. Firmly apply both.the parking brake (seeParking Brake in the Index if necessary) and the
regular brake.
NOTE: Do not use the accelerator pedal, and be ready
to turn off the engine immediately if it starts.
3.Try to start theengine in each gear.The starter should work only inP (Park) or N (Neutral). If
the starter works in any other position, your vehicle needs service.
Steering Column
Lock
While parked, and with the parking brakeset, try to turn thekey to Lock in each shift lever
position.
The ley should turn toLock only when the shift leveris in P (Park).
The key should come out only in Lock.
.
245
Maintenance Schedule
3f Least Once a Year (cant.)
CHECK
OR SERVICE
Parking Brake.
and Automatic
Transaxle P (Park)
Mechanism Check
Underbody Flushing
246
WHAT TO DO
CAUTION: When you are doing this check, your vehicle could begin
to move. You or others
could be injuredand property could be damaged. Make
sure there is room in front of your
vehicle in case it begins to roll. Be readyto apply the regular brake at .once shouldthe vehicle
begin to move.
Park on a fairly steep hill, with the vehicle facing downhill. Keeping your foot
on theregular
brake, set the parking brake.
To checkthe parking brake: With the engine running and transaxle in N (Neutral),slowly
remove foot pressure from the regular brake pedal. Do this until the vehicle is heldby the
parlung brake only.
To check the P (Park) mechanism’s holding ability: Shiftto P (Park). Then release all brakes.
At least every spring, use plain water to flush any corrosive materials fromthe.underbody. Take
care to clean thoroughly any areas where mud and other debris can collect.
Section C: Periodic Maintenance Inspections
Listed beloware inspections and services which should be performed at least twice a year (forinstance, each spring and fall).
You should let your GM dealer’s servicedepartment or other qualified servicecenter do these jobs. Make sure any necessary
Bepairs are completed at once.
INSPECTION
OR SERVICE
Restraint Systems
Steering, Suspension
and FrontWheelDrive Axle Bootand
Seal Inspection
Exhaust System
Inspection
Throttle Linkage
Inspection
Brake System
Inspection
WHAT SHOULD BE DONE
Now and then, make sure all your belts, buckles, latch plates, retractors, anchorages and
reminder systems are working properly. Look for any loose parts or damage. If you see anything
that might keep arestraint system from doingits job, have it repaired.
Inspect the front andrear suspension and steering system fordamaged, loose or missingparts,
signs of wear, or lack of lubrication. Inspect the power steering lines and hoses for proper
hookup, binding, leaks, cracks, chafing, etc. Clean and theninspect the drive axleboot seals for
damage, tears or leakage. Replace seals if necessary.
Inspect the complete exhaust system. Inspect the body near the exhaust system. Lookfor broken,
damaged, missingor out-of-position parts aswell as open seams, holes, loose connections, or
other conditions which could cause a heat build-up in the floor pan or could let exhaust fumes
into thevehicle. SeeEngine Exhaust in the Index.
Inspect the throttle linkage for interference or binding, and for damaged or missing parts.
-Replaceparts as needed.
..
Inspect the complete system. Inspect brake lines
and hoses for proper hookup, binding, leaks, cracks,
chafing, etc. Inspect disc brake pads for wearrotors
and for surface condition. Inspect
other bralte
parts, including calipers, parking brake, etc. Check parking bralte adjustment.
You may needto have
your brakes inspected more often
if your driving habits or conditions result
in frequent braking.
NOTE:-Alow brake fluid level can indicate worn disc brake pads which
may needto be serviced.
Also, if the bralte system warning light stays on or comes
on, something may be wrong with
the
brake system. SeeBrake System Warning Light
in the Index. If your vehicle is equipped with
antilock brakesand the anti-lock bralte system warning
light stays on, comes on or flashes, something
may be wrong with
the anti-lock brake system. See
Anti-Lock BrakeSystem Warning Lightin the Index.
247
ISection D: Recommended
Fluids and Lubricants
VOTE: Fluids and lubricants identified belowby name, part number or specification may be obtained from your GM dealer.
FLUID/LUBRICANT
USAGE
Engine Oil
API serviceSH or SG Energy ConservingI1 oils of the proper viscosity. The“SH)or “SG’designation
etc.
may be shown alone
or in combination with others, such as “SH/CD,” “SH,SG,CD,”“SG/CD,” To
determine the preferred viscosity for your vehicle’s engine, see
Engine Oil in theIndex.
Engine Coolant
50/50 mixture of water (preferably distilled)and good quality ethylene glycol base antifreeze
(GM Part No. 1052753 or equivalent) conforming to GM Specification 1825M or approved
recycled coolant conforming to GM Specification 1825M.
Hydraulic Brake
System
Delco Supreme 11s Brake Fluid (GMPart No. 1052535 or equivalent DOT-3brake fluid).
Parking Brake Guides
Chassis lubricant (GM Part No. 1052497 orequivalent) or lubricant meeting requirements of
NLGI Grade 2, Category LB or GC-LB.
Power Steering
System
Automatic Transaxle
Key Lock Cylinders
Automatic Transaxle
Shift Linkage
I
248
GM Hydraulic Power Steering Fluid (GMPart No. 1052884 or equivalent).
DEXRONB-I11 or DEXRONB-IIE Automatic Transmission Fluid.
Lubricate with Multi-Purpose Lubricant (GM Part No. 12345120), synthetic SAE 5W-30 engine
oil or silicone lubricant (GM Part No. 1052276 or 1052277).
Engine oil.
FLUID/LUBRlCANT
USAGE
~,
or lubricant meeting requirements of
Chassis Lubrication
Chassis lubricant (GM Part No. 1052497 or eql.-NLGI Grade 2, Category LB or GC-LB.
Windshield Washer
Solvent
GM OptildeenB Washer Solvent (GMPart No. 1051515) or equivalent.
Hood Latch Assembly
a. Pivots and Spring
Anchor
b. Release Pawl
~
~
a. Engine oil.
b. Chassis lubricant meeting requirements of NLGI Grade 2, Category LB (GM Part No.
1052497 or equivalent) or GC-LB.
Hood and Door
Hinges, Fuel Door
Hinge
Engine oil or Lubriplate Lubricant (GMPart No. 1050109)
Weatherstrips
Dielectric Silicone Grease (GMPart No. 12345579 or equivalent).
See Replacement Parts in the Index for recommended replacement filters, valves
and spark plugs.
249
Maintenance Schedule
Section E: Maintenance Record
After the scheduled servicesare performed, recordthe date,
odometer reading and who performed the service in the
columns indicated. When completingthe Maintenance
Performed column, insert the numbers from.the Schedule I
DATE
250
ODOMETER
READ/NG
SERVICED BY
or Schedule I1 maintenance charts which correspond to the
maintenance performed. Also, youshould retain all
maintenance receipts. Your owner information portfolio
is a
convenient place to storethem.
MAINTENANCE PERFORMED
Part 8
Customer Assistance Information
~
Here you will find out how to contact
Dldsmobile if youneed assistance.
rhis part also tells you how to obtain
service publications andhow to
report any safety defects.
Customer Satisfaction Procedure ......................,....................,...................,............252
Customer Assistance for the Hearing or Speech Impaired ................................... 253
BBB Auto Line Program.........................................................................................
253
Reporting Safety Defects........................................................................................ 254
Oldsmobile Roadside.Assistance Program..
........,..........,............ ...............,........,. . 255
256
Service Publications ................. ..........................................................................
251
L
CustomerAssistance,Information.
Customer Satit$action
n
253
Customer AssistanceInfomation
Oldsmobile. If this mediation is
unsuccessful, an informal hearing will
be scheduled where eligiblecustomers
may present their case to animpartial
third-party arbitrator.
The arbitrator will make a decision
which you may accept or reject. If you
accept the decision, GMwill be bound
by that decision. The entire dispute
resolution procedure should ordinarily
take about forty days fromthe time you
file a claimuntil a decision is made.
Some state laws may require you to use
this program before filing a claim
with a
state-run arbitration program orin the
courts. For further information, contact
the BBB or the Oldsmobile Customer
Assistance Center at 1-800-442-6537.
"This program may not be available in all
states, depending on state law.Canadian
owners refer toyour Warranty and Owner
Assistance information booklet. General
Motors reserves the right to change
eligibility limitations and/or to discontinue
its participation in this program.
254
IREPORTIA/G SAFETl'DEFECTS
TO THE UNITED STATES
GOVBNMENT
If you believethat your vehiclehas a
defect which could cause a crash or
could cause injury or death, you should
immediately informthe National
Highway Traffic SafetyAdministration
(NHTSA), in addition to notifying
General Motors.
If NHTSA receives similarcomplaints,
it may open an investigation, and if it
finds that a safety defect existsin a
group of vehicles, it may order a recall
and remedy campaign. However,
NHTSA cannot become involvedin
individual problemsbetween you, your
dealer, or General Motors.
To contact NHTSA, you may either call
the Auto Safety Hotline toll-free at
1-800-424-9393 (or 366-0123 in the
Washington, D.C. area) 01:write to:
NHTSA
U. S. Department of Transpartation
Washington, D.C. 20590
YcIUcan a1so obtain other information
about motor vehicle safetv fromthe
Hotline.
IREPORTING SAFETYDEFECTS
TO THE CANADL4N
GOI%RN..NT
If you live in Canada, and you believe
that your vehiclehas a safety defect,
you should immediately notify
Transport Canada, inaddition to
notifying General Motors of Canada
Limited. You may write to:
Transport Canada
Box 8880
Ottawa, Ontario I-ClG 3J2.
IREPORTING SAFETYDEFECTS
TO GENEMIMOTORS
In additionto notlfylng NHTSA (or
Transport Canada) in a situation like this,
we certainly hope you'll notify
us. Please
call us at 1-800-442-6537,
or write:
Oldsmobile CustomerAssistance
Network
P.O. Box 30095
Lansing, MI 48909
In Canada, please callus at
1-800-263-3777 (English) or
1-800-263-7854 (French). Or, write:
General Motorsof Canada Limited
Customer Assistance Center
1908 ColonelSam Drive
Oshawa, Ontario L1H 8P7
Who.is Covered?
CustomerAssistance Infomtion
Canadian Roadside Assistance
monitors product performance in the
field.
We then prepare bulletins for
Vehicles purchased in Canada have an
extensive RoadsideAssistance program servicing our products better. Now, you
can get these bulletins too.
accessible fromanywhere in Canada or
Bulletins cover various subjects. Some
the U.S.A.Please referto theseparate
brochure provided by the dealer or call pertain to the proper use and care of
1-800-268-6800for emergency services. your vehicle. Some describe costly
repairs. Others describe inexpensive
repairs which, if done on time with the
latest parts, may avoid future costly
Information on how to obtain Product
Service Publications, Subscriptions and repairs. Some bulletins tell a technician
how to repair a new or unexpected Indexes and Service Manuals as
described belowis applicable onlyin the condition. Others describe a quicker
way to fix your vehicle. They
can help a
fifty U.S. states (and the District of
technician service your vehiclebetter.
Columbia) and only for cars and light
trucks with GVWR less than 10,000
Most bulletins apply to conditions
pounds (4 536 kg).
affecting a smallnumber ofcars or
trucks. Your Oldsmobile dealeror a
In Canada, information pertaining to
qualified technician may have to
Product Service Bulletins and Indexes
determine if a specific bulletin applies
can be obtained by writing to:
to your vehicle.
General Motors of Canada Limited
You can subscribe to all Oldsmobile
Service PublicationsDepartment
bulletins. This way you’ll getthem as
1908 Colonel Sam Drive
they come out. You can wait a while
Oshawa, Ontario L1H 8P7
and
get an index to thebulletins. You
Oldsmobile regularlysends its dealers
can also get individualbulletins.
useful service bulletinsabout
However, you’ll needthe index to
Oldsmobile products. Oldsmobile
identify them.
Service Publications
Subscriptions
You can subscribe to all Oldsmobile
Product Service Publications (PSP’s).
This willinclude bulletins for all
vehicles soldby Oldsmobile and will not
be limitedto PSP’s applicableto any
particular model.
For subscription costs and ordering
information call the toll-free number
shown in thefollowing text.
What You’ll Find inthe Index
A list of all PSP’s published by
Oldsmobile in a model year(1990 or
later). PSP’s covering all modelsof
Oldsmobile vehiclesare listed in the
same index.
Price information for the PSP’s you
may want to buy.
How You Can-Gef an Index
Indexes are published periodically.
Most of the PSP’s which could
potentially applyto the most recent
Oldsmobile models will be listed
in the
most recent publication for that model
Copies at Participating Dealers
Oldsmobile.Semice Manuals
Copies of Indexes andPSP’s are at your For Service Manual costs and ordering
information call 1-800-551-4123.
participating Oldsmobile dealer. You
can askto see them.
A VERY IMPORTANT REMINDER:.
These PSP’s are meant for technicians.
They are not meant forthe “do-ityourselfer.”. Technicianshave the
equipment, tools, safety instructions,
and know-how to do a job quickly and
safely.
ToR-Free-TelephoneNumber
If you want an ordering form foran
index or a subscription, justcall tollfree.andwe’ll be happyto send you one.
Automated recording equipment will
take yourn m e and mailing address.
The numberto call is 1-800-551-4123.
- 1
257
Product Service Publication Ordering Information
Oldsmobile Division service
publications are intended for useby
professional, qualifiedtechnicians.
Attempting repairs or servicewithout
the appropriate training, tools, and
equipment could cause injury to you or
others and damage to your vehiclethat
may cause it not to operate properly.
Available publications include Service
Manuals, Pro.duct ServicePublication
Indexes, quarterly and model year PSP’s
and binders. For 1994 Product Service
Publication pricinginformation and
orders call 1-800-551-4123.
258
Notes
259
Notes
Notes
.26
Notes
-
Checking & Adding....................... 184
Disposing of Used Oil................... 187
Energy Conserving........................ 186
Filter .............................................. 186
Pressure Gage.................................. 95
Starburst ........................................ 185
Warning Light.................................. 94
Electric Outside Mirror Control ..... 82
Electrical Center, Underhood .......... 220
When to Change ............................ 186
Engine Overheating ......................... 158
Electrical Equipment.
Adding ............................. 60. 111.220 Engine Specifications....................... 232
Electronic Climate Control .............. 107 Engine Starting .................................. 59
Emergencies. Brakingin ..................130 Ethanol in Gasoline ......................... 177
Emergencies on theRoad .................149 Exhaust
Dangerous Gas in ............. 57. 69. 142
Emergencies. Steering in ................. 131
Parking with the Engine
Emergency Starting.......................... 150
Running ..................................
68. 70
Emergency Towing ..........................
154
Engine BlockHeater .......................... 61 Expectant Mothers. Use of Safety
Engine Coolant ................................ 190
Belts ................................................. 27
Expressway
Driving......................... 137
Checking &Adding .............. 160, 161
Heater ...................................... 61, 186 Extender. Safety Belt......................... 46
Low Coolant Warning Light ........... 94 Exterior Appearance (see Appearance
Proper Mixture to Use .................. 161
Care)
Safety Warnings
About .................. 159, 160,181, 190 F a b r i c Cleaning (seeAppearance Care)
Temperature Gage ........................... 93 Fan Warnings ........................... 152. 181
Engine Exhaust .................................. 69 Filling the Fuel Tank ........................ 179
Engine Identification .......................219 Filter
Air .................................................. 187
Engine Oil ........................................ 184
Fuel ................................................ 233
Additives ........................................ 186
Oil .......................................... 186. 233
Capacity ......................................... 227
Passing ........................................... 132
Through Deep Standing Water ....... 60
Winter Driving............................... 140
With a Trailer ................................
146
Drunken Driving ..............................126
1
Finish Care ....................................... 217
Finish Damage ................................. 217
Flash-to-Pass ...................................... 79
Flashers. Hazard Warning ............... 150
Flat Tire ............................................
165
Flooded Engine.................................. 60
Fluid
Automatic Transaxle ..................... 188
Bralte .............................................. 194
Capacities ...................................... 227
Power Steering .............................. 192
Windshield Washer ....................... 193
Fluids & Lubricants .................229. 248
Fog Lights .................................. 80. 204
Fold-Down Storage Compartment .... 83
Foreign Material................................ 217
Freeway Driving............................... 137
French Language Manual .................... 2
Fuel ...................................................
177
Alcohol in Fuel .............................. 177
Capacity .................................
179. 272
Exhaust Warnings ................... 57. 142
Filling YourTank ..........................
179
Fuels with Alcohol ........................
177
Gage ................................................. 93
In Foreign Countries ..................... 178
Low Fuel Warning Light.................98
Requirements ................................ 177
Fuses & Circuit Breakers ................ 220
265
L
Gages
C.oolant Temperature...+........ .........
93
Fuel ....,............................................. 93
Oil Pressure ..................................... 95
Voltmeter. ...,................................ .... 95
Gasoline ........................................... 177
Gasoline Tank, Filling Your
............ 179
Gear Positions (seeShifting the
Transaxls)
Gearshift Lever (see Shifting the
Transaxle)
Glove Box.........,.,,....,.........................58
Graphic Equalizer (seeAudio Systems)
H alogen Bulbs ......
r.. ...._...._..
......... 196
266
.
....
."
I
Stoplight. Inside .................... 215. 216
Taillights .......................... 77. 202. 203
Turn Signal .................................... 146
Warning Lights.......................... 91. 98
Loading Your Vehicle
...................... 205
Lock Finder ........................................ 56
Locks. Door ........................................ 51
Locks. Remote Control ...................... 52
Lockout Control Switch. Power
Window ............................................ 72
Long Distance Driving .................... 138
Low Battery ........................................ 98
Low Coolant Warning Light.............. 94
Low Fuel Warning Light .................... 98
Low Oil Level Light........................... 94
Luggage Carrier.................................. 87
Maintenance
Replacement Parts
......................... 233
Schedule ........................................ 235
Services. Scheduled ...................... 237
When Trailer Towing....................
148
Malfunction Indicator Lamp .............97
Manual Front Seat ............................. 12
Master Cylinder. Brake.................... 194
Methanol in Gasoline ...................... 177
Mileage Indicator (see Odometer G
Speedometer)
Mirrors
Convex Outside ............................... 81
Inside Manual Daymight ............... 81
Manual Adjust ................................. 82
Manual Remote Control ................. 82
Power Remote Control.................... 82
Visor Vanity..................................... 83
Mountain Driving ............................ 139
Convenience ............................ 57
NNewet,Vehicle
Break-In ............... 58. 144
Night Driving...................................
134
Octane Requirements (see Fuel)
Odometer ........................................... 92
Oil. Engine ....................................... 184
Capacity ......................................... 227
Pressure Gage .................................. 95
Quality ........................................... 185
Thickness ....................................... 186
Used Oil ......................................... 187
When to Change ............................ 186
Oil Warning Light........................ 94. 98
Outside Rearview Mirrors ................. 82
Overdrive. Automatic ........................ 65
Overheated Engine .......................... 158
Overheated Engine Coolant Warning
Light ................................................. 94
Owner Checks & Services............... 244
Paint
Chemical Spotting ......................... 218
Finish Care .................................... 217
Finish Damage .............................. 217
Park. Shifting Into
Column Shift ................................... 67
Console Shift................................... 68
Parking
Over ThingsThat Burn ................... 69
With the Engine Running ......... 68. 70
Parking Brake ..................................... 66
PASS-Key*II ...................................... 55
Passenger Belts (see Safety Belts)
Passing.............................................. 132
Polishing and Waxing (see Appearance
Care)
Power Antenna ................................ 124
Power Door Locks ............................. 52
Power Mirrors .................................... 82
Power Seat Controls .......................... 13
Power Steering......................... 192, 226
Power Steering Fluid ....................... 192
Power Windows............................... 226
Power Window LockoutControl
Switch ..............................................
72
Pregnancy, Useof Safety Belts During... 27
Problems on theRoad ......................
149
Publications (see Service Publications)
Pulse Windshield Wipers...................76
.
.
267
Sound Equipment. Adding .............. 111
Sound Systems (see Audio Systems)
Spare Tire. Compact........................
172
Spark Plugs .............................. 220. 233
Specifications & Capacities............. 227
Speed Control (see Cruise Control)
Speedometer ...................................... 91
SRS (Supplemental Restraint
System) ............................................ 23
Stains; Removing ..............................212
Starting Your Engine......................... 59
Starting. Jump .................................. 150
Steering
In Emergencies .............................. 131
Off-Road Recovery ........................
132
Tips ................................................
130
Steering Wheel. Tilt ........................... 71
Steering Wheel Touch Controls
Audio System ................................
122
Climate Control ............................. 109
Stereo Systems (see Audio Systems)
Stoplight. Inside Center
High Mounted ........................ 2 15. 2 16
Storage
Cassette Tape Holders ....................
83
Convenience Net................................ 57
Fold-Down Storage Compartment... 83
Rear Seat Console ........................... 84
Storing Your Vehicle ....................... 196
Stuck. If You Are ............................. 173
Sunroof ...............................................
86
Sun Visors ..........................................83
TTapeachometer
...................................... 92
Player (see Audio Systems
)
Technical Facts & Specifications
Bulbs ..............................................
230
Electrical Equipment.
Add-on ................................. 60. 111
Engine Specifications....................232
Fluid Capacities & Types ...... 227, 229
Fuses & Circuit Breakers.............. 220
Replacement Parts ......................... 233
Service Parts Identification
219
Label ............................................
Vehicle Identification Number
(VIN) .......................................... 219
Temperature Warning Light ..............98
Theft ................................................... 54
Thermostat .......................................
192
Tilt Steering Wheel ............................ 71
Time. Setting the .............................. 111
Tires .................................................. 206
Buying New................................... 209
Chains .................................... 173. 212
Flat. Changing............................... 166
Inflation ......................................... 207
Inspection & Rotation ..................208
Loading .......................................... 207
Pressure ......................................... 207
Quality Grading.............................209
Spare. Compact ............................. 172
Wear Indicators .............................
209
Wheel Alignment& Tire Balance... 210
Wheel Replacement....................... 210
When to Replace Wheels...............210
Winter Driving. and
Tires ............................140. 141. 212'
Top Strap............................................
36
Torque Lock ....................................... 69
Towing aTrailer............................... 143
Towing Your Oldsmobile................154
Trailer Towing..................................
143
Driving with a Trailer .................... 146
Maintenance ................................... 148
Parking on Hills ............................
147
Trailer Brakes ................................ 146
Turn Signals ..................................
146
Transaxle. Automatic (see Automatic
Transaxle)
Transmission. Automatic (see
Automatic Transaxle)
Trip Odometer ...................................
92
Trunk
Access Panel..................................... 84
Lock .................................................. 56
Remote Release ............................... 57
Turn Signal Indicator......................... 73
Turn SignaVMultifunction Lever...... 72
Cruise Control ................................. 74
269
Flash-to-Pass ................................... 79
High/Low Beam Changer............... 79
Pulse Windshield Wipers................ 76
Turn & Lane ChangeIndicator ...... 73
Turn Signal Indicator ......................73
Windshieid Washer ......................... 77
Windshield Wipers.......................... 76
Underhood Electrical
Center ............................ 220. 224. 225
177
Unleaded Gasoline...........................
Upholstery Care............................... 212
Khicle Identification Number
(VIN) ............................................. 219
Vehicle Loading............................... 205
Vehicle Storage............................... : 196
104, 110
Ventilation ................................
VIN ................................................... 219
Visor Vanity Mirrors.......................... 83
Voltmeter.............................................95
270
Warning Flashers. Hazard ............ 150
Warning Lights
Anti-Lock Brake System
.................96
Battery ............................................. 98
Brake ................................................ 96
Coolant Temperature ...................... 94
Fasten Belts ..................................... 18
Low Coolant .................................... 94
Oil .................................................... 94
Safety Belt .......................................15
Sewice Engine Soon ....................... 97
Washer. Windshield ........................... 77
Weight
Gross Axle Rating (GAWR).........205
Gross Vehicle Rating (GVWR) .... 205
wheel^ Alignment & Tire Balance... 210
Wheel Covers.How to Remove ....... 167
Wheel Nut Torque ................... 171. 228
Wheel Nuts ....................................... 167
Wheel Replacement ......................... 210
Windows
Passenger Lockout Switch.............. 72
Power ............................................... 72
Standard .......................................... 71
Windshield Washer............................ 77
Fluid ................................................. 191
.Windshield Wipers.............76. 216.226
Windshield Wiper Replacement...... 205
Winter Driving ................................. 140
If Your Vehicle is Stuck in Deep
Snow ........................................... 173
If You’re Caughtin a Blizzard...... 142
Wrecker Towing............................... 154
Service Statillrz Infomation
The
See
,