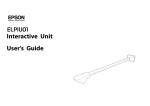
1
BrightLink 455Wi+
TM
Guía de
referencia
rápida
Quick Guide
Instalación del software
Uso del proyector
Solución de problemas
Avisos
Installing the Software
Using the Projector
Solving Problems
Notices
Guarde esta guía junto con el bolígrafo y el control remoto.
Keep this book with the pen and remote control at all times.
Contenido
Introducción . . . . . . . . . . . . . . . . . . . . . . . . . . . . . . . . . . . . . . . . . . . 3
Configuración rápida del proyector . . . . . . . . . . . . . . . . . . . . . . . . . . . . . . 4
Instalación . . . . . . . . . . . . . . . . . . . . . . . . . . . . . . . . . . . . . . . . . . . . 7
Cómo instalar el software . . . . . . . . . . . . . . . . . . . . . . . . . . . . . . . . . . . . 7
Cómo instalar las pilas del bolígrafo . . . . . . . . . . . . . . . . . . . . . . . . . . . . . 9
Cómo instalar las pilas del control remoto . . . . . . . . . . . . . . . . . . . . . . . . 10
Cómo conectar los cables . . . . . . . . . . . . . . . . . . . . . . . . . . . . . . . . . . . . 11
Cómo encender y apagar el proyector . . . . . . . . . . . . . . . . . . . . . . . . . . . 12
Cómo ajustar la imagen . . . . . . . . . . . . . . . . . . . . . . . . . . . . . . . . . . . . . 13
Cómo calibrar el proyector . . . . . . . . . . . . . . . . . . . . . . . . . . . . . . . . . . 14
Cómo usar el bolígrafo interactivo . . . . . . . . . . . . . . . . . . . . . . 17
Cómo usar el bolígrafo como mouse . . . . . . . . . . . . . . . . . . . . . . . . . . . . 17
Cómo usar las herramientas Easy Interactive Tools . . . . . . . . . . . . . . . . . . 18
Cómo usar las funciones de Tablet PC y Entrada manuscrita . . . . . . . . . . . 37
Solución de problemas . . . . . . . . . . . . . . . . . . . . . . . . . . . . . . . . 38
Problemas y soluciones . . . . . . . . . . . . . . . . . . . . . . . . . . . . . . . . . . . . . 38
Dónde obtener ayuda . . . . . . . . . . . . . . . . . . . . . . . . . . . . . . . . . . . . . . 40
Avisos . . . . . . . . . . . . . . . . . . . . . . . . . . . . . . . . . . . . . . . . . . . . . . . 42
Aviso sobre derechos reservados . . . . . . . . . . . . . . . . . . . . . . . . . . . . . . . 42
2
Su proyector BrightLink™ 455Wi+ convierte cualquier pared en una pizarra
interactiva. Después de que su proyector esté instalado, consulte esta guía para
obtener instrucciones sobre cómo:
■
Instalar el software a su computadora
■
Conectar los cables a su computadora
■
Usar el control remoto
■
Encender el proyector y ajustar la imagen
■
Iniciar el Easy Interactive Driver
■
Calibrar y usar el bolígrafo
■
Usar las herramientas Easy Interactive Tools
■
Resolver problemas generales
Español
Introducción
Esta guía contiene instrucciones sobre cómo utilizar el proyector con una
computadora portátil o de escritorio. También puede conectar el proyector a
reproductores de video, cámaras de documentos u otros equipos. Para más
información, consulte el Manual del usuario en formato electrónico. Para
información sobre la proyección por medio de una red, consulte la Guía de
funcionamiento de EasyMP® Network Projection que también se incluye en el CD
del proyector BrightLink 455Wi+.
Antes de usar el proyector, lea las instrucciones de seguridad incluidas en el
Manual del usuario en formato electrónico proporcionado en el CD del proyector.
Siga estas directrices mientras lee las instrucciones del proyector:
Advertencia:
Las Advertencias se deben seguir cuidadosamente para evitar lesiones corporales.
Precaución:
Las Precauciones se deben respetar para evitar daños al equipo.
Nota:
Las Notas contienen información importante acerca del proyector.
3
Configuración rápida del proyector
Siga los pasos indicados en las páginas 4 y 5 para poder usar su proyector de
inmediato. Haga fotocopias de estas páginas, lamínelas si es necesario, y
manténgalas con el proyector como un “ayuda memoria”. Si necesita más detalles,
consulte la página indicada para cada paso.
1. Instale el Easy Interactive Driver y las herramientas Easy Interactive Tools
(consulte la página 7). Utilice los CDs proporcionados con el proyector o
descargue el driver y las herramientas de la página:
www.latin.epson.com/proyectores.
2. Compruebe que las pilas estén instaladas en el bolígrafo
interactivo y el control remoto (consulte las páginas 9 y 10).
Pulse el botón del bolígrafo. Si el indicador luminoso se
ilumina de color verde, las pilas están instaladas y cargadas.
3. Para el mejor tipo de conexión, conecte un
cable VGA para computadora (no
incluido) y el cable USB incluido con el
proyector a su computadora con
Windows® o Mac OS® X (consulte la
página 11).
Cable VGA para
computadora
Cable USB
4. Pulse el botón de encendido P del control remoto para encender el proyector
(consulte la página 12). Si necesita ajustar la imagen, consulte la página 13.
Botón de
encendido
5. Proyecte una imagen de su computadora. Si la imagen no aparece, consulte la
página 38 o realice una de las siguientes acciones:
■
En algunas computadoras portátiles con Windows, es posible que tenga
que mantener presionada la tecla Fn del teclado y pulsar la tecla F7 o la
tecla de función que le permite ver imágenes en un monitor externo.
Puede presentar un icono como
o denominarse CRT/LCD.
4 Introducción
■
En una computadora MacBook®, es posible que tenga que abrir las
Preferencias de Pantalla y seleccionar Detectar pantallas, Mostrar
Pantallas en barra de menú o Pantallas duplicadas.
■
Pulse el botón Source Search del control remoto.
6. Inicie el Easy Interactive Driver en su computadora. Debe aparecer el icono
del bolígrafo
en la esquina inferior derecha de su pantalla (Windows) o
en el Dock (Mac OS X). Si no ve el icono, consulte la página 14 o realice una
de las siguientes acciones:
■
Windows: seleccione
o Inicio > Todos los programas o
Programas > Epson Projector > Easy Interactive Driver.
■
Mac OS X: abra la carpeta Aplicaciones, luego seleccione el icono Easy
Interactive Driver.
7. Calibre su sistema (consulte la página 14).
■
Windows: haga clic en el icono del bolígrafo
en la bandeja del
sistema de la barra de tareas (esquina inferior derecha de su pantalla),
luego seleccione Calibrar (normal).
■
Mac OS X: haga clic en el icono del bolígrafo
en el Dock, seleccione
Calibrar desde la barra del menú, luego seleccione Calibrar (Normal).
■
Luego de leer el mensaje sobre la calibración, haga clic
en OK o en Aceptar.
■
Utilice el bolígrafo interactivo para tocar cada círculo
verde que parpadea a medida que aparece. Continúe
hasta que todos los círculos dejen de parpadear y se
vuelvan negros.
■
Sostenga el bolígrafo en ángulo y compruebe que no esté proyectando una
sombra sobre el bolígrafo.
■
Si comete un error, pulse la tecla Esc del teclado de su computadora y
reinicie la calibración.
8. Inicie las herramientas Easy Interactive Tools (consulte la página 18).
■
Windows: seleccione
o Inicio > Todos los programas o
Programas > Epson Projector > Easy Interactive Tools.
Mac OS X: abra la carpeta Aplicaciones, luego seleccione Easy
Interactive Tools >
Easy Interactive Tools.
Configuración rápida del proyector 5
Dependiendo de su sistema operativo, verá las siguientes herramientas en
el escritorio de su computadora:
Windows
Alterna entre los modos
de mouse y bolígrafo
Alterna entre los modos
interactivo y pizarra
Retrocede y avanza
las páginas
Dibuja en la pantalla
Deshace la última acción
Utiliza el teclado en pantalla
Oculta parte
de la pantalla
Borra todas las anotaciones
Captura la pantalla actual
Crea efecto de foco
Minimiza la barra de herramientas
Mac OS X
Oculta la caja de herramientas
Dibuja líneas
de forma libre
Dibuja líneas rectas
Escribe texto
Utiliza el teclado
en pantalla
Borra
Borra todas las anotaciones
Selecciona el modo de anotación
Guarda la página actual
Establece el estilo de
rectángulo o círculo: borde,
relleno o ambos
Establece el color de
línea (caja superior)
6 Introducción
Establece el color de
relleno (caja inferior)
Instalación
Antes de que pueda utilizar su proyector interactivo, debe instalar el software y
conectar los cables a su computadora. Después puede encender el proyector y
calibrar su sistema.
Cómo instalar el software
Esta sección explica cómo instalar el software para el bolígrafo interactivo y los
manuales en formato electrónico.
Se aconseja visitar periódicamente la página de soporte técnico de Epson para
obtener actualizaciones gratuitas del software Easy Interactive. Visite la página
www.latin.epson.com/proyectores.
Aunque tenga otro software de anotación, debe instalar el Easy Interactive Driver
del CD llamado “Epson Projector Software for Easy Interactive Function”.
Cómo instalar el Easy Interactive Driver
1. Introduzca el CD llamado “Epson Projector Software for Easy Interactive
Function” en el lector de CDs de su computadora.
Windows: si aparece la ventana Reproducción automática, haga clic en
Ejecutar EIDriverVxxx_Setup.exe. Si aparece la pantalla Control de cuentas
de usuario, haga clic en Continuar o en Sí.
Mac OS X: haga doble clic en EIDriverVxxx_Setup en la ventana Epson.
Haga clic en Continuar, si es necesario.
2. Seleccione su idioma, si es necesario.
3. Siga las instrucciones en pantalla para instalar el software.
Cómo instalar el software 7
4. Cuando vea una de las siguientes pantallas, seleccione Registrar al Iniciar
(Windows) o Iniciar automáticamente (Mac OS X) y Inicie Easy
Interactive Driver.
Windows
Mac OS X
5. Haga clic en Instalar (Windows) o en Continuar (Mac OS X).
6. Siga las instrucciones en pantalla para terminar de instalar el software e iniciar
el Easy Interactive Driver.
Cómo instalar los manuales y las herramientas
Easy Interactive Tools
1. Introduzca el CD del proyector BrightLink 455Wi+ en el lector de CDs de su
computadora.
Windows: si aparece la ventana Reproducción automática, haga clic en
Ejecutar Setup.exe. Si aparece la pantalla Control de cuentas de usuario,
haga clic en Continuar o en Sí.
Mac OS X: haga doble clic en el icono
Epson.
2. Seleccione su idioma, si es necesario.
3. En la siguiente pantalla, haga clic en Instale los manuales del proyector
para instalar los manuales.
4. Haga clic en Instale un enlace para descargar Easy Interactive Tools
para colocar un enlace en el escritorio de su computadora.
5. Cuando termine con la instalación, haga clic en Salir.
6. Haga doble clic en el enlace Descarga Easy Interactive Tools situado en su
escritorio para acceder a la página de soporte técnico de Epson.
8 Instalación
7. Localice su producto y siga las instrucciones en pantalla para descargar e
instalar las herramientas Easy Interactive Tools.
Nota: también puede visitar la siguiente página web para descargar las herramientas
Easy Interactive Tools: www.latin.epson.com/proyectores
Cómo instalar las pilas del bolígrafo
Compruebe que las pilas del bolígrafo estén instaladas. Para revisar las pilas, pulse
el botón. Si el indicador luminoso está verde, las pilas tienen suficiente carga.
Indicador
luminoso
de las pilas Botón
Ranura para
la conexión
de un cable
Se aconseja sujetar una cuerda o cordón (disponible en tiendas) al bolígrafo.
Si necesita instalar o reemplazar las pilas, use dos pilas recargables o alcalinas AAA.
También puede usar pilas AAA recargables si tiene un cargador de pilas. No mezcle
los dos tipos de pilas.
1. Apriete la lengüeta de la tapa del compartimiento de pilas y al mismo tiempo
levántela.
2. Introduzca dos pilas, colocando los polos + y – como se muestra.
Cómo instalar las pilas del bolígrafo 9
3. Vuelva a colocar la tapa del compartimiento de pilas y presiónela hasta que
encaje en su lugar.
Cómo instalar las pilas del control
remoto
Compruebe que las pilas del control remoto estén instaladas. Si necesita instalar o
reemplazar las pilas, use dos pilas alcalinas AA.
1. Presione la lengüeta de la tapa del compartimiento
de pilas y levántela.
2. Introduzca dos pilas, colocando los
polos + y – como se muestra.
3. Vuelva a colocar la tapa del
compartimiento de pilas y presiónela hasta que
encaje en su lugar.
10 Instalación
Cómo conectar los cables
Cable VGA para
computadora
Cable USB
Puede conectar el proyector a cualquier computadora que tenga un puerto de
salida para monitores estándar con el cable VGA, el cual puede adquirir en una
tienda de informática o de electrónica.
Además, debe conectar el cable USB para poder usar el bolígrafo interactivo. Si el
cable no es lo suficientemente largo para alcanzar su computadora, es posible que
tenga que usar un cable de extensión USB (no incluido).
También puede proyectar mediante el puerto USB (USB Display) o a través de
una red. Sin embargo, el puerto de salida de monitor VGA de su computadora
ofrece el mejor rendimiento cuando se utiliza con el bolígrafo interactivo.
Cómo conectar el cable VGA
para computadora
1. Localice el cable VGA para computadora
conectado al proyector.
2. Conecte el otro extremo del cable al
puerto de salida de monitor
de su
computadora.
Cómo conectar los cables 11
Cómo conectar el cable USB para el bolígrafo interactivo
Para utilizar el bolígrafo interactivo, debe conectar el cable USB al proyector y a su
computadora.
1. Localice el cable USB conectado al
proyector.
2. Conecte el extremo plano del cable
a cualquier puerto USB
disponible de su computadora
portátil o de escritorio.
Cómo encender y apagar el proyector
Encienda su computadora antes de encender el proyector.
1. Asegure que el proyector esté conectado. El indicador de encendido P debe
estar iluminado de color naranja.
Indicador de
encendido
2. Pulse el botón de encendido P del
control remoto.
Botón de
encendido
Después de unos segundos, verá la
pantalla de su computadora
proyectada. Si aparece una pantalla
en blanco o el mensaje Sin Señal,
consulte la página 39 para obtener ayuda.
12 Instalación
Advertencia: no mire directamente la lente mientras esté encendida la lámpara ya
que esto podría dañar la vista y es especialmente peligroso para los niños.
3. Cuando termine de utilizar el proyector, pulse el botón de encendido P del
control remoto.
4. Cuando vea un mensaje de confirmación, pulse el botón de encendido P
otra vez.
Nota: la vida útil de la lámpara variará dependiendo del modo seleccionado, las
condiciones ambientales y el uso que se le dé al producto. Para prolongar la vida útil del
proyector, apáguelo cuando no lo esté utilizando.
Puede configurar el proyector para que apague automáticamente la lámpara y entre en
“modo de reposo” cuando no reciba ninguna señal durante 1 a 30 minutos (consulte
el Manual del usuario en formato electrónico para más información). Ésto ahorra
electricidad, enfría el proyector y prolonga la vida útil de la lámpara. Si desea volver
a empezar a utilizar el proyector, pulse el botón de encendido P.
Cómo ajustar la imagen
Si es necesario, puede utilizar el control remoto para ajustar la imagen.
Selecciona la fuente
de imagen a proyectar
Apaga la imagen
temporalmente
Ajusta la posición y
la calidad de imagen
Avanza por los
documentos
Selecciona entre las
fuentes de imagen
conectadas al proyector
Ajusta el color para
diferentes entornos
de visualización
Cambia la relación de
aspecto (tamaño de
la pantalla)
Acerca y aleja la imagen
Accede al sistema
de menús para ver
más ajustes
Cómo ajustar la imagen 13
Cómo calibrar el proyector
La calibración configura la conexión entre su computadora y el bolígrafo
interactivo. Mediante este sencillo proceso, su computadora puede detectar de
manera precisa la posición del bolígrafo en la superficie de proyección.
Debe realizar la calibración antes de usar el bolígrafo por primera vez, si cambia la
resolución de su computadora o si conecta otra computadora.
Iniciar el Easy Interactive Driver
Antes de que pueda calibrar su sistema, necesita comprobar que el Easy Interactive
Driver esté iniciado en su computadora.
1. Verifique que el icono del bolígrafo
aparezca en su pantalla, ya sea en la
bandeja del sistema de la barra de tareas en la esquina inferior derecha de su
pantalla (Windows) o en el Dock (Mac OS X). Puede que tenga que esperar
un minuto para que el icono aparezca luego de haber encendido la
computadora y el proyector.
Si no ve el icono en Windows, es posible que tenga hacer clic en la(s) flecha(s)
de Mostrar iconos ocultos.
Si aparece una X roja en el icono, la computadora y el proyector no están
conectados correctamente. Retire y vuelva a conectar el cable USB.
2. Si no ve el icono, realice una de las siguientes acciones:
Windows: seleccione
o Inicio > Todos los programas o Programas >
Epson Projector > Easy Interactive Driver.
Mac OS X: abra la carpeta Aplicaciones, abra la carpeta Easy Interactive
Driver, luego seleccione el icono Easy Interactive Driver.
Si necesita más ayuda, consulte la página 39.
Cuando la computadora y el proyector están conectados y se muestra el icono Easy
Interactive Driver, está listo para calibrar. Consulte la siguiente sección para
obtener instrucciones.
Nota: no seleccione Salir o Cancelar en el menú Easy Interactive Driver. Si lo hace,
tendrá que abrir el driver como se describe aquí la próxima vez que desee usar el
bolígrafo interactivo.
14 Instalación
Cómo realizar la calibración
Hay dos tipos de calibración disponibles:
■
Normal,: es más rápida y adecuada para la mayoría de las situaciones
(25 puntos de calibración)
■
Avanzada: se recomienda cuando proyecta imágenes con mucho detalle y
necesita una mayor precisión (49 puntos de calibración)
Es posible que tenga que recalibrar si utiliza una computadora diferente, cambia la
resolución de su computadora, pulsa el botón Auto o cambia la relación de
aspecto del proyector con el control remoto. Tendrá que recalibrar su sistema si
cambia los siguientes ajustes en el sistema de menús del proyector: Ajuste
automático, Resolución, Tracking, Sync., Posición, Aspecto, Keystone o
Zoom.
1. Para comenzar la calibración, realice una de las siguientes acciones:
Windows: haga clic en el icono del bolígrafo
en la bandeja del sistema de la barra de
tareas (esquina inferior derecha de su pantalla),
luego seleccione Calibrar (normal) o
Calibrar (avanzado).
Mac OS X: haga clic en el icono del
bolígrafo
en el Dock, seleccione
Calibración desde la barra del menú
y luego seleccione Calibrar
(normal) o Calibrar (avanzado).
Verá el siguiente mensaje:
2. Luego de leer el mensaje sobre la calibración,
haga clic en OK o en Aceptar.
3. Espere hasta que vea un círculo verde
parpadeante en la esquina superior izquierda
de su imagen proyectada.
Cómo calibrar el proyector 15
4. Toque el centro del círculo con la punta del bolígrafo. El círculo dejará de
parpadear y se pondrá negro. Verá otro círculo a la derecha.
5. Toque el centro del círculo siguiente, luego repita la acción. Cuando llegue al
final de la fila, aparecerá el círculo siguiente en el borde izquierdo de una
nueva fila.
Nota: para obtener la calibración más precisa, sostenga el
bolígrafo en ángulo hacia la superficie de proyección y
toque el centro del círculo.
Asegúrese de no bloquear la señal entre el bolígrafo y el
receptor interactivo (junto a la ventana de proyección del
proyector).
No pulse el botón al costado del bolígrafo durante el proceso de calibración.
Si comete un error o desea detener la calibración, pulse la tecla Esc del teclado de
su computadora. Luego, reinicie el proceso de calibración tal como se describe
anteriormente.
6. Continúe hasta que todos los círculos queden negros.
Luego de terminar la calibración, puede utilizar el bolígrafo como mouse en la
pizarra o pared de proyección. Con un software adicional, también puede usar el
bolígrafo para escribir o dibujar en la imagen proyectada. Puede utilizar cualquier
software de anotación o las herramientas Easy Interactive Tools, tal como se
describe en la página 18.
16 Instalación
Cómo usar el bolígrafo
interactivo
El bolígrafo interactivo incluido con el proyector convierte prácticamente
cualquier pared en una pizarra interactiva. Los siguientes capítulos le explica cómo
utilizar el bolígrafo y las herramientas Easy Interactive Tools.
Cómo usar el bolígrafo como mouse
Con las herramientas Easy Interactive Tools puede usar el bolígrafo como mouse.
Si instaló un software de anotación como las herramientas Easy Interactive Tools,
también puede usar el bolígrafo para escribir o dibujar en la imagen proyectada.
Indicador
luminoso
de las pilas
Botón
Pulse el botón del bolígrafo para probar las pilas. Si el indicador luminoso está
verde, las pilas tienen suficiente carga.
Siga estos consejos para usar el bolígrafo como mouse:
■
Para obtener el mejor rendimiento, sostenga el bolígrafo en ángulo (como un
bolígrafo normal) en lugar de sostenerlo perpendicular a la pizarra.
■
Para hacer clic con el botón izquierdo del mouse, toque la pizarra con el
bolígrafo.
■
Para hacer doble clic, toque la pizarra dos veces.
■
Para hacer clic con el botón derecho del mouse, toque la pizarra mientras
presiona el botón del bolígrafo.
■
Para hacer clic y arrastrar, toque la pizarra y arrastre con el bolígrafo.
Cómo usar el bolígrafo como mouse 17
Cómo usar las herramientas Easy
Interactive Tools
Con las herramientas Easy Interactive Tools, puede usar el bolígrafo para escribir o
dibujar en la superficie de proyección. Asegúrese de haber instalado el software, tal
como se describe en la página 8.
Nota: no es necesario instalar el software Easy Interactive Tools para usar las
funciones interactivas del proyector. Puede utilizar cualquier otro software de
anotación.
Cómo usar las herramientas en Windows
Tiene disponibles dos barras de herramientas diferentes, una para el modo
interactivo y la otra para el modo de pizarra:
Barra de
herramientas
de pizarra
adicional
Barra de
herramientas
interactivas
■
Barras de herramientas de pizarra
Modo interactivo: En modo interactivo, la barra de herramientas aparece en
la imagen proyectada y le permite usar el bolígrafo como mouse para realizar
acciones como abrir aplicaciones, acceder a enlaces y operar las barras de
desplazamiento.
En este modo, también puede hacer anotaciones en todo lo que se proyecte
desde su computadora y guardar las anotaciones.
18 Cómo usar el bolígrafo interactivo
■
Modo de pizarra: En modo de pizarra, la barra de herramientas aparece en
una superficie blanca. Puede escribir o dibujar con el bolígrafo, añadir
imágenes y guardar o imprimir las páginas.
1. Para lanzar Easy Interactive Tools, seleccione
o Inicio > Todos los
programas o Programas > Epson Projector > Easy Interactive Tools.
Cuando se inicia Easy Interactive Tools se abre en modo interactivo de forma
predeterminada.
2. Para alternar entre los modos interactivo y de pizarra, seleccione el icono
o
en la esquina superior derecha de la barra de herramientas.
3. Para salir, seleccione el icono Easy Interactive Tools
de Windows y seleccione Exit (Salir).
en la barra de tareas
Cómo usar el modo interactivo
Cuando abra Easy Interactive Tools por primera vez, estará en modo interactivo.
El bolígrafo o el mouse se puede activar en este modo, según lo indica el icono en
la esquina superior izquierda de la barra de herramientas. Cuando vea el icono de
mouse
en la barra de herramientas, puede usar el bolígrafo como mouse para
seleccionar otras herramientas.
Alterna entre los modos
de mouse y bolígrafo
Alterna entre los modos
interactivo y pizarra
Retrocede y avanza
las páginas
Dibuja en la pantalla
(consulte la página 22)
Deshace la última acción
Utiliza el teclado en pantalla
Oculta parte de la pantalla
Borra todas las anotaciones
Captura la pantalla actual
Crea el efecto de foco
Minimiza la barra de herramientas
Cómo usar las herramientas Easy Interactive Tools 19
Las siguientes herramientas interactivas están disponibles:
Herramientas interactivas
Icono
Función
Avanza o retrocede las páginas en un navegador u otra aplicación de
software.
Utiliza un teclado en pantalla para ingresar texto en una página Web,
en un navegador u otra aplicación de software. Consulte la página 20
para obtener más información.
Captura la pantalla actual y guardarla como un archivo de imagen.
Consulte la página 25 para obtener más información.
Oculta parte de la pantalla. Puede utilizar las flechas amarillas para
mostrar solamente las partes de la pantalla que desea que el público
pueda ver. Consulte la página 22 para obtener más información.
Crea un efecto de enfoque para resaltar o dar sombra a parte de la
pantalla. Puede mover el foco y cambiar su forma, color y
transparencia, tal como se describe en la página 21.
Utiliza el bolígrafo para hacer clic con el botón derecho sin presionar el
botón.
Minimiza la barra de herramientas. Cuando la barra de herramientas
está minimizada, puede restaurarla seleccionando el icono Easy
Interactive Tools
en la barra de tareas de Windows.
Cómo ingresar texto
Puede ingresar texto en un navegador u otra aplicación, como un procesador de
texto o una hoja de cálculo.
1. Abra su navegador de Internet u otro programa.
2. Seleccione la herramienta de teclado
20 Cómo usar el bolígrafo interactivo
. Verá el teclado en pantalla:
3. Toque el lugar en la imagen proyectada donde desea ingresar texto.
4. Seleccione las letras y los números en el teclado en pantalla.
Cómo usar la herramienta de enfoque
Para ocultar la mayoría de la imagen proyectada y mostrar solamente un área en
particular, seleccione la herramienta de enfoque
.
■
Para cambiar el tamaño del área visible, toque el borde del círculo de enfoque
y arrástrelo.
■
Para mover el área visible, toque un punto afuera del círculo de enfoque y
arrástrelo.
■
Para ajustar el área visible, seleccione el icono
en la pantalla de enfoque.
Verá la siguiente pantalla, en la cual puede ajustar la forma del área visible, y el
color y la transparencia del área oculta.
Abre una pantalla de
selección de color
Recupera el color
predeterminado
Deslice para ajustar
la transparencia del
área oculta
■
Para retirar el enfoque, seleccione el icono
en la pantalla de enfoque.
Cómo usar las herramientas Easy Interactive Tools 21
Cómo usar la herramienta de sombra
Para ocultar la imagen proyectada con una sombra opaca y mostrar solamente el
área que desea, seleccione la herramienta de sombra
. Verá lo siguiente en la
imagen proyectada:
■
Para ajustar la sombra, toque una de las flechas amarillas y arrástrela.
■
Para retirar la sombra, seleccione el botón Close (Cerrar) en la pantalla.
Cómo usar el modo de bolígrafo interactivo
Para cambiar al modo de bolígrafo interactivo, seleccione cualquiera de las
herramientas de dibujo en la barra de herramientas. O bien, seleccione el icono de
mouse
en la esquina superior izquierda. El mouse cambia a un bolígrafo.
Las siguientes herramientas de anotación y de dibujo están disponibles:
Herramientas de anotación y de dibujo
Icono
Descripción
Escribe o dibuja con un rotulador semitransparente.
Alterna entre escribir, dibujar y borrar. En el modo de borrar, puede
seleccionar un borrador de forma libre o de línea recta, o formas
circulares o rectangulares para borrar franjas grandes.
Selecciona el ancho y el color de las líneas (básico o rápido).
Personaliza el ancho y el color de las líneas (avanzado o exacto).
Escribe o dibuja líneas de forma libre (o usa un borrador de forma libre).
22 Cómo usar el bolígrafo interactivo
Herramientas de anotación y de dibujo (continuado)
Icono
Descripción
Dibuja líneas rectas (o usar un borrador de línea recta).
Dibuja círculos o elipses (o usar un borrador circular).
Dibuja rectángulos o cuadrados (o usar un borrador rectangular).
Deshace la última anotación.
Borra todas las anotaciones.
Cómo cambiar el ancho de las líneas y el color del bolígrafo
Puede seleccionar el ancho de las líneas y el color para el rotulador y las
herramientas de dibujo. Hay dos tipos de ventanas de selección disponibles, básica
y avanzada.
■
Seleccione el icono
para abrir la ventana de ajuste básico de líneas, como
se muestra a continuación:
Seleccione
entre
7 anchos
de línea
Muestra del
ancho de línea
seleccionado
Seleccione
entre 44
colores
■
Seleccione el icono
para abrir la ventana de ajuste avanzado de líneas,
como se muestra a continuación:
Deslice la marca roja para elegir
el ancho de las líneas.
Seleccione
un valor de
color en el
círculo
cromático.
Seleccione valores
de rojo, verde y
azul específicos
para crear un
color exacto.
Use el control
deslizante para
ajustar el brillo
del color.
Cómo usar las herramientas Easy Interactive Tools 23
Cómo usar el modo de pizarra
Para cambiar a una pantalla blanca que pueda utilizar como pizarra interactiva,
seleccione el icono de pizarra
.
Verá las herramientas de pizarra, como se muestra a continuación. Seleccione el
icono
para mostrar herramientas adicionales.
Cambia al modo
interactivo
Herramientas
adicionales
Muestra la lista de
páginas guardadas
Vista previa
Imprimir
Borra las anotaciones
Abre una imagen de fondo o
página previamente guardada
Crea una página nueva
Guarda las páginas actuales
Elimina la página actual
Selecciona el fondo
Copia la página anterior
o la página actual
Muestra las herramientas
adicionales
Algunas de las herramientas son las mismas que se encuentran disponibles en el
modo interactivo. A continuación se entrega una lista de herramientas que son
exclusivas del modo de pizarra
Herramientas de pizarra
Icono
Función
Seleccione este icono para ver una lista de las páginas guardadas en la
carpeta actual.
Seleccione este icono para volver al modo interactivo.
Seleccione este icono para borrar la página actual y visualizar la página
previamente guardada.
Seleccione este icono para insertar una imagen como el fondo de la
pizarra o abrir una página previamente guardada. Puede seleccionar
cualquier archivo de imagen en formato JPEG o BMP.
24 Cómo usar el bolígrafo interactivo
Herramientas de pizarra
Icono
Función
Seleccione este icono para seleccionar un fondo. Presione varias
veces el botón para escoger entre seis colores puros, dos estilos de
líneas o elementos musicales.
Seleccione este icono para crear una página nueva en la pizarra.
Seleccione este icono para copiar el contenido de la página visualizada
previamente y pegarlo en la página actual.
Seleccione este icono para deshacer la última operación.
Seleccione este icono para rehacer la última operación.
Seleccione este icono para guardar la página actual como un archivo
de imagen. Consulte la siguiente sección para obtener más
información.
Seleccione este icono para visualizar herramientas adicionales.
Seleccione este icono para imprimir una vista previa.
Seleccione este icono para imprimir todas las páginas de la pizarra que
están en la carpeta actual.
Cómo guardar las páginas
Puede guardar las páginas de la pizarra y las imágenes de la pantalla de la
computadora con las anotaciones. También puede elegir dónde guardar las
páginas y en qué formato.
1. Seleccione el icono
en la barra de tareas
(esquina inferior derecha de la pantalla), para
abrir el menú de Easy Interactive Tools:
2. Seleccione Saving Setting (Guardando ajuste).
Cómo usar las herramientas Easy Interactive Tools 25
Aparece el teclado (en pantalla) y una ventana para guardar archivos:
3. Seleccione o cree la carpeta donde desea guardar las páginas. Puede seleccionar
el teclado en pantalla para ingresar el prefijo de un nombre de archivo y
seleccionar Jpeg o BMP como el tipo de archivo.
4. Seleccione Guardar. Vuelve a las herramientas Easy Interactive Tools.
5. Realice uno de los siguientes pasos para guardar las páginas:
■
En el modo interactivo, seleccione el icono de la cámara
para capturar
la pantalla y las anotaciones actuales. Aparece un mensaje que confirma
que la pantalla se ha guardado. Easy Interactive Tools agrega la hora y la
fecha al prefijo del nombre del archivo que seleccionó, por ejemplo:
PRUEBA010-11-29-13-23-3
mes
prefijo
año
■
hora
día
segundos
minutos
En modo de pizarra, seleccione el icono de guardar
. Aparece el
teclado en pantalla y se abre una ventana Save as (Guardar como).
Puede seleccionar una ubicación para guardar el archivo e ingresar un
nombre para crear una carpeta nueva. Las páginas se guardan
automáticamente como imágenes numeradas.
26 Cómo usar el bolígrafo interactivo
Cómo imprimir las páginas
Una vez que se hayan guardado las páginas, puede imprimirlas.
1. Para mostrar imágenes en miniatura de las páginas guardadas en la carpeta
actual, seleccione el icono de páginas
. Verá miniaturas de las páginas a un
lado de la pantalla:
2. Para imprimir las páginas, seleccione el icono
para mostrar herramientas
adicionales. Luego, seleccione el icono de impresora
. Verá la ventana de
impresión:
Seleccione
los ajustes
de impresión.
Seleccione
las páginas
que desea
imprimir.
3. Seleccione las páginas que desea imprimir, luego seleccione Aceptar.
Cómo usar las herramientas Easy Interactive Tools 27
Cómo usar las herramientas en Mac OS X
Puede usar las herramientas de dos maneras diferentes: en modo interactivo
(fondo transparente) y en modo de pizarra (fondo blanco).
■
En modo interactivo, la caja de herramientas aparece en la imagen proyectada
y le permite hacer anotaciones en todo lo que se proyecte desde su
computadora. También puede usar el bolígrafo como mouse para realizar
acciones como abrir aplicaciones, acceder a enlaces y operar las barras de
desplazamiento.
■
En modo de pizarra, la caja de herramientas aparece en una superficie blanca.
Puede escribir o dibujar con el bolígrafo y guardar las páginas.
1. Para lanzar Easy Interactive Tools, seleccione Aplicaciones > Easy
Interactive Tools >
Easy Interactive Tools. Aparece la caja de
herramientas en su escritorio, tal como se muestra a continuación:
2. Para salir del software, seleccione el menú Easy Interactive Tools y seleccione
Quit Easy Interactive Tools (Salir de Easy Interactive Tools).
28 Cómo usar el bolígrafo interactivo
Cómo usar el modo interactivo (fondo transparente)
Cuando abra Easy Interactive Tools por primera vez estará en modo de bolígrafo
interactivo, lo que le permite usar el bolígrafo interactivo para dibujar o anotar en
todas las aplicaciones o imágenes en la pantalla. Verá la caja de herramientas:
Oculta la caja de herramientas
Dibuja líneas en
forma libre
Dibuja líneas rectas
Escribe texto
Usa el teclado en pantalla
Dibuja círculos
Configura el ancho
de las líneas
Configura el color
de las líneas
(cuadro superior)
Borrador
Borra todas las anotaciones
Selecciona el modo interactivo
Guarda la página actual
Dibuja rectángulos
Configura el estilo de
rectángulos y círculos:
delineado, relleno o ambos
Configura el color de
relleno (cuadro inferior)
Nota: para cambiar al modo de mouse interactivo, seleccione la flecha negra
en la
caja de herramientas. El color de la flecha se cambia a blanco, indicando que puede usar
el bolígrafo como mouse.
Las siguientes herramientas están disponibles:
Herramientas de Mac OS
Icono
Función
Seleccione este icono para escribir o dibujar líneas en forma libre.
Seleccione este icono para borrar anotaciones individuales.
Seleccione este icono para dibujar líneas rectas.
Seleccione este icono para borrar todas las anotaciones.
Seleccione este icono para abrir el cuadro de entrada de texto.
Consulte la página 32 para obtener más información.
Seleccione este icono para cambiar al modo de mouse interactivo. La
flecha se pone de color blanco, indicando que puede usar la
herramienta de lápiz como mouse.
Cómo usar las herramientas Easy Interactive Tools 29
Herramientas de Mac OS (continuado)
Icono
Función
Seleccione este icono para abrir el teclado en pantalla.
Seleccione este icono para guardar la página actual. Consulte la
página 36 para obtener más información.
Seleccione este icono para dibujar círculos o elipses.
Seleccione este icono para dibujar cuadros o rectángulos.
Seleccione este icono para seleccionar círculos o rectángulos
delineados solamente.
Seleccione este icono para seleccionar círculos o rectángulos rellenos.
Seleccione este icono para seleccionar círculos o rectángulos
(delineados o rellenos).
Toque y arrastre el control deslizante para seleccionar el ancho de las
líneas para círculos, rectángulos, líneas y el borrador. Esto también
afecta al tamaño de la fuente del texto que ingresa en el cuadro de
entrada de texto.
Seleccione este icono para seleccionar el color de las líneas (cuadro
superior) y el color de relleno (cuadro inferior) para círculos, líneas y
rectángulos. Consulte la página 34 para obtener más información.
Para acceder a las opciones adicionales, seleccione el menú de herramientas Tools
en la barra de menús de Mac OS X:
■
Para cambiar a herramientas de dibujo
semitransparentes, seleccione Highlighter
Pen (Rotulador). Todas las líneas, los círculos,
los cuadrados y el texto ingresado se volverán
semitransparente.
■
Para cambiar al modo de pizarra, seleccione White Background (Fondo
blanco). Consulte la página 36 para obtener más información.
■
Para guardar la pantalla actual, seleccione Save Screen (Guardar pantalla).
Esto funciona igual como cuando selecciona la herramienta de cámara
.
Consulte la página 36 para obtener más información.
30 Cómo usar el bolígrafo interactivo
■
Para ocultar la caja de herramientas, seleccione la X en la esquina superior
izquierda de la caja de herramientas. Para volver a mostrar la caja de
herramientas, abra el menú de herramientas Tools y seleccione Show
Toolbox (Mostrar caja de herramientas).
Cómo ingresar texto
Puede ingresar texto en la pantalla o en un navegador u otra aplicación, como un
procesador de texto o una hoja de cálculo.
1. Si es necesario, seleccione la flecha negra
en la caja de herramientas para
cambiarla a una flecha blanca. Esto le permite usar el bolígrafo como mouse.
2. Abra su navegador de Internet u otra aplicación.
3. Seleccione la herramienta de teclado
teclado en pantalla:
en la caja de herramientas. Verá el
4. Toque el lugar en la pantalla donde desea ingresar texto.
5. Seleccione las letras y los números en el teclado en pantalla. Seleccione la tecla
de mayúsculas
para ingresar letras mayúsculas.
Si no aparece el teclado, es posible que tenga que seguir estos pasos para activarlo:
1. Abra el menú Apple y seleccione Preferencias del Sistema.
2. Seleccione
entrada.
Idioma y Texto, luego seleccione la ficha Fuentes de
3. Seleccione Visor de teclado y caracteres o Visor de Teclado, luego
desplácese hacia abajo si es necesario para seleccionar su país y/o idioma.
Marque la casilla de verificación Mostrar el menú Teclado en la barra de
menús en la parte inferior de la pantalla.
Cómo usar las herramientas Easy Interactive Tools 31
4. Cuando quiera utilizar el teclado en pantalla,
seleccione el menú de entrada (icono de bandera)
ubicado en el lado derecho de la barra de menús,
luego seleccione Mostrar Visor de Teclado.
Cómo usar el cuadro de entrada de texto
Puede usar el cuadro de entrada de texto para ingresar texto para realizar
búsquedas generales o de diccionario, o para usar la función de pronunciación.
1. Para abrir un cuadro de entrada de texto, seleccione la herramienta para
escribir
, luego toque la pizarra. Se abre el cuadro de entrada de texto:
Para utilizar el
teclado en pantalla
2. Para abrir el teclado en pantalla, seleccione la herramienta de teclado
cuadro de entrada de texto.
en el
3. Seleccione letras y números en el teclado en pantalla.
4. Resalte el texto y pulse el botón en el bolígrafo para mostrar un menú, tal
como se muestra a continuación:
32 Cómo usar el bolígrafo interactivo
■
Utilice las opciones en la parte superior del menú para realizar una
búsqueda en el texto, buscarlo en el diccionario, o cortar, copiar y pegarlo.
■
Utilice las opciones en la parte inferior del menú para cambiar la fuente,
revisar la ortografía y la gramática, o escribir el texto en mayúsculas o
minúsculas.
■
Para que se pronuncien las palabras en voz alta, seleccione Speech >
Start Speaking (Habla > Empezar a hablar). Las palabras en el cuadro de
diálogo se leen en voz alta.
Nota: el color y tamaño predeterminados del texto se determina por los ajustes de
color y ancho de las líneas seleccionados. Para cambiar las propiedades del texto,
pulse el botón en el bolígrafo y seleccione Font > Show Fonts (Fuente > Mostrar
fuentes).
5. Cuando termine de ingresar el texto, seleccione el botón Enter para colocar el
texto en la pantalla, o seleccione Cancel (Cancelar) para cerrar el cuadro de
entrada de texto.
Cómo seleccionar el ancho de las líneas y el estilo de los
gráficos
Para ajustar el ancho de las líneas, utilice la herramienta
en la caja de
herramientas. Arrastre el control deslizante a la derecha para aumentar el ancho de
las líneas. Esto afecta a las líneas rectas, las líneas en forma libre, los círculos, los
cuadrados y los rectángulos.
También puede seleccionar entre tres estilos para círculos y rectángulos:
■
Seleccione
, luego seleccione la herramienta
círculo o rectángulo delineado.
o
para dibujar un
■
Seleccione
, luego seleccione la herramienta
círculo o rectángulo de color sólido.
o
para dibujar un
■
Seleccione
, luego seleccione la herramienta
o
para dibujar un
círculo o rectángulo delineado y relleno o de un color sólido.
Cómo usar las herramientas Easy Interactive Tools 33
Cómo definir el color de líneas y de relleno
Hay varios cuadros de selección de color disponibles
para configurar el color de las líneas y del relleno usado
en círculos o rectángulos.
Color de
las líneas
Color de relleno
Seleccione el cuadro de color superior en la caja de
herramientas para configurar el color de las líneas o el cuadro inferior para
configurar el color de relleno. Verá el siguiente cuadro de diálogo Colors:
Paletas cromáticas
Controles deslizantes Espectro
Caja de crayones
Barra de color
Indica el color
seleccionado
Mueva el control
deslizante para
seleccionar colores
más oscuros.
Toque cualquier parte
del círculo para
cambiar el color.
Arrastre los colores
aquí para guardarlos.
Después de seleccionar un color que le gusta, arrástrelo de la barra de color en la
parte superior a uno de los cuadros en la parte inferior del cuadro de diálogo. Esto
le permite guardar sus colores favoritos para uso posterior. Hay más cuadros
disponibles de modo que puede guardar hasta 300 colores.
34 Cómo usar el bolígrafo interactivo
Para mostrar los siguientes cuadros de selección de colores, haga clic en los iconos
en la parte superior de la pantalla.
Controles deslizantes
Espectro
Paletas cromáticas
Caja de crayones
Cómo usar las herramientas Easy Interactive Tools 35
Cómo usar el modo de pizarra (fondo blanco)
Puede cambiar a una pantalla blanca que puede utilizar como pizarra interactiva.
1. Seleccione el menú de herramientas Tools en
la barra de menús de Mac OS X:
2. Seleccione White Background (Fondo
blanco). Verá las mismas herramientas
definidas en la página 29, pero en una pantalla
blanca.
3. Para volver al modo interactivo, abra el menú de herramientas Tools y
seleccione Transparent Background (Fondo transparente).
Cómo guardar las páginas
Puede seleccionar una ubicación y un formato para guardar sus imágenes y páginas
con anotaciones.
1. Abra el menú Easy Interactive Tools y seleccione
Preferences... (Preferencias).
Verá el cuadro de diálogo Preferencias:
2. Utilice el teclado en pantalla si desea introducir un prefijo diferente del
nombre de archivo para sus páginas guardadas; luego seleccione Choose
(Elegir) si desea cambiar la ubicación donde se guarda el archivo.
3. Seleccione PNG, JPEG o Windows BMP como el formato de archivo para
sus páginas guardadas.
36 Cómo usar el bolígrafo interactivo
4. Cuando desea guardar una página, seleccione la herramienta de cámara
Verá una mensaje como éste:
.
La imagen de pantalla capturada se guarda en la ubicación seleccionada, con
un nombre de archivo generado automáticamente según la fecha y la hora
actuales, por ejemplo:
Imagen20101210094341
mes
prefijo
año
día
segundos
hora
minutos
5. Seleccione OK para confirmar.
Cómo usar las funciones de Tablet PC y
Entrada manuscrita
Cuando instala el Easy Interactive Driver, la función de Table PC se habilita en
Windows 7 y Windows Vista®. Esta función le permite anotar, ingresar letra
manuscrita y realizar otras acciones con el bolígrafo, aún sin instalar el software de
anotación.
1. Para abrir el panel de entrada de Table PC, seleccione
programas > Accesorios > Tablet PC.
> Todos los
2. Seleccione Panel de entrada de Tablet PC.
Si tiene Microsoft® Office 2003 o posterior, también puede usar la función de
tinta digital en las aplicaciones de Office. Esto le permite añadir notas escritas a
mano a un documento, una hoja de cálculo o una presentación, y guardar las notas
con el archivo.
Para más información sobre las funciones de Table PC y Entrada manuscrita,
consulte la información de ayuda de Windows.
Cómo usar las funciones de Tablet PC y Entrada manuscrita 37
Solución de problemas
Si experimenta un problema con su proyector, puede pulsar el botón ? Help del
control remoto para obtener asistencia.
También puede consultar la siguiente sección para sugerencias de solución de
problemas generales, o consulte el Manual del usuario en formato electrónico para
obtener asistencia más detallada.
Nota: si cualquiera de los indicadores luminosos del proyector están iluminados de
color rojo, esto significa que existe un problema con la lámpara, la temperatura u otro
aspecto del proyector. Consulte el Manual del usuario en formato electrónico para
obtener más información.
Problemas y soluciones
Problemas con la proyección de la pantalla de su
computadora
■
Compruebe que el indicador de encendido P esté iluminado de color verde y
que no esté parpadeando. El proyector puede estar en modo de espera o de
reposo. Si el indicador de encendido P está de color naranja, pulse el botón
de encendido P para encender el proyector. También pulse el botón A/V
Mute del control remoto para comprobar que la imagen no se haya apagado
temporalmente.
■
La computadora conectada puede estar en modo de reposo o mostrando un
protector de pantalla negro. Pulse una tecla de la computadora.
■
Si conectó más de una computadora y una o más fuentes de video, es posible
que tenga que pulsar el botón Source Search para seleccionar la fuente
correcta. Después de pulsar el botón, espere unos segundos a que el proyector
se sincronice.
■
Si no se muestra toda la pantalla, pulse el botón Auto del control remoto. O
bien, pulse botón Aspect del control remoto y pruebe diferentes ajustes.
Compruebe que la opción Resolución (en el menú Señal) esté configurada en
Automático.
38 Solución de problemas
■
Si ve el mensaje Sin Señal y está utilizando una computadora portátil con
Windows:
Mantenga presionada la tecla Fn del teclado y pulse la tecla de función que le
permite ver imágenes en un monitor externo. Puede presentar un icono como
o denominarse CRT/LCD. Es posible que tenga que mantener
presionada la tecla Fn al mismo tiempo.
■
Si ve el mensaje Sin Señal y está utilizando una Macintosh®:
1. Abra Preferencias del Sistema.
2. Haga clic en Pantalla o Pantallas.
3. Haga clic en Detectar pantallas.
4. Realice una de las siguientes acciones:
Mac OS X 10.6.x: haga clic en Mostrar Pantallas en barra de menús.
Otras versiones de Mac OS X: compruebe que esté seleccionado el
cuadro de diálogo Pantalla VGA o LCD en color, haga clic en la ficha
Alineación u Organizar, luego asegúrese de que esté marcada la casilla
de verificación Pantallas duplicadas.
Problemas con el bolígrafo interactivo
■
Compruebe que el cable USB esté conectado correctamente tanto al proyector
como a la computadora. Intente desconectar y volver a conectar el cable a su
computadora.
■
Si no ve el icono del bolígrafo
en la barra de tareas (Windows) o en el
Dock (Mac OS X), realice una de las siguientes acciones:
Windows: seleccione
o Inicio > Todos los programas o Programas >
EPSON Projector > Easy Interactive Driver.
Mac OS X: abra la carpeta Aplicaciones, luego seleccione el icono Easy
Interactive Driver.
■
Si el icono del bolígrafo
tiene una X roja, la computadora y el proyector
no están conectados correctamente. Retire y vuelva a conectar el cable USB.
■
Compruebe que las pilas del bolígrafo tengan suficiente carga. Si la luz del
bolígrafo no se pone verde al pulsar el botón, debe reemplazar las pilas.
Problemas y soluciones 39
■
Compruebe que no esté proyectando una sombra en la superficie de
proyección, y que no haya nada bloqueando la señal entre el bolígrafo y el
receptor del bolígrafo interactivo en el proyector. La cubierta de los cables
debe estar instalada en el proyector para evitar que los cables bloqueen la señal.
■
Atenúe las luces de la habitación y apague todas las luces fluorescentes.
Compruebe que la superficie de proyección y el receptor del bolígrafo no estén
expuestos directamente a la luz solar u otras fuentes de iluminación brillante.
■
Sostenga el bolígrafo en un ángulo hacia la superficie de proyección para así
hacerlo funcionar más fácilmente.
■
Si la posición del bolígrafo no es precisa, es posible que necesite recalibrar
(consulte la página 14).
■
Si no aparecen los círculos que parpadean cuando intenta calibrar, compruebe
que el cable VGA y el cable USB estén correctamente conectados a la
computadora (consulte la página 11). Intente reiniciar el Easy Interactive
Driver, tal como se describe en la página 39.
Pulse el botón Auto del control remoto para sincronizar su computadora con
el proyector.
Si los círculos no dejan de parpadear y no se vuelven negros (o dejan de
parpadear y se vuelen negros automáticamente sin tocar la pizarra), atenúe o
apague las luces brillantes que estén cerca de la superficie de proyección.
■
Compruebe que no esté utilizando el modo de visualización extendida. Las
funciones interactivas no están disponibles en este modo.
Dónde obtener ayuda
Epson ofrece los siguientes servicios de soporte técnico:
Soporte en Internet
Visite la página de soporte técnico de Epson en www.latin.epson.com y seleccione
su producto para obtener soluciones a problemas comunes. Puede descargar
utilidades y otros archivos, obtener respuestas a preguntas frecuentes y la solución
de problemas, o enviar un correo electrónico a Epson con sus preguntas.
40 Solución de problemas
Hable con un representante de soporte técnico
Puede hablar con un especialista de soporte técnico de proyectores marcando uno
de estos números de teléfono:
País
Teléfono
Argentina
(54 11) 5167-0300
Chile
(56 2) 230-9500
Colombia
(57 1) 523-5000
Costa Rica
(50 6) 2210-9555
800-377-6627
México
México, D.F.
Resto del país
(52 55) 1323-2052
01-800-087-1080
Perú
(51 1) 418-0210
Venezuela
(58 212) 240-1111
Si su país no aparece en la lista, comuníquese con la oficina de ventas Epson del
país más cercano. Puede incurrir en costos de llamada interurbana de larga
distancia.
Antes de llamar para obtener asistencia, tenga a mano la siguiente información:
■
Nombre del producto (BrightLink 455Wi+)
■
Número de serie del producto (aparece en la parte inferior del proyector y en
el menú Información)
■
Prueba de compra (como el recibo de la tienda) y fecha de adquisición
■
Configuración de la computadora o del video
■
Descripción del problema
Compra de suministros y accesorios
Puede adquirir lámparas y accesorios para el proyector de un distribuidor de
productos Epson autorizado. Para encontrar el distribuidor más cercano, póngase
en contacto con Epson tal como se describe arriba.
Dónde obtener ayuda 41
Avisos
Aviso sobre derechos reservados
Quedan reservados todos los derechos. Ninguna parte de esta publicación podrá ser reproducida,
almacenada en un sistema de recuperación o transmitida en forma alguna por ningún medio
electrónico, mecánico, de fotocopiado, de grabación o cualquier otro, sin el previo consentimiento
por escrito de Seiko Epson Corporation. La información contenida en la presente aplica solamente a
este producto Epson. Epson no se hace responsable si se utiliza esta información para el uso de otros
productos.
Ni Seiko Epson Corporation ni sus filiales asumirán responsabilidad ante el comprador de este
producto o ante terceros por daños, pérdidas, costos o gastos en que incurrieren éstos como
consecuencia de: accidente, uso inadecuado o abuso de este producto o modificaciones, reparaciones
o alteraciones no autorizadas al mismo, o (excluidos los EE.UU.) no seguir rigurosamente las
instrucciones de operación y mantenimiento de Seiko Epson Corporation.
Seiko Epson Corporation no se hace responsable por ningún daño o problemas causados por el uso
de diferentes accesorios o productos consumibles que no sean Productos originales Epson o
Productos aprobados Epson ratificados por Seiko Epson Corporation.
Marcas comerciales
Epson es una marca registrada y Epson Exceed Your Vision es un logotipo registrado de Seiko Epson
Corporation.
BrightLink es una marca comercial de Epson America, Inc.
Aviso general: el resto de productos que se mencionan en esta publicación aparecen únicamente con
fines de identificación y pueden ser marcas comerciales de sus respectivos propietarios. Epson
renuncia a cualquier derecho sobre dichas marcas.
La información contenida en la presente está sujeta a cambios sin previo aviso.
© 2010 Epson America, Inc. 12/10
42 Avisos
Contents
English
Introduction . . . . . . . . . . . . . . . . . . . . . . . . . . . . . . . . . . . . . . . . . . . 2
Quick Projector Setup . . . . . . . . . . . . . . . . . . . . . . . . . . . . . . . . . . . . . . . 3
Getting Started . . . . . . . . . . . . . . . . . . . . . . . . . . . . . . . . . . . . . . . . 6
Installing the Software . . . . . . . . . . . . . . . . . . . . . . . . . . . . . . . . . . . . . . . 6
Installing the Pen Batteries . . . . . . . . . . . . . . . . . . . . . . . . . . . . . . . . . . . 8
Installing the Remote Control Batteries . . . . . . . . . . . . . . . . . . . . . . . . . . . 9
Connecting the Cables . . . . . . . . . . . . . . . . . . . . . . . . . . . . . . . . . . . . . 10
Turning the Projector On and Off . . . . . . . . . . . . . . . . . . . . . . . . . . . . . 11
Adjusting the Image . . . . . . . . . . . . . . . . . . . . . . . . . . . . . . . . . . . . . . . 12
Calibrating the Projector . . . . . . . . . . . . . . . . . . . . . . . . . . . . . . . . . . . . 13
Using the Interactive Pen . . . . . . . . . . . . . . . . . . . . . . . . . . . . . . 16
Using the Pen as a Mouse . . . . . . . . . . . . . . . . . . . . . . . . . . . . . . . . . . . 16
Using Easy Interactive Tools . . . . . . . . . . . . . . . . . . . . . . . . . . . . . . . . . 17
Using the Tablet PC and Ink Functions . . . . . . . . . . . . . . . . . . . . . . . . . 35
Solving Problems . . . . . . . . . . . . . . . . . . . . . . . . . . . . . . . . . . . . . 36
Problems and Solutions . . . . . . . . . . . . . . . . . . . . . . . . . . . . . . . . . . . . . 36
Where To Get Help . . . . . . . . . . . . . . . . . . . . . . . . . . . . . . . . . . . . . . . 38
Notices. . . . . . . . . . . . . . . . . . . . . . . . . . . . . . . . . . . . . . . . . . . . . . . 40
Declaration of Conformity . . . . . . . . . . . . . . . . . . . . . . . . . . . . . . . . . . 40
Copyright Notice . . . . . . . . . . . . . . . . . . . . . . . . . . . . . . . . . . . . . . . . . 41
1
Introduction
Your BrightLink™ 455Wi+ projector turns any wall into an interactive
whiteboard. After your projector has been installed, read this booklet to:
■
Install the software on your computer
■
Connect the cables to your computer
■
Use the remote control
■
Turn on the projector and adjust the image
■
Launch the Easy Interactive Driver
■
Calibrate and use the pen
■
Use Easy Interactive Tools
■
Solve basic problems
This booklet explains how to use the projector with a laptop or other computer.
You can also connect the projector to video players, document cameras, or other
equipment. For additional information, see the on-screen User’s Guide included
on the BrightLink 455Wi+ CD. For network information, see the on-screen
EasyMP® Network Projection Operation Guide also included on the BrightLink
455Wi+ CD.
Before using the projector, make sure you read the safety instructions in the onscreen User’s Guide on the projector CD.
Please follow these guidelines as you read your projector instructions:
Warning:
Warnings must be followed carefully to avoid bodily injury.
Caution:
Cautions must be observed to avoid damage to your equipment.
Note:
Notes contain important information about your projector.
2 Introduction
Quick Projector Setup
Follow the steps on pages 4 and 5 to get up and running fast. Copy these pages,
laminate if necessary, and keep with the projector as a “cheat sheet.” If you need
more detail, turn to the page listed for each step.
1. Install the Easy Interactive Driver and Easy Interactive Tools (see page 6). Use
the CDs “Epson Projector Software for Easy Interactive Function” and
“BrightLink 455Wi+, that came with the projector, or download from:
www.latin.epson.com/proyectores (English and Spanish) or
www.suporte-epson.com.br (Portuguese)
2. Make sure the batteries are installed in the interactive
pen and remote control (see pages 8 and 9).
Press the button on the pen. If the light turns green,
the batteries are installed and charged.
3. For the best type of connection, connect a
VGA computer cable (optional) and the
USB cable included with the projector to
your PC or Mac® (see page 10).
4. Turn on the projector by pressing the P power button on the remote control
(see page 11). If you need to adjust the image, see page 12.
Power
button
5. Display an image from your computer. If the image doesn’t appear, see
page 36 or try one of the following:
■
On some PC laptops, you may need to hold down the Fn key on the
keyboard and press F7 or the function key that lets you display on an
external monitor. It may have an icon such as
, or it may be labelled
CRT/LCD.
■
On a MacBook®, you may need to open your Display Preferences and
select Detect Displays, Show displays in menu bar, or Mirror
Displays.
Quick Projector Setup 3
■
Try pressing the Source Search button on the remote control.
6. Launch the Easy Interactive Driver on your computer. You should see the
pen icon in the lower right corner of your screen (Windows®) or in the
Dock (Mac OS® X). If you don’t see the icon, see page 13 or do one of the
following:
■
Windows: select
or Start > All Programs or Programs > Epson
Projector > Easy Interactive Driver.
■
Mac OS: open the Applications folder, then select the Easy Interactive
Driver icon.
7. Calibrate your system (see page 13).
■
Windows: click the
pen icon in the system tray on your taskbar
(lower right corner of your screen), then select Calibrate (Normal).
■
Mac OS X: click the
pen icon in the Dock, select Calibrate from
the menu bar, then select Calibrate (Normal).
■
After you read the message about calibration,
click OK.
■
Use the interactive pen to touch each flashing green
circle as it appears. Continue until all the circles stop
flashing and turn black.
■
Hold the pen at an angle, and make sure you are not casting a shadow on
the pen.
■
If you make a mistake, press Esc on your computer keyboard and restart
calibration.
8. Launch Easy Interactive Tools (see page 17).
■
Windows: select
or Start > All Programs or Programs > Epson
Projector > Easy Interactive Tools.
Mac OS X: open the Applications folder, then select Easy Interactive
Tools >
Easy Interactive Tools.
4 Introduction
Depending on your OS, you will see the following tools on your desktop:
Windows
Toggle between mouse
and pen modes
Toggle between interactive
and whiteboard modes
Page up and down
Draw on screen
Undo
Use on-screen keyboard
Hide part of screen
Clear all annotations
Capture current screen
Create spotlight effect
Minimize the toolbar
Mac OS X
Hide toolbox
Draw free-form lines
Draw straight lines
Type text
Use the on-screen
keyboard
Erase
Clear all annotations
Select interactive mode
Save the current page
Set rectangle and circle style:
border, filled, or both
Set line color
(upper box)
Set fill color
(lower box)
Quick Projector Setup 5
Getting Started
Before you can use your interactive projector, you need to install the software and
connect the cables to your computer. Then you can turn on the projector and
calibrate.
Installing the Software
This section explains how to install the software for the interactive pen and your
on-screen manuals.
Periodically, it’s a good idea to check Epson’s support website for free updates to
your Easy Interactive software. Visit www.latin.epson.com/proyectores or
www.suporte-epson.com.br.
Even if you have annotation software, you must install the Easy Interactive Driver
from the CD labeled “Epson Projector Software for Easy Interactive Function.”
Installing the Easy Interactive Driver
1. Insert the CD labeled “Epson Projector Software for Easy Interactive
Function” in your computer.
Windows: If you see the AutoPlay window, click Run
EIDriverVxxx_Setup.exe. If you see a User Account Control screen,
click Continue or Yes.
Mac OS X: Double-click EIDriverVxxx_Setup in the Epson window.
2. Select your language, if necessary.
3. Follow the on-screen instructions to install the software.
6 Getting Started
4. When you see one of the following screens, select Register to Startup
(Windows) or Start up (Mac) and Launch Easy Interactive Driver.
Windows
Mac OS X
5. Click Finish (Windows) or Continue (Mac OS X).
6. Follow the on-screen instructions to finish installing the software and start the
Easy Interactive Driver.
Installing the Manuals and Easy Interactive
Tools
1. Insert the BrightLink 455Wi+ CD in your computer.
Windows: If you see the AutoPlay window, click Run Setup.exe. If you see a
User Account Control screen, click Continue or Yes.
Mac OS X: Double-click the
Epson icon.
2. Select your language, if necessary.
3. On the following screen, click Install Projector User’s Guides to install the
manuals.
4. Click Install Link to Download Easy Interactive Tools to place a link on
your desktop.
5. After you have finished the installation, click Exit.
6. Double-click the Download Easy Interactive Tools link on your desktop to
access Epson’s support website.
7. Locate your product and follow the instructions on the screen to download
and install Easy Interactive Tools.
Installing the Software 7
Note: You can also visit the following website to download Easy Interactive Tools:
www.latin.epson.com/proyectores (English and Spanish)
www.suporte-epson.com.br (Portuguese)
Installing the Pen Batteries
Make sure the pen batteries are installed. To check the batteries, press the button.
If the indicator light is green, the batteries have enough power.
Battery indicator
light
Button
Cord
attachment
slot
It’s a good idea to attach a commercially-available cord or lanyard to the pen.
If you need to install or replace the batteries, use two rechargeable or alkaline AAA
batteries. If you have a battery charger, you can also use rechargeable AAA
batteries. Do not mix the two battery types.
1. Press in the tab on the battery cover as you lift the cover off.
2. Install two batteries, inserting the + and – ends as shown.
8 Getting Started
3. Replace the battery cover and press it down until it clicks into place.
Installing the Remote Control Batteries
Make sure the remote control batteries are installed. If you need to install or
replace them, use 2 AA alkaline batteries.
1. Press in on the catch on the battery cover as you
lift the cover off.
2. Install two batteries, inserting the
+ and – ends as shown.
3. Replace the battery cover and press it
down until it clicks into place.
Installing the Remote Control Batteries 9
Connecting the Cables
VGA computer cable
USB cable
You can connect the projector to any computer that has a standard monitor out
port using a VGA computer, which you can purchase from a computer or
electronics store.
In addition, you must connect the USB cable before you can use the interactive
pen. If the cable is not long enough to reach your computer, you may need to use
a USB booster cable (not included).
You can also project through the USB port (USB display) or through a network.
However, the VGA monitor out port on your computer provides the best
performance when used with the interactive pen.
Connecting the VGA Computer
Cable
1. Locate the VGA computer cable connected
to the projector.
2. Connect the other end of the cable to your
computer’s
monitor out port.
Connecting the USB Cable for the Interactive Pen
In order to use the interactive pen, you must connect the USB cable to the
projector and your computer.
1. Locate the USB cable connected to the projector.
10 Getting Started
2. Connect the flat end of the cable to
any available
USB port on
your notebook or desktop
computer.
Turning the Projector On and Off
Before you turn on the projector, turn on your computer.
1. Make sure the projector is plugged in. The Ppower light should be orange.
Power light
2. Press the Ppower button on the remote control.
Power
button
After a few moments, you should see your computer desktop displayed. If you
see a blank screen or the No signal message, see page 36 for help.
Warning: Never look into the lens when the lamp is on. This can damage your
eyes, and is especially dangerous for children.
Turning the Projector On and Off 11
3. When you’re finished using the projector, press the Ppower button on the
remote control.
4. When you see a confirmation message, press the Ppower button again.
Note: Lamp life will vary depending upon mode selected, environmental conditions,
and usage. Turn off this product when not in use to prolong the life of the projector.
The projector can be set to automatically turn off the lamp and enter “sleep mode”
when it has not received any signals for 1 to 30 minutes (see your on-screen User’s
Guide for details). This conserves electricity, cools the projector, and extends the life of
the lamp. If you want to start projecting again, press the P power button.
Adjusting the Image
If necessary, you can use the remote control buttons to adjust the image:
Select the image
source to display
Temporarily turn off image
Adjust image
position and quality
Page through documents
Zoom in and out
Access menu system for
additional adjustments
12 Getting Started
Select from various image
sources connected to the
projector
Adjust color for different
viewing environments
Change aspect ratio
(screen size)
Calibrating the Projector
Calibration sets up the connection between your computer and the interactive
pen. This simple process ensures that your computer can accurately detect the
position of the pen on the projection surface.
You need to calibrate before using the pen for the first time, or if you change the
resolution on your computer or connect a different computer.
Launching Easy Interactive Driver
Before you can calibrate, you need to make sure Easy Interactive Driver is running
on your computer.
1. Make sure the
pen icon appears on your screen, either in the system tray
on your taskbar in lower right corner of your screen (Windows) or in the
Dock (Mac OS X). It may take a minute for the icon to appear after you turn
on the computer and projector.
If you don’t see the icon in Windows, you may need to click the arrow(s) for
Show hidden icons.
If a red X appears on the icon, the computer and projector are not connected
correctly. Try removing and reconnecting the USB cable.
2. If you don’t see the icon, do one of the following:
Windows: select
or Start > All Programs or Programs > Epson
Projector > Easy Interactive Driver.
Mac OS X: open the Applications folder, open the Easy Interactive Driver
folder, then select the Easy Interactive Driver icon.
If you need more help, see page 37.
When the computer and projector are connected and the Easy Interactive Driver
icon is displayed, you’re ready to calibrate. See the next section for instructions.
Note: Do not select Exit or Quit from the Easy Interactive Driver menu. If you do, you
will have to open the driver as described above the next time you want to use the
interactive pen.
Calibrating the Projector 13
Performing Calibration
Two types of calibration are available:
■
Normal, which is faster and appropriate for most situations (25 calibration
points)
■
Advanced, which is recommended when you are projecting very detailed
images and need higher accuracy (49 calibration points)
You may need to recalibrate if you use a different computer, press the Auto button
or change the projector’s aspect ratio using the remote control. You will need to
recalibrate if you change the following settings in the projector’s menu system:
Auto Setup, Resolution, Tracking, Sync, Position, Aspect, Keystone, or
Zoom.
1. To start calibration, do one of the following:
Windows: click the
pen icon in the system tray on your taskbar (lower
right corner of your screen), then select Calibrate (Normal) or Calibrate
(Advanced).
Mac OS X: click the
pen icon in the Dock, select Calibrate from the
menu bar, then select Calibrate (Normal) or Calibrate (Advanced).
You see the following message:
2. After you read the message about calibration, click OK.
14 Getting Started
3. Wait until you see a flashing green circle in the upper left corner of your
projected image.
4. Touch the center of the circle with the tip of the pen. The circle stops flashing
and turns black. You see another circle on the right.
5. Touch the center of the next circle, then repeat. When you get to the end of
the row, the next circle appears at the left edge of a new row.
Note: For the most accurate calibration, make sure you
hold the pen at an angle to the projection surface and
touch the center of the circle.
Make sure you are not blocking the signal between the pen
and the interactive receiver (next to the projection window)
on the projector.
Don’t press the button on the side of the pen while calibrating.
If you make a mistake or want to stop calibrating, press Esc on your computer
keyboard. Then restart the calibration process as described above.
6. Continue until all of the circles are black.
After you have finished calibration, you can use the pen as a mouse on the
projection board or wall. With additional software, you can also use the pen to
write or draw on the projected image. You can use any annotation software you
have or Easy Interactive Tools, as described on page 17.
Calibrating the Projector 15
Using the Interactive Pen
The interactive pen included with your projector turns almost any wall into an
interactive whiteboard. This chapter tells you how to use the pen and get started
with Easy Interactive Tools.
Using the Pen as a Mouse
The Easy Interactive Driver allows you to use the pen as a mouse. If you installed
annotation software such as Easy Interactive Tools, you can also use the pen to
write or draw on the projected image.
Battery indicator
light
Button
Press the button on the pen to test the batteries. If the indicator light is green, the
batteries have enough power.
Follow these tips to use the pen as a mouse:
■
For best performance, hold the pen at an angle (like a normal pen), rather
than perpendicular to the board.
■
To left-click, tap on the board.
■
To double-click, tap twice.
■
To right-click, tap while pressing the button on the pen.
■
To click and drag, tap and drag with the pen.
16 Using the Interactive Pen
Using Easy Interactive Tools
With Easy Interactive Tools, you can use the pen to write or draw on the
projection surface. Make sure you installed the software, as described on page 7.
Note: The Easy Interactive Tools are not required for using the interactive features of
the projector. You can use any other interactive whiteboard software.
Using the Tools for Windows
Two different toolbars are available, one for interactive mode and one for
whiteboard mode: Interactive Mode and Whiteboard Mode.
Additional
whiteboard
toolbar
Interactive toolbar
Whiteboard toolbars
■
Interactive Mode: In interactive mode, the toolbar appears on the projected
image and lets you use the pen as a mouse to open applications, access links,
and operate scroll bars, for example.
In this mode, you can also annotate whatever is displayed from your computer
and save your annotations.
■
Whiteboard Mode: In whiteboard mode, the toolbar appears on a blank
white surface. You can write or draw with the pen, add images, and save or
print your pages.
1. To start Easy Interactive Tools, select
or Start > All Programs or
Programs > EPSON Projector > Easy Interactive Tools.
When Easy Interactive Tools opens, it is in interactive mode by default.
Using Easy Interactive Tools 17
2. To toggle between interactive and whiteboard modes, select the
icon in the upper right corner of the toolbar.
or
3. To exit, select the
Easy Interactive
Tools icon on the Windows taskbar
and select Exit.
Using Interactive Mouse Mode
When you first open Easy Interactive Tools, you are in interactive mode. Either
the pen or mouse is active in this mode, as indicated by the icon in the upper left
corner of the toolbar. When you see the
mouse icon on the toolbar, you can
use the pen as a mouse to select other tools.
Toggle between interactive
and whiteboard modes
Toggle between mouse
and pen modes
Page up and down
Draw on screen
(see page 21)
Undo
Clear all annotations
Use on-screen keyboard
Capture current screen
Hide part of screen
Create spotlight effect
Minimize the toolbar
The following interactive tools are available:
Interactive tools
Icon
Description
Page up or down in a browser or other software program.
Use an on-screen keyboard to enter text on a website or in a browser or
other software program. See page 24 for more information.
Capture the current screen and save it as an image file. See page 24 for
more information.
18 Using the Interactive Pen
Interactive tools
Icon
Description
Hide part of the screen. You can use the yellow arrows to reveal only the
portions of the screen that you want the audience to see. See page 21
for more information.
Create a spotlight effect for highlighting and shading part of the screen.
You can move the spotlight and change its shape, color, and
transparency, as described on page 20.
Use the pen to right-click without pressing the button.
Minimize the toolbar. When the toolbar is minimized, you can restore it
by selecting the
Easy Interactive Tools icon on the Windows taskbar.
Entering Text
You can enter text in a browser or other program, such as a word processor or
spreadsheet.
1. Open your internet browser or other program.
2. Select the
keyboard tool. You see the on-screen keyboard:
3. Tap on the projected image where you want to enter text.
4. Select the letters and numbers on the on-screen keyboard.
Using Easy Interactive Tools 19
Using the Spotlight Tool
To hide most of your projected image and reveal only a particular area, select the
spotlight tool.
■
To resize the revealed area, tap and drag on the edge of the spotlight circle.
■
To move the revealed area, tap and drag outside the spotlight circle.
■
To adjust the revealed area, select the
icon on the spotlight screen. You
see the following window, which lets you adjust the shape of the revealed area,
and the color and transparency of the hidden area.
Open a color-selection screen
Reset back to default color
Slide to adjust transparency
of the hidden area
■
To remove the spotlight, select the
20 Using the Interactive Pen
icon on the spotlight screen.
Using the Shade Tool
To hide the projected image with an opaque shade and reveal only the area you
want, select the
shade tool. You see the following on the projected image:
■
To adjust the shade, tap and drag one of the yellow arrows.
■
To remove the shade, select the Close button on the screen.
Using Interactive Pen Mode
To switch to interactive pen mode, select any of the drawing tools on the toolbar.
Or, select the
mouse icon in the upper left corner. The mouse changes into
a pen.
The following annotation and drawing tools are available.
Drawing tools
Icon
Description
Write or draw with a semi-transparent highlighter.
Toggle between writing/drawing and erasing. In the erase mode, you
can select a free-form or straight line eraser, or circular and rectangular
shapes for erasing in large swaths.
Select line width and color (basic/fast).
Customize line width and color (advanced/accurate).
Write or draw free-form lines (or use free-form eraser).
Draw straight lines (or use straight-line eraser)
Using Easy Interactive Tools 21
Drawing tools
Icon
Description
Draw circles or ellipses (or use circle eraser).
Draw rectangles or squares (or use rectangle eraser).
Undo the last annotation.
Clear all annotations.
Changing the Line Width and Color of the Pen
You can select the line width and color for the highlighter and drawing tools. Two
types of selection windows are available, basic and advanced.
■
Select the
below:
icon to open the basic line adjustment window, as shown
Sample of
selected
line width
Select from
7 line widths
Select from
44 colors
■
Select the
below:
icon to open the advanced line adjustment window, as shown
Select a color value
on the color wheel
Slide the red mark to
select line width
Select specific RGB
values to create a
precise color
Use the slider to
adjust the color
brightness
22 Using the Interactive Pen
Using Whiteboard Mode
To switch to a white screen that you can use as an interactive whiteboard, select the
whiteboard icon.
You see the whiteboard tools, as shown below. Select the
additional tools.
icon to display the
Switch to
interactive mode
Additional tools
View list of saved pages
Print preview
Print
Clear annotations
Open background image
or previously saved page
Create new page
Save current page(s)
Delete current page
Select background
Copy previous page to
current page
Display additional tools
Some of the tools are the same as those available in interactive mode. Following is
a list of the tools that are unique to whiteboard mode:
Whiteboard tools
View a list of saved pages in the current folder.
Switch back to interactive mode.
Delete the current page and display the previously saved page.
Insert a picture as the whiteboard background or open a previously
saved page. You can select any image file in the JPEG or BMP format.
Select a background. Tap the button repeatedly to choose from six solid
colors, two styles of writing lines, or music staffs.
Create a new page on the whiteboard.
Copy the contents of the previously displayed page and paste it on the
current page.
Using Easy Interactive Tools 23
Whiteboard tools
Undo the last operation.
Redo the last operation.
Save the current page as an image file. See the next section for more
information.
Display additional tools.
Print preview.
Print all whiteboard pages in the current folder.
Saving Your Pages
You can save both whiteboard pages and computer screen images with
annotations. You can also choose where you want to save your pages and in what
format.
1. Select the
icon in your taskbar (lower righthand corner of the screen) to open the Easy
Interactive Tools menu:
2. Select Saving Setting.
You see the on-screen keyboard and a file saving window:
24 Using the Interactive Pen
3. Select or create the folder where you want to save your pages. You can use the
on-screen keyboard to enter a file name prefix and select either Jpeg or BMP
as the file type.
4. Select Save. You return to Easy Interactive Tools.
5. Do one of the following to save your pages:
■
In interactive mode, select the
camera icon to capture the current
screen and annotations. You see a message confirming that the screen is
saved. Easy Interactive Tools adds the time and date to the file name
prefix you selected, for example:
TEST010-11-29-13-23-3
month
prefix
year
■
hour
day
seconds
minutes
In whiteboard mode, select the
save icon. The on-screen keyboard
appears and a Save as window opens. You can select a location for saving
and enter a name to create a new folder. Your pages are automatically
saved as numbered images.
Printing Your Pages
Once your pages have been saved, you can print them.
1. To display thumbnail images of the pages saved in the current folder, select the
pages icon. You see the pages on the side of the screen:
Using Easy Interactive Tools 25
2. To print your pages, select the
icon to display additional tools. Then
select the
printer icon. You see the print window:
Select
print
settings.
Select the
pages you
want to print.
3. Select the pages you want to print, then select OK.
Using the Tools for Mac OS X
Note: The Easy Interactive Tools are not required for using the interactive features of
the projector. You can useany other interactive whiteboard software.
You can use the tools in two different modes: interactive (transparent background)
and whiteboard (white background).
■
In interactive mode, the toolbox appears on the projected image and lets you
annotate whatever is displayed from your computer. You can also use the pen
as a mouse to open applications, access links, and operate scroll bars, for
example.
■
In whiteboard mode, the toolbox appears on a blank white
surface. You can write or draw with the pen and save your pages.
1. To start Easy Interactive Tools, select Applications > Easy
Easy Interactive Tools. You see the
Interactive Tools >
toolbox on your desktop, as shown to the right.
26 Using the Interactive Pen
2. To quit, select the Easy Interactive Tools menu
and select Quit Easy Interactive Tools.
Using Interactive Mode (Transparent Background)
When you first open Easy Interactive Tools, you are in interactive pen mode,
which lets you use your interactive pen to draw or annotate on the applications or
images on the screen. You see the toolbox:
Hide toolbox
Draw free-form lines
Draw straight lines
Type text
Use the on-screen keyboard
Draw circles
Erase
Clear all annotations
Select interactive mouse mode
Save the current page
Draw rectangles
Set rectangle and circle style:
bordered, filled, or both
Set line width
Set line color
(upper box)
Set fill color
(lower box)
Note: To switch to interactive mouse mode, select the
black arrow on the toolbar.
The arrow turns white, indicating interactive mouse mode.
Using Easy Interactive Tools 27
The following tools are available:
Mac OS X tools
Icon
Description
Write or draw free-form lines.
Erase individual annotations.
Draw straight lines.
Clear all annotations.
Open the text input box. See page 30 for more information.
Switch to interactive mouse mode. The arrow turns white, indicating
that you can use the pencil tool as a mouse.
Open the on-screen keyboard.
Save the current page. See page 34 for more information.
Draw circles or ellipses.
Draw squares or rectangles.
Select outline-only circles or rectangles.
Select filled circles or rectangles.
Select outlined and filled circles or rectangles.
Tap and drag the slider to select the line width for circles, rectangles,
lines, and the eraser. This also affects the font size of the text you enter
into the text input box.
Select the line color (upper box) and fill color (lower box) for circles,
rectangles, and lines. See page 32 for more information.
To access additional options, select the Tools menu on the Mac OS X menu bar:
■
To switch to semi-transparent drawing tools,
select Highlighter Pen. Lines, circles, squares,
and text input all become semi-transparent.
■
To switch to whiteboard mode, select White
Background. For more information, see
page 33.
28 Using the Interactive Pen
■
To save the current screen, select Save Screen. This works the same as
selecting the
tool. For more information, see page 34.
■
To hide the toolbox, select the X in the upper left corner of the toolbox. To redisplay the toolbox, open the Tools menu and select Show Toolbox.
Entering Text
You can enter text on the screen or in a browser or other program, such as a word
processor or spreadsheet.
1. If necessary, select the
black arrow on the toolbox to change it to a white
arrow. This lets you use the pen as a mouse.
2. Open your internet browser or other program.
3. Select the
keyboard tool in the toolbox. You see the on-screen keyboard:
4. Tap in the screen field where you want to enter text.
5. Select the letters and numbers on the on-screen keyboard. Select the
lock key to enter capital letters.
caps
If the keyboard does not appear, you may need to follow these steps to activate it:
1. Open the Apple menu and select System Preferences.
2. Select
Language & Text, then select the Input Sources tab.
3. Select Keyboard & Character Viewer or Keyboard Viewer, then scroll
down if necessary and select your country and/or language. Make sure you
select the Show Input menu in menu bar checkbox at the bottom of the
screen.
4. When you want to use the on-screen keyboard, select
the Input menu (flag icon) on the right side of the
menu bar, then select Show Keyboard Viewer.
Using Easy Interactive Tools 29
Using the Text Input Box
You can use the text input box to enter text for searching, dictionary lookup, or
pronunciation.
1. To open the text input box, select the
The text input dialog box opens:
type tool, then tap on the board.
Use the on-screen
keyboard
2. To open the on-screen keyboard, select the
box.
keyboard tool in the text input
3. Select letters and numbers on the on-screen keyboard.
4. Highlight the text and press the button on the pen to bring up a menu as
shown below:
■
Use the options on the upper part of the menu to search on the text, look
it up in a dictionary, or cut, copy, and paste it.
■
Use the options on the lower part of the menu to change the font, check
spelling and grammar, or change the capitalization of the text.
30 Using the Interactive Pen
■
To have the words spoken aloud, select Speech > Start Speaking. The
words in the dialog box are spoken aloud.
Note: The default color and size of the text is determined by the selected Line
Width and Color settings. You can change the text properties by pressing the
button on the pen and selecting Font > Show Fonts.
5. When you’re done entering text, select the Enter button to place the text on
the screen, or select Cancel to close the text input box.
Selecting Line Width and Graphics Style
To adjust the width of lines, use the
tool in the toolbox. Drag the slider
to the right to increase the line width. This affects straight lines, free-form lines,
circles, squares, and rectangles.
You can also select from three styles for circles and rectangles:
■
Select
rectangle.
, then select the
or
tool to draw an outlined circle or
■
Select
rectangle.
, then select the
or
tool to draw a solid-color circle or
■
Select
, then select the
or solid-color circle or rectangle.
or
tool to draw an outlined and filled
Using Easy Interactive Tools 31
Defining Line and Fill Color
Several color selection dialog boxes are available that allow you
to set the color for lines and the fill area in circles or rectangles.
Line
color
Select the upper color box in the toolbox to set the line color
or the lower box to set the fill color. You see the following
Colors dialog box:
Fill color
Color palettes
Slider
Spectrum
Crayon box
Color bar
Indicates
selected color
Move the slider to
select darker colors
Tap anywhere on
the circle to
change the color
Save colors by
dragging them here
After you select a color that you like, you can drag it from the color bar at the top
to one of the squares at the bottom of the dialog box. This allows you to save
favorite colors for later use. More squares are available; you can save up to 300
colors.
32 Using the Interactive Pen
To display the following alternate color selection dialog boxes, click the icons at
the top of the screen.
Slider
Color palettes
Spectrum
Crayon box
Using Whiteboard Mode (White Background)
You can switch to a white screen that you can use as an interactive whiteboard.
1. Select the Tools menu on the Mac OS X
menu bar:
2. Select White Background. You see the same
tools defined on page 28, but on a white
screen.
3. To switch back to Interactive mode, open the Tools menu and select
Transparent Background.
Using Easy Interactive Tools 33
Saving Your Pages
You can select the location and format for saving your annotated images and
pages.
1. Open the Easy Interactive Tools menu and select
Preferences....
You see the preferences dialog box:
2. Use the on-screen keyboard if you want to enter a different file name prefix for
your saved pages; then select Choose if you want to change the location for
saving.
3. Select PNG, JPEG, or Windows BMP as the file format for your saved pages.
4. When you want to save a page, select the
like the following:
camera tool. You see a message
Your captured screen image is saved in the location you selected, with an
automatically generated filename based on the current date and time, for
example:
image20101005132629
month
prefix
year
5. Select OK to confirm.
34 Using the Interactive Pen
day
seconds
hour
minutes
Using the Tablet PC and Ink Functions
When you install the Easy Interactive Driver, the Tablet PC function is enabled in
Windows 7 and Windows Vista®. This allows you to annotate, use handwriting
input, and perform other actions using the pen, even without installing
annotation software.
1. To open the Tablet PC input panel, select
Accessories> Tablet PC.
> All Programs >
2. Select Tablet PC Input Panel.
If you have Microsoft® Office 2003 or later, you can also use the Ink function in
Office applications. This lets you add handwritten notes to a document,
spreadsheet, or presentation, and save the notes with the file.
For more information about the Tablet PC and Ink functions, see your Windows
Help information.
Using the Tablet PC and Ink Functions 35
Solving Problems
If you have a problem with your projector, you can press the ? Help button on the
remote control to help solve it.
You can also check the following section for basic troubleshooting suggestions, or
see the on-screen User’s Guide for more detailed help.
Note: If any of the lights on the projector turn red, this indicates a problem with the
lamp, temperature, or other aspect of the projector. See your on-screen User’s Guide
for more information.
Problems and Solutions
Problems Displaying Your Computer Screen
■
Check that the Ppower light is green and not flashing. The projector may be
in standby or sleep mode. If the Ppower light is orange, press the Ppower
button to turn the projector on. Also press the A/V Mute button on the
remote control to make sure the picture has not been turned off temporarily.
■
The attached computer may be in sleep mode or displaying a black screen
saver. Try pressing a key on the computer.
■
If more than one computer or one or more video sources are connected, you
may need to press the Source Search button to select the correct source.
Allow a few seconds for the projector to sync up after pressing the button.
■
If you don’t see the whole screen, press the Auto button on the remote
control. Or, press the Aspect button and try various settings. Make sure the
Resolution option (on the Signal menu) is set to Auto.
■
If you see a No Signal message and you’re using a PC notebook:
Hold down the Fn key on the keyboard and press the function key that lets
you display on an external monitor. It may have an icon such as
, or it
may be labelled CRT/LCD. You may need to hold down the Fn key while
pressing it.
36 Solving Problems
■
If you see a No Signal message and you’re using a Macintosh:
1. Open System Preferences.
2. Click Display or Displays.
3. Click Detect Displays.
4. Do one of the following:
Mac OS X 10.6.x: Click Show displays in menu bar.
Other versions of Mac OS X: Make sure the VGA Display or Color LCD
dialog box is selected, click the Arrangement or Arrange tab, then make
sure the Mirror Displays checkbox is selected.
Interactive Pen Problems
■
Make sure the USB cable is securely connected to the projector and computer.
Try disconnecting and reconnecting the cable to your computer.
■
If you don’t see the
pen icon on your taskbar (Windows) or in the Dock
(Mac OS X), do one of the following:
Windows: Select
or Start > All Programs or Programs > EPSON
Projector > Easy Interactive Driver.
Mac OS X: Open the Applications folder, then select the Easy Interactive
Driver icon.
■
If you see a red X on the pen icon, the computer and projector are not
connected correctly. Try removing and reconnecting the USB cable.
■
Make sure the pen batteries have enough power. If the light on the pen doesn’t
turn green when you press the button, you need to replace the batteries.
■
Make sure you are not casting a shadow on the projection surface, and
nothing is blocking the signal between the pen and the interactive receiver on
the projector. The cable cover should be attached to the projector to keep the
cables out of the way.
■
Dim the room lights and turn off any fluorescent lights. Make sure the
projection surface and the pen receiver are not in direct sunlight or other
sources of bright lighting.
■
For easier operation, hold the pen at an angle to the projection surface.
Problems and Solutions 37
■
If the pen position is not accurate, you may need to recalibrate the pen (see
page 13).
■
If the flashing circles don’t appear when you try to calibrate, make sure the
VGA cable and USB cable are securely connected to the computer (see
page 10). Try restarting the Easy Interactive Driver, as described page 37.
Press the Auto button on the remote control to sync the computer with the
projector.
If the circles don’t stop flashing and don’t turn black (or they stop flashing and
turn black automatically), dim or turn off any bright lights near the projection
surface.
■
Make sure you are not using Extended Display mode. The interactive
functions are not available in this mode.
Where To Get Help
Epson provides these technical support services:
Internet Support
Visit Epson’s support website at www.latin.epson.com/proyectores or
www.suporte-epson.com.br and select your product for solutions to common
problems. You can download software and documentation, get FAQs and
troubleshooting advice, or e-mail Epson with your questions.
38 Solving Problems
Speak to a Support Representative
You may speak with a projector support specialist by dialing one of these numbers:
Country
Telephone
Argentina
(54 11) 5167-0300
Brazil
(55 11) 3956-6868
Chile
(56 2) 230-9500
Colombia
(57 1) 523-5000
Costa Rica
(50 6) 2210-9555
800-377-6627
Mexico
Mexico City
Other Cities
(52 55) 1323-2052
01 800-087-1080
Peru
(51 1) 418-0210
Venezuela
(58 212) 240-1111
If your country does not appear on the list, contact the nearest Epson sales office.
Toll or long distance charges may apply.
Before you call for support, please have the following information ready:
■
Product name (BrightLink 455Wi+)
■
Product serial number (located on the bottom of the projector and on the
Info menu)
■
Proof of purchase (such as a store receipt) and date of purchase
■
Computer or video configuration
■
Description of the problem
Purchase Supplies and Accessories
You can purchase lamps and accessories from an Epson authorized reseller. To find
the nearest reseller, call Epson as described above.
Where To Get Help 39
Notices
Declaration of Conformity
According to 47CFR, Part 2 and 15 for: Class B Personal Computers and Peripherals;
and/or CPU Boards and Power Supplies used with Class B Personal Computers:
We:
Located at:
Epson America, Inc.
MS 3-13
3840 Kilroy Airport Way
Long Beach, CA 90806
Telephone: (562) 290-5254
Declare under sole responsibility that the product identified herein, complies with 47CFR
Part 2 and 15 of the FCC rules as a Class B digital device. Each product marketed is
identical to the representative unit tested and found to be compliant with the standards.
Records maintained continue to reflect the equipment being produced can be expected to
be within the variation accepted, due to quantity production and testing on a statistical
basis as required by 47CFR §2.909. Operation is subject to the following two conditions:
(1) this device may not cause harmful interference, and (2) this device must accept any
interference received, including interference that may cause undesired operation.
Trade Name:
Type of Product:
Model:
Marketing Name:
40 Notices
Epson
LCD projector
H440A
BrightLink 455Wi+
Copyright Notice
All rights reserved. No part of this publication may be reproduced, stored in a retrieval system, or
transmitted in any form or by any means, electronic, mechanical, photocopying, recording, or
otherwise, without the prior written permission of Seiko Epson Corporation. The information
contained herein is designed only for use with this Epson product. Epson is not responsible for any
use of this information as applied to other products.
Neither Seiko Epson Corporation nor its affiliates shall be liable to the purchaser of this product or
third parties for damages, losses, costs, or expenses incurred by purchaser or third parties as a result
of: accident, misuse, or abuse of this product or unauthorized modifications, repairs, or alterations to
this product, or (excluding the U.S.) failure to strictly comply with Seiko Epson Corporation’s
operating and maintenance instructions.
Seiko Epson Corporation shall not be liable for any damages or problems arising from the use of any
options or any consumable products other than those designated as Original Epson Products or
Epson Approved Products by Seiko Epson Corporation.
Trademarks
Epson is a registered trademark, and Epson Exceed Your Vision is a registered logomark of Seiko
Epson Corporation.
BrightLink is a trademark of Epson America, Inc.
General Notice: Other product names used herein are for identification purposes only and may be
trademarks of their respective owners. Epson disclaims any and all rights in those marks.
This information is subject to change without notice.
© 2010 Epson America, Inc. 12/10
Copyright Notice 41
CPD-28216R1
País de impresión: XXXXXX
Printed in: XXXXXX