1
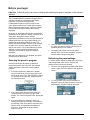
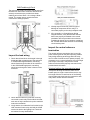
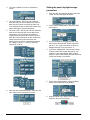
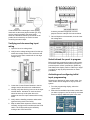
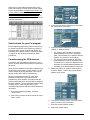
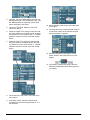
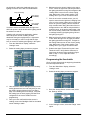
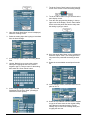
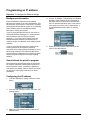
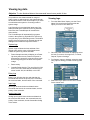
3. Touch the ‘Update Time’ box to activate the
screen.
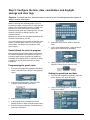
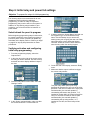
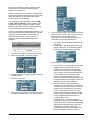
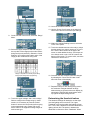
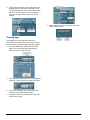
Setting the panel daylight savings
parameters
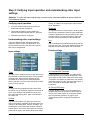
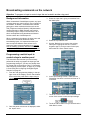
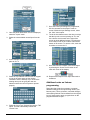
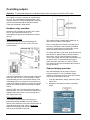
1. From the main programming display, select the
‘Panel’ button in the upper left corner.
4. Touch the ‘Month’, ‘Day’ and ‘Year’ selection
fields and enter the correct data for the current
date. Use the ‘Delete’ key within the ‘Day’ and
‘Year’ keypad screens to delete the current entry
before entering the correct information.
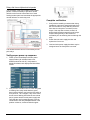
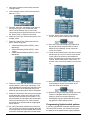
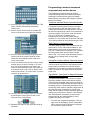
5. Touch the ‘Hour’, ‘Minute’ and ‘Second’ selection
fields in turn and enter the correct data for the
current time. Use the ‘Delete’ key within the
keypad screens to delete the current entry and
enter the correct information for the current time.
Please note that the panel uses a 24 hour
military-style time format to distinguish between
a.m. and p.m. times, i.e. 1:00 p.m. would be
entered as 13:00:00.
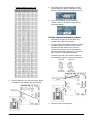
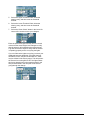
2. In the ‘Panels Settings Menu’, select the ‘DST’
menu option.
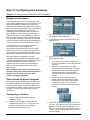
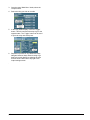
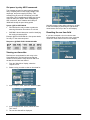
3. If your area observes Daylight Savings Time,
make certain that the ‘DST Enable’ checkbox
has an ‘X’ in it. If your area does not observe
Daylight Savings Time, remove the ‘X’.
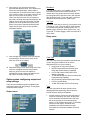
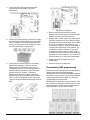
4. If you have enabled DST, select which Sunday
of which month DST begins and ends on. For
instance, in the United States, DST currently
begins on the second Sunday in March and ends
on the first Sunday in November.
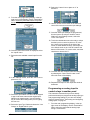
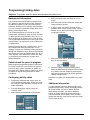
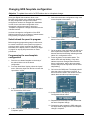
5. In the ‘Panel Settings Menu’, select the ‘Back’
button at the bottom left of the display.
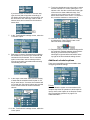
6. Once the time is entered properly, select the ‘Set
Time’ button at the bottom of the screen.
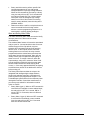
6. When prompted if you wish to save changes,
select the ‘Green Check’ button.
p18