1
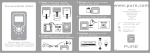
PocketDAB 2000 ®
I n fo
Menu
®
Eq
Mod
r
e
Re
Vu
Rec
S
Txt
to
Owner’s manual
Safety instructions
Keep the unit away from heat sources such as radiators, heaters
or other appliances that produce heat.
Do not expose the unit to direct sunlight.
Do not use the unit near water.
Avoid objects or liquids getting into or onto the unit.
Do not remove screws from or open the unit casing.
Damage to hearing can occur with consistent exposure to high
volume when using headphones. Always check the volume level
before inserting headphones into your ears.
Use of headphones while operating a vehicle is not
recommended and is illegal in some areas. Stop listening to your
PocketDAB 2000 if you find it distracting while operating any type
of vehicle or performing any other activity that requires your full
attention.
Copyright
Copyright 2005 by Imagination Technologies Limited. All rights reserved. No part of this
publication may be copied or distributed, transmitted, transcribed, stored in a retrieval
system, or translated into any human or computer language, in any form or by any
means, electronic, mechanical, magnetic, manual or otherwise, or disclosed to third
parties without the express written permission of Imagination Technologies Limited.
Disclaimer
Imagination Technologies Limited makes no representation or warranties with respect
to the content of this document and specifically disclaims any implied warranties of
merchantability or fitness for any particular purpose. Further, Imagination Technologies
Limited reserves the right to revise this publication and to make changes in it from time
to time without obligation of Imagination Technologies Limited to notify any person or
organization of such revisions or changes.
Trademarks
PocketDAB 2000, the PocketDAB 2000 logo, ReVu, the ReVu logo, PURE, the
PURE logo, PURE Digital, the PURE Digital logo, Imagination Technologies, and the
Imagination Technologies logo are trademarks or registered trademarks of Imagination
Technologies Limited. All other product names are trademarks of their respective
companies.
Version 1
June 2005
Contents
Introduction ..............................................................1
Overview diagrams ...................................................2
Controls and connectors....................................................2
LCD screen ........................................................................4
Quick start ................................................................5
DAB mode .................................................................6
Selecting stations ..............................................................6
ReVu™ - Pause and rewind radio ......................................6
Changing the information displayed ..................................8
Storing and recalling presets ............................................9
Recording radio ...............................................................10
Txtstor - saving scrolling text..........................................10
DAB Autotune ..................................................................11
MP3 mode ...............................................................12
Playing files .....................................................................13
Managing files .................................................................14
FM mode .................................................................15
Selecting stations ............................................................15
Storing and recalling presets ..........................................15
Adjusting the eq settings ........................................16
Setup options ..........................................................17
DAB settings ....................................................................17
FM settings ......................................................................19
MP2/MP3 settings ...........................................................19
General settings ..............................................................20
Using batteries .......................................................21
Using the adapter ...................................................23
Using USB ...............................................................24
Connecting to other devices....................................25
Analogue line out ............................................................25
Optical digital line out .....................................................25
Hints and tips ..........................................................26
Troubleshooting ..............................................................26
Resetting your PocketDAB 2000 ......................................27
Technical Support ............................................................27
Warranty information ......................................................27
Introduction
®
Men
fo
u
In
E
q
Mode
Re
V
u
Rec
S
Tx t
to
r
Thankyou for choosing the PocketDAB 2000, your perfect mobile
audio companion.
This manual provides guidance on how to get the best from your
PocketDAB 2000 and gives advice on what to do if you encounter
problems.
The Quick Guide provides a pocket-sized summary of the main
functions.
Please read the safety instructions inside the front cover.
Register your product either online at www.pure.com/register or
using the warranty card. Include an e-mail address and we’ll keep
you up to date with any software upgrades and the latest product
information.
1
Overview diagrams
Controls and connectors
LCD screen
128 x 80 pixel
backlit screen
DABnav
Rock to scroll
and push to
select stations,
tracks and menu
options
Info
Changes the
information
shown on screen
Menu
Access setup
options and
presets
Info
Me n u
®
Eq
e
Mod
Re
Vu
Mode
Switches
between DAB,
MP3 and FM
ReVu
Press in DAB to enter
ReVu with audio paused.
Hold to enter ReVu with
audio playing
2
Rec
or
St
Txt
Rec
Record DAB
radio to SD card
Eq
Switch between
six different
equalisation
settings
TxtStor
Push to store and
hold to access
stored scrolling
DAB text
Optical
Optical
Digital output
of DAB or MP3
or analogue
output
Vol -/+
Volume jog dial.
Push in to mute
Power
Hold down for 2
seconds to
turn on or off
SD card slot
For removable
MP3 storage
Lock
Power
- Vol +
3.5 mm
headphone
socket
USB
Connector for
software upgrades
and file transfer
5.7 V DC
Socket for
power adapter
5.7 V DC
Lock
Slide to lock
buttons preventing
accidental presses
Battery
compartment
Slide cover
down and
insert 3 AA
batteries
3
LCD screen
DAB screen
1Xtra - BBC
Rampage with Mike
Anthony and Treble T txt 88111
Now playing - Keisha
MP3 screen
FM screen
97.60 MHz
4
Quick start
So you’ve unpacked the box - here’s how to get up and running.
1. Insert the headphone plug into the headphone socket ( ) on
the top of your PocketDAB 2000 and unravel the headphone
cable.
2. Insert the power adapter plug into the power socket
(5.7 V DC) on the side of your PocketDAB 2000 or slide the
battery cover off and insert 3 AA batteries.
3. Press the Power button to switch your unit on. The backlight
will come on and you will briefly see the ‘Powered by
Imagination Technologies’ logo on the display.
4. Rock the DABnav button up or down and push to select your
preferred language.
5. Rock the DABnav button up or down and push to select either
United Kingdom or Rest of World. An automatic search for
DAB stations starts and you see a progress indicator and
number of stations found on screen.
The DAB stations found are put in a station list, ordered
alphanumerically and the first one on the list is selected and
you will hear it through the headphones.
To find out how to use other functions including changing stations,
pausing and rewinding radio, recording to SD card, listening to
FM, playing MP3s or changing settings, please read through the
rest of this manual.
5
DAB mode
When you first switch on your PocketDAB 2000 it switches into
DAB mode and performs an autotune to find all the DAB stations
available in your area.
To listen to DAB at any other time, press the Mode button until the
DAB icon is highlighted.
Selecting stations
The stations found during an autotune are stored
in a list ordered alphanumerically. To change
stations rock the DABnav button up and down to
view and scroll the station list and push to change
to the highlighted station.
ReVu™ - Pause and rewind radio
PocketDAB 2000 constantly stores audio and text
from the DAB station you are tuned to in its memory.
The amount stored depends on how long you have been listening
to that station and the data rate of the broadcast. You can
access this stored audio and pause or rewind live radio over
short periods (approximately 10 to 20 minutes depending on
data rate). Once the memory is full, ReVu keeps adding but
overwrites the oldest stored audio.
You can enter ReVu mode with audio paused or playing:
Paused - press and release the ReVu button.
Playing - press and hold the ReVu button for three seconds.
When you enter ReVu mode you see the ReVu icon ( ) on the
screen and the clock changes to show how many minutes and
seconds behind the live broadcast you are.
6
Once in ReVu mode you can toggle between paused and playing
by pushing the ReVu button again. To exit ReVu mode and return
to the live broadcast press the centre of the DABnav button.
To pause, rewind and replay live radio
Push the ReVu button. The screen shows the pause icon
and says “DAB paused” and the clock changes to show how
far behind the live broadcast you are and displays the time
remaining for ReVu based on the free space left in memory.
Push the ReVu button again to start replaying the stored audio
from where you left off. The timer stops counting, showing that
you are listening that many minutes and seconds behind real
time. You can listen in this way for as long as you like, or:
Rock the DABnav button left to rewind ( ) or right to fast
forward ( ) the stored audio.
Rock the DABnav button up to jump to the end of the stored
audio or down to jump to the start.
Press the centre of the DABnav button to exit ReVu mode.
7
Changing the information displayed
Press the Info button to change what you see on the screen
while you listen to DAB.
Scrolling text The default mode, displays scrolling text
messages broadcast by most stations.
Broadcast info Day and date from the current multiplex.
Multiplex the current station belongs to.
Multiplexes, sometimes known as ensembles,
are groups of stations owned and broadcast by
a single operator.
Type of content being broadcast.
Stereo or mono indicator and the data rate at
which the signal is being transmitted. This rate
is set by the broadcaster to suit the type of
material. Higher rates generally mean higher
quality.
Reception info Multiplex channel and frequency.
Signal quality. As a guide, values from 85 to 100
indicate good reception, 70 to 84 borderline
reception and 0 to 69 poor reception.
Signal strength meter. The marker indicates the
minimum required level for reception and the
filled blocks indicate the current level.
8
Storing and recalling presets
Presets enable you to store radio stations on a presets list for
easy access. To access presets press the Menu button, use the
DABnav button to select the View & manage presets icon and
choose one of the following options:
To add a preset
Rock the DABnav button right. Scroll the station list and select
the station you want to add as a preset. The current station is
indicated by a speaker icon ( ). Press the DABnav button again
for confirmation. The station is added to the DAB Presets list and
the preset icon ( ) appears next to the name on the station list.
To recall a preset
Use the DABnav button to select the preset you want.
To delete a preset
Scroll the presets list and highlight the preset you want to delete
from the list. Rock the DABnav button left to delete that preset.
9
Recording radio
You can record radio* to an SD (Secure Digital) card which you
put into the SD card slot on the side of your unit.
The amount you can record depends on the size of your card and
the quality of the audio being broadcast.
1. Push your card in the slot on the side with gold pins facing
up and cut off corner to the top.
2. Press the Rec button to start recording. You see the record
icon ( ) flashing on the screen.
3. Press the Rec button again to stop recording. You see a
message giving the name that the time, date and filename
recording has been saved under. The filename is made up
of the month, date and time. e.g. 10141020.mp2 means
that the recording was made on October the 14th, starting
at 10:20 am. The recording also stores the station and
multiplex. DAB recordings are saved in a special TRACKS
folder on your SD card so they can be found easily.
See MP3 mode, on page 12, for more details of card types
and how to play back recordings.
TxtStor - saving scrolling text
You can save the scrolling text messages broadcast by most DAB
stations. These are stored internally and you can store up to 25
text messages.
1. Press the TxtStor button to save the current text message. You
see a message confirming that the text has been stored.
2. Press the DABnav button to return to the normal display.
*Record function provided for personal use only
10
To view and delete stored messages:
1. Hold down the TxtStor button for 3 seconds or press the
Menu button, select DAB settings then TxtStor.
You see a list of the stored messages.
2. Rock the navigator left to delete the highlighted message or
right to view the message.
3. Press the Menu button to exit.
DAB Autotune
The autotune options automatically scans the DAB frequency
range and stores all the stations found in the station list for easy
selection. Note Ensure your headphones are connected before
starting an autotune. You may want to perform an autotune if
you move out of your local area or if you want to receive a new
multiplex.
To perform an Autotune
Press the Menu button and select the Start DAB autotune option.
You can cancel autotune by pressing the DABnav button again
during the tuning process.
The display will indicate tuning is underway. When finished, the
PocketDAB 2000 will return to the station you were listening to
and you will hear it through the earphones. All the stations found
are now stored in the unit. If no stations are found, you see the
message ‘No stations available’ and the display shows an option
menu. Check your headphones are connected and try one of the
available tuning options.
The frequency range scanned during an autotune can be altered
at any time using the DAB Region option, see page 18.
11
MP3 mode
MP3 mode enables you to use an SD (Secure Digital) card in your
PocketDAB 2000 for recording*, see page 10, and for playing
back digital radio or playing MP3 or MP2 files recorded elsewhere.
Your PocketDAB 2000 comes with an SD card, other sizes and
additional cards are available from PURE and other electronics
retailers. As a rough guide – a 64 MB card will give you around an
hour of recording time from a 128 kbps broadcast data rate.
There is an ever increasing range of brands, capacities and quality
of SD cards available. We have tested PocketDAB 2000 with the
most popular cards but cannot guarantee all cards will work.
Check www.pure.com/support for any known issues.
Note PocketDAB 2000 records files to SD cards in MP2
format. You may need to use a computer to convert these files
to a different format if you wish to use them in another device
that uses SD cards. Check the supplied PocketDAB 2000
Audio Software Suite CD or check www.pure.com/support for
information on software you can use to convert files.
Menu
®
I n fo
Eq
Mod
To insert an SD card push the card
in the slot on the side with gold pins
facing up and cut off corner to the
top. To remove a card push the card in
slightly and it will pop out so you can
remove it.
r
e
Re
Vu
Rec
*Record function provided for personal use only
12
S
Txt
to
Playing files
Press the Mode button until the MP3 icon is highlighted and
wait to change to MP3 mode. You see a list of the files ( )and
folders ( ) on the SD card and the MP3 mode indicator in the
top right corner of the screen.
PocketDAB 2000 records MP2 files to a TRACKS folder when you
record from radio on your PocketDAB 2000. DAB recordings will
show recording date and time and show the station name and
multiplex when played, MP3s will show track title and additional
file information where available.
The list will automatically scroll right to show extra file
information where available.
Rock the DABnav button up and down to flick through the list of
tracks and folders available on the SD card and push to select
and start playing a file or open/close a folder.
The screen shows file information and a progress bar shows time
into track and total track time.
Play/Pause - Press the ReVu button to toggle between play and
pause.
Rewind/Forward - Rock and hold the DABnav button left or right
to rewind or fast forward within a track.
Skip back/forward - Rock and release the DABnav button left or
right to skip back or forwards to the next track.
Change track - Rock the DABnav button up or down to see the
track list and push to select another file.
When your file finishes PocketDAB 2000 will automatically play
the next file in the current folder unless you have specified to
repeat the current track, see page 19.
13
Managing files
To delete files from your SD card you can use the Delete track
option in MP2/MP3 settings, see page 19, or connect to a PC
using the USB socket and use Windows Explorer to manage files
on your SD card.
14
FM mode
To listen to FM radio, press the Mode button until you see the FM
icon in the top right of the screen.
Selecting stations
To change stations you can either:
Rock the DABnav button left or right to use seek tuning which
automatically finds the next station
Rock the DABnav button up or down to step through the
frequency range manually (in steps of 0.05MHz)
Storing and recalling presets
Presets enable you to store radio stations on a presets list for
easy access. To access presets press the Menu button, use the
DABnav button to select the View & manage presets icon and
choose one of the following options:
To add a preset
Rock the DABnav button right. Select the station you want to add
as a preset. Press the DABnav button again for confirmation. The
station is added to the FM Presets list.
To recall a preset
Use the DABnav button to select the preset you want from the
list.
To delete a preset
Scroll the presets list and highlight the preset you want to delete
on the list. Rock the DABnav button left to delete that preset.
15
Adjusting the eq settings
Press the Eq button in DAB mode to apply one of six equalisation
presets to the audio. The selected eq setting is displayed on the
top line of the display using the following icons:
( ) Flat - no eq applied to the signal
( ) Bass - boosts the bass and mid frequencies
( ) Monitor - boosts the treble and mid frequencies
( ) Studio - boosts the midrange frequencies
( ) Club - boosts the bass frequencies with some treble
( ) Arena - boosts the bass and treble frequencies
16
Setup options
Press the Menu button and use the DABnav button to select one
of the following settings icons to access settings which customise
the way your PocketDAB 2000 works.
DAB settings
To adjust DAB settings select from the following options:
TxtStor
Enables you to view or delete the text messages which are
stored when you press the TxtStor button as described further on
page 10.
DAB Station order
Changes the order of stations on your station list. The current
order is highlighted. Choose from the following:
Alphanumeric
Displays all stations in alphanumeric
order.
Favourite station
Displays your ten favourite stations
at the top of the station list and the
others below. Your favourite stations
are selected by how long you listen
to each station and shown by a heart
next to the name.
Active station
Displays active stations at the top
of the station list and inactive ones
at the bottom, in alphanumeric
order. Inactive stations are those
on your station list but not currently
available, marked with a ’?’.
17
Multiplex
Lists stations in groups according to
their multiplex. Multiplexes are groups
of stations owned and broadcast by
a multiplex operator.
Remove inactive stations Removes inactive stations from the
station list.
Add favs to presets
Available only when Favourite station
order (above) has been selected.
Transfers your ten favourite stations
to presets.
Manual tune
Enables you to find new stations or fine tune your reception.
You see a list of channels and frequencies. Each multiplex
has a different channel and frequency (e.g., BBC is channel
12B and Digital One is 11D), contact the DRDB (Digital Radio
Development Bureau) by phone on 08707 74 74 74 or at www.
digitalradionow.com for information on multiplexes.
1. Select the frequency/channel you want from the list.
You see a signal strength display. The marker indicates the
minimum required level for reception and the filled blocks
indicate the current level.
2. Move your unit or headphones and try to raise the current
level to the marker or beyond. You see the multiplex name at
the bottom of the screen if a good signal is received and the
stations in that multiplex are added to the station list.
DAB region
Controls the frequency range scanned when you perform an
autotune. Choose from the following:
United Kingdom UK-only frequencies in Band III
18
Rest of World
Full range of digital frequencies in Band III
and L-band.
FM settings
Changes between stereo and mono reception - mono may be
clearer for stations with weak signals.
MP2/MP3 settings
To adjust MP2/MP3 settings select from the following options:
Delete tracks
You see a list of the tracks and folders on the SD card.
Rock the navigator left to delete the highlighted track or folder or
right to open a folder.
Press the Menu button to exit.
SD card status
Displays the total, used and available space on the SD card.
Format SD card
Removes all files (including any non-audio files) and clears the
card. This may be a good idea if you have previously used the
card in another device.
Track order
Select between playing tracks from the SD card in alphabetical
filename order or in random order.
Repeat mode
Select to repeat the Current track, All tracks or Off (no repeat).
19
General settings
To adjust general settings select from the following options:
Screen
Set the screen contrast and adjust the backlight usage with
these options. Note When using mains or connected to USB the
backlight is set to on all the time, overriding these settings.
Menu timeout
Set if you want menus to timeout if no button is pressed or not.
If you select No you need to press the Menu button or select an
option to exit menus.
Optical line out
Set the optical line out socket on or off. If you are not using the
socket switching it off will save power, extending battery life.
Select language
Select the language you want PocketDAB 2000 menus and
options to appear in. Choose from: English, French, German,
Dutch, Spanish, Italian, Danish or Swedish.
Software version
Displays the current software version installed on your
PocketDAB 2000. You may be asked to quote this if you contact
technical support.
Software upgrade
To upgrade your software, select this option and follow the
instructions on screen.
For information on whether upgrades might be available for
your unit refer to the PURE website at www.pure.com/support or
contact the PURE support team at the address on the back of
this manual.
20
Using batteries
Your PocketDAB 2000 is supplied with three high-power
rechargeable AA size NiMh batteries. You can also use alkaline
(non-rechargeable) or other rechargeable batteries of the same
size.
Inserting the batteries
To insert the batteries slide the battery cover down with your
thumb and lift off. Insert the batteries in the orientation shown
on the base of the battery compartment and replace the battery
cover.
Replacing the batteries
The battery gauge on the LCD display gives an indication of
battery power remaining from full power ( ) to empty ( )
When battery power is low the LCD backlight will not operate to
help maximise remaining battery power.
To remove old batteries push them against the spring connectors
and lift them clear. Insert the new batteries as described above.
Recharging batteries
Note Only the supplied rechargeable batteries can be recharged
in your PocketDAB 2000, others will require a separate charger.
Connect your PocketDAB 2000 to the mains and switch the unit
on with the supplied batteries inserted. Charging will commence
and is indicated by an animated battery icon on the display. You
can use the unit as normal while battery charging is underway.
When charging is complete the battery icon will disappear.
21
Battery safety
For safe operation of your PocketDAB 2000 with batteries ensure
that you:
- Do not mix battery types or sizes
- Do not mix old and new batteries
- Remove used batteries as soon as possible to prevent leakage
- Dispose of old batteries carefully
- Orientate batteries as shown in the battery compartment
22
Using the adapter
A power adapter is supplied for use with your PocketDAB 2000.
To prevent damage to your unit, use only the supplied adapter. To
use the power adapter plug one end of the cable into the power
socket on the side of your unit and plug the other into the mains.
The battery gauge on the screen will not be displayed when using
the adapter and the backlight operates continuously.
Note Only the supplied rechargeable batteries can be recharged
in your PocketDAB 2000, others will require a separate charger.
23
Using USB
Your PocketDAB 2000 comes with a USB cable suitable for
connecting your PocketDAB 2000 to a PC with a free USB port.
You may want to connect your PocketDAB 2000 to your PC to
transfer music or other files between your SD card and your PC
or to upgrade your PocketDAB 2000 software if updates become
available.
While connected via USB to a running PC your PocketDAB 2000
does not require batteries or a mains supply, being powered
entirely by the USB connection.
24
Connecting to other devices
You can connect your PocketDAB 2000 to other devices such as
an external amplifier or MiniDisc recorder using the Optical socket
on the top of your unit. You will also need a suitable S/PDIF
optical connection cable – available from your nearest PURE
dealer or direct from the accessories section of our shop at
www.pure.com or by calling the PURE order line on +44 (0)845
045 1122.
Analogue line out
By default the Optical socket is a normal analogue line output
suitable for 3.5 mm stereo cable connection to an external device.
Lift the curved edge of the protective cover to access the socket.
Optical digital line out
To use the Optical socket as an Optical digital output (also known
as an S/PDIF output):
1. Press the Menu button and select the General settings icon.
2. Select the Optical line out option and switch the S/PDIF
option On.
3. Lift the curved edge of the protective cover to access
the socket. You will see a red light inside if the S/PDIF is
switched on.
25
Hints and tips
Troubleshooting
I can’t get any sound
Make sure your PocketDAB 2000 is plugged in or has batteries inserted
and is switched on.
Check that the volume level is not set too low on the unit or
headphones.
Display in DAB mode says ‘No stations available’
Check that your headphones are connected and the cable is uncoiled.
Use the Autotune facility to search for services. Try moving to another
location to find better reception.
I can’t access secondary services
At the time of publishing not many secondary services are available. If
secondary services are available for the currently selected station the
secondary ‘>>’ indicator will be shown on the display next to the station
name.
Display says ‘Station not available’
This may occur if a broadcaster takes a station off-air whilst you are
listening to it. If tuned to a secondary service PocketDAB re-tunes
to the associated primary service. If tuned to a primary service,
PocketDAB will wait until service resumes or you pick a new station.
The buttons aren’t working
Check that the button Lock switch on the side of your unit is set to the
upper position.
I hear a ‘burbling’ sound on some stations
Although DAB is excellent at providing quality audio from very little
signal, the quality can suffer if the signal strength is too low. If that
happens, a ‘burbling’ sound can sometimes be heard.
26
Resetting your PocketDAB 2000
The reset option removes all presets, stored stations and favourite
station settings and resets all options to defaults. You may want
to use this option to restore default values to options you have
changed.
1. Press and hold the Menu button for more than two seconds.
The display will ask ‘Do you want to reset?’
2. Press the DABnav button to select Yes to confirm the reset
or press no buttons for around seven seconds to cancel the
reset.
Technical Support
The Troubleshooting section on page 26, lists some of the more
likely reasons for problems you might have with your
PocketDAB 2000. If you still have a problem with your unit, either
visit the support section of our website at www.pure.com/support
or contact us using the details on the back cover of this manual.
Warranty information
Imagination Technologies Ltd. warrants to the end user that this
product will be free from defects in materials and workmanship in
the course of normal use for a period of two years from the date of
purchase. This guarantee covers breakdowns due to manufacturing
or design faults; it does not apply in cases such as accidental
damage, however caused, wear and tear, negligence, adjustment,
modification or repair not authorised by us. Please register your
product with us online or using the warranty card. Should you have
a problem with your unit please contact your supplier or contact
PURE Support at the address shown on the rear of this manual.
27
www.pure.com
PURE Digital
Imagination Technologies Ltd.
Imagination House
Home Park Estate
Kings Langley
Herts
WD4 8LZ, UK
+44 (0) 1923 277477 support
+44 (0) 1923 277488 sales
+44 (0) 1923 270188
[email protected]
[email protected]
12F27