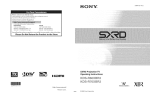
1
Operating
Instructions
KDL-19M4000
BRA VIA
© 2008 Sony Corporation
CAUTION
Owner's Record
Tile model and serM numbers are located
al tile rear of tile TV. Record these
numbers in the spaces provided below.
Rel;ar lit them whenever you call upon
your Sony dealer regarding 1his TV.
To prevenl electric
polarized AC plug
receptacle or ()tiler
be flflly in_rled to
Model Name
Safety
shock, do not use lhis
with an extension cord.
outlet unless tile blades call
prcvenl blade exposurc.
Serial No.
The plug is designed, fi)r salcly purposes.
to fit inlo tile wall oullet only one way. If
you arc unable to insert tile plug flflly into
the outlet, conlact your dealer.
If any liqukl or solid objecl should lall
inside the cabinet, unplug the TV
innnediamly and have it checked by
qualified smxice personnel belore
operating il lhrther.
If you will not be using tile TV lor scveral
days. disconnect lhe power by pulling the
plug itsdf. Never pull on the cord.
For delails concerning salcly precautions,
s_ "lmporlanl Sali:ty Instructions" on
page 3.
lnc.
WARNING
This device complies with part 15 of tile FCC
rules. Operation is subject to tile lollowing
lwo condilkms: ( 1) This device may not
cause harmlul interl;arcncc, and 12) lhis
device must accept any interlcrcncc rcceived,
including interlcrcnce that may cause
undesired operatkm.
To reduce tile risk of tire or electric shock, do
no[ expose [his WV [o rilill or nlois[urc,
NOTIFICATION
This symbol is intended to
alerl tile user lit tile presence
of uninsulated 'dangerous
voltage" within the TV's
enclosure that may be of
sufficient magnitude lit
conslitute a risk of electric
shock to persons.
This symbol is inlended to
alert the user tit the presence
of imporlant operaling and
mainlenancc (selwicing)
inslrucflons in the literamrc
acconlpanying the TV.
The TV shall not be exposed 1o dripping or
splasldng and no objects filled with liquids, such
as vases, shall be placed on the TV.
Antenna grounding according
to the National Electrical Code,
ANSI/NFPA 70
...... Antenna
leaddn
clamps_
*#4
?
wire
Ar_enna
disct_arge
unit(NECSection
Groundingconductors
_- Groundclamps
_=poGr°_
service
grounding
electrode
system
NEC:National
ElectdcN
Code (NECArt250PadH)
nleasurcs:
[]
Reorient or relocale tile rcceiving
antenna,
[]
Increase tile separation between lhe
equipment and recciver.
Connect tile equipment into an outlet on a
circuit dilli:rent l?om that to which the
receiver is connectcd.
[]
[]
[]
[]
Installing
[]
[]
This equipmcnl has been testcd mid lound to
comply wifll tile limits lor a Class B digital
device, pursuant to Part 15 of tile FCC Rules.
The_ limils are designed to provide reasonable
protccflon against harmfifl interim:fence in a
residential installation. This equipment
generates, uses and can radiate radio l?equency
energy and, if not installed and used ill
accordance with tile inslructions, may cause
harmfifl intcrlcrcnce to radio comumnicalions.
However, there is no guarant_ that inlerl_:rence
will not occur in a particular installation. If this
equipment does cau_ hamlfifl inlerl_:rcnce 1o
radio or television reception, which can be
delennined by turning the equipmcnl oH and on,
lhe user is encouraged lo try to correcl lhe
interl_:rence by one or more of lhe b.dlowing
[]
Tile TV should be inslalled near an easily
accessible power out]el.
To prcvenl internal Ileal buildup, do not
block the venlilalion openings.
Do not inslall lhe TV in a hot or humid
place, or in a place sut!iect to excessive
dust or mechanical vibration.
[]
Awfid operaling the TV al temperatures
bdow 41 °F/5°C).
[]
If tile TV is transported directly h'onl a
cold to a _.v_lrllllocation, or if tile rooln
lemperaturc changes suddcnly, tile piclurc
may be blurrcd or show poor color due 1o
nloiSltlrc
[]
condensation,
111 tiffs
case,
please wait a low hours 1olet the moismrc
evaporate belore turning on tile TV.
To obtain lhe best picture, do nol expose
lhe scrcen to direcl ilhmlination or direcl
sunlight. 11is recomnlended to use spol
lighling directed down fl-om the ceiling or
to cover the windows tllal lace the scwen
with opaque drapery. It is desirable to
install the TV in a room where tile floor
and walls are nol of a reflective material.
CAUTION
Use file lollowing Sony TVs only wifll file
lollowing WALL-MOUNT BRACKET.
Consult the dealer or an experienced
radio/TV technician Ior help.
Pursuant to FCC rcgulalions, you arc
cautioned lhal any changes or modifications
not expressly approved in this manual could
void your authorily lo operate this
equipment.
Tile shielded inlerli,ce cable recommended in
this manual must be used with this equipment in
order tit comply with the limits lbr a digital
device pursuant to Subparl B of Part 15 of FCC
Rules.
For Customers
in Canada
This Class B digilal apparatus
Canadian ICES-003.
2
[]
[]
Responsible Party: Sony Electronics
Address: 16530 Via Esprillo,
San Diego, CA 92127 U.S.A.
Telephone Number: 858-942-2230
//"
Operate tile TV only on 120-240 V AC.
Use tile AC pow'er cord specified by Sony
and suilable lor lhe voltage where you use
iL
Declaration of Conformity
Trade Nanle: SONY
Model: KDL- 19M4eefl
///,/Ground
/_
[]
[]
conlplies with
Use with other WALL-MOUNT BRACKET
may cause instability and possibly result ill
iJ_iury.
To Customers
Sullicient expertise is rcquired lor installing tile
specified TV. Be sure to subconlract the
installalion to Sony dealer or licensed
contraclors and pay adequate altenlion 1o sali:ly
during lhe inslallalion.
Note
Tiffs
television
includes
a QAM
demodulator
which
should
allow
you to
receive unscralnbled digital cable televisionprogr_muningviasubscription
selwiceto a cable service provider. Availability
of digital cable television
programming
in your area depends on the type of programming
and signal
provided
by your cable selvice provider.
Trademark
Macintosll
Information
is a tradelnark
o_ Apple
Inc., registered
in tile U.S.
and ofl_er
COtlnlries.
Important
Safety'
Instructions
1 ) Read these instructions.
HDMI,
the HDMI
trademarks
or registered
ManuLtcmred
double-D
Bhl-ray
under
symbol
and
High-Deiinition
trademarks
license
holn
are trademarks
Muhimedia
ol HDMI
Dolby
of Dolby
Interface
Licensing
Laboratories.
are
2) Keep these instructions.
3) Heed all warnings.
4 ) Follow" all instructions.
LLC.
"Dolby"
and the
Laboratories.
Disc is a trademark.
"BRAVIA',
Sony
logo
f_ R AVIA
and []
are trademarks
trademarks
oi
8)
Corporation.
HK:Im|
_)_[,'IN;I
or registered
5') Do not use this apparatus near water.
6) Clean only with dry cloth.
7_ Do not block _my ventilation openings.
Install in
accordance
with the manufacturer's
instructions.
9)
Do not install near any heat sources such
as radiators, heat registers, stoves, or o
apparatus (including amplifiers) that
produce heat
Do not defeat the safety purpose of)he polarized or
grounding-type
plug. A polarized plug has two blades
with one wider than the other. A grounding type plug
has two blades and a third grounding prong. The wide
blade or the third prong are provided for your safety.
If the provided plug does not fit into your outlet.
consult an electrician for replacement
of the obsolete
OUilet.
10 ) Protect the power cord from being walked on or
pinched particularly
at plugs, convenience
receptacles,
and the point where they exit from the
apparatus.
11) Only use attacNnents/accessones
mmmfacturer.
specified
b) the
12 ) Use onl_ with the cart. stand, tripod, bracket, or table
specified by the manufacturer,
or sold with the
apparatus. When a cart is used. use caution when
moving the cart!apparatus
combination
to avoid
injury from tip-over.
131 Unplug this apparatus during lightning storms or
when unused for long periods of time.
14 ) Refer all servicing to qualified service personnel,
Servicing is required when the apparatus has been
damaged in any way, such as power-supply
cord or
plug is damaged, liquid has been _pilled or objects
have fallen into the apparatus, the apparatus has been
exposed to ram or moisture, does not operate
normally, or has been dropped.
(ContinuedJ
3
MOISTURE
To reduce
nloisture
[]
the risk of fire or electric
The TV nmst
aever
sl lck. do not expose
be exposed
to dnppmg,
liquids
of an_ kind.
[]
Do not
"1%
place
[]
Do not use a power
line
operated
water;
near
a bathtub,
liquid
filled
Ior example,
kitchen
sink,
laund_T
ol_iects
tub.
or
set near
plant
All 3w adequme
space
[]
the TV in a contined
Never
place
around
the TV
set to ensure
space,
proper
such as ,,
air circulation.
>'r_
Uook
.......built
inoabi.et,
unlo spropor
ventU_,tion
or spilling
or potted
is provided.
:_::11["_'_n_"g:;_
( n the
-_ _;._-'-;.-.
washbowl,
wetb ..........
swim, ngpo,1,
et .
splashing,
such as a vase
TV
this TV to ram
_
t .........
_
I _J_"
_ I_
'-_'_,
,a_-,v-..--
_
Leave some space around the TV set as shown below,
Otherwise air-ctrculahon may be inadequate ano cause
overheating, wmcn may cause a fire or damage to the TV seL
Installed on the wall
t _ 7/8 inches
30 cm
When cleaning,
electric
shock.
[]
Clean
be _ure to unplug
Wipe
Stubborn
[]
If using
the LCD
s.-'r_en
stains
to a_oicl any chance
of
may
gently
with
with
of mild
soa t and warlIl
pretreat_d
nstalled
a soft cloth
be removed
a cloth
slightl
5 moistened
tbllow
the instruction
water.
cloth,
please
"
on the package.
use .qrong
with
stand
such
as a thinner,
alcohol
or benzine
Periodic
vacuuming
TOproper
of the ventilation
openings
around
the set,
I
4 inches
_
6crr_
lbi
10Oral
ensure
at least
snace
" _ 8 mcnes
4 inches
solvents
this
with
clemfing
[]
10cm
--
a dry s_ fi
a chemically
provided
Never
cord
:_4 inches (lUcre)
a bohltion
[]
of the TV with
loth
[]
the power
Leave
file cabinet
[]
t..... t nohe
(10 cm}
CLEANING
is recommended
(") _fi)
m
ventilation.
{l@-
52
VENTILATION
Leave at least this space around the set,
The ventilation
( penings in the TV are necessar 3 to ensure
operation
of the TV and to protect it fl'om overheating.
reliable
Never install the TV set as follows:
[]
Do not block or cover the ventilation
with cloth or other material_.
[]
Nevm place tim TV on a bed. soth. rug or oflmr
similar surt:ace where ventilation openings may
be blocked.
[]
Unless
proper
cause
damage.
Never
allow
[]
ventilation
[]
liquid
objects
tim TV may
to tall into
accmnulate
dust mid
the
_
or solid
immediately
and have
openings
object
falls
inside
it checked
the TV unplug
W qLmlified
service
the TV
personnel
betore
it further
push
objects
as they
or shorT OUTparts
4
or solid
If any liquid
Never
is provide&
Air circulation is blocked.
openings.
operating
[]
ventilation
openings
ofan_
may
come
dmt could
kind
into
the TV through
in contact
result
with
the ventilation
dangerous
in a fire or an electric
voltage
shock.
points
Air circulation is blocked.
CARRYING THE TV
Medical institutions
Do not place
Carry the TV in the specified manner
To avoid dropping
these guidelines:
tile TV and causing
carrying
tile TV.
serious
disconnect
inlury
[]
Betbre
[]
When you carry tile TV without
handle, place your hand as
illusrraled
and hold it securely.
Do not put stress on tile LCD
[]
When
equipment
panel.
the TV. do not
subject it to
_
vibration,
]
ox
excessi_etbrce,
use.
Outdoor use
Do not install
this TV outdoors.
direct
in order
sunlight
t
[]
handle
cause
With
to tbll down
the TV
Exposing
electric
be installed
INSTALLATION
Do not install the TV
near
gila easily
accessible
t_tce up or down,
upside
Do not install
[]
Do not install the TV hl places subjecr
m
exfrelale lelalpera[ure_
such as in direct _Ulaligllt_
the TV in hot. oily, llumid,
near a radiator or a heating
overheat
in such conditions
AC
power
or excessively
dusty
[]
_.
_
_::.-
posedto
may condense
[]
_z_¢_
[]
DonotinstalltheTVwhereitnmybeexposedtomechanicalvibnltion.
[]
Do not install
[]
Do not install the TV in a location
where
or behind a pillar, or any place you might
[]
To prevent
/_
fire keep
away
the TV.
[]
Do not
[]
enmr.
it may protrude,
such as on
Dump your head or receive
injury.
trom
place
objects
@12
cause
a fire,
./2_"J-t
TV.
l__
or open
flame
e.g. candles_
radiation
emitted
to the TV may
:ause
t?om optional
picture
equipment
distortion
mad/or
_=_,_'_
_@_?
_._;
Bracket,
/_ _
b......
t ....
qualified
Ifnotproperly
.......
or removal
f'om the
d during
Wall-Mountious injury.Bracket"
the TV may rail and
Be sure to tbllow the installation
guide supplied
when
installing
equipment
tile TV tc a wall
install
with
and/or
Wall-Mount
Bracket.
Do not hang
injury.
tile TV t?om
[]
Do not lmng anything
on the TV
[]
Do not allow
to climb
children
the ceiling.
It may
Ibll and
on the TV.
cause
senous
r-C
I
,_
_
.
Do not touch
children
Do not allow
Do not install the TV on ft miture
as a chest of drawers.
[]
Care should be taken to install
pulled over. or knocked
down.
[]
Care should
be taken
to climb
to route
cmmot
wet hand,
tile AC
power
it may cause
cord
and its plug
electric
uneven
on or play
with
thrniture
mid
_r_
power
it cmmot
cords
or grabbed
/}
_ _
TV sets.
be used as steps,
such
[]
the TV where
be pulled
{_
surf:aces.
that can easily
all AC
_,_
shock.
['_._
andlor
[]
'l
AC POWER CORD
stand.
the TV on unstable
so that they
theWall-Mounl
on top of the TV.
[]
cables
ir_/
--adv&
Besuretoattachthebracketswiththespeclfiedpartssuppliedwithdm
with
Secure
_
_ _
the TV.
[]
[]
Never
!
1_
optional
Take measures
to prevent
the TV fi'om toppling
over
and causing
injury,
damage to tile TV mid propeOy.
[]
sound.
11tN
-_1'_!,_-_9_
Prevent the TV from toppling over
[]
installed
nois)
use
a Wall-Mount
Bracket.
When installing
or
Wall-mo unt installation
requires
the use ol
........
ing the TV and the Wall-Mount
Blacker
flammable
nmy
the speaker.
Electro-magnetic
contractors.
installation
[]
bodily
may
or damage to your
Wall-mount
'_
TV nlelffmction.
may
tile TV m seawarer
shock
too closed
-a
insects
injury.
on a boat
This TV contains
a strong magnet in the speaker
unit that generates,
magnetic
field. Keep any items susceptible
to magnetic
felds away
from
[]
the TV where
and cause
nlotion
Magnetic influence
5
an_
Do not install the TV in a pl .....
direct air conditioning;
moistm'e
swaying
_,k-/_f_ ..
_ent. Tile TV may
mid cma cause
of the enclosure
and nlay cause
or
shock
places.
_
inside
to ram
fire or electric
outlet.
malfunction.
[]
not be exposed
and possible
clown or on its side.
[]
detbrmation
damage
handle
[]
[]
The TV should
1 avoid
Excessivebulalpingnlotionofamovingvehicle
or continuous
TV should
medical
Do not install this TV in a vehicle, ship or other
vessel
Witl-out
The
where
causea medical
malfimction
all cables.
carrying
_hockso_
this TV ill a place
II may
equipment is in
be sure to tbllow
be pushed,
When
disconnecting
tile AC power
cord,
grasp
the plug mad disconnect
t_om the wall outlet
frst. Do not pull by the cord.
[_
__a
V
mid connecting
by curious
children.
))/_
¢ContinuedJ
[]
Keep the power cordoway
A TV
set with
connected
a tbree-wire
to all AC
[]
Donor
[]
Consult
converi
power
iromheat
grounding
outlet
Clean the AC power plug
sources
type AC
power
with a protective
cord
plug
eartldng
must
be
damaged AC power cord should never be used•
ardamagetheACpowercord,
your electrician
to have the outlet
changed
to suit your
ACCESSORIES
TV.
Subjecting tile AC power cord to wear and/or nbuse can damage file AC
power cord and your TV.
[]
Unplug tile AC power plug and clean H
occasionall3
czmnection,
Do not _lace the TV wllere file power cord can be easily pinched, benT.
twisted, or catch your _eer.
K_ep small accessories out of children's reach.
Use only rile specified accessories with this TV.
Volume Adjustment
[]
[_
When using headphones, adjust tile volume to
avoid excessive audio levels ti'om causing
qP_,
possible bearing loss.
BATTERIES
[]
[]
[]
[]
[]
[]
Do not allow anything ro rest on or roll over the cord•
Before connecting cables, be sure to unplug tile AC power cord tbr
your safety.
Do not move tile TV with tile AC power cord (or other cables such as
audio and video connected.
Use only an original Sony ACpower cord wifll your TV: no brand
substitution is allowed.
Do not use AC power cord supplied with the TV witl_ any other
equipinenl.
Never use a damaged AC power cord• A
dmnaged AC power cord can cause a
short-circuit, which may result in a fire or
electric shock.
[]
•
_
_
_l k_l-x_
,_ _9_
-_i_
_
/2
_1
During lightning storms or when
rile TV is let} unattended and
unused tot extended periods of
time. tile AC power cord should
be unplugged fi'om tile wall
outlet. Tllis will avoid possible
damage m your TV. Also unplug
tile
ant_nlla
[]
[]
o\
[]
_
[]
Unplugging tile AC power cord [i'om the wall outlet will completely
remove pl wer _rom the TV.
[]
to prevent
damage
[]
_
__
Using
This is a structllra] property of tile LCD pm_el and is not a malfunction.
Tile LCD screen is made with high-precision technology and to
achieve a lligh level of performance and picture quality, this TV's
backlight _tting is set to maximize tile brighmess of the TV. However
tmeven brightness may be observed when tile LCD TV is, iewed in a
%
_
type of batteries.
batteries cml lead to ml explosmn
LCD SCREEN
may cause arcing mad result in a fire.
erload the same AC power outlet.
consumal-les,
123 Although tile LCD screen is made with high-precision technology and
has eft_ctive pixels of 99.99_ or more, black dots or bright points of
light (red, blue, or green) may appear constantly on tile LCD screen.
Insert tile plug fully into tile outlet. If it is loose, it
not
are
Replace only with tile same or equivalent
[]
Do
batteries
[]
J_
[]
control
[]
[]
Do not use a damaged or poorly fitting AC power
outlet as your TV's power source,
[]
relnot_
Tt preserve our enwronmen_, dispose of used batteries according _
your local laws or lvgulations.
Do not dispose of batteries in a fire.
Do not short-circuit, disassemble or overheat the batteries.
incorrect replacement
xF_p_
_
Your
X
"% P
dark
ambient
witllout
an input source
or blank
screen.tileThis
condition
is
normM
m_dnot
a malfhnction
of tile TV.
Changing
Picture
mode
Backlight setting, enabling tile Light Sensor. or turning on tim Power
Management will improve this condition
To avoid damaging tile LCD pm_el, do not expose tile LCD screen tt
direct sunlight.
Do not push ot scratch file LCD screen, or place objects on top of the
TV. File images may be uneven or the LCD panel may be dam0ged.
If tile TV is used in a cold place, smear may occur in file picture or tile
plcrure ma 3 bec_ me dark. Tllis does not indicate a f_dlure. These
phenomena improve as tile tenlperature rises.
Ghosting may occur when still pictures are displayed continuously. It
should disappear M}er a [Ew moments
Tile LCD screen and enclosure get warm when the TV is in use. This
i, nor a inalfullction.
[]
Avoid spraying insect repellent with volatile material on tile LCD
D
avoidprolongedcorltactwitlllalbb
....
plastic material to the LCD
Brok;ln screen panel
It
tile TV.
cause tile LCD screen glass to crack, break or
Donottl
.......ytbingtileTV tlleimp
......
[]
6
Forenergyconselwationlmdsat_tyreasons,
AC power cord b'om tile AC power outlet,
practlce unplugging the
_
IfdamageoccurstotlmLCDpanehsmalltracesofliquidcrystal
sandwiched between tile glass may be found on scattered broken glass•
[]
[]
Do not touch tile broken glass with bare hands. As wifll any broken
glass pieces, avoid skin contact and exposure to your eyes or lnOLl[]_l.
Avoid direct contact with liquid or damp surfhces of the glass as mese
may have all adverse eftEct on some people. Tile contacted area -hould
be rinsed thoroughly with water. If conditions persist, see your doctor.
If the su/race of the TV cracks do not touch tile TV until you have
unplugged file AC power cord. Otherwise electric shock may result.
SERVICING
Do not use the TV if you suspect the TV is
damaged or if the TV is damaged.
[]
[]
Do not attempt to service the TV yourself
since opening the cabinet may expose you
to dangerous voltage levels or other
hazards. Ret)r all servicing ro qualified
service personnd.
J_
If replacement parts are required, acqmre a
written certification fl'om the mrvice
technician which states that adequare
replacement pal_is with the same or similal
characteristics as tile original parts have been
used. Unauthorized substitutions may result in
[I[ire. _ln electric shock or other hazards.
__
Safety check
[]
Upon ccmlpletion of any TV servicing ox
repair, ask the service technician to pertbrm
routine safety checks as specified by Sony
and to certify that the TV is sat) to operate,
H....
qualified service technician dispose
of tile T¥ if it is not saf_ to operate.
k .(% _
_%J__
[_'_"
g
\,-vv,
For customers in the United States
Lamp in this product contains mercu U. Disposal of
these materials may be regulated due to
environmental considerations. For disposal or
recycling infmTnation, please contact your local
authoril tes or the Electronics Industries Alliance
_www.eiae.org _.
7
Welcome to the World of BRAVIA®
...........................................................................
Connecting the TV .........................................................................................................
Gable System or VHF/UHF Antenna System ............................................................
Gable Box/Digital Gable Box .....................................................................................
Gable System and VHF/UHF Antenna System .........................................................
Satellite Receiver and Gable/Antenna .......................................................................
10
10
10
11
11
12
VCR, Gable and Antenna ..........................................................................................
When Connecting to Optional Equipment ...................................................................
Securing the TV ..............................................................................................................
Prevent the TV from Toppling ...................................................................................
Recommended Measures to Secure the TV .............................................................
13
14
16
16
16
Bundling the Connecting Cables ...............................................................................
Adjusting the Viewing Angle of the TV ......................................................................
Setting Up the Channel List- Initial Setup ...................................................................
18
18
19
Remote Control ..............................................................................................................
TV Controls .....................................................................................................................
20
23
Overview
Using the
Using the
Using the
Using
Using the
Using the
Using the
of MENU .........................................................................................................
Picture Settings ............................................................................................
Sound Settings .............................................................................................
Screen Settings .............................................................................................
the PC Settings ...............................................................................................
Channel Settings ..........................................................................................
Parental Lock Settings .................................................................................
Setup Settings ...............................................................................................
25
25
26
27
28
29
30
33
Troubleshooting .............................................................................................................
Preparation for Wall Mounting ......................................................................................
PC Input Signal Reference Chart ..................................................................................
Specifications .................................................................................................................
Index ................................................................................................................................
35
37
38
39
40
9
Welcome
to the World of
B RAVIA®
Thank you for purchasing this Sony LCD Digital Color Television. This
manual is for model KDL-I 9M4000. Be sure to check the supplied
accessories against the list on page 39.
Connecting
the TV
To display clear crisp pictures, you must connect your TV correctly and select
the correct Wide Mode to display the picture in the correct aspect ratio (see
"Changing the Wide Screen Mode" on page 21). It is strongly recommended to
connect the antenna/cable input using the 75-ohm coaxial cable (not supplied)
to receive optimum picture quality signal. A 300-ohm twin lead cable can be
easily affected by radio noise and the like, resulting in signal deterioration. If
you use a 300-ohm twin lead cable, keep it as far away from the TV as
possible.
You can also connect a variety of optional equipment to your TV (see page 14).
For multiple equipment connections, please refer to the Quick Setup Guide.
Cable System or
VHF/UHF Antenna
System
Cable or VHF/UHF (or VHF only) Antenna
75-ohm coaxial cable
(not supplied)
__
From Cable settings in Channel
your type of input signal.
10
Rear of TV
CABLE/ANTENNA input
settings, select Cable On or Cable Off for
Getting Started
Cable Box/Digital
Cable Box
Use this hookup if
[] You subscribe to a cable TV system that uses scrambled or encoded
signals requiring a cable box to view all channels, and
[]
Cable
"_° To change channels using
the cable box, set your TV
to channel 3 or 4
depending on the cable
box channel output.
Auto Program will fix the
channel automatically.
k
You do not intend to hook up any other audio or video equipment to
your TV.
IN
1
_
jack
I
75-ohm coaxial cable
(not supplied)
OUT
l,ack
Also,setCabletoOn intheCablesettings
inChannel settings
(seepage
29).
Cable System and
VHF/UHF Antenna
System
A/B
RF Switch
Cable
Antenna
If you want to watch both antenna (over-the-air) and cable broadcast signals,
you'll need to use an optional A-B RF switch (not supplied), as shown
below.
RearofTV
Use the A-B selector to switch between the
CABLE/ANTENNAover-the-air signals and the cable signals. Then
input
set the Cable setting in the Channel settings to
On or Off, as described on page 29.
_
11
GettingStarted
Satellite Receiver
and Cable/A ntenna
Satellite Receiver
AUDIO R AUDIOL VIDEO
SATELLITE iN
J
Satellite
antenna
cable
S VIDEO
CATV/Antenna
(not supplied)
cable
f
S VIDEO --,_,_
A/V cable
(red)
12
®
@
@
@
S VIDEO cable
Rear of TV
Left side of TV
Getting Started
VCR, Cable and
Antenna
VCR
CATV cable
AUDIOR AUDIO L VIDEO
LINE
S VIDEO
©
Rear of TV
S VIDEO ...............
_q]_
S VIDEO cable
Left side of TV
AN cable
13
GettingStarted
When
Connecting
to Optional
Left side
Equipment
Rear
i.........
, _
,IN
[
[]
[]
VIDEO
2 IN
Conuects
to the S VIDEO
S VIDEO
S VIDEO.
VIDEO 2 IN
Connect
VIDEO/
AUDIO-R-
equipment
Provides
better
to the composite
such as video
output jack on your camcorder
or other video
picture
video ([_]).
quality
than composite
video and audio output
jacks on your camcorder
equipment
that has
or other video
game equipment.
L(MONO)
[]
[]
Headphones
Connects
jack
adapter
(not supplied).
PC IN
Connect
to a personal
(RGB/AUDIO)
RGB, not supplied).
to your headphones.
See "PC Input
14
Signal
If your headphones
COl!qputer's video
outpnt
Can also be connected
Reference
Chart"
do not match the jack, use a suitable
connector
nsing HD 15-HD 15 cable
to other Analog
(analog
RGB devices.
on page 38 for the signals
plug
that can be displayed.
GettingStarted
[]
HDMI IN
HDMI (High-Definition
HDMI/
audio/video interface between this TV and any HDMI-eqnipped
Multimedia Interface) provides an uncompressed,
audio/video equipment, such
all-digital
"_
AUDIO IN
as a set-top box, DVD player, and A/V receiver. HDMI supports enhanced, or high-definition
video, plus digital audio.
If the equipment has a DVI .jack and not an HDMI jack, connect the DVI .jack to the HDMI IN
(with HDMI-to-DVI cable or adapter)jack, and connect the audio jack to the AUDIO IN(L/R)
.jacks of HDMI IN. (DVI connector is l\_r video signals only.)
_,
HDMI-to-DVI cable
C_I_
,,'_
E1J_)
Audio cane
HDMI adapter
[]
SERVICE ONLY This USB port is for service only.
[]
DIGITAL
AUDIO OUT
(OPTICAL)
Connects to the optical audio input of a digital audio eqnipment that is PCM/Dolby Digital
compatible.
[]
VIDEO 1 IN
Connect to the composite video and audio output jacks on your A/V equipment such as a VCR
or other video equipment. A second composite video and audio (VIDEO 2) is located on the
left side panel of the TV.
VIDEO/
L(MONO)AUDIO-R
[]
COMPONENT
IN (108011720p1
480p1480i)1
L-AUDIO-R
Connect to your DVD player's or digital set-top box's component video (YPBPR) and audio
(L/R).jacks. Component video provides better pictnre quality than the S VIDEO ([1_) or the
composite video ([_/[])
connections.
[]
AUDIO OUT
L-AUDIO-R
Connect to the left and right audio input.jacks of your audio or video equipment. You can use
these outputs to listen to yonr TV's audio through your stereo system.
[]
AC IN
Connects the supplied AC power cord.
[]
CABLE/
ANTENNA
RF input that connects to ),our Cable or VHF/UHF antenna.
':' Manufactured under license from Dolby Laboratories. "Dolby" and the double-D symbol are trademarks of Dolby Laboratories.
15
Getting Started
Securing the TV
Sony strongly recommends taking measures to prevent the TV fiom toppling
over; as unsecured TVs may topple and result in property damage, serious
bodily injury or even death.
Prevent
the TV from
Toppling
[]
Secure
the TV to a wall and/or
[]
Do not allow children
[]
Avoid placing
[]
Never install the TV on:
• slippery,
• furniture
Recommended
Measures to Secure
the TV
16
stand.
to play or climb on furniture
or hanging
and TV sets.
items on the TV.
unstable and/or uneven surfaces.
that can easily be used as steps, such as a chest of drawers.
[]
Install
the TV where it cannot be pulled,
pushed,
[]
Route all AC power cords and connecting
accessible to curious children.
cables
1
Secure
or knocked
over.
so that they are not
the Stand for the TV.
Make sure the TV stand can adequately support the weight of the TV.
Use two angle braces (not supplied) to secure the stand.
For each angle brace use the appropriate hardware to:
• attach one side of the angle brace to the wall stud.
• attach the other side to the TV stand.
GettingStarted
2
Secure
the TV to the Stand.
Use the optional hardware listed below (not supplied):
• M6 x 12-18mm anchor bolt (screwed into the TV's stand).
_.
_
• A screw or similar (attach it to the TV stand).
• Rope or chain (stronlz enough to support the weilzht of the TV). Make
sure that there is no excess slack in the rope or chain.
An alternative way to secure the TV is with an optional Sony Support
Belt Kit.
_.
_c
Anch°r _,_m_
F
3
few
Anchor the TV to the Wall.
Use the hardware listed below (not supplied).
• Two M4 x 12-18ram anchor bolts (screw into the top-most wallmount holes located on the rear of the TV).
• Rope or chain (attach to one M4 anchor bolt).
• Wall-anchor
(attach to the wall stud) strong enough to support the
weight of the TV (pass the rope through the wall-anchor, then attach
to the other M4 anchor bolt).
Wall-mount
Anchor
bolts
Rope or
ii
:6
::
17
GettingStarted
Bundfing the
Connecting
Cables
You can bundle tile connecting cables as illustrated below.
i ii_!ii!ii_i_!_!_i!_i!_!_i_!_i!i!i!_i!_!!!_!_i!!i_i_ii_i_ii_i_i
:_i_i
i_iai_i!!i
_i_i_!i_!i_!_ii_!_!_
¸_!!_i_ii_ii_ii
Adjusting the
Viewing Angle of the
TV
This TV can be adjusted
within tile angles
Adjust the angle up and down (tilt)
5o
18
shown below.
GettingStarted
Setting Up the Channel
List - Initial
Setup
After you finish connecting your TV, you need to run Initial Setup, which
automatically
sets up available channels. The Initial Setup screen appears
when you turn on your TV for the first time. If you do not want to set up the
channels at this time. you can do it later by selectin_ tile Auto Program
option in tile Channel settings (see page 29).
POWER
1
Press
(_) to turn on tile TV.
The Initial Setup
2
screen appears.
Press ,i./,!, to highlight
the desired
language.
3
The message "First please connect
cable or antenna. Allow 50+ minutes
for completion."
program
and "Start auto
now'?" appears,
make sure
you aheady connected Cable or
Antenna, then select OK to start Auto
Program. If you want to start Auto
Program later, select Cancel.
4
The scanning of channels will start. If
you want to stop and run Auto
Program later, press Cancel.
5
When Auto Program is complete,
press @ to continue.
6
If the Initial Setup programming
found cable channels, you will be able
to scan antenna channels as well.
Connect the antenna using an A-B RF
switch (not supplied) and change the
switch to antenna then start Auto
Program to search antenna channels.
If the Initial Setup programming found antenna channels, the Auto
Program process will finish. If you want to scan cable channels, you
can do it later using the Channel settings.
To run Auto Program again at a later time
CI
Use the Auto Program
feature as described
on page 29.
To display the Picture in your Preferred Aspect Ratio
El
Select the proper
Wide
Mode
as described
on pages 21 and 27.
19
_:
Remote Control
[]
DISPLAY
Press once to display
the current
channel
number,
channel
label, and program remaining
time. The on screen
(OSD) will turn off after a few seconds.
[]
SLEEP
Press repeatedly
(Off,
the time in minutes
15, 30, 45, 60, 90 or 120) that you want the TV to remain
on before
repeatedly
[] FAVORiYEg
until the TV displays
display
shutting off. To cancel
until Oft appears.
Timer,
Sleep
Press oi_ce io dispiay ihe siored favoriie
store up to 8 channels
list.
and/or
external
press SLEEP
ⅈinn&i
ii;i: _ou_an
inputs in your Favorites
How to Add to Favorites
While tuned to the channel
FAVORITES
Q
PICTURE
and highlight
Press repeatedly
you want to add to the list, press
"Add to Favorites",
to cycle through
Vivid, Standard, Custom. The
accessed in the Picture settings.
Picture
Settings"
MENU
items and settings.
See '_Overview
[]
CC
[]
O
[]
VOL +/-
of MENU"
CC Display,
on page 25.
Captions (CC).
To change
or
see page 34.
to enter
2.1, press @,
Press to adjust the volume.
the sound.
20
modes:
Use Wiih 029 an_iENT buiiol_sio seieci _iigiiaichanneisl For
example,
"_° The 5 button and CH +
have a tactile dot, Use
them as a reference when
operating the TV.
picture
picture modes can be also
For details, see "Using the
on page 25.
Press to turn on and off Closed
customize
the available
then press
O,
C)
and ENT.
Basic Operations
[]
POWER
Press to turn on and offthe
Zoom,
Normal,
Full, 16:9 and Zoom.
can be also accessed
Changing
TV.
in the Screen
the Wide
Screen
The Wide
settings.
Mode settings
See page 27.
Mode (see page 27 for details
4:3 Original
source
Standard definition source
16:9 Original
source
High definition
source
2
o
(n
Wide
Zoom
Wide Zoom
This mode is not available
Normal
Normal
This mode is not available
....Full
[]
INPUT
[]
i./4/*/*
Fuii ....
16:9
16:9
Zoom
Zoom
Press to display the list of
through the inputs.
@
Press i.II_1_,!,*, to move the on-screen
select/confirnl
an item.
[] TOOLS ......................
Press to dispiay the
[]
dU M P
Inputs. Press
To;is
current
input: Analog
pages
25, 26, und 34).
repeatedly
cursor. Press
Menu that is associated
TV• Digital
TV or external
Press toium p back and forth between
alternates between the current channel
to toggle
(_
to
with your
inputs
(see
two channels
The TV
and the last channel that
was selected.
(Continued)
21
Basic Operations
[]
0 - 9 ENT
Press
0 - 9 to select
seconds.
[]
CH +/-
[NT
Press t° scan through
channels,
22
Press
a channel;
the channel
to change
channels
ehanneis
changes
To scan quickiy
press and hold down either
+/-.
after two
immediately.
through
Basic Operations
TV Controls
\
g,"
iNPUT
2
PO\
o
:3
[]
MENU
Press to display MENU with TV/'unctions
25).
and settings (see "Overview of MENU" on page
[]
-{INPUT
Press to display the list of Inputs. Press repeatedly to toggle through the inputs.
[]
4,--,_
- VOLUME +
Press to adjust the volume. [u the MENU screen, these buttons serve as left/right buttons.
[]
€
4,
- CHANNEL +
Press to scan through channels. To scan quickly through channels, press and hold down either
-/+. In the MENU screen, these buttons serve as np/down buttons.
[]
POWER
Press to turn on and oft'the TV.
[]
TIMER LED
Lights up in orange when the timer is set. For details, see page 33.
[]
STANDBY LED
Lights up in red when your TV is in PC power saving mode. If the LED blinks in red
continuously, this may indicate the display unit needs servicing (see contacting Sony
infonnation of the back cover).
[]
POWER LED
Lights up in green when the TV is turned on.
(Continued)
23
Basic Operations
[]
[]
24
(IR) Infrared
Receives
]R signals
t_om the remote
control.
Receiver
Do not put anything
near the sensor,
as its function
Speaker
Outputs
audio signal.
may be affected.
Overview of MENU
MENU
provides
control
panel on the screen
one button
access
for controlling
rather than a variety
your TV. It enables
of remote
control
yon to perform
button
a variety of tasks intuitively
with a
presses.
Using the Picture Settings
2
Picture Mode
Customized picture
viewing
Vivid
Select t)r enhanced
Siandard
......
Custom
picture
Seieci for siandi[rd pici{ire
entertainment.
Allow's
Resets the current
Picture
Picture
Adjust
to increase
or decrease
picture
Brightness
Adjust
to brighten
or darken
the picture.
Color
Adjust
to increase
or decrease
color intensity.
Hue
A@_st to increase
or decrease
the green
White
Temp
adjustment
Mode
setting
to the default
values.
contrast.
tones.
Cool
Select to give the white colors a bluish tint.
Neutral
Select to give the white
colors a neutral
tint.
Warm
Select to give the white
colors a reddish
tint.
Adjust
Noise
Select to reduce the noise level. Select from On and Off.
to sharpen
for tlol_:le ......
settings.
Sharpness
Reduction
and sharpness.
seiiJngs[ Recol_;_ende_i
you to store your preferred
Reset
Color
contrast
or soften the picture.
25
Using the Menus
Using the Sound Settings
Sound Mode
Customized
sound listening
Standard
Standard
sound
Clear
Suitable
for spoken
Reset
Resets the current
Sound
Treble
Adjust
to increase
or decrease
higher-pitched
Bass
Adjust
to increase
or decrease
lower-pitched
Balance
Adjust
to emphasize
Simulated Stereo
On
Adds a surround-like
Off
Select for normal
stereo
Stereo
Select for stereo
reception
Auto SAP
Select to automatically
MTS
Enjoy
and
stereo,
mono
bilingual
Voice
programs
optimized
dialog.
Mode setting
to the default values.
left or right speaker
signal
is received.
for home use.
sounds.
sounds.
bahmce.
effect to mono programs.
or mono
reception.
when viewing
a program
broadcast
in stereo.
switch the TV to second audio programs when a
[f no SAP
signal
is present,
the TV remains
in
Stereo mode.
Mono
Alternate Audio
Digital
Speaker
26
channels
Select for mono reception.
broadcasts.
Select among
only
program
streams.
the available
you are tuned
options
Use to reduce
to switch among
to may be broadcast
noise during
the alternate
in a different
language
audio
w'eak stereo
streams.
The
in the alternate
On
Select to turn on the TV speakers.
Off
Select to turn off the TV speakers and listen to the TV's
through your external audio receiver and speakers.
sound
audio
only
Using the Menus
[]
Using the Screen Settings
'2
Wide
Mode
Wide
Zoom
Select to fill screen
with minimum
distortion.
Normal
Select to display 4:3 picture in original
Full
Select to enlarge
the picture
,_
size when the original sonrce is 4:3.
horizontally
to fill the screen
when the
original source is 4:3 (Standard definition source). When the original
source is 16:9 (High definition source), select this mode to enlarge the
picture
Auto
Wide
vertically
to fill the display
16:9
Select to display
16:9 picture
in original
Zoom
Select to enlarge
the original
picture
On
Select to have the screen
is best for the current
to you, select
Off
Select
Screen
Wide
the default
distorting
change
If freqnent
to the screen
screen
Auto Wide
option.
Choose
changes
ratio.
mode that
are distnrbing
a screen
mode from the
the 4:3 picture
to fill the display
area, keeping
the
image as nmch as possible.
Seieci io display ihe 413 piciure in iis ofiginai
Full
Select to enlarge the 4:3 picture horizontally
16:9
Select to enlarge
Zoom
Select to enlarge the picture horizontally
aspect ratio that fills the wide screen.
Off
Select to continue
channel
the aspect
option.
Select to enlarge
original
Mode to use for Normai
4:3 sources
Zoom
Mode
automatically
program.
size.
without
Off.
Select to turn offthe
Wide
4:3 Default
area.
the picture
sizel
only, to fill the display area.
to 16:9 aspect ratio.
using the current
Wide
and vertically
Mode
setting
to an eqnal
when the
or input is changed.
27
Using the Menus
When a PC is connected to tile TV,
tile PC Settings screen appears
instead of the Screen settings.
Using the PC
Settings
Wide
Mode
Normal
Select to display
in the original
Full1
Select to enlarge
the picture
to fill the display
image
size.
area, keeping
the picture
to fill the display
area.
its original
aspect ratio.
Full2
Auto
Adjustment
Select to enlarge
Select to automatically
adjust the display position and phase of the picture when the TV
receives an input signal from the connected
PC. Note that Auto Adjustment may not work
well with certain
input signals.
In such cases, manually
Phase
Adjust
after
Pitch
Adjust
uneven
Allows
you to move the position
Horizontal
Center
Press 14.
Vertical
Center
......................................
Power
Management
Allows
Pitch to fine tune overall
sharpness
and press
@
of the picture
to choose
left and right.
a correction.
...........
you to move the position of the picture up and down.
@
On
Select to automatically
to choos e a correctio
no signN
28
below.
on screen.
press "11./!1"
a!}_7!press
Off
adjust the options
sharpness.
n.
............................
switch to the power saving
input for 30 seconds.
Select to turn off Power
Management.
mode when there is
Using the Menus
Using the Channel
Settings
Favorites
Select favorite
Cable
On
off
Digital
Channels
Auto Program
Show/Hide Channels
channels
and external
inputs(see
Select if you are receiving
page 20).
...............................................................
Select if you are using an antenna.
Select to add digital
Automatically
,_
cable channels
via Cable TV provider.
.................................................................................................
channels.
sets up the channel
list on the TV for all receivable
channels.
Program.
1
Select Auto
2
Select OK to start Auto
Program.
Allows you to show or hide channels that appear when you use the CH +/- buttons.
]
Press 11411,
to scroll through the channels until you find the channel you want to show or
2
hide. Then press @ to select it.
Press t1.1!1,
to determine if the channel will be shown or hidden.
To show or hide more channels, repeat steps 1-2.
Label Channels
Allows
you to assign
labels (such as station
1
Press tl4,!, to scroll through the channel numbers.
number that you want to assign a label.
2
Press
tl4,1, to scroll through
next character.
Repeat
the label characters
to add lip to 7 characters
and press @
to set.
To assign labels to more channels,
Diagnostics
call letters)
to channel
Then
(A-Z,
numbers.
press @
to select
0-9, etc.). Press
the channel
* to move to the
to the label. Press ,_, to highlight
OK
repeat steps 1-2.
Display diagnostics
inforlnation
about the TV. This can be useful in providing
an authorized technician or repair person.
inforlnation
to
29
Using the Menus
Using the Parental Lock Settings
The Parental Lock settings allows you to set up the TV to block
programs
remote
create
according
control
to their
to enter
a password,
Rating
content
a four-digit
confirm
and rating
password.
the password
Off
levels.
The
Use
0-9 on the
first time
by entering
you
it again.
Turn Parental Lock off. No programs are
blocked
Child
from viewing.
Maximum
ratings permitted
U.S.: TV-Y. TV-G,
Canada:
Youth
are:
G
C, G, TV-Y
Maximum
ratings permitted
U.S.: TV-PG, PG
Canada:
Young Adult
are:
C8+, PC, 8 ans+, TV-PG
Maximum
ratings permitted
are:
U.S.: TV-14, PG-13
Canada:
Custom
14+, 13 ans+, TV-14
Select to set ratings manually.
U.S.: See page 31 for details.
Canada: See page 32 t\_r details.
Digital
Rating
Off
Turn Parental
are blocked
Custom
Clear
Lock off. No programs
Select to block
All
programs
Select to clear the entire
Unrated
(Available only
when Country is
set to U.S.A.)
Allow
Allows
programs
Block
Blocks
all programs
Channel
Allows
Block
you to block channels
prior to blocking
channels.
password.
To View a Blocked
Press
3O
that contain
dov,,'nloadable
ratings
from viewing.
regardless
The blocked
based
on dov,,'nloadable
downloadable
and movies
ratings.
rating system.
that are broadcast
without
and movies
that are broadcast
of program
ratings.
channel
withont
The password
can only be viewed
channel
needs
by entering
Channel
ENT when tuned to the blocked
a rating.
then enter the password.
a rating.
to be set up
the correct
Using the Menus
External
Block
Input
Allows you to block external inputs regardless of program ratings. Tile password needs to be set
up prior to blocking inputs. Tile blocked input can only be viewed by entering the correct
password.
To View a Blocked
Change Password
Select
External
Input
Press ENT when
tuned to tile blocked
Select
your passw'ord.
Country
to change
input then enter the password.
U.S.A.
Select to use U.S.A.
Canada
Select to use Canadian
ratings (see below).
ratings
(see page 32).
US Models: Selecting Custom Parental Lock Rating Options
To select custom rating optiens for tile U.S., select U.S.A. in tile Select Country setting (see above).
Movie
Rating
G
All children
PG
Parental
guidance
suggested.
PG-13
Parental
guidance
for children
R
Restricted
17.
NC-17
TV Rating
Age-Based
Block programs
their rating,
both
and X
by
content
TVIY
or
?Viyt
and general
viewing,
parental
No one 17 or under
allowed.
13.
is suggested
for children
under
...... All children,.
Direcie_i io chii_iren age 7 and oiderl
guidance
..........
....................................................................................................................................
TV-PG
Parental
TV-14
Parents
strongly
cautioned.
Mature
audience
only.
Content-Based
under
guidance
Ratings
TVLG ............................................
General audience.
TV-MA
audience.
suggested.
Ratings
FV
Fantasy
D
Suggestive
violence.
L
S
Strong language.
Sexual situations.
V
Violence.
dialogue.
31
Using the Menus
Canadian Models: Selecting Custom Parental
To select custom rating options for Canada, select Canada
English
Rating
French Rating
U.S.A.
Rating
Lock Rating Options
in tile Select Country setting (see page 31 ).
C
All children.
C8+
G
PG
Children 8 years and older.
General programming.
Parental guidance.
14+
Viewers
18+
G
8 ans+
Adult programming.
General progrmnnfing.
Not recommended t\)r young children.
13 ans+
Not recommended
for ages under
13.
16 arts+
Not recommended
for ages under
16.
18 arts+
Programming
See "US Models"
14 and older.
restricted
to adults.
on page 31 for details.
Viewing Blocked Programs
You can view blocked programs by entering the password. Press ENT when tuned to a blocked program,
then enter the password. This temporarily turns the parental control feature off. To reactivate the Parental
Lock settings, turn offthe TV. When the TV is turned on again, your Parental Lock settings are reactivated.
32
Using the Menus
[] Using the Setup Settings
Closed
Captions
(CC)
Allows
closed
you to select
l¥om several
closed
Banner
Video
Closed
Closed Captions (CC) is turned off.
Captions
Allows
Set to On or
Inputs
(for programs
Off
Program
Allows
Offl When On,
you to identify
example,
label
1
displays
4,/11"to highlight
2
Press
that are broadcast
with
Y{_mcan select
on.
(CC)"
Closed
the video
name and the remaiiliiig
for a few seconds
you connected
options.
See
time iif the
when the channel
is changed
to the TV. such as a VCR, DVD,
to the COMPONENT
or the
etc. For
IN jack, you can select the
to change
inputs,
the video
on screen.
input (Video
@
1-2, Component,
to select
one of the displayed
from the following
Captions (CC)
on page 34.
input. Then when yon press INPUT
a label. Then press
4,/'!, to highlight
Captions
connected
to that input appears
want to assign
is turned
the program
Displays
A/V equipment
DVD for the Component
Press
Closed
if you have a DVD player
label you assigned
(CC)
you to set basic and advanced
broadcaster
offers this service).
DISPLAY button is pressed.
Label
modes
On
"Programming
Info
caption
captioning).
HDMI, PC) to which you
the input.
labels. Then press
@
to select
the label.
labels for each input:
Componeni
21DVD;
eR; giu:r;_;i C;_biegoxl gaieiiiie; DVRI Ga;_el C_'l_corderlSkip
HDMI
-, DVD, VCR, Blu-ray,
PC
-, Skip
Cable Box, Satellite,
DVR, Game,
Camcorder,
Skip
Language
Select to display
Sieep Timer
Sei ihe ii;_e 1;_i_in;;ies i6ff; lg minuies 30 minuies 45 minuies 60 minuies 90 minuies
or 120 minutes) that you want the TV to remain on before shutting off automatically.
all on-screen
settings
in your language
of choice:
English,
Espa_ol,
Frangais.
(Continued)
33
Using the Menus
_,
11
Power Saving
Select to reduce the power consumption by adjusting the backlight brightness. This also
enhances the black level. Select from Off, Low and High.
Product
Select to display the equipment information of your TV.
Seieci Auio io au{oi_aiicaiiy deieci fiii_i col;ie;_t anti appiy a reverse 3_2 puii_io_;n process}.....
Moving pictures will appear cleaner and more natural looking. Select Off to disable the
detection.
Information
CineMoiion
Programming
Closed Captions (CC)
If you selected the Program optien under Closed Captions
Basic
(CC), you can change the following settings:
Allows you to select basic analog (EIA-608) closed caption options.
CC1, CC2,
Displays a printed version of the dialogue or sound effects of a
CC3, CC4
program. (Should be set to CC1 for most programs.)
Text1, Text2,
Text3, Text4
Displays network/station information presented using either half or
the whole screen (if available).
Digital
.................
CO
Aiiows yo{i io sei digii;{i
EIA-708).
Advanced
Allows you to select advanced digital (EIA-708) closed caption options. Select t¥om the
available options.
Advanced
34
Settings
i_iigiiai EiA2608i or Advanced
{_iigiiai
Allows you to make additional settings for digital (EIA-708) closed caption options. Select
from the following settings.
Character Style
As Broadcast, Style 1-7
Character Color
As Broadcast, Color 1-8
Character Size
As Broadcast, Small, Standard, Large
Character Opacity
As Broadcast, Solid, Translucent, Transparent, Flashing
Edge Color
As Broadcast, Color 1-8
Edge Type
As Broadcast, None, Raised, Depressed, Uniform,
Left Shadow, Right Shadow
Background Color
As Broadcast, Color 1-8
Background
Opacity
Window Color
As Broadcast, Solid, Translucent, Transparent, Flashing
Window Opacity
As Broadcast, Solid, Translucent, Transparent, Flashing
As Broadcast, Color 1-8
Troubleshooting
If you have additional questions, service needs, or required technical assistance related to the use of your
Sony TV. please visit our website or call one of the following numbers:
<http://www.sony.com/TVsupport>
1-800-222-SONY(7669)
for US Residents
1-877-899-SONY(7669)
for Canadian
Residents
No picture.
Cannot receive any channels.
121
Make sure the power cord is connected
Turn on the power of the TV.
Check antenna/cable connections.
securely.
TV is locked to one channel.
17
Perform Auto Program to add receivable
TV's memory (page 29).
Cannot receive or select channels.
121
Perform Auto Program to add receivable channels that are not presently in the
TV's memory (page 29).
To receive or select cable channels, make sure that Cable in tire Channel
0
channels
that are not presently
settings is set to On (page 29). To receive or select UHF channels
antenna, make sure Cable is set to Off.
in the PC
Settings.(page
in the
over an
The TV turns off automatically.
FI
Check Power Management
No picture from some vide()
sources.
121
17
Check the connection between the optional vide() equipment and the TV.
Press INPUT on the remote control (page 21 ).
Press MENU on the remote control. Select your desired input from the Inputs
list.
17
Check antenna/cahle connections.
Check the antenna location and direction.
28)
Poor picture.
Double images or ghosts.
Only snow and noise appear on the 17
screen.
121
Check if the antenna is broken or bent.
Check it' tire antenna has reached the end of its serviceable
normal use, I-2 years at the seaside.)
Dotted lines or stripes.
17
Keep the TV away from noise sources sucb as cars, motorcycles, or hair-dryers.
If using 300 ohm twin lead, move the excess lead away from the TV or try using
75 ohm coaxial cable instead.
No color/Dark picture/Color is not
correct/The picture is too bright.
121
17
Press PICTURE to select the desired picture mode (page 20).
Adjust the Picture Mode options in tire Picture settings (page 25).
If you set tire Power Saving mode to LOWor High, it will enhance tire black
level.
Noisy picture.
121
Make sure that the arrteuna is connected
lili:. (3-5 years m
using the 75-ohm coaxial cable (not
supplied).
Keep the arrtenua cable away from other connecting cords.
To avoid TV irrterference, make sure to use an undamaged arrteuna cable.
"2-
Other Information
No sound/Noisy
sound
Good picture, no sound.
CI
Audio noise.
Wide Mode changes
"Black
automatically.
box" on screen.
Black bands appear at the top and
bottom of the screen.
FI
Certain
FI
digital
programs
sources
on DVD or other
display
detail, especially
or dark scenes.
during
a loss of
fast-motion
Remote control does not operate.
FI
Some digital
FI
cable channels
are not
being displayed.
rq
Lost password.
How to reset the TV to factory
settings.
36
Check the volume control.
Press MUTING or VOL + so that "Muting" disappears fl'om the screen
(page 20).
Disconnect your headphones.
Set Speaker to On in the Sound settings (page 26). If it is set to Off, sound is
not output from the TV's speakers regardless of the TV's volume control.
Make sure that the antenna is connected tlsiug the 75-olnn coaxial cable (not
supplied).
Keep the antennacable away from other connecting cords.
To avoid TV interference, make sure to use an undamaged autelma cable.
The current Wide Mode setting is automatically replaced with the 4:3 Default
setting when yon change the channel or vide<)input, if 4:3 Delault in the Screen
settings is set to other than Off. If you want to lock in the Wide Mode selected
with the WIDE button, set 4:3 Default to Off in the Screen settings (page 27).
Check the Auto Wide option in the Screen settings (page 27).
You have selected a text option in the Setup setting and no text is available. (See
pages 33 and 34 to reset Setup selections.) To mrn off this feature, set the
Closed Captions (CC) nption to Off. If you were trying to select closed
captioniug, select CCl instead of Text1-4.
Some wide screen programs are fihned in aspect ratios that are greater than 16:9
(this is especially common with theatrical releases). Your TV will show these
programs with black bands at the top and bottom of the screen. For mnre details,
check the documentation that came with your DVD (or contact your program
provider).
The compression used by certain digital broadcasts and DVDs may cause your
TV's screen to display less detail than usual, or cause artifacts (small blocks or
dots, pixelatious) to appear on your screen. This is due to your TV's large screen
and ability to show very fine detail, and is normal lot certain digitally recorded
programs.
Check the polarity of the batteries or replace the batteries.
Point the remote control at the remote control sensor of the TV.
Fluorescent lamps can interlere with your remote control operation; try turning
off the fluorescent lamps.
Keep the remote control sensor area clear from obstacles.
Certain cable companies have limitations on the broadcast of digital cable
channels. Check with your cable company l\_r mnre iuh)rmatiou.
The digital cable channel may be set to Hidden in the Show/Hide Channels
setting (see page 29).
Select the Parental Lock settings on the settings screen, then enter flaefollowing
master password: 4357. The master password clears your previous password and
allows you to enter a new password (page 31).
Turn on the TV. While holding down the t1"button on the remote control, press
and hold down the MENU button on the TV until "reset" appears nn the bottom
left corner of the screen. (The TV will turn itself off, then back on again.)
Release the t1"button.
WARNING: The Reset will clear all of your customized settings including
Parental Look setting.
Other Information
Preparation
for Wall Mounting
This TV can be installed on a wall by using a wall-mount bracket (sold
separately). Before mounting the TV on a wall, the handle and stand must be
removed fl;om tile TV.
Sony Wall-Mount
Bracket Model
SU-WLIO0
Follow tile simple steps below to remove tile handle and stand:
1 Disconnect all tile cables fiom tile TV.
2
Cover a level and stable surface with a thick and soft cloth.
3
4
Gently lay the TV face down onto the cloth.
5
Remove the screws and detach the stand from the TV [see illustration
B]. Be sure to hold the stand firmly while removing the last screw.
6
Do not remove any other screws from the TV.
Remove the screws and detach the handle [see illustration AI.
For bracket installation, refer to the instruction guide provided by the WallMount Bracket model for your TV. Sufficient expertise is required in
installing this TV. especially to determine the strength of the wall for
withstanding the TV's weight. For product protection and safety reasons,
Sony strongly recommends that you use the Wall-Mount Bracket model
designed for your TV and the wall-mounting of your TV should be
performed by Sony dealers or licensed contractors.
Handle
[]
Stand
[]
Soft cloth
37
{b
Other Information
PC Input Signal Reference
Chart
Resolution
Signals
VGA
[
Horizontal(Pixel)
Vcr
tical(Line)
1 Horizontal
(kHz)
h'equency
_lVertical
| frequency
(Hz)
l
Standard
640
480
31.5
6(1
VGA
640
480
37.5
75
VESA
720
4(X)
31.5
70
SVGA
800
6(1(I
37.9
6(1
VESA
XGA
800
1024
60_1
768
46.9
48.4
75
60
VESA
VESA Guidelines
1024
768
56.5
70
1024
768
60.0
75
VESA
1280
768
47.4
6(I
VESA
1280
768
47.8
60
VESA
136t)
768
47.7
6(I
VESA
WXGA
38
VGA-T
Guidelines
VESA
Other Information
Specifications
Dilnensions:
Television
(in ram)
with
system:
NTSC
American
ATSC
(8VSB
QAM
on
terrestrial)
ATSC
cable
Channel coverage:
compliant
8VSB
LCD
wilhoul
Display
1,440 dots
485 x 85 x 401
19 1/8 x 3 "_/8 x 15 7/8
functionality)
Mass:
Digital
75-ohm
external
Crystal
Display)
Pand
2-69
1-135
with
stand
(horizontal
IN
S Vff)EO
(4-pin
7.8
17 l/s
stand
and handle:
(in kg)
(in lb.)
6.9
15 l/s
× vertical):
Supplied
1/2:
accessories:
Remote
mini
[)IN)
(Vff)EO
Y: 1.0 Vp-p,
C: 0.286
VIDEO:
AUDIO:
2 only):
75 olnns
Vp-p
Size
unbalanced,
(Burst
signal),
sync negative
75 ohtlls
1 Vp-p, 75 ohms unbalanced,
,_ync negative
500 mVrms
(100% modulation)
hnpedance:
COMPONENT
47 kilohms
(Component
unbalanced,
negative
PB: 0.7 Vp-p,
75 ohnls
PR: 0.7 Vp-p,
75 ohms
Signal lonnat:
480i. 480p. 720p.
500 nlVrms
(100% modulation)
AUDIO:
Operating
Quick
Impedance:
(1)
(2)
(1)
Instructkms
Setup
Guide
(1)
o
( 1)
Card (1)
Registration
Opthmal
75 ohms
RM-YD025
AA batteries
AC power cord
Cable band (1)
Online
Vide()):
sync
control
Warranty
IN:
Y: 1.0 Vp-p,
HDMI
HDMI:
and handle:
(in kg)
(in lb.)
x 900 lines
VIDEO
YPBPR
and lland]e:
(in inches)
2-69
1- 135
terminal
ff)r VHF/UHF
resohttion
19 118 x 6 1/2 x 15 "_/4
sland
(in him)
System:
(Liquid
485 x 165 x 400
(in inclles)
without
Panel
and handle:
ANSI/SCTE
(17 201R)
(Does not include CabIeCARD
Analog
Terrestrial
Cable
Antenna:
TV standard
stand
Card (U,S.A,
only)
(1)
accessories:
Headphones
plug
Connecting
cables
adapter
Support
belt kit
Wall-Mount
Bracket:
SU-WLIO0
1080i
47 kilohms
IN:
Vide(): 480i, 480p, 720p, 1080i, 1080p
Audio: Two channel linear PCM 32, 44.1 and
48 kHz, 16 bits
500 nlVrms (100% modulation)
hnpedance: 47 kilohn/s
AUDIO:
Design and specifications are subject to change without notice.
AUDIO
OUT:
500 nlVrlns (100% modulation)
PC IN:
D-sub 15-pin, analog RGB, 0.7 Vp-p, 75 ohms, positive
See the PC Input Signal Relcrcncc Chart on page 38
PC AUDIO
IN:
Stereo mini jack, 500 mVrms, 47 kilohm
Headphones:
Stere() mini jack
hnpedance: 16 ohms
Power Requirement:
120 V-240 V AC, 50/60 Hz
Screen
size (in inches):
19
Speaker/Full
(in nnn)
(in inches)
Speaker
range (2):
40 x 100
1 5/8 x 4
output:
5w+5w
Power consumption:
in u_
50 W
in standby
less than 1.0 W
39
0 - 9 buttons 22
4:3 Default 27
A
ACIN 15
Advanced 34
Advanced Settings 34
Allemale Audio 26
AUDIO OUT jack. described
Auto Ac[justment 28
Auto Program 19, 29
Auto Wide 27
T
JUMP button 21
15
t.
v
Vertical Center 28
VIDEO/AUDIO (L/R) jacks, described
14, 15
Viewin_ Blocked Pr()_mtms 32
VOL+/Z bullou 20, _3
MENU button 20, 23
Movie Rating 31
MTS 26
MUTING button 20
(?able 29
N
15
Noise Reduction
CC button 20
CH+M button 22, 23
Change Password 31
Channel Block 30
Cham_els
Creating labels 33
DIGITAL AUDIO OUT (OPTICAL)
Digital CC 34
Digital Channels 29
Digital Rating 30
DISPLAY button 20
E
English Rating 32
ENT button 22
External Input Block 31
F
F_worites29
FAVORITES button 20
French Rating 32
H
HDMI IN jack, described 15
Headphones jack. described 14
Horizontal Center 28
Hue 25
WIDE button 21
Wide Mode 27,
Parental Lock 30
PCIN 14
Phase 28
Picture 25
PICT1JRE button 20
Picture Mode 25
Pitch 28
POWER button 21, 23
POWER LED 23
Power Management 28
Power Saving 34
Product hfformation 34
Settingup 19
D
Diagnostics29
W
25
P
eMo i( 34
Closed caption modes 33, 34
Closed Caplions (CC) 33
Color 25
Color
Temp 25
COMPONENT IN
/ 1080i/720p/480p/480i)
15
R
15
Tilt 18
TIMER LED 23
TOOLS button 2 ]
Treble 26
Troubleshooting 35, 36
TV Rating 31
U.S.A. Rating 32
Unrated 30
M
C
23
U
Label Channels 29
Label Video Inputs 33
Language 33
Balance 26
Basic 34
Bass 26
Brightness 25
4O
STANDBY LED
lnfo Banner 33
lnDared Receiver (IR) 24
INPUT button 21,23
Installing the TV on a wall 37
d
B
CABLE/ANTENNA
I
Rain- 30
ResetS'25, 26, 36
RETURN button 20
$
S VIDEO .jack, described
Select Country 31
Settings
Channel 29
Parental Lock 30
PC Settings 28
Picture 25
Screen 27
Setup 33
Sound 26
Sharpness 25
Show/Hide Channels 29
Simulated Stereo 26
SLEEP button 20
Sleep Timer 33
Sound Mode 26
Speaker 26
14
28
Please contact Sony directly if you:
• Have questions on the use of your television after reading your Operating Instruction manual
and Quick Setup Guide
• Experience difficulty operating your television
Contact Sony Customer Support at:
htt p://www.sony.com/tvsu
pport
or to speak with a support representative:
United States
1-800-222-SONY
Canada
(7669)
Sony will work to resolve your questions
1-877-899-SONY
(7669)
more quickly than your retailer or place of purchase.
Please Do Not Return the Product to the Store
http://www.sony.net/
Printed in China