1
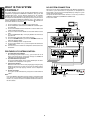
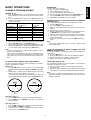
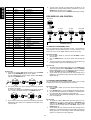
[SELECT WHETHER TO RECORD or NOT]: This is available
only when system control switch is set to SYSTEM position
8-1. The display indicates “RECORDING?” in the upper segment
and indicates “YES:FUNC” in the middle segment and indicates
“NO:ENTER” in the lower segment. If you want to record, turn
the JOG control M or press the cursor @ # button n for the
selected recording medium.
8-2. For example, if you want to record on CD-R, select “CDR” and
press the ENTER button M/ n to set recording to CD-R.
8-3. If there is no disc or a non-recordable disc in the CD-R player,
the display will indicate “NG DISC”.
If this is indicated, please check the recorder or the disc.
MULTI JOG
MULTI JOG
ON
(PUSH ENTER)
(PUSH ENTER)
9. [SETTING THE VOLUME LEVEL]
9-1. Next, set the volume level. The display indicates the volume
level.
9-2. Turn the VOLUME control N or press the VOLUME button ⁄3 to
set the sound level. The volume is adjusted to setting level
when timer is activated.
9-3. The volume will fade up to the setting level when timer is
activated, and fade out to the minimum level when timer is off.
9-4. Next set ONCE or DAILY.
10. [ONCE or DAILY]
10-1. The display indicates “ONCE”, if you select it, the timer will
activate only once.
10-2. Turn the JOG control M or press the cursor @ # button n to
select “DAILY”, if you want to activate the timer once a day.
10-3. Press the ENTER button M/ n to set the time of execution after
selecting DAILY or ONCE. The display indicates the details of
the timer programme one by one. Press the power button to set
this unit in the timer standby mode.
The standby indicator lights up in AMBER to indicate the timer
programme is set to ON.
MULTI JOG
MULTI JOG
ON
OFF
OFF
2) If the ON time of one program coincides with the OFF time of
the other program:
(Example)
PROG-2
In the case shown on the left, PROG-1
PROG-2 is also executed.
However, there is a possibility
that the OFF time of PROG-1
may be earlier than set. (For ON
OFF/ON
OFF
example, if you set an OFF
time of 13:00, the program may actually finish at 12:55.) This is
because the system takes some time to prepare the next
function.
3) There is a priority between recording and playing programs
when two or three timer programs start at the same time.
The priority is recording, so that the program of normal playing
cannot be executed.
There is a priority between PROG-1, -2 and PROG-3. The order
of priority is PROG-1 → PROG-2 → PROG-3.
SLEEP TIMER SETTING (REMOTE CONTROL ONLY)
The sleep timer function allows the unit to be in standby mode
automatically after a specified period of time.
1. While the power is ON, press the SLEEP button ⁄1 in the AMP
mode.
2. The display shows “SLEEP OF (OFF)” for 5 seconds
3. Press the SLEEP button ⁄1 within 5 seconds. Each press
changes the sleep timer period in the order 10 → 20 → 30 → 40
→ 50 → 60 → 70 → 80 → 90 → OF (OFF).
4. When the desired period is displayed, release the SLEEP button
⁄1. After that, setting of the sleep timer is completed and the count
starts.
5. Press the SLEEP button ⁄1 during the sleep timer count to display
the remaining period in standby mode. To change the setting after
the sleep timer has started the count, display the remaining time,
press the SLEEP button ⁄1 while the remaining period is
displayed, and repeat steps 3 and 4 above.
6. To cancel the sleep timer, press SLEEP button ⁄1 until “SLEEP
OF (OFF)” is displayed.
(PUSH ENTER)
(PUSH ENTER)
11. [CONFIRM THE PROGRAMME]
11-1. Press the TIMER button K/⁄0. The display indicates “PROG-1”.
Turn the JOG control M or press the cursor @ # button n to
select the desired program number and press the TIMER button
K/⁄0 again. If you want to erase this program memory, press the
ENTER button M/ n at this time.
11-2. The display indicates the details of the timer programme one by
one.
11-3. You can change the setting of selected program if necessary.
12. [NOT EXECUTING THE TIMER PROGRAMME]
The timer programs that have been set can be cancelled
temporarily when they are not required.
12-1. When the timer indicator (the standby indicator lights up in
AMBER) is displayed in standby mode, press the TIMER button
K/⁄0 . The colour of the standby indicator is changed from
AMBER to RED, and the timer program will not be executed.
12-2. The timer program can be reactivated by pressing the TIMER
button K/⁄0 again to display the timer indicator.
Note:
If all programs have been set (PROG-1, -2 and -3), it is not possible
to cancel only one of them temporarily.
15
ENGLISH
IMPORTANT:
A: Be sure to set the present time before setting the timer.
B: If the times set for two or three timer programs overlap, the timer
will operate as follows:
1) If the ON time of one program comes after the ON time of the
other program:
PROG-1
(Example)
In the case shown on the left,
PROG-2
PROG-2 is not executed.
8.