1
5. Delivering Stored Scan Data
by the Network Delivery Scanner
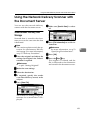
Stored scan data can be sent to a specified destination using the network delivery scanner function. This chapter explains the various display screens, delivery
procedures, and how to check of the delivery result when this function is used.
Note
❒ A delivery server in which ScanRouter V2 Lite/Professional is installed is
necessary to use the network delivery server function. Information about delivery destinations and senders must be registered first into the delivery server. Also, program a connected device in [Set I/O Device] of ScanRouter V2
Administration Utility. For more information, see ScanRouter V2 Administration Utility Help.
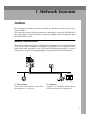
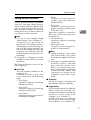
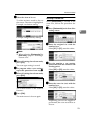
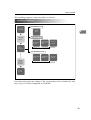
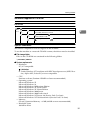
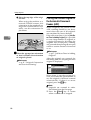
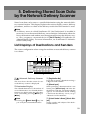
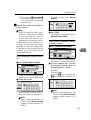
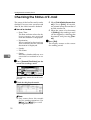
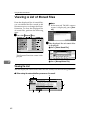
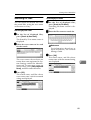
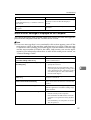
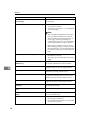
List Displays of Destinations and Senders
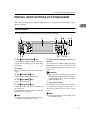
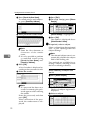
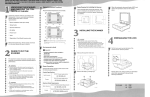
The screen configuration when using the machine as network delivery scanner
is as shown:
1
2
3
4
5
6
7
1. [ ] Network Delivery Scanner
Icon
This icon shows that the screen for network delivery scanner is displayed.
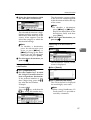
2. Destination Display
The selected destination is shown here. If
several destinations are selected, the destinations are displayed in the order they
were selected by pressing [U
U Prev.] or
[T
TNext].
Note
❒ Pressing the {Check Modes}
} key lets
you verify the selected destinations.
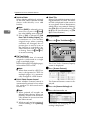
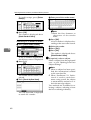
3. [Registration No.]
Press this to specify a destination using a
5-digit short ID number.
4. [Manual Input]
When specifying a destination that is not
listed, press [Manual Input] and enter the
destination with the soft keyboard that
appears. For information about sending
e-mail from the delivery server, see p.3
“Manuals for This Machine”
5. [Attach Sender’s Name] [Attach Subject]
Set the sender and subject of the delivered document.
53