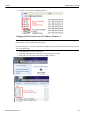
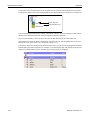
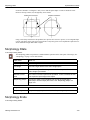
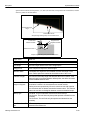
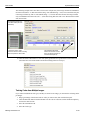
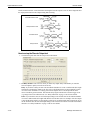
1
Impact Reference Guide Publication # 843-0093 (Rev 11.1.1) Disclaimer Datalogic Automation Inc. makes no representations or warranties for merchantability or fitness for any particular purpose, regarding Datalogic’s software or hardware. Datalogic Automation Inc. shall not be liable for errors contained herein or for incidental or consequential damages in connection with the furnishing, performance, or use of this publication or its contents. Datalogic Automation Inc. reserves the right to revise this publication from time to time and to make changes in the content hereof without obligation to notify any person of such revision or changes. Under the copyright laws, neither this publication nor the software may be copied, photocopied, reproduced, or reduced to any electronic medium or machine-readable form, in whole or in part, without the prior written consent of Datalogic Automation Inc. Telephone: Facsimile: Web site: E-Mail: 952-996-9500 952-996-9501 http://www.datalogic.com [email protected] Impact, Vision Program Manager, VPM, Control Panel Manager, CPM, Digital Serial Link, Pinpoint Pattern Find, and DSL are trademarks of Datalogic Automation Inc. Microsoft Windows is a trademark of Microsoft Corporation. Java is a trademark of Sun Microsystems, Inc. Allen-Bradley and Rockwell Automation are trademarks of Rockwell Automation. Datalogic and the Datalogic logo are registered trademarks of Datalogic S.p.A. in many countries, including the U.S.A. and the E.U. Copyright © 2002-2013 Datalogic Automation Inc. All Rights Reserved Technical Support If you have technical questions about the operation of any Datalogic product, contact your distributor or Datalogic. Please have the following information available before you call: • The model and serial number of the device, located on the unit. The version number of the Impact software you are running, found in the title bar of the software. • The type and version number of the operating system software you are running on the client computer. T A B L E O F C O N T E N T S Introduction Manual Contents ..................................................................... Intro-1 Chapter 1: Installation and Setup Help .............................................................................................. 1-1 System Requirements for the A, T, and C-Series ........................ 1-1 System Requirements for the M-Series........................................ 1-2 Installation .................................................................................... 1-2 Quick Setup .................................................................................. 1-2 Client to device cable connection .......................................... 1-3 IP Address Configuration ...................................................... 1-3 Configuring the Impact Device or Camera ................................... 1-3 Configuring the Client ................................................................... 1-5 Connect to an Impact device, camera, or Emulator ..................... 1-5 Camera Setup .............................................................................. 1-7 Camera Calibration....................................................................... 1-8 Settings tab................................................................................... 1-8 Chapter 2: Settings Tab Introduction ................................................................................... 2-1 Help .............................................................................................. 2-1 Settings Tab ................................................................................. 2-1 General.................................................................................. 2-1 Camera................................................................................ 2-16 File Camera ......................................................................... 2-34 System Log ......................................................................... 2-35 File Manager ....................................................................... 2-36 Modbus TCP/IP Server ....................................................... 2-39 AB PCCC Server ................................................................. 2-40 OPC Data Access ............................................................... 2-42 Chapter 3: Vision Program Manager Introduction ................................................................................... 3-1 Help .............................................................................................. 3-1 Start VPM ..................................................................................... 3-1 VPM - An Overview ...................................................................... 3-2 VPM User Interface ...................................................................... 3-3 Icons ...................................................................................... 3-3 Select Camera....................................................................... 3-5 Summary and Add Device..................................................... 3-5 Main Toolbar ......................................................................... 3-6 View Tabs............................................................................ 3-11 Design Tab .......................................................................... 3-11 Display Tab ......................................................................... 3-25 VPM Linking ............................................................................... 3-28 Links Between VPM Tools .................................................. 3-28 Creating a Vision Program ......................................................... 3-30 Create a Task ............................................................................. 3-33 VPM Task Configuration............................................................. 3-34 VPM Tools .................................................................................. 3-38 Toolbox and Drawers ................................................................. 3-40 Recently Used Drawer................................................................ 3-41 Image Filtering Drawer ............................................................... 3-41 Average Filter ...................................................................... 3-41 Binary Image Filter .............................................................. 3-42 Color Pixel Fill ..................................................................... 3-43 Edge Enhancement ............................................................. 3-43 TOC-1 Datalogic Automation Inc. Table of Contents Impact Reference Guide Gaussian Filter .................................................................... 3-44 Image Math.......................................................................... 3-45 Light Leveling ...................................................................... 3-47 Linear Morphology Open ..................................................... 3-49 Linear Morphology Close..................................................... 3-50 Median Filter ........................................................................ 3-50 Morphology Open ................................................................ 3-51 Morphology Close................................................................ 3-51 Morphology Dilate................................................................ 3-54 Morphology Erode ............................................................... 3-54 New Image .......................................................................... 3-55 Pixel Fill ............................................................................... 3-55 Image Geometry Drawer ............................................................ 3-56 Color Image Sampling ......................................................... 3-56 Deslant Image ..................................................................... 3-57 Image Sampling................................................................... 3-58 Image Stitching with Origins ................................................ 3-58 Image Stitching with Points ................................................. 3-59 Line Profile........................................................................... 3-60 Multiple Image Stitch ........................................................... 3-60 Unwrap ................................................................................ 3-64 Undistort Image ................................................................... 3-65 X-Y Projection...................................................................... 3-65 Locating Drawer.......................................................................... 3-66 Blob ..................................................................................... 3-66 Circular Pattern Find............................................................ 3-70 Line Find.............................................................................. 3-75 Origin ................................................................................... 3-79 Pinpoint Pattern Find™ ....................................................... 3-84 Feature Finding Drawer .............................................................. 3-92 Average Gradient ................................................................ 3-92 Average Intensity ................................................................. 3-92 Blob ..................................................................................... 3-95 Blob Filter ............................................................................ 3-95 Color Blob ............................................................................ 3-97 Color Checker.................................................................... 3-100 Contrast ............................................................................. 3-101 Contrast - Multiple ROI ...................................................... 3-103 Edge Point Find ................................................................. 3-104 Line Find............................................................................ 3-106 Spot Find ........................................................................... 3-106 Wide Edge Point Find ........................................................ 3-108 Measurement Drawer ............................................................... 3-111 Angle ................................................................................. 3-111 Circle Edge Refinement..................................................... 3-115 Circle Gauge...................................................................... 3-117 Line Find............................................................................ 3-122 Line Gauge ........................................................................ 3-122 Line Gauge Datum Line..................................................... 3-126 Line Gauge Dual ROI ........................................................ 3-129 Linear Regression ............................................................. 3-132 Midpoint ............................................................................. 3-133 Multiple Point to Point Measurements ............................... 3-133 Peak Valley Find................................................................ 3-135 Point Match........................................................................ 3-136 Point to Point Measurement .............................................. 3-138 Point to Line Measurement................................................ 3-141 Subpixel Edge Extractor .................................................... 3-143 Flaw Detection Drawer ............................................................. 3-145 Datalogic Automation Inc. TOC-2 Impact Reference Guide Table of Contents Adaptive Template ............................................................ 3-145 Average Intensity............................................................... 3-146 Blob ................................................................................... 3-147 Bump Find ......................................................................... 3-147 Color Blob.......................................................................... 3-149 Contrast ............................................................................. 3-149 Contrast - Multiple ROI ...................................................... 3-149 Extreme Difference............................................................ 3-149 Greyscale Template .......................................................... 3-151 Polygon Smoothing ........................................................... 3-153 Readers Drawer ....................................................................... 3-154 Character Contour Match .................................................. 3-159 Code Reader ..................................................................... 3-167 OCR .................................................................................. 3-180 Communication Drawer ............................................................ 3-187 Discrete Input .................................................................... 3-187 Discrete Output ................................................................. 3-188 EtherNet/IP Introduction .................................................... 3-192 EtherNet/IP Explicit Data ................................................... 3-192 EtherNet/IP Explicit Message ............................................ 3-192 EtherNet/IP Read Implicit Assembly ................................. 3-193 EtherNet/IP Write Implicit Assembly.................................. 3-193 Impact Send Message....................................................... 3-194 Impact Wait For Message ................................................. 3-197 Serial Port Out ................................................................... 3-200 TCP/IP Out ........................................................................ 3-201 Logic Drawer ............................................................................ 3-204 Basic.................................................................................. 3-204 Branch ............................................................................... 3-205 Break ................................................................................. 3-206 Call Task ........................................................................... 3-206 Counted Loop.................................................................... 3-207 Counter.............................................................................. 3-207 Data Instance .................................................................... 3-208 Data Set ............................................................................ 3-208 Delay ................................................................................. 3-209 Event Scheduler ................................................................ 3-209 Group ................................................................................ 3-210 List Loop ............................................................................ 3-210 List Sorter .......................................................................... 3-210 Multiple Branch.................................................................. 3-211 Pass Fail............................................................................ 3-211 Reset ................................................................................. 3-213 Device Control Drawer ............................................................. 3-213 Camera Trigger ................................................................. 3-213 Device Settings ................................................................. 3-214 Offline ................................................................................ 3-216 Online ................................................................................ 3-216 Vision Program Load ......................................................... 3-216 Vision Program Save......................................................... 3-217 Vision Program Unload ..................................................... 3-217 Specialized Drawer................................................................... 3-218 Change Image Calibration................................................. 3-218 Clip ROI ............................................................................. 3-219 Data Transfer .................................................................... 3-219 Grid Statistics .................................................................... 3-220 Lead Statistics ................................................................... 3-223 Train .................................................................................. 3-223 TOC-3 Datalogic Automation Inc. Table of Contents Impact Reference Guide Chapter 4: Control Panel Manager Introduction ................................................................................... 4-1 Help .............................................................................................. 4-1 Starting CPM ................................................................................ 4-1 CPM - An Overview ...................................................................... 4-1 CPM User Interface ...................................................................... 4-2 Main Toolbar.......................................................................... 4-2 Task and Panel Toolbar ........................................................ 4-6 Control Palette ....................................................................... 4-7 VPM Task Tree...................................................................... 4-7 Control Panel Tree ................................................................ 4-8 Image Display ........................................................................ 4-9 Panel and Controls Properties and Tabs............................... 4-9 Control Panel Application ...................................................... 4-9 Control Panel ....................................................................... 4-11 CPM and VPM Linking................................................................ 4-14 Links between CPM and VPM ............................................. 4-15 Links between CPM controls ............................................... 4-19 CPM Controls ............................................................................. 4-23 CPM Control Palette and Groups ............................................... 4-24 Images Group ............................................................................. 4-25 Histogram ............................................................................ 4-26 Image Display ...................................................................... 4-28 Arc ROI ................................................................................ 4-32 Blob List ............................................................................... 4-33 Greyscale Template Model.................................................. 4-36 Line List ............................................................................... 4-37 Line ROI .............................................................................. 4-38 Origin ................................................................................... 4-40 Origin List ............................................................................ 4-41 Point List .............................................................................. 4-42 Rectangle List ...................................................................... 4-43 Rectangle ROI ..................................................................... 4-45 Shape List............................................................................ 4-46 Input Group................................................................................. 4-48 Button .................................................................................. 4-48 Check Box ........................................................................... 4-49 Drop List Selector ................................................................ 4-50 Font Library ......................................................................... 4-52 Character Contour Library ................................................... 4-52 Keyboard ............................................................................. 4-53 Numeric Entry ...................................................................... 4-55 Password ............................................................................. 4-56 Radio Button........................................................................ 4-63 Radio Button Group ............................................................. 4-64 Range .................................................................................. 4-65 Range Scroll ........................................................................ 4-68 Slider ................................................................................... 4-70 Table.................................................................................... 4-71 Text Entry ............................................................................ 4-75 Toggle Button ...................................................................... 4-76 Tolerance............................................................................. 4-78 Display Group ............................................................................. 4-82 Chart .................................................................................... 4-82 Frame .................................................................................. 4-86 Graphic Display ................................................................... 4-87 Indicator Light ...................................................................... 4-88 Numeric Display .................................................................. 4-89 Rich Text ............................................................................. 4-90 Datalogic Automation Inc. TOC-4 Impact Reference Guide Table of Contents Scrolling Table..................................................................... 4-91 Tab ...................................................................................... 4-94 Tab Group ........................................................................... 4-95 Text Display......................................................................... 4-96 XBar-R Chart ....................................................................... 4-98 XML Table ......................................................................... 4-100 General Group .......................................................................... 4-102 Basic Interpreter ................................................................ 4-102 Change Log....................................................................... 4-103 Execute Command ............................................................ 4-106 Impact Connector .............................................................. 4-107 Load Image ....................................................................... 4-111 Load Vision Program ......................................................... 4-112 Save Vision Program......................................................... 4-113 Scriptor .............................................................................. 4-115 TCP-IP Logger .................................................................. 4-121 Timer ................................................................................. 4-123 Chapter 5: Impact Basic Basic Editor Window..................................................................... 5-1 Typing in the Editor Window.................................................. 5-1 General Language Format ........................................................... 5-2 Variables ............................................................................... 5-2 Constants .............................................................................. 5-3 Expressions ........................................................................... 5-4 Statement syntax................................................................... 5-5 Loop constructs ..................................................................... 5-5 Arrays .................................................................................... 5-6 Data Types ............................................................................ 5-7 Basic Commands and Functions .................................................. 5-8 Commands and Functions A-D ............................................. 5-8 Commands and Functions E-H ........................................... 5-12 Commands and Functions I-L ............................................. 5-17 Commands and Functions M-Q .......................................... 5-21 Commands and Functions R-V ........................................... 5-23 Commands and Functions W-Y .......................................... 5-29 Basic Program Examples ........................................................... 5-30 Chapter 6: Appendix Threshold Viewer.......................................................................... 6-1 On-Screen Keyboard.................................................................. 6-11 CPM .................................................................................... 6-12 VPM..................................................................................... 6-14 Emulator ..................................................................................... 6-15 Command Line Parameters........................................................ 6-16 Summary ............................................................................. 6-17 Override the program’s default system country settings ..... 6-18 Disable moving and sizing the window................................ 6-19 Override the program’s default system language settings .. 6-19 Display an image as the logo on the title bar ...................... 6-20 Display an image as a banner in the program window........ 6-20 Disable the ability to close the program .............................. 6-21 Disable the ability to stop the M-Series Device drivers ....... 6-21 Access a text file containing a list of command line options 6-22 Load a control panel application when program starts ........ 6-23 Set the window's location and size...................................... 6-23 Run a Scriptor file ................................................................ 6-24 Run a Scriptor file and display a control panel application .. 6-24 Display an image at program start and in the About dialog. 6-25 TOC-5 Datalogic Automation Inc. Table of Contents Impact Reference Guide Display a string in the title bar and in the About dialog........ 6-25 Set the amount of memory to be allocated .......................... 6-26 Modbus TCP/IP Client Tester ..................................................... 6-27 TCP/IP Settings .......................................................................... 6-28 HTTP Commands ....................................................................... 6-29 PC to Device - Direct Connection ........................................ 6-30 PC to Device - Switch Connection....................................... 6-31 PC to Device - Router Connection ...................................... 6-32 PC to Device - Internet connection ...................................... 6-33 How the Code Reader Tool Works ............................................. 6-34 Troubleshooting .......................................................................... 6-43 Issue: Bad Image Event ..................................................... 6-43 Issue: System Overrun ....................................................... 6-43 Issue: The Image Display in VPM does not refresh ........... 6-43 Issue: Need to Back Up All M-Series Settings, Configuration Files, and Programs 6-44 Issue: No Image ................................................................. 6-44 Issue: Buffers Have Not Been Created .............................. 6-44 Issue: Connection Problem Dialog ..................................... 6-44 Issue: Locked for Editing .................................................... 6-45 Issue: Different Versions .................................................... 6-45 Issue: Could Not Locate Device ......................................... 6-46 Issue: ImpactSendMessage Tool error in System Log ....... 6-47 Issue: Error Registering Online Callback ............................ 6-47 Issue: The device does not appear in the device list .......... 6-47 Issue: Message is No Camera Connected ......................... 6-48 Issue: Could not Start On-screen keyboard ....................... 6-48 Issue: OpenClient ERROR Didn’t Find Proxy ..................... 6-49 Datalogic Automation Inc. TOC-6 Introduction Thank you for purchasing a Datalogic Impact machine vision system. Please read the instructions in this document before starting your system setup. The machine vision system is flexible, compact, and configurable. This manual documents the Impact programs which you use to configure the Datalogic Impact device and view the data collected from your inspections. There are two main programs: Vision Program Manager and Control Panel Manager. VPM™ (Vision Program Manager™) is used by the inspection programmer or administrator to program inspection tasks that run on the Datalogic Impact device. A variety of tools furnish the flexibility to program many inspection tasks. The programmer or administrator can also create and call their own general purpose tasks. You can view inspection results in VPM’s Summary Table. Settings, which is part of VPM, is used to configure the Datalogic hardware. This includes all Impact devices and cameras. CPM™ (Control Panel Manager™) is used by the inspection programmer or administrator to create Control Panels. System operators, monitors, and controllers use these panels to view inspection results and control the Impact device. There are two additional standalone programs, Settings and CPM Runtime Environment (CPMRE). The Settings Program is used to configure an Impact device and CPMRE is used to connect to one or more devices through user-defined control panels. The Settings program and CPMRE cannot be used to edit vision programs or control panels. Manual Contents The Reference guide consists of the following chapters: • Chapter 1: Installation and QuickStart Setup Here are installation and basic setup instructions for your Datalogic machine vision system. • Chapter 2: Vision Program Manager This chapter describes how to set up an inspection, including descriptions of some of the tools in VPM, including Input and Output ports, linking, data fields, and creating callable tasks. • Chapter 3: Settings This chapter explains how to use the VPM Settings tab to configure the device. It reviews the cameras you can use with Impact Software, including proper setup and calibration in the client computer, and lighting adjustments. There are also details about administering the device user interface, including file management, user names and passwords, defining device IP addresses and names, and file camera use. • Chapter 4: Control Panel Manager Here are details about defining the control panels that will provide the interface between operators and inspection tasks. • Chapter 5: Impact Basic Here are details about the Basic language used to program VPM’s Basic tool. This includes examples you can copy and use in your own applications. • Chapter 6: Appendix The appendix contains material about the Threshold Viewer, On-screen Keyboard, Emulator, comIntro-1 Datalogic Automation Inc. Introduction Impact Reference Guide mand line parameters, and TCP/IP settings for the device. The Emulator allows you to create and test vision programs without device hardware. Datalogic Automation Inc. Intro-2 C H A P T E R 1 Installation and Setup This chapter discusses installing and starting Impact software. It also provides an overview of Impact software programs. NOTE: This manual covers the entire line of Datalogic Impact devices and cameras. Sections that apply to a specific models will be indicated. Impact software is a set of graphical tools used to configure the hardware and inspection tasks. The device or camera can be accessed from any client computer with an Ethernet connection that has Impact software installed on it. M-Series cameras can only be accessed by the M-Series processor. Help If you need help while using the Impact software, you can refer to this manual or the online help. To access online Help, click the Help icon in the toolbar, then click the desired topic in the Table of Contents in the left pane of the Help window. System Requirements for the A, T, and C-Series Requirements for the Client Computer • Intel®, AMD®, or VIA® x86-class processor -minimum 1.2 GHz; 64-bit processors are supported with Windows Vista and Windows 7 • Microsoft® Windows XP, Vista, or Windows 7 • 1 GB or more of RAM, 2 GB recommended • 800MB or more of available hard disk space • 10/100 Mbps Ethernet connection • Monitor display resolution of 1024 x 768 or greater • A program capable of reading Portable Document Format (PDF) files • CD-ROM Drive Requirements for the Datalogic Impact device or camera • The device or camera and client computer must have the same version of Impact software installed. • The latest release that will support the A10 camera is release 8.1.7.2. 1-1 Datalogic Automation Inc. System Requirements for the M-Series Impact Reference Guide System Requirements for the M-Series Requirements for the M-Series Processor • Monitor display resolution of 1024 x 768 or greater (for local M-Series programming) • Keyboard and Mouse (for local M-Series programming) • If you are connecting to a device or camera, the processor must have the same version of Impact software installed. • You must log in to an operating system account that has administrative privileges in order to install or run Impact software on a Windows operating system. Please note that Datalogic cannot guarantee the performance of M-Series systems which have additional software installed on them, including, but not limited to, anti-virus and firewall software. Datalogic recommends that M-Series systems remain disconnected from networks that access the Internet in order to minimize security risks. Datalogic will attempt to support systems with antivirus software installed, but we cannot guarantee system performance. Installation The install program copies all the application files to their appropriate places. This includes the files for the Java™ Runtime software, which Impact software requires. To install Impact software: 1. You may need to turn off automatic virus checking during the install if it causes installation problems. 2. You must log in to an operating system account that has administrative privileges in order to install or run Impact software on a Windows operating system. 3. Insert the Impact Installation CD in the drive. 4. The installation program should start. Select the language you want the install to use, then click OK. 5. Follow the on-screen instructions. You will have the option to install Impact software to the client, device or camera, or both. Note: If security is enabled on the device or camera, you cannot install new software on it. You must exit the install program, disable security on the device or camera, then restart the install. 6. When the installation has completed, you can start the software and complete the Quick Setup procedure. Quick Setup This section explains the basic steps to get a device or camera configured, connected to a network, and calibrated so you can start using it. A more detailed explanation can be found in later chapters of this manual. NOTE: If you want to begin creating vision programs and control panels without using a Datalogic Impact hardware device or camera, you can use the Emulator. (See “Connect to an Impact device, camera, or Emulator” on page 1-5.) Datalogic Automation Inc. 1-2 Impact Reference Guide Client to device cable connection Client to device cable connection This section applies only to the A, T, and C-Series. You need to connect an Ethernet cable between the client PC and the Impact device or camera’s Ethernet port to communicate with the device or camera in VPM. Refer to the device or camera’s hardware manual for connector locations. IP Address Configuration This section applies only to the A, T, and C-Series. An IP (or Subnet) mask specifies which bits of the Internet Protocol (IP) address are significant. The IP mask is network dependent, but it is the same for each Impact device or camera on a particular network. The IP address indicates the address of each device or camera. If there is more than one device or camera on a network, each device or camera’s address must be different. The network administrator is probably responsible for determining the IP mask and address. To work with the device or camera, the client computer’s Ethernet port must be connected to the device or camera’s Ethernet connector directly or through a correctly configured network. During address configuration, we recommend that the client computer and the device or camera be connected directly to each other and not through a network router, switch, or server. IMPORTANT NOTE: If you need help configuring the network or the client computer, you should seek professional advice. Network configuration is beyond the scope of this manual. Do not attempt to change the IP address or mask without the authorization of your network administrator; doing so could disrupt your network connection. The following procedures require technical knowledge and should not be attempted unless you understand the terminology used. IP addresses and masks consist of from one to four sets of numbers separated by periods. The device or camera is shipped with a default IP address of 192.168.0.128 and a default mask of 255.255.255.0. To be able to communicate with the device or camera, a client computer’s IP mask must correspond correctly to the device or camera’s mask, and the address must match the device or camera’s address in the first three sets of numbers. A default IP mask and address were assigned to the device or camera at the factory. If these values work for your installation, you do not need to change them. However, if you do change the default IP mask, you will also need to change the default IP address. You do not need to know the device or camera’s IP mask and address to change them. However, if you change them, you may also need to change the client computer’s IP mask and address so the device or camera and client can communicate. See “Configuring the Client” on page 1-5. Configuring the Impact Device or Camera This section applies only to the Datalogic Impact A, T, and C-Series. This section explains how to change the device or camera’s IP address and mask. Be sure the client computer and device or camera are directly connected with an Ethernet cable. 1-3 Datalogic Automation Inc. Configuring the Impact Device or Camera Impact Reference Guide 1. Start VPM. When the “Select a Device to Connect to” dialog is displayed, click on the desired device or camera in the list of Devices found. If the device or camera is not in the list, be sure the device or camera power is on and that it is connected to the client computer, then click the Refresh button. 2. Click the Edit IP Address button at the bottom of the dialog. 3. In the “Edit IP Address dialog,” enter the desired IP address and IP mask. Leave the IP Gateway unchanged. IMPORTANT: Do NOT include a leading zero in an IP Address group (for example 192.168.108.065) 4. Click OK. Datalogic Automation Inc. 1-4 Impact Reference Guide Configuring the Client 5. When the warning dialog is displayed, click OK. After the change is complete, the device or camera reboots. 6. Click OK when the Device is Rebooting dialog is displayed. Configuring the Client This section applies only to the A, T, and C-Series. You may need to change the client computer’s mask and address to match the desired device or camera IP Address. Be sure the client computer and device or camera are directly connected with an Ethernet cable. To change the client computer, see “Changing the IP Address through the Device Setup tab.” on page 2-3. Connect to an Impact device, camera, or Emulator When you connect to a Local Emulator, if it is not already running it is started automatically on the client computer and VPM connects to it. Since the Emulator is intended for creating vision programs without a device or camera, you must have previously captured images to use it. Programs created with the Emulator are stored on the client computer (or the M-Series processor). When you connect to an Impact device or camera, you can work with either live or previously captured images (File Camera). Programs you create are stored on the device or camera. Multiple users can connect to one device, but only one user at a time can edit programs or change data on the device. CAUTION: Any program that controls outputs on a device or camera that are connected to and control external mechanical equipment can cause that equipment to operate when the program runs. There are three ways you can initiate a connection to an Impact device, camera, or Emulator: • when VPM first starts • when VPM is not currently connected • when VPM is already connected to one or more devices, cameras, or Emulators When VPM first starts When VPM first starts, a dialog is displayed so you can choose what connection you want to make. See “To choose a device, camera, or Emulator connection:” on page 1-6. When VPM is not currently connected If VPM is not currently connected to a device, camera, or Emulator, click the Connect button in the VPM toolbar to initiate a connection. A dialog is displayed so you can choose what connection you want to make. See “To choose a device, camera, or Emulator connection:” on page 1-6. 1-5 Datalogic Automation Inc. Connect to an Impact device, camera, or Emulator Impact Reference Guide When VPM is already connected to one or more devices, cameras, or Emulators To disconnect from a device, camera, or Emulator so you can connect to a different device, click the Connect button in the VPM toolbar. After the disconnection is complete, click the Connect button again to connect to make another connection. See “To choose a device, camera, or Emulator connection:” on page 1-6. To maintain current connections and connect to an additional device, click the Add device tab to the right of the Summary tab. Add device Another tab will be added to the row. To choose a device, camera, or Emulator connection: TIP: Details about a device selected in the list are displayed at the bottom of the dialog. 1. Select one or more items from the list (press the Control key while you click to select multiple items). An Emulator appears in the list with Local Emulator as part of its name. 2. Click Connect to Device. If security is enabled on the device, the User Logon dialog is displayed. When a valid User ID and password have been entered, VPM will connect with the device, camera, or Emulator. • Devices found This list displays the names, IP addresses, and other information about the devices and Emulators connected to the network. • Connect to Device Click this to connect to the devices selected in the list. NOTE: If another user has already connected to the device, a dialog will be displayed indicating that the device is in use. See “Editing a vision program from multiple VPM programs” on page 3-7 for more details. Datalogic Automation Inc. 1-6 Impact Reference Guide Camera Setup • Edit IP Address... To change the IP address of the selected device, click this button. See “Changing the IP Address through the Device Setup tab.” on page 2-3. 3. When the connection has been made, you may see a message that VPM is reading from the newly connected device or camera. NOTE for Datalogic M-Series: We recommend that you do NOT edit vision programs or control panels on one camera while any other cameras on the same M-Series processor are online. If you want to edit programs on one camera, make sure the other cameras are offline. Camera Setup Note: If you want to use previously captured images for this initial setup, see “File Camera” on page 2-34. Datalogic Impact cameras contain no hardware switches so all operating parameters must be set from the VPM Settings tab. You can use several different cameras with the Impact C-Series device and M-Series processor. Refer to the C-Series Cameras Users Guide (843-0099) or the M-Series Processor and Camera Guide (843-0138) for more details. To set up a camera: 1. C-Series Digital Camera: Be sure the Ethernet and power cables are connected to the device and that the power is on. The PWR LED lamp on the front of the device should be on. Be sure the DSL cable is connected to the camera and the DSL connector on the front of the C-Series device, and that the device is powered on. The LED lamp on the rear of the camera should be green. C-Series Camera Link camera: Be sure the Camera Link cable is connected to the camera and the Camera Link connector on the front of the C-Series device, and that the device is powered on. Click the Settings tab - General - Setup - General panel and click the Camera Link radio button. Select the camera type. M-Series camera: Be sure the Power/Trigger cable is connected to power and the camera. Be sure the appropriate Ethernet cable is connected between the camera and one of the CAM ports on the M-Series processor. All other models: Be sure the Ethernet and power cables are connected to the camera and that the power is on. The Power LED lamp on the camera should be on. T-Series: the Ethernet status light should be on or blinking; A20: the Speed status light is on at 100 Mbps, off at 10 Mbps; A30: Ethernet status light should be on or blinking. Place an image or object in front of the camera. Be sure it is well lit. 2. Click the Camera icon, click the Setup tab, then click the Setup radio button above the image window. 3. Click the Trigger tab. Set the following values. • Select the Self-paced Auto-trigger radio button. This will let you run the camera without wiring a trigger signal. See “Trigger Tab” on page 2-19 for more details. 4. Click the General tab. Set the following values. (Some options are not available on all cameras.) Leave the remaining values at their default. • Gain: Default • Offset: 0 • Shutter Open Time: 10,000 microseconds • Strobe Pulse Length for Strobes being used: 30 microseconds 1-7 Datalogic Automation Inc. Camera Calibration Impact Reference Guide 5. Click the Live button. If you do not see the image or object in the image window, adjust the camera focus, image gain, shutter open time, and strobe length until a clear, well defined image is displayed. See “Camera” on page 2-16 for more details about how each of the settings affects the image. 6. You may need to move the camera toward or away from the object until it fills most of the camera’s field of view. You can now calibrate the camera if desired. Camera Calibration For this Quick Setup, you can leave the camera uncalibrated. A camera requires calibration the first time you use it and when the camera-to-subject distance is changed. Calibration insures that the measurements indicated in VPM tools accurately relate to the camera image’s measurements. See “Camera Setup Tab” on page 2-17 for more details. Settings tab In this step of the Quick Setup procedure, you need to configure the following parameters using the VPM Settings Tab - General System Object - Setup Tab. Leave the other parameters at their default setting. General Panel - Go Online When Device Starts • If you check this box, the device or camera goes online when it reboots or is powered on. Tasks can be loaded when it goes online, then they are executed based on their Trigger Event type setting. See “Go Online When Device Starts” on page 2-6 for details. General Panel - Timeout Setup • Check Enable Timeout-Task. See “Enable Timeout” on page 2-6 for more details. General Panel - Device Date/Time • Click Synchronize to PC to set the device or camera date and time to match the client computer. See “Device Date/Time” on page 2-6 for details. You have now completed the Quick setup. More details about using the Settings Tab in VPM to configure the device or camera can be found in Chapter 4. The device or camera should now be ready for defining inspection tasks, which is described in Chapter 2. Datalogic Automation Inc. 1-8 C H A P T E R 2 Settings Tab Introduction The Settings Tab is used to configure the Datalogic Impact device or camera, including its Internet Protocol (IP) Address, inputs, and outputs. This chapter explains the VPM Settings Tab and reviews the cameras you can use with Impact software, including details of proper setup and calibration on the client computer, and lighting adjustments. Help If you need help while using the Impact software, you can refer to this manual or the online help. To access online Help, click the Help icon in the toolbar, then click the desired topic in the Table of Contents in the left pane of the Help window. Settings Tab You must be connected to a device or camera to access the Settings tab. See “Connect to an Impact device, camera, or Emulator” on page 1-5. You can access parts of the device or camera through the system objects on the Settings Tab shown in the Design view. Every object has the general properties of Name, Description, and type. Some system objects have inputs and outputs that can be set directly or linked between tools. Most system objects have both a Setup and a Properties tab. NOTE: Some tabs, panels, and fields may be disabled when the device or camera is online. Access to some Settings functions is limited based on the security access level. See “Impact Device Security Overview” on page 2-13 for details. General The General system object allows access to system parameters on the device or camera. The General system object’s Properties tab shows some of the parameters. The Setup tab lets you set additional system parameters. P r o p e r t i e s Ta b 2-1 Input Name What it is Device Name The device or camera name. For example, Bearing Diameter Inspection. This name appears in the Device Connection dialog. Datalogic Automation Inc. General Impact Reference Guide Input Name What it is Device Comment A comment about the device or camera. For example, Inspects Bearing Diameter. This comment appears in the Device Connection dialog. Task Timeout See “Enable Timeout” on page 2-6. Output Name What it is System Time The current time (the number of seconds elapsed since January 1, 1970). You can use the Basic tool to manipulate and format this value. For example, see “FORMATDATE” on page 5-14. CPU Temperature The temperature on the processor board (in degrees Celsius) Available RAM The amount of RAM (in bytes). This number remains static while the system is online. Model The model number Serial Number The serial number. M-Series cameras include the camera number. Software Version The Impact software version (Major version.minor version.sub-minor version Build number) Kernel Version The operating system software version (Major version.minor version.sub-minor version Build number) Firmware Version The firmware version Board ID The identification number HTTP Port The system port the device or camera is using for HTTP commands S e t u p Ta b NOTE: Access to functions on this tab may be limited based on a user’s access level and while the device is online. General Panel Device Name The device name can contain any combination of letters or numbers up to 25 characters in length. There may be multiple devices on the network with the same name, although this may cause confusion. IP Address, IP Gateway, and IP Mask Note: Usually you will not need to use the IP Gateway address. Just leave it blank. IMPORTANT: Do NOT include a leading zero in an IP Address group (for example 192.168.108.065) The IP Mask and Address on the client or M-Series processer and Datalogic Impact device or camera work together so data can be exchanged. The IP Mask is network dependent, but it is the same for each device or Datalogic Automation Inc. 2-2 Impact Reference Guide General camera on a particular network. The IP Address must be unique to each device if there is more than one on a network. (For a detailed discussion of network configurations see page 6-28.) Note: Do not attempt to change the IP Address or Mask without the authorization of your network administrator; doing so could disrupt your network connection. To be able to communicate with the device, a client computer’s IP Mask and Address must be configured correctly. During address configuration, we recommend that the client computer and the device be connected directly to each other and not through a network server (A, T, or C-Series only). Changing the IP Address through the Device Setup tab. You may need to change the client computer’s mask and address to match the desired device or camera IP Address. Use one of the following procedures. Changing the client computer’s addresses: Windows 7 (A, T, and C-Series) 1. In the Start Menu, select Computer, Network, then click Network and Sharing Center. 2. Under "View Your Active Networks," click Local Area Connection. 3. Click Internet Protocol Version 4 in the list, then click Properties. 4. On the Alternate Configuration tab, select User Configured. 5. Enter the desired IP address and Subnet Mask. Remember, to be able to communicate with the device or camera, a client computer’s Subnet mask must correspond correctly to the device or camera’s IP mask, and the address must match the device or camera’s address in the first three sets of numbers. 6. Click OK, then close all the open dialog windows. Changing the client’s mask and address: Windows XP (A, T, and C-Series) 1. In the Start menu, right click on My Network Places and select Properties. 2. Right click on Local Area Connections and select Properties. 3. On the General tab, select Internet Protocol (TCP/IP) and click Properties. 4. On the Alternate Configuration tab, select User Configured. 5. Enter the IP Address 192.168.0.1 and the Subnet Mask 255.255.255.0, then click OK to close all the dialog windows. Changing the M-Series Processor’s IP Address (Windows XP) IMPORTANT NOTE: Change only the Local Area Connection named LAN1 or LAN2. These correspond to Ethernet Ports 1 and 2 on the front of the processor. DO NOT change any of the other Local Area Connections. Changing any other connection can cause the MSeries cameras to stop functioning. 1. In the Start menu, right click on My Network Places and select Properties. 2. Right click Local Area Connection LAN1 or LAN2 and select Properties. 3. On the General tab, select Internet Protocol (TCP/IP) and click Properties. 4. On the General tab, select Use the following IP address. 5. Enter the desired IP address. 2-3 Datalogic Automation Inc. General Impact Reference Guide 6. Click OK to close all the open dialog windows. Changing the M-Series Processor’s IP Address (Windows 7) IMPORTANT NOTE: Change only the Local Area Connection named LAN1 or LAN2. These correspond to Ethernet Ports 1 and 2 on the front of the processor. DO NOT change any of the other connections. Changing any other connection can cause the M-Series cameras to stop functioning. 1. In the Start menu, click on Control Panel. 2. Under Network and Internet, click on View Network Status and Tasks. 3. On the left side of the screen, click Change Adapter Settings. 4. Right click LAN1 or LAN 2 and select Properties. Datalogic Automation Inc. 2-4 Impact Reference Guide General 5. In the list of items, select Internet Protocol Version 4 (TCP/IPv4), then click Properties. 6. Select Use the following IP address. 7. Enter the desired IP address. 8. Click OK to close all the open dialog windows. Changing the device or camera’s Mask and Address (A, T, and C-Series) To change the device or camera’s IP Mask and Address, you must know the current IP Address and Mask so you can configure the client correctly. The Datalogic Impact device or camera is shipped with a default IP Address of 192.168.0.128 and a default Mask of 255.255.255.0. IMPORTANT: If you change a device or camera’s Mask or Address, be sure to record the new values. IMPORTANT: Do NOT include a leading zero in an IP Address group (for example 192.168.108.065) 1. Be sure that the client computer’s IP Address and Mask are set correctly. Connect the client computer and device or camera’s Ethernet ports directly using an Ethernet cable (A, T, and C-Series only) and turn on power to the device. 2. Connect to the desired device or camera. See “Connect to an Impact device, camera, or Emulator” on page 1-5. IMPORTANT NOTE: If you intend to change both the IP Address and the IP Mask, do not Reboot until you have changed them both. After you change the IP Address, you will see a message that states you must reboot for the changes to take effect. Do not reboot until after you have changed both the Mask and the Address. On T4x-Series and A30 cameras, you need to cycle power for the changes to take effect. 2-5 Datalogic Automation Inc. General Impact Reference Guide 3. When the connection has been made, click the General System Object, click the Setup tab, then click the General radio button. Enter the new IP Mask and/or IP Address in the appropriate field(s). Record the new value (along with the serial number) and store it where you can find it again. 4. Click the Diagnostics radio button, then click the Reboot device button. You must reboot to make the changes take effect in the device or camera. IP Gateway The IP Gateway address is used when you want to access an IP Address through a router. You will ordinarily leave this field blank. Device Comment The comment can contain notes about the device or camera such as its function, the physical location, what it is inspecting, or when it was put into service. This comment is displayed on the Device Selection tab. Go Online When Device Starts Check this box if you want the device to go Online when it starts. Any tasks that are loaded are executed, based on their trigger parameters. To mark which tasks get loaded when the device starts, see “File Manager Setup Tab” on page 2-37. Connections • Maximum The maximum number of users at each level (1 to 100) that can be connected to this device at one time. Multiple users can connect to one device, but only one user at a time can edit programs or change data on the device. • Current The number of users at each level currently connected to the device. Device Date/Time This displays the current date and time stored on the Datalogic Impact device. To set the device date and time to match the client computer’s, click Synchronize to PC. NOTE: The device does not automatically adjust for daylight savings time changes. You will need to manually synchronize it. Enable Timeout Here you can define the maximum length of time a task may take to execute and the maximum length of time the tool will wait for a response from a control panel. NOTE: Task Timeout applies only to tasks with the Trigger Event set to Image In Event and is effective only while the device is online and triggering. • Task - When this property is enabled, the Task Timeout value determines how much time the task is allowed to complete execution before it aborts. See “Vision Program Properties” on page 3-32. Datalogic Automation Inc. 2-6 Impact Reference Guide General If the task’s Trigger Event type is set to "Image In Event," the time starts when the camera trigger is complete, not at the beginning of task execution. For all other Trigger Event settings, the time starts when task execution begins. The timing accuracy depends on the tools in the task, but it is generally accurate to within a few milliseconds. For example, if Task Timeout is enabled, and the Timeout value is set for 10,000 milliseconds, a task will run until it completes or 10,000 milliseconds has elapsed, whichever comes first. If the Task Timeout occurs first, and Abort On Error is True, the Abort Task runs, if one is defined. If Abort On Error is False, then the task keeps running and any remaining tools immediately fail. See “VPM Task Configuration” on page 3-34 for more details. • Data Transfer Tool - When if this property is enabled, the Timeout value indicates the maximum length of time the tool will wait for a control panel response before it stops trying to send data to it. For example, if the timeout is enabled, and the Timeout value is set for 10,000 milliseconds, if the control panel does not respond to the tool’s command within 10,000 milliseconds, the transfer is terminated. Settings Files This section lets you select what Datalogic Impact device settings are saved and printed. Both is selected by default. To copy settings files from one device to another, see “To copy settings files from one device to another” on page 2-8. IMPORTANT NOTE: Settings files contain information about which vision programs should be loaded when the device starts. Since vision program files are not copied to the device when you backup and restore the settings file, some vision programs may not get loaded when the device starts. It is the system programmers responsibility to insure that the proper vision program files are copied to the device. • Camera Calibration: When you click Backup, the settings displayed on the Camera System Object Setup Tab - Calibration panel are saved to the client. Restore sends the camera calibrations from the client’s file to the device. Calibration settings are also saved whenever the calibration is changed. • Vision Device Settings: When you click Backup, the settings displayed on the General System Object are saved to the client. Restore sends the device settings from the client’s file to the device. • OPC Data Access: When you click Backup, the OPC data settings displayed on the OPC Data Access System Object are saved to the client. Restore sends the device settings from the client’s file to the device. IMPORTANT NOTE: Restore will overwrite any existing settings on the device with those currently on the client computer. If more than one client computer is connected to the device, the most recently restored settings are kept on the device. • Restore: The Restore button sends device settings currently saved on the client computer to the device. Vision program files are not copied to the device. See “Folder List” on page 2-37 for image file copying details. IMPORTANT NOTE: The client computer will backup the settings for only one device at a time. Only the currently connected device’s settings are backed up. Any previously saved settings are overwritten. • Backup: The Backup button saves the selected settings from the device to the client computer. Vision program files are not copied from the device. See “File List” on page 2-38 for image and vision program file copying details. 2-7 Datalogic Automation Inc. General Impact Reference Guide To copy settings files from one device to another 1. Connect to the source device (where you are copying from). 2. Click the Settings Tab - General - Setup - General panel 3. In the Settings Files group, select the Device Settings Only radio button. 4. Click Backup. 5. Disconnect from the source device. 6. Connect to the destination device (where you are copying to). 7. Click the Settings Tab - General - Setup - General panel 8. In the Settings Files group, select the Device Settings Only radio button. 9. Click Restore. 10. Disconnect from the destination device. 11. Repeat steps 6 through 9 to copy the files to other destination devices. TIP: To back up settings, calibration information, network information, and vision program files on an MSeries processor, “Issue: Need to Back Up All M-Series Settings, Configuration Files, and Programs” on page 6-44. Camera Type This selection is enabled only when you have a camera connected to a C-Series device. • DSL: Click this radio button when you are using a Datalogic Impact Digital Serial Link (DSL) camera. The camera type is automatically detected and displayed in the Camera system object’s Setup Calibration screen. • CameraLink: Click this radio button when you are using a Camera Link camera. Select the camera type from the drop down list. Communication Panel Shift Source This setting determines how the device responds to the hardware signal as an active input on the shift trigger input. • Camera Triggers - This indicates that the device should use the trigger input as the shift input. (The shift event will occur simultaneously with the camera trigger.) This allows you to synchronize camera triggers and shift events in inspection tasks. • Rising Edge - An active shift input is indicated by a voltage increase on the shift input. • Falling Edge - An active shift input is indicated by a voltage decrease on the shift input. • Both Edges - An active shift input is indicated by a voltage increase and decrease (two triggers per input cycle) on the shift input. (Not available on M-Series processors) Input Debounce Here you define the debounce time for two types of device trigger signals, shift and event. Debounce determines the maximum trigger rate the system will allow (basically like a governor on an engine) to help prevent negative effects from noise and high frequency bursts. The debounce setting must be able to filter out noise while not introducing any unnecessary delays. You may need to try several different Delay and Holdoff settings to find the optimum combination. Datalogic Automation Inc. 2-8 Impact Reference Guide General NOTE: The M-Series Cameras support Delay Debounce on the Trigger input (Frame Trigger on Line Scan camera). The M-Series Cameras do not support Holdoff Debounce on the Trigger or Frame Trigger, only Delay Debounce. The M-Series Line Scan Camera does not support any Debounce setting on the Line Trigger. The M-Series Processor does not support any Debounce setting on Event Inputs. Third-party cameras have varying Delay and Holdoff Input Debounce settings. Refer to the M-Series Camera and Processor Guide (843-0138) for details. • Delay: The debounce timer starts when the hardware signal’s active edge is detected, and stops when the opposite edge is detected. The input must remain active for the delay amount of time for the camera or event to be triggered. Delay is good for filtering random noise on the input, but delay makes the time between the input signal’s edge and system triggering speed-dependent, especially on high-speed inspections. Use a Delay time that is long enough to filter out the worst expected noise, but short enough to accommodate your fastest inspection times. Delay Timing Diagram • Holdoff: The shift, or event is triggered when the hardware signal’s active edge is detected, but another active edge will not trigger the input until the Holdoff time has elapsed. Holdoff is good for noise on the signal’s leading edge and it is not speed-dependent, but it is susceptible to random noise on the input signal. Use a Holdoff time long enough to reject leading edge noise, but not so long that the inspection rate is limited. Holdoff Timing Diagram Enable OPC/ActiveX Server If this check box is checked, the OPC/ActiveX Server on the device will be started each time the device starts. This server must be running if you are using OPC Data Access (see “OPC Data Access” on page 242) or the Impact ActiveX Interface (refer to the Impact ActiveX Reference Guide 843-0119). TCP/IP This is the device’s Ethernet input port number where the device "listens" for a TCP/IP message. When a message is received on this port, the device triggers the TCP/IP event and tasks that have the Task Trigger event set to TCP/IP are queued to run. You can use VPM’s TCP/IP Out tool in a task in another device to send messages to this port. The port number used in that TCP/IP Out tool should be the same as this port number. However, as the communication is 2-9 Datalogic Automation Inc. General Impact Reference Guide one-way, the input port number cannot be the same on both devices. See page 3-201 for more details about the TCP/IP Out tool and how to set up TCP/IP communications. See page 3-37 for details about the TCP/IP Input Event. Click the Edit button to change or delete the hex-value delimiter characters that indicate the end of a data string. In the Create Delimiter Sequence dialog, select a character from the list, then click Append, or click Clear to delete the delimiter. Click OK when the sequence is defined. Serial Port This section defines the parameters for the device’s serial port that will be used by VPM’s Serial Port Out and Serial Port In tools. Consult the documentation for the requirements of the device you are connecting to the device’s serial port, then set these values accordingly. The serial port does not support hardware (CTS/ RTS) or software (Xon/Xoff) data flow control. Datalogic Impact devices support only RS-232 communication protocol. RS-485 is not supported. The Emulator has no serial port. • Speed: The device or camera’s data transmission rate. Speeds supported: 300; 2,400; 9,600; 19,200; 38,400; and 115,200. VPM defaults to 115,200 when it is installed. • Parity: The number of parity bits used. • Data Bits: The number of data bits used. • Stop Bits: The number of stop bits used. • Delimiter: (This Delimiter character is used only by the Serial Port In tool. Also see “Serial Port Out” on page 3-200). The delimiter is placed at the end of the input string when it is transmitted. The receiving device’s Serial Port Delimiter must match this setting. When the device detects a delimiter in the data string, it creates a Serial Input task trigger event. If no delimiter is defined, an event is created after every character in the data. To create the Delimiter 1. Click the Edit button next to the Delimiter field. 2. In the Create Delimiter Sequence dialog, select a character from the list. 3. Click Append. 4. Repeat steps 2 and 3 until the delimiter is defined. 5. Click OK. NOTES for M-Series processors: The M-Series processor will only accept one delimiter character in the data string. The MX40 processor has two serial ports. Serial port 1 is controlled by Camera 1 (CAM1) and Serial port 2 is controlled by Camera 2 (CAM2). Serial Port 1 connector is on the front of the processor box, left of the VGA connector. The MX80 processor has four serial ports. Each Serial Port is controlled by its respective Camera (e.g port 1 is controlled by Camera 1 (CAM1) and so on). Diagnostics Panel NOTE: Access to functions on this tab may be limited based on a user’s access level and while the device is online. The Diagnostics tab lets you run diagnostic tests on various functions of the device. Outputs Datalogic Automation Inc. 2-10 Impact Reference Guide General Click a button to turn the indicated output on and off. The indicator is green when the output is on. Strobes Use this function to test your strobe outputs. When you click a strobe button, the corresponding output will pulse for 30 microseconds. Options I/O Polling Rate Enter a number from 50 to 10,000 milliseconds. VPM polls the Datalogic Impact device at this rate and updates all the indicators on the Diagnostics tab. NOTE: Enable System Log Trace only when you need to trace all system events. For instance, if you are having trouble tracking down an intermittent problem with a vision program. The system log can quickly become filled with entries and system performance can be affected, depending on the program’s complexity. Enable System Log Trace When this is checked, all system events that occur on the device are entered in the system log. This includes events, task and tool run completion, and many other occurrences that would not ordinarily get logged. Inputs This section shows the current state of each device input. (VPM polls the device at the I/O Polling Rate shown.) The indicator is green when the input is On. If the input change rate is too fast, the indicator may not switch quickly enough to indicate the true current state. To test an input, connect a "loopback" between an output and the input. The input’s state will change when the output changes. Events This section shows the hardware signal frequency on the device’s trigger, shift, or event inputs (in Hz). These values are inactive if the device is not online and receiving hardware trigger signals. The appropriate Trigger Event property must also be set. Trigger Rate: The signal on the Trigger Input. A task that has the Trigger Event property set to one of the types of Image Trigger Event must be loaded. Shift Rate: The signal on the Shift Input. A task must be loaded that has the Trigger Event property set to one of the types of Shift Event must be loaded. Event Rate: The signal on the Event Input. A task must be loaded that has the Trigger Event property set to one of the types of Input Event must be loaded. Reboot Device Click this button to restart the device. All tasks stop executing and all vision programs are unloaded. (This has the same effect as pressing the Reset button on the device.) When the device restart has completed, any vision programs set to load on startup are loaded and tasks in those vision programs are queued to execute when they are triggered. See “File Manager Setup Tab” on page 2-37 for setting vision programs to load on startup. IMPORTANT NOTE: The device must completely reboot (the Stat indicator light is off) before you can connect to it. Advanced This button presents a menu of advanced functions. 2-11 Datalogic Automation Inc. General Impact Reference Guide • Calibration Editor - When you save images in VPM, the lens calibration information is stored with them. You can edit the calibration values, or copy that information to other image files. • Memory Meter - This utility displays the current memory usage for a device. The amount of available memory shown is not updated while the device is online. • TCP Tester - This utility emulates a device to test Ethernet between the client and Datalogic Impact devices. • Modbus TCP/IP Client - Send commands to and read information directly from the Datalogic Impact device Modbus TCP/IP Server using Modbus TCP/IP protocol. (Datalogic Impact devices do not support serial Modbus protocol.) See “Modbus TCP/IP Client Tester” on page 6-27 for more details. Save Image Buffers NOTE: This button is disabled for T4x-Series, M-Series, and A30 cameras. This advanced troubleshooting function is intended to be used to find an image that causes the device to stop responding. If a Datalogic Impact device crashes, and you suspect it may be caused by processing a specific image, follow the steps below. This button is disabled if VPM is connected to an Emulator. To Save the Image Buffers 1. Do NOT cycle power! This will alter the pixels in the image buffers. 2. If the Impact device is set to go online on start up, disconnect all trigger sources before proceeding. Triggering will overwrite the image buffers. 3. Push the reset button on the device. It is located near the power connector on the C-Series and T3xSeries devices, and on the back panel of the A20 camera. 4. Wait for the device to restart. The restart is complete when the status light turns off. 5. Start VPM and connect to the Datalogic Impact device. 6. Go to the Settings tab, General icon, Diagnostics panel. 7. Press the “Save Image Buffers” button. The saving process will take about 20 seconds as it is saving ~20 MB of images 8. Go to the File Camera icon, Setup tab. You will see available images named “DiagnosticBuffer000”, “DiagnosticBuffer001”, etc. The number of buffers will vary with the camera type and partial scan settings. 9. Select the diagnostic buffer images and activate them. 10. Load the vision program files that were running when the device crashed. 11. Go to the ImageIn task and cycle through the images using the “Trigger Once” button. 12. You are trying to find one of the images that caused the device to crash. You can tell that the device has crashed when the Trigger Once button fails to come back within a few seconds, the Impact device's status light stays on and, eventually, VPM reports a “Connection Problem.” 13. The image that crashed the device is the next one after the one currently displayed in the VPM image window. For example, if DiagnosticBuffer010.png is displayed in the image window, then DiagnosticBuffer011.png is the one you want. 14. Push the reset button on the device and wait for the device to restart. 15. Go to the Settings tab, File Manager icon, select the suspect image file in the Images directory, and copy it to your PC. 16. Send the image file and your vision program files to Datalogic for diagnosis. Datalogic Automation Inc. 2-12 Impact Reference Guide General Administration Panel NOTE: Access to this tab is limited to users with an Administrator access level. Some options are unavailable while the device is online. I m pa c t D e v i c e S e c u r i t y O v e r v i e w Impact device security resides in each device. (Control panel applications and vision programs can be password protected separately. See “Vision Program Security” on page 3-32 and “CPM Security” on page 4-2.) You must connect and log on to a device to modify security for that device. When you attempt to connect to a device that has security enabled, you will have to enter a valid User ID and password. The User ID will determine your security level. Some functions are limited based on the user’s security level. Control Panel designers can check for the user’s security level and allow access to specific functions based on that level. Enable Security Security for each Impact device resides in the device. If the Enable Security check box is checked, security is enabled and the logon screen is displayed whenever a connection attempt is made to the device. The user cannot gain access to the device until a valid User ID and password have been entered. There must be at least one Administration level user defined to enable security. Users • User ID and Level: All currently defined users and their access levels are displayed in this list. Access to a device is determined by the access level assigned to each User ID. Access to functions on Control Panels is assigned by the Control Panel creator. The following access levels can be assigned, with Administrator level having full access to all functions. • Monitor: View inspection fields and values as allowed by Control Panel security; view vision program parameters, and control functions; modify values as allowed by Control Panel security; and view all fields on the Device Information tab. • Operator: Monitor level access plus view images, adjust some inspection settings, and put the device online and offline. • Controller: Monitor and Operator level access plus modify some vision program parameters. • Programmer: Monitor, Operator and Controller level access plus modify images, adjust all inspection settings, modify all vision program parameters, create and edit vision programs, and change device and camera settings. • Administrator: Monitor, Operator, Controller, and Programmer level access plus modify system security, including defining and modifying users levels and passwords. Note: Before you can enable security on the device, there must be at least one Administration level user defined. To add a User 1. Click the Add User button. 2. Enter a User ID. It may contain any letter or number. For example, this may be a name, a shift designation, or some other unique identifier. The User ID is case sensitive. 3. Select the access level from the drop-down list. 4. Enter a password in the Password field. See page 2-14 for more about passwords. Asterisks are displayed for the password. The password is case sensitive. 2-13 Datalogic Automation Inc. General Impact Reference Guide 5. Enter the same password again in the Confirm Password field. Asterisks are displayed for the password. 6. If you want the user’s password to expire after a fixed time period, check the Number of days before password expires check box and enter the number of days. Administrator level passwords never expire. 7. If you want anyone (including Administrators) to be able to change this password, check the Can Change Password check box. 8. Click the OK button. To modify a User 1. Select the User ID you want to modify. 2. Click the Modify User button. 3. Change the desired field. If you change the password, you will have to enter the new password again in the Confirm Password field. 4. Click the OK button. To delete a User 1. Select the User ID you want to delete. 2. Click the Delete User button. 3. Click the Yes button to confirm the deletion. Install Users on Multiple Devices You can copy the User IDs and passwords from the connected device to another device. To install Users on multiple devices 1. Click Install, then select the target devices for the User IDs and passwords. NOTE: Any existing User IDs and passwords on the selected devices are overwritten. 2. Click OK. Passwords Passwords are case sensitive, can contain any ASCII character (except CR or LF), and must be at least as long as the Minimum Character Length defined in the Passwords group. They are displayed as asterisks in entry fields. The Minimum Character Length and Password Reuse values apply to all passwords. • Minimum Character Length: Specifies the minimum number of characters all newly defined system passwords must contain. Existing passwords are not affected. • Password Reuse Number of Passwords: If Password Expires is enabled, this is the minimum number of new passwords that must be used before an old password can be used again. A zero indicates passwords can be reused immediately. Minimum Days: If Password Expires is enabled, this is the minimum number of days that must pass before a password that has already been used can be used again. A zero indicates passwords can be reused immediately. You can also modify a password during logon. To modify a password during logon A user cannot change their password unless the "Can Change Password" check box is checked. (See “To add a User” on page 2-13.) Datalogic Automation Inc. 2-14 Impact Reference Guide General 1. Click the Connect button, select a device from the Device Selection list, then click OK. 2. When the User Logon dialog is displayed, click Change Password. 3. Enter the User ID and the Old Password for that User ID. 4. Enter the New Password and type the same password in the Confirm Password field. 5. Click Log On. Client Directory The Client directory contains all of the files used by the Impact software. It is stored in the default directory on the client computer during installation, but it may be stored in a folder of your choice. To change the Client directory 1. Type in a directory path and name, or click Browse to locate the desired directory. If the directory is located on a network, be sure all clients have access to it. Tool Activation Some VPM tools require a Software License Key to be activated before you can use them. The Tool Activation dialog displays the current status of activated tools, and lets you enter the Software License Key for new tools. • Software License Key: Enter the number provided by Datalogic. • License States: This area lists all the currently active tools and their license numbers. About Panel NOTE: All users have access to this tab regardless of their access level. When you click the Connect button, VPM automatically scans for Impact devices on the network and displays their names, IP addresses, and other device information in the device selection list. When the client connects to the device, it determines the device’s hardware configuration and current status and displays it on this panel. None of the information on this tab can be modified. Storage Storage is the Impact device memory used to store the device’s operating system software and firmware and user-defined vision programs. Memory Memory is the Impact device memory that stores dynamic vision program data. The amount of available memory shown is not updated while the device is online. Vision Device Information This Impact device system information is for display only. Technical support personnel may ask you for this information if you call for assistance. Camera Information This Impact camera information is for display only. Technical support personnel may ask you for this information if you call for assistance. 2-15 Datalogic Automation Inc. Camera Impact Reference Guide Camera The Camera system object accesses and sets some of the Impact camera’s parameters. NOTES: The range of acceptable values for each input is determined by the camera type. Changing any of these properties while the camera is being triggered and acquiring images can cause the images to be corrupted. The camera should be offline or triggers should be stopped while these properties are being changed. C a m e r a P r o p e r t i e s Ta b Input Name What it is Digital Shift Digital shift provides digital gain for the image. Gain Gain adjusts the actual signal intensity from the camera. NOTE: The gain setting for M-Series cameras is the “raw” gain setting, not a percentage gain. The range of values will vary from camera to camera. In all cases the recommended value is the minimum gain, which corresponds to 0dB. Offset Offset adjusts the zero grey-level setting for the camera. Adjusting the offset causes the entire image to brighten or darken. Images become darker as the offset is increased. Shutter Speed Shutter Speed (Open Time) indicates the amount of time the shutter is open. The higher the number, the longer the shutter is open and the brighter the image. Next Image Number This number is appended to the image name which is displayed at the top of the image display window. The number is incremented by one for each subsequent image snapped. Image Scan Left Edge This value sets the left edge where the camera’s horizontal scan starts. The default value is determined by the camera type. (See *Note below this table) Image Scan Right Edge This value sets the right edge where the camera’s horizontal scan stops. The default value is determined by the camera type. (See *Note below this table) Image Scan Top Edge This value sets the top edge where the camera’s vertical scan starts. The default value is determined by the camera type. (See *Note below this table) Image Scan Bottom Edge This value sets the bottom edge where the camera’s vertical scan stops. The default value is determined by the camera type. (See *Note below this table) Line Trigger PreDivider See “Frequency Converter” on page 2-24. Line Trigger Multiplier See “Frequency Converter” on page 2-24. Line Trigger Divider See “Frequency Converter” on page 2-24. Datalogic Automation Inc. 2-16 Impact Reference Guide Camera Input Name What it is Units Per Pixel Units per Pixel is the scale factor for converting measurements in the image to "real-world" units. See “Calibrate Manually” on page 2-29 for details. Camera Trigger Edge Type This value sets the Camera Trigger type as follows: 0 = Rising Edge 1 = Falling Edge 2 = Both Edges (See “Trigger Tab” on page 2-19) (Not available on MSeries processors) Strobe 1 Duration Strobe 1 pulse length in microseconds Strobe 2 Duration Strobe 2 pulse length in microseconds Strobe 3 Duration Strobe 3 pulse length in microseconds DLA TCP Image Input Mode If True, the camera supports image input from AV6010 cameras. *NOTE: If the Impact device is Online when any Image Scan value is changed, the device stays Online but camera triggers are temporarily disabled and the image buffer is reallocated based on the new value. The image currently in the image buffer may be overwritten when a new image is acquired based on the new Image Scan value. Output Name What it is Acquisition Time The amount of time taken to acquire the current image Number of Buffered Images The number of images in the Impact device’s image buffer Model The Impact device’s model Lens Distortion Calibration Enabled If True, distortion calibration is enabled Real World Origin This is the X and Y coordinate location (in pixels), and the rotation angle (in degrees) of the image’s upper left corner relative to the upper left corner of the image display. Serial Number The Impact device’s serial number C a m e r a S e t u p Ta b NOTE: Access to functions on this panel may be limited based on a user’s access level and while the device is online. Datalogic’s digital cameras contain no hardware switches so all operating parameters must be set from the VPM Settings Tab - Camera System Object. This section provides details about each of the Camera System Object Setup tab options. (Available options are dependent on camera type.) Some of these options may also be modified dynamically using the Device Settings tool. (See “Device Settings” on page 3-214) 2-17 Datalogic Automation Inc. Camera Impact Reference Guide Setup Panel Snap Click the Snap button to acquire and display an image in the image window. You can use this to see how camera settings affect the image, or to position objects within the camera’s field of view. The acquired image is also displayed in the image display area of the Design and Display tabs. Live Click the Live button to continuously acquire images and display images in the image window until you click the Snap or Live buttons. You can use this to see how camera settings affect the image, or to position objects within the camera’s field of view. The acquired image is also displayed in the image display area of the Design and Display tabs. Image Source The type of camera that is currently acquiring images. Frames per Second This field indicates the number of frames the device can capture and process per second. It is calculated based on the current Shutter Open Time, Partial Scan line and Half Resolution Mode settings. General Tab Shutter Shutter Open Time indicates the amount of time the shutter will be open. The longer the shutter is open (a higher number), the brighter the image. A shutter open time that is too low can cause the inspected image to be too dark. Higher shutter open times will decrease the number of frames per second acquired and may blur the image. You can enter the value in the field or use the slider. The range of acceptable values is determined by the camera type. Dalsa Shutter / Exposure The Dalsa camera is automatically configured for timed shutter mode. The shutter time, which can be adjusted in VPM in Settings - Camera - General tab, is the exposure time PER LINE, just like the M5xx cameras. When the system is Online, the Line Trigger starts the exposure for each line, so it is very important that the line trigger period be longer than the shutter time. If the line trigger rate is too fast, then some triggers will be ignored. When the system is Offline and you are using the Snap, Live, or Trigger buttons, the line triggers are internally generated by the camera at the rate of the shutter time. This allows you to acquire images without wiring any inputs, although the images will be distorted because the line trigger rate is different. You can only see accurate images when the system is Online. Strobe Pulse Length (microseconds) Enter the number of microseconds (from 0 to 500) that you want each strobe to be on. The strobe pulse length must be coordinated with the shutter open time to provide optimum image capture and eliminate image blur. (A zero value will turn the strobe off.) Datalogic Automation Inc. 2-18 Impact Reference Guide Camera NOTE: Some third-party cameras do not have a Strobe Pulse Length setting. The strobe trigger pulse width coincides with the camera shutter speed open time setting so that it turns on when the exposure starts (shutter opens) and turns off when the exposure ends (shutter closes). Line scan cameras do not have a strobe output. Advanced Button Strobe Trigger Select the type of trigger that the strobe you are using requires. Rising - The output is normally off and a positive going signal is generated for the camera’s strobe. Falling - The output is normally on and a negative going signal is generated for the camera’s strobe. Gain Gain adjusts the actual signal intensity from the camera. Doubling the gain value has the same effect as opening the camera lens aperture approximately one f-stop. The range of acceptable values is determined by the camera type. NOTE: The gain setting for M-Series cameras is the “raw” gain setting. The range of values will vary from camera to camera. In all cases the recommended value is the minimum gain, which corresponds to 0dB. For example, the minimum gain setting for the M200 camera is 320 which corresponds to a gain of 0 dB. Offset Offset adjusts the zero grey-level setting for the camera. Adjusting the offset causes the entire image to brighten or darken. Images become darker as the offset is increased. Trigger Tab Trigger On This setting determines how the device responds to the hardware signal as an active input on the camera trigger input or how it is triggered automatically. Refer to the device’s hardware guide for appropriate trigger voltage levels. The device must be Online to respond to a hardware trigger input signal or to automatic triggers. NOTE: When it is triggered while in File Camera mode, the device will always acquire the next File Camera image, not a live camera image. • Rising Edge - An input signal is indicated by a trigger input voltage increase. • Falling Edge - An input signal is indicated by a trigger input voltage decrease. • Both Edges - An input signal is indicated by a trigger input voltage increase and decrease (two triggers per input cycle). (Not available on M-Series processors) NOTE: While either Auto-trigger or Periodic Auto-trigger mode is active, the device will ignore any hardware trigger signals. Select one of the above modes if you want to use hardware triggers. Self-Paced Auto-trigger - This is a self-paced Auto-trigger mode. The camera is automatically triggered at the fastest rate possible without overrunning image buffers. The trigger interval is the sum of either the camera’s acquire time or the ImageIn task’s execution time (whichever is greater), and the Delay time. Each time the camera starts processing an image, it triggers the next image, so that the acquisition and processing happen in parallel. This means that the acquire rate adapts to the processing rate so the device cannot overrun the image buffers. How to activate Auto-Trigger mode 2-19 Datalogic Automation Inc. Camera Impact Reference Guide a) If the Auto-trigger When Online check box is checked, automatic triggers will start when the device goes Online and stop when it goes Offline. The Start/Stop Auto-trigger button is disabled. No other Start/Stop control is available. b) If the Auto-trigger When Online check box is NOT checked, the device must be Online to enable the Start/Stop Auto-trigger button. Automatic triggers will start when the Start/Stop Auto-trigger button is clicked on and stop when it is clicked off. How Auto-trigger mode works After an image is acquired and the ImageIn task begins, the next image acquisition is started. When the task is complete, processing is delayed the number of milliseconds entered in the Delay field, then the task begins processing the next image and another image acquisition begins. This is a software-generated trigger and does not require a hardware trigger connection. This mode is especially useful in applications that use a fast tool to sense part presence then branch to a full inspection when the part is present. The camera triggers quickly when it is just running the fast tool. When part is present, the camera will not trigger again until the inspection task is done, so the inspection is self-pacing. Also, if the task execution time changes, the trigger rate does not need to be changed. • Delay (milliseconds): (for Auto-trigger mode) This is the delay time between the end of processing one image in the ImageIn task and beginning to process the next image. The value can be between 1 and 100 milliseconds. Without the delay, the camera may stay too busy to send data to VPM or CPM. If VPM or CPM is updating very slowly, especially with large images, it might help to increase this delay, although this will slow the trigger rate. • Periodic Auto-trigger - This is a fixed-pace auto-trigger mode. The camera is automatically triggered and ImageIn task execution begins after the image is acquired. After the Delay period expires, the camera is triggered and the next image acquisition begins even if the previous image’s processing is incomplete. If the image acquire time plus the delay value is less than the ImageIn task execution time, triggering is too fast and the image buffers will be overrun.This is a software-generated trigger and does not require a hardware trigger connection. How to activate Periodic Auto-Trigger mode This mode is activated using the same methods as the Auto-Trigger mode. • Delay (milliseconds): (for Periodic Auto-trigger mode) This is the delay time between camera triggers. This value should be larger than the longest ImageIn task execution time so there is time for all images to be processed. • Auto-trigger When Online: If this is checked, triggers will start when the device goes Online and stop when it goes Offline. The Start/Stop Auto-trigger button is disabled. No other Start/Stop control is available. Trigger Input Debounce Here you can define the debounce time for the device camera trigger signal. Debounce determines the maximum trigger rate the system will allow (basically like a governor on an engine) to help prevent negative effects from noise and high frequency bursts. The debounce setting must be able to filter out noise while not introducing any unnecessary delays. For more details on debounce settings, see “Input Debounce” on page 2-8. Partial Scan Tab Enter values for the left, right, top, and bottom line numbers which control the vertical and horizontal edges scanned by the camera. You can use this option to decrease the image area scanned and increase the inspecDatalogic Automation Inc. 2-20 Impact Reference Guide Camera tion speed. The range of acceptable values is determined by the camera type. If you want to use partial scanning on an image, you should calibrate the entire image first and then set the partial scan parameters. For partial scan images, the image coordinates of 0,0 correspond to the sensor pixel coordinates 0,0. This means that, when the image is partially scanned from the left or top, the upper left image pixel coordinate becomes the top left partial scan setting. The image above and to the left of the partial scan setting will not be displayed in the image window. • Scan Lines to Overlap: This property indicates the number of scan lines to copy from the bottom of the previous image and add to the top of the current image. As a result of the overlap, the resultant image is this number of lines taller than the Partial Scan setting used by the camera. For example, if a camera with 480 lines has an Overlap value of 100, the resultant image delivered to the vision program will be 580 lines, with the top 100 lines copied from the previous image and the remaining 480 lines from the camera sensor. The feature is primarily intended for use with line scan cameras, however it works with any camera. It works best with line scan cameras because the bottom line of the previous image will be placed directly adjacent to the top line of the current image. One primary application is inspection of a moving part, such as a web, that requires multiple images. If an interesting object, such as a defect, falls in the area where one image ends and the next image begins, the object can not be fully seen in either image. By setting the overlap setting to the maximum height of the object of interest, the entire object at the top of the second image will be visible. This is a property of the Camera Object, so it can be linked into your vision program and used when analyzing results. For example, smaller objects may get duplicated at the bottom of the previous image and the top of the current image, so you can recognize that the position of the object is in the overlap and avoid counting it twice. The maximum value for this property is equal to the height of the camera image. The overlap area is expressed in scan lines, not calibrated units. The overlap feature only works for vertical overlap, not horizontal overlap. The overlap feature is not currently compatible with lens distortion calibration. It is compatible with pixel size calibration. Some third-party cameras do not allow partial scanning. Color Tab This tab is enabled only when a color camera is being used. Impact software uses a 3x3 bilinear interpolation to convert the incomplete color imager output to a usable color image. White Balance If you are using a color camera, you can apply automatic white balance correction which calculates the proper red and blue pixel gains needed to provide an accurate color image, or you can manually enter values for the red and blue pixel gains. To automatically adjust the white balance: 1. Point the camera at a uniformly white or grey object or image. Be sure the image is well-lit and not too bright. Errors are returned if any of the color channels are saturated (the gain is greater than 100%). 2. Adjust the purple rectangular ROI so that it covers only a white or grey area of the image. 3. Click "Auto." The device automatically calculates the proper red and blue gain values to bring all three colors into balance. How White Balance Works 2-21 Datalogic Automation Inc. Camera Impact Reference Guide Datalogic’s color cameras have two stages of gain, the overall gain (set with the Gain slider on the General tab), and a gain for the red and blue pixels. When you click the Auto button, the average value is calculated for the red, green, and blue pixels. The red gain is computed as the average green pixel value divided by the average red pixel value. The blue gain is computed as the average green pixel value divided by the average blue pixel value. Errors are returned if any of the color channels are saturated (the gain is greater than 100%) or if the computed red or blue gain is outside of the range supported by the camera. After the red and blue gain values are calculated by clicking the Auto button, or entered manually, they are applied to the camera. First, the overall gain is applied to all pixels, then the red gain is applied to the red pixels and, finally, the blue gain is applied to the blue pixels. This means that only the overall gain is applied to the green pixels. Red pixel gain is overall gain times the red gain and blue pixels gain is overall gain times the blue gain. In all cases 100% gain equals unity gain. Line Scan Tab This tab is enabled only when a line scan camera is being used. Refer to the M-Series Processor and Camera Guide for more details about connecting line scan cameras. Datalogic’s M5xx line scan cameras have a sensor with only one row of pixels and so they acquire one line at a time. The image is formed by moving the part in front of the camera, acquiring multiple lines and stacking them together to form the image. The Acquisition Mode determines when the camera needs to be triggered, e.g. for each line, for a frame, continuously, etc. Line triggers typically come from an encoder that ensures that the lines are evenly spaced. Acquisition Mode M5xx Camera Line scan cameras can operate in several acquisition modes. The continuous modes allow the camera to acquire multiple images without requiring multiple frame triggers. This eliminates any concern about “missing lines” between images when long parts are scanned. In all the acquisition modes, the number of scan lines needed to create an image is set in the Partial Scan tab (see “Partial Scan Tab” on page 2-20). Offline operation, using Snap button or Trigger Once button, does not require line triggers since the lines are self-triggered based on shutter time. Single Frame, Edge Triggered In this mode, the camera captures a single image beginning with the edge of the frame trigger. To select the frame trigger edge type, see “Trigger Event Types” on page 3-35. This is the default mode for most Datalogic cameras. Continuous while Frame Trigger High While the frame trigger is held high, the camera will accept line triggers and create images. When the frame trigger goes high, the first line trigger starts the first line in a new image. When the current image is filled with scan lines, image acquisition is complete and the next image starts with the next line trigger. The camera will wait as long as necessary to get enough scan lines to fill each image. When the frame trigger goes low, the camera will continue taking line triggers until the current image is complete, then the camera will stop acquiring images until the frame trigger goes high again. All images will be the same height. Continuous while Frame Trigger Low Datalogic Automation Inc. 2-22 Impact Reference Guide Camera This mode’s operation is the same as Continuous while Frame Trigger High mode, except that the frame trigger polarity is reversed. Continuous while Online In this mode, the frame trigger signal is not used. Scan Lines are acquired as long as the camera is online. Hardware line triggers must be provided on the camera’s Line Trigger input. When the current image fills with scan lines, image acquisition is complete and the next image starts with the next line trigger. The camera will wait as long as necessary to get enough scan lines to fill each image. Since there is nothing to indicate the end of the scan, the last image can wait forever to fill. To flush a partial last image out of the camera and start a new one, the camera must be put Offline. If the camera is not put Offline, when a new image is started the first lines of the new image will contain the left over lines from the end of the previous image. Dalsa Acquisition Modes Dalsa cameras support four frame trigger modes: Single Frame Edge Triggered, Continuous While Frame Trigger High, Continuous While Frame Trigger Low, and Continuous While Online. In the Continuous While Frame Trigger High and Continuous While Frame Trigger Low modes, the Dalsa camera acquires images of the normal image height while the frame trigger is active. These cameras have a maximum image height of 16,383 lines. The Top Edge value is always 1 and the Bottom Edge is the number of lines to acquire. You can adjust the maximum image height and width in VPM in Settings - Camera - Partial Scan tab. When the frame trigger goes inactive, the camera immediately sends the current image to the vision program with the number of lines that have been acquired. It is up to the vision program to discard or attempt to process the partial height image. The height of the current image can be accessed programmatically in the image’s Height property in VPM. The M5xx cameras do not work this way. The M5xx cameras pause acquisition when the frame trigger is inactive and then continue acquisition when the frame trigger goes active again, so that all images are the full height. The top of the image does not necessarily correspond to the beginning of the frame trigger. Line Trigger Type M5XX Camera Single Phase The trigger signal is connected to Input 2 and the line start is triggered on the rising edge of the signal only. There are no debounce settings for Input 2. Quadrature Forward Only Use this setting with a quadrature encoder. Phase A is connected to Input 2 and Phase B is connected to Input 3. The line start is triggered on the rising and falling edge of each input as long as Phase A leads Phase B (forward direction). There are no debounce settings for Input 2 and 3. The camera does not start a line in the backward direction. It counts the trigger pulses until the encoder goes forward again, then it counts the forward pulses until all the backward pulses have been retraced, then it starts triggering. This setting allows the line start to ignore backward jitters. Quadrature Forward and Back Use this setting with a quadrature encoder.Phase A is connected to Input 2 and Phase B is connected to Input 3. Line starts are triggered on the rising and falling edge of each input in either direction. Dalsa Scan Direction 2-23 Datalogic Automation Inc. Camera Impact Reference Guide It is important to understand the scan direction of the Dalsa line scan camera. The camera has a two-line sensor capable of TDI (Time Delay Integration). An image row is exposed with one line of the sensor, then shifted and exposed again with the other line of the sensor, while the next row of the image is being exposed in the first sensor line. This doubles the net exposure time without slowing the line rate. In order to operate in this mode, the camera must know which of the two lines of the sensor is exposed first. This is determined by the scan direction input (Input 2). If this setting is wrong, the image will be blurred in the vertical direction. In Single Phase line trigger mode, Input 2 controls the scan direction. When input 2 is high, the sensor lines are shifted in the “forward” direction. When input 2 is low, the sensor lines are shifted in the “reverse” direction. If the scan direction never changes, you can hard wire Input 2 high or low, depending on how the camera is mounted. In Quadrature Phase line trigger mode, Input 2 triggers Phase B and Input 0 triggers Phase A. The sensor lines are shifted in the “forward” direction when Phase A leads Phase Band shifted in the reverse direction when Phase A trails Phase B. Physically, the forward direction for the 1K and 2K Dalsa line scan cameras runs from the top of the camera towards the bottom of the camera (from the I/O connector towards the power connector). In the 4K line scan camera, the forward direction is from the power connector towards the Ethernet connector. If the part is moving from the bottom of the camera towards the top of the camera, Input 2 should be high (or encoder Phase A should lead Phase B). Line Trigger Input Termination M5xx Camera CAUTION: Maximum Input Voltage is +6 VDC when the termination resistor is in the circuit. This setting only affects Inputs 2 and 3. Input 1 is not terminated. There are no debounce settings for Inputs 2 and 3. The ability to configure the termination resistor is necessary because Inputs 2 and 3 can accept TTL, RS-422, or RS-644 signal types. If this check box is checked, a termination resistor is present on camera Inputs 2 and 3. The check box is cleared automatically when the Line Trigger type is set to Single Phase. It is checked automatically when the Line Trigger type is set to either of the Quadrature Line Trigger Types. You should also check or clear the check box based on the following signal input configurations. • RS-422 • (camera is end device on the bus): check box must be checked • (camera is not end device on the bus): check box must be cleared • RS-644: check box must be checked • TTL: check box must be cleared Dalsa Camera This setting only affects Inputs 0 and 2. Input 1 is not terminated. There are no debounce settings for Inputs 0 and 2. The ability to configure the termination resistor is necessary because Inputs 0 and 2 can accept TTL (Transistor/Transistor Logic) or LVDS (Low Voltage Differential Signal) mode. To select TTL mode, clear the Input Termination check box. To select LVDS mode, check the check box. Frequency Converter Datalogic Automation Inc. 2-24 Impact Reference Guide Camera Because the maximum trigger input rate of the Line Scan camera is 20 MHz, which is faster than the camera’s number of lines per second acquisition rate, an internal frequency converter can be configured that will scale the line trigger input rate up or down to create fractional scale factors. This way you can match the x and y resolutions without modifying the encoder frequency. The Frequency Convertor setting can be used with any of the three Line Trigger types. Refer to the M-Series Processor and Camera Guide (843-0138) for each Line Scan camera’s maximum lines per second acquisition rate. The Line Trigger Multiplier and Line Trigger Dividers are integer scale factors. They can be combined to create a fractional scale factor. For example, if the trigger input rate is 3000 and the desired lines per second is 2000, then the Multiplier value would be 2 and the Post-Divider would be 3. 3000 * (2/3) = 2000 Pre-Divider This setting is used to the scale the frequency down to less than 30 KHz, the maximum value for the Multiplier field. For example, if the trigger input rate is 30 KHZ, the pre-divider value would be 10. Using the example above: 30000/10 * (2/3) = 2000 Example Here is an example using the M550 line scan camera to acquire an image of a cylindrical-shaped object. The M550 camera has a resolution of 2048 lines. The Field of View (FOV) is 41 mm and the object has a circumference of 73 mm. The encoder produces 2500 pulses per revolution. The horizontal resolution is FOV/ camera resolution or 41 mm/2048 = 0.020 mm/pixel The vertical resolution is circumference / encoder frequency or 73 mm/2500 = 0.029 mm/pixel Because the horizontal and vertical resolutions are different, the resultant image would appear stretched or compressed. To correct for this we set the Pre-Divider, Multiplier, and Divider to create a fractional scale factor. Pre-Divider = 0, Multiplier = 29, and Post-Divider = 20 Use these values to adjust the number of lines to acquire: Circumference * Multiplier / Post-Divider: 2500 * 29/20 = 3625 (If this result is greater than 4095 the resolution must be changed, since the maximum number of lines is 4095.) Recalculating the vertical resolution using the new number of lines: 73/3625 = 0.020mm/pixel Dalsa Frequency Converter The Dalsa camera has a frequency converter for the Line Trigger input. It has a multiplier and a divider, but not a pre-divider. The multiplier value is fixed at 256. The divider value can be adjusted to any value between 1 and 65535, so it allows for 0.25% accuracy in setting the pixel height. Advanced Tab Testing 2-25 Datalogic Automation Inc. Camera Impact Reference Guide When Test Image mode is enabled, and you click the snap button, the test image selected in the Test Images drop down is displayed in the image window. Test images are stored in the camera. Internal Correction If Enable Correction box is checked, the camera’s internal correction for gain and offset is used. You select the desired correction set from the drop-down. This field is disabled for some camera types. Modes • Half Resolution: If the Half Resolution check box is checked, the camera scans every other line so it acquires the image twice as fast with half the vertical resolution (and twice the gain). This setting can be used for high speed applications. • Digital Shift: Digital shift provides digital gain for the image. The digital value from the camera is multiplied by the multiplication factor selected from the drop down.This will brighten darker images by boosting the brighter parts and eliminating the darker parts. If the image is already bright, increasing the digital shift can saturate it. Increasing the digital shift can also increase signal noise present in the image. This field is disabled for some camera types. • Vertical Binning Mode: If vertical binning is enabled, every other line of the scanned image is discarded, then adjacent lines are added together. This produces an image that is half the original size, but the averaging can brighten a dark image somewhat. Some of the signal noise present in the image can be reduced. (This is similar to Half Resolution Mode, except the image size is reduced.) This field is disabled for some camera types. Set to Defaults Button Clicking this button restores all camera settings to their factory defaults. Default settings are determined by the camera type. Save Image Click this button to save the displayed image to a file.The image is saved in Portable Networks Graphics (PNG) format. Calibration Panel NOTE: Access to functions on this tab may be limited based on the user’s access level and while the device is online. A camera will require calibration the very first time you use it, when the camera-to-subject distance is changed, when a new camera is connected, or if the lens is changed. Calibration insures that the measurements indicated in VPM tools accurately relate to the inspected object’s measurements. You may calibrate a camera using a calibrated target or enter the camera’s units-per-pixel factor manually. If you want to use partial scanning on an image, you must calibrate the entire image first and then set the partial scan parameters. Camera Calibration Technical Details The dot centers in the image are matched to their known locations on the dot target. Any discrepancies due to lens distortion or perspective distortion are compensated for by computing a best fit 2nd-order polynomial mapping between the image dot centers and the known dot pattern of the target. Four mappings are computed, one for each quadrant of the image. The mappings are of the form: Datalogic Automation Inc. 2-26 Impact Reference Guide Camera x' = a*x*x + b*y*y + c*x*y + d*x + e*y + f y' = g*x*x + h*y*y + i*x*y + j*x + k*y + l Because there are six coefficients to be computed in each equation, a minimum of six dots must be present in each quadrant of the image to successfully compute the mapping. If more than six dots are present, they are all used to compute a best fit mapping. Larger dots provide a more accurate calibration because the dot centers can be more accurately located. It is known that a circular dot center in an image can be found with a three sigma repeatability of 0.6/sqrt (diameter) pixels. (Haralick and Shapiro, Computer and Robot Vision, 1992) It is also important to fill the field of view with the dot pattern. Areas within the field of view that are outside the dot pattern are handled by extrapolating the calibration found within the dot pattern, so any calibration errors become magnified in those areas. Once the calibration is done, any feature found in an image, such as a edge point or centroid, is passed through the polynomial mappings to find its location in the "perfect" image represented by the known dot target pattern. A color camera has half the measurement accuracy (twice the error) of a greyscale camera with the same number of pixels. The resolution rules-of-thumb for greyscale and color cameras are as follows: Greyscale Color Smallest Detectable Defect 2x2 pixels 3x3 pixels Gauging resolution 1/4 pixel 1/2 pixel The Bayer filter mosaic halves the effective resolution of the color cameras because each pixel detects either red, green, or blue. The smallest detectable defect corresponds to the smallest size defect that always fills at least one pixel. This is a theoretical lower limit. In most applications the defect will need to be larger. Also see “Color Image Sub-Properties” on page 3-35. Note that some tools provide sub-pixel options, which can improve the resolution and measurement accuracy of the image. The four options for camera calibration are: From Target, Manually, From Points, and Pixel Size Only. Snap Click the Snap button to acquire and display an image in the image window. You can use this to see how camera settings affect the image, or to position objects within the camera’s field of view. The acquired image is also displayed in the image display area of the Design and Display tabs. • NOTE: Clicking the Trigger Once button in the Summary Table buttons toolbar will not acquire a new image for this image display. Live Click the Live button to continuously acquire images and display images in the image window until you click the Snap or Live buttons. You can use this to see how camera settings affect the image, or to position objects within the camera’s field of view. The acquired image is also displayed in the image display area of the Design and Display tabs. • NOTE: Clicking the Trigger Continuously button in the Summary Table buttons toolbar will not acquire a new image for this image display. Image Source 2-27 Datalogic Automation Inc. Camera Impact Reference Guide The type of camera currently acquiring images. Frames per Second This field indicates the number of frames the device can capture and process per second. It is calculated based on the current Shutter Open Time, Partial Scan line and Half Resolution Mode settings. Calibrate Click this button to calibrate the camera when the desired image is displayed in the image window. You can use the Snap button or Load Image button to display the image. Load Image Click this button to load a file image into the image display window. You can calibrate the camera using this image and the image is displayed in the task image window. Set To Defaults Click this button to restore all camera settings to their factory defaults. Calibrate From Target Use this option when you have a calibration target with a hexagonal or grid dot pattern and a known dot pitch. This procedure assumes you are using a standard Datalogic calibration target and a live camera. The calibration algorithm works best when the target’s dot pattern fills the camera’s field of view (FOV). Any areas outside of the dot target are extrapolated. Lens distortion is a radial phenomenon (a function of the distance from the center of the lens), so the extrapolation will not be as accurate as the calibration. It is best practice to have the dot target cover all parts of the FOV where any inspection measurements will be made. Larger dots provide a more accurate calibration because the dot centers can be more accurately located. The dots must be a minimum of twenty pixels in diameter spaced twenty pixels apart. The minimum blob size is nine pixels. It is not critical to center the calibration target in the FOV. It is important, however, that the center of the image you use corresponds to the center of the lens (optical axis). The calibration algorithm assumes that the center of the calibration image is the center of the lens. It accounts for partial scanning of the run-time image, and cropped and sampled images from the Image Sampling tool. It does not account for the case where the calibration image is offset from the optical axis due to partial scanning. It is important for accurate measurement during inspection that the inspected part does not move outside the area covered by the dot target during calibration. To Calibrate from a target 1. Select From Target from the Calibrate drop-down. 2. Be sure that the camera is mounted securely. Place a standard Datalogic calibration target (Part # 3810985-xx) in front of the camera. (The final digits of the part number indicate the target’s dot pitch in millimeters.) The dot pitch is the center-to-center measurement between dots. The dots must be a minimum of twenty pixels in diameter spaced twenty pixels apart. 3. Click the Live button. Be sure that the target is well lit but not saturated. Place the target in the camera’s field of view (FOV) where the inspected part will appear. Calibration is more accurate if the target’s dot pattern fills the FOV. Datalogic Automation Inc. 2-28 Impact Reference Guide Camera 4. Move the target that the center of the image you use corresponds to the center of the lens (optical axis) as much as possible. (The yellow crosshairs indicate the center of the FOV.) When the target is placed correctly, focus the camera so that the target dots are clear and sharp. Sample Calibration Image 5. Click the Snap button. 6. Type the dot pitch measurement into the Target Pitch (units) field. The dot pitch is the distance from the center of one dot to the center of an adjoining dot. This measurement is indicated on the last two digits of the target part number. (In this sample image, the dot pitch is 16.0 units.) 7. Select the Target Dot Pattern type, hexagon or grid. 8. Click the Calibrate button. The Scale Factor (in Units per Pixel) is displayed when the calibration is complete. Scale Factor is the number of pixels in the image window per "real-world" unit on the target. This value is used to automatically calibrate measurements in VPM tools with the physical dimensions of the image. Target Settings • Target Pitch (units) This is the distance between dots on the calibration target. It is independent of the units (e.g. millimeters, inches, centimeters). The sample target image on page 2-10 has a 2.0 target pitch. • Target Dot Pattern You can use a target that is laid out in a hexagonal or a grid pattern. The two small sample images show the difference. Calibrate Manually Use this option when you know the unit to pixel conversion value for the image. Units per Pixel is the number of pixels in the image window per "real-world" units on the image. To Calibrate manually 1. Select Manually from the Calibrate drop-down. 2-29 Datalogic Automation Inc. Camera Impact Reference Guide 2. Enter the Units per Pixel value in the Manual Settings group. Units per Pixel is the scale factor for converting measurements in the image to "real-world" units. For example, if an object measures 100 millimeters and the image resolution of that object is 640 pixels, the Units per Pixel value is 100 divided by 640 = 0.156 (or 0.156 mm per pixel). 3. Choose either Disable Lens Distortion Calibration or Keep Current Lens Distortion Calibration. This selection determines whether the distortion information is stored with the image or not. 4. Click the Calibrate button. Manual Settings • Units per Pixel This is the factor that VPM tools use to convert image measurements to "real-life" measurements. For example, if you want to measure a part that is 100 mm wide and the image window resolution is 640 pixels wide, each pixel is equivalent to 0.156 mm: 100 mm / 640 pixels = 0.156 mm per pixel • Disable/Keep Lens Distortion Calibration Most lenses introduce some distortion in images. When a camera is calibrated, the calibration process can account for most of the natural pixel size and perspective distortion (not radial distortion) present in the lens. You can choose whether to disable or preserve that lens distortion in each image taken by the camera. Calibrate From Polygon Points Use this option when it is difficult to calibrate with a target or when the inspected image contains perspective distortion and you can align the provided polygon over points on the image. This option will correct for pixel size and perspective distortion, but not radial distortion. To calibrate for radial distortion you must use a calibration target. The polygon points and real-world points must correspond one-to-one, meaning that there must be the same number and they must be in the same order. The polygon points are ordered clockwise. To see a tooltip showing the point order and X/Y coordinates, hold the cursor over the desired point. Once you know the order of the polygon points, you can enter the real-world points in the correct order. To calibrate for real-world origin and pixel size calibration, the points you select should represent at least three distinct X and Y locations on the part. For acceptable distortion correction, select at least four distinct X and Y locations on the part. For example, if you only use points along the top and bottom edges, the distortion correction in the vertical direction is ill-defined and will likely be unacceptable because only two distinct Y locations are represented. You should try to space the points into at least four distinct X and Y locations. The calibration algorithm will automatically determine whether to calibrate for distortion or not. If there is not detectable distortion, or if there are too few points, it will calibrate for real-world origin and pixel size. If there is detectable distortion and enough points, it will also calibrate for distortion. The current setting is displayed after the Lens Distortion label in the “Current Calibration” box below the image window. It is possible to “confuse” the distortion calibration algorithm by defining certain point positions. If you get “odd” calibration results, you should first check that you entered the correct real-world coordinates in the correct order. If these are correct, use more points to better define the distortion. NOTE: Since the image origin (0,0) is in the upper-left corner of the image, the X and Y real-world coordinate values use a "left-handed" coordinate system. This means that the X coordinate value increases to the right and the Y coordinate value increases downward. See “Point Settings” below. Datalogic Automation Inc. 2-30 Impact Reference Guide Camera To calibrate from polygon points 1. Select From Polygon Points from the Calibrate drop-down. 2. A polygon ROI is placed on the image in the image window. Select the polygon and move it so Point 1 is centered over one of the calibration points. 3. Select and move each of the other polygon vertices to align them with the desired calibration points. The Polygon Points values are automatically updated in the Point Settings table. Add Edit Point Note: To add a polygon point, move the cursor to the desired point over the line. When the cursor changes to the Add Edit point shape, click and drag the new point. To delete a polygon point, click and drag the desired point to another polygon point. The polygon must have at least six points, each with a corresponding Real World point. The dots must be a minimum of twenty pixels in diameter spaced twenty pixels apart. To reset all the polygon points to their default position and clear the Real World point values, click the Reset Polygon button. 4. When all the polygon points are placed, enter the "real-world" measured locations that correspond to each Polygon Point.The measurement units are not necessary. For example, in the image below, Real World Point 1 (0,0) corresponds to Polygon Point 1 (38.545,200.206); Point 2, in real-world units, is 2, -2 (+2X and -2Y from Point 1); Point 3 is 6, -2 (+6X and -2Y); Point 4 is 8, 0; Point 5 is 6, 2; and Point 6 is 2, 2. 5. Click the Calibrate button. Image Window X value increases Y value increases Polygon Point 2 Polygon Point 3 Polygon Point 1 Polygon Point 4 Polygon Point 5 Polygon Point 6 Calibrate From Polygon Points Image Point Settings • Polygon Points: The X and Y coordinates of each Polygon Point is indicated. To reset the polygon to its default position, and the Real World Points values to zero, click the Reset Polygon button. 2-31 Datalogic Automation Inc. Camera Impact Reference Guide • Real World Points: The "real-world" location (in X and Y coordinates) corresponding to each Polygon Point should be entered. Double-click on a field to edit it. Click the appropriate button to Append, Insert, or Delete a Real World point. Calibrate From Entered Points Use this option when it is difficult to calibrate with a target or when the inspected image contains perspective distortion and you need to manually enter the pixel grid points for the calibration. This option will correct for pixel size and perspective distortion, but not radial distortion. To calibrate for radial distortion you must use a calibration target. The entered points and real-world points must correspond one-to-one, meaning that there must be the same number of points and they must be in the same order. To calibrate for real-world origin and pixel size calibration the points you select should represent at least three distinct X and Y locations on the part. For acceptable distortion correction, select at least four distinct X and Y locations on the part. For example, if you only use points along the top and bottom edges, the distortion correction in the vertical direction is ill-defined and will likely be unacceptable because only two distinct Y locations are represented. You should try to space the points into at least four distinct X and Y locations. The calibration algorithm will automatically determine whether to calibrate for distortion or not. If there is not detectable distortion, or if there are too few points, it will calibrate for real-world origin and pixel size. If there is detectable distortion and enough points, it will also calibrate for distortion. The current setting is displayed after the Lens Distortion label in the “Current Calibration” box below the image window. It is possible to “confuse” the distortion calibration algorithm by defining certain point positions. If you get “odd” calibration results, you should first check that you entered the correct real-world coordinates in the correct order. If these are correct, use more points to better define the distortion. NOTE: Since the image origin (0,0) is in the upper-left corner of the image, the X and Y coordinate values use a "left-handed" coordinate system. This means that the X coordinate value increases to the right and the Y coordinate value increases downward. See “Point Settings” below. To calibrate from entered points 1. From the Calibrate drop-down, select From Entered Points. 2. In the Entered Points table, enter the X and Y coordinates of each point on the image that you want to use for calibration. To append, insert, and delete points, use the buttons next to the fields. The points are NOT marked on the image. 3. When all the Entered Points have been entered, enter the "real-world" measured locations that correspond to each Entered Point. The measurement units are not necessary. For example, in the image below, Real World Point 1 (0,0) corresponds to Entered Point 1 (39,200); Point 2, in real-world units, is 2, -2 (+2X and -2Y from Point 1); Point 3 is 6, -2 (+6X and -2Y); Point 4 is 8, 0; Point 5 is 6, 2; and Point 6 is 2, 2. To append, insert, and delete Real World Points, use the buttons next to the fields. Datalogic Automation Inc. 2-32 Impact Reference Guide Camera 4. Click the Calibrate button. Entered Point 2 Entered Point 3 X value increases Entered Point 1 Entered Point 4 Y value increases Entered Point 6 Image Window Entered Point 5 Calibrate From Entered Points Image (Points marked for illustration only) Point Settings • Entered Points: The X and Y coordinates of each Entered Point. The points are NOT marked on the image. • Real World Points: The "real-world" location (in X and Y coordinates) of each Entered Point. Doubleclick on a field to edit it. Click the appropriate button to Append, Insert, or Delete a Real World point. Calibrate Pixel Size Only Use this option for a quick calibration when you know the distance between two points on the image and you want to calibrate the camera to those dimensions. To calibrate pixel size only 1. Select Pixel Size Only from the Calibrate drop-down. 2. A line ROI is placed on the image in the image window. Move and size the line until it stretches between two points with a known distance between them. 3. Enter the distance between the points into the Real World Length field. 4. Click the Calibrate button. Pixel Size Settings Pixel size settings are used when you calibrate from Pixel Size Only. 2-33 Datalogic Automation Inc. File Camera Impact Reference Guide • Line Points: The X and Y beginning and ending coordinates of the measurement line are indicated. • Real World Length: The length of the calibration line in real units. Common Calibration Settings Backup and Restore Calibration If Backup With Time Stamp is selected when you click the Backup Calibration button, the current calibration data is saved to a calibration file on the device and the client PC, and also copied to a file on the client PC with a file name that includes the current date and time. The date and time format is based on the current client PC settings in the format: IMPORTANT: File names are case sensitive. CameraCalibration_date_time.xml If Backup With Time Stamp is selected when you click the Restore Calibration button, you are able to select from time stamped files. If Backup With Time Stamp is not selected, the calibration data file is saved without the date and time included in the file name. Current Calibration This section indicates the calibrated values for the image displayed. • Lens Distortion: When a camera is calibrated, the calibration process can account for the natural distortion present in the camera lens. When an image is saved, the distortion information can be stored with it. • Units per Pixel: This is the number of units represented by one pixel in the displayed image. • Real World Origin: This is the X and Y coordinates (in pixels), and the rotation angle (in degrees) of the images upper left corner relative to the upper left corner of the image display. File Camera The File Camera system object accesses the device’s system memory where file images are stored. F i l e C a m e r a P r o p e r t i e s Ta b Output Name What it is Number of Active Images The number of images currently in the device’s RAM F i l e C a m e r a S e t u p Ta b NOTE: Access to functions on this tab may be limited based on a user’s access level and while the device is online. This tab lets you configure a device to work without a camera. Previously captured images in PNG format can be selected in the File Camera tab, then the Active selected images are displayed in the image window when the device is triggered. The following section describes each of the tab parameters in detail. Datalogic Automation Inc. 2-34 Impact Reference Guide System Log When File Camera mode is enabled, the device will not acquire images with a camera, but it will use the images in the RAM Images Active list as though they were acquired live. To enable File Camera mode, click the File Camera/Camera button. See “File Camera or Camera” on page 3-11. Available File Images The images listed in the Available list are stored in the device’s compact flash and are available to be copied to the Active Images list. When you select an image in the list, it is displayed in the Image Window. To add an image to the Available list: 1. Click Add. 2. In the Locate Image dialog, navigate to the directory that contains the image you want to use and select it. Images with a name greater than 44 characters cannot be added to the list. Tip: If you select an image format other than .png, it is automatically converted to png format when it is added to the list. 3. Click Add. (Images are saved, by default, in the Root/Images folder in the default installation location.) The image is also automatically added to the Active list in RAM Images. To remove an image from the Available list: 1. Select the desired image. 2. Click Remove. Tip: To save images from the device to the client, click the File Manager system object, open the device’s Root folder, open the Images folder, then copy the desired images to a client folder. To save a displayed image, click the Save Image button in VPM’s image display area. Active Images Images listed in the Active list are in the device’s RAM and available for processing. These images are displayed in a repeating list in order from top to bottom when the device is triggered or when the Snap or Live button is pressed on anywhere in VPM Settings Tab or in a VPM tool. When you select an image in the list, it is displayed in the Image Window. To add an image to the Active list 1. Select the desired image in the Compact Flash Images Available list. 2. Click the Activate arrow in the space between the lists. 3. To change the order of the image in the list, if necessary, click the Reorder arrows below the list. To remove an image from the list 1. Select the desired image in the list. 2. Click the Deactivate arrow in the space between the lists. System Log The System Log system object is used to view and save the System Log. Events in the System log are time and date stamped and stored on the device. This object has an additional General property named Log Entries that is a String List containing all the system log events. 2-35 Datalogic Automation Inc. File Manager Impact Reference Guide S y s t e m L o g P r o p e r t i e s Ta b Input Name What it is Log Entry The most recent log event S y s t e m L o g S e t u p Ta b NOTE: Access to functions on this tab may be limited based on a user’s access level and while the device is online. Archive Log On A-Series, C-Series, and T-Series Impact cameras, the System Log is stored on the camera. If the camera loses power for an extended period of time, existing system log events are lost unless you save them to a text file. On M-Series Processors, the system log is written to a disk file when the system is closed by using Windows shutdown or when the camera driver exits. When the system is restarted, the system log is initialized from the saved file. To Save System Log Events: 1. To save System Log Events to the default file displayed in the File field, click Archive Log. An existing file with the same name can be overwritten. 2. To save System Log Events to a different file and folder, click Browse, navigate to the desired folder, enter a new file name, then click Open. IMPORTANT: File names are case sensitive. 3. Click Archive Log. Event The events are sorted in ascending time order and contain information about the Impact device and tasks such as online and offline events, system restarts, device and image acquisition errors, trigger overruns, tool failures, and other types of system events and failures. See “Troubleshooting” on page 6-43 for more details about system errors. Clear Click Clear to clear all the events in the system log. Refresh Click Refresh to update the list of events. File Manager The File Manager tab lists and manipulates files that are in the Impact device’s flash memory. You can use this tab to copy files between the device and other network devices, including client computers. Datalogic Automation Inc. 2-36 Impact Reference Guide File Manager F i l e M a n a g e r P r o p e r t i e s Ta b Input Name What it is Display Tab Program Filter Programs that contain this name appear on the Display tab’s File Load drop down list. (See “Vision Program Load” on page 3-27.) Output Name What it is Available Flash The amount of flash memory on the device (in bytes) F i l e M a n a g e r S e t u p Ta b NOTE: Access to functions on this tab may be limited based on a user’s access level and while the device is online. Display Tab Program Filter Programs that contain this name appear on the Display tab’s File Load dropdown list. Refresh Click to refresh the list of files. Select All Click to select all the files listed. Folder List The left pane of the tab shows the folders on the client computer and the device. WARNING: The files in the device’s Root folder are important system files. The Impact device may fail to operate correctly if these files are modified or deleted. • Impact Root: The device’s operating system and firmware files. Do not put more than thirty two files in the root directory or the install may fail. • Composite Tools: Composite Tools are created by combining existing tools into new configurations. Any tools stored here (and marked to Load On Startup) are automatically included in VPM’s toolbox in a self-named drawer. • Images folder: images stored on the device. To backup images, copy them from this folder to a folder on the client PC. Images can only be placed into this folder using the File Manager. Images with a name greater than 44 characters cannot be used by the file camera. 2-37 Datalogic Automation Inc. File Manager Impact Reference Guide • VisionPrograms: Datalogic and user-created vision programs • Web folder: U-defined files that can be accessed with a web browser. To access the files in the Web folder with a browser 1. Open a web browser. 2. In the Address field, type http://123.123.123.123/file/ where 123.123.123.123 is the IP address of the Impact device. 3. Press Enter. If there is a file in the folder named index.htm or default.htm, the browser will automatically display it. If not, the directory is displayed. To display a different file, enter the file name after the directory name. IMPORTANT: File names are case sensitive. For example: http://123.123.123.123/file/index_help.htm File List To select a file from the list, click on the file name in the list. To select multiple files, hold down the Ctrl key and click each file. If a file that is pasted into the Vision Programs folder is already loaded on the Impact device, the new file is automatically loaded in place of it. To Cut or Delete a File: Select the desired file(s), then use the Cut or Delete button on the main VPM toolbar. To Copy and Paste a File: Select the desired file(s), then use the Copy and Paste buttons on the main VPM toolbar. You can also click the file and drag it to the desired folder. The right pane of the tab shows the files in the folder that is selected in the left pane. Click on the respective header to sort the files by name, size, or date modified. The small arrow on the header indicates the sort order. Not all headers are displayed for all folders. • File Name: Vision program files have a .vp extension. Each vision program file must have a unique name. IMPORTANT: File names are case sensitive. • Vision Program Name: This column is displayed only when the Vision Programs folder is selected. It shows the name of the vision program within the vision program file. Vision Programs are created with Vision Program Manager. Multiple vision programs can have the same name. Links are made from control panels to a vision program. IMPORTANT: Program names are case sensitive. • Size, Modified: Shows the size in kilobytes and the date the file was modified. • Load/Unload: This column is displayed only when the Vision Programs folder is selected. When this box is checked, the indicated vision program is immediately loaded in the Impact device. When the box is unchecked, the file is unloaded. Loaded programs can be edited in Vision Program Manager and are queued to run if they are triggered when the device is online. • Load On Startup: This column is displayed only when the Vision Programs folder is selected. When this box is checked, the indicated vision program is loaded into the device when it restarts. Loaded programs can be edited in Vision Program Manager and can run when the Impact device is online. Restoring vision program files Datalogic Automation Inc. 2-38 Impact Reference Guide Modbus TCP/IP Server To restore vision program files from the client to the Impact device: 1. Connect to the desired device. 2. Click Settings Tab - File Manager - Setup. 3. Open the folder on the client drive that contains the file to be restored. 4. Click the file to be restored to select it. 5. Click the Copy button. 6. Click the plus sign to the left of the Impact Root folder to open it. 7. Click the VisionPrograms folder. 8. Click the Paste button. 9. The file is pasted into the VisionPrograms folder. 10. If you want the file to be loaded on the device, check the Load/Unload check box. Modbus TCP/IP Server The Modbus TCP/IP Server interfaces with other devices that use Modbus TCP/IP protocol. There are brief details of the server’s operation after the following table. (Datalogic Impact devices do not support serial Modbus protocol.) All Modbus registers are 16 bit integers. The VPM Modbus server registers (the number in brackets) are used as described here. NOTE: This System Object is not available while the device is online. M o d b u s S e r v e r P r o p e r t i e s Ta b 2-39 Input Name What it is Online [0] If this value is set to one, the camera goes online. If it is set to zero, the camera goes offline. Trigger [1] If this value is set to non-zero, the camera is triggered if it is Online. This value is also written to the Trigger Ack register as a trigger acknowledgement. Gain [2] The camera’s current gain setting Shutter Speed (x 10us) [3] The camera’s current shutter speed setting in microseconds (divided by ten) Strobe 1 Duration (ms) [4] Strobe 1 current duration setting in milliseconds Strobe 2 Duration (ms) [5] Strobe 2 current duration setting in milliseconds Strobe 3 Duration (ms) [6] Strobe 3 current duration setting in milliseconds Reserved [7] - [32] These registers are reserved for future use Datalogic Automation Inc. AB PCCC Server Impact Reference Guide Input Name What it is Trigger Ack [33] If the Trigger register value is set to non-zero, the camera is triggered and that value is also written to this register as a trigger acknowledgement. Reserved [34] - [63] These registers are reserved for future use Register [64] - [127] The Modbus client can write to these registers.The value in the register can be linked to VPM tool property values. How VPM Works With Modbus TCP/IP The Modbus server runs continuously on the Impact device, listening on the standard Modbus port 502. It does not initiate any communications, but waits for other Modbus devices on the network. To configure a VPM task to run when a Modbus device communicates with the Impact device, select the Modbus Event Trigger Event Type. To run it when Modbus register data changes, select Modbus New Input Data Event Trigger Event Type. (See “Trigger Event Types” on page 3-35). The server supports only Conformance Class 0 functions — Read Multiple Registers (Function Code 0x03) and Write Multiple Registers (Function Code - 0x10). There is one register address space starting at address 0. All Modbus registers are 16 bit integers and the most-significant bit (at the lowest address) is sent first (known as Big Endian). Read and Write a Modbus Register Since VPM tool property values cannot be directly linked to a Modbus register, you need to use a Data Set tool to push a value from a tool’s property into the register. Register values can be directly linked to a VPM tool property. How to write to a register 1. Place a Data Set tool in the task. 2. In the Data Set tool, click the create link button on the Destination Port, then select the desired Modbus Register. 3. In the Data Set tool, click the create link button for the Value property, then select the property you want to link from the source tool. 4. When the Data Set tool runs, it pushes the desired value into the Modbus Register. How to read from a register 1. In the desired tool, select the desired property. 2. Click the create link button. 3. In the Modbus Server system object, select the desired Modbus Register. 4. When the tool runs, it reads the desired value from the Modbus Register. AB PCCC Server The AB PCCC Server allows Allen-Bradley®, Rockwell Automation®, and compatible PLC devices to exchange data with Impact devices using the Programmable Controller Communication Commands (PCCC) protocol encapsulated inside EtherNet/IP commands. The PCCC format is compatible with the Allen-Bradley standard PLC-5 which is supported by a wide variety of their PLCs including the SLC™-5, PLC-5®, and later products. There are brief details of the server’s operation after the following table. Datalogic Automation Inc. 2-40 Impact Reference Guide AB PCCC Server No values for the PCCC Server properties are saved in the Vision Program (*.vp) files. If you require initial values, they must be set using explicit Data Set operations in the program when it loads. The VPM PCCC server properties (the number in brackets) are described here. NOTE: This System Object is not available while the device is online. A B P C C C S e r v e r P r o p e r t i e s Ta b Input Name What it is N7-Integer [0] through N7-Integer [63] 64 indexed integer values F8-Float [0] through F8-Float [63] 64 indexed float values A9-ASCII [0] through A9-ASCII [63] 64 indexed 1-byte characters ST10-String [0] through ST10String [31] 32 indexed string values How VPM Works With AB PCCC The AB PCCC server runs continuously on the Impact device. It does not initiate any communications, but waits for other PCCC devices on the network. To configure a VPM task to run when a PLC device communicates with the Impact device, select the AB PCCC Event Trigger Event Type. (See “Trigger Event Types” on page 3-35). The server supports Typed Read and Typed Write commands. These are standard PCCC commands using command code 0F and functions 0x68 and 0x67 respectively. The PCCC command is placed inside an EtherNet/IP command that targets the EiP object 0x67 and service 0x4B on the Impact device. There are four files of data that can be read or written. These are statically-allocated arrays of data analogous to Modbus registers. File Type File Name PCCC Data Type Depth Port Names Integer 16-bit N7 INT 64 INT [*] Float 4-byte F8 REAL 64 REAL [*] Character 1-byte A9 SINT 64 SINT [*] String n-chars ST10 SINT 32 String SINT [*] The Integer file is limited to sixteen bits which is the standard for PLC-5 devices and the protocol. Reals conform to the IEEE 754 standard for representing a real number in four bytes. The Character file has signed characters. These may be used for characters of other signed one-byte data as well as Boolean values. The String file entries each contain a variable-length string. The data is passed as the SINT format. Only one string at a time may be read or written as it is already passing an array of data. The other three data types may pass one to n data elements at a time. 2-41 Datalogic Automation Inc. OPC Data Access Impact Reference Guide To access Impact device data from a PLC, use Read/Write Message commands with PLC5 as the target device. There are variations in PCCC command implementations across PLC5 product generations. The files must be accessed using the right combination of File Type, File Name, and File Name index as shown in the two tables above. Refer to your PLC documentation for command details. IMPORTANT: File names are case sensitive. Read and Write PCCC values Since VPM tool property values cannot be directly linked to a PCCC server property value, you need to use a Data Set tool to push a value from a tool’s property into the server property. Server property values can be directly linked to a VPM tool property. How to write to a server property value 1. Place a Data Set tool in the task. 2. In the Data Set tool, click the create link button on the Destination Port, then select the desired PCCC property. 3. In the Data Set tool, click the create link button for the Value property, then select the property you want to link from the source tool. 4. When the Data Set tool runs, it pushes the desired value into the PCCC property value. How to read from a server property value 1. In the desired tool, select the desired property. 2. Click the create link button. 3. In the PCCC Server system object, select the desired property. 4. When the tool runs, it reads the linked value from the server property. OPC Data Access The OPC Data Access system object interfaces with the Impact OPC Server. The Server provides OPC capable clients on the network with access to the Impact device through the OPC Data Access system object. The Server can read and write data to the OPC Data Access properties which are described here. NOTE: When you add an input to the OPC Data Access system object, you must restart the OPC Server or the Impact device to make the new input appear in the Server’s input list. Whether you should restart the OPC Server or the Impact device depends on which would cause the least disruption to your operation. (Also see “Enable OPC/ActiveX Server” on page 2-9.) For more details about the OPC Server, refer to the OPC Server Reference (Document 843-0136). NOTE: This System Object is not available while the device is online. O P C D a ta A c c e s s P r o p e r t i e s Ta b Input Name What it is Online When true, places the Impact device online. Trigger When true, a camera trigger event is created in the Impact device Gain The Impact camera gain value Datalogic Automation Inc. 2-42 Impact Reference Guide OPC Data Access Input Name What it is Shutter Speed (x 10 microseconds) The camera shutter speed Strobe 1 Duration (ms) The duration for strobe 1 Strobe 2 Duration (ms) The duration for strobe 2 Strobe 3 Duration (ms) The duration for strobe 3 Create Custom OPC Inputs You can create custom OPC inputs then read and write those input values from other VPM tool properties. How to create a custom input 1. Click the Add Input button above the properties pane. 2. Click in the new input’s name field and rename it. This is the name that the Impact OPC Server will use to read and write the input value. Refer to the OPC Server Reference for more details. Read and Write OPC values Since VPM tool property values cannot be directly linked to an OPC Data Access property value, you need to use a Data Set tool to push a value from a tool’s property into the Data Access property. Data Access property values can be directly linked to a VPM tool property. How to write to an OPC Data Access property value 1. Place a Data Set tool in the task. 2. In the Data Set tool, click the create link button on the Destination Port, then select the desired OPC Data Access property. 3. In the Data Set tool, click the create link button for the Value property, then select the property you want to link from the source tool. 4. When the Data Set tool runs, it pushes the desired value into the OPC Data Access property value. How to read from an OPC Data Access property value 1. In the desired tool, select the desired OPC Data Access property. 2. Click the create link button. 3. In the OPC Data Access system object, select the desired OPC Data Access property. 4. When the tool runs, it reads the linked value from the OPC Data Access property. 2-43 Datalogic Automation Inc. OPC Data Access Datalogic Automation Inc. Impact Reference Guide 2-44 C H A P T E R 3 Vision Program Manager Introduction This chapter describes how to set up an inspection task, including an overview of Vision Program Manager tools and how to configure them. This chapter introduces VPM and describes how to configure the tools in the Toolbox. If you are using a camera, the camera should be calibrated before you set up an inspection task so that inspection measurements are accurate. See “Camera Setup Tab” on page 2-17 for camera calibration details. Also be sure that the camera and lighting are connected and adjusted appropriately. The client computer must be connected to the Impact device hardware with the device powered on. See “PC to Device - Direct Connection” on page 6-30 for more details. If you are using the file camera, be sure the desired images are active in RAM (see “File Camera Setup Tab” on page 2-34). When you have completed the inspection task, you can view the results in the VPM Display tab, or create a custom user interface with CPM. Help If you need help while using the Impact software, you can refer to this manual or the online help. To access online Help, click the Help icon in the toolbar, then click the desired topic in the Table of Contents in the left pane of the Help window. Start VPM NOTE: Access to VPM is limited to users with an Administrator or Programmer access level. See “Impact Device Security Overview” on page 2-13 for details. To start VPM: 1. Double-click the VPM shortcut on the desktop. 2. When VPM starts, it automatically scans for Impact devices on the client’s network and displays the Device Selection list. If the desired device doesn’t appear in the list, click Refresh. If it still doesn’t appear, check the device’s power and Ethernet connections. • Devices found This list displays the names, IP addresses, and other information about the devices connected to the client network. Click the Refresh button to update the list of devices. • Connect to Device Select the desired Impact device or running Emulator, then click Connect. If security is enabled on the device, the User Logon dialog is displayed. When a valid User ID and password have been entered, VPM tries to connect to the device. If it is unsuccessful, a "connection failed" dialog is displayed. 3-1 Datalogic Automation Inc. VPM - An Overview Impact Reference Guide Multiple users can connect to one device, but only one user at a time can edit programs or change data on the device. User Logon dialog Enter a valid User ID and password, then click Log On, to access the selected Impact device. Click Change Password to change a user password from this dialog. (See “To modify a password during logon” on page 2-14 for more details.) • Edit IP Address... To change the IP address of the selected device, click this button. When the Edit IP Address dialog is displayed, enter the new IP Address, and Mask. See “IP Address, IP Gateway, and IP Mask” on page 2-2 for more details. VPM - An Overview VPM is used to develop vision inspection programs. These programs contain one or more tasks which are built from a variety of tools. Tasks can be developed to produce a certain result, then grouped together and called from other tasks to provide flexibility. This diagram shows the elements of a simple VPM vision program. Vision Program Task A Task B Tools Datalogic Automation Inc. Tools 3-2 Impact Reference Guide VPM User Interface VPM User Interface These are the primary areas in the VPM interface. Each of these areas is explained in the following sections. Summary and Add Device Select Camera Main Toolbar View Tabs Image Display and Shape List ROI Toolbar Summary Table Buttons Image Display Area Settings and Task tabs Toolbox Includes Composite Tools Tool and Task Test Buttons Task Tree and Summary Table in this area Tool Properties Tabs Icons Icons are used throughout Impact software. In some cases the icon is informative, in others it indicates a button that performs an action when you click it. This list of icons (sorted alphabetically by tool tip) shows the tool tip and a cross reference to the icon’s meaning. Each tool and system object also has a tool tip. Tools are explained starting on page 3-38. About VPM - See “About VPM” on page 3-10. Add Template - See “Add Template” on page 3-8. Camera Preferences - See “Camera Preferences” on page 3-6 and page 3-10. Connect to Device - See “Connect to Device” on page 3-6. Copy - See “Copy” on page 3-8. Currently online/offline - See “Put device online/offline” on page 3-7. Currently using File Camera/Camera - This button is disabled when you are connected to the Emulator. See “Camera Setup Tab” on page 2-17 for setting up a real camera. See “File Camera Setup Tab” on page 2-34 for setting up a file camera. Cut - See “Cut” on page 3-8. Delete (Links) - See “To delete a link” on page 3-30. 3-3 Datalogic Automation Inc. Icons Impact Reference Guide Delete Selected Items - See “Delete Selected Items” on page 3-8. Delete All Character Models - (OCR and Character Contour Match tools) See “Character Contour Match” on page 3-159 or “OCR” on page 3-180. Delete Character Model - (OCR and Character Contour Match tools) See “Character Contour Match” on page 3-159 or “OCR” on page 3-180. Float Image Display - See “To float the Image Display Area” on page 3-16. Help - See “Help” on page 3-10. Histogram - See “Display Area Toolbar” on page 3-17. Image History - See “Summary Table Buttons” on page 3-11. Inspection - See “Creating a Vision Program” on page 3-30. Line Profile - See “Display Area Toolbar” on page 3-17. Link - (Links) See To Create a Link in “VPM Linking” on page 3-28. Live Images - See “Live Images” on page 3-12. Load - See “Load” on page 3-7. New - See “New” on page 3-7. Paste - See “Paste” on page 3-8. Pause Summary Table - See “Pause Summary Table” on page 3-12. Print - (Links) See “Link Summary” on page 3-24. Print Options - See “Print Options” on page 3-8. Print Preview - (Links) See “Link Summary” on page 3-24. Print to text file - (Links) See “Link Summary” on page 3-24. Program Preferences - See “Program Preferences” on page 3-9 Reset Run Counts - See “Reset Task Run Counts” on page 3-12. ROI property colors - For any tool with an ROI, these colors next to the Input or Output property indicate the color of the ROI on the image display. Click the property to select the ROI. Run Once on Current Image - See “Run Once on Current Image” on page 3-12. Save - See “Save” on page 3-8. Save a Template - See “Save a Template” on page 3-8. Save As - See “Save As” on page 3-8. Save Image - See “Display Area Toolbar” on page 3-17. Select Program - See “Select Program” on page 3-8. Show Advanced Browser - (Links) See “Link Summary” on page 3-24. Show/Hide Tools - See “Toolbox” on page 3-11. Datalogic Automation Inc. 3-4 Impact Reference Guide Select Camera Show ROIs (Summary tab) - See “Summary and Add Device” on page 3-5 Show Summary Table buttons - See “Show Summary Table Buttons” on page 3-12. Start/Stop Auto-trigger - See “Trigger Tab” on page 2-19. Start/Stop Continuous Trigger - See “Start/Stop Continuous Trigger” on page 3-11. Task - See “Create a Task” on page 3-33. Tip - This icon indicates helpful text or a guide for what to do next. Tool branch - See “Branch” on page 3-205, “Group” on page 3-210, “Multiple Branch” on page 3-211, or “Pass Fail” on page 3-211. Tool Input property - See “Properties Tab” on page 3-24. Tool Method - See “Display panel” on page 3-23. Tool Output property - See “Properties Tab” on page 3-24. Trigger Once - See “Trigger Once” on page 3-11. Unload - See “Unload” on page 3-8. View Threshold - See “Threshold Viewer” on page 6-1. Zoom Character Models - (OCR and Character Contour Match tools) See “Change Image Calibration” on page 3-218 or “OCR” on page 3-180. Zoom Character Models to 100% - (OCR and Character Contour Match tools) See “Change Image Calibration” on page 3-218 or “OCR” on page 3-180. Zoom Image - See “Display Area Toolbar” on page 3-17. Zoom Image to 100% - See “Display Area Toolbar” on page 3-17. Zoom Image to Fit All ROIs - See “Display Area Toolbar” on page 3-17. Zoom Image to Fit View Area - See “Display Area Toolbar” on page 3-17. Select Camera You can connect to multiple devices or cameras with VPM. Click one of the tabs to display the desired device or camera. Editing a vision programs on one device or camera while another camera is online and triggering may cause unexpected results. Multiple users can connect to one device, but only one user at a time can edit programs or change data on the device. Summary and Add Device Summary tab Tip: If the Summary and Add Device tabs are not visible, check the "Hide Camera Tabs" setting in Program Preferences (see page 3-9). 3-5 Datalogic Automation Inc. Main Toolbar Impact Reference Guide The Summary tab provides a summary of the inspection results from all the devices or cameras currently connected to VPM. Show ROIs - The Show ROIs button turns the ROI display on and off for all images on the Summary tab. Total Counts, Pass/Fail bar graph, and Reset - This area displays the pass, fail, percentage, and total counts from the first Pass/Fail tool in the ImageIn task. (You must include a Pass/Fail tool in the task to display this area.) Click the Reset button to set the counts to zero. Add Device tab You can connect to multiple cameras or devices with VPM. If you are already connected to one or more, click the Add Camera tab to add another connection. When you click the tab, a dialog is displayed where you can select the desired device. See “Connect to an Impact device, camera, or Emulator” on page 1-5. Program Preferences See “Program Preferences” on page 3-9. Camera Preferences • Display Size: This dialog indicates the width and height of the current display in pixels. If you change the values, VPM will adjust the Summary tab display accordingly. If the Auto-fit to window check box is checked, VPM will automatically adjust to the current monitor resolution. Main Toolbar Use the main toolbar tools to manipulate vision programs, tools, tasks, and Impact devices. Connect to Device Click the Connect button to connect VPM to an Impact device or Emulator. (See “Connect to an Impact device, camera, or Emulator” on page 1-5 for more details.) When you are connected to a device, the button changes to the Disconnect button. If you close VPM while you are connected to a device or camera, you will see the following prompt. If you click Yes, VPM will automatically reconnect to that device or camera the Datalogic Automation Inc. 3-6 Impact Reference Guide Main Toolbar next time VPM starts. If you click No, the Device Connect dialog will be displayed the next time VPM starts. Editing a vision program from multiple VPM programs The first VPM program to connect to a device acquires exclusive editing privileges on that device. Other VPM programs can connect to the device and display data (Read Only mode), but they cannot modify its vision programs. (See “Special Case Editing” on page 4-3.) When a second VPM program connects to that device, the following dialog is displayed (WORKSTATION2 is the network name of the computer running the currently connected VPM program). When the first VPM disconnects from the device, another VPM program can connect to the device and edit on it. If that second VPM program had already connected, it must disconnect from the device, then reconnect. If the Display tab is selected in the first VPM, the Display tab on the second VPM is enabled and the second VPM can access and modify values on its Display tab. Put device online/offline Click this button to toggle the Impact device on and offline. When the device is online (the switch is labeled "1" and is colored yellow), the device accepts triggers. Any tasks that are loaded are executed when they are triggered by their selected trigger events. If you try to exit VPM while the device is online and there are unsaved changes in the vision program file, a warning dialog is displayed. When the device is offline (the switch is labeled "0" and is colored grey), tasks that are loaded remain loaded, but the device does not accept hardware triggers and VPM stops generating software triggers. New This creates a new vision program and adds it to the vision program list. A vision program may contain multiple tasks. See “Creating a Vision Program” on page 3-30 for details. Load This opens a browser dialog so you can open (load) an existing vision program into the device’s operating system and make it ready to edit or run. Vision programs are stored on the device and may also be loaded from the Settings Tab - File Manager - Setup. 3-7 Datalogic Automation Inc. Main Toolbar Impact Reference Guide Unload This closes the currently selected vision program and unloads it from the Impact device’s operating system, but it remains stored in the device’s memory. Select Program Click the button to show the list of vision programs that are currently loaded in the Impact device. Select a program to view, modify, or run it. Save This saves the currently open vision program into the Impact device’s memory and it remains loaded on the device. You can see a list of all the vision programs on the device (loaded and unloaded) from Settings Tab File Manager - Setup. This button is disabled if the file is password protected. If you try to exit VPM while the device is online and there are unsaved changes in the vision program file, a warning dialog is displayed. Save As This saves the currently open vision program with a new name. You can save the file with password protection. See “Vision Program Security” on page 3-32. This button is disabled if the file is password protected. Add Template This loads a previously saved vision program template. This button is disabled if the file is password protected. Save a Template This saves the currently selected tool or tools to a template file that you can then load for use in other tasks. This button is disabled if the file is password protected. Cut This cuts the selected tool to the system clipboard. The selected tool is deleted. This button is disabled if the file is password protected. Copy This copies the selected tool to the system clipboard. This button is disabled if the file is password protected. Paste This pastes a tool from the system clipboard to a position below the currently selected tool in the task tree. See “Paste Linked Tools” on page 3-29 for information about pasting linked tools. This button is disabled if the file is password protected. Delete Selected Items This deletes the selected tool or task. To delete a vision program file, see “File Manager Setup Tab” on page 2-37. This button is disabled if the file is password protected. Print Options • Print This prints a formatted, expanded list of all properties and values in the currently selected vision program, task, or tool. This button is disabled if the file is password protected. Datalogic Automation Inc. 3-8 Impact Reference Guide Main Toolbar • Print preview This displays a preview of a formatted, expanded list of all properties and values in the currently selected vision program, task, or tool. This button is disabled if the file is password protected. • Print to text file This prints an expanded list of all properties and values in the currently selected vision program, task, or tool to a text file. This button is disabled if the file is password protected. • Print Settings Files (displayed only when Settings-General-General Panel is selected) This prints the values in the Settings Files currently selected in the Settings Files dialog (Camera Calibration, Device Settings, and/or OPC Data Access). This button is disabled if the file is password protected. • Print Settings Files Preview (displayed only when Settings-General-General Panel is selected) This displays a preview of the values in the Settings Files currently selected in the Settings Files dialog (Camera Calibration, Device Settings, and/or OPC Data Access). This button is disabled if the file is password protected. Program Preferences NOTE: There are additional preference settings when you select the Display tab. See “On-Screen Keyboard” on page 6-11. • Automatically link tool image input: When new tools are added to the vision tree, that tool’s input image is automatically linked to the task’s image. See “Automatic Image Linking” on page 3-28 for more details. • Automatically link tool origin input: When new tools are added to the vision tree, that tool’s origin is automatically linked to the output of the closest tool above it in the task tree that has an Origin output. See “Automatic Origin Linking” on page 3-29 for more details. • Auto-update links: All tool links are automatically updated when the tool is run or selected. If this is not selected, linked data is not updated unless the Update Links button in a tool is clicked. • Use small icons: Small program and tool icons are displayed. • Hide Camera Tabs - The Select Camera, Summary, and Add Camera tabs are hidden. You can choose this option to save screen space if you are only working with one camera. • Save compressed vision program files: Compresses the vision program file into a smaller file when it is saved. Compressed files load and transfer faster. When a file is saved with password protection, it is automatically compressed. See “Vision Program Security” on page 3-32. • Show Tool Tips on image: VPM displays tooltips when the mouse is held over the image (e.g. x, y position; ROI position and angle). • Text Size: If default is selected, VPM uses Window’s default text size for all displayed text. If Custom is selected, you can enter the font size you want VPM to use. If you are using VPM with a non-English translation file, we recommend that you use the default size (11). • Enable On-screen Keyboard (Note: this setting is only available when you select the Display tab.) If this is selected, an on-screen keyboard is made available for entering text and numbers. See ““OnScreen Keyboard” on page 6-11. 3-9 Datalogic Automation Inc. Main Toolbar Impact Reference Guide Camera Preferences • Display Refresh Rate: The rate at which the Summary Table and Display tab values are refreshed while VPM is in Start/Stop Continuous Trigger mode or online. If the system is online, this setting affects only the refresh rate, not the trigger rate. • Display Refresh Timeout: Occasionally communication timeouts can cause VPM to stop refreshing the Summary Table and Display tab values. The timeout value can be too short for the amount of information being gathered for display and/or the Impact device is being triggered at a rate that does not allow it to return information to VPM. If a timeout occurs after three consecutive attempts, a warning is displayed indicating that you should increase this setting. You should adjust this timeout value only after you have received this warning. The timeout can be adjusted from one to thirty seconds; each mark on the scale represents approximately three seconds. • Auto Image History: NOTE: In high speed applications, some images may not be saved if saving them delays task execution. Determining factors can include the VPM update rate, the device’s trigger rate, inspection speed, and task execution time. In PC Memory: Images are stored in PC memory and can be accessed using the Image History button (see “Image History” on page 3-12). Type: Select the type of image you want to save. Depending on the inspection speed and task processing time, some images may not be saved if saving them delays task execution. Maximum Images: Enter the number of images to save (from two to twenty images depending on the image size and the amount of available PC memory). Save to File: Images of the selected Type from the currently selected tool or task are saved when Start/Stop Continuous Trigger is selected or the Impact device is online and getting triggers. If the tool does not have an image display, images from the Summary tab are saved. Enable: If checked, and either the Design or Display tab is selected, VPM saves the selected type of image to the indicated path. Images are saved as a png file type. NOTE: You must also link the task’s Pass/Fail status on the Task display panel (see “Options panel” on page 3-22). Type: Select the type of image you want to save. Depending on the inspection speed and task processing time, some images may not be saved if saving them delays task execution. Path: Use the default path, enter a valid path to a folder where you want to save the images, or click Browse to find a folder. The IP address of the currently selected Impact device is appended to the path name and a folder is created if it does not exist. The IP address directory name is NOT shown in the path field. For example, if you enter the path c:\image_directory, the images are saved in the folder c:\image_directory\192.168.108.65 Name: This name, along with the image number count, is used as the saved image’s file name. IMPORTANT: File names are case sensitive. Rollover at: Previously saved images are overwritten after this number of images has been saved. Help Click this to display online help information for Impact software. About VPM Click this to display version, build, and translation file information about VPM. For an M-Series processor, additional information about the number of licenses active for M-Series cameras, OCR tools, and third party cameras can be displayed. Datalogic Automation Inc. 3-10 Impact Reference Guide View Tabs View Tabs Click the Design tab to access the Design view. The following section describes the Design view. Click the Display tab to access the Display view. See “Display Tab” on page 3-25 for a complete description. Design Tab NOTE: The Design tab is hidden when the Summary tab is selected. To o l b o x Show/ Hide toolbox The toolbox contains all the vision programming tools in VPM. To show or hide the toolbox, click the toolbox Show/Hide button. To resize the toolbox, point to the right-side border then click and drag the border when the pointer becomes a double-headed arrow. Tools are grouped in the Drawers according to common functions. To open or close a Toolbox Drawer (group), click the toolbox label. Choose the tool you want, then click and drag it to the Task Tree to add it. Only one Toolbox Drawer can be open at a time. Any Composite Tools you have added are displayed in selfnamed Drawers at the bottom of the Toolbox. The Recently Used Drawer contains the ten tools most recently used. Details about each tool begin on page 3-38. S u m m a r y Ta b l e B u t t o n s The Summary Table buttons control File Camera or Camera mode, task testing functions, and the Summary Table display. The trigger buttons (except for Live Images) run the task that has the Trigger Event type set to Image In Event. (See “Trigger Event Types” on page 3-35 for more details.) File Camera or Camera Click this button to switch between File Camera and Camera mode. See “File Camera Setup Tab” on page 234 for details about the File Camera. See “Camera Setup Tab” on page 2-17 for details about Camera setup. Start/Stop Continuous Trigger Click this button once to turn it on, click it again to turn it off. While it is on, images are acquired and the task with the Trigger Event type set to Image In Event runs continuously, based on the refresh rate set by the Summary Table Refresh Rate setting in Preferences. This button is disabled when the system is online, when you are promoting inputs and outputs, or when you are linking properties. When you click this button, the view automatically switches to Summary Table view and the Results Display replaces the Tool Properties tabs (see “Results Display” on page 3-14). Trigger Once Each time this button is clicked, an image is acquired and the task with the Trigger Event type set to Image In Event runs once. This button is disabled when the system is online, when you are promoting inputs and outputs, or when you are linking properties. When you click this button, the view automatically switches to Summary Table view. Run Once on Current Image 3-11 Datalogic Automation Inc. Design Tab Impact Reference Guide When this button is clicked, the task that has its Image In Event set as its Trigger Event type runs once on the image currently in the image buffer. A new image is not acquired. This button is disabled when the system is online, when you are promoting inputs and outputs, or when you are linking properties. Live Image Live Images When this button is clicked, images are displayed as rapidly as possible. If a camera is connected to the device, images are acquired and displayed. If File Camera is selected, all the images in the file camera are displayed, one at a time. No tasks or tools are run in this mode. Image History You can save from two to twenty of the most recently acquired images in Image History (depending on the image size and the amount of available PC memory), then display them like any other acquired image. When you click the Run Once on Current Image button, the task will run on the historical image displayed. The number of images to save is set in Camera Preferences (see “Camera Preferences” on page 3-10). Show Previous Image Show Next Image Choose an Image to Show Pause Summary Table Click this button to pause Summary Table value updates, including the image. If the system is online or the Start/Stop Continuous Trigger button is depressed, tasks continues to run. This button is enabled only when the Start/Stop Continuous Trigger button is depressed or the system is online. Reset Task Run Count Reset Task Run Counts Click this button to set the values in the Summary Table’s Run Counts, Process Time, and Total Time columns to zero. Show Summary Table Buttons When the Image Display Window is resized, the row of Summary Table buttons is resized and some of the buttons can become hidden. Click this down arrow to display the hidden buttons. S e t t i n g s Ta b All of the functions on the Settings Tab are described starting on page 2-1. Ta s k Ta b s Display Task List Click a tab to select a task. If the number of tasks exceeds the list area, click the left arrow on the Task Chooser to select the first task in the list, or click the down arrow to select any other task. Datalogic Automation Inc. 3-12 Impact Reference Guide Design Tab Add a Task When you click this tab, a task is added to the currently selected vision program. (See “Create a Task” on page 3-33) This tab is disabled if the file is password protected. When you add a task, a new task tab is created. S u m m a r y Ta b l e The Summary Table shows the results of all the tools that ran in the task. When the device is online and triggering, or the Start/Stop Continuous Trigger button is pressed, the tool results are updated continuously in the table values area. When the Impact device stops triggering, or the Pause Summary Table button is pressed, the most recent tool results are shown. The table refresh rate is determined by the Summary Table Refresh Rate (See “Program Preferences” on page 3-9), the tools in the task, and the task size. Larger tasks, and more complex tools, take longer to run. To adjust the width of each table column, click and drag the separator bar in the heading. S u m m a r y Ta b l e Va l u e s This area of the Summary Table shows the results of the task and each tool when it ran. If the outputs are not visible, click on the plus sign to the left of the tool or task. The tool’s run status is indicated by different colors in the tool row. Yellow: If a tool fails to complete execution, for example, it aborts because an ROI is off the image, the row is yellow. The reason for the failure is listed in the Abort Cause column. Red: If a tool fails (its pass/fail output is false), the row is red. Grey: If a tool runs with normal results, the row is grey. NOTE: When running a task on an Emulator, the task times listed below are not necessarily the same times that will occur when running the task on an actual device or camera. They are shown only for relative time comparisons between tools and other task settings • Run Counts This is the number of times the tool or task has run since the program was loaded or the Reset Task Run Count button was clicked. • Process Time The time since the task or tool started running (in microseconds). This is a “live” value during the run because it is read during the run and updated to the current time. Once the task or tool finishes running, this time is locked to the time at which it finished. For the task, this is the time it took to run the all the tools in the task with some time added for data aggregation and evaluation at the task level. 3-13 Datalogic Automation Inc. Design Tab Impact Reference Guide • Total Time The time since the hardware trigger at the device started the image acquisition process (in microseconds). This is the "trigger to done" time, which includes exposure, acquire, image transfer to the PC, etc. This is a “live” value during the task run as it is read during the task run and updated to the current time. Once the task finishes running, this time is locked to the time at which the task finished. Note that the Process Time and Total Time will not necessarily be equal, since there is some "overhead" time included in the Total Time. • Abort Cause If the tool aborts before completing its run, for example, if an ROI is off image, this column displays the reason. Results Display If you click the Start/Stop Continuous Trigger button, the Results Display is shown. This shows a summary of results from a tool or task you select. You cannot modify any tool settings while the Results Display is shown. The Results Display for a Line Gauge tool is shown here. Ta s k Tr e e Datalogic Automation Inc. 3-14 Impact Reference Guide Design Tab The Task Tree shows the tools in the order they run when the task runs. If you link data between tools, be sure the data you are using originates in a tool that runs before the destination tool runs. Task Icon Resize Task Tree area Expand Branch Collapse Branch Expand or collapse branches: Some tools, like the Branch tool, have branches that can be expanded and collapsed. Click the Expand or Collapse icon to view the branches. Resize the task tree area: Point the cursor to the right-side border. When the pointer becomes a doubleheaded arrow, click and drag the border. Reorder tools in the task tree: To move a tool in the task tree, click and drag the tool up or down to the desired location. Input Image Display Area This is the display area toolbar. The image name is displayed here. Live camera images are numbered sequentially. The cursor’s X-Y position and pixel greyscale intensity are displayed here. Click the pushpin to float the image display area. ROIs are created and modified in the image display area. Some tools have both an Input and Output Image tab. The Task Image Display Area has a Color Image tab. The currently acquired image is displayed in this area. The name of the image is displayed at the top of the area. If you are using the File Camera, this is the image file name. If you are using a live camera, this is the camera type followed by a unique number. To reset the image number, see the Next Image Number property on the Camera Properties tab (page 2-16). 3-15 Datalogic Automation Inc. Design Tab Impact Reference Guide This image display area is where you configure Regions of Interest (ROI) and other tool parameters. To enable automatic image linking when new tools are added to the task, see “Program Preferences” on page 39. To auto-save images, see “Program Preferences” on page 3-9. If you are using an image processing tool with an ROI, the tool will not work correctly if all or part of the ROI extends past the edge of the image. If this happens, an "ROI Off Image" watermark will be displayed over the image display area for five seconds or until you move the ROI back onto the image. Image showing ROI Off Image watermark To acquire an image 1. Select the task icon. 2. Click the drop-down arrow in the Trigger Event field and select Image In Event if it is not already selected. You should only have one Image In Event task in a program. 3. Click the Snap button in the Tool Test Button area. If a camera is connected to the device, the camera image is displayed. If the device is in File Camera mode, an image from the device’s image memory is displayed. (For File Camera mode see “File Camera or Camera” on page 3-11.) Color images are displayed only on the Color Image tab. You can "float" the Image Display area to make it larger so you can see it better or move it to a second monitor so you can see it while you create or move ROIs. The float option is not available on the Setup tab. To float the Image Display Area 1. Click the pushpin in the upper right corner of the Image Display Area (next to the cursor location value). 2. Click the title bar to drag the Image Display. Click the corners or edges to resize the display. 3. To return the Image Display Area to its normal position, you can click the pushpin in the corner of the floating Image Display area, or the permanent display area. Pushpin to float or dock Image Display Datalogic Automation Inc. 3-16 Impact Reference Guide Design Tab D i s p l a y A r e a To o l b a r Save Image Zoom Histogram Line Profile Image Save Image • When you click the Save Image button, two buttons are displayed. To save the image only, click the Save Image button. If you click Save Image with Graphics, the image will be saved with all ROIs that are on the image and Pseuodocoloring (if enabled). Note that images saved with graphics are saved in 24-bit format color and cannot be used as inspection images. You will be prompted to choose the path and name for the saved file. NOTE: In order for the image calibration information to be saved and later used in the file camera, the image MUST be saved in png format without graphics. Save Image Save Image with Graphics Zoom Image Note: These buttons magnify or shrink the image size in the image window, but the inspected image size is not affected. When you click the Zoom Image button, four buttons are displayed. Zoom Image In/Out Zoom Image to 100% Zoom Image to Fit View Area Zoom Image to Fit All ROIs • Zoom Image In/Out: When you click this button, it stays depressed until you click it again. To zoom in (up to 1600:1), left click on the part of the image you want to magnify or roll the mouse wheel button toward you. To zoom out (down to 12.5:1), right click on the part of the image that you want to see in the center of the image display or roll the mouse wheel button away from you. • Zoom Image to 100%: When you click this button, the image is displayed at 100% its size (1:1). • Zoom Image to Fit View Area: When you click this button, the image size is automatically scaled so you can see the entire image in the image display. • Zoom Image to Fit All ROIs: When you click this button, the image size is automatically scaled so that all ROIs on the image can be seen and you can move them back onto the image if necessary. If an ROI goes off the screen during editing and running a tool, an "ROI Off Image" watermark is displayed over the image and the display switches to this mode. 3-17 Datalogic Automation Inc. Design Tab Impact Reference Guide Histogram and Line Profile NOTE: The Histogram and Line Profile views are not available for color images. To display the Threshold Viewer, you can also right click on the ROI or the image. The floating Threshold Viewer displays a histogram or line profile, depending on the area of the image or ROI selected. The viewer graphically represents each pixel’s grey level to show how a VPM tool "sees" the image (example below). For a detailed explanation of the Threshold Viewer, see “Threshold Viewer” on page 6-1. Region Of Interest A region of interest (ROI) is a marked area on the video image. During an inspection, the vision system only examines pixels within an ROI. Each image inspection tool has its own set of ROIs. Several different ROI types are available: line, wide line, rectangle, circle, and polygon. The rectangle, circle, and polygon are used with tools that have a Shape List data type. A Grid ROI places multiple ROIs based on a user-selected pattern. NOTE: If an ROI is linked from another tool, you cannot move or reshape the ROI in the tool to which it is linked. You can select ROIs using keyboard keys while you are using the ROI Editor. The Tab key selects the next ROI, Shift-Tab selects the previous ROI, Ctrl-Tab extends the selection to the next ROI, Shift-Ctrl-Tab extends the selection to the previous ROI. Ctrl-A selects all ROIs. Both the Tab select and the Select All methods operate on all ROIs that are visible and selectable in the ROI Editor, unless a ListROI is selected and "locked." In that case, the methods will operate only on the ROIs in that particular ListROI. Typically, ListROIs are "locked" by a tool setup so, though many types of ROIs can be displayed to show the results of setting up the tool, editing ROIs is restricted to those ROIs that represent a single tool property. S h a p e L i s t R O I To o l b a r Create ROI Datalogic Automation Inc. Grid ROI Cut Copy Paste Delete Save Zoom Histogram Line Image Profile 3-18 Impact Reference Guide Design Tab When you select the Shape List input in the list of tool inputs, this toolbar is displayed. These tools are used to create ROIs, cut, copy, paste, and delete selected ROIs, save images, zoom in and out on the image, and view a histogram or line profile. For more details, also see “Display Area Toolbar” on page 3-17. To place a Rectangle, Circle, or Polygon Shape List ROI 1. In the tool input properties, select Shape List. 2. On the toolbar, click the Create ROI button. 3. From the drop down, select the ROI type you want to place. 4. Click on the image where you want to place the ROI. To resize, move, or rotate the ROI, move the cursor around the ROI border (the cursor changes to one of these types), then click and drag the cursor to the desired place or size. Create ROI Rectangle Circle Polygon Line • Move • Resize • Rotate • Polygon Add Edit Point To delete an Edit Point, click and drag the point you want to delete over an adjacent edit point and release the mouse button. The edit point must touch the point you want to delete. NOTE: If an ROI moves outside the image window, an "ROI Off Image" watermark is displayed over the image and the display switches to Zoom to Fit All ROIs mode. You can also click the button on the Display Area toolbar (see “Display Area Toolbar” on page 3-17). To create a Grid Shape List ROI 1. In the tool properties, select the Shape List Property 2. On the toolbar, select the ROI type you want to place. 3. On the toolbar, click the Create Grid of ROIs button. 4. From the drop down, select the type of grid you want to create: • Step and Repeat: Creates a grid of ROIs based on a single start point, a number of rows and columns, x and y pitch, and a step angle. Position the Start Location ROI, then enter the number of desired rows and columns, the x and y pitch, and the step angle. Rows and columns of ROIs are created x and y distance apart at the step angle beginning at the starting location. • Grid: Creates a grid of ROIs based on a starting ROI, an ending column position, an ending row position, and row and column values. Position the Start Location ROI at the desired row 1 column 1 of the grid. Position the End Column ROI at the final column position of the grid. Position the End Row ROI at the final row position of the grid. Enter the number of desired rows and columns. A grid of ROIs is created based on the number of rows and columns defined. • Area: Creates a grid of ROIs based on a Size ROI, an Area ROI, and an x and y offset. Position the Size ROI on the desired part of the image, place the Area ROI around the desired grid area, then enter the desired x and y offset values. The defined area is filled with ROIs, based on the Size ROI and the offset values. 5. Individual ROIs can be selected and adjusted as desired. 6. When all the ROIs are in the desired place, click Create to create the grid of ROIs, Reset to reset all values and start over, or Done to exit the grid dialog. 3-19 Datalogic Automation Inc. Design Tab Impact Reference Guide Line and Wide Line ROIs To create a Line or Wide Line ROI 1. Select the desired tool, then click the desired Line ROI Property (depending on the tool). 2. On the toolbar, click the Create ROI button. 3. From the drop down, select the Line ROI. 4. Click on the image where you want to place the ROI. 5. To resize, move, or rotate the ROI, move the cursor along the ROI (the cursor changes to one of these types), then click and drag the cursor to the desired place or size. • Move • Resize / Rotate • Widen NOTE: If an ROI moves outside the image window, click the Zoom to Fit All ROIs button on the Display Area toolbar (page 3-17). Circular Arc ROIs Circular Arc ROIs are used in the Circular Pattern Find, Circle Gauge, and Unwrap tools. To adjust a Circular Arc ROI 1. To adjust a Circular arc ROI, move the cursor around the ROI border to the point where the cursor changes to the desired type, then click and drag the cursor to the desired place and/ or size. Increase/ Decrease Radius Move Increase/ Decrease Angle • Move • Increase / Decrease Angle • Increase / Decrease Radius Widen/ Narrow Arc Rotate • Rotate • Widen / Narrow Arc C u t , C o p y, P a s t e , D e l e t e R O I s To cut, copy, paste, or delete ROIs 1. Select the desired ROI, then click the appropriate button. Some tools do not allow more than one ROI to be created or allow the only remaining ROI to be deleted. To o l a n d Ta s k Te s t B u t t o n s Datalogic Automation Inc. 3-20 Impact Reference Guide Design Tab You can use the buttons in this area to run a tool or task, update tool links, and train a tool, depending on the tool type. These buttons are displayed on the Properties tab only. Run button: When you click this button, the task or tool runs just as it does when the vision program is run, but it runs only one time. (An image must be displayed in the image window.) If Auto-update links is selected in Program Preferences, all values linked to the tool (including the image) are updated before the tool runs. If auto-update links is not selected, you should click the Update Links button before you run the tool. You can also click the Run Once on Current Image button on the Summary Table buttons. Snap button: This button is displayed only when "Image In Event" is selected as the task Trigger Event type. When you click this button, the camera is triggered and an image is acquired, or a file camera image is loaded. You can also click the Trigger Once button on the Summary Table buttons. Update Links button: When you click this button, all values linked to the tool are updated, but the tool does not run. (This button is not displayed if the Auto-Update Links check box in Program Preferences is checked.) Add Input button: This button is only displayed for the task and the Data Transfer tool. Click it to add inputs to the task or the Data Transfer tool (see “Data Transfer” on page 3-219). When you add an input to the task, that tool property is "promoted" to the task level and becomes a property of the task also. This allows you to "aggregate" only certain properties from multiple tools into the task level. NOTE: If a tool property with an "Origin" data type and the name "Tool Origin" is promoted to the task level, all other promoted ROIs (including other Origins) will be placed on the image relative to that first promoted Origin when viewed from the task level. This may or may not be the Origin that is used by the tool and that is displayed on the image when the tool is selected. This situation will not affect the tool’s ROI when the tool runs. If you change the name of the first promoted Origin from "Tool Origin" to something else, all the ROIs will be placed on the image relative to an origin of (0,0)0 when viewed from the task level. Add Output button: This button is only displayed for the task. Click it to add outputs to the task. When you add an output to the task, that tool property is "promoted" to the task level and becomes a property of the task, also. This allows you to "aggregate" only certain properties from multiple tools into the task level. Train button: This button is only displayed for tools that can be trained. Training a tool sets up the necessary variables with a known good image so the tool runs properly. Synchronize with task button: This button is only displayed for the Call Task tool. If you change the called task, click this button to synchronize the Call Task tool inputs and outputs with the changes in the called task. Enter Password: This button is only displayed when you load a vision program that is password protected. Click this button to enter the password and open the program for editing, printing, or viewing. S e t u p Ta b A task or tool’s Setup guides you through the steps necessary to configure the most common properties needed to use the task or tool effectively. You may have to use the Properties tab to configure other properties in the tool or adjust those defined by the Setup to get the tool to work with your specific application. Each Setup tab has multiple choices (panels) where different parts of the task or tool are configured. If the Setup tab is disabled, another VPM program may be editing the vision program. As you select different tools, the tab you most recently selected (Setup, Properties, etc) is automatically selected if the tool has a Setup. 3-21 Datalogic Automation Inc. Design Tab Impact Reference Guide NOTE: Some tools have only a General and Display panel. For those tools, you need to click the Properties tab to configure the tool. This example shows the Pass/Fail panel in the Setup for the Blob tool. These radio buttons select the various setup screens. The cursor’s X-Y position and pixel greyscale intensity is displayed here. ROIs are created and modified in the image display area. Some tools have no image. This cursor shape means the ROI is linked from another tool. Tool parameters and results are configured and displayed in this area. Any parameters displayed in blue in this area are linked from another tool, like this Output List. Go to the Properties tab to change a linked value. If a setup parameter is disabled (grey), it is dependent on one of the other parameters. In this case, these values are enabled only when their Feature check box is checked. General panel For tasks and for tool’s without a Setup, you can modify the name here. For tool’s with a Setup, see each tool’s description (starting on page 3-38) for more details. Options panel Datalogic Automation Inc. 3-22 Impact Reference Guide Design Tab Only tasks have this panel. Here you can define how the task operates. • Task Type Called By Another Task or Control Panel: If this task is called by another task or triggered from a Control Panel, choose this option. Triggered By This Event: If this task is triggered by an event or hardware trigger in the Impact device, choose this option, then select the Trigger Event type from the drop down list. See “VPM Task Configuration” on page 3-34 for details about Trigger Event types. • Inspection Pass/Fail Status Link: Click this button to link a Pass/Fail status from a tool in the task. This status determines the Image Border color and whether the border is displayed. To automatically save passed or failed images with VPM, you must link a status here (see “Program Preferences” on page 3-9). • Show Border On Display Tab Image - When the linked Pass/Fail status is equal to the following chosen status, the image border is displayed in red or green. • Failed / Passed and Failed - Choose the status that determines whether the Image Border is displayed. • Timings - See the Output table at “VPM Task Configuration” on page 3-34. Display panel The Display panel for tools and tasks lets you select the properties that are displayed on the Display tab. This example shows the Display panel for the Pass Fail tool. This section is displayed only on the Pass Fail tool. • Clear All - Clears all the property selections. • Select All - Selects all the properties. 3-23 Datalogic Automation Inc. Design Tab Impact Reference Guide • Restore Defaults - Each tool and task has some properties that are selected by default. This restores all of the default selections. • Apply to Entire File - If this check box is checked, the Clear, Select, or Restore Defaults operation will be applied to the property selections in all the tools and tasks in the currently selected vision program file. • Property Name - If the check box to the left of the name is checked, the property value will be displayed on the Display tab. The letter signifies the property type: I = Input, O = Output, M = Method. • Label - This label is shown on the Display tab. Click in the label field to modify it. • Read Only - If this is checked, the property cannot be modified on the Display tab. • Value - The property’s current value. • Display Chart - This selection appears only on the Pass Fail tool. If Chart Results is checked, a chart showing cumulative pass and fail results is displayed on the Display tab. Click in the Chart Label field to modify it. P r o p e r t i e s Ta b In this area you view and define a tool or task’s properties, including its input values. Input properties are configured in different ways, including defining them on the Setup tab, entering them directly into the value field, linking them into the value field, or selecting the values from a list. Details about each tool’s properties begins on page 3-38. Task properties begin on page 3-34. For properties that display or contain real numbers, any number less than 0.001 is displayed in scientific notation. For example, the number 0.00123 is displayed as a fixed point number (0.00123), but the number 0.000123 is displayed in scientific notation (1.23e-4). At least four significant digits are always displayed. Outputs are also listed on the Properties tab. Data can be linked between outputs and inputs, depending on the data type. Links can be viewed on the Link Summary tab (see “Link Summary” on page 3-24). If an input or output has a small plus sign to the left of the name, you can view the sub-properties and all the available data types of those properties. For example, if you click the plus sign of the Success property in the Origin tool (a Boolean data type), other data types for that property are displayed. Value Field Entry List Selection Output sub-property Link Summary Datalogic Automation Inc. 3-24 Impact Reference Guide Display Tab The Link Summary tab window displays information about links to and from the currently selected tool, task, or program. Click the Advanced Browser button to display the data type and value. To open the Link Browser window, click the Link tab. Print to Text File Print Advanced/Basic Browser Tool, Task, or Program Name Print Preview To expand the browser window to include additional fields, click the Advanced Browser button. The link direction arrow points from the source to the destination. The following fields are displayed in the browser window, from left to right. • Icon and name of the currently selected program, task, or tool • Source/Destination value name • Source/Destination value (advanced browser) • Link direction arrow • Icon and name of the Source/Destination tool • Source/Destination value (advanced browser) • Source/Destination data type (advanced browser) The color of the Source/Destination value name indicates the link’s status: • Regular links - blue • Data Set links - purple • Unresolved links (due to a program not being loaded) - red • Broken links - blank To preview a printed list of all the link information, click the print preview icon. To print the list, click one of the print icons. To expand any column to the match the length of the data in the column, click the column header. You can also click on the column divider on the column header and drag the column to the desired width. I n f o Ta b The Info tab is only available on tools with a Setup. It provides additional information and help on how to configure the tool. Display Tab NOTE: The Display tab is hidden when the Summary tab is selected. 3-25 Datalogic Automation Inc. Display Tab Impact Reference Guide Display Areas NOTES: When you switch to the Display tab from another tab, the task does not run automatically. You can click the Run Once on Current Image button to insure that the tab displays the most current values. If a tool has a Train property (e.g. the Origin tool), and you move an ROI, you must use the Train method to update the display. (Click the Setup tab, click the Summary radio button, then select the Train method on the Show On Display tab. See “Display panel” on page 3-23.) The Display tab provides a runtime display for a program’s tool properties. You can select which properties are shown on the Display tab (see “Display panel” on page 3-23). The following examples show the various parts of the Display tab for a task containing the following tools: Origin, Image Sampling, Line Gauge, and Pass Fail. To save images displayed in the Display tab, see “Program Preferences” on page 3-9. The Tool Property display area • Tool - Click on the tool icon to switch to the Display panel in the indicated tool’s Setup tab. • Label - This label is defined on the tool Setup tab - Display panel. The default is Tool Name:Property Name. • Value - This is the property’s current value. If this is an input value, it can be modified here if it has not been marked Read Only (see “Display panel” on page 3-23). If it is an input ROI, you can click on the ROI on the image display to move or resize it. • Control - This column varies depending on the type of property being displayed. Boolean Output - Green for Pass, Red for Fail ROI - Click Display button to toggle the ROI display on the Image Method - Click the button to the initiate the action listed. For example, Train trains the tool. Datalogic Automation Inc. 3-26 Impact Reference Guide Display Tab The Image display area (the image float option is not available here) Current Image Tabs for tools with image and library outputs Four most recent images The Chart display area (to enable, see “Display panel” on page 3-23) Click Reset to reset the tool’s counts Output Tabs Some tools, the Binary Image Filter for example, have an Output Image. The OCR and Character Contour Match tools have a character library output. The libraries can be modified here if they have not been marked Read Only (see “Display panel” on page 3-23). These outputs are displayed in the Output tab area. Vision Program Load The file names listed here are filtered by the Program name entered in the Display Tab Program Filter field. See “File Manager Setup Tab” on page 2-37. You can use this feature so the operator can change between multiple pre-programmed inspections if you define multiple Programs. For example, in applications that use recipe files, you can define a Vision Program file for each "recipe" and give them same Program name. Then, enter that Program name in the Display Tab Program Filter. When you want to change the recipe, choose the desired Vision Program file from the Vision Program Load list. Files that have the same Program name are "exclusively" loaded. This means that only one Vision Program file with a specified Program name can be loaded on the Impact device at a time. The currently loaded Vision Program file name is shown in the title bar at the top of VPM. IMPORTANT: File names are case sensitive. 3-27 Datalogic Automation Inc. VPM Linking Impact Reference Guide When you select a new Vision Program file from the list, the current Program (and the Vision Program file) is unloaded and the selected one is loaded. Program files with names other than the Filter names can be loaded and unloaded through the Settings Tab File Manager - Setup. If no loaded Program names match those in the Filter, then the drop-down current selection is blank. See “To create a vision program” on page 3-30 for more details. VPM Linking Vision Program Task A Task B Tool C Tool A Tool D Tool B Links In VPM, links are the data connections between tools and tasks. They are made in the destination tool’s Input and Output tabs. They can only be made between compatible data types. For example, you cannot link an integer data type output directly into a real data type input. Inputs can be linked to inputs or outputs, but outputs can only be linked to inputs (they are source only). Links Between VPM Tools Automatic Image Linking When a tool with an image input is added to a task, the image input for that tool is linked to the same image that was last used as an image source for other tools in that task. If that input is empty, automatic linking searches for a suitable link in the following order: 1. The task Image property. 1. Task inputs and inputs promoted to the task level of color image or image data types. 2. The tools in the task are searched in execution order until one is found that has an Image data type output. In the case of Data Instance tools, the inputs are searched. 3. If no suitable default is found, a link is not automatically made. You can still make a manual link. Datalogic Automation Inc. 3-28 Impact Reference Guide Links Between VPM Tools NOTE: Any time an input image link is modified on a tool in a task, that new link source becomes the default for tools added to that task. For example, if you delete the image link in any tool in a task, the next time you add a tool to that task, the task’s image will NOT be automatically linked. The automatic linking applies whether the tool was added from the toolbox or the clipboard. The link source information is validated each time before using If the a link source no longer exists, it is set to uninitialized and reverts to the value specified in the list above. If the link source does exist, but it occurs later in execution order in the task, it is not used. However, it remains as the default link source, and is used if and when you drop a tool in after that point in the task execution. If the link source refers to a tool in a different task or program, execution order is not checked. Automatic Origin Linking When a tool with an origin input is added to a task, the origin input for that tool is linked to the same origin that was last used as an origin source for other tools in that task. If that input is empty, automatic linking searches for a suitable default in the following order: 1. Inputs or outputs promoted to the task level of origin data types. 2. The tools in the task are searched in execution order until one is found that has an output origin that is not "Relative To Tool." In the case of Data Instance tools, the inputs are searched. NOTE: Any time the link source is changed from a tool setup or properties tab, it becomes the new default link source. For example, if you delete the origin link in any tool in a task, the next time you add a tool anywhere in that task, the origin will NOT be automatically linked. The automatic linking applies whether the tool added from the toolbox or the clipboard. The link source information is validated each time before using If a link source no longer exists, it is set to uninitialized, and reverts to the value specified in the list above. If the link source does exist but it occurs later in execution order in the task, it is not used. However, it remains as the default link source, and is used if and when you drop a tool in after that point in the task execution. If the link source refers to a tool in a different task or program, execution order is not checked. P a s t e L i n k e d To o l s When you cut or copy a tool that is linked to another tool, links may be broken when it is pasted, depending on where the tool is pasted. The following situations may occur. 1. Tool A and Tool B are linked to each other in the same program and task. When Tool A is copied or cut, then pasted into the same task, the link remains. 2. Tool A and Tool B are linked to each other in the same program and task. When Tool A is copied or cut, then pasted into a different task or program, the link between them is removed. 3. Tool A and Tool B are linked to each other in the same program and task. When Tool A and Tool B are copied or cut, then pasted together into another task or program, the link between them remains. 4. Tool A is linked to Tool B which is in a different task. When Tool A is cut or copied, then pasted into the same or different task as Tool B, the link remains. NOTE: If the Program Preferences setting "Automatically link tool image input" is checked, a new link to the task image is made when a tool with an input image property is pasted, just as if the tool was added from the toolbox. 3-29 Datalogic Automation Inc. Creating a Vision Program Task One Tool A 1. Link Remains Tool B Task One Tool A 2. Link Removed Tool B Impact Reference Guide Task One Task One Tool B Tool A Tool A Tool B Task Two 3. Link Remains Task One Tool C Tool A Tool A Task Two Tool A Tool B Task Two Tool C 4. Link Remains Tool B Task Two Tool C Task Three Tool A Tool B To create a link 1. Click the destination tool in the tool tree. 2. Click the Properties tab. 3. Click the small "create link" icon on the left end of the Value field. Create link 4. Click the small "+" sign to the left of the desired source tool in the Task Tree. The enabled choices listed below the tool correspond to the data type of the destination Value field. To access additional data types, click a plus sign to the left of listed data names. To complete the link, click the desired value name. Linked values are displayed in blue in the tool’s value field. 5. To cancel the linking operation, click the "create link" icon again without selecting a value name. 6. Repeat steps 3 and 4 for additional links. To delete a link 1. Click the desired tool in the tool tree. 2. Click the Properties tab. Delete link 3. Click the small "delete link" icon next to the link you want to delete (on the left end of the Value field). Linked values are displayed in blue in the tool’s value field. Creating a Vision Program Vision Programs are saved in a Vision Program file (with a ".vp" file extension) which is stored in flash memory on the Impact device. Each Vision Program file must have a unique name. Each Vision Program file contains a Program which is a collection of one or more tasks. You can open (or load) multiple Vision Program files in VPM, but each Program name that is loaded must be unique. When you open a Vision Program file, its Program (which includes the tasks) is loaded into the device’s operating system. To create a vision program 1. Start VPM. Datalogic Automation Inc. 3-30 Impact Reference Guide Creating a Vision Program 2. Click the New button in the toolbar. The following dialog is displayed. Enter a name for the Vision Program file in the File Name field. This must be a unique name and names are case sensitive. The Program name "Inspection" is assigned by default. To assign a different Program name, click the Advanced button. The program name can be filtered by the Program name entered in the Display Tab Program Filter field in the File Manager. See “File Manager Setup Tab” on page 2-37. IMPORTANT: Program names are case sensitive. 3. Click OK to create the Vision Program file. 4. Add and create tasks as desired. (See “Create a Task” on page 3-33.) 5. Click the Save button in the toolbar. Advanced Vision Programs You can create Vision Program files that contain supporting Programs. These files are sometimes called recipe files. To create a supporting file 1. Start VPM. 2. Click the New button in the main toolbar. Enter an Inspection File Name. IMPORTANT: File names are case sensitive. 3. Click the Advanced button in the New File dialog. The following dialog is displayed. 4. Click the Supporting File radio button. 5. Enter a name in the Program Name field. The program name can be filtered by the Program name entered in the Display Tab Program Filter field in the File Manager. See “File Manager Setup Tab” on page 2-37. 6. Click OK. 7. Add and create tasks as desired. (See “Create a Task” on page 3-33.) 3-31 Datalogic Automation Inc. Creating a Vision Program Impact Reference Guide 8. Click the Save button in the toolbar. Vision Program Security You can password protect a vision program when you save it. A password protected file is automatically saved in compressed binary format and the program cannot be edited, printed, viewed, or saved. NOTE: Vision Program security protects the vision program from unauthorized access. Device security protects the Impact device from unauthorized access. (See page 2-13.) To password protect a vision program 1. Click the Save As icon in the main toolbar. 2. In the Save As dialog, click the Advanced button. 3. Check the Save With Password Protection check box. 4. Enter and confirm the desired password. 5. Click OK. To edit, view, or print a password protected vision program 1. Load the password protected program 2. Click Enter Password below the image window. 3. Enter the password and click OK. 4. If you edit the program, then save it, the program is still password protected when you close it. To remove password protection from a vision program 1. Load the password protected program 2. Click Enter Password below the image window. 3. Click the Save As icon in the main toolbar. 4. In the Save As dialog, click the Advanced button. 5. Clear the Save With Password Protection check box. 6. In the File Name field, enter the existing vision program name, or a new one. IMPORTANT: File names are case sensitive. 7. Click OK. Vision Program Properties To access the vision program properties, click on the Vision Program icon, then select the properties tab. To modify a property, click in the value field. General Properties Name What it is Program Name The name of the Vision Program. This is not the vision program file name (see “To create a vision program” on page 3-30). Names are case sensitive. File Name The name of the Vision Program file. Names are case sensitive and should end with the vp file extension. Datalogic Automation Inc. 3-32 Impact Reference Guide Create a Task General Properties Name What it is Abort On Error If True, the program will stop running when the Task Timeout value is reached or one of the tools in the task aborts due to an error. If an Abort Task is defined in the task properties, that Abort task will be queued to run. If False, then the task keeps running and any remaining tools abort and fail. (See “Enable Timeout” on page 2-6 and “VPM Task Configuration” on page 3-34.) NOTE: This property applies only to tasks in a program that have the Trigger Event type set to Image In Event and is effective only while the device is online and triggering. Output Name What it is File Name The name of the Vision Program file. Names are case sensitive and should end with the vp file extension. Create a Task A task is a collection of one or more vision system tools connected in the tool tree. When you run the task, tools are executed in order from top to bottom. When you call a task (with the Call Task tool), the called task finishes before control is returned to the calling task. To create a task 1. Start VPM. 2. Open the desired vision program, or create a new one. Add a task 3. Click the Add a Task button. A new tab is added below the program list. See page 3-34 for task configuration details. 4. Click the task icon and enter a name for the task, if desired. 5. In the toolbox, click on the tool you want to add to the task, then drag the tool to the task tree and drop it in the desired place. To add a tool after an existing tool, drop it on the existing tool. To add a tool to the branch of a tool, drop it on the branch icon. To move a tool in the task tree, click and drag the tool up or down to the desired location. 6. Continue to add and configure the tools you want in the task to create the desired program. (See page 3-38 for tool configuration details.) 7. To delete a tool, select the tool in the tool tree, then click the Delete tool button in the VPM toolbar. 8. To move a tool in the task tree, click and drag the tool up or down to the desired location. 9. When you are ready to save your work, click the Save button. To test a task 1. Select the desired task icon in the task tree. Task Icon 3-33 2. Be sure that the Auto-update links check box is checked in Program Preferences. 3. Click the Run button or the Run Once on Current Image button on the Summary Table buttons. The task runs one time, executing all the tools in the execution path, then stops. Datalogic Automation Inc. VPM Task Configuration Impact Reference Guide VPM Task Configuration Task Icon A task is a collection of tools. It runs based on a user-selected external (hardware) or internal (software) event detected in the Impact device. Multiple tasks can be combined into a Program. Every task has general properties and common outputs. Each trigger event type also presents unique inputs which are listed after each event type in the table. General Property Name What it is Name The name of the task. Names are case sensitive. Description A task description Trigger Event When the selected Trigger Event occurs, the task is immediately queued to run next. See “Trigger Event Types” on page 3-35. Abort Task A task can abort when one of the tools in the task aborts due to an error, or when a Task Timeout occurs. If the task aborts, and Abort on Error is True, the Abort Task named in this property is immediately queued to run. (See “Enable Timeout” on page 2-6 and “Vision Program Properties” on page 3-32.) Run On Load If True, this task is queued to run one time immediately after it is loaded on the device (whether the device is online or not). When programs are set to load on startup, all programs are loaded before any tasks that have this property enabled are run. The order of execution of multiple tasks with Run On Load enabled is not specified. Input Name What it is Image The greyscale camera or file image acquired when the Snap button is clicked. Click the plus sign to the left of the property name to access the sub-properties. Color Image The color camera or file image acquired when the Snap button is clicked. Click the plus sign to the left of the property name to access the subproperties. See “Color Image Sub-Properties” on page 3-35. Trigger ID An acquired image (either from a camera or the file camera) is automatically assigned a negative Trigger ID number. The Camera Trigger tool assigns a positive Trigger ID number. NOTE: The task times listed when running a task on an Emulator are not necessarily the same times that will occur when running the task on an actual device or camera. They are shown only for relative time comparisons between tools and other task settings. Output Name What it is UsecsSinceRun (Microseconds Since Run) The time since the task started running (in microseconds). This is a “live” value during the task run because it is read during the task run and updated to the current time. Once the task finishes running, this time is locked to the time at which the task finished. Datalogic Automation Inc. 3-34 Impact Reference Guide VPM Task Configuration Output Name What it is Average UsecsSinceRun The average of all UsecsSinceRun values since the last count reset Max UsecsSinceRun The maximum UsecsSinceRun value since the last count reset UsecsSinceTrigger (Microseconds Since Trigger) The time since the hardware trigger at the device started the image acquisition process (in microseconds). This is the "trigger to done" time, which includes exposure, acquire, image transfer to the PC, etc. This is a “live” value during the task run as it is read during the task run and updated to the current time. Once the task finishes running, this time is locked to the time at which the task finished. Note that UsecsSinceRun and UsecsSinceTrigger will not necessarily be equal, since there is some "overhead" time included in the UsecsSinceTrigger. Average UsecsSinceTrigger The average of all UsecsSinceTrigger values since the last count reset Max UsecsSinceTrigger The maximum UsecsSinceTrigger value since the last count reset Run Count The total number of times the task has run since the last count reset Trigger Timestamp Usecs The time (in microseconds) that the task was triggered Color Image Sub-Properties Greyscale images from color cameras are inherently half the resolution (and thus half the accuracy) of the equivalent greyscale camera image. For example, if you use a 640 x 480 pixel color camera and select a greyscale sub-property, the resulting resolution of the image is 320 x 240 pixels, half the resolution of the 640x480 greyscale camera image. This is because each pixel of the color image has a different color filter than the adjacent pixel, and the two pixels must be combined to create the greyscale value, which results in half the resolution. Note that some tools provide sub-pixel options, which can improve the resolution and measurement accuracy of the image. If the two adjacent pixels were not combined, i.e. the value of each raw color pixel was used as the greyscale value, then the resulting image would be “grainy.” For example, if the image was a red object, all the red pixels would be bright and all the green and blue pixels would be dark, creating a fine grain checkerboard. Tr i g g e r E v e n t Ty p e s To choose a trigger event type, click the drop-down arrow at the right end of the Value field and select the desired event. When the selected event occurs, the task is put into a queue of tasks that are executed in turn. • None: If this is selected, the task is not queued by any of the listed event types. It is not queued except when it is triggered from a control panel or by another task calling it. • Program Closed Event: The task is queued to run after the program listed in the Program Name property is closed (unloaded) by another task. 3-35 Datalogic Automation Inc. VPM Task Configuration Impact Reference Guide • Bad Image Event: The task is queued when an error is generated during image acquisition. This can include DSL communication errors, CRC errors, and out-of-buffer-space errors, among others. This event provides an additional input: Input Name What it is statusBits The bit map of the image acquisition error message • Image In Event: The task is queued when an image has been acquired and is ready for processing by the Impact device. This is the default for the first task added when a program is created. Only one task in a program should use this trigger event type. This event provides additional inputs. TIP: Image In Event must be selected for at least one task in a vision program to be able to snap an image during task edit. Input Name What it is Image The greyscale camera or file image acquired when the Snap button is clicked. Click the plus sign to the left of the property name to access the sub-properties. Color Image The color camera or file image acquired when the Snap button is clicked. Click the plus sign to the left of the property name to access the sub-properties. See “Color Image Sub-Properties” on page 3-35. TriggerId This number is zero or negative when an image is acquired by the camera or file camera. To use it for selective image processing, assign it a different number in the Camera Trigger tool. • Camera Button Event: The task is queued when the button on the camera case is pressed. (This option is available only on certain camera models.) • Image Trigger Event FE and RE: The task is queued by both the rising and falling edges of a hardware trigger on the Impact device’s Camera trigger input. (This option does not appear for M-Series processors or cameras.) • Image Trigger Event FE: The task is queued by the falling edge of a hardware trigger on the Impact device’s Camera trigger input. (This option does not appear for M-Series processors or cameras.) • Image Trigger Event RE: The task is queued by the rising edge of a hardware trigger on the Impact device’s Camera trigger input. (This option does not appear for M-Series processors or cameras.) • Input Event FE and RE: The task is queued by both the rising and falling edges of a hardware trigger on the Impact device’s Event input. • Input Event FE: The task is queued by the falling edge of a hardware trigger on the Impact device’s Event input. (Note: the M-Series Processor I/O does not signal the FE Input Event.) • Input Event RE: The task is queued by the rising edge of a hardware trigger on the Impact device’s Event input. (Note: the M-Series Processor I/O signals only the RE Input Event.) • Online Event: When the Impact device goes Online, the task is immediately queued to run. Input Name What it is Name The name of the device that went online. onlineState If True, the device went online. • Offline Event: When the Impact device goes Offline, the task is immediately queued to run. Datalogic Automation Inc. 3-36 Impact Reference Guide VPM Task Configuration • Scheduled Event: The task is queued when an Event Scheduler tool causes a scheduled event to occur. Use a Branch or Basic tool to determine what action to take based on the Event ID. Input Name What it is Event ID The Event ID of the Event Scheduler tool that triggered the event. • Shift Event FE and RE: The task is queued by both the rising and falling edges of a hardware trigger on the Impact device’s Shift input. • Shift Event FE: The task is queued by the falling edge of a hardware trigger on the Impact device’s Shift input. • Serial Input: The task is queued when a Carriage Return (ASCII CR) or Linefeed (ASCII LF) character is detected on the Impact device’s serial port. The inputList may contain any character, including NULL. The delimiter character indicating the end of the data string is defined in Settings Tab - General - Setup - Communication. (see “Serial Port” on page 2-10). Input Name What it is inputString The data string from the serial port inputList The list of integers from the serial port • TCP/IP Input Event: The task is queued when a message is detected on the Impact device’s TCP/IP Input Event Port. The event port number and delimiter character (which indicates the end of the data string) are configured in Settings Tab - General - Setup - Communication (see “TCP/IP” on page 2-9. The inputList may contain any character, including NULL. The string or integer list property from the TCP/IP Out tool is written to both these inputString and inputList properties. Input Name What it is inputString The data from the Input String or Input List property of the TCP/IP Out tool. inputList The data from the Input String or Input List property of the TCP/IP Out tool. • Shift Event RE: The task is queued by the rising edge of a hardware trigger on the Impact device’s Shift input. • EtherNet/IP Explicit Event: The task is queued when an incoming EtherNet/IP command causes an event to occur. Use a Branch or Basic tool to determine what action to take based on the Event ID. Input Name What it is Event ID The Event ID of the EtherNet/IP Explicit Data tool that triggered the event. • EtherNet/IP Implicit Assembly Event: The task is queued when an EtherNet/IP Implicit Assembly is written by an EtherNet/IP client. Use the Ethernet/IP Read Implicit Assembly tool to read the data. (See “EtherNet/IP Read Implicit Assembly” on page 3-193.) 3-37 Datalogic Automation Inc. VPM Tools Impact Reference Guide • Modbus TCP/IP Event: The task is queued when the Modbus Server receives any Modbus Request from a client. Input Name What it is Function Code The function code of the Modbus client's request. These are standard Modus function codes. For example, Function Code 16 is a Write Multiple Registers request and Function code 3 is a Read Multiple Registers request. Start Address The starting register in the Modbus Request sent by the Modbus Client. Count The number of registers the client accessed. • Modbus TCP/IP New Input Data Event: The task is queued when a Modbus Client writes data in a Modbus Register using the Modbus Write Request function. Input Name What it is Function Code The function code sent by the Modbus Client.These are standard Modus function codes. For example, Function Code 16 is a Write Multiple Registers request and Function code 3 is a Read Multiple Registers request. Start Address The starting register in the Modbus Request sent by the Modbus Client. Count The number of registers the client accessed. • AbPc3 Event: The task is queued when an AB PCCC client writes data in a PCCC server property using the PCCC Typed Write command. Input Name What it is File Number The file type number sent by the PCCC client. See “How VPM Works With AB PCCC” on page 2-41 for file type numbers. Start Address The starting server property index in the Typed Write command sent by the PCCC client. Count The number of indexes the client accessed. • OPC New Input Data Event: The task is queued when the OPC Server writes data in an OPC Data Access system object input. Input Name What it is InputName When data is written to this input, the task is queued. The value contains the name of the OPC Data Access property that changed. See “OPC Data Access” on page 2-42. VPM Tools VPM tools are divided by function within toolbox drawers. The tool icon helps you identify the tool within the task tree and the drawer. Sometimes, in order to enhance a tool’s function or properties, the old version of a tool is "deprecated" or made unavailable and replaced with a new version or a different tool. Deprecated tools are displayed in yellow in the task tree. They will continue to function, but they do not appear in the Toolbox and cannot be added to new Vision Program files. You can replace the older tool with Datalogic Automation Inc. 3-38 Impact Reference Guide VPM Tools an up-to-date tool or its replacement. If you do replace the tool, you may need to redefine the tool’s inspection properties. When you save the vision program file, the deprecated tool is saved the same as other tools. Current Origin tool Deprecated Origin tool Every tool has the general properties of Name, Description, and Type. Some tools also have inputs and outputs that can be linked between tools. Each tool input and output has a data type. To run a tool individually, select it in the tree and click the Run button in the Tool Test button area. Some tools have a Setup tab which is automatically selected to aid you with configuring the tool when you first add one of the tool to a task. (See “Setup Tab” on page 3-21.) If an input or output has a small plus sign to the left of the name, you can view the sub-properties and all the available data types of those properties. For example, if you click the plus sign of the Success property in the Origin tool (a Boolean data type) the other data types for that property are displayed. 3-39 Datalogic Automation Inc. Toolbox and Drawers Impact Reference Guide Toolbox and Drawers VPM tools are contained in the toolbox and grouped within drawers based on their general purpose. Some tools appear in more than one drawer because they have multiple purposes. In VPM, a brief tool tip is displayed when you hover the cursor over the tool icon in the toolbox. For tool details, refer to the page number in the tables below (displayed in toolbox, then tool, alphabetical order). Communication Device Control Flaw Detection Feature Finding Image Filtering Image Geometry Discrete Input 3-187 Camera Trigger 3213 Adaptive Template 3-145 Average Gradient 3-92 Average Filter 3-41 Color Image Sampling 3-56 Discrete Output 3-188 Device Settings 3214 Average Intensity 3146 Average Intensity 3-92 Binary Image Filter 3-42 Deslant Image 3-57 Ethernet/IP Explicit Data 3192 Offline 3-216 Blob 3-66 Blob 3-66 Color Pixel Fill 343 Image Sampling 3-58 Ethernet/IP Explicit Message 3-192 Online 3-216 Bump Find 3-147 Blob Filter 3-95 Edge Enhancement 3-43 Image Stitching With Origins 3-58 Ethernet/IP Read Implicit Assembly 3-193 Vision Program Load 3-216 Color Blob 3-97 Circle Gauge 3-117 Gaussian Filter 3-44 Image Stitching With Points 3-59 Ethernet/IP Write Implicit Assembly 3-193 Vision Program Save 3-217 Contrast 3-101 Color Blob 3-97 Image Math 3-45 Line Profile 3-60 Impact Send Message 3-194 Vision Program Unload 3-217 Contrast - Multiple ROI 3-103 Color Checker 3100 Light Leveling Multiple Image Stitch 3-60 Impact Wait For Message 3-197 Extreme Difference 3-149 Contrast 3-101 Linear Morphology Open 3-49 Unwrap 3-64 Serial Port Out 3-200 Greyscale Template 3151 Contrast - Multiple ROI 3-103 Linear Morphology Close 3-50 Undistort Image 365 TCP/IP Out 3-201 Polygon Smoothing 3-153 Edge Point Find 3-104 Median Filter 3-50 X-Y Projection 3-65 Line Find 3-106 Morphology Open 3-51 Spot Find 3-106 Morphology Close 3-51 Wide Edge Point Find 3-108 Morphology Dilate 3-54 Morphology Erode 3-54 New Image 3-55 Pixel Fill 3-55 Datalogic Automation Inc. 3-40 Impact Reference Guide Recently Used Drawer Locating Logic Measurement Readers Specialized Blob 3-66 Basic 3-204 Angle page 3-111 Character Contour Match 3-159 Change image Calibration 3-218 Circle Gauge 3-117 Branch 3-205 Circle Edge Refinement 3-115 Code Reader 3-167 Clip ROI 3-219 Circular Pattern Find 3-70 Break 3-206 Circle Gauge 3-117 OCR 3-180 Data Transfer 3-219 Line Find 3-75 Call Task 3-206 Line Find 3-122 Grid Statistics 3-220 Origin 3-79 Counted Loop 3-207 Line Gauge 3-122 Lead Statistics 3-223 Pinpoint Pattern Find™ 3-84 Counter 3-207 Line Gauge Datum Line 3-126 Train 3-223 Data Instance 3-208 Line Gauge Dual ROI 3-129 Data Set 3-208 Linear Regression 3132 Delay 3-209 Midpoint 3-133 Event Scheduler 3209 Multiple Point to Point Measurements 3-133 Group 3-210 Peak Valley Find 3135 List Loop 3-210 Point Match 3-136 List Sorter 3-210 Point to Point Measurement 3-138 Multiple Branch 3-211 Point to Line Measurement 3-141 Pass Fail 3-211 Subpixel Edge Extractor 3-143 Reset 3-213 Recently Used Drawer This drawer contains the ten tools that have been used most recently, with the most recent at the top. Image Filtering Drawer Average Filter In the Image Filtering Drawer 3-41 Datalogic Automation Inc. Binary Image Filter Impact Reference Guide The Average Filter tool can smooth the average grey level value of the pixels in an image and provide that processed image as an output. The smoothing is done within a defined filter area of pixels which is moved progressively throughout the ROI. Of the three filtering tools (Average, Gaussian and Median), this is the fastest because it weights all pixels within the filter area equally. It is not as precise as the other two, however. Input Name What it is Input Image Linked Image Tool Origin The tool’s origin relative to the entire image space Shape List The desired region of the image to search. If no shape is defined, the entire image is processed. FilterWidth The width of the area (in pixels) where the smoothing takes place FilterHeight The height of the area (in pixels) where the smoothing takes place Output Name What it is Output Image Filtered Image (may be viewed on the Output Image tab). Binary Image Filter In the Image Filtering Drawer The Binary Image Filter tool creates an output image by applying the standard thresholding methods used in the Contrast and Blob tools. In the output image, In Range pixels are assigned one value, usually 100, and Out of Range pixels are assigned another value, usually 0. This tool is useful if you want to threshold the image before applying another filter, like morphology. Input Name What it is Input Image Linked Image Tool Origin The tool’s origin relative to the entire image space Shape List The desired region of the image to search. If no shape is defined, the entire image is processed. Grey Level Threshold Type See “Grey Level Threshold Types” on page 3-68 Fixed Threshold Range The fixed grey level threshold range used when a Fixed Threshold Range Threshold Type is chosen. The parameters are start and end. In Range Output Pixel Value If a pixel in the Input Image has a grey level that is within the Threshold Range, this grey level is assigned to it (defaults to 100). Out of Range Output Pixel Value If a pixel in the Input Image has a grey level that is outside the Threshold Range, this grey level is assigned to it (defaults to 0). Output Name What it is Output Image Input Image with the thresholding applied (click the Output Image tab) Datalogic Automation Inc. 3-42 Impact Reference Guide Color Pixel Fill Output Name What it is Threshold Range Used The Threshold Range used to modify the image. The parameters are start and end. Color Pixel Fill In the Image Filtering Drawer The Color Pixel Fill tool fills portions of a color image with a specified color value. The Find Shape List defines the area to be filled. The area is filled with the RGB color value specified in the Fill Value property. The filled area appears on the output image. It can be used to fill bad regions of an image before using a Color Blob tool. This is faster than using exclude regions in the Color Blob tool. Input Name What it is Input Image Linked Image Tool Origin The tool’s origin relative to the entire image space Find Shape List The desired region of the image to fill. If no shape is defined, the entire image is filled. Shape List ROI Type Each Shape is separate ROI: Each shape is processed as a separate ROI and the results are combined. This mode is faster than the other mode if the shapes are far apart, but results are duplicated if the shapes overlap. ShapeList is One ROI: The ShapeList is one large rectangular ROI and the shapes are the enabled pixels within the rectangle. The tool may be slow if the shapes are far apart. This setting allows shapes to overlap and form complex shapes without repeating the overlapped pixels and duplicating results. NOTE: The resulting image is the same for either setting. Fill Value The percent of each RGB color value used to fill the area. Output Name What it is Output Image Image with the area filled (may be viewed on the Output Image tab). Edge Enhancement In the Image Filtering Drawer The Edge Enhancement tool produces an output image with its edges enhanced. Four of the inputs control the direction of the edge enhancement. These images show the output image for three of these settings. 3-43 Datalogic Automation Inc. Gaussian Filter Impact Reference Guide Note: Show Gradient Sign works only when just one of the Enhance Edge settings is True. Input Image All four Enhance Edge settings true Enhance 90 Degree Edges Enhance 90 Degree Edges with Show Gradient Input Name What it is Input Image Linked Image Tool Origin The tool’s origin relative to the entire image space Shape List The desired region of the image to process. If no shape is defined, the entire image is processed. Enhance 0 Degree Edges If True, edges that are not rotated are enhanced Enhance 45 Degree Edges If True, edges that are rotated 45 degrees are enhanced Enhance 90 Degree Edges If True, edges that are rotated 90 degrees are enhanced Enhance 135 Degree Edges If True, edges that are rotated 135 degrees are enhanced Show Gradient Sign If Single Direction Enabled If True, and only one Enhance Degree Edges setting is True, then falling edges are shown as dark and rising edges are shown as bright, giving the image an embossed look. Output Name What it is Output Image Enhanced Image (may be viewed on the Output Image tab). Gaussian Filter In the Image Filtering Drawer The Gaussian Filter tool performs filtering of pixel grey levels within an ROI to smooth an image. A filter area is defined and used to sequentially process an area that size within the ROI. Pixels at the center of the filter area are weighted more than those further away (a Gaussian curve). This results in more precise smoothing. The effect is similar to changing the camera focus. This tool’s filtering is more precise but slower than the Average Filter tool. Input Name What it is Input Image Linked Image Datalogic Automation Inc. 3-44 Impact Reference Guide Image Math Input Name What it is Tool Origin The tool’s origin relative to the entire image space Shape List The desired region of the image to search. If no shape is defined, the entire image is processed. Filter Size The area size (in pixels square) to include in the smoothing. Smaller numbers provide less smoothing. Output Name What it is Output Image Smoothed Image within ROI (may be viewed on the Output Image tab). Image Math In the Image Filtering Drawer The Image Math tool performs image math operations on one or more images to produce an output image. Each operation does a pixel by pixel comparison of two images. The result of the math operation on corresponding pixels provides the output image’s grey level values. All operations involve the Input Image and the Secondary Image (except Invert and NOT, which use only the Input Image). The resultant image is displayed on the Output Image tab. Each operation is explained here. • Subtract With Offset: This operation subtracts the Secondary image from the Input image and adds fifty to each pixel’s grey level value. Resultant values greater than one hundred are clipped at one hundred and values less than zero are clipped at zero. Because negative grey level values cannot be shown in an image, fifty is added to them so that they are shown as values from zero to forty nine. • Subtract This operation subtracts the secondary image from the input image. Resultant values less than zero are clipped at zero. • Absolute Difference This operation subtracts the Secondary image from the Input image and provides the absolute value of the difference as the result. For example, -1 becomes 1, -2 becomes 2, etc. • Min The result of this operation is the minimum value of the corresponding pixel grey levels on the Input image compared to those on the Secondary image. • Max The result of this operation is the maximum value of the corresponding pixel grey levels on the Input image compared to those on the Secondary image. • AND This operation performs a logical AND of the corresponding Input image and Secondary image pixel grey levels. Pixels on the images are considered logically True if their grey level is greater than zero. Pixels on the Output image are set to one hundred if they are logically True, and zero if they are logically False. • OR This operation performs a logical OR of the corresponding Input image and Secondary image pixel grey levels. Pixels on the images are considered logically True if their grey level is greater than zero. 3-45 Datalogic Automation Inc. Image Math Impact Reference Guide Pixels on the Output image are set to one hundred if they are logically True, and zero if they are logically False. • XOR This operation performs a logical XOR (exclusive OR) of the corresponding Input image and Secondary image pixel grey levels. Pixels on the images are considered logically True if their grey level is greater than zero. Pixels on the Output image are set to one hundred if they are logically True, and zero if they are logically False. • NOT This operation performs a logical NOT on the Input image pixels (the Secondary image is not used). The Output image pixel greyscale value is one hundred if the Input image value is zero, and zero if the Input image value is greater than zero. • Invert This operation performs inverse greyscale mapping of the pixels on the Input image (the Secondary image is not used). The Output image pixel greyscale level is calculated as 100 minus the input pixel value. • Weighted Average This operation is useful for combining multiple images of the same stationary object and averaging the images together to reduce the noise level. See “Weighted Average Calculation” on page 3-47 for details. The input image and secondary image must be the same height and width. Like other filtering tools, the Output image size is determined by the size of this tool’s Shape List shape and bounding box, based on the following situations. In any case, only the area within the Shape List is used in the operation. • Pixels in the Input image that are outside the shape, but inside the bounding box, like the corners of a square outside a circle, are copied unchanged from the Input image. Bounding Box Primary Image with ROI Secondary Image Output Image • If the Secondary image is the same size as this tool’s Shape List’s bounding box, that image is compared, pixel-by-pixel, with the Input image. • If the secondary image is larger or smaller than this tool’s Shape List’s bounding box, the Shape List is applied to the Secondary image before the operation. Input Name What it is Input Image The operation is performed on this image and the Secondary image Tool Origin The tool’s origin relative to the entire image space Shape List The desired region of the image to process. If no shape is defined, the entire image is processed. Datalogic Automation Inc. 3-46 Impact Reference Guide Light Leveling Input Name What it is Secondary Image The operation is performed on this image and the Input image (except for NOT and Invert) Operation The operation to perform Input Image Weight Used only for the Weighted Average operation. See “Weighted Average Calculation” on page 3-47 for details. Secondary Image Weight Used only for the Weighted Average operation. See “Weighted Average Calculation” on page 3-47 for details. Output Name What it is Output Image The image resulting from the math operation Weighted Average Calculation The output image pixel value is calculated as follows: output pixel = (input image pixel * input image weight + secondary image pixel * secondary image weight) / (input image weight + secondary image weight) The scaling of the weights and the scaling of the output image is handled automatically by the above formula. For example, the output will be the average of the two inputs as long as the input weight and secondary weight are equal, regardless of their actual value (except zero). The input image and secondary image must be the same height and width. If the secondary image is null (non-existent), the output image will be a copy of the input image. Averaging more than two images The recommended method (recursive filter) is: 1. Use a counter tool to track the number of images. 2. In the Image Math tool, link the Secondary Image input to the tool's Output Image, so that each input image is combined with the result of averaging all the previous images. 3. In order for all the images to be weighted equally, the weight of the Secondary Image must be increased each time the tool runs, so link the Secondary Image Weight to the Counter tool value. 4. Set the Input Image Weight to 1. When the first image comes into the tool, the Secondary Image Weight (from the Counter) should be 0, so that the Output Image is just a copy of the input image. When the second image comes in, both weights are 1 and the two images are averaged evenly. When the third image comes in, the Secondary Image (the average of the first two images) now has a weight of 2 and gets weighted twice as much as the Input Image, so that all three images are being given the same weight. In this way any number of images can be averaged by just changing the end value of the Counter tool. Light Leveling In the Image Filtering Drawer The Light Leveling tool corrects for uneven lighting in an image. Within the Light Sensor Shape List area, the column or row with the highest average grey level is found (based on the Direction To Level input). A 3-47 Datalogic Automation Inc. Light Leveling Impact Reference Guide scale factor is calculated for all the other columns or rows which brightens them so they have the same average grey level as the brightest column or row. Each column or row’s scale factor is then applied to all the pixels in that column or row within the entire Region To Copy. The light sensor area can be trained or recalculated on each image. The light sensor area is the ROI within which the tool calculates the spatial light distribution in the image, which it then uses to adjust the pixel intensities to be level across the entire image or the Region to Copy. Output Image Light Sensor Shape List Region To Copy (green rectangle) Input Name What it is Input Image Linked Image Tool Origin The tool’s origin relative to the entire image space Light Sensor Shape List The region of the image to level. If no shape is defined, the entire image is processed. Region To Copy The region of the image to copy to the output image. Direction To Level The tool levels the light in this direction (X, Y, or None). If leveling is required in both directions, use two tools in series. If None, no leveling is done. Training Option No Training. Recalculate Sensor On Each Image The light sensor is recalculated for each image. Train Light Sensor On This Image Trains the light sensor on the current image and then re-uses that level on every subsequent image. This choice can save processing time on each image if the light distribution within the image is static and repeatable. Trained Sensor Image Datalogic Automation Inc. Holds the trained light sensor image. Since the tool levels in X or Y directions only, this image is an X or Y projection of the light sensor ROI, like the output of the X-Y Projection tool. 3-48 Impact Reference Guide Linear Morphology Open Input Name What it is Target Intensity Selection Brightest Row/Column Average Is Target Intensity: After projecting the rows/columns of the sensor ROI, the tool finds the brightest row/column and scales all the other row/columns to have that same average intensity. It is automatic self-scaling behavior that preserves greyscale resolution. If the overall input image intensity goes up and down, then the output image intensity also goes up and down, even after it is leveled. Fixed Target Intensity: The rows/columns are scaled so that their average intensity is the Fixed Target Intensity value. This setting helps adjust the image to a fixed average intensity and can help with fixed thresholding in other tools. It takes some adjustment of the Fixed Target Intensity value to keep the image bright and not saturated. Fixed Target Intensity The tool levels the pixel intensities to this greyscale value when Target Intensity Selection is set to Fixed Target Intensity. Output Name What it is Output Image The leveled Region To Copy. Displayed on the Output Image tab. Linear Morphology Open In the Image Filtering Drawer The Linear Morphology Open tool removes small noise in an image, like the Morphology Open tool, but this tool keeps thin lines in the image during the process. (See “Morphology” on page 3-52 for more details.) 3-49 Input Name What it is Input Image Linked Image Tool Origin The tool’s origin relative to the entire image space. Shape List The desired region of the image to process. If no shape is defined, the entire image is processed. Number of Iterations The number of times to perform the operation. If zero is entered, the tool just copies the input image to the output. Keep 0 Degree Lines If True, lines in the image that are not rotated remain after processing. Keep 45 Degree Lines If True, lines in the image that are rotated 45 degrees remain after processing. Keep 90 Degree Lines If True, lines in the image that are rotated 90 degrees remain after processing. Keep 135 Degree Lines If True, lines in the image that are rotated 135 degrees remain after processing. Datalogic Automation Inc. Linear Morphology Close Impact Reference Guide Output Name What it is Output Image The morphed image (viewed on the Output Image tab). Linear Morphology Close In the Image Filtering Drawer The Linear Morphology Close tool removes small noise in an image, like the Morphology Close tool, but this tool retains thin lines in the image during the process. (See “Morphology” on page 3-52 for more details.) Input Name What it is Input Image Linked Image Tool Origin The tool’s origin relative to the entire image space. Shape List The desired region of the image to process. If no shape is defined, the entire image is processed. Number of Iterations The number of times to perform the operation. If zero is entered, the tool just copies the input image to the output. Keep 0 Degree Lines If True, lines in the image that are not rotated remain after processing. Keep 45 Degree Lines If True, lines in the image that are rotated 45 degrees remain after processing. Keep 90 Degree Lines If True, lines in the image that are rotated 90 degrees remain after processing. Keep 135 Degree Lines If True, lines in the image that are rotated 135 degrees remain after processing. Output Name What it is Output Image The morphed image (viewed on the Output Image tab). Median Filter In the Image Filtering Drawer The Median Filter tool looks for and removes random noise from an image. The edges are not softened like the Gaussian filter. This tool is slower than the Gaussian and Average filters. Input Name What it is Input Image Linked Image Tool Origin The tool’s origin relative to the entire image space Shape List The desired region of the image to search. Datalogic Automation Inc. 3-50 Impact Reference Guide Morphology Open Input Name What it is FilterWidth This is the width of the area (in pixels) within which the filtering takes place FilterHeight This is the height of the area (in pixels) within which the filtering takes place Output Name What it is Output Image Filtered Image (may be viewed on the Output Image tab). Morphology Open In the Image Filtering Drawer The Morphology Open tool performs a morphological open on the white parts of an image. (See “Morphology” on page 3-52 for more details.) Input Name What it is Input Image Linked Image Tool Origin The tool’s origin relative to the entire image space Shape List The desired region of the image to search. If no shape is defined, the entire image is processed. Number of Iterations The number of times to perform the operation. If zero is entered, the tool just copies the input image to the output. Morphology Shape Defines the shape of the neighborhood around each pixel that is searched to find the output pixel value. See “Morphology Shape” on page 3-53. Output Name What it is Output Image Morphed Image Morphology Close In the Image Filtering Drawer The Morphology Close tool performs a morphological close on the white parts of an image. This makes it useful for removing small black noise from an image, or to connect white areas together. (See “Morphology” on page 3-52 for more details.) 3-51 Input Name What it is Input Image Linked Image Tool Origin The tool’s origin relative to the entire image space Datalogic Automation Inc. Morphology Close Impact Reference Guide Input Name What it is Shape List The desired region of the image to search. If no shape is defined, the entire image is processed. Number of Iterations The number of times to perform the operation. If zero is entered, the tool just copies the input image to the output. Morphology Shape Defines the shape of the neighborhood around each pixel that is searched to find the output pixel value. See “Morphology Shape” on page 3-53. Output Name What it is Output Image The morphed Image (viewed on the Output Image tab). Morphology Morphology is the act of warping an image according to mathematically defined relationships. It can eliminate noise, smooth edges, join narrow gaps, and fill small holes on each image. Morphological operations are non-linear and irreversible. There is no inverse operation to undo what was done by the last operation. Thus, each operation loses some information about the original image. Morphology tools use 3x3 binary analysis. During binary morphology, the tool checks the greyscale values in the image and assigns each pixel an ON or OFF value. The tool then performs the operation (based on the Number of Iterations value), adjusting each pixel's value after comparing its value and the values of surrounding pixels in a 3x3 pixel neighborhood. During pixel analysis, the tool first groups pixels. A group consists of any foreground or background pixels that are connected, or touching. The tools use the eight-connected rule to group pixels into foreground blobs. The eight-connected rule states that two foreground pixels are connected if they are directly side by side, top to bottom, or if their corners touch. In this example, the white pixels A, B, C, F, H, and X are connected. Close The close operation is similar to dilation in that it tends to enlarge foreground (bright) regions in an image (and shrink background holes), but it affects the original boundary shape less. It is defined as a dilation followed by an erosion. Results of a close operation Datalogic Automation Inc. 3-52 Impact Reference Guide Morphology Close Dilate The dilate operation gradually enlarges the boundaries of regions of foreground pixels. Thus areas of foreground pixels grow in size while holes (background pixels) within those regions become smaller. Results of a dilate operation Erode The erode operation erodes away the boundaries of regions of foreground pixels. Thus areas of foreground pixels shrink in size, and holes within those areas become larger. Results of an erode operation Open The open operation is similar to erosion in that it tends to remove foreground (bright) regions in an image, but it less destructive than erosion in general. The effect is to preserve foreground regions that have a similar shape while eliminating all other regions of foreground pixels. It is defined as an erosion followed by a dilation. Results of an open operation Morphology Shape Morphology Shape defines the shape of the neighborhood around each pixel that is searched to find the output pixel value. It is sometimes referred to as structuring element, filter mask, or filter kernel. The choices are Square and Octagon. A square morphology shape is the fastest to process, but has the disadvantage of working better in the diagonal directions than in the horizontal and vertical directions. In the example shown below (the figure on the left), a Morphology Erode tool is used to test the size of a fifty-pixel radius circular hole. With a square morphology shape, the tool tests all pixels in a 100x100 square, centered on the hole. However, the number of 3-53 Datalogic Automation Inc. Morphology Dilate Impact Reference Guide iterations is limited to 35 along the x and y axes so that the square shape’s corners fit inside the circle. Defects at the top, bottom, left, and right may not be found. Defects here not found Number of iterations Using a circle shape would solve this problem, but a perfect circle is slow to process, so an octagonal shape is used. (The figure on the right.) The execution time is only 40% greater to accomplish the required 43 iterations within the octagon than within a square. Morphology Dilate In the Image Filtering Drawer The Morphology Dilate tool performs a standard dilation operation on the white parts of the image. (See “Morphology” on page 3-52 for more details.) Input Name What it is Input Image Linked Image Tool Origin The tool’s origin relative to the entire image space Shape List The desired region of the image to search. If no shape is defined, the entire image is processed. Number of Iterations The number of times to perform the operation. If zero is entered, the tool just copies the input image to the output. Morphology Shape Defines the shape of the neighborhood around each pixel that is searched to find the output pixel value. See “Morphology Shape” on page 3-53. Output Name What it is Output Image Morphed Image (may be viewed on the Output Image tab). Morphology Erode In the Image Filtering Drawer Datalogic Automation Inc. 3-54 Impact Reference Guide New Image The Morphology Erode tool performs a standard erosion on the white parts of an image. (See “Morphology” on page 3-52 for more details.) Input Name What it is Input Image Linked Image Tool Origin The tool’s origin relative to the entire image space Shape List The desired region of the image to search. If no shape is defined, the entire image is processed. Number of Iterations The number of times to perform the operation. If zero is entered, the tool just copies the input image to the output. Morphology Shape Defines the shape of the neighborhood around each pixel that is searched to find the output pixel value. See “Morphology Shape” on page 3-53. Output Name What it is Output Image Morphed Image (may be viewed on the Output Image tab). New Image In the Image Filtering Drawer The New Image tool creates a new image based on the size and width properties each time it runs. The new image is filled with a user-defined greyscale value. The tool does not save the image with the vision program file or alter other images. Its main use is to create a blank image to fill with the Pixel Fill tool. Input Name What it is Width In Pixels The width of the new image in pixels Height In Pixels The height of the new image in pixels Fill Value The greyscale value that fills the image (0-100) Output Name What it is Output Image The filled new image Pixel Fill In the Image Filtering Drawer The Pixel Fill tool fills portions of a greyscale image with a specified grey level. The Find Shape List defines the area to be filled. The area is filled with the grey level from black (zero) to white (100) specified in the Fill Value property. The filled area appears on the output image. 3-55 Input Name What it is Input Image Linked Image Datalogic Automation Inc. Image Geometry Drawer Impact Reference Guide Input Name What it is Tool Origin The tool’s origin relative to the entire image space Find Shape List The desired region of the image to fill. If no shape is defined, the entire image is filled. Shape List ROI Type Each Shape is separate ROI: Each shape is processed as a separate ROI and the results are combined. This mode is faster than the other mode if the shapes are far apart, but results are duplicated if the shapes overlap. ShapeList is One ROI: The ShapeList is one large rectangular ROI and the shapes are the enabled pixels within the rectangle. The tool may be slow if the shapes are far apart. This setting allows shapes to overlap and form complex shapes without repeating the overlapped pixels and duplicating results. NOTE: The resulting image is the same for either setting. Fill Value The greyscale value to used to fill the area. Zero is black and 100 is white. Output Name What it is Output Image Image with the area filled (may be viewed on the Output Image tab). Image Geometry Drawer Color Image Sampling In the Image Geometry Drawer The Color Image Sampling tool provides a reduced resolution color image by sampling a user-defined number of pixels. For example, you can produce an image at one-half resolution by sampling every other pixel. Impact software uses a 24-bit color system. Input Name What it is Input Image Linked Image Click the plus sign to access greyscale versions of the image that you can link into other greyscale image processing tools. These images are similar to the image you get if you use a color filter or color light with a greyscale camera. See “Color Image Sub-Properties” on page 3-35. Region of Interest The area of the image to sample. (If zero, the entire image is processed.) Tool Origin The tool’s origin relative to the entire image space. Sampling Resolution How many pixels to sample; 1 is every pixel, 2 is every other pixel, etc. This applies to x and y dimensions. Sampling Rotation The output image is rotated by this angle (0, 90, 180, or 270 degrees). Datalogic Automation Inc. 3-56 Impact Reference Guide Deslant Image Output Name What it is Output Image Reduced resolution image (viewed on the Output Image tab). Deslant Image In the Image Geometry Drawer The Deslant Image tool corrects the slant frequently seen in printed dot matrix characters. Input Name What it is Input Image Linked Image Tool Origin The tool’s origin relative to the entire image space Shape List The desired region of the image to search. If no shape is defined, the entire image is processed. Slant Angle Type See "Slant Angle Types" at the end of this table. Column Slant Angle in Degrees The character’s column slant angle. See details at the end of this table. Row Slant Angle in Degrees The character’s row slant angle. See details at the end of this table. Output Name What it is Output Image The straightened image as viewed on the Output Image tab. Slant Angle Types Angle to Slant Image In this mode, the tool slants each character by the angle amounts entered in the Column Slant Angle and Row Slant Angle fields. For example, if a character slants 10 degrees from vertical, enter -10 (degrees) in the Column Slant Angle field to correct the slant. If a row of characters slants 10 degrees from horizontal, enter -10 (degrees) in the Row Slant Angle field to correct the slant.This mode useful if you link the Slant Angle to a scroll bar on the control panel and let the operator dynamically modify the amount of slant. Measured Angle to Make Square Note: The Deslant tool and the tool used to measure the edge angle must use the same Tool Origin. In this mode, the tool calculates the amount of correction necessary to bring each character’s columns to vertical (ninety degrees), and their rows to horizontal (zero degrees), based on the Column and Row Slant Angle values. For example, if a character slants 10 degrees from vertical, enter 100 (degrees) in the Column Slant Angle field to correct the slant (100 = 90 + 10). If a row of characters slants 10 degrees from horizontal, enter 10 (degrees) in the Row Slant Angle field to correct the slant (10 - 10 = 0). You can use an Origin or Linear Regression tool to measure a character’s current vertical edge angle (from zero degrees). Link that measured angle into the Column Slant Angle field (using a Data Instance tool to extract the angle). The tool calculates the number of degrees change necessary to correct the vertical edge to make it ninety degrees. The same may be done with a horizontal edge and the Row Slant Angle. 3-57 Datalogic Automation Inc. Image Sampling Impact Reference Guide Image Sampling In the Image Geometry Drawer The Image Sampling tool provides a reduced resolution image by sampling a user-defined number of pixels. For example, you can produce an image at one-half resolution by sampling every other pixel. Input Name What it is Input Image Linked Image Tool Origin The tool’s origin relative to the entire image space. Region of Interest The area of the image to sample. (if zero, the entire image is processed) Sampling Resolution How many pixels to sample; 1 is every pixel, 2 is every other pixel, etc. This applies to x and y dimensions. Anti Alias Flag If True, the image is filtered before it is sampled. Sampling Rotation The output image is rotated by this angle (0, 90, 180, or 270 degrees). Mirror None: The Output Image is not changed. Horizontal: The Output Image is flipped horizontally. Vertical: The Output Image is flipped vertically. Any mirroring takes place after windowing and sampling operations. Output Name What it is Output Image Reduced resolution image within ROI (may be viewed on the Output Image tab). Image Stitching with Origins In the Image Geometry Drawer The Image Stitching with Origins tool provides the ability to combine (stitch) several smaller images into one large image using features in the images as reference points for the overlap. For example, you can take several images of sections of a large connector, then stitch them together to inspect the whole connector image. Input Name What it is Image 1 The first image to be stitched Overlap Feature Location in Image 1 The origin of the feature to be used to indicate the overlap between image 1 and image 2 Image 2 The second image to be stitched Overlap Feature Location in Image 2 The origin of the feature to be used to indicate the overlap between image 2 and image 1 Datalogic Automation Inc. 3-58 Impact Reference Guide Image Stitching with Points Output Name What it is Output Image The resulting stitched image (viewed on the Output Image tab). The output image must be less than 32k pixels high or wide with a practical limit of 16 Mpixels total. See “Special Note for Stitched Images with Distortion” on page 3-60. Image Stitching with Points In the Image Geometry Drawer The Image Stitching with Points tool provides the ability to combine (stitch) several smaller images into one large image using points in the images as reference points for the overlap. For example, you can take several images of sections of a large connector, then stitch them together to produce and inspect the whole connector image. (Also see “Image Stitching and Overlapping ROIs” on page 3-59.) Input Name What it is Image 1 The first image stitch Overlapping Points in Image 1 The list of points in image 1 used to indicate the overlap between image 1 and image 2 Tool Origin for Image 1 Points The origin of the overlap reference points in image 1. Image 2 The second image stitch Overlapping Points in Image 2 The list of points in image 2 to be used to indicate the overlap between image 1 and image 2 Tool Origin for Image 2 Points The origin of the overlap reference points in image 2. Output Name What it is Output Image The image resulting from the stitching operation (viewed on the Output Image tab). The output image must be less than 32k pixels high or wide with a practical limit of 16 Mpixels total. See “Special Note for Stitched Images with Distortion” on page 3-60. Image Stitching and Overlapping RO Image Stitching and Overlapping ROIs To stitch more than two images together, link the output from one stitching tool to the input of another. Stitched images work fastest and most accurately if each ROI is contained within one of the original camera snaps (i.e. they do not completely straddle an overlap area). ROIs that are larger than the overlap areas, including full images, work more slowly and do not have sub-pixel accuracy. If each ROI is kept within one of the camera snaps, then all processing is as fast and accurate as non-stitched images. This includes multiple small ROIs. The stitched image may sometimes give odd-looking, but correct, results in the overlap region. For example, when the stitched image is displayed, the overlap area contains pixels from image one. If an ROI is on image 3-59 Datalogic Automation Inc. Line Profile Impact Reference Guide two and includes the overlap area, but not any pixels from image one, then the ROI uses all image two pixels to provide the most accurate results with no seam and with distortion correction. The image display may look odd because the displayed pixels are from image one, but the results are based on image two pixels. Special Note for Stitched Images with Distortion If individual images are overly distorted due to lens anomalies, a miscalculated field of view, incorrect lensing, or other conditions, it may appear that the displayed found pixels are offset from the pixels on the resulting stitched image. The tool output data are properly corrected for distortion and any calculations on grid location work correctly. Distortion correction is applied to individual images before they are stitched to create a virtual image. (Usually distortion should only be found at the edges of an image and is correctable.) After the individual images are stitched, this mathematical information is not available, so when the tool operation is performed, the displayed found pixels may look like they are offset from the object pixels on the image. The found pixel location calculations are correct, but the image looks distorted in the image display and the pixel locations look misplaced. In short, the inspection result numbers are good even if the results do not appear correct on the image. Line Profile In the Image Geometry Drawer The Line Profile tool reads the pixel grey level values from a single line segment and outputs them as a list of reals. The pixel values are scaled so the outputs are in the range of zero to one hundred percent. Input Name What it is Input Image Linked Image Tool Origin The tool’s origin relative to the entire image space Line Segment The line segment that reads the pixel grey level values. Output Name What it is Pixel Value List A list of pixel grey levels Multiple Image Stitch In the Image Geometry Drawer The Multiple Image Stitch tool provides semi-automatic stitching of multiple images into one larger image (up to 8Mb total). (On the M-Series device, the output image must be less than 32k pixels high or wide with a total image size limited by the amount of PC memory.) For example, you can take several images of sections of a large part, then stitch them together to inspect the whole part. The tool takes an image list and stitches those images together based on their order in the list and the tool’s input settings. The images are stitched into a one or two-dimensional array with a consistent overlap in both the x and y directions. The tool uses correlation pattern matching (based on the Stitching Threshold property) to match the overlap regions and insure accurate stitching. The Image Motion input values indicate how far the camera or part moves between snaps. These values do not exactly define the image stitching, as they do in the Image Stitching With Origins tool, but they should Datalogic Automation Inc. 3-60 Impact Reference Guide Multiple Image Stitch be within five pixels on each dimension to help the tool find the correct stitching transformation. For a more detailed explanation of how the images are stitched based on the inputs, see “Stitching Directions” on page 3-62. 3-61 Input Name What it is Input Images The list of images to be stitched Image Count X The number of images in the list in the X direction Image Count Y The number of images in the list in the Y direction Image Motion X This is how far the camera or part moves in the x-direction for each successive camera snap. (This is calculated as the size of the image minus the amount of overlap, within five pixels on left and right.) This would be called the x-pitch if the images were laid onto a rectangular grid. This value is always positive. Image Motion Y This is how far the camera or part moves in the y-direction for each successive camera snap. (This is calculated as the size of the image minus the amount of overlap, within five pixels on left and right.) This would be called the y-pitch if the images were laid onto a rectangular grid. This value is always positive. Stitching Threshold This value indicates how well the images must correlate (or match) where they overlap for the stitching to be completed. A higher value means that there must be a greater correlation between the overlapping areas. The value can range from 1 to 100. Row Major Order Indicates how the images in the list are presented. If True, the images are presented in rows. If False, the images are presented in columns. Major Forward Indicates how the images within the major order (rows or columns) are presented. If True, they are presented left to right for rows and top to bottom for columns. If False, they are presented right to left for rows and bottom to top for columns. For example, if Row Major Order is True, and Major Forward is True, then the images are presented in rows from top to bottom. Minor Forward Indicates how the images within the first row or column are presented. If True, they are presented left to right for rows and top to bottom for columns. If False, they are presented right to left for rows and bottom to top for columns. If the Serpentine input is True, this order is alternated for each subsequent row or column. Serpentine If True, the image presentation order alternates direction at the end of each row or column, after the first row or column (based on the Minor Forward input). If False, the order does not alternate. Output Name What it is Stitch Successful If True, the images were stitched successfully. Datalogic Automation Inc. Multiple Image Stitch Impact Reference Guide Output Name What it is Stitching Scores A list of the stitching scores for each stitch in the output image. Output Image The image resulting from the stitching operation. Stitching Directions These examples show a part to be inspected that is too large to snap in one image. The camera moves above the part while a series of images are snapped. These images are then combined into an image list and the Multiple Image Stitch tool puts them together. The input settings help the tool recreate the camera or part motion so the input images are stitched together in the correct order. The first example shows two-image stitches, one in the X and one in the Y direction. The motion arrows show the camera movement direction. The image numbers indicate the order in which they were snapped and their order in the image list. Their order in the final stitched image is determined by the tool’s input settings (see “Stitched Image Order Table” on page 3-63). Camera Motion Image Size = 600 Image 1 Image Size = 600 Image 2 Image 1 Camera Motion Image 2 The camera moves this far, then snaps another image. Image Motion X is 400 (600 - 200 = 400) The camera moves this far, then snaps another image. Image Motion Y is 400 (600 - 200 = 400) Image overlap = 200 Image overlap = 200 The input settings for this tool are: Row Major Order = True Major Forward = Doesn’t Matter (only 1 row) Minor Forward = True Serpentine = Doesn’t Matter (only 1 row) The input settings for this tool are: Row Major Order = False Major Forward = Doesn’t Matter (only 1 column) Minor Forward = True Serpentine = Doesn’t Matter (only 1 column) This figure shows four-image stitching. The camera motion arrows show a serpentine camera movement. The image numbers indicate the order in which they were snapped and their order in the image list. Their Datalogic Automation Inc. 3-62 Impact Reference Guide Multiple Image Stitch order in the final stitched image is determined by the tool’s input settings (see “Stitched Image Order Table” on page 3-63). Image Size = 600 Camera Motion The input settings for this tool are: Row Major Order = True Major Forward = True Minor Forward = True Serpentine = True Image Size = 600 Image 1 Image 2 Image 4 Image 3 The camera moves this far, then snaps another image. Image Motion Y is 400 (600 - 200 = 400) Image overlap = 200 The camera moves this far, then snaps another image. Image Motion X is 400 (600 - 200 = 400) Stitched Image Order Table This table shows an example of how the tool’s input settings affects where images are located in a stitched output image. Assume there are four images in the image list numbered 1, 2, 3, and 4. The numbers in the Stitched Image Order column indicate where each image is located in the output image after the tool has run. Note: To create the desired output image, there does not need to be a single correct set of direction parameters; some settings have no affect on the final stitched image order. For example, for a single row of images the Serpentine input doesn’t affect the stitching order. 3-63 Row Major Major Order Forward Minor Forward Serpentine Stitched Image Order True True True True 1 2 4 3 True True True False 1 2 3 4 True True False False 2 1 3 4 True True False True 2 1 4 3 True False True True 4 3 1 2 True False True False 3 4 1 2 True False False True 3 4 2 1 True False False False 4 3 2 1 False True True True 1 4 2 3 Datalogic Automation Inc. Unwrap Impact Reference Guide Row Major Major Order Forward Minor Forward Serpentine Stitched Image Order False True True False 1 3 2 4 False True False True 2 3 1 4 False True False False 2 4 1 3 False False True True 4 1 3 2 False False False True 3 2 41 False False True False 3 1 4 2 False False False False 4 2 3 1 Unwrap In the Image Geometry Drawer The Unwrap tool can be used to straighten text in the shape of an arc so it can be analyzed with the OCR tool. A typical application is unwrapping circular text on a coin or other round object. This tool uses a wide circular ROI to specify the sampled region. The width of the ROI determines the height of the unwrapped image. A boolean value can be set to indicate whether the sample direction should put the outside or the inside of the arc on top in the resulting image. For example, if you are inspecting text at the top of the coin, set the sample direction so the outside of the arc is on top. Unwrapped sampling can cause character distortions when the inside arc is stretched and the outside arc is compressed. The distortion is worse for tighter arcs. Input Name What it is Input Image Linked Image Tool Origin The tool’s origin relative to the entire image space. Arc Region The desired region of the image to unwrap. The parameters are x coordinate, y coordinate, radius, start angle, cover angle, and width. Sample Direction Indicates whether the outer or inner arc of the Arc Region is on the top of the text. Output Name What it is Output Image The unwrapped image (may be viewed on the Output Image tab). Datalogic Automation Inc. 3-64 Impact Reference Guide Undistort Image Undistort Image In the Image Geometry Drawer The Undistort Image tool applies the input image's calibrated distortion mapping to the image to produce an output image that is not distorted. The tool’s primary purpose is to "flatten" an image with perspective distortion, so that images look similar at all rotations and translations. It also removes radial lens distortion. Use this tool with the OCR and Greyscale Template tools since they do not work with severe image distortions. This tool is not normally needed with the Blob, Gauge, and Contrast tools since the calibration process maps edge points to uniform real-world coordinates. Input Name What it is Input Image Linked Image Tool Origin The tool’s origin relative to the entire image space. Shape List The desired region of the image to search. If no shape is defined, the entire image is processed. Output Name What it is Output Image The undistorted image (may be viewed on the Output Image tab). X-Y Projection In the Image Geometry Drawer The X-Y Projection tool finds the average intensity of each column (X projection) or row (Y projection) of an area within an ROI and then repeats that average intensity across the column or row to create a new image. This image can then be used by other tools. 3-65 Input Name What it is Input Image Linked Image Tool Origin The tool’s origin relative to the entire image space. Shape List The desired region of the image to search. For a single rectangle, the x or y axis is projected. For circles, polygons, doughnuts, etc. the tool origin axes are projected and the row/column average intensity includes the enabled pixels. Projection Direction Project on X Axis: Each column is repeated Project on Y Axis: Each row is repeated Output Image Thickness The width of the output image in units in the repeated direction. Default is zero which is ten units. Fixed Threshold Range The grey level threshold range for the In Range and Out of Range options (in percentage). The parameters are start and end. Use In Range Value If True, pixels with a grey level within the Fixed Threshold Range are changed to the In Range Value before the average intensity is calculated. See “Fixed Threshold Range” on page 3-66. Datalogic Automation Inc. Locating Drawer Impact Reference Guide Input Name What it is In Range Value The pixel grey level value to use for the Fixed Threshold Range. Use Out Of Range Value If True, pixels with a grey level within the Fixed Threshold Range are changed to the Out Of Range Value before the average intensity is calculated. Out Of Range Value The pixel grey level value to use for the Fixed Threshold Range. Output Name What it is Output Image The image made from the repeated rows or columns (may be viewed on the Output Image tab). Fixed Threshold Range If Use In Range Value is true, then the pixels in the Fixed Threshold Range are changed to the In Range Value before pixels in the rows or columns are averaged together. The same is done for Use Out Of Range Value. Use In Range Value and Use Out Of Range Value can be used at the same time. This feature can be used if the averaging in the projection can cause small high contrast features to have the same intensity in the output image as larger, but lower contrast features. By remapping the lower contrast pixels, high contrast features still stand out in the output image. Locating Drawer Blob In the Feature Finding, Flaw Detection, and Locating Drawers The Blob tool uses an Autothreshold or Fixed threshold method to find randomly oriented or amorphously shaped objects within the ROI. The output list can be filtered with the Blob Filter tool to limit blobs based on size, area, and other parameters, if desired. A Setup is available for this tool, which simplifies basic configuration. Click the Setup tab to use it. NOTE: The tool’s execution time is affected by the image resolution, a rotated tool origin, and ROIs with an exclude area. Very high resolution images may take a long time. Input Name What it is Input Image The image being inspected Tool Origin The tool’s origin relative to the entire image space Shape List The desired region of the image to search. If no shape is defined, the entire image is processed. Datalogic Automation Inc. 3-66 Impact Reference Guide Blob Input Name What it is Shape List ROI Type Each Shape is separate ROI: Each shape is processed as a separate ROI and the results are combined. This mode is faster than the other mode if the shapes are far apart, but results are duplicated if the shapes overlap. ShapeList is One ROI: The ShapeList is one large rectangular ROI and the shapes are the enabled pixels within the rectangle. The tool may be slow if the shapes are far apart. This setting allows shapes to overlap and form complex shapes without repeating the overlapped pixels and duplicating results. 3-67 Grey Level Threshold Type See “Grey Level Threshold Types” on page 3-68 for more details. Blob Detect Type Detect Out of Range: detects blobs that are outside the threshold range values Detect In Range: detects blobs that are within the threshold range values Fixed Threshold Range The grey level threshold range for Fixed Threshold Range type (in percentage). The parameters are start and end. Exclude Border Blobs When true, border blobs are excluded from the output list (see “Border Blobs” on page 3-96) Fill Blob Holes If True, any holes in the found blobs are filled to create a single blob. This can save time on images with many extra blobs. Enable Width Filter When true, blobs within the Width Range are included in the output list. (Ignored when the Filter Single Blob: First Blob property is selected.) Width Range Blob minimum and maximum width Enable Height Filter When true, blobs within the Height Range are included in the output list. (Ignored when the Filter Single Blob: First Blob property is selected.) Height Range Blob minimum and maximum height Enable Area Filter When true, blobs within the Area Range are included in the output list Area Range Blob minimum and maximum Area. The minimum value should be set when the Filter Single Bobruisk Blob property is selected. (The Maximum value is then ignored.) Required Number of Blobs If the number of found blobs (based on the filter settings) is within this range, the Passed output is set to true Enable Output Blob List If True, the filtered blobs are presented in the Blob List output Enable Output Area List If True, the filtered blobs areas are presented in the Area list output Enable Output Centroid List If True, the filtered blobs centroids are presented in the Centroid list output. Datalogic Automation Inc. Blob Impact Reference Guide Input Name What it is Output Origin Type Also see “Output Origin” on page 3-70 Centroid X, Y Only: The X and Y coordinates of the blob centroid (the angle is ignored) Centroid X, Y and Major Axis Angle: The X and Y coordinates of the blob centroid and Major Axis angle in a +/- 90 degree range (useful if blob has an oblong shape). No Origin: No origin is presented (tool runs faster) Centroid X, Y, and Major Axis Angle 360 Range: The X and Y coordinates of the blob centroid and Major Axis angle in a 360 degree range Filter Single Blob This filter is applied after all the other filters Off: Blobs are filtered and output according to all filter settings Centermost Blob: Only the blob closest to the center of each ROI is output First Blob: The tool will stop processing when the first blob is found that has an area equal to or larger than the Area Range: Minimum value. (The Width Filter, Height Filter, and Area Range: Maximum filter settings are ignored. Exclude Border Blobs and Fill Blobs are forced to false to save processing time.) Largest Blob: Only the largest blob in each ROI is output Note: If Centermost or Largest blob is selected, only passed blobs will be displayed in the image window. Output Name What it is Number of Blobs Found The number of blobs found Output Blob List List of filtered blobs Output Area List List of the areas of the filtered blobs Output Centroid List List of the X and Y coordinates of the centroid points of the filtered blobs Passed If true, the number of blobs in the Output Blob List falls within the range of the Required Number of Blobs Threshold Range Used The Fixed Threshold Range input value start and end. Output Origin Relative to Tool The found origin (including angle if selected) relative to the Tool Origin, based on filtered blobs. See “Output Origin” on page 3-70 Output Origin Relative To RWC The found origin (including angle if selected) relative to the entire image space, based on filtered blobs. See “Output Origin” on page 3-70 Grey Level Threshold Types Autothreshold Contrasting Bright Pixels This sets the upper and lower thresholds automatically based on all the grey levels in the ROI. The lower threshold is set to a value somewhere in the valley between the bright pixel and the dark pixel peaks. The exact value depends on the statistics of the two peaks. The upper threshold is set to 100%. Bright pixels are Datalogic Automation Inc. 3-68 Impact Reference Guide Blob thus considered in-range. This setting is best used when looking for a bright part of an image with non-uniform grey levels. In this example, the lower threshold is approximately 50% and the upper threshold 100%. Lower Threshold 0 Threshold Range Upper Threshold 100 Autothreshold Contrasting Dark Pixels This sets the upper and lower thresholds automatically based on all the grey levels in the ROI. The lower threshold is set to 0%, and the upper threshold is set to a value somewhere in the valley between the bright pixel and the dark pixel peaks. The exact value depends on the statistics of the two peaks. Dark pixels are thus considered in-range. This setting is best used when looking for a bright part of an image with non-uniform grey levels. In this example, the lower threshold is 0% and the upper threshold approximately 50%. Lower Threshold 0 Upper Threshold 100 Threshold Range Autothreshold Uniform Region This sets the upper and lower thresholds automatically based on a uniform region of grey levels in the ROI. The lower threshold is set to the low end of the grey level values and the upper threshold is set high end of the grey level values. Pixels outside the thresholds are thus considered out-of-range. This setting can be used for flaw detection which looks for non-uniform areas in the image. In this example, the lower threshold is approximately 20% and the upper threshold approximately 80%. Lower Threshold 0 Upper Threshold Threshold Range 100 Fixed Threshold Range This sets the upper and lower thresholds based on the Fixed Threshold Range input value. Pixels with grey level values between the thresholds are considered in-range. This setting is best used for an image with uniform grey levels. Center Fixed Threshold Range On Region Average 3-69 Datalogic Automation Inc. Circular Pattern Find Impact Reference Guide The average of all grey levels within the Region of Interest is calculated. The Fixed Threshold Range (i.e. the difference between the Min and Max values) is centered on the average grey level. Pixels with grey levels within that range are considered in-range of the inspection. For example, if the Fixed Threshold Range is 20 to 40, the range is 20. If the average grey level is 70, the center of the grey level is 35. All pixels with grey levels between 25 and 45 (35 - 10 and 35 + 10) are considered in-range. Threshold Min Threshold Max Average Grey Level Output Origin The output origin is located based on the centroid of the filtered blobs. This means that the found output origin is based on the blobs that pass based on the filter settings. If there are multiple blobs, then the origin is located based on their combined centroid. In most cases you want to filter all but one blob. If that blob is not found, then set the tool to fail based on a minimum blob count of one. In other cases, you want to set the filters so that all the blobs pass and base the output origin on their combined centroid, especially if the blobs may break up. Centroid X, Y and Major Axis Angle type: The origin angle is the Major Axis of the blob, and, because the major axis is a line with two directions, the tool chooses the angle between -90 and 90 degrees. Centroid X, Y, and Major Axis Angle 360 Range type: The origin angle is the Major Axis of the blob, and, because the major axis is a line with two directions, the tool chooses the angle on the side of the blob that extends furthest from the centroid (the longer side). Circular Pattern Find In the Locating Drawer The Circular Pattern Find tool can quickly find the rotational position of rotating objects, such as coins, bottle caps, or snap rings. It uses normalized correlation over a circular arc and outputs an origin centered on the circle. The tool can be trained on and can search part or all of the circular arc. It can find one or several matches around the circular arc. The tool has one circular arc ROI. To set up the tool, place and size the circular arc ROI over the region to be inspected and click the train button. If necessary, resize the arc length to cover the desired search angles. If the train region is 360 degrees, it is not necessary to resize the arc length. If train region is less than 360 degrees, the ROI length can be resized up to 360 degrees. To adjust the circular arc ROI move the cursor around the ROI border until the cursor changes to the desired type, then click and drag the cursor to the desired place and size. • Move • Increase Angle • Increase Radius Datalogic Automation Inc. 3-70 Impact Reference Guide Circular Pattern Find • Widen Arc • Rotate Do not change the arc ROI’s width between training and running, only the arc length. Generally, a thinner arc executes faster. The tool can find multiple matches within the search ROI and the best match and a list of all matches are available as outputs. Note: You cannot see the trained model. That is, after you train and then resize the arc for searching, you can not see the trained arc angle. Input Name What it is Input Image The image being inspected Tool Origin The tool’s origin relative to the entire image space Arc Region The region of the image used to train the model. Minimum Match Score Found Match is false if no pattern is found with a match score larger than this (0 to 100) Reference Angle Method Center of Model Arc: The model is trained to report at the center of the arc region. 0 Degrees: The model is trained to report 0 degrees at the trained orientation. Correlation Model The model to find, linked from another tool Output Name What it is Found Match True when a model with a score greater than the Minimum Match Score is found Output Best Origin The model’s origin relative to the input tool origin Output Best Origin Relative to RWC The model’s origin in Real World Coordinates. Use this value when the Origin needs to be relative to the image for display or it needs to be linked as another tool’s origin Output Best Score The best match score greater than the Minimum Match Score (1 to 100) Output Origin List List of Origins relative to the input tool origin Output Origin List Relative to RWC List of Origins relative to Real World Coordinates Output Score List The match scores of origins in the Origin List Contour Pattern Find In the Locating Drawer NOTE: This tool has been deprecated and replaced by the Pinpoint Pattern Find tool (see page 3-84). It is documented here only for existing vision programs and is no longer supported. 3-71 Datalogic Automation Inc. Circular Pattern Find Impact Reference Guide The Contour Pattern Find tool creates a model based on detected edges in a user-selected part of an image, then provides a best-match score and the x-y coordinates of the model’s origin as an output. Input Name What it is Input Image The image being inspected Tool Origin The tool’s origin relative to the entire image space Train Shape List The region of the image used to train the model. Find Shape List The region of the image to search for the trained model. Shape List ROI Type Each Shape is separate ROI: Each shape is processed as a separate ROI and the results are combined. This mode is faster than the other mode if the shapes are far apart, but results are duplicated if the shapes overlap. ShapeList is One ROI: The ShapeList is one large rectangular ROI and the shapes are the enabled pixels within the rectangle. The tool may be slow if the shapes are far apart. This setting allows shapes to overlap and form complex shapes without repeating the overlapped pixels and duplicating results. Multi Resolution Contour Model The model to find, linked from another tool Angle Range The maximum angle, in degrees, that the tool searches in the image for a match of the trained model. The parameters are minus, nominal, plus, include end, and include start. Angle Range Pattern The maximum possible range of rotation of the image in relation to the trained model Full 360 Degree Range: Angle Range Only: Angle Range and180 Rotation: Angle Range and all 90 Degree Rotations: Minimum Match Score Found Match is false if no pattern is found with a match score larger than this (0 to 100) Model Reference Origin Placement Train Region Center: The output origin is in the center of the train region Train Region Upper Left Corner: The output origin is in the upper left corner of the train region Use Model Reference Origin: The output region is relative to the Model Reference Origin Model Reference Origin Offset the Output Best Origin from the Model Origin Match Sensitivity Indicates amount of noise in the image when attempting to match the model. Higher settings allow rougher edges and causes more thorough and longer searching Edge Detection Sensitivity When Training Indicates sensitivity to noise in image during tool training. Higher settings detect more weaker edges but causes the tool to run slower. Datalogic Automation Inc. 3-72 Impact Reference Guide Circular Pattern Find Input Name What it is Edge Detection Sensitivity When Finding Indicates sensitivity to noise in image while looking for the model. Higher settings allow rougher edges and causes more thorough and longer searching. Fixed Edge Threshold When Training The grey level threshold value when Fixed Threshold Edge Detection When Training is selected. Fixed Edge Threshold When Finding The grey level threshold value when Fixed Threshold Edge Detection When Finding is selected Find All Matches If True, all matches are reported. (Maximum Number of Matches is ignored.) Maximum Number of Matches If Find All Matches is False, this is the maximum number of matches reported. Initial Search Resolution Half Resolution: This setting can be used with most general purpose applications. The tool runs faster with this setting. Full Resolution: This setting can be helpful in applications where the edges are packed close together or the search area is small. The tool runs slower with this setting but it is more reliable, so it should mainly be used in application that demand full resolution matching or that can tolerate slower execution, such as those with a small search area. Output Name What it is Found Match True when a model with a score greater than the Minimum Match Score is found Output Best Origin The model’s origin relative to the input tool origin Output Best Origin Relative to RWC The model’s origin in Real World Coordinates. Use this value when the Origin needs to be relative to the image for display or it needs to be linked as another tool’s origin Output Best Score The best match score greater than the Minimum Match Score (1 to 100) Output Origin List List of Origins relative to the input tool origin Output Origin List Relative to RWC List of Origins relative to Real World Coordinates Output Score List The match scores of origins in the Origin List Output Edgel List At Initial Resolution A list of edges found during the first pass while finding the model. Used primarily for display. Output Edgel List at Final Resolution A list of edges found during the last pass while finding the model. Used primarily for display. Correlation Pattern Find In the Locating Drawer 3-73 Datalogic Automation Inc. Circular Pattern Find Impact Reference Guide NOTE: This tool has been deprecated and replaced by the Pinpoint Pattern Find tool (see page 3-84). It is documented here only for existing vision programs and is no longer supported. The Correlation Pattern Find tool is a general-purpose correlation based pattern find tool. It finds one or more instances of a trained model image in a user-defined search region. It can find the model at any angle of rotation. Input Name What it is Input Image The image being inspected Tool Origin The tool’s origin relative to the entire image space Train Region The region of the image used to train the model. If no area is defined, the entire image is processed. Find Shape List The region of the image to search for the trained model. If no shape is defined, the entire image is processed. Model Reference Origin Placement Where the tool should place the reference origin: in the center or upper left corner of the Train Region, or use the Model Reference Origin value Model Reference Origin The model reference origin for Use Model Reference Origin Placement type Angle Range The maximum angle, in degrees, that the tool searches in the image for a match of the trained model. The parameters are minus, nominal, plus, include end, and include start. Angle Range Pattern The maximum possible range of rotation of the image in relation to the trained model Full 360 Degree Range: Angle Range Only: Angle Range and180 Rotation: Angle Range and all 90 Degree Rotations: Minimum Match Score Matches with a match score larger than this (0 to 100) are reported, depending on the Find All Matches and Maximum Number of Matches settings Match Sensitivity Indicates amount of noise in the image when attempting to match the model. Higher settings allow rougher edges and causes more thorough and longer searching Find All Matches If True, all matches with a sufficient match score are reported (Maximum Number of Matches is ignored). Maximum Number of Matches The maximum number of matches to report, based on the Match Score Maximum Intensity Change from Model This is how much brighter or darker the match can be, compared to the model. Since the normalized correlation algorithm can theoretically handle any intensity change, it sometimes finds matches in very dark background regions. The change is measured as "match average intensity" / "model average intensity", so that a range of 0.5, 2 means that the model can be from half the intensity of the model up to twice the intensity of the model, thereby avoiding matches in dark background noise. Datalogic Automation Inc. 3-74 Impact Reference Guide Line Find Input Name What it is Correlation Model The model to find, linked from another tool Output Name What it is Found match If True, at least one match with a sufficient Match Score was found Output Best Origin The best origin relative to the input tool origin Output Best Origin Relative to RWC The match’s origin in Real World Coordinates. Use this value when the Origin needs to be relative to the image for display or it needs to be linked as another tool’s origin Output Best Score The best model’s match score Output Origin List A list of model origins if multiple matches were found Output Origin List Relative to RWC A list of model origins relative to Real World Coordinates, if multiple matches were found Output Score List A list of model match scores if multiple matches were found Line Find In the Locating and Feature Finding Drawers The Line Find tool finds the edge points along an edge or two edges, perform a linear regression on those points, and then create a fitted line segment along the edge (or between two edges) and an origin as an output. It can find the center line between two found lines. It also checks for the maximum gap length in the line, the maximum distance of outlying points from the line, and the line’s straightness. For more details, see “How the Line Find tool works” on page 3-77. Setting Up the Line Find tool (Setup is available) 1. Acquire an image of a good part. 2. Select the Wide Line ROI property and draw the ROI across the desired edge. If you are looking for the center between two lines, be sure to draw the ROI in the appropriate direction. 3. Click Run. If necessary, adjust the inputs until the found line is located correctly and the Passed output is True. 3-75 Input Name What it is Input Image The image to be inspected Tool Origin The tool’s origin relative to the entire image space Wide Line ROI The line segment used to find the desired edge. Line Type The tool searches in the ROI arrow direction for this type of line (see “How the Line Find tool works” on page 3-77) Datalogic Automation Inc. Line Find Impact Reference Guide Input Name What it is Edge Detection Method Gradient Edges or Grey Level Edges Gradient detection generally provides more consistent results. In some cases Gradient detection can pick up extra edges in a noisy image and Grey Level detection may offer better control. See “Edge Detection Method” on page 3-78. Edge Detection Sensitivity The sensitivity level determines the transition level necessary for detection. A higher value detects less well-defined edges. Fixed Gradient Threshold Percentage The gradient threshold value for Gradient Edges Detection Method Fixed Grey Level Threshold Percentage The grey level threshold value for Grey Level Edges Detection Method Noise Level The amount of background noise present in the image. The No Noise setting allows the tool to find edges that are close together since there isn’t as much background noise in the image. The Very High Noise setting means there is more noise in the image so it’s harder for the tool to find edges that are close together (edges along the ROI must be farther apart). Sampling Percent The row sampling rate - for example, 100 samples every row, 50 samples every other row, 0 samples a minimum of 2 rows. Outlier Distance Threshold Outlying points beyond this distance are not included in the found line Enable Angle Range Check If True, the Output Origin must lie within the Line Angle Range Line Angle Range The maximum angle, in degrees, that the Output Origin may rotate for the tool to pass. The parameters are minus, nominal, plus, include end, and include start. Enable Line Length Check If True, the found line’s length must lie within the Line Length Tolerance. Line Length Tolerance If the found line’s length exceeds this value, the tool fails. The parameters are minus, nominal, and plus. Enable Gap Length Check If True, the maximum gap length in the found line must be less than the Max Gap Length Max Gap Length The maximum allowed gap between fitted points along the line segment, in real world units. Gaps are formed by missing edge points or outliers caused by bumps or breaks in the edge. Gaps must exceed this max length to be detected. If any gaps are detected, then the tool fails. If this value is less than 1.5*Sampling Rate*pixel_size, than the larger value is used instead. Enable Straightness Check If True, the found line must have a straightness error less than Max Straightness Error Datalogic Automation Inc. 3-76 Impact Reference Guide Line Find Input Name What it is Max Straightness Error The maximum deviation allowed from a straight line (0 indicates a straight line) Output Name What it is Passed If True, the found line’s parameters lie within all the limits Line Segment The found line Output Origin Relative to Tool The X and Y coordinates of the center point and the angle of the found line relative to the Tool Origin. Output Origin Relative To RWC The X and Y coordinates of the center point and the angle of the found line relative to the entire image space. Edge Points The points used to create the found line Outlier Points The points further from the found line than the Outlier Distance Threshold Greatest Outlier Distance The distance of the furthest Outlier Point from the found line Gap Segments Line segments of gaps longer than the Max Gap Length Greatest Gap Length The length of the longest gap Straightness Error The deviation of the found line from a straight line (0 indicates a straight line) How the Line Find tool works This tool can find a line by locating multiple points on an edge and fitting them; find two lines and report the center line between them; and pass or fail based on the length, angle, straightness error (average fitting error), and maximum gap length of the found line. It can only find one line or one pair of leading and trailing lines. Edge Points Outlier Points Gaps Found Line Output Origin 3-77 Datalogic Automation Inc. Line Find Impact Reference Guide Above is an example of an image after the tool has run (some features have been removed in each example for clarity). The magenta dots are the edge points, the yellow dots are the outlier edge points, and the green line is an output that lies on the fitted line and extends from the first fitted point to the last fitted point, as they are projected to the fitted line. The output origin is centered on the fitted line and at the same angle. When the tool runs it performs the following operations: 1. Runs an Edge Point Find tool algorithm on each row of the wide line ROI and then does a linear regression on the points that are found. 2. For Dark Line type it finds the First Falling edge. For Bright Line type it finds the First Rising edge. For Center of Dark Line type it finds the strongest Falling/Rising pair. For Center of Bright Line type it finds the strongest Rising/Falling pair. 3. The regression algorithm fits all the found edge points to a line and then iteratively reduces the weights of points outside the Outlier Distance Threshold. For Center type finds, it fits the rising points to one line and the falling points to another and then averages the two lines to create the output Line Segment. 4. The output Line Segment and Gaps are found by projecting the non-outlier points to the fitted line and sorting along the line. The output line segment extends from the first to the last points on the fitted line. The gaps are the distance between adjacent points on the fitted line. 5. The output Origin is centered on the output Line Segment. The Origin is displayed only when the Display Output Origin check box in the Setup Pass/Fail panel is checked. 6. The Straightness Error is the average error of all the non-outlier points. Edge Detection Method Gradient Edges: Grey Levels in an image range from 0 to 100 percent (0 to 255 grey levels). A gradient indicates a rate of change. When you choose this setting, the tool compares the value of each pixel along the edge to its neighbor. A greater value indicates a positive gradient (dark to bright). A lesser value indicates a negative gradient (bright to dark). The difference between the two values indicates the steepness of the gradient (no difference indicates no gradient). The Fixed Gradient Threshold Percentage or Edge Detection Sensitivity input property determines the minimum steepness of the edge the tool should find. A larger threshold number or higher sensitivity means the tool only finds edges with a steeper gradient. In some cases Gradient Edge detection can find extra edges in the flat parts of a noisy image where Grey Level detection offers better control. However, if there is extra noise in the edge you are trying to find, this method probably provides more consistent results. Image edges Rising Gradient Edge Found Thresholds Gradient Falling Edge Not Found Grey Level Edges: Grey Levels in an image range from 0 to 100 percent (0 to 255 grey levels). When you choose this setting, the tool measures the grey level of each pixel along the edge. The Fixed Grey Level Threshold Percentage or Edge Detection Sensitivity input property determines the grey level value at which edges are found. For example, if one pixel’s grey level is less than the threshold and the next pixel’s grey level is greater than the threshold, then a rising edge is detected. The threshold value is related to the difference in brightness or darkness of the object rather than the steepness of the edge. This setting works someDatalogic Automation Inc. 3-78 Impact Reference Guide Origin what better than Gradient Edges when the edge is a gradual slope, the flat parts of the image are noisy, or you are trying to find more subtle edges. Image edges Rising Edge found Grey Levels Threshold Falling Edge found Origin In the Locating Drawer The Origin tool uses from one to three line ROIs to locate image edges. These edges provide an origin point and angle for other tools to use as a reference point to locate the parts of the image you want to inspect. Use this tool when the parts of the image to be inspected may move within the image window. After the tool is trained and run, the Output Origin can be linked into the Tool Origin property of other tools. Notes: When a tool with a Tool Origin input property is put in a task, that input property value is linked to the same value that was last used by other tools in the task. The Origin tool, unlike other tools, clips ROIs that fall partially off the image. Since it is a locating tool and its ROIs can dynamically position relative to each other, ROI off-image situations can happen and not be errors. A Setup is available for this tool, which simplifies basic configuration. Click the Setup tab to use it. 3-79 Input Name What it is Input Image Linked Image Tool Origin The tool’s origin relative to the entire image space. Type or link a value into this property if you are trying to find an origin relative to another tool. Origin Type One Direction: Primary ROI is used One Direction And Angle: Primary and Secondary ROIs used Two Directions: Primary and Perpendicular ROIs used Two Directions And Angle: Primary, Secondary, and Perpendicular ROIs used Relative ROI Positioning Method No Relative ROI Positioning: Each ROI is positioned based on edges found Find Primary Edge, Then Position Perpendicular ROI: When the Primary ROI is positioned, and a point is found, the Perpendicular ROI is positioned relative to the found point Find Perpendicular Edge, Then Position Primary ROI: When the Perpendicular ROI is positioned, and a point is found, the Primary ROI is positioned relative to the found point Primary ROI This is the primary locator ROI. Use this ROI alone if you are searching for a single edge in one direction. Place it perpendicular to the edge you want to find. Datalogic Automation Inc. Origin Impact Reference Guide Input Name What it is Primary Object Color to Find The object color for the Primary ROI to find Primary Threshold Method Adaptive or Fixed - See “Threshold Method” on page 3-83 for more details. Primary Fixed Threshold Percentage The percentage grey level threshold value used when fixed threshold method is selected Primary Adaptive Threshold Offset If Adaptive Threshold Method is selected, this offset is added to the adaptive threshold. This setting allows you to weight the adaptive threshold up or down. Primary Noise Level The amount of background noise present in the image. The No Noise setting allows the tool to find edges that are close together since there isn’t as much background noise in the image. The Very High Noise setting means there is more noise in the image so it’s harder for the tool to find edges that are close together (edges along the ROI must be farther apart). Primary Centering Method See “Centering Method and Point Numbers” on page 3-83 Primary Point Number The Primary ROI point used for the origin point, numbered from the start of the Primary ROI. Also see “Centering Method and Point Numbers” on page 3-83 Primary Point Number for Centering See “Centering Method and Point Numbers” on page 3-83 Primary Edge Pattern See “Primary, Secondary, Perpendicular Edge Pattern” on page 82. Secondary ROI Use this ROI in addition to the Primary ROI if you want to locate two places along one edge. Draw it parallel to the primary ROI. Secondary Uses Primary Threshold Settings If True, the Secondary ROI uses the same threshold property settings as the Primary ROI If False, the Secondary ROI uses its own settings Secondary Object Color to Find The object color for the Secondary ROI to find Secondary Threshold Method Adaptive or Fixed - See “Threshold Method” on page 3-83 for more details. Secondary Fixed Threshold Percentage The percentage grey level threshold value for fixed threshold method Secondary Adaptive Threshold Offset If Adaptive Threshold Method is selected, this offset is added to the adaptive threshold. This setting allows you to weight the adaptive threshold up or down. Datalogic Automation Inc. 3-80 Impact Reference Guide 3-81 Origin Input Name What it is Secondary Noise Level See “Primary Noise Level” on page 3-80. Secondary Centering Method See “Centering Method and Point Numbers” on page 3-83 Secondary Point Number The Secondary ROI point used for the origin point, numbered from the start of the Secondary ROI. Also see “Centering Method and Point Numbers” on page 3-83 Secondary Point Number for Centering See “Centering Method and Point Numbers” on page 3-83 Secondary Edge Pattern See “Primary, Secondary, Perpendicular Edge Pattern” on page 82. Perpendicular ROI Use this ROI in addition to the Primary ROI if you want to locate two edges in two directions. Use it with the Primary and Secondary ROIs if you want locate two places along one edge, with an angle. Draw this ROI perpendicular to the Primary and/or Secondary ROIs. Perpendicular Uses Primary Threshold Settings If True, the Perpendicular ROI uses the same threshold property settings as the Primary ROI If False, the Perpendicular ROI uses its own settings Perpendicular Object Color to Find The object color for the Perpendicular ROI to find Perpendicular Threshold Method Adaptive or Fixed - See “Threshold Method” on page 3-83 for more details. Perpendicular Fixed Threshold Percentage The percentage grey level threshold value for fixed threshold method Perpendicular Adaptive Threshold Offset If Adaptive Threshold Method is selected, this offset is added to the adaptive threshold. This setting allows you to weight the adaptive threshold up or down. Perpendicular Noise Level See “Primary Noise Level” on page 3-80. Perpendicular Centering Method See “Centering Method and Point Numbers” on page 3-83 Perpendicular Point Number The Perpendicular ROI point used for the origin point, numbered from the start of the Perpendicular ROI. Also see “Centering Method and Point Numbers” on page 3-83 Perpendicular Point Number for Centering See “Centering Method and Point Numbers” on page 3-83 Perpendicular Edge Pattern See “Primary, Secondary, Perpendicular Edge Pattern” on page 82. Datalogic Automation Inc. Origin Impact Reference Guide Input Name What it is Subpixel Method The type of subpixel averaging The grey levels of one or more adjacent pixels (3, 5, 7, or 9) around an edge point are used to interpolate the edge to a fraction of a pixel Subpixel Position The subpixel position for edges that are not well defined. See “Subpixel Position” on page 3-144. Subpixel Search Distance in Pixels The maximum distance, in pixels, that the subpixel algorithm searches from the threshold edge for the subpixel edge. See “Subpixel Search Distance” on page 3-125. Use Reference Origin If True, the Reference Origin is used to determine the Output origin. Reference Origin This is the desired position for the Origin on the displayed image. Move the Reference Origin to the desired position on the image, then press the Train button. The tool calculates the offset between the current found Origin and the Reference Origin, and use that offset for all subsequent found origins. Output Name What it is Success If True, an origin was found Output Origin Relative to Tool The found origin, relative to the Tool Origin, if any. Output Origin Relative To RWC The found origin, relative to the entire image space. Primary Points Found The point used on the Primary ROI to determine the origin. Secondary Points Found The point used on the Secondary ROI to determine the origin Perpendicular Points Found The point used on the Perpendicular ROI to determine the origin Points Found A list of points found on all ROIs Relative ROI Origin The origin based on Relative ROI positioning. (See Relative ROI Positioning Method property) Primary, Secondary, Perpendicular Edge Pattern The tool ROIs detect patterns of transition from dark to light (rising) or light to dark (falling), depending on this property. For instance, the setting "Rising Only" finds only transitions in the image that change from dark to light. The found pattern is also affected by the "...Object Color to Find" property. The origin is located on the first transition of the selected type. Alternating Falling/Rising: Detects both dark to light and light to dark transitions Rising Only: Detects only dark to light transitions Falling Only: Detects only light to dark transitions Datalogic Automation Inc. 3-82 Impact Reference Guide Origin Central Rising Edge: Detects the central point of the dark to light transition Central Falling Edge: Detects the central point of the light to dark transition First Rising Edge: Detects the first dark to light transition First Falling Edge: Detects the first light to dark transition Automatic: Detects transitions based on the "...Object Color to Find" property setting Centering Method and Point Numbers Points found on the ROI are counted from the beginning of the ROI. The first point found on the ROI is number one. The Point Number property value determines which of the points is used to determine the origin. No Centering: One point is used to determine the origin on the ROI. That point is indicated by the Point Number property. Center With Point Numbered From Start: The Point Number property is used to determine the starting point for centering. It uses the Point Number For Centering property to determine the ending point for centering. For example, if the Point Number is 1 and the Point Number for Centering is 20, the origin is centered between the first point, counting from the beginning of the ROI, and the 20th point, also counting from the beginning of the ROI. Center With Point Numbered From End: The Point Number property is used to determine the ending point for centering. The Point Number For Centering property is used to determine the beginning point for centering. For example, if the Point Number is 1 and the Point Number for Centering is 5, the origin is centered between the 5th point, counting from the end of the ROI, and the first point, counting from the beginning of the ROI. To center the origin between the first and last points on an ROI 1. For Centering Method, select Center With Point Numbered From End 2. For the Primary Point Number property, enter a value of 1 3. For the Point Number For Centering Property, enter a value of 1 Threshold Method Adaptive Threshold: The tool finds the peak grey level and automatically sets the threshold between the dark and bright areas of the image depending on the statistics of the two areas. It then checks where pixels fall within that range of grey levels to find edges. You can also apply a threshold offset to weight the adaptive threshold up or down. This threshold type allows the system to ignore small fluctuations in lighting, since the threshold moves automatically. Fixed Threshold: The threshold is fixed at the Fixed Threshold Percentage value. 3-83 Datalogic Automation Inc. Pinpoint Pattern Find™ Impact Reference Guide Pinpoint Pattern Find™ In the Locating Drawer The Pinpoint Pattern Find tool uses a train region to create a pattern (or model) from part of an image. When the tool runs, it uses correlation and contour matching routines to find one or more matches to the trained pattern. It then calculates best-match scores and provides those scores and the x-y coordinates of the found patterns as one or more origin outputs. This tool does not automatically find pattern matches in "mirrored" images. A Setup is available for this tool, which simplifies basic configuration. See “How to use the Pinpoint Pattern Find tool” on page 3-88. Input Name What it is Input Image The image being inspected Tool Origin The tool’s origin relative to the entire image space Train Shape List The region of the image used to train the pattern. You can define multiple shapes and exclude parts of a shape. The train shape must be smaller than the Find Shape. Find Shape List The region of the image to search for the trained pattern.You can define multiple shapes and exclude parts of a shape. The Find shape must be larger than the Train Shape. If no Find Shape List is defined, the entire image is searched. Edge Detection Sensitivity When Training Controls the edge gradient threshold, which indicates sensitivity to noise in the image, during training. Higher settings detect more weak edges but cause the tool to run slower. If the tool fails, the pattern may include edges that are not reliably seen in all images of the object. Fixed Edge Threshold When Training The grey level threshold value to use when Fixed Threshold is selected for Edge Detection Sensitivity When Training. A larger number rejects edges that are not well defined. Percent Of Train Edge Threshold To Use When Finding This setting is used to calculate the gradient threshold for edge finding when the tool searches for the pattern. To save time, the threshold is calculated once for each image using the Edge Detection Sensitivity When Training property. The tool then takes a percentage of that property value and uses that value for the edge finding threshold when searching. For example, if this property is 75%, the edges on the pattern edges will be found if their contrast is 75% of the contrast of the trained pattern. A smaller number causes more edges to be detected, because the calculated gradient threshold is lower. Datalogic Automation Inc. 3-84 Impact Reference Guide 3-85 Pinpoint Pattern Find™ Input Name What it is Angle Range Pattern The maximum possible range of rotation of the image in relation to the trained pattern. No Rotation: This is the fastest setting + - A Few Degrees: uses the Angle Range property value 0 And 180 + - A Few Degrees: uses the Angle Range property value plus 180 degrees. For example, if the Angle Range is -5 and 5, the tool searches for patterns rotated from -5 to +5 and 175 to 185 degrees. Full 360 Degree Range: Searches for all rotations. (The Angle Range property does not need to be set.) If a pattern is not found, it could be because the image is rotated beyond this Angle Range. Angle Range This is the maximum start and end angle, in degrees, that the tool searches in the image for a match of the trained pattern when the Angle Range Pattern property is set to + - a Few Degrees. Typically this value is -5 and 5, indicating that the image may rotate up to 5 degrees counterclockwise or clockwise from the trained pattern. Angle Range Step Type When searching for rotated patterns, the tool searches at specific rotations within the Angle Range, separated by the Angle Range Step. Fixed Steps: Enter the step value in the Angle Range Step property. Automatic Steps: Angle Range steps are calculated automatically when the pattern is trained. The value is reported in the Actual Angle Range Step output property. Angle Range Step The value to use for the Angle Range Step Type property when Fixed Steps is selected. The value is in degrees. If the tool misses patterns at certain rotations, use a smaller value. The tool runs faster with a larger value. Scale Range Pattern Scaling is involved if the size of the pattern can vary from one image to the next. No Scaling: Don’t search for any scaling. This is the fastest method and most inspections do not involve scaling. Slight Scaling: The scaling may be between + and - 10% Use Scale Range Settings: The Scale Range property value is used for scaling. If a pattern is not found, it could be because it is scaled beyond this range. Scale Range The amount of scaling used for the Scale Range Pattern when Use Scale Range Settings is selected. The values are plus and minus scale multipliers. For example, a range of 0.5 and 2.0 means the pattern can be scaled anywhere between half size (0.5) to double size (2.0). Scale Range Step Type When searching for scaled patterns, the tool searches at specific scale multipliers within the range, separated by the Scale Range Step. Use a smaller value if the tool misses patterns at certain scaling values. Use a larger value to make the tool run faster. Automatic Steps: Scale Range steps are calculated automatically when the tool is trained and reported in the Actual Scale Range Step output property. Fixed Steps: Enter the step value in the Scale Range Step property. Datalogic Automation Inc. Pinpoint Pattern Find™ Impact Reference Guide Input Name What it is Scale Range Step The value to use for the Scale Range Step Type property when Fixed Steps is selected. A typical value is 0.1. So, for example, a Scale Range of 0.5,1.5 is covered by 0.1 steps from 0.5 to 1.5 (0.5, 0.6 … 1.4, 1.5). Minimum Match Score The tool passes if a pattern is found in the Search region that has a match score greater than or equal to this value (0 to 100). This value also determines which found patterns pass or fail. Model Reference Origin Placement Train Region Center: The output origin is located in the center of the train region Train Region Upper Left Corner: The output origin is located in the upper left corner of the train region Use Model Reference Origin: The output region is relative to the Model Reference Origin. Drag the Model Reference Origin to the desired point on the image and then retrain the tool. Model Reference Origin This origin is used when the Model Reference Origin Placement property is set to Use Model Reference Origin. Number To Find This property is a counter, it does not determine whether the tool passes or fails. The tool searches the image for all pattern matches, then reports the location and score of all the found matches, up to the Number to Find property value. When multiple matches are found, they are listed in the corresponding passing or failing output property. The tool passes if it finds at least one pattern with a match score greater than the Minimum Match Score. Increasing this value can increase the tool’s execution time. Algorithm Type The type of pattern search to use. Edge Match: This type is generally faster and will work for most applications. Correlation: This type is slightly slower. If the pattern does not include many well-defined edges, use this type. See “Algorithm Type” on page 3-91. Pattern Model Use this input to link a pattern from another Pattern Find tool for sharing or to modify a pattern during runtime using a Data Set tool. Maximum Model Memory (MBytes) The maximum amount of memory to use to create and store the pattern. Patterns can be large if many scale and angle steps are used. If the vision program is running out of memory, try reducing this number. This will increase the tool’s execution time. The Model Memory Used output contains the amount of memory currently being used. Position Accuracy Fast Pixel-Level Accuracy: The tool uses complete pixels to find edges. The tool will run faster with this setting. Subpixel Accuracy: The tool uses subpixel (1/8 pixel) accuracy to find edges. The tool runs more slowly using this setting. Enable Image Edge Points Output If True, a list of all the edge points found in the Find ROI are put in the Search Image Edge Points output property. Enabling this input causes the tool to take more time, but it helps when you are debugging problems and configuring edge detection settings. Datalogic Automation Inc. 3-86 Impact Reference Guide 3-87 Pinpoint Pattern Find™ Output Name What it is Passed When at least one pattern with a score greater than or equal to the Minimum Match Score is found, this property is True. Output Best Origin The Output origin, relative to the tool origin input property, calculated from the found pattern with the highest Match Score. Output Best Origin Relative to RWC The Output origin, relative to Real World Coordinates, calculated from the found pattern with the highest Match Score. This is the output that should be linked to the tool origin input of other tools to position their regions of interest. Output Best Scale The amount of scaling in the found pattern with the highest Match Score. Output Best Score The best match score greater than the Minimum Match Score (1 to 100). Output Origin List A list of Output origins, relative to the tool origin input property, calculated from the found patterns with passing Match Scores. Output Origin List Relative to RWC A list of Output origins, relative to Real World Coordinates, calculated from the found patterns with passing Match Scores. Output Scale List A list of the scaling values used in the found patterns with passing Match Scores. Output Score List A list of the match scores in the found patterns with passing Match Scores. These scores are calculated as a normalized correlation score of the pattern and image pixels. Failing Output Origin List A list of Output origins, relative to the tool origin input property, calculated from the found patterns with failing Match Scores. Failing Output Origin List Relative to RWC A list of Output origins, relative to Real World Coordinates, calculated from the found patterns with failing Match Scores. Failing Output Scale List A list of the scaling values used in the found patterns with failing Match Scores. Failing Output Score List A list of the match scores in the found patterns with failing Match Scores. These scores are calculated as a normalized correlation score of the pattern and image pixels. Model Display Points The list of pattern edge points in the current image. If you want to show the pattern on a Control Panel, use this list. The points are relative to the input tool origin. If the pattern is scaled, then the pattern points are correspondingly scaled to line up with the image. If multiple patterns were found in the image, then pattern points are repeated at each location. Model Display Points State List The state (passing or failing) of the list of points in the Model Display Points property. When this property is linked to a Control Panel, it will display the Model Points in red and green. Search Image Edge Points The list of edge points that were found in the Find Shape List. This list is present only if the input Enable Image Edge Points Output is True. Model Memory Used The amount of memory used by the trained model, in Megabytes. Datalogic Automation Inc. Pinpoint Pattern Find™ Impact Reference Guide Output Name What it is Actual Angle Range Step The value used for the Angle Range Step Type property Actual Scale Range Step The value used for the Scale Range Step property How to use the Pinpoint Pattern Find tool Click the Setup tab to use the setup for this tool. General 1. Image: To use a different image source, click the Link button. The tool works only with greyscale images. 2. Origin: Since this is primarily a locating tool, the tool origin should usually be 0,0,0. If there is a tool with an output origin above this tool in the task tree, an origin may be automatically linked. Click the link delete button to delete the link and set the origin to 0,0,0. Train ROI 1. Train Shape List: On the Train ROI panel, move and adjust the Train Shape List so that it encloses the part of the pattern you want to find in the image. The default shape list is a rectangle that you can move and size. You can also create complex shapes by using circles, polygons, and exclusion regions. In this example, the Train ROI includes the entire center portion of the image. You can also create exclusion regions within an ROI. For example, if the text is not part of the image to inspect, click the Create Rectangle ROI icon on the left side of the image window to create an exclusion region. Create Rectangle ROI Circular Train ROI 2. Train: Click the Train button to train the tool. After you make any changes to the settings or ROIs on this panel, you need to train the pattern. If you try to leave the Train ROI panel without training the tool, a warning is displayed. After the tool is trained, the found pattern is displayed as edge points overlaid on the image. In the example below, the entire center portion of the image inside the Train ROI, Datalogic Automation Inc. 3-88 Impact Reference Guide Pinpoint Pattern Find™ minus the text, is the trained pattern. The pattern’s edge points may have gaps in them. These are a normal feature of the tool caused by a statistical data reduction process that increases execution speed. Trained Pattern Rectangular Exclusion Region 3. Pattern Model: The model from another Pinpoint Pattern Find tool can be linked to this tool, rather than training the model in this tool. You can do this, for example, if you want to search for the same model using a different Search ROI or different Search settings. All Train settings are disabled if a Pattern Model is linked here. NOTE: Searching for both Possible Rotations and Possible Scaling can add a large amount of execution time and memory usage to the tool. 4. Possible Rotations: The Possible Rotations setting determines how the tool deals with image rotation. Use the No Rotation option if the image will not rotate. This is the fastest mode as most applications do not involve rotation. Use the "+- A Few Degrees" setting if the part can rotate a small amount. The tool searches for patterns rotated from -5 to +5 degrees. You can change the Start and End rotation if necessary. Use the "0 And 180 +- A Few Degrees" option if some parts can be oriented two ways – as trained or rotated 180 degrees. The tool searches for patterns rotated from -5 to 5 degrees and 175 to 185 degrees. Use the "Full 360 Degree Range" setting for fully rotating parts. You should only use this option for parts that can be oriented at any angle. This option takes longest to execute and there is a greater risk of false matches if the search range is too large. 5. Possible Scaling: The Possible Scaling selection determines how the tool deals with scale variations (size changes) in the pattern. The setting "No Scaling" is the fastest setting as most applications do not involve any scale variation. If the pattern size varies a little, and the tool is failing to find these patterns, use the setting "Slight Scaling 0.9 - 1.1." This allows up to plus or minus 10% variation from the trained pattern size. The "Large Scaling 0.5 - 2.0" setting can deal with very large scale variation of 1/2 size to double size. 3-89 Datalogic Automation Inc. Pinpoint Pattern Find™ Impact Reference Guide 6. Model Detail Max Memory: The tool can potentially use a large amount of Impact device memory. If the vision program is running out of memory, set the maximum amount of memory the tool uses for the pattern. The Actual value is the current amount of memory used for the pattern. If you enter a value that is less than the current Actual value, and then retrain the tool, the pattern is retrained to use less memory. However restricting memory usage adds to the tool’s execution time. 7. Reference Point Placement: The tool’s output origin is normally positioned at the center of the Train Shape ROI. You can also place the origin in the upper left corner of the ROI, or position it manually by dragging and rotating the blue Reference Origin. Here are three examples. Center Reference Point Upper Left Reference Point Manual Reference Point 8. Edge Detection: This is an automatic adaptive threshold setting that adjusts to the content of the currently trained image. The More setting makes the tool more sensitive so that it detects more edges. The Fixed setting enables the Threshold slider. With this slider you can set a fixed gradient threshold value for detecting edges. For example, a value of 20 means that edges that have a contrast of 20% of the range between black and white will be found. The Fixed setting gives you greater control, but may require further manual adjustment when you train on a different image or change lighting. Search ROI and Pass/Fail 1. After the pattern is trained, click the Search ROI and Pass/Fail radio button to configure the Search ROI. By default, the ROI is a large rectangle that includes nearly the entire image because the Search ROI must be larger than the Train ROI. The tool execution time is fastest when you use a rectangular Search ROI that is parallel to the image. Datalogic Automation Inc. 3-90 Impact Reference Guide Pinpoint Pattern Find™ You can use any shape for the Search ROI including polygons, circles, and exclusion regions. If no Search ROI is defined, the entire image is searched. 2. Pass/Fail Result: The tool runs automatically and updates the panel whenever you change the Search ROI, any settings on this panel, or a new image is acquired. The result is indicated by the Pass/Fail field just below the image. The Pass/Fail result of each found pattern is shown on the image with green or red edge points. If multiple patterns are found, those with a match score greater than or equal to the Minimum Match Score are shown in green. Patterns with a match score less than the Minimum Match Score are shown in red. The Origin is displayed only for the pattern with the highest match score. To display the pattern on a control panel, use the tool’s Model Display Points property. 3. Minimum Score: The match score is a normalized correlation of the found pattern and the image at the pattern’s location. The Actual value shows the match score for the pattern with the highest score. The Minimum Score is the lowest match score possible for a pattern to pass. If there are no patterns found with a passing score, the patterns are displayed, but the tool fails. Use the failing pattern and Actual score to adjust the Minimum Score to get a passing result. If the Number To Find is greater than one, then the highest score is shown in the Actual value. 4. Number To Find: This property is a counter, not a pass/fail property. By default, the tool reports just one instance of the pattern with a match score greater than the Minimum Match Score. To report multiple instances, enter the desired number in this field. The tool searches the image for all pattern matches, then displays the patterns for all the found matches, up to the value of this property. When multiple matches are found, they are listed in the corresponding passing or failing output property. The tool passes if it finds at least one pattern with a match score greater than the Minimum Match Score. Increasing this value can increase the tool’s execution time. 5. Possible Scaling: The first field shown is the Possible Scaling setting from the Train ROI panel. The second field is the actual scaling used on the pattern. You can use the Actual Scale value as feedback to adjust the Possible Scaling settings on the Train ROI panel. You cannot adjust the Possible Scaling setting on the Search ROI and Pass/Fail panel because the tool needs to be retrained after the setting is changed. 6. Position Accuracy: Choose whether to find the pattern location to pixel level accuracy or subpixel accuracy. The tool runs faster using pixel level accuracy. 7. Edge Detection Sensitivity: This setting is used to calculate the gradient threshold for edge finding when the tool searches for the pattern. To save time, the threshold is calculated once for each image using the setting on the Train ROI panel called Edge Detection Sensitivity. The tool then uses a percentage of that value for the edge finding threshold when searching. A setting toward the More end causes more edges to be detected because the calculated gradient threshold is lower. 8. Show Image Edge Points: When you check this box, all the edge points found in the Search ROI are displayed in the image. This causes the tool to take more time, but it helps when you are configuring edge detection settings and debugging pattern find problems. NOTE: Because this setting affects the tool’s speed, it is only enabled while this Setup panel is displayed. When you leave Setup, the setting is turned off. Algorithm Type When the tool runs, it uses edge detection and edge matching to find candidate match locations, followed by correlation based final placement and scoring. The model contains both edge point lists and greyscale correlation models to support both stages of the search. Edge matching is the default first stage operation because it is fast, especially for rotated objects. However, edges are inherently variable and noise-sensitive features, so the edge matching is complemented with correlation in the final match stages to give robust final placement and scoring results. 3-91 Datalogic Automation Inc. Feature Finding Drawer Impact Reference Guide If the Algorithm Type property is set to Correlation, correlation matching is used only for the first stage of the search. The final placement and scoring is always correlation based. This setting may be useful for patterns that have weak and variable edges or for very small objects. Correlation is inherently slower than edge matching, especially for searching over large areas or with rotating patterns. Feature Finding Drawer Average Gradient In the Feature Finding Drawer The Average Gradient tool is used to measure edge point sharpness in the region of interest (ROI). The larger the Average Gradient Result, the more sharply the image edge is focused. Input Name What it is Input Image The image being inspected Tool Origin The tool’s origin relative to the entire image space Shape List The desired region of the image to search. If no shape is defined, the entire image is processed. Percent of Strongest Edgels The number of edge transitions that should be averaged into the result. A lower number includes fewer edges. Output Name What it is Average Gradient Result Grey level gradient in the ROI (in percentage) Average Intensity In the Feature Finding Drawer The Average Intensity tool calculates the average grey level intensity of pixels in one or more ROIs, calculates whether that intensity is within a user-specified tolerance, then passes or fails each ROI, and the tool, based on that calculation. A Setup is available for this tool, which simplifies basic configuration. See “How to set up the Average Intensity tool” on page 3-94. Input Name What it is Input Image The image being inspected Tool Origin The tool’s origin relative to the entire image space Shape List The desired regions of the image to search. If no shapes are defined, the entire image is processed. Datalogic Automation Inc. 3-92 Impact Reference Guide 3-93 Average Intensity Input Name What it is Shape List ROI Type Each Shape is separate ROI: Each shape is processed as a separate ROI. ShapeList is One ROI: The tool calculates average intensity as if there is only one ROI, no matter how many ROIs are used. The tool averages all the pixels from all the ROIs together and produces one Average Intensity and one Passed result. The Average Intensity and Passed Lists are one value long. Tolerance Type Use Uniform Tolerance Use Nominal Intensity List and +- tolerances Use Tolerance List Uniform Tolerance If Tolerance Type is Use Uniform Tolerance, this tolerance value is applied to the average intensity of each of the ROIs. Use this value when there is one ROI or all ROIs are expected to have the same intensity. Click Train to set this value to the overall average intensity of all the ROIs. The parameters are minus, nominal, and plus. Nominal Intensity List If the Tolerance Type is Use Nominal Intensity List and +- tolerances, this list of values is used as the Nominal Intensity value for each of the ROIs. The Plus and Minus Tolerance values are applied to each Nominal value in the list to set the allowed average intensity for each ROI. Use this mode when each ROI is expected to have a different intensity, but you want Plus and Minus Tolerances that apply to all ROIs, even as you add them. Click Train to recalculate the values in this list. If this property is linked, training has no effect. Plus Tolerance This value is used as the Plus tolerance for all the values in the Nominal Intensity List and the initial Plus tolerance for the values in the Tolerance List. Minus Tolerance This value is used as the Minus tolerance for all the values in the Nominal Intensity List and the initial Minus tolerance for the values in the Tolerance List. Tolerance List If the Tolerance Type is Use Tolerance List, this list of values, along with the Plus Tolerance and Minus Tolerance values, is used as the Nominal Intensity value for each of the ROIs. Use this mode when you want to set the plus and minus tolerance of each ROI separately. Click Train to recalculate the nominal value of each tolerance in the list. You must adjust the Plus and Minus Tolerance manually. If this property is linked, training has no effect. Number of ROIs Allowed to Fail If the number of ROIs that fail is greater than this value, the tool fails. Intensity Offset This value is added to the Average Intensity Result for each ROI. Enable Difference List Out If True, the Intensity Difference List is generated. Datalogic Automation Inc. Average Intensity Impact Reference Guide Output Name What it is Average Intensity Result Average grey level intensity of all pixels in all ROIs Intensity Difference The positive or negative difference between the Average Intensity Result and the Uniform Tolerance nominal value, regardless of the Tolerance type Intensity Offset Output The negative value of Intensity Difference. This value can be linked to the Intensity Offset input property of another Average Intensity tool to offset light level changes. Average Intensity List The calculated Average Intensity of the ROIs Intensity Difference List A list of the positive or negative differences between the measured intensity and the Tolerance nominal value for each ROI Passed If True, all the ROIs were within tolerance and no error occurred. Passed List The Pass or Fail result of each ROI. Number of Fails The number of ROIs that failed. How to set up the Average Intensity tool Tool setup is easier when you use the tool’s setup. 1. Click the Setup tab, then click the ROI & Pass/Fail radio button. 2. Position one or more ROIs over the area of the image you want to inspect. If you want to calculate the average intensity of the entire image, delete any existing ROIs. 3. Select the Tolerance Type you want to use. Use Uniform Tolerance: Use this when there is one ROI or all ROIs are expected to have the same intensity, or there are no ROIs and you want to calculate the average intensity of the entire image. Use Nominal Intensity List and +- tolerances: Use this when each ROI is expected to have a different intensity, but you want Plus and Minus Tolerances that apply to all ROIs, even as you add them Use Tolerance List: Use this when you want to set the plus and minus tolerance of each ROI separately 4. Click the Train button. This generates a list of the ROIs and their average intensity values, along with Minus, Plus, and Nominal values in the ROI Results table. If you have any ROIs selected, only those ROI values may be recalculated, depending on the Tolerance type. 5. Adjust the ROIs position and size, if necessary. Each time you adjust an ROI, the tool runs and recalculates the results. 6. Depending on the Tolerance Type you chose, adjust the Minus, Plus, and Nominal values, if necessary. To adjust a value, select the desired table row, then enter the values as follows: Use Uniform Tolerance: adjust values in the Tolerances box fields Use Nominal Intensity List and +- tolerances: adjust the Nominal value in the table Nominal cell, adjust the Minus and Plus values in the Tolerances box Minus and Plus fields Use Tolerance List: adjust all values in the Tolerances box or in the table cell Tip: To select multiple rows, hold down the Ctrl key while you select a table row. When you change a value, the tool runs and recalculates the results. Datalogic Automation Inc. 3-94 Impact Reference Guide Blob Blob In the Feature Finding, Flaw Detection, and Locating Drawers See “Blob” on page 3-66. Blob Filter In the Feature Finding Drawer The Blob Filter tool filters the blob’s output list for user-selected features such as size, shape, or whether any part of the blob is filled. The included blobs are put in a filtered list that is available as an output. 3-95 Input Name What it is Input Image The image being inspected Tool Origin The tool’s origin relative to the entire image space Input Blob List List of blobs to filter Input Shape List List of Shapes to filter Exclude Border Blobs When checked, filter excludes border blobs (see “Border Blobs” on page 3-96) Enable Width Filter When checked, filters blobs within Width Range Width Range Blob minimum and maximum width Enable Height Filter When checked, filters blobs within Height Range Height Range Blob minimum and maximum height Enable Area Filter When checked, filters blobs within Area Range Area Range Blob minimum and maximum Area Enable Filled Area Filter When checked, filters blobs within Filled Area Range (see “Filled Blobs” on page 3-96) Filled Area Range Blob minimum and maximum Filled Area Enable Oblongness Filter When checked, filters blobs within Oblongness Range (see “Oblongness” on page 3-96) Oblongness Range Blob minimum and maximum Oblongness Enable Filled Oblongness Filter When checked, filters blobs within Filled Oblongness Range Filled Oblongness Range Blob minimum and maximum Filled Oblongness Enable Convexity Filter When checked, filters blobs within Convexity Range (see “Convexity” on page 3-96) Convexity Range Blob minimum and maximum convexity Datalogic Automation Inc. Blob Filter Impact Reference Guide Input Name What it is Enable Filled Convexity Filter When checked, filters blobs within Filled Convexity Range Filled Convexity Range Blob minimum and maximum Filled Convexity Enable Filled Major Length Filter When checked, filters blobs within Filled Major Length Range (see “Major Length” on page 3-97) Filled Major Length Range Blob minimum and maximum Filled Major Length Enable Filled Minor Length Filter When checked, filters blobs within Filled Minor Length Range (see “Minor Length” on page 3-97) Filled Minor Length Range Blob minimum and maximum Filled Minor Length Enable Filled Major Minor Ratio Filter When checked, filters blobs within Filled Major Minor Ratio Range Filled Major Minor Ratio Range Blob minimum and maximum Filled Major Minor Ratio Rect List Range The list of rectangles to process Enable Filled Perimeter Filter When checked, filters blobs within Filled Perimeter Range Filled Perimeter Range Blob minimum and maximum Filled Perimeter Output Name What it is Filtered Blob List List of filtered blobs, based on input settings Border Blobs Border blobs are those blobs that touch the ROI. Filled Blobs Filled values are calculated using the entire inside of a blob, including nested blobs. A nested blob is entirely contained inside another blob. Oblongness Oblongness is the relationship of the blob’s area to its perimeter squared. A perfect circle has a value of approximately 12.5 (4 times pi) with the value increasing as the blob becomes more oblong. This value can be calculated faster than convexity. Convexity Convexity is determined by calculating the area of a convex hull drawn around the blob, then dividing that value by the area of the blob. This value increases if there are any concavities in the blob's perimeter. Datalogic Automation Inc. 3-96 Impact Reference Guide Color Blob Major Length The Major Length is the length of the major axis of an ellipse having the same moments of inertia about the major and minor axes as the blob. Major Axis Length Minor Length The Minor Length is the length of the minor axis of an ellipse having the same moments of inertia about the major and minor axes as the blob. Minor Axis Length Color Blob In the Feature Finding Drawer The Color Blob tool finds areas within an ROI based on the Trained Color. If it is set to find Out Of Range areas, it finds areas that vary from the Trained Color. If it is set to find In Range areas, it finds areas that match the Trained Color. Impact software uses a 24-bit color system. NOTE: The tool’s execution time depends on the image resolution. Very high resolution images may take a long time. Where the Blob tool has a minimum and maximum threshold range, the Color Blob tool has a Trained Color and a Maximum Allowed Color Difference from the Trained Color. Wherever the Trained Color is located in the RGB color space, the Maximum Allowed Color Difference is the radius of a sphere around that color. If the tool is set to detect Out Of Range, a pixel in an image is considered out of range when it is further from the Trained Color than the Maximum Allowed Color Difference (i.e. it is outside that sphere). If there are multiple colors in the training region, the color with the most pixels is trained. The other colors are ignored and do not affect the trained color. The Color Blob tool calculates the color difference of every pixel versus the trained color and needs a simple formula for speeds sake, so it uses the Euclidean difference. The units are greyscale steps from 0 to 100, just like the monochrome Blob tool threshold range, so values of 5 to 10 are typical settings. 3-97 Datalogic Automation Inc. Color Blob Impact Reference Guide To set up the tool using a Train Shape List: 1. Select the desired Blob Detect Type. 2. Draw the Train Shape List ROI over the desired solid color area. 3. Click the Train button. The tool finds R, G and B values of the average color in the Train Shape List ROI and put it in the Trained Color value. If you are looking for out of range blobs in a solid color area, you can set up the tool without a Train Shape List. To set up the tool without a Train Shape List: 1. Select the desired Blob Detect Type. 2. Draw the Shape List ROI over the desired solid color area. 3. Click the Train button. The tool determines that there is no Train Shape List and uses the Shape List ROI to calculate the Trained Color value. You need to adjust the sensitivity of the Maximum Allowed Color Difference. The units are greyscale steps from 0 to 100, just like the monochrome Blob tool threshold range, so values of 5 to 10 are typical. Note: This tool does not use L*a*b colors like the Color Checker does because it is unreasonably slow to calculate L*a*b color differences for every pixel. Input Name What it is Input Image Linked Image Click the plus sign to access greyscale versions of the image that you can link into other greyscale image processing tools. These images are similar to the image you get if you use a color filter or color light with a greyscale camera. See “Color Image Sub-Properties” on page 3-35. Tool Origin The tool’s origin relative to the entire image space. Shape List The desired region of the image to check. Train Shape List The region of the image that contains the desired color. Shape List ROI Type Each Shape is separate ROI: Each shape is processed as a separate ROI and the results are combined. This mode is faster than the other mode if the shapes are far apart, but results are duplicated if the shapes overlap. ShapeList is One ROI: The ShapeList is one large rectangular ROI and the shapes are the enabled pixels within the rectangle. The tool may be slow if the shapes are far apart. This setting allows shapes to overlap and form complex shapes without repeating the overlapped pixels and duplicating results. Blob Detect Type Detect Out of Range: detects blobs that are outside the Maximum Allowed Color Difference Detect In Range: detects blobs that are within the Maximum Allowed Color Difference Trained Color The Red, Green, and Blue values of the trained color. Trained Color List When Train Mode is set to Add To The Trained Color this contains a list of all the trained colors. Pixels are in range if they are in range for any color in the list. Datalogic Automation Inc. 3-98 Impact Reference Guide 3-99 Color Blob Input Name What it is Train Mode Train a New Color: trains a new color using the current settings Add To The Trained Color: trains a new color using the current settings and adds it to the Trained Color List. Pixels are in range if they are in range for any color in the list. Color Difference Method Color Difference Includes Intensity: the Maximum Allowed Color Difference value uses all 3 dimensions of color and therefore includes intensity differences.This setting is faster and works well when the lighting is controlled. Separate Color and Intensity Differences: uses both Maximum Allowed Color Difference and the Intensity Difference Range setting. The intensity and chromaticity (hue and saturation) information is separated. Intensity Difference Range indicates the allowed variation, plus or minus, from the trained intensity. The Maximum Allowed Color Difference indicates only the allowed chromaticity difference. Use Red, Green, and Blue Ranges: uses the Red Range, Green Range, and Blue Range input properties Maximum Allowed Color Difference This is the maximum difference allowed between a pixel color in the inspected image area and the Trained Color. Intensity Difference Range The allowed variation, plus or minus, from the trained intensity. The parameters are start and end. Red Range The range used for red when Color Difference Method is set to Use Red, Green, and Blue Ranges. The parameters are start and end. Green Range The range used for green when Color Difference Method is set to Use Red, Green, and Blue Ranges. The parameters are start and end. Blue Range The range used for blue when Color Difference Method is set to Use Red, Green, and Blue Ranges. The parameters are start and end. Exclude Border Blobs When true, border blobs are excluded from the output list (see “Border Blobs” on page 3-96) Fill Blob Holes When true, any holes in the found blobs are filled to create a single blob. This can save time on images with many extra blobs. Enable Width Filter When true, blobs within the Width Range are excluded from the output list Width Range Blob minimum and maximum width Enable Height Filter When true, blobs within the Height Range are excluded from the output list Height Range Blob minimum and maximum height. The parameters are start and end. Enable Area Filter When true, blobs within the Area Range are excluded from the output list Area Range Blob minimum and maximum Area. The parameters are start and end. Required Number of Blobs If the number of found blobs (based on the filter settings) is within this range, the Passed output is set to true. The parameters are start and end. Datalogic Automation Inc. Color Checker Impact Reference Guide Input Name What it is Enable Output Blob List When true, the filtered blobs are presented in the Blob List output Enable Output Area List When true, the filtered blobs areas are presented in the Area list output Enable Output Centroid List When true, the filtered blobs centroids are presented in the Centroid list output Output Origin Type Also see “Output Origin” on page 3-70 Centroid X, Y Only: The X and Y coordinates of the blob centroid (the angle is ignored) Centroid X, Y and Major Axis Angle: The X and Y coordinates of the blob centroid and Major Axis angle in a +/- 90 degree range (useful if blob has an oblong shape). No Origin: No origin is presented (tool runs faster) Centroid X, Y, and Major Axis Angle 360 Range: The X and Y coordinates of the blob centroid and Major Axis angle in a 360 degree range Filter Single Blob This filter is applied after all the other filters Off: Blobs are filtered and output according to all filter settings Centermost Blob: Only the blob closest to the center of each ROI is output Largest Blob: Only the largest blob in each ROI is output Note: If Centermost or Largest blob is selected, only passed blobs will be displayed in the image window. Output Name What it is Number of Blobs Found The number of blobs found Output Blob List List of found blobs Output Area List List of the areas of the filtered blobs Output Centroid List List of the X and Y coordinates of the centroid points of the filtered blobs Passed If true, the number of blobs in the Output Blob List falls within the range of the Required Number of Blobs Output Origin Relative to Tool The X and Y coordinates and angle of the found origin point relative to the Tool Origin. Output Origin Relative To RWC The found origin point (and angle if selected) relative to the entire image space. Color Checker In the Feature Finding Drawer The Color Checker tool compares a known, trained color with the average color within an ROI of an input image. Impact software uses a 24-bit color system. Datalogic Automation Inc. 3-100 Impact Reference Guide Contrast To set up the tool: 1. Draw the Shape List ROI over the color area you want to find. 2. Click the Train button. The tool finds the R, G and B values of the color in the Shape List ROI and put it in the Trained Color value. Wherever the Trained Color is located in the RGB color space, the Maximum Allowed Color Difference is the radius of a sphere around that color. A pixel in an image is considered out of tolerance when it is further from the Trained Color than the Maximum Allowed Color Difference (i.e. it is outside that sphere). The value is calculated using the CMC Color Difference. The CMC color difference is a complex formula that attempts to compensate for variation in human eye sensitivity across the RGB color space. It maps RGB differences into “just perceptible color differences.” The Color Checker tool averages the color in an area and calculates the CMC difference just once versus the trained color. The units are greyscale steps from 0 to 100. Input Name What it is Input Image Linked Image Click the plus sign to access greyscale versions of the image that you can link into other greyscale image processing tools. These images are similar to the image you get if you use a color filter or color light with a greyscale camera. See “Color Image Sub-Properties” on page 3-35. Tool Origin The tool’s origin relative to the entire image space. Shape List The desired region of the image to check. Trained Color The Red, Green, and Blue values of the trained color. (0-100) Maximum Allowed Color Difference This is the maximum difference allowed between the Average Color in the inspected image area and the Trained Color. Output Name What it is Average Color The Red, Green, and Blue values of the average color in the Shape List. (0-100) Actual Color Difference The difference between the Trained Color and the Average Color, in the RGB color space. Color In Tolerance If True, the Actual Color Difference is less than the Maximum Allowed Color Difference. Contrast In the Feature Finding and Flaw Detection Drawers The Contrast tool checks the pixels within an ROI and calculates the percentage or area of pixels that are outside and inside the Threshold Range. If the calculated range or area is inside or outside the user-defined range, the tool sets the Passed output to True. The In Range and Out of Range tests are mutually exclusive and the tool always Fails if they are both enabled. 3-101 Datalogic Automation Inc. Contrast Impact Reference Guide The Contrast tool evaluates all of its ROIs as a total group against a common tolerance and provides combined outputs. The Contrast - Multiple ROI tool evaluates each ROI individually, against a common tolerance, and provides a detailed list of outputs. Input Name What it is Input Image The image being inspected Tool Origin The tool’s origin relative to the entire image space Shape List The desired region of the image to search. If no shape is defined, the entire image is processed. Grey Level Threshold Type See “Grey Level Threshold Types” on page 3-68 for more details. Fixed Threshold Range The grey level threshold range for Fixed Threshold Range type (in percentage). The parameters are start and end. Enable In Range Percent Test The percentage of pixels with a grey level within the Threshold Range is calculated. If that percentage falls within the In Range Percent, the tool passes. Set In Range Percent This range is used for the In Range Percent Test. Enable In Range Area Test The area of pixels with a grey level within the Threshold Range is calculated. If that area falls within the In Range Area, the tool passes. Set In Range Area This range is used for the In Range Area Test. Enable Out of Range Percent Test The percentage of pixels with a grey level outside the Threshold Range is calculated. If that percentage falls within the Out of Range Percent, the tool passes. Set Out of Range Percent This range is used for the Out of Range Percent Test. Enable Out of Range Area Test The area of pixels with a grey level outside the Threshold Range is calculated. If that area falls within the Out of Range Area, the tool passes. Set Out of Range Area This range is used for the Out of Range Area Test. Output Name What it is Passed True if input tests are enabled and the conditions are met. Percent In Range Percentage of pixels in the ROI within the designated grey level range (0 to 100 percent) Percent Out of Range Percentage of pixels in the ROI outside the designated grey level range (0 to 100 percent) In Range Area The total area of all pixels inside the designated grey level range (in square units) Out of Range Area The total area of all pixels outside the designated grey level range (in square units) Datalogic Automation Inc. 3-102 Impact Reference Guide Contrast - Multiple ROI Output Name What it is Threshold Range Used The Fixed Threshold Range input. The parameters are start and end. Contrast - Multiple ROI In the Feature Finding and Flaw Detection Drawers The Contrast - Multiple ROI tool checks the pixels within multiple ROIs and provides the percentage or area of pixels that are outside and inside a range that is based on user-defined parameters. The Contrast - Multiple ROI tool evaluates each ROI individually, against a common tolerance, and provides a detailed list of outputs. The Contrast tool evaluates all of its ROIs as a total group against a common tolerance and provides combined outputs. 3-103 Input Name What it is Input Image Linked Image Region of Interest List The list of regions of interest to process Tool Origin The tool’s origin relative to the entire image space Grey Level Threshold Type See “Grey Level Threshold Types” on page 3-68 for more details. Fixed Threshold Value The grey level threshold range for Fixed Threshold Range type (in percentage). Fixed Threshold Range The grey level threshold range for Fixed Threshold Range type (in percentage). The parameters are start and end. Maximum Percent Out of Range Maximum percentage of pixels to allow in the ROI outside the designated grey level range (0 to 100 percent) Create In Range Percent Output List If True, a list of regions is produced, indicating whether the maximum percent of pixels in those areas were in range Create In Range Area Output List If True, a list of regions is produced indicating whether the total area of all pixels is inside the designated grey level range Create Out of Range Percent Output List If True, a list of regions is produced, indicating whether the maximum percent of pixels in those areas were out of range Create Out of Range Area Output List If True, a list of regions is produced indicating whether the total area of all pixels is outside the designated grey level range Tolerance Type Maximum Percentage Out of Range: The tool compares the percent of pixels that are out of range to the Maximum Percent Out of Range Maximum Area Out of Range: The tool compares the area of pixels that are out of range to the Maximum Area Out of Range Datalogic Automation Inc. Edge Point Find Impact Reference Guide Input Name What it is Maximum Percent Out of Range Maximum percentage of pixels to allow in the ROIs outside the designated grey level range (0 to 100 percent) Maximum Area Out of Range Maximum area of pixels to allow in the ROIs outside the designated grey level range (0 to 100 percent) Number of ROIs Allowed To Fail An ROI fails when the Maximum Area or Maximum Percent Out of Range value is exceeded. If the number of ROIs that fail exceeds this value, the tools’s Passed output boolean is set to false. Output Name What it is Percent In Range List A list of all regions with a percentage of pixels within the designated grey level range Percent Out of Range List A list of all regions with a percentage of pixels outside the designated grey level range In Range Area List A list of all regions with a total area of pixels within the designated grey level range Out of Range Area List A list of all regions with a total area of pixels outside the designated grey level range Total Percent In Range The total percentage of all pixels within the designated grey level range Total Percent Out of Range The total percentage of all pixels outside the designated grey level range Total In Range Area The total area of all pixels within the designated grey level range Total Out of Range Area The total area of all pixels outside the designated grey level range In Tolerance List A list of all regions that are within the defined parameters Number of Fails The number of regions that failed to fall within the defined parameters Passes If True, the Number of ROIs Allowed to Fail was not exceeded. Edge Point Find In the Feature Finding Drawer The Edge Point Find tool uses an adaptive or a fixed threshold method to find edge points along a single pixel line ROI. Input Name What it is Input Image Linked Image Tool Origin The tool’s origin relative to the entire image space Datalogic Automation Inc. 3-104 Impact Reference Guide 3-105 Edge Point Find Input Name What it is Line Segment The x and y coordinates of the beginning and end of the edge-finding line Line Segment List A list of all the line segments between edges found Noise Level The amount of background noise present in the image. Higher noise means the edges must be farther apart. Lower noise allows edges that are closer together. Maximum Number Of Edges To Find Limits the number of edges found to those with the strongest transitions Edge Pattern The edge pattern to find (Rising indicates a transition from dark to light; Falling indicates a transition from light to dark) All edges Alternating Rising/Falling Alternating Falling/Rising Rising Only Falling Only Central Rising Edge Central Falling Edge Edge Detection Method Gradient Edges or Grey Level Edges Gradient detection generally provides more consistent results. In some cases Gradient detection can pick up extra edges in a noisy image and Grey Level detection may offer better control. See “Edge Detection Method” on page 3-78. Edge Detection Sensitivity The sensitivity level Determines the transition level necessary for detection. A higher value detects more edges. The non-fixed uses adaptive threshold selection. See “Threshold Types” on page 3-186. Fixed Threshold uses the Adaptive Grey Level Threshold Offset fixed value. Fixed Gradient Threshold Percentage The gradient threshold value for Fixed Threshold Edge Detection Sensitivity (0 to 100 percent) Fixed Grey Level Threshold Percentage The grey level threshold value for Fixed Threshold Edge Detection Sensitivity when Grey Level Edge detection is selected (0 to 100 percent) Adaptive Grey Level Threshold Offset If one of the adaptive settings is picked from Edge Detection Sensitivity, and Grey Level Edges is selected, then this offset is added to the adaptive threshold. This allows you to weight the adaptive threshold up or down. Subpixel Method The type of subpixel averaging The grey levels of adjacent pixels (1, 3, 5, 7, or 9) around an edge point are averaged and used to interpolate the edge to a fraction of a pixel. Subpixel Position The subpixel position for edges that are not well defined. See “Subpixel Position” on page 3-144. Datalogic Automation Inc. Line Find Impact Reference Guide Input Name What it is Subpixel Search Distance in Pixels The maximum distance, in pixels, from the threshold edge that the subpixel algorithm searches for the subpixel edge. See “Subpixel Search Distance” on page 3-125. Enable Rise/Fall Output If True, the Edge Rise/Fall Indicator List output is populated. Enable Number of Edges Per Segment Output If True, the Number of Edges Per Segment List output is populated. Output Name What it is Edge Transitions List A list of the x and y coordinates of all the edge point found Edge Rise/Fall Indicator List A list of edges found, indicating whether the edge is rising or falling True = rising, False = falling Number of Edges Per Segment List Lists the number of found edges in each line segment Line Find See “Line Find” on page 3-75 Spot Find In the Feature Finding Drawer The Spot Find tool is an object or feature location tool. It detects uniformly bright (or dark) objects in an image by finding the maximum (or minimum) average grey-level within a user-defined area. It creates an output point list which contains the center locations of the detected objects. You can link this point list to the Point Match Tool to check actual point locations against ideal locations. This tool is best used to locate objects of a known size, such as balls in Ball Grid Arrays or pins in connectors. To set up the Spot Find Tool 1. Link the desired image into the tool. 2. Use the Find Shape List ROI to define the tool search area, or link in the Shape List. This is the area where the tool applies Maximum/Minimum grey-level averaging to look for objects. 3. Place the Spot Size ROI over an area slightly larger than the area that defines the desired spot to find. 4. Select the desired Spot Type. This indicates the type of spot to detect. If Find Bright Spots is selected, the maximum average grey-level within the spot is found. If Find Dark Spots is selected, the minimum average grey-level within the spot is found. 5. Select the Optimization type. For spots that are irregular in size and shape, select Find Spots Accurately. The tool runs more slowly, but with better accuracy on spots of this type. To find spots that are more uniform in size and shape, select Find Spots Quickly and the tool runs faster. 6. Set the Threshold input value. Grey-level values above this threshold (for bright objects) or below this threshold (for dark objects) are excluded from the averages. Datalogic Automation Inc. 3-106 Impact Reference Guide Spot Find 7. Run the tool. The output point list is generated. Spot Size ROI Shape List ROI Found points highlighted Sample Tool Setup Input Name What it is Input Image Linked Image Tool Origin The tool’s origin relative to the entire image space. Use this only if you are trying to find an origin relative to another tool. Find Shape List This is the tool’s search area. Shape List ROI Type Each Shape is separate ROI: Each shape is processed as a separate ROI and the results are combined. This mode is faster than the other mode if the shapes are far apart, but results are duplicated if the shapes overlap. ShapeList is One ROI: The ShapeList is one large rectangular ROI and the shapes are the enabled pixels within the rectangle. The tool may be slow if the shapes are far apart. This setting allows shapes to overlap and form complex shapes without repeating the overlapped pixels and duplicating results. Spot Size This defines the spot area to average. Threshold Grey-level values above this threshold (for bright objects) or below this threshold (for dark objects) are excluded from the averages. Spot Type The type of spot to detect. Find Bright Spots: the maximum average grey-level within the spot is found. Find Dark Spots: the minimum average grey-level within the spot is found. Optimization Find Spots Accurately: To find spots that are irregular in size and shape. The tool runs more slowly but with better accuracy. Find Spots Quickly: To find spots that are more uniform in size and shape. The tool runs more quickly. 3-107 Output Name What it is Spot Center List A list of the spot centers found Datalogic Automation Inc. Wide Edge Point Find Impact Reference Guide Wide Edge Point Find In the Feature Finding Drawer The Wide Edge Point Find tool uses an adaptive or fixed threshold method to find edge points along a wide line ROI. Input Name What it is Input Image Linked Image Tool Origin The tool’s origin relative to the entire image space Wide Line ROI Points on this ROI are used for finding the edge. Wide Line ROI List A list of wide line ROIs used for finding the edge. Noise Level The amount of background noise present in the image. Higher noise means the edges must be farther apart. Lower noise allows edges that are closer together. Maximum Number Of Edges To Find Limits the number of edges found to those with the strongest transition Edge Pattern The edge pattern to find (Rising indicates a transition from dark to light; Falling indicates a transition from light to dark) All edges Alternating Rising/Falling Alternating Falling/Rising Rising Only Falling Only Central Rising Edge Central Falling Edge Blob Threshold Method Adaptive Threshold or Fixed Threshold (See “Blob Threshold Method” on page 3-109) Fixed Blob Threshold Percentage The Threshold Percentage when Fixed Blob Threshold is selected (see “Blob Threshold Method” on page 3-109) Adaptive Blob Threshold Offset If Adaptive Threshold Method is selected, this offset is added to the adaptive threshold. This allows you to weight the adaptive threshold up or down. Subpixel Method The type of subpixel averaging. The grey levels of adjacent pixels (3, 5, or 7) around an edge point are averaged and used to interpolate the edge to a fraction of a pixel. Subpixel Position The subpixel position for edges that are not well defined. See “Subpixel Position” on page 3-144. Subpixel Search Distance in Pixels The maximum distance, in pixels, that the subpixel algorithm searches from the threshold edge for the subpixel edge. See “Subpixel Search Distance” on page 3-125. Blob Color To Find Bright or Dark objects on the Wide Line ROI Enable Rise/Fall Output If True, the Edge Rise/Fall Indicator List output is populated. Datalogic Automation Inc. 3-108 Impact Reference Guide Wide Edge Point Find Input Name What it is Enable Number of Edges Per ROI Output If True, the Number of Edges Per ROI List output is populated. Output Name What it is Edge Transitions List A list of the x and y coordinates of all the edge points found Edge Rise/Fall Indicator List A list of edges found, indicating whether the edge is rising (True) or falling (False) Number of Edges Per ROI List Lists the number of found edges in each ROI Blob Threshold Method Adaptive Threshold: The tool finds the peak grey level and automatically sets the threshold between the dark and bright areas of the image depending on the statistics of the two areas. It then checks where pixels fall within that range of grey levels to find edges. You can also apply a threshold offset to weight the adaptive threshold up or down. This threshold type allows the system to ignore small fluctuations in lighting, since the threshold moves automatically. Fixed Threshold: The threshold is fixed at the Fixed Blob Threshold Percentage value. 3-109 Datalogic Automation Inc. Wide Edge Point Find Datalogic Automation Inc. Impact Reference Guide 3-110 Impact Reference Guide Measurement Drawer Measurement Drawer Angle In the Measurement Drawer The Angle tool measures the angle between two user-specified lines. The lines can be found using the tool’s built-in Line Find ROIs or they can be linked from a Pinpoint Pattern Find or Line Find tool as Origins or Line Segments. The angle is always reported as a positive number from 0 to 360. The intersection point is also reported. See “How to set up the Angle tool” on page 3-112. 3-111 Input Name What it is Input Image Linked Image Tool Origin The tool’s origin relative to the entire image space Line 1 Type The type of line to find. The choices are using the tool’s built-in Line Find or link from another tool. Wide Line ROI 1 If Line 1 Type is First Bright Line or First Dark Line, move and adjust this ROI to find one of the tool’s measurement lines. Line Segment 1 If Line 1 Type is Link Line Segment, enter a line’s parameters, or link a line segment from another tool. This is one of the tool’s measurement lines. Origin 1 If Line 1 Type is Link Origin, enter an origin’s parameters, or link an origin from another tool. This is one of the tool’s measurement lines. Rotate Line 1 180 If True, Line 1 is rotated 180 degrees from its original position. You can use this option if the original Line or Origin provides an angle opposite of what you want. Line 2 Type The type of line to find. The choices are using the tool’s built-in Line Find or to from another tool. Wide Line ROI 2 If Line 2 Type is First Bright Line or First Dark Line, move and adjust this ROI to find one of the tool’s measurement lines. Line Segment 2 If Line 2 Type is Link Line Segment, enter a line’s parameters, or link a line segment from another tool. This is one of the tool’s measurement lines. Origin 2 If Line 2 Type is Link Origin, enter an origin’s parameters, or link an origin from another tool. This is one of the tool’s measurement lines. Rotate Line 2 180 If True, Line 2 is rotated 180 degrees from its original position. You can use this option if the original Line or Origin provides an angle opposite of what you want. Angle Direction The direction for measuring the angle from one line to the other (Clockwise or Counterclockwise). See “How to set up the Angle tool” on page 3-112. Datalogic Automation Inc. Angle Impact Reference Guide Input Name What it is Angle Endpoint Choose whether or not to consider the direction of the angle’s end line when measuring the angle. See “How to set up the Angle tool” on page 3-112. Enable Angle Range Check If True, the tool will pass if the measured Angle value is within the Angle Range limits. Angle Range If Enable Angle Range Check is True, the tool will fail if the measured Angle value falls outside these limits. Output Name What it is Angle The measured Angle’s value. This is always a positive number from 0 to 360. Passed If True, the measured Angle value is within the Angle Range Limits or Enable Angle Range Check is False. Arc The measured Angle displayed as a Wide Circular Arc ROI. Intersection The intersection point of the Angle’s measurement lines, displayed as an Origin aligned with Line 1. Found Line 1 The line segment found by Wide Line ROI 1, if Line 1 type is Find Bright Line or Find Dark Line. This value is zero if the Line Segment or Origin is linked. Found Line 2 The line segment found by Wide Line ROI 2, if Line 2 type is Find Bright Line or Find Dark Line. This value is zero if the Line Segment or Origin is linked. How to set up the Angle tool 1. Snap a good image of the desired part, then click the Setup tab. 2. Click the ROI radio button. 2a. To use the tool’s built-in Line Find ROIs: • Select the type of Line 1 or Line 2 you want to find: First Dark Line or First Bright Line. • Position the Wide Line ROIs for the desired lines on the edges you want to find. Be sure that the ROIs are oriented and aligned as desired. To adjust the ROIs, hold the cursor over an adjustment point until Datalogic Automation Inc. 3-112 Impact Reference Guide Angle the cursor changes as shown below, then click and drag. Rotate the ROI Move the ROI ROI positioned on image Adjust the ROI width These Wide Line ROIs are the same as those in the Line Find tool with the following settings: Grey level edges, Automatic thresholding, Medium noise level, Sampling of 50%, and Outlier distance of three pixels. If you want to use different settings, add a Line Find tool to the task and link that tool’s Line Segment into the Angle tool. 2b. To link a Line Segment or Origin from another tool: • Select the type of ROI you want to link for Line 1 or Line 2: Link Line Segment or Link Origin. • Type the ROI coordinates into the Source field or click the Link button and link the desired Line Segment or Origin. If the Line is linked, the source is displayed. 3. Check the Rotate 180 Degrees check box if you want the Line to point in the opposite direction. Rotation may not change the reported angle, depending on the Direction and Endpoint selections on the Pass/Fail panel. The Found or Linked Lines are marked on the image. Line 1 First Dark Line ROI and Found Line Line 2 Linked Line Segment 4. Click the Pass/Fail radio button. 3-113 Datalogic Automation Inc. Angle Impact Reference Guide 5. The Lines or linked Origin, Found Arc, and Intersection are displayed on the image. Arc Linked Origin Line 1 Intersection 6. If you check the Enable Angle Check check box, the tool will fail if the Actual Angle value is not within the Angle Range limits. Enter the desired values in the Minus, Nominal, and Plus fields. 7. Select the angle Direction from the drop down (Clockwise or Counterclockwise). The selection determines where the angle measurement starts and ends, and the Arc ROI is displayed with the arrowhead pointing in the selected direction. Whether you choose CW or CCW, the measured Angle will always be a positive number from 0 to 360. 8. Select the desired Endpoint. This allows you to choose to whether or not to consider the direction of the ending line when measuring the angle. Sometimes line orientation is ambiguous at 180 degrees rotation. For example, the major axis of a blob does not have 360 degrees of rotation, only 180 degrees. In this case, choose "Shortest Angle to Ending Line" and the tool will ignore 180 degree rotations of the ending line and always measure the shortest angle to the line. Shortest Angle To Ending Line Datalogic Automation Inc. Full Angle To Ending Line 3-114 Impact Reference Guide Circle Edge Refinement Circle Edge Refinement In the Measurement Drawer The Circle Edge Refinement tool refines the center location and diameter of a circle based on an estimated center and the number of segments to search. It indicates if the center and diameter are within an expected range. This tool is primarily used to find the centers of the balls in a ball grid array (BGA). 3-115 Input Name What it is Input Image Linked Image Tool Origin The tool’s origin relative to the entire image space Estimated Center List The list of estimated circle center point locations Diameter Tolerance The diameter variation allowed. The parameters are minus, nominal, and plus. Circle Scan Type The type of circle and how the tool should find the edge Circle Edge Detect Type First Edge, Center Edge, Best Edge: Finds one edge point per ROI, then find fits the circle with least squared error Best Two Edges, Best Three Edges, All Edges: finds multiple edge points per ROI. See “Circle Edge Detect Type” on page 3-117. Number of Line Segments How many circle edge segments the tool should use (minimum of 3) Minimum Number of Points The least number of edge points the tool should use to refine the circle Segment Length The minimum line segment length the tool should use to refine the circle Outlier Enable See “Outlier Enable and Outlier Distance Threshold” on page 3-132 Outlier Distance Threshold See “Outlier Enable and Outlier Distance Threshold” on page 3-132 Edge Detection Method Gradient Edges or Grey Level Edges Gradient detection generally provides more consistent results. In some cases Gradient detection can pick up extra edges in a noisy image and Grey Level detection may offer better control. See “Edge Detection Method” on page 3-78. Edge Detection Sensitivity The sensitivity level determines the transition level necessary for detection. A higher value detects more edges. Fixed Gradient Threshold Percentage The gradient threshold value for Gradient Edges Detection Method Fixed Grey Level Threshold Percentage The grey level threshold value for Grey Level Edges Detection Method Datalogic Automation Inc. Circle Edge Refinement Impact Reference Guide Input Name What it is Adaptive Grey Level Threshold Offset If one of the adaptive settings is picked from Edge Detection Sensitivity, and Grey Level Edges is selected, then this offset is added to the adaptive threshold. This allows you to weight the adaptive threshold up or down. Noise Level The amount of background noise present in the image. Higher noise means the edges must be farther apart. Lower noise allows edges that are closer together. Motion Blur The offsetting vector to compensate for blur in the image. Bounding Circle Enable The bounding circle is the smallest circle that includes all the points found by the tool. If Outlier Enable is True, the tool first eliminates outliers then get the bounding circle using the remaining points. Subpixel Method The type of subpixel averaging The grey levels of adjacent pixels (1, 3, 5, 7, or 9) around an edge point are averaged and used to interpolate the edge to a fraction of a pixel. Subpixel Position The subpixel position for edges that are not well defined. See “Subpixel Position” on page 3-144. Arc Angle Range The tool finds and fit points over this part of the circle. By default the range is 0 to 360 degrees. For arcs of 180 degrees or less, the fitted radius and center point are less accurate than for full circles. The parameters are minus, nominal, plus, include end, and include start. Output Name What it is Valid Circle Found List A list of true/false indications of valid circles found Refined Center List The list of refined circle center point locations Valid Refined Center List The list of valid refined circle center point locations Refined Diameter List The circles’ refined diameters Maximum Fit Error List A list of the measurements that exceeded the maximum fit All Diameters In Tolerance If true, none of the diameters were outside the defined tolerance Diameter in Tolerance List A list of the diameters that were within tolerance Edge Point List A list of the circle’s edge points found First Circle Line Segment List A list of the line segments describing the first refined circle Bounding Circle Center List If Bounding Circle Enable is True, this is the list of points that describe the Bounding Circles. Datalogic Automation Inc. 3-116 Impact Reference Guide Circle Gauge Output Name What it is Bounding Circle Diameter List If Bounding Circle Enable is True, this is the list of Bounding Circle diameters. Circle Edge Detect Type The first three settings are designed to find one edge point per ROI. The tool will then find fit the circle with least squared error. The last three settings will find multiple edge points per ROI. In these cases, a least squared error fit is unreliable, so the tool will first do a Hough transform to find the subset of points that are within nominal diameter tolerance, and then do a least squared error fit. The Hough transform step adds time, so it should only be used when you cannot reliably find the correct single edge on the majority of the ROIs. If there are close concentric circles, then you should set the Diameter Tolerance with limits that separate the circles. For example, if you are finding a circle with diameter 100 and there is also a concentric circle with diameter 110, then you should set the upper limit of the Diameter Tolerance to 105 so that the tool can discriminate between them. Circle Gauge In the Feature Finding, Locating, and Measurement Drawers The Circle Gauge tool radially searches for edge points within the ROI, then finds the best fit circle to the found points. The tool can be set to find either a circle or a ring. It will output an origin placed at the circle or ring center. If the tool is set to find a circle, the pass or fail can be based on the average radius, as well as the percentage of the radial lines that contain found points and that fit the radius tolerance. If the tools is set to find a ring (two circles that make up the Inner Diameter (ID) and the Outer Diameter (OD) of the ring), the pass or fail can be based on the fitted radius of the ID and OD; the thickness and concentricity of the ring; and the percentage of radial lines that contain found points on both rings and fit the radius and ring thickness tolerances. See “How to set up the Circle Gauge tool” on page 3-120. 3-117 Input Name What it is Input Image Linked Image Tool Origin The tool’s origin relative to the entire image space Circle ROI The desired region of the image to search. Circle Type See “How to set up the Circle Gauge tool” on page 3-120 Edge Detection Method Gradient Edges or Grey Level Edges Gradient detection generally provides more consistent results. In some cases Gradient detection can pick up extra edges in a noisy image and Grey Level detection may offer better control. See “Edge Detection Method” on page 3-78. Edge Detection Sensitivity The sensitivity level determines the transition level necessary for detection. A higher value detects more edges. Datalogic Automation Inc. Circle Gauge Impact Reference Guide Input Name What it is Fixed Gradient Threshold Percentage The gradient threshold value for Gradient Edges Detection Method when Edge Detection Sensitivity is set to Fixed Threshold Fixed Grey Level Threshold Percentage The grey level threshold value for Grey Level Edges Detection Method when Edge Detection Sensitivity is set to Fixed Threshold Noise Level The amount of background noise present in the image. Higher noise means the edges must be farther apart. Lower noise allows edges that are closer together. Sampling Percent The radial sampling rate - for example, 100 will sample every radial, 50 will sample every other radial, 0 will sample a minimum of 2 radials. Higher numbers increase accuracy, lower numbers increase speed. Outlier Distance Threshold Outlying points beyond this distance from the found circle (in units) are excluded. Max Percent of Points Out of Tolerance The tool will fail if the percent of the edge points that are out of tolerance exceeds this value. A point is out of tolerance if it is not found, is an outlier, is out of radius tolerance, or is out of ring thickness tolerance. The current Percent of Points Out of Tolerance is an output. Enable Radius Check If this is true, the fitted radius and each edge point is checked against the Inner and Outer Radius tolerance. The tool will fail if the fitted radius exceeds the tolerance. Each edge point is tested against the tolerance. If it exceeds the Outer or Inner Radius tolerance, it is put in the outlier point list and added to the Percent of Points Out of Tolerance. Outer Radius Tolerance If Enable Radius Check is true, found points outside this tolerance are excluded from the Outer Edge points. The tool will fail if the Outer Circle radius is greater than this tolerance. (Circle type is Ring.) Inner Radius Tolerance If Enable Radius Check is true, found points outside this tolerance are excluded from the Inner Edge points. The tool will fail if the Inner Circle radius is greater than this tolerance. Enable Roundness Check If true, the difference is calculated between the greatest radius and least radius of all the points on the circle, including statistical outliers. If Enable Smoothing Filter is true, noise points are excluded to provide more reliable results. If a ring is being gauged, then the roundness error is the larger error of the two circles. The tool fails if this value exceeds the Max Roundness Error. Max Roundness Error This is the difference between the greatest radius and least radius of all the points on the circle, including statistical outliers. If a ring is being gauged, then the roundness error is the larger error of the two circles. Datalogic Automation Inc. 3-118 Impact Reference Guide 3-119 Circle Gauge Input Name What it is Enable Smoothing Filter If true, the tool removes isolated outlier points (by excluding noise points) for the Roundness and Bounding Circle calculations, since these calculations are sensitive to individual defect points. An isolated outlier is one where both neighbors are not outliers. If two points in a row are beyond outlier distance, they are still considered a defect in Roundness and Bounding Circle calculations. All outlier points are still used in the "Percent of Points Out Of Tolerance" check. Enable Bounding Circle If true, the output "Bounding Circle" is calculated. The bounding circle is the smallest circle that includes all the points found. If Enable Smoothing Filter is true, noise points are excluded to provide more reliable results. If the Bounding Circle radius exceeds the Outer Bounding Radius Tolerance, the tool will fail. Outer Bounding Radius Tolerance If Enable Bounding Circle is true, and the Bounding Circle radius exceeds this tolerance, the tool will fail. Enable Inscribed Circle If True, the Inscribed Circle output is calculated. The Inscribed Circle is the largest circle that can fit inside all the points found. Inscribed Radius Tolerance If Enable Inscribed Circle is True, and the Inscribed Circle’s radius exceeds this tolerance, the tool will fail. Enable Ring Thickness Check If true, the ring’s thickness at each radial line is calculated and checked. The tool fails if this value exceeds the Ring Thickness Tolerance. The Ring Thickness is an output. (Circle Type must be a Ring type.) Each individual pair of inner and outer points on a radial line is also checked against the tolerance. If the pair exceeds the tolerance (or either the inner or outer point is missing), it is moved to the outlier list and added to the Percent of Points Out of Tolerance.The ring thickness at each radial line is the "Ring Thickness List" output. Ring Thickness Tolerance If Enable Ring Thickness Check is true, and the Ring Thickness exceeds this value, the tool will fail. Enable Concentricity Check If true, the ring’s concentricity is calculated and checked. The tool fails if this value exceeds the Max Concentricity Error. The Concentricity Error is an output. The concentricity error is the distance, in units, between the inner and outer circle centers. (Circle Type must be a Ring type.) Max Concentricity Error If Enable Concentricity Check is true, and the Concentricity Error exceeds this value, the tool will fail. Output Name What it is Passed If True, the found circle’s parameters lie within all the limits. Outer Circle The found outer circle. Inner Circle The found inner circle (Circle type is Ring). Circle Shapelist The found outer circle as a Shapelist if Circle type is Circle. The outer circle with an inner circle hole if Circle type is Ring. Datalogic Automation Inc. Circle Gauge Impact Reference Guide Output Name What it is Output Origin Relative to Tool The found origin point, relative to the Tool Origin, if any.The origin is positioned at the circle center if the Circle type is Circle. If Circle type is ring, then it is centered at the average center of the ID and OD. Output Origin Relative To RWC The found origin, relative to the entire image space. The origin is positioned at the circle center if the Circle type is Circle. If Circle type is ring, then it is centered at the average center of the ID and OD. Outer Edge Points Points used to form the Outer Circle. Outer Outlier Points The points further from the Outer Circle than the Outlier Distance Threshold. Inner Edge Points Points used to form the Inner Circle. (Circle type is Ring.) Inner Outlier Points The points further from the Inner Circle than the Outlier Distance Threshold. Percent of Points Out of Tolerance The percent of the edge points that exceed any of the tolerance checks. A point is out of tolerance if it is not found, is an outlier, is out of radius tolerance, or is out of ring thickness tolerance. Roundness Error The amount that the circle is out of round. Circle’s with a larger value are less round. Ring Thickness This is the average ring thickness as measured at each radial line. Concentricity Error The tool fails if this value exceeds the Max Concentricity Error. The concentricity error is the distance, in units, between the inner and outer circle centers. (Circle Type must be a Ring type.) Larger values indicate that the circles are less concentric. Concentricity Line Segment A line representing the amount and direction of the Concentricity Error. Bounding Circle The bounding circle is the smallest circle that includes all the points found. (Enable Bounding Circle must be True.) Bounding Circle Shapelist The Bounding Circle as a Shapelist. Inscribed Circle The Inscribed Circle is the largest circle that can fit inside all the points found. (Enable Inscribed Circle must be True.) Inscribed Circle Shapelist The Inscribed Circle as a shapelist. Ring Thickness List The ring thickness at each radial line. (Circle type is Ring.) How to set up the Circle Gauge tool 1. Snap a good image of the desired part, then click the Setup tab. Datalogic Automation Inc. 3-120 Impact Reference Guide Circle Gauge 2. Click the ROI radio button. Position the Circle ROI over the circle or ring you want to find. Be sure that the ROI completely encloses the circle or ring. To adjust the ROI, hold the cursor over an adjustment point until the cursor changes to one shown below, then click and drag. Adjust Inner and Outer ROI Diameter Adjust Arc Length Move the ROI ROI positioned on image Adjust ROI size 3. Select the "Circle-Type" based on the shape you want to find: • Dark Circle from Outside In - Start at the outer edge and search inward for a bright to dark edge • Dark Circle from Inside Out - Start at the inner edge and search outward for a bright to dark edge • Bright Circle from Outside In - Start at the outer edge and search inward for a dark to bright edge • Bright Circle from Inside Out - Start at the inner edge and search outward for a dark to bright edge • Dark Ring from Outside In - Do both Outside In and Inside Out searches for bright to dark edges • Dark Ring from Inside Out - Start at the ROI mid-Diameter and search outward and inward for dark to bright edges • Bright Ring from Outside In - Do both Outside In and Inside Out searches for dark to bright edges • Bright Ring from Inside Out - Start at the ROI mid-Diameter and search outward and inward for bright to dark edges The Inside Out Ring types will only work if the ROI mid-Diameter is located on the ring, since the search starts at the mid-Diameter. 4. The detected edges are displayed on the image. Important: Adjust the threshold and sensitivity options in the Circle ROI selection area until all the desired edges are marked in the image. Gradient and Grey Level edge detection types are supported. In cases where Gradient edge detection picks up extra edges in a noisy image, Grey Level may offer better results. Found points are marked with the following colors: Purple - OD points that are not outliers Yellow - OD points that are outliers Red - ID points that are not outliers Orange - ID points that are outliers 5. Adjust the Outlier Distance and Sampling Percent until all the desired points are found. 3-121 Datalogic Automation Inc. Line Find Impact Reference Guide 6. Click the Pass/Fail radio button. Adjust the settings in the Filter Area to define which image features you want to check. % Out of Tolerance - The percent of the edge points that can be out of tolerance. A point is out of tolerance if it is not found, is an outlier, is out of radius tolerance, or is out of ring thickness tolerance. Roundness Error - The difference between the greatest radius and least radius of all the points on the circle, including outliers. Concentricity Error - (Ring Only) The concentricity error is the distance, in units, between the inner and outer circle centers. Larger values indicate that the circles are less concentric. Smoothing Filter - Removes isolated outlier points (both neighbors are not outliers) for the Roundness and Bounding Circle calculations. 7. Adjust the settings in the Tolerances Area to further refine the image features you want to check. Bounding Circle - The size of the smallest circle that includes all the points found. Inscribed Circle - The largest circle that can fit inside all the points found. Radius - The fitted radius and each edge point is checked against the Inner and Outer Radius tolerance. Ring Thickness - (Ring Only) The ring’s thickness at each radial line is calculated and checked. Line Find See “Line Find” on page 3-75. Line Gauge In the Measurement Drawer The Line Gauge tool finds the distance between two points (the Primary Endpoint Position and the Secondary Endpoint Position) using a single line ROI. The Line Gauge tool can be calibrated so that the distance measured in pixels on the image relates correctly to the measurement’s real-world units. You can calibrate the tool alone, or in addition to, the camera. For example, you can calibrate the Line Gauge tool on a sample part as well as calibrate the camera for all parts. If you have multiple measurements and are concerned with lens distortion or multiple image planes, you can calibrate each Line Gauge tool separately. Datalogic Automation Inc. 3-122 Impact Reference Guide Line Gauge To train the tool’s scale factor: 1. Place the Wide Line ROI across the distance to be measured. If the ROI goes partly off the image during runtime, it will be clipped at the image’s edge. 2. Press the Train button. Check the endpoints found to make sure the desired distance is being measured. 3. Type the known measurement distance into the Scale Factor Train Distance field. 4. Click the Train button. The tool will calculate the scale factor required to scale the measured distance in pixels to the Scale Factor Train Distance value.This factor is applied after any camera calibration factor. A Setup is available for this tool, which will simplify basic configuration. Click the Setup tab to use it. 3-123 Input Name What it is Input Image Linked Image Tool Origin The tool’s origin relative to the entire image space Wide Line ROI Points on this ROI are used for measuring. If the ROI goes partly off the image during runtime, it will be clipped at the image’s edge. Wide Line ROI List A list of wide line ROIs used for measuring Distance Type Euclidean: direct distance between the points AbsoluteX: the distance between Point One and a line through Point Two's X coordinate and perpendicular to the X axis AbsoluteY: the distance between Point One and a line through Point Two's Y coordinate and perpendicular to the Y axis Distance Tolerance If the distance between the beginning and ending measurement points exceeds this value, the tool will fail. The parameters are minus, nominal, and plus. Primary Endpoint Position The starting point for measuring, beginning from the tail end of the ROI Secondary Endpoint Position The ending point for measuring, beginning from the tail end of the ROI Primary Use Center If True, the measurement starting point is half way between the Primary and Secondary Endpoints Secondary Use Center If True, the measurement starting point is half way between the Secondary Endpoint and the next point beyond it Blob Color To Find Bright, Dark, or both color objects Blob Threshold Method See “Grey Level Threshold Types” on page 3-68 for more details. Fixed Blob Threshold Percentage The grey level threshold value for fixed single threshold types (in percentage) Adaptive Blob Threshold Offset If Adaptive Threshold Method is selected, this offset is added to the adaptive threshold. This allows you to weight the adaptive threshold up or down. Datalogic Automation Inc. Line Gauge Impact Reference Guide Input Name What it is Noise Level The amount of background noise present in the image. Higher noise means the edges must be farther apart. Lower noise allows edges that are closer together. Maximum Number of Edges to Find Limits the number of edges found to those with the strongest transition Edge Pattern The edge pattern to find (Rising indicates a transition from dark to light; Falling indicates a transition from light to dark) Subpixel Method Indicates how many subpixel points to average when finding the edge points. More points used provides greater accuracy but takes more time. See “Subpixel Method” on page 3-125. Subpixel Position The subpixel position for edges that are not well defined. See “Subpixel Position” on page 3-144. Subpixel Search Distance in Pixels The maximum distance, in pixels, that the subpixel algorithm will search from the threshold edge for the subpixel edge. See “Subpixel Search Distance” on page 3-125. Number of Steps Duplicates the Wide Line ROI. Allows multiple measurements that occur at regular intervals across the image with one tool. Step Distance The distance between the measurement steps Step Angle in Degrees The step angle relative to the Wide Line ROI (see “Step Angle” on page 3-125) Scale Factor The scale factor applied to the output distance. This is applied after any camera calibration. (See “Scale Factor” on page 3-125.) Scale Factor Train Distance When the tool is trained, this scale factor is calculated so that the measured distance is scaled to this value. (See “Scale Factor” on page 3125.) Scale Factor List The list of Scale Factors used when Number of Steps is greater than one. (See “Scale Factor” on page 3-125.) Scale Factor Train Distance List The list of Scale Factor Train Distances used when Number of Steps is greater than one. (See “Scale Factor” on page 3-125.) Output Name What it is All in Tolerance If True, all measurements are within tolerance In Tolerance List A list of measurements indicating whether In Tolerance is true or false Distance List A list of distances measured Distance Error List A list of measured distances minus the nominal Edge Point List A list of the found edge point locations Distance Segment List A list of the measured line segments Datalogic Automation Inc. 3-124 Impact Reference Guide Line Gauge Output Name What it is Step Segment List A list of the step line segments (when Number of Steps is greater than 1) Number of Edges Per ROI List The number of edges found on each ROI. Step Angle NOTE: For purposes of conversion, one radian is equal to 180 divided by pi (approximately 57.296 degrees). One degree is equal to pi divided by 180 (approximately 0.01745 radians). When you enter a value for Number of Steps, the tool will repeat the same measurement "Number of Steps" times. Step Angle is the reference angle for the step segments in relation to the primary Wide Line ROI, in degrees. Subpixel Method Subpixel method “None” means that edges are located to pixel resolution. However, if the tool calculates Euclidean distances and the endpoints are not on the same row or column, then edges are located to fractions of pixels. This is a natural result of the ROI taking a slanted path across the pixel grid, even when it starts and ends on pixel boundaries. Integral distances are displayed if Subpixel Method is "None" AND the Distance Type is AbsoluteX or AbsoluteY (or the endpoints are on the same row or column) AND the image is not calibrated. Subpixel Search Distance This value specifies the maximum distance, in pixels, that the subpixel algorithm will search for the subpixel edge from the edge based on the threshold. In some cases the edge transition from dark to light takes several pixels. This means the subpixel edge could be located several pixels from the non-subpixel (threshold) edge, because the subpixel algorithm is looking for the point of maximum grey level change (slope). This setting can help prevent the edge location from "jumping" between subpixel positions. For example, if this search distance is set to one (1), the subpixel edge found by the algorithm will never be located more than one (1) pixel from the edge based on the threshold. Scale Factor The measurement tool can be calibrated so that the distance measured in pixels on the image relates correctly to the measurement’s real-world units. You can calibrate the tool alone or in addition to the camera. For example, you can calibrate the measurement tool on a sample part as well as calibrate the camera for all parts. If you have multiple measurements and are concerned with lens distortion or multiple image planes, you can calibrate each measurement tool separately. To train the tool’s scale factor: 1. Place the Wide Line ROI across the distance to be measured and adjust the Threshold and Sensitivity settings. 2. Press the Train button. Check the endpoints found to make sure the desired distance is being measured. 3. Type the known measurement distance into the Scale Factor Train Distance field. 4. Click the Train button. You can also average several images of measurements to create a more accurate scale factor. To average several images: 1. Train the tool’s scale factor. 3-125 Datalogic Automation Inc. Line Gauge Datum Line Impact Reference Guide 2. Snap a new image and click the Train button. The tool will average the measured distances and update the scale factor. 3. Repeat step 2 as needed to average more measurements. The tool will calculate the scale factor so that the measured distance in pixels (the Output distance) equals the Scale Factor Train Distance. This factor is applied after any camera calibration factor. Line Gauge Datum Line In the Measurement Drawer The Line Gauge Datum Line tool finds the distance between a point on a line ROI and either a Datum Line or the X or Y axis of a Datum Origin. The Line Gauge Datum Line tool can be calibrated so that the distance measured in pixels on the image relates correctly to the measurement’s real-world units. You can calibrate the tool alone, or in addition to, the camera. For example, you can calibrate the Line Gauge Datum Line tool on a sample part as well as calibrate the camera for all parts. If you have multiple measurements and are concerned with lens distortion or multiple image planes, you can calibrate each Line Gauge Datum Line tool separately. To train the tool’s scale factor: 1. Place the Wide Line ROI across the distance to be measured. If the ROI goes partly off the image during runtime, it will be clipped at the image’s edge. 2. Press the Train button. Check the endpoints found to make sure they are correct. 3. Place the Datum Line in the desired position. Press the Run button. 4. Type the known measurement distance into the Scale Factor Train Distance field. 5. Click the Train button. The tool will calculate the scale factor required to scale the measured distance in pixels to the Scale Factor Train Distance value.This factor is applied after any camera calibration factor. A Setup is available for this tool, which will simplify basic configuration. Click the Setup tab to use it. Input Name What it is Input Image Linked Image Tool Origin The tool’s origin relative to the entire image space Wide Line ROI A point found on this line is used as one endpoint of the measurement. If the ROI goes partly off the image during runtime, it will be clipped at the image’s edge. Wide Line ROI List A list of wide line ROIs used for measuring Datum Line If Datum Line Type is Datum Line, one endpoint of the measurement is on this line Datum Origin If Datum Line Type is Origin X axis or Origin Y axis, one endpoint of the measurement is on the X or Y axis of this origin. Datalogic Automation Inc. 3-126 Impact Reference Guide 3-127 Line Gauge Datum Line Input Name What it is Datum Line Type The tool measures from the Wide Line ROI point: Absolute Distance to Datum Line: the absolute distance to the Datum Line Signed Distance to Datum Origin X Axis: the signed distance to the Datum Origin’s X axis Signed Distance to Datum Origin Y Axis: the signed distance to the Datum Origin’s Y axis Absolute Distance to Datum Origin X Axis: the absolute distance to the Datum Origin’s X axis Absolute Distance to Datum Origin Y Axis: the absolute distance to the Datum Origin’s Y axis Signed Distance to Datum Line: The Datum Line is treated as an origin X axis. If the endpoint is below the datum line, then the reported distance is positive. If the endpoint is above the line, then the reported distance is negative. Signed Distance to Tool Origin X Axis: the signed distance to the tool origin’s X axis Signed Distance to Tool Origin Y Axis: the signed distance to the tool origin’s Y axis Absolute Distance to Tool Origin X Axis: the absolute distance to the tool origin’s X axis Absolute Distance to Tool Origin Y Axis: the absolute distance to the tool origin’s X axis Distance Tolerance If the distance between the beginning and ending measurement points exceeds this value, the tool will fail. The parameters are minus, nominal, and plus. Endpoint Position If Use Center is false, this is the found point to use for measuring (point number one is at the beginning end of the Wide Line ROI) Use Center If True, the measurement end point is half way between the Endpoint Position, and the next point beyond it Blob Color to Find Bright or Dark objects Blob Threshold Method See “Grey Level Threshold Types” on page 3-68 for more details. Fixed Blob Threshold Percentage The grey level threshold value for fixed single threshold types (in percentage) Adaptive Blob Threshold Offset If Adaptive Threshold Method is selected, this offset is added to the adaptive threshold. This allows you to weight the adaptive threshold up or down. Noise Level The amount of background noise present in the image. Higher noise means the edges must be farther apart. Lower noise allows edges that are closer together. Maximum Number of Edges To Find Limits the number of edges found to those with the strongest transition Edge Pattern The edge pattern to find (Rising indicates a transition from dark to light; Falling indicates a transition from light to dark) Datalogic Automation Inc. Line Gauge Datum Line Impact Reference Guide Input Name What it is Subpixel Method The type of subpixel averaging. The grey levels of adjacent pixels (3, 5, or 7) around an edge point are averaged and used to interpolate the edge to a fraction of a pixel. See “Subpixel Method” on page 3-125. Subpixel Position The subpixel position for edges that are not well defined. See “Subpixel Position” on page 3-144. Subpixel Search Distance in Pixels The maximum distance, in pixels, that the subpixel algorithm will search from the threshold edge for the subpixel edge. See “Subpixel Search Distance” on page 3-125. Number of Steps Duplicates the primary ROI. Allows multiple measurements with one tool. Step Distance The distance between the measurement steps Step Angle in Degrees The angle of the secondary ROIs from the primary ROI (see “Step Angle” on page 3-125) Scale Factor The scale factor applied to the output distance. This is applied after any camera calibration. Scale Factor Train Distance When the tool is trained, this scale factor is calculated so that the measured distance is scaled to this value. Scale Factor List The list of Scale Factors used when Number of Steps is greater than one. Scale Factor Train Distance List The list of Scale Factor Train Distances used when Number of Steps is greater than one. Output Name What it is All In Tolerance If True, all measurements are within tolerance In Tolerance List A list of measurements indicating whether In Tolerance is true or false Distance List A list of distances measured Distance Error List A list of measured distances minus the nominal Edge Point List A list of the found edge points Distance Segment List A list of the measured line segments Step Segment List A list of the Wide Line ROIs (when Number of Steps is greater than 1) Number of Edges Per ROI List The number of edges found on each ROI. Datalogic Automation Inc. 3-128 Impact Reference Guide Line Gauge Dual ROI Line Gauge Dual ROI In the Measurement Drawer The Line Gauge Dual ROI tool finds the distance between two points using two line ROIs. The Line Gauge Dual ROI tool can be calibrated so that the distance measured in pixels on the image relates correctly to the measurement’s real-world units. You can calibrate the tool alone, or in addition to, the camera. For example, you can calibrate the tool on a sample part as well as calibrate the camera for all parts. If you have multiple measurements and are concerned with lens distortion or multiple image planes, you can calibrate each tool separately. To train the tool’s scale factor: 1. Place the Wide Line ROI across the distance to be measured. If the ROI goes partly off the image during runtime, it will be clipped at the image’s edge. 2. Press the Train button. Check the endpoints found to make sure the desired distance is being measured. 3. Type the known measurement distance into the Scale Factor Train Distance field. 4. Click the Train button. The tool will calculate the scale factor required to scale the measured distance in pixels to the Scale Factor Train Distance value.This factor is applied after any camera calibration factor. A Setup is available for this tool, which will simplify basic configuration. Click the Setup tab to use it. 3-129 Input Name What it is Input Image Linked Image Tool Origin The tool’s origin relative to the entire image space Primary Wide LIne ROI A point found on this ROI is used for the measurement starting point. If the ROI goes partly off the image during runtime, it will be clipped at the image’s edge. Primary Wide LIne ROI List A list of wide line ROIs used as Primary ROIs for measuring Secondary Wide LIne ROI A point found on this ROI is used for the measurement ending point Secondary Wide LIne ROI List A list of wide line ROIs used as Secondary ROIs for measuring Distance Type Euclidean: direct distance between the points AbsoluteX: the distance between Point One and a line through Point Two's X coordinate and perpendicular to the X axis AbsoluteY: the distance between Point One and a line through Point Two's Y coordinate and perpendicular to the Y axis Distance Tolerance If the distance between the beginning and ending measurement points exceeds this value, the tool will fail. The parameters are minus, nominal, and plus. Primary Endpoint Position The starting point for the measurement, beginning from the tail end of the Primary Wide Line ROI Datalogic Automation Inc. Line Gauge Dual ROI Impact Reference Guide Input Name What it is Primary Use Center If True, the measurement starting point is half way between the Primary and Secondary Endpoint Positions Primary Blob Color To Find Bright, Dark, or both color objects on the Primary Wide Line ROI Primary Blob Threshold Method See “Grey Level Threshold Types” on page 3-68 for more details. Primary Fixed Blob Threshold Percentage The grey level threshold value for fixed single threshold types (in percentage) Primary Adaptive Blob Threshold Offset If Adaptive Threshold Method is selected, this offset is added to the adaptive threshold. This allows you to weight the adaptive threshold up or down. Primary Noise Level The amount of background noise present in the image along the Primary Wide Line ROI. Higher noise means the edges must be farther apart. Lower noise allows edges that are closer together. Primary Maximum Number Of Edges To Find Limits the number of edges found along the Primary Wide Line ROI to those with the strongest transition Primary Edge Pattern The edge pattern to find along the Primary Wide Line ROI (Rising indicates a transition from dark to light; Falling indicates a transition from light to dark) Primary Subpixel Method Indicates how many subpixel points to average when finding the edge points along the Primary Wide Line ROI. More points used provides greater accuracy but takes more time. See “Subpixel Method” on page 3-125. Primary Subpixel Position The subpixel position for edges that are not well defined. See “Subpixel Position” on page 3-144. Primary Subpixel Search Distance in Pixels The maximum distance, in pixels, that the subpixel algorithm will search from the threshold edge for the subpixel edge. See “Subpixel Search Distance” on page 3-125. Secondary Endpoint Position The ending point for the measurement, beginning from the tail end of the Secondary Wide Line ROI Secondary Use Center If True, the measurement starting point is half way between the Primary and Secondary Endpoint Positions Secondary Blob Color To Find Bright or Dark objects on the Secondary Wide Line ROI Secondary Blob Threshold Method See “Grey Level Threshold Types” on page 3-68 for more details. Secondary Fixed Blob Threshold Percentage The grey level threshold value for fixed single threshold types (in percentage) Datalogic Automation Inc. 3-130 Impact Reference Guide 3-131 Line Gauge Dual ROI Input Name What it is Secondary Adaptive Blob Threshold Offset If Adaptive Threshold Method is selected, this offset is added to the adaptive threshold. This allows you to weight the adaptive threshold up or down. Secondary Noise Level The amount of background noise present in the image along the Secondary Wide Line ROI. Higher noise means the edges must be farther apart. Lower noise allows edges that are closer together. Secondary Maximum Number Of Edges To Find Limits the number of edges found along the Secondary Wide Line ROI to those with the strongest transition Secondary Edge Pattern The edge pattern to find along the Secondary Wide Line ROI (Rising indicates a transition from dark to light; Falling indicates a transition from light to dark) Secondary Subpixel Method Indicates how many subpixel points to average when finding edge points along the Secondary Wide Line ROI. More points used provides greater accuracy but takes more time. See “Subpixel Method” on page 3-125. Secondary Subpixel Position The subpixel position for edges that are not well defined. See “Subpixel Position” on page 3-144. Secondary Subpixel Search Distance in Pixels The maximum distance, in pixels, that the subpixel algorithm will search from the threshold edge for the subpixel edge. See “Subpixel Search Distance” on page 3-125. Number of Steps Duplicates the Primary and Secondary Wide Line ROIs. Allows multiple measurements with one tool. Step Distance The distance between the measurement steps Step Angle in Degrees The angle of the duplicate ROIs relative the original ROIs (see “Step Angle” on page 3-125) Scale Factor The scale factor applied to the output distance. This is applied after any camera calibration. Scale Factor Train Distance When the tool is trained, this scale factor is calculated so that the measured distance is scaled to this value. Scale Factor List The list of Scale Factors used when Number of Steps is greater than one. Scale Factor Train Distance List The list of Scale Factor Train Distances used when Number of Steps is greater than one. Output Name What it is All In Tolerance If True, all measurements are within tolerance In Tolerance List A list of measurements indicating whether In Tolerance is true or false Distance List A list of distances measured Distance Error List A list of measured distances minus the nominal Datalogic Automation Inc. Linear Regression Impact Reference Guide Output Name What it is Edge Point List A list of the found edge point locations Distance Segment List A list of the measured line segments Step Segment List A list of the Wide Line ROIs (when Number of Steps is greater than 1) Number of Edges Per ROI List The number of edges found on each ROI. Linear Regression In the Measurement Drawer The Linear Regression tool creates a line from a list of points. You can specify whether to ignore points that lie too far from the created line (outliers). Input Name What it is Input Image Linked Image Tool Origin The tool’s origin relative to the entire image space Point List The line is fitted to this list of points Outlier Enable See below for details Outlier Distance Threshold See below for details Output Name What it is Success Flag If True, the tool was able to fit a line to the points Fitted Line x and y coordinates and the angle of the fitted line Average Deviation The average deviation distance of the points from the fitted line Maximum Deviation The distance of the furthest point from the fitted line Maximum Deviation Point The x and y coordinates of the point furthest from the fitted line Line Segment The beginning and ending x and y coordinates of the fitted line Outlier Enable and Outlier Distance Threshold The tool first uses all the input points to perform the line fit. At this point, if Outlier Enable is False, the fitting process stops. If Outlier Enable is true, and the value of Maximum Deviation is larger than the value of Outlier Distance Threshold, then the Maximum Deviation Point is considered an outlier and is excluded from the point list. The fitting process is repeated while iteratively reducing the weights of points outside of the Outlier Distance Threshold. The tool then recomputes Average and Maximum Deviation using the final fitted line and all the input points. Datalogic Automation Inc. 3-132 Impact Reference Guide Midpoint Midpoint In the Measurement Drawer The Midpoint tool calculates the midpoint between two input points and provides its x-y coordinates as an output. Input Name What it is Input Image Linked Image Tool Origin The tool’s origin relative to the entire image space PointOne The x and y coordinates of the first point PointTwo The x and y coordinates of the second point Output Name What it is Midpoint The x and y coordinates of the point midway between the two input points Multiple Point to Point Measurements In the Measurement Drawer The Multiple Point to Point Measurements tool measures the distance between multiple points in a point list. The points may be paired sequentially, as they appear in the list, or using a user-defined index. A Setup is available for this tool, which will simplify basic configuration. Click the Setup tab to use it. 3-133 Input Name What it is Input Image Linked Image Tool Origin The tool’s origin relative to the entire image space Point List The distance is calculated between the points in this list, based on the Pairing Type. See “Point List” on page 3-134. Pairing Type Pair 0-1 2-3 4-5...: calculates measurements between every other point and the one after it in the list. For example, if you have six points, three measurements are created (0-1, 2-3, 4-5). Pair 0-1 1-2 2-3 ...: calculates measurements between the points sequentially as they appear in the list. For example, if you have six points, five measurements are created (0-1, 1-2, 2-3, 3-4, 4-5) User Pairing Indexes: Pair the points using the Pairing Indexes input Pairing Indexes The order in which the points in the list should be paired, when Pairing Index Type is selected. The length of this list determines the number of output results, regardless of the length of the Point List property. Datalogic Automation Inc. Multiple Point to Point Measurements Impact Reference Guide Input Name What it is Distance Type Euclidean: direct distance between the points AbsoluteX: the distance between Point One and a line through Point Two's X coordinate and perpendicular to the X axis AbsoluteY: the distance between Point One and a line through Point Two's Y coordinate and perpendicular to the Y axis Distance Type List Allows you to specify a different distance type for each point pair. It will override the "Distance Type" value if an integer list is linked here. The allowed values are 0 =Euclidean, 1=AbsoluteX, 2=AbsoluteY. Tolerance If the distance between the beginning and ending measurement points exceeds this value, the tool will fail. The parameters are minus, nominal, and plus. Tolerance List Allows you to specify a different tolerance for each point pair. If present, this list will override the "Tolerance" value. If the length of this list does not match the number of point list pairs, the tool will fail. The number of output results is based on the length of this list. Scale Factor A real value that is multiplied by the measured distances. Can be used in place of calibrating the camera. Same as the input in the Line Gauge tools. Scale Factor List Allows you to specify a different scale factor for each point pair. It will override the "Scale Factor" value if a list is linked here. Enable Distance List Out If True, the Distance List output is populated. Enable InTolerance List Out If True, the In Tolerance List output is populated. Enable Distance Error List Out If True, the Distance Error List output is populated. Enable Line Segment List Out If True, the Line Segment List output is populated. Output Name What it is All In Tolerance If True, all measurements are within tolerance Distance List A list of distances measured In Tolerance List A list of measurements indicating whether In Tolerance is true or false Distance Error List A list of measured distances minus the nominal Line Segment List A list of the measured line segments Point List When you link a points list, the tool checks the correspondence between the source tool’s Tool Origin and this tool’s Origin to insure the measurement is made on points with the desired reference. The check is based on the following order: Datalogic Automation Inc. 3-134 Impact Reference Guide Peak Valley Find 1. If the Points List link source tool does NOT have a Tool Origin property (e.g. the Data Instance tool), the link is made without a warning. 2. If the Points List link source property contains "RWC" in the name (it uses Real World Coordinates), and this tool’s Tool Origin is 0,0,0, the link is made without a warning. 3. If the Points List link source tool has a Tool Origin property, and this tool’s Tool Origin matches it’s value, the link is made without a warning. The Multiple Point-to-Point Measurement tool Setup is designed to work with a fixed number of measurements. The Setup configures the Tolerance List property based on the number of input points, which causes the tool to always generate a specific number of measurements. The tool fails if the number of input points does not match the number of Tolerances. To match the number of configured measurements to the current point list length, push the "Rebuild Point Table" button on the Setup tab. To always make a dynamic number of measurements, based on the current length of the point list, use the property panel rather than the tool Setup. Put a Data Set Tool that writes an empty Tolerance List to the Tolerance List input of the Multiple Point-to-Point Measurement tool before the Multiple Point-to-Point tool in the task. That way, if you accidentally enter the tool setup and it configures the Tolerance List, that List is overwritten the next time the task runs. Peak Valley Find In the Measurement Drawer The Peak Valley Find tool is used to find and count maximums and minimums (peaks and valleys) along a given edge direction. A wide line segment is used as a directed ROI to specify the search direction for edges. Starting from the top of the ROI and running in the direction of the line segment, the tool finds edges and detects peaks and valleys along the given direction. 3-135 Input Name What it is Input Image Linked Image Tool Origin The tool’s origin relative to the entire image space. Use this only if you are trying to find an origin relative to another tool. Report Peaks If True, the Peak List output is populated. Report Valleys If True, the Valley List output is populated. Report Edge Points If True, the Edge Point List output is populated. Use this primarily for tool setup, since it will slow tool performance. Wide Line ROI Points on this ROI are used for finding peaks and valleys along the edge. The ROI direction indicates the edge and amplitude direction. Edge Strength Range Specifies the range of percentage difference between detected edge pixels for peak and valley detection. Minimum Amplitude The minimum distance, in the direction of the Wide Line ROI, between successive peaks and valleys. Output Name What it is Peak List A list of peak edge points. Datalogic Automation Inc. Point Match Impact Reference Guide Output Name What it is Valley List A list of valley edge points. Edge Point List A list of edge points. Peak Count A count of peak points found along the edge. Valley Count A count of valley points found along the edge. Peak Valley Find Tool Details Edges are chosen as the first edge (either rising or falling), in the direction of the line segment, that is within the given edge strength range. This range value is used to select edges more specifically and filter out image noise. Peaks and valleys are generated using this list of edges and a minimum amplitude value. The minimum amplitude is used to suppress peaks and valleys which are below the threshold. It specifies the minimal distance (in the direction of the line segment) between the adjacent peaks and valleys. If no edges are further apart than the minimum amplitude, then no peaks or valleys are detected. False peaks and valleys (due to noise or minor deviations) less than the minimum amplitude value are suppressed. Valley False Peak Edge Direction Peak Minimum Amplitude Point Match In the Measurement Drawer The Point Match tool compares an ideal point list and an actual point list and finds matches within a given tolerance. The point lists are both assumed to be relative to the same origin, but are not assumed to be in any particular order. The Point Match Tool reports extra points and points that are missing in the actual point list Since no point correspondence is assumed, two separate lists of Booleans are output to indicate which points in the ideal and actual lists have corresponding points within tolerance. Tolerance checking is based on radial or x-y offset distance (depending on which tolerance is enabled or the largest value if both are enabled). When you click the Train button, the Actual Points input is copied into the Ideal Points input. This allows you to use a golden part for quick setup of an application. The Ideal Points would ordinarily come from a CAD drawing rather than a golden part, but since that is not always feasible you can use the Train button. The Ideal Points are saved with the vision program file. Input Name What it is Input Image Linked Image Tool Origin The tool’s origin relative to the entire image space Datalogic Automation Inc. 3-136 Impact Reference Guide 3-137 Point Match Input Name What it is Ideal Points A point list generated from an ideal part that is used as a template for comparison. The points can be in any order. See “How Point Matching Works” on page 3-138. Actual Points A point list taken from a test part that is used to determine whether the part is defective. The point list is in no particular order relative to the ideal point list. Tolerance The maximum distance allowed between corresponding actual and ideal points. Large tolerance values will cause highly ambiguous matching and infinite tolerance values are considered an error. Match Tolerance If this value is greater than the tolerance, it is used to match points, but it does not determine whether the point match is In tolerance. If a point is not in tolerance, but you want to know the distance to the "matched" point, use this setting. That is, all points may be within match tolerance, but the inspection is considered a failure if the points are less than the tolerance. The Match Tolerance does not affect the match lists, or the missing or extra points outputs. Test Extra Points If True, any extra points found in the actual point list will cause In Tolerance to be False. Enable XY-Offsets If True, the X and Y Offset between the actual point and the matching actual point is used to determine point match tolerance. The In Tolerance output is True if all the X and Y Offset values are less than the tolerance. Enable Radial Offsets If True, the Radial Offset between the actual point and the matching actual point is used to determine point match tolerance. The In Tolerance output is True if all the Radial Offset values are less than the tolerance. Enable Tolerance Regions If True, the Tolerance Regions output is enabled. Output Name What it is In Tolerance If True, every ideal point has at least one unique matching actual point within the given tolerance. If Test Extra Points is True, then any extra points found will cause In tolerance to be False. Ideal Point Match If a value in this list is True, the tool found an actual point within tolerance in the actual points list. If the value is False, the matching point is missing or outside the tolerance. Actual Point Match If a value in this list is True, the corresponding actual point found an actual point within tolerance in the actual points list. If a value is false, the corresponding actual point is listed in the extra points output list. Extra Points The points in this list were found in the actual points, but had no corresponding actual point within tolerance. Extra points can occur if the actual point is out of tolerance or if multiple points are within tolerance. For multiple points within tolerance, the first point is selected as matching and the rest are considered extra. Datalogic Automation Inc. Point to Point Measurement Impact Reference Guide Output Name What it is Missing Points The points in this list were found in the ideal point list, but had no matching point within tolerance in the actual point list. Radial Offsets A list of radial distances from each ideal point to the corresponding actual point. missing points have a distance of zero. X-Offsets A list of distances from each ideal point to the corresponding actual point along the x-axis. Missing points have a distance of zero. Y-Offsets A list of distances from each ideal point to the corresponding actual point along the y-axis. Missing points have a distance of zero. Tolerance Regions These consist of circles (Radius Offsets) or squares XY-Offsets) centered on the Ideal Points with a radius or length and width equal to the Tolerance input. See “How Tolerance Regions Work” on page 3-138. How Point Matching Works Matching begins by selecting successive points in the ideal point list. Each ideal point is matched to an actual point by a tolerance check until the ideal point list is exhausted. Ideal points without a match are added to the missing points list. Actual points which have not been matched to an ideal point are put into the extra points list. NOTE: If the Tolerance value is too high, missing and extra point locations are reported incorrectly. How Tolerance Regions Work There is a Shape List output named “Tolerance Region." These regions consist of circles or squares centered on the Ideal Points with a distance equal to the Tolerance input. For example, if you set Tolerance to fifteen, Enable Tolerance Regions to True, Enable Radial Offsets to True, and press Train; Tolerance Regions are displayed on the image as purple circles fifteen pixels in diameter. The Regions are contained in the Tolerance Regions output in the properties list. The regions are circles because Enable Radial Offsets is true. Point to Point Measurement In the Measurement Drawer The Point to Point Measurement tool measures the distance between two points. A Setup is available for this tool, which simplifies basic configuration. See “How to use the Point to Point Measurement tool” on page 3139. Input Name What it is Input Image Linked Image Tool Origin The tool’s origin relative to the entire image space Point One The x and y coordinates of the beginning measurement point Point Two Origin Source Use Tool Origin: Select this if Point Two is located on the image relative to the Tool Origin property. Use Point Two Origin: Select this if Point Two is located on the image relative to the Point Two Origin property Datalogic Automation Inc. 3-138 Impact Reference Guide Point to Point Measurement Input Name What it is Point Two Origin The origin the tool will use when Point Two Origin Source is set to the value Use Point Two Origin Point Two The x and y coordinates of the ending measurement point Distance Type Euclidean: Measure direct distance between the points AbsoluteX: Measure the distance between Point One and a line through Point Two's X coordinate and perpendicular to the X axis AbsoluteY: Measure the distance between Point One and a line through Point Two's Y coordinate and perpendicular to the Y axis Tolerance If the distance between the two points is greater than this value, the tool will fail. The parameters are minus, nominal, and plus. Output Name What it is Scale Factor The scale factor applied to the output distance. This is applied after any camera calibration. (See“Scale Factor” on page 3-125.) Scale Factor Train Distance When the tool is trained, this scale factor is calculated so that the measured distance is scaled to this value. Distance The measured distance between Point One and Point Two In Tolerance True if the Distance is within the tolerance range Distance Error The difference between the Tolerance Nominal and the Distance Line Segment The distance line segment. How to use the Point to Point Measurement tool Click the Setup tab to use the setup for this tool. General 1. Image: To use a different image source, click the Link button. The tool works only with greyscale images. Points 1. Point One Tab -Point One: You define the beginning measurement point on the Point One tab. You can manually enter the X and Y coordinates of the point or click the Link button to link a point. 2. Point One Tab - Origin: When you link Point One, Setup will complete the Origin location, based on the following order: 2a. If Point One’s link source property contains "RWC" (it uses Real World Coordinates), the Origin is set to (0, 0, 0) since Point One’s location is relative to those coordinates. The Origin Link button is disabled. 2b. If Point One’s link source tool has a Tool Origin property, the Origin is linked to it. The Origin Link button is disabled. 2c. If Point One’s link source tool does NOT have a Tool Origin property (e.g. the Data Instance tool), the Origin is left unchanged. The Origin Link button is enabled. Click the Link button to link an Origin for Point One. 3-139 Datalogic Automation Inc. Point to Point Measurement Impact Reference Guide 3. Point One Tab - Measurement Type: Select how you want the tool to measure the distance between the points. Euclidean: Measures the direct distance between the points AbsoluteX: Measures the distance between Point One and a line that runs through Point Two's X coordinate and is perpendicular to the X axis AbsoluteY: Measures the distance between Point One and a line that runs through Point Two's Y coordinate and is perpendicular to the Y axis Point One Location Point One Origin 4. Point Two Tab - Point Two: You define the ending measurement point on Point Two tab. Manually enter the X and Y coordinates of the point or click the Link button to link a point. 5. Point Two Tab - Origin: When you link Point Two, Setup will complete the Origin location, based on the following order: 5a. If Point Two’s link source property contains "RWC" (it uses Real World Coordinates), the Origin is set to (0, 0, 0) since Point Two’s location is relative to those coordinates. The Origin Link button is disabled. 5b. If Point Two’s link source tool has a Tool Origin property, the Origin is linked to it. The Origin Link button is disabled. 5c. If Point Two’s link source tool does NOT have a Tool Origin property (e.g. the Data Instance tool), the Origin is left unchanged. The Origin Link button is enabled. Click the Link button to link an Origin for Point Two. Point Two Location Point Two Origin Pass/Fail 1. Train the Scale Factor: The tool can be calibrated so that the distance measured in pixels on the image relates correctly to the measurement’s real-world units. For example, you run the tool and the Measurement Length displayed is 100, but the distance in the real world is 200. Enter 200 in the Train Measurement Length field and click Train. The tool will calculates the Scale Factor so that the measured distance in pixels (the Measurement Length) equals the Train Measurement Length. The Scale Factor is applied after any camera calibration factor. The Reset button resets the Measurement Length and Scale Factor to their original values. Datalogic Automation Inc. 3-140 Impact Reference Guide Point to Line Measurement 2. Enter the Measurement Tolerances: In the Nominal field, enter the correct measurement length, then enter the tolerances in the Minus and Plus fields. Point to Line Measurement In the Measurement Drawer The Point to Line Measurement tool measures the distance between a point and a line.A Setup is available for this tool, which simplifies basic configuration. See “How to use the Point to Line Measurement tool” on page 3-141. Input Name What it is Input Image Linked Image Tool Origin The tool’s origin relative to the entire image space Point The x and y coordinates of the start measurement point Line The x and y coordinates and angle of the end measurement line Tolerance If the distance between the point and the line is greater than this value, the tool will fail. The parameters are minus, nominal, and plus. Output Name What it is Distance The measured distance from the input point to the input line. In Tolerance True if the Distance is within the tolerance range Distance Error The difference between the Tolerance Nominal and the Distance Line Segment A line from the start and end points of the distance. The start point of the line segment will always be the input point. How to use the Point to Line Measurement tool Click the Setup tab to use the setup for this tool. General 1. Image: To use a different image source, click the Link button. The tool works only with greyscale images. ROI 1. Line Tab - Line Type: Select the type of line you want to use for the beginning measurement. Line Segment: Select this to use a Line Segment. 3-141 Datalogic Automation Inc. Point to Line Measurement Impact Reference Guide Origin: Select this to use the X-axis line of the origin shown in the Tool Origin area. The X, Y, and Angle fields are set to zero. X1, Y1, X2, Y2: If the Line Segment is not linked, enter the coordinates in these fields X, Y, Angle: If the Origin is not linked, enter the coordinates in these fields. The measurement Origin is offset from the Tool Origin by this amount. 2. Line Tab - Tool Origin: Line Segment: Setup uses the link source tool’s Tool Origin property. If the link source tool does NOT have a Tool Origin property (e.g. the Data Instance tool), the Origin is left unchanged. and the Origin Link button is enabled Origin: Setup uses the link source tool’s Tool Origin property. This tool’s Tool Origin values are set to zero and the link button is disabled. If the link source tool does NOT have a Tool Origin property (e.g. the Data Instance tool), the Origin is left unchanged and the Origin Link button is enabled. Line Type Line Location Line Origin 3. Point Tab - Point: You define the ending measurement point on the Point tab. Manually enter the X and Y coordinates of the point or click the Link button to link a point. 4. Origin: When you link the Point, Setup completes the Origin location, based on the following order: 4a. If the Point’s link source property contains "RWC" (it uses Real World Coordinates), the Origin is set to (0, 0, 0) since Point Two’s location is relative to those coordinates. The Origin Link button is disabled. 4b. If the Point’s link source tool has a Tool Origin property, the Origin is linked to it. The Origin Link button is disabled. 4c. If the Point’s link source tool does NOT have a Tool Origin property (e.g. the Data Instance tool), the Origin is left unchanged. The Origin Link button is enabled. Click the Link button to link an Origin for Point Two. Point Location Point Origin Pass/Fail 1. Train the Scale Factor: The tool can be calibrated so that the distance measured in pixels on the image relates correctly to the measurement’s real-world units. For example, you run the tool and the MeaDatalogic Automation Inc. 3-142 Impact Reference Guide Subpixel Edge Extractor surement Length displayed is 100, but the distance in the real world is 200. Enter 200 in the Train Measurement Length field and click Train. The tool calculates the Scale Factor so that the measured distance in pixels (the Measurement Length) equals the Train Measurement Length. The Scale Factor is applied after any camera calibration factor. The Reset button resets the Measurement Length and Scale Factor to their original values. 2. Enter the Measurement Tolerances: In the Nominal field, enter the correct measurement length, then enter the tolerances in the Minus and Plus fields. Subpixel Edge Extractor In the Measurement Drawer The Subpixel Edge Extractor tool finds the edge points along the edge of an arbitrary shape with subpixel accuracy. See “Edge Extraction Examples” on page 3-144. 3-143 Input Name What it is Input Image Linked Image Tool Origin The tool’s origin relative to the entire image space Wide Line ROI Indicates the direction and limits of the edge search Edge Polarity Search for rising or falling edges Edge Number To Extract The edge number to extract. Maximum Number of Edge Crossings Limits the number of edges found to those with the strongest transitions. Edge Detection Method Gradient Edges or Grey Level Edges Gradient detection generally provides more consistent results. In some cases Gradient detection can pick up extra edges in a noisy image and Grey Level detection may offer better control. See “Edge Detection Method” on page 3-78. Edge Detection Sensitivity Determines the transition level necessary for detection. A higher value detects more edges. Non-fixed selections use adaptive threshold selection. Fixed Threshold uses the Fixed Gradient Threshold Percentage value or the Fixed Grey Level Threshold Percentage (depending on the Edge Detection Method) Fixed Gradient Threshold Percentage The threshold value used when Gradient Edge Detection and Fixed Threshold Edge Detection Sensitivity are selected Datalogic Automation Inc. Subpixel Edge Extractor Impact Reference Guide Input Name What it is Fixed Grey Level Threshold Percentage The threshold value used when Grey Level Edge Detection and Fixed Threshold Edge Detection Sensitivity are selected Subpixel Position The subpixel position for edges that are not well defined. See “Subpixel Position” on page 3-144. Output Name What it is Edge Point List List of edge points found Edge Extraction Examples Edges Found Wide Line ROIs Subpixel Position The subpixel position gives you greater control over subpixel position for edges that are not well defined. The bottom, middle, and top of the edge are determined by the direction of the Wide Line ROI and the Edge Polarity setting. (See the examples below.) There are three settings: 1. Middle of Step Edge: This is the default setting and the correct choice for most cases. The tool finds the steepest part of the edge (the area with the greatest grey level change). 2. Bottom of Ramp Edge: This setting finds the beginning of the edge. 3. Top of Ramp Edge: This setting finds the end of the edge. In the following examples, the edge of the part is not well defined because it is rounded and therefore becomes darker near the edge. The Middle of Step Edge setting finds the steepest part of the edge which actually occurs inside the part in this case. The Bottom of Ramp Edge setting finds the beginning of the rising edge, which is the desired edge in this case. The Top of Ramp Edge setting finds the end of the rising Datalogic Automation Inc. 3-144 Impact Reference Guide Flaw Detection Drawer edge, which is quite poorly defined in this case. The bottom, middle, and top of the edge are determined by the direction of the Wide Line ROI and the Edge Polarity setting. Edges Found Direction of Edge Detection Bottom of Step Edge setting Middle of Step Edge Setting Edge Found Direction of Edge Detection Top of Step Edge Setting Flaw Detection Drawer Adaptive Template In the Flaw Detection Drawer The Adaptive Template tool performs a gradient match similar to the Greyscale Template tool. However, unlike the Greyscale Template tool, no standoff distance is required since this tool automatically ignores edges while still extracting defects in and around them. This type of search allows the tool to account for minor errors in locating, and also deals with image lighting variations automatically. See “How the Adaptive Template tool Works” on page 3-146. Setting up the Adaptive Template tool 1. Acquire an image of a good part 2. Click the Find Shape List property and define the region of the image to search, if desired. 3. Set the Filter Width property for the maximum pixel distance to search (approximately the size of the defects to find). 4. Click the Train button. 3-145 Input Name What it is Input Image The image being inspected Tool Origin The tool’s origin relative to the entire image space Datalogic Automation Inc. Average Intensity Impact Reference Guide Input Name What it is Find Shape List The desired region of the image to search. If no shape is defined, the entire image is processed. Trained Image The Input Image is copied to this input when you train the tool. You should not link an image to here, since it is replaced when you train the tool. Filter Width The maximum distance to search in the Input Image for the best gradient match (in pixels). Output Name What it is Difference Image The difference between the Trained and Input images (click the Difference Image tab to view) How the Adaptive Template tool Works This tool matches the gradient of the Input image to the best matched gradient in the neighborhood of the corresponding gradient in the Trained image. Input Image Trained Image Find Shape List Gradient Matching Gradient In the example above, the tool examines the pixels of the Input image and calculates the gradient at the pixel shown. The pixel location is represented by the dot and the small arrow represents the gradient at that pixel. The large arrow illustrates the mapping from the Input image to the Trained image. The dot in the Trained image is the corresponding pixel and the rectangle is the neighborhood of the pixel where the tool searches for a gradient match. The four small arrows represent gradients inside the search neighborhood. The red circle in the Trained image is the best match to the gradient in the Input image since it is nearly the same direction and magnitude. Once the tool determines the best gradient match in the Input image, it uses the difference between the match in the Trained Image and the original gradient from the Input Image. This difference is recorded as a pixel value in the Difference image. After the tool examines the entire set of pixels, it creates a Difference Image of all the gradient differences. This Difference Image can then be used to perform blob or contrast analysis to find defects. Average Intensity See “Average Intensity” on page 3-92 Datalogic Automation Inc. 3-146 Impact Reference Guide Blob Blob See “Blob” on page 3-66 Bump Find In the Flaw Detection Drawer The Bump Find Tool analyzes a polygon list for bulges in the boundaries. Use the Polygon Smoothing tool (page 3-153) to smooth the polygon list before you use the Bump Find tool. The tool distinguishes between a bump or bulge defect and polygon corners or noise based on the input parameters. Smoothing reduces image noise to a low enough level so that edge variability due to noise may be reduced and defects stand out. However, too much smoothing renders defects undetectable. Cumulative turn angle and flatness length settings also help filter noise. Turn angle describes the amount of angle change (in opposite directions) that is needed between boundary edges to indicate the beginning and end of a defect point. The end of a defect is indicated by a stretch of flat boundary. The boundary is considered flat if an edge change does not exceed the minimum turn angle. Flat areas may exist within a defect, but when the length of that flat area is longer than the flatness value, the defect is considered terminated. The flatness length value should be small enough to terminate defects on any clean edge, but large enough that defects do not terminate prematurely. Note that corners near defects are often considered as part of the defect (since the flatness length is not exceeded in this case) but this should not cause a problem. Minimum area is the smallest area within a string of defect points that indicates a defect. If the area range value is not exceeded before the end of a defect, those points are not reported as defects. The Defect Point Count list indicates how many points are in each defect. This means individual defects can be separated. For example, if the Defect Point Count list contains 3, 4, 5, the first three defect points corre- 3-147 Datalogic Automation Inc. Bump Find Impact Reference Guide spond to the first defect, defect points 4, 5, 6, and 7 (the next four) correspond to the second defect, and the final five points are the third defect. Smoothed Polygon Edge Defect Points Found Sample image showing bump convex defects found Positive Area Positive Deviation Negative Area Negative Deviation Defect Point Count = 7 Sample image showing bump concave defect found Input Name What it is Input Image Linked Image Tool Origin The tool’s origin relative to the entire image space Polygon List A list of objects to inspect for defect bulges Window Width Cumulative turn angles are accumulated over this total length of the curve. Defect points are marked at the middle vertex of the curve. Flatness Length The minimum boundary length that declares the end of a defect. If the flatness length is exceeded between defect points, the defect is considered terminated between them. Cumulative Turn Angle in Degrees The minimum angle turn needed to signal a defect point. This is called 'cumulative' because it is accumulated over several vertices. Defect points are reported only if there is more than one with opposite turn directions with no flatness termination between them. This criterion makes the tool able to distinguish between corners and defect bumps. Bump Type Find Both: The tool finds both concave and convex bumps Find Convex: The tool finds only bumps that protrude outward from the boundary. Find Concave: The tool finds only bumps that are indented into the boundary. Use Point Count Filter If True, only defects that exceed the Minimum Point Count value is included in the Defect List Datalogic Automation Inc. 3-148 Impact Reference Guide Color Blob Input Name What it is Minimum Point Count This is the minimum number of points a defect must contain to be included in the Defect List Use Area Filter If True, only defects with areas that lie within the Area Range is included in the Defect List Area Range A defect’s area must lie within this range to be included in the Defect List. This is the area included between the first and last defect point in a defect. Area values within a defect are negative for concave sections and positive for convex sections. The parameters are start and end. The parameters are start and end. Use Deviation Filter If True, only defects with a deviation value that lies within the Deviation Range is included in the Defect List. Deviation Range The deviation is the maximum distance from a line connecting the first and last defect point in the defect to the defect section’s highest or lowest point. Deviation values are negative for concave sections and positive for convex sections. The parameters are start and end. Output Name What it is Defect List The list of defect points. Defect Point Counts A list of the number of points in each defect in the Defect List Defect Areas A list of the areas of each defect in the Defect List Defect Deviations A list of the deviation values of each defect in the Defect List Color Blob See “Color Blob” on page 3-97 Contrast See “Contrast” on page 3-101 Contrast - Multiple ROI See “Contrast - Multiple ROI” on page 3-103 Extreme Difference In the Flaw Detection Drawer The Extreme Difference tool detects defects indicated by a bright or dark region relative to the background. Similar to the Spot Find Tool, this tool searches the ROI for bright or dark spots. However, since this tool is used for detection instead of location, it uses a relative intensity difference rather than an absolute intensity 3-149 Datalogic Automation Inc. Extreme Difference Impact Reference Guide value. Also, since location is unimportant, non-maximal suppression is not used. Defect points tend to cluster and larger clusters indicate larger defects. The Extreme Difference tool uses concentric square regions to compare regional extremum (minimums and maximums). For example, if the tool is searching for dark regions, the minimum grey levels for the interior square and the exterior ring are calculated. These two values are compared and marked as a defect if the exterior minimum value minus the interior minimum value exceeds the difference threshold. Extremum values are used, rather than average or median values, so that the tool is insensitive to edges. The interior region must be large enough to contain any defect that is to be detected. This means that the defect must be completely contained within the inner radius. If the defect is larger than the inner radius, the defect will not be found. This is because, when the defect extends into the outer ring it raises or lowers the outer ring’s minimum value, affecting the difference calculation. Also, the tool works more effectively when the defect sizes are consistent. For example, in this picture the red dots correspond to pixel values used in the interior region and the green dots to the exterior region. The Inner Radius is three and the Outer Ring Width is two. Interior (red dot) square Inner Radius = 3 Exterior (green dot) ring Outer Ring Width = 2 Input Name What it is Input Image Linked Image Tool Origin The tool’s origin relative to the entire image space Find Shape List This is the tool’s search area. Shape List ROI Type Each Shape is separate ROI: Each shape is processed as a separate ROI and the results are combined. This mode is faster than the other mode if the shapes are far apart, but results are duplicated if the shapes overlap. ShapeList is One ROI: The ShapeList is one large rectangular ROI and the shapes are the enabled pixels within the rectangle. The tool may be slow if the shapes are far apart. This setting allows shapes to overlap and form complex shapes without repeating the overlapped pixels and duplicating results. Inner Radius The inner square’s radius. The inner square edge size is (2 times the radius) - 1. For example, if the radius is 3, the inner square edge size is 5. The defect must be completely contained in the inner radius in order to be detected. It can not extend into the outer ring. Outer Ring Width The width, in pixels, of the outer ring.The outer square edge size is twice the outer ring width plus the inner square edge size. Difference Threshold The minimum allowed difference between the inner and outer extreme grey levels (in percent). For dark objects, the difference is the outer minimum minus the inner minimum. For bright objects, it is the inner maximum minus the outer maximum. Datalogic Automation Inc. 3-150 Impact Reference Guide Greyscale Template Input Name What it is Defect Type Find Bright Defects - finds bright areas Find Dark Defects - finds dark areas Find Both Defects - finds both dark and bright areas Output Name What it is Defect List The list of points found Greyscale Template In the Flaw Detection Drawer The Greyscale Template tool creates a template of an image when the tool is trained and that template is compared to the input image. A "difference blob" is created of the differences between the template and the inspected image. The difference image can be linked to other tools. A greyscale template model consists of two parts; a greyscale image that is subtracted from the test image to find areas of difference, and a binary mask image that indicates which pixels in the rectangular model area should be used and which should be ignored. The mask image is needed because edges in the greyscale image generate large differences from the test image with even a slight misalignment. The mask image indicates <don’t care> near image edges. The size of the <don’t care> areas around edges is twice the standoff distance. 3-151 Input Name What it is Input Image Linked Image Tool Origin The tool’s origin relative to the entire image space Shape List The desired region of the image to search. Greyscale Template Model The model to find, linked from another tool Greyscale Difference Type Adaptive or Fixed (see “Greyscale Difference Type” on page 3-153) Match Sensitivity Indicates amount of noise in the image. Higher settings allow rougher edges and cause more thorough and longer searching Train Mode The template training mode (see “Train Mode” on page 3-152) Train Noise Level The amount of background noise present in the image. A larger value erodes the template edges more to eliminate more noise. If the noise level is very high, use the Standoff Distance input to increase the edge erosion. Train Edge Detection Sensitivity The sensitivity level determines the transition level necessary for detection. A higher value detects more weaker edges but causes the tool to run slower. Train Fixed Edge Value The sensitivity value for Fixed Train Edge Detection Sensitivity type Datalogic Automation Inc. Greyscale Template Impact Reference Guide Input Name What it is Train Grey Level Threshold Type The threshold type when thresholding Train Mode is selected Train Fixed Threshold Range The threshold range when Fixed Threshold Range is selected for Train Grey Level Threshold type. The parameters are start and end. Standoff Distance The distance to erode the template from the edges. Increase this value if the Train Noise Level setting is not sufficient to accommodate the image noise level. Min Feature Size Protected From Standoff The minimum size of features (in units) that should not be subject to Standoff Distance erosion. An Infinity setting means no features are protected. Perform Blob Analysis If True, the difference blobs are filtered based on the two following conditions. Maximum Allowable Blob Size The maximum size of an individual difference blob Maximum Allowable Total Blob Size The maximum total size of all the difference blobs Output Name What it is Difference Image The difference between the model and the input image (click the Difference Image tab to view) Blob Sizes In Tolerance If True, no difference blobs exceeded the maximum allowable sizes (Perform Blob Analysis must be selected) Maximum Blob Size Found The size of the largest difference blob found (Perform Blob Analysis must be selected) Total Blob Size Found Total size of all difference blobs found (Perform Blob Analysis must be selected) Defect Blob List A list of all difference blobs found that failed blob analysis (Perform Blob Analysis must be selected) Non-Defect Blob List A list of all difference blobs found that passed Blob Analysis (Perform Blob Analysis must be selected) Train Mode 1. Train New Template With Edge Detection This mode discards previous training and creates a new model on this image. The model greyscale image is a copy of the training region. The model mask image is created by detecting non-edge pixels and then eroding them by the standoff distance. IMPORTANT: Templates made with edge detection have pixels of all intensities and only exclude pixels near edges. For example, a model of text includes the black pixels inside the characters and the white pixels in the background and excludes pixels near the edges of the characters. 2. Add and Train Template With Edge Detection This mode updates an existing model by adding information from the current image. The model's Datalogic Automation Inc. 3-152 Impact Reference Guide Polygon Smoothing greyscale image is updated by averaging the current image with the existing model. The model tracks the number of images that have been added and weights the current image accordingly. For example, if the current image is the fourth one to be added to the model, the new model pixels are calculated by giving the current image one-fourth weight and the current model three-fourths weight. The mask image is updated by ANDing the non-edge pixels of the current image with the existing model mask. As a result, the model mask includes a pixel only if it was included in ALL of the images that were added. The overall result of adding images to the model is to make the model more generous by incorporating more "do not care" regions, thus accounting for more variations in the inspected part. 3. Train New Template With Thresholding This mode discards all previous training and creates a new model on this image. The model greyscale image is a copy of the training region. The model mask image is created by thresholding the image and then eroding it by the standoff distance. IMPORTANT: Templates made with thresholding only include pixels within the threshold range. For example, a model of text would include only the black pixels inside the characters OR only the white pixels in the background, not both. 4. Add and Train Template With Thresholding This mode is the same as Add and Train Template With Edge Detection, except that the model mask is created using thresholding. Greyscale Difference Type Adaptive Difference: The tool finds the mean of the grey level differences between the template and the image. It then automatically adjusts the difference image to reflect this mean. This difference type allows the system to ignore small fluctuations in lighting, since the difference mean moves automatically. Fixed Difference: No adjustment is made to the difference image. See Chapter 3 for a description of the remaining VPM tools. Polygon Smoothing In the Flaw Detection Drawer The Polygon Smoothing tool is similar to the image preprocessing performed by the image filtering tools (e.g. the Average Filter and Gaussian Filter tools). This tool preprocesses polygon boundaries for boundary analysis methods. This tool takes a blob list, converts it to a polygon list, and smooths those polygons. Since a polygon that is derived from a blob contains only right angles, some form of smoothing is needed in order to perform a reasonable analysis of the boundary. Smoothing removes jagged edges caused by pixilation from image noise and blob thresholds. This tool performs convolutions of the polygon vertices with a Gaussian filter to smooth boundary polygons. When a higher smoothing level is selected, a larger filter is used in the convolutions. 3-153 Input Name What it is Input Image Linked Image Tool Origin The tool’s origin relative to the entire image space Blob List These blobs are smoothed Smoothing Level The amount of polygon smoothing (the number of convolutions applied to the filter before it is applied to the polygon). A higher value uses a larger filter for greater smoothing. Datalogic Automation Inc. Readers Drawer Impact Reference Guide Input Name What it is Input Polygon List A list of polygons to be smoothed Output Name What it is Smooth Polygon List The list of smoothed polygons NOTE: Polygon lists are not currently visible in VPM. To see the smoothed polygon list, use a Data Instance tool with a polygon list data type and link its input to the Polygon Smoothing tool’s smooth polygon list output. You can then promote the Data Instance tool’s shape list output to a task Output. Readers Drawer Barcode INOTE: This tool has been deprecated and replaced by the Code Reader tool (see page 3-167). It is documented here only for existing vision programs and is no longer supported. The Barcode tool reads seventeen different barcode types. It automatically determines and sets the type, or you can do it manually. Outputs include the scan lines, the Pass/Fail status of the tool and each scan line, the read string, the barcode type, and a list of bar edge points found. See “How the Barcode Tool Works” on page 3-156 for more details. A Setup is available for this tool. See “How the Barcode Tool Works” on page 3-156. Input Name What it is Input Image Linked Image Tool Origin The tool’s origin relative to the entire image space Line Segment The x and y coordinates of the endpoints of the primary scan line. Draw the line across all the bars in the barcode. It may be drawn in either direction. Edge Detection Method Gradient Edges or Grey Level Edges Gradient detection generally provides more consistent results. In some cases Gradient detection can pick up extra edges in a noisy image and Grey Level detection may offer better control. See “Edge Detection Method” on page 3-78. Edge Detection Sensitivity The sensitivity level determines the transition level necessary for detection. A higher setting detects more edges. Fixed Threshold uses the Adaptive Grey Level Threshold Offset property value. Fixed Gradient Threshold Percentage The gradient threshold value for Fixed Threshold Edge Detection Sensitivity (0 to 100 percent) Datalogic Automation Inc. 3-154 Impact Reference Guide 3-155 Readers Drawer Input Name What it is Fixed Grey Level Threshold Percentage The grey level threshold value for Fixed Threshold Edge Detection Sensitivity when Grey Level Edge detection is selected (0 to 100 percent) Adaptive Grey Level Threshold Offset If one of the adaptive settings is picked from Edge Detection Sensitivity, and Grey Level Edges is selected, then this offset is added to the adaptive threshold. This allows you to weight the adaptive threshold up or down. Noise Level The amount of background noise present in the image. Higher noise means the edges must be farther apart. Lower noise allows edges that are closer together. Barcode Type See “Barcode Types” on page 3-158. Expand UPC-A to EAN-13 If True, the tool automatically expands a 12 character UPC code to a 13 character EAN-13 code. This can be useful if the codes are a mix of UPC and EAN codes and you always want 13 characters to be output. Expand UPC-E to UPC-A If True, the tool automatically expands an 8 character UPC-E code to a 12 character UPC-A code. This can be useful if the codes are a mix and you always want 12 characters to be output. It is off by default. Number of Scan Lines The number of scan lines to use for the barcode. The lines are automatically spaced equally vertically across the code, perpendicular to the bars. Their length is determined by the length of the Line Segment ROI. Percent of Scan Lines That Must Pass If this percentage of scan lines read the code successfully, the tool passes. To verify that every part of the barcode is readable, set the number of scan lines high (maximum of ten is recommended) and the percentage that must pass high. To improve the probability of reading a barcode, set this number low so that if any part of it is readable the tool passes. Verify String If this property contains a string, the tool passes only if this string matches the Output String Verify Optional Check Character See “Verify Optional Check Character” on page 3-159. Output Name What it is Successful Read If True, the tool read the barcode. Output String The string that the tool read from the code. Barcode Type Found The type of barcode read. See “Barcode Types” on page 3-158. Scan Lines The scan lines used to read the code. Success Per Scan Line A list of each lines pass status. Datalogic Automation Inc. Readers Drawer Impact Reference Guide Output Name What it is Edge Point List A list of all the points found on the Line Segment ROI. Use this list to show points on a display panel and as feedback when configuring the Edge Detection properties. How the Barcode Tool Works By default, this tool has one line segment ROI that must be drawn across all the bars of the code. (The minimum bar width is two pixels.) When you train the tool, it automatically tries to determine and sets the barcode type (autodiscrimination). The tool fails (the Successful Read property is False) when: • The code type cannot be determined • The code cannot be read • The percentage of failing scan lines exceeds the "Percent of Scan Lines That Must Pass" property • The "Read String" property does not match the "Verify String" property • The "Verify Optional Check Character" operation fails Imaging Types For optimal performance, the narrowest bars and spaces should be at least 2 pixels wide. The white pixels should not be saturated (at 100% intensity) as this reduces accurate bar and space width measurement. Autodiscrimination Autodiscrimination means that the tool reads the barcode and tries to match it to one of the supported types. If one of the types match, the "Barcode Type Found" property is set to that type. To enable this feature, choose “Any Type” in the Barcode Type property. The feature is turned on by default. There are two barcode types that autodiscrimination will not find - Code 39 Full ASCII and Pharmacode. These types must be explicitly selected from the list in order to be read. Code 39 Full ASCII: The tool automatically reads this as a standard Code 39 and explicitly decodes the shift characters ($%/+) into the output string, so, if you see some of these characters in a Code 39 output, change the Barcode Type property to Code 39 Full ASCII. Pharmacode: This barcode type is not designed for autodiscrimination and has no distinguishing characteristics. If you are using this type, you must select it in the Barcode Type property. Autodiscrimination adds time to tool execution and increases the risk of a false positive read. When you know the barcode type, you should select that type from the Barcode Type property list or click the “Train Type” button in the Setup Pass/Fail panel once the barcode type has been determined. Multiple Scan Lines By default, the tool tries to read the code using the one line segment that you draw. You can inspect the barcode more thoroughly by entering a higher value for the "Number of Scan Lines" property. For example, if you set the value to ten, the tool places ten scan lines spaced equally vertically across the code, perpendicular to the bars. Those line segments are output in the "Scan Lines" property and their pass status is output in the "Success Per Scan Line" property. By default, all the scan lines (100 percent) must read the code successfully, but you can allow some scan lines to fail by entering a smaller value in the "Percent of Scan Lines That Must Pass" property. How to set up the Barcode tool 1. Snap a good image of the desired barcode, then click the Setup tab. Datalogic Automation Inc. 3-156 Impact Reference Guide Readers Drawer 2. Click the ROI radio button. Move and size the ROI so it crosses all the bars in the barcode. Note that the ROI can extend over background clutter. It can begin in the quiet zones on the left and right of the barcode, it can be angled across the barcode, and it does not have to be perpendicular to the bars. 3. The detected edges are displayed on the image. Important: Adjust the threshold and sensitivity options in the Line ROI selection area until all the barcode edges are marked in the image with blue points. Subpixel detection is used automatically. Gradient and Grey Level edge detection types are supported. In cases where Gradient edge detection picks up extra edges in a noisy image, Grey Level may offer better results. 4. Select the number of barcode scan lines in the Scan Lines ROI area. By default the tool uses one scan line, which is the fastest operation on easy applications. To increase the number, and the accuracy, enter the value in the "Number of Scan Lines" property. (A maximum of ten is recommended.) In the example below, the number of scan lines is set to ten and "Display Scan Lines" is checked. The tool automatically determines the height of the barcode, equally spaces the lines vertically, and rotates them so they are perpendicular to the barcode. All the scan lines pass through all the bars. The scan line length is equal to the original ROI length. Even if the barcode is rotated so that the ROI misses some of the bars, the tool still reads the code. If you use multiple scan lines, you also need to adjust the "Percent of Scan Lines That Must Pass" property on the Pass/Fail setup screen. 5. Click the Pass/Fail radio button. The "Find" selection is set to "Any Type" by default. This means the tool automatically tries to determine the barcode type and display it in the "Barcode Type Found" property. If the tool finds a supported type, you can press the "Train Type" button to set the "Find" property 3-157 Datalogic Automation Inc. Readers Drawer Impact Reference Guide to that type. Doing this makes the tool read faster and reduce the unlikely possibility that the tool accidently reads the barcode type incorrectly. To change the "Find" type, select a new type or select "Any Type" to automatically determine the type. 6. Verify String - If you want to verify that the barcode contains a specific string, type or link that string into the "Verify String" property. When the tool runs, it compares the "Output String" property to the "Verify String" property and the tool will fail if they do not match. 7. Scan Lines - If you are using multiple scan lines, enter a value in the "Percent That Must Pass" property. At least this percentage of scan lines must pass for the tool to pass. To test the barcode quality, you can set this to a high value. 8. Expand UPC-A to EAN-13 and Expand UPC-E to UPC-A - Select these to automatically expand a 12 character UPC code to a 13 character EAN-13 code or an 8 character UPC-E code to a 12 character UPC-A code. These settings can be useful if the codes are a mix and you always want the maximum number of characters to be output. 9. Verify Optional Check Character - See “Verify Optional Check Character” on page 3-159. 10. On the Pass/Fail image, passing scan lines are displayed in green, failing lines are displayed in red. The tool’s pass/fail status and the Read string (that was decoded from the barcode) are displayed below the image. Barcode Types Supported Types The Barcode tool will automatically detect the following seventeen types of linear barcodes, or you can manually set the type to find. If you set the barcode type, and that type is not found, the tool will fail. Linear barcodes are those arranged such that a straight line can be drawn through all the bars. UPC-A, UPC-E, EAN-8, EAN-13, JAN-8, JAN-13, Code 128, GS1-128 (UCC/EAN-128), Code 39, Code 39 Full ASCII, Code93, Interleaved 2 of 5, ITF, Codabar, GS1 Databar Omnidirectional (RSS), GS1 Databar Limited (RSS), GS1 Databar Expanded (RSS), Pharmacode (one-track) Datalogic Automation Inc. 3-158 Impact Reference Guide Character Contour Match In the tool’s "Barcode Type" list, the four UPC/EAN/JAN types are grouped into one called “UPC/EAN/ JAN”. The GS1-128 barcode is a subset of Code 128 and will decode as Code 128 in the tool’s "Barcode Type Found" property. The RSS barcode type was renamed to GS1 Databar in 2007. It is called GS1 Databar (RSS) in the list above. There are two barcodes generally named “2 of 5.” The more common type is called “Interleaved 2 of 5,” or sometimes abbreviated as ITF. The other code is named “Industrial 2 of 5,” or it is sometimes referred to as Code 25. The Barcode tool supports Interleaved 2 of 5 / ITF. Unsupported Types The tool cannot read stacked codes, composite codes, or codes where bar heights encode information. Composite codes are linear codes with an adjacent stacked code. The tool also will not support any of the following types. BC412, Code 128 Composite, GS1 Databar Composite, UCP/EAN Composite, PDF417, Pharmacode (two-track), PLANET code, POSTNET, GS1 Databar Stacked, Industrial 2 of 5, Code 11, Code 25, MSI Plessey, Intelligent Mail Barcode (OneCode) The tool does not support the full AIM specification for grading barcodes. The use of multiple scan lines and “Percent of Scan Lines That Must Pass” property provides a subset of the grading process. There are two barcodes generally named “2 of 5.” The more common type is called “Interleaved 2 of 5,” or sometimes abbreviated as ITF. The other code is named “Industrial 2 of 5,” or it is sometimes referred to as Code 25. The Barcode tool does not support Industrial 2 of 5 / Code 25. Verify Optional Check Character This property applies to barcode types Code 39, Code 39 Full ASCII, Interleaved 2 of 5, and Codabar. These types may include an optional check character at the end of the code. If this property is True, the tool compares the final barcode character to the rest of the output string. The tool fails if the verification operation fails. If the property is False, the verification is skipped and the final barcode character is output as a normal data character. The tool cannot automatically determine if the check character is present, so the default setting is False. You should only set the property to True if you know that the check character is present. The check character is always included in the "Output String" property whether or not this property is True. Character Contour Match In the Readers Drawer The Character Contour Match tool measures character defects by comparing the image character to a trained model. The tool only verifies characters, so the tool must be trained on a good character before it runs. To allow for single character verification, define a train and search ROI for each character. If a single train ROI is placed over several characters, all the characters within the ROI are combined and considered a single character when the tool trains. The Character Contour Match tool calculates the differences between the library characters and the verified characters using boundary length measurements which do not depend on the size of individual letters. This means it is not sensitive to size differences between letters, for example, between the letters ‘i’ and ‘m.’ Also, the Character Contour Match tool knows what the string should be, so it only compares each image character to trained models of that character. This tool “understands” symbols defined as multiple characters similar to the OCR tool. For example, if there is a symbol such as a ‘comma’ defined in the library and you are trying to verify the string “1,000” you 3-159 Datalogic Automation Inc. Character Contour Match Impact Reference Guide can enter 1”comma”000 as the verification string. Note that quotes are not used in the symbol library, but only in strings used for training or verification. A Setup is available for this tool, which will simplify basic configuration. Click the Setup tab to use it. (Also see “Set up the Character Contour Match tool” on page 3-161.) Input Name What it is Input Image The image being inspected Tool Origin The tool’s origin relative to the entire image space Train Character Rectangles The list of rectangles that contains the contour models for training each individual character of the Train String Search Character Rectangles The list of rectangles used to search for characters during verification. Each rectangle corresponds to a character position and should be large enough to account for location error Train String The string of characters that defines the characters in the Train Character Rectangles Verification String The string of characters to be verified. The characters in the image are compared to model characters in this order. Match Sensitivity Indicates how well the edges of the model and image characters must match for success. Higher settings allow rougher edges and causes more thorough and longer searching. Edge Sensitivity Indicates sensitivity to edge strength in the image during tool training. Higher settings detect more weaker edges but causes the tool to run slower. Fixed Edge Threshold The grey level threshold value used when Fixed Threshold is selected for Edge Sensitivity. Angle Range The maximum angle, in degrees, that the tool will search in the image for a match of the trained model. The parameters are minus, nominal, plus, include end, and include start. Max Defect Size List A list of the maximum defect size allowed for each character. Each defect size corresponds to a character in the verification string. If there are values in this list, it is used instead of the single Max Defect Size. If the list is too long, the extra values are ignored. If the list is too short, the last value in the list is used to evaluate the remaining characters. Max Defect Size The maximum defect size allowed for a single character. The defect size is the total boundary difference between the character to be verified and the trained model. Min Match Score List Each each score in this list corresponds to a character in the verification string. If there are values in this list, the list is used instead of the single Min Match Score. If the list is too long, the extra scores are ignored. If the list is too short, the last score in the list is used to evaluate the remaining characters. Min Match Score The closeness of the match is assigned a score from 0 to 100. If the match score exceeds this Min Match Score value, and all defect sizes are less than or equal to the maximum defect size, the tool passes. Datalogic Automation Inc. 3-160 Impact Reference Guide Character Contour Match Input Name What it is Train Mode Determines what happens to trained characters in the Verification Library Add New: Appends trained characters to the Verification Library if they are not already recognized to be there Add New and Replace: Performs the Add New and removes characters from the existing Library which model the same letter but are not recognized as such in the trained image Delete Library and Add: Removes all characters from the current Verification Library and trains the new string as the Library Enable Found Models If True, the matching polygonal models are displayed in the image window. The model display speed is faster when this is False. Verification Library The set of bitmaps and contours that define the characters that have been trained Output Name What it is Success If True, all the characters in the Verification String were verified with Defect Sizes less than the Max Defect Size Defect Sizes A list of the total size difference between each character that was verified and its best matched trained model. For example, if "TEST" is the verification string, then the match error for the second letter is the difference between the second letter in the string and the best matched “E” in the Verification Library. Character Bounds List This list of rectangles was replaced by a list of rectangles which give the character bounds. This "Character Bounds List" allows the user to easily determine the width and height of verified characters.A list of the positions of rectangles around verified characters within the Train Character Rectangles. Trained boxes where they are found on the verification image. Character Success A list indicating the verification success for each character in the Verification List Found Models A list of the character model shapes found during verification. Trained Models A list of the character model shapes found during training. This list is emptied when the tool runs. Set up the Character Contour Match tool Initial Tool Setup 1. Move and size the Train Character Rectangles so they fits closely around all the characters you want to inspect. Only the characters to be verified should be inside the ROI, try to avoid including parts of the background. 2. Move and size the Search Character Rectangles around the areas you want to search for the Train Characters. 3. Select the remaining input parameters, based on the input characters’ characteristics. Select Add New Train Mode. 3-161 Datalogic Automation Inc. Character Contour Match Impact Reference Guide 4. Type the characters you are trying to find into the Train String value. 5. Click the Train button. 6. Enter the characters you want to verify into the Verification String value. 7. Click the Run button. Character Contour Match Train Modes These train modes update the Verification Library with characters found in the input string, based on the mode selected. • Add Appends trained characters to the Verification Library if they are not already recognized to be there • Add and Replace Performs the Add and removes characters from the existing Library which model the same letter but are not recognized as such in the trained image • Delete All and Add Removes all characters from the current Verification Library and trains the new string as the Library Reading Characters When you click Run, the tool will read the characters within the ROI. If any character can not be read or does not match the verification string (if there is one), then the "Success" output is False. You can adjust the input parameters if you get too many mismatches or unreadable characters. You can also add unreadable characters to the Verification Library, if desired. Verification Use the "Verification String" input value to verify that the output string is the expected string. If any character does not match the Verification String, then the "Success" output is False. The "Verification String" can also be used as a training string. If, during verification, a part fails, you can stop and train on that image and the tool will use the verification string. Verification Library Tab The Verification Library tab displays all the characters that the Character Contour Match tool has been trained to recognize. Select a character to type a new name for a character, click the Delete Model icon to delete a character, or click the Delete All Models icon to delete all the characters. Data Matrix NOTE: This tool has been deprecated and replaced by the Code Reader tool (see page 3-167). It is documented here only for existing vision programs and is no longer supported. The Data Matrix tool reads ECC 200 Data Matrix symbols. It can read all six AIM specified encoding schemes and all thirty data matrix sizes, including rectangles. All special control characters, including fnc1, upper shift, macros, and structured append, are supported. It detects orientation, reflection, and symbol contrast automatically. The ECC 000-140 Data Matrix codes and symbol quality grading are not supported. Orientation refers to the rotation of the bounding rectangle with reference to the symbol. For example, whether the finder pattern (outer ring of dots) is presented with the 'L' in the lower-left hand corner (as shown in the example image below) or rotated clockwise 90 degrees, the symbol can be still be decoded. Datalogic Automation Inc. 3-162 Impact Reference Guide Character Contour Match If symbols are printed on transparent parts, or imaged on the opposite side of the printing, there can be a reflection. The contrast difference of symbols printed dark on light or light on dark will not affect the decoding. The tool provides the string decoded from the symbol and a list of points indicating the found modules, as outputs. For more details, see “How the Data Matrix tool works” on page 3-165. A Setup is available for this tool. See “How to set up the Data Matrix tool” on page 3-164 for more details. Input Name What it is Input Image The image to be inspected Tool Origin The tool’s origin relative to the entire image space. Find Shape List The area of the image to search Shape List ROI Type Each Shape is separate ROI: Each shape is processed as a separate ROI and the results are combined. This mode is faster than the other mode if the shapes are far apart, but results are duplicated if the shapes overlap. ShapeList is One ROI: The ShapeList is one large rectangular ROI and the shapes are the enabled pixels within the rectangle. The tool may be slow if the shapes are far apart. This setting allows shapes to overlap and form complex shapes without repeating the overlapped pixels and duplicating results. 3-163 Module Size In Pixels If you enter a number in this property, then the tool uses it to find the symbol more quickly and reliably. If you leave the default value of 4 pixels, the tool automatically looks for symbols with modules of various sizes, 4, 8, 12, … If you enter a different module size, then the tool only looks for codes with modules of that size. The minimum recommended module size is 3 pixels. Enable Boundary and Module Outputs If True, the Found Modules and Symbol Boundary outputs are active. This property is mainly intended for troubleshooting during tool setup. See “How the Data Matrix tool works” on page 3-165. Decode Nonprintable Characters As Hex When True, the exact value of all non-Ascii output bytes is displayed in the Symbol String output. Useful for debugging symbols during tool setup that include non-Ascii characters. Should normally be set to False. Verify String If this string matches the decoded data matrix string, the Successful Read output is set to True. If the string is empty, no verification is performed. Verify Wildcard Char If this wildcard character is present in the Verify String, it is used as a placeholder for one letter or symbol. Threshold Method Adaptive Threshold: see “Blob Threshold Method” on page 3-109 Fixed Threshold: The threshold is fixed at the Fixed Threshold property value Fixed Threshold When Threshold Method is Fixed Threshold, this is the grey level threshold value the tool will use when it runs. Datalogic Automation Inc. Character Contour Match Impact Reference Guide Output Name What it is Symbol String The decoded data matrix symbol. Successful Read If True, the data matrix has been read and decoded successfully. If the Verify String is present, this also indicates that the matrix and verify string match. Found Modules A point list which displays the modules (dots) of the symbol read Symbol Boundary A quadrilateral which shows the boundary of the found symbol Symbol Height Number of modules along the shorter dimension Symbol Width Number of modules along the longer dimension Structured Append Position The symbol’s position in the structured append (see “How the Data Matrix tool works” on page 3-165) Structured Append Length The length of the structured append – the number of symbols to append (see “How the Data Matrix tool works” on page 3-165) Structured Append File ID The file id is used to distinguish symbols from different structured append files (see “How the Data Matrix tool works” on page 3-165) Byte Errors A list of errors indicating symbol or location quality. See “Byte Errors” on page 3-166. Sampling Resolution Used If this property value is 1, the tool’s first full resolution scan read successfully. If the value is 2, the second, half resolution scan, read successfully. Threshold Used The threshold value used when the tool ran How to set up the Data Matrix tool 1. Snap a good image of the desired Data Matrix symbol, then click the Setup tab. 2. Click the ROI & Pass/Fail radio button. Move and size the ROI so it surrounds the data matrix symbol. The ROI should include the entire symbol, but not extend too far beyond the symbol, as shown here. The symbol should have a quiet zone around it equal in width to the module size. ROI Found Module Points Symbol Boundary 3. The Found Module Points and Symbol Boundary are displayed on the image. The decoded Symbol Type and size are displayed in the Symbol Type area. The grey level threshold is adjusted automati- Datalogic Automation Inc. 3-164 Impact Reference Guide Character Contour Match cally. If necessary, you can click the check box and adjust the threshold option until all the module points are marked as Found in the image. 4. When the Automatic Module Size check box is checked, the tool automatically looks for symbols with modules of various sizes, 4, 8, 12, etc. If you enter a different module size, then the tool only looks for codes with modules of that size. The minimum recommended module size is 3 pixels. 5. If you enter a string in the Verify String field, that string is compared to the decoded string. If the strings do not match, the tool will fail. How the Data Matrix tool works This tool has the following features: Locating - Automatically locates the matrix; Distortions - Handles perspective distortion and sheared matrices; Automatic size detection - Detects matrix sizes automatically; Automatic Contrast detection - Detects whether the symbol is dark on light or vice versa; No training required - Since the matrix size and contrast are determined when the tool is run, the tool requires no training. If you enter a number in Module Size In Pixels property, then the tool uses it to find the symbol more quickly and reliably. If you leave the default value of 4 pixels, the tool automatically looks for symbols with modules of various sizes, 4, 8, 12, … If you enter a different module size, then the tool only looks for codes with modules of that size. The minimum recommended module size is 3 pixels. The "Enable Boundary and Module Outputs" property is False by default to allow for faster reading. Change it to true to turn on the Found Modules and Symbol Boundary outputs. Found Modules indicates where the image was sampled and which modules were determined to be inked; from this information you can determine whether the reader had a problem with detecting contrast (fixable via morphology) or whether the symbol has variable module sizes (not currently readable). The "Symbol Boundary" gives you feedback about where the edges of the symbol were found. If the symbol boundary doesn't appear along the edges of the symbol, the problem can probably be fixed using the Image Sampling Tool or the Pixel Fill Tool. 3-165 Datalogic Automation Inc. Character Contour Match Impact Reference Guide Another issue may include matrix inking. For this problem you can use morphology filters. For a dark on light matrix, use open morphology for light inking and close morphology for heavy inking. After using these tools, most matrices should be more readable. Structured Append The Structured Append outputs apply to symbols that are part of a structured append. A structured append is a data file that consists of multiple Data Matrix symbols that are decoded and then appended together. Each symbol includes its position in the structured append (Structured Append Position), the length of the structured append (Structured Append Length – the number of symbols to append), and a file id (Structured Append File ID) to distinguish symbols from different structured append files. Since the Data Matrix tool can only find and decode one symbol in the image or region of interest, the tool puts the structured append data in these outputs and allows you to combine the data elsewhere, for example in a BASIC tool. GS1 Encoding GS1 is a standard for packing data into a character string. It is independent of the Data Matrix standard. Some Data Matrix codes may be GS1 and GS1 can be used in 1d or 2d codes. The Data Matrix tool’s Symbol String output will contain special characters that mark it as GS1 and delimit some fields in the data string. These special characters must be parsed by other tools or software, not the Data Matrix tool, and they will not appear in the human readable text next to the symbol. The format for other human readable text in the symbol, or whether it is shown at all, is not covered in the GS1 standard. Here is an example of a GS1 encoded symbol. The Symbol String output from the Data Matrix tool in this example is ]d201093380940012611711080910C3477 The leading characters ’]d2’ are encoded in the symbol and indicate that this is a GS1 standard code, but they do not appear in the printed human readable text. They appear at the start of the output string for use by other software. The next two characters ’01’ are a GS1 Application Identifier (AI) for a GTIN (Global Trade Item Number). The next fourteen characters (09338094001261) are the GTIN. The printed human readable text shows the characters in parentheses (01) to indicate that the line is a GTIN. The next two characters after the GTIN are ’17.’ This is the AI for Expiration Date. This indicates that the next six numbers (110809) are a date in the format ’YYMMDD.’ In the printed human readable text, this appears in the 2nd row as 09/08/11. Note that the AI in this case (17) does not appear in the human readable text. The next two characters after the date are ’10.’ This is the AI for Batch or Lot Number. It indicates that the following characters, up to the end of the string or to the field termination character <GS> (ASCII 29), are a variable length Batch or Lot Number. The number in the example (C3477) is shown in the 3rd row of the printed text. Byte Errors Datalogic Automation Inc. 3-166 Impact Reference Guide Code Reader The number of byte errors indicates symbol or location quality. Each byte corresponds to eight modules or cell locations, so up to eight module errors can fit into a single byte error. The number of correctable errors is based on the size of the matrix. For example, in a 14 x 14 matrix, five byte errors are correctable. The data portion is 144 modules (12h x 12w = 144). These 144 data modules are divided into 18 bytes (144 modules / 8 bytes per module = 18 bytes). These 18 bytes consist of 8 bytes of data and 10 bytes of redundancy. Errors are correctable up to half the number of bytes of redundancy, or 5 bytes in this example. Code Reader In the Readers Drawer (Available on the Impact M-Series, T4x-Series, and A30) The Code Reader tool reads 1D, 2D, Postal, Pharmacode, and MSI/2of5 symbols and provides thirty-six different outputs from the decoded symbols. A Setup is available for this tool, see “Code Reader” on page 3167. Also see “How the Code Reader Tool Works” on page 6-34. The following table defines the Code Reader tool’s inputs and outputs. 3-167 Input Name What it is Input Image The image to be inspected Tool Origin The tool’s origin relative to the entire image space Region of Interest This is both the train and search ROI. Position the ROI over the desired part of the image to train and/or search. You can train on one area of an image, then search a different area. Train Mode After training, the tool sets the input property of the code types it finds to True. The tool then looks for those code types when it runs. You can also define the code types manually by setting the desired code type’s input property to True. If the input property for a code is True, that code is considered defined. Add: When the tool is trained, any new code types trained are added to the list of trained codes (set to True). Any existing code types stay in the list, even if they are not trained in the image again. Replace: When the tool is trained, any new code types trained in the image are added to the list of trained codes (set to True) and any existing code types that are not trained are removed from the list (set to False). Train Type These are the types of codes the tool will try to find during Training. Number of Codes to Train The minimum number of code configurations the tool uses during training. The tool stops training after it tries this number of configurations, though it may find more than this number of individual code instances. Use the smallest number that will train all the desired codes. Tool Timeout (msec) The maximum length of time (in milliseconds) that the tool runs before it aborts. Delimiter If multiple codes are read, this character is inserted between the decoded strings in the output labeled Output String. Code Type Enum This property has no affect on the tool. It is available so it can be linked to other tools or to a Control Panel. Datalogic Automation Inc. Code Reader Impact Reference Guide Input Name What it is Processing Mode When you Train the tool, the Processing Mode for the best results is automatically selected. Some input properties are only effective when Advanced mode is selected. These properties are labeled "Processing Mode Advanced" (PMA) in this table. See “Code Configuration Processing Modes” on page 6-35. Standard: Normally used for most applications. The magnification may be highly variable and the position and orientation of the symbol can be generally unpredictable. Advanced: Can be used to increase the decode rate on very small or difficult codes or when the symbol is presented at a fixed magnification and has known properties such as resolution, number of modules, orientation, minimum code height, etc. Image Mirroring If True, the tool assumes the external 90 Degree camera mirror accessory is being used. Identical Codes Decoding If True, identical codes (within the same image) are decoded when the tool runs. A code is considered identical if it has the exact same length, code type, and data string as one already decoded. If you set the 1D Advanced Box Improvement to False, you should also set this property to False to prevent the tool from reading the same code instance multiple times. Codabar If True, the tool looks for this code type when it runs. Code 39 If True, the tool looks for this code type when it runs. Code 39 Full ASCII If True, the tool looks for this code type and Code 39 when it runs. This property is not set by Training. It must be set manually. Code 32 If True, the tool looks for this code type when it runs. (This code type is also included if Code 39 or Code 39 Full ASCII is enabled.) Code 93 If True, the tool looks for this code type when it runs. Code 128 If True, the tool looks for this code type when it runs. GS1 128 If True, the tool looks for this code type when it runs. GS1 Databar If True, the tool looks for this code type when it runs. GS1 Databar Stacked If True, the tool looks for this code type when it runs. GS1 Databar Limited If True, the tool looks for this code type when it runs. GS1 Databar Expanded If True, the tool looks for this code type when it runs. GS1 Databar Expanded Stacked If True, the tool looks for this code type when it runs. Interleaved 2 or 5 If True, the tool looks for this code type when it runs. Standard 2 of 5 If True, the tool looks for this code type when it runs. Datalogic Automation Inc. 3-168 Impact Reference Guide Input Name What it is MSI If True, the tool looks for this code type when it runs. Matrix 2 of 5 If True, the tool looks for this code type when it runs. EAN/UPC If True, the tool looks for this code type when it runs. EAN/UPC Add On 2/5 If True, the tool looks for the 2 and 5 supplemental digits added to the right of the EAN/UPC code when it runs. Pharmacode (onetrack) If True, the tool looks for this code type when it runs. PDF417 If True, the tool looks for this code type when it runs. MicroPDF If True, the tool looks for this code type when it runs. Composite Codes If True, the tool looks for this code type when it runs. See “Composite Codes” on page 3-180 Datamatrix ECC 200, GS1 Datamatrix ECC 200 If True, the tool looks for this code type when it runs. QR Codes If True, the tool looks for this code type when it runs. Micro QR If True, the tool looks for this code type when it runs. Aztec If True, the tool looks for this code type when it runs. Maxicode If True, the tool looks for this code type when it runs. Postal Codes If True, the tool looks for Postal codes when it runs. Postal Customer Field Decoding Select the type of Australia Post Customer Field Decoding from the list of recognized standards. This input is not set during Training; it must be selected on the Properties tab. Postal Minimum Bar Count (PMA) If the Postal Code contains this number of bars or fewer, the tool fails. Postal Maximum Bar Count (PMA) If the Postal Code contains more than this number of bars, the tool fails. Postal Bar Edge Spacing (PMA) Postal Code Orientation (PMA) 3-169 Code Reader The sum of the Bar Width + Space Width in pixels. The code’s orientation. Any: the code can be in any orientation (this setting takes longer to run) Horizontal & Vertical: the code is aligned to either the x or y axis (+/20°) Horizontal Only: the code is aligned to the x axis (+/- 20°) Vertical Only: the code is aligned to the y axis (+/- 20°) Datalogic Automation Inc. Code Reader Impact Reference Guide Input Name What it is Code Quality Verification (PMA) To enable verification grading, this input must be set to True before Training. ISO/EIC and AIM DPM code quality grades are generated for each found code, where applicable. The grades appear on their respective outputs and on the Setup Grades panel. See “Code Quality Grades” on page 6-39. 1D Advanced Box Improvement If True, the tool increases the precision of the decoding ROI around a 1D code when it runs. If this property is False, the tool can run faster, but you should also set the Identical Codes Decoding property to False to prevent the tool from reading the same code instance multiple times. 1D Expand UPC E0-E1 Symbols If True, the UPC E0 and UPC E1 symbols are expanded in the result string according to the UPC specification 1D EAN/UPC Margin Size This is the clear margin to require around the code, expressed as a percentage of the narrow linear code module. 200(%) corresponds to an acceptable Margin Size value of 2 modules. 1D Code Orientation (PMA) The code’s orientation. Any: the code can be in any orientation (this setting is used during Training) Horizontal & Vertical: the code is aligned to either the x or y axis (+/20°) Horizontal Only: the code is aligned to the x axis (+/- 20°) Vertical Only: the code is aligned to the y axis (+/- 20°) 1D Low Code Contrast (PMA) If True, the tool provides better decoding for low contrast symbols. Low contrast may occur from printing or lighting problems, motion blur, oblique reader angles, etc. 1D Small Codes Improvement (PMA) If True, the tool improves the reading of physically small dimension linear codes. 1D Minimum Code Height (pixels) (PMA) If the 1D code is equal to or shorter in height than this number of pixels, the tool fails (includes PDF417). 1D Narrow Margins (PMA) Enables the decoding of codes with substandard length margins (quiet zone). Applies to Code128, Ean128, Code39, Interleaved 2 of 5, MSI, Standard 2 o f5, Matrix 2 of 5, Codabar, and Code 93. 1D Start/Stop Characters TX (PMA) If True, Start/Stop character transmission is enabled. Applies to Code128, EAN128, and Codabar. 1D Code 128 Characters TX (PMA) If True, Function character transmission is enabled. Applies to Code128 and EAN128. Datalogic Automation Inc. 3-170 Impact Reference Guide 3-171 Code Reader Input Name What it is 1D Check Digit Status (PMA) If True, the check digit control is enabled to improve decoding safety. The check digit is generally the last digit aligned to the right of the code which verifies the validity of the preceding digits. The calculation technique and number of check digits depends on the code type. The check digit should be used whenever the code contains one. Applies to Code39, Interleaved 2 of 5, MSI, Standard 2 of 5, Matrix 2 of 5, and Codabar 1D MSI Check Digit Status (PMA) The Check Digit algorithm used depends on the code type. MSI_ChksumDisable: Disable the algorithm MSI_ChksumSingleMod10: Use the SingleMod10 algorithm MSI_ChksumMod11Mod10: Use the Mod 10 + Mod 11algorithm MSI_ChksumTwoMod10: Use the Two Mod 10 algorithm The check digit is generally the last digit aligned to the right of the code which verifies the validity of the preceding digits. The check digit should be used whenever the code contains one. 1D Check Digit Transmission (PMA) If True, the Check Digit is included in the Output String property. Applies to Code39, MSI, Standard 2 of 5, Matrix 2 of 5, and Codabar. 1D I25 High Decoding Safety If True, the tool uses a strict control for decoding this code type. 1D I25 Minimum number of characters (PMA) If the code contains this number of characters or fewer, the tool fails. Applies to Interleaved 2 of 5. 1D Pharmacode Output format (PMA) The output format for decoded Pharmacodes. The default setting of Binary is not changed during Training. To use the Encoded property it must be manually selected on the Properties tab. Encoded: Output is standard numeric format Binary: Output is binary format - wide bars correspond to digit 1 and narrow bars correspond to digit 0 1D Pharmacode Decoded Min Value If the decoded Pharmacode’s value is equal to or less than this, the tool fails. Valid only when 1D Pharmacode Output format is set to Encoded. 1D Pharmacode Decoded Max Value If the decoded Pharmacode’s value is greater than this, the tool fails. Used only when 1D Pharmacode Output format is set to Encoded. 1D Pharmacode Colored Check bars If True, a Pharmacode’s colored bars are checked. 1D Pharmacode MinBarCount (PMA) If the Pharmacode contains this number of bars or fewer, the tool fails. 1D Pharmacode MaxBarCount (PMA) If the Pharmacode contains more than this number of bars, the tool fails. Datalogic Automation Inc. Code Reader Impact Reference Guide Input Name What it is 1D Pharmacode Code Orientation (PMA) The code’s expected orientation. Horizontal: the code is aligned to the x axis (+/- 45°) Vertical: the code is aligned to the y axis (+/- 45°) 1D Pharmacode Reverse Decoding (PMA) Indicates whether to read the code in the reverse direction. The default setting of False is not changed during Training. To use the Reverse property it must be manually selected on the Properties tab. True (Reverse): Code is read from right to left (Horizontal code) or from bottom to top (Vertical code) False: Code is read from left to right (Horizontal code) or from top to bottom (Vertical code) 2D Code Color The code’s foreground/background color combination. Training tries both colors, then sets this property appropriately. 2D Code Contrast The contrast threshold to be used during the decoding process. Low contrast values for very low contrast symbols may increase the decoding time. 2D DPM Decoding Method The decoding algorithm to use based on the symbol’s printing/marking technique and on the overall printing/marking quality. True: Use this setting to improve the decode rate for low quality Direct Part Mark codes and in general for Direct Part Mark codes with dot peening type module shapes. The tool is more aggressive but in general this setting requires longer decoding times. False: Use this setting for printed codes or for good quality Direct Part Mark codes. Applies only to Datamatrix code types. 2D Datamatrix, QR Module Size (pixels) (PMA) This is the typical resolution of codes to be read (in pixels). Choose the smallest usable value, but the minimum recommended value is 4. 2D Code Aligned (PMA) The code’s orientation. True: decodes the code if its finder pattern is aligned to the x and y axes (+/- 20°) False: decodes the code regardless of its orientation Applies only to Datamatrix code types. 2D Code Size (PMA) The number of code modules (rows x columns) to be read. When Processing Mode is set to Standard, and during Training, only the All and All Square values are read. With Processing Mode set to Advanced, all values are read. Pass Fail Wildcard When this character is used in the Pass Fail Match Code List, it replaces one or more characters to be matched in the decoded string. If you use just the Wildcard (or no characters) in the Pass Fail Match Code, all decoded strings are matched. See “Wildcard and Placeholder Characters” on page 3-179. Pass Fail Placeholder When this character is used in the Pass Fail Match Code List, it replaces one character to be matched in the decoded string.See “Wildcard and Placeholder Characters” on page 3-179. Datalogic Automation Inc. 3-172 Impact Reference Guide 3-173 Code Reader Input Name What it is Pass Fail Enable List See “Using the Pass Fail Filters” on page 3-179. Pass Fail Code Type List See “Using the Pass Fail Filters” on page 3-179. Pass Fail Match Code List See “Using the Pass Fail Filters” on page 3-179. Pass Fail Min String Length List See “Using the Pass Fail Filters” on page 3-179. Pass Fail Max String Length List See “Using the Pass Fail Filters” on page 3-179. Pass Fail Min Overall Grade See “Using the Pass Fail Filters” on page 3-179. Pass Fail Min Number of Codes List See “Using the Pass Fail Filters” on page 3-179. Pass Fail Max Number of Codes List See “Using the Pass Fail Filters” on page 3-179. Output Name What it is Passed If True, the tool found at least one of the codes it was configured to find. Also, if any Pass Fail Filters are defined, all the found codes passed all their filters. See “Using the Pass Fail Filters” on page 3-179. Output String The decoded concatenated strings of all the found codes that passed their filters. Codes are separated by the string defined in the Delimiter input property. Lowest Overall Grade The lowest of all the overall code grades. See “Code Quality Grades” on page 6-39 First Code ROI The ROI of the first found code that passed its filters. The ROI’s location is relative to the Tool Origin. Ideal for single code applications. First Code ROI Origin The Origin of the first found code that passed its filters.The Origin’s location is relative to the Tool Origin. Ideal for single code applications. First Code Type Found The Type of the first defined found code that passed its filters. Ideal for single code applications. First Code String Length The length of the first defined found code that passed its filters. Ideal for single code applications. First Code Modules Size (pixels) The size of the modules in the first found code that passed its filters. Ideal for single code applications. First 2D Code Size The size of the first found 2D code that passed its filters. Ideal for single code applications. Datalogic Automation Inc. Code Reader Impact Reference Guide Output Name What it is First Code Decoding Time (micro sec) The time required to decode the first found code that passed its filters. Ideal for single code applications. Code ROI List A list of the ROIs of each of the found codes that passed their filters. The ROIs’ locations are relative to the Tool Origin property. Code ROI Origin List A list of the Origins of each of the found codes that passed their filters. The Origins’ locations are relative to the Tool Origin property. Code Type Found List A list of the Code Types of each of the found codes that passed their filters. Output String List A list of the decoded strings from all of the codes that passed their filters. String Length List A list of the decoded string lengths of each of the defined codes that passed their filters. Modules Size (pixels) List A list of the Modules Sizes of each of the defined codes that passed their filters. 2D Code Size List A list of the Modules Sizes of each of the defined 2D codes found that passed their filters. Decoding Time (micro sec) List A list of the times required to decode each of the defined codes that passed their filters. Overall Grade ISO/IEC 15416: This is the average value of ten scan’s overall grades, each calculated as the lowest grade achieved for the calculated grading parameters. To calculate the average values, grade A=4, B=3, C=2, D=1 and F=0. AIM DPM: This is the lowest grade achieved for the calculated grading parameters: A (best value), B, C, D or F (worst value). ISO/IEC 15416 Decode Grade See “Code Quality Grades” on page 6-39. ISO/IEC 15416 Symbol Contrast Grade The difference between the highest and lowest reflectance values in a scan reflectance profile. See “Code Quality Grades” on page 6-39. ISO/IEC 15416 Minimum Reflectance Grade Rmin is the lowest reflectance value in the scan reflectance profile. Rmin shall not be higher than 0.5 x Rmax. This parameter is intended to ensure that Rmin shall not be too high, especially when the value of Rmax is high. See “Code Quality Grades” on page 6-39. ISO/IEC 15416 Minimum Edge Contrast Grade The difference between the Rs (Space Reflectance) and Rb (Bar Reflectance) of adjoining elements including quiet zones. The lowest value of edge contrast found in the scan reflectance profile is the minimum edge contrast, ECmin. See “Code Quality Grades” on page 6-39. ISO/IEC 15416 Modulation Grade The ratio of the minimum edge contrast to Symbol Contrast. It can be considered as the quality of the Analog signal related to the printing contrast. See “Code Quality Grades” on page 6-39. Datalogic Automation Inc. 3-174 Impact Reference Guide 3-175 Code Reader Output Name What it is ISO/IEC 15416 Defects Grade Defects are irregularities found within elements and quiet zones, and are measured in terms of element reflectance non-uniformity. Element reflectance non-uniformity within an individual element or quiet zone is the difference between the reflectance of the highest peak and the reflectance of the lowest valley. Defect measurement is expressed as the ratio of the maximum element Reflectance Non-Uniformity (ERNmax) to Symbol Contrast. See “Code Quality Grades” on page 6-39. ISO/IEC 15416 Decodability Grade The decodability of a barcode symbol is a measure of the accuracy of its production in relation to the appropriate reference decode algorithm. See “Code Quality Grades” on page 6-39. AIM DPM Decode Grade On a Pass/Fail basis, whether the symbol has all its features sufficiently correct to be readable. If the image cannot be decoded using the code type reference decode algorithm, then it receives the failing grade zero. Otherwise, it receives the grade four. See “Code Quality Grades” on page 6-39. AIM DPM Cell Contrast Grade Grades the difference between the means of brightest and darkest values of the symbol (instead of determining differences between the brightest and darkest values). See “Code Quality Grades” on page 6-39. AIM DPM Unused Error Correction Grade The extent to which regional or spot damage in the symbol has eroded the information redundancy margin that error correction provides. 100% Unused Error Correction Capacity is the ideal condition. See “Code Quality Grades” on page 6-39. AIM DPM Axial Non Uniformity Grade Grades the squareness of all modules in the direction of each of the symbol's major axes (X-axis and Y-axis) by applying the decode algorithm to the binarized image. See “Code Quality Grades” on page 6-39. AIM DPM Fixed Pattern Damage Grade Similar to Cell Modulation, but it grades the finder pattern and clock pattern, as well as the quiet zone around the code, instead of the data region. See “Code Quality Grades” on page 6-39. AIM DPM GRID Non Uniformity Grade Grades the largest vector deviation of the grid intersections, determined by the reference decode algorithm from the binarized image of a given symbol, from their "ideal" theoretical position. Assuming a grid on which the ideal angle of intersection is 90°, any angle deviation from 90° constitutes Grid Non-Uniformity. See “Code Quality Grades” on page 6-39. AIM DPM Cell Modulation Grade Analyzes the grid center points within the data region to determine the reflectance uniformity of light and dark elements after considering the amount of error correction available in the code. See “Code Quality Grades” on page 6-39. AIM DPM Min Reflectance Grade The image brightness is adjusted on a reference part, after which this calibrated value is compared with the reflectance of that part. Minimum Reflectance is the ratio of the parts reflectance to the calibrated reflectance. See “Code Quality Grades” on page 6-39. VL VERSION The VL Decoding library version for product support use. Datalogic Automation Inc. Code Reader Impact Reference Guide Output Name What it is Pass Fail Number of Found Codes List A list of the Actual number of codes found and passed based on the Pass Fail group of Input Property settings. See “Using the Pass Fail Filters” on page 3-179. Unicode Output String If the found code contains any text with ISO-8859-1 encoding, this string provides it in UTF-8 format. Unicode Output String List A list of found ISO-8859-1 encoded text in UTF-8 format. How to Set Up the Code Reader tool 1. Snap a good image of the desired code or codes you want to read, then click the Setup tab. 2. Click the ROI radio button. Position the ROI over the code or codes. Be sure that the ROI completely encloses the desired codes. See “Shape List ROI Toolbar” on page 3-18. Move and adjust ROI size If there are multiple codes, place the ROI around all of them. 3. Select the Train Mode. Add: When the tool is trained, any new code types trained are added to the list of trained codes. Any existing code types stay in the list, even if they are not trained in the image again. (Also see “Training Codes from Multiple Images” on page 3-178.) Replace: When the tool is trained, any new code types trained in the image are added to the list of trained codes and any existing code types that are not trained are removed from the list. 4. Select the Code Type. When the tool is trained, it enables codes of this type that it finds in the image. When the tool runs it looks for and inspects enabled codes. For more details about code types, see “How the Code Reader Tool Works” on page 6-34. 5. If you want the tool to generate code quality grades for each code found, select the Enable Verification Grading check box. The codes are displayed on the Grades panel in the Setup tab. See “Code Quality Grades” on page 6-39. 6. Enter the Minimum Number of Codes to Train. This is the minimum number of code configurations the tool uses during training. The tool stops training after it tries this number of configurations, though it may find more than this number of individual code instances. A configuration includes at least the following parameters: Minimum Number of Codes to Train, Type, whether Verification Grading is enabled, the Mode selected, and the Processing Mode selected. 7. Click the Train button. Depending on the configuration and the number of codes in the image, training may take several seconds. When it is complete, an ROI is drawn around each found code, and those codes are enabled in the Code Type window. To restart the Train process, click the Reset button and begin again with step 2. Reset will clear all the enabled codes and resets all the train configurations to the default selections. Datalogic Automation Inc. 3-176 Impact Reference Guide Code Reader NOTE: The tool will train on a maximum of thirty code symbols in one image. Additional symbols are ignored and a warning message is displayed below the image. A check indicates the Code Type is enabled. 8. Click the Pass/Fail Radio button. The tool’s Pass/Fail status and statistics about found codes are displayed. If there are multiple codes in the image, select an ROI to display that code’s statistics. 9. You can define filters to look for one or more code characteristics. If those characteristics match a found code, it is decoded and output. If all the filters pass, the tool passes. If any one of the filters fail, the tool fails. If no filters are defined or enabled, all the defined codes found in the image are output and the tool passes. If the tool has not been trained to find a code type, any filters defined for it will automatically fail and the tool will fail. Enable All: Enables all the filters. The tool will pass if all the conditions in all the filters are met. Disable All: Disables all the filters. The tool will always pass if a defined code type is in the image. Add and Edit: Click Add, or select a filter and click Edit. The Edit Filter dialog is displayed. For more details see “Using the Pass Fail Filters” on page 3-179. Delete: Select the filter you want to delete, then click Delete. 3-177 Datalogic Automation Inc. Code Reader Impact Reference Guide The following example shows two filters. The first one will pass only if the image contains two Datamatrix ECC200 codes (Min # = 2) that start with the string "728" (Match String = 728*). The second filter will pass if the image contains any UPC-A code (Match String = *). The first filter fails because the image contains only one Datamatrix ECC200 code (Act # = 1) that has a string that starts with "728." Because the first filter fails, the tool fails. The tool failed because one of the filters failed (the Datamatrix filter) In the image window, green ROIs show all found codes, including those that passed or failed a filter. The Datamatrix filter failed because the number of codes found (Act #) was less than the minimum wanted (Min #) 10. Click the Grades radio button to view code quality grades that were generated for each found code. (You must have selected the Enable Verification Grading check box in step 5.) Training Codes from Multiple Images If you want to find different code types, and they are not all in one image, you can train the tool using multiple images. 1. Snap a good image of the desired code or codes you want to train, then click the Setup tab. 2. Click the ROI radio button. Position the ROI over the code or codes. Be sure that the ROI completely encloses the desired codes. 3. Select the Train Mode Add. 4. Select the Code Type. Datalogic Automation Inc. 3-178 Impact Reference Guide Code Reader 5. If you want to generate quality grades for any of the codes you are reading, you must leave the Enable Verification Grading check box selected. 6. Enter the Minimum Number of Codes to Train. 7. Click the Train button. 8. For any additional code types you want to train, repeat steps 1 through 7. Using the Pass Fail Filters You can define one or more filters to test the characteristics of the defined codes found in the image. If a code’s characteristics match its enabled filter parameters, that code is read and output. If no filters are defined or enabled, all the defined codes found in the image are output. The tool’s pass/fail condition is based on whether the found codes in the image pass all the filter parameters defined for them. If ALL the enabled filters pass, or no filters are enabled, the codes are considered valid and the tool passes. If any code does not pass its enabled filter, the tool fails. The following list inputs are used to define the filters. Pass Fail Enable: If True, the corresponding filter is enabled. If no filters are defined or enabled, all codes pass. Pass Fail Code Type: If this code type is not present in the image, the filter fails. Pass Fail Match Code: If the decoded string does not match this string, the filter fails. (You can use Wildcard and Placeholder input properties.) Pass Fail Min String Length: If the decoded string contains this number of characters or fewer, the filter fails. Pass Fail Max String Length: If the decoded string contains more than this number of characters, the filter fails. Pass Fail Min Overall Grade: If the Overall Grade for the decoded string is equal to or less than this grade, the filter fails. The Code Quality Verification input property must be True. Pass Fail Min Number of Codes: If the image contains this number or fewer codes of the Pass Fail Code Type, the filter fails. Pass Fail Max Number of Codes: If the image contains more than this number of codes of the Pass Fail Code Type, the filter fails. Wildcard and Placeholder Characters The Pass Fail Wildcard and Pass Fail Placeholder can be used when you define a Pass Fail Match Code. The Wildcard matches one or more characters and the Placeholder matches a single character. In the example below, all codes starting with the characters "AFT" are considered a match, if • any single character occurs between the "T" and "R" characters (using the "?" Placeholder character) 3-179 Datalogic Automation Inc. OCR Impact Reference Guide • one or more characters follow the "R" character (using the "*" Wildcard character). If you include only the Wildcard in the Pass Fail Match Code, all decoded strings are matched. Composite Codes If the Composite Code input property is True, the tool decodes two different code types: • The first code is one of these 1D codes: GS1 128, Code 128, GS1 Databar, GS1 Databar Stacked, GS1 Databar Limited, GS1 Databar Expanded, or GS1 Databar Expanded Stacked. • The second code is a 1D MicroPDF code. If the Composite Code input property is False, only the linear code in the Composite code is decoded and its type is indicated. MicroPDF is a stacked code but is still considered linear When the two 1D codes are linked by the composite rule, the output "Code Type Found" is set according to the following table: Input: Composite Code Type Output: Code Type Found GS1 128 Code128 Composite Code 128 Code128 Composite GS1 Databar GS1 Databar Composite GS1 Databar Stacked GS1 Databar Stacked Composite GS1 Databar Limited GS1 Databar Limited Composite GS1 Databar Expanded GS1 Databar Expanded Composite GS1 Databar Expanded Stacked GS1 Databar Expanded Stacked Composite MicroPDF MicroPDF CCA Composite MicroPDF CCB Composite MicroPDF CCC Composite OCR In the Readers Drawer The OCR tool reads character strings to find matches with trained characters (Optical Character Recognition) and verifies those strings. Characters are read by finding the best matching character from a trained library or string, within a minimum match score. If the tool finds no matching character, it uses a substitution character to indicate it. Datalogic Automation Inc. 3-180 Impact Reference Guide OCR A Setup is available for this tool. See “How to set up the OCR tool” on page 3-183. 3-181 Input Name What it is Input Image Linked Image Tool Origin The tool’s origin relative to the entire image space Region of Interest The area of the image that contains the characters. May contain only one row of characters Threshold Type See “Threshold Types” on page 3-186. Fixed Threshold Value The grey level threshold value for fixed single threshold types (in percentage) Noise Level The amount of background noise present in the image. Higher noise means the character edges must be farther apart. Lower noise allows character edges that are closer together. Min/Max Character Width The minimum and maximum allowable width of each character. The parameters are start and end. Enable Variable Max Character Width If True, the Max value of the Min/Max Character Width property is allowed to vary to a lower value when it is used to split merged characters. Enable this setting if characters in the image are very close together, but mostly all the same width with some small variations due to the printing process. Enter the value of the maximum width of any character in the image into the Max Character Width value. The tool will sense characters narrower than that value and separate them accordingly. If False, the Max value is fixed to the Min/Max Character Width value entered. Min/Max Character Height Each character’s minimum and maximum height. Characters should be a minimum of twenty-eight units high for best results. The parameters are start and end. Minimum Spacing Between Characters The least amount of space that will appear between characters Maximum Vertical Spacing Within Characters If spots are further than this distance above or below a character, then they are not considered part of the character. By default this value is Infinity, meaning that all spots are combined vertically. If the value is reduced too much, then the characters will start to break up vertically. Maximum Percent Size Change The maximum percentage that the character size may change and still match the trained character Minimum Match Score Each input character is compared to a verify string character and assigned a match score. If the score exceeds this value, the character is added to the output string Substitution Character The character to substitute in the output string for unreadable characters Train String If this string is present, the tool will use it as the names for the characters it finds. Datalogic Automation Inc. OCR Impact Reference Guide Input Name What it is Verify String If this string is present, the tool compares this string to the input string. Successful Read is True if all characters, in order, in the input string match this string. Train Mode Add New: The Train String characters are added to the Font Library Add New and Replace: New Train String characters are added to the Font Library and existing characters is replaced Delete Library and Add: All characters in the Font Library is removed and the Train String characters are added Add All: Adds all characters in the current image into the library, regardless of whether they can be read or not. Like the “Train By Index” mode, this mode allows easy addition of marginally readable characters into the library. Add By Index: Forces one or more characters to be added to the library when Train Mode is set to Add By Index. You must also specify a value in Train Index or Train Index List. Train Index Selects which character to add to the library when the Train Mode is Add By Index. This value is used if the Train Index List value is not present. Train Index List Selects multiple characters to add to the library when the Train Mode is Add By Index. If the Train Index List is present, it is used. If it is not present, the Train Index value is used. (Zero is the first element in the list.) Font Library If you have an existing Font Library that you want to use, you can link it to here. Output Name What it is Output String The string of characters with at least the match score. Unreadable character are replaced with the substitution string. If there are missing or extra characters in the Output String, the tool will identify and skip over them, allowing the rest of the string to match. In these cases, the tool will fail overall because the Output String and verification string must match exactly, but the “Character Success List” will now indicate characters that are successfully read and verified to the right of the missing or extra characters. Character Boxes Datalogic Automation Inc. A list of individual characters that match the input string with a score equal to or greater than the match score 3-182 Impact Reference Guide OCR Output Name What it is Character Success List A list of each character’s match success or failure. If there are missing or extra characters in the Output String, the tool will identify and skip over them, allowing the rest of the string to match. In these cases, the tool will fail overall because the Output String and verification string must match exactly, but the “Character Success List” will now indicate characters that are successfully read and verified to the right of the missing or extra characters. Match Scores The match scores for each of the input characters Thresholds Used When Threshold Type is set to Block Adaptive mode, each character can have a different threshold, so this list contains the threshold value used for each character. In Adaptive Threshold mode this list will have the same value for each character. Successful Read True if all the characters in the input string are present in the font library. If the Verify String is present, the input string must match it. How to set up the OCR tool 1. Snap a good image of the desired characters then click the Setup tab. 2. Click the ROI radio button. Move and size the ROI so it fits closely around all the characters you want to inspect. Only the characters to be verified should be inside the ROI so try to avoid including parts of the background. Only one row of characters can be contained within the ROI. 3. Select an ROI Type, based on the character and background contrast. See “Threshold Types” on page 3-186. Generally, the default Adaptive Threshold choice is the most appropriate.If the image is noisy, adjust the Noise Sensitivity Slider. The default setting will work for most applications. Any time you change a value or move the ROI, the tool will run and should find characters. 4. You can adjust the Character Box settings to accommodate any special characteristics of the letters in your image and to exclude small background anomalies. For example, if the characters are different widths or heights, or the spacing is uneven. You should select Use Variable Character Width if the 3-183 Datalogic Automation Inc. OCR Impact Reference Guide character widths may change from image to image. See “Dealing with undesired results:” on page 3185. 5. If you want to link in a font library you have already created, click the Link button. 6. Click the Train radio button. In the Train - String field, enter the characters that you want to verify in the image. Select Add New from the Mode drop down. This will add the found character models to the Font Library. See “OCR Train Modes” on page 3-185 and “Font Library Tab” on page 3-186. To change the name of a model, click in the field below it. To delete one or more models, select a model and click the Font Library Delete button. 7. After you have finished finding and training all the characters you want, click the Pass/Fail radio button. This panel shows the results of the inspection. If you want to verify that the image contains the desired string, enter that string in the Verify String field. You can enter one or more question marks (?) as individual character substitutions. In this example, the string "LOT2AW7" is read in the image so the tool passed. 8. In this example, the Verify String was not read, so the tool failed. You can adjust the Minimum Match Score if you want a more or less close match for each character. In this example, the Actual Match Score of the selected character (4) is less than the Minimum Match Score so the character failed. The Datalogic Automation Inc. 3-184 Impact Reference Guide OCR Maximum Percent Size Change determines how much the read character’s size can change from the trained character’s size. OCR Train Modes These train modes update the Font Library with characters found in the input string, based on the mode selected. • Add New This mode adds any characters that are not recognized (new or different) in the input string to the Font Library. For example, if there is an "N" in the input string that is slightly different from an "N" in the Font Library, it is added to the Font Library with the same name. Totally new characters are also added. • Add New and Replace This mode adds any characters that are not recognized (new or different) in the input string to the Font Library and replaces any existing matching characters. • Delete Library and Add This mode deletes all the characters then adds any characters that are not recognized (new or different) in the input string to the Font Library. This mode is the same as the Add New mode, except it deletes the existing library before adding characters. • Add All This mode adds all the characters in the input string to the Font Library. The characters are added even if they already exist in the Font Library. • Add By Index This mode lets you add specific characters to the library, regardless of whether they can be read or not. You must also specify a value in Train Index or Train Index List. When you press the Train button, the specified characters are added to the library. If the Train Index List is present, it is used. If it is not present, the Train Index value is used. This mode is useful when you have characters that are marginally readable and you don’t want to search for a truly unreadable example to use for training. Note that the index starts with zero and spaces do not count as characters. Dealing with undesired results: • If the characters are broken into multiple bounding boxes, increase the "Minimum Spacing Between Characters" parameter. 3-185 Datalogic Automation Inc. OCR Impact Reference Guide • Characters must have at least a one pixel column of vertical separation between them. If they overlap vertically, then they can not be read. However, if the characters are on a fixed pitch, then the "Maximum Character Width" parameter can be used to force them to break apart. In some cases, filter preprocessing can also be used to separate characters. Characters should be a minimum of twenty-eight pixels high for best results. Reading Characters When you click Run, the tool will read the characters within the ROI. Any unread characters show up as the Substitution Character in the output string. If any character can not be read or does not match the verification string (if there is one), then the "Successful Read" output is False. You can adjust the input parameters if you get too many mismatches or unreadable characters. You can also add unreadable characters to the Font Library, if desired. As the tool verifies each output character against the verification string, it searches toward the right in the verification string until it finds a match. If it finds a match, then it reports the character as successfully read in the “Character Success List” output. This allows it to skip over missing characters in the image and still verify the remaining characters. If it reaches the end of the verification string without finding a match, then it treats the character as an extra character by reporting it as a failure in the “Character Success List” output and skips over it in the matching process so that the next character in the output string can still match the next character in the verification string. Verification Use the "Verify String" input value to verify that the output string is the expected string. If any character does not match the verification string, then the "Successful Read" output is False. The "Verify String" can also be used as a training string. If, during verification, a part fails, you can stop and train on that image and the tool will use the verification string. Font Library Tab The Font Library tab displays all the characters that the OCR tool has been trained to recognize. Select a character to type a new name for a character, click the Delete Character icon to delete a character, or click the Delete All Character icon to delete all the characters. Threshold Types Adaptive Threshold - Bright Characters This sets the upper and lower thresholds automatically based on all the grey levels in the ROI. The lower threshold is set to a value somewhere in the valley between the bright pixel and the dark pixel peaks. The exact value depends on the statistics of the two peaks. The upper threshold is set to 100%. Bright pixels are thus considered in-range. This setting is best used when looking for a bright part of an image with non-uniform grey levels. In this example, the lower threshold would be approximately 50% and the upper threshold 100%. Lower Threshold 0 Threshold Range Upper Threshold 100 Adaptive Threshold - Dark Characters Datalogic Automation Inc. 3-186 Impact Reference Guide Communication Drawer This sets the upper and lower thresholds automatically based on all the grey levels in the ROI. The lower threshold is set to 0%, and the upper threshold is set to a value somewhere in the valley between the bright pixel and the dark pixel peaks. The exact value depends on the statistics of the two peaks. Dark pixels are thus considered in-range. This setting is best used when looking for a bright part of an image with non-uniform grey levels. In this example, the lower threshold would be 0% and the upper threshold approximately 50%. Lower Threshold 0 Upper Threshold Threshold Range 100 Block Adaptive Threshold The tool breaks the ROI into 16 blocks from left to right and calculates a separate threshold in each block using the Adaptive Threshold method. Fixed Threshold - Dark or Light Characters This sets the upper and lower thresholds based on the Fixed Threshold Range input value. Pixels with grey level values between the thresholds are considered in-range. This setting is best used for an image with uniform grey levels. Communication Drawer Discrete Input In the Communication Drawer The Discrete Input tool reads the Impact device’s polled input lines. The input lines are read only when the tool executes. Event inputs are configured in the Events list in the main task section (see“VPM Task Configuration” on page 3-34). The state of the inputs (On or Off) can be interpreted as an integer value or as a Binary Coded Decimal (BCD) value. When Interpret as BCD is True, and the four inputs produce an illegal BCD value, the output values associated with the Inputs are still set, but Current State is not updated and BCD Output Valid is set to false. A Setup is available for this tool. See “How to set up the Discrete Input tool” on page 3-188 for more details. 3-187 Input Name What it is Interpret as BCD If True, the input values are read as Binary Coded Decimal (BCD) Output Name What it is Current State The binary value of all inputs (displayed as integer) Datalogic Automation Inc. Discrete Output Impact Reference Guide Output Name What it is BCD Output Valid If True, Interpret as BCD is True and the Input values produced a valid BCD value Input 1 to maximum The state of the respective input (The number of inputs is determined by the device type. Emulators have 16 inputs.) How to set up the Discrete Input tool 1. Click the Setup tab, then click the Setup & Test radio button. 2. BCD Selection: You only need to check this box if you want the inputs’ on and off values to be converted to a Binary Coded Decimal number. The converted value is displayed on the Properties tab Current State property as an integer value. 3. Current Input Values: When you click the Test Inputs button, the tool reads the device’s inputs and updates the status lights. If a light is on, it indicates that a voltage is present on the Impact device’s corresponding input. All Emulator inputs always indicate off. The number of inputs is determined by the device type. Refer to the device’s hardware guide for more details. Discrete Output In the Communication Drawer The Discrete Output tool turns the output lines of the M-Series processor, Impact device, or camera on and off. Output values and timings are determined by a combination of Mask and State values, as well as Dwell and Delay timing values. IMPORTANT: On multiple camera applications with the M-Series processor, no camera has exclusive control of an output. All cameras share control of all the outputs. There is a setup for this tool. See “How to set up the Discrete Output tool” on page 3-191. Input Name Data State Each bit of this integer value indicates the desired state of the corresponding output when the tool runs (see “Integer to Binary” on page 3-189) Mask Each bit of this integer value indicates which output is enabled (see “Integer to Binary” on page 3-189) Datalogic Automation Inc. 3-188 Impact Reference Guide Discrete Output Input Name Data Pulse Reset Method Indicates how each of the outputs should be reset after the tool runs. (Pulsed Output Timing only) Pulse Reset State Each bit of this integer value indicates the desired state of the corresponding output after the tool runs. This value has the same effect as the State input. Used when Pulse Reset Method is set to Use Pulse Reset State. (see “State” on page 3-190) Output Timing Method See Output Timing Method below for details Delay The number of milliseconds or event pulses to delay, based on the Output Timing Method (See “Delay and Dwell” on page 3-190.) Dwell The number of milliseconds or event pulses to hold the output (based on Output Timing Method) (See “Delay and Dwell” on page 3-190.) BCD If True, State sets the outputs after translating its value to Binary Coded Decimal (BCD). Integer to Binary NOTE: Each Impact device type has a different number of outputs. If you enter a value for State, Mask, or Pulse Reset State that exceeds the device’s number of outputs, a "Value Out of Range" error is displayed. Emulators have sixteen outputs. The Mask and State inputs are integer values, but the Output tool uses the equivalent binary value to set the device outputs. This table lists some converted values: Output Number 16 14 12 10 6 5 4 3 2 1 Binary Value 215 213 211 29 25 24 23 22 21 20 Integer Value 32,768 8192 2048 512 32 16 8 4 2 1 To select a single output, enter the corresponding integer value. To combine multiple outputs, enter the sum of the integer values for those outputs. For example, An integer value of 32 selects output number 6 An integer value of 17 (the sum of 16 and 1) selects outputs 5 and 1 An integer value of 36 (the sum of 32 and 4) selects outputs 6 and 3 An integer value of 65,535 (the sum of all the integer values) selects outputs 1 through 16 Mask An output is enabled when the corresponding bit in its Mask value is set to 1 and disabled when it is set to 0 (zero). If an output is disabled (i.e. its Mask bit is zero), the State value has no effect on that output. 3-189 Datalogic Automation Inc. Discrete Output Impact Reference Guide Note: You should only enable those outputs you want to turn on or off. If an output is enabled, and its corresponding State value bit is not set correctly, the output may be in an undesired state after the tool runs. State If an output is enabled by its corresponding bit in the Mask value, the State’s value determines whether the tool turns an output on or off. If a bit in the State value is 1, the corresponding output is turned on; if the bit is 0 (zero), that output is turned off. The length of the on or off time, and whether the output remains on or off, is determined by the Output Timing Method. Output Timing Method Note: Output delay counting (in milliseconds or event pulses) begins with the task execution trigger event. (M-Series processor outputs do not support event-based timing or queue multiple outputs.) • Immediate Set and Hold: Sets the output to the State value immediately and leaves it there. • Immediate Event-Based Pulse: Sets the output immediately to the State value, leaves it there for the "Dwell" number of Camera or Shift events (see “Shift Source” on page 2-8), then sets it to the inverted State or Pulse Reset State, based on the Pulse Reset Method. • Immediate MSec-Based Pulse: Sets the output immediately to the State value and leaves it there for the "Dwell" number of milliseconds, then sets it to the inverted State or Pulse Reset State, based on the Pulse Reset Method. • Delayed Event-Based Pulse: Delays the "Delay" number of Camera or Shift events (see “Shift Source” on page 2-8), sets the output to the State value, leaves it there for the "Dwell" number of Camera or Shift events, then sets it to the inverted State or Pulse Reset State, based on the Pulse Reset Method. • Delayed MSec-Based Pulse: Delays the "Delay" number of milliseconds, sets the output to the State value, leaves it there for the "Dwell" number of milliseconds, then set sit to the inverted State or Pulse Reset State, based on the Pulse Reset Method. If the delay time is less than the task execution time, it is treated the same as an Immediate Pulse. • Delayed Event-Based Set and Hold: Delays the "Delay" number of Camera or Shift events (see “Shift Source” on page 2-8), then turns the output to the State value and leaves it there. • Delayed MSec-Based Set and Hold: Delays the "Delay" number of milliseconds, then turns the output to the State value and leaves it there. If the delay time is less than the task execution time, it is treated the same as an Immediate Set and Hold. Delay and Dwell Note: M-Series processor outputs do not support event-based timing or queue multiple outputs. Output delay counting (in milliseconds or event pulses) begins with the task execution trigger event. For Event-based delays, Camera, Event, or Shift hardware triggers must be provided on the Impact device’s corresponding input. See “Shift Source” on page 2-8. Datalogic Automation Inc. 3-190 Impact Reference Guide Discrete Output Dwell (in milliseconds or events) determines the length of time the output is on or off. These diagrams show the output pattern based on the Output Timing Pattern setting. Immediate Set and Hold Delayed Set and Hold Immediate Pulse Delayed Pulse How to set up the Discrete Output tool 1. Click the Setup tab, then click the Setup & Test radio button. 2. Set Delay & Pulse: This section is where you define any output delays and whether you want the selected outputs to pulse (On to Off or Off to On). Delay: If you define a delay, the tool waits the indicated number of events or milliseconds (the length field) before switching the outputs to the state (On or Off) defined in the Set & Test Outputs section. An event occurs when there is a voltage present on the Impact device’s Event Input. Refer to the device’s hardware guide for details. Note that the delay begins with the task execution trigger event (e.g. Image In Event or Offline Event). See “Delay and Dwell” on page 3-190 for more details. Pulse: If you check this box, the selected outputs change to the chosen state for the indicated number of events or milliseconds (the length field) then back to the other state. For example, if the Set Output is On, and the pulse length is 10, the output is pulsed on for 10 milliseconds then be turned Off. If you do not check this box, the selected outputs change to the chosen state when the tool runs and remain in that state. See “Delay and Dwell” on page 3-190 for more details. 3-191 Datalogic Automation Inc. EtherNet/IP Introduction Impact Reference Guide 3. Set & Test Outputs: This section is where you define what you want an output to do. Note: The number of outputs shown will vary with the Impact device type. Emulators have sixteen outputs. On, Off, Unchanged: Click the radio button under the desired output for the desired output state when the tool runs. If the output is already in that state, the tool does not change it, unless a pulse was defined. Unchanged means that the tool does not change the output when it runs, even if a pulse is defined. Test Outputs: Click this button to run the tool and view the resultant output state. EtherNet/IP Introduction The Impact device is EtherNet/IP compatible. EtherNet/IP is an industrialized extension of Ethernet TCP/IP communications. The Control and Information Protocol (CIP) is a communications protocol for transferring automation data and control between two network devices. In CIP, every network device represents itself as a series of objects. Each object is simply a grouping of the related data values in a device. The Impact device’s class definition is 100 (hexadecimal 64). Datalogic’s vendor ID is 921. The Ethernet/IP Explicit Data and Explicit Message tools use explicit messaging (the data format is explicitly defined in the message) which implements a Client/Server relationship and requires a TCP/IP connection. The Explicit Data tool receives messages and the Explicit Message tool sends messages. The Ethernet/IP Read Implicit Assembly and Write Implicit Assembly tools use implicit I/O (the data format is not in the message but is implied by the pre-defined assembly object) and a UDP/IP connection. VPM provides the following four tools that allow the Impact device to exchange data with other devices on the network using EtherNet/IP protocol. Datalogic provides an EtherNet/IP Electronic Data Sheet file. See “Using an Electronic Data Sheet (EDS) file” on page 3-194. EtherNet/IP Explicit Data In the Communication Drawer The EtherNet/IP Explicit Data tool provides a way to receive explicit messages from other devices that communicate via EtherNet/IP protocol. It has no fixed inputs or outputs, but inputs can be added to provide six standard data types. These inputs define the layout of the incoming data packet. To create a new input, click Add Input, then select the data type from the type properties drop down. The tool has an additional General property - Instance. • Instance - An EtherNet/IP device sends a data packet which contains an Instance number and other data. If this tool’s Instance number matches that of the incoming packet, the data is available in this tool’s inputs. EtherNet/IP Explicit Message In the Communication Drawer The EtherNet/IP Explicit Message tool creates a message for setting or requesting data on another Ethernet/ IP device. The tool’s fixed inputs define the required parts of the message. Datalogic Automation Inc. 3-192 Impact Reference Guide EtherNet/IP Read Implicit Assembly Additional inputs and outputs can be added. Data values in the added inputs are sent with the message, while values in the added outputs are filled in when the message from another device is received. You can use an EtherNet/IP device’s data sheet to provide the appropriate values for each input and output. To create a new input our output, click the appropriate Add button, then select the data type from the type properties drop down. The following fixed inputs and outputs are available. Input Name What it is Network Path The comma-separated address of the destination EtherNet/IP device. Also known as Epath. Class The predefined class number for the destination device. The Impact device’s class definition is 100 (hexadecimal 64) Instance Which function on the device should receive the message. Service What the device should do. Get Single Attribute - 100 Set Single Attribute - 101 Get All Attributes - 102 Set All Attributes - 103 Cause EtherNet/IP Event - 104 Set Online State - 105 (Attribute value of 0 = offline; non-zero = online) Attribute The value for the service function. Member The element of the message data structure to access. Output Name What it is Write Succeeded If True, the message transfer was successful. EtherNet/IP Read Implicit Assembly In the Communication Drawer The EtherNet/IP Read Implicit Assembly tool provides a method for reading a reserved data area (called a static assembly) on the Impact device. Other EtherNet/IP devices can write data to this area. Additional outputs, which are appended to the static assembly, can be added. You can define a task trigger event to detect when this occurs. (See "EtherNet/IP Implicit Assembly Event" on page 3-37.) To create a new output, click the Add Output button, then select the data type from the type properties drop down. The tool has an additional General property - Offset. • Offset - This value indicates the static assembly location where the tool should begin reading. This allows multiple VPM EtherNet/IP tools to read from the static assembly. EtherNet/IP Write Implicit Assembly In the Communication Drawer 3-193 Datalogic Automation Inc. Impact Send Message Impact Reference Guide The EtherNet/IP Write Implicit Assembly tool provides a method for writing to a reserved data area (called a static assembly) on the Impact device. Other EtherNet/IP devices can read data from this area. Additional inputs, which are appended to the static assembly, can be added. To create a new input, click the Add Input button, then select the data type from the type properties drop down. The tool has an additional General property - Offset. • Offset - This value indicates the static assembly location where the tool should begin writing. This allows multiple VPM EtherNet/IP tools to read from the static assembly. Using an Electronic Data Sheet (EDS) file The EDS file provides a connection example for clients wishing to communicate bidirectionally with the Impact implicit assemblies (4K bytes O->T, 4K bytes T->O). It provides two client-side parameters for the PLC user to configure the size of O->T and T->O communication. Note that some PLC devices do not accept configurations greater than 256 bytes whereas Datalogic Impact supports up to 4K bytes. The connection is configured as fixed size, scheduled, program/idle included, point-to-point O->T and fixed size, scheduled, multicast T->O. Datalogic Impact's implicit assemblies are currently 32-bit word assemblies so the EtherNet/IP Read/Write Implicit Assembly tools consequently read and write tool data ports as 32-bit values. Hexadecimal display is not available on the Impact device. This can be at odds with some PLC device’s 16bit hex words. Even if both the Impact and the PLC device use little-endian for the data, the PLC may do this on 16-bit boundaries while the Impact device does it on 32-bit boundaries. Consequently the PLC device user must handle the data with this difference in mind. Impact Send Message In the Communication Drawer The Impact Send Message tool sends data from one Impact camera to another. Use the Impact Wait For Message tool to receive the data. There is a setup for this tool. See “How to set up the Impact Send Message tool” on page 3-195. NOTE: To use this tool with an A10, A20, T3x, or C-Series smart camera, the property Enable Maximum Timestamp Difference must be disabled. Input Name What it is Address The IP Address of the device that will receive the data. The receiving device must have a program that contains an Impact Wait For Message tool. Number The Message number (from 0 to 255). Enter the number of which Wait For Message tool in the other camera will receive this message. Input ... Defined inputs are listed. Output Name What it is Passed If True, the message was sent. This does not imply that the corresponding Wait For Message tool received the message. Datalogic Automation Inc. 3-194 Impact Reference Guide Impact Send Message How to set up the Impact Send Message tool The Impact Send Message tool sends data to a corresponding Impact Wait For Message tool. You define the data you want to send by adding Inputs on the Message panel. The tool will still work properly if no Inputs are defined. The Message Destination is defined on the Destination panel. Defining Message Send Data NOTE: The Impact Wait For Message tool that this message is being sent to must contain the same number and type of corresponding Outputs, in the same order, as this tool’s Inputs. Image data can be sent only when using M-Series processors and cameras. To add a tool Input 1. Click the Setup tab, then click the Message radio button. 2. Click the Add button. 3. When the Add Input dialog is displayed, enter the name for the Input 4. Click the Type drop down and select the type of the data you want to send. For List types, you can enter a Maximum List Length to limit the length. 5. In the Value field, enter the value you want to send. 6. Click OK. 3-195 Datalogic Automation Inc. Impact Send Message Impact Reference Guide To link a value into an Input 1. Click the desired Input in the Input list. 2. Click the Link button. 3. Select the desired tool and property from the Task tree. To delete an Input link 1. Click the desired Input in the Input list. 2. Click the "x" on the left side of the Value field (under the Value column). To delete an Input 1. Click the desired Input in the Input list. 2. Click the "x" on the far left side of the Input entry (under the Name column). Defining the Message Destination To send a message, you need to define the Destination camera and the Message Number. The corresponding Impact Wait For Message tool must have the same Message Number. To define the Destination Camera 1. Click the Setup tab, then click the Destination radio button. Datalogic Automation Inc. 3-196 Impact Reference Guide Impact Wait For Message 2. Click the Browse button. When the Select Message Destination dialog is displayed, select the desired Destination Camera from the list. 3. Click OK. The camera’s IP Address and name is displayed. 4. Enter the desired Message Number in the Message Number field (from 0 to 255). There should be an Impact Wait For Message tool in a task in the Destination Camera that uses the same Message Number. 5. To test the tool, click the Send button. The Pass/Fail status is True if the message was sent. This does not imply that the corresponding Wait For Message tool received the message. Impact Wait For Message In the Communication Drawer The Impact Wait For Message tool works with the Impact Send Message tool to receive data from another Impact camera. There is a setup for this tool. See “How to set up the Impact Wait For Message tool” on page 3-198. NOTE: To use this tool with an A10, A20, T3x, or C-Series smart camera, the property Enable Maximum Timestamp Difference must be disabled. 3-197 Input Name What it is Number The Message number (from 0 to 255). The corresponding Impact Send Message tool must use this number in the Number property. Datalogic Automation Inc. Impact Wait For Message Impact Reference Guide Input Name What it is Enable Maximum Timestamp Difference NOTE: To use this tool with an A, T, or C Series smart camera, this property must be disabled. When the tasks containing an Impact Send or Wait For Message tool are triggered, the input events are time stamped. If the difference between the Send task and the Wait task time stamps is greater than this value (in milliseconds), this tool fails. When the tool passes, the message data received from the corresponding Send Message tool is written to the Output properties in this tool. The Actual Time Stamp Difference Output property displays the difference between the two time stamps if the Timeout property value is not exceeded. If the value is zero (check box is not checked in setup), the time difference check is disabled and the first message with a matching message number is used if the Timeout property value is not exceeded. Timeout If this value is greater than zero, it is the maximum time (in milliseconds) the tool will wait for a matching message number. The wait time starts when tool execution starts. If the Timeout value is exceeded, the tool fails and the message data and Actual Timestamp Difference values are not written to their respective properties. If this value is zero, the tool will wait until a message is received. Task execution is suspended while the tool waits. Output Name What it is Actual Timestamp Difference This value is the difference, in milliseconds, between the Send Message and the Wait For Message tool’s time stamps. This property is not updated if the Timeout value is exceeded. Passed If True, a message number matching the Number property was successfully received. Output ... Defined outputs are listed. How to set up the Impact Wait For Message tool The Impact Wait For Message tool waits to receive data from a corresponding Impact Send Message tool. You define the data you want to receive by adding Outputs on the Message panel. The Message Number is defined on the Receiver panel. Defining the Received Message Data NOTE: The Impact Send Message tool that this message is being received from must contain the same number and type of corresponding Inputs, in the same order, as this tool’s Outputs. Image data can be sent only when using M-Series processors and cameras. To add a tool Output 1. Click the Setup tab, then click the Message radio button. Datalogic Automation Inc. 3-198 Impact Reference Guide Impact Wait For Message 2. Click the Add button. 3. When the Add Output dialog is displayed, enter the name for the Output 4. Click the Type drop down and select the type of the data you want to receive. 5. Click OK. Defining the Message Receiver To receive a message, you need to define the Receiver parameters which include the message number. The corresponding Impact Send Message tool must have the same Message Number. To define the Receiver 1. Click the Setup tab, then click the Receiver radio button. • Timeout - The Timeout field contains the maximum time (in milliseconds) that the tool will wait for a matching message number. The wait time starts when tool execution starts. If the Timeout value is 3-199 Datalogic Automation Inc. Serial Port Out Impact Reference Guide exceeded, the tool fails and the message data and Actual Timestamp Difference values are not written to their respective properties. • Message Number - Enter the desired Message Number in the Message Number field (from 0 to 255). There should be an Impact Send Message tool in a task in the Camera listed in the Camera field that uses the same Message Number. • Enable Maximum Timestamp Difference (ms) - To use this tool with an A, T, or C Series smart camera, this property must be disabled. If enabled, this is the maximum time allowed between the trigger of the Send Message task and the Receive Message task. Use this value to insure that the data being received relates to the current image being processed. For example, if the time difference is too great, the Send Message task may have fallen behind and is sending a message from a previous part. If the difference between the Send task and the Wait task time stamps is greater than this value (in milliseconds), this tool fails. When the tool passes, the message data received from the corresponding Send Message tool is written to the Output properties in this tool. The Actual Time Stamp Difference Output property displays the difference between the two time stamps if the Timeout property value is not exceeded. If this property is disabled, the first message with a matching message number is used if the Timeout property value is not exceeded. • Actual Timestamp Difference (ms) - This is the number of milliseconds that elapsed between when the Send Message and the Wait For Message tasks were triggered. • Camera - The IP Address and name of the camera that contains this tool. You can select and copy this information from here, then paste it into the Address property or the Setup’s Select Message Destination dialog of the corresponding Send Message tool. Serial Port Out In the Communication Drawer The Serial Port Out tool sends a string or integer list out the Impact device’s serial port. Impact devices support only RS-232 communication protocol. RS-485 is not supported. See “Serial Port” on page 2-10 to define the Serial Port parameters such as speed, parity, and the delimiter for the receiving device. Input Name What it is Input String The string that is sent the serial port when the task runs. Input List The integer list that is sent the port when the task runs. Synchronous If True, the Impact device synchronizes the transmission with the receiving device. Delimiter Type The delimiter is placed at the end of the input string when it is transmitted. The receiving device or camera’s Serial Port Delimiter must match this setting. The M-Series processor can use only a one character delimiter. How to set up the Serial Port Out tool 1. Click the Setup tab, then click the Setup radio button. Datalogic Automation Inc. 3-200 Impact Reference Guide TCP/IP Out 2. Select the type of data the tool will send - a string or an Integer List. String - You can type a string directly into the Data to Send field, or create a link. Integer List - can contain any valid integer value but, since each value is translated into a 1-byte character, any value outside the range -128 to +127 is truncated before it is sent. You can use a Basic tool to unpack, translate, and repack larger integer values, if necessary. You must create a link to an Integer List, you cannot type it directly into the Data to Send field. 3. Click the drop down arrow to select an End of Data Character. The delimiter is placed at the end of the input string when it is transmitted. The receiving device or camera’s Serial Port Delimiter must match this setting. (See “Serial Port” on page 2-10) The M-Series processor can use only a one character delimiter. 4. If you check the box labeled "Wait for Data Send to Complete," the tool will wait for verification from the receiving device that the data has been received. 5. If you want to test the setup at any time, you can click the Test Data Send button. TCP/IP Out In the Communication Drawer The TCP/IP tool sends a message consisting of a string or integer list out the Impact device’s Ethernet port. The tool can act as either a Server or a Client. In Server mode it uses the existing local server connections and sends the data to all remote clients when it runs. Any device on the network receives the message. In Client mode, the tool connects to the remote device with the defined IP Address and Port Number and sends that device the data. If an Impact device has a task with the Trigger Event set to TCP/IP Input, the task is queued to run. (See page 2-9 for Input Event Port definition.) The string or integer list from this tool is written to both the InputString and InputList properties of that task. NOTE: Either the Input String property or the Input List property can contain a value, but NOT both. An error will occur if both properties contain a value. Since TCP communication is one-way, you cannot send and receive on the same port number in an Impact device. To set up the TCP/IP Out tool 1. Click the Setup tab and select the Data radio button. 2. Select the type of data the tool will send - a string or an Integer List. String - You can type a string directly into the Data to Send field, or create a link. Integer List - can contain any valid integer value. You must create a link to an Integer List, you cannot type it directly into the Data to Send field. 3. Select the Destination radio button. 4. Select the Connection Type. Server: The currently configured Server IP Address and Port Number are displayed. (See “TCP/IP” on page 2-9 for configuration.) The data is sent to all currently connected clients (devices). Skip to step 9. Client: The data is sent to the configured remote device. Continue with step 5. 5. Enter the IP Address of the remote (receiving) device. 6. Enter the Port Number on the remote (receiving) device. This is the port on the receiving device where the tool sends the message. For an Impact device, this number should match the remote Impact device’s TCP/IP Input Event port number. 3-201 Datalogic Automation Inc. TCP/IP Out Impact Reference Guide 7. If you want the tool to disconnect from the remote device after the data send is complete, check the check box labeled "Disconnect After Each Send." See “Disconnect After Each Write” on page 3-204. 8. In the field labeled "Check for Successful Send after Delay," enter the number of milliseconds the tool should wait between the data send and a check for success. 9. The receiving device may require that a special character (delimiter) be appended to the data it receives. If so, select the appropriate character from the drop down labeled "End of Data Character (delimiter)." 10. After the receiving device has been configured, click the Test Data Send button. Example: Set up two Impact devices (local and remote) to communicate with each other. The local Impact device 1. With VPM, connect to the local Impact device. 2. In the Design View tab, open the Communication Drawer and add the TCP/IP Out tool to the task. 3. Select the Setup tab. In the Data area, select the data type String. 4. Type two or three words in the Data to Send text area. 5. Select the Destination radio button. 6. Select Client in the Connection Type drop down. 7. Enter the IP Address of the remote Impact device. 8. Enter the Port Number 10000. This is the port on the remote device where the tool sends the message. 9. Check the check box labeled "Disconnect After Each Send." 10. In the field labeled "Check for Successful Send after Delay," enter the number 10. 11. In the drop down labeled "End of Data Character (delimiter)," select No Delimiter. 12. Select the VPM Settings Tab - General - Trigger Events panel. 13. In the TCP/IP section, be sure the TCP/IP Input Event Port number is 20,000. This is the port number where the local Impact device listens for messages. 14. Add a task and set the Trigger By This Event to "TCP/IP Input." 15. Put the local Impact device Online. 16. Disconnect from the local Impact device. The remote Impact device 1. With VPM, connect to the remote Impact device. 2. In the Design View tab, open the Communication Drawer and add the TCP/IP Out tool to the task. 3. Select the Setup tab. In the Data area, select the data type String. 4. Type two or three words in the Data to Send text area. 5. Select the Destination radio button. 6. Select Client in the Connection Type drop down. 7. Enter the IP Address of the local Impact device. 8. Enter the Port Number 20000. This is the port on the local Impact device where the tool sends the message. (Step 13 in the local Impact device configuration.) 9. Check the check box labeled "Disconnect After Each Send." 10. In the field labeled "Check for Successful Send after Delay," enter the number 10. 11. In the drop down labeled "End of Data Character (delimiter)," select No Delimiter. 12. Select the VPM Settings Tab - General - Trigger Events panel. Datalogic Automation Inc. 3-202 Impact Reference Guide TCP/IP Out 13. In the TCP/IP section, be sure the TCP/IP Input Event Port number is 10,000. This is the port number where the local Impact device listens for messages. (Step 8 in the local Impact device configuration.) 14. Click the Test Data Send button. The data you entered in step 4 should have been sent to the local Impact device. The following inputs are available in the tool. 3-203 Input Name What it is Input String The string that is sent out the Ethernet port when the tool runs. Either the Input String property or the Input List property can contain a value, but NOT both. Input List The integer list that is sent out the port when the tool runs. The list can contain any valid integer value but, since each value is translated into a 1-byte character, any value outside the range -128 to +127 is truncated before it is sent. You can use a Basic tool to unpack, translate, and repack larger integer values, if necessary. Either the Input String property or the Input List property can contain a value, but NOT both. Delimiter Type This is placed at the end of the Input String when it is written to the port to signify the end of the string. Connection Type Server: The tool sends the data to all remote clients that are currently configured to receive data from the device. See “TCP/IP” on page 2-9 for Server port configuration. Client: The tool sends the data to the device with the IP Address and Port Number defined in the IP Address and Port Number properties. IP Address If Connection Type is Client, this is the IP address of the remote Impact device. Port Number If Connection Type is Client, this is the remote Impact device’s input event port number where the device "listens" for a TCP/IP message. Error Check Delay If Connection Type is Client, the tool waits this number of milliseconds to test for a successful write. Disconnect after each write If Connection Type is Client and this value is True, the tool disconnects from the port after each time it sends the data. See “Disconnect After Each Write” on page 3-204. Number of Retries This is the number of times the tool will retry sending the data before it reports an error. Wait for response If True, the tool will wait for a response from the remote device. Wait for response timeout The length of time the tool will wait for a response from the remote device. Datalogic Automation Inc. Logic Drawer Impact Reference Guide Output Name What it is Write Succeeded If Connection Type is Server, this value is always True and doesn't relay the number of successful remote client message transmissions. It is the responsibility of the remote client to actively manage the health of the connection. If Connection Type is Client, this value is True when the data was received by the remote device within the time defined in the Error Check Delay property. Response String If Wait for response is True, this property will contain the string sent by the connected device. Status String If Wait for response is True, this property contains the response status. Disconnect After Each Write This setting should be determined primarily by the reliability of the system network and the speed of the inspection. Factors includes the total tool execution time needed, the consistency of tool execution time needed, robustness in the face of network error, and compatibility with the receiving device’s implementation. Disconnecting after each write provides a way to asynchronously handle connection errors and changes. Set up on first execution adds time to the first execution, and may add time to a subsequent execution if a disconnect or error must be handled. This adds significant random variability into the tool's execution time in the face of delivery errors, although the overhead is much less on average except in a very errorprone environment. If the network is robust (i.e. few transmission errors) and the total task execution time is low, then the setting can be False. If the network is relatively more error prone, or the task execution time is faster, the setting should be True.The tool's default setting is True. Logic Drawer Basic In the Logic Drawer The Basic tool performs logical and mathematical calculations based on a set of user-written statements using the Basic programming language. See “Impact Basic” on page 5-1 for more information. This tool has no standard inputs and no outputs. Basic language statements are typed in the Basic editor window. As variable names are entered, variables are created as inputs in the input list. Click the Compile button Datalogic Automation Inc. 3-204 Impact Reference Guide Branch to test the validity of your Basic code. The code is also compiled when you select a different tool. When you click the Run button, the Basic program results appear in the properties pane. Click in this window, then type Variable names (e.g. count) the desired Basic language are automatically created as statements. inputs. Set the variable type here. In the example above, the variable "count" is incremented each time the tool runs, then reset to zero when it reaches five. When you type the variable name "count," the Basic tool automatically creates an input with that name. You can set the variable’s type in the Type drop-down. TIP: If the variable’s name has a specific ending, the type is assigned automatically. Variables ending in "real" are assigned type Real, "string" are assigned type String, and "int" are assigned type Integer. For example, count_real is a Real, name_string is a String, and count_int is an Integer. For more details about entering text in the Editor window, see “Typing in the Editor Window” on page 5-1). Branch In the Logic Drawer The Branch tool evaluates a user-defined Basic-language expression and executes a task branch based on whether that statement is true or false. This tool has no standard inputs. A basic language expression is typed in the Basic expression field. As variable names are entered, variables are created as inputs in the input list. The input values can be entered manually or linked from other tools. The expression is evaluated and, based on the result, the Result output is set True or False and that branch is taken. In this example, the basic language expression is ImageID < 0 3-205 Datalogic Automation Inc. Break Impact Reference Guide The tools in the False branch are executed if ImageID is greater than or equal to zero. If ImageID is greater than or equal to zero, the statement is False and the tools in the False branch run. The Branch tool evaluates the basic language expression: ImageID < 0. If it is True, the tools in the True branch run. Input Name What it is Basic Expression A Basic language expression. Each variable in the expression becomes an input that can be entered manually or linked from other tools. Output Name What it is Result The result of evaluating the Basic Expression. The True or False branch is executed based on this result. Break In the Logic Drawer The Break tool forces an early end to a programming loop tool or the task. When the programming loop ends, the next tool after the loop runs. If there are no tools after the loop, the task ends. If the tool is placed outside a programming loop, the task aborts when the tool runs. This tool has no inputs or outputs. Call Task In the Logic Drawer The Call Task tool is used to call another task. When the called task ends, control returns to the calling task and the tool after the Call Task tool runs. If there are no tools after the Call Task tool, the calling task ends. The called task must be loaded on the Impact device. This tool has no standard inputs or outputs. When you select a task to call, all the inputs and outputs that have been added in the called task become available to the calling task. If you change the called task, click the Synchronize With Task button to synchronize the Call Task tool inputs and outputs with the changes in the called task. Datalogic Automation Inc. 3-206 Impact Reference Guide Counted Loop NOTE: The called task should have the Trigger Event Type set to None. Counted Loop In the Logic Drawer The Counted Loop tool loops a user-specified number of times. The starting and step-increment values may also be defined. Any tool may be used within the loop. Input Name What it is repeatCount The number of times the loop should repeat; if zero, it does not loop startVal The starting value for the loop (may be positive or negative) stepVal The incremental value of each step in the loop (may be positive or negative) Output Name What it is currentCount The number of times the loop has repeated currentValue currentCount times stepVal plus startVal Counter In the Logic Drawer Each time the Counter tool runs it adds the Increment value to the Count value. The Increment value can be negative. If the Count value is equal to the Limit value, the Success value is set to False. When the Count value equals the Rollover Value, the Count value is set equal to the Reset value. If the Count value is set to a value less than the Limit with a Reset tool or by other means, the Success value immediately becomes True. When the Reset button is pressed, the Count value is set to the Reset value. The table below shows an example using a positive increment value. Starting values: Increment = 1, Reset = 0, Rollover = 10, Limit = 7, and Success = True. 3-207 Number of times tool run Count Success Operation Performed 0 0 True None 1 1 True Count + Increment 2 2 True Count + Increment 3 3 True Count + Increment 4 4 True Count + Increment 5 5 True Count + Increment 6 6 True Count + Increment Datalogic Automation Inc. Data Instance Impact Reference Guide 7 7 False Count + Increment Count = Limit so Success set to False 8 8 False Count + Increment 9 9 False Count + Increment 10 0 True Count + Increment Count = Rollover so Count set to Reset Value Count < Limit so Success set to True Input Name What it is Count The current Count Reset Value When the Count value equals the Rollover value, the Count value is set to the Reset value and the Success output is set to True. Rollover Value When the Count value reaches this value, the Count value is set equal to the Reset value. If the Increment value is negative, this value must also be negative and less than the initial Count value. Increment The Count value is increased (or decreased) by this amount each time the tool runs. If this value is negative, the Rollover value must also be negative. Limit When the Count value equals the Limit value, the Success output is set to False. If the Increment value is negative, this value should be negative also. Output Name What it is Success When the Count value equals the Rollover value, this output is set to True. When the Count value equals the Limit value, this output is set to False. Data Instance In the Logic Drawer This tool has no fixed inputs or outputs, but it provides a variety of inputs and outputs that vary, depending on the data type selected. Each data type has a specific set of data elements that can be accessed. You can use the Data Instance tool to access these data elements individually then link them into other tools. For instance, the Point data type contains the x and y coordinates of a point in the format of (x, y). If you select this data type in the Data Instance tool, the x and y coordinates are provided individually as Real data types on the outputs of the Data Instance tool. These Real values can then be linked individually into another tool, or displayed on a control panel. Data Set In the Logic Drawer Datalogic Automation Inc. 3-208 Impact Reference Guide Delay The Data Set tool is used to "push" data to another tool. Each data type has a specific set of data elements that can be accessed. The Data Set tool can be used to access these data elements individually then link them into other tools using its general property, Destination. When this tool runs, its data values are "pushed" into the linked tool’s values. For example, if you set the data type to Integer, then set the value to zero, the tool can be used to reset other tool values when it runs. Delay In the Logic Drawer The Delay tool delays task processing for a user-specified number of milliseconds. Control panels can still access data from the task during the delay period. The following inputs are available. Input Name What it is numMilliseconds The number of milliseconds to delay. Actual maximum delay resolution is four milliseconds. Event Scheduler In the Logic Drawer The Event Scheduler tool "fires" an event and sets the Event ID to the Event ID input property. All tasks that have Scheduled Event selected as the task’s Trigger Event type are then queued for processing. Note: The Impact device must be Online for the Scheduled Event to trigger any task. In task A, when the Event Scheduler tool runs, it fires an event with the Event ID = 1 Task B is defined with the Task Trigger type of Scheduled Event. The Branch tool checks for the Event ID number linked from the task level. The ID matches so the tool executes the True branch. 3-209 Input Name What it is Delay The number of milliseconds the system delays between tool execution and when the event is "fired." Actual maximum delay resolution is four milliseconds. Event ID The identification number of this event. Use a Branch or Basic tool to test it for selective processing. Datalogic Automation Inc. Group Impact Reference Guide Group In the Logic Drawer The Group tool provides a way to group and organize tools within the task tree. To add a tool to a group 1. If necessary, click the Expand Properties icon to the left of the tool. 2. Drag a tool from the tool box and drop it in the desired place under the Group tool. To add a tool to the top of the group, drop it on the branch icon. To add a tool to the end of the group, drop it on the bottom tool in the group. To expand the Group tool structure, click the Expand Properties icon to the left of the Group tool icon. To expand individual tool properties, click the Expand Properties icon to the left of the desired tool. To collapse any expanded properties, click the Collapse icon. Expand Properties Collapse Properties This tool has no standard inputs or outputs. List Loop In the Logic Drawer The List Loop tool loops through a list of elements each time it runs, providing access to each element in the list. This tool has as an additional General property, Data Type, which you select to indicate the data type of the list you want to process. Each data type has outputs in addition to those listed in the table. Input Name What it is List The list of elements Output Name What it is Index The position, in the list, of the element currently being accessed. Count The number of elements in the list Element The current element being processed List Sorter In the Logic Drawer The List Sorter tool provides a sorted output list from any list data type input. This tool has an additional General property called Data Type where you select the data type of the list being sorted. Input Name What it is Input List The list to be sorted Datalogic Automation Inc. 3-210 Impact Reference Guide Multiple Branch Input Name What it is Sort Feature The feature in the list that determines the sort order. Sort Order The order in which to sort the list. Output Name What it is Sorted List The sorted list. Multiple Branch In the Logic Drawer The Multiple Branch tool provides multiple branches based on multiple conditions. When it runs, the tool evaluates user-defined Basic-language expressions. The first branch with an expression that evaluates as True is taken, and the tools in that branch are run. None of the other branches are taken. If none of the expressions are True, none of the branches are taken. This tool has no standard inputs. As variable names are entered, variables are created as inputs in the input list. The input values can be entered manually or linked from other tools. Click the Add Branch button to add a branch to the tool. A General BASIC expression line is added for each branch. Type the Basic language expression for that branch in the Value field. Click on the Branch name to add tools to the branch or change the name. When this branch condition expression is true, the branch is taken. Pass Fail In the Logic Drawer When the Pass Fail tool runs, it evaluates the pass and fail status of each input tool in its Tool Name list. (Not all tools have a pass/fail status output.) After all the input tools are evaluated, the tools in the Pass or Fail branch are run, depending on the Pass Criteria selected. 3-211 Datalogic Automation Inc. Pass Fail Impact Reference Guide When you add the Pass Fail tool, it automatically creates a list of the tools above it in the task tree that have a pass/fail status (the input tools). Click the Setup tab to configure the Pass Fail tool. Pass Fail tool Setup window • Pass/Fail: This is the pass or fail status of the Pass Fail tool. After all the input tools’ pass/fail statuses have been evaluated, this LED is green if the Pass Fail tool passed and red if it failed. If the Pass Fail tool passed, the Pass branch is run. If the tool failed, the Fail branch is run. • Use: When this box is checked, the pass/fail status of that input tool is used to determine the Pass Fail tool’s status when it runs. If there is a delete icon in this column, it means the input tool is linked from a task outside the current task. Click the icon to delete the link. • Tool Name: The input tool name. • Type: The input tool type. • Current: If the input tool’s current pass/fail status is pass, the LED color in this column is green. If the pass/fail status is fail, the color is red. • Invert: If this box is checked, the input tool’s Current status is inverted or reversed before it is used to determine the Pass Fail tool’s status. • Result: This is the result of the Invert operation on the Current status. If the result is pass, the LED color is green. If the result is fail, the color is red. This status is used to evaluate the pass or fail status of the Pass Fail tool, based on the Pass Criteria. • New Pass/Fail Criteria: If you want the Pass Fail tool to evaluate an additional tool, click the Append button and select the desired task, then select the tool property. • Pass Criteria: All Tools Must Pass - If this option is selected, the Pass Fail tool passes only when all the input tools pass. At Least One Tool Must Pass - If this option is selected, the Pass Fail tool passes when any of the input tools pass. If there are no inputs, the tool fails. Input Name What it is Input Image The image being inspected Pass Criteria All Tools Must Pass - If this option is selected, the Pass Fail tool passes only when all the input tools pass. At Least One Tool Must Pass - If this option is selected, the Pass Fail tool passes if any input tool passes. Datalogic Automation Inc. 3-212 Impact Reference Guide Reset Input Name What it is Input ... Any inputs that have been added are listed in this section. Click the Add Input button on the Setup tab to add inputs. Invert Input ... If true, the input tool’s value is inverted or reversed before it is used to determine the Pass Fail tool’s status. Output Name What it is Pass Indicates the pass or fail status of the Pass Fail tool after all the input tools’ pass/fail statuses have been evaluated. Pass Count The number of times the tool has passed Fail Count The number of times the tool has failed Run Count The total number of times the tool has run Reset In the Logic Drawer When the Reset tool runs, it automatically resets the tool that is linked to the Tool To Reset property. There are no inputs, but there is an additional General property called Tool To Reset. To select the tool you want to Reset 1. Click the link icon for the Tool To Reset property. 2. Select the desired tool from the task tree. Only tools that can be Reset are highlighted. Device Control Drawer Camera Trigger In the Device Control Drawer The Camera Trigger tool can force the Impact device to acquire an image without a hardware trigger. It is primarily used to vary the lighting by snapping a second image with different strobe settings. In the example below, the task is initiated when the device acquires the initial image of the dark areas of a part using the standard strobe settings (the Task Trigger type is ImageIn Event). This first image is automatically assigned a negative TriggerId number by the Impact device and queued to be processed. The Branch tool determines if the TriggerId is positive or negative. If the TriggerId is negative (it is the first image), the Camera Trigger tool is run. When the Camera Trigger tool runs, the device acquires an image of the lighter areas of a part with a shorter strobe settings (less light) which triggers the ImageIn event and queues that image. The Camera Trigger tool assigns the image a positive TriggerId number (which was entered in its Trigger ID input property). When the task finishes processing the first image it runs again (because the Camera Trigger tool caused an ImageIn event), and the Branch tool takes the True branch and the Sample Top tool processes the second image. In this example, the Branch tool expression is TriggerID < 0 3-213 Datalogic Automation Inc. Device Settings Impact Reference Guide The tools in the False branch are executed if TriggerId is greater than zero. The Branch tool evaluates the expression: TriggerID < 0. If it is True, this is the first image so the Camera Trigger tool snaps a second image and assigns it a positive ID number. The Sample Top tool then processes the first image. If the Trigger ID is positive, it is the second image from the Camera Trigger tool so the image is processed by the Locate Label tool. Device Settings In the Device Control Drawer The Device Settings tool dynamically changes some of the settings on the Impact device. Settings made with this tool are retained in the Impact device until they are changed in the VPM Settings Tab or another Device Settings tool. Some settings are dependent on the type of camera being used. See “Camera Setup Tab” on page 2-17 for more details about these Impact device settings. If a setting does not apply to the camera being used, it is ignored. Changing any of these settings while the camera is being triggered and acquiring images can cause the images to be corrupted. The camera should be offline or triggers should be stopped while these settings are being changed. Input Name What it is Enable Camera Digital Shift If True, this tool’s Camera Digital Shift value is sent to the camera when the tool runs. Camera Digital Shift Digital shift provides digital gain for the image. Enable Camera Gain If True, this tool’s Camera Gain value is sent to the camera when the tool runs. Camera Gain Gain adjusts the actual signal intensity from the camera. Enable Camera Offset If True, this tool’s Camera Offset value is sent to the camera when the tool runs. Camera Offset Offset adjusts the zero grey-level setting for the camera. Adjusting the offset causes the entire image to brighten or darken. Images become darker as the offset is increased. Datalogic Automation Inc. 3-214 Impact Reference Guide 3-215 Device Settings Input Name What it is Enable Camera Shutter Speed If True, this tool’s Camera Shutter Speed value is sent to the camera when the tool runs. Camera Shutter Speed Shutter Speed (Open Time) indicates the amount of time the shutter is open. The higher the number, the longer the shutter is open and the brighter the image. Enable Camera Internal Correction If True, the camera’s internal correction is enabled when the tool runs. Camera Internal Correction The camera’s internal correction for gain and offset. Enable Camera Trigger Edge Type If True, this tool’s Camera Trigger Edge Type value is sent to the camera when the tool runs. Camera Trigger Edge Type This value sets the Camera Trigger type as follows: 1 = Rising Edge 2 = Falling Edge 3 = Both Edges (See “Trigger Tab” on page 2-19) (Not available on MSeries processors) Enable Image Scan Left Edge If True, this tool’s Scan Left Edge value is sent to the camera when the tool runs. Image Scan Left Edge This value sets the left edge where the camera’s horizontal scan will start. The default value is determined by the camera type. (See *Note below this table) Enable Image Scan Right Edge If True, this tool’s Scan Right Edge value is sent to the camera when the tool runs. Image Scan Right Edge This value sets the right edge where the camera’s horizontal scan will stop. The default value is determined by the camera type. (See *Note below this table) Enable Image Scan Top Edge If True, this tool’s Scan Top Edge value is sent to the camera when the tool runs. Image Scan Top Edge This value sets the top edge where the camera’s vertical scan will start. The default value is determined by the camera type. (See *Note below this table) Enable Image Scan Bottom Edge If True, this tool’s Scan Bottom Edge value is sent to the camera when the tool runs. Image Scan Bottom Edge This value sets the bottom edge where the camera’s vertical scan will stop. The default value is determined by the camera type. (See *Note below this table) Enable Units Per Pixel If True, this tool’s Units Per Pixel value is sent to the camera when the tool runs. Units Per Pixel Units per Pixel is the scale factor for converting measurements in the image to "real world" units. See “Calibrate Manually” on page 2-29 for details. Datalogic Automation Inc. Offline Impact Reference Guide Input Name What it is Enable Strobe 1 Duration If True, this tool’s Strobe 1 Duration value is sent to the camera when the tool runs. Strobe 1 Duration Strobe 1 pulse length in microseconds Enable Strobe 2 Duration If True, this tool’s Strobe 2 Duration value is sent to the camera when the tool runs. Strobe 2 Duration Strobe 2 pulse length in microseconds Enable Strobe 3 Duration If True, this tool’s Strobe 3 Duration value is sent to the camera when the tool runs. Strobe 3 Duration Strobe 3 pulse length in microseconds *NOTE: If the Impact device is Online when any Image Scan value is changed, the device stays Online but camera triggers are temporarily disabled and the image buffer is reallocated based on the new value. The image currently in the image buffer may be overwritten when a new image is acquired based on the new Image Scan value. Offline In the Device Control Drawer The Offline tool places the currently connected Impact device offline when it runs. If the device is already offline, no action is taken. This tool has no inputs or outputs. Online In the Device Control Drawer The Online tool places the currently connected system online when it runs. If the device is already online, no action is taken. This tool has no inputs or outputs. Vision Program Load In the Device Control Drawer The Vision Program Load tool loads a vision program file onto the Impact device. If a file, or a program within the file, with the same name is currently loaded, a "Duplicate Name" error is displayed as the Abort Cause. Input Name What it is Filename The name of the vision program file to be loaded. The name is case sensitive. If you link the file name as a string, the .vp file extension must be included in the string. You can view the File Name and Program Name on the Settings tab under File Manager (see “File List” on page 2-38). IMPORTANT: File names are case sensitive. Datalogic Automation Inc. 3-216 Impact Reference Guide Vision Program Save Vision Program Save In the Device Control Drawer The Vision Program Save tool saves the current vision program file to the Impact device when it runs. There are no output values. Input Name What it is Filename The name of the vision program file to be saved, without the file extension (.vp is added by default). If you enter the name of an existing file, that file is overwritten. Program Name The name of the program in the vision program file. File Save Mode Save as XML: the file is saved in XML format Save Compressed: the file is save in compressed binary format. This format creates smaller files which load faster on the Impact device. All files with password protection are saved in this format. How to use the Save Vision Program tool Use this tool when you want to save the current vision program file. If the file is saved with a new name, the file is saved with the new name on the device, then loaded. To save the current vision program file with the same name, leave the Filename and Program Name properties blank. NOTE: If you enter the name of a vision program file that already exists on the device, the existing file is overwritten without a warning. To save the current vision program file, but with a different name (Save As), enter the new name in the Filename property. Leave the Program Name property blank. The file is saved with the new name on the device, then loaded. Vision Program Unload In the Device Control Drawer The Vision Program Unload tool unloads the program named "Program Name" from the Impact device. If the program is not currently loaded, no action is taken. 3-217 Input Name What it is Program Name The name of the program to be unloaded. You can view the Program Name of currently loaded programs on the Settings tab under File Manager (see “File List” on page 2-38). Datalogic Automation Inc. Specialized Drawer Impact Reference Guide Specialized Drawer Change Image Calibration In the Specialized Drawer The Change Image Calibration tool is intended for use in situations where the camera or part moves to a new position that requires a different calibration between camera snaps. The input image’s calibration data are replaced with the calibration data stored in the tool. The camera’s calibration is not changed. This tool has one input, the image, and no outputs. Here is an example of using the Change Image Calibration tool. The Basic tool keeps track of the current camera position, A or B. If the camera is in position B, the tool uses the current input image, but changes its calibration data. If the camera is in position A, the remaining tools use the image’s original calibration data. This example assumes that there are two camera positions, A and B, and that the camera moves between positions for each snap. To set up the Change Image Calibration tool: 1. Create a task with the tools shown in the diagram. Create code in the Basic tool to keep track of the current camera position so that the appropriate branch is taken in the Branch tool. 2. Position the camera and part at position B. 3. Use VPM Settings Tab - Camera - Setup - Calibration to calibrate the camera. 4. In this step, it is important that the Change Image Calibration tool does NOT run when the image is snapped, that is, before it is trained. In VPM, snap the position B image. On the Change Image Calibration tool’s Properties tab, click the train button. The tool stores the calibration data for position B in the tool. 5. Position the camera and part in position A. 6. Use VPM Settings Tab - Camera - Setup - Calibration to calibrate the camera again. This will store the calibration data for position A in the Impact device. 7. Be sure that the input image for all image processing tools (in both branches) is linked to use the task input image. Run the task. Datalogic Automation Inc. 3-218 Impact Reference Guide Clip ROI Since the camera is calibrated for position A, all camera images are calibrated for position A by default, and there is no need for a Change Image Calibration tool trained at position A. When the Change Image Calibration tool runs, it will put the stored calibration data for position B into the image. All the tools that follow it will use the image with calibration B, even though they are using the current input image. Clip ROI In the Specialized Drawer The Clip ROI tool clips several types of ROIs to insure that they lie within the Input Image. If an ROI is forced off the screen by part movement, the tool aborts and this may end the task prematurely. The clipped ROI is available as an output. Input Name What it is Input Image The image being inspected Tool Origin The tool’s origin relative to the entire image space Input Rectangle The rectangular area within which the clipped ROI should stay Input Wide Line Segment The wide line area within which the clipped ROI should stay Input Line Segment The line area within which the clipped ROI should stay Output Name What it is Success If True, the ROI was clipped successfully Clipped Rectangle The clipped rectangle ROI Clipped Wide Line Segment The clipped wide line segment ROI Clipped Line Segment The clipped line segment ROI Data Transfer In the Specialized Drawer The Data Transfer tool has one fixed output, and it provides a variety of inputs that vary, depending on the data type selected. Each data type has a specific set of data elements that can be accessed. To create a new input, click Add Input, then select the data type from the properties drop down. When this tool executes, the appropriate data values are sent to all the CPM controls that are linked to the tool in all the connected control panels. If Data Transfer Tool Timeout is enabled, and a control panel does not respond within the indicated time, the transfer is terminated. See “Enable Timeout” on page 2-6. 3-219 Output Name What it is Passed If False, there is no control panel connected to receive the transferred data, or the transfer failed for some other reason. The Data Transfer Tool Timeout setting does not affect this property. Datalogic Automation Inc. Grid Statistics Impact Reference Guide Grid Statistics In the Specialized Drawer The Grid Statistics tool provides extensive statistics about a series of points in a grid pattern. This tool can be used analyze components such as contacts on electrical connectors, Ball Grid Array (BGA) ball spacing, or other components where a grid of found points must be compared to an ideal list. This Grid Statistics tool matches an Ideal Points list and an Actual Points list within a given set of tolerances. The point lists are both assumed to be relative to the same origin, and MUST be in the same order, i.e. lowest X coordinate to highest X, lowest Y to highest Y (relative to the tool origin). The Grid Statistics tool is similar to the Point Match tool, with several significant differences: • The Grid Statistics tool requires that the Ideal Grid Points list and Actual Points list be ordered in the same sequential order, which must be from lowest X to highest X, lowest Y to highest Y (relative to the tool origin). • The Grid Statistics tool always performs a Best Fit operation on the Ideal Grid Points list relative to the Actual Points list. This is done to correct for locating errors which will minimize the errors that would be associated with incorrectly referencing the Actual Points data to the Ideal Points data. • The Point Match tool will run noticeably faster than the Grid Statistics tool for large point lists. The difference in execution time is less noticeable on point lists less than 100 points in length. Input Name What it is Input Image Linked Image Tool Origin The tool’s origin relative to the entire image space Ideal Grid Points A point list representing an ideal part that is used as a template for comparison. The Ideal points MUST be presented in the sequence left to right, top to bottom. Actual Points A point list taken from a test part that is used to determine whether the part is defective. This point list MUST be in the same order relative to the Ideal point list (i.e. left to right, top to bottom). Pitch Calculation Method Pitch to Next Row/Column: this specifically addresses "staggered" or "hexagonal" grids. Also, The last row and column have a pitch calculated back to the previous row or column, so that every point has x and y pitch values. Pitch to Next Point: the pitch is calculated to the point to the right, for X, and the point below, for Y. This will fit a line to each row and column and calculate the pitch as the distance from the point to the next row or column, even if the next row or column is staggered. This option works best on uniform point grids that have a constant pitch in X and Y across the entire grid. Minimum X Pitch The minimum x-coordinate distance allowed between consecutive points or rows Minimum Y Pitch The minimum y-coordinate distance allowed between points or rows Datalogic Automation Inc. 3-220 Impact Reference Guide 3-221 Grid Statistics Input Name What it is Create Pitch Segments If True, the X pitches and Y pitches between the Ideal points and corresponding Actual points are created as output Line Segment lists. A separate output Line Segment list is provided for the X Pitches and the Y Pitches. Enable XY Offset If True, the X Offsets and Y Offsets between the Ideal points and corresponding Actual points are used to check the position of the Actual Points, and the measured X Offset and Y Offset values are created as output real lists. Maximum X Offset The Maximum +/- X axis error allowed for an Actual point relative to the corresponding Ideal point. This measurement is independent of all other measurements. Maximum Y Offset The Maximum +/- Y-axis error allowed for an Actual point relative to the corresponding Ideal point. This measurement is independent of all other measurements. Enable Radial Offset If True, the Radial Offsets between the Ideal points and corresponding Actual points are checked with the Maximum Radial Offset input as the tolerance and the results created as an output real list. Maximum Radial Offset The maximum Euclidean distance to allow between corresponding points. Large Radial offset values will cause highly ambiguous matching and infinite tolerance values are considered an error. Maximum Grid Radial Offset The maximum Euclidean distance allowed to offset the entire Ideal Grid relative to the Actual Points to minimize errors and optimize the X Offset and Y Offsets to a mean of zero. Extra Point Test If True, the extra points in the actual point list will cause the In Tolerance output to be False. Output Name What it is In Tolerance If True, all of the actual points have exactly one corresponding ideal point that is within the given tolerance and no more points. If the Extra Points Test is True, then extra points will not cause the fit to be outside the tolerance. (i.e. a one to many mapping is allowed) Results If a value in this list is true, the corresponding ideal point has a point within tolerance in the actual point list. If the value is false, the matching point is either out of tolerance or missing. Missing points will report all measurement values as zero (X Offset, Y Offset, Radial Offset, X Pitch, Y Pitch). X Pitches The Actual X Pitch distances between consecutive points or Columns using the Actual Point list data. The last point in a row or column in the grid will have a pitch value calculated to the previous column or point in the row. Datalogic Automation Inc. Grid Statistics Impact Reference Guide Output Name What it is Y Pitches The Actual Y Pitch distances between consecutive points or Columns using the Actual Point list data. The last point in a column or row in the grid will have a pitch value calculated to the previous row or point in the column. Pitch Results A list of the pass/fail status of the X and Y Pitch measurements between sequential Actual Points. If a value in this list is true, the corresponding X Pitch and Y Pitch between consecutive Actual Points is within tolerance. Missing points are reported as false. Pitches OK If True, all of the X and Y Pitch results are within tolerance. X Pitch Segments A line segment list of the X Pitch distances between consecutive Actual points. The line segment list can be used to display the measurement results graphically in CPM. X Pitch Results A list of the pass/fail status of the X Pitch measurements for each Actual Point. If a value in this list is true, the corresponding X Pitch between the current and next Actual Points is within tolerance. Missing points are reported as false. Y Pitch Segments A line segment list of the Y Pitch distances between consecutive Actual points. The line segment list can be used to display the measurement results graphically in CPM. Y Pitch Results A list of the pass/fail status of the Y Pitch measurements for each Actual Point. If a value in this list is true, the corresponding Y Pitch between consecutive Actual Points is within tolerance. Missing points are reported as false. X Offsets A list of the X Offset distances from Ideal points to the corresponding actual points. Missing points have zero distance. Ideal Point (1.0,YI) and Actual Point (1.1,YA) would be reported with an X Offset = XA - XI = 1.1 - 1. 0 = 0.1 Y Offsets A list of Y Offset distances from ideal points to the corresponding actual points. Missing points have zero distance. Ideal Point (XI,3.0) and Actual Point (XA,3.1,) would be reported with a Y Offset = YA - YI = 3.1 - 3. 0 = + 0.1 Radial Offsets A list of distances from ideal points to the corresponding actual points. Missing Actual points for an Ideal point result in a zero distance. The Euclidean distance measured between corresponding points. Ideal Point (XI,YI) = (1.0, 3.0) and Actual Point (XA,YA) = (1.1,3.1) would be reported with: Radial Offset = Sqrt [(XA - XI)2 + (YA - YI)2] Extra Points A subset of points from the Actual point list that have no corresponding Ideal point within tolerance. If more than 1 Actual point is near a single Ideal Point, then the closest Actual point is used as the Actual point to match with the Ideal Point and the other points are listed as Extra points. Datalogic Automation Inc. 3-222 Impact Reference Guide Lead Statistics Output Name What it is Ideal Points Relative to Tool Origin A copy of the Ideal point list that have been moved by a distance equal to the Grid Offset coordinate. This is the X Offset, Y Offset, and Angle that the entire grid would be moved to perform the Best Fit alignment of the Ideal point grid to the Actual point grid. The Ideal Points Relative to Tool Origin can be used to show the final test locations of the Ideal point grid after the Best Fit operation is completed. Grid Offset The actual X Offset, Y Offset, and rotation angle used to offset the entire Ideal Grid relative to the Actual Points to minimize errors and optimize the X Offset and Y Offsets to a mean of zero. The Grid Offset is given an Origin data type, and the values are applied to the Ideal Grid point list. The results of the Grid Offset operation are available as the Ideal Points Relative to the Tool Origin Point List output. Grid Radial Offset The Maximum Euclidian distance for the Ideal point to be offset in order accomplish the Best Fit of the Ideal Grid Points to the Actual Point grid. Grid Radial Offset OK If True, the Euclidian distance of the Grid Offset listed in the Grid Radial Offset output is less than the Maximum Grid Radial Offset input. Lead Statistics In the Specialized Drawer The Lead Statistics tool provides extensive statistics about the pitch, width, and length of part leads. This tool is used primarily to test leaded parts. Train In the Specialized Drawer When the Train tool runs, it automatically trains the tool that is linked to the Tool To Retrain property.There are no inputs, but there is an additional General property called Tool To Retrain. To select the tool you want to Train 1. Click the link icon for the Tool To Train property. 2. Select the desired tool from the task tree. Only tools that can be Trained are highlighted. 3-223 Datalogic Automation Inc. Train Datalogic Automation Inc. Impact Reference Guide 3-224 C H A P T E R 4 Control Panel Manager Introduction This section discusses the Control Panel Manager, the graphical tool for creating Control Panels. The Impact device can be accessed from any client computer on the network that has the software installed on it. Help If you need help while using the Impact software, you can refer to this manual or the online help. To access online Help, click the Help icon in the toolbar, then click the desired topic in the Table of Contents in the left pane of the Help window. Starting CPM To start Control Panel Manager: 1. Double-click the CPM shortcut on the desktop. CPM - An Overview CPM is used to develop Control Panel Applications for vision inspection programs. A Control Panel Application is a collection of Control Panels. The panels contain controls that exchange data with vision inspection programs running on the Impact device. Controls display data on the client computer’s monitor for the Control Panel operator to see, and they can provide operator control over the inspection.The vision program you want to control must be loaded on the currently connected Impact device. Control Panel Application Control Panel 1 Control Panel 2 Controls Controls Data exchange can be initiated manually (by an operator pressing a button, for example), at a specified time interval, or by another control changing state (an alarm state, for example). Multiple Control Panels can be combined into one Control Panel file. 4-1 Datalogic Automation Inc. CPM User Interface Impact Reference Guide CPM Security When you open a Control Panel in CPM, the Connector Control may attempt to connect to an Impact device or Emulator. If security is enabled on the device, the User LogOn dialog is displayed. You must enter a valid user ID and password to connect the Control Panel to the device. If you do not log on, you can still modify the Control Panel, but you will not be able to update any data or images on the Control Panel. Note: Impact device security is independent of the security enabled by the CPM Password control. (See “Password” on page 4-56 for details about the Password control.) See “Impact Device Security Overview” on page 2-13 and “Device Security” on page 4-110 for more details about CPM security. CPM User Interface These are the primary areas in the CPM user interface. Each of these areas is explained in the following sections. Main Toolbar Task and Panel Toolbar Control Panel Canvas and Preview Pane Panel Tabs and Chooser Control Description Control Palette VPM Task Tree Control Panel Tree Panel and Controls Properties and Tabs Main Toolbar Use the main toolbar tools to manipulate controls and Control Panel Applications. Connect to device Click this button to connect CPM to a device or Emulator. (See “Connect to an Impact device, camera, or Emulator” on page 1-5 for more details.) When CPM is connected to a device, the button changes to the Disconnect button. Datalogic Automation Inc. 4-2 Impact Reference Guide Main Toolbar This connection is not the same as the one provided by the Connector control. When you connect with this button, CPM is connected to the device so that the VPM Task(s) in the device can be displayed. You can then make links between the task tool’s properties and the Control Panel. Links to VPM cannot be created if this button is disconnected. When a link is made between the VPM task and a control on the Control Panel, if there is no Connector control for that device, one is automatically added to the panel and connected to the device. If there is already a Connector control, the link is added and its Connected value set to True. If there are no links between CPM and the displayed task, no Connector control is needed. In contrast, the Connector control connects the Control Panel to the device so linked values can be displayed and set. This connection is made when you set the Connector control’s Connected property to True. When you open a Control Panel Application file, you may need to set the Connector control’s Connected property to True so data values and images are updated with current VPM values. The following scenarios may occur while creating links: Connect Button Connector Control Exists Link Added Result Connected No No VPM Tree can be displayed Connected No Yes Connector Control added and connected; link is added; VPM Tree can be displayed Connected Yes No VPM Tree is displayed; Connector control may or may not be connected Connected Yes Yes Link is added; VPM Tree can be displayed Disconnected Yes Not Possible VPM Tree cannot be displayed; Control panel’s connected status determined by Connector control Disconnected No Not Possible VPM Tree cannot be displayed; Control panel is not connected Sharing a device with VPM The first VPM program to connect to a device acquires exclusive editing privileges on that device. When a program on the device is being edited, CPM control panel designers can connect to the device and create links, but they cannot modify data in vision program properties. (See “Special Case Editing” on page 4-3 below.) When the first VPM disconnects from the device, a CPM control panel can then connect to the device. Special Case Editing When CPM is running on the same client PC as the VPM program that is editing on the device, CPM can modify (set data) in vision programs. To use this special case, start VPM and load the program that you want to edit. Then, start CPM and load the control panel you want to edit. You can now modify vision program property values and test the control panel. New Control Panel Application 4-3 Datalogic Automation Inc. Main Toolbar Impact Reference Guide This opens a browser so you can load a Control Panel template to create a new Control Panel Application. Only one Control Panel Application may be open at a time. An application may contain multiple Control Panels. Several templates are provided with CPM, or you can click the Create Empty Application button to create one. You can also create controls or groups of controls, then save them as Control Panel templates. See “Control Panel Application” on page 4-9 for more details on creating a Control Panel Application. Open Control Panel Application This opens a browser dialog so you can open an existing Control Panel Application. Save Control Panel Application This saves the currently open Control Panel Application. If the Connector control Connected property is True, CPM will try to connect to the IP Address value when the Control panel is loaded. Save Control Panel Application As This saves the currently open Control Panel Application with a new name. You can save the file with password protection. See “Control Panel Application Security” on page 4-11. If the Connector control Connected property is True, CPM will try to connect to the IP Address value when the Control panel is loaded. Load Control Panel Template Control Panel templates are a predefined group of controls that you can insert into your Control Panel. This button opens a browser dialog so you can select an existing template. Save Control Panel Template You can create controls or groups of controls, then save them as Control Panel templates and insert them into a Control Panel. This button opens a browser dialog so you can save the template. Cut This button cuts a control to the system clipboard so you can paste it into a different place or Control Panel. The original control is deleted. Copy This button copies a control to the system clipboard so you can paste it into a different place or Control Panel. Paste This button pastes a control from the system clipboard to a position below the currently selected control in the control tree. Delete Use this button to delete a control or a Control Panel. To delete a control, select a single control in the control tree. To delete a Control Panel, select the Control Panel tab. When a control is deleted, if there are no other links to it in the Connector control, the links are removed in the Connector control. Datalogic Automation Inc. 4-4 Impact Reference Guide Main Toolbar Print Control Panel tree Use this button to print a formatted, expanded list of all properties and values in the currently selected application, Control Panel, or control to a chosen printer. (Connector Control Events, Methods, and Links are not listed.) Print preview of Control Panel tree Use this button to preview a formatted, expanded list of all properties and values in the currently selected application, Control Panel, or control. Print Control Panel tree to text file Use this button to print an expanded list of all properties and values in the currently selected application, Control Panel, or control to a text file. Full Screen Design Viewing Use this toggle button to preview the "look and feel" of the Control Panel you are creating in full screen view. The preview pane is expanded and the control tree and palette are closed. You can move, resize, and test controls in this view, but no live data is displayed. Design/Run Mode Use this toggle button to put the Control Panel in Run mode. You cannot move and resize controls in this mode because they are live. If the Impact device is online, and the linked tools are running, controls will display live data from the vision program. NOTE: If the Control Panel is connected to a device, and that device is put into Edit mode in VPM, a "Device Locked" message is displayed. The Control Panel cannot set data or execute methods on the device while it is locked. Check the check box marked "Don’t display this message again," to keep the message from displaying again. Program Preferences This button opens a dialog to set the following parameters: • Auto-create Control Panel .bak backup file: creates a backup file of the Control Panel (with a .bak extension) each time the Control Panel Application file is opened. • Remember last Device address entered: saves the current IP address when the Control Panel Application file is saved. • Use small icons: Small program and tool icons are displayed. • Display debugging information: A window displays each property set or method execution with a time and date stamp. This setting reverts to Off each time CPM is closed. • Text Size: If default is selected, CPM will use Window’s default font size for all displayed text. If Custom is selected, you can enter the font size you want CPM to use. • Snap to grid during design: If this is selected, controls are aligned to a grid during design mode. Enter the grid spacing, in pixels. 4-5 Datalogic Automation Inc. Task and Panel Toolbar Impact Reference Guide • Use internal on-screen keyboard: If this is selected, and Enable automatic on-screen keyboard is checked, an internal built-in, on-screen keyboard application is used for entering text and numbers. See zzzz for details. • Use External on-screen keyboard: If this is selected, and Enable automatic on-screen keyboard is checked, an external, third-party, on-screen keyboard is used for entering text and numbers. See “OnScreen Keyboard” on page 6-11 for details. • Enable automatic on-screen keyboard: If this is checked, the on-screen keyboard is enabled. Help • This displays online help information for Impact software. About Control Panel Manager • This displays version and build information about CPM. Task and Panel Toolbar Use the task and panel tools to interact with VPM and manipulate Control Panels. Select Design View Options When you click this button, a dialog is displayed so you can select whether to show or hide the Control Palette (see “Control Palette” on page 4-7), VPM Task Tree (see “VPM Task Tree” on page 4-7), and Control Panel Tree (see “Control Panel Tree” on page 4-8). In the dialog, click the view you want to display. Select Program This list shows all the programs that are loaded on the device where CPM is currently connected. When you select one, it is displayed in the VPM Task tree. If there are no programs in the list, either CPM is not connected to a device (see “Connect to device” on page 4-2), or there are no programs loaded on the device. Refresh VPM Tree Click this to refresh the VPM Tree display. The VPM Tree shows the vision program currently selected in the Select Program dropdown. If any changes are made in the VPM program, you need to refresh the display to show the changes. Add a Control Panel See “Control Panel” on page 4-11 for more details about adding Control Panels to a Control Panel Application. Datalogic Automation Inc. 4-6 Impact Reference Guide Control Palette Control Palette Open/Close Control Groups (Control Palette must be enabled. See “Select Design View Options” above.) Controls are grouped in the palette according to common functions. Click the control group header to open or close the group list. Individual controls are explained in more detail under “CPM Controls” on page 4-23. VPM Task Tree The VPM Task Tree area shows the program currently selected with the Select Program drop down (the task must be loaded in VPM). From this tree you can link task and tool properties to controls on the Control Panel. NOTE: You cannot modify the VPM task in this view. You must use VPM to modify the task. To display the Task Tree, click Select Design View Option, then select Vision Program Tree from the list. (See “Select Design View Options” on page 4-6.) The Task Tree displays the structure of the vision system programs, tasks, and tools. Expand Properties Collapse Properties Expand or collapse properties: Click the Expand or Collapse Properties icon . While properties are expanded, tool values are visible and you can create links between VPM and a Control Panel. Resize the task tree area: Point the cursor to the right-side border. When the pointer becomes a doubleheaded arrow, click and drag the border. 4-7 Datalogic Automation Inc. Control Panel Tree Impact Reference Guide This is an example of a tool with the properties expanded, showing the Input, Output, and Method properties. Control Panel Tree (Control Panel Tree must be enabled. See “Select Design View Options” on page 4-6.) This is a graphic representation of the controls on the Control Panel Canvas. Controls do not need to be in any particular order. You can add controls here or on the Canvas. As a control is added to the tree, it also appears in the Control Panel Canvas, and vice-versa NOTE: The following controls are displayed only in the Control Panel Tree, not in the Control Panel Canvas: Basic, Execute Command, Connector, Load Image, Load Vision Program, Save Vision Program, TCPIP Logger, and Timer. See the individual control descriptions for details. Panel Tabs and Chooser Click a tab to display a panel. If the number of panels exceeds the list area, the Panel Chooser is displayed. Click the left arrow on the Panel Chooser to select the leftmost panel, or click the down arrow to select any panel. To rearrange the tabbed panel’s order, click the tab and drag it left or right to the desired location. Click tab and drag to new location Move Up/Down in Tab Order Controls do not need to be in any particular order in the control tree, but you can rearrange them if desired. Datalogic Automation Inc. 4-8 Impact Reference Guide Image Display To change the order of controls 1. Select the control you want to move in the Control Tree. 2. Click and drag the control up or down to the desired location. Control Panel App Click this icon to access Control Panel Application properties. See “Control Panel Application” on page 4-9 for details about creating a Control Panel Application and its properties. Control Panel Click this icon to access Control Panel properties. See “Control Panel” on page 4-11 for more details about creating a Control Panel Application. Image Display An image can be displayed on the Control Panel with an Image Display control. Within this control you can display ROIs, as well as Greyscale Template Models. Panel and Controls Properties and Tabs The tabs in this area allow you to view and define properties, methods, events, and view existing links for a Control Panel and controls. (The Connector control has additional tabs. See “Impact Connector” on page 4107.) A property is a visible aspect of a control like color, transparency, label, or size. Properties are defined in different ways. Some are typed into the value field, for others you click in the field to select from a list or palette, and some can only be linked to another property or a vision program tool. You can only link a property to a property. A method allows you to affect the behavior of a control based on an event. For example, you can enable, hide, or change the state of controls. You can only link an event to a method. An event occurs when a control property or state changes, for example when a button changes state or a check box is checked. You can only link an event to a method (events are "Source Only.") The Link Summary displays all the links to and from the selected control. See page “Links between CPM controls” on page 4-19 for more details about links. More information about each control’s properties, methods, and events is listed with the controls starting with “CPM Controls” on page 4-23. Control Panel Application A Control Panel Application is a collection of one or more Control Panels. Control panel applications are saved in a Control Panel Application file (with a ".cp" file extension). Each Control Panel Application file 4-9 Datalogic Automation Inc. Control Panel Application Impact Reference Guide must have a unique name, although Control Panels with the same name may be stored in different Control Panel Application files. To create an empty Control Panel Application 1. Click the New Control Panel Application button. 2. Click the Create Empty Application button in the Select Template browser. New 3. Add Control Panels as desired. (See “Control Panel” on page 4-11.) To create a Control Panel Application from a template 1. Click the New Control Panel Application button. 2. Select a template from the Template browser and click Add. 3. Select a location on the Control panel for the template and left-click that location. If you click Cancel, you will create an empty application. Save 4. Add Control Panels as desired. (See “Control Panel” on page 4-11.) 5. Click the Save Control Panel Application button in the toolbar to save the application. The following Control Panel Application properties are available. Property Name What it is Filename The Application’s file name, which must have a ".cp" extension. IMPORTANT: File names are case sensitive. Panel Tab Font Selects the display font for all the Control Panel tabs Panel Tab Height Sets the tab height for all the Control panels, in pixels. A value of zero automatically adjusts to accommodate the tab font size. A value of -1 hides the tab. In this case, you must provide some other way (such as a toggle button control) to access the tabs Width of Panels Sets the width of all the Control panels, in pixels, when CPM is in Full Screen Design Viewing mode or Run mode. Set this value based on the screen resolution of the PC where the application will eventually run. Height of Panels Sets the height of all the Control panels, in pixels, when CPM is in Full Screen Design Viewing mode or Run mode. Set this value based on the screen resolution of the PC where the application will eventually run. Recommended Width/Height of Panels These dimensions are calculated based on your PC’s current screen resolution setting. Recommended Height of Panels without Toolbar Set the Height of Panels value to this value if the application will be run with CPM Runtime with no toolbar displayed. Datalogic Automation Inc. 4-10 Impact Reference Guide Control Panel Property Name What it is Control Color This property controls how some input controls are displayed in a control panel. For more details, see each control’s properties. System: The controls have rounded corners and a "3D" look. The Button Color and Border Painted properties for the Button and Toggle Button are disabled. New control panel applications default to this setting. CPM Classic: The controls have square corners and a "flatter" look. The Button Color and Border Painted properties for the Button and Toggle Button can be modified. Older control panel applications will default to this setting. Control Panel Application Security You can password protect a Control Panel Application when you save it. A password protected file is automatically saved in compressed binary format and the application cannot be edited, printed, viewed, or saved. NOTE: Control panel application security protects the application (all Control Panels) from unauthorized access. Control Panel security protects individual Control Panels from unauthorized access. (See “Password” on page 4-56 for Control Panel security.) Device security protects the Impact device from unauthorized access. (See “Impact Device Security Overview” on page 2-13.) To password protect a Control Panel Application 1. Click the Save As icon in the main toolbar. 2. In the Save As dialog, click the Advanced button. 3. Check the Save With Password Protection check box. 4. Enter and confirm the desired password. 5. Click OK. To edit, run, or print a password protected Control Panel Application 1. Click the Open Control Panel Application icon. 2. Select the file to open and click Open. 3. Enter the Password in the Enter Password field of the dialog and click OK. 4. If you edit the application, then save it, it will still be password protected when you close it. To remove password protection from a Control Panel Application 1. Open the password protected application. 2. Click the Save As icon in the main toolbar. 3. In the Save As dialog, click the Advanced button. 4. Clear the Save With Password Protection check box. 5. In the File Name field, enter the existing application name, or a new one. IMPORTANT: File names are case sensitive. 6. Click OK. Control Panel A Control Panel is a collection of controls. You can add controls to the Control Panel Canvas and arrange them as desired, then link the desired properties, methods, and events. 4-11 Datalogic Automation Inc. Control Panel Impact Reference Guide To add a Control Panel to a Control Panel Application 1. Click the Add a Control Panel button. 2. Click the Select Design View button and select the Control Palette option so the Control Palette is displayed. 3. Add controls to the panel as desired. See “Add Controls to a Control Panel” on page 4-13 for more details. The following Control Panel properties, methods, and events are available. Property Name What it is Background Color Click in the field to choose the Control Panel’s background color. Enabled If True, the Control Panel is enabled. Tab Name The name that is displayed on the Control Panel’s tab. On Top If True, the Control Panel is displayed in front of any other Control Panels. Tab Text Color Click in the field to choose the text color on the Control Panel’s tab. Method Name What it does Disable Disables the Control Panel; it cannot be selected Enable Enables the Control Panel; it can be selected Bring to Top Displays the panel in front of other panels Event Name When it happens Loaded from Disk When this Control Panel is loaded into CPM Not On Top When this Control Panel is not displayed in front of any other panels that are present. On Top When this panel is displayed in front of any other panels. Control Panel Display Size When you create a Control Panel Application, the display size for all its Control Panels is automatically calculated based on the screen resolution setting of your monitor. If you are planning to use the application on a different system, you may change the default values so the Control Panels will display correctly. Test your application on the target system to be sure it works. NOTE: Since this setting also controls the Preview Pane size, if you place controls on a panel, then change the display size, you may not be able to see the controls in full screen preview or run mode. To change the Control Panel display size 1. Start CPM. 2. Click the Control Panel Application icon at the top of the control tree. Application Datalogic Automation Inc. 4-12 Impact Reference Guide Control Panel 3. On the Properties tab, enter the desired panel width and height (in pixels). The Recommended values show the calculated width and height based on the current screen resolution. The Recommended Height without toolbar is used when the panel is run in CPM Runtime with no toolbar. Add Controls to a Control Panel There are three ways to add Controls to a Control Panel. You can add them to the Control Panel Tree, add them to the Control Panel Canvas, or have them automatically added when you create a link. To add controls to the Control Panel Tree 1. Click the Select Design View button and select the Control Palette option so the Control Palette is displayed. 2. Click the Select Design View button and select the Control Panel Tree option so the Control Panel Tree is displayed. 3. In the control palette, click the control you want to add, then drag it onto the Control Panel Tree to the desired position. Release the mouse button to add the control. To move and adjust the control you must first select it on the Control Panel Canvas. 4. Link the controls. See “Links between CPM controls” on page 4-19 for more details. 5. When you are ready to save the Control Panel file, click the Save Control Panel Application icon. To preview the Control Panel at any time while you are adding controls, click the Full Screen Design Viewing button. To return to edit mode, click the button again. To add controls to the Control Panel Canvas 1. Click the Select Design View button and select the Control Palette option so the Control Palette is displayed. 2. Click the Select Design View button and clear the Control Panel Tree option so the Control Panel Tree is not displayed. 3. In the control palette, click the control you want to add, then drag it onto the Control Panel Canvas to the desired position. Release the mouse button to add the control. You can move and adjust the control as necessary. 4. Link the controls. See “Links between CPM controls” on page 4-19 for more details. 5. When you are ready to save the Control Panel file, click the Save Control Panel Application icon. To preview the Control Panel at any time while you are adding controls, click the Full Screen Design Viewing button. To return to edit mode, click the button again. 4-13 Datalogic Automation Inc. CPM and VPM Linking Impact Reference Guide CPM and VPM Linking Impact Device VPM Vision Program Control Panel Impact Connector Control Tool A Control 1 Tool B VPM to CPM Links Control 2 CPM to CPM Links VPM to VPM Links Impact Connector Control In CPM, links can be made between vision programs and tasks on the Impact device and Control panels on the host. The links create an information path to the device through the Impact Connector control. The vision program or task you want to link to must be loaded on the Impact device, and CPM must be connected to that device, before links can be made. (See “Connect to device” on page 4-2.) How Impact Connector controls are created Each Impact Connector control can connect to only one Impact device at a time, so you need one Connector for each device that the control panel will access. You can put one Connector control on each panel or put multiple controls on one panel. When you create a link from VPM to CPM, Connector controls are automatically added and connections are made in the following order: 1. If no Impact Connector exists in the application, one is added and the Connector control connection is made to the Impact device’s IP address. 2. If a Connector with the current device’s IP address exists in the application, that Connector is used. If more than one with that address exists, a list is displayed. 3. If a Connector with a blank IP address exists in the application, the IP address is set and that Connector is used. This happens when a template that contains a Connector is used. To add additional Impact Connectors, click and drag the control from the palette to the canvas. You will need to manually enter the desired device’s IP address in that Impact Connector’s IP Address property, then set the Connected property to True. NOTES: When you use multiple Impact Connector controls on a control panel, it is possible to unknowingly have controls on the same panel connected to different Impact devices. Check the IP Address property value on the Connector controls if some controls are not responding the way you believe they should. If you delete a control or a Connector on a panel, any Connectors on that control panel that have no links to them are deleted automatically. Datalogic Automation Inc. 4-14 Impact Reference Guide Links between CPM and VPM Links between CPM and VPM The following kinds of links can be made between a VPM task or tool and a CPM control: • Get Data Link: a CPM control property receives data from a VPM tool or task property • Set Data Link: a CPM control property sends data to a VPM tool or task property • Method Link: a CPM property sends data to a VPM tool or task method property such as Run or Train • Data Transfer Link: a CPM control property receives data directly from a VPM Data Transfer tool Create Drag and Drop Links to VPM There are two ways to create a link between VPM and CPM. You can use left-click drag and drop, or rightclick. This section describes how to create drag and drop links. See “Create Right-Click Links to VPM” on page 4-18 for right-click links. When you create a drag and drop link from VPM to CPM, CPM will automatically add a new control if needed, or give you the option to link to the appropriate property type in an existing control. The type of control added, or the property choice shown, depends on the type of data you are linking. Drag and Drop - Control Added This section describes the kind of new control that is added to a Control Panel when you create a link to a blank area on the Canvas or the Control Tree. Get Data To create a Get Data link, select the desired property in VPM with the left mouse button, then drag and drop it onto an empty spot on the Control Panel Canvas or the Control Panel Tree. This table lists the default control added for a left-click drag and drop Get Data link. Property Data Type Get Data Default Control Added - Default Property Boolean Indicator Light – Light On Image Image Display – Image Integer Numeric Display – Integer Value Real Numeric Display – Real Value String Text Display – Text Font Library Font Library – Font Library Color Image Image Display – Image Verification Character Contour Library – Library Set Data 4-15 Datalogic Automation Inc. Links between CPM and VPM Impact Reference Guide To create a Set Data link, hold down the Shift key while you select the property in VPM with the left mouse button, then drag and drop it onto an empty spot on the Control Panel Canvas or the Control Panel Tree. This table lists the control choices for a drag and drop Set Data link. Property Data Type Set Data Control Choices - Default Property Boolean Check Box - Selected Toggle Button - Selected Integer Numeric Entry - Integer Value Slider - Integer Value Range 1D Range Scroll Real Numeric Entry - Real Value Slider - Integer Value String Text Entry - Text Font Library Font Library - Font Library Verification Character Contour Library – Library Drag and Drop - Existing Control This section describes the kind of control that is added to a Control Panel when you create a link to an existing control on the Canvas or in the Control Tree and there is only one property of that type to choose. For example, if you drag and drop a Blob List property to an image, the Blob List ROI control is added to the Image Display control automatically and the Blob List property is linked. Get Data To create a Get Data link, select the desired property in VPM with the left mouse button, then drag and drop it onto an existing control on the Control Panel Canvas or the Control Panel Tree. This table lists the default controls added for drag and drop Get Data links to an existing control. Property Data Type Existing Control Default Control Added - Default Property Blob List Image Display Blob List ROI - Blob List Line Segment Image Display Line ROI - Line Extents Line Segment List Image Display Line List ROI - Line List Origin Image Display Origin ROI - Origin Extents Origin List Image Display Origin List ROI - Origin List Point List Image Display Point List ROI - Point List Greyscale Template Model Image Display Greyscale Template Model Shape List Image Display Shape List ROI - Shape List Wide Line Segment Image Display Line ROI - Wide Line Extents Datalogic Automation Inc. 4-16 Impact Reference Guide Links between CPM and VPM Property Data Type Existing Control Default Control Added - Default Property Wide Line Segment List Image Display Line List ROI - Wide Line List Wide Circular Arc Image Display Arc ROI - Wide Circular Arc Circle Correlation Model Image Display Circle Correlation Model Set Data To create a Set Data link, hold down the Shift key while you select the desired property in VPM with the left mouse button, then drag and drop it onto an existing control on the Control Panel Canvas or the Control Panel Tree. This table lists the controls added for drag and drop Set Data links to an existing control. Property Data Type Existing Control Default Control Added - Default Property Blob List Image Display Blob List ROI - Blob List Line Segment Image Display Line ROI - Line Extents Line Segment List Image Display Line List ROI - Line List Origin Image Display Origin ROI - Origin Extents Origin List Image Display Origin List ROI - Origin List Point List Image Display Point List ROI - Point List Greyscale Template Model Image Display Greyscale Template Model Shape List Image Display Shape List ROI - Shape List Wide Line Segment Image Display Line ROI - Wide Line Extents Wide Line Segment List Image Display Line List ROI - Wide Line List Wide Circular Arc Image Display Arc ROI - Wide Circular Arc Circle Correlation Model Image Display Circle Correlation Model When you click and drag, the cursor will change depending on the action you are trying to complete. Release to complete link Cannot complete link The following sections will explain how to create drag and drop links. To create a Get Data link using drag and drop 1. Display the Vision Program Tree. If you want to add links to the Control Panel Tree, display it also. 2. Select the desired task from the Select Program dropdown 4-17 Datalogic Automation Inc. Links between CPM and VPM Impact Reference Guide 3. Expand the properties for the tool you want to link. Both Inputs and Outputs can be used to create Get Data links. 4. Left-click on the desired property, drag it to the Control Panel Canvas or the Control Tree, and release it. If you drop it on the Control Tree, the new control is added in the Control Tree and in the upper left corner of the Canvas. 5. Repeat step 4 until all links have been made. To create a Set Data link using drag and drop 1. Display the Vision Program Tree. If you want to add links to the Control Panel Tree, display it also. 2. Select the desired task from the Select Program dropdown 3. Expand the properties for the tool you want to link. Only Inputs can be used to create Set Data links. 4. Hold down the Shift key, then left-click on the desired property, drag it to the Control Panel Canvas or the Control Tree, and release it. If you drop it on the Control Tree, the new control is added in the Control Tree and in the upper left corner of the Canvas. 5. Repeat step 4 until all links have been made. Create Right-Click Links to VPM When you create a right-click link to or from VPM, CPM will always give you choice of what you want to do. You can choose to create a Set or Get Data link, to add a new control, or choose to link to a property type in an existing control. The type of control added, or the property choice shown, depends on the type of data you are linking. To create a Get Data link using right-click 1. Display the Vision Program Tree. If you want to add links using the Control Panel Tree, display it also. 2. Select the desired task from the Select Program dropdown. 3. Expand the properties for the tool you want to link. Inputs and Outputs can be used to create Get Data links. 4. Right-click on the desired property, then left-click on "Get link from here." Some properties and methods will only accept Set Data links. Panel Icon 5. To add the link to an existing control, hold the mouse cursor over the control and right-click. The choices displayed will depend on the VPM property data type and the compatible data types in the control. If the control does not have a compatible data type, no choices are displayed. To add the link to a new control, hold the mouse over a blank area on the Canvas, or the Panel icon in the Control Tree, and right-click. Some properties can only be linked to with a Set Data link. If this is the case, no choices are displayed. 6. Repeat steps 4 and 5 until all links have been made. To create a Set Data link using right-click 1. Display the Vision Program Tree. If you want to add links to the Control Panel Tree, display it also. 2. Select the desired task from the Select Program dropdown 3. Expand the properties for the tool you want to link. Inputs and Methods can be used to create Set Data links. 4. Right-click on the desired property, then left-click on "Set link to here." Some properties and methods will only accept Get Data links. Datalogic Automation Inc. 4-18 Impact Reference Guide Panel Icon Links between CPM controls 5. To add the link to an existing control, hold the mouse cursor over the control and right-click.The choices displayed will depend on the VPM property data type and the compatible data types in the control. If the control does not have a compatible data type, no choices are displayed. To add the link to a new control, hold the mouse over a blank area on the Canvas, or the Panel icon in the Control Tree and right-click. Some properties can only be linked to with a Get Data link. If this is the case, no choices are displayed. 6. Repeat steps 4 and 5 until all links have been made. Delete Links to VPM You must delete links to VPM through the Impact Connector control. To delete a link 1. Display the Control Panel tree. 2. Click on the Impact Connector control in the Control Panel tree. Delete Link 3. Depending on the type of link you want to delete, click the Get Data Links, Set Data Links, Method Links, or Links tab. 4. Select the link you want to delete, then click the Delete Link icon. 5. Repeat step 3 until all the desired links are deleted. Links between CPM controls Links are the connections between controls (properties, methods, and events). For example, if you want an indicator light control to turn on when the Control Panel operator presses a button control, you can link the button’s "Action" event to the indicator light’s "Turn On" method. When the button’s "action" changes (i.e. it is pressed), the indicator light method that it is linked to (Turn On) is activated. Links can be created from the "source" (the button) control or the "destination" (the indicator light) control, depending on the property data types. Link Button "Action" Event Link Indicator Light "Turn On" Method Indicator Light "On Color" Property Indicator Light 2 "On Color" Property When you link control properties together, they are synchronized. For example, since the "On Color" properties of the two Indicator Lights are linked together, they are the same color when they are On. In describing links, the following terms are used in this section: • Source control: The control’s property that provides the value when the link selection is "Get link from here." For example, if you select "Get link from here" on a Toggle Button’s property, then link to an Indicator Light’s, the Toggle Button is the Source. • Beginning control: The control that is selected to start the link process. When you create right-click links, the beginning control normally keeps the focus when the link is complete. To shift the focus to the Ending control when the link is complete, hold down the Ctrl key while you right-click on the Ending control. 4-19 Datalogic Automation Inc. Links between CPM controls Impact Reference Guide • Destination control: The control’s property that receives the value when the link selection is "Set link to here." For example, if you select "Set link to here" on an Indicator Light’s property, then link to a Toggle Button’s property, the Indicator Light is the Destination. • Ending control: The control that is selected to end the link process. When you create right-click links, the beginning control normally keeps the focus when the link is complete. To shift the focus to the Ending control when the link is complete, hold down the Ctrl key while you right-click on the Destination control. Link Properties All links are created and displayed on each control’s Properties, Methods, or Events tabs, and displayed on the Link Summary tab. This example shows links on a control’s Properties tab. For more details about link colors, see “Link Summary” on page 4-22 Hover over link for tooltip Click arrows to move outgoing links up or down in links list. Click ... to expand and contract links list Click icon to jump to linked property Link Events and Methods You can only link from one control’s event (source) to another control’s method (destination), but you can create the link from either control. If you create links from multiple events to one method, the events are processed in the order that they appear in the method’s link display. Multiple events linked to the one method If you create links from one event to multiple methods, the methods are processed in the order that they appear in the events’s link display. One event linked to multiple methods Creating Drag and Drop Links in CPM You can make multiple links between control properties, methods, and events. When the source changes, the destination is updated based on the order in the outgoing links list. Datalogic Automation Inc. 4-20 Impact Reference Guide Links between CPM controls There are two ways to create a link between controls. You can use left-click drag and drop, or right-click. This section describes how to create drag and drop links. See “Create Right-Click Links in CPM” on page 421 for right-click links. When you create a drag and drop link, CPM will always give you choice of what destination property, method, or event should get the link. The choice shown depends on the type of source data you are linking. The following sections will explain how to create drag and drop links. NOTE: You can only create drag and drop links to and from controls on the same panel. To link controls between panels, see “Create Right-Click Links in CPM” on page 4-21. To create a link from one control to another using drag and drop 1. Display the Control Panel Tree if you want to use it to add links. 2. Select the desired control from the Canvas or the Control Panel Tree and click the Properties, Methods, or Events tab. 3. Left-click on the desired source property, method, or event, then drag it to the destination control on the Control Panel Canvas or the Control Tree, and release it. 4. Select the property, method, or event in the destination control that is to receive the link. 5. Repeat steps 3 and 4 until all links have been made. To create a link to one control from another using drag and drop 1. Display the Control Panel Tree if you want to use it to add links. 2. Select the desired control from the Canvas or the Control Panel Tree and click the Properties, Methods, or Events tab. 3. Hold down the Shift key, left-click on the desired source property, method, or event, then drag it to the source control on the Control Panel Canvas or the Control Tree, and release it. 4. Select the property, method, or event in the source control that is to provide the link. 5. Repeat steps 3 and 4 until all links have been made. Create Right-Click Links in CPM When you create a right-click link, CPM will always give you choice of whether you want to create a Set or Get Data link. The property choice shown depends on the type of data you are linking. In describing right-click links, the following terms are used in this section: • Source control: The control’s property that provides the value when the link selection is "Get link from here." For example, if you select "Get link from here" on a Toggle Button’s property, then link to an Indicator Light, the Toggle Button is the Source. • Beginning control: The control that is selected to start the link process. When you create right-click links, the Beginning control normally gets the focus when the link is complete. To shift the focus to the Ending control when the link is complete, hold down the Ctrl key while you left-click on the desired Ending control property. • Destination control: The control’s property that receives the value when the link selection is "Set link to here." For example, if you select "Set link to here" on an Indicator Light’s property, then link to a Toggle Button’s property, the Indicator Light is the Destination. • Ending control: The control that is selected to end the link process. When you create right-click links, the Beginning control normally keeps the focus when the link is complete. To shift the focus to the 4-21 Datalogic Automation Inc. Links between CPM controls Impact Reference Guide Ending control when the link is complete, hold down the Ctrl key while you left-click on the desired Ending control property. To create a link from one control (source) to another (destination) using right-click 1. Display the Control Panel Tree if you want to use it to add links. 2. Select the beginning control from the Canvas or the Control Panel Tree and click the Properties, Methods, or Events tab. 3. Right-click on the desired property, method, or event, then left-click on "Get link from here." Some properties and methods will only accept Set Data links. 4. Hold the mouse cursor over the destination control on the Canvas or the Control Tree and right-click. The choices displayed will depend on the source control data type and the compatible data types in the destination. If the destination control does not have a compatible data type, no choices are displayed. 5. Left-click on the desired "Link To" property, method, or event to select it. (When the link is complete, the focus will shift back to the source control. If you want the focus to remain on the destination control, hold the Ctrl key while you left-click on the desired destination control property.) 6. Repeat steps 3, 4, and 5 until all links have been made. To create a link to one control (destination) from another (source) using right-click 1. Display the Control Panel Tree if you want to use it to add links. 2. Select the beginning control from the Canvas or the Control Panel Tree and click the Properties, Methods, or Events tab. 3. Right-click on the desired property, then left-click on "Set link to here." Some properties and methods will only accept Set Data links. 4. Hold the mouse cursor over the source control on the Canvas or the Control Tree and right-click. The choices displayed will depend on the destination control data type and the compatible data types in the source. If the source control does not have a compatible data type, no choices are displayed. 5. Left-click on the desired "Link From" property, method, or event to select it. (When the link is complete, the focus will shift back to the destination control. If you want the focus to remain on the source control, hold the Ctrl key while you left-click on the desired source control property.) 6. Repeat steps 3, 4, and 5 until all links have been made. Deleting Links in CPM You must delete links within the appropriate tab in the control. To delete a link in CPM 1. Display the Control Panel Tree if you want to use it to delete links. 2. Click on the desired control in the Control Panel Tree or on the Canvas. Delete Link 3. Depending on the type of link you want to delete, click the Properties, Methods, or Events tab. 4. Select the link you want to delete, then click the Delete Link icon. 5. Repeat step 4 until all the desired links are deleted. Link Summary The Links Summary tab displays links to and from the currently selected control or Control Panel. Click the Advanced Browser button to display the data type and value. Datalogic Automation Inc. 4-22 Impact Reference Guide CPM Controls To open the Link Browser window, click the Links tab. Print Advanced/Basic Browser Control Name Print Preview Print to Text File Hover over link for tooltip To expand the browser window to include additional fields, click the Advanced Browser button. The link direction arrow points from the source to the destination. The following fields are displayed in the browser window, from left to right. • Icon and name of the currently selected control or panel • Source/Destination property or method name • Source/Destination value (advanced browser) • Link direction arrow • Icon and name of the Source/Destination control • Source/Destination value (advanced browser) • Source/Destination data type (advanced browser) The color of the Source/Destination field name indicates the link’s status: • Blue - link endpoints • Orange - method and event links • Red - unresolved links (e.g. due to a vision program not being loaded on the device) • Black - property link endpoints To preview a printed list of all the link information, click the print preview icon. To print the list, click the print icon. To expand any column to the match the length of the data in the column, click the column header. You can also click on the column divider on the column header and drag the column to the desired width. CPM Controls There are several types of CPM controls, including those that receive and display images and other data (including regions of interest), and those that perform output operations (such as sending values to an inspection task and controls to the Impact device). Every control has a Name which is displayed on the General tab. Controls also have properties, methods, and events which are shown on their respective tabs. The Impact Connector control also has Get Data, Set 4-23 Datalogic Automation Inc. CPM Control Palette and Groups Impact Reference Guide Data, Method, and tabs. See “Control Panel” on page 4-11 for details about adding controls to a Control Panel. NOTE: All distances are in pixels, unless otherwise noted. All X coordinates are referenced to the left edge of the panel. All Y coordinates are referenced to the top edge of the panel. CPM Control Palette and Groups CPM controls are contained in the palette and grouped within groups based on their general purpose. For control details, refer to the page number in the tables below (displayed in Group, then control, then alphabetical order). Images Input Display General Histogram 4-26 Button4-48 Chart 4-82 Basic Interpreter 4102 Image Display 4-9 Check Box 4-49 Frame 4-86 Change Log 4-103 Arc ROI 4-32 Drop List Selector 450 Graphic Display 4-87 Execute Command 4-106 Blob List 4-33 Font Library 4-52 Indicator Light 4-88 Impact Connector 4-107 Greyscale Template Model 4-36 Character Contour Library 4-52 Numeric Display 4-89 Load Image 4-111 Line List 4-37 Keyboard 4-53 Rich Text 4-90 Load Vision Program 4-112 Line ROI 4-38 Numeric Entry 4-55 Scrolling Table 4-91 Save Vision Program 4-113 Origin 4-40 Password 4-56 Tab 4-94 Scriptor 4-115 Origin List 4-41 Radio Button 4-63 Tab Group 4-95 TCP-IP Logger 4121 Point List 4-42 Radio Button Group 4-64 Text Display 4-96 Timer 4-123 Rectangle List 443 Range 4-65 XBar-R Chart 4-98 Shape List 4-46 Range Scroll 4-68 Slider 4-70 Table Text Entry Toggle Button Tolerance Datalogic Automation Inc. 4-24 Impact Reference Guide Images Group Images Group D y n a m i c R O I To o l t i ps All controls have a Tooltip Text property. The text in this property is displayed when the cursor is held over the control. Tool tips for Image controls with ROIs can contain special keywords that will be replaced by information about the ROI. Each type of Image control uses different keywords. Text may be interspersed with keywords, and more than one keyword can be used in a tooltip text property. For example, if the tooltip text for a Rectangle ROI is Inspection Area %extents% the tooltip will display the text "Inspection Area," along with the ROI values, like this: Inspection Area 100, 100, 90, 200, 200 The Blob List and Greyscale Template Model do not have dynamic tooltips. Tooltips in these controls are displayed for individual elements. For example, a BlobList tooltip is displayed when the cursor is held over each Blob ROI in the list. ROI Type Keyword Properties Displayed Arc %extents% X and Y of center, radius, start angle, arc angle, width %location% X and Y of the arc’s start point %hints% description of editing that can be performed %extents% X and Y of start point, X and Y of end point, angle %location% X and Y of the line’s start point %endpoints% X and Y of start point, X and Y of end point %hints% description of editing that can be performed %extents% X and Y, angle, radius %location% X and Y %hints% description of editing that can be performed Point List %location% X and Y of the point the cursor is over Rectangle List Rectangle %extents% X and Y, angle, width, height %location% X and Y %hints% description of editing that can be performed Line List Line Origin Shape List The same text is applied to all Shapes in the list, but the property displayed depends on the Shape ROI type 4-25 Datalogic Automation Inc. Histogram Impact Reference Guide ROI Type Keyword Rectangle Circle Polygon Properties Displayed See Rectangle ROI type above %extents% X and Y, radius %location% X and Y %hints% description of editing that can be performed %extents% X and Y of each polygon vertex %location% X and Y of the vertex "grab region" closest to the mouse %vertex% The number of the vertex with a "grab region" closest to the mouse %hints% description of editing that can be performed Histogram The Histogram control displays the histogram of a selected ROI as a bar chart, where each bar represents the greyscale intensity as a percent. The image is linked from a vision program task then this control is linked to the Image Display Connection property on the Image Display control. Property Name What it is Height The control’s height. Width The control’s width. X The X coordinate of the control’s left edge. Y The Y coordinate of the control’s top edge. Enabled If True, the control is enabled. Histogram Entire ROI List If True, and the selected ROI type is a list ROI, the entire list is displayed in the histogram. Greyscale Bar Color Click in the field to select a color for the control’s greyscale value bars. Greyscale Maximum (%) The maximum greyscale value of the currently displayed histogram. Greyscale Mean (%) The mean greyscale value of the currently displayed histogram. Greyscale Minimum (%) The minimum greyscale value of the currently displayed histogram. Image Display Connection Click in the link field to link to the desired Image Display Connection property. Axis Color Click in the field to select a color for the histogram’s X and Y axis and their values. Datalogic Automation Inc. 4-26 Impact Reference Guide 4-27 Histogram Property Name What it is Background Color Click in the field to select a color for the control’s background Transparent Background If True, the control’s background is transparent. The Background Color property is ignored. Primary Threshold Midpoint Cursor Color Click in the field to select a color for Primary Threshold Midpoint Cursor. Primary Threshold Midpoint Cursor Displayed If True, a vertical line is displayed at the midpoint between the primary minimum and maximum threshold positions. Primary Threshold Midpoint Cursor Enabled If True, the Primary Threshold Midpoint Cursor can be moved. If this value is changed, the Primary Minimum and Maximum Threshold Ranges are recalculated. Primary Threshold Range Cursor Color Click in the field to select a color for Primary Threshold Minimum and Maximum Range Cursors. Primary Threshold Range Cursors Displayed If True, vertical lines are displayed at the Primary Minimum and Maximum Threshold positions. Primary Threshold Range Cursors Enabled If True, the Primary Threshold Minimum and Maximum Range Cursors can be moved. Primary Threshold Maximum (%) The histogram’s primary maximum threshold value. Primary Threshold Midpoint (%) The histogram’s primary midpoint threshold value. Primary Threshold Minimum (%) The histogram’s primary minimum threshold value. Primary Threshold Width The primary threshold range (from the minimum to the maximum threshold values). Tooltip Text Text displayed when the cursor is held over the control in Run mode. Visible If True, the histogram is visible. Method Name What it does Disable Disables the control; it cannot be used Enable Enables the control so it can be used Hide Makes the control invisible Show Makes the control visible Datalogic Automation Inc. Image Display Impact Reference Guide Event Name When it happens Threshold Range Changed When either Threshold Range value changes Image Display The Image Display control displays an image from a vision program. If Auto Image Save Enabled is true, the displayed image is saved to a file with .png extension. The image is linked to the Impact Connector control from a vision program task then linked to this control. Property Name What it is Background Click in the field to choose the color displayed behind the image. Auto Image Save All Name This is the image file name of all images when Auto Image Save Enabled is true, and Auto Image Save Type is All. This name is combined with an automatically incremented image save number. If there are no files in the folder with this name, the image save number is reset to one. IMPORTANT: File names are case sensitive. Auto Image Save Enabled If True, the displayed image is saved to a file with the .png extension. The file name is entered in the Save Image File property. The directory path is entered in the Save Image Path property. IMPORTANT: File names are case sensitive. Auto Image Save Failed Name This is the image file name of a Failed image when Auto Image Save Enabled is true, and Auto Image Save Type is Failed. This name is combined with an automatically incremented image save number. If there are no files in the folder with this name, the image save number is reset to one. IMPORTANT: File names are case sensitive. Auto Image Save Passed Name This is the image file name of a Passed image when Auto Image Save Enabled is true, and Auto Image Save Type is Passed. This name is combined with an automatically incremented image save number. If there are no files in the folder with this name, the image save number is reset to one. IMPORTANT: File names are case sensitive. Auto Image Save Rollover Limit The maximum number of image files of each image Type (and Image Save Name) that are saved in the directory specified in the Save Image Path property. Once the limit has been reached, the Image file number is reset to one and existing files are overwritten. For example, if the Rollover Limit is 100 and image types of Passed, Failed and All are selected, the current image directory will contain a maximum of 300 files. If the Image Save Name is unique with each image, the Rollover Limit will never be reached. Datalogic Automation Inc. 4-28 Impact Reference Guide 4-29 Image Display Property Name What it is Auto Image Save Type If All is selected, displayed images are saved to the Save Image Path with the name in the Auto Image Save All Name property. If Failed is selected, displayed images with the Image Passed property of false are saved to the Save Image Path with the name in the Auto Image Save Failed Name property. If Passed is selected, displayed images with the Image Passed property of true are saved to the Save Image Path with the name in the Auto Image Save Passed Name property. If this property is changed, the Image file number is reset to one. Auto Image Save With ROIs When true, and the property Auto Image Save Enabled is true, displayed images are saved with any currently displayed ROIs. These images are saved in 24-bit format color and cannot be used as inspection images. Selected Pixel Color The color of the pixel beneath the cursor when the mouse is clicked Selected Pixel Intensity The intensity of the pixel beneath the cursor when the mouse is clicked Select Pixel Location The location of the pixel beneath the cursor when the mouse is clicked Editing Enabled If True, ROI controls may be moved and resized. Height The image display’s height. Image Click in the link field to link the display image. (It must be linked into the Impact Connector tool from a vision program task.) Image Display Connection The link source for the Histogram control’s displayed image. Display Image Name If True, the image name is displayed at the top of the image frame. Image Passed This property indicates the pass or fail status of the currently displayed image so that image can be saved as a Passed or Failed image. This property is typically linked to a Boolean that indicates the final inspection status. Image Status Border When None is selected, no border is shown around the image. When Failed is selected, a red border is displayed around images with an Image Passed property of False. When Passed and Failed is selected, a red border is displayed around images with an Image Passed property of False and a green border is displayed around images with an Image Passed property of true. Maximum Pseudocolor Threshold The upper threshold for color representation of each pixel’s grey level in the image. Minimum Pseuodocolor Threshold The lower threshold for color representation of each pixel’s grey level in the image. Datalogic Automation Inc. Image Display Impact Reference Guide Property Name What it is Display Orientation Normal: The image is displayed without rotation 90: The image is rotated 90 degrees clockwise. 180: The image is rotated 180 degrees clockwise. 270: The image is rotated 270 degrees clockwise. Note: This changes only the image and ROI display orientation, the display coordinates remain the same. For example, if the Display Orientation is 90, the location 0, 0 is in the upper right corner of the display, instead of the upper left corner as it would be with the Normal setting. Pseuodocolor Color The color representation of each pixel’s grey level in the image. Pseudocolor Enabled If True, pseudocoloring is visible. Save Image File The file name for saving the image if the saveImage method is called. (The "png" extension is added to the file name and the image is saved in Portable Network Graphics format.) IMPORTANT: File names are case sensitive. Save Image Path The path for saving the image if the Save Image or Auto Save methods are invoked. The currently connected device’s IP address is added to the path name. For example, if you enter a path of c:/saved_images, the images are saved in the folder c:/saved_images/127.0.0.1/ Show Cursor Value If True, the cursor’s position on the image, with grey level or RGB value, will displayed when it is not over an ROI. Toolbar Visible If True, the Zoom toolbar is visible. Visible If True, the Image is visible. Width The image display’s width. Watermark Color The watermark’s background color. The value of the transparency property adjusts this color. Watermark Text This text is drawn repeatedly on the watermark in the same color as the watermark, but 10% more opaque. If this property is empty, only the watermark color is painted on the image. Watermark Transparency The watermark color’s transparency (a value of 100 is completely transparent, 10 is the minimum so the watermark can never be completely opaque). Watermark Visible If True, a transparent layer of text and color is painted over the displayed image. See the Watermark Color, Watermark Text, and Watermark Transparency properties. X The X coordinate of the control’s left edge. Y The Y coordinate of the control’s top edge. Datalogic Automation Inc. 4-30 Impact Reference Guide 4-31 Image Display Property Name What it is Zoom The zoom factor for the displayed image, with 1.0 as the default. For example, if Zoom is 2.0, the image is displayed twice its size. If you enter a value of -1, the value is automatically adjusted so the image fits the Image control. If you enter a value of -2, the value is automatically adjusted so the image and the ROIs fit the Image control. Method Name What it does Show Makes the control visible Reset Auto Save Image File Numbering If the Auto Image Save Enabled property is true, resets the saved Image file number to one. The file number also reset to one when there are no files in the folder with the Image Save Name, the Image Save Rollover Limit is reached, or the Image Save Type is changed. Delete Saved Image Files If the Auto Image Save Enabled property is true, all the .png files in the directory named by the Save Image Path property (concatenated with the device’s IP address) are deleted. If the Auto Image Save Enabled property is false, all the .png files in the directory named by the Save Image Path property are deleted Save Image Saves the image being displayed to the file in the Save Image Path with the name Save Image Name Auto Save Image This method should be linked to the Impact Connector's Get Data Completed event to ensure that all of the necessary linked properties for the image will have the correct values (such as the Image Passed property) before it is saved. If Auto Image Save Enabled is true, the next Auto Image Save file name is generated and the currently displayed image is saved to that file. Images are saved according to the Auto Image Save properties. If Auto Image Save Enabled is false, the image is NOT saved. IMPORTANT: File names are case sensitive. Save Image With ROIs Saves the image being displayed with its ROIs Hide Makes the control invisible Event Name When it happens Mouse Click When the user clicks the mouse on the image. No event is generated if no image is displayed. Image Saved When the currently displayed image has been successfully written to the file Image Displayed When the image display is complete Datalogic Automation Inc. Arc ROI Impact Reference Guide Arc ROI The Arc ROI control displays an Arc ROI on the displayed image. The origin is linked from a vision program tool output. See “ROI Color Properties” on page 4-34 for more ROI color properties information. Note: You must have an Image Display control in the Control Panel to add this control. Property Name What it is Arc Angle The ROI’s angle (in radians). One radian is equal, in degrees, to 180 divided by pi. One degree is equal, in radians, to pi divided by 180. This can also be stated as approximately 57.296 degrees per radian or 0.01745 radians per degree. Arrow Visible If True, the ROI’s arrow is visible. True Color Click in the field to choose the ROI’s True color. Draw Filled If True, the ROI is filled with the appropriate True or False Color. Movable If True, the ROI can be moved. (The Selectable property must be True.) Origin Link the origin from the vision program tool. Origin Angle The angle of the linked tool’s origin. Origin Color Click in the field to choose the origin’s display color. Origin Visible If True, the linked tool’s origin is visible. Origin X The X coordinate of the linked tool’s origin. Origin Y The Y coordinate of the linked tool’s origin. Radius The ROIs radius. False Color Click in the field to choose the ROI’s False color. Selectable If True, ROI can be selected. Sizable If True, the ROI can be resized. (The Selectable property must be True.) Start Angle The ROIs rotation, in radians. Tooltip Text Text displayed when the cursor is held over the control in Run mode. Fill Color Transparency The percentage of fill color transparency. Use True Color If True, the ROI is colored in the True Color. Visible If True, the ROI is visible. Width The ROI’s width. Width Visible If True, the ROI is drawn the width indicated by the Width property. If False, the ROI is drawn one pixel wide. X The X coordinate of the control’s left edge. Y The Y coordinate of the control’s top edge. Datalogic Automation Inc. 4-32 Impact Reference Guide Blob List Method Name What it does Disable Editing Disables the ability to edit the control Enable Editing Enables the ability to edit the control Hide Makes the control invisible Show Makes the control visible Event Name When it happens Extents Edited When the ROI is modified either with the mouse or by changing one of the extent’s properties. Selected Enables the ability to edit the control Unselected Makes the control invisible Blob List The Blob List ROI control displays Blob ROIs on the displayed image. The blob list and origin are linked from a vision program tool output. See “ROI Color Properties” on page 4-34 for more ROI color properties information. Note: You must have an Image Display control in the Control Panel to add this control. 4-33 Property Name What it is Blob List Link the list of blobs that are used to draw the ROI from a vision program tool with the data type Blob List. Color by States If True, the ROI is colored with the True or False Color based on its state from the State List. False Color Click in the field to choose the ROI’s False color. False State Visible If True, the ROI is visible when it’s State is False. Draw Filled If True, the ROI is drawn filled with the appropriate True or False Color. Origin Link the origin from the vision program tool. Origin Angle The angle of the linked tool’s origin. Origin Color Click in the field to choose the tool’s origin color. Origin Visible If True, the linked tool’s origin is visible. Origin X The X coordinate of the linked tool’s origin. Origin Y The Y coordinate of the linked tool’s origin. Selectable If True, the ROI can be selected. State List Link the boolean list from the vision program tool. This indicates the ROI’s True or False State. Datalogic Automation Inc. Blob List Impact Reference Guide Property Name What it is Tooltip Text Text displayed when the cursor is held over the control in Run mode. Fill Color Transparency The ROI’s transparency, from 0 to 100 percent. True Color Click in the field to choose the ROI’s True color. True State Visible If True, the ROI is visible when it’s State is True. Use True Color If True, the ROI is colored in the True Color. Visible If True, the control is visible. Method Name What it does Hide Makes the control invisible Show Makes the control visible ROI Color Properties All ROIs have the color properties of True Color, False Color, Use True Color, and Visible. List ROIs have these color properties in addition: State List, False State Visible, True State Visible, and Color By States. The Color by States property updates automatically based on how you are using the ROI. If you change the Use True Color property to True, all of the ROIs in the list will take on the True Color and the Color by States property are set to False If you change the Use True Color property to False, all of the ROIs in the list will take on the False Color and the Color by States property will again be set to False. If you link a boolean list (from a data link in the Impact Connector control) to the State List property, the ROIs in the list will take on True Colors and False Colors corresponding to the True and False values in the State List, and the Color by States property is set to True. Also, when the value of the State List is updated, the ROIs in the List become visible or invisible, based on the settings of the True State Visible and False State Visible properties. If the Visible property is changed, both the True State Visible and the False State Visible properties are changed to match it. Contour Model The Contour Model control displays an ROI linked from a vision program tool with a contour model output. See “ROI Color Properties” on page 4-34 for more ROI color properties information. Note: You must have an Image Display control in the Control Panel to add this control. Property Name What it is True Color Click in the field to choose the ROI’s True display color. Datalogic Automation Inc. 4-34 Impact Reference Guide Blob List Property Name What it is Contour Model Link the Contour Model for the ROI from a vision program tool. Origin Link the origin from the vision program tool. Origin Angle The angle of the linked tool’s origin. Origin Color Click in the field to choose the origin’s display color. Origin Visible If True, the linked tool’s origin is visible. Origin X The X coordinate of the linked tool’s origin. Origin Y The Y coordinate of the linked tool’s origin. False Color Click in the field to choose the origin’s False display color Selectable If True, the ROI can be selected. ToolTip Text Text displayed when the cursor is held over the control in Run mode. Use True Color If True, the ROI is colored in the True Color. Visible If True, the Contour Model ROI is visible. Method Name What it does Hide Makes the control invisible Show Makes the control visible Correlation Model The Correlation Model control displays an ROI from a Correlation Pattern Find tool in a vision program. See “ROI Color Properties” on page 4-34 for more ROI color properties information. Note: You must have an Image Display control in the Control Panel to add this control. 4-35 Property Name What it is True Color Click in the field to choose the ROI’s True display color. Correlation Model The Correlation Model linked from a vision program Correlation Pattern Find tool. Origin Link the origin from the vision program tool. Origin Angle The angle of the linked tool’s origin. Origin Color Click in the field to choose the origin’s display color. Origin Visible If True, the linked tool’s origin is visible. Origin X The X coordinate of the linked tool’s origin. Origin Y The Y coordinate of the linked tool’s origin. Datalogic Automation Inc. Greyscale Template Model Impact Reference Guide Property Name What it is False Color Click in the field to choose the ROI’s False display color. Selectable If True, the ROI can be selected. ToolTip Text Text displayed when the cursor is held over the control in Run mode. Use True Color If True, the ROI is colored in the True Color. Visible If True, the ROI is visible. Method Name What it does Hide Makes the control invisible Show Makes the control visible Greyscale Template Model The Greyscale Template Model control displays an ROI from a Greyscale Template tool in a vision program. See “ROI Color Properties” on page 4-34 for more ROI color properties information. Note: You must have an Image Display control in the Control Panel to add this control. Property Name What it is True Color Click in the field to choose the ROI’s True color. Draw Filled If True, the ROI is filled with the appropriate True or False Color. Greyscale Template Model Link the Greyscale Template Model from a vision program tool. Origin Link the origin from the vision program tool. Origin Angle The angle of the linked tool’s origin. Origin Color Click in the field to choose the tool’s origin color. Origin Visible If True, the linked tool’s origin is visible. Origin X The X coordinate of the linked tool’s origin. Origin Y The Y coordinate of the linked tool’s origin. False Color Click in the field to choose the ROI’s False display color. Selectable If True, the ROI can be selected. Tooltip Text Text displayed when the cursor is held over the control in Run mode. Fill Color Transparency The ROI’s transparency, from 0 to 100 percent. Use True Color If True, the ROI is colored in the True Color. Visible If True, the control is visible. Datalogic Automation Inc. 4-36 Impact Reference Guide Line List Method Name What it does Hide Makes the control invisible Show Makes the control visible Line List The Line List ROI control displays line ROIs on the displayed image. The line list and origin are linked from a vision program tool output (with the data type Line Segment List). See “ROI Color Properties” on page 434 for more ROI color properties information. Note: You must have an Image Display control in the Control Panel to add this control. 4-37 Property Name What it is Arrow Visible If True, the arrows on the ROIs are visible. Color by States If True, the ROI is colored with the True or False Color based on its state from the State List. False Color Click in the field to choose the display color for failing ROIs (based on the State List property). False State Visible If True, failed ROIs are visible. Line List Link the Line List from a vision program tool’s Line Segment List. Movable If True, the ROI can be moved. (The Selectable property must be True.) Origin Link the origin from the vision program tool. Origin Angle The angle of the linked tool’s origin. Origin Color Click in the field to choose the origin’s display color. Origin Visible If True, the linked tool’s origin is visible. Origin X The X coordinate of the linked tool’s origin. Origin Y The Y coordinate of the linked tool’s origin. State List Link the In Tolerance List from the vision program tool that contains the Line List. Selectable If True, the ROIs can be selected. Sizable If True, the ROI can be resized. (The Selectable property must be True.) Tooltip Text Text displayed when the cursor is held over the control in Run mode. True Color Click in the field to choose the ROI’s True color. True State Visible If True, the ROI is visible when it’s State is True. Use True Color If True, the ROI is colored in the True Color. Visible If True, the ROI is visible. Datalogic Automation Inc. Line ROI Impact Reference Guide Property Name What it is Wide Line List Link the Wide Line List from a vision program tool’s Wide Line Segment List. Width The ROI’s display width. Width Visible If True, ROIs is drawn the width indicated by the Width property. If False, ROIs is drawn one pixel wide. Method Name What it does Disable Editing Disables the ability to edit the control Enable Editing Enables the ability to edit the control Hide Makes the control invisible Show Makes the control visible Event Name When it happens Extents Edited When the ROI is modified either with the mouse or by changing one of the extent’s properties. Selected Enables the ability to edit the control Unselected Makes the control invisible Line ROI The Line ROI control displays a Line ROI in the Image Display control. The line extents and origin are linked from a vision program tool output (with the data type Line Segment). See “ROI Color Properties” on page 4-34 for more ROI color properties information. Note: You must have an Image Display control in the Control Panel to add this control. Property Name What it is Angle The ROI’s angle. Arrow Visible If True, the ROI’s arrow is visible. True Color Click in the field to choose the ROI’s True color. Draw to Edge If True, the ROI is extended to the image’s edges Draw Filled If True, the ROI is filled with the appropriate True or False Color. Length The ROI’s length. Line Extents Link the Line Segment from a vision program tool’s Line Segment List. (Extents are the end’s X-Y coordinates.) Mid Point X The X coordinate of the ROI’s midpoint. Datalogic Automation Inc. 4-38 Impact Reference Guide 4-39 Line ROI Property Name What it is Mid Point Y The Y coordinate of the ROI’s midpoint. Movable If True, the ROI can be moved. (The Selectable property must be True.) Origin Link the origin from the vision program tool. Origin Angle The angle of the linked tool’s origin. Origin Color Click in the field to choose the origin’s display color. Origin Visible If True, the linked tool’s origin is visible. Origin X The X coordinate of the linked tool’s origin. Origin Y The Y coordinate of the linked tool’s origin. Rectangle Extents Link the ROI’s extents from the vision program tool. (Extents are the corner’s X-Y coordinates.) False Color Click in the field to choose the ROI’s failing display color (pass or fail is based on the State List property). Selectable If True, the ROI can be selected. Sizable If True, the ROI can be resized. (The Selectable property must be True.) Tooltip Text Text displayed when the cursor is held over the control in Run mode. Fill Color Transparency The fill’s transparency; a larger number is more transparent (0-100%) Use True Color If True, the ROI is colored in the True Color. Visible If True, the ROI is visible. WideLine Extents Link the Wide Line Segment from a vision program tool’s Wide Line Segment List. (Extents are the end’s X-Y coordinates.) Width The Line ROI’s display width. Width Visible If True, the ROI is drawn the width indicated by the Width property. If False, the ROI is drawn one pixel wide. Method Name What it does Disable Editing Disables the ability to edit the control Enable Editing Enables the ability to edit the control Hide Makes the control invisible Show Makes the control visible Event Name When it happens Extents Edited When the ROI is modified either with the mouse or by changing one of the extent’s properties. Datalogic Automation Inc. Origin Impact Reference Guide Event Name When it happens Selected Enables the ability to edit the control Unselected Makes the control invisible Origin The Origin control displays an Origin linked from a vision program tool output. A tool’s origin can be linked directly to controls that display an ROI. This control is used primarily to display only the Origin ROI. See “ROI Color Properties” on page 4-34 for more ROI color properties information. Note: You must have an Image Display control in the Control Panel to add this control. Property Name What it is Angle The Origin ROI’s angle. Arrow Visible If True, the ROI’s arrow is visible. True Color Click in the field to choose the ROI’s passing display color. Draw to Edge If True, the ROI is extended to the image’s edges Movable If True, the Origin ROI can be moved. (The Selectable property must be True.) Origin Link the origin from the vision program tool. Origin Angle The angle of the linked tool’s origin. Origin Color Click in the field to choose the tool’s origin color. Extents Link the ROI’s extents from the vision program tool. (Extents are the corner’s X-Y coordinates.) Origin Visible If True, the linked tool’s origin is visible. Origin X The X coordinate of the linked tool’s origin. Origin Y The Y coordinate of the linked tool’s origin. Radius The radius of a circle drawn around the control’s ROI, in pixels. False Color Click in the field to choose the ROI’s failing display color. Selectable If True, the Origin ROI can be selected. Sizable If True, the Origin ROI can be resized. (The Selectable property must be True.) Tooltip Text Text displayed when the cursor is held over the control in Run mode. Use True Color If True, the ROI is colored in the True Color. Visible If True, the Origin ROI is visible. X The Origin ROI’s X coordinate. Datalogic Automation Inc. 4-40 Impact Reference Guide Origin List Property Name What it is Y The Origin ROI’s Y coordinate. Method Name What it does Disable Editing Disables the ability to edit the control Enable Editing Enables the ability to edit the control Hide Makes the control invisible Show Makes the control visible Event Name When it happens Extents Edited When the ROI is modified either with the mouse or by changing one of the extent’s properties. Selected Enables the ability to edit the control Unselected Makes the control invisible Origin List The Origin List control displays an Origin List linked from a vision program tool output. See “ROI Color Properties” on page 4-34 for more ROI color properties information. Note: You must have an Image Display control in the Control Panel to add this control. 4-41 Property Name What it is Arrow Visible If True, the ROI’s arrow is visible. Color by States If True, the ROI is colored with the True or False Color based on its state from the State List. Draw to Edge If True, the ROI will be drawn only to the image edge. If False, the ROI does not stop at the image edge. False Color Click in the field to choose the ROI’s False color. False State Visible If True, the ROI is visible when it’s State is False. Movable If True, the ROI can be moved. (The Selectable property must be True.) Origin Link the origin from the vision program tool. Origin Angle The angle of the linked tool’s origin. Origin Color Click in the field to choose the tool’s origin color. Origin List Link the Origin List from the vision program tool. Origin Visible If True, the linked tool’s origin is visible. Datalogic Automation Inc. Point List Impact Reference Guide Property Name What it is Origin X The X coordinate of the linked tool’s origin. Origin Y The Y coordinate of the linked tool’s origin. Radius The radius of a circle drawn around the control’s ROI, in pixels. State List Link the boolean list from the vision program tool. This indicates the ROI’s True or False State. Selectable If True, the ROI can be selected. Sizable If True, the ROI can be resized. (The Selectable property must be True.) Tooltip Text Text displayed when the cursor is held over the control in Run mode. True Color Click in the field to choose the ROI’s True color. True State Visible If True, the ROI is visible when it’s State is True. Use True Color If True, the ROI is colored in the True Color. Visible If True, the control is visible. Method Name What it does Disable Editing Disables the ability to edit the control Enable Editing Enables the ability to edit the control Hide Makes the control invisible Show Makes the control visible Event Name When it happens Extents Edited When the ROI is modified either with the mouse or by changing one of the extent’s properties. Selected Enables the ability to edit the control Unselected Makes the control invisible Point List The Point List control displays a point list linked from a vision program tool output. See “ROI Color Properties” on page 4-34 for more ROI color properties information. Note: You must have an Image Display control in the Control Panel to add this control. Property Name What it is True Color Click in the field to choose the ROI’s passing display color. Datalogic Automation Inc. 4-42 Impact Reference Guide Rectangle List Property Name What it is Color by States If True, the ROI is colored with the True or False Color based on its state from the State List. False Color Click in the field to choose the ROI’s False color. False State Visible If True, the ROI is visible when it’s State is False. Origin Link the origin from the vision program tool. Origin Angle The angle of the linked tool’s origin. Origin Color Click in the field to choose the tool’s origin color. Origin Visible If True, the linked tool’s origin is visible. Origin X The X coordinate of the linked tool’s origin. Origin Y The Y coordinate of the linked tool’s origin. Point List Link the Point List from the vision program tool. False Color Click in the field to choose the ROI’s failing display color (pass or fail is based on the State List property). State List Link the boolean list from the vision program tool. This indicates the ROI’s True or False State. True Color Click in the field to choose the ROI’s True color. True State Visible If True, the ROI is visible when it’s State is True. Use True Color If True, the ROI is colored in the True Color. Visible If True, the ROI is visible. Method Name What it does Hide Makes the control invisible Show Makes the control visible Event Name When it happens Extents Edited When the ROI is modified either with the mouse or by changing one of the extent’s properties. Selected Enables the ability to edit the control Unselected Makes the control invisible Rectangle List The Rectangle List control displays a Rectangle List ROI on the displayed image. The rectangle list and origin are linked from a vision program tool output. See “ROI Color Properties” on page 4-34 for more ROI color properties information. 4-43 Datalogic Automation Inc. Rectangle List Impact Reference Guide Note: You must have an Image Display control in the Control Panel to add this control. Property Name What it is Color by States If True, the ROI is colored with the True or False Color based on its state from the State List. False Color Click in the field to choose the ROI’s failing display color. False State Visible If True, failing ROIs are displayed in the False Color. Draw Filled If True, the ROI is filled with the appropriate True or False Color. Movable If True, the control can be moved. (The Selectable property must be True.) Origin Link the origin from the vision program tool. Origin Angle The angle of the linked tool’s origin. Origin Color Click in the field to choose the origin color. Origin Visible If True, the linked tool’s origin is visible. Origin X The X coordinate of the linked tool’s origin. Origin Y The Y coordinate of the linked tool’s origin. Rectangle List Link the Rectangle List from the vision program tool. State List Link the tool’s State List. Selectable If True, the ROI can be selected. Sizable If True, the ROI can be resized. (The Selectable property must be True.) Tooltip Text Text displayed when the cursor is held over the control in Run mode. Fill Color Transparency The fill’s transparency (0-100%) True Color Click in the field to choose the ROI’s True color. True State Visible If True, the ROI is visible when it’s State is True. Use True Color If True, the ROI is colored in the True Color. Visible If True, the ROI is visible. Method Name What it does Activate for Editing Makes the ROI available for editing Disable Editing Disables the ability to edit the control Enable Editing Enables the ability to edit the control Hide Makes the control invisible Show Makes the control visible Datalogic Automation Inc. 4-44 Impact Reference Guide Rectangle ROI Event Name When it happens Extents Edited When the ROI is modified either with the mouse or by changing one of the extent’s properties. Selected Enables the ability to edit the control Unselected Makes the control invisible Rectangle ROI The Rectangle ROI control displays a Rectangle ROI on the displayed image. The rectangle extents and origin are linked from a vision program tool output. See “ROI Color Properties” on page 4-34 for more ROI color properties information. Note: You must have an Image Display control in the Control Panel to add this control. 4-45 Property Name What it is Angle The ROI’s angle. True Color Click in the field to choose the ROI’s True color. Draw Filled If True, the ROI is filled with the appropriate True or False Color. Height The ROI’s height. Movable If True, the ROI can be moved. (The Selectable property must be True.) Origin Link the origin from the vision program tool. Origin Angle The angle of the linked tool’s origin. Origin Color Click in the field to choose the origin’s display color. Origin Visible If True, the linked tool’s origin is visible. Origin X The X coordinate of the linked tool’s origin. Origin Y The Y coordinate of the linked tool’s origin. Extents Link the ROI’s extents from the vision program tool. (Extents are the corner’s X-Y coordinates.) False Color Click in the field to choose the ROI’s False color. Selectable If True, ROI can be selected. Sizable If True, the ROI can be resized. (The Selectable property must be True.) Tooltip Text Text displayed when the cursor is held over the control in Run mode. Fill Color Transparency The percentage of fill color transparency. Use True Color If True, the ROI is colored in the True Color. Visible If True, the ROI is visible. Datalogic Automation Inc. Shape List Impact Reference Guide Property Name What it is Width The control’s width. X The X coordinate of the control’s left edge. Y The Y coordinate of the control’s top edge. Method Name What it does Disable Editing Disables the ability to edit the control Enable Editing Enables the ability to edit the control Hide Makes the control invisible Show Makes the control visible Event Name When it happens Extents Edited When the ROI is modified either with the mouse or by changing one of the extent’s properties. Selected Enables the ability to edit the control Unselected Makes the control invisible Shape List The Shape List control displays a Shape List linked from a vision program tool. Tool’s with non-line ROIs use a Shape List. See “ROI Color Properties” on page 4-34 for more ROI color properties information. Note: You must have an Image Display control in the Control Panel to add this control. Property Name What it is Color by States If True, the ROI is colored with the True or False Color based on its state from the State List. False Color Click in the field to choose the ROI’s False color. False State Visible If True, the ROI is visible when it’s State is False. Draw Filled If True, the ROI is drawn filled with the appropriate True or False Color. Movable If True, the ROI can be moved. (The Selectable property must be True.) Origin Link the origin from the vision program tool. Origin Angle The angle of the linked tool’s origin. Origin Color Click in the field to choose the tool’s origin color. Origin Visible If True, the linked tool’s origin is visible. Origin X The X coordinate of the linked tool’s origin. Datalogic Automation Inc. 4-46 Impact Reference Guide 4-47 Shape List Property Name What it is Origin Y The Y coordinate of the linked tool’s origin. Selectable If True, the ROI can be selected. Shape List Link the Shape List from the vision program tool. Sizable If True, the ROI can be resized. (The Selectable property must be True.) State List Link the boolean list from the vision program tool. This indicates the ROI’s True or False State. Tooltip Text Text displayed when the cursor is held over the control in Run mode. Fill Color Transparency The ROI’s transparency, from 0 to 100 percent. True Color Click in the field to choose the ROI’s True color. True State Visible If True, the ROI is visible when it’s State is True. Use True Color If True, the ROI is colored in the True Color. Visible If True, the control is visible. Method Name What it does Activate for Editing Makes the ROI available for editing Disable Editing Disables the ability to edit the control Enable Editing Enables the ability to edit the control Hide Makes the control invisible Show Makes the control visible Event Name When it happens Extents Edited When the ROI is modified either with the mouse or by changing one of the extent’s properties. Selected Enables the ability to edit the control Unselected Makes the control invisible Datalogic Automation Inc. Input Group Impact Reference Guide Input Group Button When the Button control is pressed, it produces an action which can be linked to other controls. This action can be used, for example, to start and stop updates, connect to the Impact device, and put the device online and offline. Property Name What it is Button Color Click in the field to choose the button’s color. (The Visible property must be True to see the button.) If this property value is "System," the operating system display properties color is used. See “Control Color” on page 4-11. Border Painted If True, a border is drawn around the button. If this property value is "System," the operating system display properties color is used. See “Control Color” on page 4-11. Height The button’s height. Width The button’s width. X The X coordinate of the control’s left edge. Y The Y coordinate of the control’s top edge. Enabled If True, the button is enabled. Label Font Click in the field to choose the button label’s font properties. Label Text Color Click in the field to choose the button label’s text color. Horizontal Alignment The button label and icon’s horizontal justification. Horizontal Text Position The button label’s horizontal position relative to the icon. Icon Height The icon’s height. Icon Text Gap The distance between the icon and the button label. Icon Width The icon’s width. Keep Icon Aspect Ratio If True, the icon’s height to width ratio is maintained when it is resized. Button Label The text displayed on the button. Some special characters will not display in this property. See “Special Characters” on page 4-97. Left Margin The distance between the button’s left edge and the label text. Right Margin The distance between the button’s right edge and the label text. Size Icon With Button If True, the icon’s size will change when the button is resized. Datalogic Automation Inc. 4-48 Impact Reference Guide Check Box Property Name What it is ToolTip Text Text displayed when the cursor is held over the control in Run mode. Icon Click in the field to place an icon on the button. Icon files may have these extensions: gif, jpg, png, and bmp. The icon file must be on the same disk drive as the Control Panel file. Vertical Text Position The button label’s vertical alignment relative to the icon. Visible If True, the button is visible. Method Name What it does Disable Disables the control; it cannot be used Click Produces the same effect as clicking the control Enable Enables the control so it can be used Hide Makes the control invisible Show Makes the control visible Event Name When it happens Action When the button is clicked Check Box The Check Box control allows the Control Panel operator to indicate a selection on the Control Panel. For instance, a control could be enabled or disabled if the operator checks or clears the check box. 4-49 Property Name What it is Background Color Click in the field to choose the control’s background color. (The Transparent property must be False to see the background.) Height The check box’s height. Width The check box’s width. X The X coordinate of the control’s left edge. Y The Y coordinate of the control’s top edge. Editable If True, the Selected property can be modified in Run Mode Enabled If True, the button is enabled. Label Font Click in the field to choose the label font properties. Label Text Color Click in the field to choose the label text color. Label Position The label’s position relative to the check box. Datalogic Automation Inc. Drop List Selector Impact Reference Guide Property Name What it is Unselected True if the check box is currently cleared. CheckBox Label The text displayed on the check box. Some special characters will not display in this property. See “Special Characters” on page 4-97. Selected If True, the check box is checked. ToolTip Text Text displayed when the cursor is held over the control in Run mode. Transparent If True, the control’s background is transparent. Visible If True, the check box is visible. Method Name What it does Disable Disables the control; it cannot be used Unselect Sets the check box to the Unselected (unchecked) state and fires the Selected and Unselected events. Select Sets the check box to the Selected (checked) state and fires the Selected and Unselected events. Toggle Sets the check box to the opposite of its current state and fires the Selected and Unselected events. Enable Enables the control so it can be used Hide Makes the control invisible Show Makes the control visible Event Name When it happens Action When the check box’s state changes Action by User Only when the check box’s state changes from a user’s action Selected When the check box is checked Selected by User Only when the check box is checked by the user Unselected When the check box is cleared Unselected by User Only when the check box is cleared by the user Drop List Selector The Drop List Selector control allows the Control Panel operator to select an item from a pre-defined list. Property Name What it is ToolTip Text Text displayed when the cursor is held over the control in Run mode. Datalogic Automation Inc. 4-50 Impact Reference Guide 4-51 Drop List Selector Property Name What it is Background Color Click in the field to choose the list’s background color. (The Transparent property must be False to see the background.) Text Color Click in the field to choose the list item’s text color. Selection Background Color Click in the field to choose the selected list item’s background color. Selection Text Color Click in the field to choose the selected list item’s text color. Font Click in the field to choose the list item’s font properties. Enabled If True, the list is enabled. Visible If True, the list is visible. Width The control’s width. Height The control’s height. X The X coordinate of the control’s left edge. Y The Y coordinate of the control’s top edge. Real Precision The list items’ decimal precision. List The control’s list of items. Selected Item The value of the list item selected. Selected Index The list item’s position in the list (the first item is index number zero). Selectable If True, a selection can be made from the list Method Name What it does Enable Enables the control so it can be used Disable Disables the control; it cannot be used Show Makes the control visible Hide Makes the control invisible Event Name When it happens Item Selected When an item is selected Item Selected by User Only when an item is selected by a user’s action Datalogic Automation Inc. Font Library Impact Reference Guide Font Library The Font Library control displays the Font Library linked from a tool in a VPM task. Click the delete icons to delete one or more selected characters from the library. Property Name What it is Height The control’s display height. Width The control’s display width. X The X coordinate of the control’s left edge. Y The Y coordinate of the control’s top edge. Editable If True, the font library can be edited through the Control Panel. Font Library Link the font library from an OCR tool in a VPM task. ToolTip Text Text displayed when the cursor is held over the control in Run mode. Zoom Percent The font library characters are magnified by this percentage in the display. Method Name What it does Hide Makes the control invisible Show Makes the control visible Event Name When it happens Edited by User When any font library model is removed Font Library Changed When a font library character changes. Changes include any changes to the models or model labels. Character Contour Library The Character Contour Library control displays the Character Contour Library linked from a Character Contour Match tool in a VPM task. Click the delete icons to delete one or more selected characters from the library. Property Name What it is Library Link the Verification Library from a Character Contour Match tool in a VPM task. Height The control’s display height. Width The control’s display width. X The X coordinate of the control’s left edge. Y The Y coordinate of the control’s top edge. Datalogic Automation Inc. 4-52 Impact Reference Guide Keyboard Property Name What it is Editable If True, the font library can be edited through the Control Panel. ToolTip Text Text displayed when the cursor is held over the control in Run mode. Zoom Percent The font library characters are magnified by this percentage in the display. Method Name What it does Hide Makes the control invisible Show Makes the control visible Event Name When it happens Edited by User When any character contour library model is removed Character Contour Library Changed When a character contour library character changes. Changes include any changes to the models or model labels. Keyboard The Keyboard Control is used in CPM to display a graphical keyboard on the screen for simulated keyboard input through a touchscreen. The Keyboard control and other input controls can display the On-Screen Keyboard (OSK) for use within that control. When you select keys on an OSK, whatever control or general Windows application has the focus will receive the key events. If the OSK is enabled, when the Text Entry control gains focus, the OSK is displayed. When the control loses focus, the OSK stops. (See “On-Screen Keyboard” on page 6-11.) 4-53 Property Name What it is Button Color Click in the field to choose the control’s color. (The Visible property must be True to see the control.) Border Painted If True, a border is drawn around the control. Height The control’s height. Width The control’s width. X The X coordinate of the control’s left edge. Y The Y coordinate of the control’s top edge. Enabled If True, the control is enabled. Label Font Click in the field to choose the control label’s font properties. Label Text Color Click in the field to choose the control label’s text color. Horizontal Alignment The control label and icon’s horizontal justification. Datalogic Automation Inc. Keyboard Impact Reference Guide Property Name What it is Horizontal Text Position The control label’s horizontal position relative to the icon. Icon Height The icon’s height. Icon Text Gap The distance between the icon and the control label. Icon Width The icon’s width. Keep Icon Aspect Ratio If True, the icon’s height to width ratio is maintained when it is resized. Keyboard Application The path to the desired On-Screen Keyboard application. You must surround the path string with quotation marks, "C:/Window/System32/ osk.exe" for example. This application is displayed whenever the Keyboard button is selected or its "Click" method occurs. (See ““On-Screen Keyboard” on page 6-11.) Button Label The text displayed on the control. Some special characters will not display in this property. See “Special Characters” on page 4-97. Left Margin The distance between the control’s left edge and the label text. On-Screen Keyboard Displayed If True, the On-Screen Keyboard is currently being displayed. See “OnScreen Keyboard” on page 6-11 Right Margin The distance between the control’s right edge and the label text. Size Icon With Button If True, the icon’s size will change when the control is resized. ToolTip Text Text displayed when the cursor is held over the control in Run mode. Icon Click in the field to place an icon on the control. Icon files may have these extensions: gif, jpg, png, and bmp. The icon file must be on the same disk drive as the Control Panel file. Vertical Text Position The control label’s vertical alignment relative to the icon. Visible If True, the control is visible. Method Name What it does Disable Disables the control; it cannot be used Click Produces the same effect as clicking the control Enable Enables the control so it can be used Hide Makes the control invisible Show Makes the control visible Event Name When it happens Action When the button is clicked Datalogic Automation Inc. 4-54 Impact Reference Guide Numeric Entry Numeric Entry You can use the Numeric Entry control to enter numbers on the Control Panel. The numbers can then be linked to a vision program or other controls. If the On-Screen Keyboard (OSK) is enabled, it is displayed when this control gains focus. 4-55 Property Name What it is X The X coordinate of the control’s left edge. Y The Y coordinate of the control’s top edge. Minimum Value The minimum value that may be entered. Maximum Value The maximum value that may be entered. Editable If True, the number is editable. Selected Background The background color of numbers selected in the entry field. Selected Color The display color of numbers selected in the entry field. Disabled Color The number’s display color when the control is disabled. Caret Color The cursor color displayed when you enter numbers. Number Type The type of number (Real or Integer) that can be entered. Integer Value The number’s current integer value. (Number Type Integer must be selected) Display Integer Grouping If True, the control displays integer values with digit grouping symbols based on Operating System settings Real Value The number’s current real value. (Number Type Real must be selected) Suppress Popups If True, error messages will not be displayed when the value entered was outside the limits set by the Minimum and Maximum value properties. The previously entered value will remain. Value Error If True, the value entered was outside the limits set by the Minimum and Maximum value properties Decimal Precision The number of decimal places to display for Real numbers. Tooltip Text This text is displayed when the cursor is held over the control in Run mode. Background Color The number’s background color. (The Transparent property must be False to see the background.) Number Color The number’s display color when the control is enabled. Transparent If True, the control’s background is transparent. Font The number’s font properties. Width The control’s width. Datalogic Automation Inc. Password Impact Reference Guide Property Name What it is Height The control’s height. Horizontal Alignment Sets the number’s horizontal justification: Left, Center, or Right Enabled If True, the control is enabled. Visible If True, the control is visible. On-Screen Keyboard Displayed If True, the On-Screen Keyboard is currently displayed. Method Name What it does Disable Disables the control; it cannot be used Enable Enables the control so it can be used Gain Focus Puts the cursor into the entry field. Hide Makes the control invisible Show Makes the control visible Event Name When it happens Action When the user presses the Enter key while in the control Focus When the control loses and gains focus Action by User When the text entry field loses focus or the user presses the Enter key Focus Gained When the control loses focus Focus Lost When the control gains focus Value Changed When the control loses focus or the Enter key is pressed AND the data has changed since the control gained focus Password The Password control provides a way to define users, passwords, and access parameters, and control access to one or more controls and control panels. Note: Security enabled on the Control Panel by this Password control is independent of the security enabled on the Impact device. See “Impact Device Security Overview” on page 2-13 for more details about device security. This control is also independent of Control Panel Application security (see “CPM Security” on page 4-2). Datalogic Automation Inc. 4-56 Impact Reference Guide Password To define, modify, or delete User IDs and passwords, click the Users property value. See “How the Password control works” on page 4-61. If there are no Users defined, and you select the Password control, its events and properties will be behave as if a Level 1user has logged on. 4-57 Property Name What it is Border Painted If True, a bevel border is drawn around the button. Height The control’s height. Width The control’s width. X The X coordinate of the control’s left edge. Y The Y coordinate of the control’s top edge. Disable Prompt Close If True, standard Windows controls are disabled for dialog prompts: Dialogs cannot be moved or resized Dialogs can only be closed by selecting one of the dialog buttons (not by clicking the title bar X) Dialogs cannot be closed using the Escape key or Alt+F4 keys Enable Large Data Entry Screens If True, all of the control's popup dialogs and messages use very large fonts and entry fields for use with touch screen monitors. Enabled If True, the button is enabled. Horizontal Alignment The Selected/Unselected icon and label’s horizontal justification. Horizontal Text Position The label’s horizontal position relative to the Selected/Unselected icon. Icon Height The icon’s height. (See Selected/Unselected Icon property.) Icon Text Gap The distance, in pixels, between the label and the Selected/Unselected icon. Icon Width The Selected/Unselected icon’s width. Unselected This value is set to False when a user completes the log in process, and set to True when the user logs off. Keep Icon Aspect Ratio If True, the Selected/Unselected icon’s height to width ratio is maintained when the control is resized Left Margin The distance between the button’s left edge and the label. Level 1 Name The name associated with the Level 1 user. This user has the highest access (includes access of Levels 1-5). Level 2 Name The name associated with the Level 2 user (includes access of Levels 25). Level 3 Name The name associated with the Level 3 user (includes access of Levels 35). Level 4 Name The name associated with the Level 4 user (includes access of Levels 4 and 5). Datalogic Automation Inc. Password Impact Reference Guide Property Name What it is Level 5 Name The name associated with the Level 5 user. This user has the least access (includes access of 5 only). Logged On If True, a user is currently logged on. Logged On Inactivity Duration If a user is logged on, and the keyboard/mouse is inactive for this amount of time (in minutes), the user will be automatically logged off. Logged On Inactivity Enabled If True, the Logged On Inactivity Duration property is effective. Logged On Level Name The name of the currently logged on user's level as defined in the "Level X Name" property. Logged On Level Number The number of the currently logged on user's level. If no one is logged on, this value is zero. Logged On Level 1 If True, a user with Level 1 access is logged on. Logged On Level 2 If True, a user with Level 1 or Level 2 access is logged on. Logged On Level 3 If True, a user with Level 1, 2, or 3 access is logged on. Logged On Level 4 If True, a user with Level 1, 2, 3, or 4 access is logged on. Logged On Level 5 If True, a user with Level 1, 2, 3, 4, or 5 access is logged on. Max Failed Logon Attempts The number of failed logon attempts allowed. If a user reaches this limit, then they are prevented from logging on until the "User Logon Disabled Duration" time has elapsed. The login attempt count is reset when any of the following occurs: The control panel application is loaded The user successfully logs on The "User Logon Disable Duration" time elapses The "Max Failed Logon Attempts Enabled" property is set to False Max Failed Logon Attempts Enabled If True, the Max Failed Logon Attempts property is effective. On Screen Keyboard Displayed If True, the on-screen keyboard is currently being displayed. (See “OnScreen Keyboard” on page 6-11) Password Expiration The expiration time, in days, for passwords. If a user’s password has expired, they will be required to furnish a new password after they log in. See “Password Expiration” on page 4-62. Password Expiration Enabled If True, passwords will expire when the time period defined in the Password Expiration property has elapsed. See “Password Expiration” on page 4-62. Password Maximum Length The maximum number of characters that a password can contain (maximum 12). Password Minimum Length The minimum number of characters that a password can contain. Datalogic Automation Inc. 4-58 Impact Reference Guide 4-59 Password Property Name What it is Password Required If True, a password that meets all system requirements must be defined for each user. Right Margin The distance between the button’s right edge and the label. Selected The value is set to True when a login has been completed. It is set to False when the control is selected while a user is logged on. (The Selected Event occurs even if the login is cancelled.) Selected Button Color Click in the field to choose the control’s color when the Selected value is True. (The Visible property must be True to see the control.) Selected Label Font Click in the field to choose the label’s font properties when the Selected value is True. Selected Icon Click in the field to choose the control’s display icon when Selected value is True. Selected Label The label displayed when the Selected value is True. Some special characters will not display in this property. See “Special Characters” on page 4-97. Selected Label Color Click in the field to choose the label’s color when the Selected value is True. Size Icon With Button If True, the icon’s size will change when the button is resized. Tooltip Text Text displayed when the cursor is held over the control in Run mode. Unselected Button Color Click in the field to choose the control’s color when the Unselected value is True. (The Visible property must be True to see the control.) Unselected Label Font Click in the field to choose the label’s font properties when the Unselected value is True. Unselected Icon Click in the field to choose an icon to display on the control when the Unselected value is True. Unselected Label The label displayed when the Unselected value is True. Some special characters will not display in this property. See “Special Characters” on page 4-97. Unselected Label Color Click in the field to choose the label’s color when the Unselected value is True. User ID Text Entry Enabled If True, the User ID field is displayed as a text entry field. If False, the User ID is displayed as a drop down list which displays all currently defined users. (See "Users" property) Users Click in this field to add, modify, or delete users, user levels, and passwords. See “How the Password control works” on page 4-61. User List Filename An XML file containing encrypted user information that is stored outside the control panel (cp) file. If this property is blank, information is stored in the cp file. If the file cannot be loaded, the Load User List Failed event is initiated. Datalogic Automation Inc. Password Impact Reference Guide Property Name What it is Logged On User The name of the user currently logged on to the control. Blank if no one is logged on. User Logon Disabled Duration The length of time, in minutes, that a user must wait to log in after the "Max Failed Logon Attempts" has been exceeded. User ID Maximum Length The maximum number of characters that the User ID can contain (maximum 12). User ID Minimum Length The minimum number of characters that the User ID can contain Vertical Text Position Sets the label’s vertical justification relative to the icon. Visible If True, the control is visible. Method Name What it does Display User Editor Displays the Edit Users dialog Hide Makes the control invisible Disable Disables the control; it cannot be used Unselect Sets the Unselected property to True Select Sets the Selected property to True Show Makes the control visible Click Produces the same effect as clicking the control Enable Enables the control so it can be used Event Name When it happens Logged On If any users are defined, when one of them logs on (a valid User ID and password were entered) If no users are defined, when the Password control is selected by the user or selected by a method or property link Selected If any users are defined, when one of them logs on or cancels a log on If no users are defined, when the Password control is selected by the user or by a method or property link If users are defined or not, when the Select Method is invoked Load User List Failed If the file listed in the User List Filename property cannot be loaded. Action The control’s status changes by the user or by a method or property link Unselected By User If any users are defined, when one of them logs off If no users are defined, when the Password control is unselected by a user Datalogic Automation Inc. 4-60 Impact Reference Guide Password Event Name When it happens Logged Off If any users are defined, when one of them logs off If no users are defined, when the Password control is unselected Action By User The control’s status changes by a user Failed Logon Attempt A user’s attempt to log on fails Selected By User If any users are defined, when one of them logs on or cancels a log on If no users are defined, when the Password control is selected by the user Unselected If any users are defined, when one of them logs off or cancels a log on If no users are defined, when the Password control is unselected by the user or unselected by a method or property link If users are defined or not, when the Unselect Method is invoked How the Password control works When you click in the Users property, or initiate the Display User Editor event, the Edit Users dialog is displayed. The options are Add User, Modify User, and Delete User. Add User 1. User ID: The User ID must be unique and can contain alphanumeric characters. Its size is determined by the properties User ID Minimum Length and User ID Maximum Length. 1. User Description: A description of the user. 2. User Level: User levels range from 1 to 5. Users with level 1 have the most access. When a user with Level 1 access logs on, they have access to all levels (all Logged On Level properties are set to True). Multiple users can have the same User Level. 3. Level Name: This is the name defined in the Level "n" Name property (where "n" is the level number). 4. Password: The password can contain any alphanumeric characters. Its size is determined by the properties Password Minimum Length and Password Maximum Length. The Password will be masked as you type it. 5. Confirm Password: Repeat the Password to verify it was entered correctly. The Password will be masked as you type it. 4-61 Datalogic Automation Inc. Password Impact Reference Guide 6. Password always expires: If this box is checked, the user’s password will expire based on the Password Expiration property. If the box is not checked, the password will never expire and, therefore, cannot be changed by the user. 7. Force password change at first logon: If this box is checked, the user will be forced to change their Password after the next time they log on. A prompt is displayed. Modify User The options in Modify User are the same as Add User, except that users can only modify users that have a higher user level number (less access). Delete User To delete a user, select the User ID from the Users list, then click the Delete User button. If there is more than one user defined, you cannot delete the last remaining Level 1 user. You can only delete other users that have a higher user level number (less access). Failed Logon Attempts There are several Password control properties and events involved when a user log on fails. The Failed Logon Attempt event fires and the attempt is recorded. If Max Failed Logon Attempt Enabled is True, and the number of attempts exceeds Max Failed Logon Attempts, a countdown is started based on User Logon Disabled Duration. The user will be unable to log on again until the time has elapsed and a warning message is displayed. The login attempt count is reset when any of the following occurs: The control panel application is loaded The user successfully logs on The "User Logon Disable Duration" time elapses The "Max Failed Logon Attempts Enabled" property is set to False Password Expiration If the Password Expiration Enabled property is False, passwords will never expire and, therefore, cannot be changed by the user. If the Password Expiration Enabled property is True, a user’s password will expire after the time defined in the Password Expiration property has elapsed (minimum 60 days, maximum 90 days). Datalogic Automation Inc. 4-62 Impact Reference Guide Radio Button The start time for each user, which is used to calculate elapsed time after each logon, is reset to the current time when any of the following occurs: The Password Expiration property is set to True A password is modified or created using the User Edit dialog A user changes their password during logon After the time has elapsed, and a user logs on, a prompt is displayed for the user to change their password. If the user cancels this operation, they will not be able to log on. Changing an Expired Password 1. Enter your current password in the Old Password field. 2. Enter your new password in the New Password field. The New Password must be different than any previous passwords you have used. 3. Enter your new password in the Confirm Password field. Radio Button The Radio Button control provides exclusive choices on a Control Panel. When two or more radio buttons are in a group, the Selected property is automatically limited to one of the buttons. That is, in Edit mode you can only set the Selected property to True and in Run mode only one of the buttons can be selected at a time. Note: You must have a Radio Button Group control in the Control Panel to add a Radio Button control. 4-63 Property Name What it is Background Color Click in the field to choose the button’s background color. (The Visible property must be True to see the background.) Border Painted If True, a bevel border is drawn around the button. Height The button’s height. Width The button’s width. X The X coordinate of the control’s left edge. Y The Y coordinate of the control’s top edge. Enabled If True, the button is enabled. Label Font Click in the field to choose the label’s font properties. Label Text Color Click in the field to choose the label’s display color. Datalogic Automation Inc. Radio Button Group Impact Reference Guide Property Name What it is Label Position The label’s position relative to the radio button Unselected If True, the button is not selected. Button Label The button’s label. Some special characters will not display in this property. See “Special Characters” on page 4-97. Selected If True, the button is Selected. Only one button in a group can be set to True, all other buttons in that group are set to False. ToolTip Text Text displayed when the cursor is held over the control in Run mode. Transparent If True, the control’s background is transparent. Visible If True, the button is visible. Method Name What it does Disable Disables the control; it cannot be used Click Produces the same effect as clicking the control Enable Enables the control so it can be used Hide Makes the control invisible Select Sets the button to the Selected state. Show Makes the control visible Unselect Sets the button to the Unselected state. Event Name When it happens Unselected When the Unselected value is set to True by anything but a user’s action. Unselected by User When the Unselected value is set to True by a user’s action. Selected When the button’s Selected value is set to True by anything but a user’s action Selected by User When the button’s Selected value is set to True by a user’s action Radio Button Group The Radio Button Group control is used with the Radio Button control to provide two or more exclusive choices on a Control Panel. When two or more radio buttons are in a group, selection is automatically limited to one of the buttons. That is, you can only set the Selected value to True; all other radio buttons in the group automatically have the Selected value set to False. Datalogic Automation Inc. 4-64 Impact Reference Guide Radio Button Group Note: You must have a Radio Button Group control in the Control Panel to add a Radio Button control. 4-65 Property Name What it is Border Text Align Sets the border text’s position at the top of the border Border Text Color Click in the field to choose the border text’s color. Border Text Font Click in the field to choose the border text’s font properties. Border Type The border type: Bevel Lowered, Bevel Raised, Etched Lowered, Etched Raised, Line, or None. Height The control’s height. Width The control’s width. X The control’s left edge X coordinate. Y The control’s top edge Y coordinate. Enabled If True, the control is enabled. Line Border Color Click in the field to choose the line border’s color. (This has no effect on other border types.) Line Border Width The line border’s width. (This has no effect on other border types.) Border Text The text displayed at the top of the border. Visible If True, the control is visible. Method Name What it does Disable Disables the control; it cannot be used Enable Enables the control so it can be used Hide Makes the control invisible Show Makes the control visible Event Name When it happens Button Selected When a button’s Selected value is set to True Button Selected by User Only when a button’s Selected value is set to True by a user’s action Datalogic Automation Inc. Range Impact Reference Guide Range The Range control is used to display and enter the start and end values of Range1D input type in a VPM tool. You can also link to and enter a Tolerance data type where the minus, nominal, and plus values are calculated from the Range control’s start and end values. See “Using the Range Control” on page 4-68. Property Name What it is Background Color Click in the field to choose the control’s background color. (The Visible property must be True to see the background.) Caret Color Sets the border text’s position at the top of the border Height Click in the field to choose the border text’s color. Width Click in the field to choose the border text’s font properties. X The border type: Bevel Lowered, Bevel Raised, Etched Lowered, Etched Raised, Line, or None. Y The control’s height. Disabled Value Color The Start and End Value color when the control is disabled. Enabled If True, the control is enabled. End Editable If True, the End Value is editable. If False, the background color is set to the Background Color property value and the field cannot be changed. End Value The current End Value. End Value Alignment Where the End Value is aligned in its field. End Value Background Color The background color of the End Value field. End Value Foreground Color The text color in the End Value field. End Value Maximum The maximum value allowed in the End Value field. End Value Minimum The minimum value allowed in the End Value field. Label Color The Start and End label text color. Labels Font The Start and End label text font. Horizontal Labels Position The label position when the control’s Orientation is horizontal. Vertical Labels Position The label position when the control’s Orientation is vertical. Labels Visible If True, the Start and End labels are visible. Orientation The control’s orientation, horizontal or vertical. Datalogic Automation Inc. 4-66 Impact Reference Guide 4-67 Range Property Name What it is Decimal Precision The number of decimal places to display in the Start and End values. Range The control’s Start and End Values as a Range 1D data type. You can only link this property. It can be linked from the Range1D property of a VPM tool. Selected Background The Start and End Value background color when the value is selected. Selected Color The Start and End Value text color when the value is selected. Start Editable If True, the Start Value field is editable. If False, the background color is set to the Background Color property value and the field cannot be changed. Start Label Text The Start Label text. Start Value The current Start Value. Start Value Alignment Where the Start Value is aligned in its field. Start Value Background Color The background color of the Start Value field. Start Value Foreground Color The text color in the Start Value field. Start Value Maximum The maximum value allowed in the Start Value field. Start Value Minimum The minimum value allowed in the Start Value field. Step Button Value The amount that the Start or End Value will change each time the Step Button is clicked. Step Buttons Visible If True, the Step Buttons are visible on the control. Tolerance The control’s Tolerance value. Link this property from the Tolerance property of a VPM tool. (Linkable Only) ToolTip Text Text displayed when the cursor is held over the control in Run mode. Transparent If True, the control’s background is transparent. Value Font The font for the Start and End Value field text. Visible If True, the control is visible. Method Name What it does Disable Disables the control; it cannot be used End Gain Focus Forces the cursor to the End Value field. Enable Enables the control so it can be used Datalogic Automation Inc. Range Scroll Impact Reference Guide Method Name What it does Hide Makes the control invisible Start Gain Focus Forces the cursor to the Start Value field. Show Makes the control visible Event Name When it happens End Value Action by User When the End Value field is changed by a user’s action End Value Action When the End Value field changes Start Value Action When the Start Value field changes Range Action by User When the Range property is changed by a user’s action, i.e. the Start or End Values, or Range property change Start Value Action By User When the Start Value field is changed by a user’s action Range Action When the Range property changes Range Lost Focus When focus is lost from any of the value entry fields Using the Range Control Start Label Text Horizontal Orientation End Label Text Step Buttons Start Value Carat End Value Vertical Orientation To change a value • Click in the field, enter the value, then press the Enter key. OR • Click in the field then click the Up or Down Step Button. The value will change according to the Step Button Value property. Range Scroll The Range Scroll control allows you to display and adjust a range of values with a scroll bar. As you slide the bar, the left end adjusts the Range Minimum value. The right end adjusts the Range Maximum value. Datalogic Automation Inc. 4-68 Impact Reference Guide Range Scroll The middle of the bar adjusts the Range Start and End values within the limits of the Range Minimum and Range Maximum values. Tools that have a data type of Range1D can be linked directly to this control. 4-69 Property Name What it is Background Color Click in the field to choose the control’s background color. (The Visible property must be True to see the background.) Height The control’s height. Width The control’s width. X The X coordinate of the control’s left edge. Y The Y coordinate of the control’s top edge. Enabled If True, the button is enabled. Precision The number of decimal places for the Range values. Range Maximum The control’s upper limit. This is displayed in the lower right corner of the control. Range Minimum The control’s lower limit. This is displayed in the lower left corner of the control. Range End The control’s highest range value. This is displayed in the lower right corner of the range scroll bar. In Run Mode, you can click and drag the upper end of the scroll bar to adjust this value. Range Start The control’s lowest range value. This is displayed in the upper left corner of the range scroll bar. In Run Mode, you can click and drag the lower end of the scroll bar to adjust this value. Label Color Click in the field to choose the label’s display color. Label Font Click in the field to choose the label’s font properties. Range The control’s Range Start and Range End properties as a Range 1D data type. Link this property to the Range1D property of the desired tool. Tool Tip Text displayed when the cursor is held over the control in Run mode. Visible If True, the control is visible. Method Name What it does Disable Disables the control; it cannot be used Enable Enables the control so it can be used Hide Makes the control invisible Show Makes the control visible Event Name When it happens Changed When the control’s value changes Datalogic Automation Inc. Slider Impact Reference Guide Event Name When it happens Changed by User Only when the control’s value changes by a user’s action. Change Completed When the control’s range, start, or end, value change is complete (the adjustment stops moving) Slider The Slider control varies a value when a slider is moved on the Control Panel. You can define the size, orientation, and major and minor tick spacing for the best presentation. Property Name What it is Background Color Click in the field to choose the control’s background color. (The Transparent property must be False to see the background.) X The X coordinate of the control’s left edge. Y The Y coordinate of the control’s top edge. Enabled If True, the slider is enabled. Real Value The slider’s real value. Foreground Color Click in the field to choose the control’s foreground color. Integer Value The slider’s integer value Invert If True, the Maximum Value is displayed on the right or bottom of the slider instead of the left or top. Label Color The slider’s label color. Label Font The slider’s label font Major Tick Spacing The numeric spacing between the slider’s major tick marks. Maximum Value The maximum slider value (must be greater than the Minimum Value). Minimum Value The minimum slider value (must be less than the Maximum Value). Minor Tick Spacing The numeric spacing between the slider’s minor tick marks. Number Type Select the number type to be displayed. Orientation choose horizontal or vertical display orientation. Paint Labels If True, the Major and Minor Tick Spacing values are displayed. Paint Ticks If True, the Major and Minor Tick marks are displayed. Paint Track If True, the slider track are displayed. Decimal Precision Enter the number of decimal places for the slider’s value. Height The control’s height. Datalogic Automation Inc. 4-70 Impact Reference Guide Table Property Name What it is Width The control’s width. Snap To Ticks If True, the slider will snap to the nearest tick mark when it is moved. Thumb Knob Height The slider knob’s height Thumb Knob Width The slider knob’s width Tooltip Text Text displayed when the cursor is held over the control in Run mode. Transparent If True, the control’s background is transparent. Visible If True, the control is visible. Method Name What it does Disable Disables the control; it cannot be used Enable Enables the control so it can be used Hide Makes the control invisible Show Makes the control visible Event Name When it happens Change Completed When the slider’s value change is complete (the slider stops moving) Changed by User Only when the slider’s value changes by a user’s action (while the slider is moving) Change Each time the slider’s value changes (while the slider is moving) Table The Table control is provides for flexible data display on a Control Panel. You can define the number of rows and columns, or indicate a dynamic display which adds rows to the table as data is created. Table Setup What it is Style Group (configure overall table styles) Table Type 4-71 Static: Number of rows and columns is predefined. Dynamic: Data rows are dynamically added to table as needed. If Dynamic is selected, some row property selections are disabled. Datalogic Automation Inc. Table Impact Reference Guide Table Setup What it is Cells Use Row Properties: All cells use the display properties (e.g. precision, boolean type) defined in the Per Row group; also enables Data Highlighting in the Rows Group Column Properties: All cells use the display properties (e.g. precision, boolean type) defined in the Per Column group; also enables Data Highlighting in the Columns Group Grid Lines Vertical visible: when checked the vertical grid lines are visible Horizontal visible: when checked the horizontal grid lines are visible Color: The grid line color. Rows Group (configure rows) Number of Rows The number of rows in the table. Select a row with the Current Row dropdown. Append: click to add a row at the end of the table Insert Before: click to insert a row above the selected row Delete: click to delete the currently selected row (Buttons are disabled when Dynamic table type is selected) Current Row The currently selected row. Click the drop-down to select a row. Label The label for the Current Row. Enabled when Visible is checked in the Labels group. Apply To All If checked, all the settings in the All Rows group are applied to all the rows in the table. If unselected, the settings only apply to the Current Row. Labels Subgroup (configure common row labels) Visible If checked, labels are visible and the Label field for the Current Row is enabled. Font The label font properties. Text Color The label text color. Background Color The label background color. Per Row/All Rows Subgroup (configure each or all rows) Some choices are enabled only when Cells Use Row Properties is selected. If Apply To All is selected, these settings apply to all rows in the table. Real Precision The number of decimal places to display. Boolean Cell Select the display type for cells with Boolean data If Indicator Light is selected, click the True and False color buttons to set the indicator light color. Editable If checked, the selected row can be edited in Run mode. Cell Text Color The text color for cells Cell Background Color The background color for cells Datalogic Automation Inc. 4-72 Impact Reference Guide Table Table Setup What it is Cell Font The font properties for cells Data Highlighting Subgroup (configure row highlighting) Enabled If checked, the selected Cell Text Color and Cell Background Color are applied to the cells. Column To Monitor Enter a column number. The state of the cell at the intersection of Column To Monitor and the Current Row is monitored. The selected Cell Text Color and Cell Background Color are used to highlight the Current Row, based on the True or False state of that cell. Cell Text Color The display Text Color for highlighted cells. Cell Background Color The display Background Color for highlighted cells. Columns Group (configure columns) Number of Columns The number of columns in the table. Select a column with the Current Column drop-down. Append: click to add a column at the right end of the table Insert Before: click to insert a column to the left of the selected column Delete: click to delete the currently selected column Current Column The currently selected column. Click the drop-down to select a column. Label The label for the Current Column. Enabled when Visible is checked in the Labels group. Apply To All If checked, all the settings in the All Columns group are applied to all the columns in the table. If unselected, the settings only apply to the Current Column. Labels Subgroup (configure common column labels) Visible If checked, labels are visible and the Label field for the Current Column is enabled. Font The label font properties. Text Color The label text color. Background Color The label background color. Per Column/All Columns Subgroup (configure each or all columns) Some choices are enabled only when Cells Use Column Properties is selected. If Apply To All is selected, these settings apply to all columns in the table. 4-73 Real Precision The number of decimal places to display. Boolean Cell Select the display type for cells with Boolean data If Indicator Light is selected, click the True and False color buttons to set the indicator light color. Editable If checked, the selected column can be edited in Run mode. Cell Text Color The text color for cells Datalogic Automation Inc. Table Impact Reference Guide Table Setup What it is Cell Background Color The background color for cells Cell Font The font properties for cells Alignment Sets the data alignment within the column. Width Sets the selected column’s width (in pixels). Data Highlighting Subgroup (configure column highlighting) Enabled If checked, the selected Cell Text Color and Cell Background Color are applied to the cells. Row To Monitor Enter a row number. The state of the cell at the intersection of Row To Monitor and the Current Column is monitored. The selected Cell Text Color and Cell Background Color are used to highlight the Current Column, based on the True or False state of that cell. Cell Text Color The display Text Color for highlighted cells. Cell Background Color The display Background Color for highlighted cells. Property Name What it is X The control’s X coordinate. Y The control’s Y coordinate. Width The control’s width. Height The control’s height. Enabled If True, the control is enabled. Visible If True, the control is visible. Tooltip Text Text displayed when the cursor is held over the control in Run mode. Background Color The color displayed behind the table if the Transparent property is False Transparent If True, the Control Panel’s color shows behind the table If False, the Background Color is displayed Remaining Properties The remaining lines in the properties tab define each cell in the table. Property Name contains the Row and Column labels Type sets the cell’s data type Value sets the cell’s current value Method Name What it does Update Updates the control’s data values. Clear Clears the control’s data values. Show Makes the control visible Datalogic Automation Inc. 4-74 Impact Reference Guide Text Entry Method Name What it does Hide Makes the control invisible Enable Enables the control so it can be used Disable Disables the control; it cannot be used Event Name When it happens Updated When the table’s values are updated Update by User Only when the table’s values are updated by a user’s action Text Entry The Text Entry control provides text entry on the Control Panel. The entered text can then be linked to a vision program or another Control Panel. If the On-Screen Keyboard is enabled, it is displayed when this control gains focus. 4-75 Property Name What it is Background Color Click in the field to choose the control’s background color. (The Transparent property must be False to see the background.) Caret Color Click in the field to choose the cursor color displayed when you enter numbers. X The control’s X coordinate. Y The control’s Y coordinate. Disabled Color Click in the field to choose the text’s display color when the control is disabled. Editable If True, the text can be edited. Enabled If True, the control is enabled. Font Click in the field to choose the text’s font properties. Text Color Click in the field to choose the text’s display color. Horizontal Alignment Sets the text’s horizontal justification: Left, Center, or Right Selected Color Click in the field to choose the text’s display color when the text field is selected. Selected Background Click in the field to choose the text’s background color when the text field is selected. Text The control’s current text value. Height The control’s height (in pixels) Width The control’s width (in pixels) Datalogic Automation Inc. Toggle Button Impact Reference Guide Property Name What it is Tooltip Text Text displayed when the cursor is held over the control in Run mode. Transparent If True, the control’s background is transparent. Visible If True, the control is visible. Method Name What it does Disable Disables the control; it cannot be used Enable Enables the control so it can be used Gain Focus The control gains focus (the cursor is placed in the text entry field). Hide Makes the control invisible. Show Makes the control visible. Event Name When it happens Action When the user presses the Enter key while in the control Focus When the control loses or gains focus Action by User When the text entry field loses focus or the user presses the Enter key Focus Gained When the control gains focus Focus Lost When the control loses focus Value Changed When the control loses focus or the Enter key is pressed AND the data has changed since the control gained focus Toggle Button Each time the Toggle Button control is pressed, it changes state from Selected to Unselected. Its Action event can be used, for example, to start and stop updates, connect and disconnect the Impact device, or put the device online and offline. Property Name What it is Border Painted If True, a raised bevel border is drawn around the button. If this property value is "System," the operating system display properties color is used. See “Control Color” on page 4-11. Height The control’s height Width The control’s width X The X coordinate of the control’s left edge. Y The Y coordinate of the control’s top edge. Enabled If True, the button is enabled. Datalogic Automation Inc. 4-76 Impact Reference Guide 4-77 Toggle Button Property Name What it is Horizontal Alignment Sets the label’s justification: Left, Center, or Right Horizontal Text Position Sets the label’s horizontal justification relative to the icon. Icon Height The icon’s height. Icon Text Gap The distance, in pixels, between the label text and the icon. Icon Width The icon’s width. Unselected If True, the button is currently Unselected. Keep Icon Aspect Ratio If True, the icon’s height to width ratio is maintained when it is resized. Left Margin The distance between the button’s left edge and the label text. Right Margin The distance between the button’s right edge and the label. Selected If True, the button is Selected. Changing this property does not fire a "Selected" or an "Unselected" event. Selected Button Color Click in the field to choose the control’s color when it is in the Selected state. (The Visible property must be True to see the control.) Selected Label Font Click in the field to choose the label’s font properties when the control is in the Selected state. Selected Icon Click in the field to choose an icon to display on the control when it is the Selected state. Icon files may have these extensions: gif, jpg, png, and bmp. The icon file must be on the same disk drive as the Control Panel file. Selected Label The displayed label when the button is in the Selected state. Some special characters will not display in this property. See “Special Characters” on page 4-97. Selected Label Color Click in the field to choose the label’s color when the control is in the Selected state. Size Icon With Button If True, the icon’s size will change when the button is resized. Tooltip Text Text displayed when the cursor is held over the control in Run mode. Unselected Button Color Click in the field to choose the control’s color when it is in the Unselected state. (The Visible property must be True to see the control.) Unselected Label Font Click in the field to choose the label’s font properties when the control is in the Unselected state. Unselected Icon Click in the field to choose an icon to display on the control when it is the Unselected state. Icon files may have these extensions: gif, jpg, png, and bmp. The icon file must be on the same disk drive as the Control Panel file. Datalogic Automation Inc. Tolerance Impact Reference Guide Property Name What it is Unselected Label The displayed label when the button is in the Unselected state. Some special characters will not display in this property. See “Special Characters” on page 4-97. Unselected Label Color Click in the field to choose the label’s color when the control is in the Unselected state. Vertical Text Position Sets the label’s vertical justification relative to the icon. Visible If True, the control is visible. Method Name What it does Disable Disables the control; it cannot be used Click Toggles the button state and fires an Action event Enable Enables the control so it can be used Hide Makes the control invisible Select Makes the control Selected Show Makes the control visible Unselect Makes the control Unselected Event Name When it happens Unselected When the button is unselected Unselected by User Only when the button is unselected by the user Action When the button’s state changes Action by User Only when the button’s state changes from a user’s action Selected When the button is selected Selected by User Only when the button is selected by the user Tolerance The Tolerance control provides the ability to view and/or adjust the minus, nominal, and plus values of the tolerance property value on a VPM tool. Optional step buttons allow you to increase or decrease the selected tolerance value in user-definable steps. To change any of the value fields 1. Click in the desired field Datalogic Automation Inc. 4-78 Impact Reference Guide Tolerance 2. Click the up or down step button OR Enter a value in the field and press the Enter key 4-79 Property Name What it is Caret Color Click in the field to choose the cursor color displayed in number entry fields. Height The control’s height (in pixels) Width The control’s width (in pixels) X The control’s X coordinate. Y The control’s Y coordinate. Disabled Value Color Click in the field to choose the value’s display color when the control is disabled. Enabled If True, the control is enabled. Labels Font Click in the field to choose the label’s font properties. Labels Position The label’s position relative to the control. Labels Visible If True, the labels are visible. Minus Label Text The text displayed for the Minus label. Minus/Plus Editable If True, the Minus and Plus values can be edited. Minus/Plus Label Color Click in the field to choose the color for the Minus and Plus labels. Minus/Plus Decimal Precision The number of displayed decimal places for the Minus and Plus values. Minus/Plus Step Button Value The amount of increase or decrease for each click on the indicated Step Button for the Minus and Plus values. Minus Value The current Minus value. Minus Value Alignment The horizontal alignment for the Minus value. Minus Value Background Color Click in the field to choose the Minus value’s background color. Minus Value Foreground Color Click in the field to choose the Minus value’s foreground color. Minus Value Maximum The maximum limit for the Minus value. Minus Value Minimum The minimum limit for the Minus value. Nominal Editable If True, the Nominal value can be edited. Datalogic Automation Inc. Tolerance Impact Reference Guide Property Name What it is Nominal Label Color Click in the field to choose the color for the Nominal label. Nominal Label Text The text displayed for the Nominal label. Nominal Decimal Precision The number of displayed decimal places for the Nominal value. Nominal Step Button Value The amount of increase or decrease for each click on the indicated Step Button for the Nominal value. Nominal Value The current Nominal value. Nominal Value Alignment The horizontal alignment for the Nominal value. Nominal Value Background Color Click in the field to choose the Nominal value’s background color. Nominal Value Foreground Color Click in the field to choose the Nominal value’s foreground color. Nominal Value Maximum The maximum limit for the Nominal value. Nominal Value Minimum The minimum limit for the Nominal value. Plus Label Text The text displayed for the Plus label. Plus Value The current Plus value. Plus Value Alignment The horizontal alignment for the Plus value. Plus Value Background Color Click in the field to choose the Plus value’s background color. Plus Value Foreground Color Click in the field to choose the Plus value’s foreground color. Plus Value Maximum The maximum limit for the Plus value. Plus Value Minimum The minimum limit for the Plus value. Range The control’s Range Start and Range End. Link this property to the Range1D property of a tool. (Linkable Only) Selected Background Click in the field to choose the text’s background color when the text field is selected. Selected Color Click in the field to choose the text’s display color when the text field is selected. Datalogic Automation Inc. 4-80 Impact Reference Guide 4-81 Tolerance Property Name What it is Step Buttons Visible If True, the step buttons are visible. Tolerance The control’s Tolerance value. Link this property to the Tolerance property of a tool. (Linkable Only) Tooltip Text Text displayed when the cursor is held over the control in Run mode. Transparent If True, the control’s background is transparent. Value Font The font for all the text entry values. Visible If True, the control is visible. Method Name What it does Minus Gain Focus The Minus value gains focus (the cursor is placed in the text entry field). Nominal Gain Focus The Nominal value gains focus (the cursor is placed in the text entry field). Disable Disables the control; it cannot be used Show Makes the control visible. Enable Enables the control so it can be used Plus Gain Focus The Plus value gains focus (the cursor is placed in the text entry field). Hide Makes the control invisible. Event Name When it happens Plus Action By User When the Plus entry field is modified by a user’s action Plus Action Anytime the Plus entry field is modified Nominal Action Anytime the Nominal entry field is modified Minus Action Anytime the Minus entry field is modified Tolerance Action By User When any value entry field is modified by a user’s action Nominal Action By User When the Nominal entry field is modified by a user’s action Minus Action By User When the Minus entry field is modified by a user’s action Tolerance Action When any value entry field is modified Tolerance Lost Focus When any value entry field loses focus Datalogic Automation Inc. Display Group Impact Reference Guide Display Group Chart The Chart control presents a graphic display of data from a vision program. Several different types of charts are available and up to five categories of data series can be plotted. Property Name What it is Chart Setup When you click in the value field, the chart property editor is displayed. (See page “Edit Chart Properties” on page 4-84 for details.) Height The control’s height. Width The control’s width. X The X coordinate of the control’s left edge. Y The Y coordinate of the control’s top edge. Series 1 Category The first data series category name. Categories are grouped together on the chart. For Vertical Bar charts, you can provide multiple category names for each series separated by a delimiter (comma by default). Each "name+indexNumber" in the category is paired with the corresponding data bar. If there is more data than category names for a series, the remaining data bars will have the index number for a label. For Pie Charts, this is the comma delimited string for the pie slice labels. See “Defining a Pie Chart” on page 4-86 Series 1 Color Click in the value field to choose the series display color. For Pie Charts, this is the color of the first data value. Series 1 Data The data to be plotted for this series. The data can be a String, Real list, or Integer list. Values in a String must be separated by the Data Delimiter character defined on the Data Tab in Chart Setup. NOTE: For Pie Charts see “Defining a Pie Chart” on page 4-86 Series 1 Name The name displayed in the legend. The name must be unique among all series. Not used for Pie Chart Series 2 Category The second data series category name. Categories are grouped together on the chart. Not used for Pie Chart Series 2 Color Click in the value field to choose the series display color. For Pie Chart, this is the color of the second data value. Series 2 Data The data to be plotted for this series. The data can be a String, Real list, or Integer list. Values in a String must be separated by the Data Delimiter character defined on the Data Tab in Chart Setup. Not used for Pie Chart Datalogic Automation Inc. 4-82 Impact Reference Guide 4-83 Chart Property Name What it is Series 2 Name The name displayed in the legend. The name must be unique. Not used for Pie Chart Series 3 Category The third data series category name. Categories are grouped together on the chart. Not used for Pie Chart Series 3 Color Click in the value field to choose the series display color. For Pie Chart, this is the color of the third data value. Series 3 Data The data to be plotted for this series. The data can be a String, Real list, or Integer list. Values in a String must be separated by the Data Delimiter character defined on the Data Tab in Chart Setup. Not used for Pie Chart Series 3 Name The name displayed in the legend. The name must be unique. Not used for Pie Chart Series 4 Category The fourth data series category name. Categories are grouped together on the chart. Not used for Pie Chart Series 4 Color Click in the value field to choose the series display color. For Pie Chart, this is the color of the fourth data value. Series 4 Data The data to be plotted for this series. The data can be a String, Real list, or Integer list. Values in a String must be separated by the Data Delimiter character defined on the Data Tab in Chart Setup. Not used for Pie Chart Series 4 Name The name displayed in the legend. The name must be unique. Not used for Pie Chart Series 5 Category The fifth data series category name. Categories are grouped together on the chart. Not used for Pie Chart Series 5 Color Click in the value field to choose the series display color. For Pie Chart, this is the color of the fifth data value. Series 5 Data The data to be plotted for this series. Data values must be separated by the Data Delimiter character. Not used for Pie Chart Series 5Name The name displayed in the legend. The name must be unique. Not used for Pie Chart Range Marker 3 Enabled If True, Range Marker 3 is shown on the chart. Range Marker1 Enabled If True, Range Marker 1 is shown on the chart. Range Marker 2 Enabled If True, Range Marker 2 is shown on the chart. Enabled If True, the control is enabled. Datalogic Automation Inc. Chart Impact Reference Guide Property Name What it is Range Marker 3 The value for Range Marker 3. Range Marker 1 The value for Range Marker 1. Range Marker 2 The value for Range Marker 2. Run on Data Change If True, the chart is updated whenever any data value changes. Chart Title The name displayed at the top of the chart. It may also be edited in the chart property editor. ToolTip Text Text displayed when the cursor is held over the control in Run mode. Visible If True, the control is visible. Y Axis Auto Range Enabled If True, autoranging is enable for Y axis values. Y Axis Maximum The maximum value to display on the Y axis. Y Axis Minimum The minimum value to display on the Y axis. Y Axis Ticks Visible If True, tick marks is displayed on the Y axis. Method Name What it does Disable Disables the control; it cannot be used Enable Enables the control so it can be used Hide Makes the control invisible Reset Resets chart to zero (XY Trend only) Run Forces the chart to update Show Makes the control visible Event Name When it happens Chart Data Change When any chart data value changes Edit Chart Properties The chart property editor lets you define all the chart’s properties, split into six tabs. Chart tab • Chart Type: When you select a chart type, a sample is displayed in chart plot area. Types include: Vertical Bar, Vertical Line, Pie, X/Y Trend, and Time Trend. (No trend samples are displayed.) NOTE: The Pie Chart is a special case. See “Defining a Pie Chart” on page 4-86 Datalogic Automation Inc. 4-84 Impact Reference Guide Chart • Title: Enter the title to be displayed at top of the chart, then select the title’s color and font. • Background: Choose the color that is displayed around the chart plot area, or select Transparent for the panel’s background color to show. Plot Tab • Background: Choose the color displayed in the chart plot area, or select Transparent for the panel’s background color to show behind the plotted data. • Range Markers (not applicable for Pie Chart): If enabled, horizontal lines are drawn in the plot area at the field values. • Range Control Limits (not applicable for Pie Chart): If enabled, shaded areas are drawn on the chart at specified locations. The Upper Spec color fills the chart from the Upper Spec value to the top of the chart. The Lower Spec color fills the chart between the Lower Spec value and the bottom of the chart. The Upper Control color fills the chart between the Upper Control value and the Upper Spec value. The Lower Control color fills the chart between the Lower Spec value and the Lower Control value. Click the Color button to select the desired control limit color. The Median marker is displayed in grey when enabled. X-Axis Tab Note: The settings on this tab have no effect for the Pie Chart. • Visible: If selected, the Label Text field is displayed on the X-axis and the Ticks group is enabled. • Label: The text in the field is displayed as the X-axis label. You can also choose the color and font for the Label Text. If the vertical check box is checked, the X-axis labels are displayed vertically rather than horizontally. • Ticks: If Visible is selected, tick marks are drawn on the X/Y Trend chart. You can also choose the color and font for the tick marks. • Range: For Time Trend charts, this is the chart’s time range, in minutes. • Samples: For X/Y Trend charts, this is the number of samples displayed on the X-axis range. Y-Axis Tab Note: The settings on this tab have no effect for the Pie Chart. • Visible: If selected, the Label Text is displayed on the Y-axis and Ticks and Auto Range are enabled. • Label: The text in the field is displayed as the Y-axis label. You can also choose the color and font for the Label Text. • Ticks: If Visible is selected, tick marks are drawn on the X/Y and Time Trend charts. You can also choose the color and font for the tick marks. • Auto Range: If Enable is selected, the chart range is automatically adjusted to fit the range of Y value data. If it not selected, the chart range will remain static between the Min and Max values. 4-85 Datalogic Automation Inc. Frame Impact Reference Guide Legend Tab Select the where to display (or Hide) the chart legend relative to the chart. Data Tab • Data Delimiter: This is the ascii delimiter that appears between data values — Carriage Return, Line Feed, CR and LF (carriage return and line feed), or User Defined. Enter the User Defined value in the field below this selection. • Out of Range Data Delete (Time Trend Chart only): If True, data is removed from the time series collection when its value is less than the bottom range of time. Defining a Pie Chart For Pie Charts, all the data values are defined in the Series 1 Data property. The data can be a String, Real list, or Integer list. Values in a String must be separated by the Data Delimiter character defined on the Data Tab in Chart Setup (with no spaces within the string). A Real list or Integer list must be linked in. The data values are displayed as percentages. For example, the string 60,20,20 (no spaces within the string) would produce a Pie Chart with three slices of 60%, 20%, and 20%. You can define or link up to five data values for the chart. NOTE: If you use more than five data values, or the sum of the percentages does not total 100, you will get unpredictable results. The labels for the pie slices are defined with a comma-delimited string (with no spaces) in the Series 1 Category property. For example, the string value1,value2,value3 would define the labels for three data values. The Color property is the only value that is relevant in any of the other Series properties. Each Series Color property sets the color of pie piece for the corresponding data value. For example, the Series 2 Color property determines the color of the pie piece displayed for the second data value. Frame The Frame control is used to group controls in the Control Panel. This allows you to move and set some of the properties of all the controls within the Frame at one time. To place a control in a frame 1. Insert the frame control into the panel. 2. Select the frame control. 3. Select the control to be added. 4. Click the Add Control button. Property Name What it is Border Text Align Sets the border text’s justification: Left, Center, or Right Border Text Color The border text’s color. Datalogic Automation Inc. 4-86 Impact Reference Guide Graphic Display Property Name What it is Border Text Font The border text’s font properties. Border Type The border type: Bevel Lowered, Bevel Raised, Etched Lowered, Etched Raised, Line, or None. Height The frame’s height. Width The frame’s width. X The X coordinate of the frame’s left edge. Y The Y coordinate of the frame’s top edge. Enabled If True, all controls within the frame are enabled. (Each control can be disabled individually.) Extend Enabled to Contents If True, this control’s Enabled property is extended to all the controls it contains. Line Border Color The line border’s display color. Line Border Width The line border’s width. (This has no effect on other border types.) Border Text The control’s border text. Visible If True, the frame and it’s controls are visible. Method Name What it does Disable Disables the control; it cannot be used Enable Enables the control so it can be used Hide Makes the control invisible Show Makes the control visible Graphic Display The Graphic Display control displays a graphic image on a Control Panel. For instance, you could display a company logo or an icon that represents an operation or machine. 4-87 Property Name What it is Keep Aspect Ratio If True, the display’s height to width ratio is maintained when the display is resized Height The graphic’s height. Width The graphic’s width. X The X coordinate of the display’s left edge. Y The Y coordinate of the display’s top edge. Datalogic Automation Inc. Indicator Light Impact Reference Guide Property Name What it is Image Click in the field to display the file browser to choose the image file. Image files may have these extensions: gif, jpg, and png. The image file must be on the same disk drive as the Control Panel file. ToolTip Text Text displayed when the cursor is held over the control in Run mode. Method Name What it does Hide Makes the control invisible Show Makes the control visible Indicator Light The Indicator Light control gives a color indication of its Light On and Light Off values. Property Name What it is X The X coordinate of the control’s left edge. Y The Y coordinate of the control’s top edge. Current Color The indicator light’s current color (either the On or Off color). Enabled If True, the control is enabled. Height The indicator light’s height. Light On If True, the indicator displays the On color. If False, the indicator displays the Off color. Width The indicator light’s width. Off Blue The indicator’s blue color value when it is off (0-100). Off Color Click in the field to choose the control’s display color when it is off. Off Green The indicator’s green color value when it is off (0-100). Off Red The indicator’s red color value when it is off (0-100). On Blue The indicator’s blue color value when it is on. (0-100). On Color Click in the field to choose the control’s display color when it is on. On Green The indicator’s green color value when it is on (0-100). On Red The indicator’s red color value when it is on (0-100). Percent Height This is the scale factor for the control’s display size. A value of 1 indicates 100%. A value of 0.5 indicates 50%. ToolTip Text Text displayed when the cursor is held over the control in Run mode. Visible If True, the control is visible. Datalogic Automation Inc. 4-88 Impact Reference Guide Numeric Display Method Name What it does Hide Makes the control invisible. Show Makes the control visible Toggle Makes the control switch state. Turn Off Makes the control’s Light On property False. Turn On Makes the control’s Light On property True. Event Name When it happens Light Change When the Indicator Light switches. Numeric Display The Numeric Display control displays numbers on the Control Panel. 4-89 Property Name What it is X The X coordinate of the control’s left edge. Y The Y coordinate of the control’s top edge. Number Type Choose whether to display Real or Integer numbers. Integer Value The integer value to be displayed (Integer Number Type property must be selected). Display Integer Grouping If True, the control displays integer values with digit grouping symbols based on Operating System settings Real Value The real value to be displayed (Real Number Type property must be selected) Decimal Precision Real number decimal places to display. Tooltip Text Text displayed when the cursor is held over the control in Run mode. Number Color Click in the field to choose the number’s display color. Font Click in the field to choose the number’s display font properties. Width The display’s width. Height The control’s height. Vertical Alignment Sets the number’s vertical justification: Top, Center, or Bottom Horizontal Alignment Sets the number’s horizontal justification: Left, Center, or Right Transparent If True, the control’s background is transparent. Background Click in the field to choose the control’s background color. (The Transparent property must be False to see the background.) Datalogic Automation Inc. Rich Text Impact Reference Guide Property Name What it is Enabled If True, the button is enabled. Visible If True, the control is visible. Border Type The border type: Bevel Lowered, Bevel Raised, Etched Lowered, Etched Raised, Line, or None. Line Border Color Click in the field to choose the line border’s color. (This has no effect on other border types.) Line Border Width The line border’s width. (This has no effect on other border types.) Method Name What it does Disable Disables the control; it cannot be used Enable Enables the control so it can be used Hide Makes the control invisible Show Makes the control visible Event Name When it happens Value Changed When the displayed value changes Rich Text The Rich Text control displays formatted text on the Control Panel. You can format text (including font type and size), and change the text pane color. Property Name What it is Height The display’s height. Width The display’s width. X The X coordinate of the display’s left edge. Y The Y coordinate of the display’s top edge. Text The text to be displayed. The text edit dialog is displayed when you click the field. ToolTip Text Text displayed when the cursor is held over the control in Run mode. Visible If True, the control is visible. Method Name What it does Hide Makes the control invisible Show Makes the control visible Datalogic Automation Inc. 4-90 Impact Reference Guide Scrolling Table Scrolling Table The Scrolling Table control displays other CPM controls in a grid layout. Only one row or column is updated with new data and, when the table is full, old data rows and columns are scrolled off the table. A qualifying control can be added by dragging it from the palette and dropping into the desired table cell. Qualifying controls include Text Display, Numeric Display, Check Box (the Editable property is set to False), Indicator Light, and Drop List Selector (the Selectable property is set to False). See “How To Set up the Scrolling Table Control” on page 4-92 4-91 Property Name What it is Auto Resize If True, the table is automatically resized when a control is added to it Background The color displayed behind the table if the Transparent property is False Border Type The border type: Bevel Lowered, Bevel Raised, Etched Lowered, Etched Raised, Line, or None Height The control’s height Width The control’s width X The control’s X coordinate Y The control’s Y coordinate Enabled If True, the control is enabled Grid Line Color The grid line color if Grid Lines Visible is Both, Vertical, or Horizontal Grid Lines Visible Which of the grid lines are visible, Both, Vertical, or Horizontal Labels Visible If True, the control labels are visible Line Border Color The border color if Line is chosen as Border Type Line Border Width The border width, in pixels, if Line is chosen as Border Type Paused This property is in effect when CPM is in Run Mode. If True, the table stops updating values. New values are recorded but not shown in the table. If False, all values recorded are displayed in the table, within the Scrolling Limit Scroll Direction Up: Rows are added to the bottom of the table and removed from the top when Scrolling Limit is reached. Down: Rows are added to the top of the table and removed from the bottom when Scrolling Limit is reached Left: Columns are added to the right of the table and removed from the left when Scrolling Limit is reached Right: Columns are added to the left of the table and removed from the right when Scrolling Limit is reached Scrolling Limit Once the number of rows or columns displayed reaches this limit, they are deleted from the table, according to the Scroll Direction Tooltip Text Text displayed when the cursor is held over the control in Run mode Datalogic Automation Inc. Scrolling Table Impact Reference Guide Property Name What it is Transparent If True, the Control Panel’s color shows behind the table If False, the Background Color is displayed Visible If True, the control is visible Scroll On Data Change If True, whenever the Scroll method is called, the table will update if one or more of the cell values has changed. This prevents the table from scrolling if no values have changed. If False, each time the Scroll method is called the table will always update whether any cell values have changed. In this situation, there is a chance of cell values being the same for consecutive updates. Method Name What it does Enable Enables the table and all the controls within it Scroll A row or column of values is appended to the table Pause The table stops updating. New values are recorded but not displayed Hide Makes the control invisible Show Makes the control visible Disable Disables the control; it cannot be used Clear Clears all the values in all the controls in the table. If CPM is in Design mode, the one active row or column of controls is visible. If CPM is in Run mode, the table is empty until the next "Scroll" method is called. Resume Any values that were saved during the pause are displayed in the table and the table values continue to update Event Name When it happens Scrolled When a row or column is appended to the table How To Set up the Scrolling Table Control To set up a Scrolling Table control, you must first add it to the Control Panel, then link the desired values into the table cells. To add the table to a panel 1. Open the Control palette. 2. Click and drag the Scrolling Table icon to the control panel and drop it on the canvas. A default table display is added. You can click and drag the borders to resize it, however, if Auto Resize is set to True, the table will resize automatically when a control is added to it. 3. Set the desired display options for the table itself, such as the Background Color, Grid Line Color, and Border Type. These settings affect only the table, not the display for each value within the table. Datalogic Automation Inc. 4-92 Impact Reference Guide Scrolling Table 4. Set the desired Scroll Direction and Scrolling Limit. These two settings determine whether the table scrolls up, down, right, or left, and how many rows or columns of values are displayed before they drop off the table. Default Scrolling Table No controls added To display values in the table, you can drop other controls into table cells and then link values into them, or drag properties directly from VPM tools into table cells. If you add controls directly to the table, you can only use qualifying controls. Qualifying controls include Text Display, Numeric Display, Check Box (the Editable property is set to False), Indicator Light, and Drop List Selector (the Selectable property is set to False). If you drag and drop a property from a tool, a default qualifying control is added to the table based on the property’s data type. NOTE: When you add a control to a table, it may automatically resize (depending on the Auto Resize property). If you want to modify a Scrolling Table property, you need to click on the outer edge of the Scrolling Table control to select it. To move the Scrolling Table control, you need to click an edge of the table, drag the edge to expand it, then click in an empty table cell and drag the table to the desired location. To add controls to a table 1. Open the Control palette. 2. Click and drag the desired control, then drop it on top of the Scrolling Table control on the canvas. 3. When you release the control, the Scrolling Table resizes automatically, (if Auto Resize is True) and a default label is added to either the row or column, depending on the Scroll Direction property. The label is a CPM Text Display control so you can select it and modify its properties as needed. 4. To modify the properties of any control in the table cell, select the control in the cell. Its properties, methods, and events are displayed in the property window. Scrolling Table with one control. Scrolling Limit is set to 5 so 4 blank rows are added Table has auto-sized and heading has been added. To resize the table, click and drag an edge. To move the table, click and drag an empty cell. To add tool properties to a table 1. Open the Vision Program Tree. 4-93 Datalogic Automation Inc. Tab Impact Reference Guide 2. Open the desired tool, click and drag the desired property, then drop it onto the Scrolling Table control. When you release the property, if the data type is compatible with one of the qualifying controls, that control is automatically added to the table. The Scrolling Table resizes automatically based on the Auto Resize and Scrolling Limit properties and a default label is added to either the row or column, depending on the Scroll Direction property. The label is a CPM Text Display control so you can select it and modify its properties as needed. 3. To modify the properties of a control in the table cell, select the control in the cell. Its properties, methods, and events are displayed in the property window. To delete controls from a table 1. Click on the header of the table row or column you want to delete. Be sure that the name of that header cell is displayed in the property window Name field. 2. Click the Delete button. Click the header to select a column to delete. The header cell’s name is displayed in the Name field. Tab The Tab control lets you group controls within selectable tabbed groups on the Control Panel. Note: You must have a Tab Group control in the Control Panel to add a Tab control. Property Name What it is Background Color The control’s background color. Enabled If True, the control is enabled. Extend Enabled to Contents If True, this control’s Enabled property is extended to all the controls it contains. Tab Text Color The text’s display color. (When the control is disabled, the text is grey.) Icon Height The icon’s display height Icon Click in the field to place an icon on the button. Icon files may have these extensions: gif, jpg, png, and bmp. The icon file must be on the same disk drive as the Control Panel file. Icon Width The icon’s display width Index The order of this tab related to other tabs in the Tab Group control. Datalogic Automation Inc. 4-94 Impact Reference Guide Tab Group Property Name What it is On Top If True, the tab is currently in front of any other tab in the Control Panel. Keep Icon Aspect Ratio If True, the icon’s height to width ratio is maintained when it is resized. Tab Name The name displayed on the control’s tab. ToolTip Text Text displayed when the cursor is held over the control in Run mode. Method Name What it does Bring To Top Puts the tab in front of all other tabs in the group Disable Disables the control; it cannot be used Enable Enables the control so it can be used Event Name When it happens Not On Top When the tab is placed behind all other tabs in the group On Top When the tab is placed in front of all other tabs in the group Tab Group The Tab Group control lets you group Tab controls on the Control Panel. 4-95 Property Name What it is Height The control’s height. Width The control’s width. X The X coordinate of the control’s left edge. Y The Y coordinate of the control’s top edge. Enabled If True, the control is enabled. Tab Height Sets the tab height for all Tab controls in the Tab Group control, in pixels. A value of zero automatically adjusts to accommodate the tab font size. A value of -1 hides the tab. In this case, you must provide some other way (such as a toggle button control) to access the tabs Tab Layout Scroll or Wrap the tabs when they are selected Tab on Top The index number of the tab currently in front Tab Placement Where to place the tab label Tab Text Font The tab text’s font properties. Datalogic Automation Inc. Text Display Impact Reference Guide Property Name What it is Tab Width Sets the tab width for all Tab controls in the Tab Group control, in pixels. A value of zero automatically adjusts to accommodate the tab font and/or icon size. ToolTip Text Text displayed when the cursor is held over the control in Run mode. Visible If True, the control is visible. Method Name What it does Disable Disables the control; it cannot be used Enable Enables the control so it can be used Hide Makes the control invisible Show Makes the control visible Event Name When it happens Tab Selected When a tab in the group is selected Text Display The Text Display control displays text on the Control Panel. Property Name What it is Background Color The control’s background color. (The Transparent property must be False to see the background.) X The X coordinate of the control’s left edge. Y The Y coordinate of the control’s top edge. Enabled If True, the control is enabled. Font The text’s font properties. Text Color The text’s display color. (When the control is disabled, the text is grey.) Horizontal Alignment Sets the text’s horizontal justification: Left, Center, or Right Text The displayed text. The text will wrap if the display is too narrow. Some special characters will not display in this property. See “Special Characters” on page 4-97. Line Border Color The line border’s color. (This has no effect on other border types.) Line Border Width The line border’s width. (This has no effect on other border types.) Height The control’s height. Datalogic Automation Inc. 4-96 Impact Reference Guide Text Display Property Name What it is Width The control’s width. ToolTip Text Text displayed when the cursor is held over the control in Run mode. Transparent If True, the control’s background is transparent. Vertical Alignment Sets the number’s vertical justification: Top, Center, or Bottom Visible If True, the control is visible. Method Name What it does Disable Disables the control; it cannot be used Enable Enables the control so it can be used Hide Makes the control invisible Show Makes the control visible Event Name When it happens Text Changed When the control’s displayed text changes Special Characters Some special characters will not display on a control unless they are entered along with special "control" characters in the control’s property. These control characters are used extensively in web page (HTML) coding. Some common characters, along with the control character string to enter in the control property, are listed in the table below. 4-97 Special Character Meaning Control Character String to Enter < less than < > greater than > © copyright © ® registered trademark ® ° degree ° ± plus or minus ± µ micro µ ≠ not equal ≠ • bullet • ™ trademark ™ Datalogic Automation Inc. XBar-R Chart Impact Reference Guide XBar-R Chart The XBar-R Chart control graphs statistical information on the Control Panel. It is used to show both the mean value (XBar) and the range (R) of a data set. The XBar portion of the chart shows any changes in the mean value of the process while the R portion shows any changes in the dispersion of the process. This chart is particularly useful because it shows changes in the mean value and dispersion of the process at the same time, making it a very effective method for checking abnormalities in the process. A data set consists of a minimum, mean, and maximum value, separated by commas. Vertical bars represent the data set's minimum and maximum values. The "XBar" appears as a square at the data set's mean value. When the number of data sets is greater than the visible chart range, the data set at the beginning of the chart is dropped and data set is added at the end of the chart. Property Name What it is Chart Setup When you click in the value field, the chart setup dialog is displayed. (See “Edit XBar-R Chart Properties” on page 4-99 for details.) ToolTip Text Text displayed when the cursor is held over the control in Run mode. X The X coordinate of the control’s left edge. Y The Y coordinate of the control’s top edge. Width The control’s width. Height The control’s height. Enabled If True, the control is enabled. Visible If True, the control is visible. Chart Title The name displayed at the top of the chart. It may also be edited in the chart property editor. Minimum Range Marker The "R" minimum for the range, shown as a horizontal line. Maximum Range Marker The "R" maximum for the range, shown as a horizontal line. Data The display data. A data set consists of a minimum, mean, and maximum value. The data can be a String, Real list, or Integer list. Values in a String must be separated by the Data Delimiter character defined on the Data Tab in Chart Setup. Run on Data Change If True, the control will run when any data value changes Mean Calculated: Mean of all data pair mean values. Minimum Calculated: Minimum of all data pair minimum values. Maximum Calculated: Maximum of all data pair maximum values. Deviation of Means Calculated: Standard deviation of all data pair mean values. Datalogic Automation Inc. 4-98 Impact Reference Guide XBar-R Chart Property Name What it is Deviation of Minimums Calculated: Standard deviation of all data pair minimum values. Deviation of Maximums Calculated: Standard deviation of all data pair maximum values. Upper Control Limit Calculated: Three times the standard deviation of all the means added to the mean of all means. Lower Control Limit Calculated: Three times the standard deviation of all the means subtracted from the mean of all means. Y Axis Auto Range Enabled If True, autoranging is enabled for the chart’s Y axis. Y Axis Maximum The maximum value the Y Axis will display Y Axis Minimum The minimum value the Y Axis will display Method Name What it does Enable Enables the control so it can be used Disable Disables the control; it cannot be used Show Makes the control visible. Hide Makes the control invisible. Reset Clears the plot and starts over with the data pairs. Run Regenerates the chart with the current properties and data pairs. Event Name When it happens Chart Data Change When any chart data value changes. Data Out Of Range When any data set's minimum or maximum is outside of the values specified in the Minimum and Maximum Range Marker properties. Edit XBar-R Chart Properties The chart setup dialog lets you define all the chart’s properties on four tabs. Chart tab • Title: Enter the title’s text, then select its color and font. • Background: Choose the color that is displayed around the chart plot area, or select Transparent for the panel’s background color to show. 4-99 Datalogic Automation Inc. XML Table Impact Reference Guide Plot Tab • Background: Choose the color displayed in the chart plot area, or select Transparent for the panel’s background color to show behind the plotted data. • Range Markers: Horizontal lines of the selected color are drawn in the plot area at the Minimum and Maximum Range Marker values. • Control Limit Markers: Horizontal lines of the selected color are drawn in the plot area at the Upper and Lower Control Limit values. Y-Axis Tab • Label: The text in the field is displayed as the Y-axis label. You can also choose the color and font for the Label Text. • Ticks: The number of decimal places of precision to display. You can also choose the color and font for the tick mark values. • Auto Range: If Enable is selected, the chart range is automatically adjusted to fit the range of Y value data. If it not selected, the chart range will remain static between the Min and Max values. Data Tab • Data Delimiter: This is the ascii delimiter that appears between data values — Carriage Return, Line Feed, CR and LF (carriage return and line feed), or User Defined. Enter the User Defined value in the field. • XBar-R Sample: Number Displayed is the number of data samples to display on the screen. XML Table The XML Table control reads an XML formatted file and displays the information in the file. The XML data must be structured in a specific way, as defined by the control’s properties.. Property Name What it is Alternating Row Background Color The Background color for all alternating rows if the Alternating Row Highlight Enabled property is True. Alternating Row Highlight Enabled If True, every other row has the Alternating Row Text Color and Alternating Row Background Color properties applied so the table is "striped" for easier viewing. If False, all rows have the Row Text Color and Row Background Color properties applied. Alternating Row Text Color The text color for all alternating rows if the Alternating Row Highlight Enabled property is True. Column Block Tag Name The XML tag name that indicates the beginning of table columns. Data from this tag to the end of the header block are the column titles in order from left to right. Datalogic Automation Inc. 4-100 Impact Reference Guide 4-101 XML Table Property Name What it is Column Reordering Enabled If True, the columns can be moved within the table. The new order is lost when the table is updated. To move a column, click the header then drag the column to the new position. To resize a column, hold the cursor over the border between columns, then click and drag the border to resize it. Column Sorting Enabled If True, data in the rows can be sorted in ascending or descending order by clicking the column header. Height The control’s height. Width The control’s width. X The X coordinate of the control’s left edge. Y The Y coordinate of the control’s top edge. Data The entire XML file as a string. This is parsed then used to populate the table. Suggested implementation is to create a Scriptor control that reads an XML file and produces a string for this property. Data Block Tag Name The XML tag name that indicates the beginning of the data block. This block contains the report data used to populate table rows. Enable Large Scroll If True, all of the control's scroll bars are very large for use with touch screen monitors. File Path This is the path and name of the XML file used to populate the table. Header Text Alignment The horizontal justification for all column headers. Header Block Tag Name The XML tag name that indicates the beginning of the header data block. This block contains the report header, including the column titles. Header Font Text font style and size for all column headers. Header Text Color Text color for all column headers. Record Block Tag Name The XML tag name that indicates the beginning of the record block that corresponds to one row of data. If the record block contains fewer data items than columns, empty values are displayed. Row Background Color Background color for all table cells if the Alternating Row Background Color property is False. Row Font Text font style and size for all table cell values. Row Text Alignment The horizontal justification for all table cell values. Row Text Color Text color for all table cell values if the Alternating Row Text Color property is False. ToolTip Text Text displayed when the cursor is held over the control in Run mode. Visible If True, the control is visible. Datalogic Automation Inc. General Group Impact Reference Guide Method Name What it does Hide Makes the control invisible. Update Table Reads the XML file specified in the "File path" property or parses the string in the Data property, then displays the data in the table according to the record tags. Show Makes the control visible. Event Name When it happens Update Failed When populating the table with data from the XML file or Data property is incomplete. Causes for the failure may include an empty tag property in the XML file or Data property, or the XML file cannot be found. Update Complete When the table has been successfully populated with data from the XML file or Data property. General Group Basic Interpreter You can use the Basic Interpreter control to write and execute Basic programs. This control is not displayed on the Control Panel Canvas. To see it, click the Select Design View Options button and select Control Panel Tree. See “Select Design View Options” on page 4-6. Basic Editor Tab The Basic Interpreter control performs logical and mathematical calculations based on a set of user-written statements using the Basic programming language. See “Impact Basic” on page 5-1 for more information. Basic language statements are typed in the Basic editor window. As variable names are entered, variables are created as inputs in the input list on the Properties tab. Click the Compile button to test the validity of your Basic code. When you click the Run button, the Basic program results appear in the Properties tab. Click in this window, then type the desired Basic language statements. Variable names (e.g. count) are automatically created as inputs on the Properties tab. Set the variable type there. Datalogic Automation Inc. 4-102 Impact Reference Guide Change Log In the example above, the variable "count" is incremented each time the tool runs, then reset to zero when it reaches five. When you type the variable name "count," the Basic tool automatically creates an input with that name. You can set the variable’s type in the Type drop-down. For more details about entering text in the Editor window, see “Typing in the Editor Window” on page 5-1). When CPM is in Run mode, the code is executed when the Run method is called, or when the Run On Variable Change property is True and any of the variables change. Property Name What it is User-defined variables You can set the data type for each variable defined in the BASIC Editor window. Run On Variable Change If True, the Basic code is executed once whenever any of the variables change. Method Name What it does Run Executes all the Basic code in the Basic Editor window once. Event Name When it happens Run Completed When all the Basic code has been executed. Change Log The Change Log control provides the option to track changes generated by Impact device changes and user interaction with the control panel application. The changes are written in a secure Protected Document Format (PDF) or XMLfile. For more details, see “How the Change Log Control Works” on page 4-104. This control is not displayed on the Control Panel Canvas. 4-103 Property Name What it is Custom Text This text is written as a log entry when the Insert Custom Text method is activated. Custom Text Timestamp Enabled If True, a timestamp will be added to the custom text. Last Error Logged The most recent error entry in the Change Log file. This is not necessarily the most recent entry. Log File Name The base name of the Change Log file, without an extension. A number is appended to this base name and incremented when a new file is created. For example, ChangeLog001.pdf. IMPORTANT: File names are case sensitive. Log File Path The path to the file in the Log File Name property. See “*Creating the Log File” on page 4-105. IMPORTANT: File names are case sensitive. Datalogic Automation Inc. Change Log Impact Reference Guide Property Name What it is Logging Level Any log event of this level or higher will be logged. If the value is zero, all events will be logged. Maximum Number of Files When this number of files has been created, the event "Maximium Number of Files Written" event is activated. The next file created is numbered at 001 and any existing log files with the same name are overwritten. Maximum Number of Pages When this number of pages have been written to the log file, a new file is created. XML File Generation Enabled If True, the log files are generated in XML format instead of PDF format. Method Name What it does Insert Custom Text Writes the contents of the Custom Text property as a log entry. Update File Writes the cached log entries to the log file. Start New Log Increments the log file number and creates a new log file. Event Name When it happens File Update Completed When the log entries have been written to the log file. File Update Failed If the stored log entries do not get written to the log file. Maximum Number of Files Written When the number of files indicated in the Maximum Number of Files property has been created. Error Logged When an error entry is written to the log file. The entry is available in the Last Error Logged property. How the Change Log Control Works Only one Change Log control is allowed in a control panel application.Logging starts when the control panel application enters run mode. Logging stops when the control panel application is closed or enters design mode. Log File Format Log files are created in either XML format or password protected PDF format, depending on the property "XML File Generation Enabled." Log Entry Formatting The log entries are formatted when they are written to the log file. In general, the entry is formatted based on the entry’s data type and the system format settings. A single value is formatted as seen in the VPM proper- Datalogic Automation Inc. 4-104 Impact Reference Guide Change Log ties pane. List values are formatted as single values separated by the system’s regional format separator. Fields are separated by four spaces.The following changes are written to the log. Change Type Device Connect/Disconnect Online/Offline State Change Get Data (after going online) Set Data Vision Program Load, Unload, Save User Password Changed, Level Changed, Description Changed User Logged On, Logged Off User Added, Deleted Any of the following VPM tool methods executed from a control panel (Connect, Disconnect, Online, Offline, Run, Retrain, Save file, Reset, Pixel Calibrate, Clear Pixel Calibrate, Start auto trigger, Stop auto trigger, Abort) *Creating the Log File When the Change Log control is added, the log file location defaults to the Root/Logs folder of the default CPM installation folder. Click in the Log File Path value field to select a different folder. If the selected Log File Path doesn't exist when the first log entry is written, an attempt will be made to create the folder. If the folder can’t be created, the default folder (based on the installation) is created and an error message is displayed. A new log file is started when any of the following occurs: • The Change Log control is created • The control panel application is loaded • When the "Start New Log" method is called • When the Maximum Number of Pages limit is reached Writing the entries to the Log File Change Log entries are stored in memory and appended to the current log file when any of the following occurs: • When fifty entries have been stored in memory 4-105 Datalogic Automation Inc. Execute Command Impact Reference Guide • When the "Update File" method is called • When the five minutes have elapsed since the entries were last written • When the control panel application closes • When CPM goes into Design mode • When the "Log File Path" property changes while in run mode • When the "Log File Name" property changes while in run mode When entries are successfully written or appended to an existing file a "File Update Completed" event occurs. If the write is unsuccessful, a "File Update Failed" event occurs. Execute Command The Execute Command control is used to execute a system command from the Control Panel. You could, for example, use it to run another application. This control is not displayed on the Control Panel Canvas. Property Name What it is Command The program to be executed. If you want to run a batch file, see “Batch File” below. Starting Path Specifies the path to the folder that contains the file to run. If the path contains spaces, it must be enclosed in double quotes. System programs (like Notepad and MSPaint) do not require a starting path. Method Name What it does Execute Command Executes the command. Event Name When it happens Command Executed When command execution has begun. Batch File To execute a batch file, use the following command line in the Command property (where "test.bat" is the name of the batch file to run). cmd.exe /c test.bat When the control runs, the batch file will run to completion, then exit. If you want to display a Command Prompt window so the user can enter input from the keyboard, use the following command line in the Command property (where "test.bat" is the name of the batch file to run). cmd.exe /c start cmd.exe /c test.bat When the control runs, a Command Prompt window is displayed on top of CPM so the user can enter input from the keyboard. When the batch file completes, the user must close the Command Prompt window. Datalogic Automation Inc. 4-106 Impact Reference Guide Impact Connector Impact Connector The Impact Connector control connects the Control Panel to an Impact device. Vision programs, tasks, and tool data are linked to this control, then linked to properties, methods, and events in other controls. This control is not displayed on the Control Panel Canvas. To see it, click the Select Design View Options button and select Control Panel Tree (see “Select Design View Options” on page 4-6). When a control is deleted, if there are no other links to it in the Connector control, the links are removed in the Connector control. Once all links are removed from a Connector control, it is automatically deleted. 4-107 Property Name What it is Enable IP Address Editing If True, the Edit IP Address button is enabled on the Device Selector dialog. (See “Connect to an Impact device, camera, or Emulator” on page 15 for more details.) Connected If True, the Control Panel is actively connected to an Impact device with the IP address shown in the IP Address property. Device Connection Used by other controls to determine which Impact device is currently connected Device Locked True if the device is currently locked in VPM. IP Address Click in the field to choose a device’s IP address. Internal Get Data Timer Interval Each time this timer interval has elapsed, the Impact Connector will update all Get Data links. The timer starts after the previous Get Data has completed. The update interval may be longer than this if the Impact device is busy. Disconnected If True, the Impact Connector is not currently connected to a device. Offline If True, the Impact device is offline. Last Command Successful If True, the last command to the Impact device was successful (for example, Get Data or Set Data). Administration Level Enabled If True, device security is enabled and a user with Administrator level security is logged on. Programmer Level Enabled If True, device security is enabled and a user with Programmer level security is logged on. Controller Level Enabled If True, device security is enabled and a user with Controller level security is logged on. Operator Level Enabled If True, device security is enabled and a user with Operator level security is logged on. Monitor Level Enabled If True, device security is enabled and a user with Monitor level security is logged on. Online If True, the Impact device is online. The online method is found on the Execute Method tab. Datalogic Automation Inc. Impact Connector Impact Reference Guide Property Name What it is Link Error If True, one or more of the links between the Control Panel and the Impact device have been broken. This may be due to some change in the vision program (e.g. a tool deletion). The links are shown on the Get Data, Set Data, and Execute Method tabs. Display Device List If True, the Impact device list is displayed when the connection is made Suppress Connect Errors If True, device connection error dialogs are not displayed when connection with the device is lost. This allows an unattended reconnect to be attempted programatically. (Other warning dialogs may be displayed.) Use Internal Get Data Timer If True, the Impact Connector will use the Internal Get Data Timer Interval property to update Get Data links. UserID\Password If device security is enabled, this contains the currently logged on user’s User ID and password. See “Device Security” on page 4-110 for more details. Method Name What it does Run GetData Updates all the data linked from the Impact device. Links from the device can be seen on the Get Data tab. Connect Attempts to connect to the Impact device. Disconnect Disconnects the Control Panel from the Impact device. Refresh Set Data For controls that have Set Data links to tool properties in VPM, reads the current values of those properties from the tools and updates the value in the control property. Event Name When it happens Connected When the connection is complete Occurred Whenever the control has received data through a Link from a tool. Get Data Completed When the most recent Get Data has completed. May be from a Run GetData Method or elapsed Get Data Timer Interval. Program Loaded/ Unloaded After a vision program has completed loading or unloading on the Impact device. C o n n e c t t h e I m pa c t C o n n e c t o r c o n t r o l During normal control panel operation, you will probably create a way for the operator to connect the Control Panel to an Impact device. During the development process, you can manually connect the Control Panel to the desired device. To manually connect an Impact Connector control to an Impact device 1. Select the Properties tab on the desired Impact Connector control. Datalogic Automation Inc. 4-108 Impact Reference Guide Impact Connector 2. Click in the IP address field and select the desired device’s IP address from the list displayed, then click OK. 3. Select the Connected property, then set the Value to True. 4. If device security is enabled, you will need to enter a valid User ID and Password. Properties Links Note: If the Control Panel is not connected to an Impact device, you cannot create links. The Properties tab shows links between the Connector control and other controls in the control panel. The color of the Link field name indicates the link’s status: • Magenta - The property shown is the source property • Blue - The property shown is the destination property Methods Links Note: If the Control Panel is not connected to an Impact device, you cannot create links. The Methods tab shows links between the Connector control methods and other events from other controls in the control panel. Method Link field names are always blue. E v e n ts L i n k s Note: If the Control Panel is not connected to an Impact device, you cannot create links. The Methods tab shows links between the Connector control methods and other events from other controls in the control panel. Method Link field names are always magenta. S e t D a ta L i n k s Note: If the Control Panel is not connected to an Impact device, you cannot create links. Set data links allow you to send data to a tool in a vision program from a control. The link is created between the Impact Connector control and a vision program tool. For example, you can link from the Set Data tab to a Contrast tool’s Threshold value, then link from a Slider control to the Set Data tab so the Control Panel operator can adjust the Threshold value from the Control Panel. See “Links between CPM and VPM” on page 4-15 for more details on links. The color of the Link name indicates the link’s status: • Blue - Normal • Red - unresolved (e.g. due to no loaded vision program or no connection to a device) • Black - Links to more than one control G e t D a ta L i n k s Note: If the Control Panel is not connected to an Impact device, you cannot create links. 4-109 Datalogic Automation Inc. Impact Connector Impact Reference Guide Get Data links allow you to get data from a tool or task in a vision program and display or use it in a control. The link is created between the Impact Connector control and the vision program tool or task. For example, you can link to a Basic tool’s calculated value, then link that to a Numeric Display control so the Control Panel operator can see the value on the Control Panel. See “Links between CPM and VPM” on page 4-15 for more details on links.The color of the Link name indicates the link’s status: • Magenta - Normal • Red - unresolved (e.g. due to no loaded vision program or no connection to a device) • Black - Links from more than one control Method Links Note: If the Control Panel is not connected to an Impact device, you cannot create links. Method links allow you to create an action in a device, vision program, task, or a tool in a vision program. The link is created between the Impact Connector control and the device, program, task, or tool. For example, you can link to a device’s online state, then link that to a button control’s action so the Control Panel operator can change the device’s online status by clicking that button on the Control Panel. See “Links between CPM controls” on page 4-19 for more details on linking. • Blue - Normal • Red - unresolved (e.g. due to no loaded vision program or no connection to a device) • Black - Links to more than one control D a ta Tr a n s f e r L i n k s Note: If the Control Panel is not connected to an Impact device, you cannot create links. Data transfer links accept data from a Data Transfer tool in a vision program. See “Links between CPM and VPM” on page 4-15 and “Data Transfer” on page 3-219 for more details. • Magenta - Normal • Red - unresolved (e.g. due to no loaded vision program or no connection to a device) • Black - Links from more than one control Link Summary This tab displays information about links to and from the currently selected Impact Connector control. See“Links between CPM controls” on page 4-19 for more details.When a control is deleted, if there are no other links to it in the Impact Connector control, the links are removed in the control. Once all links are removed from a control, it is automatically deleted. Device Security When an Impact Connector control attempts to connect to an Impact device, and security is enabled for that device, the following occurs: Datalogic Automation Inc. 4-110 Impact Reference Guide Load Image • If the User ID/Password property is empty, then the User Logon dialog is displayed. The entered User ID and Password are verified on the device to be connected. If either is invalid, an error message is displayed, otherwise the Impact Connector is connected to the device. • If a valid User ID and Password have been linked from the UserID\Password property of another Impact Connector, then the User ID and Password are verified on the device to be connected. The User Logon dialog is not displayed. If either the User ID or Password is invalid, an error message is displayed, otherwise the Impact Connector is connected to the device. If there are multiple Impact Connectors in one Control Panel, and security is enabled on one or more of the devices, the designer has the option to do one of the following. • Device Connection with Multiple Logon Dialogs: If each Impact Connector in the Control Panel Application has a blank User ID/Password property value, then the User Logon dialog is displayed for each Impact Connector prior to connection. • Sequential Device Connection with a Single Logon Dialog: The designer must create a primary Impact Connector that attempts connection before the other connectors. The UserID\Password property from the secondary Impact Connector(s) can be linked to the primary Impact Connector’s UserID\Password property. This causes only one User Logon prompt to be displayed for the "main" Impact Connector and the other connectors will then receive the logon information via the property links. What is linked What it will do Vision Device Change the online and offline state of the device Vision Program Save the selected vision program file Vision Program Task Run the selected task Vision Program Tool Run or train the selected tool Load Image The Load Image control loads an image from a file into it’s Image property. You can use this control to load the image into a VPM task, then run the task by linking this control’s Load Completed method to the task’s Run method. How to use the Load Image control 1. In CPM, connect to an Image In task loaded in VPM (see “Connect to device” on page 4-2) 2. Click the Image Path property of this Load Image control and select an image to load. If this property is left blank, you will be able to select an image when the control runs. 3. Make a Set Data link from the Connector control in this control panel to the image property of the VPM Image In task from step one. 4. Link the image property from this Load Image control to the Set Data link created in step three. 5. Make a link from the Load Completed Event of this Load Image control to the Run method of the VPM task from step one. 6. To run the Load Image control, link from a Button or other input control’s Event to this control’s Load Image method. 4-111 Datalogic Automation Inc. Load Vision Program Impact Reference Guide This control is not displayed on the Control Panel Canvas. To see it, click the Select Design View Options button and select Control Panel Tree (see “Select Design View Options” on page 4-6). Property Name What it is Image The image currently loaded into this control. Image Path Click in the field to enter the image’s file name or browse to choose the image file. Image files may have these extensions: jpg, png, and bmp. The image file must be on the same disk drive as the Interface Panel file. IMPORTANT: File names are case sensitive. Method Name What it does Load Image Loads the image into this control’s Image property. Event Name When it happens Load Completed When the image has finished loading into this control. Load Vision Program The Load Vision Program control loads a vision program file. This control is not displayed on the Control Panel Canvas. To see it, click the Select Design View Options button and select Control Panel Tree (see “Select Design View Options” on page 4-6). Property Name What it is Program Name Filter Filters the files that are displayed in the file browser based on the vision program names. You can use the asterisk (*) to replace one or more characters in the program name. NOTE: Program names are case sensitive. Browsing Enabled If True, the file browser is displayed, which allows you to select and load files from client network folders. If False, only files on the Impact device root path are displayed. Device Connection This property indicates which device contains the vision program to load. When you add the control to the control panel, this link is created to an Impact Connector control automatically. If the control panel contains more than one Connector control, you are prompted to choose one. Display Loading Prompt If True, a prompt is displayed before the program is loaded. File Path The path to the file in the File To Load property. To access vision program files on the Impact device, use the path: IMPACT Root/visionprograms. If this field is blank, the file browser is displayed. Datalogic Automation Inc. 4-112 Impact Reference Guide Save Vision Program Property Name What it is File To Load The name of the vision program file to load. If this field is blank, the file browser is displayed. If multiple files are specified, they must be separated by commas. If you try to load a file with the same program name as an already loaded file, the existing file is unloaded first. IMPORTANT: File names are case sensitive. Filename Filter Filters the files that are displayed in the file browser based on the vision program file names. You can use the asterisk (*) to replace one or more characters in the file name. IMPORTANT: File names are case sensitive. Load Successful If True, the vision program file was loaded successfully. If multiple files were selected, at least one file was loaded. Warn On Overwrite If True, a warning dialog is displayed if the vision program file already exists on the Impact device. You will have the option to cancel or overwrite the file(s). Method Name What it does Load Program Loads the vision program into Impact device memory. Event Name When it happens Load Completed When all the vision program files have finished loading into the Impact device. Load Started When the vision program files begin loading into the Impact device. Save Vision Program The Save Vision Program control saves one or more vision program files from the Impact device to the device or the client PC. Depending on the control’s property settings, you can select the files to be saved from a browser, or enter them manually. Also, depending on the control’s property settings, you can select where the files will be saved or enter them manually. To select multiple files from a file list, hold the Control key while you click each file. This control is not displayed on the Control Panel Canvas. To see it, click the Select Design View Options button and select Control Panel Tree (see “Select Design View Options” on page 4-6). 4-113 Property Name What it is Browsing Enabled If True, a browser is displayed so you can choose where the files will be saved on the client or the device. If there is a valid file path in the File Path property, that path will be displayed in the browser by default. If False, the files will be saved by default to the Impact device or the last file path entered in the File Path property. Datalogic Automation Inc. Save Vision Program Impact Reference Guide Property Name What it is Device Connection This property indicates the device that contains the files. When you add the control to the control panel, this link is created to an Impact Connector control automatically. If the control panel contains more than one Connector control, you are prompted to choose one. Display Saving Prompt If True, a message is displayed while the file is being saved. File Path If this property is blank, and the Browsing Enabled property is False, the file will be saved to the VisionPrograms folder on the Impact device by default. If a path has ever been entered into this property, the file will be saved to that folder, even if the property is currently blank. If this property is blank, and the Browsing Enabled property is True, a browser is displayed so you can choose where the files will be saved. If this property contains a valid file path, and the Browsing Enabled property is False, the files will be automatically saved to this file path. NOTE: To save files to the Impact device, enter the file path IMPACT Root/VisionPrograms If this property contains a valid file path, and the Browsing Enabled property is True, this file path will be chosen by default in the browser, but you can navigate to a different file path. File To Save If this property contains one or more file names, those files will be saved. Only files that are loaded on the Impact device can be saved. To enter multiple file names, separate them with a comma. IMPORTANT: File names are case sensitive. If this property is blank, a browser is displayed with a list of files that are currently loaded on the device so you can choose which file(s) to save. Save As If this property is blank, and the Browsing Enabled property is False, the files will be saved to the VisionPrograms folder on the Impact device by default. If this property is blank, and the Browsing Enabled property is True, a browser is displayed so you can choose where the files will be saved. If this property contains a valid file name, the File to Save property must contain the name of a file that is currently loaded on the device. If the Browsing Enabled property is False, the File to Save will automatically be saved on the device with the Save As name. The existing file (File to Save) is unloaded and the Save As file is loaded. IMPORTANT: File names are case sensitive. If the Browsing Enabled property is True, a browser is displayed so you can choose where the Save As files will be saved. Save Successful Datalogic Automation Inc. If True, the file was saved successfully. 4-114 Impact Reference Guide Scriptor Property Name What it is Warn On Overwrite If True, a confirmation dialog is displayed when you try to save a file that already exists. Warn on Save As If True, a confirmation dialog is displayed when a file is saved with a different name. File Format XML: The file is saved in uncompressed format as XML. Compressed: The file is saved in compressed binary format (resulting in a much smaller file size). Method Name What it does Save Program Saves the vision program. Event Name When it happens Save Started When the vision program files begin saving. Save Completed When all the vision program files have finished saving. Scriptor NOTE: Teaching you how to create a Java program is beyond the scope of this manual. This section describes the commands, properties, methods, and events available in the Scriptor control, but not how to implement them in Java code. For more information on Java programming, refer to Java programming guides. The scriptor only supports string types. You will need to cast them to use them as a different type, for example int myvar = new Integer(Scriptor.getProperty("Full Tool Path")).intValue(); The Scriptor control provides a way to write Java (not JavaScript) Control Panel commands and apply them to a running Control Panel Application. Control panel application designers can create scripts that connect to an Impact device, wait for the connection to complete, set and get other control properties, and call methods. The script can also run when CPM Runtime is started. See “Run a script with CPM Runtime” on page 4-121 for details. 4-115 Datalogic Automation Inc. Scriptor Impact Reference Guide Scriptor Editor Tab Click in this window, then type the desired Scriptor commands. You enter scriptor commands on this tab. See “Script Examples” on page 4-118. Property Name What it is Exit Application Upon Completion If True, CPM exits when the script has completed executing. If False, the Control Panel Application continues to run. Run Automatically If True, the script is executed as soon as the Control Panel Application enters Run mode. If False, the script executes when Run method is called. Run In Separate Thread If True, the control runs in a separate thread from CPM (this setting is provided for backward compatibility) If False, then the control runs in the main thread with CPM (this is the recommended setting for improved performance) This property defaults to False since this setting results in improved performance. Suppress Error Messages If True, no script execution errors will displayed when the script executes. Method Name What it does Run Executes the script. Event Name When it happens Run Completed When all the script commands have been executed. Scriptor Commands Error Handling Scripting errors are displayed as pop-up dialogs during runtime. Command errors, such as not finding the specified control or property, return a False boolean value to the script. It is the script author's responsibility to handle these errors within the script logic. boolean setProperty(String propertyPath, String value) Datalogic Automation Inc. 4-116 Impact Reference Guide Scriptor This command sets the specified property to the value. If this call is successful, the boolean variable (e.g. successful) is set to True. The parameter format for a non-linked control value is: ("Panel Tab Name.Frame Name (if applicable).Property Name","value") The parameter format for a linked control value is: (Panel Tab Name.IMPACT Connector Control Name:Program Name.Task Name.Tool Name:Property Name", "value") This example sets the IP Address in the Impact Connector control in Panel 1. boolean successful = Scriptor.setProperty("Panel 1.IMPACT Connector.IP Address","192.168.0.128"); This example sets a value in a control that is linked to a tool (Circular Pattern Find) in a VPM task (Task). boolean successful = Scriptor.setProperty("Panel 2.IMPACT Connector5:Indicator.Task.Circular Pattern Find:Minimum Match Score", "50"); String getProperty(String propertyPath) This command gets the specified property from a control and returns it as a String value. If the call is unsuccessful, then a null value is returned to the script. The parameter format for a non-linked control value is: ("Panel Name.Control Name.Property Name") The parameter format for a linked control value is: ("Panel Name.IMPACT Connector Control Name:Program Name.Task Name.Tool Name:Property Name") This example gets the connected status of the Impact Connector control in Panel 1 and returns it as a string (isConnected). String isConnected = Scriptor.getProperty("Panel 1.IMPACT Connector.Connected"); This example gets a value from a control that is linked to a tool (Circular Pattern Find) in a VPM task (Task) and returns it as a string (matchScore). string matchScore = Scriptor.getProperty("Panel 2.IMPACT Connector5:Indicator.Task.Circular Pattern Find:Minimum Match Score"); boolean executeMethod(String methodPath) This command calls the specified method. If the call is successful, True is returned to the script. Example: boolean successful = Scriptor.executeMethod("Panel 1.IMPACT Connector.Connect"); void sleep(int milliseconds) This command causes the script to sleep for the indicated time before processing the next script command. Example: Scriptor.sleep(200); // sleep 200 milliseconds void displayPrompt(String message) This command pops up a modal dialog, displaying the indicated message. When the user clicks the OK button, the dialog is erased and script processing continues. Example: Scriptor.displayPrompt("Error getting connection status"); boolean loadAndExecuteScript(String scriptPath) This command loads and executes the specified script. This lets you execute a script from within another script. If this call is successful, True is returned to the script. Example: 4-117 Datalogic Automation Inc. Scriptor Impact Reference Guide if(Scriptor.loadAndExecuteScript("C:/IMPACT/scripts/connect.bsh")) { boolean successful = Scriptor.loadAndExecuteScript("C:/IMPACT/scripts/ load.bsh"); if(successful) { Scriptor.loadAndExecuteScript("C:/IMPACT/scripts/save.bsh"); } } getDefaultLocale() Method This command gets the current client’s locale based on the operating system’s regional options setting and the Application.properties file. Example: import java.util.ResourceBundle; Locale locale = Scriptor.getDefaultLocale(); getResourceBundle() Method This method retrieves the ResourceBundle instance that applies to the passed in bundle name and Locale. Example: import java.util.ResourceBundle; Locale locale = Scriptor.getDefaultLocale(); try { localeResources = Scriptor.getResourceBundle("Application", locale); } catch(java.util.MissingResourceException mre) { Scriptor.displayPrompt("Could not find resource Application.properties"); } getResourceKey() Method This method retrieves the localize string associated with passed in bundle name, it's locale, and a desired key. Example: if(localeResources != null) { String propertiesFilename = "Application"; if(!locale.getLanguage().equals("en")) // not english propertiesFilename = "Application_"+locale.getLanguage(); try { String titleCompany = Scriptor.getResourceKey(propertiesFilename, locale, "Application_Title_Company"); Scriptor.setProperty("Main.App Title 1.Text", titleCompany); String titleApp = Scriptor.getResourceKey(propertiesFilename, locale, "Application_Title_App"); Scriptor.setProperty("Main.App Title 2.Text", titleApp); } catch(Exception e) { Scriptor.displayPrompt("error getting resource key"); } Script Examples Datalogic Automation Inc. 4-118 Impact Reference Guide Scriptor This section contains examples of scripts using the scriptor commands listed previously. IMPORTANT: These scripts are examples only. They will not necessarily operate as-is, since they must be modified to fit in your operating environment. Datalogic is not responsible for any malfunctions that may result from the use of this code. Main script This is a main script that calls other scripts that connect to an Impact device, then load and save vision programs on that device. main.bsh /** main script that calls scripts that load and save vision programs **/ if(Scriptor.loadAndExecuteScript("C:/IMPACT/scripts/connect.bsh")) { boolean successful = Scriptor.loadAndExecuteScript("C:/IMPACT/scripts/ load.bsh"); if(successful) { Scriptor.loadAndExecuteScript("C:/IMPACT/scripts/save.bsh"); } } Connect script This is the called script that connects to an Impact device. connect.bsh /** This script will connect to the device. **/ boolean successful = Scriptor.setProperty("Panel 1.IMPACT Connector.IP Address","192.168.0.128"); if(successful) { successful = Scriptor.executeMethod("Panel 1.IMPACT Connector.Connect"); } if(successful) { String isConnected = "false"; while(isConnected.equals("false")) { isConnected = Scriptor.getProperty("Panel 1.IMPACT Connector.Connected"); Scriptor.sleep(200); // sleep 200 milliseconds if(isConnected == null) // couldn't get connected property { successful = false; Scriptor.displayPrompt("Error getting connection status"); break; } } } Load script This is the called script that loads the vision programs. load.bsh /** This script will load the specified vision programs. **/ boolean successful = Scriptor.setProperty("Panel 1.Load Vision Program.Browsing Enabled","false"); if(successful) { 4-119 Datalogic Automation Inc. Scriptor Impact Reference Guide successful = Scriptor.setProperty("Panel 1.Load Vision Program.Warn On Overwrite", "false"); } if(successful) { // successful = Scriptor.setProperty("Panel 1.Load Vision Program.File Path", "IMPACT Root/VisionPrograms"); // successful = Scriptor.setProperty("Panel 1.Load Vision Program.File Path", ""); // defaults to device successful = Scriptor.setProperty("Panel 1.Load Vision Program.File Path", "C:/IMPACT"); } if(successful) { successful = Scriptor.setProperty("Panel 1.Load Vision Program.File To Load", "BearingOCR.vp, Locate.vp"); } if(successful) { successful = Scriptor.executeMethod("Panel 1.Load Vision Program.Load Program"); } if(successful) { // wait for all the loads to complete String loadCompleted = "false"; while(loadCompleted.equals("false")) { loadCompleted = Scriptor.getProperty("Panel 1.Load Vision Program.Load Successful"); Scriptor.sleep(200); // sleep 200 milliseconds if(loadCompleted == null) // couldn't get load successful property { successful = false; Scriptor.displayPrompt("Error getting load successful status"); break; } } } Save script This is the called script that saves the vision programs that were loaded. save.bsh /** This script will save loaded vision programs onto the client. **/ boolean successful = Scriptor.setProperty("Panel 1.Save Vision Program.Browsing Enabled","false"); if(successful) { successful = Scriptor.setProperty("Panel 1.Save Vision Program.Warn On Overwrite", "false"); } if(successful) { successful = Scriptor.setProperty("Panel 1.Save Vision Program.File Path", "C:/IMPACT/Backups"); } if(successful) { Datalogic Automation Inc. 4-120 Impact Reference Guide TCP-IP Logger successful = Scriptor.setProperty("Panel 1.Save Vision Program.File To Save", "BearingOCR.vp, Locate.vp"); } if(successful) { successful = Scriptor.executeMethod("Panel 1.Save Vision Program.Save Program"); } if(successful) { // wait for all the loads to complete String saveCompleted = "false"; while(saveCompleted.equals("false")) { saveCompleted = Scriptor.getProperty("Panel 1.Save Vision Program.Save Successful"); Scriptor.sleep(200); // sleep 200 milliseconds if(saveCompleted == null) // couldn't get save successful property { successful = false; Scriptor.displayPrompt("Error getting save successful status"); break; } } } Run a script with CPM Runtime The script runs when CPM Runtime is started by adding switches to the command line. Once CPM Runtime has opened the specified Control Panel, the specified script file is opened and interpreted. When the script is completed, the loaded Control Panel Application is unloaded and CPM Runtime exits. To edit the CPM Runtime command line 1. Find the CPM Runtime icon on the desktop. 2. Right click on the icon. 3. Select Properties from the menu. 4. Click the Shortcut tab. The CPM Runtime command line appears in the Target field on the Properties dialog. The default command line is: "C:\Datalogic\IMPACT\Applications\jre\bin\javaw.exe" -XX:+UseParallelGC -Xmx400m -Xms64m -Xrs -jar "C:\Datalogic\IMPACT\Applications\CPM\CPMRE.jar" 5. These command line options can be added to the end of the default command line to call the script created with the Scriptor control. -p "file.cp" (file.cp = path to Control Panel Application) -scr "file.bsh" (file.bsh = path to user-written script file) -v (make the CPM Runtime frame visible) 6. When you have finished editing the command line, click OK to close the Properties editor dialog. TCP-IP Logger The TCP-IP Logger control receives data from a vision program TCP/IP Out tool and writes it to a text file. This control is not displayed on the Control Panel Canvas. To see it, click the Select Design View Options 4-121 Datalogic Automation Inc. TCP-IP Logger Impact Reference Guide button and select Control Panel Tree (see “Select Design View Options” on page 4-6). You can display the received data by linking the Last Data Received property to a text display control. The control will find all local IP addresses, select the first one by default, and display them in the Local IP Address property drop down list. The last address selected is saved with the Control Panel (cp) file and restored when the file is reloaded providing that the address exists on the client machine that loaded the file. If it does not exist, the control defaults to the first address found. You can link the Local IP Address property from the control to a VPM tool, for example, through a SetData link to set the IP Address on a TCP/IP Out tool. You cannot link a value into this property; it can only be changed by selecting one of the choices in the property drop down list. Property Name What it is Log Filename The name of the log file. Entered in the Log File property. Log File Path The path to the log file. Entered in the Log File property. Enabled If True, the control is enabled. Name The control’s name. Last Data Received The last data received by the control. Last Write Failed If True, the control could not write to the log file. Last Write Successful If True, the control successfully wrote to the log file. Listening If True, the control is currently listening for data on the Listening On Port Local IP Address The client computer’s IP address. Listening on Port The tool is monitoring this port for incoming data. Max File Size (bytes) The maximum log file size. Oldest entries are overwritten with the newer ones. Overwrite Data If True, only the most recent log entry is saved. The Max File Size property is ignored. If False, when Max File Size is reached, the tool stops logging data. Log File Click in the field to enter the log file’s name or browse to choose the file. Log entries are written as text. The line delimiter type is chosen in the TCP/IP Out tool. Source Disconnects after each Write If True, the TCP/IP logging device is set to close its connection each time it logs an entry. If False, the device leaves the connection open between each log entry. This setting must match the device’s setting. (If you are using the TCP/IP Out tool in VPM, this setting must match the tool’s "Disconnect after each Write" property.) Source Disconnect Timeout If the source device closes its connection, but this control cannot detect it, the control will wait this amount of time then reset the connection. We recommend that you leave this setting at the 5000 (5 second) default. Datalogic Automation Inc. 4-122 Impact Reference Guide Timer Method Name What it does Enable Enables the control so it can be used Delete Log File Deletes the log file. Show File Browser Displays the file browser so the operator can choose a log file. Disable Disables the control; it cannot be used Event Name When it happens File Write Failed When the control cannot write to the log file. New Data Received When the control receives new data. Timer The Timer control counts elapsed time during Run mode. It can be set to repeat the time interval. This control is not displayed on the Control Panel Canvas. To see it, click the Select Design View Options button and select Control Panel Tree (see “Select Design View Options” on page 4-6). 4-123 Property Name What it is Enabled If True, the control is enabled. Repeating Timer If True, the timer counts the Time Interval, then starts over. Timer Running If True, the timer is currently counting. Time Interval The length of time to count (in milliseconds). Method Name What it does Start Starts or resets the timer. Stop Stops the timer. Event Name When it happens Timer Event When the time interval has elapsed or the timer starts or stops. If the timer is set to Repeating, the Timer Event will occur at the end of every Time Interval. Datalogic Automation Inc. Timer Datalogic Automation Inc. Impact Reference Guide 4-124 C H A P T E R 5 Impact Basic This chapter discusses the Basic language that is used in the Basic tool in VPM and the Basic Interpreter control in CPM. The Basic tool performs logical and mathematical calculations based on a set of user-written statements using the Basic programming language. The program results are available to link to other tools. Basic Editor Window Basic language commands are typed in the Basic editor window in the VPM Basic tool and the CPM Basic Interpreter. As variable names are entered, variables are created as inputs in the input list. Click the Compile button to test the validity of your Basic code. To run the tool or control, click the Run button and the calculated variable values appear in the properties tab. For more CPM details, see “Basic Interpreter” on page 4102. For more VPM details, see “Basic” on page 3-204. Typing in the Editor Window The Editor window uses standard Windows text editing commands. You enter text by typing in the Editor window. When you reach the end of a line, press Enter to create a new line. To put a blank line between lines, press Enter twice. To select text • Using the mouse: Move the cursor to the beginning of the text, then click and hold the left mouse button while you drag across the text you want to select. • Using the keyboard: Move the cursor to the beginning of the text, then hold down the Shift key while you move the cursor using the keyboard arrow keys. You can select a word at a time if you hold down the Shift and Control keys while you move the cursor. To add a new text line 1. Move the cursor to the desired location, then press Enter. 2. Type the new text. To delete text Press the Backspace key to delete the character to the left of the cursor. Press the Delete key to delete the character to the right of the cursor. To delete multiple words, letters, or lines, select the desired text, then press the Delete or Backspace key. To move text 1. Select the desired text, then press Ctrl X. 2. Move the cursor to the new location, then press Ctrl C. 5-1 Datalogic Automation Inc. General Language Format Impact Reference Guide To modify text 1. Select the desired text, then type the new text. To check the validity of your Basic code 1. Click the Compile button. 2. Any errors are displayed in the Editor window. Comments You can make your programs more readable by leaving blank lines between statements, and adding explanatory comment lines. You can indicate comment lines in one of three ways: 1. Start the line with the letters REM followed by one or more spaces. The spaces after REM are important. If you forget them, the Basic interpreter will interpret your comment as a variable and may display an error message. (See “REM” on page 5-23) 2. Start the line with an apostrophe (‘) character. 3. Start the first line of a multi-line comment with an apostrophe followed by three double-quote marks. The ending line of the multi-line comment must begin with three double-quote marks. Example: ’""" This is the first comment line This is the second comment line """ This is the ending comment line You cannot put a comment at the end of a statement. Examples: ‘This is a comment line REM This is also a comment line count = 1 REM This is an illegal comment after a statement Error Messages If you use incorrect syntax for a command, or enter something that the Basic interpreter doesn’t understand, an error message is displayed at the bottom of the Editor Window. The message will list the offending statement’s line number and a brief explanation of the error. Sample Error Message General Language Format Impact Basic is a Basic language and it has the same format as other Basic languages. Some advanced functions and commands are not implemented because they are not used. In Impact Basic, a Basic program is considered to be all the statements contained in one Basic tool. Basic statements are line oriented and are made up of commands, functions, and assignments. Each statement consists of one line and statements are executed sequentially, based on the program flow. Variables Variables are used to store values. Variable names can start with alpha characters, an underscore, a dollar sign, or a colon. They may also contain numbers starting with the second character. The name cannot contain spaces, the last character cannot be a colon, and you cannot use reserved words. Datalogic Automation Inc. 5-2 Impact Reference Guide Constants TIP: If the variable’s name has a specific ending, the type will be assigned automatically. Variables ending in "real" are assigned type Real, "string" are assigned type String, and "int" are assigned type Integer. For example, count_real is a Real, name_string is a String, and count_int is an Integer. Examples of valid variable names: myvariable _variablename count_real variable$ Examples of invalid variable names: chr$ (this is a reserved word) variable name (contains a space) variable:name (cannot use a colon inside the name) my_variable: (colon as the final character is a GOTO label name) Constants Constants retain the same value throughout the program and cannot be changed. This allows you to keep constants in one place so they can be easily changed, if necessary. You can create constants by assigning a value to a variable. Example: constant_name = value const percent = 0.15 tax = purchase * percent Undefined (undef) Impact Basic uses a special constant named "undef." This constant is undefined in the sense that it has no value (it is not zero or false and it is not any data type). Array elements that have no value assigned to them are undef. If any variables in a mathematical operation are undef, the result of the operation is undef. Some built-in functions return undef if the operation fails. For example, the function INSTR will return undef if the search string is not found. If a function’s definition indicates that it may return undef, you should include a check for that value in your code. For example: location_int = INSTR ("basestring","ase",1) IF location_int = undef then msg_string = "The string was not found" ELSE msg_string="The string was found" ENDIF You can also call the function undef to assign the value "undef" to a variable. This example assigns the undefined value to all elements in the array "mylist." Example: undef mylist If a divide by zero operation is performed, the result is "undef" which is displayed as a value of zero in the variable’s property. To make the Basic tool abort with an error on a divide by zero operation, add this code to the tool: Option RaiseMathError 1 5-3 Datalogic Automation Inc. Expressions Impact Reference Guide Expressions Expressions are used to assign and calculate values. They can contain variables, operators, function calls and parentheses. Operators, unless they are surrounded by parentheses, are evaluated from left to right in the order of precedence listed in the following table, starting with the highest precedence. Examples: 6-3+3 = 6 (3 is subtracted from 6, then 3 is added to 3) 6-(3+3) = 0; (3 is added to 3, the result is subtracted from 6) 6-3/3 = 5; (3 is divided by 3 then subtracted from 6, division has a higher precedence) Operator Operator Meaning ^ Power: raises the first operand to the power of the second operand (e.g. x = 2^2; result is 4) * Multiplication: multiplies the operands / Division: divides the left operand by the right operand (the result is undef if the right operand is zero) % Modulus: Calculates the remainder of the two operands. The operands are converted to integer value (INT function, not rounded) and the result is integer (e.g. x = 8%3; x is 2). If the second operand is zero, the result is undef. + Addition: adds the left operand to the right operand - Subtraction: subtracts the right operand from the left operand and the result is the signed difference = Equality check: compares the operands, if they are equal the result is True (e.g. z = 4>2). If one of the operands is undef, the result is False. If both operators are undef, the result TRUE. < Less than check: compares the operands, if the left operand is less than the right operand the result is True (e.g. 2<4)* <= Less than or equal check: compares the operands, if the left operand is less than or equal to the right operand the result is True (e.g. 2<=4)* > Greater than check: compares the operands, if the left operand is greater than the right operand the result is True (e.g. 4>2)* >= Greater than or equal check: compares the operands, if the left operand is greater than or equal to the right operand the result is True (e.g. 4>=2)* <> Not equal check: compares the operands, if the left operand is not equal to the right operand the result is True (e.g. 4<>2) If both operators are undef the result is False. If only one of the operands is undef then the result is True. AND AND: joins two or more conditional expressions; if both conditional expressions are true, the entire expression is true. If one or none are true, the entire expression is false. OR OR: joins two or more conditional expressions; If either or both expressions are true, the entire expression is true. If neither is true, the expression is false. XOR Logical and bit-wise: calculates the logical and bit-wise Exclusive OR of the operands Datalogic Automation Inc. 5-4 Impact Reference Guide Statement syntax Operator Operator Meaning NOT Logical negation: calculates the logical negation of the operand (e.g. NOT True; the result is False) *Note: For the compare operators (<, <=, >, >=), the result of the operation is undef if any of the operands is undef. Statement syntax Statements consist of assignments, functions, or commands written on a single line. You can leave blank lines between statements for readability. Spacing within a statement is optional. For example, "A=B+C" and "A = B + C" are equivalent. See page 5-30 for some examples of Basic program code. You should also insert comments in your programs to make them easier to understand. See “Comments” on page 5-2. Loop constructs Loops let you process a series of commands a set number of times. The following loop constructs are available. WARNING: Be careful that you do not create an "infinite" loop in the Basic tool. For example, if a variable that controls the loop is incorrectly set, the tool may never exit the loop and may run indefinitely. The tool will abort after the Task Timeout time has elapsed only if the task is online and triggering, but not when the Run button is clicked. (See “Enable Timeout” on page 2-6) Do Until Do Until expression REM loop body Loop This construct repeats the loop body until the expression is True. The expression is evaluated before entering the loop so the loop is not executed if the expression is already True. Do While Do While expression REM loop body Loop This construct repeats the loop body while the expression is True. The expression is evaluated before entering the loop so the loop is not executed if the expression is already False. For Next FOR variable = StartValue TO EndValue STEP StepValue REM loop body NEXT This loop construct starts by setting the value of variable equal to StartValue. After the execution of the loop, the variable is increased or decreased by the value of StepValue. The loop is repeated as long as the value of variable is equal to or less than the value of EndValue. If StartValue is already greater than EndValue, the loop is never executed. The keywords STEP and StepValue are optional. If they are omitted, StepValue is one. 5-5 Datalogic Automation Inc. Arrays Impact Reference Guide Repeat Until Repeat REM loop body Until expression This construct repeats the loop body until the expression is True. The expression is evaluated after the execution of the loop body so the loop body is always executed at least once. While While expression REM loop body End This construct repeats the loop body while the expression is True. The expression is evaluated before entering the loop so the loop is not executed if the expression is already False. Arrays In the Basic tool, the Boolean List, Integer List, and Real List data types are arrays. Variable values that are not linked into array variables in the tool are preserved between tool executions. If you want to clear an array of all values, assign the "undef" value. For example: undef mylist assigns an undefined value to all elements in the array "mylist." To access a list element, use the variable name followed by the list element within brackets. NOTE: All the list data types are zero based, that is, the first element of the list is zero. For example, if an array contains five elements, the first element is number zero and the final element is number four. For example, to assign a value to the third element in the mylist variable: mylist[2] = 5.5 You can use a loop construct to loop through all the elements in a list variable. For example: For loopcount = 0 to 14 mylist[loopcount] = True Next The reserved words "lbound" and "ubound" refer to the lower and upper bounding index of an array. You can use these to process an array of unknown length. For example, to process a Boolean List of unknown length: For loopcount = lbound(mylist) to ubound(mylist) if mylist[loopcount] = False then sum = sum-1 endif Next You can also extend an array by assigning a new value to the upper bounding index value. Array indices can be negative, but if the array is linked into another tool, the index of the first array element will still be zero. You can define temporary multi-dimensional arrays (the data is not maintained between tool executions). Use the following syntax to access a multi-dimensional array: mylist [firstdim,seconddim] Data Types Variables in the Basic tool can be one of the following types: Boolean, Boolean List, Integer, Integer List, Real, Real List, and String. List types can be accessed using array notation. After a variable is defined in the Datalogic Automation Inc. 5-6 Impact Reference Guide Data Types Basic code, click the drop-down arrow next to the variable name in the Tool Properties pane to define its data type. Boolean and Boolean List Boolean variables have a value of True (non-zero) or False (zero). You can use any of the comparison operators to compare boolean variables to each other or the constants True and False. You can also assign values to Boolean variables. Individual Boolean List elements can be accessed using array notation. For example, to access the third element of the Boolean List variable Checklist, use the notation Checklist[2]. Here are examples of boolean operations: bvalue = True bvalue = False If bvalue = True then REM the code to be executed goes here endif Checklistlist[2] = False Integer and Integer List Integer variables can have a whole number value from -2147483647 to 2147483647. You can use any of the comparison operators to compare integer variables to each other or constants. You can also assign values to Integer variables. Individual Integer List elements can be accessed using array notation. For example, to access the third element of the Integer List variable Checkllist, use the notation Checklist[2]. Here are examples of integer operations: value = 1 value = 1+3-99 If value>16 then REM the code to be executed goes here endif Checklist[2] = value Real and Real List Real variables can have a floating number value from -2.147483647E9 to 2.147483647E9. Real variables may use scientific notation. You can use any of the comparison operators to compare real variables to each other or constants. You can also assign values to real variables. Individual Real List elements can be accessed using array notation. For example, to access the third element of the Real List variable Checkllist, use the notation Checklist[2]. Here are examples of real operations: value = 1.5 value = 1.8+3.0-99E6 If value>16.0 then REM the code to be executed goes here endif Checklist[2] = value String A string constant is indicated by enclosing a series of letters and/or numbers in double quotes. The following functions and commands are available for string handling. ASC(), CHR(), &, HEX(), INSTR(), INSTRREV(), ISSTRING(), JOIN(), LCASE(), LEFT(), LEN(), LIKE, LTRIM(), MID(), OCT(), REPLACE(), RIGHT(), RTRIM(), SPACE(), SPLIT, STR(), STRING(), STRREVERSE(), TRIM(), UCASE(). 5-7 Datalogic Automation Inc. Basic Commands and Functions Impact Reference Guide Basic Commands and Functions Important Note: Some Basic commands and functions are not implemented in Impact software. Some of them may be implemented in future versions. These commands are implemented only in the CPM Basic control. They will not work in the VPM Basic tool. • chdir, close, curdir, delete, eod, eof, input, line, open, mkdir, isdirectory, isfile These commands are not implemented: • File, directory, network, and screen I/O functions (binmode, delete, eod, eof, line, loc, print, reset, rewind, tcpconnect, textmode, truncate, seek) • Process spawning (execute, kill, system) • Command line (environ, command) • External module access (declare, epreproc) • Sleep Impact Basic commands are listed below, in alphabetical order. Commands are shown in upper-case but they may also be written in lower-case. Commands and Functions A-D & Concantenates (joins) two strings. Example: var_string ="first" & "second" yields var_string = "firstsecond" ABS() Returns the absolute value of the argument. If the argument is undef, the result is undef. Example: x = ABS(-12) yields x = 12 ACOS() This function calculates the arc cosine of the argument (the inverse of the cos function). The result is in radians. If the argument is not between -1.0 and +1.0 the result is undef. Example: x = ACOS(0.54) yields x = 1.000359 A D D D AY ( ) This function takes two arguments and returns a real number representing a date and time. The first argument is a time value, the second argument is the number of days to add to or subtract from it. (See“FORMATDATE” on page 5-14.) Example: tomorrow = ADDDAY(now,1) yields tomorrow = 1.330420E9 Datalogic Automation Inc. 5-8 Impact Reference Guide Commands and Functions A-D ADDHOUR() This function takes two arguments and returns a real number representing a date and time. The first argument is a time value, the second argument is the number of hours to add to or subtract from it. (See“FORMATDATE” on page 5-14.) Example: newtime = ADDHOUR(now,1) yields newtime = 1.330338E9 ADDMINUTE() This function takes two arguments and returns a real number representing a date and time. The first argument is a time value, the second argument is the number of minutes to add to or subtract from it. (See“FORMATDATE” on page 5-14.) Example: newtime = ADDMINUTE(now,1) yields newtime = 1.330334E9 ADDMONTH() This function takes two arguments and returns a real number representing a date and time. The first argument is a time value, the second argument is the number of months to add to or subtract from it. (See“FORMATDATE” on page 5-14.) Example: nextmonth = ADDMONTH(now,1) yields nextmonth = 1.332840E9 ADDSECOND() This function takes two arguments and returns a real number representing a date and time. The first argument is a time value, the second argument is the number of seconds to add to or subtract from it. (See“FORMATDATE” on page 5-14.) Example: nextsecond = ADDSECOND(now,1) yields nextsecond = 1.330334E9 ADDWEEK() This function takes two arguments and returns a real number representing a date and time. The first argument is a time value, the second argument is the number of weeks to add to or subtract from it. (See“FORMATDATE” on page 5-14.) Example: nextweek = ADDWEEK(now,1) yields nextweek = 1.330939E9 ADDYEAR() This function takes two arguments and returns a real number representing a date and time. The first argument is a time value, the second argument is the number of years to add to or subtract from it. (See“FORMATDATE” on page 5-14.) Example: nextyear = ADDYEAR(now,1) yields nextyear = 1.361957E9 AMAX(array) This function returns the maximum value in the argument array. Example: list[0] list[1] list[2] list[3] listmax 5-9 = 10 = 2 = 53 = 4 =amax (list) yields listmax = 53 Datalogic Automation Inc. Commands and Functions A-D Impact Reference Guide AMAXI(array) This function returns the index of the maximum value in the argument array. Example: list[0] = 10 list[1] = 2 list[2] = 53 list[3] = 4 listmaxi =amaxi (list) yields listmaxi = 2 AMIN(array) This function returns the minimum value in the argument array. Example: list[0] list[1] list[2] list[3] listmin = 10 = 2 = 53 = 4 =amin (list) yields listmin = 2 AMINI(array) This function returns the index of the minimum value in the argument array. Example: list[0] = 10 list[1] = 2 list[2] = 53 list[3] = 4 listmini =amini (list) yields listmini = 1 ASC() This function returns the ASCII code of the first character of the argument string. Example: ascii_value = ASC("a") yields ascii_value = 97 ASIN() This function returns the arc sine of the argument (the inverse of the sin function). The result is in radians. If the argument is not between -1.0 and +1.0 the function will fail. Example: x = ASIN(0.5) yields x = 0.5235988 ATA N ( ) This function returns the arc tangent of the argument. The result is in radians. If the argument is undef, the result is undef. This example assigns the value 0.785 to the real variable x. x = ATAN(1) yields x = 0.7853982 CALL This command calls a user-written subroutine and passes optional arguments. Example: CALL mysub (x,y) CHDIR() Datalogic Automation Inc. 5-10 Impact Reference Guide Commands and Functions A-D (CPM Only) This function changes the current directory. This example changes the current directory to the path in the quotes. Example: chdir "C:\Documents\design docs" CHOMP() This function removes a trailing "newline" character from the string argument. If the last character is not a "newline," then the original string is returned. Example: chr_string = CHOMP(newline_string) CHR() This function returns the one character string corresponding to the ASCII code in the argument. If the argument is not defined, the result is a string containing a character of code zero. This example would assign the letter "A" to the string variable chr_string. Example: chr_string = CHR(65) yields chr_string = A CLOSE This function closes a previously successfully opened file. The argument is the file number that was used when the file was opened. If the file number is not associated with a successfully opened file an error is returned. This example closes file number 1. close 1 COS() This function returns the cosine of the argument. The result is in radians. If the argument is undef, the result is undef. x = COS(0.5) yields x = 0.8775826 CURDIR() (CPM Only) This function returns the current directory. This example assigns the current directory name to the string variable current_dir. current_dir = curdir D AY ( ) This function returns the number of the day corresponding to the argument. If the argument is empty, the function returns the current day based on local Impact device time. Example: current_day = DAY yields current_day = 27 Do There are two versions of this construct. The first repeats the loop body until the expression following the keyword UNTIL becomes True. The second repeats the loop until the expression following the keyword WHILE becomes False. The expression is evaluated at the end of every loop, so the loop body is always executed at least once. Do REM loop body 5-11 Datalogic Automation Inc. Commands and Functions E-H Impact Reference Guide Loop Until expression Do REM loop body Loop While expression Do Until This construct repeats the loop body until the expression is True. The expression is evaluated before entering the loop so the loop is not executed if the expression is already True. Do Until expression REM loop body Loop Do While This construct repeats the loop body while the expression is True. The expression is evaluated before entering the loop so the loop is not executed if the expression is already False. Do While expression REM loop body Loop Commands and Functions E-H END SUB This command declares the end of a subroutine. A subroutine is a piece of code that can be called from the main part of the code or from a function or another subroutine.This command is unnecessary at the end of the main section of code in the VPM Basic tool. Example: SUB MySub(Var1,Var2, Var3) REM subroutine code goes here END SUB EOF() (CPM Only) This function returns True if the end of the file currently being read has been reached. The argument is an open file number. This example assigns the value True to the variable end when the end of file 1 is reached. Example: end = eof(1) ERROR() This function returns the error code for the most recent error that occurred. This example would assign the error code to the variable errcode. Example: errcode = ERROR() ERROR n This command causes the Basic tool to fail with the error code number "n." Example: Datalogic Automation Inc. 5-12 Impact Reference Guide Commands and Functions E-H ERROR 3 ERROR$ () This function returns a string describing the most recent error. Example: error_string = ERROR$() ERROR$ (n) This function returns a string describing error number "n." Example: error_string = ERROR$ (10) EVEN() This function returns a True or False value based on whether the argument is an even or odd number. If the argument is undef, the result is undef. Example: check_it_bool = EVEN(2) yields check_it_bool = True EXIT FUNCTION This command causes an immediate return from a user-defined function. Any code after the Exit is not executed. Example: FUNCTION MyFunction(var1, var2, var3) REM function code goes here EXIT FUNCTION REM This code will not get executed END FUNCTION EXIT SUB This command causes an immediate return from a user-defined subroutine. Any code after the Exit command is not executed. Example: SUB MySub(Var1,Var2, Var3) REM subroutine code goes here EXIT SUB REM This code will not get executed END SUB EXP() This function returns the x-th exponent of the argument. If the argument is undef, the result is undef. Example: z = EXP(0) yields z = 1 FA L S E This built-in function has no arguments. It always returns the value False. Example: myresult_bool = FALSE yields myresult_bool = False 5-13 Datalogic Automation Inc. Commands and Functions E-H Impact Reference Guide FFTMAG() This function computes the Fourier transform of the argument array. The argument is an array of two or more real values. (Ideally the length should be a power of 2, e.g. 4, 8, 16, 64, 256). After computing the transform, the function computes the magnitude of each complex output value (by multiplying the value by its complex conjugate and taking the square root of the result), and stores the magnitude back in the input array. The function returns a True value if the transform was calculated successfully. The returned value should be false only if an invalid input argument is passed. Example: list[0] = 10 list[1] = 2 calc_bool = fftmag (list) yields the following result calc_bool = True list[0] = 12 list[1] = 8 FIX() This function returns the integral (non-decimal) part of the argument. If the argument is a negative non-integer number, it is truncated toward zero (less negative). If the argument is undef, the result is undef. This function is similar to the INT function. The difference is that INT truncates down while FIX truncates towards zero. The two functions are identical for positive numbers. Examples: x = FIX (3.3) yields x = 3 x = FIX(-3.3) yields x = -3 F O R M AT D AT E This function uses a format string (the first argument) to format a time or date value (the second argument). You can use a comma as a placeholder in the format string. If the second argument is missing or undefined, then the current local time is converted. Example: date_string = FORMATDATE("format",time) This function call: date_string = FORMATDATE ("WEEKDAY-NAME, *MONTH-NAME* DD at 0h:0m:0s pm",NOW) yields date_string = Friday, April 18 at 12:03:03 pm The following format strings will produce the indicated display. Format strings are case sensitive. You may also insert separation characters (such as colons, dashes, and slashes) to make the output more readable. Format String Resultant display YEAR four digit year YY two digit year MON three letter abbreviation of the month name MM month number 0M month number with leading zero, if needed *MONTH-NAME* month name DD date Datalogic Automation Inc. 5-14 Impact Reference Guide Commands and Functions E-H Format String Resultant display 0D date with leading zero, if needed WD single digit day of the week starting with Sunday = 0 WEEKDAY-NAME weekday name WDN three letter abbreviation of the weekday name HH hour (24 hour notation) 0H hour with leading zero, if needed (24 hour notation) hh hours (12 hour notation) 0h hours with leading zero, if needed (12 hour notation) mm minutes 0m minutes with leading zero, if needed ss seconds 0s seconds with leading zero, if needed am or pm indicate am or pm (12 hour notation) For Next This loop construct starts by setting the value of variable equal to StartValue. After the execution of the loop, the variable is increased or decreased by the value of StepValue. The loop is repeated as long as the value of variable is equal to or less than the value of EndValue. If StartValue is already greater than EndValue, the loop is never executed. The keywords STEP and StepValue are optional. If they are omitted, StepValue is one. FOR variable = StartValue TO EndValue STEP StepValue REM loop body NEXT FRAC() This function returns the fractional part of the argument. If the argument is an integer, it will return zero. The sign of the argument is retained. If the argument is undef, the result is undef. Example: x = FRAC(1.5) yields x = 0.5 FUNCTION This command declares a function. The function can have arguments, local variables, and local error handling. Example: FUNCTION MyFunction(var1, var2, var3) REM function code goes here END FUNCTION GMTIME 5-15 Datalogic Automation Inc. Commands and Functions E-H Impact Reference Guide This function returns the local Impact device time converted to Greenwich Mean Time (GMT) as a real number. Example: thistime_string = FORMATDATE ("MM-DD-YY HH:mm:ss",GMTIME) yields thistime_string = 2-27-12 16:29:15 GOSUB This an alternative to calling a subroutine. Program execution jumps to the line with the label indicated. (A better way to call a subroutine is to use the Call command.) Example: GOSUB mysub REM After the RETURN in mysub is executed, program execution REM returns here and executes the following code x = 3 REM more code goes here END mysub: REM mysub subroutine code is here RETURN GOTO You can use this command to alter the execution order of statements. It causes execution to jump to a program label and continue execution at that statement. The label must be local (i.e. within a program, function, or subroutine). You cannot jump into or out of a subroutine or function. Labels must be at the start of a line preceding a command and be followed by a colon. Example: looplabel: count = count+1 IF count > 50 THEN GOTO finish ENDIF GOTO looplabel finish: count = 0 In this example, execution will loop until count reaches 50, then the command "goto finish" will cause a jump to the label finish. HEX() This function returns the hexadecimal value of the integer argument as a string. Example: hex_string = HEX(255) yields hex_string = FF HOUR() This function converts the real argument to an hour value. If there is no argument, it returns the hour (in local Impact device time). Example: thishour = HOUR yields thishour = 10 Datalogic Automation Inc. 5-16 Impact Reference Guide Commands and Functions I-L Commands and Functions I-L IF THEN This command structure provides conditional execution. You can use single or multi-line syntax. If you use a single line, you cannot include an ELSE statement. (Also see “Loop constructs” on page 5-5) Example of single line statement: IF condition THEN code to execute when condition is true Example of multi-line syntax: IF condition THEN Code to execute when condition is TRUE ENDIF You can use an ELSE command to check for a True and False condition. Example using an ELSE command: IF condition THEN Code to execute when condition is TRUE ELSE Code to execute when condition is FALSE ENDIF You can only use one ELSE command. To check for multiple conditions, you can use ELSEIF commands. You can use as many ELSEIF commands as you want in a conditional statement. Example using ELSEIF commands: IF expression1 THEN Code to execute when ELSEIF expression2 THEN Code to execute when ELSEIF expression3 THEN Code to execute when ELSE Code to execute when ENDIF expression1 is TRUE expression2 is true expression3 is true expression1, expression2, and expression3 are false INPUT See “LINE INPUT” on page 5-20. INSTR() The syntax of this function is INSTR(base_string,sub_string[,position]) The first argument (base_string) is the string to search. The search starts from the beginning of the string. The second argument (sub_string) is the string to find. The third argument is the character location to start the search. The location of the first character of sub_string is returned. If the position argument is missing, the search starts with the first character of base_string. Undef is returned if the sub_string is not found. Example: location_int = INSTR ("bases","ase",1) yields location_int = 2 INSTRREV() 5-17 Datalogic Automation Inc. Commands and Functions I-L Impact Reference Guide The syntax of this function is INSTRREV(base_string,sub_string[,position]) The first argument (base_string) is the string to search. The search starts from the end of the string. The second argument (sub_string) is the string to find. The third argument is the character location to start the search. The location of the first character of sub_string is returned. If the position argument is missing, the search starts with the last character of base_string. Undef is returned if the sub_string is not found. Example: location_int = INSTRREV ("basestring","string") yields location_int = 5 INT() This function returns the integral (non-decimal) part of the argument. If the argument is a negative non-integer number, it is truncated down (more negative). If the argument is undef, the result is undef. This function is similar to the FIX function. The difference is that INT truncates down while FIX truncates towards zero. The two functions are identical for positive numbers. Examples: x = INT(3.3) yields x = 3 x = INT (-3.3) yields x = -4 I S A R R AY ( ) This function returns True if the argument is an array. Example: list[0] = 1 list[1] = 2 check_bool = isarray(list) yields check_bool = True I S D I R E C T O RY ( n a m e ) (CPM Only) This function returns True if the argument string is a directory name. This example runs the code within the IF statement if the directory "mydirectory" exists. if isdirectory("mydirectory") then error_text = "no error" else error_text = "error: directory does not exist" endif ISFILE(name) (CPM Only) This function returns True if the argument string is a file name in the current directory. This example runs the code within the IF statement if the file "myfile" exists. IMPORTANT: File names are case sensitive. if isdirectory("myfile") then error_text = "no error" else error_text = "error: file does not exist" endif ISEMPTY() This function returns True if the argument is an empty string (contains zero characters) or undefined (undef). Example: variable_string = "" check_bool = isempty(variable_string) yields check_bool = True Datalogic Automation Inc. 5-18 Impact Reference Guide Commands and Functions I-L ISINTEGER() This function returns True if the argument is an integer number. Example: x = 1 check_bool = isinteger(x) yields check_bool = True ISNUMERIC() This function returns True if the argument is a number (real or integer). Example: x = 1 check_bool = isnumeric(x) yields check_bool = True ISREAL() This function returns True if the argument is a real number. Example: x = 1.0 check_bool = isreal(x) yields check_bool = True ISSTRING() This function returns True if the argument is a string. Example: variable_string = "string" check_bool = isstring(variable_string) yields check_bool = True ISUNDEF() This function returns True if the argument is undefined (undef). Example: undef x check_bool = isundef(x) yields check_bool = True JOIN() This function joins (concantenates) the string arguments using the first argument as the joiner string. Example: var_string = JOIN("and","first", "second", "third") yields var_string = firstandsecondandthird LBOUND() This function returns the element number of the lowest occupied index of the argument array. (Also see Arrays on page 5-6.) Example: for i = 1 to 3 list[i] = i next first_element = LBOUND(LIST) yields list[1] = 1 list [2] = 2 list [3] = 3 first_element = 1 5-19 Datalogic Automation Inc. Commands and Functions I-L Impact Reference Guide LCASE() This function converts the string argument to lower case. If the argument is undef, the result is undef. Example: var_string = LCASE("ALLLOWERCASE") yields var_string = alllowercase LEFT() This function creates a string from the leftmost characters of the first argument. The second argument is the number of characters to use. Example: var_string = LEFT("This string",4) yields var_string = This LEN() This function returns an integer value indicating a string’s length. If the argument is undef, the result is undef. Example: stringsize = LEN ("This") yields stringsize = 4 LIKE This function compares a string to a string pattern. The pattern can contain a wild-card or joker character. The wild card character * matches multiple characters. The joker character "?" matches a single character. To look for * or ? in the string, use the "~" character as an escape character. Example: If "Bigstring" like "Big*" then match_bool=True endif yields match_bool = True Example: If "Bigstring" like "Big?tring" then match_bool=True endif yields match_bool = True Example: If "Big*string" like "Big~*string" then match_bool=True endif yields match_bool = True LINE INPUT (CPM Only) This function reads a record from an open file. This example reads a record from file number 1 and assigns it to the variable in_string. line input #1, in_string LOG() This function calculates the natural log of the argument. If the argument is less than or equal to zero, the result is undef. Example: Datalogic Automation Inc. 5-20 Impact Reference Guide Commands and Functions M-Q x = LOG(2.72) yields x = 1.000632 LOG10() This function calculates the log of the argument. If the argument is less than or equal to zero, the result is undef. Example: x = LOG10(1000) yields x = 3 LT R I M ( ) This function removes any existing spaces from the leftmost part of a string. Example: var_string = LTRIM (" This") yields var_string = This Commands and Functions M-Q MID() The syntax of this function is MID (string, start, [len]) The first argument is a string. The second argument indicates where to start the string extraction. The third (optional) argument indicates how many characters to extract. If the third argument is omitted, the entire string is extracted. In this example, the string "middle" is assigned to the variable var_string. Example: var_string = MID("The middle string",5,6) yields var_string = middle MINUTE() This function converts the real argument to a minute value. If there is no argument, it returns the current minute (in local Impact device time). Example: thisminute = MINUTE yields thisminute = 54 MKDIR (CPM Only) This function creates a directory from a string expression. In this example, the directory "mydirectory" is created in the current directory. mkdir "/mydirectory" MOD Note: The Basic tool does not use this function. Use the % (modulus) operator instead. See “Expressions” on page 5-4. MONTH This function converts the real argument to a month value. If there is no argument, it returns the current month (in local Impact device time). Example: thismonth = MONTH yields thismonth = 2 5-21 Datalogic Automation Inc. Commands and Functions M-Q Impact Reference Guide NOW This function returns the local Impact device time and date expressed as seconds. (See“FORMATDATE” on page 5-14.) Example: thistime_string = FORMATDATE ("MM-DD-YY HH:mm:ss",NOW) yields thistime_string = 2-27-12 11:56:19 OCT() This function returns the octal value of the integer argument as a string. Example: oct_string = OCT(255) yields oct_string = 377 ODD() This function returns a True value if the argument is an odd number. If the argument is undef, the result is undef. Example: mycheck_bool = ODD(3) yields mycheck_bool = True ON ERROR GOTO This command defines the label for an error handling entry point. If the argument is NULL, error handling is turned off. Example: ON ERROR GOTO mylabel ON ERROR RESUME If this function is called, when an error occurs the program will try to continue execution at the argument label, or the next statement if the argument is "next." Example: ON ERROR RESUME next ON ERROR RESUME mylabel OPEN (CPM Only) Open - Output This function opens a file so you can read from or write to it. This example opens a file named myfile.txt for writing in the current directory, assigns the number 1 to it, writes the string "This is the first line" into it, then closes the file. A new file is opened and any existing file with the same name is replaced. IMPORTANT: File names are case sensitive. open "myfile.txt" for output as 1 print#1,"This is the first line\n" close 1 Anytime you refer to the file you need to use the file number assigned when the file is opened. For example, the command Print#1 writes to file number 1 and the command Close 1, closes file number 1. The "\n" characters at the end of the print command write a "newline" character at the end of the text so that each line written to the file is a separate line. If you don’t use the newline character, the file will be a continuous string. Open - Append Datalogic Automation Inc. 5-22 Impact Reference Guide Commands and Functions R-V You can also open an existing file and write (append) additional records to the end of it. This example opens the existing file named yourfile.txt in the current directory and adds the string "Another line" to it. IMPORTANT: File names are case sensitive. open "yourfile.txt" for append as 1 print#1,"Another line\n" close 1 Open - Input This example opens the myfile.txt file for reading, then assigns the input string to the string variable in_string. If you used the newline character to create your file, you will need a "line input" assignment statement for each line in the file. open "myfile.txt" for input as 1 line input #1, in_string close 1 PI This function returns the value of the constant pi (the ratio of a circle’s circumference to its diameter). Example: circum_value = pi yields circum_value = 3.141593 POW This function returns the value of 10 to the power of the argument. Example: pow_value = POW(2) yields pow_value = 100 PRINT (CPM Only) This function writes to an open file. The file number must refer to a currently open file. This example opens the file "myfile.txt," writes the string "This is the first line" into it, then closes the file. open "myfile.txt" for output as 1 print#1,"This is the first line\n" close 1 Commands and Functions R-V REM You should put comments in your Basic code to make it more understandable. To indicate a comment, put this command at the beginning of a line, followed by one or more spaces. (Also see “Comments” on page 52.) You cannot put a comment at the end of a statement. Example: ‘This is a comment line. REM This is a comment also. Here is the energy calculation e = m*(c*c) Repeat Until This construct repeats the loop body until the expression is True. The expression is evaluated after the execution of the loop body so the loop body is always executed at least once. Repeat 5-23 Datalogic Automation Inc. Commands and Functions R-V Impact Reference Guide REM loop body Until expression REPLACE () The syntax of this function is REPLACE (base_string, search_string, replace_string [,number_of_replaces] [,position]). The first argument (base_string) is the string to search. The second argument (search_string) is the string to find. The third argument (replace_string) is the string to use as replacement. The fourth argument (number_of_replaces - optional) is the number of replaces to do. If this argument is missing, then all occurrences of the search_string is replaced. The fifth argument (position - optional) is the starting character position of the replacement. If this argument is missing, then the operation starts at the string beginning. Example: var_string = replace ("newxtringx","x","s") yields var_string = newstrings RESUME If this function is called, when an error occurs the program will try to continue execution. If the argument is zero it will try to execute the same statement again. If the argument is "next," it will try execute the next statement. If the argument is a statement label, it will try to execute the statement at that label. Examples: RESUME NEXT RESUME mylabel RETURN This command causes a return from a GOSUB command. Execution continues at the statement following the GOSUB command when the subroutine returns. Example: GOSUB mysub REM When the return in mysub is executed, the program executes REM the following line x = 3 REM more code goes here END mysub: REM mysub subroutine code is here RETURN RIGHT() The syntax of this function is RIGHT (string,length) The first argument is the string to extract. The second argument is the number of characters to put into the result. Example: var_string = RIGHT("This string",4) yields var_string = ring Datalogic Automation Inc. 5-24 Impact Reference Guide Commands and Functions R-V RND This function returns a random number. Example: x = RND yields x = 1016015 ROUND() This function will round the argument to zero decimal places if there is no second argument. The optional second argument indicates the number of places to round. If the first argument is undef, the result is undef. Example: x = ROUND (11.1225,2) yields x = 11.12 RTRIM() This function removes any existing spaces from the rightmost part of a string. In this example, the spaces are removed from the right of the string. Example: var_string = RTRIM ("This ") yields var_string = This SEC() This function converts the real argument to a seconds value. If there is no argument, it returns the current second (in local Impact device time). Example: thissecond = SEC() yields thissecond = 13 SIN() This function returns the sine of the argument. The result is in radians. If the argument is undef, the result is undef. In this example, the value 0.4794255 is assigned to the variable x. Example: x = SIN(0.5) yields x = 0.4794255 S PA C E ( ) This function returns a string of spaces. Example: var_string = SPACE(6) yields var_string = SPLIT The syntax of this function is SPLIT string BY delimiter TO var1, var2... This function splits "string" into sub-strings (var1, var2, etc) separated by "delimiter." A delimiter at the beginning or end of the expression is ignored. Example (splits the string 10, 11, 12, 13) into four based on the delimiter (the comma). It assigns those values to the string variables sub1, sub2, sub3, and sub4. SPLIT "10,11,12,13" by "," to sub1, sub2, sub3, sub4 yields sub1 = 10 sub2 = 11 sub3 = 12 sub4 = 13 If there are more string variables than sub-strings, the unfilled string variables are undefined. For example, 5-25 Datalogic Automation Inc. Commands and Functions R-V Impact Reference Guide SPLIT "10,11,12" by "," to sub1, sub2, sub3, sub4 yields sub1 = 10 sub2 = 11 sub3 = 12 (sub4 is undefined) If there are fewer variables than sub-strings, the last string variable will hold the remaining part of the original string and the delimiter. Example, SPLIT "10,11,12" by "," to sub1, sub2 yields sub1 = 10 sub2 = 11, 12 If two delimiters follow each other, the resulting variable is empty. Example: SPLIT "10, ,11" by "," to sub1, sub2, sub3 yields sub1 = 10 sub3 = 11 (sub2 is empty) All variables are considered strings when they are split. You need to convert those string values into real values using the VAL function if you want to compare them as numbers. If the values are not converted, they are compared as strings and the string "17.32" is evaluated as greater than "115.22." Example: temp_string = "17.32,115.22" SPLIT temp_string by "," to a,b real_value_of_a = VAL(a) real_value_of_b = VAL(b) if real_value_of_a > real_value_of_b then greatest = a else greatest = b end if S P L I TA The syntax of this function is SPLITA string by delimiter to array_variable This function splits "string" into array elements in "array_variable" separated by "delimiter." Delimiters at the beginning or end of the expression are ignored. Example: SPLIT "10, 11, 12" by "," to var_array yields var_array[0] = 10 var_array[1] = 11 var_array[3] = 12 If two delimiters follow each other, the resulting array element is empty.Example, SPLITA "10, ,11" by "," to var_array yields var_array[0] = 10 var_array[1] = var_array[3] = 11 (the second array element is empty) SQR This function returns the square root of the argument. If the argument is undef, the result is undef. Example: y = SQR(9.0) yields y = 3 STOP Datalogic Automation Inc. 5-26 Impact Reference Guide Commands and Functions R-V This command stops program execution. No further commands are executed. Example: STOP STR() This function converts a number to a string. This conversion is done automatically, but you can use this function to insure that a variable is interpreted as a string. Example: a = 6 var_string = STR(a) yields var_string = 6 is the same as a = 6 var_string = a yields var_string = 6 STRING() The syntax of this function is STRING (n,code) The first argument (n) is the string length to create. The second argument (code) is the character code to use to create the string. If the second argument is a string, then the first character of the string is used to fill the result. Otherwise the argument is converted to an integer and the ASCII code is used. Examples: (the ASCII code 98 is the letter "b") new_string = STRING (16,"a") yields new_string = aaaaaaaaaaaaaaaa new_string = STRING (16,98) yields new_string = bbbbbbbbbbbbbbbb STRREVERSE() This function reverses the string argument. Example: var_string = STRREVERSE ("backwards") yields var_string = sdrawkcab SUB() The syntax of this command is SUB sub (a,b,c) This command declares a subroutine. A subroutine is a piece of code that can be called from the main part of the code or from a function or another subroutine. Example: SUB MySub(Var1,Var2, Var3) REM subroutine code goes here END SUB TA N ( ) This function returns the tangent of the argument. The result is in radians. If the argument is undef, the result is undef. Example: x = TAN(1) yields x = 1.557408 T I M E VA L U E ( ) 5-27 Datalogic Automation Inc. Commands and Functions R-V Impact Reference Guide The syntax of this function is TIMEVALUE (year, month, day, hour, minute, second) This function returns a real number that based on the arguments. If an argument is missing or undefined, the following default values are used: year = 1970 month = January day = 1 hour = 0 minute = 0 second = 0 Example: time_var = yearday (TIMEVALUE (2005,12,23)) yields time_var = 356 TRIM() This function removes any leading and trailing spaces from a string. Example: var_string = TRIM (" This ") yields var_string = This TRUE This function always returns the value True. In this example, the value True is assigned to the variable myresult. Example: myresult = TRUE yields myresult = True TYPE This function returns the data type of the argument according to the following symbolic constant values: SbTypeUndef if the argument is undef SbTypeString if the argument is string. SbTypeReal if the argument is real. SbTypeInteger if the argument is integer SbTypeArray if the argument is an array Example: the_string = "Welcome" If TYPE(the_string) = SbTypeString then type_is_string = TRUE Else type_is_string = FALSE Endif yields type_is_string = True UBOUND() This function returns the index number of the highest occupied element of the argument array. (Also see Arrays on page 5-6.) Example: for i = 1 to 5 mylist[i] = i next last_element = UBOUND(MYLIST) yields last_element = 5 Datalogic Automation Inc. 5-28 Impact Reference Guide Commands and Functions W-Y UCASE() This function converts the string argument to all upper case. If the argument is undef, the result is undef. In this example, the string "ALL UPPERCASE" is assigned to the variable var_string. Example: var_string = UCASE("All Uppercase") yields var_string = ALL UPPERCASE UNDEF Impact Basic uses a special constant named "undef." This constant is undefined in the sense that it has no value (it is not zero or false and it is not any data type). Array elements that have no value assigned to them are undef. If any variables in a mathematical operation are undef, the result of the operation is undef. You can test for undef values with the function ISUNDEF (see page 5-19). This function assigns the value "undef" to a variable. Example: undef my_int yields an undefined value for my_int VA L ( ) This function converts a string argument to a number. If the argument is undef, the result is undef. Example: var_real = VAL("10.9") yields var_real = 10.9 Commands and Functions W-Y W E E K D AY ( ) This function converts the real argument to a number corresponding to the day of the week. (Sunday is weekday number zero, Saturday is weekday number six.) If there is no argument, it returns the current weekday number (in local Impact device time). Example: thisday = WEEKDAY (TIMEVALUE (2005,12,23)) yields thisday = 5 While This construct repeats the loop body while the expression is True. The expression is evaluated before entering the loop, so the loop is not executed if the expression is already False. While expression REM loop body Wend YEAR() This function converts the argument to a number corresponding to the current year. If there is no argument, it returns the current year (in local Impact device time). Example: thisyear = YEAR yields thisyear = 2012 Y E A R D AY This function converts the argument to a number corresponding to the current day of the year. (The first day of the year is number zero.) If there is no argument, it returns the current day of the year (in local Impact device time). Example: 5-29 Datalogic Automation Inc. Basic Program Examples Impact Reference Guide thisyearday = YEARDAY yields thisyearday = 57 Basic Program Examples The following examples of Basic tool code illustrate some simple function calls and shows how to construct Basic statements. Each example is preceded by explanatory text which will help explain its purpose. This example uses the CHR function to create a string (ab_) with the last character incrementing from ‘a’ to ‘z’ each time the code is run. ’ First, initialize the ascii value (the character’s ascii code) for ’ the last character in the string. If it is zero or greater than 121 ’ (the value for z), then set it to 96 (the value of a). IF ascii_counter = 0 OR ascii_counter > 121 THEN ascii_counter = 96 END IF ’ Now, increment the counter ascii_counter = ascii_counter + 1 ’ This line converts the ascii value to a string value char_string = chr(ascii_counter) ’ Finally, this line appends the incremented character to the ’ fixed string name_string = "ab" & char_string This example shows the use of parentheses in calculations which find the intersection point of two line segments. The segments are defined by four points. The first line segment is defined by points X1,Y1 to X2,Y2 The second line segment is defined by point X3, Y3 to X4, Y4 ’ First, find the slope of the first line segment m1 = (y2 - y1) / (x2 - x1) ’ Now find its intercept b1 = y1 - (m1 * x1) ’ This code finds the slope of the second line segment m = (y4 - y3) / (x4 - x3) ’ Now find its intercept b2 = y3 - (m2 * x3) ’ Now calculate the x and y coordinates of the intersection of ’ the two line segments x = (b2 - b1) / (m1 - m2) y = (m1 * x) + b1 Here are several examples of various functions and assignments. Example 1 ’ This example assigns an integer value of -35 to the variable ’ "cost," then assigns its absolute value to the real variable ’ abs_value using the ABS function. cost = -35 abs_value = abs(cost) Example 2 ’ This example uses the ASC function to find the ascii code ’ value of the letter "A." It assigns the integer value 65 to the ’ variable asc_value. asc_value = asc("A") Example 3 ’ This example uses the CHR function to return the letter that ’ corresponds to the ascii code assigned in the previous Datalogic Automation Inc. 5-30 Impact Reference Guide Basic Program Examples ’ example (65). It assigns the string value "A" to the variable ’ char_string. char_string = chr(asc_value) Example 4 ’ ’ ’ ’ This example uses the HEX function to find the hex value of the number assigned to the variable asc_value in the previous examples (65). It assigns the string value "41" to the variable hex_string. hex_string = hex(asc_value) Example 5 ’ ’ ’ ’ ’ This example demonstrates the string concantenation function (&). First, it assigns the integer value 5 to the string variable blobs_int. It then joins two string constants with the integer value inserted between them, and assigns that string to the string variable resulting_string. blobs_int = 5 resulting_string = "Found a total of " & blobs_int & " blobs" Example 6 ’ This example uses the function MID to extract a string from ’ the middle of the string variable resulting_string (which ’ was created in the previous example). It starts extracting at ’ character 7, and continues for 7 characters. It ’ assigns the extracted string ("a total") to the string ’ variable mid_string. mid_string = mid(resulting_string,7,7) Example 7 ’ ’ ’ ’ This example uses the function LEN to return the length of the variable resulting_string (which was used in the previous example). The returned integer (24) is assigned to the integer variable length_int. length_int = len(resulting_string) Example 8 ’ ’ ’ ’ ’ This example uses the function INSTR to find the beginning position of the string constant "a tot" inside the string resulting_string (which was used in the previous example). The result is the integer 7 (the string starts at character position 7). It is assigned to the integer variable num_int. num_int = instr(resulting_string,"a tot") Example 9 ’ ’ ’ ’ This example uses the function UCASE to convert the string variable resulting_string (which was used in the previous example) to all upper case, then assign it to the string variable upper_string. upper_string = ucase(resulting_string) Example10 ’ ’ ’ ’ This example uses the function LCASE to convert the string variable resulting_string (which was used in the previous example) to all lower case, then assign it to the string variable lower_string. lower_string = lcase(resulting_string) Example11 ’ This example uses the function STRREVERSE to reverse ’ the string variable resulting_string (which was used in the ’ previous example) and assign the result to the string 5-31 Datalogic Automation Inc. Basic Program Examples Impact Reference Guide ’ variable reverse_string. reverse_string = strreverse(resulting_string) This example shows how to format a real value to a specified number of digits. ’This is the real value to format real_value = 123.1234567890 ’Set the number of digits of precision desired precision_int = 1 ’The Basic function "instr" finds the location of the decimal point in the real value (4). The function "mid" returns the numbers in the real value beginning at 1 and ending at the location of the decimal point plus the number of digits of precision (4+1=5). This creates the string formatted_string with a value of "123.4". formatted_string = mid(real_value,1,instr(real_value,".") + precision_int) ’This code creates the same value as the previous line of code, except the string is automatically converted to a real value of 123.4 (formatted_value). formatted_value = mid(real_value,1,instr(real_value,".") + precision_int) This example shows how to change directories, open a file, write values into it, then read those values. NOTE: This example works in the CPM Basic control only. It will not work in the VPM Basic tool. ’first open the file for write and assign the file number 1, then generate a random number to write to the file open "myfile.txt" for output as 1 x = ROUND(rnd) ’now, write the result to the file print #1, "This is a first result. x = " & x & "\n" ’repeat for two more records x = ROUND(rnd) print #1, "This is a second result. x = " & x & "\n" x = ROUND(rnd) print #1, "This is a third result. x = " & x & "\n" ’close the file close 1 ’now open the file for reading, read the first record, assign the input string to the variable thestring, then close the file open "myfile.txt" for input as 1 LINE INPUT #1, thestring close 1 ’This section of the example, changes the directory to the temp directory, assigns the directory name to the variable new_dir, opens a file for reading, reads the first record, then closes the file chdir curdir & "/temp" new_dir = curdir open "myfile2.txt" for input as 2 LINE INPUT #2, thestring2 close 2 Datalogic Automation Inc. 5-32 C H A P T E R 6 Appendix This appendix explains several parts of Impact software in more detail. Threshold Viewer NOTE: The Histogram and Line Profile buttons in the Display Area toolbar are visible only when the Setup tab is selected. To display the Threshold viewer in other tabs, right click on the ROI or image. The floating Threshold viewer shows a Histogram or Line Profile, depending on the area of the image or type of ROI selected. The Histogram or Line Profile graphically represents each pixel’s grey level within the ROI or image. This shows how the VPM tools "see" images. The Threshold view varies depending on the type of ROI and which tool is being configured. This is explained in more detail below. These types of ROIs, and whole images, display a Histogram: Blob, Blob List, Circle, Polygon, Rectangle, Rectangle List, Shape, and Shape List. These types of ROIs display a Line Profile: Arc, Line, and Wide Line. The Wide Circular Arc and Wide Line Segment ROI types also display a choice of Radial or Arc Profile types. General Features When the Threshold Viewer window is open, it always remains on top of the VPM window. A horizontal splitter bar between the plot and options let you adjust the window split. The plot resizes when the window is resized. When the selected property is List ROI, all the ROI's in the list are represented in the Histogram. If no ROI is selected, the entire image is represented in the Histogram. If the Threshold Viewer is already displayed, the Histogram plot is refreshed when any of the following events happen: • A new ROI is selected. • The selected ROI is unselected, for example, when you left-click on the image or select a non-ROI property in the Properties tab. If you select a non-ROI property, the entire image’s Histogram is displayed. • A new image is displayed. • A new tool is selected in the task tree. • You move to or from Settings-Camera or Settings-File Camera setups. • VPM is in Live mode. If the Threshold Viewer is already displayed, the Line Profile plot is refreshed when any of the following events happen: • A new ROI is selected. • A new tool that has a Line ROI is selected in the task tree. 6-1 Datalogic Automation Inc. Threshold Viewer Impact Reference Guide If the Threshold Viewer window is displayed, it will close when any of the following events happen: • You click the "X" button in the upper right corner of the Threshold Viewer window. • You select the Display tab. • You select the Settings tab and the Camera or File Camera are NOT selected. • The Camera or File Camera in the Settings tab is selected and you select another system object that is NOT the Camera or File Camera. • You select Camera or File Camera and there is NO image displayed. • You select another camera tab. • You select the Summary tab. • You click the Online, Continuous Triggers, or Linking button, or you promote a property. • You leave locked mode in the design tab. • You disconnect from the current camera. • You add a new camera tab. • You create a new vision program. • You close the current vision program. • You select another vision program. Click and drag this line to adjust the window split. Click and drag a cursor to adjust a Threshold value. Histogram Image In Task and Fixed Threshold For details about the Line Profile Threshold Window, see “Line Profile - Grey Level Mode” on page 6-5. Depending on the type of threshold mode a particular tool uses, or when displaying an image, various fields and lines within the Histogram window are enabled or disabled. All tools and images have the following features. Title The window title displays the Tool or Task name and the current threshold mode being used. Datalogic Automation Inc. 6-2 Impact Reference Guide Threshold Viewer Histogram Plot The Histogram plot is displayed as a bar chart where each vertical bar represents the greyscale intensity of a pixel in the image. The Y-Axis is the scale for the number of pixels of each intensity. The X-Axis shows the range of grey levels for the pixels from zero percent (black) to 100 percent (white). Greyscale % The minimum and maximum grey levels, as shown graphically in the plot, are displayed here as numbers. Threshold (%) The Histogram window displays the selected tool’s or image’s current property values and new values are updated in the tool as they are changed in the window. The movable vertical red cursors (lines) let you set the tool’s desired threshold range on the Histogram. The current red cursor locations are displayed in the window as Threshold (%) Minimum and Maximum. The movable vertical green cursor is always positioned at the middle of the threshold range. You can move the entire range (both red cursors) by moving the green line. When you move the red cursors, the new minimum and maximum threshold values are written to the entry fields and are sent to the corresponding tool properties when the adjustment stops. The image display is also updated. If you are currently using the tool setup, the tool will run after the values are updated. When you change the values in the minimum entry fields, the red and green vertical cursors are adjusted, the values are sent to the corresponding tool properties, and the image display is updated. If you are currently using the tool setup, the tool will run after the values are updated. NOTE: If the Histogram window is displayed and the current tool, task, or system object (e.g. camera or file camera) does NOT have Threshold options, the Minimum and Maximum Threshold (%) values are set to 25 and 75. Adjusting these values will adjust the Pseudocolor in the image display, but no values are written to the tool, task, or system object's properties. In Range Pixels, Total Pixels, and In Range Percent (%) In Range Pixels: The number of pixels within the threshold range (between the red vertical cursors). Total Pixels: The number of pixels in the entire image. In Range Percent: The percentage of pixels in the entire image with a grey level that fall between the red cursors (In Range Pixels / Total Pixels * 100). Pseudocolor When Pseudocolor is turned on, pixels in the image with a greyscale intensity that falls within the threshold range are colored. The vertical plot lines in the Histogram are also colored. To select the color, click the Color Selection button. Color Selection This button displays the current Pseudocolor color. Click this button select the color from a color palette. Each camera stores its own Pseudocolor. Copy to Clipboard Click this button to create a comma-delimited string of pixel values and write it to the system clipboard. You can paste this information into other applications such as Notepad or Excel. 6-3 Datalogic Automation Inc. Threshold Viewer Impact Reference Guide Center Fixed Threshold Range - Adjustable Threshold Adjustable Threshold Center Fixed Threshold Range on Region Average If the tool's threshold type property is set to "Center Fixed Threshold on Region Average," the X-Axis is displayed as -100 to 100 and the centered red cursor is not shown. Moving either the Minimum or Maximum cursor will move the opposite cursor so that the range is always centered on zero. Bright and Dark Pixels - Autothreshold Autothreshold Bright Pixels If the tool's threshold type property is set to "Autothreshold Contrasting Bright (or Dark) Pixels," the maximum Threshold (%) is set to 100 and the minimum is set to the minimum value of the tool’s output property "Threshold Range Used" if it is present in the tool. If the tool's threshold type property is set to "Autothreshold Contrasting Dark Pixels," the minimum Threshold (%) is set to 0 and the maximum is set to the maximum value of the tool’s output property "Threshold Range Used" if it is present in the tool. You cannot adjust the Threshold (%) values or cursors in this mode. NOTE: If there is no "Threshold Range Used" property in the tool, then the cursors are not shown and the Threshold (%) Minimum and Maximum values are set to zero. The Autothreshold Contrasting Bright (or Dark) Pixels setting works well when the histogram has a bimodal distribution (i.e. it has two distinct data groupings as in the image above). When the histogram is single mode (i.e. the grey levels are grouped together around one common average), it is better to use the Center Fixed Threshold on Region Average or calculate a threshold value using the appropriate tool. Datalogic Automation Inc. 6-4 Impact Reference Guide Threshold Viewer Bright and Dark Pixels - Adaptive Threshold Adaptive Threshold Bright Pixels If the tool's threshold type is set to some form of "Adaptive Threshold - Bright," the maximum Threshold (%) is set to 100 and the minimum value is set to the value of the tool's Fixed Threshold Value property. If the tool's threshold type is set to some form of "Adaptive Threshold - Dark," the minimum Threshold (%) is set to 0 and the maximum value is set to the value of the tool's Fixed Threshold Value property. You can only adjust the Threshold(%) minimum value and cursor in this mode. Bright and Dark Pixels - Fixed Threshold Fixed Threshold Bright Pixels If the selected tool's Threshold type is set to some form of "Fixed Threshold - Bright," the maximum Threshold (%) is set to 100 and the minimum value is set to the minimum value of the tool's Fixed Threshold Range property. You can only adjust the Threshold(%) minimum value and cursor in this mode. If the selected tool's Threshold type is set to some form of "Fixed Threshold - Dark," the minimum Threshold (%) is set to 0 and the maximum value is set to the maximum value of the tool's Fixed Threshold Range property. The user can only adjust the Threshold(%) maximum value and cursor in this mode. Line Profile - Grey Level Mode 6-5 Datalogic Automation Inc. Threshold Viewer Impact Reference Guide The Threshold Viewer Window will display a grey level or gradient Line Profile, depending on the mode chosen in the tool, for these ROI types: Arc, Line, and Wide Line. For details about the Histogram window, see “Histogram” on page 6-2. Title The window title displays the current Profile Mode (Grey Level or Gradient), the Tool or Task name, and the current threshold mode being used (when applicable). Grey Level Mode - Adjustable Threshold Grey Level Mode Adjustable Threshold Line Profile Plot The grey level Line Profile is displayed as a line plotted on a graph where the X-Axis represents the length of the selected line ROI and the Y-Axis represents the line’s grey level percent from zero percent (black) to 100 percent (white). The horizontal green cursor represents the tool's Grey Level Threshold Minimum or Maximum percent (based on bright or dark line type). When the green cursor is adjusted, the threshold percent in the tool's property is also adjusted. If Pseudocolor is turned on, adjusting the green cursor will adjust the threshold limits on the image display. If the tool is in Autothreshold mode, the green cursor is only displayed when the Pseudocolor is ON, it will then only adjust the image display's threshold limits and NOT the tool's property values. Datalogic Automation Inc. 6-6 Impact Reference Guide Threshold Viewer The vertical red cursor is movable and shows the Greyscale or Gradient value at its location. A red hash mark on the selected Line ROI follows the position of the red cursor on the plot. The red hashmark on the ROI corresponds to the red cursor’s position. Red cursor Greyscale % The percent greyscale, as shown graphically in the plot, at the red vertical line (cursor). Grey Level Threshold (%) The Grey Level Threshold (%) Minimum and Maximum fields work as follows: When a Bright Line Type (e.g. First Bright Line) is selected in a tool, the Minimum field is editable and the Maximum field is disabled and displays a fixed value of 100.0. When the green horizontal line (cursor) is moved up or down, the Minimum threshold value is adjusted. When you type a value into the Minimum field, the green cursor is adjusted. The Minimum value is reflected in the tool's "Fixed Grey Level Threshold Percentage" property. When a Dark Line Type (e.g. First Dark Line) is selected in a tool, the Maximum field is editable and the Minimum field is disabled and displays a fixed value of 0.0. When the green cursor is moved up or down, the Maximum threshold value is adjusted. When you type a value into the Maximum field, the green cursor is adjusted. The Maximum value is reflected in the tool's "Fixed Grey Level Threshold Percentage" property. Profile Type Wide Circle Arc ROIs have an additional Profile Type selection: Radial and Arc Radial Profile: When Radial Profile is selected, a radial line segment is shown on the ROI. Click and drag the line segment to move it around the circle.The profile viewer shows the pixel values under the line segment. 6-7 Datalogic Automation Inc. Threshold Viewer Impact Reference Guide Arc: When Arc Profile is selected, an arc with a line segment is displayed on the ROI. You can click and drag the arc handle to contract and expand it and move the line segment. The profile viewer shows the pixel values under the line segment. The red hashmark on the ROI corresponds to the red cursor’s position. Radial Profile Click and drag the line segment. Click and drag the arc handle. Arc Profile Pseudocolor When Pseudocolor is turned on, pixels in the image with a grey level intensity that falls within the threshold range are colored. To select the color, click the Color Selection button. Color Selection This button displays the current Pseudocolor color. Click this button select the color from a color palette. Each camera stores its own Pseudocolor. Copy to Clipboard When clicked, this button creates a comma-delimited string of pixel values and writes it to the system clipboard. You can paste this information into another application such as Notepad or Excel. Grey Level Mode - Autothreshold Grey Level Mode Autothreshold Pseudocolor on When the tool is in Autothreshold mode and Pseudocolor is off, the horizontal green cursor is not displayed and the Grey Level Threshold % fields are set to zero and disabled since there are no Threshold Used properties to read. Datalogic Automation Inc. 6-8 Impact Reference Guide Threshold Viewer When Pseudocolor is on, a movable horizontal green cursor is displayed. Moving the cursor up or down adjusts either the Threshold % Minimum or Maximum numeric fields and threshold limits in the image display, depending on whether bright or dark line type is selected. In this mode, no values are update in the tool’s properties. Line Profile - Gradient Mode Gradient Introduction The term gradient refers to how quickly an image’s grey level intensity changes. For example, the Line Profile below is from the Line ROI in the image at the right. The image is black from the beginning of the line to the first circle so there is zero gradient at the beginning of the profile. As the intensity changes from black to white, the gradient increases in a positive direction, reaches a maximum at the edge, then returns to zero where the image is white. On the other side of the hole, the intensity changes from white to black and the gradient increases in a negative (black) direction. The red cursor has been moved so that the red hashmark on the image is directly over the black edge of the hole, which has a maximum gradient of -46.48. Line ROI beginning Zero Gradient Maximum Gradient at edge The other side of the white hole (negative) Line ROI beginning Zero Gradient The other side of the white hole 6-9 Datalogic Automation Inc. Threshold Viewer Impact Reference Guide Gradient Mode - Adjustable Threshold Gradient Mode Adjustable Threshold Line Profile Plot The gradient Line Profile is displayed as a line plotted on a graph where the X-Axis represents the length of the selected line ROI and the Y-Axis represents the gradient percent range. The maximum range value is based on the currently selected Gradient Range. The top horizontal green cursor represents the tool's Gradient Threshold Minimum percent. When the green cursor is adjusted, the gradient threshold percent in the tool's property is also adjusted. If the tool is in Autothreshold mode, the green cursor is not displayed. Gradient (%) The Gradient (%) value is shown in red text and displays the percent at the current location of the red vertical cursor. Gradient Range The Gradient Range drop down provides custom Y-Axis scaling options. If you select "Auto", the Y-Axis is adjusted so that the maximum range value is 10% larger than the highest gradient percent. If you select any other option, the Y-Axis is set to that value. Profile Type Wide Circle Arc ROIs have an additional Profile Type selection: Radial and Arc. See “Profile Type” on page 6-7. Gradient Threshold (%) The Gradient Threshold (%) Maximum is always set to 100.0. The Minimum field and top green cursor reflect the tool's "Fixed Gradient Threshold Percentage" property value. As the Minimum percent is adjusted in the text entry or cursor, the tool's property is updated. Copy to Clipboard When clicked, this button creates a comma-delimited string of pixel values and writes it to the system clipboard. You can paste this information into another application such as Notepad or Excel. Datalogic Automation Inc. 6-10 Impact Reference Guide Threshold Viewer Gradient Mode - Autothreshold Gradient Mode Autothreshold When the tool is in Autothreshold mode, no horizontal green cursors are displayed and the Threshold % fields are set to zero since there are no Threshold Used properties in the tool to read. 6-11 Datalogic Automation Inc. On-Screen Keyboard Impact Reference Guide On-Screen Keyboard Two on-screen keyboards (OSK) are available for entering text and numbers in VPM and CPM using a touchscreen rather than a keyboard. Only the external keyboard is available in VPM. The external and internal OSKs are available in CPM. Using the external OSK with Windows 7 (64-bit operating system) When you use the external OSK on a Windows 7 64-bit operating system, you may get the following error: If this error occurs, you are probably trying to use the default OSK program location as it is defined in the VPM and CPM OSK setup. You must copy the program file from its current location to another folder and change its default location. To Copy the OSK program 1. Using Windows Explorer, navigate to the folder: C:/Windows/System32/ 2. Locate the file named "osk.exe" and copy it to the folder: C:\Datalogic\IMPACT\Applications\OSK To Change the Default Location in CPM 1. Start CPM and click the Program Preferences button on the main toolbar. 2. In the field labeled "Path to text entry keyboard application," enter the following string (including the quotes): "C:\Datalogic\IMPACT\Applications\OSK\osk.exe" 3. Click the OK button. 4. If you are using the Keyboard control in a control panel, click on the Keyboard control. 5. In the control property named "Keyboard Application," click the Value field and enter the following string (including the quotes): "C:\Datalogic\IMPACT\Applications\OSK\osk.exe" 6. NOTE: You must complete steps 6 and 7 for each Keyboard control in your control panels. To Change the Default Location in VPM 1. Start VPM and click the Display tab. You can only change this setting from the Display tab. 2. Click the Program Preferences button on the main Display toolbar. 3. In the field labeled "Path to text entry keyboard application," enter the following string (including the quotes): "C:\Datalogic\IMPACT\Applications\OSK\osk.exe" 4. Click the OK button. Datalogic Automation Inc. 6-12 Impact Reference Guide CPM CPM There are three ways to enter information in CPM using a touchscreen: the Keyboard control, the external OSK, and the internal OSK. The Keyboard Control displays a graphical keyboard on the screen that can be used for keyboard input using a touchscreen. The Keyboard control is placed on a control panel and accessed by clicking it when you want to enter information in a field. For more details see “Keyboard” on page 4-53. The external OSK is displayed when you select an input field on a control panel. When you press a key, that field will receive the letter or number. To enable the external OSK 1. Click the Program Preferences button. 2. Click the radio button for to select the external OSK. The external OSK requires you to install or otherwise provide a program. 3. In the Program Preferences dialog, check the box labeled "Enable automatic on-screen keyboard." 4. If your text OSK application is in a different folder than the folder shown, enter the path and application name in the first field. 5. If your numeric OSK application is in a different folder than the folder shown, enter the path and application name in the second field. To enable the internal OSK 1. Click the Program Preferences button. 2. Click the radio button for to select the internal OSK. The internal OSK does not require any external programs. 6-13 Datalogic Automation Inc. CPM Impact Reference Guide 3. In the Program Preferences dialog, check the box labeled "Enable automatic on-screen keyboard." Using the internal OSK The internal OSK is displayed when you select an input field on a control panel. When you press a key, that field will receive the letter or number. Datalogic Automation Inc. 6-14 Impact Reference Guide VPM VPM The external OSK is accessible in VPM only when you are using the Display tab. If the OSK is enabled, the text entry OSK pops up when an editable text cell gains focus. The numeric OSK application is executed when an editable integer or real cell gains focus.The OSK application stops when either the table loses focus or you press the "Enter" key. If a table has various data types within it, the OSK will change depending what cell gains focus. To enable the external OSK 1. Click the Display tab. 2. Click the Program Preferences button. 3. In the Program Preferences dialog, check the box labeled "Enable on-screen keyboard." 4. If your text OSK application is in a different folder than the folder shown, enter the path and application name in the first field. 5. If your numeric OSK application is in a different folder than the folder shown, enter the path and application name in the second field. External Numeric OSK The numeric keypad application is provided by Datalogic. It uses displays standard numbers and uses a numeric keypad layout. Backspace key Enter key Transparency Setting The keyboard can be resized and moved. The Font and Icon size are adjusted based on the keypad size, but there is no external font setting. The slider at the bottom of the keypad adjusts its transparency, increasing from left to right. The decimal point key is localized based on the current operating system language. Keyboard settings are stored between uses. 6-15 Datalogic Automation Inc. Emulator Impact Reference Guide Emulator On M-Series processors the Emulator is called Impact M Device You can use an emulator with CPM and VPM to create and test vision programs without an Impact device connected to your PC. The Emulator uses the PC to emulate an Impact device. You have the option of connecting to an Emulator or a device. If you connect to an Emulator in VPM, it is started automatically and VPM connects to it. Four Emulators are automatically installed on Impact A, T, and C-Series devices. Either two or four Emulators are installed on the M-Series, based on the model. Emulators are assigned default IP Addresses and ports which cannot be changed. When the Device Connect dialog is displayed, all the Emulators are displayed. On A, T, and C-Series devices the name is "IMPACT Emulator" followed by a number. On the MSeries, the name is "IMPACT Device" followed by a number. If you are using CPM, you cannot start an Emulator directly. You must use VPM or start it using a shortcut. NOTE: When you are using multiple Emulators with ActiveX applications, you can only use the port numbers from 9933 to 10032 in ActiveX. Start and connect to the Emulator 1. Double-click the Emulator shortcut on the desktop. The Emulator dialog shows the Model, the Windows IP Address, the Emulator loopback address, and Datalogic Automation Inc. 6-16 Impact Reference Guide Command Line Parameters the software version number. The Impact Device dialog additionally shows the emulated camera port. 2. To connect to the Emulator with VPM, CPM, or Settings, select the device with the desired the name from the Device Selection list. 3. Click the Connect to Device button. To close the Emulator: 1. Be sure that VPM, CPM, or Settings are not connected to the Emulator you are closing. 2. Click Exit on the Emulator dialog. The Impact Device dialog Exit button can be disabled (see page 621) 3. Click OK on the Emulator warning dialog. Command Line Parameters This section describes command line options you can use with Impact software. Some of the options are common to all the programs, and some are unique. Be sure the option you are using is available for the program you are using. You must edit the program command line to add parameters. The command line is in the program’s shortcut. To add multiple options to a single command line, put a space between each option. Program Shortcut Icons To edit the program command line 1. Find the desired program’s shortcut icon on the desktop. This example uses Settings. 2. Right click on the icon. 3. Select Properties from the menu. 6-17 Datalogic Automation Inc. Summary Impact Reference Guide 4. Click the Shortcut tab The command line The option goes at the end of the command line 5. The command line appears in the Target field on the Properties dialog. The default command line varies with the program. For example, here is an example of the VPM program command line: "C:\Datalogic\IMPACT\Applications\jre\bin\javaw.exe" -XX:+UseParallelGC Xmx400m -Xms64m -Xrs -jar "C:\Datalogic\IMPACT\Applications\VPM\VPM.jar" Command line options must be added to the end of the default command line. After the final quotation mark, add a space, then add the option exactly as indicated in each description below. Here is an example of the above command line with the -d option added: "C:\Datalogic\IMPACT\Applications\jre\bin\javaw.exe" -XX:+UseParallelGC Xmx400m -Xms64m -Xrs -jar "C:\Datalogic\IMPACT\Applications\VPM\VPM.jar" -d 6. When you have finished editing the command line, click OK to close the Properties editor dialog. IMPORTANT: The command line on your system may not contain exactly the same information as these examples. Only add options at the end of a command line. Do not edit details in a command line. Tip: The Target field on the Properties dialog can contain a maximum of 255 characters. If the options cause the command line to exceed this length, you can create a text file containing the options, then use the "optionfile" command line. See “Access a text file containing a list of command line options” on page 6-22 for an example. Summary Here is a summary of all the Command Line parameters, along with the programs that use them. Access a text file containing command line parameters (-optionfile): CPM, CPMRE, VPM, Settings (page 622) Disable the ability to close the program (-noexit): CPM, CPMRE (page 6-21) Disable the ability to stop the M-Series Device drivers (noExit): IMPACTDevice.exe (page 6-21) Datalogic Automation Inc. 6-18 Impact Reference Guide Override the program’s default system country settings Disable moving and sizing the window (-d): CPM, CPMRE, VPM, Settings (page 6-19) Display an image as the logo in the title bar (-logo): CPM, CPMRE, VPM, Settings (page 6-20) Display an image as a banner in line with the toolbar (-banner): CPM, CPMRE, VPM, Settings (page 6-20) Display an image at program start and in the About dialog (-splash): CPM, CPMRE, VPM, Settings (page 625) Display a string in the title bar and in the About dialog (-title): CPMRE (page 6-25) Load a control panel application when the program starts (-p): CPM, CPMRE (page 6-23) Override the program’s default system language settings (-language): CPM, CPMRE, VPM, Settings (page 6-19) Override the program’s default system country settings (-country): CPM, CPMRE, VPM, Settings (page 618) Set the window’s starting location and size (-s x y width height): CPMRE (page 6-23) Run a Scriptor file when the program starts (-scr): CPMRE (page 6-24) Run a Scriptor file and display a control panel when the program starts (-scr -v): CPMRE (page 6-24) Set the window’s starting location and size (-s x y width height): CPMRE (page 6-23) Set the amount of program memory space allocated (-Xmx): CPM, CPMRE, VPM, Settings (page 6-26) Override the program’s default system country settings When this option is used, the program uses the country setting specified in the command line instead of the default system setting. The country argument is one of the valid upper-case two-letter ISO Country codes as defined by ISO-3166. For example, here is a list of codes for a few countries. Country Code Country Code Country Code Country Code United States US China CN Spain ES Germany DE Add the following option to the command line: -country Here are example command lines showing the program using the Chinese country settings (the option is in bold): CPM "C:\Datalogic\IMPACT\Applications\jre\bin\javaw.exe" -XX:+UseParallelGC -Xmx400m -Xms64m -Xrs -jar "C:\Datalogic\IMPACT\Applications\CPM\CPM.jar" -country CN CPMRE "C:\Datalogic\IMPACT\Applications\jre\bin\javaw.exe" -XX:+UseParallelGC -Xmx400m -Xms64m -Xrs -jar "C:\Datalogic\IMPACT\Applications\CPM\CPMRE.jar" -country CN VPM "C:\Datalogic\IMPACT\Applications\jre\bin\javaw.exe" -XX:+UseParallelGC -Xmx400m -Xms64m -Xrs -jar "C:\Datalogic\IMPACT\Applications\VPM\VPM.jar" -country CN Settings "C:\Datalogic\IMPACT\Applications\jre\bin\javaw.exe" -XX:+UseParallelGC -Xmx400m -Xms64m -Xrs -jar "C:\Datalogic\IMPACT\Applications\VPM\Settings.jar" 6-19 Datalogic Automation Inc. Disable moving and sizing the window Impact Reference Guide country CN Disable moving and sizing the window With this option, the program does not display the minimize, restore/down, or close buttons in the title bar. The "Exit" button is added so the program can be closed. Add the following option to the command line: -d Here are example command lines disabling the program window (the option is in bold): CPM "C:\Datalogic\IMPACT\Applications\jre\bin\javaw.exe" -XX:+UseParallelGC -Xmx400m -Xms64m -Xrs -jar "C:\Datalogic\IMPACT\Applications\CPM\CPM.jar" -d CPMRE "C:\Datalogic\IMPACT\Applications\jre\bin\javaw.exe" -XX:+UseParallelGC -Xmx400m -Xms64m -Xrs -jar "C:\Datalogic\IMPACT\Applications\CPM\CPMRE.jar" -d VPM "C:\Datalogic\IMPACT\Applications\jre\bin\javaw.exe" -XX:+UseParallelGC -Xmx400m -Xms64m -Xrs -jar "C:\Datalogic\IMPACT\Applications\VPM\VPM.jar" -d Settings "C:\Datalogic\IMPACT\Applications\jre\bin\javaw.exe" -XX:+UseParallelGC -Xmx400m -Xms64m -Xrs -jar "C:\Datalogic\IMPACT\Applications\VPM\Settings.jar" d Override the program’s default system language settings When this option is used, the program uses the translation file language setting specified in the command line instead of the default system setting. The language argument is one of the valid lower-case two-letter ISO Country codes as defined by ISO-639. For example, here is a list of the codes for a few languages. Language Code Language Code Language Code Language Code English en Chinese zh French fr German de Hindi hi Italian it Japanese ja Korean ko For more details about how to create and use a translation file, refer to the Datalogic publication "How to Use Impact Translations." Add the following option to the command line: -language Here are example command lines overriding the system language setting so the program uses French (the option is in bold): CPM "C:\Datalogic\IMPACT\Applications\jre\bin\javaw.exe" -XX:+UseParallelGC -Xmx400m -Xms64m -Xrs -jar "C:\Datalogic\IMPACT\Applications\CPM\CPM.jar" -language fr CPMRE "C:\Datalogic\IMPACT\Applications\jre\bin\javaw.exe" -XX:+UseParallelGC -Xmx400m -Xms64m -Xrs -jar "C:\Datalogic\IMPACT\Applications\CPM\CPMRE.jar" -language fr Datalogic Automation Inc. 6-20 Impact Reference Guide Display an image as the logo on the title bar VPM "C:\Datalogic\IMPACT\Applications\jre\bin\javaw.exe" -XX:+UseParallelGC -Xmx400m -Xms64m -Xrs -jar "C:\Datalogic\IMPACT\Applications\VPM\VPM.jar" -language fr Settings "C:\Datalogic\IMPACT\Applications\jre\bin\javaw.exe" -XX:+UseParallelGC -Xmx400m -Xms64m -Xrs -jar "C:\Datalogic\IMPACT\Applications\VPM\Settings.jar" language fr Display an image as the logo on the title bar This option displays an image file as a small icon just left of the title on the application title bar. This image is also displayed on the right end of the toolbar if the -banner option is not used. The image file must be type jpg, gif, or png and should be no more than 40 pixels high. If the image is not found in the designated folder, or no file name is specified, no image is displayed in the title or toolbar. IMPORTANT: File names are case sensitive. Add the following option to the command line: -logo "images/image name.ext" where the folder "images" contains "image name.ext." NOTE: The file path and name must be enclosed in quotes and include the file extension. There is a space between the option and the first quotation mark. Here are example command lines that display an image named "logo.png" located in a folder named "C:\Images" (the option is in bold): CPM "C:\Datalogic\IMPACT\Applications\jre\bin\javaw.exe" -XX:+UseParallelGC -Xmx400m -Xms64m -Xrs -jar "C:\Datalogic\IMPACT\Applications\CPM\CPM.jar" -logo "C:\Images\logo.png" CPMRE "C:\Datalogic\IMPACT\Applications\jre\bin\javaw.exe" -XX:+UseParallelGC -Xmx400m -Xms64m -Xrs -jar "C:\Datalogic\IMPACT\Applications\CPM\CPMRE.jar" -logo "C:\Images\logo.png" VPM "C:\Datalogic\IMPACT\Applications\jre\bin\javaw.exe" -XX:+UseParallelGC -Xmx400m -Xms64m -Xrs -jar "C:\Datalogic\IMPACT\Applications\VPM\VPM.jar" -logo "C:\Images\logo.png" Settings "C:\Datalogic\IMPACT\Applications\jre\bin\javaw.exe" -XX:+UseParallelGC -Xmx400m -Xms64m -Xrs -jar "C:\Datalogic\IMPACT\Applications\VPM\Settings.jar" logo "C:\Images\logo.png" Display an image as a banner in the program window This option displays an image file as a small icon on the right end of the toolbar, replacing the Datalogic logo. The image file must be type jpg, gif, or png and should be no more than 40 pixels high. If the image is not found in the designated folder, or no file name is specified, no image is displayed at the right end of the toolbar. IMPORTANT: File names are case sensitive. Add the following option to the command line: -banner "images/image name.ext" 6-21 Datalogic Automation Inc. Disable the ability to close the program Impact Reference Guide where the folder "images" contains the image to be displayed named "image name.ext." NOTE: The file path and name must be enclosed in quotes and include the file extension. There is a space between the option and the first quotation mark. Here are example command lines that display an image named "banner.png" located in a folder named "C:\Images" (the option is in bold): CPM "C:\Datalogic\IMPACT\Applications\jre\bin\javaw.exe" -XX:+UseParallelGC -Xmx400m -Xms64m -Xrs -jar "C:\Datalogic\IMPACT\Applications\CPM\CPM.jar" -banner "C:\Images\banner.png" CPMRE "C:\Datalogic\IMPACT\Applications\jre\bin\javaw.exe" -XX:+UseParallelGC -Xmx400m -Xms64m -Xrs -jar "C:\Datalogic\IMPACT\Applications\CPM\CPMRE.jar" -banner "C:\Images\banner.png" VPM "C:\Datalogic\IMPACT\Applications\jre\bin\javaw.exe" -XX:+UseParallelGC -Xmx400m -Xms64m -Xrs -jar "C:\Datalogic\IMPACT\Applications\VPM\VPM.jar" -banner "C:\Images\banner.png" Settings "C:\Datalogic\IMPACT\Applications\jre\bin\javaw.exe" -XX:+UseParallelGC -Xmx400m -Xms64m -Xrs -jar "C:\Datalogic\IMPACT\Applications\VPM\Settings.jar" banner "C:\Images\banner.png" Disable the ability to close the program When this option is used, the program does not display the Windows minimize, maximize/restore down, close or Exit buttons. The "Exit" button is not displayed in the title bar. The window cannot be sized or moved and the program cannot be closed from the program window. This option must be used with the -d option. -noexit -d Here are example command lines that disable the ability to close the program (the option is in bold): CPM "C:\Datalogic\IMPACT\Applications\jre\bin\javaw.exe" -XX:+UseParallelGC -Xmx400m -Xms64m -Xrs -jar "C:\Datalogic\IMPACT\Applications\CPM\CPM.jar" -noexit -d CPMRE "C:\Datalogic\IMPACT\Applications\jre\bin\javaw.exe" -XX:+UseParallelGC -Xmx400m -Xms64m -Xrs -jar "C:\Datalogic\IMPACT\Applications\CPM\CPMRE.jar" -noexit -d Disable the ability to stop the M-Series Device drivers This option affect the M-Series processor only. You must edit the command file that starts the device drivers to add this option. See “To edit the program command file” on page 6-22. Datalogic Automation Inc. 6-22 Impact Reference Guide Access a text file containing a list of command line options When this option is used, the Impact Device driver programs (IMPACTDevice.exe) do not display the Exit button. The program cannot be closed from the program window. To close the program you must use the Windows Task Manager. The switch is case sensitive and must NOT be preceded by a hyphen or dash. noExit To edit the program command file 1. Find the command file in the program’s installation folder. The default installation location is: C:\Datalogic\IMPACT\Applications\Device\IMPACTDevice.cmd 2. Open the file IMPACTDevice.cmd with a text editor. 3. In this file, locate this line: start /MIN ...\IMPACTDevice.exe 4. At the end of that line, add a space followed by the word “noExit” (case sensitive and NO hyphen). When you are done, the line should look like this: start /MIN ...\IMPACTDevice.exe noExit 5. When you have finished editing the command file, save and close the file. 6. The next time any of the device drivers start, the Exit button will not be displayed. Access a text file containing a list of command line options This option specifies that the program should read a text file that contains a list of command line options to use. The file should only contain valid program options, all other text is ignored. Do not include the actual command line in the file, just the option. IMPORTANT: File names are case sensitive. Add the following option to the command line: -optionfile "text folder\text file name.txt" where the folder "text folder" contains "file name.txt." NOTE: The file path and name must be enclosed in quotes and include the file extension. The path and file name are case sensitive. There is a space between the option and the first quotation mark. The options are easier to read if you list only one option per line in the text file. For example: -noexit -d -language fr -logo "C:\Images\logo.png" Here are example command lines that access the text file "options.txt" in the folder named "C:\text folder" (the option is in bold): CPM "C:\Datalogic\IMPACT\Applications\jre\bin\javaw.exe" -XX:+UseParallelGC -Xmx400m -Xms64m -Xrs -jar "C:\Datalogic\IMPACT\Applications\CPM\CPM.jar" -optionfile "C:\text folder\options.txt" 6-23 Datalogic Automation Inc. Load a control panel application when program starts Impact Reference Guide CPMRE "C:\Datalogic\IMPACT\Applications\jre\bin\javaw.exe" -XX:+UseParallelGC -Xmx400m -Xms64m -Xrs -jar "C:\Datalogic\IMPACT\Applications\CPM\CPMRE.jar" -optionfile "C:\text folder\options.txt" VPM "C:\Datalogic\IMPACT\Applications\jre\bin\javaw.exe" -XX:+UseParallelGC -Xmx400m -Xms64m -Xrs -jar "C:\Datalogic\IMPACT\Applications\VPM\VPM.jar" -optionfile "C:\text folder\options.txt" Settings "C:\Datalogic\IMPACT\Applications\jre\bin\javaw.exe" -XX:+UseParallelGC -Xmx400m -Xms64m -Xrs -jar "C:\Datalogic\IMPACT\Applications\VPM\Settings.jar" optionfile "C:\text folder\options.txt" Load a control panel application when program starts When this option is used, the specified control panel application is loaded and placed in run mode when the program starts. The window can be sized, moved, and closed. You cannot close the control panel application or open others. Add the following option to the command line: -p "control folder\control panel name.cp" where the folder "control folder" contains "control panel name.cp." NOTE: The application file path and name must be enclosed in quotes and include the "cp" extension. There is a space between the option and the first quotation mark. Here are example command lines that opens a control panel application named "inspect.cp" in the folder named "C:\control folder" (the option is in bold): CPM "C:\Datalogic\IMPACT\Applications\jre\bin\javaw.exe" -XX:+UseParallelGC -Xmx400m -Xms64m -Xrs -jar "C:\Datalogic\IMPACT\Applications\CPM\CPM.jar" -p "C:\control folder\inspect.cp" CPMRE "C:\Datalogic\IMPACT\Applications\jre\bin\javaw.exe" -XX:+UseParallelGC -Xmx400m -Xms64m -Xrs -jar "C:\Datalogic\IMPACT\Applications\CPM\CPMRE.jar" -p "C:\control folder\inspect.cp" Set the window's location and size When you use this option, the program sizes the window based on the command line option. The window can be sized, moved, and closed. You can close the control panel application or open others. Add the following option to the command line: -s x y width height where • "x" indicates the distance from the control panel's left edge to the screen's left edge • "y" indicates the distance from the control panel's top edge to the screen's top edge • "width" indicates the control panel's width • "height" indicates the control panel's height Datalogic Automation Inc. 6-24 Impact Reference Guide Run a Scriptor file All distances are in pixels. Invalid or missing values may place the control panel off screen. There is a space between each of the option values. This example command line opens a window and locates it on the screen at 0, 0 with a size of 500 by 500 pixels (the option is in bold): CPMRE "C:\Datalogic\IMPACT\Applications\jre\bin\javaw.exe" -XX:+UseParallelGC -Xmx400m -Xms64m -Xrs -jar "C:\Datalogic\IMPACT\Applications\CPM\CPMRE.jar" -s 0 0 500 500 Run a Scriptor file When this option is used, CPMRE runs a CPM Scriptor script file when it starts. You must also load the control panel application file that the script file references. IMPORTANT: File names are case sensitive. Add the following options to the command line: -scr "script path name\script file name.bsh" -p "cp path name\cp file name.cp" where "script path name" is the folder that contains the script file named "script file name.bsh" and "cp path name" is the folder that contains the control panel application file named "cp file name.cp." NOTE: The script file path and name must be enclosed in quotes and include the "bsh" extension. The path name is case sensitive. There is a space between the option and the first quotation mark. This example command line runs a script named "script.bsh" in the folder named "C:\script folder" and loads the application file named "inspect.cp" in the folder named "C:\control folder" (the option is in bold): CPMRE "C:\Datalogic\IMPACT\Applications\jre\bin\javaw.exe" -XX:+UseParallelGC -Xmx400m -Xms64m -Xrs -jar "C:\Datalogic\IMPACT\Applications\CPM\CPMRE.jar" -scr "C:\script folder\script.bsh" -p "C:\control folder\inspect.cp" NOTE: This command line may be too long to include in the shortcut. See “Access a text file containing a list of command line options” on page 6-22. Run a Scriptor file and display a control panel application Use this option to display a control panel application when a Scriptor script file starts and runs. IMPORTANT: File names are case sensitive. Add the following options to the command line: -v -scr "script path name\script file name.bsh" -p "cp path name\cp file name.cp" where "script path name" is the folder that contains the script file named "script file name.bsh" and "cp path name" is the folder that contains the control panel application file named "cp file name.cp." NOTE: The script file path and name must be enclosed in quotes and include the "bsh" extension. The path name is case sensitive. There is a space between the option and the first quotation mark. This example command line runs a script named "script.bsh" in the folder named "C:\script folder" and loads the application file named "inspect.cp" in the folder named "C:\control folder" (the option is in bold): CPMRE "C:\Datalogic\IMPACT\Applications\jre\bin\javaw.exe" -XX:+UseParallelGC -Xmx400m -Xms64m -Xrs -jar "C:\Datalogic\IMPACT\Applications\CPM\CPMRE.jar" -v scr "C:\script folder\script.bsh" -p "C:\control folder\inspect.cp" 6-25 Datalogic Automation Inc. Display an image at program start and in the About dialog Impact Reference Guide NOTE: This command line may be too long to include in the shortcut. See “Access a text file containing a list of command line options” on page 6-22. Display an image at program start and in the About dialog NOTE: The text for this option is different and it is placed within the command line, not at the end. This option displays the indicated image when the program starts and in the About dialog when you click the About icon in the toolbar. If no image file is specified, no image is displayed. IMPORTANT: File names are case sensitive. Add the following option in the command line: -splash "image path name\image file name.ext" where "image path name" is the folder that contains the image named "image file name.ext." The string must be enclosed in quotes and there is a colon (not a space) between the option and the first quotation mark. Here are example command lines containing the option. The image file is named "splashfile.png" and is in the folder named "C:\images" (the option is in bold): CPM "C:\Datalogic\IMPACT\Applications\jre\bin\javaw.exe" -splash:"c:\images\splashfile.png" -XX:+UseParallelGC -Xmx400m -Xms64m -Xrs -jar "C:\Datalogic\IMPACT\Applications\CPM\CPM.jar" CPMRE "C:\Datalogic\IMPACT\Applications\jre\bin\javaw.exe" -splash:"c:\images\splashfile.png" -XX:+UseParallelGC -Xmx400m -Xms64m -Xrs -jar "C:\Datalogic\IMPACT\Applications\CPM\CPMRE.jar" VPM "C:\Datalogic\IMPACT\Applications\jre\bin\javaw.exe" -splash:"c:\images\splashfile.png" -XX:+UseParallelGC -Xmx400m -Xms64m -Xrs -jar "C:\Datalogic\IMPACT\Applications\VPM\VPM.jar" Settings "C:\Datalogic\IMPACT\Applications\jre\bin\javaw.exe" -splash:"c:\images\splashfile.png" -XX:+UseParallelGC -Xmx400m -Xms64m -Xrs -jar "C:\Datalogic\IMPACT\Applications\VPM\Settings.jar" Display a string in the title bar and in the About dialog This option displays a string as the title in the About dialog and on the application title bar (instead of the default title). If the title option is specified without a string, no title is displayed. Add the following option to the command line: -title "the string to be displayed" The string must be enclosed in quotes and there is a space between the option and the first quotation mark. This example command line displays the string "The String" in the About dialog and in the title bar (the option is in bold): CPMRE "C:\Datalogic\IMPACT\Applications\jre\bin\javaw.exe" -XX:+UseParallelGC -Xmx400m -Xms64m -Xrs -jar "C:\Datalogic\IMPACT\Applications\CPM\CPMRE.jar" Datalogic Automation Inc. 6-26 Impact Reference Guide Set the amount of memory to be allocated -title "The String" Set the amount of memory to be allocated IMPORTANT NOTE: This option is placed within the command line, not at the end. This option already exists in the program command line. Change the existing value only, do not add a new value to the end of the command line. This option sets the amount of memory space to be allocated for the program to run. If the program exceeds its default allocated memory space, it will be terminated. This option must be set on all applicable program shortcuts used on your computer. The number following the -Xmx parameter in the command line sets the amount of memory to allocate. This number should not exceed the maximum recommended value which is calculated as 40% of the memory size of your computer, in megabytes (MB). For example, if your computer has 1 Gigabyte (1 GB) of memory, the maximum recommended value is 1,000,000,000 x .40 = 400,000,000 (400 MB). Change the following option in the command line, where nnn is the amount of memory to allocate (note the letter "m" at the end): -Xmxnnnm Here are example command lines that set the amount of memory allocated for each program to 400 MB (the option is in bold): CPM "C:\Datalogic\IMPACT\Applications\jre\bin\javaw.exe" -XX:+UseParallelGC -Xmx400m -Xms64m -Xrs -jar "C:\Datalogic\IMPACT\Applications\CPM\CPM.jar" CPMRE "C:\Datalogic\IMPACT\Applications\jre\bin\javaw.exe" -XX:+UseParallelGC -Xmx400m -Xms64m -Xrs -jar "C:\Datalogic\IMPACT\Applications\CPM\CPMRE.jar" VPM "C:\Datalogic\IMPACT\Applications\jre\bin\javaw.exe" -XX:+UseParallelGC -Xmx400m -Xms64m -Xrs -jar "C:\Datalogic\IMPACT\Applications\VPM\VPM.jar" Settings "C:\Datalogic\IMPACT\Applications\jre\bin\javaw.exe" -XX:+UseParallelGC -Xmx400m -Xms64m -Xrs -jar "C:\Datalogic\IMPACT\Applications\VPM\Settings.jar" 6-27 Datalogic Automation Inc. Modbus TCP/IP Client Tester Impact Reference Guide Modbus TCP/IP Client Tester The Modbus Client Tester is used to send function codes and data to the Modbus Server on the Impact device for testing. To launch the Modbus Client Tester 1. Start VPM 2. Select the Settings Tab - General - Diagnostics panel. 3. Click the Advanced button. 4. Select Modbus Client. 5. Click Launch Field or Button Purpose IP Address The IP address of the Impact device you want to test Lookup Click this to display the Impact device connect dialog Port The standard Modbus communication port is 502 Function Code The desired operation - read or write Start Address The starting register for the selected function (the first register is number zero) Count How many registers to read or write Send Click this to execute the function Registers The Modbus Server registers; For a write function, enter the value you want to send to the device. For a read function, this is the value read from the device Datalogic Automation Inc. 6-28 Impact Reference Guide TCP/IP Settings TCP/IP Settings This section describes different types of Impact device and PC connections and the TCP/IP settings for those connections. If you need help configuring the network or the client computer, you should seek professional advice. Network configuration is beyond the scope of this manual. Impact software TCP Ports Impact software uses an ephemeral port number to connect to Impact devices. Ephemeral ports are temporary ports assigned by the host PC’s operating system from a designated range of ports used for this purpose. When the connection between the PC and the device terminates, the ephemeral port is available for reuse, although usually the port number is not reused until the entire pool of ephemeral ports has been exhausted. This means that the PC will assign a different ephemeral port number for the new connection. Microsoft Windows uses the range of port numbers 1024 through 5000 for its ephemeral port range. The Impact device runs an HTTP server that always uses port 80. Impact software uses the following port numbers for communication. Local ports are on the host PC. Remote ports are on the Impact device. Impact ActiveX API • Discovery (finding Impact devices) Multicast UDP on address 239.255.255.250, port 3702 Replies received on local port 1024-5000 from remote port 49153-65534 • Normal transactions Local port 1024-5000, the ActiveX server always uses remote port 9977 (see “Enable OPC/ ActiveX Server” on page 2-9) • Events Received on local port 7835 from remote port 49153-65534 Impact software (VPM, CPM, CPMRE, CPMREApplets, and the Settings Program) • Impact Key License Local port 1947 is used on M-Series systems or other systems that have a Impact License Key installed. • Discovery (finding Impact devices) Multicast UDP on address 239.34.56.84, port 52315 Replies received on local port 52315 from remote port 52315 • Normal transactions Local port 1024-5000, the CORBA server always uses remote port 7994 Local port 49400+, used by the Send Message and Wait For Message tools to transfer image type data (the actual port number is 49400 + the tool message number) Local port 10012, used by the Send Message and Wait For Message tools to transfer non-image type data (UDP datagrams) • Events 6-29 Use the same local and remote port pair established for normal transactions Datalogic Automation Inc. HTTP Commands Impact Reference Guide HTTP Commands This section describes HTTP commands that can be used to send commands to a Datalogic vision device over a local area network. These commands can be sent to the vision device using a standard Internet browser. NOTE: All commands are case sensitive. To send commands to the camera 1. Start a web browser 2. In the browser's address field, type the camera’s IP Address followed by a forward slash. For example http://192.168.0.128/ 3. Type one of the following commands after the address HTTP Command What it does IsOnline Displays True if the camera is currently online Offline Puts the camera offline, if it is online status Displays the camera’s current status, including model number, software version, camera settings and other information. syslog Displays the most recent fifty entries from the System Log in reverse date order syslog/count=nnn Displays the most recent "nnn" entries from the System Log in reverse date order unlock Unlocks the camera if it is locked for editing Datalogic Automation Inc. 6-30 Impact Reference Guide PC to Device - Direct Connection PC to Device - Direct Connection Direct Connection PC 1 settings IP Address: 192.168.0.mmm Subnet: 255.255.255.0 Gateway: None Impact Device default settings IP Address: 192.168.0.128 Subnet: 255.255.255.0 Gateway: None The PC and Impact Device settings must be compatible: IP Address: AAA.BBB.CCC.nnn Subnet: 255.255.XXX.0 Gateway: AAA.BBB.CCC.nnn The first 3 fields of the IP address (AAA.BBB.CCC) must match exactly on both the PC and Impact Device. The last field 'nnn' must be unique and in the range of 1 to 254. The Subnet address on the PC and the Impact device must match exactly. The Gateway address is not used for direct connection and should be blank on both devices. 6-31 Datalogic Automation Inc. PC to Device - Switch Connection Impact Reference Guide PC to Device - Switch Connection Connection with switch No domain or network host 10/100 Ethernet switch PC 1 settings IP Address: 192.168.0.mmm Subnet: 255.255.255.0 Gateway: None Impact Device default settings PC 2 settings IP Address: 192.168.0.mmm Subnet: 255.255.255.0 Gateway: None IP Address: 192.168.0.128 Subnet: 255.255.255.0 Gateway: None The PC and Impact device settings must be compatible: IP Address: AAA.BBB.CCC.nnn Subnet: 255.255.XXX.0 Gateway: AAA.BBB.CCC.nnn The first 3 fields of the IP address (AAA.BBB.CCC) must match exactly on both the PC and Impact device. The last field 'nnn' must be unique and in the range of 1 to 254. The Subnet addresses on the PCs and the Impact devices must match exactly. The Gateway address is not used and should be blank on all devices. Datalogic Automation Inc. 6-32 Impact Reference Guide PC to Device - Router Connection PC to Device - Router Connection Connection with router Router with integral switch and DHCP PC 1 settings IP Address: 192.168.0.mmm Subnet: 255.255.255.0 Gateway: None Optional wireless connection Impact Device default settings IP Address: 192.168.0.128 Subnet: 255.255.255.0 Gateway: None 10/100 Ethernet connections PC 2 settings IP Address: 192.168.0.mmm Subnet: 255.255.255.0 Gateway: None The router is normally configured to assign TCP/IP settings automatically to all network devices. Configure the router to exclude a range of IP addresses from the DHCP server that is used by the Impact device(s). The device must be manually configured with unique IP data that is compatible with the router settings. IP Address: AAA.BBB.CCC.nnn Subnet: 255.255.XXX.0 Gateway: AAA.BBB.CCC.nnn The first 3 fields of the IP address (AAA.BBB.CCC) must match exactly on both the PC and Impact devices. The last field 'nnn' must be unique and in the range of 1 to 254. The Subnet must match exactly on the PCs and Impact devices. The Gateway address is not used for direct connection and should be blank on all devices. 6-33 Datalogic Automation Inc. PC to Device - Internet connection Impact Reference Guide PC to Device - Internet connection Server based network Internet access via a firewall and multiple subnets VPN Firewall/Router Smart Switch Subnet A = 192.168.xxx Gateway: 192.168.xxx.n Smart Switch Subnet B = 192.168.yyy Gateway: 192.168.yyy.m 10/100 Ethernet connections PC on Subnet A PC on Subnet B Impact Device on Subnet B IP Address: 192.168.yyy.mm1 Subnet: 255.255.254.0 Gateway: 192.168.yyy.m IP Address: 192.168.yyy.mm2 Subnet: 255.255.254.0 Gateway: 192.168.yyy.m See “Impact software TCP Ports” on page 628 for details on Impact Device ports used. IP Address: 192.168.xxx.nn1 Subnet: 255.255.254.0 Gateway: 192.168.xxx.n The two smart switches should be able to ping one another. For "discovery" to work, multicast must be enabled. It is disabled by default on most routers. Broadcasts are data packets sent to all nodes on a subnet and every node hears them. These broadcast packets can never cross routers. Multicast packets are special. They are only heard by nodes that are configured to hear them. Multicast receivers (nodes) 'tune in' to listen to specific multicast packets. This is similar to tuning to a radio station. Datalogic Automation Inc. 6-34 Impact Reference Guide How the Code Reader Tool Works How the Code Reader Tool Works This section explains some of the more specialized Code Reader tool functions and parameters, and provides some details about how the tool works. The tool reads the following types of 1D, 2D, and Postal symbols and provides 36 different outputs from the decoded symbols. 1D Codes Codabar Code 39 Code 39 Full ASCII Code 32 Code 93 Code 128 Code128 Composite EAN-8 EAN-8 Add On 2 EAN-8 Add On 5 EAN-13 EAN-13 Add On 2 EAN-13 Add On 5 GS1 128 GS1 Databar (RSS) GS1 Databar Composite GS1 Databar Stacked (RSS) GS1 Databar Stacked Composite GS1 Databar Limited (RSS) GS1 Databar Limited Composite GS1 Databar Expanded (RSS) GS1 Databar Expanded Composite GS1 Databar Expanded Stacked (RSS) GS1 Databar Expanded Stacked Composite Interleaved 2 of 5 (ITF) MSI Matrix 2 of 5 MicroPDF MicroPDF CCA Composite MicroPDF CCB Composite MicroPDF CCC Composite Pharmacode (one-track) PDF417 Standard 2 of 5 UPC-A UPC-A Add On 2 UPC-A Add On 5 UPC-E UPC-E Add On 2 UPC-E Add On 5 QR Codes MicroQR Aztec Maxicode Swedish Postal KIX Code Intelligent Mail Barcode Planet PostNet 2D Codes Datamatrix ECC200 GS1 Datamatrix ECC200 Postal Codes Australia Post Japan Post Royal Mail 4State Input Properties and Affected Code Types This table lists the interaction between the tool’s input properties and the different code types. If a property is not listed, it affects all code types. 6-35 Input Property Affected Code Types Image Mirroring 2D: Datamatrix, QR, MicroQR Postal: Australian Post Codabar, Code 39, Code 39 Full ASCII, Code 32, Code 93, Code 128, GS1 128, GS1 Databar, GS1 Databar Stacked, GS1 Databar Limited, GS1 Databar Expanded, GS1 Databar Expanded Stacked, Interleaved 2 of 5, Standard 2 of 5, MSI, Matrix 2 of 5, EAN/UPC, EAN/UPC Add On 2/5, Pharmacode (one-track), PDF417, MicroPDF, Composite Codes 1D Datamatrix ECC200, GS1 Datamatrix ECC200, QR Codes, Micro QR, Aztec, Maxicode 2D Postal Codes Postal Codes Postal Customer Field Decoding Postal (Australian Post) Datalogic Automation Inc. How the Code Reader Tool Works Impact Reference Guide Input Property Affected Code Types Postal Minimum Bar Count, Postal Maximum Bar Count, Postal Bar Edge Spacing, Postal Code Orientation Postal - Processing Mode Advanced (PMA) Code Quality Verification 1D: Code128, EAN128, Code39, Code93, Codabar, EAN/UPC, Interleaved 2 of 5 2D: Datamatrix ECC200 (PMA) 1D Advanced Box Improvement 1D: Interleaved 2 of 5, Code 39, Codabar, Code128, GS1-128, Code 93, EAN/UPC, Code 32,Matrix 2 of 5, Standard 2 of 5, MSI, PDF417 1D Expand UPC E0-E1 Symbols, 1D EAN/UPC Margin Size 1D Code: EAN UPC 1D Code Orientation, 1D Low Code Contrast, 1D Small Codes Improvement, 1D Code Aspect Ratio, 1D Minimum Code Height (pixels) 1D Codes (PMA) 1D Narrow Margins 1D: Code 128, EAN 128, Code 39, Interleaved 2 of 5, MSI, Code2 of 5 Standard, Code 2 of 5 Matrix, Codabar, Code 93 (PMA) 1D Start/Stop Characters TX 1D: Code 128, Ean128, Codabar (PMA) 1D Code128 Characters TX 1D: Code 128, Ean128 (PMA) 1D Code39 Full Ascii 1D: Code 39 (PMA) 1D Check Digit Status 1D: Code39, Interleaved2of5, MSI, Standard2of5, Matrix2of5, Codabar 1D MSI Check Digit Status 1D: MSI (PMA) 1D Check Digit Transmission 1D: Code 39, MSI, Standard2of5, Matrix2of5, Codabar (PMA) 1D I25 High Decoding Safety, 1D I25 Minimum number of characters 1D: Interleaved2of5 (PMA) 1D Pharmacode Output Format 1D Pharmacode Decoded Min value, 1D Pharmacode Decoded Max Value, 1D Pharmacode Colored Check bars, 1D Pharmacode MinBarCount, 1D Pharmacode MaxBarCount, 1D Pharmacode Code Orientation, 1D Pharmacode Reverse Decoding Pharmacode (PMA) 2D Code Color, 2D Code Contrast 2D Codes 2D DPM Decoding Method 2D: Datamatrix ECC200, QR Codes 2D Datamatrix, QR Module Size (pixels) 2D: Datamatrix ECC200, QR 2D Code Aligned, 2D Free Size, 2D Code Size 2D: Datamatrix ECC200 (PMA) Code Configuration Processing Modes Datalogic Automation Inc. 6-36 Impact Reference Guide How the Code Reader Tool Works The Processing Mode Input Property affects which Input Properties are used to configure each Code Type. For example, setting the Postal Minimum Bar Count will only have an effect when Processing Mode is set to Advanced. 6-37 Code Type Processing Mode Standard Settings Processing Mode Advanced Settings Australia Post Image Mirroring Customer Field Decoding Postal Codes Postal Minimum Bar Count Postal Maximum Bar Count Postal Bar Edge Spacing Postal Code Orientation Japan Post Royal Mail 4State Swedish Postal KIX Code Intelligent Mail Barcode Planet PostNet PostNet (+BB') Postal Codes Postal Minimum Bar Count Postal Maximum Bar Count Postal Bar Edge Spacing Postal Code Orientation Codabar Codabar Advanced Box Improvement 1D Code Orientation 1D Low Contrast 1D Small Codes Improvement 1D Minimum Code Height (pixels) 1D Narrow Margins 1D Start/Stop Characters Tx 1D Check Digit Status 1D Check Digit Transmission Code 39 Code 39 Advanced Box Improvement 1D Code Orientation 1D Low Contrast 1D Small Codes Improvement 1D Minimum Code Height (pixels) 1D Narrow Margins 1D Check Digit Status 1D Check Digit Transmission Code 39 Full ASCII Code 39 Full ASCII Advanced Box Improvement 1D Code Orientation 1D Low Contrast 1D Small Codes Improvement 1D Minimum Code Height (pixels) 1D Narrow Margins 1D Check Digit Status 1D Check Digit Transmission Code 32 Code 32 Advanced Box Improvement 1D Code Orientation 1D Low Contrast 1D Small Codes Improvement 1D Minimum Code Height (pixels) 1D Narrow Margins 1D Check Digit Status 1D Check Digit Transmission Code 93 Code 93 Advanced Box Improvement 1D Code Orientation 1D Low Contrast 1D Small Codes Improvement 1D Minimum Code Height (pixels) 1D Narrow Margins Datalogic Automation Inc. How the Code Reader Tool Works Impact Reference Guide Code Type Processing Mode Standard Settings Processing Mode Advanced Settings Code 128 Code 128 Advanced Box Improvement 1D Code Orientation 1D Low Contrast 1D Small Codes Improvement 1D Minimum Code Height (pixels) 1D Narrow Margins 1D Start/Stop Characters Tx 1D Code128 Characters Tx GS1 128 GS1 128 Advanced Box Improvement 1D Code Orientation 1D Low Contrast 1D Small Codes Improvement 1D Minimum Code Height (pixels) 1D Narrow Margins 1D Start/Stop Characters Tx 1D Code128 Characters Tx Code 128 Composite Code 128 Composite Codes Micro PDF Advanced Box Improvement 1D Code Orientation 1D Low Contrast 1D Small Codes Improvement 1D Minimum Code Height (pixels) 1D Narrow Margins 1D Start/Stop Characters Tx 1D Code128 Characters Tx GS1 Databar GS1 Databar Composite Codes Micro PDF 1D Code Orientation 1D Code Orientation 1D Low Contrast 1D Small Codes Improvement 1D Minimum Code Height (pixels) GS1 Databar Stacked GS1 Databar Stacked 1D Code Orientation 1D Low Contrast 1D Small Codes Improvement 1D Minimum Code Height (pixels) GS1 Databar Stacked Composite GS1 Databar Stacked Composite Codes Micro PDF 1D Code Orientation 1D Low Contrast 1D Small Codes Improvement 1D Minimum Code Height (pixels) GS1 Databar LImited GS1 Databar Limited 1D Code Orientation 1D Low Contrast 1D Small Codes Improvement 1D Minimum Code Height (pixels) GS1 Databar Limited Composite GS1 Databar Limited Composite Codes Micro PDF 1D Code Orientation 1D Low Contrast 1D Small Codes Improvement 1D Minimum Code Height (pixels) GS1 Databar Expanded GS1 Databar Expanded 1D Code Orientation 1D Low Contrast 1D Small Codes Improvement 1D Minimum Code Height (pixels) GS1 Databar Expanded Composite GS1 Databar Expanded Composite Codes Micro PDF 1D Code Orientation 1D Low Contrast 1D Small Codes Improvement 1D Minimum Code Height (pixels) GS1 Databar Expanded Stacked GS1 Databar Expanded Stacked 1D Code Orientation 1D Low Contrast 1D Small Codes Improvement 1D Minimum Code Height (pixels) Datalogic Automation Inc. 6-38 Impact Reference Guide 6-39 How the Code Reader Tool Works Code Type Processing Mode Standard Settings Processing Mode Advanced Settings GS1 Databar Expanded Stacked Composite GS1 Databar Expanded Stacked Composite Codes Micro PDF 1D Code Orientation 1D Low Contrast 1D Small Codes Improvement 1D Minimum Code Height (pixels) Interleaved 2 of 5 (ITF) Interleaved 2 of 5 (ITF) Advanced Box Improvement 1D Code Orientation 1D Low Contrast 1D Small Codes Improvement 1D Minimum Code Height (pixels) 1D Narrow Margins 1D Check Digit Status 1D I25 Minimum Number of Characters Standard 2 of 5 Standard 2 of 5 Advanced Box Improvement 1D Code Orientation 1D Low Contrast 1D Small Codes Improvement 1D Minimum Code Height (pixels) 1D Narrow Margins 1D Check Digit Status 1D Check Digit Transmission MSI MSI Advanced Box Improvement 1D Code Orientation 1D Low Contrast 1D Small Codes Improvement 1D Minimum Code Height (pixels) 1D Narrow Margins 1D Check Digit Status 1D MSI Check Digit Status 1D Check Digit Transmission Matrix 2 of 5 Matrix 2 of 5 Advanced Box Improvement 1D Code Orientation 1D Low Contrast 1D Small Codes Improvement 1D Minimum Code Height (pixels) 1D Narrow Margins 1D Check Digit Status 1D Check Digit Transmission EAN-8 EAN-13 UPC-A EAN/UPC 1D EAN/UPC Margin Size Advanced Box Improvement 1D Code orientation 1D Low Contrast 1D Small Codes Improvement 1D Minimum Code Height (pixels) EAN-8 Add On 2 EAN-8 Add On 5 EAN-13 Add On 2 EAN-13 Add On 5 UPC-A Add On 2 UPC-A Add On 5 EAN/UPC Add On 2/5 1D EAN/UPC Margin Size Advanced Box Improvement 1D Code orientation 1D Low Contrast 1D Small Codes Improvement 1D Minimum Code Height (pixels) UPC-E EAN/UPC 1D EAN/UPC Margin Size Advanced Box Improvement 1D Code orientation 1D Expand UPC E0-E1 Symbols 1D Low Contrast 1D Small Codes Improvement 1D Minimum Code Height (pixels) UPC-E Add On 2 UPC-E Add On 5 EAN/UPC Add On 2/5 1D EAN/UPC Margin Size Advanced Box Improvement 1D Code orientation 1D Expand UPC E0-E1 Symbols 1D Low Contrast 1D Small Codes Improvement 1D Minimum Code Height (pixels) Datalogic Automation Inc. How the Code Reader Tool Works Impact Reference Guide Code Type Processing Mode Standard Settings Processing Mode Advanced Settings Pharmacode (one-track) N/A Pharmacode (one-track) 1D Pharmacode Output Format 1D Pharmacode Min Bar Count 1D Pharmacode Max Bar Count 1D Pharmacode Colored Bars Check 1D Pharmacode Decoded Min Value 1D Pharmacode Decoded Max Value 1D Pharmacode Code Orientation 1D Pharmacode Reverse Decoding PDF417 PDF417 Advanced Box Improvement 1D Code orientation 1D Low Contrast 1D Small Codes Improvement 1D Minimum Code Height (pixels) MicroPDF MicroPDF 1D Code orientation 1D Low Contrast 1D Small Codes Improvement 1D Minimum Code Height (pixels) MicroPDF CCA MicroPDF CCB MicroPDF CCC Composite MicroPDF Composite Codes Code 128 GS1 Databar 1D Low Contrast 1D Small Codes Improvement 1D Minimum Code Height (pixels) Datamatrix ECC200, GS1 Datamatrix ECC200 Datamatrix ECC200, GS1 Datamatrix ECC200 Image Mirroring 2D Code Color 2D Code Contrast 2D DPM Decoding Method 2D Code Size 2D DPM Decoding Method 2D Datamatrix, QR Module Size (pixels) 2D Code Aligned QR Codes QR Codes Image Mirroring 2D Code Color 2D Code Contrast 2D Datamatrix, QR Module Size (pixels) Micro QR Micro QR 2D Code Color 2D Code Contrast Aztec Aztec 2D Code Color 2D Code Contrast Maxicode Maxicode 2D Code Color 2D Code Contrast Code Quality Grades Datalogic Automation Inc. 6-40 Impact Reference Guide How the Code Reader Tool Works If the Code Quality Verification input property is True during Training, code quality grades are generated for each found code, where applicable. The grades appear on their respective outputs and on the Setup Grades panel. This table lists the different code types and the possible grades that they can generate. Name Possible Values Code Types Overall Grade A/B/C/D/F 1D: Code128, Ean128, Code39, Code93, Codabar, EAN/UPC, Interleaved2of5 2D: Datamatrix ISO/IEC 15416 Decode Grade A/F 1D: Code128, Ean128, Code39, Code93, Codabar, EAN/UPC, Interleaved2of5 ISO/IEC 15416 Symbol Contrast Grade A/B/C/D/F 1D: Code128, Ean128, Code39, Code93, Codabar, EAN/UPC, Interleaved2of5 ISO/IEC 15416 Minimum Reflectance Grade A/F 1D: Code128, Ean128, Code39, Code93, Codabar, EAN/UPC, Interleaved2of5 ISO/IEC 15416 Minimum Edge Contrast Grade A/F 1D: Code128, Ean128, Code39, Code93, Codabar, EAN/UPC, Interleaved2of5 ISO/IEC 15416 Modulation Grade, ISO/ IEC 15416 Defects Grade, ISO/IEC 15416 Decodability Grade A/B/C/D/F 1D: Code128, Ean128, Code39, Code93, Codabar, EAN/UPC, Interleaved2of5 AIM DPM Decode Grade A/F 2D Datamatrix AIM DPM Cell Contrast Grade, AIM DPM Unused Error Correction Grade, AIM DPM Axial Non Uniformity Grade, AIM DPM Fixed Pattern Damage Grade, AIM DPM GRID Non Uniformity Grade, AIM DPM Cell Modulation Grade A/B/C/D/F 2D Datamatrix AIM DPM Min Reflectance Grade A/F 2D Datamatrix ISO/IEC 15416 1D STANDARD The ISO-IEC 15416 Standard specifies the methodologies for the measurement of specific attributes of linear bar code symbols, and methods for evaluating and grading these measurements and deriving an overall assessment of symbol quality. The ISO/IEC 15416 Verification applies only to the following 1D Codes: Code128, Ean128, Code39, Code93, Codabar, EAN/UPC, Interleaved2of5. 6-41 Datalogic Automation Inc. How the Code Reader Tool Works Impact Reference Guide Bar code symbol quality assessment is based on an analysis of the Scan Reflectance profiles. The scan reflectance profile is a record of the Reflectance values measured on a single line across the entire width of the barcode. Symbol Quality grading is used to derive a relative measure of symbol quality under the measurement conditions used. Each scan reflectance profile is analyzed and a grade on a descending scale of integers from four to zero is allocated to each of the parameters evaluated. The Scan Reflectance Profile Grade is the lowest grade of the following: Decode Datalogic Automation Inc. 6-42 Impact Reference Guide How the Code Reader Tool Works Symbol Contrast (SC) Minimum Reflectance (Rmin) Minimum Edge Contrast (ECmin) Modulation (MOD) Defects Decodability (V) The Overall Symbol grade is calculated using the mean of the ten scan grades. AIM DPM QUALITY GUIDELINE The AIM DPM Quality Guideline is applicable to the symbol quality assessment of direct parts marking performed in using two-dimensional bar code symbols. It defines modifications to the measurement and grading of several symbol quality parameters. The marking processes covered by this guideline are as follows: Dot Peening, Ink Jet, Laser Etching and Electrochemical Etching. Each quality parameter is measured and a grade on a descending scale of integers from 4 to 0 is allocated to it. The grade 4 (A) represents the highest quality, while the grade 0 (F) represents failure. The Overall symbol grade is the lowest grade achieved for the following seven parameters: Decode Cell Contrast (CC) Cell Modulation (CM) Fixed Pattern Damage Axial Non-Uniformity (ANU) Grid Non-Uniformity (GNU) Minimum 6-43 Reflectance (MR) Datalogic Automation Inc. Troubleshooting Impact Reference Guide Troubleshooting Issue: Bad Image Event A Bad Image Event generates a System Log entry with details of the detected error. It also generates a Bad Image Event Trigger (see “Trigger Event Types” on page 3-35). Things to check • Buffer Overrun – This results from triggering the camera so fast that images are acquired more quickly than the task can process them. That is, the task processing time is consistently longer than the time between camera triggers. This situation will eventually cause the camera to run out of image buffers. Slow down the triggering rate Decrease task execution time by optimizing the inspection • Trigger Overrun – This results from triggering the camera to acquire an image while it is still in the process of acquiring the previous image. This can be the result of a “bouncy” or noisy trigger signal. Use a cleaner trigger signal source Adjust the Input Debounce time. See “Input Debounce” on page 2-8. • Bad cabling or interference – If the DSL cable is bad or there is Electromagnetic Interference (EMI) coupling with the DSL cable, multiple camera triggers can be generated or the acquired image can become corrupted. Replace the DSL cable Remove the EMI source Be sure all electrical grounds are securely connected • Noisy power – A noisy power supply to the camera could generate extra triggers or degrade the DSL connection. Replace the power supply Be sure all electrical grounds are securely connected Issue: System Overrun A System Log entry "System overrun: out of image buffers" is displayed. Things to check • This results from images occupying multiple image buffers and not releasing them. The inspection task may contain image processing tools that do not process the current image. If the task branches around image processing tools, the tools that processed the previous image, but do not process the current image, will continue to reference the previous image and keep its buffer occupied. If this happens for many tools, i.e. holding references to several previous images because there are tools that have not run for several triggers, several buffers can remain occupied. Issue: The Image Display in VPM does not refresh When the system is online and receiving triggers, the image display will freeze and the current images are not displayed. Things to check • This results from triggering the camera so fast that images are acquired more quickly than they can be displayed. That is, the task processing time is consistently longer than the time between camera triggers. Datalogic Automation Inc. 6-44 Impact Reference Guide Troubleshooting Slow down the triggering rate Decrease task execution time by optimizing the inspection Issue: Need to Back Up All M-Series Settings, Configuration Files, and Programs All the settings and program files need to be saved or copied from one M-Series processor to another. Things to check • To back up and copy settings, configuration files, and programs: 1. On the M-Series processor hard drive, find the directories C:\installdirectory\IMPACT\Applications\Device\IMPACTDevice# (where "installdirectory" is the default install location and "IMPACTDevice#" is the number of the camera you want to back up) 2. Copy each of the desired directories to the back up device. Each directory contains the information for a specific camera. 3. If you want to duplicate the settings to a different M-Series processor, copy each of the directories from the back up device to the appropriate location (in step 1) on the new processor. Issue: No Image No image appears in the image window when you click the Snap, Live, or Trigger buttons in VPM. Things to check • File Camera is selected and no images are loaded In VPM, be sure the File Camera is selected. Click the File/Camera button on the Design tab. Be sure that image file names appear in the File Camera Images list. (See “Camera Setup Tab” on page 2-17) IMPORTANT: File names are case sensitive. • The camera or ethernet connection is bad Check the camera cable connection on the C-Series Impact device Check the Ethernet connection on the A and T-Series cameras • The camera software settings are adjusted incorrectly, the camera f-stop is too low, or the lighting is too dim. See “Camera Setup Tab” on page 2-17 to adjust camera software settings. Adjust the camera and/or lighting. Issue: Buffers Have Not Been Created When you maximize CPM or VPM the following error is displayed: java.lang.IllegalStateException: Buffers have not been created Things to check • If you are using dual monitors on your PC, and you run VPM or CPM on a remote PC (using Windows Remote Desktop Connection or other remote control program), this error may occur when you maximize VPM or CPM again on the main PC. Issue: Connection Problem Dialog There is a "Connection re-established by client after error" message in the System Log. A "Connection Problem" or "Connection Restored" dialog is displayed. 6-45 Datalogic Automation Inc. Troubleshooting Impact Reference Guide When communication with a device is lost or temporarily interrupted, the connected program regularly tries to re-establish communication. During this attempt, this dialog is displayed. If you click Cancel, the program will stop trying to re-establish communication. When communication with the device is restored, this dialog is displayed: Things to check • The network connection to the device is bad. Power to the device has been turned off. Check the network cable and connection Check power to the device Issue: Locked for Editing A dialog is displayed indicating "This Device is in Use." If you try to connect to a device and this dialog is displayed, it means that a VPM program is currently connected to the device and editing files (WORKSTATION2 is the network name of the computer running the currently connected VPM program). When you click OK, the connection will be completed and you will be able to read, but not edit, property values. Things to check • Someone may be connected to the device for editing Disconnect, disconnect or stop the other VPM program, then reconnect. Issue: Different Versions A dialog is displayed indicating that the Impact device and software interface are different versions. Datalogic Automation Inc. 6-46 Impact Reference Guide Troubleshooting If you try to connect to a device that has an Impact software version different from the PC, this dialog is displayed. You should click No to abandon the attempted connection. If you click Yes, the connection is completed, but you should not try to edit any vision programs on the device or change any device settings. If you do, you may corrupt the vision program files on the device or put the device into an undesirable state of operation. Things to check • The Impact device and PC Impact software versions are different Install the appropriate version of software on either the device or PC Issue: Could Not Locate Device A dialog is displayed indicating that the Impact device could not be located. When you try to connect to an Impact device, this dialog is displayed. Ordinarily the device responds immediately and the connection is completed. If the device does not respond, the dialog is displayed for approximately twenty seconds. To cancel the connection attempt, click the Cancel button. If the device does not respond during the time-out period, and you do not cancel the connection attempt, this dialog is displayed. Click OK to close the dialog. NOTE: In the case of a CPM control panel application with multiple Connector controls, the sequence of dialogs is repeated for each connection attempt. Things to check • The Impact device is not connected to the network 6-47 Datalogic Automation Inc. Troubleshooting Impact Reference Guide Connect the device • The Impact device is powered off Turn on the device’s power • The IP Address is incorrect Enter the correct IP Address Issue: ImpactSendMessage Tool error in System Log The message "ImpactSendMessageTool::Run - Failure, cannot send Image data type on this platform" is in the System Log. Things to check • A vision program file containing Send/Wait tools using the Image data type has been loaded onto a system other than an M-Series processor. The tools will fail to run, and the error is entered into the system log. Load the file onto an M-Series processor. Issue: Error Registering Online Callback An error message is displayed indicating an “Error registering online callback" when you try to connect to an Impact device. Things to check • Restrictive settings in antivirus or anti-malware software on the PC can block communication ports that Impact software uses. Some antivirus programs interpret normal communications as a computer virus. Install Impact software release 8.3.0 or greater Adjust the antivirus or anti-malware software settings so they don’t block normal communications. See “Impact software TCP Ports” on page 6-28 for more details. Issue: The device does not appear in the device list When you try to connect or install to an Impact device, the name and IP Address of the device do not appear in the list. There are several possible causes for this issue. Things to check • There is no power to the Impact device. Check the power cable and be sure the wires to the power connector are secure Be sure the device power supply is working • There is no power to the switches used for connecting the PC to the device. Connect the power cable to the switches Plug in the switch power supply • An Ethernet cable is disconnected or faulty Datalogic Automation Inc. 6-48 Impact Reference Guide Troubleshooting Reconnect the cable between the PC and/or switch and the device Check the device’s Ethernet status light, it should be on steady, not blinking • The IP addresses and/or IP masks for the PC and Impact device are incompatible Change the IP address or IP mask on the PC or device to be compatible (see “TCP/IP Settings” on page 6-28 and “IP Address Configuration” on page 1-3) • The device does not respond to a "ping" from the PC Check power to the device Check the cable connections Temporarily connect a different device to the same cable and try the "ping" again • Firewall exceptions for the Impact Java bin directory and the emulator directory are not defined Define the exceptions as described in the Configure PC Firewall section of the Readme file • The device or the PC has an older version of Impact software installed Install the most recent version (8.3.0 or greater) • When antivirus software and the firewall on the PC are temporarily disabled, the device appears in the device connection list Adjust the firewall or antivirus software settings to allow the Impact device ports to be used (see “Impact software TCP Ports” on page 6-28) Please note that Datalogic cannot guarantee the performance of M-Series systems which have additional software installed on them, including, but not limited to, anti-virus and firewall software. Datalogic recommends that M-Series systems remain disconnected from networks that access the Internet in order to minimize security risks. Datalogic will attempt to support systems with anti-virus software installed, but we cannot guarantee system performance. Issue: Message is No Camera Connected The message "No Camera Connected" is displayed. Things to check • The camera is not an Impact or a Datalogic-supported third-party camera. When you look at the system log you will see one of these entries: "GigE Camera: Can not connect to camera. It is not a Datalogic camera" or "GigE Camera: Can not connect to un