1
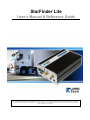
StarFinder Lite
User’s Manual & Reference Guide
Revision 1 – 2009
©1999-2008 by Laipac Technology, Inc. All rights reserved – The Specifications and information regarding the products in this manual are subjected to change without
notice. All statements, information, and recommendations in this manual are believed to be accurate but are represented without warranty of any kind, express or implied,
users must take full responsibility for their applications of any Products - Reproduction of the contents of this manual, in whole or in part, without written permission of
Laipac Technology, Inc. is prohibited.
Laipac Technology Inc.
StarFinder Lite User’s Manual & Reference Guide
Federal Communications Commission (FCC) Statement
This equipment has been tested and found to comply with the limits for a Class B digital device,
pursuant to part 15 of the FCC rules. These limits are designed to provide reasonable protection
against harmful interference in a residential installation. This equipment generates, uses, and
can radiate radio frequency energy and, if not installed and used in accordance with the
instructions, may cause harmful interference to radio communications. However, there is no
guarantee that interference will not occur in a particular installation. If this equipment does
cause harmful interference to radio or television reception, which can be determined by turning
the equipment off and on, the user is encouraged to try to correct the interference by one or
more of the following measures:
-Reorient or relocate the receiving antenna.
-Increase the separation between the equipment and receiver.
-Consult the dealer or an experienced installer for help.
You are cautioned that changes or modifications not expressly approved by the party
responsible for compliance could void your authority to operate the equipment.
© 1999-2008 by Laipac Technology Inc. All Rights Reserved.
Page 2
Laipac Technology Inc.
StarFinder Lite User’s Manual & Reference Guide
Table of Contents
1
INTRODUCTION
5
2
FEATURES
6
3
INITIAL SETUP
7
3.1
What you will need
7
3.2
Setup Summary
8
3.3
Installing the StarFinder Lite Software
8
3.4
Using Your StarFinder Lite
11
3.4.1
For The First Time
11
3.4.2
Basic Configuration
13
4
ADVANCED CONFIGURATION AND FEATURES
18
4.1
System Settings
12
4.2
Input / Output Settings
12
4.3
Application Settings
12
5
UPDATING THE FIRMWARE
5
HARDWARE DETAILS & LAYOUT……………….......12
5.1
12
Specifications…………………………………………………….14
5.1.1 GPS Engine Specs…………………………………………….…………..….14
5.1.2 GSM Modem Specs…………………………………………………………..14
5.1.3 GPS Antenna Specs…………………………………………………………..15
5.1.4 GSM Antenna Specs………………………………………………………….15
© 1999-2008 by Laipac Technology Inc. All Rights Reserved.
Page 3
Laipac Technology Inc.
StarFinder Lite User’s Manual & Reference Guide
5.1.5 Power Connector……………………………………………………………..15
5.1.6 Digital I/O
5.1.6 Optically Isolated Inputs……………………………………………………16
5.1.7 Analog Port……………………………………………………………………..16
5.1.8 Optically Isolated Outputs……………………………………………………..17
6
OPERATION………………………………………………..17
6.1
LED Operation…………………………………………………....17
6.2
Position Reporting by Event……………………………………...18
6.3
Position Reporting by Request…………………………………....19
6.4
Data Logging……………………….……………………………..19
6.5
Serial Port………………………………………………………....19
7
AVAILABLE OPTIONS…………………………………...19
7.1
Battery Backup………………………………………………........20
7.2
Speaker/Microphone……………………………………………...20
7.3
RF Panic Option..............................................................................20
© 1999-2008 by Laipac Technology Inc. All Rights Reserved.
Page 4
Laipac Technology Inc.
1
StarFinder Lite User’s Manual & Reference Guide
INTRODUCTION
The Starfinder Lite is a robust platform designed for remote vehicle tracking and security. The
Starfinder combines both GSM/SMS and GPRS (Global System for Mobile Communications/
Short Messaging Service and General Packet Radio Service) communications with ultra-sensitive
GPS technology to provide a rugged yet precise and reliable tracking platform. The Starfinder Lite
can be used to report positions or events in real-time, as well as log positions for local or remote
downloading. The Starfinder Lite comes standard with four optical inputs for connecting to alarm
systems or other sensors, one analog inputs, and three output relays for ignition disabling and
remote door unlocking. A backup battery is also included.
Each Starfinder Lite can be programmed with a unique device ID and can send data to any static
or dynamic IP address or SMS base station. Configuration of the unit can be done locally, via the
Starfinder Lite configuration utility in Windows™, or over the air via GPRS or SMS. We
currently offer our web-based tracking application www.LocationNow.com for tracking and fleet
management. For custom applications, we can provide our ADK kit with confidential protocol to
software developers for platform integration.
© 1999-2008 by Laipac Technology Inc. All Rights Reserved.
Page 5
Laipac Technology Inc.
2
StarFinder Lite User’s Manual & Reference Guide
FEATURES
•
Worldwide GSM/GPRS Quad band 850/900/1800/1900MHz
•
Multi-mode ready for SMS only, GPRS only or SMS + GPRS
•
CDMA model coming by Q4/2009
•
High Sensitivity GPS Receiver of 20 Ch.
•
GPS Accuracy 3 – 5 m
•
Dimension 9.7 x 5.9 x 2.6 cm
•
Built in jacks for SPK and MIC
•
Panic button and Dial button ready
•
Supply voltage range: 9 to 48VDC
•
Internal Li-Ion backup battery able to provide approximately 10h life from a full charge
•
Low operating power consumption (less than 1W after battery is charged)
•
Operation Temperature -30C to 85C
•
USB Port for configuration
•
Compatible with Mobile Data Terminal
•
4 Optically Isolated digital inputs
•
3 Optically Isolated digital outputs
•
1 Analog input available
•
99 Internal Geo-Fence capability with in/out of fence alert ( easily configurable through
Laipac Utility SW )
•
Data logger capability built in with 15,000 positions memory to record time stamp, speed,
location, and event state.
•
Smart logger capability built in with 600 positions memory to record time stamp, speed,
location, and event state.
•
3 Axial Motion G-Sensor to report impact, accident, crash or towing event.
•
Real time dynamic position report based on time interval or distance traveled
•
Mileage report and over-speed alert
•
3 Emergency call numbers with fail over capability
•
Firmware update through internet or through air
•
WAAS / EGNOS available
•
Power-saving options available
•
GSM fail safes available
© 1999-2008 by Laipac Technology Inc. All Rights Reserved.
Page 6
Laipac Technology Inc.
•
3
StarFinder Lite User’s Manual & Reference Guide
INITIAL SETUP
This section will help you setup and configure your Starfinder Lite GPRS tracking device.
3.1
What you will need
To begin your evaluation, you will need the following:
•
Starfinder Lite
•
Power and I/O harness cables complete with Voice and Panic buttons
•
GSM patch antenna (3 meters cable length)
•
GPS magnet mount antenna (5 meters cable length)
•
GPRS data enabled SIM card with known APN settings (2G and TDMA compliant)*
•
Your Identity Leaflet provided in the Evaluation Kit*
•
7-38V DC power supply
•
USB A to USB Mini B cable
•
PC with Windows XP™ or later Microsoft Operating System
*GPRS operation assumed
© 1999-2008 by Laipac Technology Inc. All Rights Reserved.
Page 7
Laipac Technology Inc.
3.2
StarFinder Lite User’s Manual & Reference Guide
Setup Summary
The setup summary is an outline of what must be accomplished in order to operate the device.
Detailed descriptions of these steps will be listed in the next sections.
3.3
1.
Insert the SIM card into the SIM Card Tray on the front of the unit
2.
Connect the GPS and GSM antennas
3.
Install the Starfinder Lite software and configuration utility
4.
Power the Starfinder Lite
5.
Connect the Starfinder Lite to the computer using the USB cable
6.
Press the reset button and open the configuration utility
7.
Configure the parameters and save the settings
Installing the Starfinder Lite Software
The first step in installing the Starfinder Lite software is to transfer the SF-Lite Exec.zip file onto
your computer.
After transferring the file over to your computer, you must extract or unzip the data to any
preferable location on your computer.
© 1999-2008 by Laipac Technology Inc. All Rights Reserved.
Page 8
Laipac Technology Inc.
StarFinder Lite User’s Manual & Reference Guide
Once you open up the file folder named SF-Lite Exec on your computer, locate the INSTALL
DRIVER.bat file and run it.
Note: This is a small program which will automatically install the virtual COM port necessary for
your Starfinder Lite to interface with the configuration utility.
© 1999-2008 by Laipac Technology Inc. All Rights Reserved.
Page 9
Laipac Technology Inc.
StarFinder Lite User’s Manual & Reference Guide
With the completion of the previous step, the configuration utility can be located and used. Once
you are able to open the Starfinder Lite configuration utility you may move on to the next section,
Configuring Your StarFinder Lite.
© 1999-2008 by Laipac Technology Inc. All Rights Reserved.
Page 10
Laipac Technology Inc.
3.4
StarFinder Lite User’s Manual & Reference Guide
Using Your StarFinder Lite
3.4.1 For the First Time
The first time that you connect your StarFinder Lite to your PC, Windows will call the Found
New Hardware Wizard. This will install the USB drivers needed to connect your StarFinder Lite
with your PC.
Allow Windows find and install the driver automatically.
© 1999-2008 by Laipac Technology Inc. All Rights Reserved.
Page 11
Laipac Technology Inc.
StarFinder Lite User’s Manual & Reference Guide
If the following message is displayed, click “Continue Anyway” to install the drivers. Note: For
Vista users, this message will appear differently but will have the same meaning.
Once the automatic driver installation has completed, please press Finish and then continue to the
Basic Configuration section to set up your StarFinder Lite.
© 1999-2008 by Laipac Technology Inc. All Rights Reserved.
Page 12
Laipac Technology Inc.
StarFinder Lite User’s Manual & Reference Guide
3.4.2 Basic Configuration
With the necessary files installed and unpacked, you can now set up the device for use. First, open
the StarFinder Lite Utility and click on Configuration. Next, supply power to the device; if it is
charged, the unit will be able to run off of its internal battery. Before you connect the device
with the computer via USB you must press and release the Reset button, and within five (5)
seconds of Reset then insert the USB cable. (You may have one end of the cable connected
beforehand.) You will know that the device is reset when you’ve pressed the button and the GPS
and GSM lights have shut off.
If you do this correctly then a window will come up in the corner of your screen saying “Found a
new device” followed by “Open COM#” otherwise you will get an alert from Windows saying
USB Device Not Recognized and you must try to reset and connect again.
or
With the device connected to the Utility you may now configure it for your account settings and
usage preferences. The first configuration page configures your device to work with your
LocationNow account for tracking.
© 1999-2008 by Laipac Technology Inc. All Rights Reserved.
Page 13
Laipac Technology Inc.
StarFinder Lite User’s Manual & Reference Guide
Device ID:
Specific unit identifier that identifies your device for online tracking. You
can locate the Device ID on your Identity Leaflet or more accurately in your
user account on the website www.LocationNow.com.
Password:
Is used to protect the Starfinder Lite from other people affecting its
operation with SMS commands. You can locate the Password on your
Identity Leaflet.
GSM Band:
This is for setting a frequency that your GSM provider network operates at.
The North American network bands are 850/1900 and the European network
bands are 900/1800. If you are unsure what frequency your carrier operates
at, please contact them for the correct setting.
SIM PIN Number:
If your SIM card is password protected, Enable this option and input the
PIN code. The PIN code tells the Starfinder Lite to use the user defined PIN
code when communicating with GSM.
Time Zone:
Use this to select your time zone so that the device knows your local time.
To progress to the next set of configuration options click on the word “Services”. The “Services”
option list defines what services and operating mode your StarFinder Lite will be using.
Change this page
© 1999-2008 by Laipac Technology Inc. All Rights Reserved.
Page 14
Laipac Technology Inc.
StarFinder Lite User’s Manual & Reference Guide
Note: The settings in this image are automatically set by default to use GPRS with out voice.
If you are using GPRS only, you may skip this step.
Wireless Data Plan This section governs the default modem mode connection settings or what
the unit will connect to first.
GPRS:
If you are using LocationNow tracking services, this must be enabled.
GPRS mode tells the device it will be transmitting its information across the
internet.
SMS:
If you are using LocationNow but using SMS messaging instead, this should
be enabled. Short Message System mode tells the device it will be
transmitting its information to another SMS device.
Satellite:
To be determined
Wireless Voice Plan This section initializes the voice option in the Starfinder Lite.
Voice:
If you are using a SIM card that is voice calling enabled, you may enable
this option which will allow you to use the StarFinder Lite as an
emergency/car phone. If you are not using a voice enabled SIM card, no
calling or voice communication can be accomplished.
© 1999-2008 by Laipac Technology Inc. All Rights Reserved.
Page 15
Laipac Technology Inc.
Incoming Call:
StarFinder Lite User’s Manual & Reference Guide
This setting requires Voice to be enabled and will determine whether or not
the unit will automatically answer incoming calls.
Note: By enabling the voice option, the unit can be used with emergency number calling, and
other features that will use the emergency numbers in the event of an emergency.
Fall Back Mode
This section is a fail safe based on how the unit will react in the event there
is no GSM coverage.
GPRS -> SMS:
In the event GPRS communication is lost, the unit will automatically switch
to SMS mode. In the event GPRS becomes reacquired, the unit will
automatically switch back to GPRS mode of operation. If you select SMS
mode, Satellite mode will become disabled.
GPRS -> Satellite:
In the event GPRS communication is lost, the unit will automatically switch
to Satellite mode. In the event GPRS becomes reacquired, the unit will
automatically switch back to GPRS mode of operation. If you select
Satellite mode, SMS mode will become disabled.
To progress to the next set of configuration options click on “Network”. The Network option list
contains the necessary wireless carrier settings needed for the device to access the internet and
transmit its location and events to our LocationNow servers. Note: If you are operating your
device exclusively in SMS mode, you may skip this step.
Note: In the event that GPRS fails and SMS ‘Fall Back Mode’ has been set, the unit will first
activate the smart log procedures, and will immediately try for SMS connectivity. If there is
no SMS connectivity, the unit will switch between SMS and GPRS until the unit
synchronizes with one of the modes. The same sequence will apply for GPRS to Satellite
mode.
Warning: The ‘Fall Back Mode’ takes priority over switching between ‘Alternate Servers’
and alternate ‘IP addresses’ outlined on the next page.
© 1999-2008 by Laipac Technology Inc. All Rights Reserved.
Page 16
Laipac Technology Inc.
StarFinder Lite User’s Manual & Reference Guide
Carrier Information This section covers the information required for the unit to access your
carriers Access Point.
GPRS APN:
The Access Point Name is used by your SIM card to connect to the GPRS
network. The Access Point is the carrier’s server through which the traffic
becomes converted from GSM to GPRS Internet traffic.
User Name:
The user name authorises your SIM card to access your carriers Access
Point.
Password:
The password authenticates your SIM card to access your carriers Access
Point.
© 1999-2008 by Laipac Technology Inc. All Rights Reserved.
Page 17
Laipac Technology Inc.
StarFinder Lite User’s Manual & Reference Guide
Server Configuration This section governs the destination end point for the GPRS traffic, a
failsafe for that destination, and DNS to domain name translations.
Domain Name 1a:
This is the domain name of the remote server. For www.LocationNow.com
use ‘laipgw1.com’.
Static IP 1:
This is the IP address of the remote server. For www.LocationNow.com use
‘24.235.124.170’.
Port 1 and Port 1a:
This is the Port used with the remote server. For www.LocationNow.com
use ‘1688’.
Note: The traffic generated from our devices gets forwarded to its destination by the domain name
first, IP address second and transmits the traffic through port 1688.
The device will try to communicate through the domain name first, IP address second. This is a
fail-safe so that if either the domain name or IP address are inaccessible for any reason then the
other can be used without an interruption in service.
ALTERNATIVE SERVER
The values have the same meanings as the values under Server Configuration but are for a backup
server, in case the primary server becomes completely unavailable. Configuring the alternative
server is optional.
Under DNS SERVER
DNS IP 1 and 2: Allows you to select specific DNS servers by their IP address. Since the GSM
module does this already, these settings are optional.
Note: In the event that domain name 1 fails, the unit will activate the smart logging feature
and will attempt IP address 1. If IP address 1 fails, the unit will try Domain Name 2. If
Domain Name 2 fails, the unit will try IP address 2. From here a loop effect will occur until
it connects to one of those IP addresses. During this loop effect, the smart logging feature
will remain active.
Warning: If you have a ‘Fall Back Mode’ set, along with Primary Server and Alternate
Server, the unit without GPRS connectivity function as follows: First Domain Name fails,
unit activates Smart Logging. Next the unit attempts to connect to SMS. From there the
loop effect between SMS and GPRS Domain Name 1 will occur regardless of other IP
addresses or server setup. The same applies if you have Satellite fall back mode setup.
© 1999-2008 by Laipac Technology Inc. All Rights Reserved.
Page 18
Laipac Technology Inc.
NMEA Baud:
StarFinder Lite User’s Manual & Reference Guide
NOT YET IMPLEMENTED
WAAS / EGNOS:
This setting enables the compatibility for Wide Area Augmentation System
and European Geostationary Navigation Overlay Service for added GPS accuracy. This setting is
recommended but optional.
Saving and Loading Your Configuration
Once you have finished configuring your device, click the “Save All Settings to Device” button
and the settings will save.
To save the settings to a file, click on “file”, click on “save as”, specify your filename and path
where you will store it. Once finished click “save” and a file will be generated with your
configuration.
To load the settings, click on “Read Settings from device” and point to where you have stored your
configuration file. Once you have located the file, click “Open” and the configuration will load.
From there you can edit and resave it to your Starfinder Lite.
© 1999-2008 by Laipac Technology Inc. All Rights Reserved.
Page 19
Laipac Technology Inc.
4
StarFinder Lite User’s Manual & Reference Guide
Advanced Configuration and Features
This next section covers all other configuration settings not listed under basic setup and falls
under 3 major categories: one for System, one for I/O, and the last for Applications. The
System settings are concerned with reporting and voice setup. The I/O settings are used for
customizable I/O functionality. The Applications section is used for other types of event
messages.
4.1 System Settings
Reporting Values:
This option allows you to specify how frequent the unit will send a position
update. You can specify the report by time value in hours, minutes, and
seconds. You can specify the report by distance value in kilometers, miles,
or yards.
Smart Log Report:
The smart log report option allows the unit to automatically log position
updates into internal memory, based on the reporting values, in the event
there is no GPRS connectivity. When the Starfinder Lite reconnects to
GPRS, the lost messages are then transmitted back to the GPRS server
automatically. The option is to Enable or Disable this feature.
AT Green Mode:
Air Time Green Mode allows you to set the hours in which the unit can
operate in. If you only require tracking during a particular time of day, the
unit will go live during that specified time and will turn off. To use this
feature, you must enable this feature and then specify the time the unit will
be actively reporting for.
© 1999-2008 by Laipac Technology Inc. All Rights Reserved.
Page 20
Laipac Technology Inc.
StarFinder Lite User’s Manual & Reference Guide
Waypoint Log:
Waypoints & Events Log setting gives you the option to log or store
waypoint and alert messages in the unit’s internal memory.
Log by Time:
Logs messages into internal memory based on the specified time interval.
Log by Distance:
Logs messages into internal memory based on the specified distance
interval.
DL Memory Full:
Data Logger Memory Full alert will cause the unit to send an alert when the
internal memory of the unit is full. This means that once the unit runs out of
memory, an alert will be sent to the GPRS server.
© 1999-2008 by Laipac Technology Inc. All Rights Reserved.
Page 21
Laipac Technology Inc.
StarFinder Lite User’s Manual & Reference Guide
Assistance Number: When you press the call button, the number programmed into the
“Assistance Number” field will be dialed.
Emergency Numbers: If the Assistance number is not answered, the Starfinder Lite will dial
Emergency Number 1. If Emergency Number 1 is unanswered, the
Starfinder Lite will dial Emergency Number 2. If Emergency Number 2 is
unanswered, the Starfinder Lite will redial emergency Number 1. From
there, it will cycle through both numbers until one of those lines are
answered.
SMS Base Station:
The SMS Base Station Number is used when the Starfinder Lite is operating
in SMS mode of operation. All of the waypoints and alert messages will be
sent to the SMS Base Station Number. The number it self can belong to a
cell phone, an SMS modem or any SMS device.
Note: In order to use the Assistance Number and Emergency Numbers, the ‘Voice’ option
under ‘Setup’ ‘Services’ menus must be enabled and your SIM card must be Voice enabled.
© 1999-2008 by Laipac Technology Inc. All Rights Reserved.
Page 22
Laipac Technology Inc.
StarFinder Lite User’s Manual & Reference Guide
Server Query:
Used as a GSM keep alive and tests the connection status of the Starfinder
Lite. This setting must be enabled first.
Query Interval:
The actual interval in which the Starfinder Lite tests the connection between
the GPRS server and itself. If there is no server response to the message the
Starfinder Lite sends out, the unit will reset and try to resynchronize.
Change this page
© 1999-2008 by Laipac Technology Inc. All Rights Reserved.
Page 23
Laipac Technology Inc.
StarFinder Lite User’s Manual & Reference Guide
4.2 I/O Settings
Input 1:
Allows you to activate the functionality of the input by enabling it.
Triggered Alerts:
This option allows you to send an alert when the alert condition is met by
the input detecting a high voltage level. In the example, you have the option
to receive an alert every time the ignition gets turned on.
Counter Start Value: This option allows the device to record how many times the alert gets
triggered and accumulates from the value you set it to.
Counter Alert Value: This option allows you to tell the Starfinder Lite to send an alert when the
counter value reaches a user defined value. If you set it to 90, it will send an
alert once the counter start value reaches 90.
The same settings apply across the other inputs. The only change is the suggestive use for the
application for the input. Note: Input 1 must be reserved for the vehicle ignition as it is used in
later features.
© 1999-2008 by Laipac Technology Inc. All Rights Reserved.
Page 24
Laipac Technology Inc.
StarFinder Lite User’s Manual & Reference Guide
Output 1:
Allows you to activate the functionality of the output by enabling it.
Control Functions:
The control function of the outputs enables or disables the output as a fixed
switch or a timed switch. A timed switch time is suited in situations where
the voltage across a system can not remain constant such as triggering the
door locks. A fixed switch is suited in situations where the voltage across a
system must remain constant such as triggering the starter.
Pulse Time Value:
This is the amount of time the timed switch will change its state. If the door
locks requires a 1 second pulse to trigger, set this time for 1 second. Note:
A certified vehicle installer will be able to tell you how long of a pulse is
required.
The same settings apply across the other outputs. The only change is the suggestive use for the
application of the output. The suggestion is only a recommendation and does not have to be
followed completely.
Note: The starter should be set to normally closed (On) as you would want to start the car
after installation and disable it as a test. The door locks should be set to normally open (Off)
as you want to send a voltage pulse and avoid burning out the door lock system. For more
electrical details and specs, refer to section 5.2.9 “Optically Isolated Outputs”.
© 1999-2008 by Laipac Technology Inc. All Rights Reserved.
Page 25
Laipac Technology Inc.
StarFinder Lite User’s Manual & Reference Guide
Panic Button:
Allows you to activate the functionality of the panic button by enabling it.
Once enabled, the panic button will send a panic alert message to the GPRS
server, will call emergency number 1, or will do both by sending the alert
first then calling second.
Call Button:
Allows you to activate the functionality of the call button by enabling it.
The call button has a function where it will allow the user to answer
incoming calls only or has the function to answer incoming calls and speed
dial the number programmed into Emergency Number 1.
Note: In order to use the Call Button, the ‘Voice’ option under ‘Setup’ ‘Services’ menus
must be enabled and your SIM card must be Voice enabled and a phone number is required
in the ‘Assistance Number’ field under ‘System’ ‘Phone Numbers’. Also you must have a
phone number programmed into ‘Emergency Number 1’ in order for the Panic Button to
call the number or send an alert then call the number.
© 1999-2008 by Laipac Technology Inc. All Rights Reserved.
Page 26
Laipac Technology Inc.
Analog Input:
StarFinder Lite User’s Manual & Reference Guide
The Analog Input functionality must be enabled before using. It is designed
to detect and record voltage readings between 0.00 and 3.30 volts. The
reading is then transmitted back in the waypoint message. The options to
have the unit generate an alert when the voltage drops below a user defined
value or above a user defined value are available.
Some suggestions for setting an alert warning when a voltage drops to a certain value would be
monitoring fuel or oil levels. Having an alert trigger when the voltage reading reaches a user
defined value would be monitoring a temperature gauge.
© 1999-2008 by Laipac Technology Inc. All Rights Reserved.
Page 27
Laipac Technology Inc.
RS232:
StarFinder Lite User’s Manual & Reference Guide
TO BE DEFINED LATER
© 1999-2008 by Laipac Technology Inc. All Rights Reserved.
Page 28
Laipac Technology Inc.
StarFinder Lite User’s Manual & Reference Guide
4.3 Applications
Speed Limit Alert:
In order to use this function, it must be enabled first. The Speed Limit
Alert, formerly known as over-speed, is designed to send an alert if the unit
moves faster then the speed limit value.
Speed Limit:
The speed limit is user defined and can be set in kilometers or miles per
hour. If the unit travels faster then this value, a speed limit alert will be sent
to the GPRS server.
Mileage:
The Mileage Accumulator option must be enabled before it can be used. It
is designed to start accumulating distance based on a user defined start point
and unit of distance. If the unit of distance is increased by 1, the
incremented value will be added to the current mileage value.
Starting Value:
The Mileage Start Value is user defined and is recommended to match the
odometer reading in the equipped vehicle. From there you can specify the
unit of distance being kilometers or miles and the mileage value will
accumulate from there.
Mileage Alert:
This alert must be enabled before it can be used. This alert will be sent to
the GPRS server once the mileage accumulated value matches the alert
value. It is suggested to generate a maintenance warning outlining an oil
change, etc is coming due.
Mileage Alert Value: The alert value is a user defined value that is designed to provide a warning
before a vehicle maintenance job is due. The unit of distance must be the
same as the ‘Mileage Starting Value’. The recommended setting for this
value is 1000 km before the next oil change is due.
© 1999-2008 by Laipac Technology Inc. All Rights Reserved.
Page 29
Laipac Technology Inc.
StarFinder Lite User’s Manual & Reference Guide
Towing Alert:
The Towing Alert must be enabled before it can be used. This feature may
be used with ‘Air Time Green Mode’ and must be used with ‘Input 1’ status.
When the unit is powered off for the night and there is movement or a 2G or
greater force, the unit will wake up and send an alert to the GPRS server.
This is in a situation where someone tows a vehicle with out consent rather
then turning it on and driving away with it.
Trigger Value:
The G Sensor Trigger Value has a default value of 2Gs and should be kept
at a low recommended value to sense movement. Note that the Ignition
must be off in order for this alert to work.
Accident Alert:
The accident alert requires enabling before it is used. It is designed to sense
a high impact hit and send an alert upon receiving it similar to that of a
vehicle collision.
Trigger Value:
The G Sensor Trigger Value has a default value of 7Gs and should be kept
at a high recommended value to cense a vehicle collision as opposed to a pot
hole.
Call Emergency #:
To have the Automatically Call Emergency Number function, this feature
must first be enabled. The ‘Voice’ option must be enabled under ‘Setup’
‘Services’ and you must have programmed phone numbers into the
‘Emergency Numbers’ fields under ‘System’ ‘Phone Numbers’.
© 1999-2008 by Laipac Technology Inc. All Rights Reserved.
Page 30
Laipac Technology Inc.
Geo Fence:
StarFinder Lite User’s Manual & Reference Guide
The Geo-Fence settings must be enabled before using. The term Geo-Fence
refers to setting up a geographical perimeter around the device that
generates an alert when the unit has left that perimeter. The Geo-Fence
system also provides the inverse effect meaning if the unit enters a
boundary, the device will generate an alert. The geo-fencing system allows
the device operator to setup a maximum of 99 different Geo-Fences though
20 are initialized by default.
The steps involved setting up a Geo-Fence include: Creating a new Geo-Fence Data Set, Setting up
a geo-fence over an area, specifying the type of geo-fence, naming the geo-fence, and
saving/loading data sheets.
To create a new Dataset, select the “Create New Geo Fence Dataset.” button
. From this
menu, you can specify the total number of Geo-Fences that can be used to a maximum of 99, and
where the map will be centralized over. Once you have specified the information, click ‘OK’ to
continue. Note: You will be able to zoom out or pan over to the area you would like to setup
the geo-fences.
Now that the new data sheet is created, we can setup a Geo-Fence over an area by first selecting a
zone simply by clicking on it. Next enter the map view by either, selecting the “Set Geo Fence
with Google Map” button
selecting the “Edit Data of the Zone” button
clicking on the zone. A similar image will appear as shown below.
© 1999-2008 by Laipac Technology Inc. All Rights Reserved.
, or by double
Page 31
Laipac Technology Inc.
StarFinder Lite User’s Manual & Reference Guide
The Geo Fence Zone Setting window gives the option to start editing an existing geo-fence name,
adding a new record, removing the existing record, save the record to the zone, and canceling or
undoing your changes. To close the window, click the x in the upper right. Note: The Geo Fence
Zone Setting window is only available by selecting the “Edit Data of the Zone” button.
In the “frmBroswer” window the “View Map” button allows you to view the map and clears
existing information. The “Measure” button allows you to select two different points and obtain
the distance between the two points. If you select a third point and so on, the total distance will
just keep accumulating. The “Set Geo-Fence” button allows you to set up a geo-fence over an
area. The “Send Geo Data” button saves the geo-fence to the zone that was selected in the
previous step.
Now that the geo-fence has been saved, close the “frmBroswer” window. On the “GeoFences”
page in the utility, we can see the new entry added to the Zone list. Now the type of geo-fence can
be specified by selecting the “Alert on” value option dropdown menu. The options are enter or
exit. To name the geo-fence, type in the name value you want in the field right of “Zone Name”.
Now that the geo-fence has been completely setup, select the “Save current dataset as other file”
and it will create a new file to the location of your choice. The “Save current dataset” button
will save your current work to your existing filename. To verify your settings have saved
properly, use the “Open a dataset” button
and select any previously saved file.
© 1999-2008 by Laipac Technology Inc. All Rights Reserved.
Page 32
Laipac Technology Inc.
5
StarFinder Lite User’s Manual & Reference Guide
Updating the Firmware
Sometimes we will release new firmware (the program inside the device) which will add new
features and enhance others. These updates can be easily performed using the StarFinder Lite
Utility once you have downloaded the new firmware file from the website.
To update the firmware, you must set up your StarFinder Lite device the same as if you wanted to
configure it (ie: reset just before you plug in the USB) and, like configuration, it can be performed
independent of the main power supply with a well-charged battery.
Open the StarFinder Lite Utility, and at the main screen, click on the ‘Firmware Update’ button.
Also, connect your StarFinder Lite to the PC if this is not already done. If connected, the next
window that appears will look similar to the following image.
© 1999-2008 by Laipac Technology Inc. All Rights Reserved.
Page 33
Laipac Technology Inc.
StarFinder Lite User’s Manual & Reference Guide
To load the new firmware to your StarFinder Lite, select the firmware file using the button
indicated by A (file select prompt) and once selected, begin the download with the button indicated
by B. You will see a progress bar at the bottom when it begins. If there is an indication of failure,
simply attempt the download again. Otherwise it will say Success and you may close this part of
the Utility. The firmware update is complete.
Note: The COM# will vary between computers, and the actual # does not matter. As long as a
COM# has been automatically selected then it should be fine (see highlighted area C)
© 1999-2008 by Laipac Technology Inc. All Rights Reserved.
Page 34
Laipac Technology Inc.
5
StarFinder Lite User’s Manual & Reference Guide
HARDWARE DETAILS & INSTALLATION
The Starfinder Lite is enclosed in a robust metal case and can withstand intensive shock and
temperature environments. The features on the front of the unit include a SIM card tray, a USB
port, the reset button, speaker and microphone jacks, 2 female SMA connectors for the GPS and
GSM antennas, and three LEDs to show the status of reporting and connectivity as shown in the
below image.
The connections available on the back of the unit includes four optically isolated inputs and three
optically isolated outputs in the main I/O section labeled as 12V, one analog input and the TTL I/O
ports used for the call answer button labeled as 3-5V, a wide power supply input range of 7-38V,
and RS232 interface as shown in the below image. Note: Please refer to sections 5.2.5 through
5.2.9 for detailed electrical specifications.
© 1999-2008 by Laipac Technology Inc. All Rights Reserved.
Page 35
Laipac Technology Inc.
5.1
StarFinder Lite User’s Manual & Reference Guide
Hardware Details
5.1.1
5.1.2
GPS Engine Specifications
Value
Units
Channels
20
Channels
RF Frequency
1575.42
MHz
Position update rate
1
Hz
Active antenna bias voltage
3
V
Position accuracy
< 10
Meters
Velocity accuracy
0.1
m/s
Time accuracy
1
uS
Cold start acquisition time
42
Seconds
Warm start acquisition time
38
Seconds
Hot start acquisition time
1
Seconds
Maximum velocity tracked
515
m/s
Maximum altitude tracked
18,000
Meters
Jerk
20
m/s3
Tracking Sensitivity
-159
dBm
Navigation Sensitivity
-159
dBm
GSM Modem Specifications
•
Quad-band GSM/GPRS component (850/900/1800/1900 MHz)
•
Designed for M2M and automotive applications
•
Class 4 (2W @ 900 MHz)
•
Class 2 (1W @ 1800 MHz)
•
R&TTE, GCF-CC, EMC, Safety and Chinese approved
•
Data circuit up to 14400 bits/s
•
GPRS Class 10
© 1999-2008 by Laipac Technology Inc. All Rights Reserved.
Page 36
Laipac Technology Inc.
StarFinder Lite User’s Manual & Reference Guide
5.1.3 GPS Antenna Specifications
Frequency
1575.42 +/- 3 MHz
VSWR
2.0 Max
Bandwidth
10 MHz Min
Axial Ratio
3dB Typical
Impedance
50 Ohm
Peak Gain
4 dBic Min
Gain Coverage
≥ -4dBic at 90° ≤ 0 ≤ 90° (over 75% volume)
Polarization
RHCP
DC Voltage
3.3V
5.1.4 GSM Antenna Specifications
Bands
850/900/1800/1900 MHz
Frequency Range
824~960 MHz // 1710~1990 MHz
Impedance
50 Ohm
VSWR
<2.0 : 1
Gain
2dBi
Radiation
Omni
Polarization
Vertical
Wave
Half Wave Dipole
© 1999-2008 by Laipac Technology Inc. All Rights Reserved.
Page 37
Laipac Technology Inc.
5.2
StarFinder Lite User’s Manual & Reference Guide
Installation
The difficulty level of installing your Starfinder Lite depends on which features you would like to
use. Outlined here will be the basic installation requirements for real-time tracking. You can refer
to the Optically Isolated Inputs, Optically Isolated Outputs, and Analog Port sections for more
advanced hardware features which may require a more intricate installation.
5.2.1
Required Hardware
•
Starfinder Lite
•
Power, I/O harness, and call button cables
•
GSM patch antenna (3 meters long )
•
GPS magnet mount antenna ( 5 meters long )
•
GPRS enabled SIM card with known APN settings*
5.2.2
Installing your Starfinder Lite
To begin the installation, insert your activated SIM card into the SIM card tray. Connect the GSM
patch antenna (long and skinny) and GPS magnet antenna (square) to the appropriate connectors.
To power the unit, connect the power wiring harness and connect the red and black wires to a 938V DC supply. Make sure the supplied fuse is in place.
5.2.3
Considerations
There are a few considerations you should make when installing your Starfinder Lite. You should
make sure the unit is somewhat accessible so that you can connect the unit to a laptop via USB for
configuration and local NMEA 2.0 output. The GSM antenna may be mounted almost anywhere,
as the GSM signal is generally very strong. The GPS antenna, however, should be mounted
somewhere with a clear line of sight to the sky under dash board, or at least in a position not
surrounded by metal. If you are having trouble receiving either signal try relocating the antenna.
5.2.4
Other Options
The Starfinder Lite comes with many other options which may need installation. There are 4
optically isolated inputs, 3 optically isolated outputs, and 1 analog port which may need to be
connected and would rely on the specific application for installation details. A certified car
audio/security installer should be familiar with connecting the relays to door locks or starter
triggers. The specs and considerations for these other features can be found later in this section.
© 1999-2008 by Laipac Technology Inc. All Rights Reserved.
Page 38
Laipac Technology Inc.
5.2.5
StarFinder Lite User’s Manual & Reference Guide
Power Connector
The main Power supply voltage can be in the range of 7-38V with recommended range of 9-38V.
Typical power consumption of the Starfinder Lite is 1W with peaks up to 5.5W. The current
drawn is a result of power over voltage, thus a low voltage power supply will need to provide more
current.
5.2.6
Buttons Input/Output
These four connections are used by the StarFinder Lite Button/Analog cable set. If you are using
these without the standard cable set, the following summarizes the use of these connections.
Input BIO1 – Active LOW; will start, answer, or end a phone call (if enabled)
Input BIO2 – Active LOW; will send a Panic report to LocationNow (if enabled)
Output BIO3 – Normally LOW; indicates phone call status (used to drive LED)
GND – Common Ground
The inputs are standard 3.3V to signal a logical HIGH, and tolerant up to 5V; exceeding 5V can
damage your StarFinder Lite.
© 1999-2008 by Laipac Technology Inc. All Rights Reserved.
Page 39
Laipac Technology Inc.
5.2.7
StarFinder Lite User’s Manual & Reference Guide
Analog Input
Input voltage
Resolution
Sample Time
0-3.3V
10 bit
100ms
Analog Input – When enabled, the analog port is used to measure input voltage from 0-3.3V and
will send an alert when the voltage exceeds the level specified in your configuration. The Analog
input is tolerant up to 5V; exceeding 5V can damage your StarFinder Lite.
Analog GND – This is the ground reference for the Analog Input signal. It is isolated from
Common Ground and other grounds.
5.2.8
Optically Isolated Inputs
When the inputs are enabled, they will send an alert when the specified condition is met, and all
have the same electrical characteristics and behavioural options.
© 1999-2008 by Laipac Technology Inc. All Rights Reserved.
Page 40
Laipac Technology Inc.
StarFinder Lite User’s Manual & Reference Guide
Electrical/Logic Levels Characteristics
Minimum
3.5V , 1.3mA
0V , 0mA
Logical HIGH
Logical LOW
Maximum
18V , 6.7mA
3V , 1.1mA
GND-A: Serves as electric ground for Input 1 and Input 2, and is isolated from the Common
Ground and other grounds.
GND-B: Serves as electric ground for Input 3 and Input 4, and is isolated from the Common
Ground and other grounds.
Note: An input level exceeding 19V could damage the StarFinder Lite and should be avoided.
5.2.9
Optically Isolated Outputs
The Starfinder Lite has three optical outputs which can be remotely controlled by the control
center. All three outputs have the same electrical characteristics and behavioural options.
Electrical Characteristics
All three of these outputs are optically switch transistors. They do not source any current or
voltage. Reverse current flow is prevented. Connection GND-O serves as electric ground for all
three outputs, and is isolated from the Common Ground and other grounds.
Maximum pull-up source voltage: 300V
Maximum individual sinking current: 150mA
Maximum collective sinking current: 300mA
Maximum reverse voltage tolerance: 75V
Note: Exceeding these values can damage the StarFinder Lite and should be avoided.
© 1999-2008 by Laipac Technology Inc. All Rights Reserved.
Page 41
Laipac Technology Inc.
StarFinder Lite User’s Manual & Reference Guide
Behaviour Options
Starting Closed: The output switch is closed. A remote command will change this connection to
open.
Starting Open: The output switch is open. A remote command will change this connection to
closed.
Normally Open: The output switch is normally open. A remote command will close the switch for
the length of time specified in configuration.
Normally Closed: The output switch is normally closed. A remote command will open the switch
for the length of time specified in configuration.
6
OPERATION
The following outlines the various operating and reporting features of the Starfinder Lite.
6.1
LED Operation
The Starfinder Lite has three LEDs on the front of the unit. They are Power, GPS, and GSM. The
following is a description of their operation.
LED
Power
GPS
GSM
Flashing/Off
No Power (off)
Searching for Position
Connected to Network
Steady
Power On
Valid Position Acquired
Not connected to Network
Note: A flashing GSM LED does not necessarily mean the unit is connected to GPRS or
www.LocationNow.com. It only means the unit has registered with the GSM network.
© 1999-2008 by Laipac Technology Inc. All Rights Reserved.
Page 42
Laipac Technology Inc.
6.2
StarFinder Lite User’s Manual & Reference Guide
Position Reporting by Event
There are many events which can trigger the Starfinder to send a position report. Most are
outlined below. For other possible messages, contact [email protected] to purchase the
development protocol. The descriptions in italics are options and not standard features.
•
Input 1 (Opto 1)
A ‘high’ signal at Input 1 will send a position message to the control
center with the corresponding event code.
•
Input 2 (Opto 2)
A ‘high’ signal at Input 2 will send a position message to the control
center with the corresponding event code.
•
Geo-Fence
Once the hardware Geo-Fence is set, the Starfinder will report back
to the control center when the unit has travelled outside the boundary
with the corresponding event code.
•
Overspeed
When the Starfinder travels above the set speed limit it will report
back to the control center with the appropriate event code.
•
Timed Reporting
When the time interval reporting is set the Starfinder will send a
position message to the control center after this amount of time*.
•
Distance Reporting When the distance interval is set the Starfinder will send a position
message to the control center after it has travelled this set distance*.
•
Accident Alert
When detected that a high acceleration (configurable level) is
achieved the Starfinder Lite will send a report to the SMS base
station or control center.
•
Towing Alert
When the vehicle ignition is off and the unit senses movement, an
alert message will be sent.
•
DL Memory Full
Data Logger Memory Full alert will cause the unit to send an alert
when the internal memory of the unit is full or has reached max
capacity.
* When both time and distance intervals are set they work dynamically together like an ‘OR’
operation. This means that whenever either condition is met, it will report.
© 1999-2008 by Laipac Technology Inc. All Rights Reserved.
Page 43
Laipac Technology Inc.
6.3
StarFinder Lite User’s Manual & Reference Guide
Reporting by Request
In addition to automatically reporting the position you can manually request the current position or
settings. The following are some parameters which can be requested.
6.4
•
System information such as firmware version and memory size
•
Current position
•
Current mileage or speed limit setting
•
Current Report settings
•
Current Geo-Fence settings
•
Current log settings
•
Current input status
•
Current output status
Serial Port
NOT YET DEFINED
© 1999-2008 by Laipac Technology Inc. All Rights Reserved.
Page 44