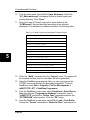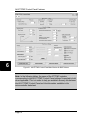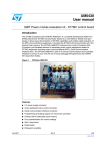
1
AK-ST7FMC
Starter Kit for
STMicroelectronics
ST7FMC
Motor Control Device
User’s Manual
Revision 1.0
Copyright © 2004 SofTec Microsystems ®
DC00718
We want your feedback!
SofTec Microsystems is always on the look-out for new ways to improve its
Products and Services. For this reason feedback, comments, suggestions or
criticisms, however small, are always welcome.
SofTec Microsystems
E-mail (general information): [email protected]
E-mail (marketing department): [email protected]
E-mail (technical support): [email protected]
Web: http://www.softecmicro.com
Important
SofTec Microsystems reserves the right to make improvements to the AK-ST7FMC Starter Kit, its documentation and software
routines, without notice. Information in this manual is intended to be accurate and reliable. However, SofTec Microsystems
assumes no responsibility for its use; nor for any infringements of rights of third parties which may result from its use.
SOFTEC MICROSYSTEMS WILL NOT BE LIABLE FOR DAMAGES RESULTING FROM LOSS OF DATA, PROFITS, USE OF
PRODUCTS, OR INCIDENTAL OR CONSEQUENTIAL DAMAGES, EVEN IF ADVISED OF THE POSSIBILITY THEREOF.
Trademarks
STMicroelectronics is a registered trademark of STMicroelectronics, Inc.
Metrowerks and CodeWarrior are trademarks or registered trademarks of Metrowerks Corp.
Microsoft and Windows are trademarks or registered trademarks of Microsoft Corporation.
PC is a registered trademark of International Business Machines Corporation.
Other products and company names listed are trademarks or trade names of their respective companies.
AK-ST7FMC User's Manual
Contents
0
Before Starting 11
0.1 Safety Warnings 11
0.1.1 General 11
0.1.2 Intended Use 11
0.1.3 Operation 11
0.1.4 Important Notice to Users 12
0.2 Required Skills 12
0.3 Credits 12
1
Overview 15
1.1
1.2
1.3
1.4
1.5
1.6
1.7
1.8
2
AK-ST7FMC Components 21
2.1
2.2
2.3
2.4
2.5
2.6
3
What is the AK-ST7FMC Starter Kit? 15
ST7FMC Family Overview 16
The Brushless DC (BLDC) Motor 16
The AC Induction Motor 17
Recommended Reading 18
Software Upgrades 18
Troubleshooting 18
Getting Technical Support 19
Package Checklist 21
The Motor Control Board 22
The BLDC Motor 24
The In-Circuit Debugger/Programmer (inDART-STX) 24
The Optoisolation board 24
The “Alternate Z Sampling” Daughter Board 25
Getting Started for BLDC Motors 27
3.1 Introduction 27
3.2 Step-by-Step Tutorial 27
3.2.1 Tools Required 27
3.2.2 Installing the Software 28
3.2.3 Installing the Hardware 28
3.2.4 Tutorial Steps 29
Contents
4
Getting Started for AC Motors 33
4.1 Introduction 33
4.2 Step-by-Step Tutorial 33
4.2.1 Tools Required 33
4.2.2 Installing the Software 34
4.2.3 Installing the Hardware 34
4.2.4 Tutorial Steps 36
5
Connectors and Functions 39
5.1 Power Supply 39
5.1.1 Introduction 39
5.1.2 Optoisolation Board Supply 40
5.1.3 Power Supply Connectors Summary 40
5.2 Push-Buttons and Potentiometer (Standalone Mode) 41
5.2.1 Introduction 41
5.2.2 Preparing for Standalone Mode: General Notes 41
5.2.3 Preparing for Standalone Mode: BLDC Motors 42
5.2.4 Preparing for Standalone Mode: AC Motors 46
5.2.5 Push-Buttons 49
5.2.6 Potentiometers 50
5.2.7 Standalone Mode: Driving a BLDC Motor 50
5.2.8 Standalone Mode: Driving an AC Motor 51
5.3 BLDC Motor Outputs and Feedback 52
5.3.1 Introduction 52
5.3.2 Sensorless Mode (STMicroelectronics Method) 53
5.3.3 Sensorless Mode (Standard Method) 54
5.3.4 Sensor Mode 54
5.4 AC Motor Outputs and Feedback 54
5.4.1 Open Loop 54
5.4.2 Closed Loop 54
5.5 ICC Connector 55
5.6 External Power Stage Connectors 55
5.7 RS-232 Connector 56
5.8 Summary of Jumper and Connector Settings 57
5.8.1 Jumpers Summary 57
5.8.2 Connectors Summary/Pinout 60
5.8.3 Jumper Settings for a BLDC Motor (Default) 64
5.8.4 Jumper Settings for an AC Motor 65
6
AK-ST7FMC Control Panel Features 67
6.1 Introduction 67
AK-ST7FMC User's Manual
6.1.1 Suggested BLDC Motor Learning Steps 67
6.1.2 Suggested AC Motor Learning Steps 68
6.2 Motor Type Choice 69
6.3 BLDC Motor Parameters 69
6.3.1 Main Motor Settings 71
6.3.2 Start-Up Settings 73
6.3.3 Real-Time Settings 76
6.3.4 Advanced Settings 77
6.4 AC Motor Parameters 87
6.4.1 Main Motor Settings 88
6.4.2 V/F Curve Settings 89
6.4.3 Start-Up Settings 89
6.4.4 Real-Time Settings 90
6.4.5 Advanced Settings 91
7
Electrical Specifications 93
AK-ST7FMC User's Manual
Index of Figures
Figure 2.1: AK-ST7FMC Hardware Components 22
Figure 2.2: Motor Control Board 23
Figure 3.1: Motor Type Choice Dialog Box 29
Figure 3.2: AK-ST7FMC Control Panel Main Window for BLDC Motors 30
Figure 4.1: AK-ST7FMC Control Panel Main Window for AC Motors 37
Figure 5.1: Power Supply Connectors 40
Figure 5.2: BLDC Motor Closed Loop Parameters Collecting 43
Figure 5.3: AC Motor Closed Loop Parameters Collecting: Ki, Kp 47
Figure 5.4: AC Motor Closed Loop Parameters Collecting: Slip Frequency 47
Figure 5.5: Push Buttons 49
Figure 5.6: Potentiometers 50
Figure 5.7: Motor Outputs and Feedback 53
Figure 5.8: Motor Outputs and Feedback 55
Figure 6.1: AK-ST7FMC Control Panel Main Window for BLDC Motors 70
Figure 6.2: BLDC Motor Advanced Settings Dialog Box 78
Figure 6.3: BLDC Motor: BEMF Sampling Methods 86
Figure 6.4: AK-ST7FMC Control Panel Main Window for AC Motors 87
Figure 6.5: AC Motor Advanced Settings Dialog Box 91
AK-ST7FMC User's Manual
Index of Tables
Table 5.1: BLDC Motor Closed Loop Standalone Firmware Defines 44
Table 5.2: Option Bytes Settings for ST7FMC Programming 45
Table 5.3: AC Motor Closed Loop Standalone Firmware Defines 48
Table 5.4: Open and Closed Loop Standalone Controls for a BLDC Motor 51
Table 5.5: Open and Closed Loop Standalone Controls for an AC Motor 52
Table 5.6: Jumpers Summary 57
Table 5.7: Connectors Summary/Pinout 60
Table 5.8: Jumper Settings Example for a BLDC Motor 64
Table 5.9: Jumper Settings Example for an AC Motor 65
Table 6.1: AK-ST7FMC Control Panel: Motor Type Choice 69
Table 6.2: AK-ST7FMC Control Panel: BLDC Motor Main Settings 71
Table 6.3: AK-ST7FMC Control Panel: BLDC Motor Start-Up Settings 74
Table 6.4: AK-ST7FMC Control Panel: BLDC Motor Real-Time Settings 76
Table 6.5: AK-ST7FMC Control Panel: BLDC Motor Advanced Settings 79
Table 6.6: AK-ST7FMC Control Panel: AC Motor Main Settings 88
Table 6.7: AK-ST7FMC Control Panel: AC Motor V/F Curve Settings 89
Table 6.8: AK-ST7FMC Control Panel: AC Motor Start-Up Settings 89
Table 6.9: AK-ST7FMC Control Panel: AC Motor Real-Time Settings 90
Table 6.10: AK-ST7FMC Control Panel: AC Motor Advanced Settings 92
Table 7.1: Motor Control Board Electrical Specifications 93
Table 7.2: Optoisolation Board Electrical Specifications 93
AK-ST7FMC User's Manual
0
0 Before Starting
0.1 Safety Warnings
0.1.1 General
In operation, the AK-ST7FMC Starter Kit has uninsulated wires, moving or
rotating parts (when connected to a motor), as well as hot surfaces. In case
of improper use, wrong installation or maloperation, there is danger of
serious personal injury and damage to property. All operations, installation
and maintenance are to be carried out by skilled technical personnel
(national accident prevention rules must be observed).
When the Motor Control board is supplied with voltages greater than 30 V
AC/DC, all of the board and components must be considered “hot”, and any
contact with the board must be avoided. The operator should stay away from
the board as well (risk of projection of material in case of components
destruction, especially when powering the board with high voltages). The
rotating parts of motors are also a source of danger.
The AK-ST7FMC Starter Kit contains electrostatic sensitive components
which may be damaged through improper use.
0.1.2 Intended Use
The AK-ST7FMC Starter Kit is made of components designed for
demonstration purposes and must not be included in electrical installations
or machinery. Instructions about the setup and use of the AK-ST7FMC
Starter Kit must be strictly observed.
0.1.3 Operation
After disconnecting the board from the voltage supply, several parts and
power terminals must not be touched immediately because of possible
energized capacitors or hot surfaces.
Page 11
Before Starting
0
0.1.4 Important Notice to Users
While every effort has been made to ensure the accuracy of all information in
this document, SofTec Microsystems assumes no liability to any party for
any loss or damage caused by errors or omissions or by statements of any
kind in this document, its updates, supplements, or special editions, whether
such errors are omissions or statements resulting from negligence, accident,
or any other cause.
0.2 Required Skills
In order to profitably use the AK-ST7FMC Starter Kit, you should be
acquainted with several skills, ranging from hardware design to software
design. In particular, you should possess the following knowledge:
§
§
§
§
Electrical motor knowledge;
Programming knowledge (Assembly and C);
Microcontroller systems;
ST7 architecture knowledge.
0.3 Credits
The AK-ST7FMC Start Kit has been developed by SofTec Microsystems
together with STMicroelectronics. In particular, the Motor Control board has
been developed by STMicroelectronics. A special thanks goes to the
following people for contributing to this project and manual with ideas,
technical information, diagrams.
Mr. Matteo Borini (SofTec Microsystems)
Mr. Jean-Marie Charreton (STMicroelectronics)
Mr. Arnaud Julienne (STMicroelectronics)
Mr. Vincent Onde (STMicroelectronics)
Mr. Loris Pacquola (SofTec Microsystems)
Mr. Eric Payet (STMicroelectronics)
Mr. Piero Poletto (SofTec Microsystems)
Page 12
AK-ST7FMC User's Manual
0
Mr. Jawhar Turki (STMicroelectronics)
Mr. Thomas Vicenzotto (SofTec Microsystems)
This manual has been edited by Paolo Xausa (SofTec Microsystems).
Page 13
AK-ST7FMC User's Manual
1 Overview
1
1.1 What is the AK-ST7FMC Starter Kit?
The AK-ST7FMC Starter Kit is an integrated system designed to provide the
user with a complete, ready-to-use motor control application. The Starter Kit
is built around the STMicroelectronics ST7FMC microcontroller, which has a
built-in, dedicated motor control peripheral. This peripheral is particularly
suited to drive brushless motors (either induction or permanent magnet
types). The Starter Kit demonstrates how effectively the ST7FMC family of
microcontrollers can be used in real-world motor control applications.
The Starter Kit is composed of a Motor Control board, a three-phase,
permanent-magnet, brushless DC (BLDC) motor, plus an in-circuit debugger
board and an Optoisolation board.
The Motor Control board has a built-in power stage and is capable of directly
driving both AC and DC motors.
The Starter Kit can be used in two ways:
1.
For demonstration purposes. Connect your own motor and drive it. A
graphical user interface (AK-ST7FMC Control Panel) is provided, which
allows you to change all of the driving parameters.
For user application development. A complete, integrated
development environment is provided, which allows you to write your
own software, download it to the ST7FMC microcontroller and debug it.
2.
!
Caution: The AK-ST7FMC Starter Kit should only be used by
engineers and technicians who are experienced in power
electronics.
Page 15
Overview
1.2 ST7FMC Family Overview
1
The ST7FMC microcontroller family is designed for mid-range applications
with a Motor Control dedicated peripheral. All devices are based on a
common industry-standard 8-bit core, featuring an enhanced instruction set
and are available with FLASH memory.
The ST7 Motor Controller peripheral (MTC) can be seen as a three-phase,
pulse-width modulator multiplexed on six output channels and a Back
Electromotive Force (BEMF) zero-crossing detector for sensorless control of
Permanent Magnet Brushless Direct Current (BLDC) motors.
The MTC is particularly suited to driving brushless motors (either induction or
permanent magnet types) and supports operating modes like:
§
§
§
§
§
§
§
Commutation step control with motor voltage regulation and current
limitation.
Commutation step control with motor current regulation, i.e. direct
torque control.
Position sensor or sensorless motor phase commutation control (sixstep mode).
BEMF zero-crossing detection with high sensitivity. The integrated
phase voltage comparator is directly referred to the full BEMF voltage
without any attenuation. A BEMF voltage down to 200 mV can be
detected, providing high noise immunity and self-commutated operation
in a large speed range.
Real-time motor winding demagnetization detection for fine-tuning the
phase voltage masking time to be applied before BEMF monitoring.
Automatic and programmable delay between BEMF zero-crossing
detection and motor phase commutation.
PWM generation for three-phase sinewave or three-channel
independent PWM signals.
1.3 The Brushless DC (BLDC) Motor
A brushless DC (BLDC) motor is a rotating electric machine where the stator
is a classic three-phase stator like that of an induction motor and the rotor
has surface-mounted permanent magnets. In this respect, the BLDC motor
is equivalent to a reversed DC commutator motor, in which the magnet
Page 16
AK-ST7FMC User's Manual
rotates while the conductors remain stationary. In the DC commutator motor,
the current polarity is altered by the commutator and brushes. On the
contrary, in the brushless DC motor, the polarity reversal is performed by
power transistors switching in synchronization with the rotor position.
Therefore, BLDC motors often incorporate either internal or external position
sensors to sense the actual rotor position or the position can be detected
without sensors.
The BLDC motor is driven by rectangular voltage strokes coupled with the
given rotor position. The generated stator flux interacts with the rotor flux,
(which is generated by a rotor magnet) and defines the torque and thus
speed of the motor. The voltage strokes must be properly applied to the two
phases of the three-phase winding system so that the angle between the
stator flux and the rotor flux is kept close to 90° to get the maximum
generated torque. Due to this fact, the motor requires electronic control for
proper operation.
1.4 The AC Induction Motor
The AC induction motor is a rotating electric machine designed to operate
from a three-phase source of alternating voltage. The stator is a classic three
phase stator with the winding displaced by 120°. The most common type of
induction motor has a squirrel cage rotor in which aluminum conductors or
bars are shorted together at both ends of the rotor by cast aluminum end
rings. When three currents flow through the three symmetrically placed
windings, a sinusoidally distributed air gap flux generating the rotor current is
produced. The interaction of the sinusoidally distributed air gap flux and
induced rotor currents produces a torque on the rotor. The mechanical
angular velocity of the rotor is lower then the angular velocity of the flux
wave by so called slip velocity.
In adjustable speed applications, AC motors are powered by inverters. The
inverter converts DC power to AC power at the required frequency and
amplitude. The inverter consists of three half-bridge units where the upper
and lower switches are controlled complimentarily. As the power device's
turn-off time is longer than its turn-on time, some dead-time must be inserted
between the turn-off of one transistor of the half-bridge and turn-on of it's
complementary device. The output voltage is mostly created by a pulse
width modulation (PWM) technique. The three-phase voltage waves are
shifted 120° to each other and thus a three-phase motor can be supplied.
Page 17
1
Overview
1.5 Recommended Reading
1
This documentation describes how to use the AK-ST7FMC Starter Kit and
how to set up basic debugging sessions with STMicrolectronics Visual
Debug IDE together with the inDART-STX in-circuit debugger/programmer.
Additional information can be found in the following documents:
§
§
§
§
§
ST7FMC Datasheets.
STMicroelectronics Motor Control Application Notes.
AK-ST7FMC Schematic.
Visual Debug Additional Documentation.
inDART-STX for ST7 User’s Manual and User’s Manual Addendum.
All of the above documents (and many more) are present on the AKST7FMC “System Software” CD-ROM.
Additionally, on the AK-ST7FMC “System Software” CD-ROM, an interactive
tutorial on electric motors is present.
1.6 Software Upgrades
The latest version of the AK-ST7FMC system software is always available
free of charge from our website: http://www.softecmicro.com.
When installing the AK-ST7FMC system software you have the option to
electronically register the product. If you register the product, you will be
automatically notified by e-mail every time a new version of the AK-ST7FMC
system software is available.
1.7 Troubleshooting
A troubleshooting guide is available online at http://mcu.st.com/faq.html.
Page 18
AK-ST7FMC User's Manual
1.8 Getting Technical Support
Technical assistance is provided free to all customers. For technical
assistance, documentation and information about products and services,
please refer to your local SofTec Microsystems partner.
SofTec Microsystems offers its customers a free technical support service at
[email protected]. Before getting in contact with us, we advise you
to check that you are working with the latest version of the AK-ST7FMC
system software (upgrades are available free of charge at
http://www.softecmicro.com).
Additional online support is available on the STMicroelectronics MCU
Support Site (http://mcu.st.com).
For ST7FMC product information (datasheets, tools, application notes, etc.),
please go to http://mcu.st.com/devicedocs-ST7MC2N6-15.html.
Knowledge base (FAQ) is available at http://mcu.st.com/faq.html.
To subscribe to automatic Motor Control updates please go to
http://mcu.st.com/modules.php?name=Subscription.
STMicroelectronics also hosts a Motor Control forum at
http://mcu.st.com/forums.html.
Page 19
1
AK-ST7FMC User's Manual
2 AK-ST7FMC Components
2.1 Package Checklist
2
The AK-ST7FMC package includes the following items:
§
§
§
§
§
§
§
§
§
§
The Motor Control board (1).
A BLDC motor (a 24 V DC AMETEK blower) (2).
An in-circuit debugger/programmer (inDART-STX) (3).
An Optoisolation board (code 237-00156) (4).
An “Alternate Z Sampling” daughter board, to use (optionally) with
BLDC motors (code 237-00158) (5).
Cables: motor cable (6), Optoisolation board’s power supply cable (7),
USB Cable (8), ISP Cables (also called ICP cables in
STMicroelectronics terminology) (9).
The SofTec Microsystems AK-ST7FMC “System Software” CD-ROM.
A “QuickStart Tutorial” color poster.
The inDART-STX for ST7 user’s manual.
This user’s manual.
Page 21
AK-ST7FMC Components
7
2
2
6
1
9
4
3
5
9
8
Figure 2.1: AK-ST7FMC Hardware Components
2.2 The Motor Control Board
The following figure illustrates the main connectors and functions of the
Motor Control board.
Page 22
AK-ST7FMC User's Manual
2
9
1
2
7
8
6
3
4
5
Figure 2.2: Motor Control Board
1.
2.
3.
4.
5.
6.
7.
8.
Motor and board input power stage, auxiliary power supply, and voltage
rectification.
Prototype area.
RS-232 connector.
Push buttons and trimmers for standalone operation.
Hall sensors input.
Tachometer input for closed-loop controlled AC motors.
Three-phases outputs to motor.
ICC connector to isolation board, or directly to inDART-STX.
Page 23
AK-ST7FMC Components
9.
10 A inverter and level shifter.
2.3 The BLDC Motor
2
The motor included in the AK-ST7FMC Starter Kit is an AMETEK 5” BLDC
Low-Voltage (24 V DC) Blower.
For electrical specifications and mechanical dimensions please refer to the
AMETEK datasheets present in the SofTec Microsystems AK-ST7FMC
“System Software” CD-ROM.
2.4 The In-Circuit Debugger/Programmer (inDARTSTX)
inDART-STX is a powerful entry-level tool for STMicroelectronics ST7-based
systems. inDART-STX takes advantage of the STMicroelectronics STVD7
(STMicroelectronics Visual Debug) Integrated Development Environment
and the ISP (In-System Programming) feature to program the FLASH
memory of the microcontrollers belonging to the ST72F family. Together with
STVD7, inDART-STX provides you with everything you need to write,
compile, download, in-circuit emulate and debug user code. Full-speed
program execution allows you to perform hardware and software testing in
real time. inDART-STX is connected to the host PC through a USB port,
while the 10-pin probe of the product fits into the target’s standard ISP
connector. A standalone, full-featured programming utility (DataBlaze) is also
provided with inDART-STX.
inDART-STX is required to program and in-circuit debug (in real-time) the
ST7FMC microcontroller present in the Motor Control board.
For more information on inDART-STX, please refer to the inDART-STX for
ST7 User’s Manual.
2.5 The Optoisolation board
The Optoisolation board’s purpose is to provide galvanic isolation between
the inDART-STX in-circuit debugger/programmer board and the Motor
Control board. The inDART-STX ISP cable (also called ICP cable in
Page 24
AK-ST7FMC User's Manual
STMicroelectronics terminology) plugs into the Optoisolation board, while
another ISP cable goes from the Optoisolation board to the Motor Control
board’s ICC connector. The Optoisolation board helps to prevent damage to
the PC in the event of a catastrophic failure on the Motor Control board. This
isolation barrier also solves the problem caused by the PC, inDART-STX
and the Motor Control board being at different ground potentials.
2.6 The “Alternate Z Sampling” Daughter Board
When using a BLDC motor the Motor Control board uses, by default,
STMicroelectronics patented three-resistor method for BEMF detection. This
method has the advantage of being implemented with few components, but
has the drawback of limiting the maximum duty cycle of the PWM signal
applied to the power switches.
If a specific application requires a 100% PWM duty cycle, the “classical”
BEMF detection method must be implemented.
The “Alternate Z Sampling” daughter board allows to drive a BLDC motor
using the classical BEMF detection circuit. The daughter board plugs into the
J11 connector and into the W14, W15 and W16 jumpers of the Motor Control
board.
Of course, motor-specific resistors and capacitors must be mounted on the
daughter board.
For detailed information, please refer to STMicroelectronics’ AN1946
Application Note.
Page 25
2
AK-ST7FMC User's Manual
3 Getting Started for BLDC
Motors
3.1 Introduction
The Motor Control board is interfaced to a host PC via the inDART-STX incircuit debugger/programmer. A control panel application is provided which
allows you to change (in real time) all of the motor’s electrical parameters. In
this way it is possible to learn all of the possibilities offered by the ST7FMC
integrated motor control peripheral.
!
Caution: before supplying the board, double check proper
connections, make sure that there are no metal parts on, below or
around the PCB and that there are no undesired earth/ground
loops due to measuring equipment such as oscilloscope.
3.2 Step-by-Step Tutorial
3.2.1 Tools Required
For this tutorial, you need:
§
§
§
§
The Motor Control board together with the provided BLDC motor;
The inDART-STX in-circuit debugger/programmer;
The Optoisolation board;
A 24 V DC, 4 A power supply (not provided with the Starter Kit).
Page 27
3
Getting Started for BLDC Motors
3.2.2 Installing the Software
Note: before to connect the inDART-STX board to the PC, it is
recommended that you install the AK-ST7FMC Control Panel application first
(see below), so that the inDART-STX USB driver will be automatically found
by Windows when you connect the board.
3
To install the AK-ST7FMC Control Panel, insert the SofTec Microsystems
“System Software” CD-ROM into your computer’s CD-ROM drive. A
startup window will automatically appear. Choose “Install Instrument
Software” from the main menu. A list of available software will appear. Click
on the “AK-ST7FMC Control Panel” option. Follow the on-screen
instructions.
Note: if you are installing the AK-ST7FMC Control Panel on Windows 2000
or Windows XP you must have logged in as Administrator.
3.2.3 Installing the Hardware
Connection steps are listed below in the recommended flow order:
1.
2.
3.
Verify that all of the Motor Control board jumpers are in their default
position (as detailed in Table 5.8: Jumper Settings Example for a BLDC
Motor on page 64).
The Motor Control board and the provided BLDC motor come
assembled together over a metal support. Verify that the motor cable is
correctly connected between the Motor Control board’s “MOTOR”
connector (J12) and the motor terminal connector.
The Motor Control board and the Optoisolation board come already
connected through an ISP cable. Moreover, the Optoisolation board’s
power connector is also already connected to the Motor Control board’s
J2 connector. In this way, the Motor Control board automatically
supplies the Optoisolation board. Verify that both the power cable and
the ISP cable are connected as stated above.
Page 28
AK-ST7FMC User's Manual
4.
5.
6.
Connect inDART-STX to the Optoisolation board with the other ISP
cable provided (from inDART-STX’s “ISP” connector to the
Optoisolation board’s “ICC IN” connector).
Connect inDART-STX to the host PC with the USB cable provided. The
green “POWER” LED on the instrument will turn on. Windows will
automatically recognize the instrument and will load the appropriate
USB driver.
Power up the Motor Control board by connecting the output terminals of
your DC power supply to the “MAINS” connector. The provided voltage
must be 24 V DC and your power supply must be able to provide a
current of 4 A.
Note: both Windows 2000 and Windows XP may issue a warning the first
time inDART-STX is connected to the PC. This warning is related to the fact
that the USB driver used by inDART-STX is not digitally signed by Microsoft,
and Windows considers it to be potentially malfunctioning or dangerous for
the system. However, you can safely ignore the warning, since every kind of
compatibility/security test has been carried out by SofTec Microsystems.
3.2.4 Tutorial Steps
1.
2.
Start the AK-ST7FMC Control Panel by selecting Start > Programs >
SofTec Microsystems > AK-ST7FMC > AK-ST7FMC Control Panel.
The AK-ST7FMC Control Panel application will open.
You will be asked what motor type you are working with. Select the “3
Phase Brushless Permanent Magnet AC or DC Motor
(Trapezoidal)” option and click the “OK” button.
Figure 3.1: Motor Type Choice Dialog Box
Page 29
3
Getting Started for BLDC Motors
3.
4.
A dialog box will appear asking you to check for proper jumpers
configuration. Click the “OK” button.
The AK-ST7FMC Control Panel main window will open.
3
Figure 3.2: AK-ST7FMC Control Panel Main Window for BLDC Motors
5.
6.
7.
Change the “Speed Regulation” parameter to “Closed Loop” and
click the “START” button. A firmware will be automatically created
based on all of the AK-ST7FMC Control Panel’s parameter and
downloaded to the ST7FMC microcontroller in the Motor Control board.
At the end of the download phase the motor will start to run.
Change the “Target Mechanical Speed” parameter to 5000 by typing
in the new value and pressing the Enter key. The new parameter will be
downloaded to the ST7FMC microcontroller in real time and the motor
will accelerate.
Click the “STOP” button to stop the motor.
Page 30
AK-ST7FMC User's Manual
Congratulations! You have successfully completed this tutorial! You can now
continue to experiment with the AK-ST7FMC Control Panel on your own.
Additionally, you can develop and debug your own application by installing
the “inDART-STX for ST7” software (which includes a complete development
toolchain) present on the SofTec Microsystems “System Software” CD-ROM.
3
Page 31
AK-ST7FMC User's Manual
4 Getting Started for AC Motors
4.1 Introduction
The Motor Control board is interfaced to a host PC via the inDART-STX incircuit debugger/programmer. A control panel application is provided which
allows you to change (in real time) all of the motor’s electrical parameters. In
this way it is possible to learn all of the possibilities offered by the ST7FMC
integrated motor control peripheral.
!
Caution: before supplying the board, double check proper
connections, make sure that there are no metal parts on, below or
around the PCB and that there are no undesired earth/ground
loops due to measuring equipment such as oscilloscope.
!
Caution: when the Motor Control board is supplied with voltages
greater than 30 V AC/DC, all of the board and components must
be considered “hot”, and any contact with the board must be
avoided. The operator should stay away from the board as well
(risk of projection of material in case of components destruction,
especially when powering the board with high voltages). The
rotating parts of motors are also a source of danger.
4.2 Step-by-Step Tutorial
4.2.1 Tools Required
For this tutorial, you need:
Page 33
4
Getting Started for AC Motors
§
§
§
§
The Motor Control board;
The three-phase, SELNI AC motor (available as an accessory—SofTec
Microsystems order code 237-00157);
The inDART-STX in-circuit debugger/programmer;
The Optoisolation board.
4.2.2 Installing the Software
4
Note: before to connect the inDART-STX board to the PC, it is
recommended that you install the AK-ST7FMC Control Panel application
(see below), so that the inDART-STX USB driver will be automatically found
by Windows when you connect the board.
To install the AK-ST7FMC Control Panel, insert the SofTec Microsystems
“System Software” CD-ROM into your computer’s CD-ROM drive. A
startup window will automatically appear. Choose “Install Instrument
Software” from the main menu. A list of available software will appear. Click
on the “AK-ST7FMC Control Panel” option. Follow the on-screen
instructions.
Note: if you are installing the AK-ST7FMC Control Panel on Windows 2000
or Windows XP you must have logged in as Administrator.
4.2.3 Installing the Hardware
Connection steps are listed below in the recommended flow order:
1.
2.
Verify that all of the Motor Control board jumpers are set up to use with
an AC motor (as explained in Table 5.9: Jumper Settings Example for
an AC Motor on page 65).
The Motor Control board and the provided BLDC motor come
assembled together over a metal support. To use the AC motor you
Page 34
AK-ST7FMC User's Manual
3.
4.
5.
6.
7.
8.
must first disconnect the BLDC motor cable from the “MOTOR”
connector (J12) and from the “HALL SENSOR” connector (J19).
Connect the AC motor phases to the Motor Control board’s “MOTOR”
connector (J12) with the motor cable provided with the AC motor.
Connect the AC motor tachometer sensor to the Motor Control board’s
“TACHOMETER” connector (J16) with the tachometer cable provided
with the AC motor.
The Motor Control board and the Optoisolation board come already
connected through an ISP cable. Moreover, the Optoisolation board’s
power connector is also already connected to the Motor Control board’s
J2 connector. In this way, the Motor Control board automatically
supplies the Optoisolation board. Verify that both the power cable and
the ISP cable are connected as stated above.
Connect inDART-STX to the Optoisolation board with the other ISP
cable provided (from inDART-STX’s “ISP” connector to the
Optoisolation board’s “ICC IN” connector).
Connect inDART-STX to the host PC with the USB cable provided. The
green “POWER” LED on the instrument will turn on. Windows will
automatically recognize the instrument and will load the appropriate
USB driver.
Make sure that the “S1” jumper selects the “<35V ONLY” position, then
power up the Motor Control board by connecting the output terminals of
your DC power supply to the “MAINS” connector. The provided voltage
must be 30 V DC and your power supply must be able to provide a
current of 4 A.
Page 35
4
Getting Started for AC Motors
Note: both Windows 2000 and Windows XP may issue a warning the first
time inDART-STX is connected to the PC. This warning is related to the fact
that the USB driver used by inDART-STX is not digitally signed by Microsoft,
and Windows considers it to be potentially malfunctioning or dangerous for
the system. However, you can safely ignore the warning, since every kind of
compatibility/security test has been carried out by SofTec Microsystems.
4.2.4 Tutorial Steps
1.
4
2.
3.
4.
Start the AK-ST7FMC Control Panel by selecting Start > Programs >
SofTec Microsystems > AK-ST7FMC > AK-ST7FMC Control Panel.
The AK-ST7FMC Control Panel application will open.
You will be asked what motor type you are working with. Select the “3
Phase AC Induction Motor (Sinewave)” option and click the “OK”
button.
A dialog box will appear asking you to check for proper jumpers
configuration. Click the “OK” button.
The AK-ST7FMC Control Panel main window will open.
Page 36
AK-ST7FMC User's Manual
4
Figure 4.1: AK-ST7FMC Control Panel Main Window for AC Motors
5.
6.
7.
Click the “START” button. A firmware will be automatically created
based on all of the AK-ST7FMC Control Panel’s parameter and
downloaded to the ST7FMC microcontroller in the Motor Control board.
At the end of the download phase the motor will start to run.
Change the “Target Rotor Frequency” parameter to 40 by typing in
the new value and pressing the Enter key. The new parameter will be
downloaded to the ST7FMC microcontroller in real time and the motor
will accelerate.
Click the “STOP” button to stop the motor.
Congratulations! You have successfully completed this tutorial! You can now
continue to experiment with the AK-ST7FMC Control Panel on your own.
Page 37
Getting Started for AC Motors
Additionally, you can develop and debug your own application by installing
the “inDART-STX for ST7” software (which includes a complete development
toolchain) present on the SofTec Microsystems “System Software” CD-ROM.
4
Page 38
AK-ST7FMC User's Manual
5 Connectors and Functions
5.1 Power Supply
5.1.1 Introduction
The Motor Control board can be supplied in two ways:
§
Single power supply (for motors requiring a voltage greater than
18 V).
Power is supplied to the J3 connector. Power supply voltage must not
be higher than 42 V DC or 30 Veff AC. This power supplies both the
motor and the Motor Control board. A 15 V DC voltage is automatically
generated for the Motor Control board logic. However, depending on
the voltage supplied to the J3 connector, two cases are possible:
1.
2.
§
If the supplied voltage is greater than 35 V DC, the S1 jumper must
select the “HIGH VOLTAGE” position;
If the supplied voltage is between 18 V and 35 V DC, the S1
jumper must select the “<35V ONLY” position.
Dual power supply (for motors requiring a voltage less than 18 V).
Power for the motor is supplied to the J3 connector, while a separate
power for the Motor Control board logic must be supplied to the J1
connector (15 V DC, 0.5 A). The S1 jumper must be removed.
Note: on the J3 connector, polarity of DC or AC input is not important.
Page 39
5
Connectors and Functions
5.1.2 Optoisolation Board Supply
The Optoisolation board requires a 15 V DC power supply. This power is
conveniently provided by the Motor Control board’s J2 connector.
Note: J1 and J2 connectors are internally connected to the same 15 V DC
power bus.
5.1.3 Power Supply Connectors Summary
The following figure illustrates the location of the Motor Control board power
supply connectors.
1
5
4
2
3
Figure 5.1: Power Supply Connectors
1.
2.
3.
J1 connector. 15 V DC, 0.5 A power supply input (used for dual power
supply mode).
J2 connector. 15 V DC output to Optoisolation board.
J3 connector. Motor power supply (for dual power supply mode) or
motor plus Motor Control board power supply (for single power supply
mode). Up to 42 V DC or 30 Veff AC.
Page 40
AK-ST7FMC User's Manual
4.
S1 jumper. In single power supply mode, selects the motor voltage. In
dual power supply mode, it must be removed.
5.2 Push-Buttons and Potentiometer (Standalone
Mode)
5.2.1 Introduction
Four potentiometer and two push-buttons are available on the Motor Control
board for standalone operation (no PC connection required). To operate the
Motor Control board in standalone mode, several steps must be completed
to ensure compatibility between the ST7FMC firmware and the push-buttons
and potentiometers.
5.2.2 Preparing for Standalone Mode: General Notes
The steps below must be followed to generate the correct firmware to use
the Motor Control board in standalone mode. Please note that the firmware
is motor-specific. After generating (and downloading to the ST7FMC
microcontroller) the appropriate firmware for the type of motor and the type
of control you want to use, the push-buttons and potentiometers are
available for use in standalone mode, as explained later.
Note: the following steps require that the inDART-STX for ST7 System
Software be installed.
To install the inDART-STX for ST7 System Software, insert the SofTec
Microsystems “System Software” CD-ROM into your computer’s CD-ROM
drive. A startup window will automatically appear. Choose “Install
Instrument Software” from the main menu. A list of available software will
appear. Click on the “inDART-STX for ST7” option. Follow the on-screen
instructions.
Page 41
5
Connectors and Functions
Note: in order to compile a project linked to the STMicroelectronics Motor
Control library, you must have a full version of either the Metrowerks or
Cosmic C compiler. Due to the size of the STMicroelectronics Motor Control
library, and the code size limit of the evaluation versions of these compilers,
any attempt to compile a project linked to the Motor Control library will not
succeed, unless you have the full version of the above compilers.
Note: the following steps illustrate how to use the Metrowerks C compiler to
compile a project based on the STMicroelectronics Motor Control library.
Similar procedures apply for the Cosmic C compiler.
5.2.3 Preparing for Standalone Mode: BLDC Motors
5
1.
2.
3.
4.
5.
6.
Set up the Motor Control board as explained in the “Installing the
Hardware” section in the “Getting Started for BLDC Motors” chapter.
Get the latest release of the AK-ST7FMC Control Panel system
software from SofTec Microsystems website
(http://www.softecmicro.com), uninstall the previous version and install
the new one.
In the “\Program Files\SofTec Microsystems\AK-ST7FMC\Library”
directory there are various subdirectories, each specific for a
motor/control type (e.g. “BLDC Sensorless”). Each subdirectory
contains a pre-made project specific for that motor/control type. Copy
the appropriate subdirectory (the subdirectory that corresponds to your
motor and control type) into another location. The copied subdirectory
will become your working directory.
Run the AK-ST7FMC Control Panel by selecting Start > Programs >
SofTec Microsystems > AK-ST7FMC > AK-ST7FMC Control Panel.
You will be asked what motor type you are working with. Select the “3
Phase Brushless Permanent Magnet AC or DC Motor
(Trapezoidal)” option and click the “OK” button. The main AKST7FMC Control Panel window will open.
To run a BLDC motor in standalone mode (Closed Loop), you must
choose an optimum sampling time and collect, for each of four critical
Page 42
AK-ST7FMC User's Manual
speeds, a set of real-time parameters (rising BEMF delay, falling BEMF
delay, Ki and Kp). These parameters must be fine tuned for the
minimum and maximum motor speed (the same speeds specified in the
Advanced Settings window) plus two other intermediate speeds of
your choice. During operation, the ST7FMC firmware will make a linear
extrapolation of real-time parameters in between the four specified
speeds to ensure smooth operation (for more information about
parameter collecting, refer to the STMicroelectronics’ Application Note
AN1905).
Rising B-EMF Delay,
Falling B-EMF Delay,
Ki, Kp
Maximum speed
V2
5
V1
Minimum speed
Target
Mechanical
Speed
Figure 5.2: BLDC Motor Closed Loop Parameters Collecting
7.
To run a BLDC motor in standalone mode (Open Loop), it is not
necessary to collect any real-time settings, since all real-time
parameters are controlled through the potentiometers.
8. Click the “Generate Source Files…” button. Browse for your working
directory and select the “\source” subdirectory. Click the “OK” button.
The appropriate header files will be generated and saved in the
“\source” subdirectory as *.h files. All parameters set in the AKST7FMC Control Panel (other than the real-time parameters listed in
point 6) are saved automatically in the *.h files.
9. Run the STVD7 IDE by selecting Start > Programs > SofTec
Microsystems > inDART-STX > ST7 > STVD7 for inDART-STX.
10. From the main menu, choose File > Open Workspace. Select the
“BLDC_Sensorless_Metrowerks.wsp” or “BLDC
Page 43
Connectors and Functions
_Sensor_Metrowerks.wsp” workspace file that is located under your
working directory. Click “Open”.
11. Only in the case of Closed Loop control, some defines in the “mtc.h”
file must be edited according to the collected parameters. The defines
to be edited are listed in the following table.
Table 5.1: BLDC Motor Closed Loop Standalone Firmware Defines
BLDC Motor-Specific Defines to Be Edited
#define SAMPLING_TIME
#define Rising_Fmin
#define Falling_Fmin
#define Ki_Fmin
#define Kp_Fmin
#define F_1
5
#define Rising_F_1
#define Falling_F_1
#define Ki_F_1
#define Kp_F_1
#define F_2
#define Rising_F_2
#define Falling_F_2
#define Ki_F_2
#define Kp_F_2
#define Rising_Fmax
#define Falling_Fmax
#define Ki_Fmax
#define Kp_Fmax
12. Select the “Build” command from the “Project” menu. The project will
be compiled and built, and an executable file will be generated.
Page 44
AK-ST7FMC User's Manual
13. Using the DataBlaze programming utility, you can now program the
ST7FMC microcontroller with the generated executable. To launch
DataBlaze, select Start > Programs > SofTec Microsystems >
inDART-STX > ST7 > DataBlaze Programmer.
14. From the DataBlaze’s main menu, select Operations > Select Device.
Make sure that the “Programming Hardware” parameter is set to
“inDART-STX” and that the “Device Code” parameter specifies the
“ST7FMC2N6B” microcontroller. Click the “OK” button.
15. From the DataBlaze’s main menu, select File > Load > Code Buffer.
Change the “Format” parameter to “Motorola S-Rec” and browse for
the BLDC_Metrowerks.s19 file located under the
“object\Metrowerks” subdirectory in your working directory. Click the
“OK” button.
16. From the DataBlaze’s main menu, select Edit > Option Bytes. The
Option Bytes must be edited as detailed in the table below.
Table 5.2: Option Bytes Settings for ST7FMC Programming
Option Bits
5
Setting
[FMP_R] - Read-Out Protection
Read-Out Protection Disabled
[DIV2] - Divider by 2
DIV2 divider enabled
[RSTC] - RESET Clock Cycle Selection
Reset phase with 4096 CPU cycles
[VD] - Voltage Detection Selection
LVD and AVD On
[CKSEL] - Clock Source Selection
PLL clock selected
[WDG_SW] - Watchdog Activation
Software
[WDG_HALT] - Watchdog and Halt Mode
Reset in HALT
[MCO] - Motor Control Output Options
Low
[PKG] - Package Selection
SDIP56
17. From the DataBlaze’s main menu, select Operations > Auto. Make
sure that all of the programming steps (but “Run”) are enabled. Click
the “START” button.
18. Now the microcontroller is programmed. You can unplug the ISP cable
from the Motor Control board and operate the Motor Control board in
standalone mode.
19. To start running the microcontroller, press the “RESET” push-button.
For details about how to control the motor with the Motor Control
Page 45
Connectors and Functions
board’s push-buttons and potentiometers, please refer to the “PushButtons”, “Potentiometers” and “Standalone Mode: Driving a BLDC
Motor” sections later in this chapter.
5.2.4 Preparing for Standalone Mode: AC Motors
1.
2.
3.
5
4.
5.
6.
Set up the Motor Control board as explained in the “Installing the
Hardware” section in the “Getting Started for AC Motors” chapter.
Get the latest release of the AK-ST7FMC Control Panel system
software from SofTec Microsystems website
(http://www.softecmicro.com), uninstall the previous version and install
the new one.
In the “\Program Files\SofTec Microsystems\AK-ST7FMC\Library”
directory there are various subdirectories, each specific for a
motor/control type. Each subdirectory contains a pre-made project
specific for that motor/control type. Copy the appropriate subdirectory
(the subdirectory that corresponds to your motor and control type) into
another location. The copied subdirectory will become your working
directory.
Run the AK-ST7FMC Control Panel by selecting Start > Programs >
SofTec Microsystems > AK-ST7FMC > AK-ST7FMC Control Panel.
You will be asked what motor type you are working with. Select the “3
Phase AC Induction Motor (Sinewave)” option and click the “OK”
button. The main AK-ST7FMC Control Panel window will open.
To run an AC motor in standalone mode (Closed Loop), you must
choose an optimum sampling time and then characterize two curves, a
Ki, Kp versus stator frequency curve and a slip frequency versus stator
frequency curve. Both curves must have two points, as illustrated
below.
Page 46
AK-ST7FMC User's Manual
Ki, Kp
V2
V1
Target Rotor Frequency
Figure 5.3: AC Motor Closed Loop Parameters Collecting: Ki, Kp
Slip Frequency
5
V2
V1
Target Rotor Frequency
Figure 5.4: AC Motor Closed Loop Parameters Collecting: Slip Frequency
7.
8.
9.
To run an AC motor in standalone mode (Open Loop), it is not
necessary to collect any real-time settings, since all real-time
parameters are controlled through the potentiometers.
Click the “Generate Source Files…” button. Browse for your working
directory and select the “\source” subdirectory. Click the “OK” button.
The appropriate header files will be generated.
Run the STVD7 IDE by selecting Start > Programs > SofTec
Microsystems > inDART-STX > ST7 > STVD7 for inDART-STX.
Page 47
Connectors and Functions
10. From the main menu, choose File > Open Workspace. Select the
“AC_Metrowerks.wsp” workspace file that is located under your
working directory. Click “Open”.
11. Only in the case of Closed Loop control, some defines in the
“ACMParam.h” file must be edited according to the collected
parameters. The defines to be edited are listed in the following table.
Table 5.3: AC Motor Closed Loop Standalone Firmware Defines
AC Motor-Specific Defines to Be Edited
#define SAMPLING_TIME
#define PI_PROP_LOWSPD
#define PI_PROP_HIGHSPD
#define PI_INT_LOWSPD
#define PI_INT_HIGHSPD
#define PI_LOWFREQ_LIMIT
5
#define PI_HIGHFREQ_LIMIT
#define OPT_SLIP_LOWFREQ_LIMIT
#define OPT_SLIP_HIGHFREQ_LIMIT
#define OPT_SLIP_LOWFREQ
#define OPT_SLIP_HIGHFREQ
12. Select the “Build” command from the “Project” menu. The project will
be compiled and built, and an executable file will be generated.
13. Using the DataBlaze programming utility, you can now program the
ST7FMC microcontroller with the generated executable. To launch
DataBlaze, select Start > Programs > SofTec Microsystems >
inDART-STX > ST7 > DataBlaze Programmer.
14. From the DataBlaze’s main menu, select Operations > Select Device.
Make sure that the “Programming Hardware” parameter is set to
“inDART-STX” and that the “Device Code” parameter specifies the
“ST7FMC2N6B” microcontroller. Click the “OK” button.
15. From the DataBlaze’s main menu, select File > Load > Code Buffer.
Change the “Format” parameter to “Motorola S-Rec” and browse for
Page 48
AK-ST7FMC User's Manual
16.
17.
18.
19.
the AC_Metrowerks.s19 file located under the “object\Metrowerks”
subdirectory in your working directory. Click the “OK” button.
From the DataBlaze’s main menu, select Edit > Option Bytes. The
Option Bytes must be edited as detailed in Table 5.2: Option Bytes
Settings for ST7FMC ProgrammingTable 5.2: Option Bytes Settings for
ST7FMC ProgrammingTable 5.2: Option Bytes Settings for ST7FMC
Programming on page 45.
From the DataBlaze’s main menu, select Operations > Auto. Make
sure that all of the programming steps (but “Run”) are enabled. Click
the “START” button.
Now the microcontroller is programmed. You can unplug the ISP cable
from the Motor Control board and use the Motor Control board in
standalone mode.
To start running the microcontroller, press the “RESET” push-button.
For details about how to control the motor with the Motor Control
board’s push-buttons and potentiometers, please refer to the “PushButtons”, “Potentiometers” and “Standalone Mode: Driving an AC
Motor” sections here below.
5.2.5 Push-Buttons
The following figure shows the location of the two push-buttons available in
the Motor Control board.
1
2
Figure 5.5: Push Buttons
Page 49
5
Connectors and Functions
1.
2.
“ON/OFF”: starts or stops the motor.
“RESET”: resets the ST7FMC microcontroller.
5.2.6 Potentiometers
The following figure shows the location of the four potentiometers available
in the Motor Control board.
1
2
5
Figure 5.6: Potentiometers
1.
2.
“POT1”: current reference setting (for BLDC motor only).
“RV1”, “RV2”, “RV3”: open loop and closed loop settings.
5.2.7 Standalone Mode: Driving a BLDC Motor
A BLDC motor can be driven in Current mode or Voltage mode. Depending
on the driving mode, you must set the W12 jumper accordingly. Furthermore,
in either mode, you can drive the motor in Open Loop mode or Closed Loop
mode.
The W12 jumper must be set as follows.
§
If the W12 jumper selects the “VARIABLE” position, the current
reference comes from a PWM-generated, RC-filtered signal generated
by the ST7FMC microcontroller. The “VARIABLE” position may be
selected either in Current mode or Voltage mode. Note: In Voltage
Page 50
AK-ST7FMC User's Manual
mode, the maximum current is set in the AK-ST7FMC Control Panel
before generating the .h files.
If the W12 jumper select the “FIXED” position, the current reference
comes from the “POT1” potentiometer. The “FIXED” position can be
selected only in Voltage mode.
§
The following table summarizes how the potentiometers can be used in
Open Loop mode or Closed Loop mode for a BLDC motor.
Table 5.4: Open and Closed Loop Standalone Controls for a BLDC Motor
Potentiometer
Open Loop
Closed Loop
RV1
Sets the duty cycle (Voltage
mode) or the current reference
(Current mode)
Sets the target speed (frequency)
RV2
Sets the coefficient to calculate
the delay for a rising BEMF
Not used
RV3
Sets the coefficient to calculate
the delay for a falling BEMF
Not used
POT1
Sets the maximum current allowed
in the motor (Voltage mode only)
Sets the maximum current allowed
in the motor (Voltage mode only)
Note: in Current mode, the W12 jumper must always select the “VARIABLE”
position to allow dynamic current control by the ST7FMC microcontroller. In
Current mode, the “POT1” potentiometer is inactive.
5.2.8 Standalone Mode: Driving an AC Motor
The following table summarizes how the potentiometers can be used in
Open Loop mode or Closed Loop mode for an AC motor.
Page 51
5
Connectors and Functions
Table 5.5: Open and Closed Loop Standalone Controls for an AC Motor
5
Potentiometer
Open Loop
Closed Loop
Closed Loop with PI
Tuning
RV1
Sets the stator
frequency (from 1 Hz
to 256 Hz)
Set the target speed
(from 10 Hz to 266
Hz)
Set the target speed
(from 10 Hz to 266
Hz)
RV2
Sets the stator
voltage (from 0 V to
the limit set by the
V/F curve)
Not used
Sets the Ki integral
coefficient (from 0 to
255)
RV3
Sets the braking
torque (from a 0 to
40% PWM duty cycle
if the PWM frequency
is 12.5 KHz and from
0 to 50% for other
PWM frequencies)
Not used
Sets the Kp
proportional
coefficient (from 0 to
255)
POT1
Not used
Not used
Not used
5.3 BLDC Motor Outputs and Feedback
5.3.1 Introduction
The Motor Control board can be configured to drive a BLDC motor in
Sensor/Sensorless mode, Open/Closed Loop mode, and an AC motor in
Open/Closed loop. This sections explains how to configure the Motor Control
board to drive a BLDC motor, while the next section explains how to
configure the Motor Control board to drive an AC motor. The following figure
illustrates where the input (sensor) connectors, the output connector (motor
phases) and related jumper settings selectors are located.
Page 52
AK-ST7FMC User's Manual
1
5
2
6
3
4
Figure 5.7: Motor Outputs and Feedback
1.
2.
3.
4.
5.
6.
J8: filtering capacitors jumper selection.
W14, W15, W16: Sensor/Sensorless mode jumper selection.
W13: tachometer jumper selection (AC motors only).
J19: Hall sensors input connector.
J12: motor phases output connector.
J16: tachometer input connector.
5
A BLDC motor can be controlled in Sensorless mode (using
STMicroelectronics patented three-resistor method), in Sensorless mode
(using classic method) and in Sensor mode, as detailed below.
5.3.2 Sensorless Mode (STMicroelectronics Method)
To drive a BLDC motor in Sensorless mode, using STMicroelectronics
patented three-resistor method, the W14, W15 and W16 jumpers should
select the upper position (default factory setting). The W13 jumper and all of
the J8 jumpers should be removed.
Additionally, the “Z Event Sampling Method” parameter, in the AKST7FMC Control Panel (in the Advanced Settings dialog box) should be set
to “At the end of the PWM low state”.
Page 53
Connectors and Functions
5.3.3 Sensorless Mode (Standard Method)
To drive a BLDC motor in Sensorless mode using classic method (dividers
and filters on each of the three phases and reconstruction of the motor
virtual neutral), the “Alternate Z Sampling” daughter board supplied with the
kit should be plugged in on the pins of the W14, W15 and W16 jumpers and
on the pins of the J11 connector. The W13 jumper must be removed. The J8
jumpers can be kept if the provided 2.2 nF filtering capacitors are compatible
with the filter needed.
Of course, motor-specific resistors and capacitors must be mounted on the
daughter board (see STMicroelectronics application note AN1946)
Additionally, the “Z Event Sampling Method” parameter, in the AKST7FMC Control Panel (in the Advanced Settings dialog box) should be set
to “At PWM on, with delay, once”, to “At PWM on, with delay, at fSCF
frequency” or to “At fSCF frequency”.
5
5.3.4 Sensor Mode
To drive a BLDC motor in Sensor mode, the W14, W15 and W16 jumpers
should select the lower position. The W13 jumper must be removed. The J8
jumpers can be kept to filter the sensor signal.
5.4 AC Motor Outputs and Feedback
An AC motor can be controlled in open or closed loop, as detailed below.
5.4.1 Open Loop
To drive an AC motor in open loop, the W14 and W15 jumpers must select
the lower position, the W16 jumper must be removed, and all of the J8
jumpers must be present.
5.4.2 Closed Loop
To drive an AC motor in closed loop, the W14 and W15 jumpers must select
the lower position, and the W16 jumper must be removed. Additionally, the
W13 jumper must be present, to feed the tachometer signal to the
Page 54
AK-ST7FMC User's Manual
microcontroller’s MCIC input. This signals needs to be filtered by the C56
capacitor. The filtering is done by placing a jumper between pins 7 and 8 in
the J8 connector.
5.5 ICC Connector
The ST7FMC microcontroller can be in-circuit programmed via the “ICC”
connector, using the inDART-STX in-circuit debugger/programmer.
5.6 External Power Stage Connectors
Two connectors allow you to override the internal power inverter.
3
4
5
5
1
2
Figure 5.8: Motor Outputs and Feedback
1.
2.
3.
4.
5.
J4: AC motor power connector.
J6: BLDC motor power connector.
W3: onboard power inverter current sensor.
W4: onboard power inverter diagnostic/enable.
W5: onboard power inverter thermal sensor.
Page 55
Connectors and Functions
The W3 and W4 jumpers should be removed when using an external power
inverter. The W5 jumper should be present if no thermal monitoring is
available on the external power inverter, otherwise the thermal sensor must
be connected to pin 1 of the W5 jumper.
5.7 RS-232 Connector
An optoisolated RS-232 connector allows the Motor Control board to be
connected to a PC for displaying information about using a terminal utility
like HyperTerminal. By default, AC motor real-time values such as speed,
voltage, stator frequency, etc. are sent to the PC (see STMicroelectronics
Application Note AN1904).
5
Page 56
AK-ST7FMC User's Manual
5.8 Summary of Jumper and Connector Settings
5.8.1 Jumpers Summary
Table 5.6: Jumpers Summary
Name
Selection
Description
S1
“HIGH VOLTAGE”
Motor supply is greater than 35 V DC or 25 Veff AC.
“<35V ONLY”
Motor supply is less than 35 V DC or 25 Veff AC.
Not present
Motor supply is separated from Motor Control board. The
Motor Control board must be supplied with 15 V DC (0.5
A) on J1.
Present
Connects the R21 shunt resistor to external Operational
OpAmp circuitry and to the ST7FMC internal OpAmp.
Not present
Disconnects the R21 shunt resistor from the external
Operational OpAmp circuitry and to the ST7FMC internal
OpAmp, when using an external power stage through J4
or J6.
Present
Connects the diagnostic output of the L6386 driver to the
MCES pin of the ST7FMC and enables the onboard
inverter power stage.
Not present
Disables the onboard inverter, when using an external
inverter power stage on J4 or J6.
Present
Connects the heatsink thermal sensor (NTC2, located on
the bottom side of the PCB) to the AIN0 pin of the
ST7FMC.
Not present
Heatsink thermal sensor not connected to the AIN0 pin
of the ST7FMC.
Not present
ST7FMC internal OpAmp is used to amplify current
sensed by the R21 shunt resistor.
Upper position
ST7FMC internal OpAmp not used. External OpAmp not
used. The ST7FMC MCCFI0 pin (comparator input) is
directly connected to the R21 shunt resistor to sense
current.
Lower position
ST7FMC internal OpAmp not used. External OpAmp
used to amplify the current sensed by the R21 shunt
resistor. The ST7FMC MCCFI0 pin (comparator input) is
connected to the external OpAmp output.
“15V” (left position)
A voltage of 15 V DC is applied on pin 9 of J4 (to supply
the external inverter and driver).
W3
W4
W5
W6
W7
Page 57
5
Connectors and Functions
Name
Selection
Description
“5V” (right position
A voltage of 5 V DC is applied on pin 9 of J4 (to supply
the external inverter and driver).
“5V” (left position)
A voltage of 5 V DC is applied on pin 8 of J4.
Right position
The pin 8 of J4 is redirected to the MCES input of the
ST7FMC.
“INT” (lower position)
Internal voltage is applied to the WUP pin of the L9638
LIN transceiver. LIN transceiver supplied with the
onboard 15 V DC, mainly for debugging purposes.
“EXT” (upper position)
External voltage is applied to the WUP pin of the L9638
LIN transceiver. LIN transceiver supplied with external
voltage, typically the battery bus in automotive
applications.
Upper position
The TDO output of the ST7FMC is directed to the L9638
LIN transceiver.
Lower position
The TDO output of the ST7FMC is directed to ST232
UART transceiver.
Upper position
The RDI input of the ST7FMC comes from the L9638
LIN transceiver.
Lower position
The RDI input of the ST7FMC comes from the ST232
UART transceiver.
“VARIABLE”
The current reference comes from a PWM-generated,
RC-filtered signal generated by the ST7FMC
microcontroller (Current mode or Voltage mode).
“FIXED”
The current reference comes from the “POT1”
potentiometer (Voltage mode only).
W13
W14
W15
W16
Not present
Upper position
Upper position
Upper position
BLDC motor: sensorless input on the MCIA, MCIB,
MCIC pins of the ST7FMC (rotor position information
comes from motor’s three phases).
W13
W14
W15
W16
Not present
Lower position
Lower position
Lower position
BLDC motor: sensor input on the MCIA, MCIB, MCIC
pins of the ST7FMC (rotor position information comes
from J19).
W13
W14
W15
W16
Not present
Lower position
Lower position
Lower position
AC motor with no tachometer sensor.
W8
W9
W10
W11
5
W12
Page 58
AK-ST7FMC User's Manual
Name
Selection
Description
W13
W14
W15
W16
Present
Lower position
Lower position
No Jumper
AC motor with tachometer sensor (the tachometer signal
is connected to the MCIC input of the ST7FMC).
J8
All jumpers present
AC motor: tachometer signal is filtered with capacitors.
BLDC motor, sensorless method other than
STMicroelectronics method: the four analog inputs
MCIA, MCIB, MCIC and MCVREF are filtered with
capacitors.
BLDC motor, Sensor mode: hall sensors signals are
filtered with capacitors.
No jumper present
BLDC motor, STMicroelectronics sensorless method.
All jumpers present
Connects the bus voltage to the AIN1 pin of the
microcontroller, and the temperature monitoring signal to
the AIN0 pin of the microcontroller.
No jumper present
No monitoring of bus voltage or temperature (not
recommended). The AK-ST7FMC Control Panel and the
Motor Control library might not work properly if these
jumpers are removed (real-time monitoring of bus
voltage and heatsink temperature might read values
leading to motor stop).
J9
J10
All jumpers present
May be used for wrapping purposes on ST7FMC Port
E[3:0] I/O pins.
J15
All jumpers present
Always connected.
Page 59
5
Connectors and Functions
5.8.2 Connectors Summary/Pinout
The following table details the pinout of each of the Motor Control board’s
connector.
Table 5.7: Connectors Summary/Pinout
Name
Reference
J1
2 1
Description/Pinout
Optional 15 V DC, 0.5 A input connector to supply the
Motor Control board logic separately from the motor
power stage.
1.
2.
J2
5
2
15 V DC output connector to supply the Optoisolation
board.
1
1.
2.
J3
15 V DC Power Supply
VSS Power
15 V DC Power Supply
VSS Power
Up to 42 V DC or 30 Veff AC power supply input
connector.
1
2
1.
2.
3.
3
J4
10
1
Earth
Power Input (AC/DC)
Power Input (AC/DC)
AC motor power connector (when overriding internal
power inverter).
1.
2.
3.
4.
5.
6.
7.
8.
MCO0 – Motor Control Output 0
MCO2 – Motor Control Output 2
MCO4 – Motor Control Output 4
MCO1 – Motor Control Output 1
MCO3 – Motor Control Output 3
MCO5 – Motor Control Output 5
MCES – Motor Control Emergency Stop
Selectable between 5 V and MCES (see W8
Jumper)
9. Selectable between 5 V and 15 V (see W7
Jumper)
10. VSS Board
Page 60
AK-ST7FMC User's Manual
Name
Reference
J5
Description/Pinout
LIN output connector.
3
1
1.
2.
3.
J6
25
26
1
2
BAT – LIN Transceiver External Supply Voltage
LIN – Bidirectional I/O
VSS Board
BLDC motor power connector (when overriding
internal power inverter).
1.
2.
3.
4.
5.
6.
7.
8.
9.
10.
11.
12.
13.
14.
15.
16.
17.
18.
19.
20.
21.
22.
23.
24.
25.
26.
MCES – Motor Control Emergency Stop
VSS Board
MCO1 – Motor Control Output 1
VSS Board
MCO0 – Motor Control Output 0
VSS Board
MCO3 – Motor Control Output 3
VSS Board
MCO2 – Motor Control Output 2
VSS Board
MCO5 – Motor Control Output 5
VSS Board
MCO4 – Motor Control Output 4
VSS Board
15 V DC Power Supply
VSS Board
MCIA – Motor Control Input A
VSS Board
MCIB – Motor Control Input B
VSS Board
MCIC – Motor Control Input C
VSS Board
OAP – Operational Amplifier Input
VSS Board
5 V DC Power Supply
VSS Board
5
Page 61
Connectors and Functions
Name
Reference
J7
Description/Pinout
LIN control connector.
4
1
1.
2.
3.
4.
1
J11
WUP – LIN Wake-Up Input
INH – LIN Inhibit Output
EN – LIN Enable Input
2.2 KOhm Pull-Up Resistor to 5 V
(enables the LIN transceiver when adding a
jumper between pin 3 and pin 4)
Motor phases and additional monitor signals. Also
used to connect the “Alternate Z Sampling” daughter
board (for classic sensorless control method).
7
5
1.
2.
3.
4.
5.
6.
7.
J12
Motor three phases output.
5
1.
2.
3.
4.
1
5.
J13
Page 62
Motor Phase C
VSS Board
Motor Phase B
VSS Board
Motor Phase A
VSS Board
MCVREF – Motor Control Voltage Reference
10
9
2
1
Motor Phase C
Motor Phase A
Motor Phase B
DC Bus Middle Point
(may be used for bi-phase motors)
Earth
ICC connector, to be used with inDART-STX to
download/debug code.
1.
2.
3.
4.
5.
6.
7.
8.
9.
10.
VSS Board
ICCDATA
VSS Board
ICCCLK
VSS Board
RESET#
5 V DC Power Supply
VPP
N.C.
VSS Board
AK-ST7FMC User's Manual
Name
Reference
J16
Description/Pinout
Tachometer input connector for AC motor speed loop
control.
2
1
1.
2.
21
J17
External analog input connected to the AIN9 pin of the
ST7FMC (available to the user).
1.
2.
21
J18
2.
1
5
Digital Input
(47 KOhm pull-up resistor to 5 V and 10 nF
debouncing capacitor: allows to directly connect a
push-button or switch).
VSS Board
Hall sensors input connector.
1.
2.
3.
4.
5.
P1
Analog Input
(filtered with a 1 KOhm/10 nF RC network)
VSS Board
External digital I/O connected to the PF3 pin of the
ST7FMC (available to the user).
1.
J19
Tachometer Bias (0.6 V)
Tachometer Input
Hall Sensor Input 1
Hall Sensor Input 2
Hall Sensor Input 3
5 V DC Power Supply
VSS Board
RS-232 connector.
6
1
9
5
1.
2.
3.
4.
5.
6.
7.
8.
9.
N.C.
RX
TX
Tied to Pin 6
0V
Tied to Pin 4
Tied to Pin 8
Tied to Pin 7
N.C.
Page 63
5
Connectors and Functions
5.8.3 Jumper Settings for a BLDC Motor (Default)
Table 5.8: Jumper Settings Example for a BLDC Motor
Jumper
S1
5
Settings for the Default
AMETEK 24 V BLDC Motor
Settings for a Generic
High-Voltage BLDC Motor
“<35V ONLY”
“<35V ONLY” or “HIGH VOLTAGE”
W3
Present
W4
Present
W5
Present
W6
Not present
W7
Not present
W8
Not present
W9
Not present
W10
Lower position
W11
Lower position
W12
“VARIABLE”
W13
Not present
W14
W15
Sensorless mode (default): all jumpers in upper position
Sensor mode: all jumpers in lower position
W16
J8
No jumper present
J9
All jumpers present
J10
No jumper present
J15
All jumpers present
Page 64
AK-ST7FMC User's Manual
5.8.4 Jumper Settings for an AC Motor
Table 5.9: Jumper Settings Example for an AC Motor
Jumper
Settings for a Generic AC Motor, Onboard Inverter Power Stage,
Tachometer Feedback
S1
“<35V ONLY” or “HIGH VOLTAGE”
W3
Present
W4
Present
W5
Present
W6
Not present
W7
Not present
W8
Not present
W9
Not present
W10
Lower position
W11
Lower position
W12
“VARIABLE”
W13
Present
W14
Lower position
W15
Lower position
W16
5
Not present
J8
All jumpers present
J9
All jumpers present
J10
No jumper present
J15
All jumpers present
Page 65
AK-ST7FMC User's Manual
6 AK-ST7FMC Control Panel
Features
6.1 Introduction
Note: the AK-ST7FMC Control Panel doesn’t reflect the full capabilities of
the ST7FMC microcontroller and uses only partially its built-in resources. To
take full advantage of the ST7FMC capabilities, it may be necessary to
bypass the AK-ST7FMC Control Panel and edit directly the ST7FMC
firmware. For instance, sinewave control of PMAC motors with sensors is not
implemented in the AK-ST7FMC Control Panel at the time of printing and
requires a separate firmware.
It can be the case that for a specific motor (e.g. PMAC or BLDC compressor
with load condition) the AK-ST7FMC Control Panel doesn’t provide enough
flexibility to be used for motor driving (start-up and/or run). In this case,
separate fine tuning of the ST7FMC firmware is needed for optimum start-up
algorithm and maximum speed.
6.1.1 Suggested BLDC Motor Learning Steps
1.
2.
3.
Run the provided AMETEK motor and use the AK-ST7FMC Control
Panel default settings to understand the interdependence of the various
parameters.
Then, run your own motor in Sensorless, Open Loop mode in order to
find the correct start-up sequence setting. Preferably, select Voltage
mode: this allows the motor to take as much current as needed (within
the maximum current limit acceptable by the motor) and ensures a
successful start-up.
Set the correct alignment parameters and acceleration phase
parameters. In the Real-Time Settings parameter group, set a duty
cycle at least equal to the acceleration phase’s. Click the “START”
Page 67
6
AK-ST7FMC Control Panel Features
4.
5.
6.
button and, in case the motor fails to start, adjust start-up settings
and/or advanced settings. When the motor starts, adjust the delay
coefficients for a given duty cycle (speed) to get the best motor
efficiency.
After the Open Loop mode start-up parameters and advanced settings
have been fine tuned, the motor can then be run in Closed Loop mode
based on these parameters.
In Closed Loop mode, start-up parameters must be set again to comply
with the closed loop operation.
It is then possible to run the motor in standalone mode by collecting
real-time data and generating the appropriate header files to be used
with the provided Motor Control library, in order to generate a firmware
to be programmed into the microcontroller. This is explained in detail in
the “Preparing for Standalone Mode: BLDC Motors” section on page 42.
6.1.2 Suggested AC Motor Learning Steps
1.
6
2.
3.
4.
5.
We suggest you to order the SELNI motor and experiment with the AKST7FMC Control Panel’s default settings for this motor, to understand
the interdependence of the various parameters.
Then, run your own motor in Open Loop mode with a speed sensor (this
will allow to monitor the speed and ensure that the stator frequency
doesn't go below the rotor frequency—otherwise reactive current will be
generated by the motor, causing overvoltage on bulk capacitors and
possibly destruction of the board) in order to characterize the motor
and/or to verify that the motor is suitable for the intended load.
After the V/F curve, the start-up parameters and the advanced settings
have been fine tuned, the motor can then be run in Closed Loop mode.
In Closed Loop mode, start-up parameters must be set again to comply
with the closed loop operation.
It is then possible to run the motor in standalone mode by collecting
real-time data and generating the appropriate header files to be used
with the provided Motor Control library, in order to generate a firmware
to be programmed into the microcontroller. This is explained in detail in
the “Preparing for Standalone Mode: AC Motors” section on page 46.
Page 68
AK-ST7FMC User's Manual
6.2 Motor Type Choice
When starting the AK-ST7FMC Control Panel, you must choose which motor
type you are working with.
Table 6.1: AK-ST7FMC Control Panel: Motor Type Choice
Parameter Name
Motor Type
Choice
Parameter Values/Description
3 Phase
Brushless
Permanent
Magnet AC or DC
Motor
(Trapezoidal)
Controls the BLDC blower included in the AKST7FMC Starter Kit or any other BLDC
motor/compressor, including PMAC wound
motors in six-step mode.
MDTG write-once register, bit PCN at 0.
3 Phase AC
Induction Motor
(Sinewave)
Controls the SELNI three-phase induction motor
(not included in the AK-ST7FMC Starter Kit) or
any other three-phase induction
motor/compressor in sinewave mode.
MDTG write-once register, bit PCN at 1.
6.3 BLDC Motor Parameters
This set of parameters allows you to control the AMETEK BLDC blower
included the kit or any other BLDC motor/compressor, including PMAC
wound motors in six step mode. Please ensure that the correct jumper
settings have been set on the board.
Page 69
6
AK-ST7FMC Control Panel Features
6
Figure 6.1: AK-ST7FMC Control Panel Main Window for BLDC Motors
Note: In the following tables, the name of the ST7FMC registers
corresponding to the AK-ST7FMC Control Panel settings is reported in bold
when applicable. This is in order to help you establish an easy link between
the AK-ST7FMC Control Panel and the information available in the
microcontroller datasheet.
Page 70
AK-ST7FMC User's Manual
6.3.1 Main Motor Settings
Table 6.2: AK-ST7FMC Control Panel: BLDC Motor Main Settings
Parameter Name
Motor Type
Parameter Values/Description
AMETEK Motor
An AMETEK 24 V BLDC blower is the default
motor included in the AK-ST7FMC Starter Kit.
This motor features 3 Hall sensors but is
controlled in Sensorless mode by default. It can
also be controlled in Sensor mode (see below).
The “Default Settings” button restores the best
performance settings for this motor.
Other BLDC
Motor
Any other BLDC motor (including compressor)
with or without sensors can be controlled by the
AK-ST7FMC Starter Kit. Motors (including
compressors) wound to use sinewave mode (so
called PMAC motors) can also be controlled with
optimum results in trapezoidal mode. Note that
all basic and advanced parameters are by
default those chosen for the AMETEK motor. It is
unlikely that these settings will suit your motor.
The AK-ST7FMC Control Panel can help you
find these parameters.
Poles Pair
Number of pair poles of the motor connected to the Starter Kit. BLDC
motors with up to 18 pairs of poles can be used.
Detection Mode
Sensorless
The default sensorless control method is the
STMicroelectronics patented three-resistor
method.
Other standard sensorless methods can be
implemented by modifying the Motor Control
board hardware and by selecting the appropriate
BEMF sampling method. All sensorless methods
implemented in this Starter Kit use a six-step
signal driving topology.
MCRA register, bit SR at 0.
Sensor 120°
To run the motor in Sensor mode you need to
properly set jumpers W14, W15, W16. You need
to connect sensors and respect sensor wiring.
MCRA register, bit SR at 1.
Page 71
6
AK-ST7FMC Control Panel Features
Parameter Name
Driving Mode
6
Parameter Values/Description
Sensor 60°
To run the motor in Sensor mode you need to
properly set jumpers W14, W15, W16. For the
AMETEK motor the wiring of sensors provided is
compatible with the firmware to control the motor
in Sensor mode. For other motors you need to
connect sensors and respect sensor wiring (and
modify jumper settings accordingly).
MCRA register, bit SR at 1.
Current Mode
In this mode, a current reference is set either by
the user (in Open Loop mode) or by the PI
(Proportional Integral regulator) to reach or
maintain target speed (in Closed Loop mode).
The ST7FMC motor control peripheral
automatically adapts the PWM duty cycle to
maintain the current in the motor at the level of
the current reference.
MCRA register, bit V0C1 at 1.
Voltage Mode
Voltage mode is preferred in applications
requiring high torque at start-up and applications
with significant load variations. In this mode, a
PWM duty cycle is set by the user (in Open Loop
mode) or by the PI (Proportional Integral
regulator) to reach or maintain target speed (in
Closed Loop mode).
MCRA register, bit V0C1 at 0.
Current
Limitation
When using Voltage mode, a programmable current limitation can be
set. The AK-ST7FMC Control Panel doesn't allow to set this value in
real time (the motor needs to be stopped each time). However, in the
actual application, the maximum current value can be programmed
and modified by software in real time (by varying the 8-bit ARTimer or
12-bit PWM duty cycle and connecting the 8-bit ARTimer or 12-bit
PWM output to the proper RC circuit, this RC circuit being connected
to the current comparator input).
MCPVH and MCPVL compare registers.
Speed
Regulation
Open Loop
Page 72
No speed regulation (no Proportional Integral
regulation) is available. The motor is controlled
directly by the user through duty cycle (voltage
mode) or current reference (current mode).
Useful to fine tune the start-up parameters and
the BEMF rising and falling edge coefficients.
AK-ST7FMC User's Manual
Parameter Name
Parameter Values/Description
Closed Loop
Proportional Integral regulation is available (this
is done by software in the MCU). The user sets a
desired speed: based on the PI values for this
speed, the MCU defines a duty cycle (voltage
mode) or a current reference (current mode).
Closed Loop mode is used to implement a fine
speed response and regulation.
6.3.2 Start-Up Settings
A successful motor start-up is a start-up that occurs 100% of the times and
in a very short time. To achieve a successful start-up, two phases are
required: the alignment phase and the acceleration phase. The start-up
method implemented in AK-ST7FMC Control Panel is only one among many
different start-up methods. For some motors it may be necessary to
implement a start-up strategy different than the one proposed in the AKST7FMC Control Panel. This will require the ST7FMC firmware to be edited
directly without using the AK-ST7FMC Control Panel.
The alignment phase consist in rotating the motor in a know position and to
stabilize the rotor before starting. To achieve this, a voltage or current ramp
is supplied to the motor (increasing current or increasing duty cycle
depending on Current or Voltage mode). During the alignment phase, the
motor is polarized with a fixed step configuration T1-T4-T6 (no rotating
statoric field).
The acceleration phase is a phase during which synchronous rotation is
forced on the motor with a fixed acceleration rate in order to get BEMF
information and switch as soon as possible from Forced mode to
Autoswitched mode (for more information about Forced mode and
Autoswitched mode please refer to the ST7FMC microcontroller datasheet).
Page 73
6
AK-ST7FMC Control Panel Features
Table 6.3: AK-ST7FMC Control Panel: BLDC Motor Start-Up Settings
Parameter Name
6
Parameter Description
Final Current
In Current mode, sets the final current at the end of the programmed
alignment time.
MCPVH and MCPVL compare registers.
Final Duty Cycle
In Voltage mode, sets the final duty cycle at the end of the
programmed alignment time.
MCPUH and MCPUL compare registers.
Alignment
Duration
The alignment duration is the duration of the alignment phase.
MCOMP (data) and MPRSR (clock) registers.
Mechanical
Acceleration
Rate
The acceleration phase is a phase during which synchronous rotation
is forced on the motor with a fixed acceleration rate in order to get
BEMF information and switch from the forced mode to the
autoswitched mode as soon as possible.
Forced mode: MCRA register, SWA bit at 0.
Autoswitched mode: MCRA register, SWA bit at 1.
To achieve mechanical acceleration, a 64-step acceleration ramp is
built, based on this parameter. 64 steps are usually more than enough
to safely reach Autoswitched mode. If Autoswitched mode cannot be
reach by the end of the acceleration ramp, the motor will stop and the
“Start-Up Fails” or “Motor Stalled” (if rotor blocked) red icon turns on.
This value can be set in Hz/s or RPM/s (click the “Hz” or “RPM”
button next to the edit box to switch between units).
Duty Cycle
Constant duty cycle applied during the acceleration phase.
MCPUH and MCPUL compare registers.
Current
Constant current reference applied during the acceleration phase.
MCPVH and MCPVL compare registers.
Number of Z
Events Before
Autoswitched
Mode
Number of consecutive Z events that must be detected to switch to
Autoswitched mode.
Step Number
without Z
detection
Number of first steps of the ramp which are blanked (no BEMF
reading). During the very first steps of the acceleration, the BEMF may
be too low to be detected. During these first steps, the BEMF detection
should be inhibited.
Page 74
AK-ST7FMC User's Manual
Parameter Name
Parameter Description
Electrical
Frequency
Theoretical projected mechanical speed based on the 64th step
duration and acceleration rate. Based on the number of pairs of poles
and acceleration rate, the AK-ST7FMC Control Panel will compute the
length of all of the elementary 64 electrical steps of the acceleration
ramp and therefore provide a projection of the mechanical frequency at
the end of the 64 steps (this is a theoretical value, as it is unlikely that
64 steps are actually needed to start-up the motor—typically the motor
control will be switched to Autoswitched mode within the first 10 steps).
This value can be set in Hz or RPM (click the “Hz” or “RPM” button
next to the edit box to switch between units).
Total Duration
Theoretical duration of the acceleration phase if all of the 64 steps are
completed.
6
Page 75
AK-ST7FMC Control Panel Features
6.3.3 Real-Time Settings
Table 6.4: AK-ST7FMC Control Panel: BLDC Motor Real-Time Settings
Parameter Name
Parameter Description
Target Electrical
Frequency
Closed Loop target speed. When running in Closed Loop this is a key
parameter because, for a given speed, several other parameters in the
AK-ST7FMC Control Panel main window (BEMF coefficients, PI
control coefficients, sampling time) and in the Advanced Settings
window (software demagnetization, and possibly blanking
windows/event counters) needs to be fine tuned.
This value can be set in Hz or RPM (click the “Hz” or “RPM” button
next to the edit box to switch between units).
Note: if the desired speed cannot be reached, it may be because of the
minimum and maximum speed limits set in the Advanced Settings
window. Please also check that the “Switches PWM Minimum Off
Time” parameter in the Advanced Settings window is not too high
(only when using the STMicroelectronics’ patented three-resistor
BEMF sampling method).
Duty Cycle
This is an Open Loop, Voltage Mode parameter. It is used to manually
control the speed of the motor.
Note: if the desired duty cycle cannot be reached, it may be because
of the maximum duty cycle set in the Advanced Settings window.
Please also check that the “Switches PWM Minimum Off Time”
parameter in the Advanced Settings window is not too high (only when
using the STMicroelectronics’ patented three-resistor BEMF sampling
method).
MCPUH and MCPUL compare registers.
Current
Reference
This is an Open Loop, Current Mode parameter. It is used to manually
control the speed of the motor.
MCPVH and MCPVL compare registers.
Delay Coefficient
Value between 0 and 255 used to compute the delay between the Zero
Crossing event (Z) and the Next Commutation event (C).
6
Formula: Delay = (Delay Coefficient * ZTime) / 256,
where ZTime is the time between the current Zero Crossing event and
the previous Zero Crossing event (or the previous two if this has been
set in the “Delay Computation” parameter in the Advanced Setting
window). Rising and falling edge detection have been differentiated to
compensate the small delay due to the imbalance in step time.
Imbalance in step time comes from the fact that the Zero Crossing
event is not exactly detected at zero but slightly before (falling BEMF)
or after (rising BEMF). This is caused by threshold voltage and by the
asymmetrical BEMF shape on some motors.
Page 76
AK-ST7FMC User's Manual
Parameter Name
Parameter Description
BEMF Rising
Edge
Sets the coefficient used to compute the delay when the BEMF is
rising.
MWGHT register.
BEMF Falling
Edge
Sets the coefficient used to compute the delay when the BEMF is
falling.
MWGHT register.
Integral
Coefficient (Ki)
Closed Loop parameter. For beginning with a new motor, it is
recommended to start from 0. The higher the value, the shorter the
time necessary to cancel the static error, but a value too high will
render the system unstable.
Proportional
Coefficient (Kp)
Closed Loop parameter. The higher the value, the lower will be the
static error, but a value too high will render the system unstable.
Sampling Time
The time interval between two PI control samplings. The lower the
sampling time the better will be the regulation bandwith. However, a
value too low will not increase the system dynamic response above a
certain point, and will consume microcontroller resources.
Electrical
Frequency
Rotor speed reading.
This value can be read in Hz or RPM (click the “Hz” or “RPM” button
next to the value to switch between units).
Reported Duty
Cycle
Available in Closed Loop only. Displays the duty cycle computed by
the PI control, which is directly applied on power switches (in Voltage
mode), or used to modulate the current reference (in Current mode).
6.3.4 Advanced Settings
BLDC motor advanced settings are available by clicking the “Advanced
Settings” button in the main AK-ST7FMC Control Panel window.
Page 77
6
AK-ST7FMC Control Panel Features
6
Figure 6.2: BLDC Motor Advanced Settings Dialog Box
Page 78
AK-ST7FMC User's Manual
Table 6.5: AK-ST7FMC Control Panel: BLDC Motor Advanced Settings
Parameter Name
Parameter Values/Description
PWM Settings
Switches PWM
Frequency
Inverter switches (IGBT/MOSFET) PWM output frequency.
In the firmware, the frequency is set as follows: in Voltage mode, the
12-bit timer frequency is set to the desired PWM frequency (MCPOL,
MCPOH and MPCR registers); in Current mode, the PWM frequency
is selected in the MPRSR register, 4 bits from SA3 to SA0. The
output polarity (MPOL register, 6 bits from OP5 to OP0) of the six
PWM outputs is fixed for the STMicroelectronics drivers and cannot be
changed. For sources using the opposite polarity, please contact
STMicroelectronics.
Switches PWM
Minimum OffTime
When using the STMicroelectronics patented three-resistor method,
this parameter is required to maintain a sufficient PWM OFF state on
the high side of the switches to allow for BEMF reading. This
parameter is enabled only when the “At end of PWM low state” Z
Event sampling method is selected. The BEMF sampling is done
during the PWM OFF state, but just before the ON state. The optimum
OFF time should be carefully calculated depending on the PWM
switching frequency and on motor behavior (mainly the motor stray
capacitance).
MPWME register, 4 bits from OT3 to OT0.
Complementary
PWM Signal
Only when using MOSFETs (instead of the Motor Control board’s
onboard IGBTs), this feature can be enabled to perform synchronous
rectification, allowing the free wheeling current to pass inside the
MOSFETs instead of the body diode (reduced power losses). The
“Dead Times” parameter (see below) must be set correctly.
Compl. PWM disabled: MDTG write-once register, bit DTE at 0.
Compl. PWM enabled: MDTG write-once register, bit DTE at 1.
Dead Times
Sets the deadtime between the switches’ high and low side to avoid
cross conduction. The inverter of the Motor Control board requires a
minimum deadtime of 0.625 µs to avoid cross conduction problems.
Values from 0.625 µs to 16 µs are available in the AK-ST7FMC
Control Panel. However, values as low as 0.125 µs can be set when
editing ST7FMC registers directly. This allows to modify the deadtime
in case an external inverter power stage is connected to the board.
MDTG write-once register, 6 bits from DTG5 to DTG0.
Page 79
6
AK-ST7FMC Control Panel Features
Parameter Name
Parameter Values/Description
PWM Distribution
Sets PWM signal distribution between the switches’ high side and low
side (respectively even and odd) after each C, D and Z event. Double
click to toggle from 0 to 1 and vice versa.
For each step it is possible to select on which active switch the PWM
signal is applied after the 3 different events (C, D and Z). This is useful
to accelerate demagnetization and to reduce the level of reactive
current inside the winding.
Example: on step T1-T4, T1 is the high side (even) and T4 is the low
side (odd). Setting the corresponding “After C” value to 1 causes the
PWM signal to be applied on the odd switch (T4) from the C event until
the D event; setting the “After D” value to 0 causes the PWM signal to
be applied on the even switch (T1) from the D event until the Z event;
setting the “After Z” value to 1 causes the PWM signal to be applied on
the odd switch (T4) from the Z event until the next C event.
MCRB register, 3 bits from OS2 to OS0.
Speed Range
6
Minimum
Mechanical
Speed
Available in Closed Loop only. Speed below which you do not want the
motor to run. This can be useful in Sensorless mode, to avoid going
below a speed that doesn't allow to generate enough BEMF.
This value can be set in Hz or RPM (click the “Hz” or “RPM” button
next to the edit box to switch between units).
Maximum
Mechanical
Speed
This is a safety value.
Example: for a motor with a specification of 20,000 RPM absolute
maximum, set the same value; if this speed is exceeded, the rotor may
be explode or ball bearings may get damaged, and in turn this may
cause major injuries (the rotor may be blocked instantaneously,
causing the whole motor chassis to turn as a reaction). Always fix
securely the motor on a mechanical bench.
This value can be set in Hz or RPM (click the “Hz” or “RPM” button
next to the edit box to switch between units).
Current Loop
Current Blanking
Window
Used to prevent the Current Loop from stopping on a current spike
after PWM ON. This spike is usually caused by the recovery current
from the half-bridge free wheeling diode and can be further increased
by the discharge of the motor winding stray capacitance. The blanking
window starts after each PWM ON event and during this blanking
window no reading of current is done. This blanking window can also
be disabled.
MCFR register, 3 bits from CFW2 to CFW0.
Current Event
Counter Filter
Number of consecutive current comparator samples (at 1 MHz)
required to switch the PWM signal to OFF.
MCFR register, 3 bits from CFF2 to CFF0.
Page 80
AK-ST7FMC User's Manual
Parameter Name
Parameter Values/Description
Maximum
Allowed Current
In Current mode, to avoid damaging the motor, the user can set a
maximum current acceptable for the motor. This value cannot be
exceeded by the PI control (in Closed Loop) and by the current
reference real-time setting (in Open Loop). However, this value can be
exceeded during the start-up phase (Alignment Phase and
Acceleration Phase). The AK-ST7FMC Control Panel the maximum
current value is clamped to 8.7 A to suit the starter kit hardware.
Maximum
Allowed Duty
Cycle
In Voltage mode, the user can specify a maximum PWM duty cycle
that the application can’t exceed. This value cannot be exceeded by
the PI control (in Closed Loop) and by the duty cycle real-time setting
(in Open Loop). However, this value can be exceeded during the startup phase (Alignment Phase and Acceleration Phase). When using the
STMicroelectronics’ patented three-resistor control method (“Z Event
Sampling Method” parameter set to “At the end of the PWM low
state”), the maximum PWM duty cycle is clamped to a value
(calculated by the AK-ST7FMC Control Panel) which is based on the
programmed PWM signal frequency and on the minimum off time.
Clamping the maximum PWM signal duty cycle to this value allows for
sufficient time for BEMF reading during the PWM OFF state.
D and Z Sampling Parameters
Sampling Clock
(fSCF)
Sampling frequency used for detecting D events. The same sampling
frequency is used for detecting Zero Crossing events, when the (“Z
Event Sampling Method” parameter is set to “At PWM On, with
delay, at fSCF frequency” or to “At fSCF frequency”.
MSCR register, 2 bits from SCF1 to SCF0.
Unused MCIx
Input
Sets the state of the two phases that, at any given time, are not
sampled (while the third phase is being sampled). When using
STMicroelectronics’ patented three-resistor sensorless method,
unused MCIx input are grounded.
MSCR register, DISS bit.
BEMF Sampling Method
Z Event Sampling
Method
At end of the
PWM low state
To be used with STMicroelectronics patented
three-resistor control method. This method uses
the default jumper setting of the Motor Control
board.
At PWM on, with
delay, once
To be used with sensorless classic control
method. The “Alternate Z Sampling” daughter
board must be used, and jumpers in the Motor
Control board must be set accordingly.
At PWM on, with
delay, at fSCF
frequency
Classic automotive method. The “Alternate Z
Sampling” daughter board must be used, and
jumpers in the Motor Control board must be set
accordingly.
Page 81
6
AK-ST7FMC Control Panel Features
Parameter Name
Parameter Values/Description
At fSCF
frequency
Pulse Amplitude Modulation method. The Motor
Control board needs to be significantly modified.
The figure at the end of this table illustrates these four sampling
methods.
MCRC register, SPLG bit and MCONF register, 4 bits from DS3 to
DS0.
Delay for
Sampling
The delay between the PWM signal rising edge and start of BEMF
sampling. This feature is only applicable to “At PWM on, with delay,
once” and “At PWM on, with delay, at fSCF frequency” Z sampling
methods.
MCONF register, 4 bits from DS3 to DS0.
Zero Crossing
6
After D Blanking
Window
Protects against noise that may be wrongly interpreted as a Zero
Crossing event. After commutation, there is a time window during
which a Zero Crossing event cannot physically occur. During this time
window there should not be Z sampling.
MZFR register, 4 bits from ZWF3 to ZWF0.
Z Event Counter
Filter
Protects against Zero Crossing (Z) spurious information. It’s possible
to detect from 1 to 15 Zero Crossing events before validating the Z
event.
MZFR register, 4 bits from ZEF3 to ZEF0.
Delay
Computation
Formula: Delay = (Delay Coefficient * ZTime) / 256
When calculating the Delay value (see the “Delay Coefficient”
parameter in the Real-Time Settings group), Ztime is the time between
the current Zero Crossing event and the one before, or between the
previous Zero Crossing event and the one preceding it. Usually,
“Current” is used. “Previous” can be selected to compensate for
asymmetrical step times.
MCRA register, DCB bit.
Z Event
Protection
Page 82
If enabled, the Motor Control board verifies that, when a Zero Crossing
event is detected, the state of the BEMF signal was opposite at the
previous sampling. This is needed to differentiate a BEMF Zero
Crossing event from a End-of-Demagnetization event. This feature can
be useful when using hardware End-of-Demagnetization event
detection and running the motor at high speed. When this parameter is
enabled, the “Z Event Counter Filter” parameter is disabled.
MCRA register, PZ bit.
AK-ST7FMC User's Manual
Parameter Name
Parameter Values/Description
Threshold
Voltage
When using the STMicroelectronics’ patented sensorless BLDC
method, this parameter sets the voltage of the second comparator
input (the voltage to be compared to BEMF, first comparator input
being the BEMF). A list of pre-set values is available.
When using other BEMF sampling methods, requiring the
reconstruction of the motor ground, the external threshold option (“Ext.
Ref.” value) should be selected, and the corresponding hardware
should be implemented on the Motor Control board.
MCRC register, 3 bits from VR2 to VR0.
After C Blanking
Window
Protect against noise that may be wrongly interpreted as an End-ofDemagnetization (D) event. After commutation, there is a time window
during which an End-of-Demagnetization event cannot physically
occur. During this time window there should not be D sampling.
MDFR register, 4 bits from DWF3 to DWF0.
D Event Counter
Filter
Protects against End-of-Demagnetization (D) spurious information. It’s
possible to detect from 1 to 15 D events before validating the D event.
MDFR register, 4 bits from DEF3 to DEF0.
Demagnetization
All Hardware
The End-of-Demagnetization event is detected
only by hardware.
MCRB register, bit HDM at 1, bit SDM at 0.
6
Page 83
AK-ST7FMC Control Panel Features
Parameter Name
Parameter Values/Description
Alternate
Hardware/
Software
It is possible to get more reliable End-ofDemagnetization event detection by using
hardware detection together with software
detection. This consists in extending by software
(after the hardware detection of D event) the
total demagnetization time before validating the
End-of-Demagnetization event. In both the AKST7FMC Control Panel and in the ST7FMC
firmware, this is implemented by multiplying the
detected hardware demagnetization time by
1.25, as in the following formula:
Total demagnetization time = Hardware
demagnetization time * Ked,
where Ked = 1.25. However, when editing
directly the ST7FMC firmware, it is possible to
change the Ked value and it is also possible add
a fixed time, i.e.:
Total demagnetization time = Hardware
demagnetization time * Ked + Ved,
where Ved is a time set by the user and which
depends on several parameters, including motor
speed (see the “All Software” below).
MCRB register, bit HDM at 1, bit SDM at 1.
6
Page 84
AK-ST7FMC User's Manual
Parameter Name
Parameter Values/Description
All Software
In some situations (e.g. when the
“Hardware/Software” option is not safe
enough) it may be necessary to set a
demagnetization time. This demagnetization
time must always be equal to or higher than the
physical demagnetization time of the motor
winding. In addition, since the rotor speed will
affect directly the step time, it is important, for
each speed (or duty cycle in Open Loop, Voltage
mode or current reference in Open Loop,
Current mode) to set a corresponding software
demagnetization time (or duty cycle, or current
reference). If the demagnetization time is too
long, it will limit the speed that can be reached
by the motor. What all of this means is that,
when using software demagnetization, you
should not significantly modify the target speed,
duty cycle, or current reference in the real-time
settings (when the motor is running), but you
should instead stop the motor, change the
software demagnetization time and start the
motor again.
MCRB register, bit HDM at 0, bit SDM at 1.
Demagnetization
Time
Available when the “All Software” option above is selected. This time
should be longer than the physical demagnetization time of the motor,
but short enough not to delay the BEMF detection. For each target
speed there should be a different software demagnetization time.
MDREG register, 8 bits from DN7 to DN0.
Force Duty Cycle
during
Demagnetization
During demagnetization, current circulating in windings where the
polarization doesn’t change may increase to a level which may
damage the motor. To avoid this situation, a dedicated duty cycle can
be applied during demagnetization. This feature is available in
Sensorless, Voltage mode.
Duty Cycle
Available when the “Force Duty Cycle during Demagnetization”
option above is enabled.
Stop Condition
Brake Level
Free Wheeling
After stop, the motor will continue to spin freely.
DC Current
Braking
To slow down the motor quickly, this feature
allows to apply active braking.
Available when the “DC Current Braking” option above is selected.
Two of the three bridge legs are grounded and a PWM signal with 50%
duty cycle (maximum) is applied on the third leg’s high side switch.
In Voltage mode, the duty cycle is loaded in the MCPUH and
MCPUL registers.
In Current mode, the current reference is loaded in the MCPVH
and MCPVL registers.
Page 85
6
AK-ST7FMC Control Panel Features
Parameter Name
Brake Time
Parameter Values/Description
Available when the “DC Current Braking” option above is selected.
Time during which active braking is applied and after which the motor
is free wheeling.
The following figures illustrates the options available for the “Z Event
Sampling Method” parameter.
Sampling at end of the
PWM OFF state
Programmable
delay
Sampling at PWM ON,
with delay, once
6
Programmable
delay
Sampling
@ f SCF
Sampling at PWM ON,
with delay, at fSCF
frequency
Sampling
@ fSCF
Sampling at fSCF
frequency
Figure 6.3: BLDC Motor: BEMF Sampling Methods
Page 86
AK-ST7FMC User's Manual
6.4 AC Motor Parameters
This set of parameters allows you to control the SELNI three-phase induction
motor (to be ordered separately) or any other three-phase induction
motors/compressors in sinewave mode. Please ensure that the correct
jumper settings has been set on the board.
6
Figure 6.4: AK-ST7FMC Control Panel Main Window for AC Motors
Page 87
AK-ST7FMC Control Panel Features
6.4.1 Main Motor Settings
Table 6.6: AK-ST7FMC Control Panel: AC Motor Main Settings
Parameter Name
Motor Type
6
Parameter Values/Description
SELNI Induction
Motor
The SELNI motor is an 800 W, 190 V, threephase induction motor. It features a tachometer
generator for speed monitoring. Due to its size
and weight it is not included in the AK-ST7FMC
Starter Kit but can be ordered separately.
Beginners to three-phase induction motor control
are strongly recommended to first use the SELNI
motor as a learning phase. The “Default
Settings” button restores the best performance
settings for driving this motor when the Motor
Control board is supplied with an input voltage of
42 V DC.
Other 3-Phase
Induction Motor
Any three-phase induction motor with or without
sensor (tachometer, encoder, Hall sensor).
Poles Pair
Number of pair of poles of the motor connected to the Starter Kit.
Induction motors with up to 2 pairs of poles can be used. Setting the
correct number of pairs of poles is important, as this defines the
relationship between speed and stator frequency.
Speed
Regulation
Open Loop
Open Loop can be selected for operating the
motor with no sensors and predictable load.
Open Loop can also be used to drive the motor
over the full Voltage/Frequency range. When
selecting Open Loop, no Proportional Integer
(PI) control is available, but speed monitoring is
possible (with the speed sensor). When
characterizing the efficiency versus the slip of
the motor, the speed sensor must be used.
Beware of motor breakdown and reactive
current.
Closed Loop
Closed Loop requires the use of the speed
sensor (either a tachometer or an Hall sensor),
and uses the PI control (see real-time settings
below). PI values must be adjusted depending
on load conditions. PI parameters not properly
set may lead to unstable behavior, especially in
case of no load condition.
Speed Sensor
Feedback
Page 88
Enable this feature if speed monitoring is required in Open Loop for
efficiency versus slip characterization.
AK-ST7FMC User's Manual
Parameter Name
Tachometer
Periods per
Revolution
Parameter Values/Description
Available when the “Speed Sensor Feedback” option above is
enabled, and specifies the number of poles pair of the tachometer
generator (if the tachometer has 8 pairs of poles, then 8 pulses per
revolution will be sent). For the SELNI motor, this value is fixed to 8.
6.4.2 V/F Curve Settings
Table 6.7: AK-ST7FMC Control Panel: AC Motor V/F Curve Settings
Parameter Name
Parameter Description
Min Voltage
Sets the maximum allowed voltage (255 corresponds to full bus
voltage) for low frequencies. This to avoid stator winding saturation
(and, in turn, stator overcurrent).
Low Frequency
Frequency below which voltage cannot go higher than the minimum
voltage specified by user.
High Frequency
Frequency above which voltage can go up to the full bus voltage
(255/255).
6
6.4.3 Start-Up Settings
Table 6.8: AK-ST7FMC Control Panel: AC Motor Start-Up Settings
Parameter Name
Parameter Description
Voltage Slew
Rate
Open Loop parameter only. Time interval between two voltage
increments (1/255).
Start-Up Stator
Frequency
Closed Loop parameter only. Inverter output frequency at start-up.
This value can be set in Hz or RPM (click the “Hz” or “RPM” button
next to the edit box to switch between units).
Maximum
Duration
Closed Loop parameter only. Time after which the motor is considered
as not started if no speed information has been detected.
Minimum Rotor
Frequency to
Validate Closed
Loop
This frequency, when reached by the rotor, will trigger true Closed
Loop control by exiting the start-up phase and entering the Closed
Loop routine (the start-up phase is controlled in Open Loop by default,
as no speed information is available during this phase). This value is
always smaller then start-up frequency.
This value can be set in Hz or RPM (click the “Hz” or “RPM” button
next to the edit box to switch between units).
Page 89
AK-ST7FMC Control Panel Features
6.4.4 Real-Time Settings
Table 6.9: AK-ST7FMC Control Panel: AC Motor Real-Time Settings
Parameter Name
6
Parameter Description
Stator Frequency
Open Loop parameter only. Defines the synchronous speed of the
motor. Basically it is the inverter output frequency.
This value can be set in Hz or RPM (click the “Hz” or “RPM” button
next to the edit box to switch between units).
Set Voltage
According to V/F
Curve
In Open Loop (and for predictable load systems), this option is useful
to adjust the speed without taking care of the applied voltage (the V/F
curve has been tuned to fit the load). If this option is disabled, then the
voltage can be set in the “Voltage” parameter below.
Voltage
Open Loop parameter only. For a given stator frequency, this is the
voltage applied to the stator windings (it can be any voltage below the
V/F limit, in other words any voltage within the red area).
Target Rotor
Frequency
Closed Loop parameter only. The target rotor speed (frequency) is the
expected speed (frequency) of the rotor. The Proportional Integral (PI)
control will adjust the stator voltage and frequency according to this
target frequency, the slip frequency and the V/F curve.
This value can be set in Hz or RPM (click the “Hz” or “RPM” button
next to the edit box to switch between units).
Target Slip
Frequency
Closed Loop parameter only. The slip value to be entered here should
be the slip giving optimum efficiency for the given target rotor
frequency and motor characteristics. The PI control will adjust the
stator voltage and frequency according to this slip frequency, the target
frequency and the V/F curve.
This value can be set in Hz or RPM (click the “Hz” or “RPM” button
next to the edit box to switch between units).
Integral
Coefficient (Ki)
Closed Loop parameter. For beginning with a new motor, it is
recommended to start from 0. The higher the value, the shorter the
time necessary to cancel the static error, but a value too high will
render the system unstable.
Proportional
Coefficient (Kp)
Closed Loop parameter. The higher the value, the lower will be the
static error, but a value too high will render the system unstable.
Sampling Time
The time interval between two PI control samplings. The lower the
sampling time the better will be the regulation bandwith. However, a
value too low will not increase the system dynamic response above a
certain point, and will consume microcontroller resources.
Reported
Frequency
Only valid in Closed Loop or in Open Loop with speed sensor
feedback. This is the speed (frequency) of the rotor as read by the
speed sensor.
This value can be read in Hz or RPM (click the “Hz” or “RPM” button
next to the value to switch between units).
Page 90
AK-ST7FMC User's Manual
Parameter Name
Parameter Description
Slip Frequency
The slip speed (frequency) is the stator speed (frequency) minus the
rotor speed (frequency).
This value can be read in Hz or RPM (click the “Hz” or “RPM” button
next to the value to switch between units).
Reported Voltage
Voltage output of the PI controller (in units of the bus voltage, full bus
voltage being 255/255).
6.4.5 Advanced Settings
AC motor advanced settings are available by clicking the “Advanced
Settings” button in the main AK-ST7FMC Control Panel window.
6
Figure 6.5: AC Motor Advanced Settings Dialog Box
Page 91
AK-ST7FMC Control Panel Features
Table 6.10: AK-ST7FMC Control Panel: AC Motor Advanced Settings
Parameter Name
Parameter Values/Description
Switches PWM
Frequency
Inverter switches (IGBT/MOSFET) PMW output frequency.
In the firmware, the 12-bit timer frequency is set to the desired PWM
frequency (MCPOL, MCPOH and MPCR registers). The output
polarity (MPOL register, 6 bits from OP5 to OP0) of the six PWM
outputs is fixed for the STMicroelectronics drivers and cannot be
changed. For sources using the opposite polarity, please contact
STMicroelectronics.
Minimum Stator
Frequency
Speed below which you do not want the motor to run.
This value can be set in Hz or RPM (click the “Hz” or “RPM” button
next to the edit box to switch between units).
Maximum Stator
Frequency
This is a safety value.
Example: for a motor with a specification of 20,000 RPM absolute
maximum, set the same value; if this speed is exceeded, the rotor may
be explode or ball bearings may get damaged, and in turn this may
cause major injuries (the rotor may be blocked instantaneously,
causing the whole motor chassis to turn as a reaction). Always fix
securely the motor on a mechanical bench.
This value can be set in Hz or RPM (click the “Hz” or “RPM” button
next to the edit box to switch between units).
Dead Times
Value
Sets the deadtime between the switches’ high and low side to avoid
cross conduction. The inverter of the Motor Control board requires a
minimum deadtime of 0.625 µs to avoid cross conduction problems.
Values from 0.625 µs to 16 µs are available in the AK-ST7FMC
Control Panel. However, values as low as 0.125 µs can be set when
editing ST7FMC registers directly. This allows the deadtime to be
modified in case an external inverter power stage is connected to the
board.
MDTG write-once register, 6 bits from DTG5 to DTG0.
Stop Condition
Free Wheeling
After stop, the motor will continue to spin freely.
DC Current
Braking
To slow down the motor quickly, this feature
allows to apply active braking.
6
Brake Level
Available when the “DC Current Braking” option above is selected.
Two of the three bridge legs are grounded and a complementary PWM
with maximum 50% duty cycle is applied on the switches of the third
leg.
Duty cycle loaded in the MCPUH and MCPUL registers.
Brake Time
Available when the “DC Current Braking” option above is selected.
Time during which active braking is applied and after which the motor
is free wheeling.
Page 92
AK-ST7FMC User's Manual
7 Electrical Specifications
Table 7.1: Motor Control Board Electrical Specifications
Parameter
Maximum Ratings
Motor Types
Three-Phase BLDC, Three-Phase AC
Main Input Voltage (J3)
42 V DC or 30 Veff AC
Auxiliary Input Voltage (J1)
15 V DC, 0.5 A
Auxiliary Output Voltage (J2)
15 V DC, 0.5 A
Maximum Output Current on Motor Phases (J12)
10 A
Analog Input Voltage (J17)
5 V DC
Digital Input/Output Voltage (J18)
5 V DC
Table 7.2: Optoisolation Board Electrical Specifications
Parameter
Maximum Ratings
Input Voltage (J3)
15 V DC, 0.3 A
“ICC IN” Connector I/O Lines Voltage (J1)
5 V DC
“ICC OUT” Connector I/O Lines Voltage (J2)
5 V DC
7
Page 93