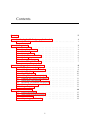
1
JPA TL
JPA Designer
Solar Panel and Wind Turbine
Payback Calculation Module
I S S U E F E B R U A RY 2 0 1 2
JPA TL Ltd.
Design Wor ks, William Street,
Felling, Gateshead, Tyne & Wear NE10 0JP
T: 0191 438 7997
E: [email protected]
W: www.techlit.co.uk
Contents
Contents
ii
1
IntroducingtheJPA Designerpaybackmodule
1.1
Quickstart . . . . . . . . . . . . . . . . . . . . . . . . . . . . . . .
1
1
2
Gettingstarted
2.1
Gettinghelp . . . . . . .
2.2
Systemrequirements . . .
2.3
Installation . . . . . . . .
2.4
Userregistration . . . . .
2.5
On-linelicencechecking
2.6
Updates . . . . . . . . .
2.7
StartingJPA Designer . .
2.8
UninstallingJPA Designer
.
.
.
.
.
.
.
.
3
3
4
4
5
6
6
7
7
.
.
.
.
.
.
.
.
.
.
8
8
9
10
10
11
11
11
12
12
13
.
.
.
.
14
15
16
18
19
3
4
.
.
.
.
.
.
.
.
.
.
.
.
.
.
.
.
.
.
.
.
.
.
.
.
.
.
.
.
.
.
.
.
.
.
.
.
.
.
.
.
.
.
.
.
.
.
.
.
Managingprojectsandcalculations
3.1
Startinganewproject . . . . . . . .
3.2
Addingprojectaddressdetails . . .
3.3
Savingprojects . . . . . . . . . . . .
3.4
Openingprojects . . . . . . . . . .
3.5
Addingcalculationstoaproject . .
3.6
Openingandclosingcalculations .
3.7
Duplicatingcalculations . . . . . .
3.8
Renamingcalculationsandprojects
3.9
Deletingcalculations . . . . . . . .
3.10 Programoptions . . . . . . . . . . .
Paybackcalculations
4.1
Projectinformation . . . . . .
4.2
Solarpanelsandwindturbines
4.3
Paybackresults . . . . . . . . .
4.4
Outputtingpaybackresults . .
ii
.
.
.
.
.
.
.
.
.
.
.
.
.
.
.
.
.
.
.
.
.
.
.
.
.
.
.
.
.
.
.
.
.
.
.
.
.
.
.
.
.
.
.
.
.
.
.
.
.
.
.
.
.
.
.
.
.
.
.
.
.
.
.
.
.
.
.
.
.
.
.
.
.
.
.
.
.
.
.
.
.
.
.
.
.
.
.
.
.
.
.
.
.
.
.
.
.
.
.
.
.
.
.
.
.
.
.
.
.
.
.
.
.
.
.
.
.
.
.
.
.
.
.
.
.
.
.
.
.
.
.
.
.
.
.
.
.
.
.
.
.
.
.
.
.
.
.
.
.
.
.
.
.
.
.
.
.
.
.
.
.
.
.
.
.
.
.
.
.
.
.
.
.
.
.
.
.
.
.
.
.
.
.
.
.
.
.
.
.
.
.
.
.
.
.
.
.
.
.
.
.
.
.
.
.
.
.
.
.
.
.
.
.
.
.
.
.
.
.
.
.
.
.
.
.
.
.
.
.
.
.
.
.
.
.
.
.
.
.
.
.
.
.
.
.
.
.
.
.
.
.
.
.
.
.
.
.
.
.
.
.
.
.
.
.
.
.
.
.
.
.
.
.
.
.
.
.
.
.
.
.
.
.
.
.
.
.
.
.
.
.
.
.
.
.
.
.
.
.
.
.
.
.
.
.
.
.
.
.
.
.
.
.
.
.
.
.
.
.
.
.
.
.
.
.
.
.
.
.
.
.
.
.
.
.
.
.
.
.
.
.
.
.
.
.
.
.
.
.
.
.
.
.
.
.
.
.
.
.
.
.
.
.
.
1 IntroducingtheJPA Designerpayback
module
Thismanualexplainshowtouse JPA Designer tocarryoutsolarpanelandwindturbine
paybackcalculationsfortheFeed-InTariff(FIT).
The payback module in JPA Designer use the methods in SAP 2009 to determine the
amountofelectricitygeneratedbyphotovoltaicpanelsandsmall-scalewindturbines1 .
Themodulethenestimatesthepaybackperiodfortheinstallation, takingaccountof:
• theinitialcostoftheinstallationandtheinterestonanyloan;
• theincomefromthefeed-intariff;
• savingsonelectricitybills;
• incomefromsaleofelectricitytothegrid;
• generalinflation(whichaffectstheFIT rate)andenergypriceinflation.
The QuickStart guideinthenextsectiontakesyouthroughthemainstepsininstallingthe
programandcarryingoutabasicpaybackcalculation. Therestofthemanualcontains
in-depthinformationtohelpyougetthemostoutofthesoftware.
WehopeyoufindJPA Designerausefulcalculationtool. Wearealwayshappytoreceive
comments, suggestionsforimprovementsornewfeatures.
1.1
Quickstart
Thissectionguidesyouthroughthemainstepsofthepaybackcalculationandtellsyou
wherecanfindmoreinformationoneachofthosestepslateroninthemanual.
Thefirstthingtodoistoinstallandregistertheprogram:
1. DownloadandinstallJPA Designer(see chapter 2).
1
ThegenerationfigurebasedonSAP 2009isanestimatedvalue. AstheMCS disclaimerstates: the
performanceofsolarPV systemsisimpossibletopredictwithcertaintyduetothevariabilityintheamount
ofsolarradiation(sunlight)fromlocationtolocationandfromyeartoyear. Thisestimateisbaedonthe
Government'sstandardassessmentprocedureforenergyratingofbuildings(SAP) andisgivenasguidance
only. Itshouldnotbeconsideredasaguaranteeofperformance.
1
CHAPTER1. INTRODUCING THE JPA DESIGNER PAYBACK MODULE
2
2. SelectJPA Designerfromthe Start button(see section 2.7). Theprogramopens.
3. Onthetoolbarclick EditUser&SecurityCodes. Thisopensthe UserRegistration
dialoguebox(see section 2.4).
4. Inthe PV productdetails area, inthe Yourcompanyname box, entertheusername
youreceivedinyourregistrationemail.
5. Nowcopythetwentycharactercodefromtheemailandpasteitintothetextbox
nexttothe Apply buttons. Click ApplyPV keycode. Thecodeiscopiedintothe
PV keycode boxes. Click OK.
Nowyoucanstartapaybackcalculation:
1. Onthe Insert menu, click SolarPanel&WindTurbinepaybackcalculation.
2. Onthe Description dialogueboxclick OK.Theprogramaddsanewpaybackcalculationtothelist, named SolarPayback1.
3. Inthe ProgramManager window, doubleclickon SolarPayback1. The Payback
windowopens(see chapter 4).
4. Onthe Edit menu, click Solar Panel &WindTurbine details. The SolarPanel&
WindTurbines dialogueboxopens(see section 4.2).
5. Inthe Photovoltaics section, onthefirstrow(row1)set
• PeakkW to 4.
• Pitch to 30º.
• Direction to South.
• Overshading to Noneorverylittle.
6. Inthe Costs section, setthe Totalinstalledcostsofsystem to10000.
7. Click OK.
8. The Payback windownowshowsthePV output, theincomeandsavingsfiguresand
thepaybackperiod. The Paybackgraph andthe Electricitygeneration graphshow
paybackperiodsandmonthlygenerationfigures.
Andthat'sit: acompletedpaybackcalculation. Ifyouwantto, youcanprinttheresults
ofthiscalculation(see section 4.4):
1. Onthetoolbar, click Print.
2. The Printpreview opens. Youcanmovethroughthepreviewusingthearrowkeys
atthetopofthewindowtomovebetweenpagesandthescrollbartothesideto
moveupanddownthepages.
3. Whenyouaresatisfiedwiththeresults, clickthe Print button.
2 Gettingstarted
ThissectionofthemanualdescribeshowtoinstallJPA DesigneronyourPC andexplains
howtheuserregistrationandon-linelicencecheckingsystemswork. Italsoincludes
instructionsonupdatingyourcopyofJPA Designer.
2.1
Gettinghelp
Thismanualusesthefollowingconventions:
• <angledbrackets> forkeysonthecomputerkeyboard, e.g. the <Enter> key.
• the + signindicatesyoushouldholddownonekeywhilepressinganother, e.g.
<Alt+F> means‘holddownthe <Alt> keywhilepressingthe <F> key’.
• Boldtype indicatespartsofJPA Designer’sscreendisplays, e.g. the SolarPanels
andWindTurbines dialoguebox.
• Menu>option indicatestheoptioninthemenuontheprogram’smenubar, e.g. Select Edit>Primaryheatingsystem means selectthe Primaryheatingsystem option
fromthe Edit menu.
Thismanualusesthefollowingspecialterms:
• dialoguebox: asmallwindowwhichdisplaysboxesorbuttonsforenteringdata.
• Optionbutton: asetofroundbuttons. Youcanonlyselectoneatatime.
• Tickbox: aboxwhichshowswhetherornotaparticularsettingison(ticked)oroff
(notticked).
• Textbox: anareaonadialogueboxinwhichyoucantypewordsornumbers.
• List: aboxwhichcanbeexpandedtoshowanumberofpre-setoptions, usually
byclickinganarrowontheright-handsideofthebox.
Ifyouhaveaproblemwiththe functioning ofthesoftwarepleasefollowthesesteps:
• Download and install the latest version of JPA Designer from our web site (section 2.3 forinstructions)andseeifthatresolvestheproblem.
3
CHAPTER2. GETTING STARTED
4
• ChecktheforumandFAQ onourwebsite(http://forum.techlit.co.uk)toseeifthe
problemisaddressedthere.
• Iftheproblempersists, emaildetailsoftheproblemto [email protected]. Please
include details of your computer system and attach sample files or PDF outputs
wherepossible. Wewillrespondassoonaswecan.
2.2
Systemrequirements
JPA Designer requires a PC running Windows XP or later. JPA Designer can run on
Intel-basedAppleMacintoshcomputersusingvirtualisationsoftware(suchasParallelsor
VMWare), orthroughBootcamp. However, wedonotguaranteetheprogramwillrun
onsuchsystems, nordoweoffertechnicalsupport.
The computer must have an internet connection to enable the program to check the
validityofyourlicencewheneveritstarts.
2.3
Installation
ToinstallJPA DesigneronyourPC:
1. Gotoourwebsiteatwww.techlit.co.ukandrightclickon DownloadJPA Designer:
select Savelinkas (forFirefox)or Savetargetas (forInternetExplorer).
2. Downloadtheinstallerfile jsetup990.exe toyourPC (werecommenddownloading
thefiletotheDesktop). Thedownloadisabout12MB.
3. Doubleclickonthefile jsetup990.exe. AfterafewmomentstheInstallShieldWizardopens.
Youmayseeasecuritywarningthatthepublisherofthefilecouldnotbeidentified.
Ifyoudo, click Run tocontinuetheinstallationprocess.
4. Click Next tocontinuewithinstallation. Theinstallerdisplaysthe LicenceAgreement. To continue with the installation click I accept the terms of the licence
agreement, thenclick Next.
5. Atthe Customerinformation screenenteryournameandcompanyname. Usethe
optionsbuttonstoselectwhetheryouwantJPA Designertobeavailabletoalluser
accountsonthecomputer, orjustone. (Werecommendyouselect all.) Click Next.
6. Atthe ChooseDestinationLocation screenwerecommendyouacceptthedefault
settingsandinstallJPA Designerintothefolder c:\programfiles\jpatl\jpadesigner
981. Click Next. The installer will now copy the JPA Designer files onto your
computer.
7. Wheninstallationhasfinishedthe SetupComplete screenisdisplayed. Tick Launch
theprogram andclick Finish. Theinstallerwillcloseand JPA Designer willopen,
showingyouthe ProjectManager window.
CHAPTER2. GETTING STARTED
5
Figure 2.1: TheEditUser&securitycodesbutton
Figure 2.2: TheUserRegistrationdialoguebox
2.4
Userregistration
WhenyoufirstinstallJPA Designertheprogramrunsin demonstrationmode anddoes
notdisplaytheresultsofcalculations. Youmustunlocktheprogramwithyourkeycode
toaccessthefullfunctionalityofthesoftware.
Toenterthekeycodefora PV andWindTurbines licence:
1. Onthetoolbar, click User&securitycodes (Figure 2.1).
2. Copytheusernamefromtheregistrationemail. Inthe PV productdetails area,
pastetheusernameinthe Yourcompanyname box. (Figure 2.2).
3. Copythe keycode fromtheregistrationemailandpasteitintotheboxatthebottom
ofthe UserRegistration dialoguebox.
CHAPTER2. GETTING STARTED
6
4. Click ApplyPV keycode. Theprogramwillnowpastethecodeintothe U-value
keycode boxes.
5. Click OK.Thesoftwareisnowunlocked
2.5
On-linelicencechecking
JPA Designerwilltrytocheckthethevalidityofyourlicenceagainstouron-linelicensing
databasethefirsttimeyouopenaPV calculationafterstartingtheprogram.
• Ifthecheckissuccessfulandthelicenceisvalidthemodulewillopen(theprogram
willrecordthedateandtimeofthatsuccessfulcheck).
• Ifthecheckissuccessfulandthelicenceisnotvalidthecalculationwillnotopen.
• Iftheprogramisunabletoconnectwiththedatabase(forexample, becauseyou
are using your lap-top away from your office) it will look at the date of the last
successfulcheck: ifthatislessthansevendaysagothenitwillopenthemodule.
• Iftheprogramisunabletoconnectwiththedatabaseandthelastsuccessfulcheck
ismorethansevendaysagothenitwill not openthemodule.
IfyouoftenuseJPA Designerawayfromtheofficeyoucanusethe Checklicenceon-line
buttononthetoolbarwillforcealicencecheckandre-setthetimesincethelastcheck
tozero. Youshouldforceacheckifyouexpectnottohaveaninternetconnectionfora
fewdays.
2.6
Updates
JPA Designeriscontinuallybeingdevelopedtointroducenewfeatures: togetthebest
from the program it is worth making sure you are using the latest version. To check
whetherthereisalaterversionavailableyoushouldcomparetheversionnumbershown
onourwebsite(www.techlit.co.uk)withthatoftheprogramyouareusing. Onthe Help
menu, click About toseetheversionnumber.
Highernumbersandlettersindicatelaterreleases, withcharacterscomingearlierinthe
namebeingmoreimportantthatlaterones: so4.05a1willbemorerecentthan4.04c2,
and4.05b1morerecentthan4.04a4. Thethreedigit Build numberindicatesaminor
changeinaversion. Figure 2.3 showsthe About messageforJPA Designertogetherwith
theversionnumberonthewebsite: inthiscasethesoftwareisuptodate, asbothversion
numbersarethesame.
Theprocessforupdatingthesoftwareisidenticaltothatoforiginallyinstallingit, butwith
theadditionalstepof uninstalling yourcurrentversionofJPA Designerbeforeinstalling
thenewversion.
ToupdateJPA Designer:
1. UsetheWindows Add/RemovePrograms or Uninstallprograms controlpanelto
uninstallthecurrentversionofJPA Designer.
Uninstallingthecurrentversionwillnotaffectyourcalculationfiles.
2. DownloadandinstallthenewversionofJPA Designerfollowingtheinstructionsin
section 2.3.
CHAPTER2. GETTING STARTED
7
Figure 2.3: TheversionnumberintheAboutdialogueboxshownoverthewebsite
2.7
StartingJPA Designer
TostartJPA Designer:
• Click Start, andthenpointto Allprograms. Click JPA Designer, thenclick JPA
DesignerEPC SAP 9.81.
TocloseJPA Designer:
• Onthe File menu, click Exit. Theprogramwillpromptyoutocloseanyfileswhich
havenotbeensaved.
2.8
UninstallingJPA Designer
TouninstallJPA Designer:
1. Click Start, thenclick ControlPanel.
2. InControlPanel, double-click Uninstallaprogram.
3. Inthelistofprograms, double-click JPA Designer.
4. Atthemessage AreyousureyouwanttouninstallJPA Designer9.90, click Yes.
5. Theprogramisuninstalled.
ThatwillnotremoveanyJPA Designerprojectfiles.
3 Managingprojectsandcalculations
Figure 3.1: TheProjectManagerwindowshowthecalculationsinaproject
JPA Designerorganisesandsavescalculationsinprojectfiles, whichhavetheextension
JDP.YoucansaveanumberofPV calculationsinthesamefile.
Youcancreate, saveandmanagecalculationsintheJPA Designer ProjectManager window(Figure 3.1), whichlistsallthecalculationsinthecurrentproject.
3.1
Startinganewproject
WheneveryoustartJPA Designertheprogramcreatesanewblankprojectwhichyoucan
startusingstraightaway. Youcanalsocreateanewprojectatanytime.
Tocreateanewproject:
• Onthe File menu, click NewProject.
Youcanchangethedefaultprojectname A blankproject tosomethingmoreuseful:
1. Clickontheprojectname, thenonthe Edit menuclick Renameselecteditem.
2. Inthe Projectname dialoguebox(Figure 3.6)typethenewnameforyourproject.
Theprojectnamedoesnotaffectthecalculationsinanyway.
8
CHAPTER3. MANAGING PROJECTS AND CALCULATIONS
9
Figure 3.2: Changingthenameofaproject
3.2
Addingprojectaddressdetails
JPA Designercanstoreclientandsitedetailsforaproject, whichyoucanthencopytoall
theindividualcalculationswithinthatproject. Youcanenterandeditthatinformation
usingthe ProjectAddress dialoguebox(Figure 3.3). Youcanalsosaveclientinformation
toreuseitlater.
Figure 3.3: TheProjectAddressdialoguebox
Toaddorchangeprojectinformation:
1. Onthe Edit menu, click ProjectAddress.
2. Inthe ProjectAddress dialoguebox, enterthedatabytypingitintotheappropriate
boxes. Usethe <Tab> keytomovebetweenboxes.
Donottryto enter datain the top lefthand box: thisbox is used for retrieving
detailsyouhavepreviouslystored.
3. Ifyouwanttostoretheclientdetailstore-uselater, click Addtoclients.
CHAPTER3. MANAGING PROJECTS AND CALCULATIONS
10
Tore-useexistingclientdatasimplyclickonthedrop-downinthe Projectinformation
dialogueboxandselectaclientfromthelist(Figure 3.4).
Ifyouneedtoeditthestoreddetailsclick Editclientslist thenmakethechangesinthe
EditClients dialoguebox.
Figure 3.4: Theclientnameandaddressdrop-down
3.3
Savingprojects
JPA Designerprojectaresavedinthesamewayasanyotherfile:
1. Onthe File menu, click SaveProject.
2. In the Save As dialogue box, select the folder into which the project should be
saved. Enteranamefortheprojectfile.
BydefaultJPA Designerwilladdtheextension JDP toallfilenames.
3. Click Save. JPA Designersavestheprojectanddisplaysthefilenameontheprogram
titlebar.
BydefaultJPA DesignerwillsavefilesintotheJPA Designerfolder(usually c:\Program
Files\JPATL\JPA Designer981). Youcanspecifyadifferentdefaultfolderusingthe Options dialoguebox(see section 3.10).
Werecommendyouhaveadailyback-upscheduleforyourdata.
3.4
Openingprojects
Toopenanexistingproject:
1. Fromthe File menu, click Openproject.
2. Inthe Open dialoguebox, clickthefileyouwanttoworkwith. Click Open.
3. Theprojectopensinthe ProjectManager window.
CHAPTER3. MANAGING PROJECTS AND CALCULATIONS
11
Figure 3.5: TheDescriptiondialoguebox
3.5
Addingcalculationstoaproject
YoucanaddnewPV calculationstoaprojectinthe ProjectManager window.
ToaddanewU-valuecalculationtoaproject:
1. Onthe Insert menu, click SolarPanel&WindTurbinepaybackcalculation.
2. In Description dialoguebox(Figure 3.5)typeanameforthecalculation, e.g. 23
NewRow.
3. Thenewcalculationisaddedtotheproject.
3.6
Openingandclosingcalculations
Toopenanexistingpaybackcalculationinthe ProjectManager window, either:
• double-clickonthecalculationname; or,
• clickonthecalculationname, thenonthe Edit menu, click Editselecteditem.
Tocloseacalculationandreturntothe Projectmanager window, onthetoolbar, click
Projectmanager.
3.7
Duplicatingcalculations
Ifyouwanttoprepareacalculationwhichisverysimilartoanexistingcalculationin
aprojectyoucanduplicatethecalculationandthenmakeyourchangestothecopy,
withoutaffectingtheoriginalcalculation. Toduplicateacalculation:
1. Inthe ProjectManager windowclickonthecalculation.
2. On the Edit menu, select Edit>Duplicate item. The Description dialogue box
opens.
3. Typeanamefortheduplicatecalculation.
4. A copyoftheoriginalcalculationisaddedtotheproject. Youcannowworkwith
theduplicatecalculationintheusualwaywithoutalteringtheoriginal.
CHAPTER3. MANAGING PROJECTS AND CALCULATIONS
3.8
12
Renamingcalculationsandprojects
Tochangethenameofacalculation:
1. Inthe ProjectManager windowclickonthecalculation.
2. Onthe Edit menu, click Renameselecteditem.
3. Inthe Name dialoguebox, enteranewnameforthecalculation.
4. The ProjectManager windowshowsthenewname.
Figure 3.6: Changingthenameofaproject
You can change the default project title A blank project to something more useful in
exactlythesameway.
Changingthenameofacalculationorprojectwillnotaffectthecalculationresults.
3.9
Deletingcalculations
YoucandeletecalculationsfromJPA Designerprojects.
WARNING:thereisnowayofrecoveringadeletedcalculation.
Todeleteacalculation:
1. Inthe ProjectManager windowclickonthecalculation.
2. Onthe Edit menu, click Deleteselecteditem.
3. Attheconfirmationmessage Areyousureyouwanttodeletetheselecteditem,
click Yes.
4. Thecalculationisremovedfromtheproject.
CHAPTER3. MANAGING PROJECTS AND CALCULATIONS
3.10
13
Programoptions
YoucancustomisetheperformanceandoutputsofJPA Designerinmanyways. Mostof
theoptionsarecontrolledfromthe Options dialoguebox.
Toopenthe Options dialoguebox:
• Clickthe Options menu.
The Options dialogueboxboxhasfourtabs:
General:
• Printermargins: changesthepagemarginsforprinting.
Ifyouareusingheadedpaperyoucansetthetopmarginforthefirstpagetobe
greaterthanthatofthesecondpage, whichcanbeprintedoncontinuationpaper
orblankpaper.
• Companynameandaddress: thedetailsyouenterhereareusedonprint-outsof
paybackcalculations.
• Options: usethesecheckboxestoselectwhichitemswhichshouldappearonthe
print-outsandtomakeback-upcopiesofJDP projectfiles.
• Start-upfolder: setsthedefaultfolderforsavingandopeningprojectfiles.
• Checkforprogrammeupdates: letsyouspecifywhetherornotthesoftwarewill
checkforupdatedversionsofJPA Designer. Formoreinformationsee section 2.6.
Theotheritemsonthistabdonotaffectpaybackcalculations.
Logoandsignature:
• Logoposition: youcanincludeyourcompanylogoonprint-outs. Usethesesettings
todeterminethepositionofthelogo. Thelogofilemustbea256colourbitmap
withthefileextensionBMP,anditmustbeintheJPA Designerfolder. Enterthe
nameofthefileinthetextbox, butdonotincludethepath(e.g. enter logo.bmp
not c:\Programfiles\JPATL\JPA Designer981\logo.bmp).
• Addressposition: Thesesettingsdeterminethepositionofyourcompanyaddress
onprintoutsandPDFs. Entertheaddressitselfinthe General tab.
Youcanignorethe Certificatesignatureposition andthe TIMSA logoposition options:
theydonotaffectpaybackcalculations.
Email:
Therearenooptionsforpaybackcalculationsonthistab.
Other:
Therearenooptionsforpaybackcalculationsonthistab.
4 Paybackcalculations
Figure 4.1: ThePaybackwindow
Paybackcalculationsarecarriedoutfromthe Payback window(Figure 4.1), whichconsistsof:
14
CHAPTER4. PAYBACK CALCULATIONS
15
1. The Menu.
2. The Toolbar.
3. Theresultssummary.
4. Thepaybackandgenerationgraphs.
Therearefivemainstepstocarryingoutapaybackcalculation:
1. Createandopenanewpaybackcalculation(see section 3.5 and section 3.6).
2. Settheprojectinformation(section 4.1).
3. EnterthePV panelandturbinedata, togetherwiththefinancialassumptions(section 4.2).
4. Reviewtheresults(section 4.3). Ifnecessaryyoucanrevisethe
5. Printtheresults(section 4.4).
4.1
Projectinformation
Youcanenterclientandlocationdetailsfortheprojectwhichwillappearonthepay-back
calculationprint-outs.
Toaddclientandlocationdetails:
1. Onthe Edit menu, click ProjectInformation.
2. Inthe ProjectInformation dialogueboxenterclientandprojectdetailsbytyping
itintotheappropriateboxes. Usethe <Tab> keytomovebetweenboxes.
Alternatively, youcancopyclientandprojectdetailswhichyouenteredinthe Project
Information dialogueboxinthe ProjectManager window.
TocopyclientandprojectdetailsfromProjectManager:
1. Onthe Edit menu, click ProjectInformation.
2. Inthe ProjectInformation dialoguebox, click Inherit. Anyinformationyouentered
in ProjectManager iscopiedtothe ProjectInformation dialoguebox.
CHAPTER4. PAYBACK CALCULATIONS
16
Figure 4.2: TheSolarPanels&WindTurbinesdialoguebox
4.2
Solarpanelsandwindturbines
Theinputdataforthephotovoltaicpanelsandwindturbinesareenteredinthe Solar
Panels&WindTurbines dialoguebox.
Toopenthedialoguebox:
• onthetoolbar, click SolarPanel&WindTurbinedetails: or,
• onthe Edit menuclick SolarPanel&WindTurbinedetails.
The SolarPanels&WindTurbines dialoguebox(Figure 4.2)hasthreesections:
• Photovoltaics;
• Microwindturbines;
• Costs.
Atthebottomofthedialogueboxarethreebuttons:
• Toaccepttheinputdataandclosethedialoguebox, click OK.
CHAPTER4. PAYBACK CALCULATIONS
17
• Toacceptalltheinputdatainthedialogueboxbutkeepsthedialogueboxopen,
click Apply. This makes it easy to see how changes to the input data affect the
calculationresultsandthenmakefurtherchanges.
• To discard the input data in the dialogue box and close the dialogue box, click
Cancel.
Photovoltaics
Toassessthebenefitsofinstallingphotovoltaicpanelsonthedwellingyoumustenterthe
followdataaboutthepanels:
• The PeakkW ofthesystem, whichyoucancalculatebymultiplyingthepeakkW
oftheindividualpanelsbythenumberofpanels.
• The Pitch ofthepanels.
• The Direction whichthepanelsface.
• Theamountof Overshading fromtreesoradjacentbuildings.
Youcanspecifytwodifferentphotovoltaicinstallationsforthesamedwelling, toallow
forsituationswherepanelsareinstalledondifferentroofslopes.
Windturbines
Toassessthebenefitsofinstallingoneormorewindturbinesonthedwellingorwithin
itscurtilage1 youmustenterthefollowingdataabouttheturbines:
• the Numberofturbines.
• the Rotordiameter, measuredinmetres.
• thetypeof terrain whichsurroundsthedwelling, whichwillbeeither Denseurban,
Lowriseurban/suburban or rural.
• the height ofthehuboftheturbineabovetheridgeoftheroof, inmetres.
Costs
Toassesstheoverallcostsandbenefitsofthepanelsand/orturbinesyoumustcomplete
the Costs areaofthedialoguebox. Thefirstrowisforthecostoftheinstallation:
• Totalinstalledcosts: howmuchwillthephotovoltaicpanelsandturbinescostto
install.
• Interestrateonloan: iftheclientwillbetakingoutaloantopayfortheinstallation
entertheinterestratehere. Ifthereisnoloanleavethisboxatzero.
1
Anareaoflandattachedtoahouseandformingoneenclosurewithit.
CHAPTER4. PAYBACK CALCULATIONS
18
• Interestadded: determinesiftheinterestontheloanisaddedona yearly or monthly
basis. Addinginterestonamonthlybasiswillincreasethepaybackperiod.
Therestofthe Costs sectionisforthedatausedinthepaybackcalculation:
• Assessmentperiod: thelengthoftimeoftheassessment, inyears. Thisisgenerally
setat25years, whichisthedurationofthefeed-intariff.
• Unitpriceofelectricity: thepriceinpenceperkWhatthetimeofcalculation.
• Exporttariff: theamountpaidbytheelectricitysupplierforenergygeneratedby
thesystemandexportedtothegrid, inpenceperkWh.
• Feed-intariff: theamountpaidbygovernmentforeachunitofelectricitygenerated
bythesystem, whetherusedwithinthedwellingorexported, inpenceperkWh.
• The percentageofgenerationusedwithinthedwelling. Electricitygeneratedand
usedwithinthedwellingreducestheuseofgridelectricity. Electricitygenerated
butexportedonlyattractsthelowergenerationpayment. Consequently, thegreater
theproportionofelectricityusedwithinthedwelling, themorebenefitisderived
fromthepanelsorturbines.
• Paneldegradation: thisrepresentsthelossofperformanceofthesolarpanelsover
theassessmentperiod. A commonpresumptionisthatattheendofathirtyyear
periodthepanelswillhaveonly80%oftheirinitialperformance.
• Systemlosses: aproportionoftheelectricitygeneratedislostthroughconversion
fromthedirectcurrent(DC) producedbythepanelstoalternatingcurrent(AC) used
withinthedwellingandbythegrid. 20%isacommonlyusedproportion.
• Inflationrate: theannualrateofinflation, whichisusedtoadjustthefeed-intariff
rate, generallysetat4%.
• Energyinflationrate: theannualrateofinflationforenergycosts, whichisusedto
adjusttheunitpriceofelectricitywhendeterminingsavings, generallysetat9%.
Youcanchangethedefaultvaluesbuiltintotheprogrambysettingtheitemsfromthe
Assessmentperiod tothe Energyinflationrate tothevaluesyouwanttousethenclicking
Setasdefaults. Thenexttimeyoustartacalculationtheprogramwillshowyourvalues.
4.3
Paybackresults
Onceyouhaveenteredthepanel, turbineandfinancialdata, JPA Designershowsthe
estimatedelectricaloutputofthesystemandthefinancialreturns. Theresultssummary
(section3ofthe Payback windowin Figure 4.1), shows:
• theannualelectricaloutputofanywindturbines;
• theannualelectricaloutputofanyPV panels;
• thetotalannualelectricaloutputofthesystem;
CHAPTER4. PAYBACK CALCULATIONS
19
• theinstalledcostofthesystem;
• theestimatedpaybackperiodinyearsandmonths.
Therighthandsideoftheresultssummaryshowsthebenefitofgenerationforsingleyear
duringtheassessment. Youcansettheyearusingthe Year slider, andtheprogramshows:
• the Feed-InTariffincome fromalltheelectricitygenerated;
• the incomefromexportedelectricity, thatis, electricitygeneratedbythesystem
butnotusedwithinthedwelling);
• the electricitysaving whichcomesfromusinggeneratedelectricityinthedwelling;
• the totalbenefit whichisthesumofthosethreeitems.
Asyoumovetheslidertherightandviewlateryearsyouwillseetheannualincomeand
benefitsincreaseasaresultofgeneralinflationandenergycostinflation.
Belowthenumericalresultsaretwographs:
• the Payback graphshowsthecumulativebenefitofthesystemovertheassessment
period. Thepaybacklinestartsatanegativenumber, whichistheinstallationcost.
Thepointatwhichthepaybacklinecrosseszeroonthey-axisisthebreak-even
point.
• the Electricitygeneration graphshowstheamountofelectricitygeneratedforeach
monthoftheyear.
Youcanswitchbetweengraphsbyclickingthe Payback and Electricitygeneration tabs.
4.4
Outputtingpaybackresults
Youcanprinttheresultsofpaybackcalculationsinordertogivethemtoapotentialclient.
Toprintresults:
1. Onthetoolbar, clickthe Print button.
2. The PrintPreview windowopens, showingadraftqualitypreviewoftheprint-out.
Usethethescrollbarontherighttomoveupanddownindividualpages, andthe
arrowbuttonsatthetopleftofthewindowtomovebetweenpages.
3. Ifyouarehappywiththepreviewclick Print.
Theprint-outconsistsofthreepages:
• Page1: Summarisestheinputsandresults(anexampleisshownin Figure 4.3):
1. Yourlogoandaddressdetails.
2. Theclientandprojectdetails.
CHAPTER4. PAYBACK CALCULATIONS
Figure 4.3: Thefirstpageofthepaybackprint-out
20
CHAPTER4. PAYBACK CALCULATIONS
21
3. Theresultssummary, includingthepaybackperiod.
4. Theinputdata, includingthefinancialassumptions.
5. ThePV andwindturbinedisclaimersrequiredbytheMCS.
• Page2showstheelectricitygenerationgraph.
• Page3showsthepaybackgraph.
Youcancustomiseprintoutsbyaddingyourcontactdetailsandacompanylogo: this
isexplainedin section 3.10. Youcanalsochangethefontusedontheprintout: onthe
File menu, click Font andmakethechangesinthe Font dialoguebox.