1
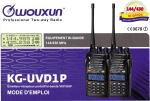
User Manual
KG-UV6X
Thanks for buying the
(1iwouxun
transceiver.
This transceiver offers latest design, enhanced features, solid
performances and easy accessibility. We believe you will be pleased
with the high quality and reliable features for all your communication
needs.
READ THIS IMPORTANT INFORMATION ON THE SAFE AND EFFICIENT OPERATION BEFORE USING
<tfc.ucuxm PORTABLE TRANSCEIVER. This manual is ONLY suitable for KG·UV6D.
User Safety. Training. and General Information
READ THIS IMPORTANT INFORMATION ON SAFE AND EFFICIENT OPERATION BEFORE USING YOUR
@UIOUXLfI
PORTABLE TWO-WAY RADIO.
Compliance with RF Energy Exposure Standards
Your @UIOUXLfI two-way radio is designed and tested to comply with a number of national and
international standards and guidelines (listed below) regarding human exposure to radio frequency
electromagnetic energy. This radio complies with the IEEE (FCq and ICNIRP exposure limits for
occupational/controlled RF exposure environment at duty cydes of up to 50% talk-50% listen and
should be used for occupational use only. In terms of measuring RF energy for compliance with the
FCC exposure guidelines, your radio radiates measurable RF energy only while it is transmitting
(during talking), not when it is receiving (listening) or in standby mode.
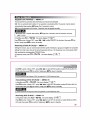
NOTE
&
»The approved batteries supplied with this radio are rated for a 5-5-90 duty cycle (5% talk-5% listen-90%
standby), even though this radio complies with the FCC occupational RF exposure limits at duty cycles of up
to 50% talk.
Your
@UIOUXLfI
two-way radio Complies with the following of RF energy exposure
standards and guidelines:
• United States Federal Communications Commission, Code of Federal Regulations; 47CFR part 2 subpart!
• American National Standards Institute (ANSI)/Institute of Electrical and Electronic Engineers (IEEE)
C95.1-1992
• Institute of Electrical and Electronic Engineers (IEEE) C95. 1-1999 Edition
• International Commission on Non-Ionizing Radiation Protection (lCNIRP) 199B
Operational Instructions and Training Guidelines
To ensure optimal performance and compliance with the occupational/controlled environment RF energy
exposure limits in the above standards and guidelines, users should transmit no more than 50% of the
time and always adhere to the following procedures:
Transmit and Receive
To transmit (talk), push the Push-To-Talk (PIT) button;
to receive, release the PIT button.
Hand-held radio operation
Hold the radio in a vertical position with the microphone 5 cm away from the lips and let the antenna
farther away from your head.
Body-worn operation
Always place the radio in an
@UJOUXlMJ
approved clip, holder, holster, case, or body harness for this
product. Use of non- @UJOUXlMJ -approved accessories may exceed FCC RF exposure guidelines.
Antennas & Batteries
• Use only
@UJOUXlMJ
approved, supplied antenna or
@UJOUXlMJ
approved replacement
antenna.
• Unauthorized antennas, modifications, or attachments could damage the radio and may violate FCC
regulations.
• Use only
@UJOUXlMJ
approved, supplied batteries or
@UJOUXlMJ
approved replacement
batteries.
• Use of non-
@UJOUXlMJ -approved batteries may exceed FCC RF exposure guidelines.
Approved Accessories
For a list of
@UJOUXlMJ
approved accessories,see the accessories page of this user manual or visit
the following website which lists approved accessories:http://www.wouxun.com
;,;
Notices to the User
• Government law prohibits the operation of unlicensed radio transmitters within the territories under
government control.
• Illegal operation is punishable by fine or imprisonment or both.
• Refer service to qualified technicians only.
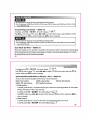
Warning&'
» It is important that the operator is aware of and understand hazards common to the operation of any
transceiver. Explosive environment (such as gases, dust, fumes, etc). Turn off your transceiver while
talking on fuel, or parking in gasoline servive stations.
»
If you require this machine to be developed or get some changes, pleased contact with
or your @UJOUXlMJ dealer.
@SUJOUXlMJ
FCC Caution:
This equipment has been testen and found to comply with the part 90 of the FCC Rules. These limits are
designed to provide reasonable protection against harmful interference in a residential installation. This
equipent generates, uses and can radiate radio frequency energy and, If the equipment is not installed and
used in accordance with the instructions, it may cause harmful interference to radio communicationgs.
However, there is no guarantee that interference will not occur in a particlar installation. If this equipment
does carse harmful interference to radio or television reception, which can be determined by turning the
equipment off and on, the user is encouraged to try to correct the interference by one or more of the
following.
Measures:
• Reorient or relocate the receiving antenna.
• Increase the separation between the equipment and receiver.
• Connect the equipment into an outlet on a circuit different from that to which the receiver is connected.
• Consult the dealer or an experienced radio/TV technician for help.
FCC Licensing Requirements
Your radio must be properly licensed Federal Communications Commission prior to use. Your
@lUOUXIMJ
Wireless dealer can assist you in meeting these requirements. Your dealer will program
each radio with your authorized frequencies, signaling codes, etc., and will be there to meet your
communications needs as your system expands.
Precautions
Only qualified technicians are allowed to maintain this product.
Do not use the radio or charge a battery in explosive areas such as coal gas, dust, steam, etc.
Switch OFF the radio while refueling or parking at a gas station.
Do not modify or adjust this radio without permission.
Do not expose the radio to direct sunlight over a long time, nor place it close to heat source.
Do not place the radio in excessively dusty, humid areas, nor on unstable surfaces.
Safety: It is important that the operator is aware of and understands hazards common to the operation
of any radio.
This device complies with Part 15 of the FCC Rules.
Operation is subject to the following two conditions:
(1) this device may not cause harmful interference, and
(2) this device must accept any interference received, including interference that may cause undesired operation.
»MODIFICATION OF THIS DEVICE TO RECEIVE CELLULAR RADIOTELEPHONE SERVICE SIGNALS
IS PROHIBITED UNDER FCC RULES AND FEDERAL LAW.
CE Caution:
Hereby, @UIOIJXLfI declares that this Two-way radio is in compliance with the essential requirements
and other relevant provisions of Directive 1999j5jEC.
A copy of the DOC may be obtained through the following address.
Address: No.928 Nanhuan Road, Jiangnan High Technology Industry Park, Quanzhou, Fujian 362000,
China
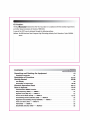
Contents
Unpacking and Checking the Equipment ..
01
Supplied Accessories ............................................................................................................. 01
Description of Functions
Getting Started
02-03
04-08
LCD Display ............................................................................................................................ 04
Description of Transceiver ............................................................................................... OS-08
Shortcut Operation Sheet ............................................................................................................········ 09-12
How to Operate
13-52
Activellnactive MENU Function ................................................................................................................ 13-14
Step Frequency (SETP) - - MENU 1 .
14
Squelch Level (SQL-LE) - - MENU 2 ........................................................................................................... 15
Power Saver Mode (SAVE) --- MENU 3 ............................................................................................. 15-16
Transmitting Power Selection (TXP) - - MENU 4 ............................................................................... 16
8egin/End Transmitting Prompt (ROGER) - - MENU 5 .
17
Time-out Timer
MENU 6 .............................................................................................................. 17
(TOn --
VOX (VOX) --- MENU 7 .................................................................................................................................... 18
Bandwidth Selection (WN) - - MENU 8 ......................................................············································· 18
Contents
Voice Guide (VOICE) --- MENU 9 ............................................................................................................... 19
Transmitting Overtime Alarm (TOA) - - MENU 10 ............................................................................ 19
Beep Prompt Function (BEEP) --- MENU 1 1 .......................................................................................... 20
Power-on Message (PONMSG) - - MENU 12 ................................................................................. 20-21
Busy Channel Lockout (BCI) --- MENU 13 ............................................................................................ 21
Keypad Lock (AUTOLK) --- MENU 14 ....................................................................................................... 22
crcss (R-CTC) - MENU 15 .............................................................................................. 22-23
Transmitting crcss (T-CTC) - - MENU 16 ............................................................................................. 23
Receiving
Receiving DCS (R-DCS) --- MENU 17 .................................................................................................. 23-24
Transmitting DCS (T-DCS) --- MENU 18 .................................................................................................. 24
Scan Mode (SC-REV) - - MENU 19 ...................................................................................................... 24-25
Scan/Lamp/SOS-CH/FM Radio on Side Key 1 (PF1) - - MENU 20 ......................................... 25-2B
Working Mode/RPT/Stopwatch Timer/Lamp/Alarm (PF2) --- MENU 21 ···························· 29-32
Working Mode Switch (CH-MDFJ - - MENU 22 ............................................................................ 32-34
Auto Backlight (ABR) - - MENU 23 .......................................................................................................... 34
Offset Frequency (OFF-SET) - - MENU 24 .
35
Frequency Shift Direction (SFT-D) - - MENU 25 .......................................................................... 35-36
Stopwatch Timer (SECOND) --- MENU 26 ...................................................................................... 36-37
Channel Name Edit (CHNAME) -
MENU 27 ...
Channel Memory (MEM-CH) - - MENU 28 ..
38-39
Channel Delete (DEL-CH) - - MENU 29 ..................................................................................................... 39
Reset (RESET) --- MENU 30 ....................................................................................................................... 40-41
SOS Band Selection (SOS-CH) -
MENU 31 ............................................................................................ 42
CTCSS/DCS Scan (SCN CD) --- MENU 32 ............................................................................................. 42-43
DTMF Encoding ....................................................................................................................... 44
ANIID Code EditlTransmitlTransmitting Delay Time & DTMF Sidetone ............................... 44-45
Priority Scan ............................................................................................................................ 46
Reverse Frequency ................................................................................................................ 46
Channel Mode Operation ...................................................................................................... 47
Low Voltage Prompt ............................................................................................................... 47
Transmitting Overtime Prompt ............................................................................................. 47
Adding Scanning Channel···············································..................................................... 47
Wire-c/one Function ................................................................................................................. 48
Working with Repeater ................................................................................................................................. 48-51
How to Use the Intelligent Charger ............................................................................................................... 51
Programming Guide·················································............................................................. 52
Contents
Trouble Shooting ....................................................................................................................................... 53-54
Technical Parameter ................................................................................................................................ 55-57
Appendix 1 (crCSS) .
55
Appendix 2 (DCS)
56-57
Technical Specification
Optional Accessories
Announcement
58
59
60
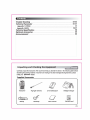
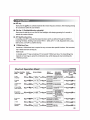
Unpacking and Checking the Equipment
Carefully unpack the transceiver. We recommend that you identify the items in the following table before
discarding the packing material. If any item are missing or has been damaged during shipment, please
notify your @wouxm dealer.
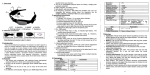
Supplied Accessories
Transceiver
$>
QI""uxUN
Beltclip
High gain antenna
f:f
Handstrap
III
Li-ion batterypack
0
Users manual
!
.
Intelligent charger
I--=
Warranty card
01
Description of Functions
1. Dual Band, Dual Frequency, Dual Display and Dual Standby
2. Frequency Range (suitable for different countries or areas):
136-174MHz & 216-2BOMHz (Rx / Tx),
136-174MHz & 350-470MHz (Rx / Tx),
136-174MHz & 4OO-4BOMHz (Rx / Tx),
136-174MHz & 420-520MHz (Rx / Tx),
144-146MHz & 430-440MHz (Rx / Tx),
144-14BMHz & 222-225MHz (Rx / Tx),
66-BBMHz & 136-174MHz (Rx / Tx),
66-BBMHz & 400-4BOMHz (Rx / Tx).
3. Working Mode: U-v, V-V or U-U selectable
4. Channel setting: VHF Tx & UHF Rx or UHF Tx & VHF Rx selectable
5. DTMF encoding
6. Digital FM Radio (76-10BMHz)
7. crCSS/DCS scan
B. Output power: VHF(5W/4W)/UHF(4W/1W)
9. 199 memory channels
10. VOX
11. Stopwatch timerfunction
12. 105 groups DCS and 50 groups cress
13. Voice guide
14. SOS Function
15. Wide/Narrow bandwidth selection (25KHz / 12.5KHz)
16. Multi-display modes (channel number/ channel frequency/ channel name selectable)
17. Reverse frequency
02
lB. Multi-functional scan modes
19. Priority scan function
20. Bright flashlight illumination
21. Frequency steps selectable (2.5/5/6.25/10/12.5/25/50/100KHz)
22.
23.
24.
25.
26.
27.
2B.
29.
30.
31.
32.
33.
34.
35.
36.
37.
3B.
High/Low power changeable when transmitting
1700mAh High capacity Li-ion batterypack
Intelligent charger
Offset frequency setting (0-69.975MHz)
Frequency shift direction setting
Busy channel lockout
Power-on message display (Battery-V/Full Screen/Other Characters)
Low voltage prompt
Begin/End transmitting prompt
Transmitting overtime prompt
Keypad lock (Auto / Manual)
Adding scanning channel
Programmable by computer
Wire-clone function
Menu/Channel reset
1750Hz burst tone
IP55 waterproof
03
Getting Started
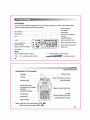
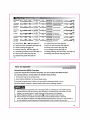
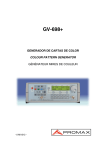
LCD Display
There are various indicators displaying on the screen when powering on. Please refer the below table
to learn what the indicators stand for accordingly.
Reverse frequency
Dual Standby
Split (negative)
VOX Function
Split (positive)
Indicator for sub frequency
receiving
DCS
Bandwidth indicator
I
CTCSS
+ -RTDRVOXSN8E:. I-- Battery capadty indicator
CT DCS
Arrow indicating the
maste r frequency
,L
+
+..,.
...; 3
121121
;---- Menu Order/Channel Order
a=-:;
75'gg
_________
....0
___
. I
25'
High/lDw power transmission- HL I!I11D
I-- Menu Order/Channel Order
I-- Keypad lock
BCl indicator
Note:
Full Battery Capacity Indicator
C"I Exhausted Battery Capacity Indicator
c.'Ol low Battery Capacity Indicator
• •_ . . . . . .
Receiving signal meter
04
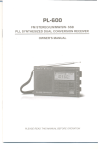
Description of Transceiver
Rotary Encoder
Antenna
Power Switch/Volume Control
Exit Key
Function
Number Key
Timer
Up/Down Key
Note: Quickly switch the working mode ( Q
Quickly reboot the transceiver ( Q +
+ l!!J )
Q)
05
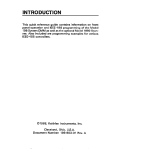
Getting Started
PIT (Push-To-Talk) Key
Speaker/
Microphone Jacks
Side Key 1: Scan/lamp
SOS-CH/Radio
Batterypack latch
Side Key 2: Monitor Oong press)
/ Flashlight (short press)
06
•
Quick Search
Short Press D
or 0
key to search the desired function/parameter during your setting, while
long press to quick search.
•
Single/Dual Band Switch
Press D
Single Band -------------. Dual Band
•
Quick Reboot the Transceiver
In standby, press Q
+Q
,then LCD displays [
[. Press Q
to confirm, and then the
transceiver re-starts.
•
Working Mode Switch
In standby, press Q
•
+D
to switch between Channel/Memory and Frequency/VFO working mode.
AlB Switch Key on Master Frequency
Press Q to select the master frequency. The frequency with arrowhead icon is the master frequency,
while the other frequency without arrowhead icon is the sub frequency. The transceiver can transmit
and receive in the master frequency, but ONLY receives in the sub frequency. When it is receiving in
the sub frequency, there shows "5" on the screen.
07
Gettin Started
• r:;::I Key
Short press the r:;::I key to activate/inactivate the reverse frequency function, while keeping pressing
for 2 seconds to active the scan function,
Side Key 2 (Flashlight/Monitor selectable)
•
Short press the side key to turn ON/OFF the flashlight, while keeping pressing for 2 seconds to
activate the monitor function,
•
RPT Multifunctional Key
In standby, press RPT to activate the desired functions which are defined through the MENU 21,
including FM Radio, Working mode switch, RPT(+/- offset, OFF, +/- R,Rl, Stopwatch timer, Lamp,
50S function, and OFF to undefine this key,
1750Hz Burst Tone
•
Sometimes, 1750Hz Burst tone is required to carry out some other specific functions, This transceiver
has 1750Hz Burst tone to help you,
How to use
In standby, press PIT key and side key PF1 to transmit 1750Hz burst tone, The transmitting time
depends on how long you press this combination keys, while releasing to stop transmitting the
1750Hz burst tone,
08
Shortcut Operation Sheet
Function Function
order
name
Enter
function
Screen display
Select
parameter
set
Return See
page
standby
Selectable
parameter
10
explanation
1 Step
Frequency
+ ClI+W P14
2 Squelch
I+Q+WP15
Level
3 Power Saver
Mode
4 Transmitting
Power Selection
;===;=;
+ ClI+WP15
ON: lUm 011 save function
OFF: Tum off AYe function
-16
H:H!&hpower(VHF5WjUHF4W) . . .
L:Lowpoww(1W)
......,
...
..;or.:IIP16
....
OFF: tum offlhis iunctkrl,without
5 Begin/End
___
___ .ROGER . , __
__
•,ransml'It'Ing Pro mpt ........, --.......,-- •
OFF
- - """"""" - Select parameter
be«inill! nnsmitlinl
EOT:re!eiUem;voaprompi
when endllll lrInsrn'tllnc
BOTH: press..d "lusel'Tl;voite
"",mO
6 Time-out
Timer
7 VOX
B Bandwidth
Selection
===::1 TOThas40levebinsieps
." _..
+ ClI+WP17
vox hulmll; frwn 1 to 10
OFF: Tumofl"VOXtransnisWn
+ ClI+WP18
;,,,,,,=:,=,":=m=,,,=,o=,====
I+ClI+WP18
'---------'
09
Shortcut Operation Sheet
9 Voice Guide
11 Beep
Prompt
12 Power-on
Message
Q .. C3 ...
=ChanneIC ....
14 Keypad
Lock
cra ...m .... I.SCL •
...........................
......,
'IIiI.I
;=I ....
ncrokey
led parameter
. 'l!i1 . .m ... led parameter
............. led...parameter
rtDkty[
. .
.....
OFF.
.•
FF.........,
15 Receiving
...a ...s
MSG: 'NELCOME
OFF: Tum off BCL
[+Q"'SP21
OFF: Tum 011 AuIiaIoc:k
5Ocro'4l'crcs5(61.oHz"-254.1Hz)
cress
offCfCSS
17 Receiving
10:5 ,",ups DCS (D023N-D7540
OFF: lLIm off DeS
DCS
P20
-21
+ Q ...SP22
...a ...
P22
...a ...s
P23
.....
.23
·24
10
b'g'ransmittingC... ca .... Cl... [: T-DS}F" ;1 ... 0
19 Scan ModeQ+aa+c+[:SC-Rf;M"
p ... I'FF'
20 Scan/Lampl
SOS·CH/FM Q ... mJ ...
Radio ( S i d e "
Key 1)
21
RPT
Multifunctional
Q
11 ... 0 +
_. -I ... Q
RADIO
....·
.
key
led parameter
10:5 '""'I" DCS (D023N-D754I)
OfF: 'RIm off DCS
...c:m+Ei3 P24
3 Kinds of San modo
TO: TimlSClllninc mod.
led parameter
key
...· led paramet!r
P24
...c:m+Ei3_25
co: Clrrler mode lSC1/!
SE: Carri ... made 1 SCIII
SCAN:Aofiv&t.....,
lAMP: 111m on
sos-o-t: 50S fiJroc:IIon
1Mn,
RADIO:
rum on
P25
...c:m",S.28
FM tldio
OFF: I . " " "
1.RnM.llifUndi..... 1(q
2. SECOND: stopwoIdI 11..... Flo ......
·
+mJ+t:a"'I.FF2
- . ;II .............
"....
R
'"""
key
Icd paramdl:r
·
key
Key (Side Key 2)
P29
"'c:m ...1$1 .32
4.505: 505 fUnction
5. Off: I n _ .... funcIIon
f. 1VID1O: _ ' " li&iio IVK:Ion
1. flVOi: WxiOnl Modo
.............
led pararrer
1. Frequency I"IIOdt CAIEQ)
2.a..noImod.
ThNllchdsofdwln .. mocioI ........:
<lla-.... (OI)
al iftqIIonc:y+a..noI runbw
to<,.."
<!la-........
23 Auto
Backlight
PIs...... kty
led parametEr
ON: rllm OIl b&ddiaht
OFF: 111m off beddllht
24 Offset
Frequency
PIs...... kty
Icd paramdl:r
I o-69.975MHuvdabll!
25 Frequency
Shift Direction........,....,.........
"""""""'
•
OFF
o,lfj ... _
uorn
·!=cc
key
Icd paramettr
...
[
+ I'tIoiINe direction
- N'plM dirKtion
OFF: 111m off frequency shift
dlredlon
...c:m ...S
35
P35
...c:m ...1$1 ·36
11
Shortcut Operation Sheet
26 Stopwatch
Timer
m ...m ... ......
27 Channel
Name Edit
""'""""'
I
..:I.UI . . . :
SECONo·
OFF
....
II +I::!l+ Fl!ssDornkey
.
""'Domkey
Select parameter
.... Q
Q ...mJ ...
...
30 Reset
31
Band
32CTCSS/
DCS Scan
.........,
......,
..........
'W.I
... [
t
.... m:I .... mJ ....
/ 0
CH A
OFF: lLIm GIf stopwatr.:h function
ril ....
•
OJlllnel name shOlJd be c:orJ1IOIOd
....
rs:::.:
Fl!ssDOrnkey
Select P""""
Fl!ssDOrnkey
Select parameter
.........,
+Q+Il:ljJP37
.J8
by261et1am"'1oZ) ..d10
Select parameter
28 Channel
Memory
Selection
ON: Tum an stDpwaldl fundiDl1
Select P""'""
Fl!ssDO.ukey
numbers (0 II> 9), oix nuimum
1199 channelsl.vail"
1
199
+Q+Il:ljJP38
-39
I
I+0+1l:ljJP39
All.: All parameter reset
P40
+Q+Il:ljJ-41
CH-A: SOS on 8i.nd A
CH-B: 505 on Band II
+Q+Il:ljJP42
VFO; Menu raet
DCS: DC5scan
I
....
....
-43
•
Quick Search D
•
High/Low power changeable (See page 16)
• SOS-CH (50S function) (See page 26)
•
DTMF encoding (See page 44)
• Priority scan function (See page 46)
•
Reverse frequency
•
Transmitting overtime prompt (See page 47)
• Adding scanning channel function (See page 47)
•
Wire-clone function (See page 48)
• Working with repeater (See page 48-51)
(See page 07)
CO (See page 46)
• 1750Hz burst tone (See page 08)
• Low voltage prompt (See page 47)
• Programming guide (See page 52)
12
How to Operate
Activellnactive MENU Function
If you don't operate the transceiver frequently, you can inactivate the MENU function
via matching software. Hereby follow the detailed setting method.
1. Set channel mode as the working mode.
2. Untick 'MENU AVAILABLE' in Channel Mode column.
If you want to operate menu function, you can switch to Frequency Mode, or put a
tick before 'MENU Available' in Channel Mode column of the matching software.
NOTE &
» In dual standby, the screen shows 'TDR'. The frequency with an arrowhead icon is the master frequency,
»
»
while the other one is the sub frequency. When receiving in sub frequency, the screen shows '5'. In dual
standby. it can transmiVreceive in master frequency but only receives in sub frequency.
Master Frequency Selection, In standby. press Q to select the desired master frequency.
This transceiver is the dual bander, with dual frequency and dual display funcions.ln frequency
mode. it can display two different receiving/transmitting frequencies at the same time. In channel mode. it
can also display the channel/frequency and related parameter in both channels at the same time.
13
How to Operate
NOTE
&.
»In frequency/channel mode, it is switchable between band A and band B by
Q
key, When the AlB indicator
shows in band A, all the operations are based on band A. While the indicator shows in band 8, all the operations
are based on band B.
»In frequency mode, it is available to seperately set the frequency step. transmitting power, squelch level,
bandwidth, cress. Des. offset frequency, frequency shift direction and channel display modes in band A or
band B.
»In channel mode, it is invalid to set frequency step, transmitting power. CTCSS, DCS, bandwidth, offset
frequency, and frequency shift direction functions in band A and band B.
Step Frequency (STEP) - - MENU 1
In standby. press
Press 0
C + eLI , the screen displays
to enter, it shows '12050K', press D
""i]
/ 0 to select the desired step, then press Oto
confirm, finally press £ljJ to return to standby.
The frequency steps selectable for this transceiver are as follows:
205KHz, 5.ooKHz, 6.25KHz, 10.ooKHz, 12050KHz, 25.ooKHz, 50.ooKHz and 100KHz.
14
Squelch Level (SQL-LE) - - MENU 2
Squelch level is about when the signal is strong enough to turn on the squelch function, and when it is
weak enough to tum off. You may hear the voice from the loudspeaker when turning ON the squelch and
receiving the same signal from other transceivers. Higher level makes it harder to receive the weak signals,
while lower level will be interfered by noises and/or unwanted signals.
»The squelch level for this transceiver has 0-9 levels selectable, and level 0 means tum off the squelch function.
The higher level of the squelch is set, the stronger receiving signal is needed.
In standby, press
Press 0
0 + m , the screen displays I:SQL-1.f
to enter, it shows '5', press D
/ 0
to select the desired squelch level, then press
ell
to
confirm, finally press £ljJ to return to standby.
Power Saver Mode (SAVE) -
MENU 3
When the power saver function is ON, the receiver circuit will be cut off for a moment, and then
re-activate to detect the signals for a while, in order to reduce the battery capacity consumption.
15
How to Operate
In standby, press
Press
Press
a
a
a
+ ca, the screen displays
to enter, it shows 'ON', press
to confirm, and then press
[:SAVE:N'
/ 0 to select turn ON/OFF the power saver funtion.
IlliJ to return to standby.
Transmitting Power Selection (TXP) In frequency mode. press
Press
a
to enter, it shows 'HIGH', press
confirm, finally press
NOTE
C+ 1i:D. the screen displays
":i]
/ 0 to select HIGH/lOW power, then press
0
to
IlliJ to return to standby.
&
» This Iransceiver has HIGH and IJ)W transmitting power seledable:
»
VHF: HIGH: 5W IJ)W:1W
UHF: HIGH: 4W LOW:1W
The quick switch between the HIGH and LOW Iransmitting power is temporary. In Iransmitting mode, press GJ
key to quick switch the HIGH/LOW transmitting power. Once the transceiver is rebooted, the transmitting power
reverts to the original output power.
16
Begin/End Transmitting Prompt (ROGER) -- MENU 5
This function is to select the prompt modes when beginning/ending transmitting.
OFF: No voice prompt when beginning or ending of transmission.
BOT: Voice prompt when pressing PIT (beginning of transmission).
EOT: Voice prompt when releasing PIT (ending of transmission).
BOTH: Voice prompt when pressing and releasing PIT (be in and end of transmission).
In standby, press Q
+ EJ r the screen displays : ROG5"F • ';
Press Oto enter, it shows 'OFF', press
confirm, finally press
/ 0 to select OFF/BOT/EOT/BOTH, then pressOto
IlliJ to return to standby.
Time-out Timer (TOn -- MENU 6
This function is to prevent the transceiver from long time transmitting. When the transceiver is
exceeding the preset time limit, it will stop transmitting with an overtime alarm.
This transceiver can be set in 40 levels with 15 seconds each, between 15 and 600 seconds.
In standby, press
Press
a
0
a
+ mY
,the screen displays
to enter, it shows '60', press
to confirm, finally press _
/ 0
[:TOT :0'
to select the desired transmitting level, then press
to return to standby.
17
How to Operate
vox (VoX) --- MENU 7
This function means the transceiver will switch
to the transmitting mode when detecting the voice singal.
As the VOX circuit must check the existing signals, the transmitting will be a little delay, and the beginning
transmission may not be transmitted completely.
+ r::D
In standby, press Q
Press
0
to enter, it shows 'OFF', press D
(1-10), then press
NOTE
,the screen displays
0
/ 0 to turn OFF VOX function or select VOX level
CiJ to return to standby.
to confirm, finally press
&
»The higher level of VOX is set, the higher volume is needed.
»In SCAN and RADIO modes, the VOX function is not available.
Bandwidth Selection (WN) - MENU 8
In standby, press
0 + Cl , the screen displays
PressQto enter, it shows 'WIDE', press D
Q
/ 0 to select WIDE/NARROW bandWidth, then press
to confirm, finally press CiJ to return to standby.
18
Voice Guide (VOICE) -- MENU 9
This transceiver has English (ENGLSH) and Chinese (CHINES) voice guide available.
In standby, press
Press Q
C!l +
m
to enter, press D
r
the screen displays
/ 0
';
to select Chinese, English or OFF, and then press
0
key to
confirm, finally press CiJ to return to standby.
and MENU 11 at the same time to turn off all the voice prompt if required.
Transmitting Overtime Alarm (TOA) --- MENU 10
This TOA means the
transmitting light will flash and alarm 'OVER TIME' before the transmitting
time reached the pre-set transmitting time (TOn.
This transceiver has 1-10 TOA level available, each level 1 second. E.g level 1 means the transceiver will
alarm and transmitting light will flash before 1 second when the transmitting time reached pre-set TOT time.
In standby, press Q
+ I:lI P
, the screen displays I:
to enter, it shows '5', press D
finally press CiJ to return to standby.
Press Q
/ 0
TOA -
5·
to select OFF/1-1 0 Level, then press Q
to confinm,
19
How to Operate
Beep Prompt Function (BEEP) --- MENU 11
Beep prompt function means the transceiver will prompt ff ft is in confirmed, wrong or problematic operating.
In standby, press Q
Press Q
+ c:a t:D
,the screen displays
to enter, it shows 'ON', press D
then press Q
to confirm, finally press _
I
/ 0
n[
to tum ON/OFF the beep prompt function,
to return to standby.
function and MENU 11 BEEP function are both on
111. VOICE function
Power-on Message (PONMSG) --- MENU 12
This transceiver has 3 display modes selectable for the power on message as follows:
OFF: display the full screen
BATT-V: display the current battery voltage
M5Ci: display 'WELCOME' or other characters
In standby, press Q
+ t:D
CD, the screen displays
Pressr:::!J to enter, it shows 'OFF', press D
/ 0
;1
to select OFF/BATT-V/MSG, then press Q
to
confirm, finally press IlJiJ to return to standby.
20
NOTE
»
.&.
'mu can edit the desired
Message via KG-UV6D programming software. It is compose of 6 digits max, induding
letlers A to Z, numbers 0-9 and oII1er characters.
Busy Channel Lockout (BCL) -- MENU 13
This function means to prevent the transceiver from interfering other communicating channels, if the selected
channel is occupied, press PIT, the transceiver will alarm and cannot transmit.
In frequency mode, press Q
Press Q
+ t:D I:!J , the screen displays [:ecL
to enter, it shows 'OFF', press D
confirm, finally press
/ 0
1[
to select ON/OFF this function, then press Q
to
IlJiJ to return to standby.
21
How to Operate
Keypad Lock (AUTOLK) --- MENU 14
This transceiver has automatic lock (AUTOLK) and manual lock selectable.
ON: Turn on automatic lock function. If no operation is conducted within 15 seconds, it will be locked
automatically. Keep pressing
r::D longer than 2 seconds to unlock.
OFF: Turn off automatic lock function. If required, lock the keypad manually.
»Manually Lock: In standby, keep pressing
again to unlock.
In standby, press Q
Press Q
+ I:i3 Ii:D
r:z.J longer than 2 seconds to lock the transceiver, and press
,the screen displays
to enter, it shows 'OFF', press D
confirm, finally press
/ 0
to select ON/OFF this function, then press Q
to
EliJ to return to standby.
Receiving crcss (R-crCSS) --- MENU 15
Setting this funcion, you can communicate with the specific indivduals or groups and neglect the unwanted
callings from other users who set the same frequencies with you. The transceivers can communicate ONLY
after receiving the corresponding crCSS/DCS tone.
In frequency mode, press Q
+ tm
,the screen displays
[:R--GT':F •:1
22
Itl
Press Q
to enter, it shows 'OFF', press D
CTeSS code, then press Q
/ 0 to turn OFF this function or select 67.0Hz to 254.1 Hz
to confirm, finally press
EliJ to return to standby.
50 groups CTCSS, see appendix (1) CTCSS frequency sheet.
Transmitting crcss (T-crCSS) - MENU
In standby, press 0
+ I:a mY , the screen displays
PressOto enter, it shows 'OFF', press D
crcss code, then press Q
to confirm, finally press
50 groups
. :1
/ 0 to turn OFF this function orselect67.0Hzto 254.1 Hz
EliJ to return to standby.
cress, see appendix (1) cress frequency sheet.
Receiving DCS (R-DCS) -- MENU 17
In frequency mode, press
Press Q
t::!I + tm
to enter, it shows 'OFF', press D
DCS code, then press
0
, the screen displays [:R-D
81F'
/ 0 to turn OFF this function or select D023N to D7541
to confirm, finally press
EliJ to return to standby.
23
How to Operate
NOTE
&.
»This transceiver has 105 groups Des, see appendix (2) Des frequency sheet.
»In DCS selections, DXXXN (from D023N to D754N) means POSITIVE code, while DXXXI (from D0231 to D7541)
means NEGATIVE code.
MENU 18
Transmitting DCS (T-DCS) -
_ '.
_ -. -..
.
[OT-Des
In standby, press,",,", + ............ , the screen dISplays,
DFF o[
Press Q
to enter, it shows 'OFF', press D / D to turn OFF this function or select D023N to 07541
to confirm, finally press IlD to return to standby.
DCS code, then press Q
NOTE
&.
»This transceiver has 105 groups Des, see appendix (2) Des frequency sheet.
»In DCS selections, DXXXN (from D023N to D754N) means POSITIVE code, while DXXXI (from D0231 to D7541)
means NEGATIVE code.
Scan Mode (SC-REV) -
MENU 19
TO: Scanning will go on if no poeration is conducted to the transceiver within 5 seconds after receiving signals.
CO: Scanning wiI stop when the transreiYer rereived signals. and will go on scanning aftEr signals disappeared fur 3 seoonds.
Sf: Scanning wiU stop when the transceiver rereived signals.
24
+ Ili3
In standby, press Q
Press Q
m
,the screen displays
to enter, it shows 'TO', press D
confirm, finally press
/D
[:SC-R'f!:' 1]
to select TO/CO/SE scan mode, then press Q
to
IlD to return to standby.
ScanILampISOS-CHIFM Radio on Side Key 1 (pF1) - MENU 20
There are four functions selectable on the side key 1 of this transceiver:
SCAN: Scan function
LAMP: Lamp function
RADIO: FM radio fundion
OFF: Disable this side key
SOS-CH: SOS fundion
1. SCAN fundion:
In standby, press side key 1 to activate scanning (scan mode can be set through MENU 19 -Scan Mode
Setting), while press any key to stop scanning.
In standby, press Q
Press Q
+ mJ P
to enter, press D / D
,the screen displays
'lii[
to select SCAN, then press Q
to confirm, finally press IlD to
return to standby.
2. LAMP fundion:
In standby, press side key 1 to turn on the Lamp, and press this key again to turn it off.
In standby, press Q
+ mJ p , the screen displays :
'lil
25
How to operate
Press I:l:!J to enter, press 0
1 0 to select LAMP. then press I:l:!J to confirm, finally pressS
to return to standby.
3. SOS-CH (50S function):
When you are in emergency circumstances, press side key 1 to transmit the 'wu wu ... ' SOS signals
to the outside for help. Meanwhile, the transceiver will also sound 'wu wu .. .' with light flash. It will
transmit the SOS signals every 5 minutes with 10 seconds each time. If the transceiver receives signals
during the transmission of SOS, it will return to the receiving mode, after the signals disappeared,
back to SOS transmitting function. Press any key to exit.
NOTE
.&
» The transceiver will
\tJu can press
Q
set the S05-a-t in the masrer frequency even the S05-a-t you set is not the masI!!r frequency.
10 re_the masterfrequency.
»\tJu can setth. 50S Band via MENU 31.
In standby, press I:l:!J +
mJ /1», then screen displays
then press I:l:!J to enter, press 0
.;1,
I 0
to choose SOS-CH submenu, the screen displays
press 0 I 0 to choose Band A or Band B, then press Q to confirm.
After the above setting, in standby, press side key 1 to activate SOS function.
I:
;1,
26
4. RADIO function:
• Turning on the FM radio: In standby, press side key 1 to turn on. The screen displays
__
and the green light flashes, it means the lransceiver is searching the radio station, it will stop flashing after
any signal is searched. Then you can listen to the radio.
• Tuning the FM radio station: In radio mode, press c;:::J , the radio keeps tuning the stations
automatically and the green light flashing until it searched the available stations. You can press 01
o
to fine-tune the searched stations.
• Storing radio station: After detecting a radio station, press Q
you can press one of the number keys between
, the screen displays
c:a and I::!J to save this radio station for your
,
future use.
The lransceiver has two groups of storages selectable for your storing, and the
group is the first storage.
E.g. If you want to store BS.1MHz into the 1st group ChannelS, In radio mode, when tuning the desired
radio station, press I:l:!J + I:lto store it into the 1st storage directly. If you want to store this frequency
into the 2nd group ChannelS. In radio mode, when tuning the desired radio station, press r:D then the
screen will display
- .At this time, pressl:l:!J+ I:l to store !his station into !he 2nd group ChannelS.
27
How to Operate
In radio mode, press 1 to 9 key to select the stored stations accordingly to listen, while use the c:I
key to switch between 1st and 2nd storages .
• Exiting from the radio mode: Press Side key 1 again to exit from the radio mode.
NOTE
.&.
»When you are listening to radio, the current channels are still working (in standby). Once receiving the signals,
it will rewrn to the transceivers communicating mode. After signals disappeared 5 seconds it will return to the
Radio mode automatically.
»In radio mode, you can press
to check the current standby channel/frequency. Press PTT to transmit,
after 5 seconds, it will go back to the Radio mode.
28
Itl
FM Radio/Working Mode/RPT/Sfopwatch Timer/Lamp/Alarm (PF2) -- MENU 21
This RPT (PF2) key with 6 functions available.
1. RPT: Multifunctional Key
In standby, short press
t:3 to activate the corresponding functions circularly. These functions are +R (+
+
shift direction & reverse frequency), -R (- shift direction & reverse frequency), R (reverse frequency),
(+ shift direction), - (- shift direction), and OFF (inactivate this key).
In standby, press Q
/ 0
+
m
t::a ,the screen shows
to select RPT, and then press 0
I::;::;" -
to confirm, press
9
"Ill ,press Q
to enter, then press D
turn to standby mode.
Please refer to MENU 24/25 to set the Offset Frequency and Frequency Shift Direction
functions.
NOTE
.&.
»This functions only available in Frequency mode. If the frequency range is out of the range of +R and -R, the
Reverse function is invalid.
2. SECOND: Stopwatch Timer Function
In standby, short press
t:3 to activate the stopwatch timer function.
29
How to Operate
In standy, press
/ 0
I::!J + mJ
t:a ,the screen shows
to select SECOND, the screen shows
press
I::!J to enter, then press D
,press t::!I to confirm, and then press IlliJ to
turn to standby mode.
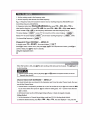
NOTE
A
»If the RPT is defined as SECOND stopwatch timer function, please also set MENU 26 (Stopwatch limer) to
activate this function.
3, LAMP: Activate Lamp Function
C3 to turn ON/OFF the backlig:"hcct,--.___,.,
I::!J + mJ tm, the screen shows
'11], press I::!J to enter, then press D
In standby, short press
In standby, press
/ 0
to select LAMp, the screen shows
turn to standby mode.
"---="-''---J
4. 50S: 50S Function
In standby, short press
C3
to activate SOS function.
+ mJ tm , the screen shows
t::!I to enter, then press D
/ D to select 50S, the screen shows [:PF2S
: S·I'l ' press Q to confirm, and then press ED to turn
In standby, press Q
-
,press
to standby mode.
30
»If the RPT is defined as 50S function, please also set MENU 31 (50S Band Selection) to activate this function.
5. OFF: Inactivate this Function
C3 function.
In standby, press t::!I + mJ t:a
Turn OFF this
D
/ 0
,the screen shows
to select OFF, the screen shows
[:PF2o: F'Il] , press Q
,press t::!I
to enter, then press
ED
to confirm, and then press
to turn to standby mode.
6. RADIO: Activate FM Radio Function
In standby, short press
In standby, press
C3
to activate FM radio
t::!I + mJ tm
,the screen shows ]:;;;:;- 'Il], press
0 / 0 to select RADIO, the screen shows
to turn
to
___...,
.fi] , press Q
t::!I to enter, then
press
to confirm, and then press
mil
mode.
»If the RPT is defined as RADIO function, please also set MENU 20 (FM Radio Function on Side Key 1) to
activate this function.
31
How to operate
7. FRlCH: Working Mode Switch
In standby. short press
/ 0
to speedily switch between Frequency and Channel mode.
- .;"11, press Q
+ ED CLI the screen shows
In standby, press Q
D
C3
I
to select FR/CH, the screen shows
_.;: ,press a
to enter, then press
to confirm, and then press EliJ
to turn to standby mode.
»If the RPT is defined as FRiCH function, please also set MENU 22 (Working Mode Switch) to activate this
function.
Working Mode Switch (CH-MDF) - MENU 22
This transceiver has two options for the working mode:
1. Frequency mode (FREQ)
2. Channel mode
There are three channel display selections in channel mode as follows:
(!)Channel (CH)
(l)Frequency
+ Channel number (CH FREQ)
@Channel name (NAME)
32
NOTE
&.
»It is available to switch between the frequency mode and the channel mode manually or via the programming
software. If you want, you can set the password for the mode switch.
»The password for the mode switch is ONLY available to set via KG-UV60 programming software.
»The password is consist of 6 characters, while "000000" means no password needed for the mode switch.
Frequency mode (FREQ) and Channel mode switchable
(!) Without password input
+ tiD tiD , then press D
In standby, press a
press
Q
/ 0
to choose working mode and finally
to confirm.
a:> With password input
In standby, pressa
Press a
+ mJ tiD, then press D
to confirm, then the screen displays
/ 0 to choose one of FREQ/NAME/CH/CHFREQ.
[:====::='ll[ . Please input the preset password
through the keypad, then the transceiver will switch to the selected mode.
33
How to Operate
NOTE
&
»Only it stored at least 1 Channel and/or Channel Name, then the transceiver can switch to Channel Number and/or
Channel Name mode.
»Speedy switch between Frequency and Channel Mode:
In standby, press
+ GJ combination keys to switch the desired working mode. Input the password of mode
switching if set
em
Auto Backlight (ABR) --- MENU 23
In standby, press
+ aJ c:!J, the screen displays
a
Press Oto enter, it shows 'ON', press D
press
a
to confirm, press
D
/ D
[:ABR
;[
to turn ON/OFF auto backlightfunction, then
return to standby.
» This funcion is only activated when operating on the front case keypads and side key 1, but not on side key 2
and PIT key.
34
Offset Frequency (OFF-SET) -- MENU 24
Offset frequency means the difference between transmitting frequency and receiving frequency. The
range of this transceiver is from 0 to 69.975MHz.
In standby, press C
Press
a
+mJ ltD r the screen displays
to enter, then press D
keypad directly. Press
a
/D
to select the listed offset frequency, or manually input through
to oonfirm, then press S
return to standby.
Frequency Shift Direction (SFT-D) -- MENU 25
There are three selections for the frequency shift direction setting:
1. Plus shift (+), which means that the transmitting frequency is higher than the receiving frequency.
2. Minus shift (-), which means that the transmitting frequency is lower than the receiving frequency.
3. Turn off this function.
In standby, press
Press
a
a
+ lID EJ ,the screen displays
to enter, press D
/ D
[:SFTOPF"l![
to select +/-/OFF, then press
r:::!J to confirm, finally press S
return to standby.
The Offset Frequency and Frequency Shift Direction functions will be only valid under Frequency mode.
Please follow the below setting steps:
35
How to operate
1. Set the working mode to the frequency mode.
2. Set the frequency shift direction and offset frequency.
E.g.: In frequency mode, the transceiver needs to work on receiving frequency 450.025MHz and
Iransmitting frequency 460.025MHz.
In Frequency mode, input Il:D
P P aJ
then press Q + mJ+
+ 0 to
select positive direction (+), press Q+£jjJ, then press 0 + mJ+ Il:D + Q+ D / 0 to
choose 10.000+ 0 + £jjJ, so the frequency shift direction and offset frequency are set.
- . press PTT to transmit and the screen displays
Release PIT the screen displays
- and it means receiving frequency is
The screen displays
Stopwatch Timer (SECOND) --- MENU 26
I:
,---....--....--,
-I
In standby, press Q + mJ Ill!] ,the screen displays
Press Qto enter, it shows 'OFF', then press D / 0 to turn ON/OFF this function, press 0
confirm, finally press CiJ to return to standby.
Using the stopwatch timer:
36
to
i. "Ii
i.
When this function is ON, press r::;J to start counting, while press any key to pause. Press r::;Jagain to
re-start counting.
»When it pauses counting, press any key,except
Stopwatch timer function.
r:D and & (defined as Stopwatch function) to Exit the
Channel Name Edit (CHNAME) -- MENU 27
You should at least store one channel to the transceiver, and it must be under Channel mode, then you
can edit the Channel Name.
1. Channel Name is composed by 26 letters (A-Z) and 10 numbers (0-9), 6 digits max. Press the D
key to choose letters then press the 0 to select the editing place. The "-" symbol means that this
digit is a blank.
2. Edit channel name via KG-UV6D programming software, or input via keypads manually.
Editing Method
1. Set the transceiver in Channel Name display mode (see P32-34: Working Mode Switch).
2. Select the desired channel, press 0
+ aJ +
+Q
,the sreen display 6 "-" bar, press the
37
How to Operate
D
key to choose letters, then press the 0
Q
to confirm, then press
to edit the second digit. After finishing editing, press
CiJ to exit. The screen displays the edited name, and the right corner
shows the corresponding channel number.
Channel Memory (MEM-CH) - MENU 28
In frequency mode and in standby, it is available to store the desired frequencies and relevant parameter
into the specified channel.
Press Q
to enter, press D
/ 0
to seleel the desired channel, then press
voice prompt "receiving memory". Press
Q to store, with the
CiJ to exit, this memory channel with same TX and RX frequency.
If you need to store the different TX and RX frequencies in the same channel, repeat the above operation
with another frequency, then there is another voice prompt "transmitting memory".
E.g.: Store receiving frequency 450.025MHz and transmitting frequency 460.025MHz into CH-20.
1. In frequency mode, inputli:lEl OOtiD I::::J +0 +tiDl:l +0, then pressmJ
o
/ 0 to seleel CH-20, press 0
or D
press IlllJ
to confirm, voice prompt for receiving memory, then
.
38
2. Input Ii:lElJ 0 0 mJ t::J
+ CD + tiD en + m + CI, voice prompt for transmitting
memory, then press CiJ.
The different TX and RX frequencies were stored to CH20 successfully now.
NOTE
&
» If required, the creSS/DCS tone should be set before storing the matching TX/RX frequencies to the channel.
» Transmitting memory only store the transmitting frequency.
»The empty channels can set both receiving and transmitting memory, otherwise only transmitting memory can
be done. Delete the stored channels if you want to set receiving and transmitting memory in the same channel.
»When the memory channel you selected displays
before), while displays
;1
i:
I
tI: means that this channel is not empty (stored
means that U,is channel is empty.
»Besides the manual memory, It is also available to do the memory channel via the matching programming software.
Channel Delete (DEL-CH) --- MENU 29
In standby, press
press
0
0
+ mJ
m
to enter, and press D
,the screen displays
/ 0
to seleel the d'"-es""Cir-ed-;-CchC"a--'nnel, then press
After the channel is deleted successfully, press
CiJ
0
to confirm.
to return to standby.
39
How to Operate
Reset - - MENU 30
This transceiver has two selections for the reset operation-VFO reset and All reset.
VFO reset means that all the functional parameter set in frequency mode resume to the factory setting.
All reset means that all the functional parameter set in both frequency mode and channel mode resume
to the factory setting.
1. VFO Reset
In standby, press Q + c::g p , the screen displays [:RESo1o .;[
press Q to enter, and press D / 0 to select VFO, then press Q, the screen displays [
[,
I.
press Q again to confirm, and the screen displays
After this operation, the transceiver will be resumed automatically.
2. All Reset
In order to avoid the faulty operations, we suggest that you set the password for the All Reset via
KG-UV6D programming software. Only input the valid password, the transceiver can be reset to the
factory setting completely. Pis see the password setting in the programming software, which is consist of
six arabic numerals selectable from 0 to 9.
When the password is "000000", it means no password needed to input for this operation.
40
(1) Setting password as ''000000''
In standby, press Q + c::g p
,the screen displays [:RESO}O ·11]
press Q to enter, and press D / 0 to select All, press 0 , the screen displays [
then press 0 again to confirm, the screen displays
[.
When the reset is done, the transceiver will be resumed automatically.
(2) Setting password as "XlO(XlO(" (E.g.:123456)
In standby, press 0 + c::g p, the screen displays :RESO;!'O ..
press Q
to enter, and press D
/ 0
to select All, press Q
],
,the screen will displays
-] ,at this time input the valid password (e.g.:123456), the screen displays
[,
then the transceiver will start resetting. After reset is done, the transceiver will be resumed
automatically.
41
How to Operate
SOS Band Selection (SOs-eH) - MENU 31
This function can set which band to transmit the SOS signals.
0
In standby, press
D
/ 0
+ CEJ t:a
,the screen shows
to select CH-A or CH-B, press
0
,press
to confirm, and then press g
0
to enter, then press
to turn to standby mode.
»To activate the 50S function, please also set MENU 20 (50S Function on Side Key 1) or MENU 21 (50S
Function on RPT Multifunctional Key).
creSS/Des Scan ---- MENU 32
This function can scan all transmitters crCSS/DCS tones. If your crCSS/DCS is different from the
other members in your group, you can detect these different tones.
When the transceiver is in receiving mode, press Q
Press 0
+ c:9 ED • the screen displays
to enter, the arrowhead points to "crCSS". Press D
And then press
0
/ 0
.
to select CTCSS or DCS scan.
to confirm, it starts scanning crCSS/DCS frequencies.
42
NOTE
»
»
»
»
.&.
This function only works in frequency mode.
Only when the transceiver detects the cresS/DeS signals from outside, this function works.
Press
D
/ D
or rotate the Rotary Encoder to change ascending or descending scanning.
When the transceiver scans cresS/DCS frequency, it stops at this frequency. 'rtlu can press
C
to temporarily
replace this frequency as the current standby frequency. If you want to directly set this scanned frequency to be
cunrent working frequency, please enter into MENU 15/16 (cresS) or MENU 17/18 (DCS) to save separately.
Or it will be reset to the original setting before the next scanning.
» Only the band with the arrowhead and detecting the signal can activate the cresS/DeS scanning.
43
How to Operate
DTMF Encoding
Q , D , 0 , IlliJ keys are respectively corresponding to A, B,
C, D at DTMF encoding setting.
Please follow the below steps to activate DTMF manually:
1. Hold on pressing PIT key to transmit.
2. At the same time, press the keys on the keyboard to send out the DTMF tone.
»This transceiver will monitor the transmission of corresponding DTMF tone.
ANIID Code Edit/Transmit/Transmitting Delay Time & DTME Sidetone
»The above functions in this transceiver only can be edited by our programming software.
Editing ANI ID Code
ANI ID Code can be made up of alphanum (A-D and 0-9) with 6 digits max.
Transmitting ANI ID Code
44
Turn this function ON means when press PIT key, the ANI ID Code will be transmitted automatically,
while turning OFF means manual transmitting.
ANI 10 Code Transmitting Delay
This means the delay time of transmitting ANI ID after pressing the PIT key to communicate.
This delay time can be set 3 seconds max, total 30 levels with lOOms each.
DTMF Sidetone
DTMF sidetone means to turn ON/OFF the speaker when transmitting DTMF code, and get the
corresponding DTMF tone.
There are 4 options on setting sidetone:
<D Keypad Sidetone: Press keypad to turn on sidetone when transmitting.
<D ANI-ID Code Sidetone: Transmit ANIID Code to turn on sidetone.
<D key Sidetone+ANI-ID Sidetone: Pressing number key or transmit ANI ID Code can turn on sidetone
when transmitting.
@) OFF: In encoding mode, all sidetones are off.
45
How to Operate
Priority Scan
If you want to monitor the other frequency and check the certain preferred frequency at the same time,
you can set priority scan function.
E.g.: Scan six channels: Set CH1, CH2, CH3, CH4 and CH5 as the common scanned channels, and CH6
as the priority scanned channel. then the scanning order is as followings:
rCH1-CH6-CH2 - CH6- CH3- CH6-CH4-CHG-CH5- CH6]
When this transceiver detects signal on the priority channel during scanning,it will on its frequency.
Please program the priority channel via KG-UV6D programming software.
Reverse Frequency
When using the reverse frequency function, the transmitting and receiving frequencies of this transceiver
will be interchanged together with all settings for crCSS/DCS and DTMF setting.
How to set the reverse frequency:
In standby, press
CO to activate this funciton, while press CO again to switch it off.
46
Channel Mode Operation
1. Activate/Inactivate Menu function
2. Activate/Inactivate Reset function
Please program above operations via Wouxun KG-UV6D programming software.
Low Voltage Prompt
When the batterypack is in low voltage, there will be voice prompt for the lower voltage, at this time,
the backlight flashes every five seconds and the transceiver sounds out "click" to remind of being charged
timely.
Transmitting Overtime Prompt
When the transmitting time is exceeding the preset time, there will be an alarm to remind of the overtime
transmitting, and the transmitting will be paused, if you want to continue transmitting, please press PIT
to resume transmitting. (Please see MENU15 about the Time-out timer TOn
Channel
47
How to Operate
Wire-clone Function
1. Well install the battery into the source radio and the target radio, and then well connect the wireclone cable of these two radios.
2. Turn ON the target radio.
3. Press the MONI key of the source radio meanwhile turn ON.
4. The RED light of source radio flashing, it means start copying the data.
5. The GREEN light of target radio flashing, it means start receiving the data.
6. After finishing copying, the RED and GREEN light of these two radios went off, and then return to the
standby mode.
Working with Repeater
This series of transceiver is available to work with repeater both in Frequency mode and Channel mode,
which is programmable through the key board and via the programming software.
Please refer to the following steps about manual programming the channels to work with the Repeater.
a. Set the transceiver work in the Frequency/VFO mode. (If the radio works in channel mode, please
press r::lJ + C!!J key to switch to frequency mode.)
b. Input the Receive frequency through the keyboard. (The Receive frequency of this transceiver is the
Transmit frequency of Repeater.)
48
c. Set the related parameter you need for this frequency,like MENU 15-18 CTCSS/DCS, MENU23
Offset frequency, MENU 24 Shift frequency direction and others.
d. Memorize this frequency and the parameter into the specified channel by MENU 27.
e. Repeating above settings to set the Transmitting Memory.
»
After setting the Offset frequency and the Shift frequency direction of receiving memory, you don't need
to memorize the Transmit
After above, the settings to work with repeater are successful.
Switch the working mode to Channel mode, call out this specified channel you have memorized, the
transceiver can join in the Repeater.
For example, the Receive frequency of Repeater is 442.850MHz, the Offset frequency is 5.00MHz,
the Shift frequency direction is "-", the T-CTCSS is 103.5Hz, the specified channel CH-20. Please
see the steps as following:
a. Power on the transceiver, and set it to work in Frenquecy mode.
b. Press
r::lJ + IlWI + r::lJ to set the Frequency step, and then press r::lJ to confirm, finally pressED
to return to standby.
49
How to Operate
c. Input the frequency 447850 through the keyboard, and program followings:
» Press a + p + Il:D + a to select the desired power, and then press Q to confirm, finally
press EliJ to return to standby. (Please refer to MENU 4 on Page 16)
» Press 0 + I:i:3 + mY + a t o select the desired CTCSS code 103.5Hz, and then press a to
confirm, finally press _
» Press a
+
aJ + Il:D + Q to select the desired offset frequency 5.00MHz, and then press a
confirm, finally press _
» Press 0 + mJ + c::J +
finally press _
» Press
a
+
to return to standby. (Please refer to MENU 16 on Page 23)
to
to return to standby. (Please refer to MENU 24 on Page 35)
a
to select the desired direction "-", and then press a
to confirm,
to return to standby, (Please refer to MENU 25 on Page 35-36)
aJ + Cl + a
to Memory channel, Press D
/
key, rotate the channel encoder,
or directly input 2 +0 through the keyboard to select the specified channel CH-20, and then press a
to confirm, there is voice prompt "Receiving memory" (if the Voice guide is ON.). Finally press _
to
return to standby. (Please refer to MENU 28 on Page 38-39)
After above, the settings for memory channel to work with the repeater is done.
If required editing the repeater's channel name, please press Q+ Dto switch the working mode to
Channel mode. Select the specified channel CH-20, and press a
+ mJ +
aJ + a
to select
50
channel NAME displaying mode, press Q
+ aJ +
press
EliJ
+ a
to confirm, press _
to return to standby. Then pressa
to edit the channel name. After finishing editing, press a
to confirm, then finally
to return to standby. (Please refer to MENU 22 on Page 32-34 and MENU 27 on Page 37-38)
How to Use the Intelligent Charger
1. Insert the AC plug into the power grid socket (AC:90-240V), the indicator on the charger flashes, then
the charger is in the charging standby mode.
2. Insert the battery into the charger the RED lED is on ,which means that charging is on the progress.
It will turn to GREEN when fully charged.
NOTE
&
»When inserting the exhausted battery into the charger, it will pre-charge the battery in trickling mode, the
RED light of charger flashes and lasts 10-20 minutes, then start normal charging with RED light keeping on,
it will turn to GREEN when is fully charged.
»Trickling charge the exhausted battery is to protect the Lithium-ion battery.
51
How to 0 erate
Programming Guide
1. Download, unzip and install the USB driver according to different PC operating system.
2. Restart the computer, it shows that the driver is installed successfully.
3. Download and unzip the corresponding programming software.
4. Well connected the transceiver and computer with USB cable, then power on the transceiver.
5. Read from the transceiver to check the connection.
6. Set the desired data on the software, then write to the transceiver.
NOTE
.&.
» The USB driver of Windows XP /2000 and Windows 7 & Vista is not compatible, please download the
»
matching drivers according to your PC system.
If 'Failed Connection' displays when reading from the b"ansceiver, please re-check the first four steps as
»
well as the communication ports.
Please note, once well done the first three steps, the com port will be selected automatically. However, as
the different computer settings, sometimes you should re-set the com port, in this case, please select the
»
correct com port from the device manager according to the port assignment.
If the connection is still failed. try to use another cable or another transceiver on another computer to
double check.
»
For more details. kindly contact your nearest dealer.
52
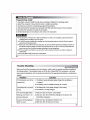
Trouble Shooting
Before confirmed the transceiver with real problems, kindly check the possible problems according to
the following chart. If the problems come out all the time. Please RESET the transceiver, it will solve
some incorrect operations. And, try to get some help from the experienced technician or contact your
supplier.
Problem
The transceiver can not be
powered on.
Solution
I. The battery may be exhausted, please change the new battery or
re·charge it.
2. The battery was not installed correctly, pis re·install.
The battery life is too short
I. The battery life is over, please change a new battery.
to use.
2. The battery is not fully charged.
The receiving light keeps
I. Make sure that the volume is the highest.
flashing, but there is no
2. Make sure that the CreSS/DCS settings are the same as the
sound coming out.
transmitting transceiver.
It seems that the keyboard
I. Make sure that the keypad is locked or not.
does not work.
2. Make sure that the keys are not stuck.
53
Trouble Shooting
Problem
Solution
In standby, the transceiver
Make sure VOX function is ON or not, and its level is set too low or not.
will transmit automatically
even the PIT key is not
pressed.
Some functions can not
Please confirm if the transceiver is working in channel mode, since some
be stored normally.
functions are ONLY set in channel mode via programming software.
There are other disturbed
Please change the CTCSS/DeS frequencies set in your group.
signals or ncice( from other
groups) in the channel.
54
Technical Parameter
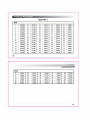
Appendix 1
cress
1
67.0
11
94.8
21
131.8
31
171.3
41
203.5
2
69.3
12
97.4
22
136.5
32
173.8
42
206.5
3
71.9
13
100.0
23
141.3
33
177.3
43
210.7
4
74.4
14
103.5
24
146.2
34
179.9
44
218.1
5
77.0
15
107.2
25
151.4
35
183.5
45
225.7
6
79.7
16
110.9
26
156.7
36
186.2
46
229.1
7
82.5
17
114.8
27
159.8
37
189.9
47
233.6
8
85.4
18
118.8
28
162.2
38
192.8
48
241.8
9
88.5
19
123.0
29
165.5
39
196.6
49
250.3
10
91.5
20
127.3
30
167.9
40
199.5
50
254.1
55
Technical Parameter
Appendix 2
Des
1
2
3
4
5
6
7
8
9
10
11
12
13
14
15
D023N
D025N
D026N
D031N
D032N
D036N
D043N
D047N
D051N
D053N
D054N
D065N
D071N
D072N
D073N
16
17
18
19
20
21
22
23
24
25
26
27
28
29
30
D462N
D464N
D465N
D466N
D503N
D506N
82
83
D074N
D114N
D115N
D116N
D122N
D125N
D131N
D132N
D134N
D143N
D145N
D152N
D155N
D156N
D162N
31
32
33
34
35
36
37
38
39
40
41
42
43
44
45
D165N
D172N
D174N
D205N
D212N
D223N
D225N
D226N
D243N
D244N
D245N
D246N
D251N
D252N
D255N
46
47
48
49
50
51
52
53
54
55
56
57
58
59
60
D261N
D263N
D265N
D266N
D271N
D274N
D306N
D311N
D315N
D325N
D331N
D332N
D343N
D346N
D351N
61
62
63
64
65
66
67
68
69
70
71
72
73
74
75
D356N
D364N
D365N
D371N
D411N
D412N
D413N
D423N
D431N
D432N
D445N
D446N
D452N
D454N
D455N
56
Des
76
77
78
79
80
81
84
85
86
87
D516N
D523N
D526N
D532N
D546N
D565N
88
89
90
91
92
93
D606N
D612N
D624N
D627N
D631N
D632N
94
95
96
97
98
99
D645N
D654N
D662N
D664N
D703N
D712N
100
101
102
103
104
105
D723N
D731N
D732N
D734N
D743N
D754N
57
Technical S ecification
Frequency Range
(can be suitable for different
136-174MHz &. 350-470MHz
136-174MHz &. 420-520MHz
144-148MHz &. 222-225MHz
66-88MHz &. 400-480MHz
countries or areas):
be updated wtthout prior notice.
58
Optional Accessories
Six-way charger
1300mAh Li-ion batterypack
"AA" batterypack
Eliminator
Programming software
USB programming cable
Wireclone cable
Leather case
(SL 16) (BNC)
Antenna adapter
cCiitri
Car charger
Headset
Speaker/Mic
59
0>
0
::J
0
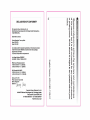
DECLARATION OF CONFORMITY
0...,
!:!:"'C
£ !:!:
5'
::J
<C
CD
We, Quanzhou Wouxun Electronics Co.,Ltd,
No.928 Nanhuan Road,Jiangnan High Technology Industry Park,Quanzhou,
Fujian 362000,Chins,
(ii'
3
II)
::J
!::
aiii !!!..
dedare that our product:
....
is in compliance with the essential requirements and other relevsnt provisions
of the R&TIE directive 1999/5JEC and carries the CE mark accordingly.
Supplementary infonnation:
The product complies with the requirements of:
II)
CD
0-
(ii'
Low Voltage Directive 2006l95lEC
·EN 60950·1: 2006+A11 :2009+A1 :201 0
(/)
m
:::l
Efficient use of frequency spectrum
CQ.
iii"
:::r
·ETSI EN 301783·1 V1.1.1(200B-09)
·ETSI EN 301783·2 V1.1.1 (2008-09)
<
CD
EMC Directive 2004/108/EC
·ETSI EN 301489-1 V1.8.1 (2008-04)
·ETSI EN 301 489-15 V1.2.1 (2002·08)
iii
O·
:::l
Date: June 16, 2010
Place: Quanzhou,Fujian,China
Name: Danny Chen
"G>,
lAu11111
C
<
Ol
Quanzhou Wouxun Electronics Co.,Ltd.
Add:No.928 Nanhuan Road,Jiangnan High Technology Industry
Park,Quanzhou,Fujian 362000,China
Tel:+86 595 28051265 Fax:+86 595 28051267
Http://www.wDuxun.com
0,
.....
.....
0
00
<:
.....
!::
!::
;:::;:
(ii'
(/)
-::J
0
"'C
CD
.2:
n- O'n-
CD
S- ...,
0- Il)
CD ::J
!::
'<
"'C"'C
Co 0
!a (/)
CD !!!.
CooCD
!
0
!::
"'C
:::::!.
0...,
f
CD
::J
Co
CD
- ....
....
0-
Product Description: Two-way Radio
Brand: WOUXUN
Model: KG·UV6D
Signature:
S-
Il)
<
iil
0
0
II)
0
(ii'
c5
....
CD
Il)
O
0
!::
iil
.Q
II)
::J
Co
8
3
3 CD
....
0
"'C
(ii' CD
(/)
::J
::J
(/)
CD
C)" (/)
(/)
MEMO