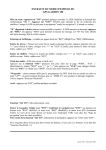
Download SOB QuickStart Card
Transcript
"Software-On-Board"
QuickStart Card – SOBvMAX
"Software-On-Board"
QuickStart Card – SOBvMAX
General Tools
MOUSE ACTIONS
•
Touch is the same as Left-Clicking the chart.
•
Press is what you do to Buttons or Check Boxes.
•
Left-Click Ship’s Target (or [F9]) at any time to setup ship’s position.
•
Left-Click with no tools selected to centre chart.
[Ctrl]-Left-Click to select an object beneath the Ship’s Symbol.
•
Middle-Click at any time to centre chart.
•
Right-Click at any time to view data about that chart point (same as [Info]>[Touch])
•
Double-Click the chart to display the NMEA form.
•
MouseWheel will perform fast zooming.
•
Touch/Slide along chart edges to pan chart when Pan button pressed.
•
Many actions involve Touching the chart twice.. Note: this is NOT double-clicking, the first Touch
selects the item, Touching it again performs the action (i.e.: showing a form).
FORMS
•
Ship’s Settings & Display Options ................. press [F9] or touch Ship’s Symbol at any time
Dead Reckoning; Ship Target and label settings; wind tools
•
Waypoints ................................................press Waypoint button, touch any existing waypoint
Rename; locate; activate as destination; show wind shadow; set icon style
All Waypoints............................................................................ press [F10] or [Info]>[Wpt]
•
Route Details ..................................touch a route TurningMark twice, or press [Info]>[Route]
View route details; activate; settings; planning; create auto search routes
All Routes................................................................................press [F11] or [Info]>[Route]
•
PastTracks...........................................................press [BackSpace] or CTRL-Click the Track
•
Chart Object Detail..................................................................... right-click any chart symbol
•
Tides ................................................................................................. right-click a Tide symbol
•
Raw NMEA Data .....................................................................press [N] or double-click chart
Raw data from serial inputs; replay a log file; enable NMEA talking
•
AIS/ARPA Targets ........................................................... press [T] or [Radar/Target] button
•
About SOB..................................................................................................press [ ? ] button
Installed C-Maps & SOB Registration and UnlockCodes
•
Installed Charts .................................................. press [C-MAP] button on About SOB form
•
Order New Charts ................................... press [C-Map Selector] button on About SOB form
KEYSTROKES
F1 Display help page showing keystrokes
F2 Display/hide Level Toolbar
F3 Display/hide Chart Toggles Toolbar
F4 Cycle available display palettes
F5
F6
F7
F8
Display/hide Spot Soundings
Toggle Mix Levels ON/OFF
Cycle night modes
Declutter chart display
F9
F10
F11
F12
Ships form
All Waypoints form
All Routes form
Perspective View
© 5 December, 2005 DigiBOAT Pty Limited
[space]
[Alt-space]
[Enter]
[Arrows]
Centre at ship
Pan to exact location
Start Info mode
Pan chart
[I][O]
Zoom IN, Zoom OUT
[L][R]
[-][+]
Steer ship in DR mode
Change ship’s DR speed
[B]
[N]
[T]
Configure chart borders
Show/Hide Raw NMEA form
Show/Hide Targets form
www.digiboat.com.au
ZOOM-IN
ZOOM-OUT
Decrease chart scale. Change Level as required.
Increase chart scale. Change Level as required.
CENTRE CHART AT SHIP POSITION
Chart will be centred at Ship’s Position.
AUTO-CENTRE CHART AT SHIP POSITION
Ship’s Symbol prevented from "sailing" off the screen.
AUTO-PAN CHART
Moving the cursor along the chart edge will pan the chart.
Special Tools
MAN OVER BOARD Begin a MOB scenario. SOB will calculate a return route and
provide instructions and retrieval tips. The MOB creates a regular Wpt at the Ship’s
Position setup as a "Navigate to Destination" mark.
TARGETS
Show form listing acquired AIS / ARPA targets and CPA details and
settings. If connected, settings for redisplay of RADAR cursor, scale-rings and VRM/EBL.
LOCATE PORTS AND SERVICES
Search for Ports, Marinas or any of dozens of
various marine services and facilities (fuel, water, phone, post, toilets, chandlers etc).
Displays range and bearing (from centre of the display) and location of these places.
Note: ports and services will only be displayed if detailed charts of these locations are installed.
INFORMATION
Depressing this button is like entering Right-Click mode …
• Point to a chart navigation symbol or Target to show Quick Information box.
• Touch any chart symbol for detailed information (same as Right-Click).
• Use with Route, Waypoint or Centre Button to extend their function.
Note: for TouchScreen use, true right-click mode is entered via the driver utility
Information & Settings
SHOWS/HIDES DATA & INFORMATION PANELS
Control display of View
Panels: Ship’s Data; Messages; Navigation; Targets; Anti-Grounding.
PRINT
Starts chart print mode. Select [Portrait] or [Landscape], zoom/pan the
chart as desired, then press the [Printer] button to preview and print the image.
DECLUTTER Reduce chart tools and drawings to minimalist display to declutter the
chart surface. Hides Wind tools, Text labels, Chart borders etc
T
REGISTRATION & C-MAP CHART DETAILS
• Show version details about SOB and the C-MAP library
• Enter SOB Unlock Code to establish Registration
• View details about current C-MAP charts and licenses
• Run "C-Map NT/PC Selector" application to order/purchase additional charts
TIDES
• Zoom to change the chart level to C, D or E Level to show Tide Symbols on chart.
NOTE: The current chart level is displayed in square brackets on the status bar eg: [D] 75000:1
• Right-Click (or [Info->Touch]) any tide symbol for tide data, graphs and predictions.
© 5 December, 2005 DigiBOAT Pty Limited
www.digiboat.com.au
INTERFACE
SOB is designed for "touch screen" use, however extra functionality and ease of use is experienced with
a mouse (middle-wheel recommended). The interface contains no menus and few actions require mouse
"dragging". The chart display will automatically refresh itself every 5-10 seconds. For convention, our
documentation uses [ ] brackets to indicate a button.
Further help and online manual at http://www.digiboat.com.au.
INSTALLING & FILE LOCATIONS
SOB will auto-install into the C:\SOBvMAX folder. This is the recommended folder, however you can
override this and use any location (eg: 'C:\Program Files\SOB'). Win2K and WinXP users will need to
login as 'Administrator' to install and use SOB in it’s default folder.
If upgrading from previous SOB version - copy your Waypoints, Routes, Logfiles, Trackfiles and Licensed
Charts over to the corresponding folder in SOBvMAX\.
SOB folders and Files:
SOBvMAX\
Programs
SOBvMAX.exe
SOB_COM.exe
SOB_REG.exe
Documentation
QuickStart.pdf
SOB Manual.pdf
RELEASE_NOTES.pdf
NMEA Sentences.pdf
Main program file
Utility Program for detecting & setting available serial ports
Utility for restoring licensed charts on multiple PCs
For use with a C-Map Dongle, contact [email protected]
This card.
Printable version of the SOB Online User Manual.
Addendum to the PDF User Manual.
Summary of compatible NMEA data.
SOBvMAX\Waypoints
!waypoints.wpt
*.wpt
SOB default waypoints file, which are reloaded when SOB starts.
User’s wpt files, load as necessary with AllWaypoints form.
SOBvMAX\Routes
*.rte
User’s route files, load as necessary with AllRoutes form.
SOBvMAX\Logfiles
!messages.txt
!SOB_NMEA_DATA.log
!autoplay.log
*.log
File containing text printed to the Messages ViewPanel.
SOB’s NMEA data log file. Enable logging on NMEA Data form.
If exists, will start playing when SOB starts up.
User log files. Any text file containing NMEA sentences.
SOBvMAX\PastTracks
!LastTrack.trk
!PastTrack.txt
*.txt
Previous displayed pasttrack for automatic loading when SOB starts.
Accumulated PastTrack data.
PastTrack files that can be analysed in Excel, or reloaded in SOB.
SOBvMAX\DemoCharts
DMCxxxxx.MCV
Full detail Demo charts (15 available).
SOBvMAX\Charts
AUC20106.MCP
EWC21507.MCP
Optional folder for storing licensed C-Map charts.
eg: Australia chart #201 ver 06 (Australia East Coast).
eg: Western Europe #215 ver 07 (English Channel).
SOBvMAX\UserCard
created by SOB when a C-Map UserCard file is saved to HDD.
Drawing Modes / Navigation Tools
WAYPOINTS
Touch chart to place a mark at that position. Touch an existing
Wpt mark for detailed Wpt information or to change its settings. A Wpt can be
placed at the current ship’s position by pressing the MOB button, then releasing the
button to end MOB mode – then rename and configure this Wpt as desired.
ALL WAYPOINTS Press the [Info]>[Wpt] buttons, or the [F10] key. Manage all
loaded and unloaded wpts from this form. Control the groups (files) of Wpts for
Loading or Unloading. Capture Wpts from compatible GPS, load User files
(MARK/EVENT/ROUTE) from C-Map UserCard.
QUICK NAVIGATION POINT & LINE Touch the chart to draw a navigation line
from Ship’s Position. The Info Box shows: latitude & longitude; magnetic variation;
range (RL & GC) and bearing (and reciprocal heading) from ship; and Time-to-Go at
current SOG (Speed Over Ground).
Note: the InfoBox can not be hidden, to remove from your work area, zoom out or pan and
place the box out of the way, then zoom or pan back to your work area. The line drawn from
InfoBox to Ship can be hidden or displayed via the Ship Tools page of the Ship’s Form.
RBL – RANGE & BEARING LINES
Touch the chart to draw an RBL from Ship’s
Position, consecutive Touches will extend the RBL. Up to five extensions can be
drawn, then the RBL will restart. Manually restart the RBL by pressing the RBL
button twice (ie: Turn-Off RBL mode, then Turn-On RBL mode again). The RBL’s
have a short life span, whenever the RBL button is depressed the current RBL is
cleared and a new RBL is started. So to remove the RBL from the chart: enter RBL
mode (press button), then exit RBL mode without touching the chart. After the next
chart refresh, only the start and end points of the RBL will connect back to the
Ship’s position.
ROUTES Create a new Route: Start Route mode, consecutively Touching chart
will place the Starting-mark, Turning-marks and Destination positions. Select a
Route: Touch any route mark to select that route, the route will change colour to
red to show it is selected. The currently selected mark, will become a large solid dot,
the next mark along the route will be a large hollow dot.
Edit a Route: The
Route/mark must first be selected, then Touch the new location to move the mark.
(Hint: if the old mark is in the way when moving, first move to a different location,
then move back). Insert Route Mark: Touch a mark twice, pressing the [Insert]
button will place a new mark after the selected one. Move the new mark to its
desired location.
Delete a Mark: Touch the mark twice, then press the [Delete]
button.
Activate a Route: by depressing the button on a Route Form. Active
routes will start N2D mode and send control data to an AutoPilot.
Display Route Details Form: Touch a route mark to select it, then Touch it again
and press [Details] on the button menu OR select the route from the list on the All
Routes form, then press the [Details…] button.
ALL ROUTES Form: Press [Info]>[Route], or type the [F11] key.
Loaded Routes from file: All routes used during a SOB session are automatically
saved when the program exits, the route name is used for the file name. To force a
save, press [ ] on the All Routes form. To delete a route, simply delete the file
name from Windows™ Explorer.
NOTE: Routes are easily transferred between computers (either email as an attachment, or save
to disk), just place the file in the Routes folder, then load it in SOB using the All Routes form.


