1
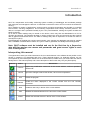
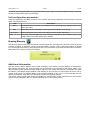
DLHT
User's Manual
Date 06/07/2009
Device and data management software for DLHT –
Temperature and Humidity data loggers
Software version 1.1.2.0
2/35
Tecnosoft s.r.l.
Via delle Regioni, 34, 20090 Segrate (Milano)
phone +39 02 26922888 - fax +39 02 26922875
e-mail: [email protected] - web: www.tecnosoft.net
DLHT
TecnoSoft s.r.l.
TecnoSoft s.r.l.
DLHT
3/35
INDEX
LICENSE AGREEMENT......................................................................................................................5
INTRODUCTION...............................................................................................................................6
INTERPRETING THIS MANUAL.......................................................................................................................6
SYSTEM REQUIREMENTS..................................................................................................................7
HARDWARE.........................................................................................................................................7
SOFTWARE..........................................................................................................................................7
MAIN OPERATIONS.........................................................................................................................8
STARTING UP THE SOFTWARE......................................................................................................................8
THE MAIN WINDOW.............................................................................................................................8
ON-LINE HELP....................................................................................................................................9
ABOUT..............................................................................................................................................9
EXITING THE PROGRAM...........................................................................................................................9
CHECK THE STATUS OF A UNIT......................................................................................................10
SYNCHRONIZING THE CLOCK...................................................................................................................10
UNIT CONFIGURATION PARAMETERS...........................................................................................................11
ERASING MEMORY..............................................................................................................................11
ADDITIONAL INFORMATION....................................................................................................................11
STARTING A NEW MISSION...........................................................................................................12
MISSION PARAMETERS..........................................................................................................................13
INFORMATION.........................................................................................................................................................13
ALARMS................................................................................................................................................................13
ACQUISITION..........................................................................................................................................................13
OPTIONS...............................................................................................................................................................13
LED 1, LED 2 AND BUZZER.....................................................................................................................................14
MEMORY..............................................................................................................................................................14
CURRENT MISSION STATUS.........................................................................................................................................14
DOWNLOAD READINGS...............................................................................................................15
DOWNLOADING DATA..........................................................................................................................15
STOPPING A MISSION...........................................................................................................................16
DISPLAYING THE DATA IN A GRAPH...........................................................................................................16
VIEWING DATA AS A TABLE.....................................................................................................................18
PRINTING REPORTS..............................................................................................................................18
THE SYSTEM ARCHIVE...................................................................................................................19
THE BACKUP PROCEDURE......................................................................................................................19
THE RESTORE PROCEDURE......................................................................................................................19
THE RESET PROCEDURE.........................................................................................................................20
DATA LOGGER MANUAL..............................................................................................................21
CONNECTING A DEVICE........................................................................................................................21
SWITCHING ON THE DEVICE....................................................................................................................21
HOW TO VIEW THE CURRENT TEMPERATURE READINGS.......................................................................................21
ADJUSTING THE DISPLAY CONTRAST...............................................................................................................................21
BROWSING THE TABLE OF READINGS...........................................................................................................21
MANAGING THE ALARMS.......................................................................................................................23
COMMUNICATION MENU.......................................................................................................................23
REPLACING THE BATTERIES......................................................................................................................23
RESETTING THE DEVICE..........................................................................................................................23
4/35
DLHT
TecnoSoft s.r.l.
DISPLAYING THE UNIT'S SERIAL NUMBER..........................................................................................................................24
SUPERVISORS MANUAL.................................................................................................................25
THE HARDWARE PROTECTION KEY.............................................................................................................25
CONFIGURING THE PROGRAM FOR THE FIRST TIME...........................................................................................26
THE MAIN WINDOW..............................................................................................................................26
CONFIGURING THE SOFTWARE PROGRAM.....................................................................................................27
THE GENERAL TABSHEET............................................................................................................................................27
THE DATABASE TABSHEET...........................................................................................................................................27
THE SECURITY TABSHEET.............................................................................................................................................28
THE PATH TABSHEET...................................................................................................................................................28
THE REPORT TABSHEET...............................................................................................................................................29
MANAGING THE USERS.........................................................................................................................29
MANAGING THE HARDWARE KEYS.............................................................................................................30
MANAGING THE DLHT UNITS.................................................................................................................31
LE REGISTRAZIONI DELLE OPERAZIONI..........................................................................................................31
MANAGING ACQUISITIONS.....................................................................................................................32
CONFIGURING THE TEMPLATES.................................................................................................................32
ADDING A TEMPLATE................................................................................................................................................33
TecnoSoft s.r.l.
DLHT
5/35
License agreement
Read this license agreement thoroughly before using the Software. Using and copying this Software is subject to the
acceptance of this agreement.
If you choose to refuse the following conditions, please return this Software to the point of purchase for a complete refund.
This agreement involves Tecnosoft srl, Redecesio di Segrate, Milano, Italy (henceforth called Tecnosoft) and the User (be it
a physical or juridical person) for the following software products (henceforth called Software): "DLHT Software" and any
software product accompanying it.
Tecnosoft grants the user a non-exclusive right to use a copy of the software on a single computer provided that the user
accepts the following conditions.
1. User license. The Software is property of Tecnosoft and cannot be copied nor sold without the prior written authorization
of Tecnosoft. The Software is protected by Italian and European Laws and by International Treaties concerning intellectual
properties.
2. Additional licenses. The purchase of additional licenses conveys the right to use the Software on a corresponding
number of computers at the same time.
3. Exclusion of liabilities. Except for what stated by applicable laws, in no case can Tecnosoft be considered liable for
damages or losses, direct or indirect, including, but not limited to, loss or missing income, suspension of activities, loss of
information or any other monetary or economical damage, deriving from proper or improper use of the Software even if
Tecnosoft has been advised of the possibility of such damages. In any case, the responsibility of Tecnosoft for such
damages will be limited to the price paid for the Software. This clause is applied even if the User does not accept the
Software.
4. Use of Software results. It is User's responsibility to check that results given by the Software are correct and appropriate. In
no case the Software should be used if such use can be threatening to the health or life of human beings. This clause is
applied even if the User does not accept the Software.
5. Updates. If the Software is an update of a previous version, the license is transferred from the old version to the update.
Only the update can be used, unless the update is destroyed.
6. Separation of components. The Software is licensed as a single product. Components cannot be separated.
7. Limitations. The User cannot convert, decode, decompile or disassemble the Software, except for what is explicitly
requested by applicable laws.
6/35
DLHT
TecnoSoft s.r.l.
Introduction
DLHT is a temperature and humidity monitoring system consisting of a datalogger and a software package
that configures and manages the devices. A USB cable connects the units to the PC on which the software is
running.
DLHT satisfies a number of applications, amongst which monitoring temperature and humidity in controlled
environments, checking refrigerators, and monitoring temperature and humidity sensitive products. The
device is compact and is powered internally by two 1.5V pencil batteries, making the system versatile and
easily to relocate.
Up to half a million readings may be stored on the device, which may then be downloaded to a PC for
reporting and storage. The software package is used to program the units and view and print the acquired
data in graphical and tabular format. The table of readings may also be exported to a file that can then be
read by Excel (.SLK)
Each datalogger is supplied with a unique serial number; upon request, the datalogger may also be supplied
with a calibration certificate that is valid for one year in order to guarantee the validity of the readings taken.
Note: DLHT software must be installed and run for the first time by a Supervisor
who will then assign user names and passwords and grant access rights to each
user of the system.
Interpreting this manual
Throughout this manual you will be instructed to click on certain buttons in the software whose position on the
window in question is not described each time. These particular buttons, for aesthetic reasons, are not
accompanied by a text description. Below is a list of these buttons, beside which you will find the text used to
identify them in this manual (Name) and a short description of the function they carry out (Description).
Pulsante
Nome
Descrizione
Confirm
Applies any modification carried out in the current window, confirms operations,
used as OK.
Cancel
Ignore the changes made to this window, cancel current operations.
Exit
Refresh
Closes the program.
Update the items displayed in the current window from the unit currently
connected.
New
Creates a new entry in the list of the current window.
Edit
Modifies the selected element in the list of the current window.
Delete
Deletes the selected element in the list of the current window.
TecnoSoft s.r.l.
DLHT
7/35
System requirements
Hardware
Description
Minimum
Recommended
Microprocessor
Celeron 300
Pentium III 400
Memory
64 MB
128 MB
Video Settings
800x600 a 256 colors
1024x768, 16 million colors
2 free USB ports
Software
Description
Operating System
Supported
Windows 98 / 2000 / XP
8/35
DLHT
TecnoSoft s.r.l.
Main operations
Starting up the software
Once the computer has booted, double click on the DLHT icon on the desktop to run the program;
alternatively select DLHT from the start menu by clicking on Start – Programs (or All programs, if you use
Windows XP) – TECNOSOFT - DLHT – DLHT. Soon after the user access window will appear: select your
login name from the list in the User field and enter your password in the Password field. Click on the confirm
button to proceed or on the exit button to close the program.
If it is the first time that a particular user is accessing the program, this user must use the password assigned
to him by the supervisor. After this a new window will appear where the user may change the password to a
unique password of his/her choice. The new password must be typed twice.
The Main Window
The main window will then appear, entitled Dual Temperature Data Logger, that is divided into sections. The
middle part holds the 4 buttons that carry out the main functions: DLHT, Data, Info and Exit. The first button
is used to access on the device or devices that are connected to the PC, the second is used to process data
that has been downloaded from the devices and saved on the PC. The other two buttons are used to display
information about the software and to exit the program. Depending upon the access rights for a particular
user, clicking on DLHT or on Data will provide access to some of the software functions.
The bottom part of the window holds three panels: the first is used to display the system date and time (either
local time or GMT as selected by the supervisor), the second displays the user that is currently active and the
third will display the serial number of the device currently connected to the PC; if any.
The following chapters of this manual will describe all the functions that a user with full access rights may
use, therefore not all the features described may be accessible by all users.
TecnoSoft s.r.l.
DLHT
9/35
On-line Help
To open the online help, click on the Info button and from there double click the DLHT image. The various
pages are linked to each other and you may navigate the help in a manner similar to navigating a web site.
About
The Info button, when clicked, will bring up a window that displays the software version and the release date,
as well as the code of the hardware protection key connected to the PC. To close this window click on the
Tecnosoft icon on the left hand side.
Exiting the program
To exit the software, click on the Exit button. The program will not be closed, but the user will be
disconnected and the access window will appear again such that any other user may login. To close the
program in a definitive manner use the exit button on the access window.
10/35
DLHT
TecnoSoft s.r.l.
Check the status of a unit
The status and configuration parameters of a connected DLHT unit may be queried at any time. Ensure that
the unit has been correctly connected to the PC using the USB cable (see the section Connecting the device,
page 21) and click on DLHT in the main window. A window entitled DLHT Connection will appear: the
program will search for units that are currently connected to the PC and will display them in a list in the middle
of the form.
The devices in the list may be identified by means of their serial number and their description: this last option
may be modified by the Supervisor, whereas the serial number cannot be changed. If new units are
connected to the PC whilst this window is being displayed, click on the Refresh button to force the program
to search for new units. Select the unit you which to query and click on the confirm button.
The following window holds a button labelled Status at the top left: click on this button to open the DLHT
window that will display all the configuration parameters for the unit you selected. This window is
automatically updated every 5 seconds, however you may generate a manual refresh by clicking on the
refresh button.
Synchronizing the clock
The device time and the PC time may be synchronized by clicking on the button next to the Date and Time
entry. The Date and Time section displays the date and time on the device; if this section is red, it means that
TecnoSoft s.r.l.
DLHT
11/35
the clocks are not synchronized. To resynchronize the clocks make sure that the date and time on your PC
are set correctly before clicking on the button.
Unit configuration parameters
These are displayed in the Mission section of the window, and are the parameters of the unit that is currently
active. The parameters are:
Field
Description
Status
Rate
Description
Field 1, 2, 3, 4
Indicates whether the device is in standby or if it is acquiring (also displays mission start
date in this case).
Acquisition Interval, expressed in hours (H), minutes (M) and seconds (S).
A brief description of the current unit, may be set only by the Supervisor.
The names for these fields may only be set by the supervisor, and the fields may be used
to add mission information before this is started.
Erasing Memory
The Memory section holds a column that fills up with a green bar according to the amount of memory that is
currently occupied. To erase the memory, and all the data it contains, click on the button holding an Eraser
icon on the right of this column: the program will ask for a confirmation of this task and will inform you that the
data will be lost. Confirm or Cancel accordingly.
Additional Information
The last section, Status, displays some useful information; first of all the current readings for temperature
and humidity are shown. The next two items may be checked or not according to the device status. If the
device had the circular memory function enabled, and some of the older data has been overwritten, the check
box Memory Overwritten will be enabled. If the batteries on the unit are low, the program will inform you by
means of the check box denoted Battery Low becoming enabled: if this is so it is recommended that you
replace the batteries, especially if you are about to launch an important mission.
The bottom section holds three panels that display the serial number of the connected unit, the firmware
version and the calibration date. To close this window click on the Confirm button.
12/35
DLHT
TecnoSoft s.r.l.
Starting a New Mission
To program a Data Logger and start a new mission, ensure that the unit is correctly connected to the PC
(refer to the section Connecting a device). Click on the DLHT button in the main window, and after
connecting to the desired unit, click on the Start button. A window entitled Start DLHT Mission will appear that
is split up into various sections. The bottom bar holds the Confirm and Cancel buttons, along with either one
or two other buttons. The button towards the centre, Template, provides access to a particular standard set
of parameters that have been created and saved by the Supervisor. The other, leftmost, button is displayed
only if a particular default configuration has been assigned to the logger currently connected to the PC.
The information bar directly above the section that holds the buttons displays selected information about the
DLHT that is currently connected to the PC: the serial number, the firmware version, the date and time held
by the device and the calibration expiry date.
Before explaining in detail each section of the window, the use of the templates will be described.
Using the Templates
The templates may be created and configured only by the Supervisor who is therefore responsible for
selecting the standard configuration parameters that will be used for particular missions. The templates have
been designed in order to simplify the process for starting missions and programming the data loggers. Using
templates we avoid having to input the same parameters over and over, since in practice most of these will
be identical for each successive mission. In fact, when starting a new mission, a number of configuration
parameters must be set, amongst which the acquisition interval, the start delay (if necessary), alarm
thresholds and so on. Not all the parameters need to be set, however by setting more parameters it becomes
much easier to retrace and analyze acquisitions. The Supervisor may therefore create a standard
configuration for each product or product type that needs to be monitored (for example, a food processing
firm may create templates for, "cheese" or "meat"), that may be reloaded instantly by the technician
programming the DLHT. If your Supervisor has created and saved one or more templates, you may load
them by simply clicking on the Template button: a window entitled Select Template will appear. A list will
display all the templates that the supervisor has created: to assign the parameters in this template to the
mission you are about to start, select the desired template name from the list and click on the Confirm button.
The template parameters will be loaded and will appear in the start mission window. Before clicking on
confirm, after selecting a template from the list, you may enable the option Set as default for this DLHT. In
this case, in the Start DLHT Mission window, the name of this template will appear on a button to the left of
the bottom bar. By clicking this button, the parameters will be automatically loaded into the corresponding
fields, without having to select the template from the list.
TecnoSoft s.r.l.
DLHT
13/35
Mission Parameters
As mentioned beforehand, the start mission window is divided into sections, each of which refers to a
particular part of the mission and within which one may set the parameters as desired.
Information
This section is dedicated to those parameters that enable identification of the particular mission, as they refer
to the use of the DLHT and the mission itself. The name assigned to the fields in this section are set by the
Supervisor and will be the same for all missions. There are 4 fields in all, and if the Supervisor has not
assigned names to these fields, they will be labeled Info 1, 2, 3 and 4. In these fields you may enter
information that you deem necessary to facilitate identification of the mission at a later date.
Alarms
Six fields are dedicated to device alarms: maximum (Max), minimum (Min) and Hysteresis, for both
temperature and humidity. You must enter the threshold values, both min and max, for both parameters in
these fields, that determine when the visual and audible alarms on the DLHT will set in. The value of
hysteresis enables you to keep the unit under control, by preventing it from repeatedly generating alarms if
the temperature measured oscillates between the min and max values. As an example, consider setting 30°C
as the maximum temperature threshold, and 2°C as the hysteresis; when the temperature measured
exceeds 30°, the alarms will go off and they will remain on until the temperature measured reaches 28° (30° 2°). Once the temperature goes below 28°, the alarms will not go off again until the temperature reaches 30°
again. By means of the hysteresis, we avoid an annoying situation where the alarms go on and off repeatedly
in a short time; for example if the ambient temperature oscillates about the 30° mark (for example it exceeds
30°, then drops for a few seconds to 29.5°, then exceeds 30° again and then drops again to 29.5 and so
on...) then the alarms will go on and off every few seconds.
Acquisition
Here we set those parameters that directly affect data collection. We set the start delay (Start), by selecting
the date and time at which the acquisition will start (local or GMT as set by the supervisor; you may check the
actual logger time by looking at the information bar at the bottom of the form, just above the buttons). We
must also set the acquisition interval, which is the rate at which data is collected by the data logger. We can
set this from a minimum of 5 seconds to a maximum of 91 hours, 1 minute and 20 seconds.
If you select the Manual Start option, the DLHT will start acquiring after you press the left and right buttons
concurrently.
Options
In this section we set certain options pertaining to how the DLHT will function; The options are enabled by
clicking on them, and are:
• Show Temperature: The readings from sensor 1 are shown on the unit's display;
• Show Humidity: The readings from sensor 2 are shown on the unit's display;
• Enable Table: The table of readings may be accessed and viewed on the unit's display;
• Enable Graph: A graph of readings may be accessed and viewed on the unit's display;
• Display Off: The display will automatically switch off after one minute (if not selected the display will
be always on; Select this option to conserve battery charge;
14/35
•
•
•
DLHT
TecnoSoft s.r.l.
Fahrenheit: displays temperature in Fahrenheit rather than degrees Celsius;
Circular Memory: if this option is selected, once memory has been filled up, the DLHT will keep
acquiring data and will start overwriting the oldest data it has collected (if this option is not selected,
once the device has filled up the memory it will automatically stop acquiring);
5 Second Check: The readings will always be read every 5 seconds, but will be saved to memory
only according to the acquisition rate. This function permits the alarms to be kept up to date, even if
the acquisition interval is very large.
LED 1, LED 2 and Buzzer
In these three sections we have those options that configure the alarms. DLHT is equipped with three LED
indicators and an acoustic alarm (buzzer): One LED is reserved as a battery low indicator, whereas LED 1
and 2 may be configured via software. Similarly, the acoustic alarm (Buzzer), may be configured using this
window. Each section holds the options for each indicator: you may also select more than one option for the
same alarm (for example, LED 1 may be used to signal that the temperature has exceeded the threshold on
both temperature and Humidity). The options are:
• °C Max: The temperature is currently above the maximum threshold;
• °C Min: The temperature is currently below the minimum threshold;
• %RH Max: The humidity reading is above the maximum threshold;
• %RH Min: The humidity reading is below the minimum threshold;
• Sticky: The alarm will remain active even after the temperature or humidity has returned within the
thresholds.
Memory
This section displays the percentage of memory that is currently filled with data (the green part of the
column), which data may be cleared by clicking on the button that displays an eraser close to this column.
Current Mission Status
The current status of the unit is displayed here, which indicates whether the unit is in standby or is acquiring
(the start date will also be displayed in this case).
TecnoSoft s.r.l.
DLHT
15/35
Download Readings
Once you receive a data logger that has completed its acquisition mission, you may view and process the
data in a number of ways. There are three fundamental steps that may be carried out in order to view the
data: download the data, stop the mission (this is optional) and view the data in a graph or as a table.
In order to carry out the first two functions, the DLHT must be correctly connected to the PC, after which you
may click on the DLHT button in the main window and connect to the desired device.
Downloading Data
Click on the Download button to start downloading data. A window labeled Download will appear, and before
proceeding you may enable one or both options present at the bottom of the window: Delete Data after
download (the data will be erased from the unit's memory once the download is complete) and Stop Unit after
Download (in this case you will be notified when the mission has stopped). To start the download click on the
Confirm button.
When all the available data has been downloaded, a message will appear indicating the operation has been
completed successfully.
If it is the first time that data is being downloaded from this DLHT, or if certain parameters (such as the
Description) have been modified for this unit, one of the following two messages may appear before the
confirmation message just described: Added DLHT to database or DLHT updated in database.
16/35
DLHT
TecnoSoft s.r.l.
Stopping a mission
To stop a mission currently in progress, connect to the unit using the software and click on the Stop button. A
message will confirm that the data logger has been stopped.
Displaying the data in a graph
To view the downloaded data in graphical format, click on the Data button in the main window to bring up
another set of available options.
Click on the button labelled Graph, at the top left; a window entitled Filter will appear, where you may select a
number of filters in order to identify the mission you want to view.
Each section of this window refers to a particular type of filter. To activate a filter you must select it by clicking
on it's name: after this you may act upon the fields inside that section. The more filters you enable, the more
precise will the data shown match the data you want to display. Also, the more information you have included
when starting the mission, the more options the filters will provide. The filters you may use are:
• Unit: you may select the unit from which you have downloaded data based upon the Code as well as
their Description;
TecnoSoft s.r.l.
DLHT
17/35
•
User: you may select a user from the list that have started a mission on a DLHT device from which
data has been downloaded;
• Date: Here you may specify a range, based on date and time, that will appear in the graph, by
specifying the start date and time (From) and the end date and time (To);
• Info: permits you to view data according to the information that has been inserted in the appropriate
fields by the person that started the missions. The lists will only hold values that have been used at
least once for a mission that has been downloaded.
Set up the filters as required, click on confirm to proceed and view the graph. A window entitled Graph will
appear, that holds the graphical representation of the readings in the middle part, the temperature scale on
the left, that for humidity on the right and on the horizontal axis you will find the points for date and time. The
bottom bar holds three possible options:
• Show Alarm: This function displays the thresholds that have been set for both sensors. If a value for
hysteresis has been set, the line will also display a smudged area equivalent to the hysteresis
selected;
• Hint: if you double click on any point of the two graph lines, the data at that point along with the date
and time for that acquisition will be displayed in a caption box. If this option is enabled or disabled,
the caption will appear or disappear accordingly;
• Show Point: if this option is enabled, the points at which readings where effectively acquired will be
displayed on the graph lines.
You may zoom into a particular area of the graph by clicking with the left button of the mouse on your desired
starting point (the top left corner of the area you want to zoom into) and keeping the button pressed drag the
mouse until you enclose the desired area in a box. When you release the left button the graph will zoom into
that area. To revert to the original graph right click with the mouse and select the Zoom Out menu item.
You may also zoom into the graph using another two methods: the first is done by selecting a range, using
the mouse in a manner similar to that described above, however creating the 'box' only on the y-axis on the
left (for temperature) or on the right (for humidity). The graph will be resized such that the graph now uses the
new y-axis scale to generate the graph. For example you could select, on the left hand side (temperature), a
box that encloses temperatures from 20 to 30°C; the graph will resize such that the graph will zoom to
include only temperatures in this range. The graph for humidity will not be affected.
The last method for zooming is to click with the right hand button of the mouse in the graph area, and
selecting the option Set Scale from the menu; a window labeled Graph Scale will appear where you may
select the range to be displayed for each sensor and the start and stop date and time to be used as the x-axis
scale.
18/35
DLHT
TecnoSoft s.r.l.
Viewing data as a table
The downloaded data may also be viewed in tabular form; click on the Data button in the main window, after
which choose the Table button located at the top right. The Filter window will appear again, which is identical
to that explained above for the graph option. After clicking on confirm, a window entitled Acquisition Table will
appear.
The main part of the window displays the acquired data for both temperature sensors that were connected to
the DLHT in question, along with the time stamp for each acquisition, the user who launched the mission and
so on. Further down we find User Information, that relate to the hardware key connected to the computer that
was used to launch the mission.
The button labelled Export, will bring up a window where you may select the path where a copy of the data
may be saved in .slk format, which may then be imported using Microsoft Excel where you may personalize
the data.
Printing Reports
From the graph window you may print a report of the data acquired. The printout will reflect the current zoom
settings, and the report will also include certain DLHT mission parameters. Click on the Print button to open
a window where you may select the printer to be used and the print options (number of copies etc...). Click on
Start to start printing.
If the Supervisor has enabled print preview, a window will open up before printing where a sample of how the
final printed document will look is displayed. In this preview window you may zoom into the page, move
between pages, save the preview in one of two formats (ll for List&Labels and EMF, that may be viewed with
most graphic programs) and, of course, send the file to the printer.
TecnoSoft s.r.l.
DLHT
19/35
The system archive
The Archive function, that may be accessed from the Data menu by clicking on the Archive button presents
the user with a number of functions in order to act upon the database and storage of data in system files. The
program automatically saves information gathered by the software (acquisitions, settings, templates etc...) in
the system database as well as in separate files.
There are three Archive functions available, namely Backup, Restore and Reset.
The Backup Procedure
The backup procedure is an automatic process by which the program will create a compressed file that
contains a backup of all the files found in the Database path (specified by the Supervisor) and all the files with
extension .dat found in the Acquisition path (as specified by the Supervisor).
Click on the Backup button to open the backup window. This window presents the user with a few backup
options.
Destination: by default the path displayed is that set by the Supervisor. This path may be changed if required
in order to save files in a different location.
Remove Acquisition Files: this option, if selected, will delete the actual acquisition files that have been backed
up from the default folder, after the backup has been successfully completed.
Acquisitions after date: this option is used to specify a range of files to be backup up starting from the date
specified in the field to the left of this option, up to the present date. This may be useful if you backup files on
a periodic basis (for example on the 5th day of every month) and therefore you need not backup the whole
directory but only those files starting from the last backup date.
After selecting the options as required click on the Confirm button to start the backup process. Alternatively
click on the Cancel button to exit without executing the backup. Once the backup is complete, a confirmation
window will be displayed.
The Restore Procedure
The restore process is essentially the inverse process of the backup procedure. Using the restore procedure
the program will identify any compressed files in the backup directory and extract the original files and save
them to their original location; the acquisition files will be saved to the Acquisition path and the database files
20/35
DLHT
TecnoSoft s.r.l.
will be restored to the Database directory.
Click on the Restore button from the Archive window to open the Restore window. This window holds two
entries:
Source: this entry holds the path from which the compressed files will be sourced. By default this is set to the
path as specified by the Supervisor. If you have made a backup to an alternate location, you may open that
backup file by changing the path in the source field to match that where the file is located.
Restore Only Acquisitions: if this option is selected, only the acquisition related files will be restored. The files
relative to the database will not be modified. This is particularly useful if since performing the particular
backup, the Supervisor has made changes to the general database (such as adding new users etc..)
The Reset Procedure
The reset process is used to delete unwanted acquisition files from the acquisition directory as well as from
the program database file. You will be prompted to select a time period (between two dates) within which the
files will be selected and then deleted.
The files are permanently deleted, and therefore this function would typically be carried out after performing a
system backup.
Click on the Reset button from the main Archive window; a window labelled Date Range will appear. In this
window you must specify the range (dates), starting From a specific date To the end date.
All the files whose date falls within that range will be deleted. A warning message will ask you whether you
want to delete the files, click on confirm to proceed or on cancel to exit without deleting files.
TecnoSoft s.r.l.
DLHT
21/35
Data Logger Manual
Connecting a device
DLHT connects to the PC via a USB cable, and therefore you must have at least one free USB port. The
cable supplied with the software has two different connectors on its extremities. The larger connector plugs
into the USB port of your PC, whilst the smaller connector must be plugged into the matching female
connector found at the bottom of the DLHT. Once a device is connected, the PC will recognize the device
and automatically load the necessary drivers, at which point the device is ready to communicate with the
software.
Switching on the device
When the batteries are inserted into a DLHT, the unit will go on and will remain on. Even if the display is off,
the device is in actual fact still running in a low power mode. The display automatically turns off once the unit
has not been used (that is; no key has been pressed) for one minute. If DLHT is connected to the PC and is
communicating with the software, the display will remain on. When the display is off, you may turn it back on
by simply pressing on any of the buttons on the device.
How to view the current temperature readings
DLHT has two basic operating modes: standby and acquisition mode. When in standby, the device reads the
sensors and shows the values on the display, but does not save the readings. In the acquisition mode, the
device stores the readings in memory according to how it was configured. When the display is off, pressing
any of the direction keys will force the device to make an immediate measurement and display the results.
The display that shows the current readings also indicates the status of the unit; that is whether it is in
standby or in acquisition mode. If the unit is acquiring, the display will switch between three messages below
the readings, by pressing left or right: either Time, followed by the current date and time settings, Next, along
with the date and time at which the next acquisition will be taken, or the description of the unit. If the unit is in
standby, in the same area we may have two entries: either Unit is Idle or the description of the device. Again
you may switch between the two using the left and right keys.
Adjusting the display contrast
If required you may adjust the contrast of the display by pressing the ESC + UP keys to increase the contrast,
or the ESC + DOWN keys to decrease the contrast. A bar will appear at the bottom of the display indicating
the contrast level. The bar moves from left to right with increasing contrast level.
Browsing the table of readings
If an acquisition mission is in progress, you may view all the readings taken up to this time by accessing the
table of readings. To do this press the OK button on the unit to bring up a menu, then using the directional
keys select the entry Browse table and press OK. The table can be viewed in a number of ways, and you may
change between views in a cyclic manner using the right directional key. The first view presented will depend
upon the one that has been selected last.
One type of view displays the complete date (day/month/year) and the time, pressing the right directional key
we skip to the next view, that displays the day, the time and the value of temperature; the next view displays
22/35
DLHT
TecnoSoft s.r.l.
the day, time and the humidity value; the last view displays the temperature value and humidity. At this point
pressing the right directional key again will set the view back to the complete date and time, and so on. Press
the ESC button to exit.
Viewing the Data Graph
It is possible to view the graph of all the temperature and humidity data recorded. Simply press OK from the
menu where the actual values are displayed and select View graph. The temperature graph will be displayed.
Press ESC to switch between the humidity and the temperature graph. Keep ESC pressed to exit from the
graph menu.
You will see in the graph a vertical bar: below the graph are displayed alternatively the date and time and the
temperature and humidity values of the exact point where the bar is placed. Use the left and right arrows to
scroll left and right and reposition the bar. Use the up and down arrows to zoom and un-zoom in the graph
and use the left and right arrows to scroll it when it is zoomed in. Press OK while a graph is displayed and a
menu comes up: select the first two lines and press OK to input the start (first line) and end (second line)
time of the displayed graph. Change the values as you wish and after finished press OK (pressing ESC will
not change the values). Press ESC from the menu and the graph will be zoomed accordingly to your
changes. The other next four lines in the menu are used to set the maximum and minimum values of
temperature and humidity for the zoom option (for example, you can set 30°C as maximum temperature and
then press OK and ESC and the graph will be zoomed so that the maximum value of temperature displayed
is 30°C). The last two options, Auto Zoom and Default, are used to set an automatic zoom for the graph, best
fitting the display, and to restore original values (all graph displayed).
TecnoSoft s.r.l.
DLHT
23/35
Managing the alarms
If any alarm condition arose throughout the mission, you may view these by accessing the alarm page.
Access the menu page by pressing the OK key and select Browse alarms using the directional keys, then
press OK. The alarm view will display the symbol representing the type of alarm on the left, and the date/time
at which the alarm occurred on the right. To switch between date and time use the left and right directional
keys.
The key to the alarm symbols is displayed below:
Symbol
Description
Temperature exceeded the maximum threshold.
Temperature returned below the maximum threshold.
Temperature exceeded the minimum threshold.
Temperature returned above the minimum threshold.
Humidity exceeded the maximum threshold.
Humidity returned below the maximum threshold.
Humidity exceeded the minimum threshold.
Humidity returned above the minimum threshold.
Communication menu
When a DLHT is connected to the PC and communicating with the software, a nearly blank menu will be
displayed and the keyboard will be turned off.
Replacing the batteries
DLHT works using two 1.5V AA batteries. If the batteries need to be replaced, the unit will signal this by
means of the LED marked B. The lid of the battery compartment is located at the back of the device. Open
the lid by applying slight pressure on the tip of the lid identified by the arrow symbol, and slide the lid in the
direction pointed to by the same arrow symbol. Remove the batteries and replace them with a fresh set.
Replace the lid and slide it until it clicks in place.
Resetting the device
The device reset button is located at the back of the unit and may be accessed by removing the battery
compartment lid. At one end of the battery compartment you will find a small opening, underneath which you
should be able to see the reset button. Using a slim object (such as a paper-clip) press the reset button. The
unit will be reset; the display will display some information and remain in that state, accompanied by a small
beep every 5 seconds, until you complete the reset procedure by pressing the left and right keys concurrently
until the display changes to the normal view in which it displays temperature. The reset procedure does not
24/35
DLHT
TecnoSoft s.r.l.
delete data from memory, however it automatically stops any operation in progress and sets the unit in the
standby state.
Displaying the unit's serial number
The screenshot that appears after a reset displays the unit's serial number as well as the firmware version.
TecnoSoft s.r.l.
DLHT
25/35
Supervisors Manual
DLHT software is a multi-user program. The users are assigned access codes and granted access rights by
the Supervisor, who is basically a user with full access to the standard program functions, as well as having
access to a number of added program features and settings. The software must be installed by the
Supervisor, since a number of program configuration settings may only be carried out by this user, and also
because the supervisor is the only user that is able to create new users.
The Hardware protection key
In order to use DLHT, you must first install the USB hardware protection key that has been supplied with the
software. To do this please follow carefully the instructions below.
Do not insert the key into the PC USB port just yet.
After having installed the DLHT software, you will be presented with the Smartkey Driver Installation
window. Select the tab sheet named USB and click on Install. (The windows below are for the Italian version)
Once the installation is complete, a message will inform you that the drivers have been installed correctly;
click on OK to proceed.
Now insert the hardware protection key into a USB slot on the PC; the Windows operating system will present
the Found New Hardware wizard. In the first screen select Install the software automatically and click Next.
In the next window click Next again.
After some time the following window should appear:
Click on Finish.
The Smartkey Hardware Installation window should be similar to the one below.
Now you may launch the DLHT program.
26/35
DLHT
TecnoSoft s.r.l.
Configuring the program for the first time
When the program is launched for the very first time, the First Login page will appear. This page holds 4
fields as shown below:
The first field cannot be modified and displays the Dongle Code, that is the code held by the USB hardware
key. The second field, Activation Code, is where you must type in the activation code that has been supplied
with the software (The activation code is uniquely tied to a specific dongle code). In the next two fields,
denoted Password and Retype Password, the supervisor should enter a secret password that will become
the password for the user Supervisor to gain access to the program.
Click on Confirm to proceed and open the next window: Key. This window displays the Dongle Code and
provides another 4 fields where specific information should be entered that will be programmed into the USB
hardware dongle and stored in each DLHT that are programmed and on which missions are started by
software holding this dongle. The information is useful in order to retrace the units and the operations that
have been carried out on them. You should therefore complete the fields named Company, Department,
Reference and Notes as you deem necessary.
Click on confirm to complete access to the program, that is done by means of the following window named
Login. The drop down list in the field named User you may select the user name for a particular user,
whereas in the Password field the corresponding password should be entered. Since this is the first time the
program is being accessed, there is only one user available, the Supervisor. Select this entry and input the
password that you have just selected for this user; click on confirm or press enter to gain access to the
supervisor section. Click on Exit to close the program.
The main window
The main window for the user Supervisor provides access to all the management functions of the software,
the database, the users and so on. The Info and Exit buttons have the same functions as those present for a
standard user. (refer to the section Online Help, About and Exiting the program).
TecnoSoft s.r.l.
DLHT
27/35
Configuring the software program
Click on the Setup button to open the Configuration window, which provides access to five different tabbed
sheets: General, Database, Security, Path and Report.
The General Tabsheet
•
•
•
•
Degree Mode: This section enables you to select whether you want data to be displayed in
Fahrenheit or Degrees Celsius.
Language: You may choose the language used within the program by choosing from Italian or
English. The change will take place the next time the program is launched.
Timeout: This is time in minutes that set the length of the period of inactivity that must elapse before
the user is automatically logged out of the system. When this occurs the user must re-enter the
password to gain access to the program.
Custom Fields: You may assign a name to each of these 4 fields, that will be displayed when
launching a new mission (see the Mission Parameters - Information section for details ). The user will
then fill in the information reserved for each of these fields when launching a mission.
The Database Tabsheet
•
•
•
•
Database source: Here you must select the reference database for the program. The DLHT database
is created during installation and is pre-selected by default. If, for whatever reason, you would like to
use a different database, select it from the list and connect to it using the button to the right of this
list.
Login: The username and password of the reference database for the program must be inserted
here. If the values are incorrect you will not be able to access the database. The values present by
default are those for the default database DLHT.
Maintenance: In this section you may create or recreate the database archives that you select from
those present, by clicking on the Create button. The program automatically creates the archives
during installation, however if they get damaged you may recreate them from here. The data saved to
date will not be lost but will not be visible in the program.
The Rebuild Acq. button may be used to re-insert acquisitions into the database if these have been
damaged or if they have been deleted inadvertently by the Supervisor (See section Managing
Acquisitions below.)
Directory: This field is used to specify the location of the reference database.
28/35
DLHT
TecnoSoft s.r.l.
The Security Tabsheet
•
•
•
•
Dongle Code: This is the code of the USB hardware key necessary to launch the program.
Password and Confirm password: these fields may be used to change the supervisor password; the
new password must be input in both fields, after which click on the Change button to apply the
change.
Start and Stop: These fields are used to set a time frame during which the software may be used.
The Supervisor sets this time frame to prevent the software being used before or after specific dates.
If, for example, a DLHT device is programmed at a date outside this time frame, possibly because
the user has changed the date on the PC, the software will notify this anomaly.
Code AUX and code BASE: These are specific codes that are used to generate specific checksums
in the database. These may be changed from the default values in order to be able to distinguish
between databases on different PC's or different installations.
The path Tabsheet
Acquisition: This holds the path to which the acquisition data will be saved. (Click on the folder icon to edit
this path).
• Export: The path to which exported files will be saved. (Click on the folder icon to edit this path).
• Report: The path to which reports will be saved. (Click on the folder icon to edit this path).
• Backup: The path to which backups will be saved.
TecnoSoft s.r.l.
DLHT
29/35
The Report Tabsheet
This sheet holds 4 fields in which strings of text may be input by the Supervisor. These strings will be
included as the first four strings of each report that is printed. The first field holds the main heading of the
report, whereas the other three are sub-headings.
For example, we could set the Company name as the main heading (Head. 1), the scope of the temperature
monitoring process as the second and so on... These four headings will be included in all the reports
generated by the program. You could see how the fields will end up in the final report printout by generating a
print (or using the print preview feature). The print preview feature is enabled by means of the checkbox to
the bottom right of this sheet. This feature enables the users to preview the document before it is printed. In
the field labeled Number Of Copies input the default number of copies that will be generated for each report
that is printed. (The user can change this before printing)
Managing the Users
One of the more important operations that the Supervisor must carry out is the creation of the various users
that may access the software. The part of the software accessible by the standard users is different to those
presented when logging in as a supervisor; for this reason the Supervisor may also wish to create a standard
user for him or herself. In this manner the supervisor will also be able to program and access the DLHT units.
To create users, click on the User button to open the corresponding window. This window holds a list of the
existing users. Note that the supervisor is not considered a standard user and therefore if the list is empty it
indicates that no users have been created yet. A user name accompanied by the @ symbol indicates that this
user has never logged in to the program yet.
The list will display, for each user, the login name (Login), the actual name of the user (Name) and the time
frame within which the user may access the program. To create a new user, click on the New button; a
window labelled User will appear where you may set the details and assign the access rights that will be
granted to the user.
30/35
DLHT
TecnoSoft s.r.l.
Each User has the following properties:
• Login: An identifier used to differentiate between users (login name);
• Password: The default password for the login name specified above. The Supervisor will inform the
particular user of his or her login name and password. The password may then be changed by the
user when this person first accesses the software;
• Name: The actual name of the user to whom this login is assigned;
• Start – Stop: This is the time frame within which the account is valid. Outside this time fame, the user
will not be able to access the software. This is particularly useful if temporary accounts need to be
created. The Supervisor may then extend the period at any moment in time as deemed necessary.;
• Authorized Tasks: The items in this frame represent those tasks which the Supervisor wishes to
assign to each user. When a task is enabled by checking the box next to the task name, the
particular user is granted access to the particular function. The tasks that may be granted or masked
for each user are:
• Set Date: The user may synchronize the date and time of the devices to the PC. (see Synchronizing
the clock );
• Start DLHT: The user may start a new acquisition mission (see Starting a new Mission);
• Stop DLHT: The user may stop a mission that is in progress (see Stopping a mission);
• Read: The user is allowed to download readings from a device (See Downloading Data);
• Browse: Allows the user to view the data in graphical or tabular form;
• Delete: Allows the user to clear the memory on the data loggers (See Erasing memory);
• Archive: Allows the user to act upon the saved files.
•
Click on Confirm to create the user.
Managing the hardware keys
The Supervisor may also control a number of hardware keys apart from that used to launch the software. The
dongle codes of these keys may be added to a list such that the program may recognize them. By clicking on
the button labeled Key in the main window, a window holding a list of keys that have been configured
appears. At least one key is always present, which is the key used to launch the software.
To add new keys, click on the New button and insert the appropriate information in the following window. First
of all you must input the dongle code for that particular key that should be given to you by the owner of the
TecnoSoft s.r.l.
DLHT
31/35
hardware key. Since the dongle code is used to identify each mission that has been launched on a DLHT
device, if a particular unit has been programmed on a different PC (and therefore with a different hardware
key), your software will recognize that that mission has been launched using a different key and will display
some additional information related to the owner of the particular key. The information displayed is the same
information you input in the remaining fields of the Key window. These are the Company field, Department,
Reference and Notes.
Managing the DLHT units
The Supervisor may manage the DLHT units that have been connected to the PC at least once, and
therefore they have been added automatically to the program database. Click on the DLHT button in the main
window. A window will appear displaying a list of all the devices known to the program. To be able to add a
new unit or modify the description of an existing one, the particular device must be connected to the PC.
Changing the description of a DLHT Unit
When adding a new DLHT to the list, you will be automatically prompted to assign a description to the unit,
after which this is added to the list. If, on the other hand, you wish to change the description of a unit that
already exists in your list, you must first delete the unit from the list and then add it as a new device, changing
the description when prompted to. When adding a new unit you will also be asked whether you would like to
assign a default template to it.
Le Registrazioni delle operazioni
The software program automatically saves a log file of the main operations effected by each user, such that a
track record is kept for future reference. Only the Supervisor may access this log, by means of the Log
button in the main window. The Log window will appear, which holds a list displaying the description of the
operation carried out, the name of the user that effected it and the time and date at which this was done. The
operations that are logged are:
32/35
DLHT
TecnoSoft s.r.l.
Login and logout of users, synchronization of date and time, started mission, stopped mission, downloaded
data, erased memory, saved data and deleted files. In this window the Supervisor may delete an entry from
the list, if required.
Managing acquisitions
The Supervisor may access a list of all the acquisitions that have been started and downloaded to the PC by
clicking on the Acq button in the main window. A table will appear displaying the DLHT Code, the unit
description, the date and time when the mission was Started, the date and time when the mission was
Stopped and the contents of the additional information fields. The Supervisor may delete an entry from the
list, in which case the data relating to that particular mission will be lost.
Configuring the templates
As has been explained in the section Using the templates, the Supervisor may set a number of default
parameters related to specific conditions, products or product categories in a template, such that the users
may set all the necessary parameters with a single click. The parameters are assigned to a template that is
named appropriately (e.g. "Product A") such that the user may select this template from the list and
automatically upload the default setting for this mission. Click on the Temp. button in the main window to
bring up the corresponding window.
TecnoSoft s.r.l.
DLHT
33/35
The list of templates will appear, displaying selected information related to each template; to add or edit a
template click on the appropriate buttons at the bottom of the window.
Adding a template
Click on the New button to open the window entitled Acquisition Template: in the description field you must
assign a name to the template. Most of the remaining fields are identical to those described in the section
Using the templates, except for the section Acquisition, where we set certain acquisition parameters:
•
•
•
•
Mode: The drop down list presents 4 options. Immediately is used to start the mission as soon as the
data logger is programmed; Given Date is used to specify a specific day and time at which the logger
will start acquiring (for example if we insert 10 as the day the mission will start on the next 10th day of
the month that occurs from the time the device is programmed. If we set 16 as the hour, the device
will start logging the next time the DLHT clock reaches 16, and so on for minutes and seconds. If a
field is left blank, the parameter is ignored; The Given Weekday option is used to start the mission as
soon as the day specified in the drop down list labelled Weekday starts. Choose Manually to set the
device such that the mission starts when a button is pressed on the unit.
Rate: Here specify the default acquisition rate in Hours, Minutes and Seconds;
Day, Hour, Minute and Second: These fields are used to hold the corresponding values that will be
used if the option Given Date was chosen as the acquisition mode.
Weekday: select the weekday at which missions will start if the acquisition mode has been set to
Given Weekday;
34/35
•
DLHT
TecnoSoft s.r.l.
Delay: The delay is applied from the moment the devices are programmed to start a new mission.
This delay is independent of the acquisition mode and has been included so that the unit may be
transported to the site to be monitored without taking readings before it arrives. The delay is
expressed in minutes.
TecnoSoft s.r.l.
DLHT
Company ISO 9001:2000 certified for firmware and software development
35/35