1
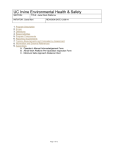
Using Zistos
PNSC over
BGAN
Self powered Field
Surveillance and
Monitoring
Version 01
12th November 2009
1
Contents
1
Overview
1
2
Applications
1
3
Features & Benefits
1
4
Network Diagram
2
5
Connecting PNSC to BGAN
3
6
Configuring the PNSC Video Server Console
3
6.1
WAN Settings
4
6.2
Video settings
5
7
8
Configuring the BGAN terminal
5
7.1
Thrane & Thrane EXPLORER™ 300/500/700 and 527
5
7.2
Thrane & Thrane EXPLORER™ 110
7
7.3
Sabre 1 Wideye
8
7.4
HNS 9201, 9250 and 9350
9
Zitos Setup
10
8.1
Camera setup and Monitoring
10
8.2
Control and Monitoring
11
9
Bandwidth Usage
11
10
Zistos Contact Information
12
Using Zistos over BGAN
1
Overview
The Zistos PNSC is designed to provide a turn-key solution for field surveillance and radiological
monitoring applications, where no power or pre-existing networks are available. This self-contained,
self-powered system allows for dynamic deployment of single or multiple video surveillance cameras
in the field.
The Zistos PNSC is rugged and completely weatherproof when the
cover is closed and the system is properly assembled. It consists
of a pole-mounted camera mounted to the carrying case. Two
choices of camera are available – a Day/Night camera with
Vari-focal lens, and a Day/Night PTZ type camera. The Day /
Night camera is available with optional white light illumination.
When the PNSC is used with the BGAN satellite connection,
Surveillance and sensor data is broadcast over the internet. The
PNSC can be controlled and monitored by the control computer
connected to the internet anywhere in the world.
2
3
Applications
•
Perimeter surveillance around a mobile asset/terrorist
target
•
Video and Lighting support for disaster management scenarios
•
Event security for large and small venues
•
Tactile covert surveillance for hostage barricades
•
Surveillance for sting operations: warehouse, loading docks, depots
•
Border security / VIP security
•
Construction site safety and security
•
Optional Gamma radiation sensor available
Features & Benefits
•
Cost-effective solution
•
Easy to transport and deploy – sets up in 5 minutes!
•
Rugged Weatherproof design
•
Battery powered Camera can run up to 30 hours between charges
•
Motion alarm capable
•
Records video on PC
•
Optional Gamma Radiation Sensor available
1
4
Network Diagram
Internet
Zistos
Typical
surveillance
situation
Computer connected
to internet, monitoring
& recording
surveillance video
This instruction sheet includes additional instructions for setting up PNSC to interface with BGAN
satellite communication. Physical setup of the PNSC and software loading instructions are included
in the standard PNSC manual supplied.
Using Zistos over BGAN
2
5
Connecting PNSC to BGAN
When operating the PNSC with the BGAN terminal, the PNSC must be set to ‘Wired’ mode.
PNSC
WIRED / WIRELESS
Switch
PNSC Control Panel
Plug a standard CAT5 Ethernet cable into the jack labeled Ethernet on the rear panel of the PNSC.
Ethernet Jack
PNSC Rear Panel
6
Configuring the PNSC Video Server Console
Using the PNSC with BGAN satellite connectivity requires modification of the PNSCs default settings.
This can be accomplished using any standard PC with a standard wired Ethernet connection.
Connect the computer to the PNSC Ethernet with a suitable length of CAT5 Ethernet cable.
To log onto the PNSC video server and make configuration changes, the PC TCP/IP settings will
need to be temporarily changed.
1.
Turn the PC on.
2.
Go to Start > Control panel
Using Zistos over BGAN
3
3.
Double-click the Network and internet Connections icon
4.
Double-click the Network Connections Icon
5.
Highlight the Icon labelled Local Area connection and click on “Change settings of the connection in
the Network tasks Column.
6.
Select internet protocol (TCP/IP) from the list and click on Properties
7.
Click the Use the following IP address radio button and enter the IP address and subnet mask as
shown. Click OK when finished
IP Address: 192.168.0. x
Subnet Mark : 255.255.255.0
Where x can be any number from 2 – 254 expect 100
8.
Using a web browser, enter address http://192.168.0.1
9.
When you reach the Video Server Console sign-in screen, for user name, enter: admin. For the
password, enter: 123456
10. Once the video monitor window has opened, click on Quit near the upper left hand corner of the
display. The following screen is displayed.
6.1
WAN Settings
The next thing that needs to be configured is the WAN settings. On the web interface
1.
Click on: >> Wan Setting
2.
Change the IP address of the video server to:
Hughes HNS 9201 uses 192.168.128.X
X = From 200 to 209 for a Background Connection using the ACA settings for TEs with Static
IP address
All Thrane & Thrane terminals 192.168.0.X
X = From 2 to 254
AddValue terminals 192.168.1.X
X = From 1 to 254 except 35
Subnet mask: 255.255.255.0 for all is
USP Gateway: The IP address of the terminal.
Hughes HNS 9201 uses 192.168.128.100
All Thrane & Thrane terminals 192.168.0.1
AddValue terminals 192.168.1.35
Click on: Apply. Make sure you click the Apply box in the section labelled WAN setting
Click on: >> Save Reboot
Using Zistos over BGAN
4
6.2
Video settings
1.
Click on: >> Video Settings
2.
Verify Encoder Type is set to: MPEG4
3.
Set Frame Rate to: (1 to
4.
Set Video Maximum Bitrate to: (56k to a maximum of 384K)
Or
Set Encoder Type to: MJPEG
Set Quality to: (10 to 100)
5.
Click on: Apply
6.
Click on: >> Save Reboot
7
Configuring the BGAN terminal
7.1
Thrane & Thrane EXPLORER™ 300/500/700 and 527
Background IP service should be initiated from the BGAN terminal and can be configured from
either the EXPLORER™’s built-in web server (via a laptop’s web browser) or using the LCD MMI.
1.
Open your internet web browser and type the following IP address in the address bar:
192.168.0.1
2.
Click on Settings and then LAN
3.
Now you should see the web server interface. The screenshot below shows the
settings required as configured via the EXPLORER™’s web server interface, ensure
you click apply before leave the web page. Please consult your EXPLORER™
manual for more detailed information.
4.
NAT Mode Select Router
5.
APN Select User Defined, enter the APN, user name and password provided by your
SP in order to get a Static IP address. NOTE: If no static IP address is used your IP
address will change every time you connect to the BGAN network. On the dashboard
screen you can see the IP address of you connection.
6.
Automatic Activation select Enable.
7.
Click Apply
8.
Now your terminal is configured to start a Standard connection after you register on the
network.
9.
Click on Port Forwarding on the left Menu.
10. On Port Forwarding select ENABLE.
Using Zistos over BGAN
5
11. Check the Active box and enter 80 for the Incoming port Range and the IP address you
configured in the PNSC ex. 192.168.0.X then for the destination port 80
12. Check the Active box and enter 6005 to 6006 for the Incoming port Range and the IP
address you configured in the PNSC ex. 192.168.0.X then for the destination port 6005
13. Click APPLY before leaving the page.
14. Restart your terminal and click OK after properly pointing the terminal. Once the Explorer
is register on the BGAN network you will be connected automatically with a Standard
connection.
Connecting to BGAN via LCD MMI
The screenshot below shows the settings required as configured via the EXPLORER™ LCD
MMI.
To initiate a connection from the LCD MMI, go to the main view of the LCD.
Press Arrow Down button until CONNECT menu is selected
Press OK
Select Standard and press OK button
Select START and press OK button
Press OK button to confirm Standard connection and wait a minute or two to allow the
EXPLORER™ to register the Packet Switched connection with the BGAN system. After
Using Zistos over BGAN
6
registration the LCD main screen will show DATA ACTIVE.
7.2
Thrane & Thrane EXPLORER™ 110
Background service should be initiated from the BGAN terminal using the EXPLORER™110’s builtin web server (via a PC’s web browser).
1.
Open your internet web browser and type the following IP address in the address bar:
192.168.0.1
2.
Now you should see the web server interface
3.
Next, click on Data connections on the left hand side menu.
4.
Change the connection type by clicking the dropdown box and select ‘Standard
Background’.
5.
Make sure your Data Connection Activation is set to ‘Automatic when any PC is
connected to the Unit’
6.
APN Select User Defined APN, enter the APN, check Apply user defined APN, enter
the user name and password provided by your SP in order to get a Static IP address.
NOTE: If no static IP address is used your IP address will change every time you connect
to the BGAN network. On the Status screen you can see the IP address of you
connection.
7.
Before you exit the web interface make sure you click ‘Store Settings’.
You can connect to BGAN in two different ways, from the web server interface or by using the front
panel.
Using the front panel
1.
Power on the terminal by pressing and holding the ACTIVATE for 1.5 seconds.
2.
Obtain a GPS fix.
3.
Find the best signal.
4.
Press the Activate on the front panel of the terminal and you will automatically register to
the network. Wait approx. 30 seconds and you will be on the internet. If you have a World
Set you will see displayed ‘Connected’.
Using the Web Interface (if you set up ‘Data connection Activation’ to ‘Manual’)
5.
Open your internet web browser and type the following IP address in the address bar:
192.168.0.1
Using Zistos over BGAN
7
7.3
6.
Next, click on Data connections on the left hand side menu.
7.
Make sure the ‘Manual’ radio button is selected under connections
8.
Finally, scroll down and click ‘Connect’ at the bottom of the page.
Sabre 1 Wideye
Background Standard service should be initiated from the BGAN terminal and needs to be
configured from the Wideye™ Sabre I’s built-in web server (via a PC’s web browser).
1.
Open your internet web browser and type the following IP address in the address bar:
192.168.1.35
2.
Then you will prompt for the User Name: sabre1 Password: wideye.
3.
On the web interface, Click on the Data Icon
4.
Click on Primary Profiles
5.
Select the connection Type as Standard
6.
Check mark ‘Set as default’
7.
Click ‘Update Settings’
Your configuration should look like this
8.
Click on the Settings Tab
9.
Select ‘Router Mode (Multi User)’
10.
Check the box for ‘Auto PDP context Activation’. This will make the terminal start the
Standard connection automatically after you register on the network.
11.
Save settings
12.
Click on Port Forwarding
Using Zistos over BGAN
8
7.4
13.
Click Add, Enter the Incoming port 80 destination address the IP you assigned to the
PNSC 192.168.1.X, Protocol TCP and the destination port 80. Check Enable and click
Apply.
14.
Click Add, Enter the Incoming port 6005 destination address the IP you assigned to the
PNSC 192.168.1.X, Protocol UDP and the destination port 6005. Check Enable and click
Apply.
15.
Click Add, Enter the Incoming port 6006 destination address the IP you assigned to the
PNSC 192.168.1.X, Protocol UDP and the destination port 6006. Check Enable and click
Apply.
16.
Save Settings
17.
Reboot the terminal
18.
Accept the signal strength by pressing Enter on the LCD screen. Now your Standard
connection should start in a minute of so.
HNS 9201, 9250 and 9350
Standard service should be initiated from the BGAN terminal and needs to be configured from the
Hughes™ HNS9201’s built-in web server (via a PC’s web browser).
1.
Open your internet web browser and type the following IP address in the address bar:
192.168.128.100
2.
Click on ACA on the menu on the left.
3.
Select ACA settings for TEs with Static IP address ‘ON’ for the range of 200 – 209. QoS select
Background. Enter the APN, user name and password provided by your SP in order to get a
Static IP address. NOTE: If no static IP address is used your IP address will change every time
you connect to the BGAN network. On the PDP Contexts screen you can see the IP address of
you connection.
Using Zistos over BGAN
9
4.
Click Apply
5.
Then Click Restart Terminal
6.
Now register the terminal by pressing the Audio button until the signal strength lights go off or by
clicking the Register with the Network button on the Properties page of the web interface.
7.
The terminal will automatically recognize the IP address assigned to the PNSC and start
the Background connection automatically.
8
Zitos Setup
8.1
Camera setup and Monitoring
Adding PNSC stations to the system
1.
Click on the ActiveSetup shortcut
2.
Log into Active Setup
User account: Admin
Password: 123456
Server IP address: Local host
Language: English
Auto log in with this account: (check this box if auto login is desired)
3.
Click on the Setup Camera icon (the hammer with the camera)
Active setup icons
4.
Click on the Manual radio button
5.
In the Camera IP box, enter the WAN IP address of the BGAN terminal.
6.
Click on the Get Device setting tab
7.
The following screen should appear. Click Apply
Using Zistos over BGAN
10
8.2
Control and Monitoring
All standard control and monitoring functions of the PNSC and monitoring software NVR are
specified in the PNSC user manual. Consult the manual for all camera control and monitoring
functions.
9
Bandwidth Usage
Here are some examples of the bandwidth and data rates for the various settingsFor MPEG 4
Frame rate
Bit Rate
Bandwidth kbps
4
256K
332
4
128K
166
4
56K
78
For MJEPG
Using Zistos over BGAN
Quality
Bandwidth kbps
100
130
70
91
30
39
11
10
Zistos Contact Information
Inmarsat Contact
[email protected]
Zistos Contact
For PNSC technical support:
Zistos Corporation
1736 Church Street
Holbrook, NY 11741
Phone: 1-631-434-1370
[email protected]
[email protected]
www.inmarsat.com/bgan
Whilst the above information has been prepared by Inmarsat in good faith, and all reasonable efforts have been made to ensure its accuracy, Inmarsat makes no warranty or representation as to
the accuracy, completeness or fitness for purpose or use of the information. Inmarsat shall not be liable for any loss or damage of any kind, including indirect or consequential loss, arising from
use of the information and all warranties and conditions, whether express or implied by statute, common law or otherwise, are hereby excluded to the extent permitted by English law.
INMARSAT is a trademark of the International Mobile Satellite Organisation, Inmarsat LOGO is a trademark of Inmarsat (IP) Company Limited. Both trademarks are licensed to Inmarsat Global
Limited. © Inmarsat Global Limited 2006. All rights reserved
Using Zistos over BGAN
12