1
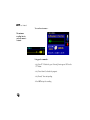
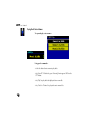
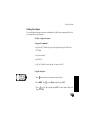
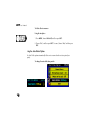
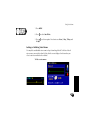
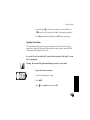
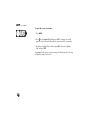
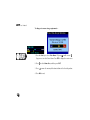
Using Voice Memo
11. Using Voice Memo
The Voice Memo program allows you to record and play brief messages. From the main
program screen, Voice Memo displays a list of stored voice memos that you can select, play
back, or delete. The program also allows you to import or export sound files using storage
(compact flash) cards.
Important! Speech recognition is turned off DURING voice memo recording. To resume
Speech Recognition, you must press the PTT button.
Recording Voice Memos
The “Record” speech command or the menu command are available to record voice memos.
The maximum recording time allowed per voice memo is 3 minutes (180 seconds.)
165
User’s Manual
To record a voice memo—
The maximum
recording time for
each voice memo is
3 minutes
Using speech commands—
• Say “Auto PC.” Wait for the green “Listening” bar to appear. OR Press the
PTT button.
• Say “Voice Memo” (to launch the program).
• Say “Record,” then start speaking.
• Press ENT to stop the recording.
166
Using Voice Memo
Using the faceplate or remote controller—
1. Say “AutoPC.” Wait for the green “Listening” bar to appear. OR press the
PTT button.
2. Say “Voice Memo.”
3. Say “Record”, and then start talking.
4. Press ENT to stop recording.
Using menu commands—
1. Press the Start key to select Voice Memo. OR Press
(small screen) /
(large screen) to select Voice Memo. Press ENT to display the main screen.
2. Press MENU.
3. Press
Scenario
to select Record, and then press ENT.
4. Press ENT again to stop the recording.
If you are new to Voice Memo, conduct a test. Record a brief message and then play it back.
If the play back is too loud or too soft, you will need to adjust the Microphone Gain setting.
(See Adjusting Microphone Gain later in this section.)
167
User’s Manual
Playing Back Voice Memos
To open and play a voice memo—
Using speech commands—
• Select the desired voice memo to play back.
• Say “Auto PC.” Wait for the green “Listening” bar to appear. OR Press the
PTT button.
• Say “Play” to play back the displayed voice memo file.
• Say “Next” or “Previous” to play other voice memo files.
168
Using Voice Memo
Using the faceplate or remote controller—
1. Press MENU while in Voice Memo application.
2. Press
to select Open, and then press ENT.
3. Select a memo, and then press ENT to start play back.
Fast Forward, Fast Reverse, and Pause
During playback, the following options are available—
• Press
to rewind (fast reverse).
• Press
to advance (fast forward).
• Press ENT to pause playback, and then press ENT or
(Right) to resume.
• Press ENT to end playback.
169
User’s Manual
Muting the CD Player or Radio While Recording
To mute the CD player and Radio during voice memo recording—
1. Press MENU while in the Voice Memo main screen.
2. Press
to select Mute On Record.
3. Press
and select On or Off.
4. Press BACK to exit.
Adjusting the Microphone Gain
You can adjust microphone sensitivity using the Microphone Gain option. You can set the gain
control from - 10 (the lowest) to + 10 (the highest).
To set the gain level for the microphone—
1. Press MENU while in the Voice Memo application.
2. Press
3. Press
to select Microphone Gain.
to select a value within a range of ± 10.
4. Press BACK to exit.
170
Using Voice Memo
Deleting Voice Memos
You can delete voice memos using voice commands or the delete menu command. Note that
you cannot delete Locked memos.
To delete a single voice memo—
Using speech commands—
• Say “Auto PC.” Wait for the green “Listening” bar to appear. OR Press the
PTT button.
• Say “Voice Memo.”
• Say “Delete.”
• Say “Yes” to delete the voice memo. To cancel, say “No.”
Using the faceplate—
1. Press
to choose the voice memo you want to delete.
2. Press MENU. Press
to select Delete, and then press ENT.
3. Press
to select “Yes,” and then press ENT. To cancel, choose “No,” and
then press ENT.
171
User’s Manual
To delete all voice memos—
Using the faceplate—
1. Press MENU, choose Delete All, and then press ENT.
2. Choose “Yes,” and then press ENT. To cancel, choose “No,” and then press
ENT.
Using the Auto-Delete Option
The Auto Delete option automatically deletes voice memos based on a time period you
specify.
To change the auto-delete time period—
172
Using Voice Memo
1. Press MENU.
2. Press
to select Auto Delete.
3. Press
to select an option. Your choices are: Never, 5 days, 15 days, and
30 days.
Locking or Unlocking Voice Memos
You may lock an individual voice memo to keep it from being deleted. To delete a locked
voice memo, you must first unlock it. Note that the screen displays a lock icon when you
select a voice memo that has been locked.
To lock a voice memo—
173
User’s Manual
1. Select the voice memo you want to lock.
2. Press the pound “#” key. Optionally, press MENU. Press
and then press ENT.
to select Lock,
As shown above, locked voice memos display the lock icon in the upper
portion of the screen.
To unlock a voice memo—
1. Select the locked voice memo that you want to unlock.
2. Press the “#” key. Optionally, press MENU. Press
then press ENT.
to select Unlock, and
Renaming Voice Memos
To rename voice memos—
1. Select the voice memo file to rename.
2. Press MENU.
3. Press
next.
174
to select Rename, and then press ENT. A data entry form appears
Using Voice Memo
4. Use the keypad or to enter a letter or number in the first edit box. Use
to move to the next or previous edit box. This may take some practice.
5. Select Done when finished, and then press ENT to save your changes.
Exporting Voice Memos
The export function allows you to copy voice memos from the Joyride™ system’s internal
memory to a storage card. Voice memo files exported to a storage card are saved in the WAV
file format, and can be played back on a PC.
Be sure the CF card is inserted in the CF card slot on the front panel of the Joyride™ system
before exporting files.
Warning! Do not turn off the ignition switch during an export of a voice memo.
To export the current voice memo—
1. Select the desired memo to export.
2. Press MENU.
3. Press
to select Export, and then press ENT.
175
User’s Manual
To export all of your voice memos—
1. Press MENU.
2. Press to select Export All, and then press ENT. An option screen will
appear to let you know that files with the same name will be overwritten.
3. To continue, highlight “Yes,” and then press ENT. Otherwise, highlight
“No” and press ENT.
As prompted by the system, accept or change the default name of a file using
the Export to Storage Card screen.
176
Using Voice Memo
Importing WAV Files
A Joyride™ system Voice Memo file can only be imported and played by the Joyride™ system
Voice Memo application.
Be sure the CF card containing proper Joyride™ system Voice Memo files is inserted in the
CF card slot on the Joyride™ system unit before importing files.
To import WAV files—
1. Press MENU.
2. Press
to select Import, and then press ENT.
Allocating Memory for Voice Memo Storage
The Voice Memo program adjusts the memory size depending on the available system
memory. If the available system memory is 2MB or greater, the maximum amount of memory
available for voice memo storage will be 1 MB. If the available system memory is less than
2MB, the maximum amount of memory available for voice memo storage will be ½ the
remaining system memory (e.g., system memory = 1.5 MB, voice memo storage = 0.75 MB;
system memory = 300KB; voice memo storage = 150 KB).
177
User’s Manual
To change voice memo storage requirements—
1. Press the Start key to select Voice Memo. OR press
(small screen) /
(large screen) to select Voice Memo. Press ENT to display the main screen.
2. Press
3. Press
to select Memo Store, and then press ENT.
to move the memory allocation indicator to the desired position.
4. Press Back to exit.
178