1
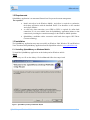
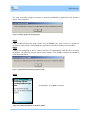
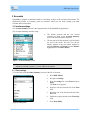
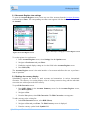
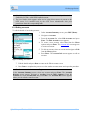
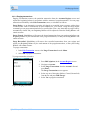
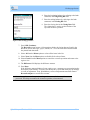
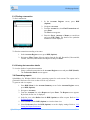
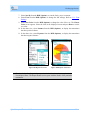
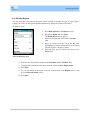
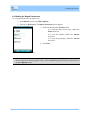
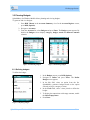
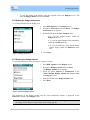
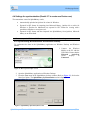
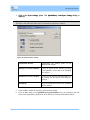
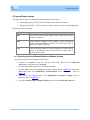
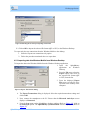
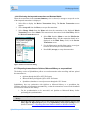
Desktop application
10. Press Done.
11. Select Edit from the Menu options to edit an existing transaction and press Enter.
The Edit Scheduled Transaction screen appears. Edit the details and press Done.
To view the scheduled transactions that you have created,
1. Press RSK (Menu) in the Accounts Summary screen.
2. Select Upcoming Transactions from the Account’s list.
3.3.3.1 Setting the periodicity
To set the periodicity
1. Select the Date field in the Edit Scheduled
Transaction or New Scheduled Transaction screen.
2. Use the left or right arrow key to open the
Periodicity screen.
The Periodicity screen appears.
3. Enter the date of the next (or first) occurrence of the
scheduled transaction in the Next Date field.
4. Select the frequency of the transaction such as
weekly, once, quarterly, and annually from the list in
the Frequency field.
Figure 23 Setting periodicity for scheduled transaction
5. Select an option from the list in the Repeat field:
•
Indefinitely, for ongoing transactions (For example, cable TV, newspaper
bills, etc.).
•
# of times, for specifying transactions that occur for a specified number of
times. Enter the number of times in the number box.
6. Select an option from the list in the Enter field:
•
Manually - to record the transaction manually. On start up of the
SplashMoney application, a reminder for the upcoming scheduled transaction
pops-up. Select OK to view the scheduled transactions.
•
Remind me - a reminder to manually record a transaction periodically, even
when the application is not running. Enter the number of days before the due
date of the transaction (reminder period), in the number box.
7. Press Done
If you have one or more transactions that are due, you will be prompted to view them when you launch
SplashMoney. If you select Yes, you will be taken to the Upcoming Transactions dialog where you
can record them. If you select Later, you will be reminded again the next time you launch
SplashMoney.
SplashMoney on Windows Mobile
20