Download OPT1 Operating Procedure for Spectrum Acquisition Rev3
Transcript
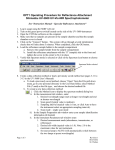
OPT1 Operating Procedure for Spectrum Acquisition
Shimadzu UV-3600 UV-Vis-NIR Spectrophotometer
See Chapter 3 in UV-3600 User’s Manual and Chapter 2 in UVProbe Tutorial Manual
1. Log in usage using the SMIF web site
2. Load the appropriate sample holder in the sample compartment
a. Film holder for solid samples
b. Cuvette holder for liquid samples
c. 8-Microcell holder for multiple small volume liquid samples, with option of
measurements taken at elevated temperature(s). Be sure to connect the
communication cable to the socket on the inside of the UV-3600 sample
chamber and the two external cables to the temperature controller.
Note: For measurements of absorption as a function of temperature, follow the
OPT1 Operating Procedure for Temperature Analysis using the 8-Position Micro
Multi Cell
3. Turn on the green power switch located on the side of the UV-3600 instrument
4. Open the UVProbe software on the computer
5. Make sure that no samples are present in the sample chamber and that the sample
chamber cover is closed
6. Click on the “Connect” button. The system will go through several initialization
checks that will take about 5 minutes. When completed, click the OK button.
7. Verify that Spectrum mode is selected or click on the Spectrum icon button to choose
spectrum mode
Spectrum Mode selected
8. Create a data collection method or load a previously saved method (see pages 3-11 to
3-13 in the UV-3600 User’s Manual)
a. To load a previously saved method, choose “Open” from the File pull down
menu, go to your personal directory in the User Data folder, select Method
File (*.smd) as the file type, and choose the desired method file
b. To create a new data collection method:
i. Click the Method icon to display the spectrum method dialog box
ii. In the measurement tab window, enter:
1. Desired wavelength range (start at longer wavelength and end
at shorter wavelength
2. Scan speed (typical value is medium)
3. Sampling interval (typical value is 1nm, or click Auto to have
the instrument select an appropriate sampling interval).
4. Scan mode
a. Choose single scan mode when using the cuvette holder
or film holder for a single reading across the selected
wavelength range, or when using the 8-microcell holder
Page 1 of 4
Revision 3
10/06/2010
M. Walters
and you wish to manually measure each sample
individually
b. Choose Auto scan mode if using multiple samples in
the 8-microcell holder and you would like all samples
measured automatically. Then select your data
directory and enter a filename for the results
iii. In the Sample Preparation tab window enter your sample identification
information (if desired)
iv. In the Instrument Parameters tab window enter:
1. Desired measurement mode (typically set to absorbance or
transmission)
2. Desired slit width (typical value is 1nm). Note: 5nm is the
maximum value for our instrument.
3. Set source lamp to AUTO (will automatically switch between
the two lamps at preset wavelengths)
4. Press the “Details” button” and select “stair correction”
v. In the Attachments tab window chose “None” unless the 8-microcell
attachment is being used. If using the 8-microcell attachment:
1. Select 8 microcell and the number of cells to use
2. Load the empty 8-cell holder with the red dot facing the front.
Make sure that no samples are present in the cells and close the
sample chamber cover.
3. Click on the Initialize button, make sure the sample chamber
cover is closed and then click OK. It will take a couple of
minutes for the holder to initialize.
4. When initialization is complete, click OK in the Spectrum
Method Window. You should see buttons at the bottom of the
software window that allow you to manually move the holder
to the various sample positions.
9. Save the data collection method by selecting “Save As” under the File pull down
method.
a. Choose your personal directory to save the file
b. Enter a name in the filename box
c. In the Save As Type list, choose Method File (*.smd) and then click Save
10. Perform a baseline correction
a. A baseline correction should be performed at start-up, and anytime you
change the wavelength range, slit width, or solvent solution.
b. Make sure that no samples are present in the sample chamber and that the
sample chamber cover is closed. (If using the 8-cell holder, select an empty
cell position using the cell next button).
Page 2 of 4
Revision 3
10/06/2010
M. Walters
c. Click “Baseline” on the photometer button bar, verify the wavelength range
and that the sample chamber cover is closed and then click OK to start the
baseline measurement
11. Load the sample into the sample compartment and if desired, load a reference into the
reference compartment.
If using the 8-cell holder:
i. Load your samples in the 8-cell holder. If using the Auto scan mode,
start with the front compartment (the compartment closest to the red
dot) and load the samples sequentially. The number of samples should
match the number of cells selected previously in the method file.
ii. Move to cell position 1 if using Auto scan mode, or to the first sample
if using Single scan mode.
iii. If desired, turn on the temperature controller power switch located on
the back of the controller. To manually set the desired measurement
temperature (see pages 2-6 and 2-7 in the Instruction Manual for
TMSPC-8), use the front panel of the temperature controller to:
1. Press Mode button to select Normal mode
2. Use the Up/Down arrows to select the desired temperature
3. Press Start button
12. Click the “Start” button on the instrument bar to initiate the measurement
13. Adjust the overlay graph Y axis values as desired (the X axis will scale automatically)
14. When the scan is complete:
a. If using Single scan mode, a New Data Set dialog box will appear. Enter a
filename and select your data directory and then click OK.
b. If using Auto scan mode, the New Data Set dialog box will not appear. Data
from each sample will automatically appear in separate filenames in the data
window.
Note: At this point, the data is only stored in temporary memory, but not to the
computer disk.
15. To save the data to the computer disk
a. Select “Save As” from the File pull down menu
b. If more than one dataset is present in the data window, click on the Select
button to choose the desired dataset
c. Select your personal directory in the User Data folder to save the file and enter
a filename
d. Select the desired file type in the “Save As Type” list:
i. Spectrum files (.spc) to save as a spectrum file for the UVProbe
software
ii. Data Print Table (.txt) to save the data as a text file
e. Click Save
16. See the UVProbe Tutorial instruction manual (pages 2-8 through 2-17) and on line
help files for an explanation of the various data manipulation and analysis functions
17. To open a previously saved file for data analysis, choose “Open” from the File pull
down menu and select the .spc file of interest.
Page 3 of 4
Revision 3
10/06/2010
M. Walters
18. Shut down the system
a. Unload your sample and close sample chamber cover
b. Exit the UVProbe software
c. Turn off the green power switch on the side of the UV-3600 instrument
d. If the 8-position multi-cell holder was used:
i. Turn off the power switch on the back of the temperature controller (if
used)
ii. Unload the 8-cell holder sample compartment and install the sample
holder assembly
iii. Remove your samples from the 8-cell holder and clean the 8-cell
holder using DI water and/or alcohol. (DI water and alcohols can be
found in the sample prep lab). When clean, return the 8-cell holder to
the storage box.
19. Log out usage using the SMIF web site
Page 4 of 4
Revision 3
10/06/2010
M. Walters


