1
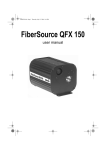
FiberSource Q150
user manual
© 1997 - 2004 Martin Professional A/S, Denmark.
All rights reserved. No part of this manual may be
reproduced, in any form or by any means, without
permission in writing from Martin Professional A/S,
Denmark.
Printed in Denmark.
P/N 35000044, Rev B
Contents
section 1
INTRODUCTION .......................................5
Features ................................................................................................ 5
About this manual ................................................................................. 5
section 2
SAFETY PRECAUTIONS..........................6
section 3
SETUP .......................................................7
Installing the lamp ................................................................................. 7
Inserting a color filter ............................................................................. 8
Inserting fiber optic cable ...................................................................... 9
Mounting the fixture ............................................................................ 10
Checking voltage and frequency settings ........................................... 10
Installing a plug on the power cord ..................................................... 11
section 4
BASIC SERVICE .....................................12
Changing the ballast voltage ............................................................... 12
Replacing the fuse .............................................................................. 12
appendix a
TROUBLESHOOTING ............................13
appendix b
SPECIFICATIONS...................................14
appendix c
ACCESSORIES AND
REPLACEMENT PARTS ........................15
3
section 1
INTRODUCTION
Thank you for selecting the Martin FiberSource Q150. The FiberSource is a rugged
and efficient light specially designed for illuminating fiber optics.
Features
•
Long-life Osram HQI-R 150 W discharge lamp
•
Multi-cable adapter for 50 to 300 optic fibers
•
Coated cold light reflector and combined UV/heat filter for cool and safe
light.
•
Diffusion filter for even light distribution
•
Built-in slot for an optional color or CTC filter
•
Thermo-switch for overheating protection
•
Super-quiet fan cooling
A b o u t t h i s m a nu a l
Please familiarize yourself with this manual before using the FiberSource Q150.
Electricity and ultraviolet light are dangerous if handled incorrectly. Please follow the
precautions listed in section 2 and observe the warnings printed on the fixture. If you
have any doubts about how to operate or service the fixture safely, please contact
your Martin dealer for assistance before proceeding.
Please refer any service not described in this manual to a qualified technician.
us e r m a n ua l
5
section 2
SAFETY PRECAUTIONS
6
•
The FiberSource Q150 is NOT for domestic use.
•
Read user manual before connecting or operating the fixture.
•
For protection against dangerous electric shock, always ground (earth)
the fixture electrically. Use only a source of AC power that complies with
local building and electrical codes.
•
Disconnect the fixture from AC power if the lamp blows. Allow the fixture
to cool for 5 minutes before installing a new lamp.
•
Always completely disconnect the fixture from electricity and allow to
cool when removing any part, including the fiber adaptor.
•
To reduce risk of fire and electrical shock, do NOT expose to rain or
moisture.
•
Keep all combustible materials (for example fabric, wood, paper) at least
10 cm (4 inches) away from the fixture. Keep flammable materials well
away from the fixture.
•
Do NOT block fan or exhaust vents.
•
Do NOT operate the fixture with the fiber optic cable, filters, or any other
parts removed: discharge lamps operate under pressure and can
explode, and an unshielded lamp emits dangerous UV radiation that can
cause burns and eye damage.
•
Check voltage and frequency settings before applying power.
•
Do NOT operate the fixture if the ambient temperature (ta) exceeds 40°C
(104°F).
•
Refer service operations not described in this manual to a qualified technician.
Fi be r S ou r c e Q 1 5 0
section 3
SETUP
The FiberSource Q150 includes:
•
IEC power cable
•
User manual
•
Osram HQI-R 150 W discharge lamp
adaptor shaft
power socket
fuse holder
230 mm
230 mm
cover screws
317 mm
Installing the lamp
The FiberSource Q150 is designed to work exclusively with the Osram HQI-R 150
W discharge lamp. Do not install any other type of lamp. The FiberSource Q150
ships from the factory with the lamp installed in the ideal burning position when the
fixture sits on a level surface. The lamp must be turned so the wires point toward the
ground if the fixture is mounted on a wall or ceiling.
As the quartz envelope weakens with use and may eventually burst, lamp replaceus e r m a n ua l
7
ment is recommended after 6000 hours of use.
Avoid touching the glass bulb. Oils from your fingers will shorten the lamp life. To
remove oils, use a soft cloth and denatured alcohol.
1.
Disconnect the fixture from electricity and allow it to cool.
2.
Remove the 4 cover screws and lift off the cover.
3.
To remove a lamp, disconnect the lamp wires, place your fingers
under the reflector and gently lift out the lamp. Lifting by the ceramic
base may break the lamp.
4.
Position the lamp behind the diffusion filter. Turn it so the wires
will point toward the ground
when the fixture is permanently installed. This positions
the filament in the ideal horizontal burning position.
5.
Gently guide the lamp between the springs.
6.
Plug the lamp wires into the white connector.
7.
Turn the diffusion filter 90°, if necessary, so the long sides of the
prisms align with the filament. See filter placement sketch below.
Inserting a color filter
The color of the light may be altered by inserting a 52 mm square dichroic glass color
or temperature correction filter. See appendix c for a list of available colors. The
FiberSource Q150 has a slot for 1 filter.
1.
Disconnect the FiberSource Q150 from electricity and allow to cool.
2.
Remove the 4 cover screws and lift off the cover.
3.
Guide the filter into the slot in front of the UV/heat filter.
4.
Replace the cover.
color
UV/heat
diffusion
Align long side of
diffusion prisms with
lamp filament.
8
Fi be r S ou r c e Q 1 5 0
I n s e r t i n g f i b e r o p t i c c a bl e
Fiber optic cables of 50 to 300 1 mm fibers may be attached to the FiberSource Q150
using the specially designed fiber optic cable adaptor. Please refer to the instructions
with the cable adaptor. The correct adaptor position within the shaft depends on the
number of fibers.
1.
Slide the adaptor into the shaft until the edge of the groove closest
to the wide end of the adaptor (see below) aligns with the face of
the adaptor shaft.
If, for example, there are 100 fibers, then count to the 7th groove
from the wide end and insert the adaptor until the groove just disappears and the edge is even with the face of the female fitting.
2.
Tighten the set screw.
Fibers (groove)
50 (10)
75 (8)
100 (7)
125 (6)
150 (5)
175 (4)
200 (3)
225 (2)
250 (1)
275 - 300 (0)
Alignment Grooves
us e r m a n ua l
9
Mounting the fixture
The FiberSource Q150 must be positioned such that the lamp filament is horizontal.
The fixture may be mounted on a vertical surface if it is turned so that the lamp is
horizontal.
Wall-mount with lamp horizontal
The FiberSource Q150 gets hot. Install it in a dry area where there is •
•
•
•
no danger of accidentally touching it,
at least 10 cm (4 in) clearance around the fixture,
good circulation,
no flammable material nearby.
Secure the fixture with 6 mm hardware (not included) through the 4 mounting holes
in the base. The mounting hardware and surface shall be able to bear at least 10 times
the weight of the fixture.
C h e ck i n g vo l t ag e a n d f r e q u e n cy s e t t i n g s
The fixture voltage setting must match your AC mains voltage. Check the setting
printed on the label on the back of the fixture and verify that it is the correct setting
for your voltage before applying power to the fixture. See page 12 for more information.
10
Fi b e r S o ur c e Q15 0
I n s t a l l i n g a p l u g o n t h e p ow e r c o rd
The fixture’s mains lead may require a grounding-type cord cap that fits your power
distribution cable or outlet. Consult a qualified electrician if you have any doubts
about proper installation.
WARNING!
For protection from dangerous electric shock, the fixture
shall be grounded (earthed). The AC mains supply shall
have a fuse or circuit breaker and ground-fault protection.
Following the cord cap manufacturer’s instructions, connect the yellow and green
wire to ground (earth), the brown wire to live, and the blue wire to neutral. The table
below shows some pin identification schemes.
Wire
Pin
Marking
Screw color
brown
live
“L”
yellow or brass
blue
neutral
“N”
silver
yellow/green
ground
use r m a n ua l
green
11
section 4
BASIC SERVICE
WA RN IN G !
Dangerous voltages. Ensure the fixture is isolated from
electricity before removing the cover.
C h a n g i n g t h e b a l l a s t vo l t ag e
1.
Unplug the FiberSource Q150 and allow it to cool.
2.
Remove the 4 cover screws and lift off the cover.
3.
Remove the ballast cover plate.
4.
Remove the black wire from the ballast terminal: insert a small
screwdriver in the small hole under the terminal and release the
spring with a clockwise turn.
5.
Open the spring as above for the correct terminal and insert the
black wire. The terminals are marked on the side of the ballast.
6.
Replace the ballast cover plate.
7.
Replace the cover.
50 Hz
AC Voltage
EU Model
Ballast Setting
60 Hz
AC Voltage
US Model
Ballast Setting
218 - 235 V
230 V
210 - 225 V
220 V
235 - 245 V
240 V
225 - 240 V
230 V
245 - 260 V
250 V
Replacing the fuse
12
1.
Unplug the power cord from the fixture.
2.
Place the tip of a screwdriver in the slot on top of the fuse holder
and pry open the holder.
3.
Replace the fuse with one of the same rating. The rating is shown
on the label.
4.
Replace the fuse holder and reconnect the power cord.
Fi b e r S o ur c e Q15 0
appendix a
TROUBLESHOOTING
problem
No light and the fan does
not run.
Fan runs but there is no
light.
Poor or uneven light.
probable cause(s)
suggested remedy
No power to the fixture.
• Check connections.
Blown fuse.
• Replace fuse.
Lamp too hot to strike.
• Wait a few minutes.
Lamp will strike when
cool.
Incorrect voltage setting.
• Check and correct voltage setting.
Burned out lamp.
• Install new lamp.
Fixture overheating.
• Allow to cool.
• Improve air flow.
• Clean the fan.
Adaptor installed incorrectly.
• Adjust adaptor as
described in section 3.
Rough fiber ends.
• File fiber ends smooth
as described in adapter
installation.
Lamp filament oriented
incorrectly.
• Turn lamp so wires
point toward the
ground.
If the suggested remedies do not solve the problem, contact your Martin dealer for
service.
use r m a n ua l
13
appendix b
SPECIFICAT IONS
Dimensions
•
•
•
•
Length ................................................................... 230 mm (9.1
Width ....................................................................317 mm (12.5
Height .................................................................... 139 mm (5.5
Weight ...........................................................................5 kg (11
in)
in)
in)
lb)
Electrical
•
•
•
•
•
•
•
•
Power consumption .............................................................. 180 W
Current consumption, EU model................................ 0.9 A at 230 V
Current consumption, US model................................ 1.0 A at 220 V
Ballast taps, EU model ............................................. 230/240/250 V
Ballast taps, US model .................................................... 220/230 V
AC frequency, EU model ........................................................50 Hz
AC frequency, US model ........................................................60 Hz
Fuse ....................................................................... 3.15 AT / 250 V
S o u rc e
•
•
•
•
•
•
•
•
Lamp ......................................................... Osram HQI-R discharge
Power ................................................................................... 150 W
Burning angle ........................................ horizontal with wires down
Rated average life................................................................ 6000 h
Color temperature ................................................................. 4200K
Output*, 10 mm diameter ................................................... 1850 lm
Output*, 20 mm diameter ................................................... 4000 lm
Output*, 25 mm diameter ................................................... 5200 lm
* Does not include filter and cable loss.
Construction
•
•
Housing ............................................................ steel and aluminum
Finish .................................................. electrostatic powder coating
Thermal
•
•
•
•
14
Cooling method................................................................ forced air
Surface temperature under normal conditions .......... 65° C (150° F)
Maximum operating environment temperature .......... 40° C (104° F)
Protection ................................................................. thermo-switch
Fi b e r S o ur c e Q15 0
appendix c
ACCESSORIES AND
R E P L A C E M E N T PAR T S
52 x 52 x 1.1 mm color filters
Color
P/N
Color
P/N
3500 - 5600K CTC
46403139
5500 - 3400K CTC
46403101
Red 301
46403102
Blue 101
46403105
Red 304
46403131
Blue 102
46403106
Red 305
46403132
Blue 103
46403107
Red 308
46403133
Blue 104
46403108
Red 309
46403134
Blue 105
46403109
Green 201
46403114
Blue 106
46403110
Green 202
46403115
Blue 107
46403104
Green 203
46403116
Blue 108
46403111
Green 204
46403117
Blue 111
46403112
Green 205
46403118
Orange 302
46403124
Green 206
46403103
Orange 306
46403125
Green 208
46403119
Purple 502
46403129
Magenta 501
46403120
Purple 509
46403130
Magenta 504
46403121
Cyan 401
46403113
Magenta 505
46403122
Yellow 601
46403135
Magenta 507
46403123
Yellow 602
46403136
Pink 303
46403126
Yellow 603
46403137
Pink 307
46403127
Yellow 604
46403138
Pink 312
46403128
1/2 minus green
46403141
use r m a n ua l
15
Fiber optic cables
P/N
Emission
Diameter
Fibers
15901002
side
3/16”
4.8 mm
10
15901004
side
5/16”
7.9 mm
18
15901006
side
7/16”
11.1 mm
50
15901008
side
9/16”
14.3 mm
80
15900002
end
3/16”
4.8 mm
12
15900004
end
5/16”
7.9 mm
25
15900006
end
7/16”
11.1 mm
50
15900008
end
9/16”
14.3 mm
75
Other accessories
•
Fiber adaptor kitP/N 91611016
R e p l a c e m e n t pa r ts
•
•
Osram HQI-R 150 W discharge lampP/N
97010101
3.15 AT fuseP/N 05020013