1
IBM Cloud Manager with OpenStack
Administrator Guide, version 4.2
IBM Cloud Manager with OpenStack
Administrator Guide, version 4.2
Note
Before using this information and the product it supports, read the information in “Notices” on
page 341.
Seventh Edition (December 2014)
© Copyright IBM Corporation 2012, 2014.
US Government Users Restricted Rights – Use, duplication or disclosure restricted by GSA ADP Schedule Contract
with IBM Corp.
Contents
Chapter 1. Overview of IBM Cloud
Manager with OpenStack . . . . . . . 1
IBM Cloud Manager with OpenStack technical
overview . . . . . . . . . . . . . .
Self-service management portal (optional) . . .
Overview of access-based roles . . . . . .
Terminology . . . . . . . . . . . .
What's new in IBM Cloud Manager with OpenStack
License information . . . . . . . . . . .
Accessibility . . . . . . . . . . . . .
.
.
.
.
1
2
3
4
5
. 6
. 6
Chapter 2. Planning for IBM Cloud
Manager with OpenStack . . . . . . . 7
IBM Cloud Manager with OpenStack prerequisites . 7
IBM Cloud Manager with OpenStack hardware
prerequisites . . . . . . . . . . . . . 7
IBM Cloud Manager with OpenStack operating
system and software prerequisites . . . . . . 8
IBM Cloud Manager with OpenStack virtualization
environment prerequisites . . . . . . . . . 10
Microsoft Hyper-V prerequisites . . . . . . 10
KVM or QEMU prerequisites . . . . . . . 11
PowerKVM prerequisites . . . . . . . . . 12
IBM Power Virtualization Center prerequisites. . 12
VMware prerequisites . . . . . . . . . . 12
z/VM prerequisites . . . . . . . . . . . 14
Supported IBM Cloud Manager with OpenStack
support matrix . . . . . . . . . . . . 14
Network considerations . . . . . . . . . . 16
Scalability and performance considerations . . . . 18
Server and concurrent user maximums . . . . 18
Minimum requirements for large-scale PowerVC
environment . . . . . . . . . . . . . 18
Planning worksheets: Deploying a cloud . . . . 18
Worksheet: Getting started with a minimal
topology . . . . . . . . . . . . . . 19
Worksheet: Controller +n compute or distributed
database topology . . . . . . . . . . . 19
Chapter 3. Installing and uninstalling
IBM Cloud Manager with OpenStack . . 21
Installing IBM Cloud Manager with OpenStack on
Linux . . . . . . . . . . . . . . .
Installing IBM Cloud Manager with OpenStack
on Linux by using console installation . . .
Installing IBM Cloud Manager with OpenStack
on Linux by using graphical installation . . .
Installing IBM Cloud Manager with OpenStack
on Linux by using silent installation . . . .
Changing the Chef server password . . . .
Deploying the z/VM appliance . . . . . . .
Installing and uninstalling the IBM Cloud Manager
with OpenStack Hyper-V Agent . . . . . .
© Copyright IBM Corp. 2012, 2014
. 21
. 21
. 23
. 25
. 27
. 27
. 28
IBM Cloud Manager with OpenStack Hyper-V
Agent Installation Prerequisites . . . . . . .
Installing the IBM Cloud Manager with
OpenStack Hyper-V Agent . . . . . . . .
Uninstalling the IBM Cloud Manager with
OpenStack Hyper-V Agent . . . . . . . .
Uninstalling the IBM Cloud Manager with
OpenStack Hyper-V Agent on Microsoft Hyper-V
Server 2012 R2 . . . . . . . . . . . .
Configuring operating system yum repositories on
the deployment server . . . . . . . . . . .
Applying fixes and updates . . . . . . . . .
Applying fixes and updates for IBM Cloud
Manager with OpenStack . . . . . . . . .
Applying fixes and updates for DB2 . . . . .
Best practices for maintaining a multi-region
cloud or test cloud . . . . . . . . . . .
Uninstalling IBM Cloud Manager with OpenStack
Uninstalling IBM Cloud Manager with
OpenStack from deployment server . . . . .
Uninstalling the self-service portal on Linux . .
28
29
36
36
37
39
39
40
41
42
42
42
Chapter 4. Upgrading IBM Cloud
Manager with OpenStack . . . . . . . 45
Upgrading the topology . . . . . . . . . .
Upgrading a multi-region topology . . . . . .
Upgrading the stand-alone self-service portal . . .
Upgrading the stand-alone self-service portal
topology when using Derby . . . . . . . .
Upgrading the stand-alone self-service portal
topology when using DB2 . . . . . . . .
Upgrading a single node . . . . . . . . . .
Upgrading the PowerVC controller and nodes . . .
Upgrading the IBM Cloud Manager with OpenStack
Hyper-V Agent . . . . . . . . . . . . .
Graphical Upgrade . . . . . . . . . . .
Silent upgrade . . . . . . . . . . . .
45
51
57
57
59
61
64
65
65
66
Chapter 5. Deploying an IBM Cloud
Manager with OpenStack cloud . . . . 69
Topology overview . . . . . . . . . . .
Minimal deployment . . . . . . . . .
Controller +n compute deployment . . . .
Distributed database deployment . . . . .
Stand-alone self-service portal deployment . .
Deploying the cloud environment . . . . . .
Deploying prerequisites . . . . . . . .
Deploying an evaluation cloud . . . . . .
Deploying a test or production cloud . . . .
Deployment customization options . . . .
Verifying Open vSwitch configuration . . .
Using your cloud environment . . . . . .
Adding the self-service portal to a deployed
topology . . . . . . . . . . . . . .
Adding a compute node to a deployed topology
. 69
. 70
. 71
. 72
. 73
. 74
. 74
. 76
. 77
. 109
. 143
. 144
. 144
145
iii
Removing a compute node from a deployed
topology . . . . . . . . . . . .
Changing passwords and secrets . . . .
Redeploying a node cleanup . . . . .
Updating a deployed topology . . . .
Determining the fix level of deployed nodes
Adding a region to a deployed topology .
.
.
.
.
.
.
.
.
.
.
.
.
.
.
.
.
.
.
147
147
148
149
151
152
Chapter 6. Configuring IBM Cloud
Manager with OpenStack . . . . . . 155
Configuring IBM Cloud Manager with OpenStack
properties . . . . . . . . . . . . . .
Changing IBM Cloud Manager with OpenStack
properties . . . . . . . . . . . . .
Creating initial networks . . . . . . . .
Configuring SSH and ICMP access to deployed
virtual machines . . . . . . . . . . .
Configuring migration for a KVM node with
NFS shared storage . . . . . . . . . .
Installing a network time service . . . . . .
Configuring multiple block storage back ends
Configuring IBM Cloud Manager with OpenStack
self-service portal properties . . . . . . . .
Configuring secure shell (SSH) communication
Configuring user registry authentication . . .
Configuring database. . . . . . . . . .
Configuring email notifications . . . . . .
Configuring common cloud properties . . . .
Configuring global image deployment . . . .
Configuring multiple instances for a single
deployment . . . . . . . . . . . . .
Configuring logging . . . . . . . . . .
Configuring a network . . . . . . . . .
Configuring billing . . . . . . . . . .
Configuring metering . . . . . . . . .
Configuring capacity and overcommit rates . .
Configuring web user interface . . . . . .
Configuring IBM Cloud Manager with OpenStack
dashboard properties . . . . . . . . . . .
Rebranding the dashboard . . . . . . . .
155
155
155
157
158
161
161
163
164
166
170
171
172
173
193
194
194
196
200
201
202
204
204
Chapter 7. Managing IBM Cloud
Manager with OpenStack as an
Administrator . . . . . . . . . . . 207
Configuring the license key. . . . . . . . .
Managing IBM Cloud Manager with OpenStack
services . . . . . . . . . . . . . . .
Checking status of OpenStack services . . . .
Restarting IBM Cloud Manager with OpenStack
services . . . . . . . . . . . . . .
IBM Cloud Manager with OpenStack services
Managing with the IBM Cloud Manager with
OpenStack self-service portal (Administrator
access). . . . . . . . . . . . . . . .
Starting and stopping IBM Cloud Manager with
OpenStack self-service portal . . . . . . .
Configuring the default administrator user
account and changing password . . . . . .
Configuring LDAP authentication using the web
interface . . . . . . . . . . . . . .
iv
207
207
207
208
208
211
211
Managing images . . . . . . . . . . .
Managing projects . . . . . . . . . . .
Managing approval policies . . . . . . .
Managing requests . . . . . . . . . .
Managing expiration policies . . . . . . .
Managing flavors (OpenStack only) . . . . .
Managing clouds . . . . . . . . . . .
Managing network configurations . . . . .
Managing instances . . . . . . . . . .
Managing storage volumes . . . . . . . .
Managing users . . . . . . . . . . .
Managing accounts . . . . . . . . . .
Clearing or archiving events . . . . . . .
Viewing capacity statistics . . . . . . . .
Managing with OpenStack dashboard . . . . .
Copying images from one OpenStack region to
another . . . . . . . . . . . . . . .
Copying a self-service portal image . . . . .
Copying OpenStack Glance images . . . . .
Backing up and restoring IBM Cloud Manager
with OpenStack . . . . . . . . . . . .
Backing up and restoring the deployment server
Backing up and restoring the OpenStack
databases . . . . . . . . . . . . . .
Backing up and restoring the self-service portal
214
224
227
229
230
231
234
237
244
248
248
251
252
252
253
253
254
254
256
256
258
259
Chapter 8. Security . . . . . . . . . 261
Port usage . . . . . .
User names and passwords.
Strengthening security . .
.
.
.
.
.
.
.
.
.
.
.
.
.
.
.
.
.
.
.
.
.
. 261
. 263
. 265
Chapter 9. Reference . . . . . . . . 267
Commands . . . . . . . . . . . . .
Topology JSON file . . . . . . . . .
Cloud YAML configuration file . . . . .
Cloud YAML Configuration Keys. . . . .
Environment YAML Configuration File . . .
Passwords and secrets JSON file . . . . .
Data bags . . . . . . . . . . . . .
Mapping attributes to services. . . . . . .
Qpid messaging service attributes . . . .
OpenStack identity service attributes . . .
OpenStack image service attributes . . . .
OpenStack block storage service attributes. .
OpenStack orchestration service attributes . .
OpenStack telemetry service attributes . . .
OpenStack compute service attributes . . .
OpenStack network service attributes . . .
IBM OpenStack IaaS gateway attributes . .
IBM OpenStack PowerVC driver service
attributes . . . . . . . . . . . . .
IBM OpenStack z/VM driver service attributes
Roles . . . . . . . . . . . . . . .
Best practices when using the self-service portal
IBM Cloud Manager with OpenStack FAQ .
Using the screen command . . . . . .
Using the nohup command . . . . . . .
211
212
IBM Cloud Manager with OpenStack: Administrator Guide, version 4.2
.
.
.
.
.
.
.
.
.
.
.
.
.
.
.
.
.
267
270
273
274
276
277
277
279
279
279
280
280
282
282
282
283
286
. 286
286
. 287
288
. 288
. 290
. 290
Chapter 10. Troubleshooting and
support for IBM Cloud Manager with
OpenStack . . . . . . . . . . . . 291
Techniques for troubleshooting problems . . . .
Logging tasks . . . . . . . . . . . . .
Change logging levels from the OSGi command
prompt . . . . . . . . . . . . . .
Retrieve log and system files . . . . . . .
Troubleshooting using the OSGi console . . .
Logging chef-client output . . . . . . . . .
Searching knowledge bases . . . . . . . . .
Getting fixes from Fix Central . . . . . . . .
Contacting IBM Support. . . . . . . . . .
Exchanging information with IBM . . . . . .
Sending information to IBM Support . . . .
Receiving information from IBM Support . . .
Subscribing to Support updates . . . . . . .
Troubleshooting errors when deploying or
updating topologies . . . . . . . . . . .
Deployment hangs when running the Open
vSwitch recipe . . . . . . . . . . . .
DB2 database requests fail with SQL1225N . .
MySQL database requests fail with "Too many
connections" . . . . . . . . . . . . .
Network connectivity loss to nodes during
deployment . . . . . . . . . . . . .
Data bag item not found . . . . . . . .
Deploying z/VM compute node fails . . . .
Deployment fails with package installation error
Node verification failed . . . . . . . . .
Deploying a client node fails . . . . . . .
Deploying a remote node fails . . . . . . .
Cookbook not found . . . . . . . . . .
Network interface not found . . . . . . .
291
293
293
294
295
295
296
297
298
299
299
299
300
301
301
301
302
303
303
304
304
305
305
306
306
307
Operating system repository not found . . . .
Package failed to install or upgrade . . . . .
PowerVC driver deploys successfully; later is
dead . . . . . . . . . . . . . . .
Compute node is deployed or updated
successfully; later Open vSwitch agent is down .
Fingerprint error during deploy . . . . . .
Error restarting neutron when deploying a
topology . . . . . . . . . . . . . .
Cinder error occurs when you deploy a
controller node . . . . . . . . . . . .
Internal service error occurs when you run a
knife command . . . . . . . . . . . .
Error upgrading the openstack-selinux package
No IP addresses on virtual machines after
deployment . . . . . . . . . . . . .
Self-service portal displays volumes attached to
wrong device . . . . . . . . . . . .
Known problems and solutions for an
Administrator . . . . . . . . . . . . .
Known issues . . . . . . . . . . . .
Limitations . . . . . . . . . . . . .
Known problems and solutions for a User. . . .
Cached display . . . . . . . . . . . .
Saving image exception . . . . . . . . .
Error message language . . . . . . . . .
Internet Explorer display . . . . . . . .
Login fails . . . . . . . . . . . . .
307
308
308
308
309
310
310
311
311
311
312
312
312
330
335
335
335
335
335
337
Accessibility . . . . . . . . . . . . 339
Notices . . . . . . . . . . . . . . 341
Trademarks . . . . . . .
Privacy policy considerations .
.
.
.
.
.
.
.
.
.
.
.
.
. 343
. 343
Contents
v
vi
IBM Cloud Manager with OpenStack: Administrator Guide, version 4.2
Chapter 1. Overview of IBM Cloud Manager with OpenStack
IBM® Cloud Manager with OpenStack is an easy to deploy, simple to use cloud management software
offering that is based on OpenStack with IBM enhancements that feature a self-service portal for
workload provisioning, virtual image management, and monitoring. It is an innovative, cost-effective
approach that also includes automation, metering, and security for your virtualized environment.
IBM Cloud Manager with OpenStack technical overview
The IBM Cloud Manager with OpenStack solution, provides the architecture, software, and mechanisms
that deliver OpenStack clouds to your environment quickly.
By installing the IBM Cloud Manager with OpenStack product, you receive the tools to easily deploy an
OpenStack cloud, made up of an OpenStack controller node and one or more compute hosts. There are
various topologies that are provided to help you deploy the nodes, which create your cloud.
The general flow for setting up your cloud includes the following steps:
1. Install IBM Cloud Manager with OpenStack on the deployment server.
2. Deploy the cloud topology that includes the controller node and any compute nodes that you want to
include.
3. Complete additional configuration steps such as creating initial networks and defining secure access
to virtual machines.
After you install and deploy a cloud, the IBM Cloud Manager with OpenStack solution includes the
following management tools.
v IBM Cloud Manager with OpenStack self-service portal: Optional and intended for management by
cloud users.
v OpenStack dashboard: Intended for use by cloud administrators.
v APIs and knife commands: Intended for cloud administrator use.
You must understand the concepts and terminology of OpenStack and Chef server technology. There is
significant documentation that is provided in the community. Review some of the key concepts like
cookbooks, recipes, environments, and roles. For more information, see the following terminology resources:
v All about Chef ...
v Get started with OpenStack
IBM Cloud Manager with OpenStack is designed to get you started quickly, yet provide you flexibility for
production level installations. It uses Chef server technology to provide a robust installation and
configuration method by using cookbooks, recipes, environments, and roles. Chef provides a client that
communicates with the deployment server to install software on remote nodes as well.
This image shows the communication between the IBM Cloud Manager with OpenStack components in
your cloud.
© Copyright IBM Corp. 2012, 2014
1
The deployment server is where you install the IBM Cloud Manager with OpenStack solution. This server
becomes your Chef server and it stores cookbooks and templates (for example) that are applied to nodes.
The nodes use the recipes, templates, and file distributions to do as much of the configuration work as
possible on the nodes themselves (and not on the Chef server).
For more detail about specific deployment options, see the “Topology overview” on page 69.
Note: You can use the Chef server that is provided with IBM Cloud Manager with OpenStack to upload
your own cookbooks, roles, and data bags. These Chef resources can then be used along with the IBM
Cloud Manager with OpenStack Chef resources to further customize your cloud deployments. Your
customization must be compatible with IBM Cloud Manager with OpenStack.
Related reference:
OpenStack (http://www.openstack.org/)
Chef Overview (http://docs.opscode.com/chef_overview.html)
Self-service management portal (optional)
Easy to deploy and easy to use, IBM Cloud Manager with OpenStack features a self-service portal for
performing cloud operations.
With the IBM Cloud Manager with OpenStack self-service portal, you can perform the following public
and private cloud operations:
v Provisioning and de-provisioning virtual servers on OpenStack (KVM, PowerKVM, Hyper-V, PowerVC,
z/VM®), and VMware vSphere using vCenter virtualization environments
v Providing access to multiple clouds from a single portal
v Drafting and cloning instances
2
IBM Cloud Manager with OpenStack: Administrator Guide, version 4.2
v
v
v
v
v
Capturing instances
Starting and stopping servers as part of an instance
Resizing existing virtual machines
Creating projects to give team-specific access to instances
Providing network configurations, which set unique network properties to different instances
v Creating expiration polices to reduce abandoned virtual machines
v Providing request and approval workflow support
v Monitoring resource allocations and billing for services
IBM Cloud Manager with OpenStack self-service portal uses the following FIPS 140-2 approved
cryptographic providers:
v IBMJCEFIPS (certificate 376)
v IBMJSSEFIPS (certificate 409)
v IBM Crypto for C (certificate 384)
The certificates are listed on the NIST website at http://csrc.nist.gov.
Overview of access-based roles
The IBM Cloud Manager with OpenStack self-service portal supports role-based access control.
Role-based access control is enforced by assigning one or more roles to the user, and allowing each role
to perform a given set of operations.
The self-service portal provides the following predefined roles:
User
The main responsibility of an end user is to request the provisioning of deployed virtual
machines.
v Deploy an image.
v Manage instances.
v View requests.
v View projects.
v View activity reports.
Administrator
Users with this role are responsible for administering all resources in the cloud. The typical tasks
of administrators are:
v Configuring the cloud.
v Creating a project, which manages cloud access.
v Manage images.
v Manage instances.
v Manage requests.
v View activity reports.
Content that is specific to one role or the other is designated with the following flags:
v
v
Chapter 1. Overview
3
Terminology
IBM Cloud Manager with OpenStack supports many different types of virtualization infrastructure
environments. These environments sometimes use different terminology for the same concepts.
The terminology differences are described in the following table.
Note: IBM Cloud Manager with OpenStack is aligning more closely with OpenStack terminology. For
example, workload and appliance are now referred to as an instance and image. OpenStack is an open
source cloud-computing platform for private and public clouds. For information about OpenStack, see
http://www.openstack.org/
Table 1. A terminology comparison between the virtualization infrastructure type and the IBM Cloud Manager with
OpenStack equivalent term
Virtualization
infrastructure type
Term
Definition
IBM Cloud Manager with
OpenStack equivalent
VMware
Template
A blueprint of a virtual
machine containing the
metadata and one or more
disk images that can be
used to create new virtual
machines.
VMware
Virtual machine
A runnable instance of a
Instance
virtual computer, similar to
a physical computer that
runs an operating system
and applications.
OpenStack
Flavor
Flavor
A flavor is a defined size
for a provisioned virtual
machine. Each flavor has a
unique combination of
resource configurations and
sizes.
Image
In addition to terminology differences between environments, there are key concepts that you must
understand, if you use the self-service portal.
Projects
Projects, within the self-service portal, provide a management realm to group images and
instances that only the members of that project can see and manage.
Requests
Requests are any actions that require administrator approval before they can complete. The
self-service portal sends an approval request when a user attempts an operation that an
administrator has set up to require approvals.
Accounts
Enabling the billing operation in the self-service portal activates the account feature. An account
includes a balance, an owner, an account balance threshold, account members, and invoices. The
account members are charged for the instances that they deploy.
Note: Only administrators can create accounts, but a user can be assigned as an account owner.
Basic and advanced deployments
Users deploy an image by using the basic deployment form. Project owners or administrators can
use the basic or the advanced deployment forms. They can also configure which deployment
settings are shown on the basic deployment form.
4
IBM Cloud Manager with OpenStack: Administrator Guide, version 4.2
What's new in IBM Cloud Manager with OpenStack
IBM Cloud Manager with OpenStack is a cloud solution with new features and support in this release.
The new features include the following:
v A new, simplified command line method for deploying clouds in the KVM or QEMU, PowerKVM,
PowerVC environments. With this option of deploying clouds you use an example cloud file that is
configured with typical defaults. You can customize the example cloud file as needed to meet your
needs. For more information, see “Deploying a prescribed configuration with KVM or QEMU compute
nodes” on page 79, “Deploying a prescribed configuration with PowerKVM compute nodes” on page
86, and “Deploying a prescribed configuration to manage to PowerVC” on page 98.
v Enhanced planning worksheets to help you get started. For more information see, “Planning
worksheets: Deploying a cloud” on page 18
v IBM Cloud Manager with OpenStack features an enhanced OpenStack compute scheduler, IBM
Platform Resource Scheduler. For more information about Platform Resource Scheduler, see Platform
Resource Scheduler. The Getting Started section provides more information about What's New and
Known Issues in Platform Resource Scheduler.
v Ability to upgrade the IBM Cloud Manager with OpenStack environment from version 4.1 to version
4.2. For more information see, Chapter 4, “Upgrading IBM Cloud Manager with OpenStack,” on page
45.
v Support for configuring your cloud topology to be compliant with the Federal Information Processing
Standards (FIPS) for cryptography modules. For more information, see “Customizing for a
FIPS-compliant topology” on page 116.
New support includes:
v IBM Cloud Manager with OpenStack version 4.2 is based on the Juno OpenStack release.
– Support for APIs for the newly integrated OpenStack projects - Sahara and Trove.
v
v
v
v
– Support across all OpenStack Juno APIs.
– Integrated support for load balancer as a service.
– RabbitMQ support for messaging queue.
Added support for PowerVC 1.2.2, with new features that include:
– Using maintenance mode to enable or disable a host system for maintenance.
– Using the Attach interfaces (os-interface) Nova API service to create, list, get details for, and
delete port interfaces.
– Allocating a floating IP address to an OpenStack instance. For more information, see Allocating a
floating IP address to an instance (OpenStack) and “Managing external networks and floating IP
addresses” on page 243.
Added support for PowerKVM 2.1.1 with GRE network type support. For more information, see
“Importing images (OpenStack only)” on page 214.
Added support VXLAN network type support. For more information, see “Network considerations” on
page 16.
Updated browser support. For more information, see “Supported IBM Cloud Manager with OpenStack
web browsers” on page 9.
For information on the latest OpenStack release, see the OpenStack (Juno) Release Notes.
Technical preview features include the following support:
v IBM Cloud Manager with OpenStack version 4.2 includes a technical preview of a disaster recovery
service that enables disaster recovery for OpenStack workloads. For more information, see Disaster
Recovery Technical Preview Documentation.
Chapter 1. Overview
5
License information
Learn about license information for the IBM Cloud Manager with OpenStack product.
The IBM Cloud Manager with OpenStack product includes a default trial license, with a 90-day trial
period. You can use this license to investigate IBM Cloud Manager with OpenStack. However, to have
full use of IBM Cloud Manager with OpenStack, you need to update the trial license to a permanent
license.
Licenses may be required for multiple systems:
v If you install IBM Cloud Manager with OpenStack on an IBM Power® system or x86 system, licenses
are required for each socket on the system that is running IBM Cloud Manager with OpenStack.
Licenses are also required for each socket on a system that is being managed by IBM Cloud Manager
with OpenStack.
v If you install IBM Cloud Manager with OpenStack on a System z® system, or are managing a System z
system with IBM Cloud Manager with OpenStack, a managed engine license is required for each
System z engine that is running the program or being managed by the program.
For more information, see the license agreement.
To display the current license of IBM Cloud Manager with OpenStack, run the following command:
/opt/ibm/cmwo/bin/cmwo_lic.sh
Accessibility
Accessibility features help users who have a disability, such as restricted mobility or limited vision, to use
information technology products successfully.
Accessibility features
IBM® strives to provide products with usable access for everyone, regardless of age or ability. This
product uses standard browser navigation keys.
The following list includes the major accessibility features in IBM Cloud Manager with OpenStack:
v Keyboard-only operation
v Interfaces that are commonly used by screen readers
v Keys that are discernible by touch but do not activate just by touching them
v Industry-standard devices for ports and connectors
v The attachment of alternative input and output devices
The IBM Cloud Manager with OpenStack Information Center, and its related publications, are
accessibility-enabled.
Keyboard navigation
The product use standard browser navigation keys.
IBM and accessibility
See the IBM Human Ability and Accessibility Center for more information about the commitment that
IBM has to accessibility.
6
IBM Cloud Manager with OpenStack: Administrator Guide, version 4.2
Chapter 2. Planning for IBM Cloud Manager with OpenStack
Review the following information for planning to install and using IBM Cloud Manager with OpenStack.
The information includes hardware and software requirements for the various IBM Cloud Manager with
OpenStack components.
IBM Cloud Manager with OpenStack prerequisites
Review the following information for planning to install and using IBM Cloud Manager with OpenStack.
The information includes hardware and software requirements for the various IBM Cloud Manager with
OpenStack components.
IBM Cloud Manager with OpenStack hardware prerequisites
This section describes hardware prerequisites for various platforms and components that IBM Cloud
Manager with OpenStack supports.
The information provided is a general guideline and actual requirements can vary from installation to
installation. Specific sizings should be done to meet your installation requirements.
The IBM Cloud Manager with OpenStack server is supported on the following platforms:
v Intel x86-64 (Linux)
v POWER6®, POWER7®, or POWER8™ (PowerLinux™)
v z/VM systems (IBM z/Architecture®)
This table describes both the minimum hardware requirements and recommended minimum production
hardware requirements for the IBM Cloud Manager with OpenStack deployment server, controller,
database, and compute node components.
The minimum requirements listed indicate the absolute minimum hardware levels needed when running
with only 5-10 concurrent users.
The recommended minimum production requirements are recommendations to support a small cloud. As
with any software solution, hardware needs to be properly sized for a specific customer scenario.
Table 2. Minimum hardware requirements
Component
Minimum hardware requirements
Recommended minimum hardware
production requirements
IBM Cloud Manager with OpenStack
deployment server 1
v 4 CPUs
v 8 CPUs
v Free disk space: 4 GB for
/opt/ibm/cmwo
v 25 GB free disk space
v 8 GB physical memory
v Free disk space: 4.5 GB of
temporary space while installing
v Chef server: 5.0 GB of free disk
space in /opt; 5.0 GB of free disk
space in /var.
v 4 GB physical memory
© Copyright IBM Corp. 2012, 2014
7
Table 2. Minimum hardware requirements (continued)
Component
Minimum hardware requirements
Recommended minimum hardware
production requirements
OpenStack controller
v 4 CPUs
v 4 CPUs
v 16 GB physical memory
v 16 GB physical memory
v 6 GB free disk space for installed
code and empty databases
v 6 GB free disk space for installed
code and empty databases (4 GB
for DB2® and databases)
v 1 network interface card
v 3 network interface cards
Standalone DB2
4 GB for DB2 and empty databases
Compute nodes
The following compute nodes are
installed from IBM Cloud Manager
with OpenStack. For specific
requirements, see information about
the applicable virtualization
environment.
v
4 GB for DB2 and empty databases
“KVM or QEMU prerequisites” on
page 11
v “PowerKVM prerequisites” on
page 12
v “Microsoft Hyper-V prerequisites”
on page 10
v “z/VM prerequisites” on page 14
Other supported virtualization
environments:
v “IBM Power Virtualization Center
prerequisites” on page 12
v “VMware prerequisites” on page
12
1
Requirements are for the IBM Cloud Manager with OpenStack deployment server only (for example, Chef server).
If other servers are installed on the same system, the requirements would need to be higher to account for the
additional needs of the other components installed and running there.
IBM Cloud Manager with OpenStack operating system and software
prerequisites
This section lists the software prerequisites for IBM Cloud Manager with OpenStack.
The software versions listed are current at the time of publication. See the IBM Cloud Manager with
OpenStack wiki for any updates.
Supported IBM Cloud Manager with OpenStack operating systems
This section lists the operating systems and versions that IBM Cloud Manager with OpenStack supports.
The following table lists the operating systems that are supported by the IBM Cloud Manager with
OpenStack server, controller, and stand-alone DB2 nodes.
Table 3. Supported operating systems
Operating system
Versions
Notes
Red Hat Enterprise Linux
Version 6.5 (64-bit)
With latest fix pack
8
IBM Cloud Manager with OpenStack: Administrator Guide, version 4.2
Table 3. Supported operating systems (continued)
Operating system
Versions
Notes
z/VM
Version 6.3
For more information, see
“z/VM prerequisites” on page
14.
Note: If you use the GNOME Desktop Environment (gnote) or KDE Desktop Environment, some package
conflicts might exist with IBM Cloud Manager with OpenStack. For more information about resolving the
package conflicts, see “Error occurs when installing qpid” on page 324.
Supported IBM Cloud Manager with OpenStack databases
This sections lists the database and versions that IBM Cloud Manager with OpenStack supports.
The following table lists the databases that are supported by the IBM Cloud Manager with OpenStack
server.
Table 4. Supported databases
Database
Versions
Notes
DB2
10.5
With service pack 3
MySQL
5.1.x
For Red Hat Enterprise Linux
version 6.5 on x86 systems
Supported messaging services
This section lists the messaging services and versions that IBM Cloud Manager with OpenStack supports.
The following table lists the messaging services that are supported by the IBM Cloud Manager with
OpenStack server.
Table 5. Supported messaging services
Messaging service
Versions
Notes
RabbitMQ (default)
3.3.x
For Red Hat Enterprise Linux version
6.5 on x86 systems
Qpid
0.30
For Red Hat Enterprise Linux version
6.5 on x86 systems
Supported IBM Cloud Manager with OpenStack web browsers
This section lists the web browsers and versions that the IBM Cloud Manager with OpenStack self-service
portal supports.
The following table lists the web browsers that are supported for clients that access the IBM Cloud
Manager with OpenStack servers.
Note: Web browsers or versions that are not listed here might also work.
Chapter 2. Planning
9
Table 6. Web browser compatibility
Browser
Versions
Notes
Internet Explorer
11.0
With latest fix pack
Minimum resolution of 1024x768 (or
greater)
Internet Explorer 9 or 10
compatibility view is not supported
Firefox
31
With latest fix pack
Minimum resolution of 1024x768 (or
greater)
Chrome
38
With latest fix pack
Safari
7
With latest fix pack
Supported IBM Cloud Manager with OpenStack user registries
Review the user registries that are supported by the IBM Cloud Manager with OpenStack server.
The following table lists the user registries that are supported by the IBM Cloud Manager with
OpenStack server.
Table 7. Supported user registries
User registry
Versions
Notes
IBM Cloud Manager with OpenStack
Local identity storage and
authentication
v The IBM Cloud Manager with
OpenStack database is used to
store identity artifacts including
credentials.
v Intended for small-scale usage,
such as proof-of-concept scenarios,
demonstrations, or environments
with up to 30 users and projects
Lightweight Directory Access
Protocol (LDAP) Version 3
IBM Tivoli® Directory Server Version
6.1
Microsoft Active Directory
6.1.7600.16385
OpenLDAP Version 2.4.x
v Intended for production
environments to provide the
highest level of security.
v Scales to hundreds or thousands of
users and projects.
v Supports TLS (transaction level
security).
IBM Cloud Manager with OpenStack virtualization environment
prerequisites
IBM Cloud Manager with OpenStack depends on one of several providers for platform management and
virtualization services. These providers have unique software prerequisites that depend on the type of
cloud provider that you use.
Microsoft Hyper-V prerequisites
View the prerequisites for using IBM Cloud Manager with OpenStack with Microsoft Hyper-V.
IBM Cloud Manager with OpenStack is compatible with the following versions of these products:
10
IBM Cloud Manager with OpenStack: Administrator Guide, version 4.2
Table 8. Supported Microsoft Hyper-V products
Microsoft Hyper-V products
Microsoft Hyper-V Server 2012 R2
Versions
1
Windows Server
2012 R2 with Hyper-V role enabled
v Standard Edition
v Datacenter edition
1. Microsoft Hyper-V Server 2012 R2 does not provide the APIs that are needed for IBM Cloud Manager with
OpenStack to create the ISO image file that provides customization data to virtual machines. To useMicrosoft
Hyper-V Server 2012 R2 with IBM Cloud Manager with OpenStack, you must install a compatible ISO
generation utility such as genisoimage from Cygwin. For more information, see “Enabling Microsoft Hyper-V
Server 2012 R2 systems for ISO generation.”
Note: All operating systems must have the latest fix pack applied.
The management of Microsoft Hyper-V hypervisor is outside the scope of this document. Refer to the
product documentation for troubleshooting instructions.
Enabling Microsoft Hyper-V Server 2012 R2 systems for ISO generation
If you are using Microsoft Hyper-V Server 2012 R2 with IBM Cloud Manager with OpenStack, you must
install a compatible ISO generation utility such as genisoimage from Cygwin. After you install a
compatible ISO generation utility such as genisoimage from Cygwin to use on Microsoft Hyper-V Server
2012 R2 systems, you must update the nova.conf file on each system where you installed the IBM Cloud
Manager with OpenStack Hyper-V Agent.
Procedure
1. Use a text editor to edit the nova.conf file that is located at C:\Program Files (x86)\IBM\Cloud
Manager with OpenStack\Hyper-V Agent\etc\nova.
Find the line mkisofs_cmd=C:\Program Files (x86)\IBM\Cloud Manager with OpenStack\Hyper-V
Agent\bin\ibmgenisoimage.exe and change the path and file name of the mkisofs_cmd property to the
ISO generation utility that you installed. For example: mkisofs_cmd=C:\cygwin\bin\genisoimage.exe
3. Restart the IBM Cloud Manager with OpenStack Hyper-V Compute Agent Service by running the
following commands:
v net stop “IBM Cloud Manager with OpenStack Hyper-V Compute Agent Service”
v net start “IBM Cloud Manager with OpenStack Hyper-V Compute Agent Service”
2.
KVM or QEMU prerequisites
View the prerequisites for using IBM Cloud Manager with OpenStack with KVM or QEMU.
The KVM or QEMU host must satisfy the following requirements:
v Red Hat Enterprise Linux 6.5
v A libvirt version 0.9.11 or later
v Open vSwitch version 2.0
v Python version 2.6.x.
Certify that the KVM or QEMU host device drivers work with Open vSwitch and update the host device
drivers to the latest level. IBM testing with Red Hat Enterprise Linux 6.5 on an IBM PureFlex™ system
required that the following device drivers be updated:
kmod-be2iscsi-4.6.267.4-1.x86_64
kmod-tg3-3.129d-1.x86_64
kmod-elx-lpfc-8.3.7.29-1.x86_64
kmod-be2net-4.6.267.4-1.x86_64
kmod-brocade-bfa-3.2.1.1-0.x86_64
Chapter 2. Planning
11
kmod-qlgc-qla2xxx-8.04.00.12.06.0_k3-1.x86_64
Updated IBM device drivers are available on the following IBM Support website:
http://ibm.com/support
PowerKVM prerequisites
View the prerequisites for using IBM Cloud Manager with OpenStack with PowerKVM.
IBM Cloud Manager with OpenStack supports IBM PowerKVM compute nodes. PowerKVM compute
nodes must be hosts; nested virtual machines are not supported.
The PowerKVM host must satisfy the following requirements:
v Operating system: IBM_PowerKVM release 2.1.0 and 2.1.1
v Hardware: Power8 Server with the PowerKVM hypervisor configured.
IBM Power Virtualization Center prerequisites
View the prerequisites for using IBM Cloud Manager with OpenStack with IBM Power Virtualization
Center.
IBM Cloud Manager with OpenStack is compatible with IBM Power Virtualization Center Standard
version 1.2.0.1, 1.2.0.2, and 1.2.x, a comprehensive virtualization management tool for the PowerVM®
platform. To take advantage of the latest features of IBM Power Virtualization Center Standard, version
1.2.2 is required.
IBM Cloud Manager with OpenStack along with PowerVC provides the following capabilities:
v Support for IBM Power Systems™ hosts that are managed by Hardware Management Console.
v Support for storage area networks.
v Support for multiple Virtual I/O Server virtual machines on each host.
v Support for multiple storage connectivity groups, which enable you to deploy images so that they have
access to storage that is dedicated to a particular purpose. For more information on PowerVC and
storage connectivity groups, refer to the IBM PowerVC documentation.
Limitations for PowerVC support from IBM Cloud Manager with OpenStack:
v PowerVC Express® Edition is not supported.
v Image capture is not supported for any existing virtual machines that are added to PowerVC by using
the Manage Existing function.
v Restarting and config drive are not supported for PowerVC 1.2.0.1 or 1.2.0.2.
For information about IBM Power Virtualization Center Standard, including hardware and software
requirements and supported guest operating systems, see the IBM Power Virtualization Center
information center at the following website.
http://www.ibm.com/support/knowledgecenter/SSXK2N/welcome
Note: IBM Cloud Manager with OpenStack supports managing a PowerVM environment only through
PowerVC. If you want to manage a PowerKVM environment, you can use IBM Cloud Manager with
OpenStack to manage PowerKVM directly. For more information, see “PowerKVM prerequisites.”
VMware prerequisites
View the prerequisites for using IBM Cloud Manager with OpenStack with VMware.
IBM Cloud Manager with OpenStack is compatible with the following versions of VMware products:
12
IBM Cloud Manager with OpenStack: Administrator Guide, version 4.2
Table 9. Supported VMware products
VMware products
Versions
VMware vCenter Server 4
Standard edition (version 4.1 update 1)
Essentials (version 4.1 update 1)
VMware vCenter Server 5
Standard edition
Essentials edition
Editions that are listed support the following versions:
v 5.1.0
v 5.1 update 1
v 5.5
VMware vSphere 4
Standard edition (version 4.1 update 1)
Advanced edition (version 4.1 update 1)
Enterprise edition (version 4.1 update 1)
Essentials Plus (version 4.1 update 1)
VMware vSphere 5
Standard edition
Essentials Plus edition
Enterprise edition
Enterprise Plus edition
Editions that are listed support the following versions:
v 5.0.0
v 5.1
v 5.1 update 1
v 5.5
IBM Cloud Manager with OpenStack is compatible with existing installations of VMware vSphere
managed by VMware vCenter. Ensure that the VMware vCenter Server product is installed, operational,
and managing a VMware vSphere environment.
The configuration of the VMware products is outside the scope of this document. Refer to the product
documentation for configuration and troubleshooting instructions.
Links
v VMware vCenter Server website at http://www.vmware.com/products/vcenter-server/overview.html.
v VMware vSphere website at http://www.vmware.com/products/vsphere/overview.html.
v VMware Documentation website at http://www.vmware.com/support/pubs/
IBM Cloud Manager with OpenStack supports only Windows and Linux guest operating systems, which
are supported by vCenter and ESXi and allow guest customizations. For more information, see the
following resources:
v VMware Compatibility Guide for Guest Operating Systems
v Guest OS Customization Support Matrix
Chapter 2. Planning
13
Customization of certain Microsoft Windows operating systems requires Microsoft Sysprep Tools. See the
information for your version of vCenter for detailed instructions about obtaining the Sysprep Tools and
where to store the tools on the vCenter Servers file systems.
Configuration considerations for VMware
v Use DRS-enabled clusters for advanced placement
Allow vCenter to place the user workload on the best host machine by using a DRS-enabled cluster
within vCenter and setting the appliance target to use the cluster or a resource pool that is defined in
the cluster. This allows vCenter to manage the available host resources. Otherwise, the appliance target
is an individual host machine or a resource pool on a host machine.
v Place vCenter server and IBM Cloud Manager with OpenStack self-service portal on the same network.
For best performance, it is recommended the vCenter server and the IBM Cloud Manager with
OpenStack self-service portal are on the same network.
z/VM prerequisites
View the prerequisites for using IBM Cloud Manager with OpenStack with z/VM.
IBM Cloud Manager with OpenStack is compatible with z/VM version 6.3, which is a comprehensive
virtualization management tool for the System z platform.
IBM Cloud Manager with OpenStack with z/VM provides the following capabilities:
v Support for IBM System z hosts that are managed by Extreme Cloud Administration Toolkit.
v Support for storage area networks.
v Support for multiple virtual machines on each host.
v Support for configuring a z/VM node as a controller node or a compute node.
For more information about enabling z/VM for OpenStack and for information about deploying the
z/VM appliance to manage from the z/VM environment, see Enabling z/VM for OpenStack. To deploy
the z/VM appliance and manage from the z/VM environment, you must install the required prerequisite
PTFs. For more information about the PTFs, see the Service Information related to IBM Cloud Manager
with OpenStack for System z.
Ensure that z/VM 6.3 and Extreme Cloud Administration Toolkit (xCAT) are configured correctly and
working well.
The configuration of z/VM and xCAT is outside the scope of this document. Refer to the following
product documentation for configuration and troubleshooting information:
v z/VM 6.3 web site:
http://www.vm.ibm.com/zvm630/
v z/VM 6.3 product information in IBM Knowledge Center:
http://www.ibm.com/support/knowledgecenter/SSB27U_6.3.0/com.ibm.zvm.v630/
zvminfoc03.htm?lang=en
v z/VM Systems Management Application Programming Guide, version 6.3http://www.vm.ibm.com/
library/hcsl8c20.pdf
Supported IBM Cloud Manager with OpenStack support matrix
The following information describes the OpenStack configurations that are supported through the IBM
Cloud Manager with OpenStack.
14
IBM Cloud Manager with OpenStack: Administrator Guide, version 4.2
Table 10. IBM Cloud Manager with OpenStack support matrix
Controller node
Compute (Nova)
Scheduler
Filter-scheduler
IBM Platform Resource Scheduler
Nova -network
Not supported, use Neutron
quota_driver
nova.quota.DbQuotaDriver (default)
nova.quota.NoopQuotaDriver
Network (Neutron)
IP version
IPv4
IPv4/IPv6 dual
(not supported by the PowerVC driver)
Network type
v Flat
v GRE (one compute hypervisor must be KVM or PowerKVM)
v VXLAN (one compute hypervisor must be KVM)
v VLAN
Virtual switch
Open vSwitch 2.0
Plug-in
Ml2Plugin (default)
OVSNeutronPluginV2
IP address
assignment
for deployed
instances
DHCP - provided by Neutron DHCP agent
/ dnsmasq service. Not supported on PowerVC
Static - provided to instance by config_drive.
Metadata service not supported.
L3 agent or floating - Enabled by default in
the example environments
Storage (Cinder)
Security groups
Default neutron security groups do not allow ICMP
or SSH into deployed instance.
Driver
cinder.volume.drivers.ibm.storwize_svc.StorwizeSVCDriver
to SAN Volume Controller 6.4.1/6.4.2 for iSCSI and
Fibre Channel
cinder.volume.drivers.LVMVolumeDriver
on Red Hat Enterprise Linux version 6.4 or 6.5
for iSCSI
cinder.volume.drivers.ibm.ibmnas.IBMNAS_NFSDriver
for SONAS and IBM Storwize® V7000 Unified
cinder.volume.drivers.ibm.gpfs.GPFSDriver
powervc.volume.driver.powervc.PowerVCDriver
Authentication
(Keystone)
Identity backend
keystone.identity.backends.sql.Identity
keystone.identity.backends.ldap.Identity
Token format
UUID
PKI
Image (Glance)
Image activation
config drive+cloud init
(guest operating system: Linux or Windows)
config drive+VSAE
(guest operating system: Linux or Windows)
config drive+sysprep
(guest operating system: Windows)
ovf+VSAE
(for PowerVC)
Others
Operating System
Red Hat Enterprise Linux version 6.5
z/VM version 6.3
Database
DB2 version 10.5 SP3
Queue
Qpid 0.26 Transient in memory
rabbitmq-server 3.3.4 Transient in memory
Chapter 2. Planning
15
Table 10. IBM Cloud Manager with OpenStack support matrix (continued)
Compute node
Hypervisor
Type
KVM in Red Hat Enterprise Linux version 6.5
Hyper-V in Microsoft Hyper-V Server 2012 R2, or Microsoft Windows
Server 2012 Standard, 2012 data center, 2012 R2 Standard, 2012 R2 data
center
PowerKVM 2.1
PowerVC in Red Hat Enterprise Linux version 6.5
Driver
KVM:
Nova.virt.libvirt.LibvirtDriver
Hyper-V:
Nova.virt.hyperv.HyperVDriver
PowerVC:
powervc.nova.driver.virt.powervc.driver.PowerVCDriver
z/VM: nova.virt.zvm.ZVMDriver
Network (Neutron)
Agent
KVM:
OVSNeutronAgent
Hyper-V:
HyperVNeutronAgent
PowerKVM:
OVSNeutronAgent
PowerVC:
PowerVCNeutronAgent (Running on controller node)
Network considerations
Consider the following information before you deploy your cloud environment.
There are a number of factors to consider when you decide which network type is applicable. If you
require a web interface for managing network aspects of your environment, you must consider the
following web interface support:
Table 11. Web interface management capabilities
Web interface
Network types
Self-service portal
VLAN, Flat, GRE (management only), VXLAN (management only),
and DHCP
Dashboard (based on Horizon)
VLAN, Flat, GRE, VXLAN, and DHCP
The network type that you can define is also limited by your network configuration and the type of
hypervisor on the nodes in your environment.
Table 12. Supported network configuration
Hypervisor
type
Hyper-V
16
Number of network
interface cards per node
Two
1
Network type
VLAN2 or Flat
IBM Cloud Manager with OpenStack: Administrator Guide, version 4.2
Table 12. Supported network configuration (continued)
Hypervisor
type
Number of network
interface cards per node
Network type
KVM
One
v Local
v GRE3
v VXLAN
Two
1
v Local
v GRE3
v Flat
v VLAN2
v VXLAN
Three
v Local
v GRE3
v Flat
v VLAN2
v VXLAN
PowerKVM
One
GRE
1
Two
v GRE
v VLAN2
v Flat
1
PowerVC
Two
z/VM
Two1
v
VLAN
Note: PowerVC can be configured without a virtual machine data
network (only a single network card). DHCP is not supported.
VLAN2 or Flat
1
– Management network = Defaults to eth0. It is used for OpenStack communication between nodes.
– Virtual machine data network = Defaults to eth1 (optional). It is used for virtual machine data communication
within the cloud environment and is only required if you are using VLAN or Flat networks. Do not use a
management or external network as the virtual machine data network.
– External network L3 network = Defaults to eth0. It can be shared with the management network, which is the
default configuration.
Note: Using a shared network interface card might only be appropriate for testing purposes though.
The environment must have a gateway set in the public network interface configuration files or
/etc/sysconfig/network. A default gateway is required.
In the example environments, the GRE and VXLAN networks are configured to use the management network
eth0. The environment can be updated to allow GRE and VXLAN networks to use the virtual machine data
network as well.
2
v
DHCP can be configured with GRE, VXLAN, and flat networks. If using a VLAN network with DHCP, ensure
that the single controller is running on dedicated physical hardware, instead of a virtual machine.
v
3
If one or more of the compute hypervisors is not KVM, then GRE and VXLAN cannot be used.
Note:
v The local network type can be configured; however, the network traffic is limited to the current node.
The minimum topology uses the local network option, by default.
Chapter 2. Planning
17
Scalability and performance considerations
IBM Cloud Manager with OpenStack offers considerations with regard to scalability and performance
within the cloud environment.
Server and concurrent user maximums
IBM Cloud Manager with OpenStack allows management of a configurable number of OpenStack
compute nodes from one OpenStack controller node and self-service portal interface.
Depending on your cloud target, IBM Cloud Manager with OpenStack supports a different number of
users and server instances in the environment. The number of concurrent servers that are supported per
OpenStack compute node is highly variable based on the hardware configuration of the host and the
resource consumption of the workload being deployed.
The following data represents the maximum scale with which this framework was tested.
Table 13. Server and concurrent user maximums for IBM Cloud Manager with OpenStack
Concurrent users
Concurrent instances
Compute nodes
50
1250
11
Environment specifications where testing was completed:
v Controller +n compute topology with distributed database
v Red Hat Enterprise Linux 6.5 guest image using 2048 MB of memory and 20 GB of disk space
v Red Hat Enterprise Linux 6.5 x86 KVM hosts
The VMware cloud manager allows management of one vCenter without the use of OpenStack, from the
self-service portal interface. The following data represents the maximum scale with which this framework
was tested.
Table 14. Server and concurrent user maximums for VMware cloud manager
Concurrent users
Concurrent instances
50
3000
For more information about VMware configuration maximums, see the following information:
v VMware configuration maximums (v4) PDF at http://www.vmware.com/pdf/vsphere4/r40/vsp_40_config_max.pdf
v VMware configuration maximums (v5) PDF at http://www.vmware.com/pdf/vsphere5/r50/vsphere-50-configurationmaximums.pdf
v VMware configuration maximums (v5.5) PDF at http://www.vmware.com/pdf/vsphere5/r55/vsphere-55-configurationmaximums.pdf
Minimum requirements for large-scale PowerVC environment
When you plan to run a large-scale IBM Power Virtualization Center environment with up to 2,000
workloads, ensure that you adhere to the following guidelines.
Controller node minimum requirements in a large-scale PowerVC environment
v CPU: 16
v Memory: 150 GB
v Disk: 50 GB
Planning worksheets: Deploying a cloud
Use these worksheets to review common actions that an IBM Cloud Manager with OpenStack
administrator might perform to deploy a cloud.
18
IBM Cloud Manager with OpenStack: Administrator Guide, version 4.2
Worksheet: Getting started with a minimal topology
Use this worksheet to review common tasks required to get started with IBM Cloud Manager with
OpenStack. This is a common deployment if you want to evaluate and learn more about the product.
Table 15. Getting started
Tasks
___ 1.
Description
Chapter 2, “Planning for IBM Cloud Manager with OpenStack,” on page 7
__ 1.
Review “IBM Cloud Manager with OpenStack prerequisites” on page 7
__ 2.
Review “Scalability and performance considerations” on page 18
___ 2.
“Installing IBM Cloud Manager with OpenStack on Linux” on page 21
___ 3.
“Changing the Chef server password” on page 27
___ 4.
“Configuring operating system yum repositories on the deployment server” on
page 37
___ 5.
Chapter 5, “Deploying an IBM Cloud Manager with OpenStack cloud,” on
page 69
__ 1. Review “Topology overview” on page 69
__ 2.
Review “Minimal deployment” on page 70
__ 3. Review “Deploying prerequisites” on page 74
__ 4.
Create your cloud environment with or without customizations:
v With Customizations: “Deploying a prescribed configuration with
KVM or QEMU compute nodes” on page 79
v Without Customizations: “Deploying an evaluation cloud” on page 76
___ 6.
Review “Managing with OpenStack dashboard” on page 253, “Managing with
the IBM Cloud Manager with OpenStack self-service portal (Administrator
access)” on page 211, and Managing with IBM Cloud Manager with OpenStack
self-service portal (User access)
Worksheet: Controller +n compute or distributed database topology
Use this worksheet to review common tasks required to get started with IBM Cloud Manager with
OpenStack. This is a common deployment if you want to start using the product in production
environments and perform some customization.
Table 16. Getting started
Tasks
___ 1.
Description
Chapter 2, “Planning for IBM Cloud Manager with OpenStack,” on page 7
__ 1.
Review “IBM Cloud Manager with OpenStack prerequisites” on page 7
__ 2.
Review “Scalability and performance considerations” on page 18
___ 2.
“Installing IBM Cloud Manager with OpenStack on Linux” on page 21
___ 3.
“Changing the Chef server password” on page 27
___ 4.
“Configuring operating system yum repositories on the deployment server” on
page 37
___ 5.
“Installing a network time service” on page 161
___ 6.
Chapter 5, “Deploying an IBM Cloud Manager with OpenStack cloud,” on
page 69
__ 1. Review “Topology overview” on page 69
__ 2.
Review “Controller +n compute deployment” on page 71.
__ 3.
Review “Distributed database deployment” on page 72.
__ 4. Review “Deploying prerequisites” on page 74
__ 5.
___ 7.
Complete “Deploying a test or production cloud” on page 77 to create
your cloud environment.
Review “Managing with OpenStack dashboard” on page 253, “Managing with
the IBM Cloud Manager with OpenStack self-service portal (Administrator
access)” on page 211, and Managing with IBM Cloud Manager with OpenStack
self-service portal (User access)
Chapter 2. Planning
19
20
IBM Cloud Manager with OpenStack: Administrator Guide, version 4.2
Chapter 3. Installing and uninstalling IBM Cloud Manager with
OpenStack
Use the following topics to install and uninstall IBM Cloud Manager with OpenStack according to your
environment configuration.
Important: If you have a previous release that is installed on the deployment server, then IBM Cloud
Manager with OpenStack upgrades the deployment server to version 4.2. It is recommended that you
back up the deployment server before you upgrade to the current release. For more information, see
“Backing up and restoring the deployment server” on page 256.
Installing IBM Cloud Manager with OpenStack on Linux
Installing IBM Cloud Manager with OpenStack on the deployment server is the first step in the process
of setting up your cloud.
When you install IBM Cloud Manager with OpenStack the installation process sets up the system as a
deployment server. The installation process completes the following tasks:
v Installs and configures the chef-server
v Installs the IBM OpenStack RPM files in a yum repository on the deployment server
v Uploads the OpenStack cookbooks, roles, data bags and sample environments to the chef-server
v Installs an IBM extension to the Chef knife command that enables IBM OpenStack topology
deployments
Installing IBM Cloud Manager with OpenStack on Linux by using
console installation
You can install IBM Cloud Manager with OpenStack on Linux by using a console.
Before you begin
The hostname for the deployment server must meet the following requirements:
v The host where you install the management server must have a fully qualified domain name that
includes the domain suffix. For example, a fully qualified domain name is, mydeploymentserver.ibm.com,
not mydeploymentserver. To verify that the deployment system hostname is a fully qualified domain
name, run the following command:
$ hostname
If the hostname is a fully qualified domain name, it will return something like:
$ mydeploymentserver.ibm.com
v The hostname must be resolvable. Add the hostname for the deployment server to the DNS system. To
verify that a hostname is resolvable, run the following command:
$ hostname -f
If the hostname is resolvable it will return something like:
$ mydeploymentserver.ibm.com
© Copyright IBM Corp. 2012, 2014
21
If the hostname is not resolvable, refer to the networking documentation for the platform to get specific
guidance on how to add the hostname to the DNS system.
Important: You need root authority to run the installer.
The product installer requires a functional Upstart environment. Upstart is used to manage the service
state of the Chef server.
Note: This may not be the case in Docker containers or chroot environments that are common in
deployment phases that use Anaconda/Kickstart.
You can verify that Upstart is running with the following command:
initctl list
About this task
To install IBM Cloud Manager with OpenStack, follow these steps:
Procedure
1. Download the following installation packages:
v Linux: cmwo420_xlinux_install.bin and all cmwo420_xlinux_install_pkgnn.tar.gz files
v Linux on Power: cmwo420_plinux_install.bin and all cmwo420_plinux_install_pkgnn.tar.gz files
Copy all of the downloaded files to the same directory on the deployment system:
INSTALLER_LAUNCH_DIR.
2. Optional: You can define a response file for the silent installation. The sample installation response
file, cmwo-install-sample.rsp that is provided at the download site and on the installation media
defines various keyword attributes that can be changed for the installation process. The sample
response file includes information in the comments on the use and purpose of each keyword. It
includes examples of how to specify the response file when you start the installation.
3. Navigate to the INSTALLER_LAUNCH_DIR directory from a terminal session and run the following
commands:
Platform
Installation commands
Linux
chmod +x ./cmwo420_xlinux_install.bin
./cmwo420_xlinux_install.bin
Linux on Power
chmod +x ./cmwo420_plinux_install.bin
./cmwo420_plinux_install.bin
4. Follow the installation instructions.
5. The installation log, IBM_Cloud_Manager_with_OpenStack_Install_MM_DD_YYYY_HH_mm_ss.log, is located
in the following directory: /opt/ibm/cmwo/_installation/Logs/
Note: Low-level detail can be found in the following file: /tmp/cmwo-installer.log
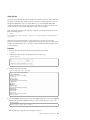
6. To verify that the Chef server installed successfully, you can run the following command to check the
Chef server status:
chef-server-ctl status
The command should return output similar to the following example:
22
IBM Cloud Manager with OpenStack: Administrator Guide, version 4.2
[root@elvis-chef3 ]# chef-server-ctl status
run: bookshelf: (pid 17198) 201s; run: log: (pid 17197) 201s
run: chef-expander: (pid 17145) 207s; run: log: (pid 17144) 207s
run: chef-server-webui: (pid 17357) 187s; run: log: (pid 17356) 187s
run: chef-solr: (pid 17112) 209s; run: log: (pid 17111) 209s
run: erchef: (pid 17535) 180s; run: log: (pid 17239) 199s
run: nginx: (pid 17518) 181s; run: log: (pid 17517) 181s
run: postgresql: (pid 17015) 220s; run: log: (pid 17014) 220s
run: rabbitmq: (pid 16685) 236s; run: log: (pid 16684) 236s
What to do next
When the installation completes, the components that are necessary for creating a cloud environment are
installed. Continue with the following steps to create your cloud.
1.
Important: Download and install the latest fix pack for the IBM Cloud Manager with OpenStack from
Fix Central. For more information, see “Getting fixes from Fix Central” on page 297.
2. Change the Chef server password.
3. Create an operating system yum repository.
4.
Select and deploy a topology for your cloud configuration.
Installing IBM Cloud Manager with OpenStack on Linux by using
graphical installation
You can install IBM Cloud Manager with OpenStack on Linux by using a graphical user interface.
Before you begin
The hostname for the deployment server must meet the following requirements:
v The host where you install the management server must have a fully qualified domain name that
includes the domain suffix. For example, a fully qualified domain name is, mydeploymentserver.ibm.com,
not mydeploymentserver. To verify that the deployment system hostname is a fully qualified domain
name, run the following command:
$ hostname
If the hostname is a fully qualified domain name, it will return something like:
$ mydeploymentserver.ibm.com
v The hostname must be resolvable. Add the hostname for the deployment server to the DNS system. To
verify that a hostname is resolvable, run the following command:
$ hostname -f
If the hostname is resolvable it will return something like:
$ mydeploymentserver.ibm.com
If the hostname is not resolvable, refer to the networking documentation for the platform to get specific
guidance on how to add the hostname to the DNS system.
Important: You need root authority to run the installer.
Chapter 3. Installing and uninstalling
23
The product installer requires a functional Upstart environment. Upstart is used to manage the service
state of the Chef server.
Note: This may not be the case in Docker containers or chroot environments that are common in
deployment phases that use Anaconda/Kickstart.
You can verify that Upstart is running with the following command:
initctl list
About this task
To install IBM Cloud Manager with OpenStack, follow these steps:
Procedure
1. Download the following installation packages:
v Linux: cmwo420_xlinux_install.bin and all cmwo420_xlinux_install_pkgnn.tar.gz files
v Linux on Power: cmwo420_plinux_install.bin and all cmwo420_plinux_install_pkgnn.tar.gz files
Copy all of the downloaded files to the same directory on the deployment system:
INSTALLER_LAUNCH_DIR.
2. Optional: You can define a response file for the silent installation. The sample installation response
file, cmwo-install-sample.rsp that is provided at the download site and on the installation media
defines various keyword attributes that can be changed for the installation process. The sample
response file includes information in the comments on the use and purpose of each keyword. It
includes examples of how to specify the response file when you start the installation.
3. Navigate to the INSTALLER_LAUNCH_DIR directory from a terminal session and run the following
commands:
Platform
Installation commands
Linux
chmod +x ./cmwo420_xlinux_install.bin
./cmwo420_xlinux_install.bin -i gui
Linux on Power
chmod +x ./cmwo420_plinux_install.bin
./cmwo420_plinux_install.bin -i gui
4. Follow the installation instructions.
5. The installation log, IBM_Cloud_Manager_with_OpenStack_Install_MM_DD_YYYY_HH_mm_ss.log, is located
in the following directory: /opt/ibm/cmwo/_installation/Logs/
Note: Low-level detail can be found in the following file: /tmp/cmwo-installer.log
6. To verify that the Chef server installed successfully, you can run the following command to check the
Chef server status:
chef-server-ctl status
The command should return output similar to the following example:
[root@elvis-chef3 ]# chef-server-ctl status
run: bookshelf: (pid 17198) 201s; run: log: (pid 17197) 201s
run: chef-expander: (pid 17145) 207s; run: log: (pid 17144) 207s
run: chef-server-webui: (pid 17357) 187s; run: log: (pid 17356) 187s
run: chef-solr: (pid 17112) 209s; run: log: (pid 17111) 209s
run: erchef: (pid 17535) 180s; run: log: (pid 17239) 199s
run: nginx: (pid 17518) 181s; run: log: (pid 17517) 181s
run: postgresql: (pid 17015) 220s; run: log: (pid 17014) 220s
run: rabbitmq: (pid 16685) 236s; run: log: (pid 16684) 236s
24
IBM Cloud Manager with OpenStack: Administrator Guide, version 4.2
What to do next
When the installation completes, the components that are necessary for creating a cloud environment are
installed. Continue with the following steps to create your cloud.
1.
Important: Download and install the latest fix pack for the IBM Cloud Manager with OpenStack from
Fix Central. For more information, see “Getting fixes from Fix Central” on page 297.
2. Change the Chef server password.
3. Create an operating system yum repository.
4. Select and deploy a topology for your cloud configuration.
Installing IBM Cloud Manager with OpenStack on Linux by using silent
installation
You can use a response file to install IBM Cloud Manager with OpenStack on Linux silently.
Before you begin
The hostname for the deployment server must meet the following requirements:
v The host where you install the management server must have a fully qualified domain name that
includes the domain suffix. For example, a fully qualified domain name is, mydeploymentserver.ibm.com,
not mydeploymentserver. To verify that the deployment system hostname is a fully qualified domain
name, run the following command:
$ hostname
If the hostname is a fully qualified domain name, it will return something like:
$ mydeploymentserver.ibm.com
v The hostname must be resolvable. Add the hostname for the deployment server to the DNS system. To
verify that a hostname is resolvable, run the following command:
$ hostname -f
If the hostname is resolvable it will return something like:
$ mydeploymentserver.ibm.com
If the hostname is not resolvable, refer to the networking documentation for the platform to get specific
guidance on how to add the hostname to the DNS system.
Important: You need root authority to run the installer.
The product installer requires a functional Upstart environment. Upstart is used to manage the service
state of the Chef server.
Note: This may not be the case in Docker containers or chroot environments that are common in
deployment phases that use Anaconda/Kickstart.
You can verify that Upstart is running with the following command:
initctl list
Chapter 3. Installing and uninstalling
25
About this task
Procedure
1. Download the following installation packages:
v Linux: cmwo420_xlinux_install.bin and all cmwo420_xlinux_install_pkgnn.tar.gz files
v Linux on Power: cmwo420_plinux_install.bin and all cmwo420_plinux_install_pkgnn.tar.gz files
Copy all of the downloaded files to the same directory on the deployment system:
INSTALLER_LAUNCH_DIR.
2. Define a response file for the silent installation.
v The only required keyword attribute for the response file is the LICENSE_ACCEPTED=true keyword
value pair. The silent installation commands show how to populate the response file and launch a
silent mode installation in a single command call.
v The sample installation response file, cmwo-install-sample.rsp that is provided at the download
site and on the installation media defines various keyword attributes that can be changed for the
installation process. The sample response file includes information in the comments on the use and
purpose of each keyword. It includes examples of how to specify the response file when you start
the installation.
3. Navigate to the INSTALLER_LAUNCH_DIR directory from a terminal session and run the following
commands:
Platform
Silent installation command
Linux
chmod +x ./cmwo420_xlinux_install.bin
echo LICENSE_ACCEPTED=true >
./installer.rsp; ./cmwo420_xlinux_install.bin -i silent -f
./installer.rsp
Linux on Power
chmod +x ./cmwo420_plinux_install.bin
echo LICENSE_ACCEPTED=true >
./installer.rsp; ./cmwo420_plinux_install.bin -i silent -f
./installer.rsp
4. The installation process takes several minutes to complete.
5. Check the status of the installation by running the following command:
echo $?
If the return code is 0, the installation was successful. If the return code is something other than 0,
refer to the installation logs to determine the problem.
6. The installation log, IBM_Cloud_Manager_with_OpenStack_Install_MM_DD_YYYY_HH_mm_ss.log, is located
in the following directory: INSTALLER_LAUNCH_DIR.
Note: Low-level detail can be found in the following file: /tmp/cmwo-installer.log
7. To verify that the Chef server installed successfully, you can run the following command to check the
Chef server status:
chef-server-ctl status
The command should return output similar to the following example:
26
IBM Cloud Manager with OpenStack: Administrator Guide, version 4.2
[root@elvis-chef3 ]# chef-server-ctl status
run: bookshelf: (pid 17198) 201s; run: log: (pid 17197) 201s
run: chef-expander: (pid 17145) 207s; run: log: (pid 17144) 207s
run: chef-server-webui: (pid 17357) 187s; run: log: (pid 17356) 187s
run: chef-solr: (pid 17112) 209s; run: log: (pid 17111) 209s
run: erchef: (pid 17535) 180s; run: log: (pid 17239) 199s
run: nginx: (pid 17518) 181s; run: log: (pid 17517) 181s
run: postgresql: (pid 17015) 220s; run: log: (pid 17014) 220s
run: rabbitmq: (pid 16685) 236s; run: log: (pid 16684) 236s
What to do next
When the installation completes, the components that are necessary for creating a cloud environment are
installed. Continue with the following steps to create your cloud.
1.
Important: Download and install the latest fix pack for the IBM Cloud Manager with OpenStack from
Fix Central. For more information, see “Getting fixes from Fix Central” on page 297.
2. Change the Chef server password.
3. Create an operating system yum repository.
4.
Select and deploy a topology for your cloud configuration.
Changing the Chef server password
After you install the IBM Cloud Manager with OpenStack deployment server, you must change the
administrator password of the Chef server web user interface.
About this task
Use the following steps to change the password.
Procedure
1. From a web browser, open https://[deployment-server-fqdn]:14443/. The login screen displays the
current, default administrator password on the right side of the page.
2. Using the default password, log in to the Chef server web user interface.
3. You are prompted to change the password. Enter the new password and confirmation password. You
can keep the other values displayed on the page the same.
4. Click Save User to apply the changes.
What to do next
To continue, you must create an operating system yum repository. Then, select and deploy a topology for
your cloud configuration.
Deploying the z/VM appliance
To use IBM Cloud Manager with OpenStack to manage your cloud environment from a z/VM system,
you can deploy the z/VM appliance.
About this task
For more information about enabling z/VM for OpenStack and for information about deploying the
z/VM appliance to manage from the z/VM environment, see Enabling z/VM for OpenStack. To deploy
the z/VM appliance and manage from the z/VM environment, you must install the required prerequisite
Chapter 3. Installing and uninstalling
27
PTFs. For more information about the PTFs, see the Service Information related to IBM Cloud Manager
with OpenStack for System z.
Installing and uninstalling the IBM Cloud Manager with OpenStack
Hyper-V Agent
IBM Cloud Manager with OpenStack can manage Microsoft Hyper-V hypervisors from OpenStack
technology. To manage these hypervisors, an IBM Cloud Manager with OpenStack Hyper-V Agent must
be installed on the Hyper-V endpoint server.
This IBM Cloud Manager with OpenStack Hyper-V Agent contains packaging of the OpenStack
technology that is required to provision to the Hyper-V server. The IBM Cloud Manager with OpenStack
Hyper-V Agent can be installed on a Microsoft Hyper-V Server 2012 R2 or Microsoft Windows Server
2012 R2 with the Hyper-V role enabled. The IBM Cloud Manager with OpenStack Hyper-V Agent must
be installed on all managed compute nodes. The IBM Cloud Manager with OpenStack Hyper-V Agent
installation is packaged as a Microsoft Windows Installer that can be run as an installation wizard, or in
silent mode. This installation installs the required OpenStack components on to the Hyper-V server and
configures them to run as Microsoft Windows services.
IBM Cloud Manager with OpenStack Hyper-V Agent Installation
Prerequisites
Use the following steps to prepare your environment for installation.
Preparing Your Hyper-V Server for Installation
On each Hyper-V server that is managed from IBM Cloud Manager with OpenStack, a Network Time
Service (NTP) must be synchronized with the Hyper-V appliance system that is running the IBM Cloud
Manager with OpenStack server. Complete the following steps to install the NTP service.
1. Access the NTP installation package, ntp-4.2.6p5-ibm-win32-setup.exe, in the root directory of the
IBM Cloud Manager with OpenStack installation media.
2. Run the ntp-4.2.6p5-ibm-win32-setup.exe file to install the NTP service.
3. After the NTP package is installed, specify the NTP server IP address or host name in
C:\ntp\etc\ntp.conf.
# your local system clock, could be used as a backup
# (this is only useful if you need to distribute time no
matter how good or bad it is)
server x.x.x.x
# but it should operate at a high stratum level to let the
4. Navigate to Control Panel > System and Security > Administative Tools > Services, and start
Network Time Protocol Daemon service.
See the following document in the OpenStack Compute Administration Guide for more details: Hyper-V
Virtualization Platform.
Note: Before you can install the IBM Cloud Manager with OpenStack Hyper-V Agent on Microsoft
Windows Server 2012 R2, ensure that the Hyper-V role is enabled on the server.
Preparing the Host
The host must be a domain joined computer to support live migration. If the host is not a domain joined
computer, you might see the following error display during installation:
28
IBM Cloud Manager with OpenStack: Administrator Guide, version 4.2
Failed to modify service settings. Live migrations can be enabled only on a domain joined
computer.
Preparing the User
Add the user who installs the Hyper-V Agent for IBM Cloud Manager with OpenStack to the Hyper-V
Administrators group.
Note: If you are creating the user profile for the first time, the Hyper-V server must be restarted before
you install the IBM Cloud Manager with OpenStack Hyper-V Agent.
If the user plans to uninstall the Hyper-V Agent in the future, ensure that the user has permission to each
of the installation directories on the system.
Installing the IBM Cloud Manager with OpenStack Hyper-V Agent
Follow these steps to install the IBM Cloud Manager with OpenStack Hyper-V Agent on Microsoft
Windows Server 2012 R2 or Microsoft Hyper-V Server 2012 R2.
Overview of the installation
The installation completes the following steps:
v Create a product installation directory
v Create a Hyper-V external virtual switch (optional)
v Configure Hyper-V Live Migration settings for this host (optional)
v Install an independent Python environment to avoid conflicts with existing applications
Note: This embedded Python environment is only intended for use by the IBM Cloud Manager with
OpenStack Hyper-V Agent. Do not attempt to access this environment from any other application. This
independent environment is designed to coexist with any preexisting Python environments that might
already be installed on the system. Do not install new Python modules into the embedded Python
environment.
v Install the required Python modules/packages required by the application
v Install and configure the OpenStack Nova Compute service
v Install and configure the OpenStack Hyper-V Neutron agent for networking
v Register two Windows services, which are set to auto-start by default:
– IBM Cloud Manager with OpenStack Network Service
– IBM Cloud Manager with OpenStack Compute Service
Important:
v The 4.2 Hyper-V agent installer supports two message queue types, RabbitMQ and Qpid. You must
select a message queue type that is consistent with the controller node.
v IBM Cloud Manager with OpenStack by default enables Platform Resource Scheduler in the controller
node. To complete the installation, update nova.conf file by appending ibm_notifications to
notification_topics like “notification_topics=notifications,ibm_notifications”, and then restart the
IBM Cloud Manager with OpenStack compute service.
v If you migrate IBM SmartCloud® Entry 3.2 to IBM Cloud Manager with OpenStack 4.1, the neutron
password is neutron by default. If you install a new Hyper-V Agent, you must change the default
password for neutron to neutron to be consistent with the controller node.
v The 3.1 Hyper-V agent installer does not prevent users from installing a previous version over the
more recent Hyper-V agent.
Chapter 3. Installing and uninstalling
29
Creating installation or uninstallation logs
Follow these steps to create installation or uninstallation logs for use during the installation or
uninstallation of IBM Cloud Manager with OpenStack Hyper-V Agent on Microsoft Windows Server 2012
R2.
About this task
Because the IBM Cloud Manager with OpenStack Hyper-V Agent installer is MSI-based, you can create
an installation or uninstallation log by starting the installer with the msiexec command with the correct
parameters. Detailed information about creating logs can be found here: How to enable Windows
Installer logging.
Graphical Installation
Follow these steps to install the IBM Cloud Manager with OpenStack Hyper-V Agent by using the
graphical installation wizard.
Procedure
1.
Download the latest fix for the IBM Cloud Manager with OpenStack Hyper-V Agent from Fix
Central. For more information, see “Getting fixes from Fix Central” on page 297.
Note: The IBM Cloud Manager with OpenStack Hyper-V Agent and the OpenStack controller node
must be at the same level, either the GA level, or the fix level.
2. Locate the installation image, and double-click IBM Cloud Manager with OpenStack Hyper-V Agent.msi
to start the installation wizard.
3. Follow the instructions that are provided by the installation wizard. Agree to the license terms,
provide an installation destination directory, and select the type of setup you want to use.
Note: The IBM Cloud Manager with OpenStack Hyper-V Agent must be installed to the local C: disk
of the server. However, the instance directory (Instances Path) that is used to store virtual machine
instance data can be on any local disk.
4. Use the Nova Compute Configuration window to configure the compute agent parameters. You can
leave the default values provided and manually configure the nova.conf file, which is in the etc\nova
folder, later. The following table shows the mappings between areas from this dialog and properties in
the nova.conf file.
Table 17. Nova Compute Configuration fields and related properties in nova.conf. Mapping of field names in the
installation wizard, related properties in the nova.conf file, and installation wizard default values
Area in dialog
Property in nova.conf
Installation wizard default values
Glance API Server
glance_host
appliance_mgmt_ip
Note: Where appliance_mgmt_ip is
the IP address of the network
interface on the appliance.
Port (after Glance API Server)
glance_port
9292
Message Queue Type
Note: There is no related property in RabbitMQ
nova.conf.
Note:
1. Supports RabbitMQ or Qpid.
2. Be consistent with the message
queue type on the controller
node.
Message Queue Server
30
qpid_hostname or rabbit_host
IBM Cloud Manager with OpenStack: Administrator Guide, version 4.2
appliance_mgmt_ip
Note: Where appliance_mgmt_ip is
the IP address of the network
interface on the appliance.
Table 17. Nova Compute Configuration fields and related properties in nova.conf (continued). Mapping of field
names in the installation wizard, related properties in the nova.conf file, and installation wizard default values
Area in dialog
Property in nova.conf
Installation wizard default values
Port (after Message Queue Server)
qpid_port or rabbit_port
5671
Message Queue User Name
qpid_username or rabbit_userid
rabbitclient
Password
qpid_password or rabbit_password
openstack1
Instances Path
instances_path
C:\Program Files (x86)\IBM\Cloud
Manager with OpenStack\Hyper-V
Agent\
Note: The property qpid_hostname or rabbit_userid is also written to the file
hyperv_neutron_agent.ini. For more detailed descriptions about properties in the nova.conf file, see
the List of configuration options topic in the OpenStack Compute Administration Manual.
5. Use the Nova Compute Advanced Configuration window to configure the advanced compute agent
parameters. Select Use Cow Images to enable the copy on write feature and speed up deployment
times. You can also manually configure the nova.conf file, which is in the etc\nova folder, later. The
following table shows the mappings between areas from this dialog and properties in the nova.conf
file.
Table 18. Nova Compute Advanced Configuration fields and related properties in nova.conf. Mapping of field names
in installation wizard and related properties in the nova.conf file
Area in dialog
Property in nova.conf
Use Cow Images
use_cow_images
Verbose Logging
verbose
Log file
logdir
6. Use the Neutron Network Configuration window to configure network agent parameters. The
installation wizard applies changes that are made to this window to properties in both the nova.conf
and neutron.conf files. You can leave the default values provided and manually configure the
nova.conf and neutron.conf files later. These properties files are in the etc\nova and etc\neutron
folders. The following table shows the mappings between areas from this dialog and properties in the
nova.conf and neutron.conf files.
Table 19. Neutron Network Configuration fields and related properties in nova.conf and neutron.conf. Mapping of
field names in the installation wizard, related properties in the nova.conf file and neutron.conf file, and installation
wizard default values
Area in dialog
Property in nova.conf and
neutron.conf
Neutron URL
neutron_url
http://appliance_mgmt_ip:9696
Note: Where appliance_mgmt_ip is
the IP address of the network
interface on the appliance.
Username
neutron_admin_username
neutron
Password
neutron_admin_password
openstack-network
Tenant Name
neutron_admin_tenant_name
service
Region name
neutron_region_name
RegionOne
Authentication Url
neutron_admin_auth_url
http://appliance_mgmt_ip:35357/v2.0
Note: Where appliance_mgmt_ip is
the IP address of the network
interface on the appliance.
Installation wizard default values
Chapter 3. Installing and uninstalling
31
Note: The file, hyperv_neutron_agent.ini, is also updated in the background by the installer. The
following properties are updated:
v rpc_backend=neutron.openstack.common.rpc.impl_qpid or
neutron.openstack.common.rpc.impl_kombu, based on the message queue type that you select.
v verbose=true
v debug=true
v control_exchange=neutron
v physical_network_vswitch_mappings = *:external
7. Use the Hyper-V Live Migration Settings window to configure the Live Migration settings for the
host.
Note: IBM Cloud Manager with OpenStack with Hyper-V supports a Shared nothing live migration.
To use live migration, the Hyper-V server must belong a common domain. You can also skip this step
and configure the Hyper-V Live Migration setting manually later. See the following document in the
OpenStack Compute Administration Guide for more details: Hyper-V Virtualization Platform
Note: When you provide a user name in the Nova compute service user field, ensure that the user
you select is a domain user.
8. Use the Virtual Switch Configuration window to configure Virtual Switch settings. For more
information about Hyper-V Switches, see the following topic:Hyper-V Virtual Switch Overview. If no
existing virtual switches are detected, create a new virtual switch. To add a new virtual switch, there
must be at least one physical network adapter that is not bound to any existing virtual switch. To
manually determine whether a physical network adapter is available, you can use the PowerShell
command get-networkadapter -physical' to see all physical network adapters. Next, you can use the
PowerShell command get-vmswitch to see all network adapters that are already in use. A new virtual
switch must be exclusively associated with a physical network adapter. No two virtual switches can
be associated with the same physical network adapter on the host. See the following document in the
OpenStack Compute Administration Guide for more details on using the PowerShell command:
Hyper-V Virtualization Platform
Note: The Shared for management property determines whether the Hyper-V Agent can use this
physical network adapter to manage network traffic.
9. After you complete the information in the installation wizard, the installation begins.
Silent installation
Because the IBM Cloud Manager with OpenStack Hyper-V Agent is installed by using the Microsoft
Installer (MSI), you can start MSI directly without using the graphical installation wizard. This process is
called silent (unattended) installation, and is useful for installing this program over a network on a
remote system from a shared drive on a LAN server. Follow these steps to silently install IBM Cloud
Manager with OpenStack Hyper-V Agent on Microsoft Windows Server 2012 R2.
Before you begin
If you choose to install silently, you must create an IBM Cloud Manager with OpenStack Hyper-V Agent
silent installation response file and use it to drive the installation. The file is addressed in the following
sections, and a sample response file is provided for reference
About this task
To install silently, you either provide installation parameters through the command line, or use an INI file
(response file) to specify all the parameters in a single file. For both cases, use the msiexec command to
start the installation. For more information about this command, see Msiexec (command-line options)
32
IBM Cloud Manager with OpenStack: Administrator Guide, version 4.2
Installing silently with the command line:
Follow these steps to silently install IBM Cloud Manager with OpenStack Hyper-V Agent by using the
command line.
Before you begin
If you choose to install silently, you must create an IBM Cloud Manager with OpenStack Hyper-V Agent
silent installation response file and use it to drive the installation. The file is addressed in the following
sections, and a sample response file is provided for reference.
Procedure
1. Download the latest fix for the IBM Cloud Manager with OpenStack Hyper-V Agent from Fix Central.
For more information, see “Getting fixes from Fix Central” on page 297.
Note: The IBM Cloud Manager with OpenStack Hyper-V Agent and the OpenStack controller node
must be at the same level, either the GA level, or the fix level.
2. To start the installation through the command line directly, open a command prompt and input the
following parameters, substituting the IP address and port with your own: msiexec /i
"Hyper-V-OpenStack installer.msi" /qn GLANCE_SERVER="127.0.0.1" GLANCE_SVR_PORT = "9292"
Tip: The /i parameter means to install, and the /qn parameter means that the installation is done
with no GUI.
Tip: You can provide as many parameters as you like in the format key=value, separated by a space
character at the end of the command.
Note: The IBM Cloud Manager with OpenStack Hyper-V Agent must be installed to the local C: disk
of the server. However, the instance directory (Instances Path) that is used to store virtual machine
instance data can be on any local disk.
Example
The following table shows the mappings between parameters in the response file and properties in the
nova.conf file.
Table 20. Response file parameters and related properties in nova.conf. This table shows the mappings between
parameters in the response file and properties in the nova.conf file.
Parameters in the response file
Property in nova.conf
GLANCE_SERVER
glance_host
GLANCE_SVR_PORT
MESSAGE_QUEUE_TYPE
glance_port
1
Note: There is no related property in nova.conf.
QPID_SERVER
qpid_hostname or rabbit_host
QPID_SVR_PORT
qpid_port or rabbit_port
QPID_UNAME
qpid_username or rabbit_userid
QPID_PWD
qpid_password or rabbit_password
INSTANCES1
instances_path
COW
use_cow_images
VERBOSE
verbose
NOVA_LOG_PATH
Logdir
Chapter 3. Installing and uninstalling
33
Table 20. Response file parameters and related properties in nova.conf (continued). This table shows the mappings
between parameters in the response file and properties in the nova.conf file.
Parameters in the response file
Property in nova.conf
1
MESSAGE_QUEUE_TYPE parameter in the response file is the message queue type, which has no related property
in nova.conf. MESSAGE_QUEUE_TYPE = "1" means you select RabbitMQ as the message queue, which is the
default value. MESSAGE_QUEUE_TYPE = "0" means you select Qpid as the message queue.
The following table shows the mappings between parameters in the response file and properties in both
the nova.conf and neutron.conf files
Table 21. Response file parameters and related properties in nova.conf and neutron.conf files. This table shows the
mappings between parameters in the response file and properties in the nova.conf and neutron.conf files.
Parameters in the response file
Property in nova.conf and neutron.conf
NEUTRON_URL
neutron_url
ADMIN_USERNAME
neutron_admin_username
ADMIN_PASSWORD
neutron_admin_password
ADMIN_TENANT_NAME
neutron_admin_tenant_name
REGION_NAME
neutron_region_name
NEUTRON_AUTH_URL
neutron_admin_auth_url
ALLOW_RESIZE_TO_SAME_HOST
allow_resize_to_same_host
NEUTRON_AUTH_STRATEGY
neutron_auth_strategy
Note: The property ;AgreeToLicense in the response file specifies your agreement to the license for the
application. Its default value is set to no. You must specify yes to run the silent installation successfully.
Installing silently with a response file:
Follow these steps to run a silent installation by using a response file.
Before you begin
If you choose to install silently, you need to create an IBM Cloud Manager with OpenStack Hyper-V
Agent silent installation response file and use it to drive the installation. The file is addressed in the
following sections, and a sample response file is provided for reference.
Procedure
1. Download the latest fix for the IBM Cloud Manager with OpenStack Hyper-V Agent from Fix
Central. For more information, see “Getting fixes from Fix Central” on page 297.
Note: The IBM Cloud Manager with OpenStack Hyper-V Agent and the OpenStack controller node
must be at the same level, either the GA level, or the fix level.
2. To run the installation through the response file, you must first enter the correct parameters in your
locally saved copy of the response file. See the sample response file that is provided for more details.
Note: The IBM Cloud Manager with OpenStack Hyper-V Agent must be installed to the local C: disk
of the server. However, the instance directory (Instances Path) that is used to store virtual machine
instance data can be on any local disk.
3. Next, open a command prompt and input the following statement:
msiexec /i "Hyper-V-OpenStack installer.msi" /qn USEINI="absolute path to responsefile"
34
IBM Cloud Manager with OpenStack: Administrator Guide, version 4.2
Example
The sample response file provides an example INI file that can be used to drive a silent installation. This
example shows all properties that are available during a graphical installation of the IBM Cloud Manager
with OpenStack Hyper-V Agent.
[Response]
#indicate whether you agree with the liscense and its default value is “no”
AgreeToLicense=yes
GLANCE_SERVER=controllerNodeHostOrIP
GLANCE_SVR_PORT=9292
#(IntOpt)The message queue type you select. It has two optional values, “0” and “1”.
#Set “1” means you select RabbitMQ as the message queue.
#Set “0” means you select QPID as the message queue.
MESSAGE_QUEUE_TYPE=1
QPID_SERVER=controllerNodeHostOrIP
QPID_SVR_PORT=5671
QPID_UNAME=rabbitclient
QPID_PWD=openstack1
NEUTRON_URL=http://127.0.0.1:9696
ADMIN_USERNAME=neutron
ADMIN_PASSWORD=openstack1
ADMIN_TENANT_NAME=service
REGION_NAME=RegionOne
NEUTRON_AUTH_URL=http://127.0.0.1:35357/v2.0
NEUTRON_URL_TIMEOUT=30
ALLOW_RESIZE_TO_SAME_HOST=True
NEUTRON_AUTH_STRATEGY=keystone
INSTANCES1=C:\Program Files (x86)\IBM\Cloud Manager with OpenStack\Hyper-V Agent\instances
COW=true
ENABLELOG=1
VERBOSE=true
NOVA_LOG_PATH=C:\Program Files (x86)\IBM\Cloud Manager with OpenStack\Hyper-V Agent\log\nova\
#The path that IBM SCE Hyper-V Agent will be installed.
INSTALLDIR=C:\Program Files (x86)\IBM\Cloud Manager with OpenStack\Hyper-V Agent\
#The string coming after a period is the UUID of the DIM used by the installer internally.
#You can actually ignore it during the installation.
#(IntOpt)Live Migration authentication type you choose. It has two optional values, “0” and “1”.
#“0” stands for “Kerberos”, and “1” stands for “CredSSP”.
LIVEMIGRAUTHTYPE.EDDDE39A_8D99_430B_BFF6_7644F125D2A1=0
NOVACOMPUTESERVICEUSER.EDDDE39A_8D99_430B_BFF6_7644F125D2A1=
#(IntOpt)The max active virtual machine migrations.
MAXACTIVEVSMIGR.EDDDE39A_8D99_430B_BFF6_7644F125D2A1=
(IntOpt)The max active storage migrations.
MAXACTIVESTORAGEMIGR.EDDDE39A_8D99_430B_BFF6_7644F125D2A1=
#(IntOpt)The networks you migrate from. It has two optional values, “0” and “1”.
#Set “1” means you can migrate from any network, and the following property MIGRNETWORKS will be disabled.
#Set “0” means you have to specify the network you migrate from by stating the following property.
MIGRNETWORKSANY_INTERNAL.EDDDE39A_8D99_430B_BFF6_7644F125D2A1=1
#(IntOpt)Specific network you migrate from.
#This property only make sense when the MIGRNETWORKSANY_INTERNAL is set to “0”.
MIGRNETWORKS.EDDDE39A_8D99_430B_BFF6_7644F125D2A1=10.10.10.1/32
#(IntOpt) It has two optional values, “0” and “1”.
#Set to “1” means you will skip the virtual switch configuration, and the following four properties
#SKIPNOVACONF, ADDVSWITCH, VSWITCHNAME, VSWITCHNETADAPTER,NEWVSWITCHNAME, VSWITCHSHARED will be disabled.
#Set “0” means you configure the virtual switch during installation.
SKIPNOVACONF.D5E17CCE_FABA_4230_9715_2DF2AA168F6C=1
#(IntOpt)Whether to add a virtual switch. It has two optional values, “0” and “1”.
#Set “1” means a newvirtual switch will be add, and the following property VSWITCHNAME will be disabled.
#Set “0” means you will use an existing virtual switch,
#and the following property VSWITCHNETADAPTER and NEWVSWITCHNAME will be disabled.
ADDVSWITCH.D5E17CCE_FABA_4230_9715_2DF2AA168F6C=0
#(StrOpt)The name of an existing virtual switch you choose.
VSWITCHNAME.D5E17CCE_FABA_4230_9715_2DF2AA168F6C=
#(StrOpt)The adapter you use to create a new virtual switch.
Chapter 3. Installing and uninstalling
35
VSWITCHNETADAPTER.D5E17CCE_FABA_4230_9715_2DF2AA168F6C=
#(StrOpt)The name you use to create a new virtual switch.
NEWVSWITCHNAME.D5E17CCE_FABA_4230_9715_2DF2AA168F6C=
#(IntOpt) It has two optional values, “0” and “1”.
#Set to “1” to allow management operating system toshare this network adapter. Set to “0” to disable it
VSWITCHSHARED.D5E17CCE_FABA_4230_9715_2DF2AA168F6C=
# End of the file
Notes:
1. The property AgreeToLicense in the response file specifies your agreement to the license for the
application. Its default value is set to no. You must specify yes to run the silent installation
successfully.
2. A response file must start with [Response], followed by any parameters in format key=value.
3. Check the node [’openstack’][’mq’][’service_type’] attribute in the controller node environment to
determine whether the QPID or RabbitMQ is used.
Uninstalling the IBM Cloud Manager with OpenStack Hyper-V Agent
The IBM Cloud Manager with OpenStack Hyper-V Agent uninstaller supports uninstallation by using the
Microsoft Windows Control Panel and command line.
About this task
Use the following steps to uninstall the IBM Cloud Manager with OpenStack Hyper-V Agent on
Microsoft Windows:
Procedure
1. Shut down the IBM Cloud Manager with OpenStack Hyper-V Agent by using the Microsoft Windows
Services panel or the appropriate command line.
2. Navigate to Start > Control Panel > Programs > Uninstall a program
3. Select IBM OpenStack Hyper-V Agent and click Uninstall.
4. Follow the instructions on the uninstallation wizard to complete the operation.
Results
After the IBM Cloud Manager with OpenStack Hyper-V Agent is uninstalled, the uninstaller will back up
the following files to the %USERPROFILE%/AppData folder:
v nova.conf
v neutron.conf
v hyperv_neutron_agent.ini
Note: The uninstaller does not delete any existing instances that you started. These instances are saved
in the instances folder.
Uninstalling the IBM Cloud Manager with OpenStack Hyper-V Agent on
Microsoft Hyper-V Server 2012 R2
The IBM Cloud Manager with OpenStack Hyper-V Agent uninstaller supports uninstallation from the
Microsoft Hyper-V Server 2012 R2 command line.
About this task
Use the following steps to uninstall The IBM Cloud Manager with OpenStack Hyper-V Agent on
Microsoft Hyper-V Server 2012 R2:
36
IBM Cloud Manager with OpenStack: Administrator Guide, version 4.2
Procedure
1. Shut down the IBM Cloud Manager with OpenStack Hyper-V Agent by using the Microsoft Windows
Services panel or the appropriate command line.
2. Open a command-line window and enter the following command: WMIC.
3. Enter the following command to display a list of installed products: product get name.
4. Enter the command product name call uninstall, where product name is the name of the IBM Cloud
Manager with OpenStack Hyper-V Agent installed product.
5. Enter Y to uninstall.
Results
After the IBM Cloud Manager with OpenStack Hyper-V Agent is uninstalled, the uninstaller will back up
the following files to the %USERPROFILE%/AppData folder:
v nova.conf
v neutron.conf
v hyperv_neutron_agent.ini
Note: The uninstaller does not delete any existing instances that you started. These instances are saved
in the instances folder.
Configuring operating system yum repositories on the deployment
server
After you install IBM Cloud Manager with OpenStack on the deployment server, you must determine
how your Linux nodes can access yum repositories that contain operating system packages that are
required when OpenStack is deployed.
About this task
You have the following options for configuring yum repositories:
v You can use your own yum repositories. If you choose this option, the yum repositories must be
configured on the nodes before deploying OpenStack. If you choose to use your own yum repositories,
the following steps are unnecessary. To determine if a node has access to a yum repository, you can run
the yum list libvirt command on the node. If the command fails, a valid yum repository does not
exist on the node.
v You can use the following instructions to allow the deployment server to serve as a yum repository.
When the deployment server is configured as a yum repository, the yum repositories are configured on
the nodes automatically when OpenStack is deployed.
Note: RDO repositories are not supported because they contain packages that conflict with IBM Cloud
Manager with OpenStack.
The operating system installation media for the node system contains all of the packages that are
required to deploy OpenStack. You can access the operating system installation media by inserting the
installation media for the node into the DVD device or by mounting the installation ISO image for the
node system.
The deployment server is configured to serve these packages from the following locations:
Packages:
<installation directory>/yum-repo/operatingsystem/<platform><platform version>/<architecture>
Package updates:
Chapter 3. Installing and uninstalling
37
<installation directory>/yum-repo/operatingsystem/<platform><platform version>/<architecture>/updates
Where the variables have the following definitions:
installation directory
The location where IBM Cloud Manager with OpenStack is installed, typically /opt/ibm/cmwo.
platform
The platform of the node system. For example, redhat or ibm_powerkvm.
platform version
The version of the operating system on the node system. For example, 6.5 or 2.1.
architecture
The architecture for the node system. For example, x86_64 or ppc64.
An x86 64-bit Red Hat Enterprise Linux 6.5 node system requires the packages to be in the following
directories:
/opt/ibm/cmwo/yum-repo/operatingsystem/redhat6.5/x86_64
/opt/ibm/cmwo/yum-repo/operatingsystem/redhat6.5/x86_64/updates
An IBM PowerKVM 2.1 node system requires the packages and updates to be in the following
directories:
/opt/ibm/cmwo/yum-repo/operatingsystem/ibm_powerkvm2.1/ppc64
/opt/ibm/cmwo/yum-repo/operatingsystem/ibm_powerkvm2.1/ppc64/updates
To configure the deployment server, complete the following steps:
Note: The following steps use the Red Hat Enterprise Linux 6.5 version and x86 64-bit architecture.
However, similar steps apply for other supported options.
Procedure
1. Create the directories for packages and package updates on the deployment server as appropriate for
your environment.
2. Copy the Packages and repodata directory from the installation media to the packages directory on
the deployment server.
$ cd /opt/ibm/cmwo/yum-repo/operatingsystem/redhat6.5/x86_64
$ cp -r /mnt/iso/Packages .
$ cp -r /mnt/iso/repodata .
Note: Alternatively, you can create a symbolic link to the installation media. If you create the
symbolic link, you do not create the architecture directory. Instead, make a symbolic link to the
installation media.
$ cd /opt/ibm/cmwo/yum-repo/operatingsystem/redhat6.5/x86_64
$ ln -s /mnt/iso/Packages
$ ln -s /mnt/iso/repodata
If you use the symbolic link, you need to ensure that the mount point persists the deployment server
is restarted.
3. Optional: If you have package updates, you can create an updates repository as follows.
a. On the deployment server, install the createrepo package. This package is used to create a yum
repository and is available as part of the base operating system packages.
$ yum install createrepo
Note: Details about yum repositories and creating repositories is beyond the scope of this
document. If you need more information, see your operating system documentation.
38
IBM Cloud Manager with OpenStack: Administrator Guide, version 4.2
b. Acquire the updated package for your environment and place it in the updates directory.
/opt/ibm/cmwo/yum-repo/operatingsystem/redhat6.5/x86_64/updates
c. Run the createrepo command to create the updates repository:
$ cd updates
$ createrepo .
Results
When the deployment server is set up as a yum repository for the operating system packages and
updates, these yum repositories are automatically configured on the node systems during the deployment
process. You do not need to manually add these yum repositories on the node systems.
Related reference:
“Operating system repository not found” on page 307
You might see an error in the log file that the yum repository is not available.
Applying fixes and updates
You can apply fixes and updates for the IBM Cloud Manager with OpenStack product.
Related tasks:
“Updating a deployed topology” on page 149
After you deploy a topology, you might need to apply fixes, either to the IBM Cloud Manager with
OpenStack services themselves or to how the IBM Cloud Manager with OpenStack services are deployed.
“Getting fixes from Fix Central” on page 297
You can use Fix Central to find the fixes that are recommended by IBM Support for a variety of products,
including IBM Cloud Manager with OpenStack. With Fix Central, you can search, select, order, and
download fixes for your system with a choice of delivery options. A IBM Cloud Manager with OpenStack
product fix might be available to resolve your problem.
Applying fixes and updates for IBM Cloud Manager with OpenStack
Updates for IBM Cloud Manager with OpenStack provide fixes to the product.
About this task
There are two steps to apply updates.
1. Update IBM Cloud Manager with OpenStack on the deployment server.
2. Update the topology on the client nodes.
Use the following steps to install a IBM Cloud Manager with OpenStack fix pack. The fix pack updates
Chef cookbooks and other resources that are stored on the deployment server. It does not apply updates
to the client nodes in your topology.
After you install the fix pack, you can deploy the fix pack to your topology.
To install a IBM Cloud Manager with OpenStack fix pack, complete the following steps:
Procedure
1. Copy the IBM Cloud Manager with OpenStack fix pack files to a temporary directory, for example
/tmp/cmwo_fixpack, on the deployment server.
2. Extract the fix pack files.
# cd /tmp/cmwo_fixpack
# tar -zxf cmwo_fixpack_4.2.0.1.tar.gz
3. Run the fix pack installation script.
Chapter 3. Installing and uninstalling
39
# ./install_cmwo_fixpack.sh
4. The script output indicates whether the installation succeeded or failed and stores a copy of the fix
pack log files in the <product_dir>/version directory, where <product_dir> is the directory where
IBM Cloud Manager with OpenStack was installed. The default path is /opt/ibm/cmwo.
What to do next
The <product_dir>/version directory keeps an overall history of fix pack installs and records the fix pack
level in the product.version file.
After you install the IBM Cloud Manager with OpenStack fix pack on the deployment server, you can
deploy the fixes to your topology using the knife os manage update tool. The tool uses the chef server
and client to update the client nodes, and can be used to update single nodes or all nodes in your
topology. Update the OpenStack controller and database nodes first, then update the compute nodes.
For more information about updating the topology on the client nodes, see “Updating a deployed
topology” on page 149.
Related tasks:
“Getting fixes from Fix Central” on page 297
You can use Fix Central to find the fixes that are recommended by IBM Support for a variety of products,
including IBM Cloud Manager with OpenStack. With Fix Central, you can search, select, order, and
download fixes for your system with a choice of delivery options. A IBM Cloud Manager with OpenStack
product fix might be available to resolve your problem.
Applying fixes and updates for DB2
Updates for DB2 provide fixes to the DB2 database server.
About this task
These instructions assume you installed DB2 10.5, fix pack 2 and would like to install 10.5, fix pack 3.
To install a DB2 fix pack, complete the following steps:
Procedure
1. Extract the DB2 fix pack.
$ tar –zxvf v10.5fp3_linuxx64_server.tar.gz
2. Shut down DB2.
a. View the number of instances, using the following command:$ db2ilist.
b. Run the following commands on each DB2 instance.
$ su – db2inst1
$ db2 force applications all
DB20000I The FORCE APPLICATION command completed successfully.
DB21024I This command is asynchronous and may not be effective immediately.
$ db2 terminate
DB20000I The TERMINATE command completed successfully.
$ db2stop
SQL1064N DB2STOP processing was successful.
3. Stop the DB2 administrator server (DAS).
Note: This step is not applicable if you do not have a DAS user.
40
IBM Cloud Manager with OpenStack: Administrator Guide, version 4.2
$ su – dasusr1
$ db2admin stop
SQL4407W The DB2 Administration Server was stopped successfully.
4. Remove the DB2 IPC resources for the engine and clients on each instance.
$ su – db2inst1
$ ipclean
Application ipclean: Removing DB2 engine and client IPC resources for db2inst1.
5. Upgrade to DB2 10.5, fix pack 3.
$ ./installFixPack -b /opt/ibm/db2/V10.5/
Do you want to choose a different installation directory for the fix pack? [yes/no]
-----------------------------------------------------------------------------------no
6.
Verify the new version of DB2.
$ db2level
DB21085I This instance or install (instance name, where applicable:
"db2inst1") uses "64" bits and DB2 code release "SQL10053" with level
identifier "0604010E".
Informational tokens are "DB2 v10.5.0.3", "s140203", "IP23551", and Fix Pack
"3".
Product is installed at "/opt/ibm/db2/V10.5".
Related tasks:
“Getting fixes from Fix Central” on page 297
You can use Fix Central to find the fixes that are recommended by IBM Support for a variety of products,
including IBM Cloud Manager with OpenStack. With Fix Central, you can search, select, order, and
download fixes for your system with a choice of delivery options. A IBM Cloud Manager with OpenStack
product fix might be available to resolve your problem.
Best practices for maintaining a multi-region cloud or test cloud
You can use a single IBM Cloud Manager with OpenStack deployment server to deploy multiple clouds
or a multi-region cloud. Alternatively, you can choose to manage each cloud or region from its own IBM
Cloud Manager with OpenStack deployment server.
Whether you decide to maintain a single deployment server or multiple deployment servers determines
how you manage updates or upgrades.
Requirements and constraints
v A given IBM Cloud Manager with OpenStack deployment server propagates a single release and fix
level to its managed nodes. Any changes that you make to a managed server through IBM Cloud
Manager with OpenStack will update that managed server to the current fix level of the deployment
server.
v All servers within a single region must be managed by a single IBM Cloud Manager with OpenStack
installation.
v Regions within a cloud are required to be at the same release, but not necessarily the same fix level.
However, fixes that you make to a shared resource, such as Keystone, self-service portal, or dashboard,
require an update to the region that owns that resource.
Considerations
v Consider having a test cloud that is managed from its own IBM Cloud Manager with OpenStack
deployment server. Install fix packs or new releases of IBM Cloud Manager with OpenStack on the
deployment server that is managing the test cloud. After you have tested the fixes on the test cloud,
you can then install the fix pack or new release on the deployment server or servers that are managing
the production cloud.
Chapter 3. Installing and uninstalling
41
v Keep the region that owns shared resources, such as Keystone, self-service portal, and dashboard, at
the latest fix level within your cloud.
Uninstalling IBM Cloud Manager with OpenStack
You can uninstall IBM Cloud Manager with OpenStack from the deployment server. You can also
uninstall the optionally installed IBM Cloud Manager with OpenStack self-service portal.
Uninstalling IBM Cloud Manager with OpenStack from deployment
server
The IBM Cloud Manager with OpenStack uninstaller for the deployment server, similar to the installer,
supports three installation types: console, silent, and graphical installers.
About this task
The default display type is console.
Complete the following steps to uninstall IBM Cloud Manager with OpenStack from the deployment
server:
Procedure
1. Run the uninstaller with root authority by running the following command:
cmwo_uninstall
2. To uninstall IBM Cloud Manager with OpenStack using a non-default installation type, start the
uninstaller from the command line and enter -i <uninstall type> where <uninstall type> is silent,
or gui.
Results
IBM Cloud Manager with OpenStack is uninstalled from the deployment server. After the uninstall is
complete, you must restart the system.
The uninstallation log, IBM_Cloud_Manager_with_OpenStack_Uninstall_MM_DD_YYYY_HH_mm_ss.log, is in the
user's home directory.
Note: The /tmp/cmwo-uninstaller.log file contains low-level detail.
Restriction: Support does not exist to uninstall a deployed topology for IBM Cloud Manager with
OpenStack. The node system where a topology is deployed must be re-installed or reset back to its
pre-deployment state to remove the deployed topology.
Uninstalling the self-service portal on Linux
You can disable and uninstall the IBM Cloud Manager with OpenStack self-service portal from your
deployed topology.
About this task
1. Update the following attribute in the override_attributes section of your environment file. In a
multi-region cloud environment, this must be done for each region’s environment.
ibm-sce.service.enabled: false
2. Replace the ibm-sce-node role with the ibm-sce::uninstallsce recipe in your topology file,
your-topology-name.json.
42
IBM Cloud Manager with OpenStack: Administrator Guide, version 4.2
Replace role[ibm-sce-node] with recipe[ibm-sce::uninstallsce] in the run_list for the node running the
self-service portal. For example, in a Minimal topology file, you would replace the ibm-sce-node role,
as shown.
"runlist":[
"role[ibm-os-allinone-kvm]",
"recipe[ibm-sce::uninstallsce]"
]
3. Follow the instructions in the “Updating a deployed topology” on page 149 topic to complete
disabling and uninstalling the self-service portal.
Note: For topology deployments with OpenStack, the preceding steps disable and uninstall the
self-service portal only. They do not roll back the OpenStack policy files (that the self-service portal
replaced) nor do they remove the sceagent user that is registered in OpenStack.
To roll back the OpenStack policy files, complete the following steps:
1. Log in to the controller node and go to the "/etc/keystone/" folder.
2. Run the following commands:
$ mv policy.json.openstack policy.json
$ chmod 644 policy.json
$ chown root:keystone policy.json
3. Go to each of the folders below, one by one, and run the command in step 2 again from each folder,
replacing keystone with the appropriate component.
v /etc/glance/
v /etc/nova/
v /etc/neutron/
v /etc/cinder/
4. Run the following commands on the controller node to restart the OpenStack block storage and image
API services:
$ service openstack-cinder-api restart
$ service openstack-glance-api restart
Chapter 3. Installing and uninstalling
43
44
IBM Cloud Manager with OpenStack: Administrator Guide, version 4.2
Chapter 4. Upgrading IBM Cloud Manager with OpenStack
This section describes the in-place upgrade process to move to the latest release.
Upgrading the topology
You can complete an in-place upgrade from IBM Cloud Manager with OpenStack, version 4.1 to IBM
Cloud Manager with OpenStack, version 4.2.
About this task
Upgrade support is provided for all the IBM Cloud Manager with OpenStack topologies: Minimal,
controller + n compute, distributed database, and distributed using Cinder driver configuration.
Before you begin, ensure that the following assumptions are true:
v The cloud environment (including PRS, PowerVC driver, z/VM driver, self-service portal, and so on) is
deployed by the IBM Cloud Manager with OpenStack 4.1 deployment server, using Chef cookbooks,
with the knife os manage deploy topology xxx command.
v The Chef server that is installed by the IBM Cloud Manager with OpenStack deployer in the
deployment server must only be used to install IBM OpenStack, but cannot be used to run other
cookbooks for any other purposes. You must not change the environment or runlist assigned to any
nodes.
v If you deployed the controller node together with the deployment server node in IBM Cloud Manager
with OpenStack version 4.1, you must add the --use-qpid option when you run the upgrade
command. It is unsupported to switch the message queue from qpid to rabbitmq in this configuration.
v If you deployed the controller node together with the deployment server node in IBM Cloud Manager
with OpenStack version 4.1, you must check the file permission for /var/log/cinder/cinder.log on the
controller node and cinder node. The file permission must be cinder:cinder. If the file permission is
root:root, you need to run chown cinder:cinder /var/log/cinder/cinder.log to change the file
permission.
v If you used IBM Platform Resource Scheduler in IBM Cloud Manager with OpenStack 4.1, disable
nova-ibm-ego-ha-service on the controller node by running the following command:
nova service-disable $controller-node nova-ibm-ego-ha-service
where $controller-node is the hostname where the nova-ibm-ego-ha-service runs. You can find the
hostname by running the command, nova service-list.
v The default values for most of the OpenStack processing workers numbers are bound to CPU cores.
Such behavior works well when the system has matching memory size when compared to its CPU
cores. There might be memory problems on Power Systems when many CPU cores are recognized by
the operating system, and you have a relatively small amount of memory.
Therefore, ensure the OpenStack services on the controller node are stopped before you run the
in-place upgrade command. For multi nodes, you must run the script on each node to stop the
services. For more information about stopping these services, see Restarting IBM Cloud Manager with
OpenStack services.
Create
cmwo_services.sh script and run sudo ./cmwo_services.sh ’CHANGEME_STOP_ORDER’
stop .
set CHANGEME_STOP_ORDER to the following services list:
openstack-nova-powervc
openstack-glance-powervc
openstack-cinder-powervc
openstack-neutron-powervc
openstack-ceilometer-alarm-evaluator
© Copyright IBM Corp. 2012, 2014
45
openstack-ceilometer-agent-notification
openstack-ceilometer-collector
openstack-ceilometer-central
openstack-ceilometer-api
openstack-heat-engine
openstack-heat-api-cloudwatch
openstack-heat-api-cfn
openstack-heat-api
openstack-cinder-scheduler
openstack-cinder-api
openstack-cinder-volume
openstack-nova-consoleauth
openstack-nova-novncproxy
openstack-nova-cert
openstack-nova-scheduler
openstack-nova-api
openstack-nova-conductor
neutron-dhcp-agent
neutron-openvswitch-agent
openstack-glance-registry
openstack-glance-api
openstack-keystone
Complete the following steps to upgrade in-place:
Procedure
1. Upgrade the deployment server from version 4.1 to version 4.2. To upgrade the deployment server,
you must install IBM Cloud Manager with OpenStack, version 4.2 on a deployment server that
already has version 4.1 installed. As a result, the installer upgrades the deployment server to the
current release of the product. It is recommended that you back up the deployment server before
you upgrade to the current release. For more information, see “Backing up and restoring the
deployment server” on page 256.
2. Change the performance attributes in your environment file in order to customize settings for items
such as the message queue and workers. After you complete the configuration changes, upload the
environment JSON file.
$ # Edit the environment JSON file, your-environment-name.json.
$ knife environment from file your-environment-name.json
For more information, see “Customizing performance attributes” on page 127.
3. The topology files that you used to deploy the nodes in IBM Cloud Manager with OpenStack 4.1 are
required to complete the upgrade. Find them and confirm that the environment and topology in
these files were not modified. If you lost the topology files, you must create a new topology file that
depicts your OpenStack topology. For instructions to create a topology file, see “Deploying the cloud
environment” on page 74.
4. If you are using the self-service portal with a DB2 database, you must upload the granted user
password of your old database to the data bag, which is used to connect to the database in the
self-service portal, version 4.1.
a. Run mkdir data_bags.
b. Update the following JSON attributes in your environment file, your-environment-name.json.
v openstack.developer_mode: Set to False. Only use this setting for the Minimal (all-in-one)
environment. The default existed in the other environment.
v openstack.secret.key_path: Set to /etc/chef/encrypted_data_bag_secret. Only use this setting for
the Minimal (all-in-one) environment. The default existed in the other environment.
c. Run cp -r /opt/ibm/cmwo/chef-repo/data_bags/inplace_upgrade_passwords data_bags/.
d. Run chmod -R 600 data_bags/.
e. Change the value at passwOrd to the password in the data_bags/inplace_upgrade_passwords/
self_service_db2.json file.
46
IBM Cloud Manager with OpenStack: Administrator Guide, version 4.2
{
"id": "self_service_db2",
"self_service_db2": "passw0rd"
}
f. Upload the data bag items for the passwords, the secret file is included in your topology file.
$ knife data bag from file inplace_upgrade_passwords data_bags/inplace_upgrade_passwords/
self_service_db2.json --secret-file secret-file-name
g. Remove the local data bag items since they are no longer needed.
$ rm -rf data_bags/
5. If you are using VMware as the hypervisor and you have virtual machine disk (VMDK) as the block
storage backend, you must upload the vCenter host password to the data bag before you upgrade
the topology.
a.
b.
c.
d.
Run mkdir data_bags.
Run cp -r /opt/ibm/cmwo/chef-repo/data_bags/secrets/openstack_vmware_secret_name.json.
Run chmod -R 600 data_bags/.
Change the value at CHANGEME to the password in the data_bags/secrets/
openstack_vmware_secret_name.json file.
{
"id": "openstack_vmware_secret_name",
"openstack_vmware_secret_name": "CHANGEME "
}
e. Upload the data bag items for the passwords, the secret file is included in your topology file.
$ knife data bag from file self_service_paswords data_bags/secrets/
openstack_vmware_secret_name.json --secret-file secret-file-name
f. Remove the local data bag items since they are no longer needed.
$ rm -rf data_bags/
6.
If you are using the Cinder z/VM driver, you must remove the role[ibm-os-zvm-block-storagenode] that is specified in the controller node runlist (inside the topology file).
7.
If you are using the z/VM compute node, you must upload thez/VM xcat mnadmin password to
your data bag.
a. Run mkdir data_bags.
b. Run cp /opt/ibm/cmwo/chef-repo/data_bags/user_passwords/xcatmnadmin.json data_bags/.
c. Run chmod -R 600 data_bags/.
d. Change the value at OPENSTACK1 to the password of the user mnadmin in the xcat server, within
the data_bags/xcatmnadmin.json file.
{
"id": "xcatmnadmin",
"xcatmnadmin": "openstack1"
}
e. Upload the data bag item, your_env_user_passwords, which is the data bag name you created for
user_passwords, in the secret file that is included in your topology file.
Note: The following command must be entered on a single line, even though the example shows
a line break for formatting purposes.
$ knife data bag from file your_env_user_passwords data_bags/xcatmnadmin.json --secret-file
secret-file-name
f. Remove the local data bag items since they are no longer needed.
$ rm -rf data_bags/
8. Determine whether to use the qpid or rabbitmq option during the upgrade. The in-place upgrade
from IBM Cloud Manager with OpenStack version 4.1 to 4.2 changes the message queue from qpid
to rabbitmq, by default. If you do not want to change the message queue, you must use the in-place
upgrade command with the --use-qpid option.
Chapter 4. Upgrading
47
Notes:
v If you are not familiar with qpid and rabbitmq, do not use this option.
v If your controller node exists on the deployment server in version 4.1, then you must use the
--use-qpid option to complete the upgrade. See the assumptions section at the beginning of this
topic.
If you use --use-qpid, the updated topology uses qpid as the message queue. Otherwise, the
message queue is replaced by rabbitmq automatically. Complete the following steps, depending on
the message queue you want to use.
rabbitmq message queue (default)
To use the rabbitmq message queue, you must upload the client password for rabbitmq to
your data bag before running the in-place upgrade command.
a. Run mkdir data_bags.
b. Run cp /opt/ibm/cmwo/chef-repo/data_bags/user_passwords/rabbitclient.json
data_bags/.
c. Run chmod -R 600 data_bags/.
d. Change the value at OPENSTACK1 to the password of the user rabbitclient to
communicate to rabbitmq, within the data_bags/rabbitclient.json file.
{
"id": "rabbitclient",
"rabbitclient": "openstack1"
}
e. Upload the data bag item, your_env_user_passwords, which is the data bag name you
created for user_passwords, in the secret file that is included in your topology file.
Note: The following command must be entered on a single line, even though the
example shows a line break for formatting purposes.
$ knife data bag from file your_env_user_passwords data_bags/rabbitclient.json
--secret-file secret-file-name
f. Remove the local data bag items since they are no longer needed.
$ rm -rf data_bags/
qpid message queue
To continue to use the qpid message queue, use the --use-qpid option. For example, knife
os manage in place upgrade topology topology_file.json --use-qpid.
9. If you are using the IBM Storwize Cinder driver, you must upload the SAN controller password to
your data bag before you upgrade the topology.
a. If the user name of the SAN controller is admin, you must contact the SAN storage administrator
to create a new user with a different name, and set the attribute openstack.blockstorage.san.san_login in your environment file to the new user name. There is a limitation that
you cannot use admin for the authentication between Cinder service and SAN storage.
$ knife environment edit your-environment-name
where your-environment-name is the environment in your topology.
b. Run mkdir data_bags.
c. Run cp /opt/ibm/cmwo/chef-repo/data_bags/user_passwords/admin.json data_bags/
<san_login_username>.json.
where san_login_username is the user name of the SAN controller. For example, if your SAN user
name is update_sanuser, then you run the command cp /opt/ibm/cmwo/chef-repo/data_bags/
user_passwords/admin.json data_bags/update_sanuser.json.
d. Run chmod -R 600 data_bags/.
48
IBM Cloud Manager with OpenStack: Administrator Guide, version 4.2
e. Change the value at openstack1 to the password of the SAN controller and change the value at
admin to the user name of the SAN controller within the data_bags/<san_login_username>.json
file. If you don't want to authenticate with the password, you can set the password to an empty
value "".
Note: The user name you specified here must be the same as openstack.blockstorage.san.san_login in your environment.
{
"id": "admin",
"admin": "openstack1"
}
For example, if your SAN user name is update_sanuser, then you change "admin" to
update_sanuser, as follows:
{
"id": "update_sanuser",
"update_sanuser": "openstack1"
}
f. Upload the data bag item, your_env_user_passwords, which is the data bag name you created for
user_passwords, the secret-file-name that is included in your topology file.
$ knife data bag from file your_env_user_passwords data_bags/admin.json --secret-file secret-file-name
g. Remove the local data bag items since they are no longer needed.
$ rm -rf data_bags/
10. You must upload the heat_stack_admin password to your data bag for the OpenStack heat service.
a. Run mkdir data_bags.
b. Run cp /opt/ibm/cmwo/chef-repo/data_bags/user_passwords/heat_stack_admin.json
data_bags/.
c. Run chmod -R 600 data_bags/.
d. Change the value at OPENSTACK1 to the keystone password of the user heat_stack_admin, within the
data_bags/heat_stack_admin.json file.
{
"id": "heat_stack_admin",
"heat_stack_admin": "openstack1"
}
e. Upload the data bag item, your_env_user_passwords, which is the data bag name you created for
user_passwords, the secret file that is included in your topology file.
Note: The following command must be entered on a single line, even though the example shows
a line break for formatting purposes.
$ knife data bag from file your_env_user_passwords
--secret-file secret-file-name
data_bags/heat_stack_admin.json
f. Remove the local data bag items since they are no longer needed.
$ rm -rf data_bags/
11. Ensure the configuration for global_admin in the /etc/keystone/policy.json file on each node of
your topology is as shown:
"global_admin": "rule:admin_role or is_admin:1",
If it is not, update and restart the Keystone service with the service openstack-keystone restart
command. For more information, see “Upgrading a topology fails” on page 316.
12. Upgrade the topology deployment in-place.
$ knife os manage in place upgrade topology your-topology-name.json
Note: In IBM Cloud Manager with OpenStack version 4.1, if you configured your cloud topology to
use the Open vSwitch plugin for networking
(neutron.plugins.openvswitch.ovs_neutron_plugin.OVSNeutronPluginV2), the upgrade process
Chapter 4. Upgrading
49
migrates the OVS plugin to the ML2 plugin automatically for IBM Cloud Manager with OpenStack
version 4.2. The Open vSwitch core plugin is not supported in the Juno release of OpenStack that is
used in IBM Cloud Manager with OpenStack version 4.2. If the migration from OVS to ML2 is
unexpectedly unsuccessful, the upgrade process restores the neutron database and aborts the
upgrade process. For this failure, customer support is required. The migration from OVS to ML2 is
only supported when using this command to upgrade the topology. The migration from OVS to ML2
is not supported when upgrading a single node.
All of the nodes that are defined in the topology are upgraded. This command provides two options
to control the upgrade process:
--no-validation
This option indicates that when the nodes list or node runlist, that is identified in the
topology file, conflicts with the list stored in the deployment Chef server, the upgrade
should continue. Without this option, you are prompted whether to continue. By default,
you are prompted to confirm.
Note: To avoid breaking the cloud unintentionally, you should retain the default setting that
requires your confirmation.
Example:
$ knife os manage in place upgrade topology topology_file.json --no-validation
--use-qpid
With this option, the updated topology uses qpid as the message queue. Otherwise, the
message queue is replaced by rabbitmq.
--topology-type TYPE
TYPE is the topology type of the deployed nodes. Its value must be 1-4:
Table 22. Topology type. The table displays the option values and associated topology types.
Option
Type
Description
1
All-In-One topology
This topology runs all IBM Cloud Manager with OpenStack services from
one system.
2
1 + N topology
This topology provides a single controller node, plus any number (n) of
compute nodes.
3
1 + N distributed DB topology
This topology is similar to the controller + n compute topology; however, it
allows the IBM Cloud Manager with OpenStack database service to run on
a separate compute node. It also supports advanced customization.
4
1 + N distributed cinder
topology
This topology provides a cloud environment with extra block storage
(Cinder) nodes.
You can use the command without specifying this option. In that case, the command tries to
identify the topology by analyzing the topology file and checking the roles that are given to
the nodes automatically. If the process fails, then the command exits and requests that you
explicitly set the topology type.
Example:
$ knife os manage in place upgrade topology topology_file.json --topology-type 1
It means that the topology of nodes is the Minimal topology.
Here is an example of the running result:
$ knife os manage in place upgrade topology 39.json
The following nodes: ["dhcp-10-1-3-43.sce.cn.ibm.com"]
have the same env with the topology are not in topology updated list.
Do you want to continue to update all of the nodes
in the topology? (y/n)[y] y
Back up file ’/root/Updated-backup/env_39-env1407922391.json’ saved.
Back up file ’/root/Updated-backup/
50
IBM Cloud Manager with OpenStack: Administrator Guide, version 4.2
node_dhcp-10-1-3-39.sce.cn.ibm.com1407922391.json’ succeeded.
39-env: Chef environment has been updated.
dhcp-10-1-3-39.sce.cn.ibm.com: Node has been updated.
Update env attribute ibm-openstack.upgrade.inplace to true.
Update env attribute ibm-openstack.upgrade.inplace to false.
Upgrade complete!
Updated attributes are:
----------------------------------Environment[’39-env’] updated attributes:
Update attribute[’openstack.compute.rpc_backend’], value =
’nova.openstack.common.rpc.impl_kombu’
Delete attribute[’inplace.update’]
Create attribute[’openstact.test’], value = ’test’
Node[dhcp-10-1-3-39.sce.cn.ibm.com] updated attributes:
Updated totally 3 attributes.
-----------------------------------
What to do next
After the upgrade is finished, review the following information.
1. The environment and nodes information from the old topology is backed up. All back-up files are in
the Update-backup folder in the same folder as the topology file you specified.
2. Rerunning this command is allowed. If the environment and nodes information is already backed up,
and there are no more changes, the back-up action is not completed. The command tries to update the
nodes only.
3. For the self-service portal, the old home directory is backed up. The default location is
/var/opt/ibm/.SCE41_no_delete/, which cannot be removed as a backup of the old data.
4. If you disabled the IBM Platform Resource Scheduler service before the upgrade, enable
nova-ibm-ego-ha-service on the controller node by running the following command:
nova service-enable $controller-node nova-ibm-ego-ha-service
where $controller-node is the hostname where the nova-ibm-ego-ha-service runs.
Upgrading a multi-region topology
You can upgrade your multi-region cloud environment from IBM Cloud Manager with OpenStack,
version 4.1 to IBM Cloud Manager with OpenStack, version 4.2.
About this task
Before you begin, ensure that the following assumptions are true:
v The multi-region cloud environment (including PRS, PowerVC driver, z/VM driver, self-service portal,
and so on) is deployed by the IBM Cloud Manager with OpenStack 4.1 deployment server, using Chef
cookbooks, with the knife os manage deploy topology xxx command.
v The Chef server that is installed by the IBM Cloud Manager with OpenStack deployer in the
deployment server must only be used to install IBM OpenStack, but cannot be used to run other
cookbooks for any other purposes. You must not change the environment or runlist assigned to any
nodes.
v If you deployed the controller node together with the deployment server node in IBM Cloud Manager
with OpenStack version 4.1, you must add the --use-qpid option when you run the upgrade
command. It is unsupported to switch the message queue from qpid to rabbitmq in this configuration.
v If you deployed the controller node together with the deployment server node in IBM Cloud Manager
with OpenStack version 4.1, you must check the file permission for /var/log/cinder/cinder.log on the
Chapter 4. Upgrading
51
controller node and cinder node. The file permission must be cinder:cinder. If the file permission is
root:root, you need to run chown cinder:cinder /var/log/cinder/cinder.log to change the file
permission.
v The default values for most of the OpenStack processing workers numbers are bound to CPU cores.
Such behavior works well when the system has matching memory size when compared to its CPU
cores. There might be memory problems on Power Systems when many CPU cores are recognized by
the operating system, and you have a relatively small amount of memory.
Therefore, ensure the OpenStack services on the controller node are stopped before you run the
in-place upgrade command. For multi nodes, you must run the script on each node to stop the
services. For more information about stopping these services, see Restarting IBM Cloud Manager with
OpenStack services.
Create
cmwo_services.sh script and run sudo ./cmwo_services.sh ’CHANGEME_STOP_ORDER’
stop .
set CHANGEME_STOP_ORDER to the following services list:
openstack-nova-powervc
openstack-glance-powervc
openstack-cinder-powervc
openstack-neutron-powervc
openstack-ceilometer-alarm-evaluator
openstack-ceilometer-agent-notification
openstack-ceilometer-collector
openstack-ceilometer-central
openstack-ceilometer-api
openstack-heat-engine
openstack-heat-api-cloudwatch
openstack-heat-api-cfn
openstack-heat-api
openstack-cinder-scheduler
openstack-cinder-api
openstack-cinder-volume
openstack-nova-consoleauth
openstack-nova-novncproxy
openstack-nova-cert
openstack-nova-scheduler
openstack-nova-api
openstack-nova-conductor
neutron-dhcp-agent
neutron-openvswitch-agent
openstack-glance-registry
openstack-glance-api
openstack-keystone
This example uses two regions for the multi-region cloud environment; however, upgrading also works if
you have more than two regions. This example also uses a single deployment server to manage all of the
regions. However, upgrading works if you have a separate deployment server for each region.
Complete the following steps to upgrade the deployed multi-region topology in-place:
Procedure
1. Upgrade the deployment server from version 4.1 to version 4.2. To upgrade the deployment server,
you must install IBM Cloud Manager with OpenStack, version 4.2 on a deployment server that
already has version 4.1 installed. As a result, the installer upgrades the deployment server to the
current release of the product. It is recommended that you back up the deployment server before
you upgrade to the current release. For more information, see “Backing up and restoring the
deployment server” on page 256.
2. Change the performance attributes in your environment file in order to customize settings for items
such as the message queue and workers. After you complete the configuration changes, upload the
environment JSON file.
$ # Edit the environment JSON file, your-environment-name.json.
$ knife environment from file your-environment-name.json
52
IBM Cloud Manager with OpenStack: Administrator Guide, version 4.2
For more information, see “Customizing performance attributes” on page 127.
3. The topology files that you used to deploy the regions in IBM Cloud Manager with OpenStack 4.1
are required to complete the upgrade. Each region should have a separate topology file. Find the
files and confirm that the environment and topology in these files were not modified. If you lost the
topology files, you must create new topology files that depict your multi-region topology. For
information on creating topology files for each region, see “Deploying multi-region support” on page
104.
4. Complete the subsequent steps for each region. You must complete the in-place upgrade procedure
for each region separately.
5. If you are using the self-service portal with a DB2 database, you must upload the granted user
password of your old database to the data bag, which is used to connect to the database in the
self-service portal, version 4.1.
a. Run mkdir data_bags.
b. Update the following JSON attributes in your environment file, your-environment-name.json.
v openstack.developer_mode: Set to False. Only use this setting for the Minimal (all-in-one)
environment. The default existed in the other environment.
v openstack.secret.key_path: Set to /etc/chef/encrypted_data_bag_secret. Only use this setting for
the Minimal (all-in-one) environment. The default existed in the other environment.
c. Run cp -r /opt/ibm/cmwo/chef-repo/data_bags/inplace_upgrade_passwords data_bags/.
d. Run chmod -R 600 data_bags/.
e. Change the value at passwOrd to the password in the data_bags/inplace_upgrade_passwords/
self_service_db2.json file.
{
"id": "self_service_db2",
"self_service_db2": "passw0rd"
}
f. Upload the data bag items for the passwords, the secret file is included in your topology file.
$ knife data bag from file inplace_upgrade_passwords data_bags/inplace_upgrade_passwords/
self_service_db2.json --secret-file secret-file-name
g. Remove the local data bag items since they are no longer needed.
$ rm -rf data_bags/
6. If you are using VMware as the hypervisor and you have virtual machine disk (VMDK) as the block
storage backend, you must upload the vCenter host password to the data bag before you upgrade
the topology.
a. Run mkdir data_bags.
b. Run cp -r /opt/ibm/cmwo/chef-repo/data_bags/secrets/openstack_vmware_secret_name.json.
c. Run chmod -R 600 data_bags/.
d. Change the value at CHANGEME to the password in the data_bags/secrets/
openstack_vmware_secret_name.json file.
{
"id": "openstack_vmware_secret_name",
"openstack_vmware_secret_name": "CHANGEME "
}
e. Upload the data bag items for the passwords, the secret file is included in your topology file.
$ knife data bag from file self_service_paswords data_bags/secrets/
openstack_vmware_secret_name.json --secret-file secret-file-name
f. Remove the local data bag items since they are no longer needed.
$ rm -rf data_bags/
7.
If you are using the Cinder z/VM driver, you must remove the role[ibm-os-zvm-block-storagenode] that is specified in the controller node runlist (inside the topology file).
Chapter 4. Upgrading
53
8.
If you are using the z/VM compute node, you must upload thez/VM xcat mnadmin password to
your data bag.
a. Run mkdir data_bags.
b. Run cp /opt/ibm/cmwo/chef-repo/data_bags/user_passwords/xcatmnadmin.json data_bags/.
c. Run chmod -R 600 data_bags/.
d. Change the value at OPENSTACK1 to the password of the user mnadmin in the xcat server, within
the data_bags/xcatmnadmin.json file.
{
"id": "xcatmnadmin",
"xcatmnadmin": "openstack1"
}
e. Upload the data bag item, your_env_user_passwords, which is the data bag name you created for
user_passwords, in the secret file that is included in your topology file.
Note: The following command must be entered on a single line, even though the example shows
a line break for formatting purposes.
$ knife data bag from file your_env_user_passwords data_bags/xcatmnadmin.json --secret-file
secret-file-name
f. Remove the local data bag items since they are no longer needed.
$ rm -rf data_bags/
9. Determine whether to use the qpid or rabbitmq option during the upgrade. The in-place upgrade
from IBM Cloud Manager with OpenStack version 4.1 to 4.2 changes the message queue from qpid
to rabbitmq, by default. If you do not want to change the message queue, you must use the in-place
upgrade command with the --use-qpid option.
Notes:
v If you are not familiar with qpid and rabbitmq, do not use this option.
v If your controller node exists on the deployment server in version 4.1, then you must use the
--use-qpid option to complete the upgrade. See the assumptions section at the beginning of this
topic.
If you use --use-qpid, the updated topology uses qpid as the message queue. Otherwise, the
message queue is replaced by rabbitmq automatically. Complete the following steps, depending on
the message queue you want to use.
rabbitmq message queue (default)
To use the rabbitmq message queue, you must upload the client password for rabbitmq to
your data bag before running the in-place upgrade command.
a. Run mkdir data_bags.
b. Run cp /opt/ibm/cmwo/chef-repo/data_bags/user_passwords/rabbitclient.json
data_bags/.
c. Run chmod -R 600 data_bags/.
d. Change the value at OPENSTACK1 to the password of the user rabbitclient to
communicate to rabbitmq, within the data_bags/rabbitclient.json file.
{
"id": "rabbitclient",
"rabbitclient": "openstack1"
}
e. Upload the data bag item, your_env_user_passwords, which is the data bag name you
created for user_passwords, in the secret file that is included in your topology file.
Note: The following command must be entered on a single line, even though the
example shows a line break for formatting purposes.
54
IBM Cloud Manager with OpenStack: Administrator Guide, version 4.2
$ knife data bag from file your_env_user_passwords data_bags/rabbitclient.json
--secret-file secret-file-name
f. Remove the local data bag items since they are no longer needed.
$ rm -rf data_bags/
qpid message queue
To continue to use the qpid message queue, use the --use-qpid option. For example, knife
os manage in place upgrade topology topology_file.json --use-qpid.
10.
If you are using the IBM Storwize Cinder driver, you must upload the SAN controller password to
your data bag before you upgrade the topology.
a. If the user name of the SAN controller is admin, you must contact the SAN storage administrator
to create a new user with a different name, and set the attribute openstack.blockstorage.san.san_login in your environment file to the new user name. There is a limitation that
you cannot use admin for the authentication between Cinder service and SAN storage.
$ knife environment edit your-environment-name
where your-environment-name is the environment in your topology.
b. Run mkdir data_bags.
c. Run cp /opt/ibm/cmwo/chef-repo/data_bags/user_passwords/admin.json data_bags/
<san_login_username>.json.
where san_login_username is the user name of the SAN controller. For example, if your SAN user
name is update_sanuser, then you run the command cp /opt/ibm/cmwo/chef-repo/data_bags/
user_passwords/admin.json data_bags/update_sanuser.json.
d. Run chmod -R 600 data_bags/.
e. Change the value at openstack1 to the password of the SAN controller and change the value at
admin to the user name of the SAN controller within the data_bags/<san_login_username>.json
file. If you don't want to authenticate with the password, you can set the password to an empty
value "".
Note: The user name you specified here must be the same as openstack.blockstorage.san.san_login in your environment.
{
"id": "admin",
"admin": "openstack1"
}
For example, if your SAN user name is update_sanuser, then you change "admin" to
update_sanuser, as follows:
{
"id": "update_sanuser",
"update_sanuser": "openstack1"
}
f. Upload the data bag item, your_env_user_passwords, which is the data bag name you created for
user_passwords, the secret-file-name that is included in your topology file.
$ knife data bag from file your_env_user_passwords data_bags/admin.json --secret-file secret-file-name
g. Remove the local data bag items since they are no longer needed.
$ rm -rf data_bags/
11. You must upload the heat_stack_admin password to your data bag for the OpenStack heat service.
a. Run mkdir data_bags.
b. Run cp /opt/ibm/cmwo/chef-repo/data_bags/user_passwords/heat_stack_admin.json
data_bags/.
c. Run chmod -R 600 data_bags/.
d. Change the value at OPENSTACK1 to the keystone password of the user heat_stack_admin, within the
data_bags/heat_stack_admin.json file.
Chapter 4. Upgrading
55
{
"id": "heat_stack_admin",
"heat_stack_admin": "openstack1"
}
e. Upload the data bag item, your_env_user_passwords, which is the data bag name you created for
user_passwords, the secret file that is included in your topology file.
Note: The following command must be entered on a single line, even though the example shows
a line break for formatting purposes.
$ knife data bag from file your_env_user_passwords
--secret-file secret-file-name
data_bags/heat_stack_admin.json
f. Remove the local data bag items since they are no longer needed.
$ rm -rf data_bags/
12. Ensure the configuration for global_admin in the /etc/keystone/policy.json file on each node of
your topology is as shown:
"global_admin": "rule:admin_role or is_admin:1",
If it is not, update and restart the Keystone service with the service openstack-keystone restart
command. For more information, see “Upgrading a topology fails” on page 316.
13. Update your environment. Set openstack.auth.strategy to uuid.
14. Upgrade the topology in place.
$ knife os manage in place upgrade topology your-topology-name.json
All of the nodes that are defined in the topology are upgraded. This command provides two options
to control the upgrade process:
--no-validation
This option indicates that when the nodes list or node runlist, that is identified in the
topology file, conflicts with the list stored in the deployment Chef server, the upgrade
should continue. Without this option, you are prompted whether to continue. By default,
you are prompted to confirm.
Note: To avoid breaking the cloud unintentionally, you should retain the default setting that
requires your confirmation.
Example:
$ knife os manage in place upgrade topology topology_file.json --no-validation
--use-qpid
With this option, the updated topology uses qpid as the message queue. Otherwise, the
message queue is replaced by rabbitmq.
--topology-type TYPE
TYPE is the topology type of the deployed nodes. Its value must be 1-4:
Table 23. Topology type. The table displays the option values and associated topology types.
Option
Type
Description
1
All-In-One topology
This topology runs all IBM Cloud Manager with OpenStack services from
one system.
2
1 + N topology
This topology provides a single controller node, plus any number (n) of
compute nodes.
3
1 + N distributed DB topology
This topology is similar to the controller + n compute topology; however, it
allows the IBM Cloud Manager with OpenStack database service to run on
a separate compute node. It also supports advanced customization.
4
1 + N distributed cinder
topology
This topology provides a cloud environment with extra block storage
(Cinder) nodes.
56
IBM Cloud Manager with OpenStack: Administrator Guide, version 4.2
You can use the command without specifying this option. In that case, the command tries to
identify the topology by analyzing the topology file and checking the roles that are given to
the nodes automatically. If the process fails, then the command exits and requests that you
explicitly set the topology type.
Example:
$ knife os manage in place upgrade topology topology_file.json --topology-type 2
It means that the topology of the nodes is the 1 + N topology topology.
15. If you have any regions that were upgraded without using the --use-qpid option, and you are using
the self-service portal to manage IBM Cloud Manager with OpenStack, there is an extra requirement.
After you complete the preceding steps for each region, you must change the message queue from
qpid to rabbitmq on the self-service portal. For instructions on how to change the message queue
option in the self-service portal, see “Changing the message queue option” on page 236.
Note: You do not need to do anything with the region whose controller node was installed on the
same server as the self-service portal. The region is in OK state on the self-service portal because the
message queue for this region is automatically changed to rabbitmq during the in-place upgrade
command process.
What to do next
After the upgrade is finished, review the following information.
1. The environment and nodes information from the old topology is backed up. All back-up files are in
the Update-backup folder in the same folder as the topology file you specified.
2. Rerunning this command is allowed. If the environment and nodes information is already backed up,
and there are no more changes, the back-up action is not completed. The command tries to update the
nodes only.
3. For the self-service portal, the old home directory is backed up. The default location is
/var/opt/ibm/.SCE41_no_delete/, which cannot be removed as a backup of the old data.
4. If you disabled the IBM Platform Resource Scheduler service before the upgrade, enable
nova-ibm-ego-ha-service on the controller node by running the following command:
nova service-enable $controller-node nova-ibm-ego-ha-service
where $controller-node is the hostname where the nova-ibm-ego-ha-service runs.
Upgrading the stand-alone self-service portal
You can migrate your IBM Cloud Manager with OpenStack self-service portal configuration and data
from IBM Cloud Manager with OpenStack, version 4.1 to IBM Cloud Manager with OpenStack, version
4.2.
About this task
Use these instructions only for upgrading a stand-alone self-service portal topology. If you deploy the
stand-alone self-service portal with any other IBM Cloud Manager with OpenStack topology, such as
minimal, controller + n compute, distributed database, or distributed by using Cinder driver
configuration, see “Upgrading the topology” on page 45.
Upgrading the stand-alone self-service portal topology when using
Derby
If you are using the self-service portal with a Derby database, use these instructions to migrate your data
and configuration.
Chapter 4. Upgrading
57
About this task
Before you begin, ensure that the following assumptions are true:
v The self-service portal environment is deployed by IBM Cloud Manager with OpenStack 4.1
deployment server, using chef cookbooks, with the knife os manage deploy topology
TOPOLOGY_FILE_NAME command.
v The Chef server that is installed by the IBM Cloud Manager with OpenStack deployer in the
deployment server must only be used to install IBM OpenStack, but cannot be used to run other
cookbooks for any other purposes. You must not change the environment or runlist assigned to any
nodes.
Complete the following steps to upgrade the self-service portal node in-place. You might have deployed
the self-service portal node by using the knife topology or node command.
Procedure
1. Upgrade the deployment server from version 4.1 to version 4.2. To upgrade the deployment server,
you must install IBM Cloud Manager with OpenStack, version 4.2 on a deployment server that
already has version 4.1 installed. As a result, the installer upgrades the deployment server to the
current release of the product. It is recommended that you back up the deployment server before you
upgrade to the current release. For more information, see “Backing up and restoring the deployment
server” on page 256.
2. Upgrade the topology deployment in-place.
$ knife os manage in place upgrade topology your-topology-name.json
The node is upgraded. this command provides two options to control the upgrade process:
--no-validation
This option indicates that when the nodes list or node runlist that is in the topology file
conflicts with the list stored in the deployment Chef server, the upgrade should continue.
Without this option, you are prompted whether to continue. By default, you are prompted to
confirm.
Note: To avoid breaking the cloud unintentionally, retain the default setting that requires your
confirmation.
Example:
$ knife os manage in place upgrade topology topology_file.json --no-validation
--topology-type TYPE
TYPE is the topology type of the deployed nodes. Its value must be 1-5:
Table 24. Topology type. The table displays the option values and associated topology types.
Option
Type
Description
1
All-In-One topology
This topology runs all IBM Cloud Manager with OpenStack services from
one system.
2
1 + N topology
This topology provides a single controller node, plus any number (n) of
compute nodes.
3
1 + N distributed DB topology
This topology is similar to the controller + n compute topology; however, it
allows the IBM Cloud Manager with OpenStack database service to run on
a separate compute node. It also supports advanced customization.
4
1 + N distributed cinder
topology
This topology provides a cloud environment with extra block storage
(Cinder) nodes.
5
Stand-alone self-service portal
topology
This topology provides a self-service portal node used ONLY to manage
VMware clouds.
58
IBM Cloud Manager with OpenStack: Administrator Guide, version 4.2
You can use the command without specifying this option. In that case, the command tries to
identify the topology by analyzing the topology file and checking the roles that are given to
the nodes automatically. If the process fails, then the command exits and requests that you
explicitly set the topology type.
Example:
$ knife os manage in place upgrade topology topology_file.json --topology-type 5
It means that the topology of nodes is the Stand-alone self-service portal topology.
What to do next
After the upgrade is finished, review the following information.
1. The environment and nodes information from the old topology is backed up. All back-up files are in
the Update-backup folder in the same folder as the topology file you specified.
2. Rerunning this command is allowed. If the environment and nodes information is already backed up,
and there are no more changes, the back-up action is not completed. The command tries to update the
nodes only.
3. For the self-service portal, the old home directory is backed up. The default location is
/var/opt/ibm/.SCE41_no_delete/, which cannot be removed as a backup of the old data.
Upgrading the stand-alone self-service portal topology when using
DB2
If you are using the self-service portal with a DB2 database, use these instructions to manually migrate
your data and configuration.
Before you begin
When you migrate data in the self-service portal, you must migrate sequentially. You cannot skip a
version. For example, if you want to migrate IBM SmartCloud Entry version 3.2 to IBM Cloud Manager
with OpenStack version 4.2, you must migrate from version 3.2 to version 4.1 first.
About this task
Before you migrate to the latest version, ensure that all available fix packs are applied. Then, migrate
from IBM Cloud Manager with OpenStack self-service portal version 4.1 (with fix packs) to version 4.2.
Complete the following steps to migrate your IBM Cloud Manager with OpenStack self-service portal
configuration and data to a new version.
Procedure
1. Stop IBM Cloud Manager with OpenStack self-service portal 4.1 by running the following command:
service sce stop
2. Back up the /var/opt/ibm/.SCE41 folder on the self-service portal node as the migration source folder:
# cp -rfp /var/opt/ibm/.SCE41/ /var/opt/ibm/.SCE41_no_delete/
Important: Ensure that the backup process successfully completed before you continue with the next
step to uninstall IBM Cloud Manager with OpenStack self-service portal 4.1. If the backup is not
finished before you uninstall, then configuration and data for self-service portal 4.1 is lost.
3. Uninstall the IBM Cloud Manager with OpenStack self-service portal 4.1 by running the following
command:
# knife os manage deploy node node.fqdn.com recipe[ibm-sce::uninstall] -P node-ssh-password -E node-environment
where
Chapter 4. Upgrading
59
v node.fqdn.com is the fully qualified domain name for the self-service portal node
v node-ssh-password is the ssh password for the self-service portal node
v node-environment is the chef environment for the self-service portal node
Example:
knife os manage deploy node hostname.my.company.com recipe[ibm-sce::uninstall] -P passw0rd -E your-environment-name
4. Install self-service portal 4.2. For more information, see “Stand-alone self-service portal for managing
VMware clouds” on page 108.
5. To migrate all of your preferences from one set of configuration files to the new set, run the following
OSGi command:
migrateConfig source_directory
where source_directory is the location of the previous IBM Cloud Manager with OpenStack self-service
portal release configuration files. Ensure that the owner of the source directory is the same as the
owner of the self-service portal service when you migrate the configuration.
Running this command migrates the following configuration files:
v cfs.keystone
v ldap.xml
v deployment.properties
v authentication.properties (admin.name is not updated by the command.)
v email.properties
v messaging.properties
v metering.properties
v billing.properties
v web.properties
v
v
v
v
v
*.jks
products/*.xml
server_rules.json
openstack.properties
Server.properties
6. To migrate data from your previous database, complete the following steps:
a. Ensure that the target database exists.
b. In your browser, log out and close all open self-service portal windows.
c. Run the following OSGi command:
upgradeDatabase ’DB_Path’ ’DB2_User_Name’ ’DB2_password’
where DB_Path is the path of the database, DB2_User_Name is the name of the DB2 administrator,
and DB2_password is the password for the DB2 administrator.
Note: DB2_User_Name and DB2_password are only needed when migrating data from a DB2
database.
For example, to migrate your data from a DB2 database, run the following command:
upgradeDatabase '//localhost:50001/ssp41''db2admin' 'db2passwd'
For example, to migrate your data from a Derby database, run the following command:
upgradeDatabase '/var/opt/ibm/.SCE41_no_delete/'
Considerations:
v The upgradeDatabase command supports only major versions of databases.
v The source database must be Derby or DB2.
60
IBM Cloud Manager with OpenStack: Administrator Guide, version 4.2
v Only approved requests can be migrated, while others such as pending requests, rejected
requests, and withdrawn requests cannot be migrated. If the approved-requests related instances
are deleted, they cannot be migrated either.
v Before you migrate the IBM Cloud Manager with OpenStack self-service portal 4.1 data, wait 5
minutes after you start IBM Cloud Manager with OpenStack self-service portal 4.2, to ensure
that the database is fully initialized.
v If any errors occur during migration, renew the target database and run the upgradeDatabase
command again.
7. Restart the self-service portal by running the following command:
service sce restart
8. You must migrate some configuration information manually. This information includes your network
configuration and the logging.properties file.
Note: When you migrate configuration information for a Microsoft Windows 2008 installation, you
must manually configure the cloud connection.
Upgrading a single node
You can complete an in-place upgrade for a single node from IBM Cloud Manager with OpenStack,
version 4.1 to IBM Cloud Manager with OpenStack, version 4.2.
About this task
Upgrade support is provided for all the IBM Cloud Manager with OpenStack topologies: Minimal,
controller + n compute, distributed database, and distributed using Cinder driver configuration.
Before you begin, ensure that the following assumptions are true:
v The cloud environment (including PRS, PowerVC driver, z/VM driver, self-service portal, and so on) is
deployed by the IBM Cloud Manager with OpenStack 4.1 deployment server, using Chef cookbooks,
with the knife os manage deploy topology xxx command.
v The Chef server that is installed by the IBM Cloud Manager with OpenStack deployer in the
deployment server must only be used to install IBM OpenStack, but cannot be used to run other
cookbooks for any other purposes. You must not change the environment or runlist assigned to any
nodes.
v If you deployed the controller node together with the deployment server node in IBM Cloud Manager
with OpenStack version 4.1, you must add the --use-qpid option when you run the upgrade
command. It is unsupported to switch the message queue from qpid to rabbitmq in this configuration.
v If you deployed the controller node together with the deployment server node in IBM Cloud Manager
with OpenStack version 4.1, you must check the file permission for /var/log/cinder/cinder.log on the
controller node and cinder node. The file permission must be cinder:cinder. If the file permission is
root:root, you need to run chown cinder:cinder /var/log/cinder/cinder.log to change the file
permission.
v If you deployed the self-service portal and are using a distributed DB2 connection in IBM Cloud
Manager with OpenStack version 4.1, you must complete the instructions in the “Upgrading the
topology” on page 45 topic instead of proceeding with the following steps.
Complete the following steps to upgrade the single node in-place. You might have deployed the single
node using the knife topology or node command.
Procedure
1. Upgrade the deployment server from version 4.1 to version 4.2. To upgrade the deployment server,
you must install IBM Cloud Manager with OpenStack, version 4.2 on a deployment server that
already has version 4.1 installed. As a result, the installer upgrades the deployment server to the
Chapter 4. Upgrading
61
current release of the product. It is recommended that you back up the deployment server before you
upgrade to the current release. For more information, see “Backing up and restoring the deployment
server” on page 256.
2. If you are using the self-service portal with a DB2 database, you must upload the granted user
password of your old database to the data bag, which is used to connect to the database in the
self-service portal, version 4.1.
a. Run mkdir data_bags.
b. Update the following JSON attributes in your environment file, your-environment-name.json.
v openstack.developer_mode: Set to False. Only use this setting for the Minimal (all-in-one)
environment. The default existed in the other environment.
v openstack.secret.key_path: Set to /etc/chef/encrypted_data_bag_secret. Only use this setting for the
Minimal (all-in-one) environment. The default existed in the other environment.
c. Run cp -r /opt/ibm/cmwo/chef-repo/data_bags/inplace_upgrade_passwords data_bags/.
d. Run chmod -R 600 data_bags/.
e. Change the value at passwOrd to the password in the data_bags/inplace_upgrade_passwords/
self_service_db2.json file.
{
"id": "self_service_db2",
"self_service_db2": "passw0rd"
}
f. Upload the data bag items for the passwords, the secret file is included in your topology file.
$ knife data bag from file inplace_upgrade_passwords data_bags/inplace_upgrade_passwords/
self_service_db2.json --secret-file secret-file-name
g. Remove the local data bag items since they are no longer needed.
$ rm -rf data_bags/
3. If you are using VMware as the hypervisor and you have virtual machine disk (VMDK) as the block
storage backend, you must upload the vCenter host password to the data bag before you upgrade the
topology.
a. Run mkdir data_bags.
b. Run cp -r /opt/ibm/cmwo/chef-repo/data_bags/secrets/openstack_vmware_secret_name.json.
c. Run chmod -R 600 data_bags/.
d. Change the value at CHANGEME to the password in the data_bags/secrets/
openstack_vmware_secret_name.json file.
{
"id": "openstack_vmware_secret_name",
"openstack_vmware_secret_name": "CHANGEME "
}
e. Upload the data bag items for the passwords, the secret file is included in your topology file.
$ knife data bag from file self_service_paswords data_bags/secrets/
openstack_vmware_secret_name.json --secret-file secret-file-name
f. Remove the local data bag items since they are no longer needed.
$ rm -rf data_bags/
4.
62
If you are using the z/VM compute node, you must upload thez/VM xcat mnadmin password to
your data bag.
a. Run mkdir data_bags.
b. Run cp /opt/ibm/cmwo/chef-repo/data_bags/user_passwords/xcatmnadmin.json data_bags/.
c. Run chmod -R 600 data_bags/.
d. Change the value at OPENSTACK1 to the password of the user mnadmin in the xcat server, within
the data_bags/xcatmnadmin.json file.
IBM Cloud Manager with OpenStack: Administrator Guide, version 4.2
{
"id": "xcatmnadmin",
"xcatmnadmin": "openstack1"
}
e. Upload the data bag item, your_env_user_passwords, which is the data bag name you created for
user_passwords, in the secret file that is included in your topology file.
Note: The following command must be entered on a single line, even though the example shows
a line break for formatting purposes.
$ knife data bag from file your_env_user_passwords data_bags/xcatmnadmin.json --secret-file
secret-file-name
f. Remove the local data bag items since they are no longer needed.
$ rm -rf data_bags/
5. Determine whether to use the qpid or rabbitmq option during the upgrade. The in-place upgrade
from IBM Cloud Manager with OpenStack version 4.1 to 4.2 changes the message queue from qpid to
rabbitmq, by default. If you do not want to change the message queue, you must use the in-place
upgrade command with the --use-qpid option.
Note: If you are not familiar with qpid and rabbitmq, do not use this option.
If you use --use-qpid, the updated topology uses qpid as the message queue. Otherwise, the message
queue is replaced by rabbitmq automatically. Complete the following steps, depending on the message
queue you want to use.
rabbitmq message queue (default)
To use the rabbitmq message queue, you must upload the client password for rabbitmq to
your data bag before running the in-place upgrade command.
a. Run mkdir data_bags.
b. Run cp /opt/ibm/cmwo/chef-repo/data_bags/user_passwords/rabbitclient.json
data_bags/.
c. Run chmod -R 600 data_bags/.
d. Change the value at OPENSTACK1 to the password of the user rabbitclient to communicate
to rabbitmq, within the data_bags/rabbitclient.json file.
{
"id": "rabbitclient",
"rabbitclient": "openstack1"
}
e. Upload the data bag item, your_env_user_passwords, which is the data bag name you
created for user_passwords, in the secret file that is included in your topology file.
Note: The following command must be entered on a single line, even though the example
shows a line break for formatting purposes.
$ knife data bag from file your_env_user_passwords data_bags/rabbitclient.json
--secret-file secret-file-name
f. Remove the local data bag items since they are no longer needed.
$ rm -rf data_bags/
qpid message queue
To continue to use the qpid message queue, use the --use-qpid option. For example, knife os
manage in place upgrade node your-node-fqdn --use-qpid.
6. Upgrade the node deployment in-place.
$ knife os manage in place upgrade node your-node-fqdn -x ssh-user -P ssh-password
The node is upgraded. This command provides options to control the upgrade process:
Chapter 4. Upgrading
63
--use-qpid
With this option, the updated topology uses qpid as the message queue. Otherwise, the
message queue is replaced by rabbitmq.
--topology-type TYPE
TYPE is the topology type of the deployed nodes. Its value must be 1-4:
a.
b.
c.
d.
All-In-One topology
1 + N topology
1 + N distributed DB topology
1 + N distributed cinder topology
You can use the command without specifying this option. In that case, the command tries to
identify the topology by analyzing the topology file and checking the roles that are given to
the nodes automatically. If the process fails, then the command exits and requests that you
explicitly set the topology type.
Example:
$ knife os manage in place upgrade node your-node-fqdn -x ssh-user -P ssh-password --topology-type 1
It means that the topology of nodes is the Minimal topology.
What to do next
After the upgrade is finished, review the following information.
1. The environment and nodes information from the old topology is backed up. All back-up files are in
the Update-backup folder in the same folder as the topology file you specified.
2. Rerunning this command is allowed. If the environment and nodes information is already backed up,
and there are no more changes, the back-up action is not completed. The command tries to update the
nodes only.
3. For the self-service portal, the old home directory is backed up. The default location is
/var/opt/ibm/.SCE41_no_delete/, which cannot be removed as a backup of the old data.
4. If you disabled the IBM Platform Resource Scheduler service before the upgrade, enable
nova-ibm-ego-ha-service on the controller node by running the following command:
nova service-enable $controller-node nova-ibm-ego-ha-service
where $controller-node is the hostname where the nova-ibm-ego-ha-service runs.
Important: Repeat step 6 onward for each node that you must upgrade in place.
Upgrading the PowerVC controller and nodes
You can complete an in-place upgrade for IBM Cloud Manager with OpenStack, PowerVC controller and
nodes from version 4.1 to version 4.2.
Before you begin
Before you begin, review the following information.
v Your PowerVC nodes must remain at level 1.2.1 or lower before you upgrade the IBM Cloud Manager
with OpenStack PowerVC controller node.
v You cannot upgrade PowerVC using the IBM Cloud Manager with OpenStack in place upgrade. To
upgrade PowerVC from version 1.2.1 to 1.2.2, see the PowerVC product information in IBM
Knowledge Center.
64
IBM Cloud Manager with OpenStack: Administrator Guide, version 4.2
About this task
To upgrade the PowerVC controller node and PowerVC node, complete the following steps.
Procedure
1. Upgrade the IBM Cloud Manager with OpenStack PowerVC controller node from version 4.1 to 4.2.
For instructions, see “Upgrading the topology” on page 45.
2. Upgrade PowerVC from version 1.2.1 to version 1.2.2. For instructions, see the PowerVC product
information.
3. Update the IBM Cloud Manager with OpenStack PowerVC controller node version 4.2 configuration
for PowerVC version 1.2.2.
a. Export the version 4.2 environment after the IBM Cloud Manager with OpenStack upgrade to
version 4.2 is complete.
knife environment show your-environment-name -d -Fjson > your-environment-name.json
b. Update the Chef environment file and data bags. Prepare PowerVC 1.2.2 rabbit client ssl
key/certificates, as described in steps 4-7 and step 9 in the “Deploying an advanced configuration
to manage to PowerVC” on page 101 topic.
c. Update your PowerVC controller node configuration for PowerVC version 1.2.2. For instructions,
see “Updating a deployed topology” on page 149.
Upgrading the IBM Cloud Manager with OpenStack Hyper-V Agent
You can upgrade the IBM Cloud Manager with OpenStack Hyper-V Agent by using the graphical
installation wizard or silently.
Note: You must upgrade the Hyper-V Agent one version at a time. For example, if you have Hyper-V
Agent version 3.1, FP2 installed, you must upgrade to version 3.2 and then upgrade to version 3.2, FP1.
However, if you want to upgrade the Hyper-V agent to IBM Cloud Manager with OpenStack version 4.1,
you must upgrade directly from IBM SmartCloud Entry version 3.2, FP2 to IBM Cloud Manager with
OpenStack version 4.1, FP1. If you upgrade the Hyper-V agent from IBM SmartCloud Entry version 3.2,
FP2 to IBM Cloud Manager with OpenStack version 4.1 without installing FP1 for version 4.1, you are
likely to encounter a problem.
Attention: During a graphical installation of the Hyper-V agent, if you provide a user name in the Nova
compute service user field on the "Hyper-V Live Migration Settings" window, the IBM Cloud Manager
with OpenStack Compute Service runs using the domain user. In this case, after you upgrade, you must
complete the following steps to ensure that the instances can support live migration successfully on the
Hyper-V compute node.
1. Open Control Panel -> Administrative Tools -> Services.
2. Locate the service that is named IBM Cloud Manager with OpenStack Compute Service, right-click, and
select the properties menu.
3. Switch to the Log On tab, select the second option for Log on as and provide the domain user
account and password.
4. Click Apply and OK.
5. Locate the service that is named IBM Cloud Manager with OpenStack Compute Service, right-click, and
select Restart to restart the service.
Graphical Upgrade
To upgrade the IBM Cloud Manager with OpenStack Hyper-V Agent by using the graphical installation
wizard, follow these steps:
Chapter 4. Upgrading
65
Procedure
1. Download the latest fix for the IBM Cloud Manager with OpenStack Hyper-V Agent from Fix Central.
For more information, see “Getting fixes from Fix Central” on page 297.
Note: The IBM Cloud Manager with OpenStack Hyper-V Agent and IBM Cloud Manager with
OpenStack must be at the same level, either the GA level, or the fix level.
2. Locate the installation image, and double-click IBM Cloud Manager with OpenStack Hyper-V
Agent.msi to start the installation wizard.
3. Follow the instructions that are provided by the installation wizard. For example, you must agree to
the license terms and specify configuration information, such as target directory, basic nova and
virtual switch configuration information, and message queue information. The IBM Cloud Manager
with OpenStack Hyper-V Agent supports two message queue types: Qpid and RabbitMQ. When you
upgrade the Hyper-V Agent to 4.2, select Qpid or RabbitMQ as the message queue, depending on
your controller.
4. After you complete the information in the installation wizard, the upgrade begins.
Silent upgrade
To upgrade IBM Cloud Manager with OpenStack Hyper-V Agent silently, follow these steps:
Before you begin
Procedure
1. Download the latest fix for the IBM Cloud Manager with OpenStack Hyper-V Agent from Fix Central.
For more information, see “Getting fixes from Fix Central” on page 297.
Note: The IBM Cloud Manager with OpenStack Hyper-V Agent and IBM Cloud Manager with
OpenStack must be at the same level, either the GA level, or the fix level.
2. To run the installation through the response file, you must first enter the correct parameters in your
locally saved copy of the response file. For detailed information, see the sample response files.
The sample response files provide example INI files that can be used to drive a silent installation. This
Qpid Sample Response File upgrades the Hyper-V Agent using Qpid as the message queue. The
RabbitMQ Sample Response File upgrades the Hyper-V Agent using RabbitMQ as the message queue.
The two examples show all properties that are available during a graphical installation of the IBM
Cloud Manager with OpenStack Hyper-V Agent.Qpid Sample Response File
[Response]
#indicate whether you agree with the license and its default value is “no”
AgreeToLicense=yes
#indicate using Qpid as the message queue
UPGRADE_MQ_TYPE=0
RabbitMQ Sample Response File
[Response]
#indicate whether you agree with the license and its default value is “no”
AgreeToLicense=yes
#indicate using RabbitMQ as the message queue
UPGRADE_MQ_TYPE=1
# The RabbitMQ userid
UPGRADE_MQ_UNAME=rabbitclient
# The RabbitMQ password
UPGRADE_MQ_PASSWORD=openstack1
Notes:
a. The property ;AgreeToLicense in the response file specifies your agreement to the license for the
application. Its default value is set to no. You must specify yes to run the silent installation
successfully.
66
IBM Cloud Manager with OpenStack: Administrator Guide, version 4.2
b. The UPGRADE_MQ_TYPE property specifies the message queue type. Its default value is set to 1,
which means you use RabbitMQ as the message queue. If the value is set to 0, it means you use
Qpid as the message queue.
c. The UGRADE_MQ_UNAME and UPGRADE_MQ_PASSWORD properties specify the RabbitMQ user ID and
password. If you use Qpid as the message queue type, you do not need to set the
UPGRADE_MQ_UNAME and UPGRADE_MQ_PASSWORD properties.
Note:
3. Next, open a command prompt and input the following statement:
Note: The following statement must be entered on a single line, even though the example shows a
line break for formatting purposes.
msiexec /i "IBM Cloud Manager with OpenStack Hyper-V Agent.msi"
/qn USEINI="absolute path to responsefile"
The following properties in the nova.conf file are copied:
glance_host;
glance_port;
qpid_hostname;
qpid_port;
qpid_username;
qpid_password;
instances_path;
neutron_url;
neutron_admin_username;
neutron_admin_password;
neutron_admin_tenant_name;
neutron_region_name;
neutron_admin_auth_url;
auth_strategy with default value "keystone";
flat_injected with default value "true";
rpc_thread_pool_size with default value "128";
rpc_conn_pool_size with default value "60";
rpc_response_timeout with default value "600";
use_cow_images=" ";
vswitch_name=" ";
use_ipv6 with default value "true";
verbose with default value "false";
log_dir=" ";
These following properties in neutron.conf file are copied:
qpid_hostname;
qpid_port;
qpid_username;
qpid_password;
allow_overlapping_ips;
rpc_thread_pool_size with default value "128";
rpc_conn_pool_size with default value "60";
rpc_response_timeout with default value "600";
The following properties in hyperv_neutron_agent.ini file are copied:
qpid_hostname;
qpid_username;
qpid_password;
physical_network_vswitch_mappings;
rpc_backend;
verbose;
debug;
control_exchange;
tenant_network_type;
network_vlan_ranges;
Notes:
Chapter 4. Upgrading
67
a. If you manually modified properties that are not shown, you must manually modify those
properties after the upgrade is complete.
b. If you use RabbitMQ as the message queue, the Qpid properties are replaced with RabbitMQ
properties, including rabbit_userid, rabbit_password, rabbit_host, rabbit_port, and
rabbit_use_ssl.
68
IBM Cloud Manager with OpenStack: Administrator Guide, version 4.2
Chapter 5. Deploying an IBM Cloud Manager with OpenStack
cloud
After IBM Cloud Manager with OpenStack is installed, you must follow these instructions to complete
the installation.
To continue, select a topology and deploy the components that are necessary to create your cloud
environment.
1. Select the topology that you want to deploy. Review the “Topology overview” for more information.
2. Deploy the components that are necessary to create your cloud environment. See “Deploying the
cloud environment” on page 74 and follow the steps for the topology you select to deploy.
Topology overview
The IBM Cloud Manager with OpenStack solution provides some predefined topologies.
The following topologies are the supported configurations for IBM Cloud Manager with OpenStack.
Table 25. Supported topologies
Topology
Description
Minimal
For product evaluation purposes. This topology is the
simplest topology and does not require any
customization. Some basic customization is supported for
the KVM/QEMU compute hypervisor type.
Controller +n compute
For smaller test or production environments. This
topology provides a single controller node, plus any
number of compute nodes. You can configure this
topology for your specific needs. For example, configure
networking, resource scheduler, and other advanced
customization.
Distributed database
For larger test or production environments. This
topology is similar to the controller +n compute
topology; however, it allows the IBM Cloud Manager
with OpenStack database service to run on a separate
node. It also supports advanced customization.
Stand-alone self-service portal
For the environment in which you manage only VMware
clouds. This topology provides a self-service portal node
that is ONLY used to manage VMware clouds.
OpenStack components are not installed.
The following terminology is used by the topologies:
Deployment server
The deployment server is the system where you install the IBM Cloud Manager with OpenStack
product. The deployment server runs the Chef server and maintains the IBM Cloud Manager
with OpenStack repository.
IBM Cloud Manager with OpenStack repository
The repository is the location that where all of the IBM Cloud Manager with OpenStack
components are stored. The repository includes Chef resources, RPMs, commands, licenses,
dependencies, and more. As an administrator, you manage your topology by using this
repository.
© Copyright IBM Corp. 2012, 2014
69
Node
A node is a system that is part of your topology. The applicable IBM Cloud Manager with
OpenStack components are deployed to the node based on your cloud environment.
The repository, along with the associated OpenStack Chef cookbooks and dependencies provide the basic
building blocks that you can use to deploy IBM Cloud Manager with OpenStack.
The topologies support the following operating systems, database, message queue, and OpenStack
components.
Note: The following support information applies to the minimal, controller +n compute, and distributed
database topologies only. The stand-alone self-service portal topology includes only the self-service portal.
v OpenStack Components: Identity, Image, Network, Compute, Orchestration, Block Storage, Telemetry,
and Dashboard
v OpenStack Networking: Neutron
v OpenStack Compute Scheduler: Compute scheduler filters, IBM Platform Resource Scheduler (PRS)
v Operating System for OpenStack controller: Red Hat Enterprise Linux 6.5 or z/VM 6.3
v Database: IBM DB2 (default) , MySQL
v Message Queue: RabbitMQ (default), Qpid
v Hypervisor types: Linux Kernel-based Virtual Machine (KVM), PowerKVM, QEMU, z/VM, and
Hyper-V
v Virtualization Manager: PowerVC
v Self-service portal
You can use a single IBM Cloud Manager with OpenStack setup to manage multiple topologies and
multiple environments for those topologies. To manage, use the IBM Cloud Manager with OpenStack
commands that simplify administration.
Minimal deployment
This topology is for product evaluation or proof of concept deployments.
With the minimal topology, all IBM Cloud Manager with OpenStack services run from one system. The
IBM Cloud Manager with OpenStack node runs basic services, including the KVM/QEMU Nova
compute service.
The deployment server is the system to which you install IBM Cloud Manager with OpenStack. The
solution delivery repository is the repository that contains all the IBM Cloud Manager with OpenStack
components. As an administrator, you manage the topology using this repository. The graphic below
shows some examples of deploying a minimal topology. Option 2 is the recommended example if you
plan to use the deployment server to deploy additional cloud topologies.
70
IBM Cloud Manager with OpenStack: Administrator Guide, version 4.2
Controller +n compute deployment
This topology is for smaller deployments.
The controller +n compute deployment topology is similar in size to the topology used by IBM
SmartCloud Entry 3.1 and 3.2. The IBM Cloud Manager with OpenStack single controller node provides
the basic IBM OpenStack services, excluding the OpenStack compute node services. The OpenStack
compute node services are provided by the IBM Cloud Manager with OpenStack compute nodes. The
IBM Cloud Manager with OpenStack single controller node can run PowerVC driver services. This
topology supports all of the IBM Cloud Manager with OpenStack supported compute hypervisors. The
specific compute hypervisors supported include:
v
v
v
v
KVM/QEMU
PowerKVM
z/VM
Hyper-V
Note: The Chef client does not run on Hyper-V compute nodes since the Hyper-V Agent installer is
used.
Deploying this topology requires a minimum of two systems. One system is for the deployment server
and the other system is for the IBM Cloud Manager with OpenStack single controller node. If the
KVM/QEMU, PowerKVM, Hyper-V, or z/VM compute hypervisor is used, then one or more systems are
also required to provide the IBM Cloud Manager with OpenStack compute nodes for the topology.
Deploying a topology to manage to PowerVC requires an existing IBM Power Virtualization Center to be
available.
Chapter 5. Deploying the cloud
71
Related tasks:
“Deploying a test or production cloud” on page 77
Deploy the components that are necessary to create a test or production cloud environment with more
than one node. Use the instructions that apply to your specific hypervisor for each compute node.
Distributed database deployment
This topology is for larger deployments that use a distributed database.
The distributed database deployment topology is similar to the controller +n compute topology; however,
it allows the IBM Cloud Manager with OpenStack database service to run on a separate node. The IBM
Cloud Manager with OpenStack single controller node provides the basic IBM OpenStack services,
excluding the OpenStack compute node services. The OpenStack compute node services are provided by
the IBM Cloud Manager with OpenStack compute nodes. The IBM Cloud Manager with OpenStack single
controller node can run PowerVC driver services. This topology supports all of the IBM Cloud Manager
with OpenStack supported compute hypervisors. The specific compute hypervisors supported include:
v KVM/QEMU hypervisor
v PowerKVM
v z/VM
v Hyper-V
Deploying this topology requires a minimum of three systems. One system is for the deployment server,
another system is for the IBM Cloud Manager with OpenStack database service, and the third system is
for the IBM Cloud Manager with OpenStack single controller node. If the KVM/QEMU, PowerKVM,
Hyper-V, or z/VM compute hypervisor is used, then one or more systems are also required to provide
the IBM Cloud Manager with OpenStack compute nodes for the topology. Deploying a topology to
manage to PowerVC requires an existing IBM Power Virtualization Center to be available.
This image shows the IBM Cloud Manager with OpenStack database service running on a separate node.
Note: The Chef client does not run on Hyper-V compute nodes since the Hyper-V Agent installer is
used.
72
IBM Cloud Manager with OpenStack: Administrator Guide, version 4.2
Stand-alone self-service portal deployment
This topology is for VMware cloud management.
With the stand-alone self-service portal topology, only the self-service portal service is installed on the
node. OpenStack components are not installed.
The deployment server is the system on which you install IBM Cloud Manager with OpenStack. The
solution delivery repository is the repository that contains all of the IBM Cloud Manager with OpenStack
components. As an administrator, you manage the topology by using this repository. The following image
shows some examples of deploying a stand-alone self-service portal deployment topology. Use the
example in Option 2 if you plan to use the deployment server to deploy additional cloud topologies.
Chapter 5. Deploying the cloud
73
Deploying the cloud environment
Deploy the components that are necessary to create your cloud environment.
Complete the prerequisites, then follow the steps for the topology you want to deploy.
Deploying prerequisites
Before deploying an IBM Cloud Manager with OpenStack topology, you need to complete the
prerequisites.
Procedure
1. Install the latest fix packs for IBM Cloud Manager with OpenStack before you proceed. For
information about fix packs, see “Applying fixes and updates” on page 39.
2. Identify the node systems for the topology. Validate and collect basic information about a node
system. Change node-fqdn to the fully qualified domain name of a node system. The deployment
system must be able to SSH by using the fully qualified domain name. You can also set to the public
IP address, private IP address, or host name. You are prompted for the SSH root user password for
the node. To use an SSH identity file instead of a password, use the -i node-ssh-identity option,
where node-ssh-identity is the SSH identity file for the node.
knife os manage validate node node-fqdn
The command performs basic validation on the node system and displays the results to the terminal.
The command also stores the results in a JSON file, validate_node_node-fqdn.json, and creates a
cloud configuration YAML snippet file, node_node-fqdn.yml, in the current directory. The YAML
snippet file contains network information collected for the node, including the recommended
management network to use for the node. The file does not contain a recommended data network
for the node, even if a data network exists. In addition, the file may not identify networks that have
unique configurations. The node’s network information is used when you deploy your cloud
environment.
a. Verify that the time on the node systems is within 15 minutes of the time that is shown on the
deployment server. Consider synchronizing the system clock of the deployment server and node
systems with a network time protocol (NTP) server. For more information, see “Installing a
network time service” on page 161.
Note: You can configure the deployment server as the network time protocol (NTP) server. When
you are following the deployment process, customize the topology to use the NTP server you
configured. Look for the customization step.
b. Record the IP addresses for each node.
c. Record the fully qualified domain names for each node.
d. Record the root user login information (either password or SSH identity file) for each node.
e. Record the number and name of each network interface card on each node.
v Management network = Defaults to eth0. It is used for OpenStack communication between
nodes.
v Virtual machine data network = Defaults to eth1 (optional). It is used for virtual machine data
communication within the cloud environment and is only required if you are using VLAN or
Flat networks. Do not use a management or external network as the virtual machine data
network.
v External network L3 network = Defaults to eth0. It can be shared with the management
network, which is the default configuration.
If the deployment nodes do not have an eth0 or eth1 interface or if the management, external
network and virtual machine data network are on different interfaces besides eth0 and eth1, then
you must change the default environment settings when you configure the deployment.
74
IBM Cloud Manager with OpenStack: Administrator Guide, version 4.2
Note:
v The network interface cards must not connect to the same network at the same time. For
example, eth0 and eth1 must not connect to Network A at the same time.
v The example environment assumes that the network configuration is identical across all of the
deployment nodes.
f. The network configuration and hypervisor type limit the type of networks that can be defined.
For more information about network considerations, see “Network considerations” on page 16.
3. Verify the OpenStack controller node system meets the following criteria:
v Operating System: Red Hat Enterprise Linux 6.5 or z/VM 6.3
v Architecture: x86_64, ppc64, or 64-bit IBM z/Architecture
4. If applicable, verify that the PowerVC environment that you want to manage meets the “IBM Power
Virtualization Center prerequisites” on page 12.
5. If applicable, verify the KVM, QEMU compute node system meets the following criteria:
v See “KVM or QEMU prerequisites” on page 11 for details.
v To use the KVM hypervisor type on a node system, the node must support KVM acceleration. If
the node system does not support KVM acceleration, then you must use the QEMU hypervisor
type. To use the QEMU hypervisor type, set the openstack.compute.libvirt.virt_type attribute
to qemu in the default_attributes section of your environment when you deploy your cloud
environment. The Minimal topology uses the QEMU hypervisor type by default. Note that the
QEMU hypervisor type is not recommended for a production deployment. For details , see the
OpenStack documentation.
6. If applicable, verify that the z/VM compute node system meets the following criteria:
v See “z/VM prerequisites” on page 14 for details.
v To use the z/VM hypervisor, one or more x86_64 Red Hat Enterprise Linux system nodes should
be used to install the compute and network driver to manage the z/VM hypervisor. One x86_64
Red Hat Enterprise Linux system node is supported for each z/VM node. For more information
on configuring the z/VM hypervisor, see the Enabling z/VM for OpenStack user manual.
7. If applicable, verify the PowerKVM compute node system meets the following criteria: See
“PowerKVM prerequisites” on page 12 for details.
8. If applicable, verify that the Hyper-V compute node system meets the following criteria: See
“Installing and uninstalling the IBM Cloud Manager with OpenStack Hyper-V Agent” on page 28 for
details.
9. Linux node systems must have access to a yum repository, which contains base operating system
packages for your node systems. Many of the OpenStack components depend on operating system
packages that are automatically installed on the node system during the deployment process. To
determine if a node has access to a yum repository you can run the yum list libvirt command on
the node. If the command fails, a valid yum repository does not exist on the node. If you do not
have a yum repository configured on the node system, you can configure the Deployment Server to
create the yum repositories on the nodes automatically when OpenStack is deployed. For
configuration information, see “Configuring operating system yum repositories on the deployment
server” on page 37.
10. Consider this restriction before deploying IBM Cloud Manager with OpenStack, in case you must
undo a deployment.
v Support does not exist to uninstall a deployed topology for IBM Cloud Manager with OpenStack.
You must reinstall or reset the node back to its pre-deployment state. You cannot attempt to
redeploy to the same managed system without first setting the node back to its pre-deployment
state. Back up your node system before deployment by using existing snapshot or capture
capabilities that are provided by the underlying virtualization manager or other backup methods.
v The node must also be deleted from the chef server. For more information, see “Redeploying a
node cleanup” on page 148.
Chapter 5. Deploying the cloud
75
11. To ensure the IP address moves from the interface to the corresponding OVS bridge, verify that the
following preconditions are met.
a. Each interface must have an ifcfg-ethX file in the /etc/sysconfig/network-scripts/ directory.
b. If BOOTPROTO is static, the IPADDR, DEVICE attributes must be contained in the ifcfg-ethX file. In
addition, either PREFIX or NETMASK must be specified in the ifcfg-ethX file as well.
c. Before you deploy, the controller node and compute node have a default gateway.
12. If the controller node has several CPUs, deploying the topology might fail because of excessive
database connections. The following troubleshooting topics, that are related to deploying topologies,
can help you to identify and correct this problem, if relevant for your environment:
v “DB2 database requests fail with SQL1225N” on page 301
v “MySQL database requests fail with "Too many connections"” on page 302
A correct configuration for this problem depends on several factors, including the database engine,
number of CPUs, physical memory, and swap space.
13. Consider whether to encrypt passwords during the deployment process. When you enter passwords
into files during the deployment process (such as in the cloud YAML, passwords JSON, or topology
JSON files), you can use a command to encrypt the password. The encryption avoids having clear
text passwords in those files.
knife os manage encrypt password [PASSWORD]
The command takes a clear text password and returns an encrypted password that can be used by
the other IBM Cloud Manager with OpenStack commands when processing a deployment.
Deploying an evaluation cloud
Use the following procedure to deploy the components necessary to create a very basic cloud
environment. The cloud environment is for product evaluation or a proof of concept and uses the
minimal topology with KVM or QEMU compute nodes.
Procedure
1. Log in to the deployment system as the root user. This is the system where IBM Cloud Manager with
OpenStack was installed.
2. Deploy your topology. Change node.fqdn.com to the fully qualified domain name of the node.
$ knife os manage deploy evaluation node.fqdn.com
Note: With the evaluation deployment, you must have separate nodes for the deployment system and
the node. If that is not possible, then you must deploy using the minimal topology and customize the
topology to use the Qpid message service. See “Deploying a prescribed configuration with KVM or
QEMU compute nodes” on page 79 for instructions.
3. After the deployment completes, the IBM Cloud Manager with OpenStack services are ready to use.
The IBM Cloud Manager with OpenStack dashboard is available at https://node.fqdn.com/, where
node.fqdn.com is the fully qualified domain name of the node. The web interface for IBM Cloud
Manager with OpenStack self-service portal is available at https://node.fqdn.com:18443/cloud/web/
login.html. You can log in using admin user with admin as the default password.
For information about managing IBM Cloud Manager with OpenStack services, see “Managing IBM
Cloud Manager with OpenStack services” on page 207.
Additionally, the IBM Platform Resource Scheduler (PRS) is enabled as the default OpenStack
scheduling engine, for more information see “Customizing the scheduler” on page 110.
Results
You are ready to start using your cloud environment. To continue, see “Using your cloud environment”
on page 144.
Related reference:
76
IBM Cloud Manager with OpenStack: Administrator Guide, version 4.2
“Messaging service limitation when deployment server and IBM Cloud Manager with OpenStack
controller are on same server” on page 331
You must use the Qpid messaging service if your deployment server and the IBM Cloud Manager with
OpenStack controller are on the same server.
Deploying a test or production cloud
Deploy the components that are necessary to create a test or production cloud environment with more
than one node. Use the instructions that apply to your specific hypervisor for each compute node.
Related concepts:
“Controller +n compute deployment” on page 71
This topology is for smaller deployments.
Deploying with Hyper-V compute nodes
Deploy the components that are necessary to create a cloud environment with Hyper-V compute nodes.
Before you begin
Before you begin, ensure you completed the “Deploying prerequisites” on page 74 steps.
About this task
Use the following procedure to deploy the topology to your node systems.
Procedure
1. Log in to the deployment system as the root user. This is the system where IBM Cloud Manager with
OpenStack was installed.
2. Create a directory to store the files for the topology that you deploy. Change your-deployment-name
to the name for your deployment.
$ mkdir your-deployment-name
$ chmod 600 your-deployment-name
$ cd your-deployment-name
3. Copy the example environment for the topology that you deploy. Change your-environment-name to
the name for your environment.
Note: The following command must be entered on a single line, even though the example shows a
line break for formatting purposes.
$ knife environment show example-ibm-os-single-controller-n-compute -d -Fjson
> your-environment-name.json
4. Change the following JSON attributes in your environment file, your-environment-name.json:
a. Name: Set to your environment name: your-environment-name.
b. Description: Set to the description for your environment.
c. openstack.region: (Optional) Customize the region name for your cloud. The region name must
not contain spaces or special characters.
d. openstack.endpoints.host, openstack.endpoints.bind-host, and openstack.endpoints.mq.host:
Change from 127.0.0.1 to the IP address of the controller node system for the topology.
e. openstack.network.ml2.mechanism_drivers: hyperv
f. openstack.network.ml2.tenant_network_types: vlan or flat, depending on your environment. The
default value is vlan.
g. openstack.network.ml2.flat_networks: Add your Hyper-V flat networks. For example, physnet1.
h. openstack.network.ml2.network_vlan_ranges: Add your Hyper-V network VLAN range. For
example, physnet1:1000:2999.
Chapter 5. Deploying the cloud
77
Network configuration: If the management network interface of your single controller node is not
eth0, if the virtual machine data network interface is not eth1, or if both apply, then update all
occurrences of eth0, eth1, or both in the environment file to match your network configuration.
5. Copy the following example topology to a file, your-topology-name.json. Change
your-topology-name to the name for your topology. Here is an example topology with Hyper-V
compute nodes.
{
"name":"CHANGEME",
"description":"CHANGEME",
"environment":"CHANGEME",
"secret_file":"CHANGEME",
"run_sequentially":false,
"nodes": [
{
"fqdn":"CHANGEME",
"password":"CHANGEME",
"identity_file":"CHANGEME",
"quit_on_error":true,
"run_order_number":1,
"runlist": [
"role[ibm-os-single-controller-node]",
"role[ibm-os-prs-ego-master]",
"role[ibm-os-prs-controller-node]",
"role[ibm-sce-node]"
]
}
]
}
6. Customize the topology file. The node in your topology file is your single controller node. The
Hyper-V compute nodes will be deployed after the single controller node. Change the following
JSON attributes in your topology file, your-topology-name.json:
a. Name: Set to your topology name: your-topology-name.
b. Description: Set to the description for your topology.
c. Environment: Set to the environment for your topology: your-environment-name.
d. nodes.fqdn: For each node, you must set to the fully qualified domain name of the node system.
The deployment system must be able to ssh using the fully qualified domain name. You can also
set to the public IP address, private IP address, or host name.
e. nodes.password or nodes.identity_file: Set to the appropriate SSH root user authentication for
the node system. Either a password and an SSH identity file can be used for authentication.
Remove the unused attribute.
7. Customize the passwords and secrets before deploying. For instructions, see “Customizing
passwords and secrets” on page 114.
8. Configure the OpenStack block storage (cinder) driver. By default, the environment is configured to
use the LVM iSCSI cinder driver. You can change the following JSON attributes in your environment
file, your-environment-name.json, to customize the LVM iSCSI cinder driver configuration.
a. openstack.block-storage.volume.create_volume_group: If set to true, then the cinder-volumes
volume group is created on the controller node with a size determined by openstack.blockstorage.volume.volume_group_size. If set to false (default), then you can create the volume group
manually using physical disks. For more information, see “Creating an LVM volume group using
physical disks” on page 132.
b. openstack.block-storage.volume.volume_group_size: The amount of storage you use must be
smaller than the size available. If necessary, you can set the value to your free disk size. The
default value is 40 GB. This attribute is used only if openstack.blockstorage.volume.create_volume_group is set to true.
c. openstack.block-storage.volume.iscsi_ip_address: Change from 127.0.0.1 to the management
IP address of the controller node.
78
IBM Cloud Manager with OpenStack: Administrator Guide, version 4.2
To customize your environment for the IBM Storwize Cinder driver, see“Configuring IBM Storwize
Cinder driver” on page 132.
9. (Optional) Complete any optional customizations. For options, see “Deployment customization
options” on page 109.
Note: Some customization options might not be supported for all hypervisor types and some cannot
be configured after you deploy your cloud environment.
10. Deploy your topology.
a. Upload the environment for your deployment.
$ knife environment from file your-environment-name.json
b. Deploy the topology.
$ knife os manage deploy topology your-topology-name.json
c. (Optional) Check the detailed status of the IBM Cloud Manager with OpenStack services that are
deployed.
$ knife os manage services status –-topology-file your-topology-name.json
11. Install the Hyper-V agent on your Hyper-V compute nodes. For instructions, see “Installing and
uninstalling the IBM Cloud Manager with OpenStack Hyper-V Agent” on page 28.
12. After the deployment is complete, the IBM Cloud Manager with OpenStack services are ready to
use. The IBM Cloud Manager with OpenStack dashboard is available at https://
controller.fqdn.com/, where controller.fqdn.com is the fully qualified domain name of the
controller node in your topology. The web interface for IBM Cloud Manager with OpenStack
self-service portal is available at https://controller.fqdn.com:18443/cloud/web/login.html. You
can log into either using admin user with the password that you customized in step 7 on page 78.
For more information about managing IBM Cloud Manager with OpenStack services, see “Managing
IBM Cloud Manager with OpenStack services” on page 207.
Results
You are ready to start using your cloud environment. To continue, see “Using your cloud environment”
on page 144.
Related reference:
“Troubleshooting errors when deploying or updating topologies” on page 301
If a topology deployment or update fails, review the log output from the deployment command for more
information.
Deploying with KVM or QEMU compute nodes
Deploy the components that are necessary to create a cloud environment with KVM or QEMU compute
nodes. You can complete the deployment with either a prescribed or advanced configuration.
Deploying a prescribed configuration with KVM or QEMU compute nodes:
Deploy the components that are necessary to create a cloud environment with KVM or QEMU compute
nodes by using a prescribed cloud configuration.
Before you begin
Before you begin, ensure you completed the “Deploying prerequisites” on page 74 steps.
Chapter 5. Deploying the cloud
79
About this task
The following information provides details about this prescribed configuration.
Table 26. Summary of prescribed configuration
Component
Configuration
OpenStack Components
Identity, Image, Network, Compute, Orchestration, Block Storage, Telemetry, and
Dashboard
OpenStack Networking
Neutron with ML2 plugin using Open vSwitch mechanism driver
OpenStack Network Types
Supported
v Minimal topology: Local
v All topologies except Minimal:
– Local, GRE
– Flat, VLAN or VXLAN (Note: Only supported if the controller node has a
data network.)
Note: You must create your initial OpenStack networks after deployment. For more
information, see “Creating initial networks” on page 155.
OpenStack compute scheduler
IBM Platform Resource Scheduler (default) or Compute scheduler filters
OpenStack Block Storage
Driver
LVM iSCSI Cinder driver
Note: For the Minimal topology, an initial 40 GB volume group is created that uses
a file-backed loop device. For other topologies, you must create an LVM volume
group using physical disks after deployment. For more information, see “Creating
an LVM volume group using physical disks” on page 132.
Database
IBM DB2 (default) or MySQL
Message Queue
RabbitMQ (default) or Qpid
Hypervisor Type
v Minimal topology: QEMU
v All topologies except Minimal: KVM
Self-service portal
Enabled (default) or disabled
Use the following procedure to deploy the topology to your node systems.
Procedure
1. Log in to the deployment system as the root user. This is the system where IBM Cloud Manager with
OpenStack was installed.
2. Create a directory to store the files for the topology that you deploy. Change your-deployment-name to
the name for your deployment.
$ mkdir your-deployment-name
$ chmod 600 your-deployment-name
$ cd your-deployment-name
3. Copy the appropriate example cloud file as the base structure for your cloud deployment and rename
it for your cloud environment.
a. Identify the topology, and its associated example cloud file, that you want to deploy for your
cloud.
v Minimal: example-minimal-cloud.yml
v Controller +n compute: example-controller-n-compute-kvm-cloud.yml
v Distributed database: example-distributed-database-kvm-cloud.yml
For more information about each topology type, see “Topology overview” on page 69.
b. Run the following command to copy the example cloud file that you want to use and rename it
for your cloud.
80
IBM Cloud Manager with OpenStack: Administrator Guide, version 4.2
Note: This step assumes the default IBM Cloud Manager with OpenStack installation path on the
deployment server (/opt/ibm/cmwo).
In the following command, change example-cloud.yml to the example cloud file for the topology
that you want to deploy. Change your-cloud.yml to the name of your cloud.
$ cp /opt/ibm/cmwo/cli/config/example-cloud.yml your-cloud.yml
4. Change the required YAML attributes in your cloud file, your-cloud.yml.
v Cloud Information (cloud): Customize the cloud information.
a. name: Set the name for your cloud. The name cannot contain spaces or special characters. This
name is also used as the OpenStack region name.
b. password: Set the cloud administrator (admin) user's password. This value is not required or
supported for the minimal topology. The minimal topology defaults the password to admin.
v Node Information (nodes): Customize the information for each node system in your cloud. For the
controller +n compute or distributed database topologies, you can copy the kvm_compute node
section to include more KVM compute nodes in your cloud.
a. name and description: Leave these set to the default values provided.
b. fqdn: Set to the fully qualified domain name of the node system. The deployment system must
be able to SSH by using the fully qualified domain name. You can also set to the public IP
address, private IP address, or host name.
c. password or identity_file: Set to the appropriate SSH root user authentication for the node
system. You can use either a password or an SSH identity file for authentication.
d. nics.management_network: Set to the management network interface card for the node system.
This network is used for IBM Cloud Manager with OpenStack communication between the
nodes in the cloud. The fqdn setting for the node must resolve to the IP address of this network.
The default is eth0.
e. nics.data_network: Set to the data network interface card for the node system. The default is
eth1. If the node system does not have a second network interface card that can be used as a
data network, then set to ~. Do not set to the same value as nics.management_network. Also, do
not set to a network interface card that provides an alternative management network or an
external network for the node, for example, a private or public IP address. A data network is
required to use VLAN or Flat networks in your cloud.
5. Optional: Complete any optional customization by changing the appropriate YAML attributes in your
cloud file, your-cloud.yml.
a. Optional: Cloud Information (cloud): Customize the cloud information.
v database_service_type: You can change the database that is used by OpenStack from DB2
(default) to MySQL by setting this attribute to mysql.
v messaging_service_type: You can change the messaging queue that is used by OpenStack from
RabbitMQ (default) to Qpid by setting this attribute to qpid.
v self_service_portal and self_service_portal_node_name: IBM Cloud Manager with OpenStack
features an easy to use self-service portal for cloud operations. You can disable the self-service
portal cloud feature by setting the self_service_portal attribute to disabled and the
self_service_portal_node_name attribute to ~.
v platform_resource_scheduler: IBM Cloud Manager with OpenStack features an enhanced
OpenStack compute scheduler, IBM Platform Resource Scheduler. You can disable Platform
Resource Scheduler and use the default OpenStack compute scheduler filters by setting this
attribute to disabled. For more information about Platform Resource Scheduler, see Platform
Resource Scheduler product information.
Note: If you are using the deployment server as one of the nodes in your cloud (not
recommended), then you must use the Qpid messaging service type.
b. Optional: Environment Information (environment): Customize the environment information.
Chapter 5. Deploying the cloud
81
v ntp.servers: Set to the NTP servers that are accessible to your deployment. The list of NTP
servers must be comma separated, for example, [your.0.ntpserver.com, your.1.ntpserver.com]. The
default is [0.pool.ntp.org, 1.pool.ntp.org, 2.pool.ntp.org, 3.pool.ntp.org].
6. Deploy your cloud.
$ knife os manage deploy cloud your-cloud.yml
Note: This command generates a topology file and other related files for your deployment and stores
them in the same directory as your cloud file, your-cloud.yml. The cloud file is no longer needed after
the deployment completes and can be removed. The generated files are only used if you must update
your cloud.
$ rm your-cloud.yml
7. After the deployment is complete, the IBM Cloud Manager with OpenStack services are ready to use.
The IBM Cloud Manager with OpenStack dashboard is available at https://node.fqdn.com/, where
node.fqdn.com is the fully qualified domain name of the node. The web interface for IBM Cloud
Manager with OpenStack self-service portal is available at https://node.fqdn.com:18443/cloud/web/
login.html. You can log in to either using admin user with the password customized in step 4 on page
81.
For more information about managing IBM Cloud Manager with OpenStack services, see “Managing
IBM Cloud Manager with OpenStack services” on page 207.
Results
You are ready to start using your cloud environment. To continue, see “Using your cloud environment”
on page 144.
Deploying an advanced configuration with KVM or QEMU compute nodes:
Deploy the components that are necessary to create a cloud environment with KVM or QEMU compute
nodes using advanced configuration.
Before you begin
v Before you begin, ensure you completed the “Deploying prerequisites” on page 74 steps.
v For the node systems, the network configuration and hypervisor type limit the type of networks that
can be defined. For example:
Table 27. Supported network configuration
Number of network interface cards (NICs) per
node
1 - eth0 is dedicated as the management network
Network type
Hypervisor type
v Local
KVM only
Note: If one or more of the compute hypervisors is not KVM, then GRE and VXLAN cannot be used.
v GRE
v VXLAN
2
v Local
v eth0 is the management network and the
external network.
v eth1 is dedicated as the virtual machine data
network.
Note: Default configuration
3 or more
v eth0 is dedicated as the management network.
v eth1 is dedicated as the virtual machine data
network.
v eth2 is dedicated as the external network.
KVM only
Note: If one or more of the compute hypervisors is not KVM, then GRE and VXLAN cannot be used.
v Flat
v VLAN
v VXLAN
v GRE
v Local
KVM only
Note: If one or more of the compute hypervisors is not KVM, then GRE and VXLAN cannot be used.
v Flat
v VLAN
v VXLAN
v GRE
Note: Recommended configuration
Note:
– The virtual machine data network must be on a dedicated interface. Communication to the node
must be done through the management network or another interface on the node.
82
IBM Cloud Manager with OpenStack: Administrator Guide, version 4.2
– The local network type can be configured; however, the network traffic is limited to the current
node. The minimum topology uses the local network option, by default.
For more information about network considerations, see “Network considerations” on page 16.
Use the following procedure to deploy the topology to your node systems.
Procedure
1. Log in to the deployment system as the root user. This is the system where IBM Cloud Manager
with OpenStack was installed.
2. Create a directory to store the files for the topology that you deploy. Change your-deployment-name
to the name for your deployment.
$ mkdir your-deployment-name
$ chmod 600 your-deployment-name
$ cd your-deployment-name
3. Copy the example environment for the topology that you deploy. Change your-environment-name to
the name for your environment.
Note: The following command must be entered on a single line, even though the example shows a
line break for formatting purposes.
$ knife environment show example-ibm-os-single-controller-n-compute -d -Fjson
> your-environment-name.json
4. Change the following JSON attributes in your environment file, your-environment-name.json:
v Name: Set to your environment name: your-environment-name.
v Description: Set to the description for your environment.
v openstack.region: (Optional) Customize the region name for your cloud. The region name must
not contain spaces or special characters.
v openstack.endpoints.host, openstack.endpoints.bind-host, and openstack.endpoints.mq.host:
Change from 127.0.0.1 to the IP address of the controller node system for the topology.
v openstack.compute.libvirt.virt_type: Set to the hypervisor type, kvm or qemu, for the topology.
v (Single network interface card or no virtual machine data network): If you are using a GRE or
VXLAN network with a single network interface card on the nodes (or no virtual machine data
network), you must change the following default values in the environment:
openstack.network.openvswitch.tenant_network_type = "gre"
openstack.network.openvswitch.bridge_mappings = ""
openstack.network.openvswitch.network_vlan_ranges = ""
openstack.network.openvswitch.bridge_mapping_interface = ""
openstack.network.ml2.tenant_network_types = "gre"
openstack.network.ml2.network_vlan_ranges = ""
openstack.network.ml2.flat_networks = ""
Note: If you are using VXLAN, then replace gre in the previous example with vxlan.
If the management network interface of the nodes is not eth0, then update all occurrences of eth0
in the environment file to match your network configuration on the nodes.
(Recommended network configuration) If the management network interface of the nodes is not
eth0, if the virtual machine data network interface is not eth1, or both apply, then update all
occurrences of eth0, eth1, or both in the environment file to match your network configuration. The
following list displays some of the networking properties and their default values (from the
example environment) that you might need to change. In most cases, these default values should
be sufficient and do not need to be changed.
– openstack.network.core_plugin: neutron.plugins.ml2.plugin.Ml2Plugin.
In the example environment, the openstack.network.core_plugin property is set to
"neutron.plugins.ml2.plugin.ML2Plugin" and the openstack.network.ml2.mechanism_drivers
property is set to "openvswitch". The ML2 specific properties (properties that begin with
Chapter 5. Deploying the cloud
83
openstack.network.ml2.*) must be consistent and kept in sync with the properties of the
mechanism driver (openstack.network.openvswitch.*). The example environment is set up with
these two sets of properties in sync.
– openstack.network.openvswitch.bridge_mapping_interface: "br-eth1:eth1". The
bridge_mapping_interface property is used to control the creation of the data network OVS
bridge on the nodes. If Open vSwitch is installed and the data network bridge is already
configured on the nodes, this property is not necessary and you can set the variable to " ". If a
specific network configuration is needed for the data network (for example, bonding), you must
set this variable to "" and complete set up manually before or after the node is converged.
– openstack.network.openvswitch.bridge_mappings: "default:br-eth1".
The bridge_mappings property controls which OVS bridge is used for flat and VLAN network
traffic from the node. If this OVS bridge does not exist, the Open vSwitch agent does not start.
This bridge can be automatically created by setting the bridge_mapping_interface property.
– openstack.network.openvswitch.network_vlan_ranges and
openstack.network.ml2.network_vlan_ranges: These two properties define the default vlan
range used when creating a tenant network. Both of these properties default to default:1:4094.
This vlan range might need to be adjusted based on the vlan configuration of the physical
switches and hypervisors in your environment. The values of both properties must be the same.
5. Copy the following example topology to a file, your-topology-name.json. Change
your-topology-name to the name for your topology. Here is an example topology with KVM or
QEMU compute nodes.
{
"name":"CHANGEME",
"description":"CHANGEME",
"environment":"CHANGEME",
"secret_file":"CHANGEME",
"run_sequentially":false,
"nodes": [
{
"fqdn":"CHANGEME",
"password":"CHANGEME",
"identity_file":"CHANGEME",
"quit_on_error":true,
"run_order_number":1,
"runlist": [
"role[ibm-os-single-controller-node]",
"role[ibm-os-prs-ego-master]",
"role[ibm-os-prs-controller-node]",
"role[ibm-sce-node]"
]
},
{
"fqdn":"CHANGEME",
"password":"CHANGEME",
"identity_file":"CHANGEME",
"quit_on_error":true,
"run_order_number":2,
"runlist": [
"role[ibm-os-compute-node-kvm]",
"role[ibm-os-prs-compute-node]"
]
}
]
}
6. Customize the topology file.
a. The first node in your topology file is your single controller node. The second node in your
topology file is for a compute node. If your topology requires extra compute nodes, copy the
compute node section as many times as needed. Ensure that additional compute node sections
are comma-separated.
84
IBM Cloud Manager with OpenStack: Administrator Guide, version 4.2
b. Change the following JSON attributes in your topology file, your-topology-name.json:
v Name: Set to your topology name: your-topology-name.
v Description: Set to the description for your topology.
v Environment: Set to the environment for your topology: your-environment-name.
v nodes.fqdn: For each node, you must set to the fully qualified domain name of the node
system. The deployment system must be able to ssh using the fully qualified domain name.
You can also set to the public IP address, private IP address, or host name.
v nodes.password or nodes.identity_file: For each node, set to the appropriate SSH root user
authentication for the node system. Either a password and an SSH identity file can be used for
authentication. Remove the unused attribute for each node.
c.
(Optional) Create node specific attribute files. This step is only required when one or more nodes
in your topology require different attributes from those defined in your environment file
your-environment-name.json.
1) Create a node-specific attribute file that is similar to the following format. For example, a
node may not have an eth0 network interface, which is the default value for some attributes.
Below is an example node attribute file that can be used to change the eth0 default network
on a compute node over to use eth2.
{
"openstack": {
"endpoints": {
"network-openvswitch": {
"bind_interface": "eth2"
},
"compute-vnc-bind": {
"bind_interface": "eth2"
}
}
}
After creating the node specific attribute files, add the nodes.attribute_file JSON attributes in
your topology file, your-topology-name.json:
v nodes.attribute_file: For each node, set to the attribute JSON file which overrides the
attributes in the default_attributes section of the environment file.
7. Customize the passwords and secrets before deploying. For instructions, see “Customizing
passwords and secrets” on page 114.
8. Configure the OpenStack block storage (cinder) driver. By default, the environment is configured to
use the LVM iSCSI cinder driver. You can change the following JSON attributes in your environment
file, your-environment-name.json, to customize the LVM iSCSI cinder driver configuration.
openstack.block-storage.volume.create_volume_group: If set to true, then the cinder-volumes
volume group is created on the controller node with a size determined by openstack.blockstorage.volume.volume_group_size. If set to false (default), then you can create the volume group
manually using physical disks. For more information, see “Creating an LVM volume group using
physical disks” on page 132.
b. openstack.block-storage.volume.volume_group_size: The amount of storage you use must be
smaller than the size available. If necessary, you can set the value to your free disk size. The
default value is 40 GB. This attribute is used only if openstack.blockstorage.volume.create_volume_group is set to true.
c. openstack.block-storage.volume.iscsi_ip_address: Change from 127.0.0.1 to the management
IP address of the controller node.
To customize your environment for a different cinder driver, see “Configuring Cinder drivers” on
page 129.
9. (Optional) Complete any optional customizations. For options, see “Deployment customization
options” on page 109.
a.
Chapter 5. Deploying the cloud
85
Note: Some customization options might not be supported for all hypervisor types and some cannot
be configured after you deploy your cloud environment.
10. Deploy your topology.
a. Upload the environment for your deployment.
$ knife environment from file your-environment-name.json
b. Deploy the topology.
$ knife os manage deploy topology your-topology-name.json
c. (Optional) Check the detailed status of the IBM Cloud Manager with OpenStack services that are
deployed.
$ knife os manage services status –-topology-file your-topology-name.json
11. After the deployment is complete, the IBM Cloud Manager with OpenStack services are ready to use.
The IBM Cloud Manager with OpenStack dashboard is available at https://controller.fqdn.com/,
where controller.fqdn.com is the fully qualified domain name of the controller node in your
topology. The web interface for IBM Cloud Manager with OpenStack self-service portal is available
at https://controller.fqdn.com:18443/cloud/web/login.html. You can log into either using admin
user with the password that you customized in step 7 on page 85.
For more information about managing IBM Cloud Manager with OpenStack services, see “Managing
IBM Cloud Manager with OpenStack services” on page 207.
12. (Optional) Verify the Open vSwitch (OVS) configuration for your network. See “Verifying Open
vSwitch configuration” on page 143.
What to do next
You are ready to start using your cloud environment. To continue, see “Using your cloud environment”
on page 144.
Related reference:
“Troubleshooting errors when deploying or updating topologies” on page 301
If a topology deployment or update fails, review the log output from the deployment command for more
information.
Platform Resource Scheduler online product documentation
Configure the Image Service
“Creating initial networks” on page 155
After you deploy the components for creating a cloud environment, you can create several different types
of networks.
Deploying with PowerKVM compute nodes
Deploy the components that are necessary to create a cloud environment with PowerKVM compute
nodes. You can complete the deployment with either a prescribed or advanced configuration.
Deploying a prescribed configuration with PowerKVM compute nodes:
Deploy the components that are necessary to create a cloud environment with PowerKVM compute
nodes by using a prescribed cloud configuration.
Before you begin
Before you begin, ensure you completed the “Deploying prerequisites” on page 74 steps.
86
IBM Cloud Manager with OpenStack: Administrator Guide, version 4.2
About this task
The following information provides details about this prescribed configuration.
Table 28. Summary of prescribed configuration
Component
Configuration
OpenStack Components
Identity, Image, Network, Compute, Orchestration, Block Storage, Telemetry, and
Dashboard
OpenStack Networking
Neutron with ML2 plugin using Open vSwitch mechanism driver
OpenStack Network Types
Supported
v GRE (Note: Supported with PowerKVM 2.1.1 only)
v Flat, VLAN (Note: Only supported if the controller node has a data network.)
Note: You must create your initial OpenStack networks after deployment. For more
information, see “Creating initial networks” on page 155.
OpenStack compute scheduler
IBM Platform Resource Scheduler (default) or Compute scheduler filters
OpenStack Block Storage
Driver
LVM iSCSI Cinder driver
Note: You must create an LVM volume group using physical disks after
deployment. For more information, see “Creating an LVM volume group using
physical disks” on page 132.
Database
IBM DB2® (default) or MySQL
Message Queue
RabbitMQ (default) or Qpid
Hypervisor Type
PowerKVM
Self-service portal
Enabled (default) or disabled
Use the following procedure to deploy the topology to your node systems.
Procedure
1. Log in to the deployment system as the root user. This is the system where IBM Cloud Manager with
OpenStack was installed.
2. Create a directory to store the files for the topology that you deploy. Change your-deployment-name to
the name for your deployment.
$ mkdir your-deployment-name
$ chmod 600 your-deployment-name
$ cd your-deployment-name
3. Copy the appropriate example cloud file as the base structure for your cloud deployment and rename
it for your cloud environment.
a. Identify the topology, and its associated example cloud file, that you want to deploy for your
cloud.
v Controller +n compute: example-controller-n-compute-powerkvm-cloud.yml
v Distributed database: example-distributed-database-powerkvm-cloud.yml
For more information about each topology type, see “Topology overview” on page 69.
b. Run the following command to copy the example cloud file that you want to use and rename it
for your cloud.
Note: This step assumes the default IBM Cloud Manager with OpenStack installation path on the
deployment server (/opt/ibm/cmwo).
In the following command, change example-cloud.yml to the example cloud file for the topology
that you want to deploy. Change your-cloud.yml to the name of your cloud.
$ cp /opt/ibm/cmwo/cli/config/example-cloud.yml your-cloud.yml
4. Change the required YAML attributes in your cloud file, your-cloud.yml.
Chapter 5. Deploying the cloud
87
v Cloud Information (cloud): Customize the cloud information.
a. name: Set the name for your cloud. The name cannot contain spaces or special characters. This
name is also used as the OpenStack region name.
b. password: Set the cloud administrator (admin) user's password.
v Node Information (nodes): Customize the information for each node system in your cloud. You can
copy the powerkvm_compute node section to include more PowerKVM compute nodes in your cloud.
a. name and description: Leave these set to the default values provided.
b. fqdn: Set to the fully qualified domain name of the node system. The deployment system must
be able to SSH by using the fully qualified domain name. You can also set to the public IP
address, private IP address, or host name.
c. password or identity_file: Set to the appropriate SSH root user authentication for the node
system. You can use either a password or an SSH identity file for authentication.
d. nics.management_network: Set to the management network interface card for the node system.
This network is used for IBM Cloud Manager with OpenStack communication between the
nodes in the cloud. The fqdn setting for the node must resolve to the IP address of this network.
The default is eth0.
e. nics.data_network: Set to the data network interface card for the node system. The default is
eth1. If the node system does not have a second network interface card that can be used as a
data network, then set to ~. Do not set to the same value as nics.management_network. Also, do
not set to a network interface card that provides an alternative management network or an
external network for the node, for example, a private or public IP address. A data network is
required to use VLAN or Flat networks in your cloud.
5. Optional: Complete any optional customization by changing the appropriate YAML attributes in your
cloud file, your-cloud.yml.
a. Optional: Cloud Information (cloud): Customize the cloud information.
v database_service_type: You can change the database that is used by OpenStack from DB2
(default) to MySQL by setting this attribute to mysql.
v messaging_service_type: You can change the messaging queue that is used by OpenStack from
RabbitMQ (default) to Qpid by setting this attribute to qpid.
v self_service_portal and self_service_portal_node_name: IBM Cloud Manager with OpenStack
features an easy to use self-service portal for cloud operations. You can disable the self-service
portal cloud feature by setting the self_service_portal attribute to disabled and the
self_service_portal_node_name attribute to ~.
v platform_resource_scheduler: IBM Cloud Manager with OpenStack features an enhanced
OpenStack compute scheduler, IBM Platform Resource Scheduler. You can disable Platform
Resource Scheduler and use the default OpenStack compute scheduler filters by setting this
attribute to disabled. For more information about Platform Resource Scheduler, see Platform
Resource Scheduler product information.
b. Optional: Environment Information (environment): Customize the environment information.
v ntp.servers: Set to the NTP servers that are accessible to your deployment. The list of NTP
servers must be comma separated, for example, [your.0.ntpserver.com, your.1.ntpserver.com]. The
default is [0.pool.ntp.org, 1.pool.ntp.org, 2.pool.ntp.org, 3.pool.ntp.org].
6. Deploy your cloud.
$ knife os manage deploy cloud your-cloud.yml
Note: This command generates a topology file and other related files for your deployment and stores
them in the same directory as your cloud file, your-cloud.yml. The cloud file is no longer needed after
the deployment completes and can be removed. The generated files are only used if you must update
your cloud.
$ rm your-cloud.yml
88
IBM Cloud Manager with OpenStack: Administrator Guide, version 4.2
7. After the deployment is complete, the IBM Cloud Manager with OpenStack services are ready to use.
The IBM Cloud Manager with OpenStack dashboard is available at https://node.fqdn.com/, where
node.fqdn.com is the fully qualified domain name of the node. The web interface for IBM Cloud
Manager with OpenStack self-service portal is available at https://node.fqdn.com:18443/cloud/web/
login.html. You can log in to either using admin user with the password customized in step 4 on page
87.
For more information about managing IBM Cloud Manager with OpenStack services, see “Managing
IBM Cloud Manager with OpenStack services” on page 207.
Results
You are ready to start using your cloud environment. To continue, see “Using your cloud environment”
on page 144.
Deploying an advanced configuration with PowerKVM compute nodes:
Deploy the components that are necessary to create a cloud environment with IBM PowerKVM compute
nodes using advanced configuration.
Before you begin
Before you begin, ensure you completed the “Deploying prerequisites” on page 74 steps.
About this task
Use the following procedure to deploy the topology to your node systems.
Procedure
1. Log in to the deployment system as the root user. This is the system where IBM Cloud Manager
with OpenStack was installed.
2. Create a directory to store the files for the topology that you deploy. Change your-deployment-name
to the name for your deployment.
$ mkdir your-deployment-name
$ chmod 600 your-deployment-name
$ cd your-deployment-name
3. Copy the example environment for the topology that you deploy. Change your-environment-name to
the name for your environment.
Note: The following command must be entered on a single line, even though the example shows a
line break for formatting purposes.
$ knife environment show example-ibm-os-single-controller-n-compute -d -Fjson
> your-environment-name.json
4. Change the following JSON attributes in your environment file, your-environment-name.json:
v Name: Set to your environment name: your-environment-name.
v Description: Set to the description for your environment.
v openstack.region: (Optional) Customize the region name for your cloud. The region name must
not contain spaces or special characters.
v openstack.endpoints.host, openstack.endpoints.bind-host, and openstack.endpoints.mq.host:
Change from 127.0.0.1 to the IP address of the controller node system for the topology.
v (Recommended network configuration) If the management network interface of the nodes is not
eth0, if the virtual machine data network interface is not eth1, or both apply, then update all
occurrences of eth0, eth1, or both in the environment file to match your network configuration. The
Chapter 5. Deploying the cloud
89
following list displays some of the networking properties and their default values (from the
example environment) that you might need to change. In most cases, these default values should
be sufficient and do not need to be changed.
– openstack.network.core_plugin: neutron.plugins.ml2.plugin.Ml2Plugin.
In the example environment, the openstack.network.core_plugin property is set to
"neutron.plugins.ml2.plugin.ML2Plugin" and the openstack.network.ml2.mechanism_drivers
property is set to "openvswitch". The ML2 specific properties (properties that begin with
openstack.network.ml2.*) must be consistent and kept in sync with the properties of the
mechanism driver (openstack.network.openvswitch.*). The example environment is set up with
these two sets of properties in sync.
– openstack.network.openvswitch.bridge_mapping_interface: "br-eth1:eth1". The
bridge_mapping_interface property is used to control the creation of the data network OVS
bridge on the nodes. If Open vSwitch is installed and the data network bridge is already
configured on the nodes, this property is not necessary and you can set the variable to " ". If a
specific network configuration is needed for the data network (for example, bonding), you must
set this variable to "" and complete set up manually before or after the node is converged.
– openstack.network.openvswitch.bridge_mappings: "default:br-eth1".
The bridge_mappings property controls which OVS bridge is used for flat and VLAN network
traffic from the node. If this OVS bridge does not exist, the Open vSwitch agent does not start.
This bridge can be automatically created by setting the bridge_mapping_interface property.
– openstack.network.openvswitch.network_vlan_ranges and
openstack.network.ml2.network_vlan_ranges: These two properties define the default vlan
range used when creating a tenant network. Both of these properties default to default:1:4094.
This vlan range might need to be adjusted based on the vlan configuration of the physical
switches and hypervisors in your environment. The values of both properties must be the same.
5. Copy the following example topology to a file, your-topology-name.json. Change
your-topology-name to the name for your topology. Here is an example topology with PowerKVM
compute nodes.
{
"name":"CHANGEME",
"description":"CHANGEME",
"environment":"CHANGEME",
"secret_file":"CHANGEME",
"run_sequentially":false,
"nodes": [
{
"fqdn":"CHANGEME",
"password":"CHANGEME",
"identity_file":"CHANGEME",
"quit_on_error":true,
"run_order_number":1,
"runlist": [
"role[ibm-os-single-controller-node]",
"role[ibm-os-prs-ego-master]",
"role[ibm-os-prs-controller-node]",
"role[ibm-sce-node]"
]
},
{
"fqdn":"CHANGEME",
"password":"CHANGEME",
"identity_file":"CHANGEME",
"quit_on_error":true,
"run_order_number":2,
"runlist": [
"role[ibm-os-compute-node-powerkvm]",
"role[ibm-os-prs-compute-node]"
90
IBM Cloud Manager with OpenStack: Administrator Guide, version 4.2
]
}
]
}
6. Customize the topology file.
a. The first node in your topology file is your single controller node. The second node in your
topology file is for a compute node. If your topology requires extra compute nodes, copy the
compute node section as many times as needed. Ensure that additional compute node sections
are comma-separated.
b. Change the following JSON attributes in your topology file, your-topology-name.json:
v
v
v
v
Name: Set to your topology name: your-topology-name.
Description: Set to the description for your topology.
Environment: Set to the environment for your topology: your-environment-name.
nodes.fqdn: For each node, you must set to the fully qualified domain name of the node
system. The deployment system must be able to ssh using the fully qualified domain name.
You can also set to the public IP address, private IP address, or host name.
v nodes.password or nodes.identity_file: For each node, set to the appropriate SSH root user
authentication for the node system. Either a password and an SSH identity file can be used for
authentication. Remove the unused attribute for each node.
c. (Optional) Create node specific attribute files. This step is only required when one or more nodes
in your topology require different attributes from those defined in your environment file
your-environment-name.json.
1) Create node specific attribute files. This step is only required when one or more nodes in
your topology require different attributes from those defined in your environment file
your-environment-name.json. For example, a node may not have an eth0 network interface,
which is the default value for some attributes. Below is an example node attribute file that
can be used to change the eth0 default network.
{
"openstack": {
"endpoints": {
"network-openvswitch": {
"bind_interface": "CHANGEME" (Run the ifconfig command to identify
the name of the interface, for example, enP3p9s0f0.)
},
"compute-vnc-bind": {
"bind_interface": "CHANGEME" (Run the ifconfig command to identify
the name of the interface, for example, enP3p9s0f0.)
}
}
}
After creating the node specific attribute files, add the nodes.attribute_file JSON attributes in
your topology file, your-topology-name.json:
v nodes.attribute_file: For each node, set to the attribute JSON file which overrides the
attributes in the default_attributes section of the environment file.
7. Customize the passwords and secrets before deploying. For instructions, see “Customizing
passwords and secrets” on page 114.
8. Configure the OpenStack block storage (cinder) driver. By default, the environment is configured to
use the LVM iSCSI cinder driver. You can change the following JSON attributes in your environment
file, your-environment-name.json, to customize the LVM iSCSI cinder driver configuration.
a. openstack.block-storage.volume.create_volume_group: If set to true, then the cinder-volumes
volume group is created on the controller node with a size determined by openstack.blockstorage.volume.volume_group_size. If set to false (default), then you can create the volume group
manually using physical disks. For more information, see “Creating an LVM volume group using
physical disks” on page 132.
Chapter 5. Deploying the cloud
91
b. openstack.block-storage.volume.volume_group_size: The amount of storage you use must be
smaller than the size available. If necessary, you can set the value to your free disk size. The
default value is 40 GB. This attribute is used only if openstack.blockstorage.volume.create_volume_group is set to true.
c. openstack.block-storage.volume.iscsi_ip_address: Change from 127.0.0.1 to the management
IP address of the controller node.
To customize your environment for a different cinder driver, see “Configuring Cinder drivers” on
page 129.
9. (Optional) Complete any optional customizations. For options, see “Deployment customization
options” on page 109.
Note: Some customization options might not be supported for all hypervisor types and some cannot
be configured after you deploy your cloud environment.
10. Deploy your topology.
a. Upload the environment for your deployment.
$ knife environment from file your-environment-name.json
b. Deploy the topology.
$ knife os manage deploy topology your-topology-name.json
c. (Optional) Check the detailed status of the IBM Cloud Manager with OpenStack services that are
deployed.
$ knife os manage services status –-topology-file your-topology-name.json
11. After the deployment is complete, the IBM Cloud Manager with OpenStack services are ready to use.
The IBM Cloud Manager with OpenStack dashboard is available at https://controller.fqdn.com/,
where controller.fqdn.com is the fully qualified domain name of the controller node in your
topology. The web interface for IBM Cloud Manager with OpenStack self-service portal is available
at https://controller.fqdn.com:18443/cloud/web/login.html. You can log into either using admin
user with the password that you customized in step 7 on page 91.
For more information about managing IBM Cloud Manager with OpenStack services, see “Managing
IBM Cloud Manager with OpenStack services” on page 207.
What to do next
You are ready to start using your cloud environment. To continue, see “Using your cloud environment”
on page 144.
Related reference:
“Troubleshooting errors when deploying or updating topologies” on page 301
If a topology deployment or update fails, review the log output from the deployment command for more
information.
Platform Resource Scheduler online product documentation
Deploying with z/VM compute nodes
Deploy the components that are necessary to create a cloud environment with z/VM compute nodes.
Before you begin
v Ensure you completed the “Deploying prerequisites” on page 74 steps.
v To use the z/VM hypervisor, one or more x86_64 Red Hat Enterprise Linux system nodes must be
used to install the compute and network driver to manage the z/VM hypervisor. You can run several
compute and network agent services (for several z/VM hypervisors) on one x86_64 Red Hat Enterprise
Linux system node. For more information on configuring the z/VM hypervisor, see the z/VM
OpenStack user manual.
92
IBM Cloud Manager with OpenStack: Administrator Guide, version 4.2
About this task
Use the following procedure to deploy the topology to your node systems.
Procedure
1. Log in to the deployment system as the root user. This is the system where IBM Cloud Manager
with OpenStack was installed.
2. Create a directory to store the files for the topology that you deploy. Change your-deployment-name
to the name for your deployment.
$ mkdir your-deployment-name
$ chmod 600 your-deployment-name
$ cd your-deployment-name
3. Copy the example environment for the topology that you deploy. Change your-environment-name to
the name for your environment.
Note: The following command must be entered on a single line, even though the example shows a
line break for formatting purposes.
$ knife environment show example-ibm-os-single-controller-n-compute -d -Fjson
> your-environment-name.json
4. Change the following JSON attributes in your environment file, your-environment-name.json:
a.
v Name: Set to your environment name: your-environment-name.
v Description: Set to the description for your environment.
v openstack.region: (Optional) Customize the region name for your cloud. The region name
must not contain spaces or special characters.
v openstack.endpoints.host, openstack.endpoints.bind-host, and
openstack.endpoints.mq.host: Change from 127.0.0.1 to the IP address of the controller node
system for the topology.
v openstack.compute.instance_name_template: Change the default value to a string of 8
characters in length. For example, abc%05x.
Note: z/VM does not support more than 8 characters; therefore, this parameter does not
support more than 8 characters.
b.
v (Recommended network configuration) If the management network interface of the nodes is
not eth0, if the virtual machine data network interface is not eth1, or both apply, then update
all occurrences of eth0, eth1, or both in the environment file to match your network
configuration.
v Update the following attributes for the controller node in your environment file.
– openstack.network.openvswitch.bridge_mapping_interface: Set the value as nil.
– openstack.network.ml2.mechanism_drivers: Add zvm, using a comma-separated list.
– openstack.network.ml2.flat_networks: Add your z/VM flat networks. You must include all
flat networks of managed hosts, separated by a comma. For example,
xcatvsw1flat,xcatvsw2flat.
– openstack.network.ml2.network_vlan_ranges: Add your z/VM network VLAN range. You
must include all VLAN networks of managed hosts, separated by a comma. For example,
xcatvsw1vlan:10:100,xcatvsw2vlan:10:100.
– ibm-openstack.network.l3.enable: Set the value to false. The l3-agent is not supported in
z/VM.
– ibm-openstack.network.ipmovement.enable: Set the value to false. The parameter is not
required in z/VM.
Chapter 5. Deploying the cloud
93
c. z/VM compute nodes configurations: You can update the following attributes for the z/VM
compute nodes in the environment file. Otherwise, you can specify the attributes in the attributes
file for each node, as described in step 6 which describes how to customize the attribute file.
ibm-openstack.zvm-driver.hosts: Specify all z/VM hypervisors to be managed.
ibm-openstack.zvm-driver.#host: Specify each z/VM hypervisor managed, the value should
match the values in ibm-openstack.zvm-driver.hosts. For example, if you set
ibm-openstack.zvm-driver.hosts as ["server1","server2"], then you have the attributes
ibm-openstack.zvm-driver.server1 and ibm-openstack.zvm-driver.server2. This is also the top attribute
for each managed z/VM hypervisor. The sub-attributes of each ibm-openstack.zvmdriver.#host describe properties of the corresponding z/VM hypervisor.
v ibm-openstack.zvm-driver.#host.xcat.server: Specify the xCAT MN IP address or host name.
v ibm-openstack.zvm-driver.#host.xcat.username: Specify the xCAT REST API user name.
v
v
v ibm-openstack.zvm-driver.#host.xcat.zhcp_nodename: Specify the zHCP node name in xCAT.
v ibm-openstack.zvm-driver.#host.xcat.master: Specify the xCAT master node (the node name
in the xCAT definition).
ibm-openstack.zvm-driver.#host.xcat.mnadmin: Specify the xCAT management user that can
ssh into xcat mn. If you do not set this user, the default value is mnadmin.
v ibm-openstack.zvm-driver.#host.xcat.mgt_ip: Specify the first IP address of the management
network.
v
Note: Remember the xCAT management interface IP address. xCAT uses this IP address to
connect a newly deployed instance server.
v ibm-openstack.zvm-driver.#host.xcat.mgt_mask: Specify the network mask of the xCAT
management network. For example: 255.255.255.0.
v ibm-openstack.zvm-driver.#host.xcat.connection_timeout: Specify the timeout value for
reading the xCAT response in seconds.
v ibm-openstack.zvm-driver.#host.xcat.image_clean_period: Specify the amount of time that if
the xCAT image is not used, it is purged after the specified time expires. The default is 30
days.
v ibm-openstack.zvm-driver.#host.xcat.free_space_threshold: Specify the threshold when
xCAT MN disk space is not large enough. The default is 50G. After the disk space threshold is
met, a purge operation starts.
v ibm-openstack.zvm-driver.#host.xcat.timeout: Specify the number of seconds the agent waits
for a xCAT MN response. The recommended value is 300.
v ibm-openstack.zvm-driver.#host.config.ram_allocation_ratio: Specify the memory
overcommit ratio for the z/VM Driver. The recommended value is 3.
v ibm-openstack.zvm-driver.#host.image.tmp_path: Specify the path that images are stored
(snapshot, deploy, and so on).
v ibm-openstack.zvm-driver.#host.image.cache_manager_interval: This value is not z/VM
specific. Set it to the default 86400(s), which is 24 hours.
v ibm-openstack.zvm-driver.#host.rpc_response_timeout: Specify the timeout response time.
The default is 180 seconds. If the value is reached, the live migration does not succeed.
v ibm-openstack.zvm-driver.#host.reachable_timeout: After this value, the deployment reports
an error 'Failed to power on instance'.
v ibm-openstack.zvm-driver.#host.polling_interval: The Neutron z/VM agent's polling
interval, in seconds.
v ibm-openstack.zvm-driver.#host.config_drive.format: The config driver format. This value
must be tgz.
94
IBM Cloud Manager with OpenStack: Administrator Guide, version 4.2
v ibm-openstack.zvm-driver.#host.config_drive.inject_password: Defines whether to inject the
password in config drive. If it is set to True, the default os root password for the new booted
virtual machine is the random value of the adminPass property that is shown in the output of
the Nova boot command.
v ibm-openstack.zvm-driver.#host.diskpool: Specify the disk pool name from where xCAT
allocates disks for new servers. The disk pool name is the name of the storage 'group' defined
in the Directory Manager.
v ibm-openstack.zvm-driver.#host.diskpool_type: Specify the disk pool type, either FBA or
ECKD™.
v ibm-openstack.zvm-driver.#host.zvm_host: Specify the xCAT node name of the z/VM
hypervisor.
v ibm-openstack.zvm-driver.#host.host: Specify the host that is used to distinguish different
Nova compute hosts. It can be the same as zvm_host.
v ibm-openstack.zvm-driver.#host.user_profile: Specify the default template of the user
directory for new servers. Do not use lnxdflt but define your own profile.
v ibm-openstack.zvm-driver.#host.config_drive.inject_password: Define whether to place the
password in the config drive. If inject_password is set to False, the default os root password of
the new booted virtual machine is the password in data bag user_passwords.zlinuxroot. If
inject_password is set to True, the default os root password can be set using Nova user-data. If
you do not specify the password in nova user-data, the default os root password is a random
value of adminPass property that is shown in the output of the virtual machine boot console.
v ibm-openstack.zvm-driver.#host.scsi_pool: Specify the name of the xCAT SCSI pool. You can
specify any name. xCAT creates and manages it.
v ibm-openstack.zvm-driver.#host.fcp_list: Specify the list of FCPs used by instances. Each
instance needs one FCP to attach a volume to itself. Those FCPs should be well planned and
made online before OpenStack can use them. OpenStack does not check their status, so if they
are not ready, you might receive errors. The format of this variable should look like
'min1-max1;min2-max2;min3-max3'. Contact your z/VM system manager if you do not know
what FCPs you can use.
v ibm-openstack.zvm-driver.#host.zhcp_fcp_list: Specify the list of FCPs used only by xCAT
HCP node. It must be different from zvm_fcp_list or you receive errors. The format of this
variable should look like 'min1-max1;min2-max2;min3-max3'. Only specify one FCP for HCP to
avoid wasting resources. Contact your z/VM system manager if you do not know what FCPs
you can use.
v ibm-openstack.zvm-driver.#host.external_vswitch_mappings: Set the OSA configuration for
each of the virtual switches. These configurations are required if the virtual switch connects
outside of z/VM. The format of this variable is 'xcatvsw2:6243,6245;xcatvsw3:6343'. Where
xcatvsw2 and xcatvsw3 are the virtual switches and 6243, 6245, 6343 are RDEV addresses of the
OSA cards that are connected to the virtual switch.
v ibm-openstack.zvm-driver.#host.ml2.flat_networks: Add your z/VM flat networks. For
example, xcatvsw1flat.
v ibm-openstack.zvm-driver.#host.ml2.network_vlan_ranges: Add your z/VM network VLAN
range. For example, xcatvsw1vlan:10:100.
5. Copy the following example topology to a file, your-topology-name.json. Change
your-topology-name to the name for your topology. Here is an example topology with z/VM
compute nodes.
{
"name":"CHANGEME",
"description":"CHANGEME",
"environment":"CHANGEME",
"secret_file":"CHANGEME",
"run_sequentially":false,
"nodes": [
{
Chapter 5. Deploying the cloud
95
"fqdn":"CHANGEME",
"password":"CHANGEME",
"identity_file":"CHANGEME",
"quit_on_error":true,
"run_order_number":1,
"runlist": [
"role[ibm-os-single-controller-node]",
"role[ibm-os-prs-ego-master]",
"role[ibm-os-prs-controller-node]",
"role[ibm-sce-node]"
]
},
{
"fqdn":"CHANGEME",
"password":"CHANGEME",
"identity_file":"CHANGEME",
"quit_on_error":true,
"run_order_number":2,
"runlist": [
"role[ibm-os-zvm-driver-node]",
"role[ibm-os-prs-compute-node]"
],
"attribute_file":"CHANGEME"
}
]
}
6. Customize the topology file.
a. The first node in your topology file is your single controller node. The second node in your
topology file is for a compute node. If your topology requires extra compute nodes, copy the
compute node section as many times as needed. Ensure that additional compute node sections
are comma-separated.
b. Change the following JSON attributes in your topology file, your-topology-name.json:
v Name: Set to your topology name: your-topology-name.
v Description: Set to the description for your topology.
v Environment: Set to the environment for your topology: your-environment-name.
v nodes.fqdn: For each node, you must set to the fully qualified domain name of the node
system. The deployment system must be able to ssh using the fully qualified domain name.
You can also set to the public IP address, private IP address, or host name.
v nodes.password or nodes.identity_file: For each node, set to the appropriate SSH root user
authentication for the node system. Either a password and an SSH identity file can be used for
authentication. Remove the unused attribute for each node.
c. Create node-specific attribute files. You can create the attribute file for each node you deploy. The
following example shows a node-specific attribute file for a z/VM compute node. The example
file that is shown creates two compute services in the node. Reference Step 4 to review what each
attribute stands for.
In addition, you must update occurrences of CHANGEME to the actual value. You can also
change the default values and hosts in the examples.
{
"ibm-openstack": {
"zvm-driver" :{
"hosts" : ["zvm1","zvm2"],
"zvm1" : {
"xcat": {
"username": "CHANGEME",
"server": "CHANGEME",
"zhcp_nodename": "CHANGEME",
"master": "CHANGEME",
"mgt_ip": "CHANGEME",
"mgt_mask": "CHANGEME"
},
96
IBM Cloud Manager with OpenStack: Administrator Guide, version 4.2
"ml2": {
"type_drivers": "local,flat,vlan,gre",
"tenant_network_types": "vlan",
"flat_networks": "CHANGEME",
"network_vlan_ranges": "CHANGEME"
},
"config": {
"ram_allocation_ratio": "3"
},
"image": {
"tmp_path": "/var/lib/nova/images",
"cache_manager_interval": "86400"
},
"config_drive": {
"format": "tgz",
"inject_password": "false"
},
"diskpool" : "CHANGEME",
"diskpool_type" : "CHANGEME",
"zvm_host" : "CHANGEME",
"host" : "CHANGEME",
"user_profile" : "CHANGEME",
"scsi_pool" : "CHANGEME",
"fcp_list" : "CHANGEME",
"zhcp_fcp_list" : "CHANGEME",
"external_vswitch_mappings": "CHANGEME"
},
"zvm2" : {
"xcat": {
"username": "CHANGEME",
"server": "CHANGEME",
"zhcp_nodename": "CHANGEME",
"master": "CHANGEME",
"mgt_ip": "CHANGEME",
"mgt_mask": "CHANGEME"
},
"ml2": {
"type_drivers": "local,flat,vlan,gre",
"tenant_network_types": "vlan",
"flat_networks": "CHANGEME",
"network_vlan_ranges": "CHANGEME"
},
"config": {
"ram_allocation_ratio": "3"
},
"image": {
"tmp_path": "/var/lib/nova/imagesCHANGEME",
"cache_manager_interval": "86400"
},
"config_drive": {
"format": "tgz",
"inject_password": "false"
},
"diskpool" : "CHANGEME",
"diskpool_type" : "CHANGEME",
"zvm_host" : "CHANGEME",
"host" : "CHANGEME",
"user_profile" : "CHANGEME",
"scsi_pool" : "CHANGEME",
"fcp_list" : "CHANGEME",
"zhcp_fcp_list" : "CHANGEME",
"external_vswitch_mappings": "CHANGEME"
}
}
}
}
Chapter 5. Deploying the cloud
97
After creating the node-specific attribute files, add the nodes.attribute_file JSON attributes in
your topology file, your-topology-name.json:
v nodes.attribute_file: For each node, set to the attribute JSON file that overrides the attributes
in the default_attributes section of the environment file.
7. Customize the passwords and secrets before deploying. You must change the passwords of the xCAT
administrator xcat, the xCAT mnadmin user xcatmnadmin, and any instances that are created by the
z/VM root user zlinuxroot in the user_passwords data bag. For instructions, see “Customizing
passwords and secrets” on page 114.
8. (Optional) Complete any optional customizations. For options, see “Deployment customization
options” on page 109.
Note: Some customization options might not be supported for all hypervisor types and some cannot
be configured after you deploy your cloud environment.
9. Deploy your topology.
a. Upload the environment for your deployment.
$ knife environment from file your-environment-name.json
b. Deploy the topology.
$ knife os manage deploy topology your-topology-name.json
c. (Optional) Check the detailed status of the IBM Cloud Manager with OpenStack services that are
deployed.
$ knife os manage services status –-topology-file your-topology-name.json
10. After the deployment is complete, the IBM Cloud Manager with OpenStack services are ready to
use. The IBM Cloud Manager with OpenStack dashboard is available at https://
controller.fqdn.com/, where controller.fqdn.com is the fully qualified domain name of the
controller node in your topology. The web interface for IBM Cloud Manager with OpenStack
self-service portal is available at https://controller.fqdn.com:18443/cloud/web/login.html. You
can log into either using admin user with the password that you customized in step 7.
For more information about managing IBM Cloud Manager with OpenStack services, see “Managing
IBM Cloud Manager with OpenStack services” on page 207.
What to do next
You are ready to start using your cloud environment. To continue, see “Using your cloud environment”
on page 144.
Related reference:
“Troubleshooting errors when deploying or updating topologies” on page 301
If a topology deployment or update fails, review the log output from the deployment command for more
information.
Configure the Image Service
“Creating initial networks” on page 155
After you deploy the components for creating a cloud environment, you can create several different types
of networks.
Deploying to manage to PowerVC
Deploy the components that are necessary to create a test or production cloud to manage to PowerVC.
You can complete the deployment with either a prescribed or advanced configuration.
Deploying a prescribed configuration to manage to PowerVC:
Deploy the components that are necessary to create a cloud environment to manage to PowerVC using a
prescribed cloud configuration.
98
IBM Cloud Manager with OpenStack: Administrator Guide, version 4.2
Before you begin
Before you begin, ensure you completed the “Deploying prerequisites” on page 74 steps.
About this task
The following information provides details about this prescribed configuration.
Table 29. Summary of prescribed configuration
Component
Configuration
OpenStack Components
Identity, Image, Network, Compute, Orchestration, Block Storage, Telemetry, and
Dashboard
OpenStack Networking
Neutron with ML2 plugin using Open vSwitch mechanism driver
OpenStack Network Types
Supported
VLAN
OpenStack compute scheduler
Compute scheduler filters
OpenStack Block Storage
Driver
OpenStack PowerVC driver
Database
IBM DB2 (default) or MySQL
Message Queue
RabbitMQ (default) or Qpid
Virtualization Manager
PowerVC
Self-service portal
Enabled (default) or disabled
Use the following procedure to deploy the topology to your node systems.
Procedure
1. Log in to the deployment system as the root user. This is the system where IBM Cloud Manager with
OpenStack was installed.
2. Create a directory to store the files for the topology that you deploy. Change your-deployment-name to
the name for your deployment.
$ mkdir your-deployment-name
$ chmod 600 your-deployment-name
$ cd your-deployment-name
3. Copy the example cloud file to use as the base structure for your cloud deployment and rename it for
your cloud environment.
Note: This step assumes you used the default IBM Cloud Manager with OpenStack installation path
on the deployment server (/opt/ibm/cmwo).
In the following command, change your-cloud.yml to the name for your cloud.
$ cp /opt/ibm/cmwo/cli/config/example-controller-powervc-driver-cloud.yml your-cloud.yml
4. Change the required YAML attributes in your cloud file, your-cloud.yml.
v Cloud Information (cloud): Customize the cloud information.
a. name: Set the name for your cloud. The name cannot contain spaces or special characters. This
name is also used as the OpenStack region name.
b. password: Set the cloud administrator (admin) user's password.
v Node Information (nodes): Customize the information for your cloud controller node. This node
runs the IBM Cloud Manager with OpenStack PowerVC driver services. The services connect to
your existing PowerVC environment.
a. name and description: Leave these set to the default values provided.
Chapter 5. Deploying the cloud
99
b. fqdn: Set to the fully qualified domain name of the node system. The deployment system must
be able to SSH using the fully qualified domain name. You can also set to the public IP address,
private IP address, or host name.
c. password or identity_file: Set to the appropriate SSH root user authentication for the node
system. You can use either a password or a SSH identity file for authentication.
d. nics.management_network: Set to the management network interface card for the node system.
This network is used for IBM Cloud Manager with OpenStack communication between the
nodes in the cloud. The fqdn setting for the node must resolve to the IP address of this network.
The default is eth0.
v PowerVC Information (powervc): Customize the PowerVC information.
a. host: Set to the fully qualified domain name or IP address of PowerVC.
b. admin_user: Set to the PowerVC administrator’s user name.
c. admin_password: Set to the PowerVC administrator’s password.
d. storage_connectivity_groups: Set to the PowerVC storage connectivity groups that you want to
make available in your cloud. The default is Any host, all VIOS. Add one storage connectivity
group per line.
5. Optional: Complete any optional customization by changing the appropriate YAML attributes in your
cloud file, your-cloud.yml.
a. Optional: Cloud Information (cloud): Customize the cloud information.
v database_service_type: You can change the database that is used by OpenStack from DB2
(default) to MySQL by setting this attribute to mysql.
v messaging_service_type: You can change the messaging queue that is used by OpenStack from
RabbitMQ (default) to Qpid by setting this attribute to qpid.
v self_service_portal and self_service_portal_node_name: IBM Cloud Manager with OpenStack
features an easy to use self-service portal for performing cloud operations. You can disable the
self-service portal cloud feature by setting the self_service_portal attribute to disabled and the
self_service_portal_node_name attribute to ~.
b. Optional: Environment Information (environment): Customize the environment information.
v ntp.servers: Set to the NTP servers that are accessible to your deployment. The list of NTP
servers must be comma separated, for example, [your.0.ntpserver.com, your.1.ntpserver.com]. The
default is [0.pool.ntp.org, 1.pool.ntp.org, 2.pool.ntp.org, 3.pool.ntp.org].
6. Deploy your cloud.
$ knife os manage deploy cloud your-cloud.yml
Note: This command generates a topology file and other related files for your deployment and stores
them in the same directory as your cloud file, your-cloud.yml. The cloud file is no longer needed after
the deployment completes and can be removed. The generated files are only used if you must update
your cloud.
$ rm your-cloud.yml
7. After the deployment is complete, the IBM Cloud Manager with OpenStack services are ready to use.
The IBM Cloud Manager with OpenStack dashboard is available at https://node.fqdn.com/, where
node.fqdn.com is the fully qualified domain name of the node. The web interface for IBM Cloud
Manager with OpenStack self-service portal is available at https://node.fqdn.com:18443/cloud/web/
login.html. You can log into either using admin user with the password customized in step 4 on page
99.
For more information about managing IBM Cloud Manager with OpenStack services, see “Managing
IBM Cloud Manager with OpenStack services” on page 207.
100
IBM Cloud Manager with OpenStack: Administrator Guide, version 4.2
Results
You are ready to start using your cloud environment. To continue, see “Using your cloud environment”
on page 144.
Deploying an advanced configuration to manage to PowerVC:
Deploy the components that are necessary to create a cloud environment to manage to PowerVC using an
advanced configuration.
Before you begin, ensure you completed the “Deploying prerequisites” on page 74 steps.
Use the following procedure to deploy the topology to your node systems.
1. Log in to the deployment system as the root user. This is the system where IBM Cloud Manager
with OpenStack was installed.
2. Create a directory to store the files for the topology that you deploy. Change your-deployment-name
to the name for your deployment.
$ mkdir your-deployment-name
$ chmod 600 your-deployment-name
$ cd your-deployment-name
3. Copy the example environment for the topology that you deploy. Change your-environment-name to
the name for your environment.
Note: The following command must be entered on a single line, even though the example shows a
line break for formatting purposes.
$ knife environment show example-ibm-os-single-controller-n-compute -d -Fjson
> your-environment-name.json
4. Configure the SSL client key and certificates for the PowerVC 1.2.2 message queue:
a. Generate the SSL private key in the PowerVC driver controller node as follows:
openssl genrsa -out key.pem
2048
b. Generate a certificate request in the PowerVC driver controller node with the previously created
private key. You must enter the subject for your controller node:
Note: The following command must be entered on a single line, even though the example shows
a line break for formatting purposes.
openssl req -new -key key.pem -out cert.csr -subj "/CN=c582f1-n36-vm1_pok_stglabs_ibm_com
Messaging Client/O=PowerVC Driver"
Note: Replace 'c582f1-n36-vm1_pok_stglabs_ibm_com' with the name of your controller node.
c. Copy the certificate request generated in the previous step to your PowerVC node.
d. Sign the requested certificate by the PowerVC message queue certificate authority (CA), on
thePowerVC node:
Note: The following command must be entered on a single line, even though the example shows
a line break for formatting purposes.
openssl ca -batch -config /etc/pki/messages/ca/openssl.conf -extensions client_ext
-in cert.csr -out cert.pem -notext
e. Copy the SSL certificate 'cert.pem' and PowerVC message queue CA certificate,
/etc/pki/messages/ca/cacert.pem from the PowerVC node to the PowerVC driver controller
node.
f. Set the SSL key, certificate, and PowerVC message queue CA files attributes. Below is the default
SSL key, certificate, and CA files path (with line breaks for formatting purposes). Set these
attributes to your generated (or copied) SSL key and certificate file path:
Chapter 5. Deploying the cloud
101
[’ibm-openstack’][’powervc-driver’][’powervc’][’rabbitmq’][’ssl_keyfile_source’] =
’/root/powervcmq_ssl/key.pem’
[’ibm-openstack’][’powervc-driver’][’powervc’][’rabbitmq’][’ssl_certfile_source’] =
’/root/powervcmq_ssl/cert.pem’
[’ibm-openstack’][’powervc-driver’][’powervc’][’rabbitmq’][’ssl_ca_certs_source’] =
’/root/powervcmq_ssl/cacert.pem’
5. Configure the PowerVC node with SSH access. If the PowerVC version is 1.2.2 or later, then SSH
access is configured by default.
v If already configured, skip to step 6.
v If you do not configure the PowerVC node with SSH access, you must create the PowerVC Rabbit
client user on the PowerVC side. To do so, run the following command in the PowerVC node:
su - rabbitmq -c "/usr/lib/rabbitmq/bin/rabbitmqctl add_user <username><password>
su - rabbitmq -c ’/usr/lib/rabbitmq/bin/rabbitmqctl set_permissions -p / <username> ".*" ".*" ".*"’
Then, disable the SSH access and set RabbitMQ client user and password in your environment
file, your-environment-name.json:
[’ibm-openstack’][’powervc-driver’][’powervc’][’ssh’][’access’] = false
[’ibm-openstack’][’powervc-driver’][’powervc’][’rabbitmq’][’username’] = ’powervcdriver_mq’
Note: The RabbitMQ client user password is set in user data bag item 'pvcrabbit' in step 7.
6. Change the following JSON attributes in your environment file, your-environment-name.json:
v Name: Set to your environment name: your-environment-name.
v Description: Set to the description for your environment.
v openstack.region: (Optional) Customize the region name for your cloud. The region name must
not contain spaces or special characters.
v openstack.endpoints.host, openstack.endpoints.bind-host, and openstack.endpoints.mq.host:
Change from 127.0.0.1 to the IP address of the controller node system for the topology.
v ibm-openstack.powervc-driver.powervc.admin_user: Specify the administrator for PowerVC.
v ibm-openstack.powervc-driver.db_create: Set to true for PowerVC driver.
v ibm-openstack.powervc-driver.powervc.host: Specify the host name for PowerVC.
v ibm-openstack.powervc-driver.powervc.mq.service_type: Specify the message queue type for
PowerVC. For PowerVC version 1.2.2 and later, set it as "rabbitmq". For PowerVC 1.2.0.X or
1.2.1.X, set it as "qpid".
v ibm-openstack.powervc-driver.powervc.rabbitmq.ssl_keyfile_source: The SSL private key file
path for the PowerVC message queue.
v ibm-openstack.powervc-driver.powervc.rabbitmq.ssl_certfile_source: The SSL signed certificate
file path for the PowerVC message queue.
v ibm-openstack.powervc-driver.powervc.rabbitmq.ssl_ca_certs_source: The SSL CA file path for
the PowerVC message queue.
v ibm-openstack.powervc-driver.powervc.scg: Specify the PowerVC Storage Connectivity Group list
that will be used by the PowerVC Driver.
Note: Depending on your configuration, change the following values:
v By default Neutron is set to use ML2 as the core plug-in. Set the following additional values:
– openstack.network.ml2.tenant_network_types list "vlan" in the value list.
– openstack.network.ml2.network_vlan_ranges list "default:1:4094" in the value list.
– openstack.network.openvswitch.tenant_network_type: "vlan"
– openstack.network.openvswitch.network_vlan_ranges list "default:1:4094" in the value list.
v In a PowerVC only environment, where no other compute node is registered to a controller node
that is running the PowerVC driver, the default configuration can be simplified. You do not need
to set up a dedicated virtual machine data network. In the sample environment file, the GRE
102
IBM Cloud Manager with OpenStack: Administrator Guide, version 4.2
network type is enabled by the default settings. However, since PowerVC does not support the
GRE network type, set the following attributes to disable GRE and specify a valid network type.
– openstack.network.openvswitch.bridge_mappings = ""
– openstack.network.openvswitch.bridge_mapping_interface = ""
– openstack.network.openvswitch.enable_tunneling ="False"
– openstack.network.openvswitch.tunnel_type = ""
– openstack.network.openvswitch.tunnel_id_ranges = ""
For simplification, you can also disable the L3 agent and IP address movement functions if you
choose. By default, they are both enabled as shown in the following default parameters.
– openstack.network.l3.external_network_bridge = br-ex
– openstack.network.l3.external_network_bridge_interface = eth0
– ibm-openstack.network.ip_movement.enable = true
– ibm-openstack.network.l3.enable = true
To disable the L3 agent and IP address movement, change true to false before deploying the
controller node.
7. Copy the following example topology to a file, your-topology-name.json. Change
your-topology-name to the name for your topology. Here is an example topology to manage to
PowerVC.
{
"name":"CHANGEME",
"description":"CHANGEME",
"environment":"CHANGEME",
"secret_file":"CHANGEME",
"run_sequentially":false,
"nodes": [
{
"fqdn":"CHANGEME",
"password":"CHANGEME",
"identity_file":"CHANGEME",
"quit_on_error":true,
"run_order_number":1,
"runlist": [
"role[ibm-os-single-controller-node]",
"role[ibm-os-powervc-driver-node]",
"role[ibm-sce-node]"
]
}
]
}
8. Customize the topology file. The node in your topology file is your single controller node that
includes the PowerVC driver. Change the following JSON attributes in your topology file,
your-topology-name.json:
v Name: Set to your topology name: your-topology-name.
v Description: Set to the description for your topology.
v Environment: Set to the environment for your topology: your-environment-name.
v nodes.fqdn: For each node, you must set to the fully qualified domain name of the node system.
The deployment system must be able to ssh using the fully qualified domain name. You can also
set to the public IP address, private IP address, or host name.
v nodes.password or nodes.identity_file: Set to the appropriate SSH root user authentication for
the node system. Either a password and an SSH identity file can be used for authentication.
Remove the unused attribute.
9. You must change the passwords in the user_passwords data bag to the actual password for the
PowerVC administrator and PowerVC message queue client user.
Enter the PowerVC admin password in the following Chef data bag:
Chapter 5. Deploying the cloud
103
`user_passwords` data bag’s `pvcadmin` data bag item
Enter the PowerVC release 1.2.1.x or 1.2.0.x message queue client user password in the following
Chef data bag:
`user_passwords` data bag’s `pvcqpid` data bag item
Enter the PowerVC release 1.2.2 (or later) message queue client user password in the following Chef
data bag:
`user_passwords` data bag’s `pvcrabbit` data bag item
To change the passwords in pvcadmin, pvcqpid, or pvcrabbit data bags, see Customizing passwords
and secrets.
10. (Optional) Complete any optional customizations. For options, see “Deployment customization
options” on page 109.
Note: Some customization options might not be supported for all hypervisor types and some cannot
be configured after you deploy your cloud environment.
11. Deploy your topology.
a. Upload the environment for your deployment.
$ knife environment from file your-environment-name.json
b. Deploy the topology.
$ knife os manage deploy topology your-topology-name.json
c. (Optional) Check the detailed status of the IBM Cloud Manager with OpenStack services that are
deployed.
$ knife os manage services status –-topology-file your-topology-name.json
12. After the deployment is complete, the IBM Cloud Manager with OpenStack services are ready to
use. The IBM Cloud Manager with OpenStack dashboard is available at https://
controller.fqdn.com/, where controller.fqdn.com is the fully qualified domain name of the
controller node in your topology. The web interface for IBM Cloud Manager with OpenStack
self-service portal is available at https://controller.fqdn.com:18443/cloud/web/login.html. You
can log into either using admin user with the password that you customized in step 9.
For more information about managing IBM Cloud Manager with OpenStack services, see “Managing
IBM Cloud Manager with OpenStack services” on page 207.
You are ready to start using your cloud environment. To continue, see “Using your cloud environment”
on page 144.
Deploying multi-region support
In a multi-region cloud environment, you can set up two separate deployments that use the same
OpenStack Keystone server, but use different regions and different hypervisors.
About this task
Use the following instructions to build your own multi-region cloud environment. These instructions
assume that you are familiar with the instructions for deploying a single-region cloud environment.
This example uses two regions for the multi-region cloud environment; however, you can have more than
two regions. Also, this example uses a single deployment server to manage all of the regions. However,
you can use a separate deployment server for each region. If separate deployment servers are used, they
must have the same version of IBM Cloud Manager with OpenStack installed, but are allowed to have
different fix pack levels. For more information about updates and release upgrades in these
configurations, see “Best practices for maintaining a multi-region cloud or test cloud” on page 41.
104
IBM Cloud Manager with OpenStack: Administrator Guide, version 4.2
Procedure
1. Create two directories to store the files for the multi-region cloud environment. One directory is used
for region one and the second directory is used for region two.
2. Create two environment files, which are copied from the example-ibm-os-single-controller-ncompute example environment. One file is used for region one and the second file is used for region
two.
3. Create two topology files that are based on the hypervisor that is used in each region. One file is used
for region one and the second file is used for region two.
4. Update the environment and topology files for each region to support the multi-region cloud
environment.
a. In each region’s environment file, update openstack.region to be the unique name for each region.
The region name must not contain spaces or special characters.
Note: For the Keystone configuration, the UUID authentication strategy is the default
authentication strategy. The PKI authentication strategy must not be used for a multi-region
topology.
b. In each region’s environment file, update the openstack.endpoint.identity-api.host,
openstack.endpoints.identity-admin.host, and openstack.endpoints.identity-internal.host
attributes to specify the node that contains the shared OpenStack Keystone server. The node can
be any single controller node, within the multiple region cloud environment. The following
example JSON snippet is added to the environment file inside override_attributes > openstack >
endpoints, where X.X.X.X is the management IP address for the single controller node where the
shared OpenStack Keystone server is located:
"identity-api": {
"host": "X.X.X.X"
},
"identity-admin": {
"host": "X.X.X.X"
},
"identity-internal": {
"host": "X.X.X.X"
}
The other endpoint host attributes (openstack.endpoints.host, openstack.endpoints.bind-host,
openstack.endpoints.mq.host, openstack-endpoints.db.host, and so on) reference the
management IP address for the single controller node of the region
c. If you want to use the self-service portal to manage your multi-region cloud environment, then
each region’s environment file must set ibm-sce.service.enabled to true. In addition, only one
region’s topology file can contain a node with the ibm-sce-node role. That is, only one self-service
portal is supported in a multi-region cloud environment. The self-service portal can be installed in
any region. If you do not want to use the self-service portal to manage your multi-region cloud
environment, then each region's environment file must set ibm-sce.service.enabled to false.
Neither region's topology file can contain a node with the ibm-sce-node role.
d. Customize the passwords and secrets for each region. Since each region uses the same OpenStack
Keystone server, the data bag items that are related to OpenStack Keystone must have the same
passwords in all regions. Other passwords and secrets can be unique for each region. For more
information about customizing passwords and secrets, see “Customizing passwords and secrets”
on page 114.
The following passwords and secrets must be the same between the regions. For more information
on the data bags that are referenced, see “Data bags” on page 277.
v Shared passwords and secrets in the secrets data bag:
openstack_identity_bootstrap_token
openstack_simple_token
v All passwords and secrets in the service_passwords data bag are shared.
Chapter 5. Deploying the cloud
105
v Shared passwords and secrets in the user_passwords data bag:
admin
sceagent
Note: You can use the following command to determine the current passwords and secrets for the
first region. The command downloads and decrypts the data bags that contain the passwords and
secrets for the first region and stores them in the data_bags directory. The directory also contains a
passwords and secrets JSON file, region-one-environment-name_passwords_file.json, that can be
used to set the passwords and secrets for the second region. Ensure that you remove the
data_bags directory after you are done using it.
$ knife os manage get passwords --topology-file topology_region_one.json data_bags
e. The remaining environment and topology file updates are normal updates for a stand-alone
deployment. However, the same database service (DB2 or MySQL) and messaging service (Qpid)
must be used for each region.
5. Deploy the topology for the region that contains the shared OpenStack Keystone server:
$ knife os manage deploy topology topology_region_one.json
6. Deploy the topology for the remaining region:
$ knife os manage deploy topology topology_region_two.json
7. (Optional) Check the detailed status of the IBM Cloud Manager with OpenStack services that are
deployed.
$ knife os manage services status –-topology-file your-topology-name.json
8. (Self-service portal): If the self-service portal is installed, restart the IaaS gateway service on the node
where the shared OpenStack Keystone server is running. Run the service openstack-iaasgateway
restart command to restart the service. Then, restart the self-service portal service on the node where
it is installed. Run the service sce restart command to restart the service. After you restart the
services, you can add an OpenStack cloud connection for the additional region. For more information,
see “Adding an OpenStack cloud configuration” on page 234.
Note: Only one self-service portal must be installed to manage the multiple regions.
What to do next
For more information about managing IBM Cloud Manager with OpenStack services, see “Managing IBM
Cloud Manager with OpenStack services” on page 207.
Deploying multiple hypervisor types
Use this information to deploy the components that are necessary to create a cloud environment with
multiple hypervisor types.
About this task
It is possible to configure different types of hypervisors in the same OpenStack environment.
The following example shows how to build a dual hypervisor type environment using IBM Cloud
Manager with OpenStack. The example uses the following system setup:
v System 1: This is the deployment system where IBM Cloud Manager with OpenStack is installed.
v System 2: The OpenStack single controller node.
v System 3: The OpenStack x86 Linux Kernel-based Virtual Machine (KVM) compute node.
v System 4: The OpenStack PowerKVM compute node.
Important: This procedure is for example purposes only.
106
IBM Cloud Manager with OpenStack: Administrator Guide, version 4.2
Procedure
1. Install IBM Cloud Manager with OpenStack on system 1. For instructions, see “Installing IBM Cloud
Manager with OpenStack on Linux” on page 21.
2. Follow the deployment prerequisites for all systems. See “Deploying prerequisites” on page 74 for
details.
3. From system 1, complete the following steps.
a. Create a directory to store the files for the topology that you deploy. Change your-deploymentname to the name for your deployment.
$ mkdir your-deployment-name
$ chmod 600 your-deployment-name
$ cd your-deployment-name
b. Copy the example environment for the topology that you deploy. Change your-environment-name
to the name for your environment.
Note: The following command must be entered on a single line, even though the example shows
a line break for formatting purposes.
$ knife environment show example-ibm-os-single-controller-n-compute -d -Fjson
> your-environment-name.json
c. Create a topology file that is based on the following example topology file, your-topologyname.json.
{
"name":"CHANGEME",
"description":"CHANGEME",
"environment":"CHANGEME",
"secret_file":"CHANGEME",
"run_sequentially":false,
"nodes": [
{
"fqdn":"CHANGEME_TO_SYSTEM2",
"password":"CHANGEME",
"quit_on_error":true,
"run_order_number":1,
"runlist": [
"role[ibm-os-single-controller-node]",
"role[ibm-sce-node]"
]
},
{
"fqdn":"CHANGEME_TO_SYSTEM3",
"password":"CHANGEME",
"quit_on_error":true,
"run_order_number":2,
"runlist": [
"role[ibm-os-compute-node-kvm]"
]
},
{
"fqdn":"CHANGEME_TO_SYSTEM4",
"password":"CHANGEME",
"quit_on_error":true,
"run_order_number":2,
"runlist": [
"role[ibm-os-compute-node-powerkvm]"
]
}
]
}
4. From system 1, modify the environment and topology files for the deployment. See “Deploying a test
or production cloud” on page 77 for details.
5. From system 1, deploy your topology.
Chapter 5. Deploying the cloud
107
a. Upload the environment for your deployment.
$ knife environment from file your-environment-name.json
b. Deploy the topology.
knife os manage deploy topology your-topology-name.json
c. (Optional) Check the detailed status of the IBM Cloud Manager with OpenStack services that are
deployed.
$ knife os manage services status –-topology-file your-topology-name.json
6. After the deployment is complete, the IBM Cloud Manager with OpenStack services are ready to use.
The IBM Cloud Manager with OpenStack dashboard is available at https://controller.fqdn.com/,
where controller.fqdn.com is the fully qualified domain name of the controller node in your
topology. The web interface for IBM Cloud Manager with OpenStack self-service portal is available at
https://controller.fqdn.com:18443/cloud/web/login.html. You can log into either using admin user
with the password that you customized in your deployment.
For more information about managing IBM Cloud Manager with OpenStack services, see “Managing
IBM Cloud Manager with OpenStack services” on page 207.
Related reference:
“Troubleshooting errors when deploying or updating topologies” on page 301
If a topology deployment or update fails, review the log output from the deployment command for more
information.
“Roles” on page 287
The following roles are provided in support of the reference topologies.
Stand-alone self-service portal for managing VMware clouds
Deploy the components that are necessary to use IBM Cloud Manager with OpenStack self-service portal
to manage your VMware clouds.
Before you begin
Before you begin, ensure you completed the “Deploying prerequisites” on page 74 steps.
About this task
Use the following procedure to deploy the topology to your node systems.
Procedure
1. Log in to the deployment system as the root user. This is the system where IBM Cloud Manager with
OpenStack was installed.
2. Create a directory to store the files for the topology that you deploy. Change your-deployment-name to
the name for your deployment.
$ mkdir your-deployment-name
$ chmod 600 your-deployment-name
$ cd your-deployment-name
3. Copy the example environment for the topology that you deploy. Change your-environment-name to
the name for your environment.
4. Change the following JSON attributes in your environment file, your-environment-name.json:
v Name: Set to your environment name: your-environment-name.
v Description: Set to the description for your environment.
5. Copy the following example topology to a file, your-topology-name.json. Change your-topology-name
to the name for your topology.
{
"name":"CHANGEME",
"description":"CHANGEME",
"environment":"CHANGEME",
108
IBM Cloud Manager with OpenStack: Administrator Guide, version 4.2
"run_sequentially":true,
"nodes": [
{
"fqdn":"CHANGEME",
"password":"CHANGEME",
"identity_file":"CHANGEME",
"quit_on_error":true,
"runlist": [
"role[ibm-sce-node]"
]
}
]
}
6. Change the following JSON attributes in your topology file, your-topology-name.json:
a. Name: Set to your topology name: your-topology-name.
b. Description: Set to the description for your topology.
c. Environment: Set to the environment for your topology: your-environment-name.
d. nodes.fqdn: For each node, you must set to the fully qualified domain name of the node system.
The deployment system must be able to ssh by using the fully qualified domain name. You can
also set to the public IP address, private IP address, or host name.
e. nodes.password or nodes.identity_file: Set to the appropriate SSH root user authentication for
the node system. Either a password and an SSH identity file can be used for authentication.
Remove the unused attribute.
7. Customize the administrator (admin) user's password before deploying. For instructions, see
“Customizing passwords and secrets” on page 114.
8. Deploy your topology.
a. Upload the environment for your deployment.
$ knife environment from file your-environment-name.json
b. Deploy the topology.
$ knife os manage deploy topology your-topology-name.json
c. (Optional) check the detailed status of the IBM Cloud Manager with OpenStack services that are
deployed.
$ knife os manage services status --topology-file your-topology-name.json
Results
The web interface for IBM Cloud Manager with OpenStack self-service portal is available at
https://node.fqdn.com:18443/cloud/web/login.html, where node.fqdn.com is the fully qualified domain
name for the node on which you deployed the self-service portal. You can log in using admin user with
the password customized in Step 7.
Deployment customization options
Configure these basic and advanced customization options before deploying your cloud environment.
Note:
v With some customization options, you can also configure them after you deploy your cloud
environment.
v Some cloud environments might not support certain customization options.
Customizing for a distributed database topology
To customize your deployment for a distributed database topology then you must update your
environment and topology files.
Chapter 5. Deploying the cloud
109
About this task
The following information provides details about supported options.
Table 30. Summary of support details
Support options
Details
Supported hypervisor types?
All
Support for post-deployment customization?
No
Supported topologies?
Distributed Database
Complete the following steps to update your environment and topology files.
Procedure
1. Change the following JSON attributes in the override_attributes section of your environment file,
your-environment-name.json:
v openstack.endpoints.db.host: Change from 127.0.0.1 to the IP address of the database node system
for the topology.
v mysql.root_network_acl: If you changed the database that is used by OpenStack from DB2®
(default) to MySQL, then change this attribute to ['x.x.x.x', 'fqdn.node.com'] where x.x.x.x is the IP
address and fqdn.node.com is the fully qualified domain name of the database node system for the
topology.
2. Add the following database node system as the first node in your topology file, your-topologyname.json.
{
"fqdn":"CHANGEME",
"password":"CHANGEME",
"identity_file":"CHANGEME",
"quit_on_error":true,
"run_order_number":0,
"runlist": [
"role[ibm-os-database-server-node]"
]
},
3. Modify the role for the controller node system in your topology file, your-topology-name.json.
Change the "role[ibm-os-single-controller-node]" role to "role[ibm-os-single-controllerdistributed-database-node]".
4. To finish the customization, return to the relevant topology deployment process and complete the
remaining steps.
Related tasks:
“Deploying a test or production cloud” on page 77
Deploy the components that are necessary to create a test or production cloud environment with more
than one node. Use the instructions that apply to your specific hypervisor for each compute node.
Customizing the scheduler
The default scheduler for IBM Cloud Manager with OpenStack is IBM Platform Resource Scheduler. You
can further customize your cloud deployment to use the Platform Resource Scheduler high availability
topology. Alternatively, you can disable Platform Resource Scheduler and use the default OpenStack
compute scheduler instead.
About this task
Platform Resource Scheduler provides additional resource optimization policies and the ability to add a
high availability service policy. These optimization policies rely on live migration for virtual machines. To
use these features, ensure that you enable live migration for IBM Cloud Manager with OpenStack by
110
IBM Cloud Manager with OpenStack: Administrator Guide, version 4.2
following the steps in “Configuring migration for a KVM node with NFS shared storage” on page 158.
For more information about using resource optimization policies and HA service policies, see the
Platform Resource Scheduler information, Resource optimization policies and HA service policy.
Related tasks:
“Deploying a test or production cloud” on page 77
Deploy the components that are necessary to create a test or production cloud environment with more
than one node. Use the instructions that apply to your specific hypervisor for each compute node.
“Updating a deployed topology” on page 149
After you deploy a topology, you might need to apply fixes, either to the IBM Cloud Manager with
OpenStack services themselves or to how the IBM Cloud Manager with OpenStack services are deployed.
Related reference:
“Roles” on page 287
The following roles are provided in support of the reference topologies.
Platform Resource Scheduler online product documentation
Customizing for Platform Resource Scheduler high availability topology:
Use these instructions if you want to customize your deployment to use the IBM Platform Resource
Scheduler high availability (HA) topology.
About this task
Table 31. Summary of support details
Support options
Details
Supported hypervisor types?
Hyper-V, KVM or QEMU, PowerKVM, and z/VM
Support for post-deployment customization?
No
Supported topologies?
All, except Stand-alone self-service portal
To customize for a Platform Resource Scheduler HA deployment, complete the following steps.
Procedure
1. Append the following Platform Resource Scheduler roles to the run list for the single controller, all
compute nodes, and the Platform Resource Scheduler candidate node as follows:
# PRS roles to insert in the OpenStack single controller run list before the
# SCE role("role[ibm-sce-node]")
"role[ibm-os-prs-ego-master]",
"role[ibm-os-prs-controller-node]"
# PRS roles to append to an OpenStack compute nodes’ run list
"role[ibm-os-prs-compute-node]"
# PRS candidate role to run on prs-candidate-node
# Ensure the "run_order_number" is the largest in topology file
{
"fqdn": "prs-candidate-node.fqdn",
"identity_file": "CHANGEME",
"password": "CHANGEME",
"quit_on_error": true,
"run_order_number": 999,
Chapter 5. Deploying the cloud
111
"runlist": [
"role[ibm-os-prs-ego-candidate]"
]
}
Note: If you use Hyper-V as the hypervisor type, to enable Platform Resource Scheduler on your
compute nodes, complete the following steps:
a. Update the nova.conf file, and append ibm_notifications to notification_topics. The following is
an example:
notification_topics=notifications,ibm_notifications
b. Restart the IBM Cloud Manager with OpenStack compute service.
2. Customize the following attributes in your environment file, your-environment-name.json:
v ibm-openstack.prs.ego.master_list: Set to your EGO master (OpenStack single controller) host
FQDN and EGO master candidate hosts’ FQDN.
v ibm-openstack.prs.ego.failover.enabled: Set to true to enable EGO HA topology.
v ibm-openstack.prs.ego.failover.share_dir: Set to the mount point of the NFS share directory on
the EGO master and EGO master candidate hosts.
v ibm-openstack.prs.ego.failover.mount_host: Set to the FQDN or IP address of your NFS server.
v ibm-openstack.prs.ego.failover.mount_dir: Set to the NFS share directory exported by your NFS
server.
Here is an example environment file with Platform Resource Scheduler HA topology enabled:
"override_attributes": {
......
"ibm-openstack": {
"prs": {
"ego": {
"master_list": ["the-fqdn-of-ego-master", "the-fqdn-of-ego-candidate"],
"failover": {
"enabled": true,
"share_dir": "/opt/share",
"mount_host": "10.0.0.10",
"mount_dir": "/opt/nfs_dir"
}
}
}
},
......
}
3. Customize optional Platform Resource Scheduler attributes in your environment file,
your-environment-name.json, as described in “Customizing optional Platform Resource Scheduler
attributes.”
4. To finish the customization, return to the relevant topology deployment process and complete the
remaining steps.
Customizing optional Platform Resource Scheduler attributes:
You can customize optional attributes for Platform Resource Scheduler when deploying or updating IBM
Cloud Manager with OpenStack.
About this task
Table 32. Summary of support details
Support options
Details
Supported hypervisor types?
Hyper-V, KVM or QEMU, PowerKVM, and z/VM
Support for post-deployment customization?
Yes
112
IBM Cloud Manager with OpenStack: Administrator Guide, version 4.2
Table 32. Summary of support details (continued)
Support options
Details
Supported topologies?
All, except Stand-alone self-service portal
Note: If you are using the prescribed configuration with KVM, QEMU, or PowerKVM, customize the
optional YAML override_attributes in your cloud file.
Procedure
1. Customize the following optional attributes in your environment file, your-environment-name.json,
under the override_attributes section before deploying IBM Cloud Manager with OpenStack.
v ibm-openstack.prs.ego.clusteradmin: Set to your user account for the EGO cluster administrator.
By default, this is egoadmin.
v ibm-openstack.prs.ego.baseport: Set to your port range used by EGO services in the EGO master
and EGO master candidate hosts. By default, this is 7869 which means EGO services will use a port
range of 7869 to 7879.
v ibm-openstack.prs.policy_per_host_aggregate: Set to enable policy management for host
aggregate based mode policies. By default, this is false.
v ibm-openstack.prs.prs_ha_timeout_seconds: Set to the duration that a VM instance can attempt a
live migration or cold migration operation before Platform Resource Scheduler times out with an
error. By default, this is 1200 seconds.
v ibm-openstack.prs.prs_mt_migration_preferred_order: Set to your preferred order when you put a
hypervisor host into maintenance mode and require migrating instances away from the hypervisor
host. The available orders are memory_mb.most, memory_mb.least, vcpus.most, and vcpus.least. By
default, this is memory_mb.most.
v openstack.compute.scheduler.default_filters: Set to enable the scheduler feature. Refer to
http://docs.openstack.org/juno/config-reference/content/section_compute-scheduler.html for
available filters. By default, this is RetryFilter AvailabilityZoneFilter RamFilter ComputeFilter
ComputeCapabilitiesFilter and ImagePropertiesFilter.
v openstack.compute.config.cpu_allocation_ratio: Set the CPU over commit ratios for all compute
nodes in a cluster. By default, this is 16.0.
v openstack.compute.config.ram_allocation_ratio: Set the memory over commit ratios for all
compute nodes in a cluster. By default, this is 1.5.
v openstack.compute.config.disk_allocation_ratio: Set the disk over commit ratios for all compute
nodes in a cluster. By default, this is 1.0.
2. When complete, return to the relevant topology deployment or update process and complete the
remaining steps.
Disabling IBM Platform Resource Scheduler:
You can disable IBM Platform Resource Scheduler and use the default OpenStack compute scheduler.
About this task
Table 33. Summary of support details
Support options
Details
Supported hypervisor types?
Hyper-V, KVM or QEMU, PowerKVM, and z/VM
Support for post-deployment customization?
Yes
Supported topologies?
All, except Stand-alone self-service portal
To disable IBM Platform Resource Scheduler, complete the following steps:
Chapter 5. Deploying the cloud
113
Procedure
1. Remove the following IBM Platform Resource Scheduler roles from the run list for the single
controller, and from all compute nodes as follows:
# PRS roles to remove from the OpenStack single controller’s run list
"role[ibm-os-prs-ego-master]",
"role[ibm-os-prs-controller-node]"
# PRS roles to remove from OpenStack compute nodes' run list
"role[ibm-os-prs-compute-node]"
Note: If you use Hyper-V as the hypervisor type, to disable IBM Platform Resource Scheduler on you
compute nodes, complete the following steps:
a. Update the nova.conf file, and remove ibm_notifications from notification_topics.
b. Restart the IBM Cloud Manager with OpenStack compute service.
2. To finish the customization, return to the relevant topology deployment or update process and
complete the remaining steps
Customizing passwords and secrets
You can customize the passwords and secrets that are used during the deployment process.
The following information provides details about supported options.
Table 34. Summary of support details
Support options
Details
Supported hypervisor types?
All
Support for post-deployment customization?
No, see “Changing passwords and secrets” on page 147
for customization post-deployment.
Supported topologies?
All, except Minimal.
If you are deploying a Minimal topology, then all passwords and secrets are the same as their associated
user name (for example, admin/admin). Customization is not enabled for the topology.
If you are deploying any other topology, then by default, all passwords, and secrets are obtained through
encrypted data bags. An example secret key (/opt/ibm/cmwo/chef-repo/data_bags/
example_data_bag_secret) and data bags (/opt/ibm/cmwo/chef-repo/data_bags/) are provided by the IBM
Cloud Manager with OpenStack installation. The following steps guide you through customizing these
examples for your deployment:
1. Copy and update the example passwords and secrets file. By default, this example file ensures that all
passwords and secrets are randomly generated for your deployment. To explicitly set the user
password for the cloud administrator (admin), change the password entry for admin from RANDOM
to your desired password. The same can be done for the cloud messaging service user (qpidclient or
rabbitclient). If you are deploying a cloud environment with PowerVC or z/VM, you must set the
passwords for those environments as well. For more information about the passwords and secrets that
are used by a deployment, see “Data bags” on page 277.
$ cp /opt/ibm/cmwo/chef-repo/data_bags/example_passwords_file.json ./your_passwords_file.json
Note: This step assumes the default IBM Cloud Manager with OpenStack installation path on the
deployment server (/opt/ibm/cmwo).
2. Set the passwords and secrets for your deployment.
Note: The following command must be entered on a single line, even though the example shows a
line break for formatting purposes.
114
IBM Cloud Manager with OpenStack: Administrator Guide, version 4.2
$ knife os manage set passwords -E your-environment-name.json --secret-file your-secret-file
--topology-file your-topology-name.json your_passwords_file.json
This command also creates a secret key, your-secret-file, that is used to encrypt the data bags.
3. (z/VM only) Edit the following z/VM related data bag items: xcat, xcatmnadmin, and zlinuxroot.
These values set host-specific passwords for z/VM and update the data bags.
a. Download and decrypt the data bags that contain the passwords and secrets for your deployment.
The information is stored in the data_bags directory. The data_bags directory contains a
subdirectory for each data bag that is used by your deployment. The subdirectories contain the
data bags items for your deployment. Ensure that you remove the data_bags directory when you
are done using it.
$ knife os manage get passwords --topology-file your-topology-name.json data_bags
b. Edit the following data bag items: xcat, xcatmnadmin, and zlinuxroot.
Here is an example using the data bag xcat, using your_env_user_passwords/xcat.json:
{
"id": "xcat",
"xcat_server1": "CHANGEME",
"xcat_server2": "CHANGEME"
}
You must change the xcat_server1 (xcat_server2) to the corresponding value of the attribute
ibm-openstack.zvm-driver.#host.xcat.server in your attribute file, and then change the password to
match xcatmnadmin.json.
Here is an example for data bag zlinuxroot item, using your_env_user_passwords/
zlinuxroot.json:
{
"id": "zlinuxroot",
"host1": "CHANGEME",
"host2": "CHANGEME"
}
You must change the host1(host2) to the corresponding value of the attribute
ibm-openstack.zvm-driver.hosts in your attribute file, and then change the password.
c. Update the changed data bags.
$ knife os manage update passwords --topology-file your-topology-name.json data_bags
d. Remove the data bag directory because it is no longer needed.
$ rm -rf data_bags
4. Remove your passwords and secrets file because it is no longer needed.
$ rm –f your_passwords_file.json
Note: You can use the following command to download and decrypt the data bags that contain the
passwords and secrets for your deployment. The information is stored in the data_bags directory. The
data_bags directory contains a subdirectory for each data bag that is used by your deployment. The
subdirectories contain the data bags items for your deployment. Ensure that you remove the
data_bags directory when you are done using it.
$ knife os manage get passwords --topology-file your-topology-name.json data_bags
Related reference:
“Data bag item not found” on page 303
You might see an error in the log that a data bag item is missing.
“Data bags” on page 277
The following example data bags are provided in support of the IBM Cloud Manager with OpenStack
topologies.
Chapter 5. Deploying the cloud
115
Customizing for a FIPS-compliant topology
Additional steps are required to configure your topology so that it is compliant with the Federal
Information Processing Standards (FIPS) for cryptography modules.
About this task
The following information provides details about supported options.
Table 35. Summary of support details
Support options
Details
Supported hypervisor types?
All, except Hyper-V
Support for post-deployment customization?
Yes
Supported topologies?
All, except Stand-alone self-service portal
To customize your deployment for a FIPS-compliant topology, you need to ensure that OpenStack
components are configured to communicate with HTTPs. Then, you can set the related attributes in the
environment file and deploy the topology.
Note: Most attributes are in the override_attributes section of your environment, while some attributes
might be in the default_attributes section, depending on your topology.
Procedure
1. Create or configure the certificates. For a production environment, obtain the certificates from a
trusted CA agency. You can also use the following steps to create the certificates for a non-production
environment.
a. Run the following commands:
$ mkdir /etc/certs
$ cd /etc/certs
$ openssl genrsa -des3 -out server.key 2048
You are asked to enter a passphrase. You can input whatever you choose, because the password is
removed in a future step.
$ openssl req -new -key server.key -out server.csr
Note: This command requests that you enter some information. When you are asked for the
Common Name, enter the public IP address of the proxy node.
$ cp server.key server.key.org
$ openssl rsa -in server.key.org -out server.key
$ openssl x509 -req -days 9999 -in server.csr -signkey server.key -out server.crt
b. Set the following values in the environment file:
v ibm-openstack.apache-proxy.certfile = /PATH/TO/server.crt
v ibm-openstack.apache-proxy.certkeyfile = /PATH/TO/server.key
c. Optional: Copy this directory and the certificates to the same directory of the compute nodes. This
step is not needed for the Minimal topology.
2. Complete the Apache proxy setup for each component API service. Set the following values in the
environment file:
v ibm-openstack.apache-proxy.enabled = true. This value is the switch to enable the proxy solution
for FIPS. The default value is false. By setting this value to true, the system attempts to put an
Apache proxy outside of each OpenStack API service.
v openstack.endpoints.host = PUBLIC_IP_ADDR of the controller node. The default value in the
environment file is 127.0.0.1.
116
IBM Cloud Manager with OpenStack: Administrator Guide, version 4.2
v openstack.endpoints.bind-host = 127.0.0.1. This value is the IP address that the OpenStack API
services bind to. Ensure that you set the value to 127.0.0.1, the default value.
v openstack.endpoints.SERVICE.port = PROXY_PORT_FOR_EACH_SERVICE. This value is the port
that each API service listens to, where SERVICE is the OpenStack API services such as
identity-admin/identity-api/network-api/compute-api. The default port number for each API
service and the related proxy is the same. For example, the proxy for nova-api and the nova-api
service itself both listen to the same port number, 8774. You can set different port numbers by
changing these attributes. An exception is that the port number for the keystone proxy must not be
modified.
3. Configure how you want the certificate to be verified. You can specify an insecure method or a
certificate verification method. The insecure method explicitly allows the client to perform insecure
SSL (https) requests, meaning the certificate from the server is not verified against any certificate
authorities. Alternatively, the certificate verification method requires the certificates to be verified.
a. For an insecure method of verification, set the insecure values to true. For example, the following
values must be set to true:
v openstack.network.api.auth.insecure = true
v openstack.network.nova.nova_api_insecure = true
v openstack.compute.network.neutron.api_insecure = true
v
v
v
v
v
openstack.compute.api.auth.insecure = true
openstack.compute.image.glance_api_insecure = true
openstack.compute.block-storage.cinder_api_insecure = true
openstack.block-storage.api.auth.insecure = true
openstack.block-storage.image.glance_api_insecure = true
v openstack.orchestration.api.auth.insecure = true
v openstack.orchestration.clients.insecure = true
v openstack.telemetry.api.auth.insecure = true
v openstack.telemetry.service-credentials.insecure = true
v openstack.image.api.block-storage.cinder_api_insecure = true
v openstack.image.api.auth.insecure = true
v openstack.image.registry.auth.insecure = true
v openstack.dashboard.ssl_no_verify = "True"
v ibm-openstack.iaas-gateway.keystone_insecure - true if IaaS gateway is used.
b. For the certificate verification method, set all of the CA file values to be the certificate file of the
certificate authority. See the following examples:
v openstack.image.registry.auth.cafile = /PATH/TO/server.crt
v openstack.image.api.block-storage.cinder_ca_certificates_file = /PATH/TO/server.crt
v openstack.network.api.auth.cafile = /PATH/TO/server.crt
v openstack.network.nova.nova_ca_certificates_file = /PATH/TO/server.crt
v openstack.compute.network.neutron.ca_certificates_file = /PATH/TO/server.crt
v
v
v
v
v
v
v
v
openstack.compute.api.auth.cafile = /PATH/TO/server.crt
openstack.compute.image.ssl.ca_file = /PATH/TO/server.crt
openstack.compute.block-storage.cinder_ca_certificates_file = /PATH/TO/server.crt
openstack.block-storage.api.auth.cafile = /PATH/TO/server.crt
openstack.orchestration.api.auth.cafile = /PATH/TO/server.crt
openstack.orchestration.clients.ca_file = /PATH/TO/server.crt
openstack.telemetry.api.auth.cafile = /PATH/TO/server.crt
openstack.telemetry.service-credentials.cafile = /PATH/TO/server.crt
Chapter 5. Deploying the cloud
117
openstack.image.api.auth.cafile = /PATH/TO/server.crt
openstack.dashboard.ssl_cacert = /PATH/TO/server.crt
openstack.dashboard.ssl_no_verify = "False"
ibm-openstack.iaas-gateway.keystone_ca_certs = path to certificate authority if IaaS gateway is
used.
v openstack.block-storage.image.glance_ca_certificates_file = /PATH/TO/server.crt
4. Set the related attributes in the environment file.
a. Set all of the "hash_algorithm" or "hash_algorithms" in the environment file to sha256. The default
value for hash_algorithm is md5. For FIPS, a recommended algorithm is sha256. See the following
examples:
v openstack.identity.token.hash_algorithm = sha256
v openstack.image.api.auth.hash_algorithms = sha256
b. If auth_token is configured to use memcached (in other words, memcached_servers and
memcache_security_strategy are set) and the deployer wants to protect the data, set the
memcache_secret_key to a value that is at least 112 bits. You can generate a random 112+ bit string
by reading from the following path: /dev/random: head -c 15 /dev/random | base64. For
example, memcached_servers = localhost:11211 and memcache_security_strategy are set to either
MAC or ENCRYPT.
v
v
v
v
5. Before you enable FIPS, stop all OpenStack services and httpd services on the IBM Cloud Manager
with OpenStack controller node.
Tip: For the FIPS environment, it is suggested to have the Chef server and controller node on
different nodes. Redeployment from a non-FIPS IBM Cloud Manager with OpenStack to a
FIPS-compliant IBM Cloud Manager with OpenStack is supported only when the Chef-server node
and controller node are on different nodes.
6. When complete, return to the relevant topology deployment or update process and complete the
remaining steps.
What to do next
You can use the following verification examples after the installation.
v Insecure method: add --insecure in the command. For example:
– nova --insecure list
– nova --insecure image-list
v Certificate verification method: the certificates need to be provided. For example:
– neutron --os-cacert /var/lib/neutron/keystone-signing/cacert.pem agent-list
– heat --os-cacert /var/cache/heat/cacert.pem --ca-file /var/cache/heat/cacert.pem stack-list
Related tasks:
“Deploying a test or production cloud” on page 77
Deploy the components that are necessary to create a test or production cloud environment with more
than one node. Use the instructions that apply to your specific hypervisor for each compute node.
“Updating a deployed topology” on page 149
After you deploy a topology, you might need to apply fixes, either to the IBM Cloud Manager with
OpenStack services themselves or to how the IBM Cloud Manager with OpenStack services are deployed.
Customizing basic options
You can update the attributes in your environment file to customize basic options for your cloud
environment.
118
IBM Cloud Manager with OpenStack: Administrator Guide, version 4.2
Customizing NTP attributes:
You can change the NTP servers attribute in your environment file to modify the NTP servers used by
the node systems throughout your topology deployment.
About this task
The following information provides details about supported options.
Table 36. Summary of support details
Support options
Details
Supported hypervisor types?
All
Support for post-deployment customization?
Yes
Supported topologies?
All, except Stand-alone self-service portal
Complete the following steps to customize your environment.
Procedure
1. Update the following attribute in the override_attributes section of your environment file.
v ntp.servers: Set to the NTP servers accessible to your deployment.
2. When complete, return to the relevant topology deployment or update process and complete the
remaining steps.
Related tasks:
“Deploying a test or production cloud” on page 77
Deploy the components that are necessary to create a test or production cloud environment with more
than one node. Use the instructions that apply to your specific hypervisor for each compute node.
“Updating a deployed topology” on page 149
After you deploy a topology, you might need to apply fixes, either to the IBM Cloud Manager with
OpenStack services themselves or to how the IBM Cloud Manager with OpenStack services are deployed.
Customizing OpenStack attributes:
You can change the OpenStack attributes in your environment file to control logging, quotas and
uploading images.
About this task
The following information provides details about supported options.
Table 37. Summary of support details
Support options
Details
Supported hypervisor types?
All
Support for post-deployment customization?
Yes
Supported topologies?
All, except Stand-alone self-service portal
Complete the following steps to customize your environment.
Chapter 5. Deploying the cloud
119
Procedure
1. Update the following attributes in your environment file. Most attributes are in the
override_attributes section of your environment, while some of the logging attributes might be in
the default_attributes section, depending on your topology
v openstack.compute.config.quota_*, openstack.network.quota.*, and openstack.blockstorage.quota_*: The environment file provides default quota settings for the IBM Cloud Manager
with OpenStack compute, network, and block storage components. Set the quotas as needed for
your deployment. If your deployment is part of a multi-region cloud environment, quotas settings
are unique to each region. For more information, see the OpenStack manage quotas documentation.
v openstack.image.upload_image and openstack.image.upload_images: These attributes allow an
image to be uploaded to OpenStack as part of your deployment. openstack.image.upload_image is
a set of key-value pairs where the key is the image name and the value is the URL location of the
image. openstack.image.upload_images is a list of keys from openstack.image.upload_image that
you want to upload. For example:
"openstack": {
"image": {
"upload_image": {
"myimage": "https://myimagesource.com/myimage"
},
"upload_images": [
"myimage"
]
}
}
v openstack.identity.debug and openstack.identity.verbose: Set to true or false for the desired
logging level for the OpenStack identity service.
v openstack.image.debug and openstack.image.verbose: Set to true or false for the desired logging
level for the OpenStack image service.
v openstack.network.debug and openstack.network.verbose: Set to true or false for the desired
logging level for the OpenStack network service.
v openstack.compute.debug and openstack.compute.verbose: Set to true or false for the desired
logging level for the OpenStack compute service.
v openstack.block-storage.debug and openstack.block-storage.verbose: Set to true or false for the
desired logging level for the OpenStack block storage service.
v openstack.telemetry.debug and openstack.telemetry.verbose: Set to true or false for the desired
logging level for the OpenStack telemetry service.
v openstack.orchestration.debug and openstack.orchestration.verbose: Set to true or false for the
desired logging level for the OpenStack orchestration service.
Note: For more information about customizing the OpenStack values, see the following configuration
options. To map the OpenStack configuration file options to the IBM Cloud Manager with OpenStack
attributes, see “Mapping attributes to services” on page 279.
v cinder.conf (block-storage attributes) configuration options
v glance-api.conf (image.api attribute) configuration options
v glance-registry.conf (image.registry attribute) configuration options
v keystone.conf (identity attributes) configuration options
v nova.conf (compute attributes) configuration options
v neutron.conf (network attributes) configuration options
2. When complete, return to the relevant topology deployment or update process and complete the
remaining steps.
Related tasks:
“Deploying a test or production cloud” on page 77
Deploy the components that are necessary to create a test or production cloud environment with more
120
IBM Cloud Manager with OpenStack: Administrator Guide, version 4.2
than one node. Use the instructions that apply to your specific hypervisor for each compute node.
“Updating a deployed topology” on page 149
After you deploy a topology, you might need to apply fixes, either to the IBM Cloud Manager with
OpenStack services themselves or to how the IBM Cloud Manager with OpenStack services are deployed.
Customizing database attributes:
You can customize the attributes for the database that is used by OpenStack.
Changing the database from DB2 (default) to MySQL:
You can change the database that is used by OpenStack from DB2 (default) to MySQL.
About this task
The following information provides details about supported options.
Table 38. Summary of support details
Support options
Details
Supported hypervisor types?
All
Support for post-deployment customization?
No
Supported topologies?
All, except Stand-alone self-service portal
Update the following JSON attributes in your environment file, your-environment-name.json.
Note: The attributes are located in the override_attributes section of the environment file.
v openstack.db.service_type: Set to mysql.
v openstack.db.telemetry.nosql.used: Set to false.
v mysql.allow_remote_root: Set to true.
v openstack.endpoints.db.port: Remove this attribute from the environment file.
v openstack.db.telemetry.port: Remove this attribute from the environment file.
Note: MySQL requires the MySQL ruby gem. During deployment, this gem is downloaded and installed
from the deployment server.
When complete, return to the relevant topology deployment process and complete the remaining steps.
Related tasks:
“Deploying a test or production cloud” on page 77
Deploy the components that are necessary to create a test or production cloud environment with more
than one node. Use the instructions that apply to your specific hypervisor for each compute node.
Customizing SSL attributes for DB2 database:
You can customize the SSL attributes for the DB2 database.
Chapter 5. Deploying the cloud
121
About this task
The following information provides details about supported options.
Table 39. Summary of support details
Support options
Details
Supported hypervisor types?
All
Support for post-deployment customization?
Yes
Supported topologies?
All, except Stand-alone self-service portal
IBM Cloud Manager with OpenStack includes the DB2 database with SSL enabled. To disable SSL, change
the following attributes in your environment file.
Note: The attributes are located in the override_attributes section of the environment file.
v db2.ssl.enable: Set to false.
v openstack.endpoints.db.port: Set to 50000.
To configure SSL to use your own private keys and certificates instead of the default private keys and
certificates, change the following attributes in your environment file:
v db2.ssl.cert_label
v
v
v
v
db2.ssl.server_keydb_url
db2.ssl.server_stash_url
db2.ssl.client_keydb_url
db2.ssl.client_stash_url
The default value for db2.ssl.cert_label is dbserver. Set this attribute to your own certificate label name.
The default value for each URL attribute is nil. You can set these attributes to your own available
addresses.
The certificate database and stash files must be generated by IBM Global Security Kit (GSKit) tools. For
more information about how to use GSKit to generate certificates, see Configuring Secure Sockets Layer
(SSL) support in a DB2 instance.
IBM Cloud Manager with OpenStack includes the GSKit toolkit. After you install IBM Cloud Manager
with OpenStack, locate the RPM packages in the following directory: <installation directory>/yumrepo/openstack/juno/rhel6/arch, where <installation directory> is the directory in which you installed
IBM Cloud Manager with OpenStack and arch is either x86_64 or ppc64. The yum-repo file is created only
when IBM Cloud Manager with OpenStack is deployed, so you can install the gskcrypt64 and gskssl64
RPM packages by sequence.
To finish the customization, return to the relevant topology deployment or update process and complete
the remaining steps.
Related tasks:
“Deploying a test or production cloud” on page 77
Deploy the components that are necessary to create a test or production cloud environment with more
than one node. Use the instructions that apply to your specific hypervisor for each compute node.
“Updating a deployed topology” on page 149
After you deploy a topology, you might need to apply fixes, either to the IBM Cloud Manager with
OpenStack services themselves or to how the IBM Cloud Manager with OpenStack services are deployed.
122
IBM Cloud Manager with OpenStack: Administrator Guide, version 4.2
Customizing the messaging service attributes:
You can change the messaging service used by OpenStack from RabbitMQ (default) to Qpid.
About this task
The following information provides details about supported options.
Table 40. Summary of support details
Support options
Details
Supported hypervisor types?
All
Support for post-deployment customization?
No
Supported topologies?
All, except Stand-alone self-service portal
Update the following JSON attributes in your environment file, your-environment-name.json.
Note: The attributes are located in the override_attributes section of the environment file.
v openstack.mq.service_type: Set to qpid.
v openstack.mq.user: Set to qpidclient.
v openstack.compute.rpc_backend: Set to nova.openstack.common.rpc.impl_qpid.
To finish the customization, return to the relevant topology deployment process and complete the
remaining steps.
Related tasks:
“Deploying a test or production cloud” on page 77
Deploy the components that are necessary to create a test or production cloud environment with more
than one node. Use the instructions that apply to your specific hypervisor for each compute node.
Customizing memcached attributes:
You can change the limits for the memcached service.
About this task
The following information provides details about supported options.
Table 41. Summary of support details
Support options
Details
Supported hypervisor types?
All
Support for post-deployment customization?
Yes
Supported topologies?
All, except Stand-alone self-service portal
Update the following attributes in your environment file. The attributes are located in the
override_attributes section of the environment file for the Minimal topology and in the
default_attributes section for other topologies.
Example
v memcached.memory: Maximum memory in MB for memcached instances. The default value is 64.
v memcached.maxconn: Maximum number of connections to accept. The default value is 1024.
v memcached.max_object_size: Maximum size of an object to cache. The default value is 1 MB.
Chapter 5. Deploying the cloud
123
Note: To specify a value in KB or MB, use k and m. For example, 1k or 1m. The minimum value is 1k
and the maximum value is 128m.
To finish the customization, return to the relevant topology deployment and update process and complete
the remaining steps.
Related tasks:
“Deploying a test or production cloud” on page 77
Deploy the components that are necessary to create a test or production cloud environment with more
than one node. Use the instructions that apply to your specific hypervisor for each compute node.
“Updating a deployed topology” on page 149
After you deploy a topology, you might need to apply fixes, either to the IBM Cloud Manager with
OpenStack services themselves or to how the IBM Cloud Manager with OpenStack services are deployed.
Customizing the IaaS gateway:
The IaaS gateway is a part of IBM Cloud Manager with OpenStack.
About this task
It is a light-weight proxy middleware container capable of providing pluggable adaptation to normalize
interactions across multiple IaaS cloud provider vendors.
The following information provides details about supported options.
Table 42. Summary of support details
Support options
Details
Supported hypervisor types?
All
Support for post-deployment customization?
Yes
Supported topologies?
All, except Stand-alone self-service portal
Complete the following steps to customize your environment.
Procedure
1. Customize the iaasgateway attributes. You can update the following attributes in your environment
file to customize the ibm-openstack.iaasgateway.* attributes.
Note: The attributes are located in the override_attributes section of the environment file.
v ibm-openstack.iaas-gateway.iaasgateway_ip: The default value for this attribute binds to the
management IP address specified by the openstack.endpoints.host value. If you want this value to
be different from the openstack.endpoints.host value, set this attribute individually.
v ibm-openstack.iaas-gateway.listen_port: The default value for this attribute is 9973. With the
default value, the iaasgateway listens to port 9973.
v ibm-openstack.iaas-gateway.logging.enabled: The default value for this attribute is true. With the
default value, when you start the iaasgateway, it logs basic information.
v ibm-openstack.iaas-gateway.logging.debug: The default value for this attribute is false. With the
default value, only the informational level (INFO) messages are logged. If you want more detailed
messages, set this value to true.
2. Manage the license. After iaasgateway is installed, there are some default licenses installed in
/etc/iaasgateway/ssl that expire in 10 years. If you want to provide you own certifications, replace
them with the same name or use the environment to set them before using IBM Cloud Manager with
OpenStack or deploying the controller node. If you use the environment to set the values, you must
124
IBM Cloud Manager with OpenStack: Administrator Guide, version 4.2
add the following attributes into the environment. For more information about how to create a license
and its expiration date, see http://www.openssl.org/docs/apps/openssl.html.
v ibm-openstack.iaas-gateway.ssl.certfile_url: The default value for this attribute is nil. The value
must be a url where you can download the certification file. If you set this value, both of the
following values must be set, otherwise this setting does not work.
v ibm-openstack.iaas-gateway.ssl.keyfile_url: The default value for this attribute is nil. The value
must be a url where you can download the key file. If this value is not nil, then certfile_url and
ca_certs_url cannot be nil, or this setting does not work.
v ibm-openstack.iaas-gateway.ssl.ca_certs_url: The default value for this attribute is nil. The value
must be a url where can download the ca file. If this value is not nil, then certfile_url and
keyfile_url cannot be nil, or this setting does not work.
3. When complete, return to the relevant topology deployment or update process and complete the
remaining steps.
Related tasks:
“Deploying a test or production cloud” on page 77
Deploy the components that are necessary to create a test or production cloud environment with more
than one node. Use the instructions that apply to your specific hypervisor for each compute node.
“Updating a deployed topology” on page 149
After you deploy a topology, you might need to apply fixes, either to the IBM Cloud Manager with
OpenStack services themselves or to how the IBM Cloud Manager with OpenStack services are deployed.
Customizing advanced options
You can update the attributes in your environment file to customize advanced options for your cloud
environment.
Customizing SELinux attributes:
You can change the SELinux attribute in your environment file to modify the SELinux state on the node
systems to which you deploy a topology.
About this task
The following information provides details about supported options.
Table 43. Summary of support details
Support options
Details
Supported hypervisor types?
All
Support for post-deployment customization?
Yes
Supported topologies?
All, except Stand-alone self-service portal
Complete the following steps to customize your environment.
Procedure
1. Update the following attributes in your environment file. The attributes are located in the
override_attributes section of the environment file for the Minimal topology and in the
default_attributes section for other topologies.
selinux.state
The default value for this attribute is nothing. With the default value, the SELinux state is
unchanged for the node systems in your topology. If you need to change the SELinux state on
each node system, the attribute can be set to enforcing, permissive or disabled. For more
information about SELinux, see the SELinux Project Wiki.
Chapter 5. Deploying the cloud
125
2. When complete, return to the relevant topology deployment or update process and complete the
remaining steps.
Related tasks:
“Deploying a test or production cloud” on page 77
Deploy the components that are necessary to create a test or production cloud environment with more
than one node. Use the instructions that apply to your specific hypervisor for each compute node.
“Updating a deployed topology” on page 149
After you deploy a topology, you might need to apply fixes, either to the IBM Cloud Manager with
OpenStack services themselves or to how the IBM Cloud Manager with OpenStack services are deployed.
Customizing iptables attributes:
You can change the iptables attributes in your environment file to control iptables rules customization,
access to IBM Cloud Manager with OpenStack services, and SSH access on the nodes in your topology.
About this task
The following information provides details about supported options.
Table 44. Summary of support details
Support options
Details
Supported hypervisor types?
All
Support for post-deployment customization?
Yes
Supported topologies?
All, except Stand-alone self-service portal
Complete the following steps to customize your environment.
Procedure
1. You can update the following attributes in your environment file. The attributes are located in the
override_attributes section of the environment file for the Minimal topology and in the
default_attributes section for other topologies.
ibm-openstack.iptables.status
The default value for this attribute is enabled. With the default value, the iptables rules can be
customized for the node systems in your topology using the other ibm-openstack.iptables.*
attributes. If you want to manually configure the iptables for each node system, you must set
this attribute to unchanged.
ibm-openstack.iptables.use_default_rules
When this attribute is set to true (default value), iptables rules are created to allow access to
the IBM Cloud Manager with OpenStack services that are running on each node system.
ibm-openstack.iptables.include_ssh_default_rule
When this attribute is set to true (default value), iptables rules are created to allow SSH access
to the node systems.
ibm-openstack.iptables.custom_rules
You can use this attribute to create custom iptables rules.
Note: If you want to manually configure the iptables for each node system, you must set the
ibm-openstack.iptables.status attribute to unchanged. The unchanged value will leave the
iptables unchanged on each node system and allow your manual configuration to be
maintained.
126
IBM Cloud Manager with OpenStack: Administrator Guide, version 4.2
2. When complete, return to the relevant topology deployment or update process and complete the
remaining steps.
Related tasks:
“Deploying a test or production cloud” on page 77
Deploy the components that are necessary to create a test or production cloud environment with more
than one node. Use the instructions that apply to your specific hypervisor for each compute node.
“Updating a deployed topology” on page 149
After you deploy a topology, you might need to apply fixes, either to the IBM Cloud Manager with
OpenStack services themselves or to how the IBM Cloud Manager with OpenStack services are deployed.
Customizing performance attributes:
You can change the performance attributes in your environment file to customize settings for item such
as the message queue and workers.
About this task
The following information provides details about supported options.
Table 45. Summary of support details
Support options
Details
Supported hypervisor types?
All
Support for post-deployment customization?
Yes
Supported topologies?
All, except Stand-alone self-service portal
The default values for the attributes are sufficient for most topology deployments. However, you might
need to customize the values for heavily used deployments.
You can update the following attributes in the override_attributes section of your environment file.
Procedure
1. You can update the following JSON attributes in your environment file, your-environment-name.json,
to customize the Qpid performance attributes. The Rabbitmq performance attributes do not need to be
updated.
Table 46.
Attribute
Description
qpid.broker.max-connections
qpid.broker.connection-backlog
qpid.broker.worker-threads
v The default value for qpid.broker.max-connections is 1000.
v The default value for qpid.broker.connection-backlog is 10.
v The default value for qpid.broker.worker-threads is 20.
For more information about customizing these values, see the Qpid
broker man page.
openstack.compute.rpc_thread_pool_size
openstack.compute.rpc_conn_pool_size
openstack.compute.rpc_response_timeout
v The default values for openstack.compute.rpc_thread_pool_size is
2048.
v The default value for openstack.compute.rpc_conn_pool_size is 60.
v The default value for openstack.compute.rpc_response_timeout is
60.
Chapter 5. Deploying the cloud
127
Table 46. (continued)
Attribute
Description
openstack.network.rpc_thread_pool_size
openstack.network.rpc_conn_pool_size
openstack.network.rpc_response_timeout
v The default value for openstack.network.rpc_thread_pool_size is
128.
v The default value for openstack.network.rpc_conn_pool_size is 60.
v The default value for openstack.network.rpc_response_timeout is
300.
openstack.compute.osapi_compute_workers v The default value for openstack.identity.public_workers and
openstack.identity.public_workers
openstack.identity.admin_workers is the number of CPUs, with a
openstack.identity.admin_workers
minimum value of 2.
openstack.network.api_workers
v The default value for openstack.network.api_workers and
openstack.network.rpc_workers
openstack.network.rpc_workers is 0.
openstack.image.api.workers
v
The default values for the remaining attributes are equal to the
openstack.image.registry.workers
number
of CPUs on the node system (with a maximum value of 8).
openstack.block-storage.osapi_volume_
Changes to the default values should be based on the number of
workers
CPUs that are available on the single controller node system. Some
openstack.compute.conductor.workers
workers are limited to a maximum value of 8.
openstack.sysctl.net.core.somaxconn
You can run the sysctl net.core.somaxconn command on the node
systems in your topology to determine the default value for each node
system. Heavily used deployments might require a minimum value of
512.
Note: The attribute name for net.core.somaxconn includes the period
(.) in the name.
ibm-openstack.powervc-driver.db.max_
pool_size
ibm-openstack.powervc-driver.db.max_
overflow
If you plan to run a large-scale IBM Power Virtualization Center
environment with up to 2,000 workloads, modify the values of the
following attributes to enhance performance.
v ibm-openstack.powervc-driver.db.max_pool_size=50
v ibm-openstack.powervc-driver.db.max_overflow=100
You might need to increase the maximum file descriptor limit on the single controller node system in
your topology. The message queue service runs on the single controller node. You can increase the
maximum file descriptor limit by adding the following lines to the /etc/security/limits.conf file.
After the update, new processes will use the new limit. Existing processes continue to use their
current limit.
* soft nofile 65536
* hard nofile 65536
2. When complete, return to the relevant topology deployment or update process and complete the
remaining steps.
Related tasks:
“Deploying a test or production cloud” on page 77
Deploy the components that are necessary to create a test or production cloud environment with more
than one node. Use the instructions that apply to your specific hypervisor for each compute node.
“Updating a deployed topology” on page 149
After you deploy a topology, you might need to apply fixes, either to the IBM Cloud Manager with
OpenStack services themselves or to how the IBM Cloud Manager with OpenStack services are deployed.
Configuring storage (Cinder)
Use this information to configure your storage environment if you want to use a storage driver that is
different than the default, configure multiple block storage back ends, or create a cloud environment with
extra block storage (Cinder) nodes.
128
IBM Cloud Manager with OpenStack: Administrator Guide, version 4.2
Configuring Cinder drivers:
Use this information to configure Cinder storage drivers appropriately for IBM Cloud Manager with
OpenStack.
Configuring LVM iSCSI Cinder driver:
By default, cloud topologies for IBM Cloud Manager with OpenStack are configured so that the controller
node runs the block storage service (cinder-volumes) by using the LVM iSCSI Cinder driver. You can
customize how the LVM group is created.
About this task
The LVM iSCSI Cinder driver is supported in the following environments:
Table 47. Summary of support details
Support options
Details
Supported hypervisor types?
KVM or QEMU, PowerKVM, and Hyper-V
Support for post-deployment customization?
Yes
Supported topologies?
All, except Stand-alone self-service portal
Storage (Cinder) node?
Controller or block storage node
Operating system?
Red Hat Enterprise Linux 6.5
Architecture?
x86_64 or ppc64
Complete the following steps to configure IBM Cloud Manager with OpenStack to use the LVM iSCSI
Cinder driver.
Procedure
1. Add the following attributes as needed to your environment or node attribute file.
Note: Attributes are added to one of the following depending on your topology:
v Minimal topology (based on the example-ibm-os-allinone environment). Add the attributes to the
override_attributes section of your environment file.
v Controller +n compute topology (based on the example-ibm-os-single-controller-n-compute
environment). Add attributes that are shared by all nodes to the default_attributes section of
your environment file. Those attributes that are specific to individual nodes are added to the node
attributes file.
v openstack.block-storage.volume.driver: The default value is
cinder.volume.drivers.lvm.LVMISCSIDriver
v openstack.block-storage.volume.create_volume_group: The default value is set to false. To have
IBM Cloud Manager with OpenStack create the volume group during deployment, set this value to
true.
v openstack.block-storage.volume.volume_group_name: Set this value to the name of the LVM
volume group to be used. The default name is cinder-volumes.
v openstack.block-storage.volume.iscsi_ip_address: Change from 127.0.0.1 to the IP address of the
block storage node; this is the controller or a block storage node.
2. Determine how the LVM volume group will be created. IBM Cloud Manager with OpenStack can
create the volume group automatically during the deployment process, or you can create the volume
group manually before deploying the block storage nodes.
Chapter 5. Deploying the cloud
129
You can create a Linux Volume Manager (LVM) volume group that spans one or more physical block
devices (entire disks or partitions). You can add block devices to the volume group later to increase
capacity.
Use the following topics to customize how the LVM volume group is created.
3. When complete, return to the relevant topology deployment or update process and complete the
remaining steps.
Related tasks:
“Deploying a test or production cloud” on page 77
Deploy the components that are necessary to create a test or production cloud environment with more
than one node. Use the instructions that apply to your specific hypervisor for each compute node.
“Updating a deployed topology” on page 149
After you deploy a topology, you might need to apply fixes, either to the IBM Cloud Manager with
OpenStack services themselves or to how the IBM Cloud Manager with OpenStack services are deployed.
Creating the initial volume group as part of the deployment by using block devices:
The initial cinder-volumes volume group can be created as part of deploying your topology. Use these
instructions to create the initial volume group that uses one or more block devices (disks).
About this task
The following information describes details about supported options.
Table 48. Summary of support details
Support options
Details
Supported hypervisor types?
KVM or QEMU, PowerKVM, and Hyper-V
Support for post-deployment customization?
Yes
Supported topologies?
All, except Stand-alone self-service portal
Storage (Cinder) node?
Controller or block storage node
Operating system?
Red Hat Enterprise Linux 6.5
Architecture?
x86_64 or ppc64
Procedure
1. Identify the block devices that you want to use on the block storage node. The block devices can be
an entire disk (for example, /dev/sdb) or a partition (for example, /dev/sdba). You can use tools like
df and pvs to identify devices that are used by existing mounted file system or LVM volume groups.
2. Modify the environment or node attributes file to contain the following additional attributes. The
attributes are in the override_attributes section of the environment file for the Minimal topology
and in the default_attributes section for other topologies:
v openstack.block-storage.volume.create_volume_group: Set this value to true.
v openstack.block-storage.volume.create_volume_group_type : Set this value to "block_devices".
v openstack.block-storage.volume.block_devices: Set this value to a list of the devices to be used in
the volume group. Separate the devices with a space in between each device.
The block_devices attribute accepts the following kinds of values:
v A single device: "/dev/sdb"
v A list of devices: "/dev/sdb /dev/sdc"
v A pattern that matches multiple devices: "/dev/sd[k-m]1". This pattern matches /dev/sdk1, /dev/sdl1,
and /dev/sdm1.
130
IBM Cloud Manager with OpenStack: Administrator Guide, version 4.2
See the following example for configuring an LVM by using a block device.
{
"openstack" : {
"block-storage": {
"volume": {
"create_volume_group": true,
"create_volume_group_type": "block_devices",
"block_devices": "/dev/sdb",
}
}
}
}
3. When complete, return to the relevant topology deployment or update process and complete the
remaining steps.
Related tasks:
“Deploying a test or production cloud” on page 77
Deploy the components that are necessary to create a test or production cloud environment with more
than one node. Use the instructions that apply to your specific hypervisor for each compute node.
“Updating a deployed topology” on page 149
After you deploy a topology, you might need to apply fixes, either to the IBM Cloud Manager with
OpenStack services themselves or to how the IBM Cloud Manager with OpenStack services are deployed.
Creating the initial volume group as part of the deployment by using a file-backed loop device:
The initial cinder-volumes volume group can be created as part of deploying your topology. Use these
instructions to create the initial volume group that uses a file-backed loop device.
About this task
When you create a volume group that is backed by a file on the block storage node, the deployment
process creates a file, /var/lib/cinder/cinder-volumes.img, and attaches a loop device, /dev/loopx, to
the file. Additionally, it creates a service, cinder-group-active, that is used to reattach the loop device
when the system is rebooted.
The following information describes details about supported options.
Table 49. Summary of support details
Support options
Details
Supported hypervisor types?
KVM or QEMU, PowerKVM, and Hyper-V
Support for post-deployment customization?
Yes
Supported topologies?
All, except Stand-alone self-service portal
Storage (Cinder) node?
Controller or block storage node
Operating system?
Red Hat Enterprise Linux 6.5
Architecture?
x86_64 or ppc64
Procedure
1. 1. Modify the environment or node attributes file to contain the following additional attributes. These
attributes are in the override_attributes section of the environment file for the Minimal topology
and in the default_attributes section for other topologies.
v openstack.block-storage.volume.create_volume_group: Set this value to true.
v openstack.block-storage.volume.create_volume_group_type : Set this value to "file".
Chapter 5. Deploying the cloud
131
v openstack.block-storage.volume.volume_group_size : Set this value to the size of the volume
group in GB. There must be enough free space on the file system to create the file. The default
value is 40.
2. When complete, return to the relevant topology deployment or update process and complete the
remaining steps.
Related tasks:
“Deploying a test or production cloud” on page 77
Deploy the components that are necessary to create a test or production cloud environment with more
than one node. Use the instructions that apply to your specific hypervisor for each compute node.
“Updating a deployed topology” on page 149
After you deploy a topology, you might need to apply fixes, either to the IBM Cloud Manager with
OpenStack services themselves or to how the IBM Cloud Manager with OpenStack services are deployed.
Creating an LVM volume group using physical disks:
Use the following instructions to create an LVM volume group on the block storage node or nodes.
About this task
The LVM iSCSI volume driver uses a volume group named "cinder-volumes" by default. These
instructions use that name.
v Identify the block devices that you want to use on the block storage node. This can be an entire disk
(for example, /dev/sdb) or a partition (for example, /dev/sdba). You can use tools like df and pvs to
identify devices that are used by existing mounted file system or LVM volume groups.
v Create an LVM physical volume over each block device using the pvcreate command. To create an
LVM physical volume for /dev/sdb, use this command:
# pvcreate /dev/sdb
v Create a "cinder-volumes" LVM volume group using the physical volume or volumes you previously
created:
# vgcreate cinder-volumes /dev/sdb [additional devices]
Adding a block device to an existing LVM volume group:
Use the following instructions to add a block device to an existing LVM volume group on a block storage
node. You can do this at any time.
About this task
v Identify the block devices that you want to use on the block storage node. This can be an entire disk
(for example, /dev/sdb) or a partition (for example, /dev/sdba). You can use tools like df and pvs to
identify devices that are used by existing mounted file system or LVM volume groups.
v Create an LVM physical volume over each block device using the pvcreate command. To create an
LVM physical volume for /dev/sdb, use this command:
# pvcreate /dev/sdb
v Extend the LVM volume group using the physical volume or volumes you previously created:
# vgextend cinder-volumes /dev/sdb [additional devices]
Configuring IBM Storwize Cinder driver:
You can configure IBM Cloud Manager with OpenStack to use the IBM Storwize Cinder driver.
132
IBM Cloud Manager with OpenStack: Administrator Guide, version 4.2
About this task
The IBM Storwize Cinder driver is supported in the following environments:
Table 50. Summary of support details
Support options
Details
Supported hypervisor types?
KVM or QEMU, PowerKVM, Hyper-V, and z/VM
Support for post-deployment customization?
Yes
Supported topologies?
All, except the following 2 topologies:
v Minimal
v Stand-alone self-service portal
Storage (Cinder) node?
Controller or block storage node
Operating system?
Red Hat Enterprise Linux 6.5
Architecture?
x86_64
Complete the following steps to configure IBM Cloud Manager with OpenStack to use the IBM Storwize
Cinder driver.
Procedure
1. Create an SSH public / private key pair for authenticating to the SAN controller, or use an existing
key pair. The public key should be placed on the SAN controller as described in the SAN storage
documentation. Place the private key on the Cinder volume server (typically the controller node), and
record its location for use below. The file permissions for this file are set during deployment so that it
is owned and readable only by the OpenStack block storage user (Cinder).
2. Add the following attribute to the default_attributes section of your environment file.
v openstack.block-storage.volume.driver: Set to
cinder.volume.drivers.ibm.storwize_svc.StorwizeSVCDriver
3. Add the following attributes as needed to the default_attributes section of your environment file.
The values for these attributes must be based on your IBM Storwize Cinder configuration.
v openstack.block-storage.san.san_ip: IP address of SAN controller. The default value is 127.0.0.1.
v openstack.block-storage.san.san_login: User name for SAN controller. The default value is admin.
v openstack.block-storage.san.san_private_key: File name of the private key to use for SSH
authentication. The default is /v7000_rsa.
v openstack.block-storage.storwize.storwize_svc_volpool_name: Storage system storage pool for
volumes. The default is volpool.
v openstack.block-storage.storwize.storwize_svc_vol_rsize: Storage system space-efficiency
parameter for volumes. The default value is 2.
v openstack.block-storage.storwize.storwize_svc_vol_warning: Storage system threshold for
volume capacity warnings. The default value is 0.
v openstack.block-storage.storwize.storwize_svc_vol_autoexpand: Storage system auto-expand
parameter for volumes. The default is true.
v openstack.block-storage.storwize.storwize_svc_vol_grainsize: Storage system grain size
parameter for volumes. The default is 256.
v openstack.block-storage.storwize.storwize_svc_vol_compression: Storage system compression
option for volumes. The default value is false.
v openstack.block-storage.storwize.storwize_svc_vol_easytier: Enable Easy Tier® for volumes.
The default value is true.
v openstack.block-storage.storwize.storwize_svc_flashcopy_timeout: Maximum number of
seconds to wait for FlashCopy® to be prepared. The default value is 120.
Chapter 5. Deploying the cloud
133
v openstack.block-storage.storwize.storwize_svc_vol_iogrp: The I/O group in which to allocate
volumes. The default value is 0.
v openstack.block-storage.storwize.storwize_svc_connection_protocol: Connection protocol (iSCSI
or Fibre Channel). The default value is iSCSI.
Note: Only iSCSI is supported by Hyper-V compute nodes.
v openstack.block-storage.storwize.storwize_svc_iscsi_chap_enabled: Configure CHAP
authentication for iSCSI connections. The default value is true.
Note: If the compute node is Hyper-V, specify the value in the environment file as false.
v openstack.block-storage.storwize.storwize_svc_multipath_enabled: Connect with multipath
(Fibre Channel only; iSCSI multipath is controlled by Nova). The default value is false.
v openstack.block-storage.storwize.storwize_svc_multihostmap_enabled: Allows vdisk to
multi-host mapping. The default value is true.
4. When complete, return to the relevant topology deployment or update process and complete the
remaining steps.
Related tasks:
“Deploying a test or production cloud” on page 77
Deploy the components that are necessary to create a test or production cloud environment with more
than one node. Use the instructions that apply to your specific hypervisor for each compute node.
“Updating a deployed topology” on page 149
After you deploy a topology, you might need to apply fixes, either to the IBM Cloud Manager with
OpenStack services themselves or to how the IBM Cloud Manager with OpenStack services are deployed.
Configuring IBM Storwize V7000 Unified and IBM SONAS Cinder driver:
You can configure IBM Cloud Manager with OpenStack to use the IBM Storwize V7000 Unified and IBM
Scale Out Network Attached Storage Cinder driver.
About this task
The IBM Storwize V7000 Unified and IBM SONAS Cinder driver is supported in the following
environments:
Table 51. Summary of support details
Support options
Details
Supported hypervisor types?
KVM or QEMU, and PowerKVM
Support for post-deployment customization?
Yes
Supported topologies?
All, except the following 2 topologies:
v Minimal
v Stand-alone self-service portal
Storage (Cinder) node?
Controller or block storage node with NFS client
installed
Operating system?
Red Hat Enterprise Linux 6.5
Architecture?
x86_64
Complete the following steps to configure IBM Cloud Manager with OpenStack to use the IBM Storwize
V7000 Unified and IBM SONAS Cinder driver.
134
IBM Cloud Manager with OpenStack: Administrator Guide, version 4.2
Procedure
1. Add the following attribute to the default_attributes section of your environment file.
v openstack.block-storage.volume.driver: Set to cinder.volume.drivers.ibm.ibmnas.IBMNAS_NFSDriver.
2. Add the following attributes as needed to the default_attributes section of your environment file.
The values for these attributes must be based on your IBM Storwize V7000 Unified and IBM SONAS
Cinder driver configuration.
v openstack.block-storage.ibmnas.nas_ip: Management IP address of IBM SONAS or IBM Storwize
V7000 Unified storage. The default value is 127.0.0.1.
v openstack.block-storage.ibmnas.nas_login: User name to authenticate for IBM SONAS or IBM
Storwize V7000 Unified storage. The default value is admin.
v openstack.block-storage.ibmnas.nas_access_ip: Host name or public IP address to access shares.
There is no default value.
v openstack.block-storage.ibmnas.nas_ssh_port: SSH port to access shares. There is no default
value.
v openstack.block-storage.ibmnas.shares_config: File that contains a list of IBM SONAS or IBM
Storwize V7000 Unified shares. The default value is /etc/cinder/nfs_shares.conf.
v openstack.block-storage.ibmnas.mount_point_base: Storage system mount point path for volume
creation. The default value is /mnt/cinder-volumes.
v openstack.block-storage.ibmnas.nfs_sparsed_volumes: Storage system volume creation method.
The default value is true.
v openstack.block-storage.ibmnas.export: Storage system shares / export path parameter. There is
no default value.
3. Create a data bag item in the user passwords data bag for your environment. This data bag item will
contain the password to authenticate to the storage system.
a. Create a directory for the user passwords data bag. Change your_env_user_passwords to the name
of the user passwords data bag for your environment. The
openstack.secret.user_passwords_data_bag attribute in your environment file contains the data
bag name to use.
$ mkdir -p data_bags/your_env_user_passwords
$ chmod -R 600 data_bags/
b. Create a data bag item with the following contents. The data bag item name must match the value
of the openstack.block-storage.ibmnas.nas_login attribute. The following example assumes that
the value is your_data_bag_item_name.
$ cat data_bags/your_env_user_passwords/your_data_bag_item_name.json
{
"id": "your_data_bag_item_name",
"your_data_bag_item_name": "CHANGE_TO_PASSWORD"
}
c.
Upload the data bag item that you created in the previous step. Change your-secret-key-name to the
secret key for your topology. The secret_file JSON attribute in your topology file contains the
secret file to use.
$ knife data bag from file your_env_user_passwords
your_data_bag_item_name.json --secret-file your-secret-key-name
d. Remove the local data bag item since it is no longer needed.
$ rm -rf data_bags/
4. When complete, return to the relevant topology deployment or update process and complete the
remaining steps.
Related tasks:
“Deploying a test or production cloud” on page 77
Deploy the components that are necessary to create a test or production cloud environment with more
than one node. Use the instructions that apply to your specific hypervisor for each compute node.
Chapter 5. Deploying the cloud
135
“Updating a deployed topology” on page 149
After you deploy a topology, you might need to apply fixes, either to the IBM Cloud Manager with
OpenStack services themselves or to how the IBM Cloud Manager with OpenStack services are deployed.
Configuring IBM GPFS Cinder driver:
You can configure IBM Cloud Manager with OpenStack to use the IBM GPFS™ Cinder driver.
About this task
The IBM GPFS Cinder driver is supported in the following environments:
Table 52. Summary of support details
Support options
Details
Supported hypervisor types?
KVM or QEMU with GPFS client installed
Support for post-deployment customization?
Yes
Supported topologies?
All, except the following two topologies:
v Minimal
v Stand-alone self-service portal
Storage (Cinder) node?
Controller or block storage node with GPFS client
installed
Operating system?
Red Hat Enterprise Linux 6.5
Architecture?
x86_64 or ppc64
Complete the following steps to configure IBM Cloud Manager with OpenStack to use the IBM GPFS
Cinder driver.
Procedure
1. Add the following attribute to the default_attributes section of your environment file.
v openstack.block-storage.volume.driver: Set to cinder.volume.drivers.gpfs.GPFSDriver.
2. Add the following attributes as needed to the default_attributes section of your environment file.
The values for these attributes must be based on your IBM GPFS Cinder driver configuration.
v openstack.block-storage.gpfs.gpfs_mount_point_base: Path to directory in GPFS file system
where volume files are located. There is no default value.
v openstack.block-storage.gpfs.gpfs_images_dir: Path to directory in GPFS file system where
images are located. There is no default value.
v openstack.block-storage.gpfs.gpfs_images_share_mode: Path to directory in GPFS file system
where Glance images are located. The default value is copy_on_write.
v openstack.block-storage.gpfs.gpfs_sparse_volumes: Create volumes as sparse or fully allocated
files. The default value is true.
v openstack.block-storage.gpfs.gpfs_max_clone_depth: Maximum clone indirections that are
allowed when volume file snapshots clones are created. The default value is 8.
v openstack.block-storage.gpfs.gpfs_storage_pool: GPFS storage pool that volumes are assigned
to. The default value is system.
For more information about configuration parameters, see OpenStack information to Enable the GPFS
driver.
3. When complete, return to the relevant topology deployment or update process and complete the
remaining steps.
Related tasks:
136
IBM Cloud Manager with OpenStack: Administrator Guide, version 4.2
“Deploying a test or production cloud” on page 77
Deploy the components that are necessary to create a test or production cloud environment with more
than one node. Use the instructions that apply to your specific hypervisor for each compute node.
“Updating a deployed topology” on page 149
After you deploy a topology, you might need to apply fixes, either to the IBM Cloud Manager with
OpenStack services themselves or to how the IBM Cloud Manager with OpenStack services are deployed.
Configuring XIV storage cookbook:
After you deploy a topology, you can configure the cookbook for IBM XIV® storage.
About this task
The IBM XIV Cinder driver is supported in the following environments:
v Storage (Cinder) node: Controller or block storage node
v Operating system: Red Hat Enterprise Linux 6.5
v Architecture: x86_64
v Compute nodes: KVM or QEMU
Complete the following steps to configure the XIV chef cookbook for IBM Cloud Manager with
OpenStack.
Procedure
1. Ensure that you installed the latest fix pack. Then, follow these steps to extract and upload the XIV
Cinder driver cookbook (xiv_ds8k) to the deployment server.
a. Create a temporary directory to store the XIV Cinder driver cookbook.
mkdir /tmp/xiv
b. Extract the XIV Cinder driver cookbook to the temporary directory.
tar -xvf /opt/ibm/cmwo/file-repo/xiv/xiv_ds8k_cookbook_0.2.1.tgz -C /tmp/xiv
c. Upload the XIV Cinder driver cookbook to Chef.
knife cookbook upload xiv_ds8k -o /tmp/xiv
2. Ensure that the python-setuptools RPM is included in the operating system yum repository before
running the following command. For more information about configuring yum repositories, see
“Configuring operating system yum repositories on the deployment server” on page 37.
3. Base 64 encode the password that is used to connect to the SAN storage:
# echo -n <san-password> | base64
The output is used as the <base64 XIV Password> below.
Note: This cookbook does not currently support use of encrypted data bags.
4. Edit your environment file, adding the following to override_attributes.openstack.block-storage:
"xiv_ds8k": {
"san_ip": "<ip of XIV management>",
"san_clustername": "<XIV POOL for Cinder>",
"xiv_ds8k_connection_type": "iscsi",
"xiv_chap": "disabled",
"san_login": "<XIV Management Login>",
"san_password": "<base64 XIV Password>",
}
Upload the modified environment to the Chef server.
5. Edit your topology file, my-topology.json, and add the following recipes to the end of the run list for
the node that acts as the block storage server. The node can be the controller or a separate block
storage node.
Chapter 5. Deploying the cloud
137
"recipe[xiv_ds8k::install]"
"recipe[xiv_ds8k::configure]"
The resulting run list might look like this:
"runlist": [
"role[ibm-os-single-controller-node]",
"recipe[xiv_ds8k::install]",
"recipe[xiv_ds8k::configure]"
]
6. Finish deploying the topology as described in the directions for your hypervisor.
Configuring multiple block storage back ends:
When you deploy an IBM Cloud Manager with OpenStack topology, you can also configure multiple
block storage back ends on the controller or a block storage node.
Before you begin
To configure multiple block storage back ends, ensure that the latest fix pack is installed.
About this task
You can also use this multiple block storage back ends technique when you configure block storage back
ends on multiple servers to use a different volume_backend_name for each block storage node. To configure
multiple block storage back ends, you can define an openstack.block-storage.volume.multi_backend
table to configure each back end as part of the cloud environment or node attributes.
To configure multiple block storage back ends in the Chef environment, complete the following steps:
Procedure
1. Record the configuration for the cinder.conf properties as described in Configure multiple-storage
back ends. The following example shows two storage back ends, lvm_1 and lvm_2:
[DEFAULT]
...
enabled_backends = lvm_1, lvm_2
...
[lvm_1]
volume_driver=cinder.volume.drivers.lvm.LVMISCSIDriver
volume_backend_name=lvm-1
volume_group=cinder-volumes-1
[lvm_2]
volume_driver=cinder.volume.drivers.lvm.LVMISCSIDriver
volume_backend_name=lvm-2
volume_group=cinder-volumes-2
2. Convert the information from the previous step to a JSON map for the openstack.blockstorage.volume.multi_backend attribute that has an entry for each back end configuration file section
(lvm_1, lvm_2). Each of these JSON entries is a map that contains the property name and value pairs
for each property in the section. The example from the previous step would look like the following
example:
{
"openstack" : {
"block-storage" : {
"volume" : {
"multi_backend" : {
"lvm_1" : {
"volume_driver" : "cinder.volume.drivers.lvm.LVMISCSIDriver",
"volume_backend_name" : "lvm-1",
"volume_group" : "cinder-volumes-1"
},
"lvm_2": {
138
IBM Cloud Manager with OpenStack: Administrator Guide, version 4.2
"volume_driver" : "cinder.volume.drivers.lvm.LVMISCSIDriver",
"volume_backend_name" : "lvm-2",
"volume_group" : "cinder-volumes-2"
}
}
}
}
}
}
3. If the only block storage node in your topology is the controller, add the information from step 2 to
the Chef environment for your cloud.
4. If you have multiple block storage nodes, or the controller is not acting as the block storage node, add
the information from step 2 to the node attributes file for the block storage node.
Deploying with block storage (Cinder) nodes:
Deploy the components that are necessary to create a cloud environment with extra block storage
(Cinder) nodes.
About this task
One or more nodes in your cloud topology can be configured as block storage nodes. The controller node
is automatically configured as a block storage node. You can define more nodes by using the
ibm-os-block-storage-node role. A block storage node runs the Cinder volume and Ceilometer compute
services; it does not run other controller or compute node services.
A block storage node must meet the following requirements:
v Operating System: Red Hat Enterprise Linux 6.4 or 6.5
v Architecture: x86_64 or ppc64
For more information about storage (Cinder) drivers and the compute node hypervisors that they
support, see “Configuring Cinder drivers” on page 129.
When you define your cloud topology, you must define attributes for each block storage node. For
example, when you configure the block storage nodes to use the LVM iSCSI driver, you define the iSCSI
IP address for each node. Depending on how you want to allocate volumes across the block storage
nodes, you might want to define a unique volume backend name for each node.
The general process for including block storage nodes in your cloud topology is as follows:
v Define a controller +n compute or distributed database topology. Refer to other articles in
“Deploying a test or production cloud” on page 77 for instructions to create a topology for your
hypervisor.
v Define one or more nodes in your topology as block storage nodes and define the node-specific block
storage attributes for each block storage node.
v Deploy your topology.
Use the following instructions to define block storage nodes in your topology.
Procedure
1. Ensure that your environment overrides openstack.endpoints.db.host with the IP address of the
database server (your controller or distributed database server).
2. Create node attribute files for each block storage node. The files include the volume driver-specific
attributes for the volume driver that is being used.
Example node attributes file, storage-node-1-attributes.json. It uses the LVM volume driver with
its default volume group name, cinder-volumes.
Chapter 5. Deploying the cloud
139
{
"openstack" : {
"block-storage" : {
"volume" : {
"create_volume_group" : true,
"create_volume_group_type" : "file",
"iscsi_ip_address" : "x.x.x.x",
"multi_backend" : {
"lvm-1" : {
"volume_driver" : "cinder.volume.drivers.lvm.LVMISCSIDriver",
"volume_backend_name" : "lvm-1"
}
}
}
}
}
}
3. Edit your topology file, my-topology.json, and add nodes for the block storage nodes. The
run_order_number for the block storage nodes must be greater than that of the controller node and the
distributed database node (if present). The run list for the node must be the single role
ibm-os-block-storage-node. Identify the attribute_file you created for each node.
{
"name": "CHANGEME",
"environment": "CHANGEME",
"secret_file":"/opt/ibm/cmwo/chef-repo/data_bags/example_data_bag_secret",
"nodes": [
{
"fqdn": "controller.private.cloud",
. . .
},
{
"fqdn": "storage-node-1.private.cloud",
"password": "CHANGEME",
"run_order_number": 3,
"quit_on_error": true,
"runlist": [
"role[ibm-os-block-storage-node]"
],
"chef_client_options": "",
"user": "root",
"attribute_file": "storage-node-1-attributes.json"
},
{
"fqdn": "compute-node-1.private.cloud",
. . .
}
]
}
4. Finish deploying the topology as described in the directions for your hypervisor.
Disabling Neutron and enabling Nova network
OpenStack provides the following networking services: Nova and Neutron.
About this task
In the default environments that are provided by IBM Cloud Manager with OpenStack, the Neutron
network service is configured as the preferred network service.
Important: Due to a number of limitations, it is not recommended to enable the Nova network. For
example, the only supported hypervisor type is KVM. Also, the direction of the OpenStack community is
to use the Neutron network.
140
IBM Cloud Manager with OpenStack: Administrator Guide, version 4.2
The following information describes details about supported options.
Table 53. Summary of support details
Support options
Details
Supported hypervisor types?
KVM and QEMU
Support for post-deployment customization?
No
Supported topologies?
All, except Stand-alone self-service portal
If the Nova network is required, complete the normal deployment steps. You must create the
your-environment-name.json file using the example environments that are provided. Then, update your
environment as normal, and make the following extra changes. All attributes are in the
override_attributes section of the environment file.
Procedure
1. Change the openstack.compute.network.service_type attribute to nova.
2. (Optional) Update the openstack.compute.network.network_manager attribute to the applicable
network type. Possible values include:
v nova.network.manager.FlatManager
v nova.network.manager.FlatDHCPManager (Default value)
v nova.network.manager.VlanManager
3. Disable IPv6. Nova network support for IPv6 is limited. It is easiest to disable IPv6 in the
environment. Find the use_ipv6 setting in the environment and set it to False. For example,
use_ipv6=false. The JSON property containing use_ipv6 varies depending on the environment
version.
4. By default, Chef automatically creates a public and a private Nova network with the following
settings:
{
’label’ => ’public’,
’ipv4_cidr’ => ’192.168.100.0/24’,
’bridge’ => ’br100’,
’bridge_dev’ => ’eth2’,
’dns1’ => ’8.8.8.8’,
’dns2’ => ’8.8.4.4’’
},
{
’label’ => ’private’,
’ipv4_cidr’ => ’192.168.200.0/24’,
’bridge’ => ’br200’,
’bridge_dev’ => ’eth3’,
’dns1’ => ’8.8.8.8’,
’dns2’ => ’8.8.4.4’,
}
If you do not want these networks, the openstack.compute.networks attribute can be specified to
either disable the creation of the prior networks or to specify what network should be automatically
created.
5. If the single-controller-n-compute environment is being used, two more changes must be done
because the Nova network running on the compute node must access the Nova database that is
defined on the controller.
v Change the following JSON attribute in your environment file, your-environment-name.json:
– openstack.endpoints.db.host: Change from 127.0.0.1 to the IP address of the controller node
system.
v The database client role must be added to each of the compute nodes. Modify the run list for each
compute node in your topology file, your-topology-name.json. Then, add the following client role:
Chapter 5. Deploying the cloud
141
’role[ibm-os-database-client-node]’
6. To finish the customization, return to the relevant topology deployment process and complete the
remaining steps.
Related tasks:
“Deploying a test or production cloud” on page 77
Deploy the components that are necessary to create a test or production cloud environment with more
than one node. Use the instructions that apply to your specific hypervisor for each compute node.
Disabling the self-service portal
If you want to disable the self-service portal which is used to manage IBM Cloud Manager with
OpenStack, you must manually exclude the self-service portal in a topology.
About this task
After you disable the self-service portal, only the IBM Cloud Manager with OpenStack dashboard is
available. When the self-service portal is enabled, you can manage IBM Cloud Manager with OpenStack
using the dashboard and the self-service portal.
The following information describes details about supported options.
Table 54. Summary of support details
Support options
Details
Supported hypervisor types?
All
Support for post-deployment customization?
No. For disabling and uninstalling the self-service portal
post-deployment, see “Uninstalling the self-service portal
on Linux” on page 42
Supported topologies?
All, except Stand-alone self-service portal
To exclude the self-service portal in the topology, complete the following steps.
Procedure
1. Update the following JSON attribute, which is in the override_attributes section of your
environment file, your-environment-name.json.
v ibm-sce.service.enabled: false.
2. Remove the ibm-sce-node role in your topology file, your-topology-name.json.
v Remove "role[ibm-sce-node]" (including the comma immediately following) in the run_list for
the node. For example, in a Minimal topology file, you would remove the ibm-sce-node role, as
shown.
"runlist":[
"role[ibm-os-allinone-kvm]"
]
3. To finish the customization, return to the relevant topology deployment process and complete the
remaining steps.
Related tasks:
“Deploying a test or production cloud” on page 77
Deploy the components that are necessary to create a test or production cloud environment with more
than one node. Use the instructions that apply to your specific hypervisor for each compute node.
Related reference:
“Managing clouds” on page 234
You can add, configure, edit, and remove clouds.
142
IBM Cloud Manager with OpenStack: Administrator Guide, version 4.2
“Roles” on page 287
The following roles are provided in support of the reference topologies.
Verifying Open vSwitch configuration
Verify the Open vSwitch configuration for the applicable network that you configured.
Procedure
1. If you configured a GRE network, verify that there is at least one port beginning with "gre-" created
on the br-tun bridge. Also, verify that the local and remote IP addresses that are listed in the options
field match the IP addresses of the controller and the compute node.
> ovs-vsctl show
Bridge br-tun
Port br-tun
Interface br-tun
type: internal
Port "gre-2"
Interface "gre-2"
type: gre
options: {in_key=flow, local_ip="192.168.0.1",
out_key=flow, remote_ip="192.168.0.2"}
Port patch-int
Interface patch-int
type: patch
options: {peer=patch-tun}
2. If you configured a flat or VLAN network, verify you see the following output:
a. Verify that a bridge was created matching the name that you specified in the
openstack.network.openvswitch.bridge_mappings property. Typically the bridge is called br-ethX.
b. Verify that port ethX was added to bridge br-ethX as an interface.
c. Verify that port phy-br-ethX was added to bridge br-ethX as an interface.
d. Verify that port int-br-ethX was added to bridge br-int as an interface.
> ovs-vsctl show
Bridge br-int
Port br-int
Interface br-int
type: internal
Port "int-br-eth1"
Interface "int-br-eth1"
Bridge "br-eth1"
Port "br-eth1"
Interface "br-eth1"
type: internal
Port "eth1"
Interface "eth1"
Port "phy-br-eth1"
Interface "phy-br-eth1"
Note: The previous example was truncated to display only what you must verify. If you do not see
"phy-br-ethX' and 'int-br-ethX' ports in the ovs-vsctl show output (c and d from the previous list),
verify that neutron-openvswitch-agent is active (service neutron-openvswitch-agent status) and
check the error log in /var/log/neutron/openvswitch-agent.log.
3. If you configured a VXLAN network, verify that you see the following output.
v Verify that there is at least one port beginning with vxlan- created on the br-tun bridge.
v Verify that the local and remote IP addresses that are listed in the options field match the IP
addresses of the controller and the compute node.
Chapter 5. Deploying the cloud
143
> ovs-vsctl show
Bridge br-tun
Port patch-int
Interface patch-int
type: patch
options: {peer=patch-tun}
Port br-tun
Interface br-tun
type: internal
Port "vxlan-0a0b010b"
Interface "vxlan-0a0b010b"
type: vxlan
options: {df_default="true", in_key=flow, local_ip="x.x.x.x", out_key=flow, remote_ip="y.y.y.y"}
4. By default, the L3 agent and IP movement is enabled. Unless you disabled them, verify that you can
see the following output. Specifically, you must verify that the port ethX was added to the external
network bridge (default is br-ex).
> ovs-vsctl show
Bridge br-ex
Port br-ex
Interface br-ex
type: internal
Port "eth2"
Interface "eth2"
Using your cloud environment
Now that you deployed the components necessary to create your cloud environment, you are ready to
start using it.
About this task
For information on managing your cloud environment, see Chapter 7, “Managing IBM Cloud Manager
with OpenStack as an Administrator,” on page 207 and if you have the self-service portal enabled, see
Managing with IBM Cloud Manager with OpenStack self-service portal (User access).
After deployment, you can further configure some of the IBM Cloud Manager with OpenStack services in
your cloud environment. For example, you might need to create your initial networks. For information on
configuring your cloud environment, see Chapter 6, “Configuring IBM Cloud Manager with OpenStack,”
on page 155.
Adding the self-service portal to a deployed topology
IBM Cloud Manager with OpenStack features an easy to use self-service portal for performing cloud
operations. Deploying a cloud environment with the self-service portal is optional. After you deploy your
cloud environment, you can add the self-service portal.
About this task
Use the following procedure to add the self-service portal to a deployed topology.
Procedure
1. Log in to the deployment system as the root user. This is the system where IBM Cloud Manager with
OpenStack was installed.
144
IBM Cloud Manager with OpenStack: Administrator Guide, version 4.2
2. Update the following JSON attribute in your environment file your-environment-name.json. If you
have a multi-region cloud environment, then you must update the attribute in the environment file
for each region.
ibm-sce.service.enabled: true
This attribute configures the self-service portal for use with OpenStack.
3. Choose a node in your environment on which to deploy the self-service portal. Typically, the
self-service portal is co-located with the single controller node or is installed on a stand-alone node.
Append the ibm-sce-node role to this node in your topology file your-topology-name.json. If you
have a multi-region cloud environment, only one self-service portal is installed to manage the
multiple regions.
For example, in a minimal topology file, you would append role[ibm-sce-node] to the run list for the
node:
"runlist":[
"role[ibm-os-allinone-kvm]",
"role[ibm-sce-node]"
]
4. Update your cloud environment to add the self-service portal. If you have a multi-region cloud
environment, then you must complete these steps for each region, starting with the region that
contains the shared OpenStack Keystone server.
a. Upload the updated environment file.
$ knife environment from file your-environment-name.json
b. Update the topology.
$ knife os manage update topology your-topology-name.json
Note: When you enable the self-service portal for IBM Cloud Manager with OpenStack, the
following configuration changes are made:
v Modified OpenStack policy files are installed instead of the default OpenStack policy files. The
policy files that are modified for the self-service portal ensure that the user role security model
is consistent between what the self-service portal allows and OpenStack. For more information,
see Overview of project membership roles.
v Self-service portal users, roles and projects are pushed into the OpenStack Keystone identity
service. For more information, see Project management with OpenStack and “User management
with OpenStack” on page 250.
v The OpenStack cloud connection is configured in the self-service portal.
5. After the update is complete, the IBM Cloud Manager with OpenStack self-service portal is available
at https://node.fqdn.com:18443/cloud/web/login.html, where node.fqdn.com is the fully qualified
domain name for the node on which you deployed the self-service portal. You can log in using your
current cloud administrator (admin) user.
6. If you have a multi-region cloud environment, you can add an OpenStack cloud connection for the
additional regions. For more information, see “Adding an OpenStack cloud configuration” on page
234.
Results
Your existing cloud resources are synchronized with the self-service portal and you can start to use the
self-service portal. For more information about the self-service portal, see “Managing with the IBM Cloud
Manager with OpenStack self-service portal (Administrator access)” on page 211.
Adding a compute node to a deployed topology
After deploying your topology, you can add a compute node system to your deployment. This does not
apply to the Minimal topology.
Chapter 5. Deploying the cloud
145
Before you begin
Before you begin, ensure you completed the Deploying prerequisites steps based on the type of your new
compute node.
About this task
Use the following procedure to add a Linux Kernel-based Virtual Machine (KVM) or QEMU, PowerKVM
or z/VM compute node to your deployment. To add another Hyper-V compute node, see “Installing and
uninstalling the IBM Cloud Manager with OpenStack Hyper-V Agent” on page 28.
Note: This procedure is only applicable for adding a new node. It is not meant for deploying to an
existing node in your topology.
Procedure
1. Log in to the deployment system as the root user. This is the system where IBM Cloud Manager with
OpenStack was installed.
2. Create a node specific attribute file. This step is only required when the new compute node requires
different attributes from those defined in the environment for the topology. For more information on
node specific attribute files, see the applicable “Deploying a test or production cloud” on page 77
section for your compute node type.
3. Deploy the new compute node. Change the following in the command below.
v node-fqdn: Set to the fully qualified domain name of the node system. You can also set to the public
IP address, private IP address, or hostname.
v node-run-list: Set the node run list to be the same as the run list for an existing compute node in
the topology. You can look in the topology JSON file to see the run list for an existing compute
node. For example, if the run list is "runlist": ["role[ibm-os-compute-node-kvm]","role[ibm-osprs-compute-node]"], then set node-run-list to 'role[ibm-os-compute-node-kvm],role[ibm-os-prscompute-node]'.
v node-ssh-password: SSH root user password for the node. To use an SSH identity file instead of a
password, use the -i node-ssh-identity option, where node-ssh-identity is the SSH identity file
for the node.
v node-attribute-file: Set to the node specific attribute file created in step 2. Remove this option if
not required.
v topology-file: Set to the fully qualified path and file name of the topology JSON file used to
deploy the other nodes in the topology. The command updates the topology file with the added
compute node information.
Note: The following command must be entered on a single line, even though the example shows a
line break for formatting purposes.
knife os manage deploy node node-fqdn ’node-run-list’ -P node-ssh-password --attribute-file
node-attribute-file --topology-file topology-file
For example, knife os manage deploy node hostname.my.company.com 'role[ibm-os-compute-nodekvm],role[ibm-os-prs-compute-node]' -P passw0rd --attribute-file /root/clouds/hostname_attributes.json
--topology-file /root/clouds/my_topology.json
Note: For more information on the knife os manage deploy node command and the topology file, see
“Commands” on page 267.
4. After the deployment completes, you can check the status of the IBM Cloud Manager with OpenStack
services, see “Checking status of OpenStack services” on page 207.
146
IBM Cloud Manager with OpenStack: Administrator Guide, version 4.2
Results
You are ready to start using IBM Cloud Manager with OpenStack services on the new compute node
system.
Related tasks:
“Deploying a remote node fails” on page 306
You attempt to deploy a remote compute node but the deployment fails.
Removing a compute node from a deployed topology
After you deploy your topology, you can remove a compute node system from your deployment. This
does not apply to the Minimal topology.
About this task
The knife os manage remove node command attempts to stop and disable any running OpenStack
services on the compute node. It then removes the compute node from the cluster on the controller node,
and also removes the chef 'node' and 'client' objects for the node from the Chef server.
Use the following procedure to remove a Linux Kernel-based Virtual Machine (KVM), QEMU or
PowerKVM compute node from your deployment.
Procedure
1. Log in to the deployment system as the root user. This is the system where IBM Cloud Manager with
OpenStack was installed.
2. Remove the compute node. Change the following command parameters.
v node-fqdn: Set to the fully qualified domain name of the node system.
v node-ssh-password: SSH root user password for the node. To use an SSH identity file instead of a
password, use the -i node-ssh-identity option, where node-ssh-identity is the SSH identity file for
the node.
v topology-file: Set to the topology file used for deployment. Specifying the topology-file is
optional. If specified, the command removes the compute node information from the
topology-file.
v topology-secret-file: Set to the secret file used for deployment. If the topology-file is specified,
then specifying the topology-secret-file is optional.
Note: The following command must be entered on a single line, even though the example shows a
line break for formatting purposes.
knife os manage remove node node-fqdn -P node-ssh-password -–topology-file topology-file
--secret-file topology-secret-file
The compute node is now removed from the deployed topology environment. See “Redeploying a
node cleanup” on page 148 to clean up the removed compute node.
Changing passwords and secrets
You can change the passwords and secrets that were used during the deployment process.
About this task
This task applies to the Controller +n compute or Distributed database topologies. Customizing
passwords and secrets is not done for the Minimal topology.
Note: This procedure only applies to passwords and secrets that are found in the “Data bags” on page
277 topic.
Chapter 5. Deploying the cloud
147
Procedure
1. Change the passwords using the appropriate management interface. From the previous list of data
bags, this step is only required for PowerVC and z/VM.
v For a PowerVC instance:
– pvcadmin: Password for the PowerVC admin user. You need to use the proper PowerVC
management interface to change it.
– pvcqpid: Password for the PowerVC Qpid powervc_qpid user. You must not change this password.
– pvcrabbit: Password for the PowerVC RabbitMQ powervcdriver_mq user. This password can be
changed with following command on a PowerVC instance.
Note: The following command must be entered on a single line, even though the example shows
a line break for formatting purposes.
su - rabbitmq -c ’/usr/lib/rabbitmq/bin/rabbitmqctl change_password <powervcdriver_mq user>
<powervcdriver_mq password>’
v For a z/VM instance:
– xcat: Password for the z/VM xcat admin user.
– xcatmnadmin: Password for the z/VM xcat mnadmin user.
– zlinuxroot: Password for the instances that are created by z/VM root user.
2. You need to refresh your topology deployment to apply the password changes. You also change the
secrets as part of this step.
a. Log in to the deployment system as the root user. This is the system where IBM Cloud Manager
with OpenStack was installed.
b. Change to the directory where you stored the files for the topology that you deployed. Change
your-deployment-name to the name for your deployment.
$ cd your-deployment-name
c. Download and decrypt the data bags that contain the passwords and secrets for your deployment
and store them in the data_bags directory. The data_bags directory contains a subdirectory for
each data bag that is used by your deployment. The subdirectories contain the data bag items for
your deployment.
$ knife os manage get passwords --topology-file your-topology-name.json data_bags
d. Change the passwords and secrets in the data bag items for your deployment. The password
changes must be based on any prior changes. To change the password, you must change the value
of the data bag item name. For example, for the admin.json data bag item, change the value at
CHANGEME to the password.
{
"id": "admin",
"admin": "CHANGEME"
}
e. Upload the changed data bags for your deployment.
$ knife os manage update passwords --topology-file your-topology-name.json data_bags
f. Refresh the topology deployment with the changed passwords and secrets.
$ knife os manage update topology your-topology-name.json
Redeploying a node cleanup
If you need to deploy a topology to a node where a topology has previously been deployed, ensure that
the node is in a clean state and that any corresponding node data on the deployment server has been
removed.
148
IBM Cloud Manager with OpenStack: Administrator Guide, version 4.2
About this task
Before you redeploy a topology, complete the following steps to prepare your node and deployment
server.
Procedure
1. Revert your node system where a topology was previously deployed to a snapshot or backup version
of the node. The node must be in the state that it was in prior to when the topology was first
deployed.
2. On the deployment server, you must delete the data that is stored about a previously deployed node.
The deployment server maintains state and other data about a node system in the deployment server
database. If you are redeploying, or if you replace a node with the same fully qualified domain name,
run the following commands on the deployment server to remove the data that has been stored about
the node:
$ knife node delete node.fqdn -y
$ knife client delete node.fqdn -y
These commands reset the node to a clean state for the Chef server.
3. Depending on how your node is configured, you might also need to delete the SSH fingerprint on
your deployment server. The deployment knife commands use SSH to communicate with the node
system to deploy OpenStack. Use one of the following methods to delete SSH fingerprints from the
.ssh/known_hosts file on the deployment server:
v Run the following command:
ssh-keygen -R node fqdn
v Edit the .ssh/known_hosts file in a text editor and delete the line that contains your node system.
Updating a deployed topology
After you deploy a topology, you might need to apply fixes, either to the IBM Cloud Manager with
OpenStack services themselves or to how the IBM Cloud Manager with OpenStack services are deployed.
About this task
In addition, you might need to modify the IBM Cloud Manager with OpenStack configuration files or
other customizations for your topology.
Note: If you have a multi-region cloud deployment, you need to update each region separately.
To update a deployed topology, complete the following steps:
Procedure
1. Log in to the deployment system as the root user. This is the system where IBM Cloud Manager with
OpenStack was installed.
2. Locate the directory that contains the files for the topology that you deployed. Change
your-deployment-name to the name for your deployment.
$ cd your-deployment-name
3. Download the current environment for your deployment. Change your-environment-name to the name
for your deployment. The name of your environment can be found in the topology file for your
deployment.
$ knife environment show your-environment-name -d -Fjson > your-environment-name.json
Chapter 5. Deploying the cloud
149
4. (This step is only required when you apply fixes as part of the update.) The environment file for your
deployment has constraints on the cookbook versions used. These constraints must be updated to use
the new cookbook versions. The knife os manage update environment command can be used to
update the cookbook version constraints.
v To update a JSON environment file that is named your-environment.json, run the following
command:
knife os manage update environment your-environment.json
The file name must end with the .json extension. If the file refers to an existing chef environment,
the file is uploaded to the chef server.
A fix pack might also require other changes to the environment. Refer to the instructions in the IBM
Cloud Manager with OpenStack fix pack.
5. Optional: You can change the configuration of your IBM Cloud Manager with OpenStack cloud
environment after you deploy it. For information about the supported configuration changes, see
“Deployment customization options” on page 109. Some cloud environments might not support
certain customization options. In addition, some customization options are not supported after a
topology is deployed.
When you make configuration changes to your deployment environment, you can either manually
modify the environment JSON file that you downloaded in Step 3 on page 149 or you can use the
knife os manage set environment command to assist you.
v Option 1: Manually edit your environment JSON file and then upload it after you complete the
configuration changes.
$ # Edit the environment JSON file, your-environment-name.json.
$ knife environment from file your-environment-name.json
v Option 2: Create an environment YAML configuration file that contains the configuration changes.
Use the knife os manage set environment command to modify your environment. For information
about the environment YAML configuration file that is used by the command, see “Environment
YAML Configuration File” on page 276.
$ touch your-environment-name-changes.yml
$ # Add your environment changes to the environment YAML configuration file.
$ knife os manage set environment –-env-conf your-environment-name-changes.yml –y your-environment
Note: Manual modifications to IBM Cloud Manager with OpenStack configuration files that are
managed by Chef are overwritten when you update your cloud environment. Configuration files
that are managed by Chef have a banner similar to the following example at the beginning of the
file:
# This file autogenerated by Chef
# Do not edit, changes will be overwritten
If you must manually modify such configuration files, the modification must be redone after the
update.
6. Refresh the topology deployment.
$ knife os manage update topology your-topology-name.json
All of the nodes that are defined in the topology are refreshed. The following topology JSON items,
which are required during a topology deployment, are optional during a topology update:
Topology Keys: environment
The environment to use with all nodes in the topology. The environment must exist on the
Chef server.
Node Keys: runlist
The runlist for the node. The runlist is a list of roles and cookbook recipes to be applied to the
node. The roles and cookbook recipes must exist on the Chef server.
150
IBM Cloud Manager with OpenStack: Administrator Guide, version 4.2
If the environment, or runlist values are specified in the topology JSON, they are set again for each
node in the topology. If the environment is not specified in the topology JSON, it is not set on all
nodes. If the runlist is not specified for a particular node in the topology JSON, it is not set on that
node.
If there are nodes in the topology that you do not want to refresh, there are two options to prevent
them from being updated (while still leaving them in the topology).
v The knife os manage update topology command can be run in interactive mode by specifying the
--interactive command-line option:
$ knife os manage update topology your-topology-name.json --interactive
When run in interactive mode, and choosing not to update all nodes, the command asks whether to
update each node. You can then skip any nodes in the topology that you do not want to refresh.
v If you do not want to refresh a node in the topology, you can set a key in the topology JSON file
that is used to specify whether to update it.
Node Keys: allow_update
A Boolean value, which indicates whether to update the node. Set to true to update the
node. Set to false if you do not want to update the node. The default is true.
7. (This step is only required when you apply fixes as part of the update.) After you refresh the topology
deployment, restart the IBM Cloud Manager with OpenStack services. For more information, see
“Managing IBM Cloud Manager with OpenStack services” on page 207.
Related concepts:
“Applying fixes and updates” on page 39
You can apply fixes and updates for the IBM Cloud Manager with OpenStack product.
Related tasks:
“Restarting IBM Cloud Manager with OpenStack services” on page 208
If you need to restart services for IBM Cloud Manager with OpenStack, use the IBM Cloud Manager with
OpenStack services command and specify the restart action. You can use the command to restart IBM
Cloud Manager with OpenStack services on a specific node or on all nodes in a topology.
Determining the fix level of deployed nodes
During the IBM Cloud Manager with OpenStack topology update process, you might want to know the
current fix level of your deployed nodes.
About this task
The IBM Cloud Manager with OpenStack fix level of the nodes in a topology is available as the
ibm-openstack.cmwo_version node attribute. This attribute is stored in the IBM Cloud Manager with
OpenStack Chef server and in a file that is located on each node. The version is updated after
successfully running the knife os manage deploy node / topology or knife os manage update node /
topology commands.
To query the IBM Cloud Manager with OpenStack Chef server for the ibm-openstack.cmwo_version node
attribute, use the knife search command. If a deployed node is restored from a backup, the information
in the Chef server will be incorrect if the last deployment or update was completed after the backup.
You must use one of the following commands to show the attribute value for a single node, all nodes,
and all nodes that use the same environment.
Chapter 5. Deploying the cloud
151
Example
Single node
[root@cmwo ~]# knife search node1.mycompany.com -a ibm-openstack.cmwo_version
1 items found
node1.mycompany.com:
ibm-openstack.cmwo_version: 4.2.0.0
All nodes
[root@cmwo ~]# knife search "*" -a ibm-openstack.cmwo_version
2 items found
node1.mycompany.com:
ibm-openstack.cmwo_version: 4.2.0.0
node2.mycompany.com:
ibm-openstack.cmwo_version: 4.2.0.0
All nodes using the regionOne environment:
[root@cmwo ~]# knife search chef_environment:regionOne -a ibm-openstack.cmwo_version
2 items found
node1.mycompany.com:
ibm-openstack.cmwo_version: 4.2.0.0
node2.mycompany.com:
ibm-openstack.cmwo_version: 4.2.0.0
The IBM Cloud Manager with OpenStack version that is used by the most recent knife os manage deploy
or update command is stored in the file /etc/cmwo-version:
# This file autogenerated by Chef
# Do not edit, changes will be overwritten
version=4.2.0.0
A cumulative log of the updates including the date, result, and IBM Cloud Manager with OpenStack
version is maintained in the file /etc/cmwo-version.log:
2014-08-22 15:28:47 -0500 : Update failed : cmwo_version=4.2.0.0
2014-08-22 15:45:26 -0500 : Update succeeded : cmwo_version=4.2.0.0
Adding a region to a deployed topology
After you deploy your topology, you can add a region to your cloud environment to create or expand a
multi-region cloud environment.
About this task
Each region is set up as a separate deployment that uses the same OpenStack Keystone server, but uses a
different region and possibly a different hypervisor type. Use the following instructions to add a region
to your cloud environment.
This example uses a single deployment server to manage all of the regions. However, you can use a
separate deployment server for each region. If separate deployment servers are used, they must have the
same version of IBM Cloud Manager with OpenStack installed, but are allowed to have different fix pack
levels. For more information about updates and release upgrades in these configurations, see “Best
practices for maintaining a multi-region cloud or test cloud” on page 41.
To begin, you must prepare the first region as described.
152
IBM Cloud Manager with OpenStack: Administrator Guide, version 4.2
Procedure
1. Log in to the deployment system as the root user. This is the system where IBM Cloud Manager
with OpenStack was installed.
2. Collect information about the first region deployed. This region contains the shared OpenStack
Keystone server.
a. Record the values for the following JSON attributes in the first region’s topology file:
environment and secret_file.
b. Record the values for the following JSON attributes in the first region’s environment file:
v openstack.auth.strategy
v openstack.region
v openstack.endpoints.host
v openstack.db.service_type
v openstack.mq.service_type
v openstack.secrets.* _data_bag
v ibm-sce.service.enabled
3. If the OpenStack authentication strategy for the first region (openstack.auth.strategy) is not set to
uuid, then you need to update the topology deployment for the first region.
a. Update the environment file for the first region to set openstack.auth.strategy to uuid. Then,
upload the updated environment file.
$ knife environment from file first-region-environment-name.json
b. Refresh the topology deployment for the first region.
$ knife os manage update topology first-region-topology-name.json
Now you are ready to add the new region. Continue with the following steps.
4. Create an environment file for the new region, which is copied from the example-ibm-os-singlecontroller-n-compute example environment.
5. Create a topology file for the new region that is based on the hypervisor type that is used in the
region.
6. Update the environment and topology files for the new region to support the multi-region cloud
environment.
a. In the new region’s environment file, set openstack.auth.strategy to uuid.
b. In the new region’s environment file, update openstack.region to be a unique name for the new
region. The region name must not contain spaces or special characters.
c. In the new region’s environment file, add the openstack.endpoints.identity-api.host,
openstack.endpoints.identity-admin.host, and openstack.endpoints.identity-internal.host
attributes and set them to the value of the first region’s openstack.endpoints.host attribute. The
other endpoint host attributes (openstack.endpoints.host, openstack.endpoints.bind-host,
openstack.endpoints.mq.host, openstack-endpoings.db.host, and so on) reference the
management IP address for the single controller node of the new region.
d. In the new region’s environment file, set ibm-sce.service.enabled to the value of the first
region’s ibm-sce.service.enabled attribute.
e. Customize the passwords and secrets for the new region. Since each region uses the same
OpenStack Keystone server, the data bag items that are related to OpenStack Keystone must have
the same passwords in all regions. Other passwords and secrets can be unique for each region.
For more information about customizing passwords and secrets, see “Customizing passwords
and secrets” on page 114.
The following passwords and secrets must be the same between the regions. For more
information on the data bags that are referenced, see “Data bags” on page 277.
v Shared passwords and secrets in the secrets data bag:
– openstack_identity_bootstrap_token
Chapter 5. Deploying the cloud
153
– openstack_simple_token
v All passwords and secrets in the service_passwords data bag are shared.
v Shared passwords and secrets in the user_passwords data bag:
– admin
– sceagent
Note: You can use the following command to determine the current passwords and secrets for
the first region. The command downloads and decrypts the data bags that contain the passwords
and secrets for the first region and stores them in the data_bags directory. The directory also
contains a passwords and secrets JSON file, first-region-environmentname_passwords_file.json, that can be used to set the passwords and secrets for the new region.
Ensure that you remove the data_bags directory when you are done using it.
$ knife os manage get passwords --topology-file first-region-topology-name.json data_bags
f. The remaining environment and topology file updates are normal updates for a stand-alone
deployment. However, the same database service (see first region’s openstack.db.service_type
attribute) and the same messaging service (see first region’s openstack.mq.service_type attribute)
must be used for each region. In addition, only one self-service portal is supported in a
multi-region cloud environment.
7. Upload the environment and deploy the topology for the new region.
$ knife environment from file new-region-environment-name.json
$ knife os manage deploy topology new-region-topology-name.json
8. (Optional) Check the detailed status of the IBM Cloud Manager with OpenStack services that are
deployed.
$ knife os manage services status –-topology-file your-topology-name.json
For more information about managing IBM Cloud Manager with OpenStack services, see “Managing
IBM Cloud Manager with OpenStack services” on page 207.
9. If the self-service portal is installed in your multi-region cloud environment, you can add an
OpenStack cloud connection for the new region. For more information, see “Adding an OpenStack
cloud configuration” on page 234.
10. (Self-service portal): If the self-service portal is installed, restart the IaaS gateway service on the node
where the shared OpenStack Keystone server is running. Run the service openstack-iaasgateway
restart command to restart the service. Then, restart the self-service portal service on the node
where it is installed. Run the service sce restart command to restart the service. After you restart
the services, you can add an OpenStack cloud connection for the additional region. For more
information, see “Adding an OpenStack cloud configuration” on page 234.
Note: Only one self-service portal must be installed to manage the multiple regions.
Results
You are ready to start using IBM Cloud Manager with OpenStack services in the new region.
154
IBM Cloud Manager with OpenStack: Administrator Guide, version 4.2
Chapter 6. Configuring IBM Cloud Manager with OpenStack
Use the following information to configure your IBM Cloud Manager with OpenStack deployment.
Configuring IBM Cloud Manager with OpenStack properties
Various configuration tasks for IBM Cloud Manager with OpenStack include changing the configuration
of a topology after you deploy it, creating initial networks, and configuring SSH and ICMP. You can also
configure live migration for a KVM node with shared storage, install a network time service, and
configure multiple storage backends.
Changing IBM Cloud Manager with OpenStack properties
You can change the configuration of the IBM Cloud Manager with OpenStack topology after you deploy
it.
About this task
To change the configuration, follow the instructions in “Updating a deployed topology” on page 149.
Note: Manual modifications to IBM Cloud Manager with OpenStack configuration files that are managed
by Chef are overwritten when you update your cloud environment. Configuration files that are managed
by Chef have a banner similar to the following example at the beginning of the file:
# This file autogenerated by Chef
# Do not edit, changes will be overwritten
If you must manually modify such configuration files, the modification must be redone after the update.
Creating initial networks
After you deploy the components for creating a cloud environment, you can create several different types
of networks.
About this task
The type of network that you must create depends on the type of network connectivity and hypervisor
that you are using. For more information, see “Network considerations” on page 16.
Ensure that you understand the components of OpenStack networking before you create your initial
networks. For more information, see Networking API, Tenant and provider networks, and Terminology.
The type of network is not specified for a tenant network because the type of network is determined by
one of the following OpenStack properties:
v openstack.network.openvswitch.tenant_network_type
v openstack.network.ml2_tenant_network_types
When you create a network, you can specify the network type when you specify the provider network
extension. You must have the administrator role to use the provider network extensions. For more
information about provider network extensions, see Provider attributes.
You can create and manage your networks by using any of the following methods:
© Copyright IBM Corp. 2012, 2014
155
OpenStack CLI
For details, see Basic networking operations, Advanced Networking operations, and Provider
extension API operations.
OpenStack dashboard
You can create a network in either of the following ways:
v To create both a network and a subnet - Log in to the dashboard, select Project > Network >
Networks. Then, click Create Network. You cannot specify the network provider settings by
using this method. For more information, see Create and manage networks and refer to the
section entitled, "Create a network."
v To create a network and specify the network provider settings - Log in to the dashboard, select
Admin > System Panel > Networks. Then, click Create Network. You cannot create a subnet
by using this method. You can create the subnet after the network is created. For more
information, see Configuring IBM Cloud Manager with OpenStack dashboard and refer to the
section entitled "Provider Network Settings."
IBM Cloud Manager with OpenStack web interface
For details, see “Managing network configurations” on page 237.
Example: Creating network using OpenStack CLI (Hyper-V environment)
Review this example that uses OpenStack CLI to create a network for a Hyper-V environment.
It also shows other network management actions.
Note: The steps are provided for example purposes only.
1. Log in to the controller node.
2. Create a Neutron network that is named mynetwork.
[root@controller ]# neutron net-create mynetwork
The network is created.
+---------------------------+--------------------------------------+
| Field
| Value
|
+---------------------------+--------------------------------------+
| admin_state_up
| True
|
| id
| 2a75441c-9467-43bf-8afb-3b6821cade52 |
| name
| mynetwork
|
| provider:network_type
| local
|
| provider:physical_network |
|
| provider:segmentation_id |
|
| router:external
| False
|
| shared
| False
|
| status
| ACTIVE
|
| subnets
|
|
| tenant_id
| 51cc2d2aff6a4e7d812e2ff60ac9a47a
|
+---------------------------+--------------------------------------+
3. Create a subnet that is associated with mynetwork, and assign its Classless Inter-Domain Routing
address.
[root@controller ]# neutron subnet-create mynetwork x.x.x.0/24
The subnet is created.
+-------------------+--------------------------------------------+
| Field
| Value
|
+-------------------+--------------------------------------------+
| allocation_pools | {"start": "x.x.x.2", "end": "x.x.x.254"} |
| cidr
| x.x.x.0/24
|
| dns_nameservers
|
|
| enable_dhcp
| True
|
| gateway_ip
| x.x.x.1
|
| host_routes
|
|
| id
| edd8c644-2fbd-4bc6-b2c3-9d44061407a0
|
| ip_version
| 4
|
156
IBM Cloud Manager with OpenStack: Administrator Guide, version 4.2
| ipv6_address_mode |
|
| ipv6_ra_mode
|
|
| name
|
|
| network_id
| 2a75441c-9467-43bf-8afb-3b6821cade52
|
| tenant_id
| 51cc2d2aff6a4e7d812e2ff60ac9a47a
|
+-------------------+--------------------------------------------+
4. Update the subnet. For example, you can enable DHCP and assign a new subnet name, such as
mysubnet.
[root@controller ]# neutron subnet-update --enable-dhcp --name mysubnet edd8c644-2fbd-4bc6-b2c3-9d44061407a0
Updated subnet: edd8c644-2fbd-4bc6-b2c3-9d44061407a0
5. Delete the subnet.
[root@controller ]# neutron subnet-delete mysubnet
Deleted subnet: mysubnet
6. Delete the Neutron network.
[root@controller ]# neutron net-delete mynetwork
Deleted network: mynetwork
Configuring SSH and ICMP access to deployed virtual machines
After you deploy the components for creating a cloud environment, you can configure SSH and ICMP for
accessing your virtual machines.
About this task
To configure SSH and ICMP access to your virtual machines by using the OpenStack dashboard, see
Configure access and security for instances and refer to the section entitled, "Add a rule to the default
security group."
For information about using commands to configure SSH and ICMP to access your virtual machines, see
Enable ping and SSH on VMs (security groups). Using these commands result in the following error:
Multiple security_group matches found for name ’default’, use an ID to be more specific.
Each tenant has a security group called default. To determine the security group ID, you can take one of
the following actions:
v Deploy a virtual machine and look at the Neutron port settings of the IP address that is assigned to
that virtual machine. The security group ID is a property of the Neutron port.
v Use the keystone tenant-list to determine the tenant ID and then dump each Neutron security group to
determine which one has the matching tenant ID.
After you identify the security group ID, replace default with the security group ID when you run the
original neutron security-group-rule-create commands.
OpenStack provides the following default security rules.
Chapter 6. Configuring
157
Table 55. Default security rules provided by OpenStack
Direction
EtherType
IP protocol
Remote
Description
Ingress
IPv4 or IPv6
Any
default
Allows all inbound
network traffic from
any virtual machine
that is using this
security group.
Allows virtual
machines that are
deployed with this
security group to
receive data from
each other. To prevent
or limit
communication
between deployed
virtual machines,
delete this rule and
add a rule that is
more restrictive.
Egress
IPv4 or IPv6
Any
v 0.0.0.0/0 (CIDR)
for IPv4
Allows all outbound
network traffic to be
sent to all
destinations (0.0.0.0).
Does not restrict any
outbound network
traffic from the
virtual machines. If
you want to limit
outbound traffic from
a deployed virtual
machine, delete this
rule and add a rule
that is more
restrictive.
v ::/0 (CIDR) for
IPv6
Note: As an administrator, you can use OpenStack to create, delete, and update security groups. Then,
when you deploy an image you can use either the OpenStack dashboard, or the image configuration
support that is provided through the self-service portal, to manage the security groups. For more
information about security group management, see the OpenStack documentation and commands:
v http://docs.openstack.org/openstack-ops/content/security_groups.html
v http://docs.openstack.org/cli-reference/content/
Configuring migration for a KVM node with NFS shared storage
You can migrate running instances from one IBM Cloud Manager with OpenStack compute node to
another compute node.
Before you begin
The following prerequisites must be true:
v IBM Cloud Manager with OpenStack was deployed using the controller +n compute or distributed
database topology with two or more KVM compute nodes.
v You must have NFS shared storage configured.
158
IBM Cloud Manager with OpenStack: Administrator Guide, version 4.2
About this task
Complete the following steps to enable migration capabilities with IBM Cloud Manager with OpenStack
on KVM over NFS shared storage.
Procedure
1. Change the following JSON attributes in your environment file:
a. Under selinux.booleans.virt_use_nfs, add the following value.
"selinux" : {
"booleans" : {
"virt_use_nfs" : "on"
}
},
b. In the default_attributes.openstack.endpoints section, add compute-vnc-proxy-bind as shown:
"endpoints" : {
"compute-vnc-proxy-bind" : {
"bind_interface": "eth0"
}
If the management network interface of the nodes is not eth0, change the bind_interface attribute
to match your network configuration.
In the override_attributes.openstack.endpoints section, add compute-vnc-bind as shown:
"compute-vnc-bind" : {
"bind_interface": false,
"host" : "0.0.0.0"
}
This configures the libvirt console VNC service to bind to all compute host interfaces, rather
than to a compute host-specific IP that is not valid if the virtual machine is migrated to a different
compute host. This could be considered a security exposure, so you might want to consider
adding fire wall rules to block VNC access over other interfaces. The default configuration enables
VNC access only through the eth0 interface.
2. Change the following node-specific JSON attributes in your topology file for the controller node:
"ibm-openstack": {
"iptables": {
"custom_rules": "-A FWR -m state --state NEW -m tcp -p tcp --dport 2049 -j
ACCEPT -m comment --comment \"nfs\"\n-A FWR -m multiport -m state --state NEW -m
udp -p udp --dports 111,875,32803,32769,892,662,2020,20049 -j
ACCEPT -m comment --comment \"nfs\""
}
},
3. Update the topology. For instructions, see “Updating a deployed topology” on page 149.
4. Verify the following after the IBM Cloud Manager with OpenStack deployment is completed. Update
as needed.
a. Verify that virt_use_nfs Boolean is set to ON.
# getsebool -a|grep virt_use_nfs
virt_use_nfs --> on
Note: If needed, run the following command to set virt_use_nfs Boolean is set to ON:
# setsebool -P virt_use_nfs=on
b. In the /etc/nova/nova.conf path within the controller and compute nodes, verify the following
values.
live_migration_flag=VIR_MIGRATE_UNDEFINE_SOURCE,VIR_MIGRATE_PEER2PEER,VIR_MIGRATE_LIVE
c. Ensure that the UID and GID of user ‘nova’ are identical between each of your nodes.
# id nova
uid=162(nova) gid=162(nova) groups=162(nova)
Chapter 6. Configuring
159
v To change a node, run the following commands:
# usermod -u 103 nova (to change UID to 103)
# groupmod -g 103 nova (to change GID to 103)
v Run the following commands to change file ownership:
#service nova-api stop
#service libvirt-bin stop
#find / -uid 162 -exec chown nova {} \;
#find / -gid 162 -exec chgrp nova {} \;
#service nova-api restart
#service libvirt-bin restart
(UID 162 is the old nova UID)
(GID 162 is the old nova GID)
5. Configure NFS.
a. Ensure that the controller and compute nodes are configured with DNS or /etc/hosts. Make sure
that all nodes can perform name resolution with each other. You might use the ping command to
ping each host from one another.
b. Ensure that the UID and GID of your Compute user (Nova) are identical among all of your nodes.
This ensures that the permissions on the NFS mount work correctly.
c. Export INSTANCES_PATH (that is /var/lib/nova/instances) from the controller node, and have it
readable and writable by the Compute user on compute nodes.
d. Configure the NFS server at controller node.
1) Add the following line to the /etc/exports file:
INSTANCES_PATH Controller_IP/MASK(rw,sync,fsid=0,no_root_squash)
2) Set the subnet mask to the appropriate value to include the IP addresses of all compute nodes.
Then, configure and start services:
# exportfs –r
# chkconfig nfs on
# service nfs restart
e. Set the appropriate permissions on your shared directory. Run the following on all nodes.
# chmod 775 INSTANCES_PATH
f. Configure NFS mounts on compute nodes.
1) Add the following line to the /etc/fstab file:
Controller_IP:/ /INSTANCES_PATH nfs4 defaults 0 0
2) Ensure that you can mount the exported directory can be mounted:
# mount -av
3) Verify that mount was successful:
$ df -k
Filesystem
1K-blocks
Used
Available Use% Mounted on
...
Controller_IP: 921515008 101921792 772783104 12%
/var/lib/nova/instances ( <-- verify this)
4) Verify that the INSTANCES_PATH directory is accessible and writable by the ‘nova’ user:
# ls -ld INSTANCES_PATH
drwxrwsr-x. 5 nova nova 4096 Apr 20 18:25 /var/lib/nova/instances/
#
#
#
#
su – nova
touch INSTANCES_PATH/test.txt (this file should be successfully created)
rm -f INSTANCES_PATH/test.txt (should be successfully removed)
exit
Note: For more information, see https://help.ubuntu.com/community/SettingUpNFSHowTo
6. Use the Nova live-migration command to migrate the instances:
# nova live-migration server host_name
The server variable can be either the ID of the server or the name. The host_name variable is the new
compute host as shown in the Nova service-list.
160
IBM Cloud Manager with OpenStack: Administrator Guide, version 4.2
What to do next
After IBM Cloud Manager with OpenStack is deployed and NFS shares a mount, all instances that are
created from this point forward can be migrated between compute nodes.
Important:
v You must configure the firewall (IP tables) to allow libvirt to communicate between nodes. By
default, libvirt listens on TCP port 16509, and an ephemeral TCP range 49152 - 49261 is used for the
KVM communications. As a quick test, you can shut down the IPtables service to eliminate any
firewall issues. When you change firewall rules, be careful choosing what ports you open and
understand who has access. For information about ports that are used with libvirt, see
http://libvirt.org/remote.html#Remote_libvirtd_configuration.
v If you change the Nova VNC console configuration and have existing virtual machines, nova updates
the existing virtual machines the next time they are started. You must restart the existing virtual
machines before attempting live migration.
For more information about migration, see
v Migrate instances
v Configure migrations
Installing a network time service
Consider synchronizing the system clock of the deployment server and node systems with a network
time server.
Before you begin
Note: This task is for Windows NTP server setup only. For Red Hat Enterprise Linux NTP server setup,
see your Red Hat Enterprise Linux documentation.
About this task
Complete the following steps to install the Network Time Protocol (NTP) service:
1. Access the NTP installation package, ntp-4.2.6p5-ibm-win32-setup.exe, in the root directory of the
IBM Cloud Manager with OpenStack installation media.
2. Run the ntp-4.2.6p5-ibm-win32-setup.exe file to install the NTP service.
3. After the NTP package is installed, specify the NTP server IP address or host name in
C:\ntp\etc\ntp.conf.
# your local system clock, could be used as a backup
# (this is only useful if you need to distribute time no
matter how good or bad it is)
server x.x.x.x
# but it should operate at a high stratum level to let the
4. Navigate to Control Panel > System and Security > Administative Tools > Services, and start
Network Time Protocol Daemon service.
For more information about how to synchronize the system clock with an NTP server, see the Network
Time Protocol setup documentation for the platform.
Configuring multiple block storage back ends
When you deploy an IBM Cloud Manager with OpenStack topology, you can also configure multiple
block storage back ends on the controller or a block storage node.
Chapter 6. Configuring
161
Before you begin
To configure multiple block storage back ends, ensure that the latest fix pack is installed.
About this task
You can also use this multiple block storage back ends technique when you configure block storage back
ends on multiple servers to use a different volume_backend_name for each block storage node. To configure
multiple block storage back ends, you can define an openstack.block-storage.volume.multi_backend
table to configure each back end as part of the cloud environment or node attributes.
To configure multiple block storage back ends in the Chef environment, complete the following steps:
Procedure
1. Record the configuration for the cinder.conf properties as described in Configure multiple-storage
back ends. The following example shows two storage back ends, lvm_1 and lvm_2:
[DEFAULT]
...
enabled_backends = lvm_1, lvm_2
...
[lvm_1]
volume_driver=cinder.volume.drivers.lvm.LVMISCSIDriver
volume_backend_name=lvm-1
volume_group=cinder-volumes-1
[lvm_2]
volume_driver=cinder.volume.drivers.lvm.LVMISCSIDriver
volume_backend_name=lvm-2
volume_group=cinder-volumes-2
2. Convert the information from the previous step to a JSON map for the openstack.blockstorage.volume.multi_backend attribute that has an entry for each back end configuration file section
(lvm_1, lvm_2). Each of these JSON entries is a map that contains the property name and value pairs
for each property in the section. The example from the previous step would look like the following
example:
{
"openstack" : {
"block-storage" : {
"volume" : {
"multi_backend" : {
"lvm_1" : {
"volume_driver" : "cinder.volume.drivers.lvm.LVMISCSIDriver",
"volume_backend_name" : "lvm-1",
"volume_group" : "cinder-volumes-1"
},
"lvm_2": {
"volume_driver" : "cinder.volume.drivers.lvm.LVMISCSIDriver",
"volume_backend_name" : "lvm-2",
"volume_group" : "cinder-volumes-2"
}
}
}
}
}
}
3. If the only block storage node in your topology is the controller, add the information from step 2 to
the Chef environment for your cloud.
4. If you have multiple block storage nodes, or the controller is not acting as the block storage node, add
the information from step 2 to the node attributes file for the block storage node.
162
IBM Cloud Manager with OpenStack: Administrator Guide, version 4.2
Configuring IBM Cloud Manager with OpenStack self-service portal
properties
You can configure many self-service portal features through a web user interface. However, you can
configure all self-service portal features by modifying configuration property files that are in the
self-service portal home directory. This section contains information about these configuration property
files and the values that you can modify.
The /.SCE42 directory is the self-service portal home directory and contains all of the self-service portal
configuration property files and log files. On Linux platforms, the default location is the /var/opt/ibm
directory.
The authentication.properties file settings are required for the self-service portal to interface with your
cloud manager. The other features provide flexibility and convenience.
To configure basic properties and features of the self-service portal, you must modify properties that are
defined within the configuration files in the home directory. These configuration files include the
following properties:
authentication.properties
Specifies the user authentication type to use for the self-service portal.
database.properties
Specifies the database type and path.
email.properties
Specifies email notification capabilities.
cloud.properties
Specifies the common configuration of the self-service portal and the URL for the User Guide
documentation.
deployment.properties
Specifies properties for configurations of virtual appliances to simplify deployments for cloud
users.
logging.properties
Specifies self-service portal log file properties.
networkConfiguration.properties
Specifies network configurations for deployments.
billing.properties
Enables charging for cloud resources upon deployment.
metering.properties
Enables metering for cloud resources upon deployment.
web.properties
Specifies properties for the user interface configuration.
server.properties
Specifies properties for enabling the optional Secure Sockets Layer (SSL) configuration.
Note: If you modify these properties while the self-service portal server is active, you must stop and
restart the self-service portal for the new property values to take effect.
Chapter 6. Configuring
163
Configuring secure shell (SSH) communication
The IBM Cloud Manager with OpenStack self-service portal ships a self-signed certificate for SSL
communication between a client machine, such as a web browser, and the IBM Cloud Manager with
OpenStack self-service portal node. This certificate is stored in the <home directory>/.keystore file.
This self-signed certificate is shipped for testing purposes only. It is not associated with a qualified host
and domain name. Additionally, it is self-signed so a security warning is displayed when you access the
host using https. To use SSL configuration in production, create a different self-signed or CA issued
certificate that is designated specifically for the qualified host. Additionally, the keystore password must
be changed or another keystore must be used to contain this certificate with a secure password. The new
passwords would then be used in the following server.properties file configuration example.
To export a certificate to be used by clients, run the following command from the .SCE42 directory:
"<jre path>/keytool" -export
-v -alias SKC -file SKC.cer -keystore .keystore -storepass password
where password is the password you specify.
Notes:
v In order for this command to run properly, the Java/bin directory must be added to the system %PATH%
variable.
v keytool is a key and certificate management utility that is included with Java™ SE 6.0.
After this certificate is imported into a client, the client can communicate with the IBM Cloud Manager
with OpenStack self-service portal by using the trusted certificate with no additional user intervention
required. If the import is not done, the client, such as a browser, might prompt the user to verify it and
confirm that the certificate is trusted. After you confirm that you accept the risk of the certificate, you will
be able to use SSL.
Note: When you use Internet Explorer to install a self-signed certificate, ensure that the certificate issuer
name exactly matches the domain name of the URL that you are using it for. For example, if the URL is
https://ip_address/cloud/web/login.html, where ip_address is your IP address, the CN setting must be
CN=ip_address and the command is as follows:
keytool -genkey -dname "CN=ip_address, OU=Cloud, O=IBM, L=RTP, S=NC, C=US" -alias SKC
-keystore .keystore -keyalg RSA -keysize 1024
If you still cannot install the certificate using Internet Explorer, it might be necessary to modify the
system date time to synchronize with the IBM Cloud Manager with OpenStack self-service portal time.
Also, ensure that you shut down and restart all instances of Internet Explorer after you install the
certificate.
SSL is enabled on the server by configuring the server.properties file in the self-service portal home
directory as follows:
# HTTP server port
org.osgi.service.http.port=18080
# Flag to enable/disable HTTP. If it is necessary for the protocol to be only SSL,
# set this flag to false.
org.eclipse.equinox.http.jetty.http.enabled=true
# Flag to enable/disable HTTPS
org.eclipse.equinox.http.jetty.https.enabled=true
# HTTPS port
org.eclipse.equinox.http.jetty.https.port=18443
164
IBM Cloud Manager with OpenStack: Administrator Guide, version 4.2
# SSL password
org.eclipse.equinox.http.jetty.ssl.password=password
# Keystore password
org.eclipse.equinox.http.jetty.ssl.keypassword=password
# The full path location of the keystore
org.eclipse.equinox.http.jetty.ssl.keystore=home directory/.keystore
# The SSL protocol
org.eclipse.equinox.http.jetty.ssl.protocol=SSL_TLS
Note: The org.eclipse.equinox.http.jetty.ssl.protocol property is SSL_TLS if running on an IBM
JRE. The property is TLS if running on a Sun or Oracle JRE.
Restart the server after you change the server.properties file. With the server running, point your client
to https://system:18443/cloud/api/users to test it. Depending on whether you imported the certificate
from above, you might be prompted to accept the certificate.
Creating a new certificate for your host
You can use the keytool tool to create a self-signed certificate for the host you are deploying IBM Cloud
Manager with OpenStack self-service portal on or to create a certificate signing request (CSR) to send to a
certificate authority (CA) to get a CA-issued certificate that is trusted by clients automatically.
For example, to generate a new keystore with specific customer information, use the following command:
keytool -genkey -dname "CN=cloud.ibm.com, OU=Cloud Services, O=IBM, L=RTP, S=NC, C=US"
-alias SKC -keystore .keystore -keyalg RSA -keysize 1024
CN
Specifies the customers domain.
OU
Specifies the organization within the customer’s company.
O
Specifies the company.
L
Specifies the city of the company location.
S
Specifies the state where that city resides.
CB
Specifies the country.
To generate a certificate signing request from the keystore, run the following command:
keytool -certreq -alias SKC -keystore .keystore -file NewCertSignRequest.csr
To import the trusted certificate (.cer) file, run this command:
keytool -import -trustcacerts -alias SKC -file ./TrustedCertificate.cer -keystore .keystore
See the keytool documentation for your JRE for instructions. For the IBM JRE, the instructions are
available at http://www.ibm.com/developerworks/java/jdk/security/60/secguides/keytoolDocs/
keytool.html.
Note: When the CA is not trusted by clients automatically and you are attempting to access the
self-service portal using https protocol, an exception is encountered that says the connection is untrusted.
You must confirm that the risks are understood and must add an exception to continue. Even with a
trusted certificate, when using Internet Explorer, you are likely to run into a similar exception.
Connecting using SSH
To further minimize security risks when connecting using OpenSSH, change the OpenSSH daemon
configuration file so that the line containing Protocol is changed to 2. Anything less than 2 is more
Chapter 6. Configuring
165
susceptible to attack. The OpenSSH daemon implemented under the IBM Cloud Manager with
OpenStack self-service portal uses port 22 as a default for communication.
Configuring user registry authentication
The IBM Cloud Manager with OpenStack self-service portal supports both Local and Lightweight
Directory Access Protocol (LDAP) user registry authentication mechanisms. Authentication is performed
by using the self-service portal local user registry.
Important: If you deployed the self-service portal as part of a IBM Cloud Manager with OpenStack
topology, it is automatically configured to use the Keystone authentication mode. Therefore, this
information does not apply. These instructions apply to the stand-alone self-service portal topology only.
Local user registries are intended for small-scale usage, such as proof-of-concept scenarios,
demonstrations, or environments with up to 30 users and projects.
LDAP user registries provide the highest level of security and scalability for production environments
and enable the self-service portal to share a central user registry for existing users with other applications
that support LDAP.
For more information about user registry authentication, see “Supported IBM Cloud Manager with
OpenStack user registries” on page 10.
LDAP authentication
The IBM Cloud Manager with OpenStack includes an LDAP authenticator that is designed to
authenticate users in a wide range of environments, whether the authentication process is a simple bind
or a multistage process.
LDAP authentication is performed by defining a series of steps for the authentication process, defining
the inputs and outputs of each step, and then running them in sequence. If all the steps run successfully,
the user is authenticated.
Configuring LDAP authentication manually
Beginning in IBM Cloud Manager with OpenStack 3.1 the web interface is the primary means of
configuring LDAP. If you have a migrated LDAP configuration from a previous release, or if you want to
enable user name case sensitivity, you can edit the ldap.xml configuration file.
For more information about configuring LDAP by using the web interface, see “Configuring LDAP
authentication using the web interface” on page 212.
Properties of an LDAP authentication step
Host
A string host name for the LDAP host. This property is required.
Search Context
If an LDAP lookup is to be performed, a search context must be provided. This property is
required only if a search filter is provided.
Search Filter
If an LDAP lookup is to be performed, a search filter format string must be provided. This string
tells the authenticator how to create a search filter that ensures that only one result is returned, as
LDAP does not guarantee ordering of results if there are more than one. Additionally, the string
FILTER is a special value in the search filter. This string is replaced with the user ID entered
during login. If you do not use the string FILTER in your configuration file, there is no
replacement during authentication. If the strings that are defined in your configuration file are
static, and a search context is provided, the search filter property is required.
Authentication DN
166
IBM Cloud Manager with OpenStack: Administrator Guide, version 4.2
This property specifies the distinguished name (DN) used for authenticating to the LDAP server. If
you are using this property to perform a search, you can specify the property as:
</authDN password="password">dnname</authDN>
If the property is specifying the DN to use for authentication, define the DN in one of the following
ways:
v The DN can be constructed from the user ID. For example, the DN for a user logging in as joe can
be constructed by using the following:
<authDN>uid={FILTER},ou=people,dc=site</authDN>
This example creates the DN uid=joe,cn=users,ou=people,dc=site
v The DN of the LDAP user entry that is returned by a previous search step is represented using
the special value {PERSON_DN}, as shown in this example:
<authDN>{PERSON_DN}</authDN>
In both cases, the password that the user entered to log in is also used to authenticate to the
LDAP server.
To perform an anonymous search, do not specify the authentication DN property.
Admin Users
This attribute specifies a list of LDAP user accounts to be given administrator privileges:
<adminUsers>[email protected],[email protected]</adminUsers>
User name case sensitive
This attribute specifies whether the LDAP server defines the user name as case sensitive or not.
<userNameCaseSensitive>true</userNameCaseSensitive>
Secure connection enablement
This attribute specifies whether to enable a secure connection for LDAP authentication. Some
LDAP servers enable the StartTLS operation by default, and other LDAP server do not. As an
administrator, you can turn off the secure connection, if the LDAP server does not support
StartTLS operation. The possible values for this attribute are true or false. To enable a secure
connection, specify this property in the config element:
<enableSecureConn>true</enableSecureConn>
Outputs
This value indicates what information is needed during the current step for the next step and
how to pass that information along. The Outputs value is essentially a list of instructions that
gets an attribute value, for example foo, and passes it along as bar. This value is optional.
v User account name: An output can be flagged as the name for a user account by adding
attribute="fullname" to the output tag. This value is retrieved and used as the user name by
IBM Cloud Manager with OpenStack. If you do not specify this value, the user ID is used for
the user display name.
v User e-mail address: An output can be flagged as the email for a user account by adding
attribute="email" to the output tag. This value is retrieved and used as the user email
address by IBM Cloud Manager with OpenStack.
Example of an ldap.xml file
In this example of an ldap.xml file, an authenticated secure search is performed to find the directory
entry where the mail attribute matches the value that is passed into the username field.
<?xml version="1.0"?>
<config>
<host>ldap://ldap.company.com</host>
<adminUsers>[email protected],[email protected]</adminUsers>
<enableSecureConn>false</enableSecureConn>
<userNameCaseSensitive>true</userNameCaseSensitive>
Chapter 6. Configuring
167
<step>
<authDN password="password">cn=ldapAdmin,ou=directory,o=company.com</authDN>
<searchFilter>(|(mail={FILTER}))</searchFilter>
<searchContext>ou=directory,o=company.com</searchContext>
<outputs>
<output attribute="fullname">
<get>cn</get>
</output>
</outputs>
</step>
<step>
<authDN>{PERSON_DN}</authDN>
</step>
</config>
Changing authentication mode
You can change the IBM Cloud Manager with OpenStack to LDAP authentication mode by editing the
authentication.properties file.
About this task
Note: Beginning in IBM Cloud Manager with OpenStack 3.1, the web interface is the primary means of
configuring LDAP. If you use the web interface to configure LDAP, the steps in this task are not required.
For more information about configuring LDAP by using the web interface, see “Configuring LDAP
authentication using the web interface” on page 212.
To change IBM Cloud Manager with OpenStack to LDAP authentication mode, complete the following
steps:
Procedure
1. Open the authentication.properties file in the home directory.
2. Set the authentication.type property to LDAP as shown in the following example:
authentication.type=LDAP
3. Open the ldap.xml file in the home directory.
4. Configure the LDAP steps as described in the “Configuring LDAP authentication manually” on page
166.
5. Restart the IBM Cloud Manager with OpenStack server.
You can change the authentication mode back to local by setting the authentication.type property
back to LOCAL.
Configuring local authentication
By default IBM Cloud Manager with OpenStack is set up to use local authentication mode. Local
authentication is intended for small-scale usage, such as proof-of-concept scenarios, demonstrations, or
environments with up to 30 users and projects. For large-scale production environments, configure LDAP
to ensure the highest level of security.
About this task
Validate the configuration by following these steps:
Procedure
1. Open the authentication.properties file in the home directory.
2. Configure the authentication.type property to use local authentication, such as:
authentication.type=Local
3. Configure the default administrator user name, name, and password, similar to the following
example:
168
IBM Cloud Manager with OpenStack: Administrator Guide, version 4.2
admin.username=admin
admin.name=SCE Administrator
admin.password=<password>
Notes:
a. These fields might already be populated or configured during installation.
b. The values of the admin.username, admin.name, and admin.password that are shown are examples.
You should update these values according to your business or security guidelines.
c. To prevent too many invalid login attempts, a user can attempt to login to IBM Cloud Manager
with OpenStack three times within a 24-hour period. After three failed login attempts, both the
user and administrator roles are locked out. However, the administrator can unlock the user
record.
To configure this limitation, enable the com.ibm.cfs.failedlogincheck.enabled property as
follows:
com.ibm.cfs.failedlogincheck.enabled=false
This property is disabled by default.
d. The account 'Locked' field associated with the user record in IBM Cloud Manager with OpenStack,
is valid only when the account is locked in IBM Cloud Manager with OpenStack using LOCAL
authentication, rather than LDAP authentication. If you are using the LDAP authentication and
have the 'account locking' feature enabled on your LDAP server, do not enable it on the IBM
Cloud Manager with OpenStack server. In this case, set the
com.ibm.cfs.failedlogincheck.enabled property to false in the authentication.properties file
on the IBM Cloud Manager with OpenStack server.
Configuring REST API authentication
You can configure IBM Cloud Manager with OpenStack to require authentication when it calls to the IBM
Cloud Manager with OpenStack REST APIs.
About this task
IBM Cloud Manager with OpenStack supports the following authentication methods:
v Basic HTTP authentication for a user login and REST API-based validation
v Encrypted token-based authentication for REST API calls
The basic strategy for using encrypted tokens is as follows:
v HTTP/REST agents (browser or REST client) initially use the login authentication REST API to
authenticate their user ID and password credentials.
v The user ID and password are validated against the LOCAL or LDAP repository (depending if LOCAL
or LDAP is configured).
v Upon successful login authentication, an encrypted token and its expiration are returned in the login
response.
v The agent can use (as an HTTP header cookie) the encrypted token for subsequent REST API calls to
identity themselves until the token expires.
v After the authentication token expires, the agent must use the login REST API again to validate their
user ID and password. When complete, the agent obtains a new authentication token.
Note: The system that is running the IBM Cloud Manager with OpenStack web interface or REST client
must have the date, time, and time zone that is correctly configured for its physical location.
To require authentication when IBM Cloud Manager with OpenStack calls to the Rest APIs, complete the
following configuration steps:
Chapter 6. Configuring
169
Procedure
1. Open the authentication.properties file in the home directory.
2. Set the authentication.secure property to true as shown in the following example:
authentication.secure=true
When the property is set to true, the caller is prompted for credentials before it processes the API
request. The credentials are validated against the user registry that is configured, such as Local or
LDAP.
3. If IBM Cloud Manager with OpenStack is configured to use Single Sign On with other SmartCloud
products, you must set the shared secret key. Use the same shared secret key in all applications by
using Single Sign On. If IBM Cloud Manager with OpenStack is not using Single Sign On, leave the
property unset and the application generates and save a new secret key when it first starts.
com.ibm.cfs.token.key=The Secret Encryption Key
4. Optional: Set the name of the HTTP header cookie. The cookie is used to transport the encrypted
authentication token. This property specifies the name of the HTTP header cookie, which is used in
HTTP REST API requests to transport the encrypted authentication token. The default value is
simpletoken.
com.ibm.cfs.token.header.field.name=simpletoken
5. Optional: Set the time duration for authentication tokens (in seconds). This time duration determines
how long an authentication token is valid. After a token expires, the agent must obtain a new token
by using the login authentication REST API.
com.ibm.cfs.token.duration=14400
6. Optional: Disable automatic renewal for the authentication token. When enabled, authentication
tokens renew (by using the specified duration period) each time they are successfully used on an API
call. If this option is disabled, the only way to renew an authentication token is to obtain a new token
by using the login authentication REST API.
com.ibm.cfs.token.autorenew.enabled=false
7. Restart your IBM Cloud Manager with OpenStack server for the changes to take effect.
Configuring database
By default, IBM Cloud Manager with OpenStack uses an internal Derby database that is created inside
the home directory. For optimal performance in a large environment such as a production environment,
consider the use of an external database. IBM Cloud Manager with OpenStack supports the use of an
external DB2 database.
About this task
For more information about DB2 support, see “Supported IBM Cloud Manager with OpenStack
databases” on page 9.
The self-service portal also supports initial use of a Derby database and migration to a DB2 database at a
future point.
To change the self-service portal database configuration to use DB2, complete the following steps:
Procedure
1. Open the database.properties file in the home directory.
2. Set the database.type property to DB2, as shown in the following example:
database.type=db2
3. Set the database.username property to the user ID defined for the database, as shown in the following
example:
database.username=<db2user>
170
IBM Cloud Manager with OpenStack: Administrator Guide, version 4.2
4. Set the database.password property to the password ID defined for the database, as shown in the
following example:
database.password=<db2passwd>
Note: The clear text password is replaced with an encrypted password after the self-service portal
starts the first time.
5. Set the database.db2.path property to the location of the DB2 database, as shown in the following
example:
database.db2.path=//localhost:50000/cfs:
Note:
v One or more connection directives can be appended to the database path, and they must be
separated by a semicolon. For example:
database.db2.path=//localhost:50000/cfs:retrieveMessagesFromServerOnGetMessage=true;
v Replace localhost with a full IP address (it can be a remote host) and verify the port number. Here
are a few links to help you find the port number:
UNIX: http://publib.boulder.ibm.com/infocenter/cmgmt/v8r3m0/index.jsp?topic=
%2Fcom.ibm.sysadmin.hlp%2Fcsa10010.htm or as a potential shortcut, use the grep i db2
/etc/services command.
Windows: http://publib.boulder.ibm.com/infocenter/cmgmt/v8r3m0/index.jsp?topic=
%2Fcom.ibm.sysadmin.hlp%2Fcsa10010.htm or as a potential shortcut, look for the DB2 entries in
the services file at C:\WINDOWS\system32\drivers\etc\services.
Configuring email notifications
To receive email notifications when various actions are taken, you must configure the notification
properties in the home directory.
About this task
The following examples are user and administrator events that can be configured to trigger an email
notification.
v Account is created or deleted, reaches its balance threshold, is delinquent, receives a payment, has a
bill created
v Instances are deployed, fail, expire, have snapshots complete
v Project access is requested or granted
v User is created, requests access, has a password reset
v Virtual machine is backed up, restored, has a snapshot created, or reverts to a snapshot
v Volumes are created, deleted, detached and resized
To set up notification for the IBM Cloud Manager with OpenStack self-service portal, follow these steps:
Procedure
1. Open the email.properties file in the home directory.
2. Set the com.ibm.cfs.email.relay.host property to the host name of the relay host that the self-service
portal uses for outgoing SMTP emails.
3. Optionally, you can set the email subject prefix for all self-service portal emails and the "from" name,
by setting the following properties:
com.ibm.cfs.email.subject.prefix
com.ibm.cfs.email.from.name
com.ibm.cfs.email.from.address
4. Save the email.properties file and restart the self-service portal service.
Chapter 6. Configuring
171
You can globally disable email notifications in the self-service portal by setting the
com.ibm.cfs.email.default.notifications property in the email.properties file to false.
Individual users can disable notifications through the self-service portal.
Note: Ensure that the self-service portal administrator has an email address that is configured to
receive notifications. The notifications email for volume operations can be sent only to the self-service
portal Administrator.
Configuring common cloud properties
Common cloud properties are configured by providing information such as the refresh interval and
online help configuration in the cloud.properties file.
About this task
To configure your cloud manager, complete the following steps:
Procedure
1. Open the cloud.properties file in the home directory.
2. Edit the properties by providing values for each configuration property.
3. Save the cloud.properties file and restart the IBM Cloud Manager with OpenStack self-service portal
server.
Cloud refresh interval
IBM Cloud Manager with OpenStack checks for new images and instances in the cloud and synchronizes
the properties for these images and instances.
By default, IBM Cloud Manager with OpenStack receives messages from the cloud to synchronize with
the cloud manager. The frequency of this synchronization is determined by the
com.ibm.cfs.cloud.refresh.interval property in the cloud.properties file. If the property is not set, a
default of 30 seconds is used.
IBM Cloud Manager with OpenStack scans the cloud for updates on instances as often as the refresh
interval property specifies. However, you can change the synchronization mode so that IBM Cloud
Manager with OpenStack periodically checks with the cloud without waiting for messages.
For more information about setting the synchronization mode, see “Configuring cloud synchronization
mode” on page 174.
Cloud online help configuration
The IBM Cloud Manager with OpenStack has a configurable documentation property that enables IBM
Cloud Manager with OpenStack to open the User Guide when the Help link is selected by the user.
About this task
To configure the URL for the Help documentation, follow these steps:
Procedure
1. Open the cloud.properties file in the home directory.
2. Configure the property com.ibm.cfs.cloud.documentation to be set to the URL for the User Guide
location. By default, this property is set to the IBM Cloud Manager with OpenStack User Guide.
Using the default property setting, the user can access the User Guide on the IBM Cloud Manager
with OpenStack wiki in any of the supported languages by selecting the link for the language of
choice. If something other than this default behavior is wanted, the property can be changed to any
URL where the User Guide document is located.
172
IBM Cloud Manager with OpenStack: Administrator Guide, version 4.2
Configuring global image deployment
Image deployment customization properties that apply equally to all images in the IBM Cloud Manager
with OpenStack self-service portal image library can be configured through the deployment.properties
configuration file in the home directory.
To simplify the image deployment process for self-service portal users, configure all of the images before
you make the self-service portal available to users. Image property customization often requires knowing
the low-level details of the environment or having advanced knowledge of the data center.
You can configure image deployment customization properties through the self-service portal for
individual image settings or through the deployment.properties file in the home directory for global
image settings. For more information about configuring individual image settings, see “Configuring
image deployment properties” on page 219.
The contents of the deployment.properties configuration file depend on what is expected by the cloud
manager software, either VMware or OpenStack and what hardware is available.
Note: Global configurations are refreshed only when manually reset or when the deployment target
changes.
VMware
When you use VMware as the cloud manager, the following properties are supported for Linux and
Windows images:
vmware.linux.dns1=9.8.8.8
vmware.linux.dns2=9.8.8.7
vmware.linux.hostname=myhost
vmware.linux.domainname=cloud.company.com
vmware.windows.computername=WINDOWS
vmware.windows.workgroup=WORKGROUP
vmware.windows.timezone=20
vmware.windows.username=John Doe
vmware.windows.organization=Cloud Company
vmware.windows.productkey=xxxx-xxxx-xxxx-xxxx-xxxx
vmware.windows.password=Default_password_for_windows_deployments
vmware.dnssuffixlist=cloud.company.com,company.com
vmware.networkdevice.Network
vmware.networkdevice.Network
vmware.networkdevice.Network
vmware.networkdevice.Network
vmware.networkdevice.Network
vmware.networkdevice.Network
vmware.networkdevice.Network
vmware.networkdevice.Network
vmware.networkdevice.Network
vmware.networkdevice.Network
adapter
adapter
adapter
adapter
adapter
adapter
adapter
adapter
adapter
adapter
1.network=VM Network
1.usedhcp=false
1.ipaddress=
1.netmask=255.255.255.0
1.gateway1=9.9.9.9
1.gateway2=
1.dns1=9.8.8.8
1.dns2=9.8.8.7
1.primaryWINS=9.8.8.10
1.secondaryWINS=9.8.8.11
For VMware, you can also find these properties in the deployment.properties file.
OpenStack
When you use OpenStack as the cloud manager, the following properties are supported for AIX®, Linux,
and Windows images in the deployment.properties file:
openstack.openstack.flavors
openstack.openstack.keypairs
openstack.openstack.security.groups
openstack.openstack.server.personality.source.[1-5]
Chapter 6. Configuring
173
openstack.openstack.server.personality.target.[1-5]
openstack.openstack.server.customizations
openstack.networkdevice.Network adapters.networks
openstack.config.drive
More deployment properties are available for images that have a configuration strategy. For more
information about configuration strategies, see “Configuring images with OpenStack” on page 184.
Configuring a deployment target
By default, IBM Cloud Manager with OpenStack deploys images to any known pool or host in the cloud,
where "pool" refers to a resource pool when you are using VMware. OpenStack only supports the cloud
as the deployment target. For VMware, you can set a different default global deployment target.
About this task
To change this default target selection strategy, follow these steps:
Procedure
1. Open the deployment.properties file in the home directory.
2. Set the value of the com.ibm.cfs.deployments.target.strategy property to any of the following target
selection strategies:
byName
Use the target with the given name. The name might refer to a host, system pool, resource
pool, or cluster depending on the type of cloud adapter that is being used. Set the property
value to byName:{targetName}, where {targetName} is the actual name of the desired system.
byID
Use the system with the specified ID. Set the property value to byID:{targetOID}, where
{targetOID} is the actual OID of the desired system.
anyPool
Use any system that is a pool.
anyHost
Use any system that is a physical host.
anyPoolOrHost
Use any pool or physical host.
anyCluster
Use any cluster (applicable to VMware only).
anyTarget
Use any pool or host or cluster for VMware.
3. Save the deployment.properties file and restart the IBM Cloud Manager with OpenStack server.
Configuring cloud synchronization mode
IBM Cloud Manager with OpenStack scans the cloud for updates on instances as often as the refresh
interval property specifies. However, you can change the synchronization mode so that IBM Cloud
Manager with OpenStack periodically checks with the cloud without waiting for messages.
To change the sync mode, open the deployment.properties file and modify the following settings:
com.ibm.cfs.cloud.sync=push
To enable IBM Cloud Manager with OpenStack to synchronize with the cloud by using periodic checking,
set this property to poll. Enable the configuration by ensuring that you uncomment the
com.ibm.cfs.cloud.sync line (remove any preceding # symbol).
For more information about setting the refresh interval, see “Cloud refresh interval” on page 172.
174
IBM Cloud Manager with OpenStack: Administrator Guide, version 4.2
Configuring a staging project
By default, IBM Cloud Manager with OpenStack scans the cloud for new images periodically. When IBM
Cloud Manager with OpenStack finds a new image or instance, it places it in the Public project where all
users have access to it. However, you can configure a staging project to store newly discovered images or
instances, allowing administrators to configure images before making them available to other users.
For more information about newly discovered images, see Cloud refresh interval.
To configure this staging project, add or uncomment this line in the deployment.properties file:
com.ibm.cfs.staging.project=Staging
Save the deployment.properties file and restart the IBM Cloud Manager with OpenStack server. The
property takes effect after the server is restarted.
Note: When using the VMware adapter, virtual servers that are defined as templates on the vCenter
server are automatically discovered and displayed on the IBM Cloud Manager with OpenStack Images
area. The IBM Cloud Manager with OpenStack administrator defines which images belong to which user
profiles and therefore defines which VMware virtual server templates a user can access. IBM Cloud
Manager with OpenStack discovers all virtual server templates regardless of which datacenter they reside
in. There is currently no option to limit IBM Cloud Manager with OpenStack to specific datacenters.
Configuring global priority of an instance when relocating
IBM Cloud Manager with OpenStack enables you to choose whether you want your users to update the
global priority of an instance when relocating the instance from host to host. Instance priority is the
priority for relocating instances from one host to another host, when the instance is deployed in a pool.
Depending on your site administration policies, you might not want users to change the priority of
instances.
About this task
To configure the ability of updating instance priority, follow these steps:
Procedure
1. Open the deployment.properties file in the home directory.
2. To disable the ability to update instance priority, set the com.ibm.cfs.deployments.update.priority
property to false. The default value of this property is false. If this property does not exist in the
deployment.properties file, add it to the file.
3. Save the deployment.properties file and restart the IBM Cloud Manager with OpenStack server.
Configuring access to advanced deployment form
IBM Cloud Manager with OpenStack allows you to choose whether you want your users to see the
advanced deployment form or just the basic deployment form.
About this task
The advanced deployment form allows a user or administrator to access all of the image properties that
can be configured when an image is deployed. The basic deployment form contains only a subset of the
image properties. Depending on your site administration policies, you may or may not want to show this
advanced panel to the user.
To configure the visibility of the advanced deployment form, follow these steps:
Procedure
1. Open the deployment.properties file in the home directory.
Chapter 6. Configuring
175
2. Set the deployment.advanced.form.enabled property to true. This value enables the advanced
deployment form so that it is displayed to all users. The default value of this property is false; users,
by default, do not see the advanced deployment form.
3. Save the deployment.properties file and restart the IBM Cloud Manager with OpenStack server.
Results
Note: Administrators can also configure which advanced properties are shown on the basic deployment
form. Use the web interface to configure those values for an image. When the
deployment.advanced.form.enabled property is set to true, project owners can also configure which
advanced properties are shown on the basic deployment form
Configuring the number and maximum size of additional storage
IBM Cloud Manager with OpenStack interface allows a user to add additional secondary disks to a
virtual image using the Add Storage property. Adding additional secondary disks is also supported for
VMware when you are deploying an image. IBM Cloud Manager with OpenStack provides a
configurable property to set the maximum number of disks that can be attached to a virtual machine.
This property applies during and after deployment of the virtual machine.
About this task
Note: This feature is not supported if the following statements are true:
v The virtual machine is deployed in the Shared Storage Pool.
v The instance that is being deployed is an IBM i instance.
To configure the secondary disk properties, follow these steps:
Procedure
1. Open the deployment.properties file in the home directory.
v To set the maximum number of disks to use, edit the com.ibm.cfs.vs.max.disks property. The
default value of this property is 3.
v To set the maximum size in megabytes, edit the com.ibm.cfs.vs.max.disksize property. The default
value of this property is 2048000.
2. Save the deployment.properties file and restart the IBM Cloud Manager with OpenStack server.
Configuring images with VMware
This section describes some additional setup and configuration considerations when using the VMware
cloud manager.
VMware considerations when deploying an image:
v IBM Cloud Manager with OpenStack requires the vCenter virtual switches and distributed virtual
switch port groups to be defined before deploying instances. IBM Cloud Manager with OpenStack
users and administrators are allowed to choose which virtual network the instance uses. IBM Cloud
Manager with OpenStack supports either standard VMware vSwitches or distributed virtual switch
port groups. IBM Cloud Manager with OpenStack supports the IBM DVS 5000V and the IBM SDN VE
distributed virtual switches. If you are using a distributed virtual switch other than those, check the
type in vCenter to ensure that it is supported.
To check the type in vCenter, follow these steps:
1. Browse to https://<your vCenter>/mob.
2. Log in with an administrator account.
3. Select the content link.
4. Select the root folder.
5. Select the data center that contains the third party distributed virtual switch.
176
IBM Cloud Manager with OpenStack: Administrator Guide, version 4.2
6. Select the network folder.
7. Select the distributed switch that you want (the id starts with dvs-).
The top of the page shows the managed object type of the switch. If the switch type is
VmwareDistributedVirtualSwitch or DistributedVirtualSwitch then it is supported. If the distributed switch
type is something other than the types listed, it is not supported; you receive an error when you
deploy to a port group that uses that distributed switch.
v IBM Cloud Manager with OpenStack connects to the vCenter server by using a single user ID and
password. It is recommended that this user has the vCenter administrator role. If you choose to use a
different user ID, that user must have sufficient permissions to perform the operations on the virtual
machines. The user ID must also have access to various virtual machine resources, such as networks
and datastores.
v Do not change a virtual machines UUID in the vSphere Infrastructure Client. In some cases, such as
manually moving a virtual machine, the vSphere Infrastructure Client asks if you want the UUID
changed. When an instance is deployed, IBM Cloud Manager with OpenStack keeps the UUID of the
virtual machine in its database and uses that UUID to find the virtual machine in vCenter, therefore
you should not change the UUID.
v At some point, you might decide to migrate from IBM Cloud Manager with OpenStack to the IBM
Tivoli Service Automation Manager (TSAM) product or other IBM cloud product. To ease the
transition, it is highly recommended that you set up your Windows and Linux guest images as
required by TSAM. Even if you have no plans to migrate, see Creating operating system image
templates for VMware in the IBM Tivoli Service Automation Manager information center at
http://pic.dhe.ibm.com/infocenter/tivihelp/v10r1/topic/com.ibm.tsam_7.2.4.1.doc/rdp/
c_supported_os_vmware.html for more information about configuring your guest images.
v It is recommended that you install VMware tools on your guest operating systems before you make the
virtual machine a template.
Note: The VMware tools must be current with your version of VMware.
v If you are using the VMware Converter tool to import your virtual machines into vCenter, you should
fully start the virtual server by using the VMware vSphere Client before you make it a template. This
action allows vCenter to discover whether VMware tools are installed into the guest.
v All virtual machines in vCenter are shown as instances in IBM Cloud Manager with OpenStack. If you
convert a virtual machine to a template, the status of that instance in IBM Cloud Manager with
OpenStack changes to Unknown since the virtual machine is now a template. Do not delete this
instance from IBM Cloud Manager with OpenStack since that deletes the underlying template on
vCenter. If you want to make this instance not available for non-administrative users, use the Hide
option instead.
v IBM Cloud Manager with OpenStack does not allow you to import vApps. If you want to enable users
to deploy a single virtual server vApp, follow these steps:
– Import the vApp by using vCenter
– Modify the vApp properties as required by the application.
– Convert the vApp to a template
v vApps with more than one virtual server are not supported.
v During the deployment of an image, IBM Cloud Manager with OpenStack uses the VMware API to
apply customizations to the new virtual machine image. Therefore the VMware template image must
be customizable by VMware. While VMware vCenter enables you to deploy a template without
customizations, this option is not available in IBM Cloud Manager with OpenStack.
v When you deploy an image, IBM Cloud Manager with OpenStack instructs VMware to power on the
newly deployed virtual machine. In some cases, depending on server loads, VMware might not power
on the virtual machine. In this case, IBM Cloud Manager with OpenStack displays, by default, the
instance in STOPPED state. Since the instance has been successfully cloned and configured, IBM Cloud
Chapter 6. Configuring
177
Manager with OpenStack does not display an error and the instance can be started by the user. You
can change this default behavior by using a deployment property that is described in the Waiting for a
deployed virtual machine (VMware) topic.
v By default, IBM Cloud Manager with OpenStack reports a newly deployed instance in OK state as
soon as VMware powers on the virtual machine. Depending on the guest operating system and image
definition, it might be a few minutes before the virtual machine is completely up and running and can
be used. In some cases, VMware might restart the virtual machine more than once during the
customization process. You can change this default behavior by using a deployment property that is
described in the Waiting for a deployed virtual machine (VMware) topic.
v IBM Cloud Manager with OpenStack allows the target of a deployment to be either a specific host, a
host resource pool that is associated with a host, a cluster, or a resource pool that is associated with a
cluster. If the cluster is a DRS enabled cluster, VMware chooses the appropriate host and therefore you
cannot choose an individual host in that cluster. By default, IBM Cloud Manager with OpenStack is
configured to randomly choose a host that is not associated with a cluster. If no hosts are available,
you get an error when you deploy. You can change the default behavior by modifying the
deployment.properties file as described in section “Configuring a deployment target” on page 174.
However, it is recommended that an administrator configure each images target. For more information,
see “Configuring global image deployment” on page 173.
v IPv6 is not supported when deploying to a VMware cloud. In order for deployments to not obtain an
IPv6 address, the administrator needs to disable IPv6 in the VM template that is used for deploys.
Saving, restoring, and deleting virtual servers:
The IBM Cloud Manager with OpenStack allows users to save back up copies of their virtual server disks
and configuration files. These copies can be restored later.
In addition, IBM Cloud Manager with OpenStack provides functions to allow users to view and delete
their saved images. IBM Cloud Manager with OpenStack allows users to keep an administrator
configured number of saved images. When the limit is reached, the system automatically deletes the
oldest saved image. For information about how users perform save, restore, view, and delete operations,
see the IBM Cloud Manager with OpenStack User Guide.
Deleting a virtual server
When a virtual server is deleted, all the saved images are deleted at the same time. There is no option to
keep images beyond the life of the virtual server.
Approvals
The save and restore functions can be configured for approval control. This requires an IBM Cloud
Manager with OpenStack administrator to first approve any save or restore request.
Note: If the virtual server is powered on, the save function powers down the virtual server before
starting the save operation. If the approval process is enabled, the virtual server remains powered on
until the administrator approves the save or restore request. There is no approval process for deleting a
saved virtual server image. To enable the approval process, see “Managing approval policies” on page
227.
Authorization
Only the creator of an instance, an IBM Cloud Manager with OpenStack administrator, or the project
owner is allowed to save, restore, or delete a virtual server image. Users within the same project are not
allowed to perform save, restore, or delete operations on other user images within a project.
178
IBM Cloud Manager with OpenStack: Administrator Guide, version 4.2
Notifications
The save, restore, and delete images functions log events to the IBM Cloud Manager with OpenStack
event log. In addition, save image and restore image operations send email notifications, if the user
configuration is enabled to receive email notifications.
For more information about email notifications, see “Configuring email notifications” on page 171.
Setting saved image limit:
By default, IBM Cloud Manager with OpenStack allows you to keep up to three saved virtual server
images.
About this task
To change this limit, follow these steps:
Procedure
1. Open the deployment.properties file.
2. Update the com.ibm.cfs.vs.max.backups property.
For example, to keep 10 saved virtual server images, change the property to the following setting:
com.ibm.cfs.vs.max.backups=10
3. Save the deployment.properties file.
4. Restart the IBM Cloud Manager with OpenStack server.
VMware datastore assignment during deployment:
There is a new deployment property that you can set to select the target storage to be used when you
deploy a virtual image. You can set the Target Storage property value to datastores or datastore clusters
that are attached to the selected deployment target. If the selected deployment target is changed, the
target storage value is updated to match what is available on the newly selected deployment target. IBM
Cloud Manager with OpenStack always sets the default target storage value to use the default storage
selection algorithm.
The default storage selection algorithm retrieves the list of datastores and datastore clusters that are
associated with the deployment target. It then selects one of the datastores or datastore clusters that is
backed by a block device that has enough free space to contain the virtual machine disk sizes. If a block
storage cannot be selected, then the appropriate NFS file storage, with the largest free space is chosen. If
there is no available storage, the deployment fails.
You can specify a set of datastores and datastore clusters for the selection algorithm to exclude or include
or both. Set the com.ibm.cfs.cloud.vmware.enable.clone.template.properties property in the
vmware.properties file to true. To exclude datastores and datastore clusters from being selected, edit the
com.ibm.cfs.cloud.vmware.datastore.exclude.list property and add a comma-separated list of
datastore and datastore cluster names. To set the datastores and datastore clusters that can be selected,
edit the com.ibm.cfs.cloud.vmware.datastore.include.list property and add a comma-separated list of
datastore and datastore cluster names.
Note: By default, the selection algorithm includes all of the datastores and datastore clusters that are
associated with the deployment target.
For example,
com.ibm.cfs.cloud.vmware.enable.clone.template.properties=true
com.ibm.cfs.cloud.vmware.datastore.exclude.list=dscluster3,localdisk4
com.ibm.cfs.cloud.vmware.datastore.include.list=localdisk1,dscluster2
Chapter 6. Configuring
179
To disable the algorithm, specify the datastore that you want to use in the
com.ibm.cfs.cloud.vmware.target.datastore.names property.
For example:
com.ibm.cfs.cloud.vmware.enable.clone.template.properties=true
com.ibm.cfs.cloud.vmware.target.datastore.names=san,san,san
Each datastore that is listed is for a different virtual disk. The first entry is the datastore where the virtual
server configuration files are located. The subsequent datastores in the list are for the virtual system hard
disk devices. For example, if your virtual server has three disks you must specify four datastores in this
list. These datastores can all be the same datastore or a combination of different datastores. If the first
entry is for a datastore cluster, then the remaining entries are ignored. The datastore cluster is used for
both the configuration files and disks. Datastore clusters are ignored when specified for subsequent
entries in the list.
These vmware.properties file changes apply globally to IBM Cloud Manager with OpenStack and
therefore to all deployment targets. Make sure that you specify datastores and datastore clusters that are
available to all hosts that are the potential targets for every image. You cannot use the include list and
datastore names properties, if the following is true:
v You have multiple cluster targets, each with its own set of storage, that is managed by the same
vCenter.
v You want IBM Cloud Manager with OpenStack to target all the clusters.
In the datastore names property, you can specify different datastores for different disks if your virtual
server templates have more than one disk.
Note:
v Datastore clusters are only available when you are using vSphere 5 Enterprise Plus edition. For more
information about configuring and using datastore clusters, see the vSphere documentation.
v When you create the vmware.properties file, you must restart IBM Cloud Manager with OpenStack
server. However, changes made to the property file after you restart the server are automatically
updated.
Setting VMware user data during deployment:
When you deploy an image, you can set user data for the deployed virtual machine by using instance
customization. The user data customization enables you to pass your own configuration information to
the deployed virtual machine. If this customization fails during deployment, IBM Cloud Manager with
OpenStack displays the instance in FAILED state.
About this task
IBM Cloud Manager with OpenStack does not require a specific content or format for the user data.
Other than base64 decoding, IBM Cloud Manager with OpenStack passes the data unchanged to the
guest. It is therefore the responsibility of the guest provider to process the user data. This usually requires
writing and configuring a startup script to read this data from the CD device. IBM Cloud Manager with
OpenStack does not provide nor recommend any particular script.
IBM Cloud Manager with OpenStack supports base64 encoded and plain text user data. The default
value is set to base64 encoded. If decoding the user data fails, the user data is treated as plain text. IBM
Cloud Manager with OpenStack passes the decoded user data to the deployed virtual machine through a
CD backed by an ISO file. This gives the virtual machine access to the user data through the user-data
file on one of its CD devices.
180
IBM Cloud Manager with OpenStack: Administrator Guide, version 4.2
IBM Cloud Manager with OpenStack must be configured properly to create an ISO file that contains the
user data. When IBM Cloud Manager with OpenStack is installed on Linux, the the mkisofs or
genisoimage binary must exist in the /usr/bin directory.
In addition, you can also set the following properties in the vmware.properties file to control the user
data:
com.ibm.cfs.cloud.vmware.user.data.file.name
The name of the file on the ISO that contains the actual user data. The default value is user-data.
com.ibm.cfs.cloud.vmware.user.data.iso.temp.path
The name of the path that is used to temporarily store ISO files on the IBM Cloud Manager with
OpenStack server. The default value is the IBM Cloud Manager with OpenStack home directory.
This path must end with a path separator, such as '/' on Linux.
Note:
v The ISO files that are created are managed by IBM Cloud Manager with OpenStack and not VMware.
As a result, when you delete a virtual machine outside of IBM Cloud Manager with OpenStack, such
as through the vSphere client interface, the ISO file that is created for the virtual machine is not
removed.
v The ISO file of the virtual machine that contains the user data is not preserved with any saved virtual
server images or capture instances that are created from the virtual machine.
Set secure access during deployment:
When you deploy a Linux image, you can set secure access to the deployed virtual machine by using
instance customizations.
Using these optional customizations, you can set the password or SSH public key or both for a user on
the guest operating system. If these customizations fail during deployment, IBM Cloud Manager with
OpenStack displays the instance in FAILED state. You can set secure access for a root or a non-root user.
IBM Cloud Manager with OpenStack must be provided with the current root user name and password
for the guest operating system to set secure access during deployment. In addition, IBM Cloud Manager
with OpenStack uses VMware guest operations to complete the customizations and there are special
requirements for performing VMware guest operations. For more information, see “Requirements for
VMware guest operation” on page 183.
When you set a password for a user, access the IBM Cloud Manager with OpenStack server by using a
secure connection. This ensures that the password is encrypted when sent to the IBM Cloud Manager
with OpenStack server. For more information, see “Configuring secure shell (SSH) communication” on
page 164.
When you set an SSH public key for a user, the guest operating system must have OpenSSH installed
and configured to take advantage of this customization. In addition, the SSH public key must be specified
according to the OpenSSH authorized_keys file format. For more information about OpenSSH, see
http://www.openssh.org/.
Resetting secure access during capture:
When you capture a Linux instance, the SSH public keys for a user are removed from the guest operating
system if they were set by IBM Cloud Manager with OpenStack when the instance was deployed.
Note: For more information, see “Set secure access during deployment.”
Chapter 6. Configuring
181
Removing the SSH public keys prevents the keys from being available to instances deployed from the
captured image. If the SSH public keys are unable to be removed during capture, IBM Cloud Manager
with OpenStack displays warning messages in the image logs. In such cases, you must manually remove
the SSH public keys for the user.
IBM Cloud Manager with OpenStack needs the current root user name and password for the guest
operating system to reset secure access during capture. IBM Cloud Manager with OpenStack obtains this
information from the virtual server credentials, which are initially set based on the instance
customizations. The virtual server credentials can be reset later if changed in the guest operating system
after deployment. For more information, see the GET and PUT /instances/{id}/virtualServers/{id}/credentials
REST APIs in the IBM Cloud Manager with OpenStack Software Development Kit (SDK) Reference guide.
IBM Cloud Manager with OpenStack uses VMware guest operations to reset secure access during capture
and there are special requirements for performing VMware guest operations.
Note: For more information, see “Requirements for VMware guest operation” on page 183.
Waiting for a deployed virtual machine (VMware):
IBM Cloud Manager with OpenStack provides a deployment property that enables users to specify
whether to wait for a deployed virtual machine to be started and ready for use before it reports the
newly deployed instance in OK state.
About this task
This deployment property option is labeled “Wait for the deployed virtual machine to be started and
ready for use.” When this option is enabled, IBM Cloud Manager with OpenStack displays the instance
in a FAILED state, if the deployed virtual machine is not started and ready for use in the allotted time. A
failure can be caused by problems during the customization process (for example, specifying an incorrect
Windows product key) or if the virtual machine cannot be powered on.
If VMware Tools is installed on the guest operating system, the virtual machine is considered started and
ready for use when the virtual machine is powered on and the necessary network customizations are
completed for it. If VMware Tools is not installed, then only the powered on state is checked.
You can configure the amount of time to wait for a deployed virtual machine to be started and ready for
use by setting the com.ibm.cfs.cloud.vmware.deployed.vm.start.wait.time in the vmware.properties file. The
time is in seconds and defaults to 2,700 (or 45 minutes). For example,
com.ibm.cfs.cloud.vmware.deployed.vm.start.wait.time=1800
You can also configure the default value for this deployment property by setting
com.ibm.cfs.cloud.vmware.default.deployed.vm.start.wait in the vmware.properties file. The default value is
false, which disables the option so that IBM Cloud Manager with OpenStack reports a newly deployed
instance in OK state as soon as VMware powers on the virtual machine. You can override the
com.ibm.cfs.cloud.vmware.default.deployed.vm.start.wait setting when you configure or deploy an image. For
example, com.ibm.cfs.cloud.vmware.default.deployed.vm.start.wait=true.
Note:
v The wait time starts after IBM Cloud Manager with OpenStack attempts to power on the deployed
virtual machine.
v This deployment property applies globally to IBM Cloud Manager with OpenStack and therefore to all
VMware deployments.
v When you create the vmware.properties file, you must restart IBM Cloud Manager with OpenStack
server; however changes made to the property file after that are picked up automatically.
182
IBM Cloud Manager with OpenStack: Administrator Guide, version 4.2
v During deployment, some optional instance customizations require the deployed virtual machine to be
started and ready for use before the customizations can be completed. In such cases,IBM Cloud
Manager with OpenStack waits for the deployed virtual machine regardless of the value that is
specified for this deployment property.
Note: For example, see “Set secure access during deployment” on page 181.
Requirements for VMware guest operation:
VMware guest operations are used to perform certain optional customizations of instances.
When you request such customizations, your request must meet the following requirements to
successfully perform the VMware guest operations:
1. vCenter version 5.0 or later is required.
2. The vSphere host machine that is used for the instance must be at version 5.0 or later and IBM Cloud
Manager with OpenStack must have network connectivity to it.
3. VMware tools must be installed and current on the guest operating system for the virtual machine.
4. VMware guest operations must be enabled for both the virtual machine and the host machine. They
are enabled by default, but can be disabled.
Note: If it is necessary to connect to the host machine to complete the VMware guest operations, IBM
Cloud Manager with OpenStack automatically accepts the security certificate for the host machine. The
security certificate is stored in the <host machine>.jks file in your IBM Cloud Manager with OpenStack
home directory.
Configuring shutdown of VMware instances:
In previous versions of IBM Cloud Manager with OpenStack stopping an active instance of VMware
instantly powered off the running instance. The virtual machine was given no delay to allow it to
perform its own shutdown process. IBM Cloud Manager with OpenStack now provides a 90-second delay
for the system to complete the shutdown process. If by the end of 90 seconds the system is not shut
down, IBM Cloud Manager with OpenStack forces the VMware instance to power down immediately.
You can configure the behavior of how VMware instances are shut down by modifying the following
statements in vmware.properties:
com.ibm.vmware.client.shutdown.delay.in.milliseconds=90000
This property allows the VMware instance time to shut down before a power off is called. The
default is 90000 milliseconds if the property is not specified. Setting this property to 0 (zero)
prevents a shutdown from being called.
com.ibm.vmware.client.disable.save.image.shutdown=false
This property disables shutdown when save image is called. The default value is set to false,
which allows shutdown to be called before save image. Specifying a value of true prevents a
shutdown from being called on save image operations.
VMware limitations:
The following limitations apply to VMware and IBM Cloud Manager with OpenStack.
v The saved images are managed by IBM Cloud Manager with OpenStack and not VMware. Deleting an
image outside of IBM Cloud Manager with OpenStack, such as through the vSphere client interface,
does not remove the saved images.
v Properties that are defined in the deployment.properties file and the vmware.properties file are global
to all users, instances, and images. There is no option to configure these options on a more granular
level.
Chapter 6. Configuring
183
v If you have an image that is defined in IBM Cloud Manager with OpenStack and you rename the
associated virtual machine template by using the vSphere Client, the name of the image in IBM Cloud
Manager with OpenStack does not change. The IBM Cloud Manager with OpenStack image is still
associated with the renamed template and can continue to be used. The image details page displays
the renamed template name in the Original name field. You can manually change the name of the
image by clicking the name of the image on the Images details page and pressing Save.
v If you have an image that is defined in IBM Cloud Manager with OpenStack and you convert it to a
virtual machine by using the vSphere Client, the image in IBM Cloud Manager with OpenStack shows
a state of unknown. This state is displayed because it is no longer a template on the VMware server; the
conversion made it a virtual machine, which shows up as an IBM Cloud Manager with OpenStack
instance. If the unknown IBM Cloud Manager with OpenStack image is no longer needed, it can be
deleted. A deletion of the IBM Cloud Manager with OpenStack image does not affect the IBM Cloud
Manager with OpenStack instance or virtual machine on the VMware server.
v In some cases, when you use special characters in names of VMware objects such as port group names
and cluster names, the VMware API encodes these specials characters in a URL encoding scheme. For
example a / character is encoded as a %2f. When the names are displayed in IBM Cloud Manager with
OpenStack, the characters are not decoded. IBM Cloud Manager with OpenStack displays the encoded
name. For example, if you have a cluster named DRS/Cluster it is displayed as DRS%2f%Cluster.
v IBM Cloud Manager with OpenStack creates and manages custom fields for internal use when using
VMware virtual machines. The custom fields have a "SKC_" prefix and you should not modify or
remove them using the vSphere client.
Configuring images with OpenStack
The following topics cover information to configure images in an OpenStack environment.
Customizing an OpenStack instance:
When an image is deployed, you might have to customize the resulting instance on startup to apply
network configurations, login information, application settings, and so on, before the instance is ready for
use.
About this task
IBM Cloud Manager with OpenStack provides a deployment property to enable OpenStack config drive
support when deploying an image. This support is used to pass customizations (for example: server
metadata, user data, personality files, and SSH keys) to an instance. The config drive can be accessed by
any guest operating system capable of mounting an ISO9960 file system. Images that are built with a
recent version of the cloud-init software package, or similar software package such as IBM SmartCloud
init, can automatically access and apply the supported customizations that are passed to the instance by
the config drive.
Note: For more information about the cloud-init software package and the customizations that it
supports, see CloudInit.
IBM Cloud Manager with OpenStack also supports the Pluggable Configuration Strategy feature added
by IBM to OpenStack. This feature is similar to the config drive support in that it provides an instance
with the necessary customizations. Like config drive, the image must be built with the correct software
package for the configuration strategy to automatically access and apply the customizations. In particular,
this feature provides support for Open Virtualization Format (OVF) or Microsoft Windows System
Preparation (Sysprep) configuration. For more information, see the following resources:
v For information about OVF configuration, see Open Virtualization Format (OVF).
v For information about Sysprep configuration, see Sysprep Technical Reference.
184
IBM Cloud Manager with OpenStack: Administrator Guide, version 4.2
Cloud-init software package:
IBM Cloud Manager with OpenStack supports the cloud-init software package.
When you deploy an image with config drive enabled, IBM Cloud Manager with OpenStack makes the
instance customizations available to cloud-init using the OpenStack config drive support. The cloud-init
software package can then access the config drive and apply the customizations to the instance. The
following are some of the customizations made available through the config drive:
1. User data
2. Personality files
3. SSH key pair
4. Network adapter information (for static networks)
5. Password of the default user (the password option)
Using IBM Cloud Manager with OpenStack, you can enter the contents of the user data and personality
files by using the deployment properties. You can enter the contents when you configure or deploy an
image. The contents can be either base64 encoded or plain text. There are also deployment properties for
the SSH key pair and network adapters that are based on the SSH key pairs and networks available. You
can set the network adapters when you configure or deploy an image. However, the SSH key pair should
not be set when you configure an image because OpenStack SSH key pairs are scoped to a user. Instead,
the user who deploys the image should select an appropriate SSH key pair.
Note:
v Config drive is ignored when deploying PowerVC images. As a result, the instance customizations that
are passed by the config drive are also ignored.
v The cloud-init password option sets the password for the default user, which is usually not the root
user.
v For more information about the cloud-init software package and the customizations that it supports,
see CloudInit.
v For more information about the OpenStack config drive support, see Config drive.
Configuration strategies:
IBM Cloud Manager with OpenStack supports the OVF and Sysprep types of pluggable configuration
strategies.
When an image is deployed that has one of these configuration strategies, the OpenStack Pluggable
Configuration Strategy feature determines the customizations made available to the instance and how
they are made available. The appropriate software package (for the configuration strategy type) on the
image is expected to access and apply the customizations. The customizations that are provided by
OpenStack come from the following sources:
1. Server metadata that is provided by OpenStack itself.
2. Server metadata that is provided by the user deploying the image.
The following server metadata is provided by OpenStack:
server.admin_password
server.hostname
server.domainname
server.dns-client.pri_dns
server.dns-client.sec_dns
server.dns-client.dns_list
server.network.[n].mac
server.network.[n].mac_alt
server.network.[n].slotnumber
Random administrator password generated by OpenStack.
The hostname for the instance.
Domain name from the dhcp_domain configuration option.
Primary DNS server IP address.
Secondary DNS server IP address.
Space separated list of DNS server IPs.
Mac address for network interface number n.
Mac address formatted with '-' rather than ':'.
Slot number for network interface number n.
Defined as the decimal value of the last two digits
Chapter 6. Configuring
185
of the mac address.
server.network.[n].[v4|v6].address IPv4 or IPv6 address for network
server.network.[n].[v4|v6].netmask IPv4 or IPv6 netmask for network
server.network.[n].[v4|v6].cidr
IPv4 or IPv6 address and netmask
for network interface number n.
server.network.[n].[v4|v6].gateway IPv4 or IPv6 gateway for network
server.network.[n].v4.use_dhcp
'true' if the network uses DHCP.
interface number n.
interface number n.
in CIDR notation
interface number n.
Server metadata that is provided by the user during deployment are prefixed with ’server.metadata’.
Creating a configuration strategy:
A complete and accurate OVF or Sysprep configuration strategy is important to ensure that an image can
be deployed and customized properly. A poor configuration strategy can cause the deployment to fail or
prevent the instance from being customized.
About this task
A configuration strategy consists of the following parts:
v Type
v Template
v Mapping
v User metadata
For information about how to add, update or delete the configuration strategy of an image, see
“Updating an image configuration strategy (OpenStack only)” on page 218.
Type
The type is required and can either be ovf or sysprep.
Template
The template is required. When you are using an ovf configuration strategy type, this contains
the OVF descriptor for the image. When you are using a sysprep configuration strategy type, this
contains the template unattend.xml file for the image.
Mapping
The mapping is required. It defines how to map the server metadata that is provided by both
OpenStack and the user deploying the image to the appropriate elements/parts of the template.
The mapping is a JavaScript Object Notation (JSON) array of objects, where each object has a
source representing the server metadata to map to the target element/part in the template. For
example:
[
{
"source": "server.network.1.v4.address",
"target": "com.ibm.vsae.2_1.network-interface.ipaddr"
},
{
"source": "server.network.1.v4.netmask",
"target": "com.ibm.vsae.2_1.network-interface.netmask"
},
{
"source": "server.network.1.v4.gateway",
"target": "com.ibm.vsae.2_1.network-interface.gateway"
},
{
"source": "server.hostname",
"target": "com.ibm.vsae.2_1.system-host.hostname"
},
186
IBM Cloud Manager with OpenStack: Administrator Guide, version 4.2
{
"source": "server.domainname",
"target": "com.ibm.vsae.2_1.system-host.domainname"
},
{
"source": "server.dns-client.pri_dns",
"target": "com.ibm.vsae.2_1.dns-client.pri_dns"
},
{
"source": "server.metadata.username",
"target": "com.ibm.vsae.2_1.system-user.username"
},
{
"source": "server.metadata.system.password",
"target": "com.ibm.vsae.2_1.system-user.password"
}
]
IBM Cloud Manager with OpenStack uses the mapping to create additional deployment
properties for the image. Every object in the mapping with a source prefix of ‘server.metadata.’
is added to the configurable deployment properties for the image. Doing so allows such
properties to be customized by the user when the image is deployed. For more information about
defining the mapping, see “OVF configuration strategy” on page 188 and “Sysprep Configuration
Strategy” on page 190 topics.
Note:
v The same source can be mapped to multiple targets. To do this, you must define a separate
source/target object in the JSON array for each mapping.
v An empty mapping (for example, []) must be used only for testing purposes since all deploys
will use the same template and thus have the same customizations applied.
v When you define a source mapping name with the ‘server.metadata.’ prefix, avoid using '.'
in the suffix portion of the name.
User Metadata
The user metadata is optional. It determines how IBM Cloud Manager with OpenStack defines,
displays, and processes the configurable deployment properties created based on the mapping. If
no user metadata is provided for a mapping, a basic string deployment property is used.
Defining detailed user metadata helps users properly configure and deploy the image. The user
metadata is a JSON array of objects where each object might contain the following:
1. name
2. type
subtype
description
required
min
max
3.
4.
5.
6.
7.
8. allowed_values
9. default_value
For example:
[
{
"name": "system.username",
"type": "STRING",
"description": "System user name",
Chapter 6. Configuring
187
"required": "true"
},
{
"name": "system.password",
"type": "STRING",
"subtype": "PASSWORD",
"description": "System user password hash",
"required": "true"
}
]
The name string is required. The name corresponds to the mapping source without the
‘server.metadata.’ prefix.
The type string is optional. It is the native type of the deployment property (INT, LONG, FLOAT,
BOOLEAN, or STRING). The default is STRING.
The subtype string is optional. It is a more descriptive type to allow for early validation of the
deployment property. A STRING type can have the following subtypes: IPV4_ADDRESS,
DOMAIN_NAME, DOMAIN_NAMES, IPV4_SUBNET_MASK, HOST_NAME and PASSWORD. A
BOOLEAN type can have the following subtypes: DHCP_FLAG and DNS_FLAG. The default is
no specific subtype.
The description string is an optional description of the deployment property. If no description is
provided, the name is used for the description.
The required flag is optional. It is a flag indicating whether the deployment property is required
when deploying the image. The default is false.
The min and max strings are optional. They provide minimum and maximum boundaries for
INT, LONG, FLOAT and STRING type deployment properties. The default is no boundaries.
The allowed_values string is optional. It is a comma-separated list of allowed values for the
deployment property. When you specify a list of allowed values, also provide the default_value
and ensure that the allowed values are valid for the type. The default is any allowed values
corresponding to the type.
The default_value string is optional. It is the default value for the deployment property. The
default value should be valid for the type. If no default value is provided, a value must be
explicitly set by the user in order for the deployment property to be used when deploying the
image.
OVF configuration strategy:
The OVF configuration strategy is an example of an OpenStack Pluggable Configuration Strategy. It is
designed for use with OVF configuration, which is a way to package and provide configuration options
for an image.
About this task
The OVF configuration strategy supports OVF version 1.1. For more information about OVF standards,
see Open Virtualization Format (OVF).
The OVF configuration strategy passes the configuration options in an ovf-env.xml file in a disk that is
presented to the guest system. It is expected that an activation engine, such as IBM VSAE, embedded in
the image mounts the drive, read the ovf-env.xml, and apply the customizations when an instance
deployed from the image starts.
The ovf-env.xml file is created based on the default values in the OVF descriptor (that is, the template in
the configuration strategy) and the configuration options that are mapped using the mapping that is
specified in the configuration strategy.
188
IBM Cloud Manager with OpenStack: Administrator Guide, version 4.2
To know what mappings to specify in the configuration strategy, you must know the properties that the
image expects in the ovf-env.xml file. The properties that the image expects in the ovf-env.xml are
specified in the OVF descriptor's ProductSection elements, as documented in the OVF 1.1 specification,
section 9.5. Here is an example ProductSection from an OVF descriptor:
<ovf:ProductSection ovf:class="com.ibm.vsae.2_1.network-interface">
<ovf:Info>System network interface configuration</ovf:Info>
<ovf:Property ovf:key="ipaddr" ovf:type="string" ovf:userConfigurable="true"
ovf:value="192.168.71.129">
<ovf:Description/>
<ovf:Label>IP address</ovf:Label>
</ovf:Property>
</ovf:ProductSection>
Using the previous example, the image can have a property com.ibm.vsae.2_1.network-interface.ipaddr that
defaults to 192.168.71.129. You might want to have the IP address set to the value that OpenStack assigns
to it, which is given in the server.network.1.v4.address server metadata. To do this, you would create the
following mapping:
{
"source": "server.network.1.v4.address",
"target": "com.ibm.vsae.2_1.network-interface.ipaddr"
}
Here is another example ProductSection:
<ovf:ProductSection ovf:class="com.ibm.vsae.2_1.ntp-client">
<ovf:Info>activates the openntp client</ovf:Info>
<ovf:Property ovf:key="ntp-server" ovf:type="string" ovf:userConfigurable="true"
ovf:value="0.pool.ntp.org">
<ovf:Description>Ntp server</ovf:Description>
<ovf:Label>Ntp server</ovf:Label>
</ovf:Property>
</ovf:ProductSection>
Using the previous example, there is no OpenStack provided server metadata that contains the NTP
server's IP address. Therefore, if you want users to be able to override the value when they deploy the
image, you would create the following ‘server.metadata.’ mapping:
{
"source": "server.metadata.ntp-server",
"target": "com.ibm.vsae.2_1.ntp-client.ntp-server"
}
The OVF configuration strategy also supports using the wildcard character * to map multiple server
metadata items that are provided by OpenStack using a single source/target mapping. When the
wildcard character is used, the system matches existing configuration properties against the source to
generate targets for the wildcard matches. This support is useful when you need to dynamically add
network adapters at the time you deploy an image. Here is an example mapping that uses the wildcard
character:
{
"source": "server.network.*.v4.address",
"target": "com.ibm.vsae.2_1.network-interface.ipaddr.*"
}
If the following server metadata items were provided by OpenStack when deploying an image:
server.network.1.v4.address = 192.168.1.101
server.network.2.v4.address = 192.168.1.102
server.network.3.v4.address = 192.168.1.103
Then the following mapping would be generated when deploying the image:
[
{
"source": "server.network.1.v4.address,
"target": "com.ibm.vsae.2_1.network-interface.ipaddr.1"
Chapter 6. Configuring
189
},
{
"source": "server.network.2.v4.address,
"target": "com.ibm.vsae.2_1.network-interface.ipaddr.2"
},
{
"source": "server.network.3.v4.address,
"target": "com.ibm.vsae.2_1.network-interface.ipaddr.3"
}
]
The wildcard character support has the following restrictions:
1. The wildcard character replaces a string of decimal digits only that translates internally to regular
expression 'd+'.
2. The mapping source must have only one wildcard character.
3. The mapping target must have at least one wildcard character. If more than one wildcard character is
used, they are all replaced.
Note: The OVF configuration strategy has the following limitations:
v The OVF configuration strategy support is only for image activation (that is, ProductSection elements)
and does not support actions such as adding disks to the image.
v After activation is complete, OpenStack does not automatically detach the disk drive that contains the
ovf-env.xml file.
v Extensions to IBM VSAE might be required to support network configurations with both IPv4 and IPv6
addresses.
Sysprep Configuration Strategy:
The Sysprep configuration strategy is an example of an OpenStack Pluggable Configuration Strategy. It is
designed for use with Microsoft Windows System Preparation (Sysprep) configuration, which allows
customizing many aspects of a Windows system as it starts. For more information about Sysprep, see
Sysprep Technical Reference.
The Sysprep configuration strategy passes the image configuration options in an unattend.xml file in a
CD-ROM device that is presented to the guest system. Before adding the Sysprep configuration strategy
to an image, it is expected that the image is ready for Sysprep, and that it runs Sysprep to read the
unattend.xml file, and apply the customizations when starting an instance deployed from the image.
The unattend.xml file is created based on the default values in the template unattend.xml file (that is, the
template in the configuration strategy) and the configuration options that are mapped using the mapping
that is specified in the configuration strategy. To know what mappings to specify in the configuration
strategy, you must know the properties that the image expects in the unattend.xml file.
The format of the target values in the configuration strategy mapping is as follows:
v To identify an element, the format is an XPATH. In this case, the contents of the element are replaced
with the value of the source configuration property.
v To identify an attribute, the format is like XPATH@attribute-name. In this case, the attribute in the
element is set to the value of the source configuration property.
For documentation on the XPATH format, see the python documentation. If the path identifies more than
one element, only one of the elements are the target element. If the path does not identify an element in
the template the boot of the instance fails with an error.
Example template unattend.xml file:
190
IBM Cloud Manager with OpenStack: Administrator Guide, version 4.2
<?xml version="1.0" encoding="utf-8"?>
<unattend xmlns="urn:schemas-microsoft-com:unattend">
<settings pass="oobeSystem">
<component name="Microsoft-Windows-Shell-Setup" processorArchitecture="amd64"
xmlns:wcm="http://schemas.microsoft.com/WMIConfig/2002/State">
<Display>
<ColorDepth>16</ColorDepth>
<HorizontalResolution>1024</HorizontalResolution>
<RefreshRate>60</RefreshRate>
<VerticalResolution>768</VerticalResolution>
</Display>
<RegisteredOrganization>OpenStack</RegisteredOrganization>
<OOBE>
<HideEULAPage>true</HideEULAPage>
<NetworkLocation>Cluster</NetworkLocation>
<ProtectYourPC>1</ProtectYourPC>
<SkipMachineOOBE>true</SkipMachineOOBE>
<SkipUserOOBE>true</SkipUserOOBE>
</OOBE>
</component>
</settings>
</unattend>
Using the above example, the following mapping target would identify the ColorDepth element:
.//{urn:schemas-microsoft-com:unattend}Display/{urn:schemas-microsoft-com:unattend}ColorDepth
Using the above example, the following mapping target would identify the processorArchitecture
attribute in the component element: .//{urn:schemas-microsoft-com:unattend}component[@name='MicrosoftWindows-Shell Setup']@processorArchitecture
Considerations for capturing an OpenStack instance:
Consider the following information before capturing an OpenStack instance.
When you capture an instance that was deployed by using a pluggable configuration strategy (OVF or
Sysprep), the configuration strategy is copied from the source image for the instance to the new image. If
the source image for the instance was deleted, the configuration strategy cannot be copied to the new
image. As a result, you need to manually add the configuration strategy to the new image.
After an instance is deployed using a configuration strategy, the activation software (for example, Sysprep
or IBM VSAE) has run and applied the configuration. Therefore, you might have to perform more actions
when you capture the instance. If you want the activation software to run again when you deploy the
image that was created, the activation software must be reset. If you do not have to run the activation
software again, you can delete the configuration strategy from the image that was created.
For more information about the reset requirements and other capture prerequisites, see the
documentation for the applicable activation software. For more information about pluggable
configuration strategies, see “Configuration strategies” on page 185.
Configuring PowerVC images
Use the following information to configure PowerVC images with IBM Cloud Manager with OpenStack.
About this task
Placement policy
IBM Cloud Manager with OpenStack provides a deployment property to control the placement of
a deployed PowerVC virtual machine. The placement of the virtual machine can either be
handled by the OpenStack scheduler or the PowerVC scheduler. This deployment property option
is labeled Use the PowerVC scheduler to place the deployment. Select the appropriate option for
your environment.
Chapter 6. Configuring
191
v When this option is enabled, the PowerVC scheduler is used.
v When this option is disabled, the OpenStack scheduler is used.
Note: This option is enabled by default.
Network adapter configuration
OpenStack images to be deployed only to PowerVC support VLAN type networks with a
physical network name equal to "default". Such networks must also exist in the PowerVC
environment. In addition, if the network supports both IPv4 and IPv6 addresses, only the IPv4
addresses are used by PowerVC.
Flavor storage size
PowerVC does not support resizing during image deployment. However, you can resize the
virtual machine after it is successfully deployed. As a result, regardless of the OpenStack flavor
that is selected, PowerVC uses the size of the image as the storage size of the deployed PowerVC
virtual machine. For more information about PowerVC flavors, see the PowerVC Information
Center.
Config drive and virtual machine customizations
PowerVC does not support config drive and the related virtual machine customizations during
image deployment. If specified, these configurations are ignored. For more information about the
cloud-init software package and the customizations that it supports, see “Cloud-init software
package” on page 185.
Boot Volume Storage Template
By default, when you deploy an image, the boot volume is created using the default storage
template, as configured on the PowerVC server. If you would like the boot volume to use a
different storage template, you need to add the boot volume type property to the extra
specifications of the flavor that is used to deploy the image. Edit the flavor and add the following
extra specifications.
v Set the property key powervm:boot_volume_type
v Set the value of the property to the ID of the volume type you want to use.
You can find the volume type id by running the following OpenStack command: cinder
type-list
Note: The volume type ID that is specified must be a PowerVC volume type. When you run a
command in the IBM Cloud Manager with OpenStack appliance, PowerVC volume type names
are prefixed with a pvc:. For more information about flavors, see Flavors.
Related reference:
PowerVC Standard Edition
Nova placement policy
Configuring instance resize timeout
IBM Cloud Manager with OpenStack allows the administrator to configure a timeout for an instance
resize action. This is optional, but can be configured in the event that the cloud manager does not
respond in a reasonable timeframe.
About this task
To configure the instance resize timeout, follow these steps:
Procedure
1. Open the deployment.properties file in the home directory.
192
IBM Cloud Manager with OpenStack: Administrator Guide, version 4.2
2. Set the com.ibm.cfs.deployments.resize.timeout property to the time in minutes to wait for an
instance resize action to complete in the cloud. The default value is 10 minutes.
3. Save the deployment.properties file and restart the IBM Cloud Manager with OpenStack server.
Identifying expired instances
IBM Cloud Manager with OpenStack has a configurable task that allows administrators to identify
expired instances and how long to keep them after they have expired.
About this task
To set how often expired instances are identified and how long they are kept, follow these steps:
Procedure
1. Open the deployment.properties from your home directory.
2. Configure each property in the file.
a. com.ibm.cfs.expired.deployments.finder.interval=10
When the expiration date is reached, the deployment property is put into an EXPIRED state and the
virtual machine is stopped in the deployment. The
com.ibm.cfs.expired.deployments.finder.interval defines how often IBM Cloud Manager with
OpenStack identifies expired deployments. This interval is set in seconds.
b. com.ibm.cfs.deployments.expired.delete.interval=1
This property defines the interval for deleting instances that have been identified as expired. The
unit is hour. If not set or valid, the default value is 24 hours.
This property is also defined by the length of the grace period set when you create an expiration
policy for a cloud or a project. For more information, see “Managing expiration policies” on page
230.
Configuring multiple instances for a single deployment
You can deploy multiple instances through a single deployment.
About this task
If you enable the multiple instance deployment function, a user can deploy multiple instances through a
single deployment. The deployed instances use the deployment name as the prefix of each single
instance. The new names also use -x as the suffix, where x is the index of that instance.
Procedure
1. To enable or disable this feature, set the following property value within the deployment.properties
file that is in the .SCE42 directory:
v com.ibm.cfs.deployments.multi.enabled=true to enable the function.
v com.ibm.cfs.deployments.multi.enabled=false to disable the function.
Note: By default, this feature is enabled.
2. To control the maximum number of instances that a user is allowed to deploy at one time, set the
following property value within the deployment.properties file:
com.ibm.cfs.deployments.multi.max.value=5
Note:
v The default value is 5.
v If this value is set too high, it might overload the connected cloud.
Chapter 6. Configuring
193
Configuring logging
Log files are automatically saved by the IBM Cloud Manager with OpenStack self-service portal. You can
configure the default number of log files that are saved and the types of messages that are logged.
About this task
By default, the self-service portal saves 9 log files of 50 MB each. These defaults can be modified in the
logging.properties file in the home directory.
To change the default logging options:
Procedure
Open the logging.properties file in the home directory.
v To change the number of log files that are saved, set the java.util.logging.FileHandler.count
property to the number of log files that you to save. The default is 9.
v To change the types of messages that are saved, set the java.util.logging.FileHandler.level
property to the level of messages that you want to receive. The default is INFO.
The types of messages that are logged in the log file are informational, warning, and error messages.
Use the debugging messages only for troubleshooting and debugging purposes because performance
can be impacted by excessive logging.
What to do next
Modifying the logging.properties file requires restarting the self-service portal server to pick up the
changes.
For more information about logging, see Chapter 10, “Troubleshooting and support for IBM Cloud
Manager with OpenStack,” on page 291.
Configuring a network
The IBM Cloud Manager with OpenStack self-service portal provides a convenient way to manage and
apply network settings by using network configurations. Network configurations are a group of network
settings for a particular environment, typically a virtual network. These settings can be managed as a
single entity and applied to image configurations or instance deployment settings.
For example, suppose that a cloud environment contains two virtual networks applicable to instance
deployment: a public and a private virtual network. In this case, an administrator might create two
network configurations, one for the public and one for the private. In the public configuration, the
administrator would specify all the public network settings such as primary DNS, secondary DNS, and
primary gateway. The same would be done for the private network configuration. After the
configurations are created, the administrator can configure the images to use the appropriate network
configuration. This action saves time by not requiring the administrator to specify each network setting in
each image. It also allows an easier way to manage the network settings on a virtual network.
While the actual settings specified in a configuration are tailored to a specific environment, the network
configurations themselves are a superset of all network settings regardless of image, operating system, or
cloud management system. Therefore, all settings that are specified in a configuration are applicable. For
example, the primary and secondary WINS settings of a network configuration are only applicable to
Windows based images. So when you create a configuration for an image that is not using Windows,
these values are not needed and can be left blank.
194
IBM Cloud Manager with OpenStack: Administrator Guide, version 4.2
Note: With the self-service portal, you can specify the network configuration for a cloud. The self-service
portal displays only the fields that are applicable for that cloud. Before you can create an OpenStack
network configuration, you must select an existing OpenStack cloud.
When network configuration settings are applied to either an image configuration or during an advanced
instance deployment, their individual settings can be overridden or manually specified, if wanted.
Note: You cannot override or manually specify OpenStack network configuration settings.
You can modify your network connections through the self-service portal or though the property files in
the home directory. For more information about modifying your network connections through the
self-service portal, see “Managing network configurations” on page 237.
Note: You cannot use property files to specify OpenStack network configuration settings. You must use
the self-service portal.
To modify your network connections from the home directory, create a .properties file and save it to
your home directory. The name of these files should be prefixed with networkConfiguration followed by
an arbitrary suffix and the .properties file extension, similar to networkConfiguration.properties,
networkConfiguration-vlan1.properties, or networkConfiguration3.properties.
Each property file contains a group of network setting. For example, assume that there is a file that is
named networkConfiguration.properties in the home directory, which containing the following settings:
name=VLAN1
dns1=9.10.244.100
dns2=9.10.244.200
gateway1=9.5.40.1
gateway2=9.5.40.2
domain=mydomain.company.com
subnet=255.255.252.0
networkId=[Network 1]=hostVnet:ETHERNET0/1
useDHCP=false
hostnamePrefix=sce
computerNamePrefix=sce
workgroup=workgroup
description=default network configuration
9.5.42.250
9.5.42.251
9.5.43.23
Note: When you use a brocade switch, you must configure a host name prefix in the
networkConfiguration.properties file: hostnamePrefix=sce.
When the self-service portal starts, the network configuration named "VLAN1" is added to the network
configuration list.
(VMware only) In the VWware environment, the value of the Network ID field is the name of a VMware
standard switch network, port group name, or distributed port group. A typical VMware network ID is
VM Network. This value is used to assign the virtual network adapter to the VMware network during a
deployment. The rest of the values in the network configuration should be appropriate for that network.
The network configuration displays all available port groups and distributed port groups. Not all port
groups or distributed port groups might be available on all target hosts. Validation of this field occurs
only at deployment time when the actual deployment target is known. If the selected port group or
distributed switch is not available on the selected target host, then an error occurs and the instance
deployment fails.
Chapter 6. Configuring
195
Configuring billing
The IBM Cloud Manager with OpenStack self-service portal has a configurable billing and accounting
interface. The interface allows the self-service portal to monitor resource use and create subsequent billing
to the self-service portal user accounts for the usage.
For more information about accounts, see “Managing accounts” on page 251.
Configuring billing
To enable billing, edit the billing.properties file and define what action to take when an account
becomes delinquent. Also, set the time intervals to determine accounts that are delinquent or at their
account balance threshold.
About this task
Important: For billing to work, you must also enable metering. Account bills are generated based on
metering results.
To configure billing, follow these steps:
Procedure
1. Open the billing.properties file in the home directory.
2. Configure each property in the file.
com.ibm.cfs.billing.enabled=true
Defines whether to enable the billing and accounting functionality in IBM Cloud Manager
with OpenStack. True enables and false disables billing and accounting.
com.ibm.cfs.billing.delinquency.policy= com.ibm.cfs.services.billing.policies.shutdown
Determines the action IBM Cloud Manager with OpenStack takes against existing instances
and volumes when an account becomes delinquent. Possible values are as follows:
Table 56.
Value
Description
com.ibm.cfs.services.billing.policies.destroy
This value destroy all deployments and detaches all
volumes for the delinquent account.
com.ibm.cfs.services.billing.policies.shutdown
This value suspends all deployments for the delinquent
account.
com.ibm.cfs.services.billing.policies.do.nothing
This value ignores delinquent accounts.
com.ibm.cfs.services.billing.policies.detach
This value detaches all volumes for the delinquent
account.
com.ibm.cfs.services.billing.policies.delete
This value deletes all volumes for the delinquent
account.
com.ibm.cfs.services.billing.policies.shutdowndetach
This value suspends all deployments and detaches all
volumes for the delinquent account.
com.ibm.cfs.services.billing.policies.shutdowndelete
This value suspends all deployments and deletes all
volumes for the delinquent account.
com.ibm.cfs.services.billing.policies.destroydelete
This value destroy all deployments and deletes all
volumes for the delinquent account.
com.ibm.cfs.billing.delinquency.finder.interval=120
This property represents the number of seconds to wait before running a job that examines
each account to determine whether the account is delinquent.
196
IBM Cloud Manager with OpenStack: Administrator Guide, version 4.2
com.ibm.cfs.billing.account.balance.threshold.interval= 24
This property represents the number of hours to wait before running a job to find accounts
that are at their account balance threshold. The default value of this property is 24 hours or 1
day.
Note:
v The billing.properties file is not configurable through the web user interface.
v For PowerVC support, the PowerVC driver file, /etc/powervc/powervc.conf, has staging user
(staging_user) and project (staging_project_name) properties. These properties control which
OpenStack user and project owns instances that are synchronized from PowerVC. The default
configuration uses the IBM Cloud Manager with OpenStack administrator and the public project.
An instance must be owned by a user in OpenStack, so when you enable billing, the default owner
is also billed for those instances in the PowerVC cloud.
What to do next
After you enable billing, ensure that you also enable metering. For more information, see “Configuring
metering” on page 200.
Configuring billing details
IBM Cloud Manager with OpenStack can produce charges that are billed back to users when using a
specific cloud resource, such as an instance.
About this task
IBM Cloud Manager with OpenStack currently has the following configurable products:
Table 57. Configurable products by cloud type
OpenStack configurable products
VMware configurable products
v Processor
v Processor
v Memory
v Memory
v Disks
v Disks
v Volume
A cloud product might be something similar to processor by the hour, 1 GB of RAM per day, a fixed rate
charge for a running VM, or 20 GB of active disks per day. IBM Cloud Manager with OpenStack loads
those cloud products into a product catalog. System events, such as deploying an instance, can cause the
creation of a bill with one or more charges from one or more cloud products. IBM Cloud Manager with
OpenStack automatically deducts money from the account to which the instance owner belongs.
Chapter 6. Configuring
197
Figure 1. Sample billing account summary
The settings for product price per interval time are configurable. To configure product pricing
information, follow these steps:
Procedure
1. Open the products directory in the home directory to locate the product configuration files. The cloud
type is added to the file name as a prefix as shown in the following examples:
For OpenStack:
v Openstack_CPU.xml
v Openstack_RAM.xml
v Openstack_Disk.xml.
v Openstack_Volume.xml
For VMware:
v VMware_CPU.xml
v VMware_RAM.xml
v VMware_Disk.xml.
The file that you configure depends on the cloud and product type.
2. Configure processor price in the cloud_type_cpu.xml.
<pricing currency="USD" interval="3600" price="1.000"/>
This property specifies that the default IBM Cloud Manager with OpenStack collector collects charges
on virtual servers by using the number of processors that are assigned to them at a rate of $1.00 per
hour. Collecting at an interval less than the actual described rate (for example, hours instead of days)
enables users to get a more accurate approximation of their actual charges. Having an accurate look at
the charges might be important for accounting purposes or in situations where account credit is
limited.
3. Configure Memory price in cloud_type_ram.xml.
<pricing currency="USD" interval="3600" price="0.000976563"/>
198
IBM Cloud Manager with OpenStack: Administrator Guide, version 4.2
This property specifies that the default IBM Cloud Manager with OpenStack collector collects charges
on virtual machines by using the number of bytes of RAM assigned to them at a rate of $0.000976563
per MB per hour, which is about $1.00 per hour per GB.
4. Configure disks in cloud_type_disk.xml.
<cloudProduct id="com.ibm.cfs.cloud.vmc.products.storage">
<name>Active Disk</name>
<description>The amount of total disk storage in MB used in a workload
per minute.</description>
<!-- $1.627604167E-5 per megabyte per minute -->
<pricing currency="USD" interval="60" price="1.627604167E-5"/>
</cloudProduct>
These properties specify that the default IBM Cloud Manager with OpenStack collector collects
charges on virtual machines by using the disks that are assigned to them at a rate of $0.000976563 per
MB per hour, which is about $1.00 per hour per GB.
The <name> and <description> can also be overridden from the IBM Cloud Manager with OpenStack
defaults by specifying different values.
Note: The currency for all configurable products must be consistent. For example, set US dollar (USD)
for both or Chinese Yuan (CNY) for both. Using inconsistent currencies causes incorrect product
charges.
5. For OpenStack clouds, configure volume price in Openstack_Volume.xml.
<cloudProduct id="com.ibm.cfs.cloud.openstack.products.volume"
cloudType="Openstack" objectType="Volume">
<name>Volume</name>
<description>The amount of a volume in MB per minute.</description>
<!-- $1.627604167E-5 per megabyte per minute -->
<pricing currency="USD" interval="60" price="1.627604167E-5"/>
</cloudProduct>
These properties specify that the default IBM Cloud Manager with OpenStack collector collects
charges on volumes at a rate of $1.627604167E-5 per MB per hour, which is about $1.00 per hour per
GB. The <name> and <description> can also be overridden from the IBM Cloud Manager with
OpenStack defaults by specifying different values.
Note: The currency for all configurable products must be consistent. For example, set US dollar (USD)
for both or Chinese Yuan (CNY) for both. Using inconsistent currencies causes incorrect product
charges.
Results
After you configure account billing, you can view account billing information in the IBM Cloud Manager
with OpenStack interface.
Chapter 6. Configuring
199
Figure 2. Sample billing account settings
Configuring metering
The IBM Cloud Manager with OpenStack self-service portal has a configurable metering framework that
enables the self-service portal to record and present metering data.
About this task
You can download metering data files through the metering data API. To enable metering with the
self-service portal, configure the following properties:
Procedure
1. Open the metering.properties file in the home directory.
2. Configure the property com.ibm.cfs.metering.enabled=true to enable the metering function within
the self-service portal. The default value for this property is false.
3. Configure the property com.ibm.cfs.metering.interval=<time in minutes> where <time in minutes>
is the time in minutes between each metering record synchronization. The default value is 1441, or
every day. If you want a more frequent synchronization, you can decrease this value.
4. Configure the property com.ibm.cfs.metering.data.path = cfshome/metricsdata/. This property
allows the administrator to configure the storage system where the metrics data is located. The default
location is the self-service portal home directory/metricsdata/ if not specified.
5. Configure the property com.ibm.cfs.metering.data.export.interval = <interval time, hour as
unit>. This property is used for how often to export the metering data to file. The default value is 1
hour.
6. Configure the property com.ibm.cfs.metering.data.expired.days = <day as unit>. This property is
used to set the number of days that the metering data is expired. The default value is 370 days.
7. Configure the property com.ibm.cfs.statistics.interval = <interval time, seconds as unit> This
property is used to set the frequency of the synchronization of the statistics resource usage from the
200
IBM Cloud Manager with OpenStack: Administrator Guide, version 4.2
cloud. By default, the self-service portal retrieves resource usage from the cloud. These statistics
include processors in core, memory, and storage in megabytes. If the property is not set, a default of
60 seconds is used.
Results
After you configure usage metering, you can monitor the cloud resource usage from the self-service
portal by selecting Reports > Usage Metering. View details about a specific virtual server by selecting the
virtual server from the Usage metering grid.
For more information about using Usage Metering, see the IBM Cloud Manager with OpenStack User
Guide.
Configuring capacity and overcommit rates
The capacity in the IBM Cloud Manager with OpenStack self-service portal indicates the total and used
(or allocated) resources, including processors, memory, and storage.
The capacity view is enabled for all the supported virtualization environments. All x86 clouds support
resource overcommit by the hypervisors. Therefore, the total amount of virtual resources that can be
allocated are larger than the total physical resources available. Therefore, the self-service portal supports
the ability to set an overcommit rate to limit the resource use.
Note: Overcommit rate is not supported for PowerVC virtualization environments.
The overcommit rate is represented in the following fields:
v totalCpu - Represents the physical processor cores that are multiplied by the processor overcommit ratio
v totalMem - Represents the physical memory size that is multiplied by the memory overcommit ratio
Note: Overcommitted storage is not allowed.
The capacity API tells administrators the amount of physical resources, the amount of resources (after
overcommitted), and the resources that are allocated. The user interface shows the physical resource and
the overcommit rate only. It excludes the amount of resources after they are overcommitted.
To configure the overcommit rate, open the cloud.properties file and set the following properties:
# The cpu overcommit rate in OpenStack cloud
com.ibm.cfs.openstack.overcommit.cpu=16
# The memory overcommit rate in OpenStack cloud
com.ibm.cfs.openstack.overcommit.memory=1.5
# The cpu overcommit rate in VMware cloud
com.ibm.cfs.vmware.overcommit.cpu=10
# The memory overcommit rate in VMware cloud
com.ibm.cfs.vmware.overcommit.memory=1.5
com.ibm.cfs.openstack.overcommit.memory is invalid for hyper-v hypervisor.
The self-service portal checks whether there are sufficient available resources when deploying. If the
available resource is less than the requested resource, the self-service portal stops the deployment process.
This feature can be enabled or disabled by using the following property in the deployment.properties
file:
#Enable/Disable the capacitiy check against the selected target while deploying a workload.
com.ibm.cfs.resource.check.enable=true
Chapter 6. Configuring
201
Configuring web user interface
Configuring user interface widgets
The widgets in the web user interface of IBM Cloud Manager with OpenStack and the properties of the
widgets are configurable. Using configuration settings, you can control which widgets appear and in
what order they appear.
About this task
To configure user interface widgets for IBM Cloud Manager with OpenStack, perform the following steps:
Procedure
1. Open the web.properties file in the home directory.
2. Set the com.ibm.cfs.web.pods.order property to the names of widgets that are to be shown in the
IBM Cloud Manager with OpenStack user interface, in the order you want them displayed. The
names are not case-sensitive and must be separated by a comma. Possible names include the
following names:
v CloudStatus
v WorkloadsStatus
v ResourceUsageStatus
v RecentEvents
3. Set the properties of each widget. The following example shows a widget property configuration
example using the CloudStatus widget.
a. com.ibm.cfs.web.pods.cloudstatus.enabled=true
If the value is true, the CloudStatus widget is displayed in the IBM Cloud Manager with
OpenStack web user interface. If the value is false, the property is not specified in the file, or you
specify an incorrect value (truue) then the CloudStatus widget is not displayed.
b. com.ibm.cfs.web.pods.cloudstatus.closed
If the value is true, the CloudStatus widget is initially displayed in a collapsed form. Otherwise,
the CloudStatus widget is initially expanded in the IBM Cloud Manager with OpenStack web user
interface.
c. com.ibm.cfs.web.pods.cloudstatus.refresh.interval=30
The value of this property indicates how often the CloudStatus widget is refreshed. The value is
specified in seconds and must be an integer of 1 or higher.
Repeat these substeps for each additional named widget to be configured, including
WorkloadsStatus, ResourceUsageStatus, and RecentEvents. The following properties can be set:
WorkloadsStatus:
v com.ibm.cfs.web.pods.workloadsstatus.enabled
v com.ibm.cfs.web.pods.workloadsstatus.closed
v com.ibm.cfs.web.pods.workloadsstatus.refresh.interval
ResourceUsageStatus
v com.ibm.cfs.web.pods.resourceusagestatus.enabled
v com.ibm.cfs.web.pods.resourceusagestatus.closed
v com.ibm.cfs.web.pods.resourceusagestatus.refresh.interval
RecentEvents
v com.ibm.cfs.web.pods.recentevents.enabled
v com.ibm.cfs.web.pods.recentevents.closed
v com.ibm.cfs.web.pods.recentevents.refresh.interval
202
IBM Cloud Manager with OpenStack: Administrator Guide, version 4.2
4. Save the web.properties file and restart the IBM Cloud Manager with OpenStack server. The
properties of each widget take effect after the server is restarted.
Note:
v If a widget is not listed in com.ibm.cfs.web.pods.order and its property
com.ibm.cfs.web.pods.name.enabled is set to true, it is displayed in the IBM Cloud Manager with
OpenStack user interface after all the widgets specified in the com.ibm.cfs.web.pods.order
property.
v If the web.properties file does not exist, all user interface widgets show by default.
Configuring session timeout
You can configure how long a web interface session for an IBM Cloud Manager with OpenStack user can
remain inactive before the session times out.
About this task
To configure the timeout value, follow these steps:
Procedure
1. Open the web.properties file in the home directory.
2. Set the com.ibm.cfs.client.idle.timeout property to the number of minutes for which the session is
allowed to be inactive. The number must be a positive number and greater than one. After the
specified amount of time passes, the user session with IBM Cloud Manager with OpenStack expires.
If the property is set to -1, the user session with IBM Cloud Manager with OpenStack never expires.
3. Save the web.properties file and restart the IBM Cloud Manager with OpenStack server. The property
takes effect after the server is restarted.
Note: If com.ibm.cfs.client.idle.timeout property is not present or is set to an invalid value, a
default value of 30 minutes is used.
Configuring the Welcome page
You can configure IBM Cloud Manager with OpenStack to display the welcome page for all users.
Procedure
1. Open the web.properties file in the home directory.
2. To display the welcome page for all users, set the com.ibm.cfs.web.welcomepage.enabled property to
true.
3. Save the web.properties file and restart the IBM Cloud Manager with OpenStack server. The property
takes effect after the server is restarted.
Note: If com.ibm.cfs.web.welcomepage.enabled property is not present or is set to an invalid value,
the welcome page is displayed.
Configuring the default instance name
You can configure IBM Cloud Manager with OpenStack to use a default instance name when deploying
an image. If you set this property to true, a default instance name based on the image name that is being
deployed is generated; otherwise no default is used.
Procedure
1. Open the web.properties file in the home directory.
2. To set the default instance name to the image name being deployed, set the
com.ibm.cfs.web.workloadname.default.enabled property to true.
Chapter 6. Configuring
203
3. Save the web.properties file and restart the IBM Cloud Manager with OpenStack server. The property
takes effect after the server is restarted.
Note: If com.ibm.cfs.web.workloadname.default.enabled property is not present or is set to an
invalid value, the default name is set.
Configuring IBM Cloud Manager with OpenStack dashboard properties
You can configure various web interface properties for the IBM Cloud Manager with OpenStack
dashboard.
After you successfully install IBM Cloud Manager with OpenStack, you can customize the IBM Cloud
Manager with OpenStack dashboard to manage your cloud. For information about customizing the
dashboard settings and configuration, see Horizon Settings and Configuration Documentation.
Rebranding the dashboard
IBM Cloud Manager with OpenStack provides a recipe to customize the branding that is applied to the
dashboard.
The branding information must be contained in a compressed file. For example, openstackbranding.tar.gz. The compressed file content is a folder that contains up to three items:
v A file that is named product_name.txt that contains the dashboard name on the first line.
v A folder that is named icons that contains custom icons that override the default icons.
v A folder that is named styles that contains custom style sheets to be applied to the dashboard.
Here is an example branding folder structure:
branding
|-- product_name.txt
|-- icons
| |-- favicon.png
| |-- logo.png
| |-- logo-splash.png
|-- styles
| |-- custom_1.css
| |-- custom_2.scss
To create the tar file, put the branding files into a local directory structure as noted above.
1. Change the active directory to the branding directory.
2. Run cd branding.
3. Run the tar command: tar -czf ../openstack-branding.tar.gz *.
4. Make tar file available to Chef server.
5. Add the ibm-os-dashboard-branding role to the end of the run list of the controller node which is
running Horizon and is to be re-branded
6. Update the node. See steps in the “Updating a deployed topology” on page 149 topic.
Changing the dashboard name
You can change the dashboard name by providing a product_name.txt file. The first line of this file is
used in the page title and displayed on the Login page and in the page header.
204
IBM Cloud Manager with OpenStack: Administrator Guide, version 4.2
Changing Icons
You can change the icons that are displayed in the dashboard by providing custom icons in the icons
folder. The content of this folder is copied into the dashboard icons directory, overwriting any existing
icons. To override an icon, provide an icon of the same name in the icons folder. You might change the
following icons for rebranding purposes:
v favicon.png: The favicon image that is displayed in the browser.
Note: The favicon.ico file is not used.
v logo.png: The logo that is displayed in the page header.
v logo-splash.png: The logo that is displayed on the Login page
The dashboard icons are in /usr/share/openstack-dashboard/openstack_dashboard/static/dashboard/
img.
Providing Custom Style sheets
You can provide custom style sheets by placing them in the styles folder. The supported style sheet types
include SCSS (.scss extension) and CSS (.css extension). Files of any other extension type are ignored.
Multiple style sheets are applied in alphanumeric order. For example, a style sheet that is named
custom1.css is applied before a style sheet named custom2.css.
Changing the Custom Branding
You can change or remove any custom branding that is applied to the dashboard by running the
dashboard branding recipe again using different branding information. To remove a previously applied
customization, omit the customization information from the provided branding folder. For example, to
return the icons back to the default, run the branding recipe using a branding folder that does not
contain an icons folder. By using an empty branding folder, all customizations are removed.
Chapter 6. Configuring
205
206
IBM Cloud Manager with OpenStack: Administrator Guide, version 4.2
Chapter 7. Managing IBM Cloud Manager with OpenStack as
an Administrator
Use the following information for working with IBM Cloud Manager with OpenStack. The management
tasks vary depending on the IBM Cloud Manager with OpenStack role and access level you are using.
Select the content that applies below, depending on whether you log in as an Administrator or a User.
Configuring the license key
The IBM Cloud Manager with OpenStack product includes a default trial license, with a 90-day trial
period. You can use this license to investigate IBM Cloud Manager with OpenStack.
About this task
To update the license, follow these steps:
Procedure
1. Copy the cmwo_4.2.lic file from the IBM Cloud Manager with OpenStack installation media to the
deployment server system.
2. To apply the permanent license, run the following command:
/opt/ibm/cmwo/bin/cmwo_lic.sh -a /product_dir/cmwo_4.2.lic
where product_dir is the directory to which you copied the cmwo_4.2.lic file.
Results
If the license is valid, you receive a message that states the update was successful. If it is not valid, you
receive a message that states the license is invalid.
Related reference:
“License information” on page 6
Learn about license information for the IBM Cloud Manager with OpenStack product.
Managing IBM Cloud Manager with OpenStack services
Use this information to see which services run in your IBM Cloud Manager with OpenStack topology
deployment. Additionally, learn to check the status of services and restart services.
Checking status of OpenStack services
After an IBM Cloud Manager with OpenStack topology is deployed, you can check the status of the IBM
Cloud Manager with OpenStack services. You can use the OpenStack Dashboard or issue an IBM Cloud
Manager with OpenStack command to check more detailed status.
About this task
To check the services status with OpenStack Dashboard, log in and select Admin > System Panel.
If you want a more detailed status check of the IBM Cloud Manager with OpenStack services, issue the
following command for each node in your topology deployment.
$ knife os manage services status –-node your-node-FQDN
The status of all IBM Cloud Manager with OpenStack services on the node is displayed.
© Copyright IBM Corp. 2012, 2014
207
Alternatively, issue the following command to get detailed status for each node in a known topology by
using a topology JSON file:
$ knife os manage services status –-topology-file your-topology-name.json
The status of all IBM Cloud Manager with OpenStack services on all of the nodes is displayed.
Restarting IBM Cloud Manager with OpenStack services
If you need to restart services for IBM Cloud Manager with OpenStack, use the IBM Cloud Manager with
OpenStack services command and specify the restart action. You can use the command to restart IBM
Cloud Manager with OpenStack services on a specific node or on all nodes in a topology.
About this task
To restart the IBM Cloud Manager with OpenStack services, issue the following command for any node
in your topology deployment:
$ knife os manage services restart –-node your-node-FQDN
All IBM Cloud Manager with OpenStack services on the node are restarted.
If you restart an OpenStack controller node, you should also restart the IBM Cloud Manager with
OpenStack services on all of the OpenStack compute nodes in the topology. Issue the knife os manage
services restart command for each OpenStack compute node to restart the services on each compute
node in the topology.
Alternatively, issue the following command to restart the IBM Cloud Manager with OpenStack services in
the proper order for each node in a known topology by using a topology JSON file:
$ knife os manage services restart –-topology-file your-topology-name.json
All IBM Cloud Manager with OpenStack services on all nodes in the topology are restarted in the proper
order.
Related concepts:
“Updating a deployed topology” on page 149
After you deploy a topology, you might need to apply fixes, either to the IBM Cloud Manager with
OpenStack services themselves or to how the IBM Cloud Manager with OpenStack services are deployed.
IBM Cloud Manager with OpenStack services
The IBM Cloud Manager with OpenStack services provided throughout your topology deployment are
determined by the roles that are defined for each node.
Overview
The following lists detail the services that are provided by each role. The services are listed in their start
order. If you stop services, you must stop the services in reverse order. If you need to restart database
services, then all services on the OpenStack controller node must be stopped before the database services
can be restarted. In addition, if you need to restart the Qpid (or RabbitMQ) messaging service, then the
services running on the OpenStack compute nodes must also be restarted.
Note: Nodes that have the Hyper-V agent installed are not assigned a role. For more information about
managing the IBM Cloud Manager with OpenStack services that are running on Hyper-V agent nodes,
see Installing and uninstalling the IBM Cloud Manager with OpenStack Hyper-V Agent.
The following roles run the same services as other roles that are described in detail below.
208
IBM Cloud Manager with OpenStack: Administrator Guide, version 4.2
ibm-os-allinone-kvm
Runs the same services as the ibm-os-single-controller-node role followed by the
ibm-os-compute-node-kvm role.
ibm-os-single-controller-node
Runs the same services as the ibm-os-database-server-node and ibm-os-messaging-server-node
roles followed by the ibm-os-single-controller-distributed-database-node role.
ibm-os-single-controller-powervc-driver
Runs the same services as the ibm-os-single-controller-node role followed by the
ibm-os-powervc-driver-node role.
ibm-os-single-controller-distributed-database-node
memcached
openstack-keystone
openstack-iaasgateway
openstack-glance-api
openstack-glance-registry
neutron-server
neutron-openvswitch-agent
neutron-dhcp-agent
neutron-lbaas-agent
neutron-l3-agent
neutron-vpn-agent
openstack-nova-conductor
openstack-nova-api
openstack-nova-scheduler
openstack-nova-cert
openstack-nova-novncproxy
openstack-nova-consoleauth
openstack-cinder-volume
openstack-cinder-api
openstack-cinder-scheduler
openstack-heat-api
openstack-heat-api-cfn
openstack-heat-api-cloudwatch
openstack-heat-engine
openstack-ceilometer-api
openstack-ceilometer-central
openstack-ceilometer-collector
openstack-ceilometer-notification
openstack-ceilometer-alarm-evaluator
openstack-ceilometer-alarm-notifier
httpd
Note:
v The neutron-l3-agent service is only present if the Neutron L3 agent setting is enabled with the
environment override attribute ibm-openstack.network.l3.enable = true and the VPN setting is
disabled with the environment override attribute openstack.network.enable_vpn = false.
v The neutron-vpn-agent service is only present if the VPN setting is enabled with the environment
override attribute openstack.network.enable_vpn = true.
ibm-os-compute-node-kvm
neutron-openvswitch-agent
openstack-nova-compute
openstack-ceilometer-compute
ibm-os-compute-node-powerkvm
Runs the same services as the ibm-os-compute-node-kvm role.
Chapter 7. Managing as an Administrator
209
ibm-os-zvm-driver-node
neutron-zvm-agent-*
openstack-nova-compute-*
Note: neutron-zvm-agent-* stands for all Neutron z/VM agent services that have the prefix
neutron-zvm-agent-. Each Neutron z/VM agent service is named neutron-zvm-agent-#{host}, and each
#{host} corresponds to its attribute ibm-openstack.zvm-driver.#{host} that is set by ibm-openstack.zvmdriver.hosts in Chef.
openstack-nova-compute-* stands for all Nova compute services that have the prefix openstack-nova-compute-.
Each Nova compute service is named openstack-nova-compute-#{host}, and each #{host} corresponds to its
attribute ibm-openstack.zvm-driver.#{host} that is set by ibm-openstack.zvm-driver.hosts in Chef.
ibm-os-powervc-driver-node
openstack-glance-powervc
openstack-cinder-powervc
openstack-neutron-powervc
openstack-nova-powervc
ibm-os-database-server-node
# When DB2 database is used.
db2.service
db2.nosql.service
# When MySQL database is used:
mysqld
ibm-os-messaging-server-node
# When Qpid messaging service is used:
qpidd
# When RabbitMQ messaging service is used:
rabbitmq-server
ibm-sce-node
sce
ibm-os-prs-ego-master
ego
ibm-os-prs-controller-node
openstack-nova-ibm-notification
openstack-nova-ibm-ego-resource-optimization
openstack-nova-ibm-ego-ha-service
ibm-os-block-storage-node
openstack-ceilometer-compute
openstack-cinder-volume
tgtd
Related reference:
“Roles” on page 287
The following roles are provided in support of the reference topologies.
210
IBM Cloud Manager with OpenStack: Administrator Guide, version 4.2
Managing with the IBM Cloud Manager with OpenStack self-service
portal (Administrator access)
With the Administrator role in the IBM Cloud Manager with OpenStack self-service portal, you perform
tasks such as configuring clouds, creating projects, and managing images, instances, and requests.
For information about using the self-service portal as a non-administrative user, see the Managing as a
User (self-service portal) section.
Starting and stopping IBM Cloud Manager with OpenStack self-service
portal
The following steps are required for starting IBM Cloud Manager with OpenStack self-service portal.
Note: When you start or restart the self-service portal on a high scale cloud, the synchronization between
the self-service portal and the cloud might take longer than expected. This resynchronization might cause
operations such as deploying, deleting, or resizing an instance to be delayed or even fail. Wait for the
synchronization to complete before you attempt these actions.
Starting and stopping IBM Cloud Manager with OpenStack self-service portal on
Linux
The IBM Cloud Manager with OpenStack self-service portal installation on Linux can be started by the
root user or by users who are members of the sce group.
After the self-service portal on Linux is installed, the self-service portal service is started. You can check
the self-service portal status on your controller node with the service sce status command.
Use the following commands to start, stop, and restart the self-service portal service on Linux:
v Start the self-service portal: service sce start
v Stop the self-service portal: service sce stop
v Restart the self-service portal: service sce restart
Access the self-service portal user interface by opening https://localhost:18443/cloud/web/index.html
in a supported browser.
Note: The host name localhost and port 18443 are the default host and port names. Substitute the
appropriate values for your environment if necessary.
Configuring the default administrator user account and changing
password
The default administrator account is created the first time the IBM Cloud Manager with OpenStack
self-service portal is started. As administrator, configure the default administrator user account to receive
email and notification from users.
About this task
To modify the default administrator user account, follow these steps:
Procedure
1. In the self-service portal, log in as the cloud administrator.
2. Select Cloud Administrator in the upper right title bar of the screen, and click Show user
preferences.
Chapter 7. Managing as an Administrator
211
3.
4.
5.
6.
7.
On the User Profile dialog, enter the administrator email address.
Check Send notifications about instances and other events.
Verify the Timezone and Language for the administrator.
To change the Cloud Administrator password, click Change Password.
Click Update.
Configuring LDAP authentication using the web interface
Use the web interface to configure IBM Cloud Manager with OpenStack self-service portal as an LDAP
client.
Procedure
1. Log in to the self-service portal as an administrator.
2. Click the Configuration tab and select LDAP in the navigation pane.
3. Click Edit and enter the configuration settings to specify how to connect to the LDAP host.
LDAP provider hostname
The fully qualified server host name or IP address of the LDAP host.
Port
The port number of the LDAP service on the host for either transaction level security (TLS) or
for no security protocol. The default port number is 389.
Security Protocol
The self-service portal allows transaction level security (TLS) to be used.
Certificate
If transaction level security is used, you must provide the certificate (public key) used by the
LDAP server for securing the connection. For information about obtaining a certificate, see
your LDAP server documentation.
LDAP search DN
This is the distinguished name that should be used to connect to the LDAP host to perform a
directory search, for example cn=Administrator,cn=users,dc=cfs1,dc=us
Note: This field might be required based on the configuration of the LDAP server. For
example, if the LDAP server does not support anonymous bind, or if you specify transaction
level security (TLS) for the Security Protocol, this field is required. If the LDAP search DN is
required, the ID must have read authority on the LDAP server.
Password
This is the password that is associated with the LDAP search DN.
Note: This field is required if the LDAP search DN is required.
Search filter
This is the filter that is used to authenticate users when they log in. Include the special value
{FILTER} in the filter to specify where the user ID that is provided during the login should be
substituted. For example, (|(userPrincipalName={FILTER}))
Search context
The search context for providing the LDAP lookup.
User ID attribute
The name of the LDAP field to use as the user ID in the self-service portal.
User name attribute
The name of the LDAP field to use as the user name in the self-service portal.
Email address attribute
The name of the LDAP field to use as the email address in the self-service portal.
212
IBM Cloud Manager with OpenStack: Administrator Guide, version 4.2
4. Click Save.
5. Restart the self-service portal service for the settings to take effect.
Example
The following examples show settings for different connections:
v Example 1: Non secure connection (transaction level security is disabled)
LDAP provider hostname
your.host.com.
Port
389
Security Protocol
None
LDAP search DN
cn=Manager,dc=sce,dc=com
Password
password
Search filter
(|(cn={FILTER}))
Search context
ou=People,dc=sce-svt,dc=com
User ID attribute
uid
Username attribute
cn
Email addressattribute
mail
v Example 2: Transaction level security is enabled
LDAP provider hostname
your.host.com.
Port
389
Security Protocol
Transaction level security (TLS)
Certificate
certificate_file.cer
LDAP search DN
cn=Manager,dc=sce,dc=com
Password
password
Search filter
(|(cn={FILTER}))
Search context
ou=People,dc=sce-svt,dc=com
User ID attribute
uid
Chapter 7. Managing as an Administrator
213
Username attribute
cn
Email addressattribute
mail
What to do next
Notes:
v The self-service portal cannot be returned to use local authentication (non-LDAP authentication)
through the web interface. If it is necessary to restore local authentication, see Configuring local
authentication for more information. Local authentication is intended only for non-production
environments such as for a proof of concept or for performing a demo.
v If you want to enable user name case sensitivity, you must update the ldap.xml file after setting the
initial LDAP configuration in the web interface. For more information, see “Configuring LDAP
authentication manually” on page 166 for more information.
Managing images
In the Images tab, you can manage and configure the images that are available for deployment. You can
view image properties and deploy images.
In IBM Cloud Manager with OpenStack, each image has a status that is associated with it. If the status is
OK, then the image is ready to be deployed. Click the refresh arrow to update the status.
To view the properties of an image, click the name of the image.
If the list of images does not contain the image that you want, ensure that the current cloud, project, and
architecture filters are set correctly.
Building images
Building images manually is a complex and error-prone process. By pre-building images from specific
software bundles for reuse by others, administrators can streamline this process. There are several
different ways of building images.
Building images with VMware Studio
VMware Studio and the OVF Toolkit simplify the process of image creation. The images that are
created in VMware Studio can be imported and deployed by using vSphere Client. For more
information about using VMware Studio, see VMware Studio Documentation at
http://www.vmware.com/support/developer/studio/.
Building images manually
You can choose to build images manually using open source tools. This method requires
significant virtualization and image configuration (for example, OVF, Sysprep or cloud-init)
experience.
For more information about creating OpenStack compatible images, see Create images manually
in the OpenStack documentation.
Importing images (OpenStack only)
Using IBM Cloud Manager with OpenStack, you can import images to an OpenStack cloud.
About this task
You can use existing OpenStack compatible images. For more information about creating OpenStack
compatible images, see Create images manually in the OpenStack documentation.
214
IBM Cloud Manager with OpenStack: Administrator Guide, version 4.2
IBM Cloud Manager with OpenStack supports OpenStack images with the following disk formats
supported by different hypervisor types.
Table 58. Supported disk formats by hypervisor
Disk Format
Hyper-V
KVM
PowerKVM
PowerVC
Details
VHD
Y
N
N
N
Microsoft virtual
hard disk format
RAW
N
Y
Y
Y
Raw virtual
machine disk
format
QCOW2
N
Y
Y
N
QEMU disk
format
VMDK
N
Y
N
N
VMware virtual
machine disk
format
AMI/AKI/ARI
N
Y
N
N
Amazon
machine/kernel/
ramdisk disk
format
ISO
N
N
N
N
Disk format with
an optical disk
file system
VDI
N
N
N
N
Virtual desktop
infrastructure
disk format
IBM Cloud Manager with OpenStack supports OpenStack images for one of the following guest
operating systems:
Table 59. Supported guest operating systems by hypervisor
Guest
operating
system
Hyper-V
KVM
PowerKVM
PowerVC
VMware
z/VM
Windows
Y
Y
N
N
Y
N
Y
Y
N
N
Y
N
v Windows 8
v Windows 7
v Windows
Server 2012
R2
Linux
v Red Hat
Enterprise
Linux 6.5
v SUSE Linux
Enterprise
Server 11.2
Chapter 7. Managing as an Administrator
215
Table 59. Supported guest operating systems by hypervisor (continued)
Guest
operating
system
Linux on
Power
Hyper-V
KVM
PowerKVM
PowerVC
VMware
z/VM
N
N
Y
Y
N
N
SUSE Linux
Enterprise
Server 12 LE
(PowerKVM
2.1.1 only)
v Red Hat
Enterprise
Linux 5.9
v Red Hat
Enterprise
Linux 6.5
v SUSE Linux
Enterprise
Server 11
SP3
v SUSE Linux
Enterprise
Server 12 LE
(PowerKVM
2.1.1 only)
N
N
N
N
N
Y
N
N
N
Y
N
N
IBM i
N
N
N
N
N
N
Ubuntu
Y (Ubuntu
12.10 only)
Y (Ubuntu
12.10 only)
Y (Ubuntu
14.04 LE only)
N
Y (Ubuntu
13.10 only)
N
Linux on IBM
System z
v Red Hat
Enterprise
Linux 6.5
v SUSE Linux
Enterprise
Server 11.2
AIX
v AIX 6.1, TL
9
v AIX 7.1, TL
3
v Ubuntu
12.10
v Ubuntu
13.10
v Ubuntu
14.04 LE
Notes:
v The imported image file is stored in the OpenStack cloud and not in the IBM Cloud Manager with
OpenStack database.
v An image with the VMDK disk format must have its disk that is contained in a single VMDK file.
v IBM Cloud Manager with OpenStack does not support directly deploying images with the AKI and
ARI disk formats. Such images are deployed with an AMI disk formatted image. As a result, images
with the AKI and ARI disk formats have an Undeployable state in IBM Cloud Manager with
OpenStack.
216
IBM Cloud Manager with OpenStack: Administrator Guide, version 4.2
v IBM Cloud Manager with OpenStack does not support importing images for deployment to PowerVC.
Only the PowerVC images that were synchronized into the OpenStack cloud and made available to
IBM Cloud Manager with OpenStack can be deployed to PowerVC. For information about working
with PowerVC images, see the IBM Power Virtualization Center Standard information center:
http://www.ibm.com/support/knowledgecenter/SSXK2N_1.2.1/com.ibm.powervc.standard.help.doc/
powervc_images_hmc.html.
Procedure
1. In the IBM Cloud Manager with OpenStack interface, click the Images tab.
2. Click More and choose Import image... from the menu to open the Import Image window.
3. Update the cloud, project, image name, disk format, and container format for the image being
imported.
Note: When the AMI disk format is selected, you can select the associated AKI (kernel image) and
ARI (ramdisk image) disk formatted images. If these images have not been imported, then you can
edit these image properties later.
4. Update the hypervisor type for the image being imported. The hypervisor type might have a default
value set based on the disk format selected. If the image does not have a specific hypervisor type
requirement, then select the “Not Specified” option. If a specific hypervisor type is selected and there
is no hypervisor in the OpenStack cloud that has a matching type, the image is not deployable.
5. Optional: If the image has a minimum memory or storage size requirement, update the minimum
memory (MB) and minimum storage (GB) fields.
Note: By default, OpenStack uses the size of the image as the minimum storage size requirement
when deploying the image. This default is often sufficient. However, if the image uses a compressed
disk format, such as QCOW2, then the minimum storage size requirement should be set to the
decompressed image size.
6. Optional: If the image has specific OpenStack architecture requirements, update the architecture fields.
7. Click Import.
Note: When you upload an image file using some older browser versions, space for the image file is
required in the server temp directory. This temporary file is deleted when the upload completes. If the
upload does not complete successfully, it is possible that the temporary file is not deleted
automatically. If you must use an older browser, place the image file in a location where it can be
imported using a URL.
Results
After the image is successfully imported, you can edit a subset of the image properties. For more
information on editing OpenStack image properties, see Editing image properties (OpenStack only).
If an image is not deployable after it is imported, check the log entries for the image for more
information. You might must modify the image properties to make the image deployable.
Related reference:
Building images
This topic contains more information about building images.
Related information:
Getting virtual machine images
This site contains example images that are compatible with OpenStack.
Editing image properties (OpenStack only)
IBM Cloud Manager with OpenStack supports viewing and editing a subset of the properties that are
stored with an image in the OpenStack cloud.
Chapter 7. Managing as an Administrator
217
Procedure
1. In the IBM Cloud Manager with OpenStack web interface, click an image to view or edit the
properties of that image.
2. The following basic OpenStack image properties can be edited: name, disk format, container format,
minimum memory (MB), and minimum storage (GB).
3. Optional: You can also view, create, update, and delete additional OpenStack image properties. The
additional properties might include architecture, hypervisor_type, kernel_id, ramdisk_id, os_version
or os_distro. For more information about OpenStack image properties, see the OpenStack Compute
Administration Guide at http://docs.openstack.org/admin-guide-cloud/content/section_imagemgmt.html.
Some of the additional OpenStack image properties are specific to certain OpenStack hypervisor types.
For example, the KVM hypervisor supports the hw_vif_model, hw_disk_bus and hw_cdrom_bus
properties. For more information about these properties, see Libvirt Custom Hardware Configuration
at https://wiki.openstack.org/wiki/LibvirtCustomHardware.
Notes:
v An image configuration strategy is part of the additional OpenStack image properties. However, the
configuration strategy cannot be viewed or edited with this task.
v To deploy an image to an OpenStack KVM hypervisor, the qemu value is used for the
hypervisor_type property of the image.
Updating an image configuration strategy (OpenStack only)
IBM Cloud Manager with OpenStack supports adding, updating, and deleting the configuration strategy
for an image in an OpenStack cloud.
About this task
The configuration strategy is stored with the image in the OpenStack cloud.
Procedure
1. Select the image that you want to update.
2. Click More and choose Configuration Strategy... from the menu.
3. Click Edit.
Note: If a configuration strategy exists, a Delete button is provided to delete the existing
configuration strategy. The Edit button can be used to add or update the configuration strategy.
4. Update the configuration strategy type, template, user metadata, and mapping for the image.
5. Click Save.
Note: After you update the configuration strategy, reset the image configuration in order for the
updated configuration strategy to be applied when you configure or deploy the image.
Related tasks:
“Configuring images with OpenStack” on page 184
The following topics cover information to configure images in an OpenStack environment.
Creating a VMware linked virtual machine
Linked virtual machines can be created from a snapshot or from the current running point. A linked
clone is a virtual machine whose disks are linked with the template that it was cloned from. Duplicated
data is shared between the linked virtual machine and the template. Linked clones deploy much faster
because most of the disk data does not have to be copied.
218
IBM Cloud Manager with OpenStack: Administrator Guide, version 4.2
About this task
You can use any image (or template) to create a linked virtual clone. To create a linked virtual clone,
follow these steps:
Procedure
1. Open IBM Cloud Manager with OpenStack and select Images.
2. Select the image that you want to clone and select Deploy > Advanced.
3. On the Advanced Deployment window, select the option to Link virtual machine to image.
What to do next
Note:
v The creation of a linked clone requires the image to contain a virtual machine snapshot. If the image
used to create a linked clone does not have a virtual machine snapshot, IBM Cloud Manager with
OpenStack creates a virtual machine snapshot for the image before the linked clone is created.
v If an image already has a virtual machine snapshot, IBM Cloud Manager with OpenStack does not
create a new snapshot, but instead uses the current snapshot. Changes that are made to the template
might not be reflected, since the clone operation is based on the snapshot and any future changes you
make are outside of the snapshot If you must change the template, create a new snapshot that includes
your changes.
v Storage DRS supports linked clones starting in VMware vSphere version 5.1. However, Storage DRS is
not always able to make a recommendation to place linked clones on a datastore. As a result, an
attempt to deploy a linked clone to a storage DRS cluster results in the creation of a full clone, and a
warning message in the log that a linked clone was not created.
v The disks of a linked clone cannot be resized. Any attempt to resize a linked disk at deployment time
results in an error.
v The datastores of the image must be accessible by the deployment target or the virtual machine cannot
be linked to the image. In this case, IBM Cloud Manager with OpenStack deploys a full clone.
v You cannot unlink a linked clone from the image.
Configuring image deployment properties
Image deployment customization properties that you want to apply to individual images must be
configured through the IBM Cloud Manager with OpenStack web user interface. IBM Cloud Manager
with OpenStack enables you to save these properties in advance so that your users do not have to know
all the internal and advanced deployment details.
About this task
To set global image deployment properties, see “Configuring global image deployment” on page 173.
The values that are set in the global image deployment properties are used when deploying an image
unless individual deployment properties are set for an image. The values that are set for an individual
image are used unless they are explicitly overridden when deploying an image. Administrators can set
which values are displayed in the basic deployment or even allow users to set advanced deployment
properties. For more information about allowing users to view advanced form, see “Configuring access to
advanced deployment form” on page 175.
Note: Global configurations are refreshed only when manually reset or when the deployment target
changes.
To configure image default deployment customization properties to be used when deploying it from IBM
Cloud Manager with OpenStack, complete the following steps:
Chapter 7. Managing as an Administrator
219
Procedure
1. In the IBM Cloud Manager with OpenStack interface, click the Images tab.
2. Click the name of the image that you want to configure.
Note: If the image that you want is not available, make sure that the correct cloud, architecture, and
project are specified.
3. Click Configure.
4. Complete the default customization for the image properties. These properties are divided into several
groups, including: Hardware, Software, Network, Storage, Image Target and Other Settings,
depending on the type of image that you select.
Note: Changes that were made in the cloud since the image was added, such as networks that were
created or removed, might not display on the Configure Image panel. To ensure that the current cloud
settings are available to configure the image, click Reset to Defaults.
v Hardware
Notes:
– For OpenStack you can control the size of the virtual machine that is deployed from an image by
the flavor that you select. Only flavors that meet the disk and memory size requirements for the
image are listed as options.
– For Power Systems that are running in shared mode, the minimum, desired, and maximum
number of both shared virtual processors and shared processing units are paired. For each paired
value, take care to ensure that values are set correctly. The number of processing units must be
less than or equal to the number of virtual processors. However, the processing units, multiplied
by 10, must be greater than or equal to the number of virtual processors.
For example, if the minimum number of virtual processors is 1, then the minimum number of
processing units must be less than or equal to 1 (between 0.1 and 1), and must also be greater
than or equal to 1 when it is multiplied by 10.
Figure 3. Processor settings
v Software
v Network
Notes:
– You can click Show settings for each network configuration setting to display configurable
options. For Power Systems, VLAN configuration is available in the Adapter network
configuration section. (For OpenStack images, Show settings is not shown or valid.)
– The NONE value indicates that no network configuration is applied to the settings, in which case
the values should be entered manually. (For OpenStack images, NONE is not shown or valid.)
220
IBM Cloud Manager with OpenStack: Administrator Guide, version 4.2
– When a network configuration (including NONE) is selected for use, all settings in the subsection
are cleared, indicating they draw from the configuration specified.
– When a network configuration is applied, individual settings can be specified manually by
providing a value for the setting and therefore overriding the setting that is specified in the
network configuration. Any settings that are blank are taken from the configuration settings. (For
OpenStack networks, individual network settings cannot be specified.)
v Storage
Notes:
a. The Virtual disk options for an add disk request option is for adding a disk during the
image deployment and is specific to a VMware cloud. This option is an ordered and
colon-separated list of virtual disk options. The default value for an optional virtual disk option
is an empty string. The options are parsed in the following order:
Disk size in MB (Required)
This option is parsed as a long.
Thin provisioned (Optional)
This option is parsed as a boolean. The default value is false which specifies thick
provisioned status.
Eagerly scrub (Optional)
This option is parsed as a boolean. The default value is false which specifies that the
underlying file system determines the scrub status.
Datastore (Optional)
This option is parsed as a string. The default value is null which specifies that you want
to use the same datastore as the datastore that is used by the main disk of the virtual
machine. Input value sample:
The following is an example of this option:
1:true:false:datastore_01
b. To configure the maximum number of disks that are allowed or the maximum size of the disks,
see “Configuring the number and maximum size of additional storage” on page 176.
v Image target
v Other Settings
5. Depending on the image, you might be able to enter the root password for the server that is
provisioned by this image, such that users that deploy the image receive the root password in an
email notification.
6. Optionally, you can select specific image customization properties to display to a user on the basic
deployment form.
a. Select the Show basic deploy panel settings check box at the top of the configuration panel.
b. For individual customization properties, select the associated Show in basic deploy settings check
box. This option causes the property to be displayed when a user brings up the basic deployment
form for this image. Check only those properties that you want a user to customize, for example,
passwords or port numbers for a specific software product included in the image.
7. Select Save.
Note: You can reset an image customization to its original configuration by clicking Reset to
Defaults.
Deploying an image
You can deploy an image with either basic configuration options or advanced configuration options.
Advanced configuration options are only available if the administrator enables them for your
environment.
Chapter 7. Managing as an Administrator
221
Procedure
1. Click the name of the image you want to deploy.
2. In the Image Details properties page, click Deploy.
Note: The IBM Cloud Manager with OpenStack cloud administrator can configure IBM Cloud
Manager with OpenStack to allow users to use the advanced deployment form when deploying an
image. Click More > Advanced deploy to display the advanced deployment form.
Basic deployment
With a basic deployment, minimal configuration options, including name, description, project,
flavors (if you are using OpenStack), processor information, memory, and key pairs (if you are
using OpenStack and at least one key pair is configured for the user) are displayed.
Advanced deployment
Advanced deployment makes a number of different settings available when an
image is deployed. For example, with advanced deployment a user can configure setting like
networking, storage, and software configuration values. To enable access to these functions,
you can do one of the following:
v Make the advanced deployment form available to all users.
v Choose specific values for an image by selecting the corresponding check box and exposing
that on the basic deployment.
For more information about enabling advanced deployment options for users, see
“Configuring image deployment properties” on page 219.
With advanced deployment, administrators can configure the options, so users can suspend
and resume instances. The VMware and OpenStack Linux Kernel-based Virtual Machine
(KVM) and Hyper-V environments support the suspend action by default.
If you enable the multiple instances on a single deployment operation, users can deploy
multiple instances through a single deployment. The deployed instances use the deployment
name as the prefix of each single instance. The new names also use -x as the suffix, where x is
the index of that instance.
If the deployment approval process is enabled, you receive a single approval request. You can
change the number of deployment instances while you review the request. The metering and
billing functions remain for each of the single deployment instances. When deploying
multiple instances on a single deployment, the instances of this deployment are not displayed
immediately after you click Deploy or Approve.
You can also set fields, such as Virtual Machine Customization, Virtual Machine Personality
Files, and more.
Note:
v Only the members of the selected project can see the instance that is created as a result of the image
deployment.
v If approvals are enabled, deployment does not begin until the request is approved by the
administrator.
v If billing is enabled, you must be a member of an account that is not delinquent for the deployment
to proceed.
v The expiration period and approvals policy settings for deployment depends on the policies that
are set for the cloud. If more detailed expiration and approvals are set for the project where the
image is being deployed, the policies for the project are applied.
v If you are deploying multiple instances, IBM Cloud Manager with OpenStack deploys the instances
one by one. If you restart IBM Cloud Manager with OpenStack before all the deployments are
complete, the deployments that are not started will not be deployed. For example, if there are five
222
IBM Cloud Manager with OpenStack: Administrator Guide, version 4.2
instances to be deployed and three of them are complete and one is in progress when IBM Cloud
Manager with OpenStack is restarted, the fourth instance will be deployed, but the fifth instance
will not be deployed.
v If you are deploying an image on z/VM through OpenStack, the instance must have at least one
network configuration assigned to the management network. This is because the Extreme Cloud
Administration Toolkit (xCAT) is in the management network and the instance must be in the same
network as the xCAT, or the deployment will fail.
Use the Advanced Deploy option and select the first network configuration that is displayed in the
IBM Cloud Manager with OpenStack user interface for the management network.
Copying image definitions
Rather than copy an entire image, you can create image copies by using just the metadata of the image.
About this task
By copying the metadata, you can make the same image available to multiple projects or provide
multiple alternative configurations of the same base image. You can use the Configure Image window to
modify various configuration settings for the copies. The copy image function is enabled for
administrators and for project owners for images within their project.
When you copy an image definition, only the image metadata that is stored in the IBM Cloud Manager
with OpenStack database is copied. As a result, any metadata that is stored with the image in the cloud is
common across the base and copied images. For example, the configuration strategy for an OpenStack
image is metadata that is stored with the image in the cloud. Therefore, the same configuration strategy
is used for the base and copied images. For more information about OpenStack configuration strategies,
see Configuration strategies.
Note: If you delete the base image, then all copied image configurations are also deleted.
To copy an image definition, perform the following steps:
Procedure
1. On the IBM Cloud Manager with OpenStack page, click the Images tab.
2. On the Images page, click the base image name that you want to copy.
3. Click Copy to enter the image name and description that you want to assign to the copied image.
What to do next
Now you can configure the copied image and move it to different project if desired.
Viewing image properties
You can view image properties such as the image name, description, last modification date, specification
version, revision comments, and logs. As an administrator, or if you have project owner authority, you
can also make copies of the image, view related images (images that share the same base image), and
modify the image name, description, and project.
About this task
Click the image to view or edit the details of that image. Remember that modifications that you make to
an image in IBM Cloud Manager with OpenStack might not be reflected in the underlying virtualization
infrastructure.
Deleting images
Using IBM Cloud Manager with OpenStack you can delete images from an OpenStack cloud and certain
images from VMware clouds.
Chapter 7. Managing as an Administrator
223
About this task
When you delete an image, it is deleted from IBM Cloud Manager with OpenStack. The image is deleted
from the OpenStack cloud if it is a OpenStack base image.
The ability to delete an image varies by cloud type:
v OpenStack images can be deleted at any time. Deleting an OpenStack base image results in all of its
related images, or copied images, being deleted as well.
Procedure
1. In the IBM Cloud Manager with OpenStack interface, click Images.
2. Select the image that you want to delete.
3. Click the delete icon.
Managing projects
You can create, manage, and request access to projects on the Projects page, which is available on the
Access tab.
Projects are used to define the users that have access to a set of images and instances. Only members of a
project can view images and instance within a project. In many cases, projects correspond to a
department or other human organization.
To manage projects, go to the Access tab and click Projects to view the list of available projects.
IBM Cloud Manager with OpenStack self-service portal comes with a default project called the Public
project, to which all users belong. All virtual images and instances created outside of the self-service
portal are, by default, assigned to the Public project. You can also configure a staging project to store
newly discovered images or instances. The staging project allows administrators to configure images
before making them available to other users. For more information, see “Configuring a staging project”
on page 175.
Overview of project membership roles
When you are added as a member of a project, one of three membership roles are assigned to you.
Owner
A project owner has administrator authority to the project and its contents. The project owner
primarily manages the contents of the project and who has authority to the project and its
contents.
A project user has the authority to use the project and the objects within the project. For example,
a project user can deploy a virtual image to the project. A user can also view and potentially
restore backup images of virtual machines that are created by other users, depending on how the
project and roles were initially set up. The project user primarily handles their own deployments.
User
Viewer
A project viewer has authority only to view the project and the virtual images and instances that
are contained in the project.
Creating a project
If you are given authority by your administrator, you can create projects.
Before you begin
Discuss your authority level with your administrator. The com.ibm.cfs.project.creation.by.user property in
the deployment.properties file must be set to True for you to create projects.
224
IBM Cloud Manager with OpenStack: Administrator Guide, version 4.2
Procedure
1. Click New Project.
2. Type a project name and description in the corresponding fields.
3. Click Create.
Editing project properties
If you have project owner authority, you can edit the properties of an existing project, including project
roles, project name, or project membership.
Procedure
1. From the list of projects, select the project you want to edit.
2. To update the project name or description, click the text field and type the new values.
3. To update project membership:
a. Click Project Members to open the panel.
b. In the Add Project Members window, select the new members and their project roles to add them
to the project.
c. Click OK.
d. To modify an existing member's project role, select the users you want to modify and click Set
Role to to select the new project role.
e. To remove members from the project, select the users you want to remove and then click Remove
to remove the users from the project.
4. To update the expiration policies:
a. Click Expiration Policies to open the panel.
b. Choose one of the following to set the expiration policy:
Use cloud default
The expiration of the deployment will depend on the expiration configuration of the cloud
to which the image belongs.
Customize settings
The expiration policy you set on this panel (by setting the Maximum expiration value and
Maximum extension period values) overrides the expiration policy of the cloud to which
the image belongs.
5. To update the approval policies:
a. Click Approval Policies to open the panel.
b. Choose one of the following to set the approval policy:
Use cloud default
The project uses the approval policy of cloud groups.
Customize settings
The project uses the approval policy you set on this panel (by selecting checkboxes from
the Require approval for the following events list) overrides the approval policy of the
cloud groups.
6. Click Save.
Setting project policies
For projects that you own, you can set expiration policies and approval policies that affect the instances
that are deployed in that project.
Procedure
1. Click the Access tab and then the Projects tab.
2. Click the name of the project in the table to display the project properties.
Chapter 7. Managing as an Administrator
225
3. Click Edit.
4. Expand the title of the item you want to work with: Expiration Policies or Approval Policies.
5. Set your policies for your projects, or select Use cloud default to use the policies set by your
administrator.
What to do next
For more information about expiration policies and approval policies, see the IBM Cloud Manager with
OpenStack Administrators Guide.
Deleting an existing project
As a project owner, you can delete a project at any time.
About this task
When a project is deleted from IBM Cloud Manager with OpenStack, all of the virtual images and
instances contained in the project are transferred to the public project.
Procedure
1. In the projects list, select the project you want to delete.
Restriction: You cannot delete the default Public project.
2. Click the Delete selected projects icon.
Project management with OpenStack
Unlike other cloud types, OpenStack clouds provide native support for project management through the
OpenStack keystone component. Because the projects are managed in OpenStack, the projects cannot be
updated unless the OpenStack cloud is available.
Keystone is an OpenStack component that provides identity, token, catalog, and policy services to projects
in the OpenStack family. Upon first connecting to an OpenStack cloud, IBM Cloud Manager with
OpenStack self-service portal imports all the projects that currently exist inOpenStack. The current project
membership is accepted and reflected in the self-service portal.
After the initial OpenStack projects import, when connected to an OpenStack cloud, the self-service portal
enters transactional mode for project management. When in transactional mode, all project management
operations that are performed in the self-service portal are also performed in OpenStack (that is in
keystone). If a project management operation (or any of the operations described in this section) fails to
complete successfully in the self-service portal it does not occur in OpenStack. Likewise, if it fails in
OpenStack, it reverts in IBM Cloud Manager with OpenStack self-service portal.
IBM Cloud Manager with OpenStack enters transactional mode for project operations, while connected to
OpenStack, in order to have the registries in both products synchronized. For this reason, when
connected to an OpenStack cloud, IBM Cloud Manager with OpenStack cannot perform project-related
operations while the OpenStack cloud is down or unavailable. In addition, the projects created using
Keystone are only synchronized when the self-service portal is restarted. This cannot be done manually
from the self-service portal.
The project name changes, membership changes, and project description changes made using Keystone
are also only synchronized when the self-service portal is restarted. If you cannot restart the self-service
portal, these changes must be made manually from the self-service portal.
Restriction: If the project is deleted directly using Keystone, you also must delete this project manually
from the self-service portal after the self-service portal is restarted. You are not allowed to change the
226
IBM Cloud Manager with OpenStack: Administrator Guide, version 4.2
name or delete the Public project using Keystone. Only membership changes and project description
changes can be modified in the Public project directly using Keystone.
To connect to OpenStack, the IBM Cloud Manager with OpenStack self-service portal uses a service user
account and a default service tenant. Some OpenStack installations have user accounts specific to
OpenStack components (for example, nova, keystone, neutron). These and other service user accounts or
service tenants in an OpenStack server that do not represent an actual user account or tenant, can be
added to the list of service users and service tenants. By doing so, they are ignored by the self-service
portal and those service users are not allowed to log into the self-service portal. To make this change, add
the service users and tenants to the comma-separated list of users in the
com.ibm.cfs.cloud.openstack.service.users property, or the comma-separated list of tenants in the
com.ibm.cfs.cloud.openstack.service.tenants property, in the openstack.properties file.
Managing approval policies
IBM Cloud Manager with OpenStack self-service portal administrators can enable approval policy
support by specifying the operations that require approval. If approval policies are enabled, the requested
operation is held until the approval request is processed by the administrator.
This approval requirement ensures that self-service portal administrators control the self-service portal
instance process and provides an audit trail of the requester and approver roles.
From a user standpoint, the approval lifecycle behaves similar to the following:
v Users can see only requests that they initiate.
v Users are unable to view any requests against an instance in the public project that they did not
originate. Instances indicate that they are in a Pending state, but users cannot see the outstanding
requests that are initiated by other users against that instance.
Setting or modifying approval policies for a cloud
Follow these steps to set or modify an approval policy for a cloud. These policies are used unless they
are overridden by an approval policy for a project.
Procedure
1. In the IBM Cloud Manager with OpenStack interface, select Configuration > Clouds.
2. Click the cloud name for which you want to modify approval policies.
3. Select Approval Policies.
4. Set the events that require administrator approval.
Deploying an image
Approval policy that is invoked when deploying an image to create an instance in the cloud.
This approval policy suspends the deployment operation until the generated request is
approved or rejected.
Extending the instance expiration time frame
Approval policy that is invoked when extending the expiration date of an existing instance.
This approval policy suspends the expiration operation until the generated request is
approved or rejected.
Resizing an instance
Approval policy that is invoked when resizing an existing instance. This approval policy
suspends the resize operation until the generated request is approved or rejected.
Capturing an instance
Approval policy that is invoked when capturing an existing instance. This approval policy
suspends the capturing operation until the generated request is approved or rejected.
Chapter 7. Managing as an Administrator
227
Deleting an instance
Approval policy that is invoked when deleting an existing instance. This approval policy
suspends the delete operation until the generated request is approved or rejected.
Requesting to attach storage to a virtual machine
Approval policy that is invoked when attaching storage to a virtual machine. This approval
policy suspends the attach storage operation until the generated request is approved or
rejected.
Requesting to detach storage from a virtual machine
Approval policy that is invoked when detaching storage from a virtual machine. This
approval policy suspends the detach storage operation until the generated request is approved
or rejected.
Saving a virtual machine image
Approval policy that is invoked when saving a virtual machine image. This approval policy
suspends the save image operation until the generated request is approved or rejected.
Requesting to create virtual machine snapshot
Approval policy that is invoked when creating a virtual machine snapshot. This approval
policy suspends the virtual machine snapshot operation until the generated request is
approved or rejected.
Restoring a virtual machine
Approval policy that is invoked when restoring a saved virtual machine image. This approval
policy suspends the restore operation until the generated request is approved or rejected.
Requesting to revert virtual machine to snapshot
Approval policy that is invoked when reverting a virtual machine to snapshot version. This
approval policy suspends the revert to snapshot operation until the generated request is
approved or rejected.
Deleting a volume
Approval policy that is invoked when a volume is deleted. This approval policy suspends the
delete volume operation until the generated request is approved or rejected.
Creating a volume
Approval policy that is invoked when a volume is created. This approval policy suspends the
create volume operation until the generated request is approved or rejected.
Updating a volume
Approval policy that is invoked when a volume is updated. This approval policy suspends
the update volume operation until the generated request is approved or rejected.
Setting or modifying approval policies for a project
Follow these steps to set or modify an approval policy for a project. These policies override the approval
policies that are set for a cloud.
Procedure
1. In the IBM Cloud Manager with OpenStack interface, select Access > Projects.
2.
3.
4.
5.
Select the project for which you want to modify approval policies.
Select Customize settings.
Select Approval Policies.
Set the events that require administrator approval. To use setting defined for a cloud, select Use cloud
default.
Deploying an image
Approval policy that is invoked when deploying an image to create an instance in the cloud.
This approval policy suspends the deployment operation until the generated request is
approved or rejected.
228
IBM Cloud Manager with OpenStack: Administrator Guide, version 4.2
Extending the instance expiration time frame
Approval policy that is invoked when extending the expiration date of an existing instance.
This approval policy suspends the expiration operation until the generated request is
approved or rejected.
Resizing an instance
Approval policy that is invoked when resizing an existing instance. This approval policy
suspends the resize operation until the generated request is approved or rejected.
Capturing an instance
Approval policy that is invoked when capturing an existing instance. This approval policy
suspends the capturing operation until the generated request is approved or rejected.
Deleting an instance
Approval policy that is invoked when deleting an existing instance. This approval policy
suspends the delete operation until the generated request is approved or rejected.
Requesting to attach storage to a virtual machine
Approval policy that is invoked when attaching storage to a virtual machine. This approval
policy suspends the attach storage operation until the generated request is approved or
rejected.
Requesting to detach storage from a virtual machine
Approval policy that is invoked when detaching storage from a virtual machine. This
approval policy suspends the detach storage operation until the generated request is approved
or rejected.
Saving a virtual machine image
Approval policy that is invoked when saving a virtual machine image. This approval policy
suspends the save image operation until the generated request is approved or rejected.
Requesting to create virtual machine snapshot
Approval policy that is invoked when creating a virtual machine snapshot. This approval
policy suspends the virtual machine snapshot operation until the generated request is
approved or rejected.
Restoring a virtual machine
Approval policy that is invoked when restoring a saved virtual machine image. This approval
policy suspends the restore operation until the generated request is approved or rejected.
Requesting to revert virtual machine to snapshot
Approval policy that is invoked when reverting a virtual machine to snapshot version. This
approval policy suspends the revert to snapshot operation until the generated request is
approved or rejected.
Deleting a volume
Approval policy that is invoked when a volume is deleted. This approval policy suspends the
delete volume operation until the generated request is approved or rejected.
Creating a volume
Approval policy that is invoked when a volume is created. This approval policy suspends the
create volume operation until the generated request is approved or rejected.
Updating a volume
Approval policy that is invoked when a volume is updated. This approval policy suspends
the update volume operation until the generated request is approved or rejected.
Managing requests
When you deploy an image or when you initiate an action that requires approval from an administrator,
a request is created and submitted to an administrator for approval. The status is set to Pending until the
administrator handles the approval request.
Chapter 7. Managing as an Administrator
229
You can set which actions require administrator approval by using the Approval policies function. For
more information, see “Managing approval policies” on page 227.
Processing instance requests
When an image is deployed, initiating an instance, the deployment request may require approval by an
administrator. The instance status is set to pending until the administrator handles the approval request.
About this task
You can process an instance request from the Instances tab or from the Requests tab. For more
information about processing an instance request from the Instances tab, see “Processing requests from
the Instances tab” on page 245
To process a pending request, follow these steps:
Procedure
1. In the IBM Cloud Manager with OpenStack interface, select Access > Requests.
2. Expand the Request Details section to review or update the request before approving.
3. Expand the Comments section to review comments or use the Add Comment link to provide
additional comments.
v Click Approve to approve the request and allow the deployment processing to start.
v Click Reject to reject the request.
v Click Withdraw to withdraw a request.
Clearing or archiving requests
You can clear or archive requests. Clearing requests deletes the requests while archiving requests saves
them to an archive folder. By clearing requests, you can free space on your system and improve
performance in the IBM Cloud Manager with OpenStack interface. Archive any requests that you may
want to reference in the future.
About this task
To clear or archive a request, follow these steps:
Procedure
1. In the IBM Cloud Manager with OpenStack interface, select Access > Requests.
v To clear requests, click Clear.
v To archive requests, click Archive.
2. Use the Request filter to select a subset of requests to clear or archive. Filter by status or start and end
date. If you filter by date, you must provide an end date.
v To clear the selected requests, click Clear.
v To archive the selected requests, click Archive. The filtered requests are saved in a file called
requests_<current time in milliseconds>.csv. This file can be found in the archives folder,
located in the IBM Cloud Manager with OpenStack configuration directory.
Managing expiration policies
Expiration policies require users to set an expiration period that specifies the maximum length of the
instance lease and determine the lifecycle of expired instances.
You can set a default expiration policy for a cloud or for a project. Expiration policies set for a project
override the expiration policies set for a cloud. After an expiration policy is set, you must set an
expiration date whenever deploying an image from that cloud or project. However, the administrative
user can set a date with no limitations.
230
IBM Cloud Manager with OpenStack: Administrator Guide, version 4.2
If you are deploying an image from a cloud or project that does not have an expiration policy set, you
can choose whether to set an expiration date.
The user who deployed the instance receives an email notification when the instance is about to expire.
The user can extend the lease if extensions are enabled.
After the instance expires, it will be stopped. The instance can be automatically deleted after a limited
time, which is specified by the grace period. If no grace period is specified, the instance is deleted
immediately. This setting applies regardless of whether the instance expiration maximum is set.
Updating the default expiration policy for a cloud
You can update the default expiration policy for IBM Cloud Manager with OpenStack.
About this task
To update the default expiration policy, complete the following steps:
Procedure
1. In the IBM Cloud Manager with OpenStack interface, select Configuration > Clouds.
2. Click the name of the cloud for which you want to update the expiration policy.
3. Click Expiration Policies to open the form.
4. Enter information for the default expiration policy and click Save.
Note: To delete expired instances immediately, set the Grace period to 0.
Updating the default expiration policy for a project
You can update the default expiration policy for IBM Cloud Manager with OpenStack project.
Procedure
1. In the IBM Cloud Manager with OpenStack interface, select Access > Projects.
2. Select a project to open the project update page.
Note: To delete expired instances immediately, set the Grace period to 0.
3. Enter information for the default expiration policy.
v If you select Use cloud default, the expiration of the deployment depends on the expiration
configuration of the cloud to which the image belongs.
v If you select Customize settings, the expiration policy overrides the expiration policy of the cloud
to which images belong.
4. Click OK.
Managing flavors (OpenStack only)
A flavor is the prescribed size of a provisioned virtual machine. Each flavor has a unique combination of
resource configurations and sizes.
Updating the flavor for an OpenStack cloud configuration
You can update the flavor that is configured for the cloud.
Procedure
1. In the IBM Cloud Manager with OpenStack interface, select Configuration > Clouds.
2. Select the cloud for which you want to modify flavors.
3. Click Edit.
Chapter 7. Managing as an Administrator
231
4. Expand the Flavors section. You can create a flavor based on an existing flavor or you can create a
completely new flavor.
5. Click the flavor name that you want to copy or click the Create a new flavor icon to create a new
flavor.
6. Set the following required values:
v Name
v Virtual CPUs
v Memory (MB)
v Storage (GB)
v Swap(MB) This option is only supported for KVM deployments.
Notes:
v When updating the flavor, only integers are valid for the processor, memory, storage, and swap
sizes. Any fractional data is omitted.
v After a flavor is created or updated, it can be used to deploy OpenStack images. However, the new
or updated flavor might not be immediately available when configuring an image. If this occurs,
you can reset the image configuration to the default values in order to pick up the flavor changes
made in the cloud. For more information, see Configuring image deployment properties.
v Flavors with a storage size of 0 have special meaning in OpenStack and are not supported by
numerous hypervisors such as Hyper-V. Hypervisors that do support such flavors use the size of
the image as the storage size when provisioning a virtual machine from the image.
7. Optional: Specify extra specifications. For information, see “Extra specifications.”
Extra specifications
A flavor might include properties that are in addition to the base flavor properties. These extra
specifications are key value pairs that can be used to provide advanced configuration that is in addition
to the configuration provided by the base flavor properties. This configuration is specific to the
hypervisor.
Advanced configuration provided with flavor extra specifications might include the following:
v CPU shares
v CPU period
v disk read and write rates per second
In addition to enabling advanced hypervisor configuration, extra specifications are used in OpenStack as
a mechanism to enable advanced placement by the scheduler with specific scheduler filters such as the
ComputeCapabilitiesFilter and the AggregateInstanceExtraSpecsFilter. For specific information about
using these filters, see the OpenStack documentation.
KVM extra specifications
Flavor extra specifications are supported as part of the KVM support with OpenStack that is provided
with IBM Cloud Manager with OpenStack.
The following extra specifications enable tuning the CPU for a virtual machine:
v quota:cpu_shares
v quota:cpu_period
v quota:cpu_quota
The following extra specifications enable tuning the device I/O for a virtual machine:
v quota:disk_read_bytes_sec
232
IBM Cloud Manager with OpenStack: Administrator Guide, version 4.2
v
v
v
v
v
quota:disk_read_iops_sec
quota:disk_write_bytes_sec
quota:disk_write_iops_sec
quota:disk_total_bytes_sec
quota:disk_total_iops_sec
The following extra specifications enable tuning the network device interfaces for a virtual machine.
However, they are not supported in IBM Cloud Manager with OpenStack since they are not used with
OpenVSwitch.
v quota:vif_inbound_average
v
v
v
v
v
quota:vif_inbound_peak
quota:vif_inbound_burst
quota:vif_outbound_average
quota:vif_outbound_peak
quota:vif_outbound_burst
PowerVC extra specifications
Flavor extra specifications are supported as part of the PowerVC support with OpenStack that is
provided with IBM Cloud Manager with OpenStack.
The following extra specifications enable tuning the CPU for a virtual machine:
v
v
v
v
v
powervm:proc_units
powervm:min_proc_units
powervm:max_proc_units
powervm:min_vcpu
powervm:max_vcpu
v
v
v
v
v
v
powervm:dedicated_proc
powervm:share_idle
powervm:uncapped
powervm:shared_weight
powervm:availability_priority
powervm:processor_compatibility
The following extra specifications enable tuning the memory for a virtual machine:
v powervm:min_mem
v powervm:max_mem
The following extra specifications enable tuning the boot volumes:
v powervm:boot_volume_type
For more information, see the PowerVC Information Center.
Extra specification labels
Because it can be difficult to determine the purpose of extra specifications from their names, you can
label extra specifications.
In the openstack.properties file any property that contains the com.ibm.cfs.openstack.flavor.extraspec.label. prefix
is considered a localizable label for an OpenStack flavor extra spec. The suffix of the property must be
Chapter 7. Managing as an Administrator
233
the extra spec name, and the value of the property must be the list of localized extra spec labels.
For example, you can provide a label for the quota:cpu_shares extra specification that is similar to the
following:
com.ibm.cfs.openstack.flavor.extraspecs.label.quota:cpu_shares=CPU Shares, en_us=CPU Shares,
es=Porción de Procesador
The first value is the label for the default locale, which is followed by a list of locale=label pairs. Each
time the extra specification is displayed in the IBM Cloud Manager with OpenStack user interface, the
corresponding label is displayed, based on the locale of the end user.
Managing clouds
You can add, configure, edit, and remove clouds.
In the Cloud status window, you can see the status of all of the clouds that IBM Cloud Manager with
OpenStack self-service portal is connected to. To view details about a specific cloud, select Cloud
settings.
In the Clouds section of the Configuration tab, you can add, edit, and delete cloud configurations. When
you edit cloud configurations, you can also set or update expiration policies and approval policies.
You can customize each cloud to have its own approval and expiration policies. You can also configure a
network for a specific cloud.
Adding a cloud configuration
You can configure a cloud in the Clouds section of the Configuration tab.
Procedure
1.
2.
3.
4.
Open IBM Cloud Manager with OpenStack and select Configuration > Clouds.
Click Add Cloud.
Enter information in each of the fields that is denoted with a red asterisk (*).
Click Add.
What to do next
After you click Add, you are prompted to trust the cloud server SSL certificate. If you do not accept this
certificate, the cloud configuration is not added.
Note: If you do not want to accept the default Approval or expiration policies, you can edit the cloud
configuration after adding it.
Adding an OpenStack cloud configuration
When you deploy your cloud environment, the OpenStack cloud configuration is added automatically.
However, if you added a new OpenStack region to your deployment, you must manually add the
OpenStack cloud configuration for the new region.
Before you begin
Before you begin these steps, ensure that the ceilometer and heat users exist on the
com.ibm.cfs.cloud.openstack.service.users property in the /var/opt/ibm/.SCE42/openstack.properties
file. If the ceilometer and heat users do not exist, add them and restart the sce service before continuing.
For more information, see “User management with OpenStack” on page 250.
To add an OpenStack cloud configuration, follow these steps:
234
IBM Cloud Manager with OpenStack: Administrator Guide, version 4.2
Procedure
1.
2.
3.
4.
Log in to IBM Cloud Manager with OpenStack self-service portal as an administrator.
Click the Configuration tab and select Clouds in the navigation pane.
Click Create a new cloud configuration.
Enter the cloud configuration settings for the OpenStack cloud.
Name Assign a name to the OpenStack cloud that you want to create.
Description
Optionally, add a description for the OpenStack cloud.
Type
Select OpenStack for the cloud type.
Region
Select the region that you want to use for this OpenStack cloud.
Message Queue Settings
Message queue type
Select the message queue type that is used by the OpenStack cloud.
Host name
Select the host name or the IP address of the OpenStack controller node. For more
information, see “Customizing the messaging service attributes” on page 123.
Port
Accept the default value of 5671.
Secure the cloud connection using SSL
Select if the OpenStack cloud is configured to expose an SSL connection. By default it
is selected.
User ID
Enter the user ID that communicates with the messaging server. The user ID is based
on the message queue type selected. Enter rabbitclient when the message queue type is
RABBIT or enter qpidclient when the type is QPID.
Password
Type the password for the user ID. For password information, see “User names and
passwords” on page 263.
5. Click Add to finish.
Results
If you receive a PKI token error when you are attempting to configure the OpenStack cloud, see “PKI
error when adding OpenStack cloud with self-service portal” on page 322 for more information.
OpenStack clouds:
When you add an OpenStack cloud, IBM Cloud Manager with OpenStack self-service portal enters a
transactional mode for user and project operations. Also, OpenStack relies on Coordinated Universal Time
(UTC) time.
When in transactional mode, all user and project operations fail if the OpenStack cloud is unavailable.
These operations fail even if the user or project in question is not currently used in connection to
OpenStack.
Additionally, IBM Cloud Manager with OpenStack self-service portal uses OpenStack efficient polling
with the changes-since parameter support to maintain internal caches of certain OpenStack resources.
The OpenStack changes-since support relies on Coordinated Universal Time (UTC) time to determine if a
resource has changed. As a result, the IBM Cloud Manager with OpenStack self-service portal and
Chapter 7. Managing as an Administrator
235
OpenStack systems must maintain accurate and consistent UTC time to avoid caching and other
problems that can occur due to incorrect system time. For more information about user and project
management with OpenStack, see User management with OpenStack and Project management with
OpenStack.
Multiple cloud support
IBM Cloud Manager with OpenStack allows you to manage multiple clouds from a single instance. For
example, you can have a test cloud set up to implement your latest policies before moving those policies
to your production cloud.
This support also allows you to manage multiple types of clouds For example, you can have multiple
VMware cloud instances available from a single IBM Cloud Manager with OpenStack user interface.
Updating a cloud
You can update a cloud in the Clouds section of the Configuration tab.
Procedure
1. Open IBM Cloud Manager with OpenStack and select Configuration > Clouds.
2. Click the name of the cloud that you want to update.
3. Update the desired fields and click Save.
Tip: From this configuration panel, you can also review or change the Expiration Policies, Approval
Policies, and Flavors (OpenStack cloud) of the cloud. For more information, see the following topics:
v “Managing expiration policies” on page 230
v “Managing approval policies” on page 227
v “Managing flavors (OpenStack only)” on page 231
Removing a cloud
You can remove an association with a cloud from IBM Cloud Manager with OpenStack from the Clouds
section of the Configuration tab.
Procedure
1. Open IBM Cloud Manager with OpenStack and select Configuration > Clouds.
2. Select the cloud that you want to remove. You can either remove just the cloud, or remove the cloud
and all instances that were deployed by IBM Cloud Manager with OpenStack.
3. Click Remove.
4. Click Remove Cloud Only to remove just the cloud, or click Remove cloud configuration and all
related instances to remove the cloud and all instances that were deployed by IBM Cloud Manager
with OpenStack.
5. Click Yes to confirm.
Results
Note: When removing a cloud configuration, all of the cloud resources created by IBM Cloud Manager
with OpenStack are lost. Recreating the connection to the cloud at a later time will not recover these
resources
Changing the message queue option
If you have any regions that were upgraded without using the --use-qpid option, and you are using the
self-service portal to manage IBM Cloud Manager with OpenStack, you must change the message queue
option in the self-service portal to rabbitmq for each of those regions.
236
IBM Cloud Manager with OpenStack: Administrator Guide, version 4.2
Before you begin
Without completing this task, the regions are in error state on the self-service portal after an in-place
upgrade.
About this task
To change the message queue from qpid to rabbitmq on the self-service portal manually, complete the
following steps for each region until all the clouds are connected properly.
Procedure
1. Log in to the self-service portal web interface as an administrator.
2. Click the Configuration tab and select Clouds in the navigation pane.
3. Click the name of the cloud (in the table) that corresponds to the region to display the cloud
properties.
4. Click Edit.
5. Change the message queue to rabbitmq for the cloud. The message settings are as follows:
v User ID: rabbitclient
v Password: Enter the password of the rabbitmq message queue.
v Message queue type: RABBIT
v Virtual host: Use the default value, /.
6. Click Save.
7. Click Refresh. The state of the cloud is updated to OK.
Managing network configurations
The IBM Cloud Manager with OpenStack self-service portal provides a convenient way to manage and
apply network settings by using network configurations. Network configurations are a group of network
settings for a particular environment, typically a virtual network. These settings can be managed as a
single entity and applied to image configurations or instance deployment settings.
For example, suppose that a cloud environment contains two virtual networks applicable to instance
deployment: a public and a private virtual network. In this case, an administrator might create two
network configurations, one for the public and one for the private. In the public configuration, the
administrator would specify all the public network settings such as primary DNS, secondary DNS, and
primary gateway. The same would be done for the private network configuration. After the
configurations are created, the administrator can configure the images to use the appropriate network
configuration. This action saves time by not requiring the administrator to specify each network setting in
each image. It also allows an easier way to manage the network settings on a virtual network.
While the actual settings specified in a configuration are tailored to a specific environment, the network
configurations themselves are a superset of all network settings regardless of image, operating system, or
cloud management system. Therefore, all settings that are specified in a configuration are applicable. For
example, the primary and secondary WINS settings of a network configuration are only applicable to
Windows based images. So when you create a configuration for an image that is not using Windows,
these values are not needed and can be left blank.
Note: With the self-service portal, you can specify the network configuration for a cloud. The self-service
portal displays only the fields that are applicable for that cloud. Before you can create an OpenStack
network configuration, you must select an existing OpenStack cloud.
When network configuration settings are applied to either an image configuration or during an advanced
instance deployment, their individual settings can be overridden or manually specified, if wanted.
Chapter 7. Managing as an Administrator
237
Note: You cannot override or manually specify OpenStack network configuration settings.
Managing network configurations
You can create, edit, and delete, network configurations from the IBM Cloud Manager with OpenStack
web interface.
About this task
To create, edit, or delete a network configuration, follow these steps:
Procedure
1. Open IBM Cloud Manager with OpenStack and select Configuration.
2. Select Network.
The network configurations that are defined in the property files are displayed. The Network tab
provides a listing of all existing network configurations, and enables you to edit, create, or delete
these network configurations.
v The Network Configuration column shows the name of the existing network configuration.
v The Cloud column shows the name of the cloud scope that is associated with the network
configuration.
v The Type column shows the IP address version that the network configuration supports. VMware
network configurations support only IPv4 addresses, but OpenStack network configurations can
support IPv4 or both IPv4 and IPv6 addresses. OpenStack networks do not support IPv6-only
addresses.
v The Available Addresses column shows the number of IP addresses available in the network.
v The Allocated Addresses column shows the number of IP addresses that are allocated.
You can edit, create, or delete these network configurations.
v To view specific network configuration properties, click the network configuration name.
v To edit specific network configuration properties, click the network configuration name and then
click Edit.
v To manage the IP addresses for an existing configuration, click Manage IP Addresses for the
existing configuration.
icon.
v To create a new network configuration, click the New
v To create a new network configuration that is based on an existing configuration, select a
configuration and click the Copy
icon.
v To delete an existing configuration, select a configuration and click the Delete
icon.
Adding a network configuration
You can add a network configuration from the IBM Cloud Manager with OpenStack web interface.
Before you begin
z/VM only
The /etc/neutron/plugins/openvswitch/ovs_neutron_plugin.ini file contains a network_vlan_ranges
value similar to the following:
network_vlan_ranges = xcatvsw2,xcatvsw3:2:3999
Before you can add a network configuration for an OpenStack cloud running on z/VM, follow these
steps:
238
IBM Cloud Manager with OpenStack: Administrator Guide, version 4.2
1. Create two networks in the OpenStack environment as follows:
a. First, run the following command to create the management network:
Note: The following command must be entered on a single line, even though the example shows
a line break for formatting purposes.
neutron net-create xcat_management --provider:network_type flat
--provider:physical_network xcatvsw2
b.
Next, run the following command to create the customer network:
Note: The following command must be entered on a single line, even though the example shows
a line break for formatting purposes.
neutron net-create opnstk_compute --provider:network_type vlan
--provider:physical_network xcatvsw3 --provider:segmentation_id 2
2. Define a subnet for each network as follows:
a. Run the following command to define the subnet for the management network:
neutron subnet-create --allocation-pool start=10.1.0.2,end=10.1.0.199 xcat_management 10.1.0.0/16
Note: You can change the IP range to any value that you want. The Extreme Cloud
Administration Toolkit (xCAT) MN interface can connect this range.
b. Run the following command to change the IP range for the customer network:
neutron subnet-create opnstk_compute cidr
Note: You can use any IP address that you want.
When you use IBM Cloud Manager with OpenStack to connect to z/VM, the network configuration in
OpenStack is done.
About this task
To add a network configuration, follow these steps:
Procedure
1. Open IBM Cloud Manager with OpenStack and select Configuration.
2. Select Network.
3. To create a network configuration, click New.
4. Specify a cloud scope.
When you specify a cloud scope, the network configuration that you are adding is only available
when you deploy an image to that cloud. If you specify VMware for the cloud scope, the
configuration is available to all VMware images. When you specify a cloud scope, this page displays
only the fields that are applicable to the selected cloud scope.
5. Enter a name for the configuration.
6. Follow the steps for the cloud scope that you selected.
v VMware
a. Optionally, enter a description.
b. Select a unique Network ID.
c. Select one of the following IP Settings:
– Use DHCP
– Use IP address pool
If you select Use IP address pool, follow these steps:
1) Specify a Subnet mask and Gateway address. You can also provide an alternative gateway
address.
Chapter 7. Managing as an Administrator
239
2) Specify a number of IP addresses and the starting address for allocation. The ending
address is calculated based on the number of addresses and starting address.
Note: If you specify a number of IP addresses, the number must be at least 2. To create a
single IP address, you must first create then network configuration, and then add the
single IP address.
3) Specify DNS Settings.
d. Specify System-wide settings, including Linux and AIX Network Settings and Windows
Network Settings.
e. Choose to be a member of a domain or a workgroup:
– Domain
If you select Domain, specify the domain name, user, and password.
– Workgroup
If you select Workgroup, specify the workgroup name.
f. If you selected Use IP address pool, you can also select Obtain host name and domain name
from DNS server. If you select this option, the DNS used by the system must correlate with the
DNS used by this application. If it does not, the names that are obtained might be different from
the name that is resolved by the system DNS. The DNS server must be configured correctly for
the operating system of the IBM Cloud Manager with OpenStack server. If the names cannot be
resolved, the host name prefix and domain name that are provided in this configuration are
used.
Note: Only the host name and domain name are configured when you select Obtain host name
and domain name from DNS server. For other setup, such as the DNS IP address, you must
configure those settings manually when an image is deployed.
g. Click Save.
v OpenStack
a. Select one of the following IP address versions:
– IPv4 only
– IPv4 and IPv6
If you select IPv4 and IPv6, you can enter separate IP address settings for IPv4 and IPv6
addresses. However, the number of IPv6 addresses to allocate must be the same as the
number of IPv4 addresses.
b. Specify a subnet mask (for IPv4) or prefix length (for IPv6) and gateway address.
c. Specify a number of IP addresses and the starting address for allocation. The ending address is
calculated from the number of addresses and the starting address.
Notes:
1) There must be at least two IP addresses.
d. Specify DNS settings.
e. Specify provider network settings as follows:
– Specify one of the following network types:
- None selected
A network is created based on the tenant_network_type property in the
/etc/neutron/plugin.ini file. This value is set to vlan in the SCE image. If this option is
used, the physical network name and vlan ID are automatically selected based on the
"network_vlan_ranges" property in /etc/neutron/plugin.ini file. This property is set to
default:1:4094 in the SCE image.
- Flat
240
IBM Cloud Manager with OpenStack: Administrator Guide, version 4.2
A virtual network that is realized as packets on a specific physical network that contains
no IEEE 802.1Q header. Each physical network can realize at most one flat network.
- Local
A virtual network that allows communication within a host, but not across the network.
Local networks are intended mainly for single-node test scenarios.
- VLAN
A virtual network that is realized as packets on a specific physical network that contains
IEEE 802.1Q headers with a specific VLAN id. VLAN networks that share a physical
network are isolated from each other. Each distinct physical network that supports VLAN
networks is treated as a separate VLAN trunk, with a distinct space of VLAN id values.
– If you select Flat or VLAN for the network type, enter the physical network name.
This physical network name must match the name that is specified in the
network_vlan_ranges property of the /etc/neutron/plugin.ini file.
Note: You can create only one Flat network on each physical network.
– If you select VLAN, enter the VLAN ID.
Valid VLAN ID values are 1 through 4094.
f. Click Save.
Editing network configurations
You can edit a network configuration from the IBM Cloud Manager with OpenStack self-service portal.
About this task
To edit a network configuration, follow these steps:
Procedure
1. Open IBM Cloud Manager with OpenStack and select Configuration.
2. Click Network. The network configurations that are defined in the property files are displayed.
3. Select a network configuration that you want to edit from the list of available configurations. The
current properties are displayed for the selected configuration. The properties that are displayed
depend on the cloud management system for which the network configuration was created.
4. Click Edit. You can edit only certain network configuration properties.
5. Change the properties of the configuration. If you want to edit the IP addresses for this configuration,
click Manage IP Addresses. For more information about setting up an IP address pool, see
“Managing IP address pools.”
6. Click Save to save your changes, or Cancel to exit the screen without saving your changes.
Managing IP address pools
IBM Cloud Manager with OpenStack can automatically select the IP address (or IP addresses) to be used
when provisioning a virtual machine from a list of predetermined IP addresses known as an IP address
pool. IP addresses are managed and assigned automatically to an instance so that the user requesting the
deployment does not need to specify them.
About this task
An IP address is marked as "In Use" when IBM Cloud Manager with OpenStack selects that IP addresses
from the network configuration and uses it for the deployment of an instance. When the instance is
deleted by IBM Cloud Manager with OpenStack, the IP address "In Use" indication is cleared so that the
IP address can be reused by another instance deployment. If IBM Cloud Manager with OpenStack detects
that the instance has failed and no longer exists in the cloud, the IP address is unlocked immediately and
the "In Use" flag cleared.
Chapter 7. Managing as an Administrator
241
The administrator can also mark an IP address or a range of IP addresses as "Locked". "Locked" IP
addresses are not selected by IBM Cloud Manager with OpenStack for instance deployment. The purpose
of "Locked" IP addresses is to allow the administrator to mark certain IP addresses in the network as
reserved or "In Use" by other applications. If the administrator later wants to enable the IP address so
that it can be used by IBM Cloud Manager with OpenStack for instance deployment, the "Unlock" option
can be used to remove the "Locked" indicator.
The main difference between "In Use" and "Locked" is conceptual; addresses that are "In Use" are being
used by the IBM Cloud Manager with OpenStack application, while addresses that are "Locked" are being
used by an external application or are not available as specified by an administrator.
Each network configuration contains its own IP address pool, which allows IP addresses to be managed
on a per network configuration basis. If a configuration is applied to the deployment settings of an
instance (and the configuration is not set to use DHCP), the IBM Cloud Manager with OpenStack
automatically uses the pool that is associated with the configuration.
Notes:
1. Network configurations typically represent a VLAN or a virtual network. While a network
configuration cannot contain the same IP address more than once, different network configurations
can contain the same IP addresses. This behavior was added to allow multiple VLANs to use the
same IP address ranges. If the same IP address ranges are specified in multiple network
configurations, care must be taken to ensure that these network configurations are used on different
networks or VLANs.
2. OpenStack network configurations cannot contain the same IP addresses. Each of the IP subnets that
are defined in the OpenStack network configurations must be unique and must not overlap.
3. The IP addresses for an OpenStack network configuration are specified when the OpenStack network
configuration is first created. IP addresses cannot be added to or removed from an OpenStack
network configuration. Lock and unlock of IP addresses is supported.
The following steps describe how an administrator can manage the IP address pools that are used by the
IBM Cloud Manager with OpenStack application.
Procedure
1. Open IBM Cloud Manager with OpenStack and select Configuration > Network.
2. From the Network page, select Edit under IP Addresses.
3. The IP Addresses view is displayed. Use this view to add, remove, lock, or unlock IP addresses.
4. To add IP addresses, select Add.
a. Add an individual or range of IP addresses to the pool.
b. Select OK to add the IP address or range, or select Cancel to cancel the operation.
242
IBM Cloud Manager with OpenStack: Administrator Guide, version 4.2
5. To remove, lock, or unlock specific IP addresses, select the IP addresses to which to apply the
operation, then select Remove, Lock or Unlock from the Manage IP addresses page to apply the
operation.
Note: The IP addresses page allows for smart selection of IP addresses to which to apply the Remove,
Lock, and Unlock operations. When Remove, Lock, or Unlock is selected, smart selection determines
whether any addresses are selected on the page. If addresses are selected, the operation is applied to
the selected addresses without an extra dialog. If no addresses are selected, a dialog is displayed
which allows either individual or range based operations for remove, lock, or unlock.
Managing external networks and floating IP addresses
External networks typically provide Internet access for your instances.
By default, the external network allows Internet access only from instances using Network Address
Translation (NAT). You can enable Internet access to individual instances using a floating IP address and
suitable security group rules. The admin tenant owns this network because it provides external network
access for multiple tenants. You must also enable sharing to allow access by those tenants.
External networks
Use the following steps to create the external network and allow the instance to connect to the public
network.
Procedure
1. Create an external network.
$ neutron net-create ext-net --shared -–router:external True
2. Create a subnet for the external network.
$ neutron subnet-create ext-net --name ext-subnet \
--allocation-pool start=FLOATING_IP_START,end=FLOATING_IP_END \
--disable-dhcp --gateway EXTERNAL_NETWORK_GATEWAY EXTERNAL_NETWORK_CIDR
For example:
$ neutron subnet-create ext-net --name ext-subnet \
--allocation-pool start=10.6.12.100, end=10.6.12.200 \
--disable-dhcp --gateway 10.6.12.1 10.6.12.0/24
3. Create a router.
Chapter 7. Managing as an Administrator
243
$ neutron router-create ext-to-int
4. Connect the router to ext-net by setting the gateway for the router as ext-net.
$ neturon router-gateway-set ext-to-int-id ext-net-id
5. Add the router interface to an existing private network. If you don't have one, you must create it.
$ neutron router-interface-add ext-to-int-id private-subnet-id
Start an instance with the dedicated private network, and now the instance can connect to the public
network.
Floating IP addresses
A floating IP address is an IP address that a project can associate with a virtual machine. This association
gives the instance the same public IP address each time that it starts. You can create a pool of floating IP
addresses and assign them to instances as they are started, to maintain a consistent IP address for
maintaining DNS assignment. Complete the following steps to associate a floating IP address to an
instance.
Procedure
v Create a floating IP address.
$ neutron floatingip-create ext-net
v Associate the floating IP address to the port of the instance.
$ neutron floatingip-associate floating_ip_id instance_port_id
Now you can connect the instance by the floating IP address in the public network.
Note: Ensure that you have added the right security group rules to the instance so you can ping or ssh
the instance.
What to do next
The default security group does not allow inbound traffic from the external network to the virtual
machine instance that uses the floating IP address. To add rules that all of the external networks can use
to communicate with the virtual machine instance, see “Configuring SSH and ICMP access to deployed
virtual machines” on page 157.
Managing instances
Use the Instances tab in the IBM Cloud Manager with OpenStack self-service portal to manage instances
after they are created.
VMware: An instance in the self-service portal is equivalent to a VMware virtual machine. All of the
VMware virtual machines are displayed on the self-service portal Instances tab.
You can filter the list of instances by Cloud, Projects, or Architectures.
As an administrator, you can act on pending instance requests and hide specific instances from appearing
to other users.
Note: When you start or restart the self-service portal on a high scale cloud, the synchronization between
the self-service portal and the cloud might take longer than expected. This resynchronization might cause
operations such as deploying, deleting, or resizing an instance to be delayed or even fail. Wait for the
synchronization to complete before you attempt these actions.
Capturing an instance
You can capture an instance or workload to create an image.
When you capture an OpenStack PowerVC instance, a message is displayed to indicate that capturing
this instance requires some manual preparation. For information about preparing an OpenStackPowerVC
244
IBM Cloud Manager with OpenStack: Administrator Guide, version 4.2
instance for capture, see Capture requirements in the PowerVC information center at the following web
page: http://www.ibm.com/support/knowledgecenter/SSXK2N_1.2.1/
com.ibm.powervc.standard.help.doc/powervc_standard.html
Note: For OpenStack PowerVM, you can only capture instances that are stopped.
For information about capturing an OpenStack instance, see “Considerations for capturing an OpenStack
instance” on page 191
Pinning an instance
In a deployed instance, you can pin a virtual machine to a specific physical host to prevent the server
from being relocated. However, an instance or workload that is set to be highly available cannot have
pinned virtual machines.
Procedure
1. In the IBM Cloud Manager with OpenStack interface, select Instances.
2. Select an instance to open the properties.
v To pin an instance, select Pin.
v To unpin an instance, select Unpin.
3. Click Close.
Migrating an instance (OpenStack)
In a deployed instance, you can migrate a virtual machine to a specific physical host. You can also
migrate multiple instances to a specific physical host.
Before you begin
Make sure that the instances that you want to migrate have a status of OK. If you are migrating multiple
instances, all the instances must be running on a common OpenStack cloud.
Note: If you are using a PowerVC virtualization environment, overcommitting a disk and migrating
non-shared storage are not supported for PowerVM instances. For more information about PowerVC live
migration settings and capabilities, see the PowerVC Information Center.
Procedure
1. In the IBM Cloud Manager with OpenStack interface, select Instances.
2. Select the instances that you want to migrate.
3. Click More > Migrate to new host to open the live migration page.
4. Select a destination host as follows:
v To specify that the system select a destination host, select Allow system.
If the associated instance is a PowerVM instance and its Use PowerVC placement policy virtual
machine property is true, then the Allow system property indicates that the PowerVC scheduler
selects a host.
v To manually select a destination host, select Manually select and then select a destination host.
5. Click Migrate. The instance status changes to Migrating.
6. Click the refresh arrow to update the status. When the status changes from Migrating to OK, the
migration is complete and the instance is available
Processing requests from the Instances tab
When an image is deployed, initiating an instance, the deployment request may require approval by an
administrator. In this case, the instance status is set to pending until the administrator handles the
approval request.
Chapter 7. Managing as an Administrator
245
About this task
You can process an instance request from the Instances tab or from the Requests tab. For more
information about processing an instance request from the Requests tab, see “Processing instance
requests” on page 230
To process a pending request, follow these steps:
Procedure
1. In the IBM Cloud Manager with OpenStack interface, select Instances.
2. Select an instance name to view the instance details. Find the request list in the instance details and
select a request to display. The Request properties page appears.
3. Expand the Request Details section to review or update the request before approving.
4. Expand the Comments section to review comments or use the Add Comment link to provide
additional comments.
v Click Approve to approve the request and allow the deployment processing to start.
v Click Reject to reject the request.
v Click Withdraw to withdraw a request.
Hiding or showing an instance
Follow these steps to show or hide an instance.
Procedure
1. In the IBM Cloud Manager with OpenStack interface, select Instances.
2. Select an instance and click Hide/Show to hide or show the instance in the instance list for all
non-administrative users.
3. After an instance is hidden, a non-administrative user does not see the instance in the instance list,
but administrative users can choose to display the hidden instance. To display hidden instances in the
instance list, select Include hidden instances.
Resizing an instance (VMware)
You can modify the amount of resources used by the virtual machines provisioned by your instance
running on VMware. Depending on how your VMware virtual machines are configured, you can add
memory and virtual processors while your virtual machine is running.
About this task
Increasing the size of the virtual machine disks makes more space available on the disk, but does not
change the size of the partitions and the file systems. There are commands that must be run on the guest
operating system to increase the size of the file system. For more information about how to change the
size of the file system after storage is added, see your operating system documentation.
For more information about how a running virtual machine handles changes in memory and processor,
see the VMware documentation and your operating system documentation.
Procedure
1. Click the name of the instance that you want to resize.
2. Click More > Resize.
3. Update the number of processors and memory resources to be allocated to the virtual machine in
your instance.
The settings that can be resized when a virtual machine is in the started state depend on how the
virtual machine is configured on VMware:
246
IBM Cloud Manager with OpenStack: Administrator Guide, version 4.2
Notes:
a. If the instance is started and the virtual machine is not configured to allow memory or processor
changes, those fields are not displayed. To change those values, you must first stop the instance.
b. For memory, the virtual machine must have the Memory Hot Add option enabled. Memory is
only allowed to be increased, and the maximum amount that is allowed, and the valid values, are
determined by VMware.
c. For processors, the virtual machine must have the processor Hot Plug option enabled. To remove
processors, the virtual machine must have the processor Hot Add and Remove option enabled.
The maximum number of processors that are allowed is determined by the number of logical
processors on the vSphere machine that is running the virtual machine.
d. If you are changing the storage size, you can update only to a larger disk size.
4. Increase the disk size.
5. Click Resize.
Note:
v If approvals are enabled, then the approval must be completed before the instance is resized.
v Linked clone disks or disks that are using an IDE controller cannot be resized.
Resizing an instance (OpenStack)
You can modify the amount of resources that are used by the virtual machines.
About this task
Stop the instance before you continue the procedure.
Procedure
1. Click the name of the instance that you want to resize.
2. Click More > Resize... to open the Resizing instance page.
3. Under the Hardware section, update the OpenStack Flavor to be allocated to the virtual machine in
your instance.
Notes:
v The flavor details change depending on the size flavor that you select.
v When you update the flavor, the processor, memory, and storage size fields accept integers only.
Any fractional data is omitted.
v (PowerVM and Hyper-V) If you are changing the storage size, you can update to a larger disk size
only.
v (KVM and PowerKVM only) If you choose a flavor with a smaller storage size, KVM skips to
storage resize if it cannot be completed. The other resources are resized accordingly.
v (KVM and PowerKVM only) Resizing an instance only supports local storage.
v (z/VM only) You can change only the CPU and memory resources assigned to the virtual machine.
4. Click Resize.
Notes:
v If approvals are enabled, then the approval must be completed before the instance is resized. To
verify that the instance was resized, check the virtual machine flavor ID property of the instance.
v If the instance is running, OpenStack stops, resizes, and restarts the instance after the hypervisors
are resized (except PowerVM instance).
v Active resize is supported for PowerVC instances. The instances stay active during the resizing
progress. The active resize action is limited by instance resource ranges (maximum and minimum
values of processor, memory, and processor units), and unsupported flavors are filtered. In addition,
Chapter 7. Managing as an Administrator
247
the active resize action is not allowed unless the health status of the instance is OK. For more
information about resource ranges, see “Extra specifications” on page 232.
v (Multiple PowerKVM hypervisors) You might encounter the following error ssh ...Permission
denied. As a Nova user, ensure the hypervisors can ssh to each other by public key. For more
information, see “SSH permissions error when resizing an instance (OpenStack)” on page 318.
If you are resizing an instance on the Hyper-V hypervisor, the IBMComputeNodeService service that is
deployed with the Hyper-V agent installer must run with domain credentials and configure Kerberos
constrained delegation. You can set the service credentials by using the following command:
C:\sc config "IBM SmartCloud Entry Compute Service" obj="DOMAIN\username" password="password"
.
To configure the Kerberos constrained delegation setting, see step 1 in the following guide: Configure
constrained delegation.
Managing storage volumes
If you have an OpenStack cloud, you can use the Volumes tab in IBM Cloud Manager with OpenStack
self-service portal to create and manage storage volumes for your virtual machines. You can manage the
volumes by sorting on the cloud and project to which the volumes and associated virtual machines
belong.
About this task
From the Volumes tab you can create, delete, edit, and attach and detach storage volumes for virtual
machines in your OpenStack environment.
When you add a volume, you can choose the source for the new volume. You can create an empty
volume, or you can create a volume that is sourced from an existing image or snapshot of a volume. To
create an image from a snapshot, you must capture an existing volume and use the captured volume as
the snapshot source.
Note: PowerVC does not support a snapshot of a volume. So while, the self-service portal does not
prevent a snapshot volume in PowerVC, the snapshot volume cannot be supported by IBM Cloud
Manager with OpenStack either.
When you delete a volume, all data is lost from the volume. Alternatively, you can detach a volume from
a virtual machine to retain the content of the volume and use it in the future by attaching it to a different
instance.
Procedure
1. On the Volumes tab, use the Cloud and Project controls to sort the volumes that you want to
manage.
2. Use the Add and Delete icons to add and delete volumes.
3. Use the More menu to complete tasks such asAttach, Detach, and Capture on a selected volume.
4. To edit an existing volume, click the volume and select Edit.
What to do next
Note: You also can manage storage volumes for a specific virtual machine from the Instances tab. Click
the virtual machine for which you want to manage storage, and expand Storage Volumes.
Managing users
The Users tab in the IBM Cloud Manager with OpenStack self-service portal is enabled for
administrative users and is used for creating, viewing, and managing users.
248
IBM Cloud Manager with OpenStack: Administrator Guide, version 4.2
Creating a user
Complete the following steps to create a user.
Procedure
1.
2.
3.
4.
In the IBM Cloud Manager with OpenStack self-service portal, select Access.
Select Users.
Click New User.
Enter information for the new user.
5. Click Create.
Notes:
v You can only create valid user accounts when using local authentication. When using LDAP
authentication, user accounts are created and managed directly through the LDAP server.
v A user can also request a new user account. To approve or reject these requests, go to Access >
Requests.
Viewing or updating a user
About this task
To view or update information about a user, follow these steps:
Procedure
1. In the IBM Cloud Manager with OpenStack interface, select Access.
2. Select Users.
3. To view or update information about a user, select the user you want to view.
Locking a user
If you want to prevent a user from accessing the IBM Cloud Manager with OpenStack self-service portal,
you can lock the user account.
About this task
To lock a user, follow these steps:
Procedure
1. Open the IBM Cloud Manager with OpenStack self-service portal and select Access.
2. Select Users.
3. Select the user to unlock and click More > Lock.
Unlocking a user
If a user has three invalid login attempts in a 24 hour period, the user account becomes locked and
requires an administrator to unlock it.
About this task
To unlock a user, follow these steps:
Procedure
1. Open the IBM Cloud Manager with OpenStack self-service portal and select Access.
2. Select Users.
3. Select the user to unlock and click More > Unlock.
Chapter 7. Managing as an Administrator
249
What to do next
Note: If the default administrator account becomes locked, it is unlocked when the server is restarted.
Deleting a user
Complete the following steps to delete a user.
Procedure
1.
2.
3.
4.
In the IBM Cloud Manager with OpenStack interface, select Access.
Select Users.
Select the user you want to delete from the list of users and click Delete.
To confirm the user deletion, select Yes. To cancel the user deletion, select No.
Note: A user can also request to delete his user account. To approve or reject these requests, go to
Access > Requests.
User management with OpenStack
Unlike other cloud types, OpenStack clouds provide native support for user management through the
OpenStack keystone component.
When you first connect to an OpenStack cloud, the IBM Cloud Manager with OpenStack self-service
portal imports all the user accounts that currently exist in OpenStack. All user roles and project
membership are accepted and reflected in the self-service portal.
After the IBM Cloud Manager with OpenStack self-service portal imports the initial OpenStack users and
connects to an OpenStack cloud, the self-service portal enters transactional mode for user management.
When in transactional mode, all operations that are performed in the self-service portal are also
performed in OpenStack (for example, keystone). If a user management operation (such as any of the
operations that are described in this section) fails to complete successfully in the self-service portal, it
does not occur in OpenStack. Likewise, if it fails in OpenStack it reverts in IBM Cloud Manager with
OpenStack self-service portal.
The self-service portal enters transactional mode for user operations while connected to OpenStack so
that the user registries in both products are always synchronized. For this reason, when connected to an
OpenStack cloud, it is not possible to perform user-related operations while the OpenStack cloud is down
or unavailable. In addition, the users created using Keystone are only synchronized when the self-service
portal is restarted. This cannot be done manually from the self-service portal.
The user email and project membership changes made using Keystone are only synchronized when the
self-service portal is restarted. If you cannot restart the self-service portal, these changes must be made
manually from the self-service portal.
Restriction: If a user is deleted directly using Keystone, you also must delete this user manually from
the self-service portal, after the self-service portal is restarted. The user name is not allowed to change
directly using Keystone. If the user name is changed directly using Keystone by mistake, the old name,
and new name are not allowed to log in before the self-service portal is restarted, and the old name is
changed back in Keystone after the self-service portal is restarted. After that, the old name can log in. If
you cannot restart the self-service portal, you must change back to the old name manually from the
self-service portal. You cannot change or delete the admin user directly using Keystone.
To connect to OpenStack, IBM Cloud Manager with OpenStack self-service portal uses a service user
account and a default service tenant. Some installations of OpenStack have user accounts specific to
OpenStack components (for example, Nova, Keystone, Neutron). These and other service user accounts or
service tenants in an OpenStack server that do not represent an actual user account or tenant, can be
added to the list of service users and service tenants. By doing so, they are ignored by IBM Cloud
250
IBM Cloud Manager with OpenStack: Administrator Guide, version 4.2
Manager with OpenStack and those service users are not allowed to log into the IBM Cloud Manager
with OpenStack self-service portal. To make this change, add the service users and tenants to the
comma-separated list of users in the com.ibm.cfs.cloud.openstack.service.users property, or the
comma-separated list of tenants in the com.ibm.cfs.cloud.openstack.service.tenants property, in the
openstack.properties file.
Managing accounts
You can view information for those accounts of which you are either an owner or a member.
Accounts are required when IBM Cloud Manager with OpenStack self-service portal billing is enabled.
See the following guidelines for self-service portal billing:
v Only self-service portal administrators can create accounts, but you can be made an account owner.
v You can deploy instances only if you are an account member and the account has a positive balance
with which to pay for server use.
v Only account owners and self-service portal administrators can manage accounts.
v Accounts have a balance, an owner, an account balance threshold, account members, and invoices.
– The balance is a monetary balance of the account. The cost of each request and running deployment
is subtracted from the balance over time.
– The account owner is the self-service portal user profile that is accountable for crediting and paying
the account.
– The account balance threshold is a value that represents the amount at which the account balance
becomes a low balance. If the balance drops to zero, the account is delinquent.
– The account members are self-service portal users that belong to the account. When account members
deploy instances in the self-service portal, the instances are billed to their account.
– Each instance has an invoice. An account can have many invoices, which are viewable from the
Account properties window.
Creating an account
You can create an account at any time.
Procedure
1. Click New Account.
2. Enter information for the new account. Both the Account name field and the Account owner field are
required.
3. Click Create.
Add members to an account
You can add members to your account at any time, however, users can only be members of one account
at a time.
Procedure
1. In the account table, select the account to which you want to add members.
2. To open the account member management window, click Edit list.
3. To add a member, select the member to be added from the Available users list and click Add.
Viewing or managing an account
You can view the properties of any account, or manage the accounts that you own.
About this task
To view account properties or manage accounts that you own, select the Access tab and click Accounts.
Then, you can select the account that you want to work with in the account table.
Chapter 7. Managing as an Administrator
251
Deleting an account
You can delete an account only if you are the owner of the account, and only when the account is not
associated with any active instances.
Procedure
1. In the account table, select the account you want to delete.
2. Click the Delete icon and confirm the deletion.
Clearing or archiving events
From the Events tab, you can see events such as instance completion, instance failure, new account
requests, and new accounts created. You can also clear or archive events. Clearing an event deletes it.
Archiving an event saves it to an archive folder. By clearing events, you can free space on your system
and improve performance in the IBM Cloud Manager with OpenStack self-service portal. Archive any
events that you might want to reference in the future.
About this task
To clear or archive an event, follow these steps:
Procedure
1. In the self-service portal, select Reports > Events.
v To clear an event, click Clear.
v To archive an event, click Archive.
2. Use the Events filter to select a subset of events to clear or archive. Filter by severity or start and end
date. If you filter by date, you must provide an end date.
v To clear the selected events, click Clear.
v To archive the selected events, click Archive. The archived events are saved to a file called
events_<current time in milliseconds>.csv. This file is in the archives folder, which is in the
self-service portal configuration directory.
Viewing capacity statistics
Using the Capacity view, you can identify the current capacity of the resources in your virtualization
environment. Understanding the capacity of resources within the cloud helps you gauge the health of the
entire cloud. It also helps you determine suitable targets to which you might deploy instances.
The Capacity tab shows the total, allocated available resources of a host or resource pool, including the
number of virtual processors, memory, and storage size. The usage rate shows the real-time metrics of
hosts and virtual machines, like processor, memory, storage usage, available storage size, disk I/O
requests, network I/O packets, and more.
To access the Capacity view, click the Reports tab and then select Capacity from the left navigation.
Used
This field shows a summary of all allocated resources, regardless of the state of the guest
operating system.
Physical
This field shows the physical capacity.
The color of the capacity indicator can be green or yellow. Green indicates that the used resources are less
than the physical resources. Yellow indicates that the used resource is overcommitted on the available
physical resources, but you can still deploy.
You can also access the individual instance to see the target deployment grid that displays live metrics
for the resources you want to deploy or migrate.
252
IBM Cloud Manager with OpenStack: Administrator Guide, version 4.2
Notes:
1. The allocated processors and memory that is displayed for a IBM PowerVC host might not match the
actual allocation in the PowerVC environment. This is because the IBM Cloud Manager with
OpenStack appliance environment with OpenStack does not support fractional processor units and
manages only resources that are owned by the Storage Connectivity Group that is defined in the
PowerVC driver configuration.
2. The physical capacity for processors and memory that is displayed for a PowerVC host does not
include resources that are reserved in the PowerVC environment.
3. The Capacity view does not display storage data for PowerVC clouds.
Managing with OpenStack dashboard
Use this information if you are managing your cloud using the OpenStack dashboard, which is based on
OpenStack Horizon. The IBM Cloud Manager with OpenStack dashboard is intended for administrator
use only.
If you choose, you can use the OpenStack dashboard to manage your cloud environment. After you
install and deploy IBM Cloud Manager with OpenStack, access the dashboard. From a supported
browser, type https://controller.fqdn.com/, where controller.fqdn.com is the fully qualified domain
name of the controller node in your topology.
You can log in using the admin user with the password that you customized for your deployment. If you
deployed the Minimal topology, then the default password is admin. For more information about users
and passwords, see the “User names and passwords” on page 263 and “Data bags” on page 277 topics.
You can configure some of the properties in the dashboard as well. For specific configuration options, see
“Configuring IBM Cloud Manager with OpenStack dashboard properties” on page 204.
The OpenStack dashboard is based on OpenStack Horizon. For information about the OpenStack
dashboard, see Horizon: The OpenStack Dashboard Project.
Copying images from one OpenStack region to another
You can copy an image that is stored in the image repository of one OpenStack region to the image
repository in another region.
About this task
An image consists of the following information:
v A disk image
v Image metadata that is stored in the OpenStack image repository (Glance)
v Image configuration data that is stored in the IBM Cloud Manager with OpenStack self-service portal
database
OpenStack provides APIs and command line interfaces that can be used to copy images from one image
repository to another.
v OpenStack Image Service APIs can be used to list images, retrieve and upload images.
v The openstack image command (create, list, save, set and show subcommands) and glance command
(image-create, image-download, image-list, image-show and image-update subcommands) provide
command line interfaces to the Image Service APIs.
v The OpenStack dashboard provides image management capabilities.
IBM Cloud Manager with OpenStack self-service portal provides APIs and graphical interfaces for
working with images. The self-service portal manages some properties in the OpenStack image metadata
Chapter 7. Managing as an Administrator
253
that must be kept in sync with data stored in the self-service portal database. For this reason, images that
are used with the self-service portal cannot be copied using the same technique as copying OpenStack
images.
The self-service portal does not provide features for copying images from one region to another or
copying image configuration data from one cloud image to another.
Copying a self-service portal image
Use these instructions to copy an image that is used by the IBM Cloud Manager with OpenStack
self-service portal from one region to another.
About this task
To copy an image that is used by the self-service portal in region r1 to region r2, use the following
procedure. The examples assume that the file openrc contains credentials for authenticating to region r1.
This file could be the openrc file that is installed on the region r1 controller.
Procedure
1. View the original image in the self-service portal and note the following properties:
v Name: myimage
v UUID: 90a8c085-5014-4a19-9001-3593f0389582
v Disk format: QCOW2
v Container Format: BARE
v Minimum memory: 0
v Minimum storage: 0
v Additional Properties:
– architecture:: x86_64
– hypervisor_type: qemu
2. Extract the image file for the image. You can extract the image file by using OpenStack APIs or CLI
from any system. For convenience, the glance image-download CLI on the region r1 controller is used
in this example.
# . openrc
# glance image-download --file myimage.img 90a8c085-5014-4a19-9001-3593f0389582
Note: If you already have the image file, for example, from importing the original image into the
self-service portal, you do not need to extract the image.
3. If necessary, transfer the image file to the system where your web browser is running or to a system
where you have HTTP access to the image file.
4. From the self-service portal, go to the Image tab to import the image. Select the cloud for region r2.
Then, enter the path or URL to the image file and the other information that you collected in the first
step of this process.
5. Using the self-service portal, edit the new image and set other properties to match the original image.
The additional properties might include information such as the image configuration and deployment
strategy.
Copying OpenStack Glance images
Use these instructions to copy OpenStack Glance images from one region to another.
254
IBM Cloud Manager with OpenStack: Administrator Guide, version 4.2
About this task
If you have access to the image files and you already know information such as the container format and
disk format, you can create those images in region two. If the file is accessibly using HTTP, you can use
the OpenStack dashboard to create a new image. Otherwise, you can use the glance image-create
command to create the image. The following example assumes that you are logged on to the region two
controller and that you have copied the image file, test_image.img, to that system:
Note: The following command must be entered on a single line, even though the example shows a line
break for formatting purposes.
# . openrc
# glance image-create --name=’test image’ --is-public=true --container-format=bare --disk-format=qcow2 <
test_image.img
If the image files are stored in the region one glance repository or you are not sure of the image
properties, use the following procedure to copy OpenStack cloud images from region r1 to region r2. The
examples assume that the files openrc.r1 and openrc.r2 contain credentials for authenticating to regions
r1 and r2 respectively.
Procedure
1. Access the environment file for the first region by using the following command.
# . openrc.r1
2. List the images in the first region and identify those that you want to copy.
# openstack image list
+--------------------------------------+------------+
| ID
| Name
|
+--------------------------------------+------------+
| f3b35877-f182-4cb5-a69c-bc3b40a4feb3 | test image |
+--------------------------------------+------------+
3. Display the properties for the image:
# openstack image show -f shell "test image"
checksum="d972013792949d0d3ba628fbe8685bce"
container_format="bare"
created_at="2014-12-08T20:51:26.066496"
deleted="False"
deleted_at="None"
disk_format="qcow2"
id="f3b35877-f182-4cb5-a69c-bc3b40a4feb3"
is_public="True"
min_disk="0"
min_ram="0"
name="test image"
owner="e17e12ef8219460abeaf1075cbaabbd5"
properties="{}"
protected="False"
size="13147648"
status="active"
updated_at="2014-12-08T20:54:24.441587"
virtual_size="None"
4. Note the highlighted items in the previous step. The highlighted parameters are used in the openstack
image create command. If the properties field has a value, it must be split into sets of key value
pairs. For example:
properties="{u’key2’: u’value2’, u’key1’: u’value1’}"
The preceding values correspond to the following key value pairs:
Chapter 7. Managing as an Administrator
255
"key2" "value2"
"key1" "value1"
5. Save the image file on the region two controller:
# openstack image save --file test_image.img "test image"
6. Access the environment file for the second region by using the following command.
# . openrc.r2
7. Create the image in region r2:
Note: The following command must be entered on a single line, even though the example shows a
line break for formatting purposes.
# openstack image create
"test image"
--container-format bare --disk-format=qcow2 --public --file test_image.img
If the image has properties set, use the --property key=value option to set each option. For example:
--property key1=value1 --property key2=value2
Note: You can use glance help or openstack help to get more information about OpenStack CLI
commands for working with images in the OpenStack image repository.
Results
The glance repository in region r2 should now contain copies of the images from region r1 including their
metadata.
Backing up and restoring IBM Cloud Manager with OpenStack
To protect your IBM Cloud Manager with OpenStack data, you must back up critical files in case the
server enters an undesired state. Before you back up your data, determine the circumstances in which
you intend to restore your data.
Backing up and restoring the deployment server
While there are many techniques for backing up and restoring servers, the following procedure backs up
the minimal set of data needed for a successful recovery.
How you choose to back up the deployment server data varies depending on how you deployed the
deployment server and the backup and recovery strategy and infrastructure of your organization.
Regardless of the technique that is chosen, it is important to test both your backup and restore processes.
Backing up the deployment server
1. Make a directory to copy the backup data. This directory can be anything that you choose, but you
must ensure that it has enough disk space to hold the backup data. The commands in this document
use the following directory:
mkdir /tmp/backup
2. If you changed the Chef server configuration files, you must back up your changes. IBM Cloud
Manager with OpenStack sets these values during installation; therefore, no changes are typically
required. If you used a response file for installation, you must backup the response file and keep it
with your backups so it can be used to reinstall IBM Cloud Manager with OpenStack.
cp ~/cmwo_install.rsp /tmp/backup
3. Back up the certificates of the webserver.
mkdir /tmp/backup/nginx
cp -a /var/opt/chef-server/nginx/ca /tmp/backup/nginx/ca
4. Back up the bookshelf data.
256
IBM Cloud Manager with OpenStack: Administrator Guide, version 4.2
mkdir /tmp/backup/bookshelf
cp -a /var/opt/chef-server/bookshelf/data /tmp/backup/bookshelf/data
5. Back up the postgres database. The pg_dump command produces a consistent backup even if the
server processes are running.
mkdir /tmp/backup/database
su - opscode-pgsql
pg_dump -c opscode_chef > /tmp/chefserver.sql
exit
cp /tmp/chefserver.sql /tmp/backup/database
6. Back up your topology, node attribute, and encrypted data bag, secret key files. By default, these
files are in your /root/your-deployment-name directory.
cp -a /root/your-deployment-name /tmp/backup/
7. Back up the /root/.chef/knife.rb file.
cp /root/.chef/knife.rb /tmp/backup
8. Back up the server SSL certificate.
cp /root/.chef/os-management-server.pem /tmp/backup
9. If you are using identity files rather than passwords, back up identity files of the node. The location
depends on your configuration. When you deployed the node, you needed to specify either the
node's password or identity file in your topology files. Check your topology files to see whether you
used identity files and find their locations.
10. If you customized the file-repo or the yum-repo, back up those changes.
11. Compress the /tmp/backup directory and store in a safe location.
zip -r backup /tmp/backup
Restoring the deployment server
Start with a clean system and do the following:
1. Retrieve your backup archive file that you want to restore and extract it to /tmp/backup.
unzip backup.zip
2. Install IBM Cloud Manager with OpenStack. Use the response file if you used one during the initial
installation.
3. Apply any IBM Cloud Manager with OpenStack fix packs.
4. Apply any file-repo or yum-repo changes that were made or restore those changes from the backup
archive file.
5. Restore the postgres database.
/opt/chef-server/embedded/bin/psql -U opscode-pgsql opscode_chef
< /tmp/backup/database/chefserver.sql
6. Stop the server processes.
chef-server-ctl stop
7. Restore the bookshelf data.
cp -a /tmp/backup/bookshelf/data/* /var/opt/chef-server/bookshelf/data/
8. Restore chef configuration data.
cp -a /tmp/backup/nginx/ca /var/opt/chef-server/nginx
9. Restore the knife.rb file.
cp -a /tmp/backup/knife.rb /root/.chef/
10. Restore the certificate of the webserver.
cp -a /tmp/backup/os-management-server.pem /root/.chef
11. Restore your topology, node attribute, and data bag encryption, secret key files.
cp -a /tmp/backup/your-deployment-name /root
Chapter 7. Managing as an Administrator
257
12. If you are using identity files rather than passwords, restore the identity files of the node. The
location depends on your configuration.
13. Restart the chef server.
chef-server-ctl start
14. Reindex the chef server.
chef-server-ctl reindex
Your deployment server restore is now complete.
Backing up and restoring the OpenStack databases
The backup procedure is different depending on the database that is being used.
Backing up database data for recovery
All of the database data that is related to IBM Cloud Manager with OpenStack users, such as projects,
networks, instances, images, are stored in the database. The backup procedure is different depending on
the database that is being used.
1. Stop the IBM Cloud Manager with OpenStack services to ensure that the backup data is complete.
2. Follow the instructions that pertain to your specific database.
MySQL
For more information, see Backup and Recovery in the OpenStack community documentation.
DB2 OpenStack database
DB2 can also be used to host the OpenStack databases on the cloud controller. The following
shell script backs up a list of DB2 OpenStack databases. This shell script must be modified to
match the environment. The variable DB is where the DB2 program is located. The variable
DBLIST is a list of OpenStack databases to back up. The variable DBBACKUPDIR is a
directory to save the backups in. Since this shell script quiesces each database, while this shell
script runs, calls to these databases fail. The backup directory contains the backup files that
appear similar to the following example: NOVA.0.db2inst1.DBPART000.20140523134214.001 The
following shell script is an example DB2 OpenStack database backup script:
#!/bin/bash
##########################################################
# DB2 OpenStack DB backup Linux shell script
# MODIFY these variables to fit your environment
#
DB2 - home directory of DB2
#
DBLIST - list of Openstack DB to be backed up
#
DBBACKUPDIR - directory holding backed up copies
##########################################################
DB2="/opt/ibm/db2/V10.5/bin/db2"
DBLIST="nova glance"
DBBACKUPDIR="/tmp/DB2backupOpenstack"
mkdir -p $DBBACKUPDIR
for DB in $DBLIST
do
su - db2inst1 <<EOSU
echo "------DB $DB is being backed up ------"
$DB2 connect to $DB
$DB2 quiesce database immediate force connections
$DB2 connect reset
echo $DB2 backup database $DB to $DBBACKUPDIR without prompting
$DB2 backup database $DB to $DBBACKUPDIR without prompting
$DB2 connect to $DB
$DB2 unquiesce database
$DB2 connect reset
EOSU
done
258
IBM Cloud Manager with OpenStack: Administrator Guide, version 4.2
For more information, see Backup and Recovery in the OpenStack community documentation.
Restoring the DB2 OpenStack databases
DB2 can also be used to host the OpenStack databases on the cloud controller. The following shell script
can restore a DB2 OpenStack database. This shell script must be modified to match the environment. The
variable DB2 is where the DB2 program is located. The variable DBBACKUPDIR is a directory where the
backup files are located. The Variable DB is the OpenStack database to restore. The variable
DBBACKUPTIME is the time stamp part of the backup file name, found in the backup directory. Since
this shell script quiesces each database, while this shell script runs, calls to these databases fail. Here is an
example DB2 OpenStack database restore shell script:
#!/bin/bash
##########################################################
# DB2 OpenStack DB restore Linux shell script
# MODIFY these variables to fit your environment
#
DB2HOME - home directory of DB2
#
DB - database name to be restored
#
DBBACKUPDIR - directory holding backed up copies
#
DBBACKUPTIME - timestamp part of backupname
#
example : 20140522162140
##########################################################
DB2="/opt/ibm/db2/V10.5/bin/db2"
DBBACKUPDIR="/tmp/DB2backupOpenstack"
DB="nova"
DBBACKUPTIME="20140523135648"
su $DB2
$DB2
$DB2
echo
$DB2
$DB2
$DB2
$DB2
EOSU
db2inst1 <<EOSU
connect to $DB
quiesce database immediate force connections
connect reset
$DB2 restore database $DB from $DBBACKUPDIR taken at $DBBACKUPTIME without prompting
restore database $DB from $DBBACKUPDIR taken at $DBBACKUPTIME without prompting
connect to $DB
unquiesce database
connect reset
For more information, see Backup and Recovery in the OpenStack community documentation.
Backing up and restoring the self-service portal
To protect your self-service portal data, you must back up critical files in case the server enters an
undesired state. Before you back up your data, determine the circumstances in which you intend to
restore your data.
Backing up self-service portal data for recovery
There are two kinds of data to back up. The first set of data is for server configuration and the second set
of data is used by the database. When you consider what data to back up, review both sets of data.
Note: This procedure backs up the self-service portal only. It does not back up the underlying
virtualization managers, such as VMware vCenter or storage devices.
1. Stop the IBM Cloud Manager with OpenStack server to ensure that the backup data is complete.
2. Back up the following configuration files.
v The .SCE42 folder.
v In the installation folder: skc.ini
Note: If any values are changed in this file, you must back up the updated file after you change
default values.
Chapter 7. Managing as an Administrator
259
A copy of all these files is required to ensure a complete backup.
Backing up database data for recovery
All of the database data that is related to IBM Cloud Manager with OpenStack users, such as projects,
networks, instances, images, are stored in the database. The backup procedure is different depending on
the database that is being used.
1. Stop the IBM Cloud Manager with OpenStack server to ensure that the backup data is complete.
2. Follow the instructions that pertain to your specific database.
Derby database
If you are using the Derby database, backup the .SCE42/database folder that stores all the
database data.
DB2 database
If DB2 is configured, backup the database in the DB2 server. For more information about how
to back up the DB2 server, see the DB2 product information.
Note: Ensure that the information referenced matches the version of DB2 that you are using.
If not, reference the appropriate support documentation for similar information.
Restoring the server
To restore a backup of the server and the Derby database, copy all the saved files back to the original
server. After the copy is complete, start the IBM Cloud Manager with OpenStack server.
If you are using the DB2 database, there are some extra steps.
1. Ensure the path that is specified in the database.properties configuration file, by the property
database.db2.path, is correct.
# If db2 then the path to the DB2 dtatbase needs to be provided. This will be ignored for derby.
#database.db2.path=//localhost:50000/cfs:.
Essentially, creating a backup of the entire home folder and skc.ini file ensures a complete backup of the
IBM Cloud Manager with OpenStack server. Copying the files back to their original location restores the
data.
Important: There is a limitation to be aware of when you use this best practice. Any incremental data
that occurs after backing up the IBM Cloud Manager with OpenStack server is lost after you restore the
server. Therefore, some functions might not work as expected. For example, consider the circumstance
where you create an instance after you complete a capture, and then you restore the server. The IP
address that was assigned to the instance (after the backing up) is still available in the IP address pool. It
might be assigned to another instance.
260
IBM Cloud Manager with OpenStack: Administrator Guide, version 4.2
Chapter 8. Security
IBM Cloud Manager with OpenStack offers security options such as secure sockets layer (SSL),
Lightweight Directory Access Protocol (LDAP), and user administration. This section provides
information on managing passwords that are associated with the security options.
Passwords
IBM Cloud Manager with OpenStack uses keys to encrypt and decrypt passwords and other sensitive
information. If using the self-service portal, there is a protected file named cfs.keystore that stores the
randomly-generated Data Encryption Standard (DES) key that IBM Cloud Manager with OpenStack uses.
The following list provides links to various sections in this document that describe default passwords and
places where passwords are entered and stored in IBM Cloud Manager with OpenStack.
v “Customizing passwords and secrets” on page 114
v Chapter 3, “Installing and uninstalling IBM Cloud Manager with OpenStack,” on page 21
v “Configuring secure shell (SSH) communication” on page 164
v “Configuring REST API authentication” on page 169
v “Configuring database” on page 170
v “Configuring global image deployment” on page 173
v Set secure access during deployment (Linux on VMware)
v “Creating a configuration strategy” on page 186
v “Configuring the default administrator user account and changing password” on page 211
v “Configuring LDAP authentication using the web interface” on page 212
v “Adding a network configuration” on page 238
Port usage
The number of ports that IBM Cloud Manager with OpenStack uses depends upon the various
components and which network interfaces allow access to them.
The following tables list the default ports that might apply to your IBM Cloud Manager with OpenStack
environment, depending upon your configuration. You can change these values to customize them for
your environment as well.
Table 60. Port usage for IBM Cloud Manager with OpenStack single controller
Port
Service
Notes
22
sshd
SSH access that uses the customer network can be enabled.
67
DHCP server
68
DHCP server
80
openstack-dashboardserver
Provides access to the Horizon dashboard.
443
openstack-dashboardserver
Provides https access to the Horizon dashboard.
5000
openstack-identity-api
35357
openstack-identityadmin
© Copyright IBM Corp. 2012, 2014
261
Table 60. Port usage for IBM Cloud Manager with OpenStack single controller (continued)
Port
Service
Notes
5671
openstack-messagingserver
6080
openstack-computenovnc
8000
openstackorchestration-api-cfn
8003
openstackorchestration-apicloudwatch
8004
openstackorchestration-api
8774
openstack-computeapi
8776
openstack-blockstorage-api
8777
openstack-telemetryapi
9191
openstack-imageregistry
9292
openstack-image-api
9696
openstack-network-api
9973
ibm-openstack-iaasgateway
27017
openstack-databasenosql
50000
openstack-databaseserver
DB2 NoSQL wire protocol listener for access to ceilodb2 database
Table 61. Port Usage - IBM Cloud Manager with OpenStack self-service portal
Port
Service
Notes
7777
sce
OSGi console, access from localhost only
18080
sce
HTTP port
18443
sce
HTTPS port
Table 62. Port usage - Compute nodes
Port
Service
Notes
22
ssh
SSH port. This port must be accessible from the Chef server.
5900 5999
vnc-server
Only applicable to KVM/QEMU or PowerKVM compute nodes.
Table 63. Port usage - Chef server
Port
Notes
1443
The secure (HTTPS) port for accessing the Chef server. The port number is configurable.
1480
The non-secure (HTTP) port for accessing the Chef server. The port number is configurable.
262
IBM Cloud Manager with OpenStack: Administrator Guide, version 4.2
User names and passwords
The following default user names and passwords are included with IBM Cloud Manager with OpenStack.
Default user names and passwords
Table 64. OpenStack credentials
Default data bag item
(that contains the
password)
Description
User name
Password
ceilodb2
ceilodb2 (minimal
topology) and
ceilometer (controller
+n compute or
distributed database
topology)
db_passwords/
ceilometer
Used for internal communication to Ceilometer
database.
cinder
cinder
db_passwords/cinder
Used for internal communication to the Cinder
database.
glance
glance
db_passwords/glance
Used for internal communications to the Glance
database.
heat
heat
db_passwords/heat
Used for internal communications to the Heat
database.
dash
horizon
db_passwords/horizon
Used for internal communications to the Horizon
database.
keystone
keystone
db_passwords/keystone
Used for internal communications to the
Keystone database.
neutron
neutron
db_passwords/neutron
Used for internal communications to the Neutron
database.
nova
nova
db_passwords/nova
Used for internal communications to the Nova
database.
powervc
powervc
db_passwords/powervc
Used for internal communications to the
PowerVC driver database.
admin
admin (minimal
user_passwords/admin
topology) openstack1
(controller +n compute
or distributed
database topology)
OpenStack and (if installed) the self-service
portal administrator user.
ceilometer
openstack-ceilometer
service_passwords/
openstack-ceilometer
OpenStack service user for Ceilometer.
cinder
openstack-blockstorage
service_passwords/
openstack-block-storage
OpenStack service user for Cinder.
glance
openstack-image
service_passwords/
openstack-image
OpenStack service user for Glance.
heat
openstackorchestration
service_passwords/
openstack-orchestration
OpenStack service user for Heat.
neutron
openstack-network
service_passwords/
openstack-network
OpenStack service user for Neutron.
nova
openstack-compute
service_passwords/
openstack-compute
OpenStack service user for Nova.
Chapter 8. Security
263
Table 64. OpenStack credentials (continued)
Default data bag item
(that contains the
password)
User name
Password
powervc
openstack-powervcdriver
service_passwords/
openstack-powervcdriver
OpenStack service user for PowerVC driver.
gwagent
openstack-iaasgateway
service_passwords/
openstack-iaas-gateway
OpenStack service user for IaaS gateway.
db2das1
db2das1 (minimal
user_passwords/db2das1 DB2 administrator user.
topology) openstack1
(controller +n compute
or distributed
database topology)
db2fenc1
db2fenc1 (minimal
user_passwords/
topology) openstack1 db2fenc1
(controller +n compute
or distributed
database topology)
db2inst1
user_passwords/db2inst1 DB2 instance user.
db2inst1 (minimal
topology) openstack1
(controller +n compute
or distributed
database topology)
heat_stack_
admin
openstack1
user_passwords/
heat_stack_admin
Keystone user with roles sufficient to manage
users and projects in the stack-user-domain.
mysqlroot
openstack1 (controller
+n compute or
distributed database
topology)
user_passwords/
mysqlroot
MySQL root user.
qpidadmin
qpidadmin (minimal
user_passwords/
topology) openstack1 qpidadmin
(controller +n compute
or distributed
database topology)
Qpid administrator user. Used for
communication with the Qpid messaging server.
qpidclient
qpidclient (minimal
user_passwords/
topology) openstack1 qpidclient
(controller +n compute
or distributed
database topology)
Qpid client user. Used for communication with
the Qpid messaging server.
qpidssl
user_passwords/qpidssl
qpidssl (minimal
topology) openstack1
(controller +n compute
or distributed
database topology)
Qpid SSL user. Used for communication with the
Qpid messaging server.
264
Description
DB2 fenced user.
IBM Cloud Manager with OpenStack: Administrator Guide, version 4.2
Table 64. OpenStack credentials (continued)
Default data bag item
(that contains the
password)
User name
Password
Description
rabbitclient
rabbitclient (minimal
user_passwords/
topology) openstack1 rabbitclient
(controller +n compute
or distributed
database topology)
sceagent
sceagent (minimal
user_passwords/sceagent IBM Cloud Manager with OpenStack self-service
topology) openstack1
portal user. Used to set up the IaaS Gateway and
add an OpenStack cloud.
(controller +n compute
or distributed
database topology)
RabbitMQ client user. Used for communication
with the RabbitMQ messaging server.
If you deployed a controller +n compute or distributed database topology, you can use the following
command to download and decrypt the data bags that contain the passwords and secrets for your
deployment. The information is stored in the data_bags directory. The directory also contains a
passwords and secrets JSON file, your-environment-name_passwords_file.json, that summarizes the
passwords and secrets for your deployment. Ensure that you remove the data_bags directory when you
are done using it.
$ knife os manage get passwords --topology-file your-topology-name.json data_bags
Note: You can customize all passwords when you deploy a topology. For more information about
customizing passwords when deploying a topology, see “Customizing passwords and secrets” on page
114. For more information about changing passwords after a topology is deployed, see “Changing
passwords and secrets” on page 147.
Strengthening security
If you are using Keystone authentication and must comply with enhanced security requirements, ensure
you are using the correct configuration settings.
Token hash algorithms
The default hash algorithm to use for PKI tokens is md5, which might not be adequate.
You can set any algorithm that the Python standard library's hashlib function supports by configuring
the hash_algorithm option in the [token] section of the keystone.conf file. The auth_token middleware
must be configured with the same hash_algorithm value as well. The token hash algorithm should be a
minimum of SHA2. If you set the value to sha256, you provide a SHA2 hash that is adequate for most
standards.
Disable the s3 extension
The s3 extension is enabled by default. You must disable the extension.
To disable, remove the s3_extension from the pipeline. This is in the /etc/keystone/api-paste.ini file.
Remove s3_extension from the following options:
v [pipeline:admin_api]
v [pipeline:api_v3]
Chapter 8. Security
265
266
IBM Cloud Manager with OpenStack: Administrator Guide, version 4.2
Chapter 9. Reference
The following topics provide reference information for IBM Cloud Manager with OpenStack.
Commands
IBM Cloud Manager with OpenStack offers a command-line interface.
Refer to the following commands and their descriptions. For instructions to use the command, open a
command line and enter --help. For example, knife os manage deploy topology --help. To assist in
analyzing problems with the commands, enter -VV to obtain debug level information. For example, knife
os manage deploy topology simple_topology.json -VV. You can also review the sample topology file,
keys, and descriptions provided by IBM Cloud Manager with OpenStack.
Note: For information about the OpenStack command line interface, see OpenStack Command-Line
Interface Reference in the OpenStack community documentation.
Table 65. Commands and descriptions
Command
Description
knife os manage deploy evaluation [NODE_FQDN] (options)
Used to deploy an evaluation node.
where:
v NODE_FQDN is the host fully qualified domain name or IP address for
the node. The fully qualified domain name (FQDN) of the node is
optional. However, if it is not specified, you are prompted for it and
it defaults to the FQDN of the host the command is running on. The
command also prompts for the SSH root user password of the node
being deployed to.
knife os manage deploy node NODE_FQDN
RUN_LIST_ENTRY[,RUN_LIST_ENTRY] (options)
Used to deploy a single node.
where:
v NODE_FQDN is the host fully qualified domain name or IP address for
the node.
v RUN_LIST_ENTRY is a comma-separated list of run list items such as
roles, and recipes. If the run list entries are specified, they are set on
the node. Otherwise, they are not required.
knife os manage deploy topology TOPOLOGY_FILE_NAME (options)
Used to deploy a topology.
where:
v TOPOLOGY_FILE_NAME is a JSON file that describes the topology. If the
topology file is in the current directory, only the topology file name
is required, otherwise, the fully qualified topology file name is
accepted as well.
knife os manage update node NODE_FQDN
[RUN_LIST_ENTRY[,RUN_LIST_ENTRY]] (options)
Used to update or refresh a single node.
where:
v NODE_FQDN is the host fully qualified domain name or IP address for
the node.
v RUN_LIST_ENTRY is a comma-separated list of run list items such as
roles, and recipes. If the run list entries are specified, they are set on
the node. Otherwise, they are not required.
© Copyright IBM Corp. 2012, 2014
267
Table 65. Commands and descriptions (continued)
Command
Description
knife os manage remove node NODE_FQDN -–topology-file
TOPOLOGY_FILE --secret-file SECRET_FILE (options)
Used to remove a compute node from a
deployed topology.
where:
v NODE_FQDN is the fully qualified domain name of a node that was
deployed.
v TOPOLOGY_FILE is the name of the topology JSON file that describes a
topology that was already deployed.
v SECRET-FILE is the secret file that is used to encrypt the passwords
and secrets. A secret file is required for this command. If this option
is not specified, the example data bag secret file that is found in the
IBM Cloud Manager with OpenStack Chef repository is used.
knife os manage validate node NODE_FQDN
where:
Used to validate a node prior to
deployment.
v NODE_FQDN is the fully qualified domain name of a node system.
knife os manage update topology TOPOLOGY_FILE_NAME (options)
Used to update or refresh a topology.
where:
v TOPOLOGY_FILE_NAME is a JSON file that describes the topology. If the
topology file is in the current directory, only the topology file name
is required, otherwise, the fully qualified topology file name is
accepted as well.
knife os manage set environment [ENVIRONMENT_NAME] (options)
where:
Used to create a new, or modify an
existing Chef environment that is used
during a topology or node deployment.
v ENVIRONMENT_NAME is the name of a new environment to create, or an
existing environment to modify. New environments are created based
on one of the existing example environments that are stored in the
IBM Cloud Manager with OpenStack Chef repository. By default, the
command prompts for several environment values, and when done,
saves the environment that is created or modified on the Chef server.
You can use the –env-config option in an environment YAML
configuration file to enter environment changes instead of using the
command line. After the environment is updated, it can be used to
deploy or update a single node or a topology. The ENVIRONMENT_NAME
field is optional. If it is not provided, the command prompts for one.
knife os manage set topology [TOPOLOGY_FILE_NAME] (options)
where:
v TOPOLOGY_FILE_NAME is the name of a new topology JSON file to
create. The command prompts for all of the information that is
required to deploy a topology of nodes. The resulting JSON file is
saved to the current directory, and can then be used to deploy a
topology using the knife os manage deploy topology command.
268
IBM Cloud Manager with OpenStack: Administrator Guide, version 4.2
Used to create a new topology JSON file
that can be used during the deployment of
a topology.
One of the required topology items is the
environment name. If you enter a new
environment name in this command while
entering the topology information results
in the knife os manage set environment
command being called automatically to
create the new environment and upload it
to the Chef server when it is complete.
Thus, this command can be used to create
a new environment, and upload to the
chef server, as well as, create a new
topology JSON file in one step.
Table 65. Commands and descriptions (continued)
Command
Description
knife os manage appliance migrate node NODE_FQDN (options)
Used to migrate the data and
configuration from a IBM SmartCloud
Entry 3.2 appliance to a IBM Cloud
Manager with OpenStack single control
node.
where:
v NODE_FQDN is the host fully qualified domain name of the controller
node.
Used to set passwords and secrets for a
knife os manage set passwords --secret-file SECRET_FILE -E
ENVIRONMENT[.json] --topology-file TOPOLOGY_FILE [PASSWORDS_FILE] new topology deployment.
where:
v SECRET_FILE is the secret file that is used to encrypt the passwords
and secrets. A secret file is required for this command. If this option
is not specified, the example data bag secret file that is found in the
IBM Cloud Manager with OpenStack Chef repository is used. If the
secret file does not exist, it is created.
v
ENVIRONMENT[.json] is the environment that is updated with the
new passwords and secrets. This option is required and can either be
the name of the environment on the Chef server or the environment
JSON file.
v TOPOLOGY_FILE is the topology JSON file that is updated to reference
the secret file that is used by this command.
v PASSWORDS_FILE is the passwords and secrets JSON file. If not
specified, all passwords and secrets are randomly generated. If
specified, the file contains the passwords and secrets that the caller
wants to set for the specified data bags and data bag items. A subset
of all passwords and secrets can be set in this file. If a password or
secret is not set or its value is set to RANDOM, then a random
password is generated. An example passwords and secrets JSON file
can be found in the IBM Cloud Manager with OpenStack Chef
repository.
knife os manage get passwords --secret-file SECRET_FILE -E
ENVIRONMENT --topology-file TOPOLOGY_FILE [DATA_BAGS_DIRECTORY]
Used to get passwords and secrets for a
topology deployment.
where:
v SECRET_FILE is the secret file that is used to encrypt the passwords
and secrets for the deployment. The default value is the example
data bag secret file that is found in the IBM Cloud Manager with
OpenStack Chef repository. If this option is not specified and the
TOPOLOGY_FILE option is specified, the secret file that is specified by
the topology JSON file is used.
v ENVIRONMENT is the environment that is used for the deployment. If
this option is not specified and the TOPOLOGY_FILE option is specified,
the environment that is specified by the topology JSON file is used.
v TOPOLOGY_FILE is the topology JSON file for the deployment. If the
SECRET_FILE option is not specified, then the secret file that is
specified by this topology JSON file is used. If the ENVIRONMENT
option is not specified, then the environment that is specified by this
topology JSON file is used.
v DATA_BAGS_DIRECTORY is the directory that is created to store the data
bags and data bag items that contain the passwords and secrets for
the deployment. If this option is not specified, the 'data_bags'
directory is used.
Chapter 9. Reference
269
Table 65. Commands and descriptions (continued)
Command
Description
knife os manage update passwords --secret-file SECRET_FILE -E
ENVIRONMENT --topology-file TOPOLOGY_FILE [DATA_BAGS_DIRECTORY]
Used to update passwords and secrets for
a topology deployment.
where:
v SECRET_FILE is the secret file that is used to encrypt the passwords
and secrets for the deployment. The default value is the example
data bag secret file found in the IBM Cloud Manager with OpenStack
Chef repository. If this option is not specified and the TOPOLOGY_FILE
option is specified, the secret file that is specified by the topology
JSON file is used.
v ENVIRONMENT is the environment that is used for the deployment. If
this option is not specified and the TOPOLOGY_FILE option is specified,
the environment that is specified by the topology JSON file is used.
v TOPOLOGY_FILE is the topology JSON file for the deployment. If the
SECRET_FILE option is not specified then the secret file that is
specified by this topology JSON file is used. If the ENVIRONMENT
option is not specified then the environment specified by this
topology JSON file is used.
v DATA_BAGS_DIRECTORY is the directory containing the data bags and
data bag items with the updated passwords and secrets for the
deployment. If this option is not specified the 'data_bags' directory is
used.
knife os manage encrypt password [PASSWORD]
where PASSWORD is the clear text password to encrypt. If PASSWORD is not
entered, you are prompted to enter the password.
knife os manage services ACTION --node NODE_FQDN --topology-file
TOPOLOGY_FILE
where:
Used to encrypt a clear text password for
use in a topology JSON, passwords JSON,
or cloud YAML file.
Used to start, stop, restart, disable, enable,
and obtain status from the OpenStack
services that are running on a particular
node or topology.
v ACTION is the action to perform on the OpenStack services. Valid
values are start, stop, restart, enable, disable, and status.
v NODE_FQDN is the fully qualified domain name of a node that was
deployed.
v TOPOLOGY_FILE is the name of the topology JSON file that describes a
topology that was already deployed.
Either the -node option or the –topology-file option is required, but both
cannot be specified.
knife os manage deploy cloud CLOUD_FILE_NAME
where CLOUD_FILE_NAME is the full path and file name of the cloud
YAML configuration file.
Topology JSON file
View a sample layout found in the topology JSON file.
A topology JSON looks similar to the following layout:
{
"name":"Topology1",
"description":"This is a topology",
"environment":"os-single-controller-n-compute",
"secret_file":"data_bags/example_data_bag_secret",
"run_sequentially":false,
270
IBM Cloud Manager with OpenStack: Administrator Guide, version 4.2
Used to deploy a cloud topology.
"concurrency":10,
"nodes": [
{
"name": "controller",
"description": "This is the controller node",
"fqdn":"controllername.company.com",
"password":"passw0rd",
"run_order_number":1,
"quit_on_error":true,
"chef_client_options": [
"-i 3600",
"-s 600"
],
"runlist": [
"role[ibm-os-single-controller-node]"
]
},
{
"name": "KVM qemu compute",
"description": "This is a KVM qemu compute node",
"fqdn":"computename.company.com",
"user":"admin",
"identity_file":"/root/identity.pem",
"run_order_number":2,
"allow_update": false,
"runlist": [
"role[ibm-os-compute-node-kvm]"
],
"attributes":"{\"openstack\":{\"compute\":{\"libvirt\":{\"virt_type\":\"qemu\"}}}}"
}
]
}
Table 66. Topology Keys
Topology Keys
Description
name
A user-defined name of the topology.
description
A user-defined description of the topology.
environment
The environment to use with all nodes in the topology. The environment must be on the
chef server.
secret_file
The secret file that contains the symmetric key for encrypted data bags. This file is only
required if encrypted data bags are used to store the OpenStack passwords.
run_sequentially
An optional flag that is used to control how nodes in a node run_order_number run. Set to
true to run each node sequentially. Set to false to run all nodes in a run_order_number in
parallel. The default value is false.
concurrency
An optional integer value that is used to specify the maximum number of nodes that can
run in parallel if run_sequentially is set to false. If not set, all nodes in with a
run_order_number run in parallel, without limit. The default is there is no limit on the
number of nodes that can run in parallel.
nodes
A list of nodes in the topology. At least one node is required
Table 67. Node Keys
Node Keys
Description
name
A user-defined name of the node.
description
A user-defined description of the node.
fqdn
The host fully qualified domain name or IP address of the node.
chef_node_name
The optional setting for the node's name on the Chef server. This setting defaults to the
fully qualified domain name value of the node if not explicitly set.
Chapter 9. Reference
271
Table 67. Node Keys (continued)
Node Keys
Description
user
The ssh user of the node. This setting defaults to root.
password
The ssh user password of the node. This might be used in place of identity_file. Either
the password, or the identity_file are required for ssh access. The password value can
be either plain text, or encrypted. Encrypted passwords are written by the os manage set
topology command when it is used to build the topology JSON file.
identity_file
The identity file that contains the ssh private key. This file might be used in place of
password for ssh access. Either the password, or the identity_file are required for ssh
access to the node.
run_order_number
Each node has an optional run_order_number setting that is an integer value greater than
or equal to zero. The default run_order_number value, if not specified, is zero. The
run_order_number is used to group one or more nodes to be deployed together as a
collection of nodes. If the topology setting of run_sequentially is not specified or is set
to false, all nodes with a given run_order_number are run in parallel as a group. If the
topology setting of run_sequentially is set to true, all nodes with run_order_number are
run sequentially as a group. The numbers are processed by the smallest one first, and the
largest one last. When a run_order_number is processed, all nodes with that
run_order_number are deployed in parallel or sequentially, depending on the topology
run_sequentially setting. Within a given run_order_number, nodes with different
environment values must be bootstrapped sequentially, but nodes with the same
environment value can be bootstrapped in parallel. All nodes within a given
run_order_number deploy (run chef_client) in parallel after all nodes in the
run_order_number are bootstrapped. The default value is zero.
quit_on_error
Each node has an optional quit_on_error boolean value that defaults to false. The
quit_on_error setting applies to a given run_order_number. If set to true, any node with
that run_order_number causes the run to stop on failure at the end of the run. Flow
would not continue to the next run_order_number set of nodes. If any of the nodes within
a given run_order_number has its quit_on_error value set to true, then the process stops
at the end of the run, and does not proceed to the set of nodes in the next
run_order_number. The default value is false.
chef_client_options
An optional list of run options to be passed to the chef-client program run on the node.
runlist
The run list for the node. The run list is a list of roles or cookbook recipes to be applied
to the node. The roles and cookbook recipes must be on the Chef server.
attributes
The optional JSON attribute string to pass to the node during the deploy or update
process. The attributes that are specified in the JSON string are applied when the
chef-client is run on the node during a deploy or update operation.
attribute_file
The optional fully qualified path and file name of an attribute JSON file to use in place of
the attributes setting. The attributes in the JSON file are applied when the chef-client is
run on the node during a deploy or update operation. Either attribute_file or attributes
can be specified, but not both.
allow_update
An optional Boolean value that is used during updates only that indicates whether a
node should be updated. Set to true to allow the node to be updated. Set to false if the
node should not be updated. The default is true.
The following settings are required topology settings.
v The following topology keys are required during a topology deploy operation. The other keys are
optional.
environment
v The following node keys are required for each node during a topology deploy operation. The other
keys are optional.
272
IBM Cloud Manager with OpenStack: Administrator Guide, version 4.2
fdqn
runlist
either the password or the identity_file.
v None of the topology keys are required during a topology update operation.
v The following node keys are required for each node during a topology update operation. The other
keys are optional.
fdqn
either the password or the identity_file.
Cloud YAML configuration file
A cloud YAML configuration file is used as the base structure for your cloud deployment. An example
cloud YAML configuration file is included here.
A cloud YAML configuration file looks similar to the following:
# =================================================================
# Cloud Information
# =================================================================
cloud:
# Cloud Name: The cloud name must not contain spaces or special
# characters. The name is used for the OpenStack region name.
name: MyCloudName
# Cloud Description
description: Controller + N Compute Topology - x86 KVM
# Cloud Administrator (admin) User’s Password
password: MyCloudPassword
# Cloud Database Service Type: db2 or mysql
database_service_type: db2
# Cloud Messaging Service Type: rabbitmq or qpid
messaging_service_type: rabbitmq
# Cloud Features: The cloud features to be enabled or disabled.
features:
self_service_portal: enabled
platform_resource_scheduler: enabled
# Cloud Topology: References the node name(s) for each role
# within the cloud’s topology.
topology:
database_node_name: controller
controller_node_name: controller
self_service_portal_node_name: controller
kvm_compute_node_names: kvm_compute
# ================================================================
# Environment Information
# ================================================================
environment:
base: example-ibm-os-single-controller-n-compute
default_attributes:
# (Optional) Add Default Environment Attributes
override_attributes:
# (Optional) Add Override Environment Attributes
# ================================================================
# Node Information
# ================================================================
nodes:
- name: controller
description: Cloud controller node
fqdn: controllername.company.com
password: passw0rd
identity_file: ~
nics:
Chapter 9. Reference
273
management_network: eth0
data_network: eth1
- name: kvm_compute
description: Cloud KVM compute node
fqdn: kvmcomputename.company.com
password: ~
identity_file: /root/identity.pem
nics:
management_network: eth0
data_network: eth1
# (Optional) Node Attribute JSON File
attribute_file: ~
Cloud YAML Configuration Keys
This information describes the cloud configuration keys that are used in the cloud YAML configuration
file.
Table 68. Cloud YAML Configuration Keys
Key
Description
cloud
The cloud information section.
cloud.name
The user-defined name for the cloud. The cloud name must not contain
spaces or special characters. The name is used for the OpenStack region
name.
cloud.description
The optional user-defined description for the cloud.
cloud.password
The optional user-defined password for the cloud administrator (admin) user.
If not specified, a randomly generated password is used unless
cloud.password_file is specified. The os manage get passwords command
can be used to determine the password generated.
cloud.password_file
The optional user-defined passwords and secrets JSON file containing the
passwords and secrets for the cloud topology. If cloud.password is also set
then it will override the cloud administrator (admin) user’s password in the
file. Any passwords or secrets not set by cloud.password or
cloud.password_file are randomly generated. The os manage get passwords
command can be used to determine the passwords and secrets generated.
cloud.database_service_type
The database used by OpenStack. Set to db2 to use DB2 or mysql to use
MySQL.
cloud.messaging_service_type
The message queue used by OpenStack. Set to rabbitmq to use RabbitMQ or
qpid to use Qpid.
cloud.features
The cloud features section.
cloud.features.self_service_portal
IBM Cloud Manager with OpenStack features an easy to use self-service
portal for performing cloud operations. Set to enabled to enable this feature. If
not set or set to disabled, this features is disabled. When the feature is
disabled, then cloud.topology.self_service_portal_node_name must be set
to ~.
cloud.features.platform_resource_
scheduler
IBM Cloud Manager with OpenStack features an enhanced OpenStack
compute scheduler, IBM Platform Resource Scheduler (PRS). Set to enabled to
enable this feature. If not set or set to disabled, the default OpenStack compute
scheduler filters are used.
cloud.topology.database_node_name
The name of the node (nodes.name) that runs the IBM Cloud Manager with
OpenStack database service.
cloud.topology.controller_node_name The name of the node (nodes.name) that runs the IBM Cloud Manager with
OpenStack single controller node services.
cloud.topology.self_service_portal_
node_name
274
If cloud.features.self_service_portal is enabled, this is the name of the
node that runs the IBM Cloud Manager with OpenStack self-service portal.
IBM Cloud Manager with OpenStack: Administrator Guide, version 4.2
Table 68. Cloud YAML Configuration Keys (continued)
Key
Description
cloud.topology.kvm_compute_
node_names
The name of the nodes (nodes.name) that run the IBM Cloud Manager with
OpenStack KVM/QEMU compute node services. These node names are only
required when deploying a cloud environment with KVM/QEMU compute
nodes. One or more nodes can share the same name. Remove the key or set
to ~ when not required for your cloud environment.
cloud.topology.powerkvm_
compute_node_names
The name of the nodes (nodes.name) that run the IBM Cloud Manager with
OpenStack PowerKVM compute node services. These node names are only
required when deploying a cloud environment with PowerKVM compute
nodes. One or more nodes can share the same name. Remove the key or set
to ~ when not required for your cloud environment.
cloud.topology.powervc_
driver_node_name
The name of the node (nodes.name) that runs the IBM Cloud Manager with
OpenStack PowerVC Driver services. This node name is only required when
deploying a cloud environment to manage to PowerVC. Remove the key or
set to ~ when not required for your cloud environment.
environment
The environment information section.
environment.base
The name of the base Chef environment, found in the IBM Cloud Manager
with OpenStack Chef repository, that is used to create the Chef environment
for the cloud.
environment.default_attributes
The optional list of Chef environment default attributes to set. The attributes
must be specified by using the same syntax as the “Environment YAML
Configuration File” on page 276.
environment.override_attributes
The optional list of Chef environment override attributes to set. The attributes
must be specified by using the same syntax as the “Environment YAML
Configuration File” on page 276.
nodes
The nodes information section.
nodes.name
The user-defined name of the node. One or more nodes can share the same
name. This node name is used by the cloud.topology.* keys to reference the
node.
nodes.description
A user-defined description of the node.
nodes.fqdn
The fully qualified domain name of the host or IP address of the node.
nodes.password
The SSH user password of the node. Either nodes.password or
nodes.identity_file is required for SSH access. Set to ~ to use
nodes.identity_file.
nodes.identity_file
The SSH identity file of the node. Either nodes.password or
nodes.identity_file is required for SSH access. Set to ~ to use
nodes.password.
nodes.nics
The nodes network interface cards section.
nodes.nics.management_network
The name of the network interface card used for IBM Cloud Manager with
OpenStack communication between the nodes in the cloud. The fqdn setting
for the node must resolve to the IP address of this network.
nodes.nics.data_network
The optional name of the network interface card used for the virtual machine
data network of the cloud. It is only required if you use VLAN or Flat
networks in your cloud. Set to ~ if the node does not have a second network
interface card. Do not set to the same value as nics.management_network for
the node. Also, do not set to a network interface card that provides an
alternative management network for the node, for example, a private or
public IP address.
nodes.attribute_file
The optional name of an attribute JSON file to use in place of the attributes
setting. The attributes in the JSON file are applied the first-time chef-client is
run on the node.
Chapter 9. Reference
275
Table 68. Cloud YAML Configuration Keys (continued)
Key
Description
powervc
The PowerVC information section.
powervc.host
The fully qualified domain name or IP address of PowerVC.
powervc.admin_user
The PowerVC administrator’s user name.
powervc.admin_password
The PowerVC administrator’s password.
powervc.messaging_service
_auto_config
IBM Cloud Manager with OpenStack can automatically configure the
PowerVC message queue for your cloud. Set to enabled to enable this feature.
If not set or set to disabled, the PowerVC message queue must be manually
configured and powervc.messaging_service_type and
powervc.messaging_service_password must be set.
powervc.messaging_service_type
The message queue used by PowerVC. Set to rabbitmq to use RabbitMQ or
qpid to use Qpid. This is ignored if powervc.messaging_service_auto_config
is enabled.
powervc.messaging_service_
password
The PowerVC message queue service’s password. This is ignored if
powervc.messaging_service_auto_config is enabled.
powervc.storage_connectivity_groups The PowerVC storage connectivity groups that you want to make available in
your cloud. Add one storage connectivity group per line.
Environment YAML Configuration File
An environment YAML configuration file looks similar to the following example:
default_attributes:
openstack.attribute_test.string
openstack.attribute_test.string_no_quotes
openstack.attribute_test.integer
openstack.attribute_test.boolean
openstack.attribute_test.nothing
:
:
:
:
:
"test"
test
14
true
# This is one string and not an array of strings
openstack.attribute_test.array_strings
: zero, one, two
# Arrays of strings
openstack.attribute_test.array_strings_1 : ["zero", "one", "two"]
openstack.attribute_test.array_strings_2 : [zero, one, two]
openstack.attribute_test.array_strings_3 :
- zero
- one
- two
# This is one string and not an array of strings
openstack.attribute_test.array_strings_4 :
- zero, one, two
# Array of integers
openstack.attribute_test.array_integers : [0, 1, 2, 3]
openstack.attribute_test.array_integers_1 :
- 0
- 1
- 2
- 3
override_attributes:
openstack.network.openvswitch.tenant_network_type
:
openstack.network.openvswitch.bridge_mappings
:
openstack.network.openvswitch.network_vlan_ranges
:
openstack.network.openvswitch.bridge_mapping_interface:
openstack.network.ml2.tenant_network_types
:
openstack.network.ml2.network_vlan_ranges
:
276
"gre"
""
""
""
"gre"
""
IBM Cloud Manager with OpenStack: Administrator Guide, version 4.2
openstack.network.ml2.flat_networks
: ""
# This is optional. It is used to set the environment’s description.
env_description:
input_validation
: string
default
: Daryl’s environment with direct attributes
enabled
: true
This file is used by the os manage set environment command. The file contains the default and override
attributes to set in the environment. In addition, the file might optionally contain the description to set
for the environment.
Passwords and secrets JSON file
The passwords and secrets JSON file is used by the os manage deploy cloud command and the os manage
set passwords command. An example passwords and secrets JSON file is included here.
A passwords and secrets JSON file looks similar to the following:
{
"user_passwords": {
"admin": "my_admin_password",
"rabbitclient": "my_rabbitclient_password"
}
}
When the os manage deploy cloud command or the os manage set passwords command is run, the
command accesses the passwords and secrets JSON file. The file contains the passwords and secrets that
the caller wants to set for the specified data bags and data bag items. A subset of all passwords and
secrets can be set in this file. If a password or secret is not set or its value is set to RANDOM, then a
random password is generated. This file only supports the passwords and secrets that are found in the
Data bags topic.
After the passwords and secrets are set for a deployment with the os manage deploy cloud command or
the os manage set passwords command, you can generate the passwords and secrets JSON file by using
the os manage get passwords command. The generated file contains the actual password values that you
set for the deployment.
Data bags
The following example data bags are provided in support of the IBM Cloud Manager with OpenStack
topologies.
These data bags contain passwords and secrets for your cloud operating environments running IBM
Cloud Manager with OpenStack. By default, all data bags are encrypted using the example secret key
that is provided with your IBM Cloud Manager with OpenStack installation (/opt/ibm/cmwo/chef-repo/
data_bags/example_data_bag_secret).
v db_passwords
v secrets
v service_passwords
v user_passwords
db_passwords
Contains IBM Cloud Manager with OpenStack database passwords for your deployment. By
default, all passwords match the data bag item name.
v ceilometer: Database password for the telemetry component.
v cinder: Database password for the block-storage component.
v glance: Database password for the image component.
Chapter 9. Reference
277
v
v
v
v
v
heat: Database password for the orchestration component.
horizon: Database password for the dashboard component.
keystone: Database password for the identity component.
neutron: Database password for the network component.
nova: Database password for the compute component.
v powervc: Database password for the PowerVC driver component.
secrets
Contains IBM Cloud Manager with OpenStack secrets. By default, all secrets match the data bag
item name except, openstack_simple_token.
v neutron_metadata_secret: Metadata secret for the network component.
v openstack_identity_bootstrap_token: Bootstrap token for the identity component.
v openstack_metering_secret: Metering secret for the telemetry component.
v openstack_simple_token: Simple token for the IBM Cloud Manager with OpenStack identity
component. The secret must be a base64 encoded value. To generate a secret, run the following
command:
dd if=/dev/urandom bs=16 count=1 2>/dev/null | base64
v openstack_vmware_secret_name: Secret for the VMware driver.
service_passwords
Contains IBM Cloud Manager with OpenStack service user passwords. By default, all passwords
match the data bag item name.
v openstack-block-storage: Cinder service user password for the block-storage component.
v
v
v
v
v
v
openstack-ceilometer: Ceilometer service user password for the telemetry component.
openstack-compute: Nova service user password for the compute component.
openstack-image: Glance service user password for the image component.
openstack-network: Neutron service user password for the network component.
openstack-orchestration: Heat service user password for the orchestration component.
openstack-iaas-gateway: IaaS gateway service user password for the iaas-gateway component.
v openstack-powervc-driver: PowerVC driver service user password for the PowerVC driver
component.
user_passwords
Contains IBM Cloud Manager with OpenStack user passwords. This includes passwords for the
IBM Cloud Manager with OpenStack administrator along with the Qpid, RabbitMQ, DB2, and
MySQL users. By default, all passwords are openstack1.
v admin: Password for the OpenStack admin user and the IBM Cloud Manager with OpenStack
self-service portal admin user.
v db2inst1: Password for the DB2 db2inst1 user.
v db2das1: Password for the DB2 db2das1 user.
v db2fenc1: Password for the DB2 db2fenc1 user.
v heat_stack_admin: Keystone password for stack_domain_admin user.
v mysqlroot: Password for MySQL root user.
v qpidadmin: Password for the Qpid qpidadmin user.
v
v
v
v
v
qpidclient: Password for the Qpid qpidclient user.
qpidssl: Password for the Qpid qpidssl certificate user.
rabbitclient: Password for the RabbitMQ rabbitclient user.
pvcadmin: Password for the PowerVC admin user.
pvcqpid: Password for the PowerVC Qpid powervc_qpid user.
v pvcrabbit: Password for the PowerVC RabbitMQ powervcdriver_mq user.
278
IBM Cloud Manager with OpenStack: Administrator Guide, version 4.2
v sceagent: Password for the IBM Cloud Manager with OpenStack self-service portal sceagent
user.
v xcat: Password for the z/VM xcat admin user.
v xcatmnadmin: Password for the z/VM xcat mnadmin user.
v zlinuxroot: Password for the instances that are created by z/VM root user.
Mapping attributes to services
The following environment and node attributes are mapped to specific options for IBM Cloud Manager
with OpenStack services.
Qpid messaging service attributes
Review mappings for the Qpid messaging service attributes
Table 69. Qpid messaging service attributes
Attribute
File
Option
qpid.broker.maxconnections
/etc/qpid/qpidd.conf
max-connections
qpid.broker.connectionbacklog
/etc/qpid/qpidd.conf
connection-backlog
qpid.broker.workerthreads
/etc/qpid/qpidd.conf
worker-threads
qpid.broker.interface
/etc/qpid/qpidd.conf
interface
OpenStack identity service attributes
Review mappings for the OpenStack identity service attributes.
Table 70. OpenStack identity service attributes
Attribute
File
Section
Option
openstack.identity.verbose
/etc/keystone/keystone.conf
DEFAULT
verbose
openstack.identity.debug
/etc/keystone/keystone.conf
DEFAULT
debug
openstack.identity.public_workers
/etc/keystone/keystone.conf
DEFAULT
public_workers
openstack.identity.admin_workers
/etc/keystone/keystone.conf
DEFAULT
admin_workers
Chapter 9. Reference
279
OpenStack image service attributes
Review mappings for the OpenStack image service attributes
Table 71. OpenStack image service attributes
Attribute
File
Section
Option
openstack.image.verbose
v
DEFAULT
verbose
DEFAULT
debug
/etc/glance/glanceapi.conf
v
/etc/glance/glancecache.conf
v
/etc/glance/glanceregistry.conf
v
/etc/glance/glancescrubber.conf
openstack.image.debug
v
/etc/glance/glanceapi.conf
v
/etc/glance/glancecache.conf
v
/etc/glance/glanceregistry.conf
v
/etc/glance/glancescrubber.conf
openstack.image.filesystem_store_datadir
/etc/glance/glanceapi.conf
DEFAULT
filesystem_store_datadir
openstack.image.api.workers
/etc/glance/glanceapi.conf
DEFAULT
workers
openstack.image.registry.workers
/etc/glance/glanceregistry.conf
DEFAULT
workers
OpenStack block storage service attributes
Review mappings for the OpenStack block storage service attributes.
Table 72. OpenStack block storage service attributes
Attribute
File
Section
Option
openstack.block-storage.no_snapshot_gb_quota
/etc/cinder/cinder.conf
DEFAULT
use_default_quota_class
openstack.block-storage.quota_driver
/etc/cinder/cinder.conf
DEFAULT
quota_driver
openstack.block-storage.quota_gigabytes
/etc/cinder/cinder.conf
DEFAULT
quota_gigabytes
openstack.block-storage.quota_snapshots
/etc/cinder/cinder.conf
DEFAULT
quota_snapshots
openstack.block-storage.quota_volumes
/etc/cinder/cinder.conf
DEFAULT
quota_volumes
openstack.block-storage.use_default_quota_class
/etc/cinder/cinder.conf
DEFAULT
use_default_quota_class
openstack.block-storage.verbose
/etc/cinder/cinder.conf
DEFAULT
verbose
openstack.block-storage.debug
/etc/cinder/cinder.conf
DEFAULT
debug
openstack.block-storage.iscsi_ip_address
/etc/cinder/cinder.conf
DEFAULT
iscsi_ip_address
openstack.block-storage.san.san_ip
/etc/cinder/cinder.conf
DEFAULT
san_ip
openstack.block-storage.san.san_login
/etc/cinder/cinder.conf
DEFAULT
san_login
280
IBM Cloud Manager with OpenStack: Administrator Guide, version 4.2
Table 72. OpenStack block storage service attributes (continued)
Attribute
File
Section
Option
openstack.block-storage.san.san_private_key
/etc/cinder/cinder.conf
DEFAULT
san_private_key
openstack.block-storage.storwize.
storwize_svc_volpool_name
/etc/cinder/cinder.conf
DEFAULT
storwize_svc_volpool_name
openstack.block-storage.storwize.
storwize_svc_vol_rsize
/etc/cinder/cinder.conf
DEFAULT
storwize_svc_vol_rsize
openstack.block-storage.storwize.
storwize_svc_vol_warning
/etc/cinder/cinder.conf
DEFAULT
storwize_svc_vol_warning
openstack.block-storage.storwize.
storwize_svc_vol_autoexpand
/etc/cinder/cinder.conf
DEFAULT
storwize_svc_vol_autoexpand
openstack.block-storage.storwize.
storwize_svc_vol_grainsize
/etc/cinder/cinder.conf
DEFAULT
storwize_svc_vol_grainsize
openstack.block-storage.storwize.
storwize_svc_vol_compression
/etc/cinder/cinder.conf
DEFAULT
storwize_svc_vol_compression
openstack.block-storage.storwize.
storwize_svc_vol_easytier
/etc/cinder/cinder.conf
DEFAULT
storwize_svc_vol_easytier
openstack.block-storage.storwize.
storwize_svc_flashcopy_timeout
/etc/cinder/cinder.conf
DEFAULT
storwize_svc_flashcopy_timeout
openstack.block-storage.storwize.
storwize_svc_vol_iogrp
/etc/cinder/cinder.conf
DEFAULT
storwize_svc_vol_iogrp
openstack.block-storage.storwize.
storwize_svc_connection_protocol
/etc/cinder/cinder.conf
DEFAULT
storwize_svc_connection_protocol
openstack.block-storage.storwize.
storwize_svc_iscsi_chap_enabled
/etc/cinder/cinder.conf
DEFAULT
storwize_svc_iscsi_chap_enabled
openstack.block-storage.storwize.
storwize_svc_multipath_enabled
/etc/cinder/cinder.conf
DEFAULT
storwize_svc_multipath_enabled
openstack.block-storage.storwize.
storwize_svc_multihostmap_enabled
/etc/cinder/cinder.conf
DEFAULT
storwize_svc_multihostmap_
enabled
openstack.block-storage.ibmnas.nas_ip
/etc/cinder/cinder.conf
DEFAULT
nas_ip
openstack.block-storage.ibmnas.nas_login
/etc/cinder/cinder.conf
DEFAULT
nas_login
openstack.block-storage.ibmnas.nas_ssh_port
/etc/cinder/cinder.conf
DEFAULT
nas_ssh_port
openstack.block-storage.ibmnas.shares_config
/etc/cinder/cinder.conf
DEFAULT
nfs_shares_config
openstack.block-storage.
ibmnas.mount_point_base
/etc/cinder/cinder.conf
DEFAULT
nfs_mount_point_base
openstack.block-storage.
ibmnas.nfs_sparsed_volumes
/etc/cinder/cinder.conf
DEFAULT
nfs_sparsed_volumes
openstack.block-storage.
gpfs.gpfs_mount_point_base
/etc/cinder/cinder.conf
DEFAULT
gpfs_mount_point_base
openstack.block-storage.
gpfs.gpfs_images_dir
/etc/cinder/cinder.conf
DEFAULT
gpfs_images_dir
openstack.block-storage.
gpfs.gpfs_images_share_mode
/etc/cinder/cinder.conf
DEFAULT
gpfs_images_share_mode
openstack.block-storage.
gpfs.gpfs_sparse_volumes
/etc/cinder/cinder.conf
DEFAULT
gpfs_sparse_volumes
openstack.block-storage.
gpfs.gpfs_max_clone_depth
/etc/cinder/cinder.conf
DEFAULT
gpfs_max_clone_depth
openstack.block-storage.
gpfs.gpfs_storage_pool
/etc/cinder/cinder.conf
DEFAULT
gpfs_storage_pool
openstack.block-storage.
ibmnas.ibmnas_platform_type
/etc/cinder/cinder.conf
DEFAULT
ibmnas_platform_type
openstack.block-storage.
osapi_volume_workers
/etc/cinder/cinder.conf
DEFAULT
osapi_volume_workers
Chapter 9. Reference
281
OpenStack orchestration service attributes
Review mappings for the OpenStack orchestration service attributes.
Table 73. OpenStack orchestration service attributes
Attribute
File
Section
Option
openstack.orchestration.verbose
/etc/heat/heat.conf
DEFAULT
verbose
openstack.orchestration.debug
/etc/heat/heat.conf
DEFAULT
debug
openstack.orchestration.heat_stack_user_role
/etc/heat/heat.conf
DEFAULT
heat_stack_user_role
openstack.orchestration.stack_user_domain_
name
/etc/heat/heat.conf
DEFAULT
stack_user_domain_name
openstack.orchestration.stack_domain_admin /etc/heat/heat.conf
DEFAULT
stack_domain_admin
OpenStack telemetry service attributes
Review mappings for the OpenStack telemetry service attributes.
Table 74. OpenStack telemetry service attributes
Attribute
File
Section
Option
openstack.telemetry.verbose /etc/ceilometer/
ceilometer.conf
DEFAULT verbose
openstack.telemetry.debug
DEFAULT debug
/etc/ceilometer/
ceilometer.conf
OpenStack compute service attributes
Review mappings for the OpenStack compute service attributes.
Table 75. OpenStack compute service attributes
Attribute
File
Section
Option
openstack.compute.verbose
/etc/nova/nova.conf
DEFAULT
verbose
openstack.compute.debug
/etc/nova/nova.conf
DEFAULT
debug
openstack.compute.rpc
_thread_pool_size
/etc/nova/nova.conf
DEFAULT
rpc_thread_pool_size
openstack.compute.rpc
_conn_pool_size
/etc/nova/nova.conf
DEFAULT
rpc_conn_pool_size
openstack.compute.rpc
_response_timeout
/etc/nova/nova.conf
DEFAULT
rpc_response_timeout
openstack.compute
.state_path
/etc/nova/nova.conf
DEFAULT
state_path
openstack.compute
.lock_path
/etc/nova/nova.conf
DEFAULT
lock_path
openstack.compute
.instances_path
/etc/nova/nova.conf
DEFAULT
instances_path
openstack.compute.log_dir
/etc/nova/nova.conf
DEFAULT
log_dir
openstack.compute.config
.quota_driver
/etc/nova/nova.conf
DEFAULT
quota_driver
openstack.compute.config
.quota_cores
/etc/nova/nova.conf
DEFAULT
quota_cores
282
IBM Cloud Manager with OpenStack: Administrator Guide, version 4.2
Table 75. OpenStack compute service attributes (continued)
Attribute
File
Section
Option
openstack.compute.config
.quota_instances
/etc/nova/nova.conf
DEFAULT
quota_instances
openstack.compute.config
.quota_ram
/etc/nova/nova.conf
DEFAULT
quota_ram
openstack.compute.config
.quota_floating_ips
/etc/nova/nova.conf
DEFAULT
quota_floating_ips
openstack.compute.config
.quota_fixed_ips
/etc/nova/nova.conf
DEFAULT
quota_fixed_ips
openstack.compute
.config.quota_security_groups
/etc/nova/nova.conf
DEFAULT
quota_security_groups
openstack.compute.config
.quota_security_groups_rules
/etc/nova/nova.conf
DEFAULT
quota_security_groups_rules
openstack.compute.config
.quota_metadata_items
/etc/nova/nova.conf
DEFAULT
quota_metadata_items
openstack.compute.config
.quota_injected_files
/etc/nova/nova.conf
DEFAULT
quota_injected_files
openstack.compute.
config.quota_injected_file
_path_length
/etc/nova/nova.conf
DEFAULT
quota_injected_file_path_length
openstack.compute
.config.quota_injected
_file_content_bytes
/etc/nova/nova.conf
DEFAULT
quota_injected_file_content_bytes
openstack.compute.config
.quota_key_pairs
/etc/nova/nova.conf
DEFAULT
quota_key_pairs
openstack.compute.libvirt
.virt_type
/etc/nova/nova.conf
libvirt
virt_type
openstack.compute.osapi
_compute_workers
/etc/nova/nova.conf
DEFAULT
osapi_compute_workers
openstack.compute
.metadata_workers
/etc/nova/nova.conf
DEFAULT
metadata_workers
openstack.compute
.conductor.workers
/etc/nova/nova.conf
conductor
workers
openstack.region
/etc/nova/nova.conf
DEFAULT
os_region_name
openstack.compute.
libvirt.live_migration_flag
/etc/nova/nova.conf
libvirt
live_migration_flag
openstack.compute.
vif_plugging_is_fatal
/etc/nova/nova.conf
DEFAULT
vif_plugging_is_fatal
openstack.compute.
vif_plugging_timeout
/etc/nova/nova.conf
DEFAULT
vif_plugging_timeout
OpenStack network service attributes
Review mappings for the OpenStack network service attributes.
Table 76. OpenStack network service attributes
Attribute
File
Section
Option
openstack.network.verbose
/etc/neutron/
neutron.conf
DEFAULT
verbose
Chapter 9. Reference
283
Table 76. OpenStack network service attributes (continued)
Attribute
File
Section
Option
openstack.network.debug
v /etc/neutron/
neutron.conf
DEFAULT
debug
v /etc/neutron/
metadata_agent.ini
v /etc/neutron/
dhcp_agent.ini
v /etc/neutron/
l3_agent.ini
v /etc/neutron/
lbaas_agent.ini
openstack.network.rpc
_thread_pool_size
/etc/neutron/
neutron.conf
DEFAULT
rpc_thread_pool_size
openstack.network.rpc_conn
_pool_size
/etc/neutron/
neutron.conf
DEFAULT
rpc_conn_pool_size
openstack.network.rpc
_response_timeout
/etc/neutron/
neutron.conf
DEFAULT
rpc_response_timeout
openstack.network.core
_plugin
/etc/neutron/
neutron.conf
DEFAULT
core_plugin
openstack.network.service
_plugins
/etc/neutron/
neutron.conf
DEFAULT
service_plugins
openstack.network.ml2
.mechanism_drivers
/etc/neutron/plugins/
ml2/ml2_conf.ini
ml2
mechanism_drivers
openstack.network.ml2
.type_drivers
/etc/neutron/plugins/
ml2/ml2_conf.ini
ml2
type_drivers
openstack.network.ml2
.tenant_network_types
/etc/neutron/plugins/
ml2/ml2_conf.ini
ml2
tenant_network_types
openstack.network.ml2
.flat_networks
/etc/neutron/plugins/
ml2/ml2_conf.ini
ml2_type_flat
flat_networks
openstack.network.ml2
.network_vlan_ranges
/etc/neutron/plugins/
ml2/ml2_conf.ini
ml2_type_vlan
network_vlan_ranges
openstack.network.ml2
.tunnel_id_ranges
/etc/neutron/plugins/
ml2/ml2_conf.ini
ml2_type_gre
tunnel_id_ranges
openstack.network.ml2
.vni_ranges
/etc/neutron/plugins/
ml2/ml2_conf.ini
ml2_type_vxlan
vni_ranges
openstack.network
.openvswitch.network_vlan_ranges
/etc/neutron/plugins/
openvswitch/
ovs_neutron_plugin.ini
OVS
network_vlan_ranges
openstack.network
.openvswitch.enable_tunneling
/etc/neutron/plugins/
openvswitch/
ovs_neutron_plugin.ini
OVS
enable_tunneling
openstack.network
.openvswitch.tunnel_type
/etc/neutron/plugins/
openvswitch/
ovs_neutron_plugin.ini
OVS
tunnel_type
openstack.network
.openvswitch.tunnel_types
/etc/neutron/plugins/
openvswitch/
ovs_neutron_plugin.ini
AGENT
tunnel_types
284
IBM Cloud Manager with OpenStack: Administrator Guide, version 4.2
Table 76. OpenStack network service attributes (continued)
Attribute
File
Section
Option
openstack.network
.openvswitch.tunnel_id_ranges
/etc/neutron/plugins/
openvswitch/
ovs_neutron_plugin.ini
OVS
tunnel_id_ranges
openstack.network
.openvswitch.bridge_mappings
/etc/neutron/plugins/
openvswitch/
ovs_neutron_plugin.ini
OVS
bridge_mappings
openstack.network.openvswitch
.veth_mtu
/etc/neutron/plugins/
openvswitch/
ovs_neutron_plugin.ini
AGENT
veth_mtu
openstack.network.quota
.driver
/etc/neutron/
neutron.conf
QUOTAS
quota_driver
openstack.network.quota
.items
/etc/neutron/
neutron.conf
QUOTAS
quota_items
openstack.network.quota
.default
/etc/neutron/
neutron.conf
QUOTAS
default_quota
openstack.network.quota
.network
/etc/neutron/
neutron.conf
QUOTAS
quota_network
openstack.network.quota
.subnet
/etc/neutron/
neutron.conf
QUOTAS
quota_subnet
openstack.network.quota
.port
/etc/neutron/
neutron.conf
QUOTAS
quota_port
openstack.network.quota
.security_group
/etc/neutron/
neutron.conf
QUOTAS
quota_security_group
openstack.network.quota
.security_group_rule
/etc/neutron/
neutron.conf
QUOTAS
quota_security_group
_rule
openstack.network.quota.router
/etc/neutron/
neutron.conf
QUOTAS
quota_router
openstack.network.quota.floatingip
/etc/neutron/
neutron.conf
QUOTAS
quota_floatingip
openstack.network.openvswitch.
tenant_network_type
/etc/neutron/plugins/
openvswitch/
ovs_neutron_plugin.ini
OVS
tenant_network_type
openstack.network.use_namespaces
/etc/neutron/
dhcp_agent.ini
DEFAULT
use_namespaces
/etc/neutron/
neutron.conf
DEFAULT
allow_overlapping_ips
openstack.network.dhcp.ovs_use_veth /etc/neutron/
dhcp_agent.ini
DEFAULT
ovs_use_veth
openstack.network.l3.
external_network_bridge
/etc/neutron/l3_agent.ini
DEFAULT
external_network_bridge
openstack.network.api_workers
/etc/neutron/
neutron.conf
DEFAULT
api_workers
openstack.network.rpc_workers
/etc/neutron/
neutron.conf
DEFAULT
rpc_workers
/etc/neutron/l3_agent.ini
openstack.network.
allow_overlapping_ips
Chapter 9. Reference
285
IBM OpenStack IaaS gateway attributes
Review mappings for the IBM OpenStack IaaS gateway attributes.
Table 77. IBM OpenStack IaaS gateway attributes
Attributes
File
Section
Option
ibm-openstack.iaasgateway.logging.verbose
/etc/iaasgateway/
iaasgateway.conf
DEFAULT verbose
ibm-openstack.iaasgateway.logging.debug
/etc/iaasgateway/
iaasgateway.conf
DEFAULT debug
ibm-openstack-iaasgateway.ssl.certfile
/etc/iaasgateway/
iaasgateway.conf
service
certfile
ibm-openstack-iaasgateway.ssl.keyfile
/etc/iaasgateway/
iaasgateway.conf
service
keyfile
ibm-openstack-iaasgateway.ssl.ca_certs
/etc/iaasgateway/
iaasgateway.conf
service
ca_certs
IBM OpenStack PowerVC driver service attributes
Review mappings for the IBM OpenStack PowerVC driver service attributes.
Table 78. IBM OpenStack PowerVC driver service attributes
Attributes
File
Section
Option
ibm-openstack.powervcdriver.powervc.admin_user
/etc/powervc/powervc.conf
powervc
admin_user
ibm-openstack.powervcdriver.powervc.auth_url
/etc/powervc/powervc.conf
powervc
auth_url
ibm-openstack.powervcdriver.powervc.qpid.host
/etc/powervc/powervc.conf
powervc
qpid_hostname
/etc/powervc/
powervc-neutron.conf
DEFAULT
qpid_hostname
IBM OpenStack z/VM driver service attributes
Review mappings for the IBM OpenStack z/VM driver service attributes.
Table 79. IBM OpenStack z/VM driver service attributes
Attributes
File
Section
Option
ibm-openstack.zvmdriver.xcat.server
/etc/nova/nova.conf
DEFAULT
zvm_xcat_server
/etc/neutron/plugins/
zvm/
neutron_zvm_plugin.ini
AGENT
zvm_xcat_server
ibm-openstack.zvmdriver.xcat.username
/etc/nova/nova.conf
DEFAULT
zvm_xcat_username
/etc/neutron/plugins/
zvm/
neutron_zvm_plugin.ini
AGENT
zvm_xcat_username
ibm-openstack.zvmdriver.xcat.zhcp_nodename
/etc/nova/nova.conf
DEFAULT
zhcp_nodename
/etc/neutron/plugins/
zvm/
neutron_zvm_plugin.ini
AGENT
xcat_zhcp_nodename
ibm-openstack.zvmdriver.xcat.master
/etc/nova/nova.conf
DEFAULT
zvm_xcat_master
286
IBM Cloud Manager with OpenStack: Administrator Guide, version 4.2
Table 79. IBM OpenStack z/VM driver service attributes (continued)
Attributes
File
Section
Option
ibm-openstack.zvmdriver.xcat.mgt_ip
/etc/neutron/plugins/
zvm/
neutron_zvm_plugin.ini
AGENT
xcat_mgt_ip
ibm-openstack.zvmdriver.xcat.mgt_mask
/etc/neutron/plugins/
zvm/
neutron_zvm_plugin.ini
AGENT
xcat_ mgt_mask
ibm-openstack.zvmdriver.diskpool
/etc/nova/nova.conf
DEFAULT
zvm_diskpool
ibm-openstack.zvmdriver.diskpool_type
/etc/nova/nova.conf
DEFAULT
zvm_diskpool_type
ibm-openstack.zvmdriver.zvm_host
/etc/nova/nova.conf
DEFAULT
zvm_host
/etc/neutron/plugins/
zvm/
neutron_zvm_plugin.ini
AGENT
zvm_host
ibm-openstack.zvm-driver.host
/etc/nova/nova.conf
DEFAULT
host
ibm-openstack.zvmdriver.user_profile
/etc/nova/nova.conf
DEFAULT
zvm_user_profile
ibm-openstack.zvm-driver
.config_drive.inject
_password
/etc/nova/nova.conf
DEFAULT
zvm_config_drive
_inject_password
ibm-openstack.zvmdriver.scsi_pool
/etc/nova/nova.conf
DEFAULT
zvm_scsi_pool
ibm-openstack.zvm-driver.fcp_list /etc/nova/nova.conf
DEFAULT
zvm_fcp_list
ibm-openstack.zvmdriver.zhcp_fcp_list
DEFAULT
zvm_zhcp_fcp_list
/etc/nova/nova.conf
Roles
The following roles are provided in support of the reference topologies.
You add one or more of these roles to the run list of a node system. After the roles are run on a node
system, the node system provides the described IBM Cloud Manager with OpenStack services.
v ibm-os-allinone-kvm
v ibm-os-single-controller-node
v ibm-os-single-controller-powervc-driver
v ibm-os-single-controller-distributed-database-node
v
v
v
v
v
ibm-os-compute-node-kvm
ibm-os-compute-node-powerkvm
ibm-os-zvm-driver-node
ibm-os-powervc-driver-node
ibm-os-client-node
v ibm-os-database-server-node
v ibm-sce-node
v ibm-os-block-storage-node
ibm-os-allinone-kvm
Installs and configures all default IBM Cloud Manager with OpenStack services on a single node
Chapter 9. Reference
287
system, including the compute node services for the KVM or QEMU hypervisor types. This role
combines the ibm-os-single-controller-node and ibm-os-compute-node-kvm roles to support the
minimal topology.
ibm-os-single-controller-node
Installs and configures all default IBM Cloud Manager with OpenStack services on a single
controller node system except for the compute node services. This role supports both the minimal
and controller +n compute topologies.
ibm-os-single-controller-powervc-driver
Installs and configures all default IBM Cloud Manager with OpenStack services on a single
controller node system with IBM Cloud Manager with OpenStack PowerVC driver services to
provide manage-to PowerVC capabilities. This role combines the ibm-os-single-controller-node
and ibm-os-powervc-driver-node roles to support the controller +n compute and distributed
database topology.
ibm-os-single-controller-distributed-database-node
This role is similar to the ibm-os-single-controller-node role. The only difference is that it does
not run the database server service. This role supports the distributed database topology.
ibm-os-compute-node-kvm
Installs and configures the compute node services for the KVM or QEMU hypervisor types.
ibm-os-compute-node-powerkvm
Installs and configures the compute node services for the PowerKVM hypervisor type.
ibm-os-zvm-driver-node
Installs and configures the compute driver services for the z/VM hypervisor type.
ibm-os-powervc-driver-node
Installs and configures the PowerVC driver services to manage-to the PowerVC virtualization
manager.
ibm-os-client-node
Installs and configures the command-line client interface. This role is included in the
ibm-os-single-controller-node role and needs to be used only if you would like another node
system to provide a command-line client interface to IBM Cloud Manager with OpenStack.
ibm-os-database-server-node
Installs and configures the database server service. This includes creating the required databases
for IBM Cloud Manager with OpenStack. This role supports the distributed database topology.
ibm-sce-node
Installs and configures the IBM Cloud Manager with OpenStack self-service portal. This role
supports all topologies. You can manually add this role to the run list for a node.
ibm-os-block-storage-node
Installs and configures a block storage (openstack-cinder-volume) node.
Best practices when using the self-service portal
This section contains some tips and techniques when using the IBM Cloud Manager with OpenStack
self-service portal.
IBM Cloud Manager with OpenStack FAQ
The frequently asked questions (FAQ) topic is a list of questions and answers about IBM Cloud Manager
with OpenStack.
Q:
A:
288
How do I find my home directory?
For Linux, type echo $HOME in a command window.
IBM Cloud Manager with OpenStack: Administrator Guide, version 4.2
Q:
A:
I created a trusted certificate. Why am I still getting an exception that says the connection is untrusted?
When the CA is not trusted by clients automatically and you are attempting to access IBM Cloud Manager
with OpenStack with the https protocol, an exception is encountered that says the connection is untrusted.
You must confirm that the risks are understood and must add an exception to continue. Even with a trusted
certificate, when you are using Internet Explorer, a similar exception is likely to occur.
Q:
I want to have spaces in my directory name, but it keeps failing when I try to create it. How can I have
spaces?
If you have spaces in a directory name, then you must have double quotation marks around it as shown in
the following example: sce240_windows_installer.exe -i silent -f "c:\My Directory\
installer.properties"
A:
Q:
A:
My user ID is locked! How do I unlock it?
If you have three invalid attempts to log in to IBM Cloud Manager with OpenStack in a 24 hour period,
your user ID is locked and must be unlocked by an administrator. If your administrator ID becomes locked,
you can either wait 24 hours without logging in or restart IBM Cloud Manager with OpenStack and then try
logging in again.
Q:
A:
How does IBM Cloud Manager with OpenStack store the passwords for local users or clouds?
The passwords are encrypted and stored in either property files or a database.
Q:
A:
IBM Cloud Manager with OpenStack GUI looks distorted. How can I fix that?
See the information in Display issue with Internet Explorer (self-service portal).
Q:
I upgraded/installed IBM Cloud Manager with OpenStack, but I’m still seeing the previous version in my
browser. How can I fix that?
Clear the cache in your browser and try again. You might have to close your browser after you clear the
cache and then reopen your browser and try connecting to IBM Cloud Manager with OpenStack again.
A:
Q:
A:
My image is not visible in the window. Where is it?
Make sure that your image is deployed and that the correct project is specified. If it still is not visible,
contact the administrator to ensure that you have access.
Q:
A:
The product charges that I set are incorrect or are not updating. What do I do?
First of all, verify that the currencies for all configurable products are the same. You cannot mix currencies.
To change your currency for a product, see the “Configuring billing” on page 196. Make sure that you are
restarting IBM Cloud Manager with OpenStack after saving.
Q:
The instances for a user were moved to a different project. Now when the user logs on, he cannot see his
instances. How can the user access his instances?
The project where the instances were moved might need to be edited to grant the user access to the project.
When you have ensured that the user has access to the new project, have the user check again to see
whether the instances display.
A:
Q:
A:
When updating IBM Cloud Manager with OpenStack to a new release, can I migrate data and
configurations from two releases previous to the current release? For example, can I migrate data in IBM
Cloud Manager with OpenStack from version 2.2 to version 2.4?
No, you must migrate sequentially. For example, migrate from IBM Cloud Manager with OpenStack version
2.2 to version 2.3. Then you can migrate from IBM Cloud Manager with OpenStack version 2.3 to version
2.4.
Chapter 9. Reference
289
Q:
A:
Does the IBM Cloud Manager with OpenStack infocollect command support collecting a database log
such as DB2?
No, you must check with the administrator of the database and collect the log manually.
Q:
A:
Why does my login fail with the session timing out?
If your user login fails because the session times out, there might be a problem with the timezone setting.
Verify that the IBM Cloud Manager with OpenStack server and client time and timezone match. For
example, on the server, if the timezone is Coordinated Universal Time +08:00, the time is 11:27. For the
client, the timezone is Coordinated Universal Time +07:00, and the time should be 10:27.
Q:
A:
Why can't I access the IBM Cloud Manager with OpenStack GUI page after I start it?
Verify that a firewall is not blocking the http or https port that you accessed. To check whether it worked in
the IBM Cloud Manager with OpenStack host, access for example, http://localhost:18080/cloud/web/
login.html or use the UNIX command wget http://localhost:18080/cloud/web/login.html.
Using the screen command
The screen command can be used to start or shut down the IBM Cloud Manager with OpenStack server
or to access the OSGI console when the server is up and running when running Linux.
For example, enter screen and then run the command to start the server. After the server is started, type
ctrl+a, then d to disconnect and leave the IBM Cloud Manager with OpenStack server running,
To get back to the IBM Cloud Manager with OpenStack OSGI prompt to perform other actions, such as
enabling additional logging, enter screen -r.
Using the nohup command
On AIX or Linux, if you start a process from the command line and then log off, the processes you
started are generally terminated, even if you spawn them as background processes, because each process
is sent a hang up signal (SIGHUP). The nohup command allows you to start a process with the hang up
signal disabled so that the process is not ended when you log off.
The nohup command is used frequently for starting services, such as ssh daemon or DB2 instances.
For example, to start IBM Cloud Manager with OpenStack as a background service, run the following
command:
nohup /opt/ibm/SCE24/skc -nosplash < /dev/null > /dev/null &
The options in this command include the following:
-nosplash
Prevents the process from displaying a splash screen.
< /dev/null
Disconnects the process from terminal input. This option can prevent the process from entering a
stopped state as can sometimes happen when started from the command line on AIX. This option
is not needed when starting the command from a shell script.
> /dev/null
Redirects the OSGI console output. For example, you might want to redirect the output to a log
file.
&
290
Runs the command as a background process.
IBM Cloud Manager with OpenStack: Administrator Guide, version 4.2
Chapter 10. Troubleshooting and support for IBM Cloud
Manager with OpenStack
To isolate and resolve problems with your IBM products, you can use the troubleshooting and support
information. This information contains instructions for using the problem-determination resources that are
provided with your IBM products, including IBM Cloud Manager with OpenStack.
Techniques for troubleshooting problems
Troubleshooting is a systematic approach to solving a problem. The goal of troubleshooting is to determine
why something does not work as expected and how to resolve the problem. Certain common techniques
can help with the task of troubleshooting.
The first step in the troubleshooting process is to describe the problem completely. Problem descriptions
help you and the IBM technical-support representative know where to start to find the cause of the
problem. This step includes asking yourself basic questions:
v What are the symptoms of the problem?
v Where does the problem occur?
v When does the problem occur?
v Under which conditions does the problem occur?
v Can the problem be reproduced?
The answers to these questions typically lead to a good description of the problem, which can then lead
you to a problem resolution.
What are the symptoms of the problem?
When starting to describe a problem, the most obvious question is “What is the problem?” This question
might seem straightforward; however, you can break it down into several more-focused questions that
create a more descriptive picture of the problem. These questions can include:
v Who, or what, is reporting the problem?
v What are the error codes and messages?
v How does the system fail? For example, is it a loop, hang, crash, performance degradation, or incorrect
result?
Where does the problem occur?
Determining where the problem originates is not always easy, but it is one of the most important steps in
resolving a problem. Many layers of technology can exist between the reporting and failing components.
Networks, disks, and drivers are only a few of the components to consider when you are investigating
problems.
The following questions help you to focus on where the problem occurs to isolate the problem layer:
v Is the problem specific to one platform or operating system, or is it common across multiple platforms
or operating systems?
v Is the current environment and configuration supported?
v Do all users have the problem?
v (For multi-site installations.) Do all sites have the problem?
© Copyright IBM Corp. 2012, 2014
291
If one layer reports the problem, the problem does not necessarily originate in that layer. Part of
identifying where a problem originates is understanding the environment in which it exists. Take some
time to completely describe the problem environment, including the operating system and version, all
corresponding software and versions, and hardware information. Confirm that you are running within an
environment that is a supported configuration; many problems can be traced back to incompatible levels
of software that are not intended to run together or have not been fully tested together.
When does the problem occur?
Develop a detailed timeline of events leading up to a failure, especially for those cases that are one-time
occurrences. You can most easily develop a timeline by working backward: Start at the time an error was
reported (as precisely as possible, even down to the millisecond), and work backward through the
available logs and information. Typically, you need to look only as far as the first suspicious event that
you find in a diagnostic log.
To develop a detailed timeline of events, answer these questions:
v Does the problem happen only at a certain time of day or night?
v How often does the problem happen?
v What sequence of events leads up to the time that the problem is reported?
v Does the problem happen after an environment change, such as upgrading or installing software or
hardware?
Responding to these types of questions can give you a frame of reference in which to investigate the
problem.
Under which conditions does the problem occur?
Knowing which systems and applications are running at the time that a problem occurs is an important
part of troubleshooting. These questions about your environment can help you to identify the root cause
of the problem:
v Does the problem always occur when the same task is being performed?
v Does a certain sequence of events need to happen for the problem to occur?
v Do any other applications fail at the same time?
Answering these types of questions can help you explain the environment in which the problem occurs
and correlate any dependencies. Remember that just because multiple problems might have occurred
around the same time, the problems are not necessarily related.
Can the problem be reproduced?
From a troubleshooting standpoint, the ideal problem is one that can be reproduced. Typically, when a
problem can be reproduced you have a larger set of tools or procedures at your disposal to help you
investigate. Consequently, problems that you can reproduce are often easier to debug and solve.
However, problems that you can reproduce can have a disadvantage: If the problem is of significant
business impact, you do not want it to recur. If possible, re-create the problem in a test or development
environment, which typically offers you more flexibility and control during your investigation.
v Can the problem be re-created on a test system?
v Are multiple users or applications encountering the same type of problem?
v Can the problem be re-created by running a single command, a set of commands, or a particular
application?
Related tasks:
292
IBM Cloud Manager with OpenStack: Administrator Guide, version 4.2
“Searching knowledge bases” on page 296
You can often find solutions to problems by searching IBM knowledge bases. You can optimize your
results by using available resources, support tools, and search methods.
Logging tasks
The IBM Cloud Manager with OpenStack log files are a source of information for additional details about
IBM Cloud Manager with OpenStack errors.
By default, IBM Cloud Manager with OpenStack creates a log file in the <home directory>/logs directory
and saves 9 log files of 50 MB each. The latest log file is called skc-0.log.
Change logging levels from the OSGi command prompt
The logging levels can be changed dynamically while the server is running by using the log command
from the IBM Cloud Manager with OpenStack (OSGi) command prompt.
About this task
The logging levels can be changed dynamically while the server is running by using the log command
from the IBM Cloud Manager with OpenStack (OSGi) command prompt. Changes made using the log
command are not saved and are only in effect while the server is running. If the server is restarted, the
logging levels are reset to their initial values as specified in the logging.properties file. For more
information about changing these values in the logging.properties file, see “Configuring logging” on
page 194.
To run the log command, follow these steps:
Procedure
1. Access the IBM Cloud Manager with OpenStack OSGi console.
2. At the OSGi command prompt enter log <action> <action parameters>, where the following actions
are supported:
help
Displays the online help.
list
Lists the available loggers and their current levels.
setlevel <logger name>=<logger level>
Sets the specified logger to the specified logging levels. To set more than one logger, separate
the logger name=logger level pair with a space.
Results
See the following examples for typical log commands:
log
log
log
log
help
list
setlevel com.ibm.cfs.cloud=finest
setlevel com.ibm.cfs.cloud=info default=finest
The most common log message level that an IBM Cloud Manager with OpenStack administrator might
want to change is com.ibm.cfs.rest.client.internal=FINE. Changing the message level causes the
output of HTTP requests and responses to be sent to and from the OpenStack REST API.
In a production environment, keep a backup of the log files for at least two weeks to help resolve
problems that are not reported immediately or that go undetected.
Note: The property file values are not case-sensitive so a property such as
com.ibm.cfs.rest.client.internal=FINE is the same as com.ibm.cfs.rest.client.internal=fine.
Chapter 10. Troubleshooting and support
293
Retrieve log and system files
IBM Cloud Manager with OpenStack provides a command-line utility that enables you to gather logs and
system information. If IBM Cloud Manager with OpenStack self-service portal and OpenStack are
installed in the same node, then both self-service portal and standard OpenStack logs can be collected,
otherwise you can collect the former. When you use standard OpenStack logs you do not have to use
log_config to customize the configuration. This tool runs independently of IBM Cloud Manager with
OpenStack and is available even when IBM Cloud Manager with OpenStack is not running.
To use the command-line utility, run the following commands:infocollect.sh
Note: These scripts can be found in the SELF_SERVICE_PORTAL_INSTALLATION_DIR/program/bin directory.
The command accepts the following options:
-c
Specifies the configuration directory, for example: SELF_SERVICE_PORTAL_HOME, where all the IBM
Cloud Manager with OpenStack configuration and log files are saved. This argument is
mandatory. You must provide an existing directory path. The command exits with an error if the
specified directory cannot be found.
-d
Specifies the destination directory for the result files. If this argument is used, provide an existing
directory path. This command exists with an error if the specified. If this argument is not
provided, the HOME directory of the caller is used. If the HOME directory is not found, for example,
the corresponding environment variable is not set correctly, the system TEMP directory is used as
the default output directory. For example, in Linux /tmp is the system TEMP directory.
-h
Prints usage information.
When this utility is started, the following files are created:
openStackLog.zip(Optional)
Contains all of the OpenStack log files:
*.log files
*.gz files
sceHome.zip
Contains all of the IBM Cloud Manager with OpenStack configurations:
*.properties files
*.log files
*.udr files
Billing configurations: .xml files under products/
All .xml and .txt files under SELF_SERVICE_PORTAL_HOME
basicSysInfo.txt
Contains basic OS information:
CPU
Memory
OS name
Note: This information is retrieved by calling OS shell commands, so the results vary depending
on the concrete OS.
Example
Collect the configurations in Linux or AIX, logs, and system information, and save the result to the
directory of /tmp/diagnostic. The SELF_SERVICE_PORTAL_HOME is /var/opt/ibm/.SCE42.
294
IBM Cloud Manager with OpenStack: Administrator Guide, version 4.2
./infocollect.sh -c /var/opt/ibm/.SCE42 -d /tmp/diagnostic
Troubleshooting using the OSGi console
Use the Open Services Gateway initiative (OSGi) console to review information about IBM Cloud
Manager with OpenStack.
By default, IBM Cloud Manager with OpenStack starts an OSGi command-line console when the IBM
Cloud Manager with OpenStack executable is run. You can access the console directly in the command
window started by the executable.
You can also run the console in the background and assign a specific port for telnet connections. To
assign a port, modify the skc.ini file and add an unused port number on a new line after the -console
option.
-console
<port number>
For example, to assign port 7777 for telnet connections, change the option to the following:
-console
7777
To connect to the OSGi console, type the following:
telnet localhost 7777
Logging chef-client output
You can obtain chef-client logs from the nodes when you use the IBM Cloud Manager with OpenStack
commands.
The IBM Cloud Manager with OpenStack commands log chef-client console output that is captured from
each node on the Chef server in a central location. The log file name includes the node name, as well as,
an integer time stamp. Up to 9 log files are kept for each node in the /var/log/chef-server/nodes folder
on the Chef server. Each IBM Cloud Manager with OpenStack deployment or update command typically
writes 3 log files. One is for the initial ping to the node. The second is for the bootstrap, and the final is
for the actual chef-client run.
The log file generation can be controlled by two settings in the chef server /root/.chef/knife.rb file:
knife[:node_log_max_files] = 9
knife[:node_log_path] = ’/var/log/chef-server/nodes’
These settings default in the IBM Cloud Manager with OpenStack command-line interface code to the
preceding values shown above. The preceding values can be set in knife.rb, if the defaults are not
adequate.
To turn of node logging, set knife[:node_log_max_files] = 0
Log files are created for each node to which the IBM Cloud Manager with OpenStack command connects.
The log file name is <node_name>_<timestamp>.log. For example:
host.my.company.com_2014-10-23_06-56-24-314222499000.log
By default, up to 9 log files are saved for each node.
Logging chef-client output to a log file on the node itself can also be accomplished by specifying
chef-client options when you issue one of the IBM Cloud Manager with OpenStack os manage deploy or
os manage update commands. When chef-client writes to a log file, it does not affect its console output.
Chapter 10. Troubleshooting and support
295
To enter the chef-client options on a IBM Cloud Manager with OpenStack CLI 'node' type command, use
the -O option followed by a string that contains the chef-client options. For example:
knife os manage update node host.my.company.com -P passw0rd -O ’-l info -L /var/log/chef-client.log’
The -l chef-client option is the log level (info is specified in the preceding example). The -L chef-client
option is the log file location.
Note: The log file path must exist or an error occurs when the log file is written.
To enter the chef-client options on a IBM Cloud Manager with OpenStack CLI 'topology' type command,
use the chef-client-options JSON key in the topology file that contains a list of chef-client options. For
example, the JSON key and value for a node in the topology file might look like the following example:
"chef_client_options": ["-l info", "-L /var/log/chef-client.log"],
The preceding options are passed to chef-client to cause it to perform info level logging and store the log
information in /var/log/chef-client.log.
When forcing the chef-client to write to a log file, the output is not the same as that seen on the console.
That console output is logged on the chef server as previously mentioned.
Another option to forcing chef-client to write to a log file is to set the following values in the client.rb
file on the node:
log_location "/var/log/chef-client.log"
verbose :info
log_level :info
That would cause info level logging to occur for all chef-client calls to the log file /var/log/chefclient.log.
Note: The chef-client log is not cleared. It is always appended to by chef-client.
Searching knowledge bases
You can often find solutions to problems by searching IBM knowledge bases. You can optimize your
results by using available resources, support tools, and search methods.
About this task
You can find useful information by searching the knowledge center for IBM Cloud Manager with
OpenStack. However, sometimes you need to look beyond the knowledge center to answer your
questions or resolve problems.
Procedure
v Find the content that you need by using the IBM Support Portal.
The IBM Support Portal is a unified, centralized view of all technical support tools and information for
all IBM systems, software, and services. The IBM Support Portal lets you access the IBM electronic
support portfolio from one place. You can tailor the pages to focus on the information and resources
that you need for problem prevention and faster problem resolution. Familiarize yourself with the IBM
Support Portal by viewing the demo videos (https://www.ibm.com/blogs/SPNA/entry/
the_ibm_support_portal_videos) about this tool. These videos introduce you to the IBM Support Portal,
explore troubleshooting and other resources, and demonstrate how you can tailor the page by moving,
adding, and deleting portlets.
v The Techdocs Web site at www.ibm.com/support/techdocs/ provides white papers, technotes, tips,
and other documents related to IBM Cloud Manager with OpenStack.
296
IBM Cloud Manager with OpenStack: Administrator Guide, version 4.2
Tip: To locate the information that you need, either select the categories that you want to search or
select All of the Techdocs library to search all categories. Then enter IBM SmartCloud Entry in the for:
field and click Search.
v Search for content on the forum: Forum
v Search for content by using the IBM masthead search. You can use the IBM masthead search by typing
your search string into the Search field at the top of any ibm.com® page.
v Search for content by using any external search engine, such as Google, Yahoo, or Bing. If you use an
external search engine, your results are more likely to include information that is outside the ibm.com
domain. However, sometimes you can find useful problem-solving information about IBM products in
newsgroups, forums, and blogs that are not on ibm.com.
Tip: Include “IBM” and the name of the product in your search if you are looking for information
about an IBM product.
Related concepts:
“Techniques for troubleshooting problems” on page 291
Troubleshooting is a systematic approach to solving a problem. The goal of troubleshooting is to determine
why something does not work as expected and how to resolve the problem. Certain common techniques
can help with the task of troubleshooting.
Related reference:
“Known problems and solutions for an Administrator” on page 312
If you are using IBM Cloud Manager with OpenStack with the Administrator role, review theses known
problems and solutions that you might encounter.
“Known problems and solutions for a User” on page 335
If you are using IBM Cloud Manager with OpenStack with the User role, review theses known problems
and solutions that you might encounter.
Getting fixes from Fix Central
You can use Fix Central to find the fixes that are recommended by IBM Support for a variety of products,
including IBM Cloud Manager with OpenStack. With Fix Central, you can search, select, order, and
download fixes for your system with a choice of delivery options. A IBM Cloud Manager with OpenStack
product fix might be available to resolve your problem.
Procedure
To find and install fixes:
1. Obtain the tools that are required to get the fix. If it is not installed, obtain your product update
installer. You can download the installer from Fix Central. This site provides download, installation,
and configuration instructions for the update installer.
Click Find Product.
Begin typing IBM Cloud Manager with OpenStack in the Product Selector field.
Select IBM Cloud Manager with OpenStack from the list. For Installed version, select All.
Identify and select the fix that is required.
Download the fix.
a. Open the download document and follow the link in the “Download Package” section.
b. When downloading the file, ensure that the name of the maintenance file is not changed. This
change might be intentional, or it might be an inadvertent change that is caused by certain web
browsers or download utilities.
7. Apply the fix using the instructions in the readme.txt file that comes with the fix package.
Related concepts:
2.
3.
4.
5.
6.
Chapter 10. Troubleshooting and support
297
“Applying fixes and updates for IBM Cloud Manager with OpenStack” on page 39
Updates for IBM Cloud Manager with OpenStack provide fixes to the product.
“Applying fixes and updates for DB2” on page 40
Updates for DB2 provide fixes to the DB2 database server.
“Applying fixes and updates” on page 39
You can apply fixes and updates for the IBM Cloud Manager with OpenStack product.
Contacting IBM Support
IBM Support provides assistance with product defects, answers FAQs, and helps users resolve problems
with the product.
Before you begin
After trying to find your answer or solution by using other self-help options such as technotes, you can
contact IBM Support. Before contacting IBM Support, your company or organization must have an active
IBM software maintenance agreement (SWMA), and you must be authorized to submit problems to IBM.
For information about the types of available support, see the Support portfolio topic in the “Software
Support Handbook”: http://www14.software.ibm.com/webapp/set2/sas/f/handbook/offerings.html.
Procedure
To contact IBM Support about a problem:
1. Define the problem, gather background information, and determine the severity of the problem. For
more information, see the Getting IBM support topic in the Software Support Handbook
http://www14.software.ibm.com/webapp/set2/sas/f/handbook/getsupport.html.
2. Gather diagnostic information.
3. Submit the problem to IBM Support in one of the following ways:
v Online through the IBM Support Portal ( http://www.ibm.com/software/support/): You can open,
update, and view all of your service requests from the Service Request portlet on the Service
Request page.
v By phone: For the phone number to call in your region, see the Directory of worldwide contacts
(http://www.ibm.com/planetwide/) web page.
Results
If the problem that you submit is for a software defect or for missing or inaccurate documentation, IBM
Support creates an Authorized Program Analysis Report (APAR). The APAR describes the problem in
detail. Whenever possible, IBM Support provides a workaround that you can implement until the APAR
is resolved and a fix is delivered. IBM publishes resolved APARs on the IBM Support website daily, so
that other users who experience the same problem can benefit from the same resolution.
What to do next
Be prepared to work with the IBM technical-support representative by using IBM Assist On-site, which is
a remote-assistance plug-in that you can download to your computer. The IBM technical-support
representative can use IBM Assist On-site to view your desktop and share control of your mouse and
keyboard. This tool can shorten the time that it takes to identify the problem, collect the necessary data,
and solve the problem. For more information, see IBM Assist On-site: http://www.ibm.com/support/
assistonsite/.
298
IBM Cloud Manager with OpenStack: Administrator Guide, version 4.2
Exchanging information with IBM
To diagnose or identify a problem, you might need to provide IBM Support with data and information
from your system. In other cases, IBM Support might provide you with tools or utilities to use for
problem determination.
Sending information to IBM Support
To reduce the time that is required to resolve your problem, you can send trace and diagnostic
information to IBM Support.
Procedure
To submit diagnostic information to IBM Support:
1. Open a problem management record (PMR). You can use the Service Request Tool to create a PMR:
http://www.ibm.com/support/servicerequest
2. Collect the diagnostic data that you need. Diagnostic data helps reduce the time that it takes to
resolve your PMR. Manually collect and compress the required diagnostic information by following
the directions that you receive from IBM Support.
Note: See “Retrieve log and system files” on page 294 for directions on collecting logs and system
information for IBM Cloud Manager with OpenStack.
3. Transfer the files to IBM. Use the information on the IBM Enhanced Customer Data Repository
(ECuRep) website: http://www.ibm.com/software/support/exchangeinfo.html. While ECuRep is the
primary method for uploading data, you can also use one of the following methods to transfer the
files to IBM. All of these data exchange methods are described on the ECuRep website as well.
v
v
v
v
The Service Request tool
Standard data uploads methods: FTP, HTTP
Secure data upload methods: FTPS, SFTP, HTTPS
Email
Receiving information from IBM Support
ECuRep is the primary method for exchanging data. However, on occasion, an IBM technical-support
representative might ask you to download diagnostic tools or other files. You can use FTP to download
these files.
Before you begin
Ensure that your IBM technical-support representative provided you with the preferred server to use for
downloading the files and the exact directory and file names to access.
Procedure
To download files from IBM Support:
1. Use FTP to connect to the site that your IBM technical-support representative provided and log in as
anonymous. Use your email address as the password.
2. Change to the appropriate directory:
a. Change to the /fromibm directory.
cd fromibm
b. Change to the directory that your IBM technical-support representative provided.
cd nameofdirectory
3. Enable binary mode for your session.
Chapter 10. Troubleshooting and support
299
binary
4. Use the get command to download the file that your IBM technical-support representative specified.
get filename.extension
5. End your FTP session.
quit
Subscribing to Support updates
To stay informed of important information about the IBM products that you use, you can subscribe to
updates.
About this task
By subscribing to receive updates about IBM Cloud Manager with OpenStack, you can receive important
technical information and updates for specific IBM Support tools and resources. You can subscribe to
updates by using My Notifications:
My Notifications
With My Notifications, you can subscribe to Support updates for any IBM product. (My
Notifications replaces My Support, which is a similar tool that you might have used in the past.)
With My Notifications, you can specify that you want to receive daily or weekly email
announcements. You can specify what type of information you want to receive (such as
publications, hints and tips, product flashes (also known as alerts), downloads, and drivers). My
Notifications enables you to customize and categorize the products about which you want to be
informed and the delivery methods that best suit your needs.
Procedure
To subscribe to My Notifications, complete the following steps:
1. Go to the IBM Support Portal (http://www.ibm.com/software/support/) and sign in by using your
IBM ID and password.
2. In the Notifications portlet, click Manage all my subscriptions, then click the Subscribe tab.
3. Click Other Software.
4. Select IBM Cloud Manager with OpenStack, then click Continue.
a. Select your preferences for how to receive updates, whether by email, online in a designated
folder, or as an RSS or Atom feed.
b. Select the types of documentation updates that you want to receive, for example, new information
about product downloads and discussion group comments.
c. Click Submit.
Results
Until you modify your My Notifications preferences, you receive notifications of updates that you have
requested. You can modify your preferences when needed.
Related reference:
Subscribe to My Notifications support content updates
My Notifications for IBM technical support
My Notifications for IBM technical support overview
300
IBM Cloud Manager with OpenStack: Administrator Guide, version 4.2
Troubleshooting errors when deploying or updating topologies
If a topology deployment or update fails, review the log output from the deployment command for more
information.
Identify errors, starting at the beginning of the log output. The first error found is typically the most
useful. Errors found at the end of the log output might be the result of earlier errors. The following topics
might provide additional information to solve the problem. After completing the recommended resolution
to the problem, retry the topology deployment or update.
Deployment hangs when running the Open vSwitch recipe
You might encounter a hang during the deployment process if you specified an incorrect value for your
controller node’s data network.
Symptoms
Your deployment hangs at the following step and you cannot log in to the controller node using the fully
qualified domain name that you specified when you deployed the node:
Running Recipe openstack-network::openvswitch
Resolving the problem
To resolve the problem, complete the following steps.
1. Access the console for your controller node or, if available, log in to the controller node using an
alternative management or external network.
2. Delete the Open vSwitch data network bridge that was created during deployment. To do so, run
ovs-vsctl del-br br-eth0, where br-eth0 is the bridge and eth0 is the incorrect value that is
specified for your controller node’s data network. After the bridge is deleted, log in to the controller
node using the fully qualified domain name that you specified when you deployed the node.
3. Update you deployment files with the correct management and data networks. For more information
about determining the management and data networks for a node, see the Deploying prerequisites
topic.
4. Cancel the hung deployment and then try again.
DB2 database requests fail with SQL1225N
When you deploy a topology with DB2 databases and cloud nodes that have several CPUs, database
requests might fail with a SQL1225N message.
Symptoms
During deployment, the Chef logs show a failure with a SQL1225N message:
Error executing action `run` on resource ’execute[grant privilege
to user(dash) on database(horizon)]’
================================================================================
Mixlib::ShellOut::ShellCommandFailed
-----------------------------------Expected process to exit with [0], but received ’4’
---- Begin output of su - db2inst1 -c "(db2 ’connect to horizon’) &&
(db2 ’grant dbadm on database to user dash’) && (db2 ’connect reset’)" ---STDOUT: SQL1225N The request failed because an operating system process, thread, or
swap space limit was reached. SQLSTATE=57049
STDERR:
---- End output of su - db2inst1 -c "(db2 ’connect to horizon’) &&
(db2 ’grant dbadm on database to user dash’) && (db2 ’connect reset’)" ----
Chapter 10. Troubleshooting and support
301
Causes
Some OpenStack components start multiple worker processes based on the number of CPUs. Each of
these processes has its own database connections. When the number of CPUs is large (for example, 32),
the database connections might require more memory than is available.
Resolution
The following attributes can be set in the environment to control the number of worker processes.
openstack.block-storage.osapi_volume_workers
openstack.compute.conductor.workers
openstack.compute.osapi_compute_workers
openstack.identity.admin_workers
openstack.identity.public_workers
openstack.image.api.workers
openstack.image.registry.workers
The default values for these attributes, particularly the compute and identity workers, is based on the
number of CPUs and might need to be set to a smaller value. For more information about how to change
these attributes, see “Customizing performance attributes” on page 127.
Alternately, you can add physical memory or increase the swap space on the node.
MySQL database requests fail with "Too many connections"
When deploying a topology with MySQL database and cloud nodes that have several CPUs, database
requests might fail with a "Too many connections" error.
Symptoms
The chef logs from deploy shows a failure like the following:
ERROR: database_user[neutron] (openstack-ops-database::openstack-db line 99)
had an error: Mysql::Error: Too many connections
Causes
Some OpenStack components start multiple worker processes based on the number of CPUs. Each of
these processes has its own database connections. When the number of CPUs is large (for example, 32),
the number of database connections might exceed the MySQL maximum connection limit, which is set to
151 connections.
Resolution
The following attributes can be set in the environment to control the number of worker processes.
openstack.block-storage.osapi_volume_workers
openstack.compute.conductor.workers
openstack.compute.osapi_compute_workers
openstack.identity.admin_workers
openstack.identity.public_workers
openstack.image.api.workers
openstack.image.registry.workers
The default values for these attributes, particularly the compute and identity workers, is based on the
number of CPUs and might need to be set to a smaller value. For more information about how to change
these attributes, see “Customizing performance attributes” on page 127.
302
IBM Cloud Manager with OpenStack: Administrator Guide, version 4.2
Network connectivity loss to nodes during deployment
You might experience a loss of network connectivity to your controller or compute nodes during the
deployment process.
If you experience a loss of network connectivity to your controller node or compute nodes, update your
environment file to skip the L3 agent and IP address movement recipes. By skipping these two recipes,
the deployment is similar to the IBM Cloud Manager with OpenStack, version 4.1 deployment process.
Review the following information on disabling the IP address movement and L3 agent networking
options.
IP address movement
IP address movement moves the data network interface and external network IP address to the
related OVS bridge. With this feature, the IP address in the data network interface and external
network interface can be accessed after the deployment process is finished. You can disable it by
changing the ibm-openstack.network.ip_movement.enable parameter value from true to false.
L3 agent
You can disable the L3 agent by changing the ibm-openstack.network.l3.enable parameter value
from true to false.
Note: If you leave the L3 agent enabled, then you must not disable the IP address movement
recipe. Otherwise, the IP address in the external network interface is not accessible after the
deployment process is complete.
Data bag item not found
You might see an error in the log that a data bag item is missing.
Symptoms
### Data bag item not found ###
================================================================================
Recipe Compile Error in /var/chef/cache/cookbooks/openstack-identity/recipes/server.rb
================================================================================
Net::HTTPServerException
-----------------------404 "Object Not Found"
Cookbook Trace:
--------------/var/chef/cache/cookbooks/openstack-common/libraries/passwords.rb:46:in `secret’
/var/chef/cache/cookbooks/openstack-common/libraries/passwords.rb:52:in `get_secret’
/var/chef/cache/cookbooks/openstack-identity/recipes/server.rb:113:in `from_file’
Relevant File Content:
---------------------/var/chef/cache/cookbooks/openstack-common/libraries/passwords.rb:
Causes
The data bag attribute in your environment file might be incorrect or missing on the Chef server.
Resolving the problem
Verify that the data bag attributes in your environment file are correct and that the data bags and data
bag items for your topology deployment exist on the Chef server. You can use the knife data bag list
and knife data bag show my-data-bag-name commands to determine the data bags and data bag items
available on the Chef server.
Chapter 10. Troubleshooting and support
303
Deploying z/VM compute node fails
You attempt to deploy z/VM compute nodes but the deployment fails.
About this task
If you encounter problems when you deploy your z/VM compute nodes, verify that you updated all the
required attributes in your environment file, your-environment-name.json prior to deployment. For
example, verify that you add and update the following attribute:
v ibm-openstack.zvm-driver.xcat.mnadmin: Specify the xCAT management user that can ssh into xcat
mn. If you do not set this user, the default value is mnadmin.
To view the necessary attributes, review all the steps in the “Deploying with z/VM compute nodes” on
page 92 topic.
Deployment fails with package installation error
During deployment, a package might fail to install successfully and you receive a deployment error.
If you receive the following error during the deployment process, follow these steps to troubleshoot. The
error message states:
========================================================================
Error executing action `upgrade` on resource ’package[openstack-nova-common]’
================================================================================
First, use one the following options to determine what caused the `package` to fail to install.
v SSH to the node where the `upgrade` failed, and attempt to 'yum install' the `package` to see the
detailed failure. For example, run # yum install openstack-nova-common. You receive a message
similar to the one shown here.
...Error unpacking rpm package python-ecdsa-0.11-1.ibm.el6.noarch
error: unpacking of archive failed on file /usr/lib/python2.6/site-packages/ecdsa-0.11-py2.6.egg-info: cpio: rename
Verifying : python-ecdsa-0.11-1.ibm.el6.noarch 1/1
Failed:
python-ecdsa.noarch 0:0.11-1.ibm.el6
Complete!
v Otherwise, SSH to the node where the `upgrade` failed, and view the yum log in /var/log/yum.log and
identify the package that failed. For example:
# cat /var/log/yum.log | grep ecdsa
Sep 29 03:07:44 python-ecdsa-0.11-1.ibm.el6.noarch: 100
The installation of a package might fail if you use PIP to install python packages, prior to installing the
RPMs. This combination is error prone.
Use the following steps to resolve the issue:
1. Uninstall the package that failed and deploy the topology again. For example:
# pip uninstall ecdsa
Uninstalling ecdsa:
/usr/lib/python2.6/site-packages/ecdsa-0.11-py2.6.egg-info
/usr/lib/python2.6/site-packages/ecdsa/__init__.py
/usr/lib/python2.6/site-packages/ecdsa/__init__.pyc
/usr/lib/python2.6/site-packages/ecdsa/_version.py
/usr/lib/python2.6/site-packages/ecdsa/_version.pyc
/usr/lib/python2.6/site-packages/ecdsa/curves.py
/usr/lib/python2.6/site-packages/ecdsa/curves.pyc
/usr/lib/python2.6/site-packages/ecdsa/der.py
/usr/lib/python2.6/site-packages/ecdsa/der.pyc
/usr/lib/python2.6/site-packages/ecdsa/ecdsa.py
304
IBM Cloud Manager with OpenStack: Administrator Guide, version 4.2
/usr/lib/python2.6/site-packages/ecdsa/ecdsa.pyc
/usr/lib/python2.6/site-packages/ecdsa/ellipticcurve.py
/usr/lib/python2.6/site-packages/ecdsa/ellipticcurve.pyc
/usr/lib/python2.6/site-packages/ecdsa/keys.py
/usr/lib/python2.6/site-packages/ecdsa/keys.pyc
/usr/lib/python2.6/site-packages/ecdsa/numbertheory.py
/usr/lib/python2.6/site-packages/ecdsa/numbertheory.pyc
/usr/lib/python2.6/site-packages/ecdsa/rfc6979.py
/usr/lib/python2.6/site-packages/ecdsa/rfc6979.pyc
/usr/lib/python2.6/site-packages/ecdsa/six.py
/usr/lib/python2.6/site-packages/ecdsa/six.pyc
/usr/lib/python2.6/site-packages/ecdsa/test_pyecdsa.py
/usr/lib/python2.6/site-packages/ecdsa/test_pyecdsa.pyc
/usr/lib/python2.6/site-packages/ecdsa/util.py
/usr/lib/python2.6/site-packages/ecdsa/util.pyc
Proceed (y/n)? y
Successfully uninstalled ecdsa
2. Redeploy your topology.
Node verification failed
You might see an error in the log that the topology node verification failed.
Symptoms
ERROR: RuntimeError: Topology node verification failed.
Causes
An error in the topology file might cause this error.
Resolving the problem
Verify that the following information is correct in your topology file:
v Fully qualified domain name for each node
v Login information for each node
Correct any errors and try the task again.
Deploying a client node fails
You might see an error in the log that the topology node failed to deploy.
Symptoms
ERROR 14: Peer cert cannot be verified or peer cert invalid.
Causes
The deployment can fail if an SSL certificate exists on the client node.
Resolving the problem
Ensure that the client node does not have an existing SSL certificate.
1. On the Chef server, run the following commands:
knife node delete -y chef-client-fqdn
knife client delete -y chef-client-fqdn
2. On the client node, run the following commands:
a. Run the rm -rf /etc/chef command.
b. Run the rm -rf /etc/yum.repos.d/ibmos* command.
c. List the yum repos and validate that you do not have OpenStack yum repos configured:
Chapter 10. Troubleshooting and support
305
1) Run yum repolist to list the repos.
2) Delete OpenStack yum repos. To delete all yum repos, run yum clean all or to delete an
individual repo, run yum erase <repo>.
d. Delete the SSL certificates.
1) Export NSS_DEFAULT_DB_TYPE="sql".
2) To list the named certificates in the NSS db, run the following command:
certutil -L -d /etc/pki/nssdb
3)
To extract the Chef certificate and view who issued it, run the following command:
certutil -L -d /etc/pki/nssdb -a -n ’chef-server-cert’ > chef.crt
openssl x509 -noout -text -in chef.crt | grep Issuer
4) To delete the Chef certificate, run the following command:
certutil -D -d /etc/pki/nssdb -n ’chef-server-cert’
Deploying a remote node fails
You attempt to deploy a remote compute node but the deployment fails.
About this task
When you try to deploy a remote compute node, you see the following error:
Deploy of node at fqdn_of_remote_compute_node failed:
Ssh execution of command ’bash -c ’; exists() {; if command -v $1 ... }; EOP;
chef-client -j /etc/chef/first-boot.json -E Region1’’ failed with exit status ’1’.
Node ’FQDN_of_remote_compute_node’ failed:
ERROR: Failed to add certificate for the Chef server..
See the log file ’/var/log/chef-server/nodes/FQDN_of_remote_compute_node_2014-10-29_14-30-51-885630295000.log’
for more information.
where FQDN_of_remote_compute_node is the fully qualified domain name for the remote host.
This problem can occur when the Chef server cannot be reached by using its fully qualified domain name
(FQDN). Try to ping the Chef server by using its FQDN. If you are unable to reach the Chef server, then
you must change your DNS settings.
Related concepts:
“Adding a compute node to a deployed topology” on page 145
After deploying your topology, you can add a compute node system to your deployment. This does not
apply to the Minimal topology.
Cookbook not found
You might see an error in the log file about missing cookbooks.
Symptoms
You might see an error similar to the following example:
================================================================================
Error Resolving Cookbooks for Run List:
================================================================================
Missing Cookbooks:
-----------------The following cookbooks are required by the client but don’t exist on the server:
* openstack-common
Resolving the problem
306
IBM Cloud Manager with OpenStack: Administrator Guide, version 4.2
Verify that the cookbook version constraints in the environment file are correct. The cookbook might exist
on the Chef server, however, it might be ignored because of a version constraint. For example, a
cookbook version constraint of ~> 9.2.0 would support versions >= 9.2.0 and < 9.3.0. You can use knife
cookbook show cookbook-name to determine the versions of a cookbook that are available.
Network interface not found
You might encounter an error in the log if the network interface cannot be found.
Symptoms
You might see information similar to the following example if a network interface is not defined correctly.
================================================================================
Recipe Compile Error in /var/chef/cache/cookbooks/openstack-common/recipes/set_endpoints_by_interface.rb
================================================================================
NoMethodError
------------undefined method `[]’ for nil:NilClass
Cookbook Trace:
--------------/var/chef/cache/cookbooks/openstack-common/libraries/network.rb:29:in `address_for’
/var/chef/cache/cookbooks/openstack-common/libraries/endpoints.rb:96:in `address’
Resolving the problem
Verify that the network interface attributes in the environment file and node specific attributes files are
correct. For example, a node may not have an eth0 network interface which is the default value for some
attributes.
Operating system repository not found
You might see an error in the log file that the yum repository is not available.
Symptoms
The error might be similar to the following example:
================================================================================
Error executing action `run` on resource ’ruby_block[operating system yum repository not available]’
================================================================================
#<Class:0x000000044e86b8>::NoOperatingSystemRepositoryException
--------------------------------------------------------------There are no yum repositories available that contain operating system packages that the openstack
installation depends on. You must either configure your nodes to have access to a yum repository
or you can create this repository on the deployment server. You can create your own repository by
copying the Packages and repodata directory from this node system’s installation media to the
following location: https://mychefserver.com:14443/yum-repo/operatingsystem/rhel6.5/x86_64.
Once the yum repository is created on the server or you have updated the node systems yum repository
list to include a repository which contains operating system packages, re-run the deployment process.
The package used to test the repository is libvirt. For more information on creating your own
operating system yum repository, see the product documentation.
Resolving the problem
Follow the instructions that are outlined in the error to set up an operating system yum repository for
your topology deployment.
Chapter 10. Troubleshooting and support
307
Package failed to install or upgrade
You might see an error in the log file about being unable to upgrade a resource.
Symptoms
The error might be similar to the following example:
================================================================================
Error executing action `upgrade` on resource ’package[python-openstackclient]’
================================================================================
Resolving the problem
The node might be unable to connect to or use the Chef server or the operating system or IBM Cloud
Manager with OpenStack package repositories. Log in to the node and attempt to install or upgrade the
package manually. Start by clearing the expired package cache by running yum clean expire-cache, then
attempt to install the failed package (for example, yum install python-openstackclient). If the package
installs successfully, try the topology deployment or update again. If the package installation fails, the
command output provides more information about why the error occurred and how to resolve it.
PowerVC driver deploys successfully; later is dead
It appears that you successfully deployed a controller node that includes the PowerVC driver, but later
the PowerVC driver service is dead.
Symptoms
After successfully deploying a controller node you might subsequently notice that PowerVC services are
dead and the system is unusable.
Causes
A configuration error such as a mistake for the IP address of the PowerVC host system can cause the
PowerVC driver services to eventually fail.
Diagnosing the problem
You can use the following command to check the status of the PowerVC driver service.
service openstack-nova-powervc status
Resolving the problem
If PowerVC services are dead, ensure that the settings in the environment file are correct. Then try the
deployment task again.
Compute node is deployed or updated successfully; later Open
vSwitch agent is down
You successfully deploy, update, or apply a fix pack to a compute node, but later the Open vSwitch agent
on the compute node is down.
Symptoms
After you successfully deploy, update, or apply a fix pack to a compute node, you are unable to start a
new virtual machine.
You check the status of the Open vSwitch agent by running the following command on your controller
node:
neutron agent-list
The Open vSwitch agent is down.
Causes
308
IBM Cloud Manager with OpenStack: Administrator Guide, version 4.2
This problem can occur for various reasons, one of which is that there is an error in the
/etc/neutron/plugins/openvswitch/ovs_neutron_plugin.ini file on the compute node.
Resolving the problem
To resolve the problem, try to restart the Open vSwitch agent by running the following command on the
compute node:
service neutron-openvswitch-agent restart
Take one of the following actions:
v If the agent status on the controller is active, try to start the virtual machine.
v If the agent status is not active, see the /var/log/neutron/openvswitch-agent.log file on the compute
node.
If you applied a fix pack to multiple PowerKVM compute nodes, it is likely that the agent is down on all
of them. You can resolve the problem similarly for each compute node.
Fingerprint error during deploy
When redeploying to a node where a topology has previously been deployed, you receive an SSH
fingerprint error.
Symptoms
When updating the environment during the deployment process, you receive an error similar to the
following:
ERROR: fingerprint 1d:51:e2:2d:79:85:9c:c0:7c:9d:82:c7:3f:94:ad:b4 does not
match for "your_system.domain.com,x.x.x.x"
ERROR: /opt/chef/embedded/lib/ruby/gems/1.9.1/gems/net-ssh-2.9.0/lib/net/ssh
/verifiers/secure.rb:50:in `process_cache_miss’
/opt/chef/embedded/lib/ruby/gems/1.9.1/gems/net-ssh-2.9.0/lib/net/ssh/
verifiers/secure.rb:35:in `verify’
/opt/chef/embedded/lib/ruby/gems/1.9.1/gems/net-ssh-2.9.0/lib/net/ssh/
verifiers/strict.rb:16:in `verify’
/opt/chef/embedded/lib/ruby/gems/1.9.1/gems/net-ssh-2.9.0/lib/net/ssh/
verifiers/lenient.rb:15:in `verify’
/opt/chef/embedded/lib/ruby/gems/1.9.1/gems/net-ssh-2.9.0/lib/net/ssh
/transport/kex/diffie_hellman_group1_sha1.rb:173:in `verify_server_key’
/opt/chef/embedded/lib/ruby/gems/1.9.1/gems/net-ssh-2.9.0/lib/net/ssh/
transport/kex/diffie_hellman_group1_sha1.rb:68:in `exchange_keys’
/opt/chef/embedded/lib/ruby/gems/1.9.1/gems/net-ssh-2.9.0/lib/net/ssh/
transport/algorithms.rb:364:in `exchange_keys’
/opt/chef/embedded/lib/ruby/gems/1.9.1/gems/net-ssh-2.9.0/lib/net/ssh/
transport/algorithms.rb:205:in `proceed!’
/opt/chef/embedded/lib/ruby/gems/1.9.1/gems/net-ssh-2.9.0/lib/net/ssh/
transport/algorithms.rb:196:in `send_kexinit’
/opt/chef/embedded/lib/ruby/gems/1.9.1/gems/net-ssh-2.9.0/lib/net/ssh/
transport/algorithms.rb:151:in `accept_kexinit’
/opt/chef/embedded/lib/ruby/gems/1.9.1/gems/net-ssh-2.9.0/lib/net/ssh/
transport/session.rb:195:in `block in poll_message’
/opt/chef/embedded/lib/ruby/gems/1.9.1/gems/net-ssh-2.9.0/lib/net/ssh/
transport/session.rb:173:in `loop’
/opt/chef/embedded/lib/ruby/gems/1.9.1/gems/net-ssh-2.9.0/lib/net/ssh/
transport/session.rb:173:in `poll_message’
/opt/chef/embedded/lib/ruby/gems/1.9.1/gems/net-ssh-2.9.0/lib/net/ssh/
transport/session.rb:210:in `block in wait’
/opt/chef/embedded/lib/ruby/gems/1.9.1/gems/net-ssh-2.9.0/lib/net/ssh/
transport/session.rb:208:in `loop’
/opt/chef/embedded/lib/ruby/gems/1.9.1/gems/net-ssh-2.9.0/lib/net/ssh/
transport/session.rb:208:in `wait’
/opt/chef/embedded/lib/ruby/gems/1.9.1/gems/net-ssh-2.9.0/lib/net/ssh/
transport/session.rb:87:in `initialize’
/opt/chef/embedded/lib/ruby/gems/1.9.1/gems/net-ssh-2.9.0/lib/net/
ssh.rb:202:in `new’
Chapter 10. Troubleshooting and support
309
/opt/chef/embedded/lib/ruby/gems/1.9.1/gems/net-ssh-2.9.0/lib/net/
ssh.rb:202:in `start’
/opt/chef/embedded/lib/ruby/gems/1.9.1/gems/net-ssh-multi-1.2.0/lib/net/
ssh/multi/server.rb:185:in `new_session’
/opt/chef/embedded/lib/ruby/gems/1.9.1/gems/chef-11.12.4/lib/chef/
monkey_patches/net-ssh-multi.rb:79:in `next_session’
/opt/chef/embedded/lib/ruby/gems/1.9.1/gems/net-ssh-multi-1.2.0/lib/
net/ssh/multi/server.rb:138:in `session’
/opt/chef/embedded/lib/ruby/gems/1.9.1/gems/net-ssh-multi-1.2.0/lib/
net/ssh/multi/session_actions.rb:36:in `block (2 levels) in sessions’
ERROR: Node ’powervc-rhel64’ at your_system.domain.com verification error:
Could not connect to your_system.domain.com
as user ’root’ with the specified password : Ssh execution of command
’2>/dev/null 1>&2 echo hello’ failed:
fingerprint 1d:51:e2:2d:79:85:9c:c0:7c:9d:82:c7:3f:94:ad:b4 does not match
for "your_system.domain.com,x.x.x.x"
ERROR: RuntimeError: Topology node verification failed.
Resolving the problem
You might need to delete the SSH fingerprint on your deployment server. The deployment knife
commands use SSH to communicate with the node system to deploy OpenStack. Use one of the following
methods to delete SSH fingerprints from the .ssh/known_hosts file on the deployment server:
v Run the following command:
ssh-keygen -R node fqdn
v Edit the .ssh/known_hosts file in a text editor and delete the line that contains your node system.
Error restarting neutron when deploying a topology
When you attempt to deploy a topology, you receive an error about restarting the neutron-pluginopenvswitch-agent service.
Symptoms
You see something similar to the following error:
ESC[31mError executing action `restart` on resource ’service[neutron-plugin-openvswitch-agent]’ESC
Causes
You might not have the right version of a package, such as OpenSSL.
Resolving the problem
Ensure that the yum repositories are configured correctly so that package updates are accessible. For
more information, see “Configuring operating system yum repositories on the deployment server” on
page 37.
Then, try the deployment task again.
Cinder error occurs when you deploy a controller node
You see a cinder error in the log after you try to deploy a controller node.
Symptoms
You try to deploy a controller node and it fails. You check the log and see the following error message:
Error executing action `run` on resource ’execute[cinder-manage db sync]’
IOError: [Errno 13] Permission denied: ’/var/log/cinder/cinder.log’
Causes
This error can occur if Service Pack 1 is not installed before you deploy a controller node with storage
support.
Resolving the problem
310
IBM Cloud Manager with OpenStack: Administrator Guide, version 4.2
To resolve the problem, manually delete the /var/log/cinder/cinder.log file and reconverge the
controller node.
Internal service error occurs when you run a knife command
You receive an internal service error when you run a knife command.
The error might be similar to the following example:
knife environment from file environment.json
ERROR: internal server error
Response: internal service error
To resolve the problem, run the chef-server-ctl tail command and read the information in the
chef-server logs. You can also review the logs in the /var/log/chef-server directory to find more
information about the cause of the error and how to resolve it.
Error upgrading the openstack-selinux package
When you deploy a topology with IBM Cloud Manager with OpenStack, you receive an error about
upgrading the openstack-selinux package.
Symptoms
The specific error might look similar to the following message:
Error executing action `upgrade` on resource ’package[openstack-selinux]’
Resolving the problem
1. To resolve the error, downgrade libselinux and libselinux-utils by using the following command:
# yum downgrade libselinux libselinux-utils
The system should display output similar to the following output:
Loaded plugins: product-id, rhnplugin, subscription-manager
Setting up Downgrade Process
Resolving Dependencies
--> Running transaction check
---> Package libselinux.ppc64 0:2.0.94-5.3.el6 will be a downgrade
---> Package libselinux.ppc64 0:2.0.94-5.3.el6_4.1 will be erased
---> Package libselinux-utils.ppc64 0:2.0.94-5.3.el6 will be a downgrade
---> Package libselinux-utils.ppc64 0:2.0.94-5.3.el6_4.1 will be erased
--> Finished Dependency Resolution
Dependencies Resolved
================================================================================
Package Arch Version Repository Size
================================================================================
Downgrading:
libselinux ppc64 2.0.94-5.3.el6 local-rhels6.4-ppc64 112 k
libselinux-utils ppc64 2.0.94-5.3.el6 local-rhels6.4-ppc64 81 k
Transaction Summary
================================================================================
Downgrade 2 Package(s)
2. Retry the topology deployment.
No IP addresses on virtual machines after deployment
There is a known issue that Open vSwitch VLANs do not work with older NICs.
You must use a NIC whose driver does not have VLAN problems.
Chapter 10. Troubleshooting and support
311
For more information about an Open vSwitch workaround, see ovs−vlan−bug−workaround. There is
additional information on the following Open vSwitch Frequently Asked Questions page as well.
Self-service portal displays volumes attached to wrong device
For a PowerVM environment, when you investigate volumes that are attached to a device, the name that
is displayed by the self-service portal user interface is not meaningful.
The Attached VM or Attached to fields in the user interface display a device name (or mount point). For
example, Attached to icm42ui on /dev/sdb. For PowerVM, this device name is meaningless and does
not reflect the actual device name in the guest operating system.
The following example shows the device details that display from the Cinder show command, which are
also meaningless for PowerVM.
------------------------------------------------------------------------+
|
attachments
|
[{u’device’: u’/dev/sdd’, u’server_id’:
u’bddd1457-507f-42a5-9d56-a2a6c79f1e6c’, u’id’: u’c21a8b02-7454-4018-9539-9c1fa4b60a71’,
u’host_name’: None, u’volume_id’: u’c21a8b02-7454-4018-9539-9c1fa4b60a71’}]
Note: This behavior applies only to PowerVM environments.
Known problems and solutions for an Administrator
If you are using IBM Cloud Manager with OpenStack with the Administrator role, review theses known
problems and solutions that you might encounter.
If your particular problem is not represented, see “Searching knowledge bases” on page 296 for a list of
other references, particularly the Techdocs Web site, where more recent solutions or workarounds might
instead reside.
Known issues
There are several known issues with the current release of IBM Cloud Manager with OpenStack.
If your particular problem is not represented, see “Searching knowledge bases” on page 296 for a list of
other references, particularly the Techdocs Web site, where more recent solutions or workarounds might
instead reside.
DBDuplicateEntry error in Neutron server log
After you finish the deploying, if you use DB2 as the OpenStack database, you might see the
DBDuplicateEntry error in the Neutron server log. This error message does not impact any OpenStack
function. The error appears in the error log of the Neutron server and openvswitch-agent.
Symptoms
In the /var/log/neutron/server.log and /var/log/neutron/openvswitch-agent.log, you might see the
following errors, which are a result of the DBDuplicateEntry error:
Note: The output has been formatted for display purposes.
2014-11-10 23:14:36.050 31989 ERROR oslo.messaging.rpc.dispatcher [req-e07a7ed7-d22f-40e9-b299-aba6e06f
9470 ]
Exception during message handling: (IntegrityError) ibm_db_dbi::IntegrityError: Statement Execute Failed:
[IBM][CLI Driver][DB2/LINUXX8664] SQL0803N One or more values in the INSERT statement, UPDATE statement,
or foreign key update caused by a DELETE statement are not valid because the primary key, unique constraint
or unique index identified by "2" constrains table "NEUTRON.AGENTS" from having duplicate values for
the index key.
SQLSTATE=23505 SQLCODE=-803 ’INSERT INTO agents (id, agent_type, "binary", topic, host, admin_state_up,
created_at,
started_at, heartbeat_timestamp, description, configurations) VALUES (?, ?, ?, ?, ?, ?, ?, ?, ?, ?, ?)’
312
IBM Cloud Manager with OpenStack: Administrator Guide, version 4.2
(’5028b520-1a90-46c2-9e97-b1cb80d6ebe0’, ’Open vSwitch agent’, ’neutron-openvswitch-agent’, ’N/A’,
’testhl12.sce.ibm.com’, ’1’, datetime.datetime(2014, 11, 11, 4, 14, 35, 580590),
datetime.datetime(2014, 11, 11, 4, 14, 35, 580590), datetime.datetime(2014, 11, 11, 4, 14, 35, 580590),
None, ’{"arp_responder_enabled": false, "tunneling_ip": "10.11.1.12", "devices": 0, "l2_population":
false,
"tunnel_types": ["gre", "vxlan"], "enable_distributed_routing": false, "bridge_mappings": {"default":
"br-eth1"}}’)
2014-11-10 23:14:36.050 31989 TRACE oslo.messaging.rpc.dispatcher Traceback (most recent call last):
2014-11-10 23:14:36.050 31989 TRACE oslo.messaging.rpc.dispatcher
File "/usr/lib/python2.6/site-packages/oslo/messaging/rpc/dispatcher.py", line 134, in _dispatch_and_reply
2014-11-10 23:14:36.050 31989 TRACE oslo.messaging.rpc.dispatcher incoming.message))
2014-11-10 23:14:36.050 31989 TRACE oslo.messaging.rpc.dispatcher
File "/usr/lib/python2.6/site-packages/oslo/messaging/rpc/dispatcher.py", line 177, in _dispatch
2014-11-10 23:14:36.050 31989 TRACE oslo.messaging.rpc.dispatcher return self._do_dispatch(endpoint,
method, ctxt, args)
2014-11-10 23:14:36.050 31989 TRACE oslo.messaging.rpc.dispatcher
File "/usr/lib/python2.6/site-packages/oslo/messaging/rpc/dispatcher.py", line 123, in _do_dispatch
2014-11-10 23:14:36.050 31989 TRACE oslo.messaging.rpc.dispatcher
result = getattr(endpoint, method)(ctxt, **new_args)
2014-11-10 23:14:36.050 31989 TRACE oslo.messaging.rpc.dispatcher
File "/usr/lib/python2.6/site-packages/neutron/db/agents_db.py", line 237, in report_state
2014-11-10 23:14:36.050 31989 TRACE oslo.messaging.rpc.dispatcher
self.plugin.create_or_update_agent(context, agent_state)
2014-11-10 23:14:36.050 31989 TRACE oslo.messaging.rpc.dispatcher
File "/usr/lib/python2.6/site-packages/neutron/db/agents_db.py", line 214, in create_or_update_agent
2014-11-10 23:14:36.050 31989 TRACE oslo.messaging.rpc.dispatcher
return self._create_or_update_agent(context, agent)
2014-11-10 23:14:36.050 31989 TRACE oslo.messaging.rpc.dispatcher
File "/usr/lib/python2.6/site-packages/neutron/openstack/common/excutils.py", line 82, in __exit__
2014-11-10 23:14:36.050 31989 TRACE oslo.messaging.rpc.dispatcher
six.reraise(self.type_, self.value, self.tb)
2014-11-10 23:14:36.050 31989 TRACE oslo.messaging.rpc.dispatcher
File "/usr/lib/python2.6/site-packages/neutron/db/agents_db.py", line 197, in create_or_update_agent
2014-11-10 23:14:36.050 31989 TRACE oslo.messaging.rpc.dispatcher
return self._create_or_update_agent(context, agent)
2014-11-10 23:14:36.050 31989 TRACE oslo.messaging.rpc.dispatcher
File "/usr/lib/python2.6/site-packages/neutron/db/agents_db.py", line 191, in _create_or_update_agent
2014-11-10 23:14:36.050 31989 TRACE oslo.messaging.rpc.dispatcher
greenthread.sleep(0)
2014-11-10 23:14:36.050 31989 TRACE oslo.messaging.rpc.dispatcher
File "/usr/lib64/python2.6/site-packages/sqlalchemy/orm/session.py", line 447, in __exit__
2014-11-10 23:14:36.050 31989 TRACE oslo.messaging.rpc.dispatcher
self.rollback()
2014-11-10 23:14:36.050 31989 TRACE oslo.messaging.rpc.dispatcher
File "/usr/lib64/python2.6/site-packages/sqlalchemy/util/langhelpers.py", line 58, in __exit__
2014-11-10 23:14:36.050 31989 TRACE oslo.messaging.rpc.dispatcher
compat.reraise(exc_type, exc_value, exc_tb)
2014-11-10 23:14:36.050 31989 TRACE oslo.messaging.rpc.dispatcher
File "/usr/lib64/python2.6/site-packages/sqlalchemy/orm/session.py", line 444, in __exit__
2014-11-10 23:14:36.050 31989 TRACE oslo.messaging.rpc.dispatcher
self.commit()
2014-11-10 23:14:36.050 31989 TRACE oslo.messaging.rpc.dispatcher
File "/usr/lib64/python2.6/site-packages/sqlalchemy/orm/session.py",
line 354, in commit
2014-11-10 23:14:36.050 31989 TRACE oslo.messaging.rpc.dispatcher
self._prepare_impl()
2014-11-10 23:14:36.050 31989 TRACE oslo.messaging.rpc.dispatcher
File "/usr/lib64/python2.6/site-packages/sqlalchemy/orm/session.py", line 334, in _prepare_impl
2014-11-10 23:14:36.050 31989 TRACE oslo.messaging.rpc.dispatcher
self.session.flush()
2014-11-10 23:14:36.050 31989 TRACE oslo.messaging.rpc.dispatcher
File "/usr/lib64/python2.6/site-packages/sqlalchemy/orm/session.py", line 1818, in flush
2014-11-10 23:14:36.050 31989 TRACE oslo.messaging.rpc.dispatcher
self._flush(objects)
2014-11-10 23:14:36.050 31989 TRACE oslo.messaging.rpc.dispatcher
File "/usr/lib64/python2.6/site-packages/sqlalchemy/orm/session.py", line 1936, in _flush
2014-11-10 23:14:36.050 31989 TRACE oslo.messaging.rpc.dispatcher
Chapter 10. Troubleshooting and support
313
transaction.rollback(_capture_exception=True)
2014-11-10 23:14:36.050 31989 TRACE oslo.messaging.rpc.dispatcher
File "/usr/lib64/python2.6/site-packages/sqlalchemy/util/langhelpers.py", line 58, in __exit__
2014-11-10 23:14:36.050 31989 TRACE oslo.messaging.rpc.dispatcher
compat.reraise(exc_type, exc_value, exc_tb)
2014-11-10 23:14:36.050 31989 TRACE oslo.messaging.rpc.dispatcher
File "/usr/lib64/python2.6/site-packages/sqlalchemy/orm/session.py", line 1900, in _flush
2014-11-10 23:14:36.050 31989 TRACE oslo.messaging.rpc.dispatcher
flush_context.execute()
2014-11-10 23:14:36.050 31989 TRACE oslo.messaging.rpc.dispatcher
File "/usr/lib64/python2.6/site-packages/sqlalchemy/orm/unitofwork.py", line 372, in execute
2014-11-10 23:14:36.050 31989 TRACE oslo.messaging.rpc.dispatcher
rec.execute(self)
2014-11-10 23:14:36.050 31989 TRACE oslo.messaging.rpc.dispatcher
File "/usr/lib64/python2.6/site-packages/sqlalchemy/orm/unitofwork.py", line 525, in execute
2014-11-10 23:14:36.050 31989 TRACE oslo.messaging.rpc.dispatcher
uow
2014-11-10 23:14:36.050 31989 TRACE oslo.messaging.rpc.dispatcher
File "/usr/lib64/python2.6/site-packages/sqlalchemy/orm/persistence.py", line 64, in save_obj
2014-11-10 23:14:36.050 31989 TRACE oslo.messaging.rpc.dispatcher
table, insert)
2014-11-10 23:14:36.050 31989 TRACE oslo.messaging.rpc.dispatcher
File "/usr/lib64/python2.6/site-packages/sqlalchemy/orm/persistence.py", line 569, in _emit_insert_
statements
2014-11-10 23:14:36.050 31989 TRACE oslo.messaging.rpc.dispatcher
execute(statement, params)
2014-11-10 23:14:36.050 31989 TRACE oslo.messaging.rpc.dispatcher
File "/usr/lib64/python2.6/site-packages/sqlalchemy/engine/base.py", line 662, in execute
2014-11-10 23:14:36.050 31989 TRACE oslo.messaging.rpc.dispatcher
params)
2014-11-10 23:14:36.050 31989 TRACE oslo.messaging.rpc.dispatcher
File "/usr/lib64/python2.6/site-packages/sqlalchemy/engine/base.py", line 761, in _execute_clauseelement
2014-11-10 23:14:36.050 31989 TRACE oslo.messaging.rpc.dispatcher
compiled_sql, distilled_params
2014-11-10 23:14:36.050 31989 TRACE oslo.messaging.rpc.dispatcher
File "/usr/lib64/python2.6/site-packages/sqlalchemy/engine/base.py", line 874, in _execute_context
2014-11-10 23:14:36.050 31989 TRACE oslo.messaging.rpc.dispatcher
context)
2014-11-10 23:14:36.050 31989 TRACE oslo.messaging.rpc.dispatcher
File "/usr/lib/python2.6/site-packages/oslo/db/sqlalchemy/compat/handle_error.py", line 125, in _handle_
dbapi_exception
2014-11-10 23:14:36.050 31989 TRACE oslo.messaging.rpc.dispatcher
six.reraise(type(newraise), newraise, sys.exc_info()[2])
2014-11-10 23:14:36.050 31989 TRACE oslo.messaging.rpc.dispatcher
File "/usr/lib/python2.6/site-packages/oslo/db/sqlalchemy/compat/handle_error.py", line 102, in _handle_
dbapi_exception
2014-11-10 23:14:36.050 31989 TRACE oslo.messaging.rpc.dispatcher
per_fn = fn(ctx)
2014-11-10 23:14:36.050 31989 TRACE oslo.messaging.rpc.dispatcher
File "/usr/lib/python2.6/site-packages/oslo/db/sqlalchemy/exc_filters.py", line 323, in handler
2014-11-10 23:14:36.050 31989 TRACE oslo.messaging.rpc.dispatcher
context.is_disconnect)
2014-11-10 23:14:36.050 31989 TRACE oslo.messaging.rpc.dispatcher
File "/usr/lib/python2.6/site-packages/oslo/db/sqlalchemy/exc_filters.py", line 223, in _db2_dupe_key_
error
2014-11-10 23:14:36.050 31989 TRACE oslo.messaging.rpc.dispatcher
raise exception.DBDuplicateEntry(
[], integrity_error)
2014-11-10 23:14:36.050 31989 TRACE oslo.messaging.rpc.dispatcher
DBDuplicateEntry: (IntegrityError) ibm_db_dbi::IntegrityError:
Statement Execute Failed: [IBM][CLI Driver][DB2/LINUXX8664] SQL0803N
One or more values in the INSERT statement, UPDATE statement, or
foreign key update caused by a DELETE statement are not valid because
the primary key, unique constraint or unique index identified by "2"
constrains table "NEUTRON.AGENTS" from having duplicate values for the index key.
SQLSTATE=23505 SQLCODE=-803 ’INSERT INTO agents (id, agent_type, "binary",
topic, host, admin_state_up, created_at, started_at, heartbeat_timestamp,
description, configurations) VALUES (?, ?, ?, ?, ?, ?, ?, ?, ?, ?, ?)’
314
IBM Cloud Manager with OpenStack: Administrator Guide, version 4.2
(’5028b520-1a90-46c2-9e97-b1cb80d6ebe0’, ’Open vSwitch agent’,
’neutron-openvswitch-agent’, ’N/A’, ’testhl12.sce.ibm.com’, ’1’,
datetime.datetime(2014, 11, 11, 4, 14, 35, 580590), datetime.datetime(2014, 11, 11, 4, 14, 35,
580590),
datetime.datetime(2014, 11, 11, 4, 14, 35, 580590), None, ’{"arp_responder_enabled": false,
"tunneling_ip": "10.11.1.12", "devices": 0, "l2_population": false, "tunnel_types": ["gre",
"vxlan"],
"enable_distributed_routing": false, "bridge_mappings": {"default": "br-eth1"}}’)
Resolution
This error does not impact any function. You can ignore these errors.
Self-service portal displays unknown or missing instances
You might encounter a situation where the instance status is unknown or missing from the self-service
portal.
Symptom
This occurs whenever the instance is not removed using the self-service portal interface or self-service
portal REST API. For example, if you use the OpenStack command line or the PowerVC interface to
remove the instance, the status displays as unknown or is missing in the self-service portal.
Resolution
To resolve this issue, you must manually remove the instance using the self-service portal interface,
assuming the instance does not exist in OpenStack.
If the instance status is missing, consider these circumstances for PowerVC:
v The instance has an outstanding task_state, except the "Activating" task_state.
v The instance is in ERROR state, and it has no "host" or "hypervisor_hostname" property defined.
If an instance is in either of these states, then the instance does not populate the self-service portal in IBM
Cloud Manager with OpenStack.
Unexpected error in neutron-ns-metadata-proxy-*.log
You might see many unexpected errors in the neutron-ns-metadata-proxy-*.log when you boot an
instance that has an l3-agent that is enabled in the environment.
These errors appear even though you already created the external network, router, and set router
gateway.
Symptoms
In the /var/log/neutron/neutron-ns-metadata-proxy-*.log file, you see the following errors (altered for
formatting purposes):
ERROR neutron.agent.metadata.namespace_proxy [-] Unexpected error.
TRACE neutron.agent.metadata.namespace_proxy Traceback (most recent call last):
TRACE neutron.agent.metadata.namespace_proxy
File "/usr/lib/python2.6/sitepackages/neutron/agent/metadata/namespace_proxy.py", line 72, in __call__
TRACE neutron.agent.metadata.namespace_proxy
req.body)
TRACE neutron.agent.metadata.namespace_proxy
File "/usr/lib/python2.6/site-packages/
neutron/agent/metadata/namespace_proxy.py", line 103, in _proxy_request
TRACE neutron.agent.metadata.namespace_proxy
connection_type=UnixDomainHTTPConnection)
TRACE neutron.agent.metadata.namespace_proxy
File "/usr/lib/python2.6/site-packages/httplib2/
__init__.py", line 1605, in request
TRACE neutron.agent.metadata.namespace_proxy
(response, content) = self._request(conn,
authority, uri, request_uri, method, body, headers, redirections, cachekey)
TRACE neutron.agent.metadata.namespace_proxy
File "/usr/lib/python2.6/site-packages/httplib2/
Chapter 10. Troubleshooting and support
315
__init__.py", line 1353, in _request
TRACE neutron.agent.metadata.namespace_proxy
(response, content) = self._conn_request(conn,
request_uri, method, body, headers)
TRACE neutron.agent.metadata.namespace_proxy
File "/usr/lib/python2.6/site-packages/httplib2/
__init__.py", line 1327, in _conn_request
TRACE neutron.agent.metadata.namespace_proxy
conn.connect()
TRACE neutron.agent.metadata.namespace_proxy
File "/usr/lib/python2.6/site-packages/neutron/
agent/metadata/namespace_proxy.py", line 46, in connect
TRACE neutron.agent.metadata.namespace_proxy
self.sock.connect(cfg.CONF.metadata_proxy_socket)
TRACE neutron.agent.metadata.namespace_proxy
File "/usr/lib/python2.6/site-packages/eventlet/
greenio.py", line 222, in connect
TRACE neutron.agent.metadata.namespace_proxy
while not socket_connect(fd, address):
TRACE neutron.agent.metadata.namespace_proxy
File "/usr/lib/python2.6/site-packages/eventlet/
greenio.py", line 36, in socket_connect
TRACE neutron.agent.metadata.namespace_proxy
raise socket.error(err, errno.errorcode[err])
TRACE neutron.agent.metadata.namespace_proxy error: [Errno 2] ENOENT
TRACE neutron.agent.metadata.namespace_proxy
Resolution
This issue exists because the metadata service is not enabled. The preceding errors do not impact any
functions. You can ignore them.
Upgrading a topology fails
You might see an error in the log after upgrading a topology.
Symptoms
You try to in-place upgrade a topology and it fails. You check the log and see the following error
message:
========================================================================
Error executing action `run` on resource ’execute[heat-keystone-setup-domain]’
================================================================================
Mixlib::ShellOut::ShellCommandFailed
-----------------------------------Expected process to exit with [0], but received ’1’
---- Begin output of heat-keystone-setup-domain ---STDOUT:
STDERR: ERROR (heat-keystone-setup-domain:115) User ’admin’ is not authorized to
perform this operation, please try with other OS_USERNAME setting.
---- End output of heat-keystone-setup-domain ----
Causes
The issue is caused by policy difference between IBM Cloud Manager with OpenStack version 4.1 and
4.2.
Resolution
You need to modify the keystone policy file and restart keystone service on each node in your topology.
1. Modify the /etc/keystone/policy.json file. Change the line "global_admin": "(rule:admin_role and
domain_id:default) or is_admin:1" to "global_admin": "rule:admin_role or is_admin:1".
2. Run the following command to restart keystone service:
service openstack-keystone restart
Error when removing floating IP address
An error appears in the l3-agent.log when you attempt to remove a floating IP address.
316
IBM Cloud Manager with OpenStack: Administrator Guide, version 4.2
This error may occur if you have not manually installed the conntrack-tools in the l3-agent system. The
error does not break any Neutron functions.
Symptoms
While you attempt to delete a floating IP address with OpenStack, the floating IP address is deleted
successfully, but there is the following error in the l3-agent.log.
Executable not found: conntrack
This error occurs because the conntrack-tools is not installed by IBM Cloud Manager with OpenStack,
but Neutron calls the conntrack command.
Resolution
To resolve this issue, install the conntrack-tools manually. For more information, see the
"conntrack-tools" project.
Restarting network deletes some OVS ports
The IP movement function is enabled in your environment by default. If it is enabled after the
deployment process is complete, after the network restarts, some ports in the external network bridge
and data network bridge disappear.
Symptoms
Symptom 1
Assumes that IP movement is enabled in your environment and you do not have the router
gateway set in your external network.
1. Run ovs-vsctl show to view the phy-br-eth1 in br-eth1.
Bridge "br-eth1"
Port "br-eth1"
Interface "br-eth1"
type: internal
Port "eth1"
Interface "eth1"
Port "phy-br-eth1"
Interface "phy-br-eth1"
type: patch
options: {peer="int-br-eth1"}
2. Run service network restart to restart the network.
3. Run ovs-vsctl show to see that the phy-br-eth1 port disappeared.
Bridge "br-eth1"
Port "br-eth1"
Interface "br-eth1"
type: internal
Port "eth1"
Interface "eth1"
Symptom 2
Assumes the following conditions:
v IP movement is enabled in your environment.
v You created an external network and ran neutron router-gateway-set router-name
external-network-name to set the gateway for your external network.
To view the symptom, complete the following steps:
1. Run ovs-vsctl show to view the following ports in br-eth1 and br-ex.
Bridge br-ex
Port "qg-5bf61667-67"
Interface "qg-5bf61667-67"
Chapter 10. Troubleshooting and support
317
type: internal
Port br-ex
Interface br-ex
type: internal
Port "eth2"
Interface "eth2"
.........
Bridge "br-eth1"
Port "br-eth1"
Interface "br-eth1"
type: internal
Port "eth1"
Interface "eth1"
Port "phy-br-eth1"
Interface "phy-br-eth1"
type: patch
options: {peer="int-br-eth1"}
2. Run service network restart to restart the network. Notice that qg-5bf61667-67 and
phy-br-eth1 ports in br-ex and br-eth1 disappear.
Bridge br-ex
Port br-ex
Interface br-ex
type: internal
Port "eth2"
Interface "eth2"
Bridge "br-eth1"
Port "br-eth1"
Interface "br-eth1"
type: internal
Port "eth1"
Interface "eth1"
Resolution
Resolution for Symptom 1
Run service neutron-openvswitch-agent restart to resolve the issue.
Resolution for Symptom 2
1. Run service neutron-openvswitch-agent restart to restart openvswitch-agent.
2. Run service neturon-l3-agent restart to restart l3-agent.
3. Run neutron router-gateway-set router_name external_network_name to reset the router
gateway.
4. Run ovs-vsctl show to verify that the missing ports reappear.
SSH permissions error when resizing an instance (OpenStack)
If you are resizing an instance on multiple PowerKVM hypervisors, you might encounter an ssh
...Permission denied error.
In this situation, you must ensure that the hypervisors can ssh (as a Nova user) to each other by public
key. To do so, complete the following steps:
1. Obtain a key pair (public key and private key). You can use the root key that is in the
`/root/.ssh/id_rsa and /root/.ssh/id_ras.pub directories or you can generate a new key pair.
2. Run setenforce 0 to put SELinux into permissive mode.
3. Enable login abilities for the Nova user.
usermod -s /bin/bash nova
Now you can switch to the Nova account by using the following command.
su nova
318
IBM Cloud Manager with OpenStack: Administrator Guide, version 4.2
4. Create the folder that is needed by ssh and place the private key that you obtained in step 1 into this
folder.
mkdir -p /var/lib/nova/.ssh
cp <private key> /var/lib/nova/.ssh/id_rsa
cat<pub key> >> /var/lib/nova/.ssh/authorized_keys
echo ’StrictHostKeyChecking no’ >> /var/lib/nova/.ssh/config
chmod 600 /var/lib/nova/.ssh/id_rsa /var/lib/nova/.ssh/authorized_keys
5. Repeat steps 2-4 on each node.
Important: All the nodes share a key pair and you must not generate a new key pair for the second
node.
6. Ensure that the key is working properly.
# su - nova
# ssh node-another
Note:
a. You log in to the node-another node without a password.
b. If your server is configured with both the IP address and the hostname, you must run this
command twice. For example:
1) su nova ssh nova@host-name
2) su nova ssh [email protected]
where x.x.x.x is the server IP address.
Ceilometer collector not working after message queue is restarted
You might experience problems if you restart the message queue service on its own.
Symptom
The Ceilometer collector is not working and the message queue service was restarted recently.
Explanation
If the message queue is restarted, it is possible that the Ceilometer collector cannot collect metrics.
Resolution
Restart the Ceilometer collector service.
1. Log in to the controller node.
2. Run the following command:
service openstack-ceilometer-collector restart
PowerVC quota exceeded
When you deploy an instance on PowerVC, you might see an error that the instance quota was exceeded.
Symptoms
You receive the following error when you deploy an instance on PowerVC.
NV-02B1F9F Quota exceeded for instances
Resolving the problem
Check the user's tenant and run the following command nova quota-update --instances <number>
<tenant of the user>
Chapter 10. Troubleshooting and support
319
where <number> is a larger number than the current value and <tenant of the user> is the tenant or
project ID to which the user belongs.
Installation fails after uninstall
When you attempt to install IBM Cloud Manager with OpenStack on the deployment server, after
performing an uninstall, the installation fails with a NONFATAL_ERROR during console and graphical user
interface mode installs or with a nonzero return code during silent mode installs.
Symptoms
The installation fails with a NONFATAL_ERROR during console and graphical user interface mode installs or
with a nonzero return code during silent mode installs after performing an uninstall.
Causes
Occasionally, the IBM Cloud Manager with OpenStack uninstall process does not remove the
openstack-utils RPM. This symptom appears when the installation process attempts to install this
package again. To verify this is the case, review the /tmp/cmwo-installer.log to determine whether the
openstack-utils was already installed. If a line similar to the following is found in the
/tmp/cmwo-installer.log then this is the cause of the symptom:
package openstack-utils-2014.1.1-201405072052.ibm.el6.15.noarch is already installed
If the symptom was caused for other reasons, contact your support representative.
Resolving the problem
To resolve the problem, complete the following steps.
v Uninstall IBM Cloud Manager with OpenStack by running, cmwo_uninstall.
v Uninstall the openstack-utils RPM by running, yum erase openstack-utils -y.
v Install IBM Cloud Manager with OpenStack.
Cannot resize z/VM instance (self-service portal)
You cannot resize a z/VM instance through IBM Cloud Manager with OpenStack.
Symptoms
While you attempt to resize a z/VM instance through IBM Cloud Manager with OpenStack, it might take
a long time and appear to fail.
Causes
The virtual machine status in the OpenStack command line displays the following message:
VERIFY_RESIZE
However, you can access the virtual machine, and the virtual machine resize is successful. The resize
operation can take a long time (for example, 2 hours or more), depending on the size of the virtual
machine. IBM Cloud Manager with OpenStack times out while waiting for the resize operation to finish.
Resolving the problem
You can extend the timeout value for this operation in the openstack.properties file. Modify the
com.ibm.cfs.cloud.openstack.client.wait.for.server.resize.timeout.in.seconds value.
Cannot resize PowerVC instance
You cannot resize a PowerVC instance through IBM Cloud Manager with OpenStack.
Symptoms
While you attempt to resize a PowerVC instance through IBM Cloud Manager with OpenStack, you
might receive an error similar to the following message.
320
IBM Cloud Manager with OpenStack: Administrator Guide, version 4.2
Exception during message handling:
Get error: PVCExpendvdiskFCMapException:
Flashcopy is in progress for boot volume, volume size didn’t change.
Please try again later. (HTTP 409) (Request-ID: req-xxxx)
Resolving the problem
After you create the virtual machine in PowerVC from IBM Cloud Manager with OpenStack, the create
process completes, but the FlashCopy might not complete in the backend of PowerVC. You cannot
complete the resize operation during this time. You must wait to resize the instance until the FlashCopy
completes as well.
Cannot complete active resize of PowerVC instance
You cannot complete an active resize of a PowerVC instance through IBM Cloud Manager with
OpenStack.
Symptoms
While you attempt to actively resize a PowerVC instance through IBM Cloud Manager with OpenStack,
you might receive an error.
Resolving the problem
If the virtual machine (running PowerVC from IBM Cloud Manager with OpenStack), does not meet the
requirements for an active restart, you must stop the virtual machine before you resize the instance. For
more information, see “Resizing an instance (OpenStack)” on page 247.
Instance status on PowerVC driver hangs and the migration fails
Instance migrating status hangs on PowerVC driver and the migration fails.
Symptoms
When you are using IBM Cloud Manager with OpenStack with the PowerVC driver to migrate an
instance on PowerVC, you might encounter a problem where live migration fails. The instance status
might hang and stay in migrating status for a long time. When this occurs, you cannot use the instance.
Resolving the problem
To resolve this problem, use ssh to access the IBM Cloud Manager with OpenStack controller node and
check the log file nova-powervc.log in the directory /var/log/powervc. Fix the problem that is described
in the log file. After the problem is fixed, use the command nova reset-state to reset the instance status.
After the status of the instance is changed to active by the PowerVC driver code, rerun the live
migration operation.
Cannot attach disk to virtual machine without restarting the virtual machine
After you attach a disk to a virtual machine that is running PowerKVM, the new volume is not visible on
the associated instance unless you restart the virtual machine.
Symptoms
You attached a disk to a PowerKVM virtual machine by using IBM Cloud Manager with OpenStack, but
when you check the instance, the volume does not display. If you restart the virtual machine, the
attached disk does display.
Causes
The packages that support hotplug on PowerKVM are out of date.
Resolving the problem
The packages on the guest that you are using for the virtual machine must be updated. To support
hotplug, you must update the following packages to the latest versions:
v powerpc-util
Chapter 10. Troubleshooting and support
321
v librtas
v ppc64-diag
To download the latest versions of the PowerKVM packages for your Linux distribution, see Index of
/software/server/POWER/Linux/yum/IBM.
Two users within the same browser
Logging in as two different users within the same browser shows only the most recent user.
Details
Different tabs or windows of the same browser instance share the same session and browser cookies so
the user does not really have two independent sessions. If a user logs in with two different user IDs at
the same time, the browser will use information based on that most recent login, and there is no clear
indication that one just superseded the other. For example, if a user logs in as UserA in one browser
window and UserB in another browser window, both windows are UserB, and all content and settings
displayed belong to UserB.
Solution
To log in as a different user with a browser, log out and close all browser instances before logging in as
the alternate user. To log in as two different users at the same time, two different browsers are needed,
for example, Internet Explorer and Mozilla Firefox.
Delete of an instance while a storage flashcopy is running against the instance
will cause the delete to fail
An IBM Cloud Manager with OpenStack instance cannot be deleted immediately after the same instance
has been deployed or captured.
Details
A recently deployed or captured IBM Cloud Manager with OpenStack instance has a status of "OK" and
the cloud manager instance status also shows "OK", but the storage flashcopy may still be in progress,
and an attempt to delete the instance while the flashcopy is running will cause the delete to fail.
Solution
To prevent an error from happening on a delete soon after a deploy or capture, you must either monitor
the flashcopy until it ends, or wait for some conservative period of time, for example, 20 minutes, before
attempting the delete.
The best way to tell if the flashcopy has finished is by accessing the storage subsystem user interface (UI).
Here is how to use the Storwize storage subsystem UI to determine when the flashcopy is finished:
1. Access Storwize UI.
2. From IBM Cloud Manager with OpenStack, perform the deploy or capture.
3. From the Storwize UI left navigation pane, select: Copy Services, then Flashcopy Mappings.
A flash copy should be in progress. If a flash copy is not in progress, wait for it to be displayed; in
our testing the flashcopy usually appeared about 30-60 seconds after the IBM Cloud Manager with
OpenStack deploy or capture was started.
4. Wait until the flash copy completes. Once the flash copy has completed, the IBM Cloud Manager with
OpenStack instance can be deleted.
PKI error when adding OpenStack cloud with self-service portal
You encounter an error message when you attempt to add an OpenStack cloud to IBM Cloud Manager
with OpenStack using the self-service portal.
322
IBM Cloud Manager with OpenStack: Administrator Guide, version 4.2
Details
You receive the following message when you are attempting to add an OpenStack cloud to IBM Cloud
Manager with OpenStack. Error: Unreachable Cloud :CYX6154E: An error occurred while making the
OpenStack identity service token request for user 'sceagent'. The identity service responded
with the following status: 500 - Error occurred when dealing with PKI token. The internal reason
is '__init__() got an unexpected keyword argument 'output'' Verify that the identity service is
running, and that the user name, password and tenant name are correct. Contact your system
administrator for assistance.
Solution
Due to time change on the deployment server, or because a Network Time Protocol (NTP) server is not
being used, the self-signed certificates that are used for PKI tokens can become invalid. To fix the issue,
ensure that the deployment server operating system has the correct date and time. Then, use the
following steps to regenerate the tokens:
1. Stop the OpenStack keystone service. For more information, see “Restarting IBM Cloud Manager with
OpenStack services” on page 208.
Note: Stop only the keystone service.
2.
Clear the keystone certificates by using the following command:
# rm -rf keystone base signing directory
Where keystone base signing directory is found in the /etc/keystone/keystone.conf file of the controller,
under the [signing] section. By default, the base signing directory is /etc/keystone/ssl.
3.
Generate new PKI keys. Alternatively, you can import external certificates.
a. Find the keystone user and keystone group by running the following command on the OpenStack
controller:
ls -la /etc/keystone/ssl
The keystone user is the owner of that directory. The keystone group is the group that is
identified for that directory.
b. Use the following command to generate new PKI keys:
# keystone-manage pki_setup --keystone-user keystone user --keystone-group keystone group
4. Verify the new ticket by using the following command.
# openssl x509 -in
/etc/keystone/ssl/certs/signing_cert.pem -text -noout
The output lists the current date and time in the output for the Not Before value.
5. Clear the PKI signing caches on the OpenStack controller by using the following commands:
rm
rm
rm
rm
rm
rm
/var/cache/ceilometer/api/*
/var/cache/cinder/api/*
/var/cache/glance/api/*
/var/cache/glance/registry/*
/var/cache/nova/api/*
/var/lib/neutron/keystone-signing/*
Note: If the signing_dir directory is not present, temporary caches are used. If temporary caches are
used, restarting the service creates a new cache.
6. Restart OpenStack services and the self-service portal. For more information, see “Restarting IBM
Cloud Manager with OpenStack services” on page 208.
Error opening sockets to server when using DB2
When you are running IBM Cloud Manager with OpenStack with DB2 as the database, you intermittently
encounter an unexpected condition that the server cannot fulfill the request.
Chapter 10. Troubleshooting and support
323
Details
The following specific error is displayed:
The server encountered an unexpected condition which prevented it from fulfilling the request
If you check the IBM Cloud Manager with OpenStack log you might see an exception similar to the
following:
[05/16/13 04:38:17:009] 33904 SEVERE: CYX1846E: Internal database error.
<openjpa-2.1.0-r422266:1071316 fatal general error> org.apache.openjpa.persistence.
PersistenceException: [jcc][t4][2043][11550][4.8.87] Exception java.net.NoRouteToHostException:
Error opening socket to server localhost/127.0.0.1 on port 50,000 with message: Cannot assign
requested address. ERRORCODE=-4499, SQLSTATE=08001. Stack Trace: <openjpa-2.1.0-r422266:1071316
fatal general error> org.apache.openjpa.persistence.PersistenceException:
[jcc][t4][2043][11550][4.8.87] Exception java.net.NoRouteToHostException: Error opening socket to
server localhost/127.0.0.1 on port 50,000 with message: Cannot assign requested address.
ERRORCODE=-4499, SQLSTATE=08001
DB2 socket connections in TIMED_WAIT state are exhausting the available ports for DB2 connections.
Normally, the system releases sockets in TIMED_WAIT state after 2 minutes. However, in some cases, this
wait is too long and there are no more available sockets to use. You can reduce the amount of wait time
by adjusting the TIMED_WAIT reuse and recycle values on the IBM Cloud Manager with OpenStack
server.
Solution
To adjust the TIMED_WAIT reuse and recycle values on the controller node for the deployed topology,
add the following to the /etc/sysctl.conf file:
net.ipv4.tcp_tw_reuse = 1
net.ipv4.tcp_tw_recycle = 1
Make the TIMED_WAIT reuse and recycle values effective by using the following command:
/sbin/sysctl -p
Error occurs when installing qpid
During the installation of IBM Cloud Manager with OpenStack or when deploying a cloud topology, you
might encounter an error that the Qpid package did not install correctly.
Symptoms
During installation or when deploying a topology you might see an error similar to the following:
[2014-02-12T10:43:31-06:00] DEBUG: Chef::Exceptions::Exec: package[qpid-cpp-server]
(/var/chef/cache/cookbooks/qpid/providers/setup.rb line 15) had an error:
Chef::Exceptions::Exec: returned 1, expected 0
Causes
A conflict might exist with Red Hat Enterprise Linux GNOME Desktop Environment (gnote), KDE
Desktop Environment (Akonadi - the PIM Storage Service), or another external package that depends on
version 1.41.0 of Boost C++ libraries.
Resolving the problem
To remove the conflict, identify and remove the conflicting package. Run the following command to
identify any conflicting packages:
rpm -qa | grep -e "boost-.*-1\.41\.0.*" | xargs rpm --test -e
Then run the following command to remove any conflicting packages:
yum remove "package_name"
324
IBM Cloud Manager with OpenStack: Administrator Guide, version 4.2
where package_name is the name of the conflicting package.
After any conflicting packages are removed, try the installation or deployment task again.
Installation fails when SSH is interrupted
When attempting to install IBM Cloud Manager with OpenStack on the deployment server, the
installation fails and you are unable to uninstall the product.
Symptoms
You might see an error similar to the following message: This Application has Unexpectedly Quit.
Causes
InstallAnywhere cannot tolerate a Secure Shell (SSH) interruption. The results of the attempted
installation are unpredictable. The installation is incomplete and the uninstall utility is unusable.
Resolving the problem
You must manually clean up the system.
1. Uninstall the Chef and Chef server RPMs if they were installed.
2. Delete the /etc/chef and /etc/chef-server directories if they exist.
3. Delete the /root/.chef directory if it exists.
4. Delete the /opt/ibm/cmwo directory.
5. Delete the /var/..com.zerog.registry.xml file if it exists. This file is the InstallAnywhere registry.
6. Trying running the installation again
SSL connection error occurs when certificate expires
An SSL connection error occurs due to an expired certificate.
Symptoms
You receive an SSL connection error.
Causes
The error can occur when your SSL certificate is expired.
Resolving the problem
Determine whether the certificate is expired. If it expired, you must delete the certificate and create a new
certificate with a specific expiration date. To resolve the problem, complete the following steps:
1. Determine the name of your certificate by going to the following directory:
/etc/pki/
Run the following command:
# certutil -L -d qpid/
Check the output for the name of the certificate, for example, qpidssl or openssl.
2. Determine whether the certificate is expired by running the following command:
# certutil -V -n certificate_name -u C -d qpid/
where certificate_name is the name of your certificate.
3. Determine the expiration date of the certificate by running the following command:
# certutil -L -d qpid/ -n certificate_name
4. Delete the expired certificate by running the following command:
# certutil -D -d qpid/
qpid/cert.password -n certificate_name
5. Create a certificate by running the following command:
Chapter 10. Troubleshooting and support
325
# certutil -S -d ./qpid/ -n certificate_name -s ’CN=certificate_name’ -t ’CT,,’ -x -v 10
-f ./qpid/cert.password -z /usr/bin/certutil
IBM Knowledge Center seems to cut off bottom of page
While you are browsing content about IBM Cloud Manager with OpenStack in IBM Knowledge Center,
you encounter a page that seems to cut off part of the information at the bottom of the page.
Symptoms
You might see extra white space at the bottom of an IBM Knowledge Center topic that contains a table.
The link to a parent topic might be missing.
Causes
The framework has a known issue.
Resolving the problem
Try displaying the content in a different web browser.
Using IPv6 and Python version 2.6
If you want to use the IPv6 management network and you are also using Python, version 2.6, you might
need to patch Python with an update to version 2.6.
Symptoms
For example, you attempt to configure glance_api_servers in nova.conf to [2001:db8::22]:9696. You receive
en error similar to the following output:
Traceback (most recent call last):
File "<stdin>", line 1, in <module>
File "urlparse.py", line 105, in port
return int(port, 10)
ValueError: invalid literal for int() with base 10: ’db8::22]:9696’
Causes
The root cause of this problem is that the urlparse lib in Python 2.6 does not parse IPv6 URLs correctly.
Resolving the problem
To resolve this issue, you must patch the Python 2.6 code to successfully parse the IPv6 management
network URL. Use the following instructions to patch Python.
1. For more information about the IPv6 URL parsing problem, see http://bugs.python.org/issue2987.
2. For more information about the fix patch for the bug, see http://bugs.python.org/file10451/pythonurlparse-rfc2732-fix.patch.
3. Find the following code in /usr/lib64/python2.6/urlparse.py:
@property
def hostname(self):
netloc = self.netloc
if "@" in netloc:
netloc = netloc.rsplit("@", 1)[1]
if ":" in netloc:
netloc = netloc.split(":", 1)[0]
return netloc.lower() or None
@property
def port(self):
netloc = self.netloc
if "@" in netloc:
netloc = netloc.rsplit("@", 1)[1]
if ":" in netloc:
port = netloc.split(":", 1)[1]
return int(port, 10)
return None
4. Change the bold lines in step 3 into:
326
IBM Cloud Manager with OpenStack: Administrator Guide, version 4.2
@property
def hostname(self):
netloc = self.netloc
if "@" in netloc:
netloc = netloc.rsplit("@", 1)[1]
if netloc and netloc[-1] != ’]’ and ":" in netloc:
netloc = netloc.rsplit(":", 1)[0]
return netloc.lower() or None
@property
def port(self):
netloc = self.netloc
if "@" in netloc:
netloc = netloc.rsplit("@", 1)[1]
if netloc and netloc[-1] != ’]’ and ":" in netloc:
port = netloc.rsplit(":", 1)[1]
return int(port, 10)
return None
5. If you need to apply the fix to more than one system, you can generate a patch by completing the
following steps:
a. cp /usr/lib64/python2.6/urlparse.py /usr/lib64/python2.6/urlparse.py.ori
b. Update /usr/lib64/python2.6/urlparse.py according to the previous steps.
c. Generate the patch by using the following command: diff /usr/lib64/python2.6/
urlparse.py.ori /usr/lib64/python2.6/urlparse.py > urlparse.patch
d. Apply the patch on other system by using the following command: patch /usr/lib64/python2.6/
urlparse.py urlparse.patch
6. After the code is changed or the patch is applied, clean up the pyc and pyo files for urlparse.py:
rm /usr/lib64/python2.6/urlparse.pyc
rm /usr/lib64/python2.6/urlparse.pyo
7. Restart the OpenStack services that are configured with IPv6 management network URLs.
Error viewing OpenStack resources with multiple regions (self-service portal)
After you deploy a topology that uses multiple regions with the IBM Cloud Manager with OpenStack
self-service portal enabled, you see errors when you attempt to list OpenStack resources.
Symptoms
When you view OpenStack resources from the self-service portal, you encounter errors such as the
following:
Failed to get the endpoint url of the volumes.
Causes
PKI tokens are being used for the authentication strategy and the tokens have become too large.
Resolving the problem
Switch the authentication strategy to uuid by setting this value in your chef environment file:
[’openstack’][’auth’][’strategy’] = ’uuid’
Then redeploy the topology.
Error logs about failure to connect to messaging queue service
You might briefly see error logs about a failure to connect to the messaging queue service when
OpenStack services start for the first time.
Chapter 10. Troubleshooting and support
327
Symptoms
You might see errors similar to the error from /var/log/nova/conductor.log in the following example:
Note: Line breaks added in the following example for formatting purposes only.
2014-11-05 04:56:25.737 18393 ERROR oslo.messaging._drivers.impl_rabbit [-] Failed
to consume message from queue: 320: (CONNECTION_FORCED - broker forced connection
closure with reason ’shutdown’, (0, 0), None)
2014-11-05 04:56:25.737 18393 TRACE oslo.messaging._drivers.impl_rabbit Traceback
(most recent call last):
2014-11-05 04:56:25.737 18393 TRACE oslo.messaging._drivers.impl_rabbit
File "/usr/
lib/python2.6/site-packages/oslo/messaging/_drivers/impl_rabbit.py", line 656, in ensure
2014-11-05 04:56:25.737 18393 TRACE oslo.messaging._drivers.impl_rabbit
return
method()
2014-11-05 04:56:25.737 18393 TRACE oslo.messaging._drivers.impl_rabbit
File "/usr/
lib/python2.6/site-packages/oslo/messaging/_drivers/impl_rabbit.py", line 736, in _
consume
2014-11-05 04:56:25.737 18393 TRACE oslo.messaging._drivers.impl_rabbit
return
self.connection.drain_events(timeout=timeout)
2014-11-05 04:56:25.737 18393 TRACE oslo.messaging._drivers.impl_rabbit
File "/usr
/lib/python2.6/site-packages/kombu/connection.py", line 280, in drain_events
2014-11-05 04:56:25.737 18393 TRACE oslo.messaging._drivers.impl_rabbit
return
self.transport.drain_events(self.connection, **kwargs)
2014-11-05 04:56:25.737 18393 TRACE oslo.messaging._drivers.impl_rabbit
File "/usr/
lib/python2.6/site-packages/kombu/transport/pyamqp.py", line 91, in drain_events
2014-11-05 04:56:25.737 18393 TRACE oslo.messaging._drivers.impl_rabbit
return
connection.drain_events(**kwargs)
2014-11-05 04:56:25.737 18393 TRACE oslo.messaging._drivers.impl_rabbit
File "/usr/
lib/python2.6/site-packages/amqp/connection.py", line 286, in drain_events
2014-11-05 04:56:25.737 18393 TRACE oslo.messaging._drivers.impl_rabbit
return
amqp_method(channel, args)
2014-11-05 04:56:25.737 18393 TRACE oslo.messaging._drivers.impl_rabbit
File "/usr/
lib/python2.6/site-packages/amqp/connection.py", line 491, in _close
2014-11-05 04:56:25.737 18393 TRACE oslo.messaging._drivers.impl_rabbit
raise
ConnectionError(reply_code, reply_text, (class_id, method_id))
2014-11-05 04:56:25.737 18393 TRACE oslo.messaging._drivers.impl_rabbit ConnectionError:
320: (CONNECTION_FORCED - broker forced connection closure with reason ’shutdown’, (0,
0), None)
Similar error logs can be found in other OpenStack services.
Explanation
The reason is that the messaging queue service restarts three times during deployment, and the
OpenStack services fail to connect when it is being restarted. The error disappears after the final restart
completes. OpenStack functions are unaffected.
Resolution
You can ignore these log errors.
DB2 size increases when you use Ceilometer services
You notice that the size of your DB2 database quickly increases after you enable metering in a compute
node.
Symptom
This problem can occur when you enable metering in a compute node by using the compute_monitors =
ComputeDriverCPUMonitor setting in nova.conf and you are using the default configuration for your
Ceilometer services.
328
IBM Cloud Manager with OpenStack: Administrator Guide, version 4.2
Resolution
To resolve the problem, you must archive the database and remove unnecessary data by completing the
following steps:
1. Stop all of the Ceilometer services by running the following command:
/etc/init.d/service_name stop
where service_name is the name of the Ceilometer service.
Run the command on each of the following services:
v openstack-ceilometer-alarm-evaluator
v openstack-ceilometer-api
v openstack-ceilometer-collector
v openstack-ceilometer-alarm-notifier
v openstack-ceilometer-central
v openstack-ceilometer-notification
2. Stop the DB2 NoSQL service:
/etc/init.d/db2.nosql.service stop
3. Back up the old database:
su - db2inst1 -c ’db2 backup db ceilodb2 user ceilodb2user using ceilometer to /home/db2inst1/’
where ceilodb2 is the name of the Ceilometer database, ceilodb2user is the user name for the Ceilometer
database, and ceilometer is the user password for the Ceilometer database.
4. Start the DB2 NoSQL service and remove unnecessary data by completing the following steps:
Note: The following steps represent an example of DB2 NoSQL usage and removing unnecessary date.
For detailed information about DB2 JSON databases and the DB2 JSON command-line interface, see
JSON application development for IBM data servers and DB2 JSON capabilities, Part 2: Using the
command-line processor.
a. Start the DB2 NoSQL service:
/etc/init.d/db2.nosql.service start
b. Switch to the db2inst1 user:
su - db2inst1
c. Add the Java JDK to the PATH environment variable:
export PATH=$PATH:/home/db2inst1/bin:/opt/ibm/db2/V10.5/java/jdk64/bin/
d. Start the db2nosql command-line tool:
cd /opt/ibm/db2/V10.5/json/bin
./db2nosql.sh
The following output is displayed:
JSON Command Shell Setup and Launcher.
This batch script assumes your JRE is 1.5 and higher. 1.6 will mask your password.
Type db2nosql.sh -help to see options
Enter DB:
e. Enter the Ceilometer database name:
ceilodb2
where ceilodb2 is the name of your Ceilometer database.
The following output is displayed:
Chapter 10. Troubleshooting and support
329
IBM DB2 NoSQL JSON API 1.1.0.0 build 1.3.44
Licensed Materials - Property of IBM
(c) Copyright IBM Corp. 2013 All Rights Reserve
nosql>Type your JSON query and hit <ENTER>
nosql>Type help() or help for usage information. All commands
are case sensitive.
nosql>
f. Enter the following command:
use ceilodb2
where ceilodb2 is the name of your Ceilometer database.
The following output is displayed:
Switched to schema: CEILODB2
nosql>
g. Your DB2 configuration determines how many records you can delete at one time. If you delete
too many records at one time, you might see memory errors in the DB2 transaction logs. You can
limit the number of records to be deleted. In this example, 5,000 records are deleted at a time; you
might be able to delete a larger number of records.
Determine the total number of records to be deleted:
nosql>db.meter.count()
The number of total records is displayed.
h. Determine the time stamp that can be used to delete the 5,000 oldest records:
nosql> db.meter.find().sort({timestamp : [1, "$date"]}).skip(5000).limit(1)
i. Delete the records:
nosql>db.meter.remove({"timestamp":{"$lte": {"$date":"2014-12-03T06:00:59.599Z"}}})
The number of records that are removed is displayed.
Note: If multiple records have the same time stamp, more than 5,000 records might be deleted.
j. Repeat the two previous steps to find and remove records until all of the old records are removed.
5. Restart all of the Ceilometer services:
/etc/init.d/service_name start
where service_name is the name of the Ceilometer service.
Run the command on each of the following services:
v openstack-ceilometer-collector
v openstack-ceilometer-alarm-notifier
v openstack-ceilometer-central
v openstack-ceilometer-notification
v openstack-ceilometer-alarm-evaluator
v openstack-ceilometer-api
Limitations
There are several known limitations with the current release of IBM Cloud Manager with OpenStack.
If your particular problem is not represented, see “Searching knowledge bases” on page 296 for a list of
other references, particularly the Techdocs Web site, where more recent solutions or workarounds might
instead reside.
330
IBM Cloud Manager with OpenStack: Administrator Guide, version 4.2
IPv6 limitation with deployment
You can deploy the OpenStack components in an IPv6-supported environment and then, configure IPv6
on the OpenStack components.
However, due to limitations with InstallAnywhere and Chef, you cannot deploy an IPv6-configured
OpenStack environment directly through the IBM Cloud Manager with OpenStack deployment process.
Using the deployment process, you can install an IPv4 environment only.
Commands fail after DB2 restarted
You might experience problems when you run commands after the database is restarted.
Symptom
If the database (whether DB2 or mysql) is restarted, it is possible that the OpenStack command lines fail
to return results, even after several attempts.
Resolution
Run the command again and it works after several attempts.
Cannot create images (Glance) with Unicode values
If you encounter issues when you create an image, ensure that you are not using Unicode property
values.
There cannot be any Unicode property values within uploaded Glance images. The limitation also applies
to any headers for an image request.
Messaging service limitation when deployment server and IBM Cloud Manager
with OpenStack controller are on same server
You must use the Qpid messaging service if your deployment server and the IBM Cloud Manager with
OpenStack controller are on the same server.
When the deployment server is on the same server as the IBM Cloud Manager with OpenStack controller,
the controller cannot be restarted due to a port conflict after the operating system is restarted. This
limitation occurs because the configuration file used by the rabbitmq-server in the deployment server
and the configuration file that is deployed by IBM Cloud Manager with OpenStack are in the same
location.
In this configuration, you must use the qpid messaging service.
Note: In addition, this configuration must be used for evaluation purposes only.
In IBM Cloud Manager with OpenStack version 4.2, the rabbitmq messaging service is the default.
Therefore, you must switch from the RabbitMQ messaging service to the Qpid messaging service before
you deploy IBM Cloud Manager with OpenStack. For instructions, see “Customizing the messaging
service attributes” on page 123.
VLAN networks must have unique IDs
IBM Cloud Manager with OpenStack only supports VLAN networks that have different IDs.
With PowerVC, you can create different VLAN networks with the same VLAN ID. However, IBM Cloud
Manager with OpenStack does not support this configuration. In this situation, IBM Cloud Manager with
OpenStack only creates one VLAN.
Chapter 10. Troubleshooting and support
331
Billing limitation with OpenStack Cinder service
In the IBM Cloud Manager with OpenStack self-service portal, there is a limitation when you use the
Cinder service with the billing function.
Symptoms
Billing does not work with the volume configurable product if you use the Cinder service API, version 1.
Resolving the problem
If you want to use the billing function for volumes, you must use the Cinder service API, version 2.
Starting IBM Cloud Manager with OpenStack on a high scale cloud
When starting or restarting IBM Cloud Manager with OpenStack on a high scale cloud, the
synchronization between IBM Cloud Manager with OpenStack and the cloud may take longer than
expected. This resynchronization may cause operations such as deploying, deleting, or resizing an
instance to be delayed or even fail. Wait for the synchronization to complete before attempting these
actions.
Limitations when using VMware within the self-service portal
v The vCenter linked mode is not supported due to limited testing. You are responsible for any errors
while you are using linked vCenters mode.
v The size of a virtual disk can be increased either at deployment time or through the IBM Cloud
Manager with OpenStack self-service portal resize function. This increases the size of the disk,
however, the guest file system is not changed and does not automatically use the increased size. To
increase the guest file system to use the larger disk size, see the VMware documentation and guest
operating system documentation.
v If your virtual system disks contain a Logical Volume Manager, then you must install VMware Tools
inside the guest so that vCenter can customize the image during the deploy operation. For more
information about LVM support, see the VMware documentation.
v All snapshots must be integrated before you create a template.
v Preferably, use shared storage for the hosts that are part of a cluster deployment target. If this is not
possible, then remove hosts from the cluster while they are in maintenance mode. This prevents the
default storage selection algorithm from selecting a data store that is only available from the host in
maintenance mode. Selecting such a data store would cause a deployment to fail. For more information
about the default storage selection algorithm, see “VMware datastore assignment during deployment”
on page 179.
VMware capture instance:
The capture instance function is implemented using the VMware clone to template feature. The IBM
Cloud Manager with OpenStack allows you to configure the optional properties in vmware.properties for
controlling where the new template is created when a capture request is initiated:
com.ibm.cfs.cloud.vmware.capture.image.datastore.names
Datastore(s) used when capturing the image of an instance, for example when creating a
template. This list is a series of datastore names separated by commas.
com.ibm.cfs.cloud.vmware.capture.image.destination.name
The destination host or cluster for where the new template will be placed.
com.ibm.cfs.cloud.vmware.capture.image.destination.type
The type of the destination for the new template, either HOST or CLUSTER.
com.ibm.cfs.cloud.vmware.capture.image.folder
The folder path for where to place the new template, for example, . /DatacenterName/vm/
FolderName.
332
IBM Cloud Manager with OpenStack: Administrator Guide, version 4.2
If these properties are not specified, the default behavior is to create the new template in the same
location as the existing virtual machine.
VMware storage:
v When attaching a new storage volume in a cloud using VMware vCenter Server cloud, the space in
assigned storage name will be ignored in the attached storage volume.
Include only ASCII characters in configuration files
When editing self-service portal configuration files, only use ASCII characters. If non-ASCII characters are
used, the original characters are not preserved and display as garbled text in the IBM Cloud Manager
with OpenStack self-service portal user interface. The configuration files include all the .properties files in
the home directory.
Disk resize support
In a Shared Storage Pool environment, changing the disk size when deploying is not supported. In
addition, when deploying an IBM i workload, disk resize is not available. In these cases, the disk size
property is not displayed in the output of POST /cloud/api/workload and the disk resize field is not
displayed on the Advanced deployment window.
Limitation when you use characters other than printable ASCII characters
Limitations apply when you use characters that are not printable ASCII characters for IBM Cloud
Manager with OpenStack operations. You must use only printable ASCII characters because Python 2.X
supports only printable ASCII characters.
Examples:
v You use Chinese characters to try to create, edit, or update a volume. You receive a warning that
indicates that there are too many characters, or you receive an error that states that the operation
cannot complete. Try the operation again, but ensure that you use printable ASCII characters instead of
Chinese characters.
v You might encounter a problem when you run the following command:
cinder list --display-name display-name
when display-name is composed of characters that are not printable ASCII characters. Ensure that you
use printable ASCII characters for display-name.
v When you install IBM Cloud Manager with OpenStack, the path to the installer must contain only
printable ASCII characters.
Unable to restore a virtual server with fixed VHD type
When a virtual server is deployed by using an image with a fixed VHD type on Hyper-V, that virtual
server cannot be successfully restored after a backup.
The limitation is due to the following error condition:
CYX6161E: An error occurred at ’2013-05-06T21:05:04Z’ for
’fd319c6e-91e9-4350-b896-9fdcd3236282’. The error code is
ImageTooLarge - Image is larger than instance type allows
File "C:\Program Files (x86)\IBM\SmartCloud Entry\Hyper-V
nova\compute\manager.py", line 230, in decorated_function
return function(self, context, *args, **kwargs)
File "C:\Program Files (x86)\IBM\SmartCloud Entry\Hyper-V
nova\compute\manager.py", line 1230, in run_instance
do_run_instance()
File "C:\Program Files (x86)\IBM\SmartCloud Entry\Hyper-V
nova\openstack\common\lockutils.py", line 242, in inner
retval = f(*args, **kwargs)
File "C:\Program Files (x86)\IBM\SmartCloud Entry\Hyper-V
nova\compute\manager.py", line 1229, in do_run_instance
admin_password, is_first_time, node, instance)
File "C:\Program Files (x86)\IBM\SmartCloud Entry\Hyper-V
virtual machine with identifier
’500’. The detailed error is:
Agent\Python27\lib\site-packages\
Agent\Python27\lib\site-packages\
Agent\Python27\lib\site-packages\
Agent\Python27\lib\site-packages\
Agent\Python27\lib\site-packages\
Chapter 10. Troubleshooting and support
333
nova\compute\manager.py", line 877, in _run_instanceself._set_instance_error_state(context,
instance[’uuid’])
File "C:\Program Files (x86)\IBM\SmartCloud Entry\Hyper-V Agent\Python27\lib\contextlib.py",
line 24, in __exit__
self.gen.next()
File "C:\Program Files (x86)\IBM\SmartCloud Entry\Hyper-V Agent\Python27\lib\site-packages\
nova\compute\manager.py",
line 798, in _run_instance
image_meta = self._check_image_size(context, instance)
File "C:\Program Files (x86)\IBM\SmartCloud Entry\Hyper-V Agent\Python27\lib\site-packages\
nova\compute\manager.py", line 1040, in _check_image_size
raise exception.ImageTooLarge()
Instance could no longer be found in the Cloud.
It could have been purposely deleted from the Cloud.
This issue is tracked at https://bugs.launchpad.net/nova/+bug/1177927.
Validation errors when updating a configuration strategy
When you update the configuration strategy for an image, all fields on the page are validated after you
select a local file for the template, user metadata, or mapping. If any of the fields are not valid, an error
message displays. Error messages display even if you have not yet provided a value for a required field,
such as the mapping field. Proceed by specifying the required fields.
Problem choosing correct datastore during concurrent deployments (VMware
vCenter)
The IBM Cloud Manager with OpenStack self-service portal is unable to choose the correct target
datastore if VMware vCenter does not provide real-time datastore usage information.
VMware vCenter does not refresh the data of datastore usage before cloning is completed. When you run
concurrent deployments, if VMware vCenter cannot provide real-time datastore usage, IBM Cloud
Manager with OpenStack self-service portal cannot decide the correct target datastore under concurrent
deployment scenario. As a result, the datastore is not enough when the concurrent deployments need a
total datastore resource that is bigger than the datastore nodes left. With insufficient resources,
deployments fail as the resources do not meet the minimum amounts. The self-service portal tries to
suggest other datastore nodes. It attempts three times, by default. If you want to configure a value
greater than three, open the vmware.properties file and add the following line:
"com.ibm.vmware.client.clone.retry.attempts=5", for example.
The failed virtual machine sends a log to the self-service portal interface, as follows:
The following instance logs were found in the Cloud. CYX0886E: Unable to determine if the deployed
virtual machine ’*’ is started and ready for use in the allotted time of 2,700 seconds.
The deployed virtual machine may still be starting or may have had customization problems.
Check the log and the virtual machine for more information.
If the virtual machine was started and is ready for use,
increase the wait time in the vmware.properties file."
XFS dependency packages required for Swift
If you want to use Swift on an IBM Power system or System z system that is running IBM Cloud
Manager with OpenStack, you must first manually install several XFS file system packages.
Symptoms
Before you can use Swift with IBM Cloud Manager with OpenStack on an IBM Power system or System
z system, you must locate and install several XFS file system packages.
Resolving the problem
The XFS packages that are required to run Swift on an IBM Power system or System z system with IBM
Cloud Manager with OpenStack are included in the following list:
v xfsdump
v xfsprogs-devel
334
IBM Cloud Manager with OpenStack: Administrator Guide, version 4.2
v xfsprogs
Locate and install these XFS file system packages before attempting to run Swift on an IBM Power system
or System z system with IBM Cloud Manager with OpenStack.
Migration information not available
You cannot find instructions for migrating from IBM SmartCloud Entry, version 3.2 to IBM Cloud
Manager with OpenStack, version 4.2.
Symptoms
You are not able to locate instructions for migrating from IBM SmartCloud Entry, version 3.2 to IBM
Cloud Manager with OpenStack, version 4.2.
Causes
Instructions for migrating from IBM SmartCloud Entry, version 3.2 to IBM Cloud Manager with
OpenStack, version 4.2 are not available at this time.
Known problems and solutions for a User
If you are using IBM Cloud Manager with OpenStack with the User role, review theses known problems
and solutions that you might encounter.
Cached display
When you install or upgrade to IBM Cloud Manager with OpenStack, your browser might not update the
images from a previous version of the software.
Be sure to clear your browser’s cache after you upgrade to, or install, IBM Cloud Manager with
OpenStack.
Saving image exception
If the virtual machine is not created by the current IBM Cloud Manager with OpenStack, you receive an
error message when you save an image backup of the virtual machine.
IBM Cloud Manager with OpenStack requires the details of the virtual machine to create an image
backup. If this error occurs, you receive the following message:
CYX4755E: Instance "instance name" does not have a customization and its virtual machine cannot be saved.
Note: Instance name is the name of the instance that contains the virtual machine.
Error message language
Some error messages appear in a language other than the language that you set for the IBM Cloud
Manager with OpenStack user interface.
These error messages appear in the language set in your operating system. If the error message does not
appear in the language that you want, verify your settings in both the IBM Cloud Manager with
OpenStack user interface and the operating system.
Internet Explorer display
When you are using IBM Cloud Manager with OpenStack in Internet Explorer 9, 10, or Internet Explorer
11, you might see that layout and formatting makes the screen difficult to navigate.
When you are accessing IBM Cloud Manager with OpenStack with Internet Explorer 9, 10, or Internet
Explorer 11, the browser might render the web user interface in Compatibility View mode by default.
Chapter 10. Troubleshooting and support
335
Switch from Internet Explorer Compatibility View mode to the standard mode with the following steps:
1. To switch from Compatibility View mode to the standard mode, click the Compatibility View button,
which is located on the right side of the address bar (highlighted in green in the following image).
Figure 4. Compatibility button
2. If the Compatibility View button is not visible, press F12.
3. Depending on which version of Internet Explorer you are using, continue with one set of the
following steps:
v If you are using Internet Explorer 9, click Browser Mode: IE9 > Internet Explorer 9 to select the
standard mode of viewing. Notice that the only check mark in the menu is in front of Internet
Explorer 9.
v If you are using Internet Explorer 10, click Browser Mode: IE10 > Internet Explorer 10 to select the
standard mode of viewing. Notice that the only check mark in the menu is in front of Internet
Explorer 10.
Figure 5. Browser Mode: IE10 menu
v If you are using Internet Explorer 11, click Document Mode to select the standard mode of
viewing.
336
IBM Cloud Manager with OpenStack: Administrator Guide, version 4.2
Figure 6. Browser Mode: IE11 menu
Tip: If Internet Explorer, which is accessing IBM Cloud Manager with OpenStack, switches from standard
mode to Compatibility View mode automatically, clear the option in Tools > Internet options >
Advanced > Automatically recover from page layout errors with Compatibility View.
Login fails
If your user login fails because the session times out, there might be a problem with the timezone setting.
Check the following possible resolutions.
v Verify that the IBM Cloud Manager with OpenStack server and client time and timezone match. For
example, on the server, if the timezone is Coordinated Universal Time +08:00, the time is 11:27. For the
client, the timezone is Coordinated Universal Time +07:00, and the time should be 10:27.
Note: The client is the clock for the system where the IBM Cloud Manager with OpenStack user
interface is being run (such as a personal computer).
v Verify that the user is not locked. The administrator can lock and unlock user accounts from the
self-service portal. If a user is locked out, that person cannot log in. If the default administrator account
is locked, it unlocks when the server is restarted.
Chapter 10. Troubleshooting and support
337
338
IBM Cloud Manager with OpenStack: Administrator Guide, version 4.2
Accessibility
IBM Cloud Manager with OpenStack does not interfere with the accessibility features for supported
browsers. For a comprehensive list of accessibility features please visit the accessibility support page for
the supported browser that you are using. For a list of supported browsers, see Supported web browsers.
No hardcopy publications are shipped with this program. The IBM Knowledge Center is a worldwide
central repository of IBM technical publications hosted in a single application, located at a single URL:
http://www-01.ibm.com/support/knowledgecenter/
Find and navigate technical content more efficiently and easily with improved search, filtering and user
experience. Create your own collections of IBM documents with PDF output on-demand.
Note: You can find the IBM Cloud OpenStack Platform product collection here:
http://www-01.ibm.com/support/knowledgecenter/SSUTA8/welcome
When you send information to IBM, you grant IBM a nonexclusive right to use or distribute the
information in any way it believes appropriate without incurring any obligation to you.
© Copyright IBM Corp. 2012, 2014
339
340
IBM Cloud Manager with OpenStack: Administrator Guide, version 4.2
Notices
This information was developed for products and services offered in the U.S.A. This material may be
available from IBM in other languages. However, you may be required to own a copy of the product or
product version in that language in order to access it.
IBM may not offer the products, services, or features discussed in this document in other countries.
Consult your local IBM representative for information on the products and services currently available in
your area. Any reference to an IBM product, program, or service is not intended to state or imply that
only that IBM product, program, or service may be used. Any functionally equivalent product, program,
or service that does not infringe any IBM intellectual property right may be used instead. However, it is
the user's responsibility to evaluate and verify the operation of any non-IBM product, program, or
service.
IBM may have patents or pending patent applications covering subject matter described in this
document. The furnishing of this document does not grant you any license to these patents. You can send
license inquiries, in writing, to:
IBM Director of Licensing
IBM Corporation
North Castle Drive
Armonk, NY 10504-1785
U.S.A.
For license inquiries regarding double-byte character set (DBCS) information, contact the IBM Intellectual
Property Department in your country or send inquiries, in writing, to:
Intellectual Property Licensing
Legal and Intellectual Property Law
IBM Japan Ltd.
1623-14, Shimotsuruma, Yamato-shi
Kanagawa 242-8502 Japan
The following paragraph does not apply to the United Kingdom or any other country where such
provisions are inconsistent with local law: INTERNATIONAL BUSINESS MACHINES CORPORATION
PROVIDES THIS PUBLICATION "AS IS" WITHOUT WARRANTY OF ANY KIND, EITHER EXPRESS OR
IMPLIED, INCLUDING, BUT NOT LIMITED TO, THE IMPLIED WARRANTIES OF
NON-INFRINGEMENT, MERCHANTABILITY OR FITNESS FOR A PARTICULAR PURPOSE. Some
states do not allow disclaimer of express or implied warranties in certain transactions, therefore, this
statement may not apply to you.
This information could include technical inaccuracies or typographical errors. Changes are periodically
made to the information herein; these changes will be incorporated in new editions of the publication.
IBM may make improvements and/or changes in the product(s) and/or the program(s) described in this
publication at any time without notice.
Any references in this information to non-IBM Web sites are provided for convenience only and do not in
any manner serve as an endorsement of those Web sites. The materials at those Web sites are not part of
the materials for this IBM product and use of those Web sites is at your own risk.
IBM may use or distribute any of the information you supply in any way it believes appropriate without
incurring any obligation to you.
© Copyright IBM Corp. 2012, 2014
341
Licensees of this program who wish to have information about it for the purpose of enabling: (i) the
exchange of information between independently created programs and other programs (including this
one) and (ii) the mutual use of the information which has been exchanged, should contact:
IBM Corporation
Dept. LRAS/Bldg. 903
11501 Burnet Road
Austin, TX 78758-3400
U.S.A.
Such information may be available, subject to appropriate terms and conditions, including in some cases,
payment of a fee.
The licensed program described in this document and all licensed material available for it are provided
by IBM under terms of the IBM Customer Agreement, IBM International Program License Agreement,
IBM License Agreement for Machine Code, or any equivalent agreement between us.
Any performance data contained herein was determined in a controlled environment. Therefore, the
results obtained in other operating environments may vary significantly. Some measurements may have
been made on development-level systems and there is no guarantee that these measurements will be the
same on generally available systems. Furthermore, some measurements may have been estimated through
extrapolation. Actual results may vary. Users of this document should verify the applicable data for their
specific environment.
Information concerning non-IBM products was obtained from the suppliers of those products, their
published announcements or other publicly available sources. IBM has not tested those products and
cannot confirm the accuracy of performance, compatibility or any other claims related to non-IBM
products. Questions on the capabilities of non-IBM products should be addressed to the suppliers of
those products.
All statements regarding IBM's future direction or intent are subject to change or withdrawal without
notice, and represent goals and objectives only.
All IBM prices shown are IBM's suggested retail prices, are current and are subject to change without
notice. Dealer prices may vary.
This information is for planning purposes only. The information herein is subject to change before the
products described become available.
This information contains examples of data and reports used in daily business operations. To illustrate
them as completely as possible, the examples include the names of individuals, companies, brands, and
products. All of these names are fictitious and any similarity to the names and addresses used by an
actual business enterprise is entirely coincidental.
COPYRIGHT LICENSE:
This information contains sample application programs in source language, which illustrate programming
techniques on various operating platforms. You may copy, modify, and distribute these sample programs
in any form without payment to IBM, for the purposes of developing, using, marketing or distributing
application programs conforming to the application programming interface for the operating platform for
which the sample programs are written. These examples have not been thoroughly tested under all
conditions. IBM, therefore, cannot guarantee or imply reliability, serviceability, or function of these
programs. The sample programs are provided "AS IS", without warranty of any kind. IBM shall not be
liable for any damages arising out of your use of the sample programs.
342
IBM Cloud Manager with OpenStack: Administrator Guide, version 4.2
Each copy or any portion of these sample programs or any derivative work, must include a copyright
notice as follows:
© IBM Corp. 2014. Portions of this code are derived from IBM Corp. Sample Programs. © Copyright IBM
Corp. 2012, 2014.
If you are viewing this information in softcopy, the photographs and color illustrations may not appear.
Trademarks
IBM, the IBM logo, and ibm.com are trademarks or registered trademarks of International Business
Machines Corporation in the United States, other countries, or both. If these and other IBM trademarked
terms are marked on their first occurrence in this information with a trademark symbol (® and ™), these
symbols indicate U.S. registered or common law trademarks owned by IBM at the time this information
was published. Such trademarks may also be registered or common law trademarks in other countries. A
current list of IBM trademarks is available on the Web at Copyright and trademark information at
www.ibm.com/legal/copytrade.shtml
Adobe, the Adobe logo, PostScript, and the PostScript logo are either registered trademarks or trademarks
of Adobe Systems Incorporated in the United States, and/or other countries.
Intel, Intel logo, Intel Inside, Intel Inside logo, Intel Centrino, Intel Centrino logo, Celeron, Intel Xeon,
Intel SpeedStep, Itanium, and Pentium are trademarks or registered trademarks of Intel Corporation or its
subsidiaries in the United States and other countries.
Java and all Java-based trademarks and logos are trademarks or registered trademarks of Oracle
and/or its affiliates.
Linux is a trademark of Linus Torvalds in the United States, other countries, or both.
Microsoft, Windows, Windows NT, and the Windows logo are trademarks of Microsoft Corporation in the
United States, other countries, or both.
UNIX is a registered trademark of The Open Group in the United States and other countries.
Other company, product, or service names may be trademarks or service marks of others.
Privacy policy considerations
IBM Software products, including software as a service solutions, (“Software Offerings”) may use cookies
or other technologies to collect product usage information, to help improve the end user experience, to
tailor interactions with the end user or for other purposes. In many cases no personally identifiable
information is collected by the Software Offerings. Some of our Software Offerings can help enable you to
collect personally identifiable information. If this Software Offering uses cookies to collect personally
identifiable information, specific information about this offering’s use of cookies is set forth below.
Depending upon the configurations deployed, this Software Offering may use session and persistent
cookies that collect each user’s user name and password for purposes of session management,
authentication, and enhanced user usability. These cookies cannot be disabled.
Notices
343
If the configurations deployed for this Software Offering provide you as customer the ability to collect
personally identifiable information from end users via cookies and other technologies, you should seek
your own legal advice about any laws applicable to such data collection, including any requirements for
notice and consent.
For more information about the use of various technologies, including cookies, for these purposes, See
IBM’s Privacy Policy at http://www.ibm.com/privacy and IBM’s Online Privacy Statement at
http://www.ibm.com/privacy/details the section entitled “Cookies, Web Beacons and Other
Technologies” and the “IBM Software Products and Software-as-a-Service Privacy Statement” at
http://www.ibm.com/software/info/product-privacy.
344
IBM Cloud Manager with OpenStack: Administrator Guide, version 4.2
Printed in USA