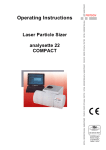
Download Laser Particle Sizer Analysette 22 NanoTec / MicroTec / XT
Transcript
Operating instructions
Laser Particle Sizer
"analysette 22"
NanoTec / MicroTec / XT
Fritsch GmbH
Laborgerätebau
Industriestraße 8
D - 55743 Idar-Oberstein
Phone:
06784/ 70-0
Fax: 06784/ 70-11
Email:
[email protected]
URL: http://www.fritsch.de
Fritsch GmbH, Laborgerätebau was certified by the TÜV Zertifizierungsgemeinschaft e.V. on 21.11.2003.
Based on an audit report Fritsch GmbH has been awarded the certificate of
compliance to the requirements of DIN EN ISO 9001:2000.
The enclosed conformity declaration specifies the directives fulfilled by the
laser particle sizer "analysete 22 NanoTec / MicroTec" in order to carry
the CE symbol.
NanoTec model numbers:
22.2000.00, 22.2800.00, 22.850.00, 22.2900.00
MicroTec model numbers:
22.4000.00, 22.4400.00, 22.4500.00, 22.4950.00
MicroTec XT model numbers:
22.4900.00, 22.4940.00, 22.4960.00
applies as of serial number 0001
Edition 06/2004 Index 004
Table of Contents
Page
1
General / Introduction..............................................................1
1.1
1.2
1.3
Notes about Operating Instructions...................................................... 1
Symbols Used ...................................................................................... 2
Brief Description of the Device ............................................................. 3
1.3.1
1.3.2
1.3.2.1
1.3.2.2
1.3.2.3
1.3.2.4
1.3.2.5
1.3.2.5.1
1.3.2.5.2
1.3.3
1.3.3.1
1.3.3.2
1.3.3.3
Design.............................................................................................................. 3
Function ........................................................................................................... 5
The Conventional Design of the Parallel Laser Beam...................................... 5
The "Inverse Fourier Design" Convergent Laser Beam .................................. 6
Resolution........................................................................................................ 6
Fraunhofer / Mie Theory .................................................................................. 7
Measuring in the Nanometre Range ................................................................ 7
Forward Diffraction........................................................................................... 8
Backward Diffraction ........................................................................................ 9
NanoTec / MicroTec Device Description.......................................................... 9
Liquid Dispersing Unit .................................................................................... 11
Dry Dispersing Unit ........................................................................................ 12
Combination Unit for Dry and Liquid Dispersing ............................................ 12
1.4
Technical Data.................................................................................... 12
1.4.1
1.4.2
General .......................................................................................................... 12
"NanoTec" (22.2000.00) MicroTec (22.4000.00) MicroTec XT (22.4900.00) . 12
2
Operating Safety ....................................................................15
2.1
2.2
General Safety Instructions ................................................................ 15
Device Safety Instructions .................................................................. 16
2.2.1
2.2.2
2.2.3
Laser.............................................................................................................. 16
Ultra-sound Bath ............................................................................................ 17
Moving the Measuring Cells........................................................................... 17
2.3
2.4
Operators............................................................................................ 17
Safety Equipment ............................................................................... 18
2.4.1
2.4.2
Laser Emissions............................................................................................. 18
Pinching Danger ............................................................................................ 18
2.5
2.6
Danger Points..................................................................................... 18
Electrical Safety.................................................................................. 18
2.6.1
2.6.2
General .......................................................................................................... 18
Overload Protection ....................................................................................... 18
3
Installation ..............................................................................19
3.1
3.2
3.3
3.4
3.5
3.6
Transport ............................................................................................ 19
Unpacking........................................................................................... 19
Setup .................................................................................................. 22
Transport safety device ...................................................................... 23
Accessory Case.................................................................................. 24
Electrical Connection.......................................................................... 25
3.6.1
3.6.2
3.6.3
Electrical Fuses.............................................................................................. 25
Stability of the Power Supply ......................................................................... 25
Adapting to the Power Network...................................................................... 25
3.7
3.8
3.9
3.10
3.11
3.12
Connections........................................................................................ 26
Preparing the Computer ..................................................................... 27
Data Connections ............................................................................... 27
Switching on the Device ..................................................................... 27
Checking the Communication ............................................................ 27
Function Check................................................................................... 28
4
Liquid Dispersing Unit...........................................................29
4.1
4.2
4.3
Installing Hose Connections............................................................... 29
Selection of the Liquids ...................................................................... 30
Cleaning ............................................................................................. 31
4.3.1
4.3.2
4.3.2.1
4.3.2.2
4.3.2.3
4.3.2.4
4.3.2.5
4.3.2.6
4.3.2.6.1
4.3.2.6.2
4.3.2.7
Cleaning the Device....................................................................................... 31
Cleaning the Measuring Cell .......................................................................... 31
Service Position ............................................................................................. 31
Preparation .................................................................................................... 31
Preparation .................................................................................................... 32
Disassembling the Measuring Cell................................................................. 33
Cleaning......................................................................................................... 35
Cleaning the Window ..................................................................................... 35
Loose Window ............................................................................................... 35
Flange Window .............................................................................................. 37
Installing the Measuring Cell .......................................................................... 38
"analysette 22" NanoTec / MicroTec
Table of Contents
Page
4.4
Filling the Measuring Cell ................................................................... 39
4.4.1
4.4.2
Liquid Dispersing Unit .................................................................................... 39
Filling the Measuring Cell When Using the Small Quantity Dispersing Unit ... 39
4.5
4.6
Setting the Measuring Range for Calibration ..................................... 40
Mounting instructions Measuring Range Extension Kit “WET” .......... 41
5
Dry Dispersing Unit................................................................43
5.1
Preparing the Dry Dispersing Unit...................................................... 43
5.1.1
5.1.2
5.1.3
5.1.4
5.1.5
5.1.5.1
5.1.6
Dry Dispersing Nozzle and Measuring Cell.................................................... 43
Connecting the Measuring Device ................................................................. 43
Compressed Air Technical Data .................................................................... 43
Connection to the Computer .......................................................................... 43
Connecting the Vacuum................................................................................. 44
Vacuum Technical Data................................................................................. 44
Setting the Pressure ...................................................................................... 44
5.2
Cleaning the Measuring Cell Windows of the "Dry Dispersing Unit".. 45
5.2.1
5.2.2
5.2.3
Service Position ............................................................................................. 45
Disassembly of the Measuring Cell................................................................ 45
Assembly of the Measuring Cell..................................................................... 49
5.3
5.4
Measuring with the „Dry Dispersing Unit“........................................... 50
Mounting instructions Measuring Range Extension Kit “Dry”............. 52
6
Accessories ............................................................................54
6.1
6.2
"analysette 22 WINDOWS" Program ................................................. 54
Small Quantity Dispersing Unit........................................................... 54
6.2.1
6.2.2
Connection of the small volume dispersing unit ............................................. 54
Small volume dispersing unit for manual change of the measuring cell "liquid"... 55
7
8
9
Maintenance ...........................................................................57
Warranty..................................................................................57
Troubleshooting.....................................................................57
9.1
9.2
9.3
9.4
9.5
Error List ............................................................................................. 57
Transferability of Measurement Results............................................. 57
Selection of Liquids for Suspensions ................................................. 58
Dispersing of Poorly Wettable Samples ............................................. 59
Measurement of Weakly Soluble Samples ........................................ 59
"analysette 22" NanoTec / MicroTec
1
General / Introduction
1.1
Notes about Operating Instructions
•
•
•
•
•
•
•
•
Fritsch GmbH, Laborgerätebau retains the copyright to these
technical documents.
These operating instructions are not to be reprinted or copied
without the express approval of Fritsch GmbH.
Read the operating instructions carefully.
All operators must be familiar with the contents of the operating instructions.
Please follow the notes for your safety.
The laser particle sizer was designed from the perspective of
user safety, however some risks could not be excluded. Follow the advice in these instructions to avoid risks to users.
The symbols in the right hand margin highlight the risks described in the text.
Some symbols may also be found on the device and warn
against possible hazards existing there. Warning symbols are
surrounded by a triangle.
These operating instructions do not constitute a complete
technical description. They describe only the details required
for safe operation and maintenance for usage under normal
conditions.
"analysette 22" NanoTec / MicroTec
Seite 1
1.2
Symbols Used
Attention!
Warning against danger spot
Observe operating instructions
Attention! Mains voltage
Attention! Hazard of explosion
Attention! Inflammable substances
Attention!
Warning against laser beam
Wear safety goggles!
Spraying with water forbidden!
Warning against hand injury!
"analysette 22" NanoTec / MicroTec
Seite 2
1.3
Brief Description of the Device
The laser particle sizer "analysette 22", model NanoTec and model MicroTec are universally usable devices for determination of particle size
distribution in suspensions, emulsions, solids and aerosols. They are
primarily used in research and development and in quality and process
inspections.
The "analysette 22" NanoTec and MicroTec models utilise the FRITSCH
patent on a convergent laser beam for determination of particle size distribution.
1.3.1 Design
The measuring device of NanoTec contains two semi-conductor lasers
(wavelength 650 nm, laser power 7mW, laser class IIIb). The measuring
device of MicroTec contains one semi-conductor lasers (wavelength 650
nm, laser power 7mW, laser class IIIb). Warning labels for laser radiation
are located on the inside of the device.
All optical and electrical components are situated in a vertically aligned
aluminium profile. Depending on the feature variant, the dry (left side) or
liquid dispersion unit (right side) are located underneath the stainless
steel covers. Combination versions contain both the liquid and dry dispersion units.
Depending on the model, the measuring cells for measurement in suspension or for measurement of dry solids with a nozzle arrangement for
dispersing the sample and a suction device are installed separately or, in
the combination devices, together on separate guide rails. Switching of
the measuring cell, and therefore switching of the dispersion type, takes
place automatically.
The multi-element detector with 80 individual elements and the associated preamplifier are situated in a protected housing on the top end of
the optical bench. The measuring device also contains the drive system
for sliding the measuring cell or the nozzle arrangement to the two end
positions.
"analysette 22" NanoTec / MicroTec
Seite 3
The liquid dispersion unit has an approximately 300 ml stainless steel
container to hold the samples, which is designed as an ultra-sound bath.
The ultra-sound output is approximately 70 Watts at 36 kHz and can be
switched on or off as desired. An optical fill level sensor monitors the
liquid level in the ultra-sound bath.
A centrifugal pump with flange connection beneath the ultra-sound bath
pumps the suspension through the entire measuring circuit. Due to the
high flow rate of the suspension, even larger particles with high density
are measured correctly. The centrifugal principle also handles mechanically sensitive samples as gently as possible. The supply and discharge
of the suspension and the automatic rinsing and filling are performed
automatically by electro-mechanical control valves and ball valves.
Do not use any highly flammable, burnable liquids such as alcohols, ketones, benzines, etc.
Do not allow any liquids to flow into the device.
Parts coming into contact with liquid are made of PA66(Nylon), Viton, Teflon and stainless steel.
"analysette 22" NanoTec / MicroTec
Seite 4
1.3.2 Function
Analysis devices for determination of particle size distribution with laser
deflection make use of the physical principle of the scattering of electromagnetic waves.
Particles in a parallel laser beam deflect the light at a defined angle that
depends on the diameter of the particles. A convergent lens focusses
the scattered light in a ring on a sensor mounted in the focal plane of the
lens. Undiffracted light always converges at the focal point on the optical
axis.
With the help of complex mathematics, the particle size distribution of
the particles diffracting the light can be calculated from the intensity distribution of the diffracted light. As a result, one obtains a particle diameter from the laser diffraction that is equivalent to that of a ball with identical diffracted light distribution. Average volume diameters are measured
and the resulting particle size distribution is a volume distribution.
1.3.2.1 The Conventional Design of the Parallel Laser Beam
The diffraction image in the focal plane can be mathematically described
with the help of Fourier optics. The measurement principle is based on
the unique property of a convergent lens of performing a twodimensional Fourier transformation on the incoming field. For this reason, the convergent lens situated in the parallel laser beam is also called
a Fourier transformation lens.
The local frequencies of the Fourier components are directly proportional
to the focal width of the convergent lens. Changing the measuring range
therefore always requires changing the lens, involving reconfiguration of
the device. Many manufacturers have therefore adopted an alternative
measurement design in recent years, one that was invented by the
FRITSCH company.
"analysette 22" NanoTec / MicroTec
Seite 5
1.3.2.2 The "Inverse Fourier Design"
Convergent Laser Beam
The "analysette 22" offers an alternative optical design that is both stateof-the-art and impressively simple.
The design, which was included in ISO 13320-1 under the term "Inverse
Fourier Optics", has long been known as a part of Fourier optics. However, the advantages for particle size distribution measurement were first
recognised, utilised and patented by FRITSCH.
The sample is placed within a convergent laser beam. The distance between the measuring cell and the detector is equivalent to the focal
length of the convergent lens in conventional applications; one obtains
the same diffraction image as with a conventional design without the
disadvantages of reconfiguration in order to change the measuring
range: the measuring range can be changed by simply moving the
measuring cell as with a zoom lens. The user has full control over the
local frequencies of the Fourier optics.
• Large distance between measuring cell and detector (TELE)
Æ Measuring of coarse particles
• Small distance between measuring cell and detector
(MACRO)
Æ Measuring of small particles down to the submicron range
The laser particle sizer "analysette 22" is the only instrument with which
the measuring cell is moved along the optical axis to adjust the measuring range without the need to change the lens. The sample is therefore
always measured with the greatest dynamic and optimal conditions.
1.3.2.3 Resolution
The inverse Fourier optics also allow measurement of a particle size
distribution with extremely high resolution. With the fully automatic, computer-controlled positioning of the measuring cell within the convergent
beam, a super matrix of up to 520 measurement channels can be created for calculations using the models NanoTec, MicroTec and MicroTec
XT. The total measuring range is available without limitation.
"analysette 22" NanoTec / MicroTec
Seite 6
1.3.2.4 Fraunhofer / Mie Theory
The energy distribution measured in radially positioned sensor elements
is evaluated and used to calculate the particle size distribution. In the
"analysette 22", this calculation can be performed according to either the
Fraunhofer or the Mie theory.
The Fraunhofer theory, named after German physicist Josef von Fraunhofer and based on diffraction at the particle edges, applies only to fully
opaque particles and small diffraction angle.
For particle sizes in the range of the wavelength and below, the Fraunhofer assumption of a constant extinction coefficient
no longer applies. To account for the optical particle properties, the
"analysette 22" makes use of the Mie theory, named after German
physicist Gustav Mie. It describes the radiation in and around a homogenous, spherical particle in a homogenous, non-absorbing medium
for all spatial dimensions. The particles can be transparent or completely
opaque.
The Mie theory states that light diffraction is a resonance phenomenon.
If a light beam with a specific wavelength encounters a particle, the particle performs electromagnetic oscillations in the same frequency as the
stimulating light - regardless of the relationship of the light wavelength to
the particle diameter and the refractive index of the particles and medium. The particle is tuned to the reception of specific wavelengths and
reemits the energy like a relay station within a defined spatial angle distribution. According to the Mie theory, multiple oscillation states of varying probabilities are possible and there exists a relationship between the
optically effective cross section and particle size, light wavelength and
the refractive index of the particles and medium.
In order to apply the Mie theory, the refractive index and absorption coefficient of the sample and the medium must therefore be known. The
software of the "analysette 22" contains these constants for many materials within its database. During measurement, an appropriate diffraction
matrix is selected or calculated within seconds upon entry of new constants.
1.3.2.5 Measuring in the Nanometre Range
As the particle size decreases, the diffracted light contains less and less
information. At the same time, the diffraction angles become very large
and the intensity of the diffracted light decreases significantly. For this
reason, more elaborate instrument technology is required for the nano
range:
"analysette 22" NanoTec / MicroTec
Seite 7
1.3.2.5.1 Forward Diffraction
The light diffracted in the measuring cell is diffracted in a forward direction and captured by the light-sensitive elements of the diffracted light
detector. The detector contains a micro-hole in its centre, through which
the laser light encounters a photodiode to determine the total absorption.
Light-sensitive elements are arranged concentrically around this microhole. These have increasingly large surfaces in the outer area to compensate for the small diffraction angle of smaller particles. In the inner
region of the detector, the elements are very small so that even the diffracted light of large particles can be measured with high resolution. The
separation of the individual elements from each other is performed using
state-of-the-art semiconductor manufacturing processes.
The diffracted light cannot leave the measuring cell at arbitrarily large
angles because total reflection occurs at a specific angle upon transition
from an optically more dense to less dense medium. The optical measuring cell glasses of the "analysette 22" are therefore given prismshaped wide-angle surfaces from which diffracted light can escape at a
large angle. This light is measured on the detector by special wide-angle
elements. In the forward direction (lower measuring limit ~0.1 µm), a
diffraction angle range to approximately 60° is covered with this design.
"analysette 22" NanoTec / MicroTec
Seite 8
1.3.2.5.2 Backward Diffraction
To capture the diffracted light of nanometre particles, a significantly larger angle range must be covered. To accomplish this, the "analysette
22" NanoTec uses a backward laser that passes through the same micro-hole in the detector and generates light diffraction in the measuring
cell that is then detected by the detector as backward diffraction in an
angle range from 60 – 180°.
In addition, the optimised geometry of the detector makes it possible to
capture and evaluate the various diffractive effects of nano particles parallel and perpendicular to the polarisation direction of the laser. The
lower measuring limit with this design is ~10 nm.
1.3.3 NanoTec / MicroTec Device Description
The NanoTec version is a device combination offering maximum user
comfort. The "analysette 22" NanoTec offers everything that a user of
modern laser particle sizers expects. High quality optical, mechanical
and electronic components combined with modern, flexible software for
calculation of the Mie components, the particle size distribution and the
resulting parameters guarantee a state-of-the-art analysis instrument.
The measuring range is 0.01 to 1000 µm.
The "analysette 22" MicroTec is the measuring instrument for samples in
the micron and submicron range. The reduced optical bench allows a
very compact and inexpensive design. The MicroTec is the "little"
brother of the NanoTec. All hardware and software components are
identical with those of the "analysette 22" NanoTec except for the nano
expansion. The measuring range is from 0.1 to 600 µm (MIcroTec XT:
0.1 to 2000µm).
As a new feature world-wide, Fritsch offers optional software for
shape recognition for the models "analysette 22" NanoTec and
"analysette 22" MicroTec.
"analysette 22" NanoTec / MicroTec
Seite 9
The dispersing units for measuring in suspensions or of dry solids contain independent processor controls for all functions of sample preparation and feeding. All of their functions can be accessed on the screen
using the mouse or keyboard. If you wish, the computer and processor
controls work together so that an individually programmed measurement
cycle consisting of
• background measurement,
• sample feeding,
• measurement (single or multiple measurement),
• documentation of the results and
• cleaning
is executed fully automatically, e.g. as a routine measurement that can
be repeated at the push of a button.
The small dispersing unit is available as a special accessory for preparation of small sample quantities in suspension. With this accessory, you
can perform a complete measurement with a small quantity of liquid
(approx. 100 ml).
Between the smallest measuring range from 0.1 µm to approx. 53 µm
(measuring cell at the smallest possible distance from the sensor) and
the largest measuring range between 7 µm and 1000 µm (largest distance between measuring cell and sensor), you can freely select any
intermediate range.
The optical bench is constructed of high quality components in a vertical
design to save space. Two independent guides for liquid and dry measurements allow fully automatic changing of the dispersing unit within
seconds.
The fibre-coupled, robust 7 mW double laser diodes with polarisationpreserving fibre, good temperature stability, high beam quality and long
service life radiate in the visible range. A newly developed diffracted light
detector on a ceramic base "made in Germany" according to state-ofthe-art manufacturing methods offers the best mechanical and thermal
stability.
"analysette 22" NanoTec / MicroTec
Seite 10
With the expansion for measurement of backward diffracted light, the
"analysette 22" NanoTec covers a diffracted angle range from 0° to
approx. 180°. It has a double laser diode for diffracted light measurements in the forward and backward directions. To expand the measurement in the nanometre range, the forward laser is switched off and a
laser in the reverse direction is activated. This generates light diffraction
in the measuring cell that can be captured by the detector as polarisation-selective backward diffraction in the angle range 60 – 180°. The
extinction of the backward laser is captured by a photodiode swivelled to
a position in front of the forward laser. The "nano" option can be activated in connection with the module for liquid dispersion. For the cell
distance of 20 mm, this expands the measuring range of the device
down to 10 nm.
You can make use of the full scope of the extremely large measuring
range from 0.01 µm to 1000 µm in a single measurement process
through controlled coupling of up to 10 individual measurements.
Your wish for a higher resolution in the measurement and calculation of
the particle size distribution can be satisified for every multiple measurement by simply inputing the desired number of measurement channels yourself.
After specifying an upper and lower limit, the measurement is distributed
among up to ten adjacent measurement areas - the sample is introduced
only once before the start of the test.
The result of a measurement performed in this way is characterised by a
resolution in up to 570 measurement channels. In this way, wide and
highly inhomogeneous samples distributed over the entire measuring
range can be measured precisely. The high resolution displays fine details that remain hidden to other measurement methods.
This extreme resolution is particularly interesting in the finest particle
range: during multiple measurement within narrow limits, between 0.01
µm and 60 µm, the sample can be measured, for instance, in 155 true
measurement channels (or more) and calculated.
1.3.3.1 Liquid Dispersing Unit
The liquid dispersing module offers fully automatic pumping of the suspension. Through the use of a motor-driven 4/2-way valve, the pumping
takes place without dead space. With the integrated ultra-sound bath
(approx. 500 ml volume, 50 Watts output), even difficult to disperse
samples can be measured without additional instrument work. The digital ultra-sound generator keeps the specified output optimal and constant.
The powerful centrifugal pump with 100 Watt output also pumps particles with higher specific gravity and is suitable for long-term operation.
The entire liquid volume can be completely pumped once within three
seconds with the powerful pump. This makes the measurement independent of inhomogeneities in the sample. The pump rotation speed and
ultra-sound output can be adapted to the properties of the sample.
All parts in contact with the liquid are of stainless steel, Viton and PA60.
All functions can be controlled by computer.
"analysette 22" NanoTec / MicroTec
Seite 11
1.3.3.2 Dry Dispersing Unit
The dispersing module for dry samples prepares agglomerates using
mechanical and pneumatic forces. The dosed sample is supplied by a
new amplitude-controlled vibration dosing channel. The dispersing takes
place in a two-phase annular gap nozzle through air fins with aerodynamic wave formation at the nozzle outlet and high flow speed in the
nozzle channel.
To operate the dry dispersing unit, a connection for oil-, water- and particle-free compressed air with a pressure of at least 5 bar and a flow rate
of at least 8 m³/h is required.
The fully automatic measuring sequences can be freely programmed
and saved. The entire functional process is controlled by an integrated
microprocessor.
1.3.3.3 Combination Unit for Dry and Liquid Dispersing
The combination device contains the module for both liquid and for dry
dispersing. The desired dispersing type can be selected with a software
command.
1.4
Technical Data
1.4.1 General
Operating Noise
The noise level is 42dB (A).
Voltage
Single-phase alternating voltage 90-230V ± 10%.
1.4.2 "NanoTec" (22.2000.00) MicroTec (22.4000.00)
MicroTec XT (22.4900.00)
Current consumption
The maximum current consumption is 0.5 A
Power consumption
The maximum power consumption is 125 W.
Electrical fuses
Electronic fuses in the interior of the device on the switched power supply and beneath the wet connection combination.
"analysette 22" NanoTec / MicroTec
Seite 12
Device
Liquid Dispersion
Dry Dispersion
NanoTec
0.01 - 1000 µm
0.1 - 1000 µm
MicroTec
0.1 - 600 µm
0.1 - 600 µm
MicroTec XT
0,1 - 2000 µm
0,1 - 2000 µm
Module
Dry /
Liquid
Measuring
Time
approx.
10 s
Sample Quantity/
Liquid Volume
dry
3
5 - 50 cm
Combination device for
liquid and dry measuring
22.2000.00
dry /
liquid
Device for liquid measuring
22.2800.00
Device for dry measuring
22.2900.00
Small quantity liquid
dispersing unit
22.6750.00 or
22.6700.00
liquid
approx.
10 s
dry
approx.
10 s
liquid
approx.
10 s
0.1 – 0.5 cm in
100 ml liquid
Module
Dry /
Liquid
Measuring
Time
Sample Quantity Weight
/ Liquid Volume
Dimensions
Combination device for
liquid and dry measuring
dry /
liquid
approx.
10 s
dry
80 x 65 x
94 cm
liquid
approx. 0.1 – 2
3
cm in 500 ml
liquid
approx. 0.1 – 2
3
cm in 500 ml
liquid
3
5 - 50 cm
3
5 - 50 cm
Weight
Dimensions
net 105 kg,
gross 140 kg
80 x 65 x
122 cm
net 105 kg,
gross 140 kg
80 x 65 x
122 cm
net 105 kg,
gross 140 kg
80 x 65 x
122 cm
net 8 kg,
gross 10 kg
14 x 14 x
32 cm
net 90 kg,
3
gross 125 kg
22.4000.00
liquid
approx. 0.1 – 2
3
cm in 500 ml
liquid
Device for liquid measuring
liquid
approx.
10 s
approx. 0.1 – 2
3
cm in 500 ml
liquid
net 75 kg,
80 x 65 x
94 cm
gross 125 kg
22.4400.00
Device for dry measuring
dry
approx.
10 s
5 - 50 cm
3
net 76 kg,
80 x 65 x
94 cm
gross 125 kg
22.4500.00
Small quantity liquid
dispersing unit
liquid
approx.
10 s
3
0.1 – 0.5 cm in
100 ml liquid
14 x 14 x
32 cm
net 8 kg,
gross 20 kg
22.6750.00 or
22.6700.00
"analysette 22" NanoTec / MicroTec
Seite 13
Combination device for
liquid and dry measuring
22.4900.00
dry /
liquid
Device for liquid measuring
22.4940.00
Device for dry measuring
22.4960.00
liquid
approx.
10 s
dry
approx.
10 s
Sample Quantity/
Liquid Volume
dry
3
5 - 50 cm
liquid
approx. 0.1 – 2
3
cm in 500 ml
liquid
approx. 0.1 – 2
3
cm in 500 ml
liquid
3
5 - 50 cm
NanoTec
Liquid
NanoTec Dry
Accessory
Measuring
Time
approx.
10 s
Weight
Dimensions
net 105 kg,
gross 140 kg
80 x 65 x
122 cm
net 105 kg,
gross 140 kg
80 x 65 x
122 cm
net 105 kg,
gross 140 kg
80 x 65 x
122 cm
MicroTec/ XT
Dry
Dry /
Liquid
MicroTec/ XT
Liquid
Module
22.6900.00
Small quantity liquid
dispersing unit
22.6750.00
Small quantity liquid
dispersing unit
•
22.6700.00
Small quantity liquid
dispersing unit
•
•
•
22.6300.00
Liquid mini vessel
22.2910.00
Software for particle
shape recognition
"analysette 22" NanoTec / MicroTec
•
•
Seite 14
2
Operating Safety
2.1
General Safety Instructions
•
•
•
•
•
•
•
•
•
•
•
•
•
Read the operating instructions carefully.
The device may only be used for the purpose described in
Section 1.3 Brief Description of the Device.
Use only original accessories. Failure to adhere to this may
jeopardize the protection of the machine.
All operators must be familiar with the contents of the operating instructions. For this purpose, always keep the operating
instructions within easy reach.
Do not remove the instruction labels
Care to prevent accidents must be taken during all work.
Independent conversions of the device negate the conformity
with European directives declared by Fritsch and void the
warranty.
When measuring oxidisable substances, such as metals, organic substances, wood, coal, plastics, etc. the risk of spontaneous combustion (dust explosion) exists if the fine portion
exceeds a certain percentage. For this reason, special safety
measures (e.g. measurement in suspension) must be taken
and the work must be supervised by a specialist.
In addition, the MAK values of the pertinent safety regulations
must be observed, and sufficient ventilation must be ensured
or the device must be operated under a hood.
The device is not designed with explosion protection and is
not suitable for measuring explosive, combustable or firepromoting substances.
The device may not be used in an electrically conducting,
dust-containing or moist environment.
Do not allow any liquids to flow into the device.
Do not use any highly flammable, burnable liquids such as alcohols, ketones, benzines, etc.
"analysette 22" NanoTec / MicroTec
Seite 15
2.2
Device Safety Instructions
2.2.1 Laser
The measuring unit of the "analysette 22" contains a semi-conductor
laser with 7 mW output and a wavelength of 655 nm. The laser of the
"analysette 22" NanoTec and MicroTec is therefore classified as Class
3b EN 60825-1/11.2001 and may only be operated in compliance with
the corresponding safety instructions of EN 60825 Part 1 and 2 with regard to the laser emitter in the purview of the safety regulations of the
German Trade Supervision. The user must familiarise himself with the
hazards involved with laser emitters before using the device.
Warning labels regarding the laser emissions are located on the inner
doors of the device.
Caution!
• Never look into the laser beam.
• Never place reflective objects within the laser beam.
• Wear appropriate safety goggles during maintenance or calibration work on the open laser emitter. (< 10 mW, 655 nm).
• The device equipped with a laser emitter may only be operated by authorised personnel.
• The user of the device must familiarise himself with the hazards involved with laser emitters before using it.
• Do not remove information and warning signs.
Laser devices of laser classes 3B and 4 are hazardous to the human
eye; even an exposure time of 0.25 s is sufficient to cause permanent
damage to the retina. For this reason, any person operating the device
with opened doors must wear suitable safety goggles. The safety goggles must be suitable for the wavelengths of the laser used; for example,
safety goggles that protect against a green laser fail against a red laser.
The wavelength of the built-in laser is 655 nm.
For laser devices of laser safety class 3B or 4, laser safety officers must
be appointed in accordance with GUV 2.20.
"analysette 22" NanoTec / MicroTec
Seite 16
2.2.2 Ultra-sound Bath
The ultra-sound bath built into the liquid dispersing unit has an output of
70 Watts. PZT ultra-sound oscillators fastened to the oscillating trough
convert electrical energy into mechanical vibrations. Fritsch ultra-sound
baths cause the liquid to vibrate at 36 kHz. This causes the formation of
tiny vacuum bubbles that implode (cavitation). This cavitation principle
destroys agglomerations.
Liquids contain dissolved gasses (e.g. oxygen). Freshly added liquids or
liquids remaining in the oscillating trough for longer periods of time
should be exposed to ultra-sound for approx. 5 to 15 minutes before
use. During the degassing period, the cavitation noise alters, loud degassing noises disappear at the end of the degassing process, the device operates noticeably more quietly. A lower noise level does not
mean any subsiding in the ultra-sound output, only the end of the degassing process.
Caution!
• Do not operate the ultra-sound bath without liquids.
• Do not use any flammable liquids (e.g. benzine, solvents) and
no chemicals that contain or give off chloride ions (some disinfectants, household cleaners and dishwishing soaps) for ultrasound cleaning in the stainless steel trough.
• Do not use aggressive cleaning liquids (e.g. acids, salt solutions).
• Do not reach into the cleaning fluid during ultra-sound cleaning.
• The cleaning fluid heats up during longer periods of operation;
check the temperature.
2.2.3 Moving the Measuring Cells
Do not operate the device with open doors. Due to the high
torque of the motor for moving the measuring cell, severe pinching or injuries can occur if the measuring cell is moved while the
doors are open.
Always close both doors before initiating "Start Measurement".
2.3
Operators
•
•
The device may only be operated by authorised persons and
maintained and repaired by trained experts.
Persons under the influence of health impairments, medications, drugs, alcohol or excess fatigue may not operate the
device.
"analysette 22" NanoTec / MicroTec
Seite 17
2.4
Safety Equipment
Safety equipment such as coverings must be used as instructed and
may not be disabled or removed.
2.4.1 Laser Emissions
The laser emissions are not directly accessible because the laser is always blocked off by mechanical shutters after a properly completed
measurement. Sudden, uncontrolled opening of the doors by the user
also does not lead to a hazardous state because built-in electronics together with the light-sensitive silicon detector immediately detect an increase in the residual light, the measurement is halted and the laser is
blocked by the mechanical shutters. This state remains in effect until the
doors are closed. Then a new measurement cycle must be started with
"Start Measurement".
For this reason, the "analysette 22" NanoTec and MicroTec are classified as laser safety class 1.
2.4.2 Pinching Danger
Sudden, uncontrolled opening of the doors by the user does not lead to
a hazardous state because the built-in electronics together with the lightsensitive silicon detector detect an increase in the residual light and any
movement by the measuring cell is immediately halted. This state remains in effect until the doors are closed. Then a new measurement
cycle must be started with "Start Measurement".
2.5
Danger Points
Pinching danger at the cell holder when moving the measuring cell. Do
not operate the device with open doors.
Laser emitter with 7 mW output, laser class 3b, do not look into the
beam. Only operate the device in an open state while wearing safety
goggles.
2.6
Electrical Safety
Attention:
Connect the measuring device to a power supply line protected
with a residual current circuit breaker.
2.6.1 General
The power switch disconnects the machine from the supply at both
poles.
2.6.2 Overload Protection
The power supply protection provides overload protection.
"analysette 22" NanoTec / MicroTec
Seite 18
3
Installation
3.1
Transport
Transport over larger distances only in a transport box.
3.2
Unpacking
Compare your order with the delivery! In the event of incomplete delivery
and/or transport damages, inform the shipper and FRITSCH GmbH
(within 24 hours). Later complaints can no longer be accepted.
Only open the boxes while the arrows point upward! Remove the transport packaging as shown in the following pictures.
"analysette 22" NanoTec / MicroTec
Seite 19
"analysette 22" NanoTec / MicroTec
Seite 20
"analysette 22" NanoTec / MicroTec
Seite 21
Unscrew the carry grips from the base plate and insert the grips into the
fixtures in the accessory case provided for this. Close the screw holes in
the base plate with the closing plugs from the accessory case.
3.3
Setup
•
•
•
•
•
Place the device indoors on a flat, stabile surface. It is not
necessary to fasten the device in place.
Please avoid intense heat (sunlight, heaters, etc.), dusty environments and their effects on the interior of the measuring
device as well as extreme humidity (>85%).
During operation of the device, the ambient temperature may
not exceed 35°C or fall below 10°C. Storage between 1°C
and 40°C is possible. If it is expected that the temperature will
fall below the permissible temperature range (e.g. for a
planned transport), it is essential that the entire suspension
circuit (dispersion unit, hoses and measuring cell in the
measuring device) first be rinsed thoroughly with ethanol and
the liquid then completely removed.
The device may not be switched on while cooled below the
permissible temperature.
After the device has been cooled to temperatures below
10°C, you must wait for the device to warm to ambient temperature before switching it on; condensation in the device
can lead to disruptions and damage.
"analysette 22" NanoTec / MicroTec
Seite 22
•
•
•
3.4
You will be able to see characters and graphics on the screen
more easily if you select a setup location such that sunlight or
artificial light do not fall directly on the image tubes. Sometimes simply turning the monitor "out of the light" will help,
partial shadow increases the contrast and helps to prevent
eye fatigue.
Easy accessibility should be ensured during setup so the device can be operated without difficulty. When opening the
measuring device, you must be able to reach the measuring
cell easily.
The setup location must be protected against water. If there
exists the risk that a water layer could form on the setup surface in the event of an error, you must select another setup
location. If no other location is available, the entire device
must be elevated (use riser blocks).
Transport safety device
To avoid damanges of the laser diode during the transport, it is secured
by a protecting cap (MicroTec model).
Please remove this before the first measurement.
"analysette 22" NanoTec / MicroTec
Seite 23
3.5
Accessory Case
The accessory case contains
• Agents and tools for cleaning the optical glass elements
(cleaning liquid, cleaning cloths, compressed air, etc.)
• Replacement screws and hose clamps for the measuring cell
• A storage tool for the front flange of the measuring cell with
glass
• Tool for assembly and maintenance
• A CD-ROM with software
• A micro-fibre cleaning cloth for metal and glass surfaces
• Internal particle size standard F500, F70
• Cell storage tool
• Closing plugs and carry grips
"analysette 22" NanoTec / MicroTec
Seite 24
3.6
Electrical Connection
Connect the measuring device, the computer with monitor and the
printer to a power strip each with separate power cables. The enclosed
power cable is intended for the measuring device. It is a special design
with electronic filter that was selected to ensure error-free operation:
Attention:
Connect the measuring device to a power supply line protected
with a residual current circuit breaker.
3.6.1 Electrical Fuses
The device has two device fuses beneath the power connection assembly.
The internally required, stabilised direct current of 24 V is provided by an
integrated switched power supply with internal electronic short circuit
and surge protection.
3.6.2 Stability of the Power Supply
Devices with electronic components demand stabile supply voltages (+/5% deviation). For weak power networks or networks not safe against
errors (voltage peaks due to inductive load changes or switched-mode
power supplies), we recommend connecting a voltage stabiliser and
filters between the power supply and device (order no. 20.600.00).
3.6.3 Adapting to the Power Network
Manual switching of the voltage ranges on the device is not necessary
because the device can be operated with 90 – 230 V. The switching is
performed automatically.
"analysette 22" NanoTec / MicroTec
Seite 25
3.7
Connections
1.
2.
3.
4.
5.
6.
7.
8.
Connection control box (8) for vacuum (dry dispersing)
Main power supply
Suspension liquid supply (water connection at least 2 bar)
Suspension liquid discharge
Compressed air supply (7m³/h, at least 5bar) (dry dispersing)
Connection for vacuum (dry dispersing)
RS232 connection to the computer
Control box for vacuum (dry dispersing)
"analysette 22" NanoTec / MicroTec
Seite 26
3.8
Preparing the Computer
See the software operating manual.
3.9
Data Connections
Connect the 9-pin connector on the rear of the device to the Com1 or
Com2 port of your computer with the included RS232 cable.
After checking all connections, the plug of the power strip may be connected to the power network as the final step.
3.10 Switching on the Device
Switch the device on with the main power switch on the front lower right
of the device. The internal control then performs an initialisation routine.
Any measuring cells positioned within the beam path of the laser are
moved to the park position and the entire measuring cell is positioned at
its reference point. All filter wheels for transmitting or blocking the laser
beams are moved to the reference point.
The initialisation routine may last a few seconds.
3.11 Checking the Communication
After you have established the serial connection between the measuring
device and the computer, you must check the communication.
To do this, open the associated program "analysette 22 for Windows"
and select the item "Set System Configuration" in the "Configuration"
menu. In the dialog "Set System Configuration...", select your version of
the analysette 22. In the dialog that appears next to the lower right, select the RS232 port of your computer to which you have connected the
cable to the measuring device.
If you do not receive any communication in the following steps, this is
usually the result of a missing or non-functional RS232 port on your
computer. In this case, always check the hardware of your computer.
"analysette 22" NanoTec / MicroTec
Seite 27
3.12 Function Check
Select the version of your "NanoTec / MicroTec", and the liquid dispersing for combination devices.
Enter "Measuring Range Setting" and select a cell distance of 190 mm.
Enter the "Beam Adjustment". You will not immediately see signals from
the detector; you will see signals only after you have selected "Manual
Adjustment" and clicked on one of the arrows. Then one data record is
sent from the measuring device to the computer. Check whether the
beam adjustment is accurate (see here the operating manual).
Select only "Background Measurement" as the measurement process.
Press "Start Measurement".
The measuring cell must now move to a distance of 190 mm and you
must see the signals of the background measurement on the screen.
Now perform a measurement with the Fritsch internal standard sample.
Instructions for this can be found in the Fritsch reference manual.
"analysette 22" NanoTec / MicroTec
Seite 28
4
Liquid Dispersing Unit
4.1
Installing Hose Connections
The liquid dispersing unit has two pipe connectors in the rear for hoses
with 18 mm inner diameter. The 18 mm pipe connector with the designation "Out" (lower connection) serves to release used measuring and rinsing fluid through the discharge valve. Lay the hoses without kinks.
The 18 mm pipe connector with the designation "In" (upper connection)
should be connected directly to your building water connection. It serves
to fill the measuring apparatus. The device has an internally integrated
pressure reducer that is permanently set to 1.5 bar.
In order to ensure that the rinsing process can be completed properly, you must therefore provide at least 2 bar from your water supply.
If you connect the supply connection "In"
• with demineralised, filtered water or
• a liquid storage tank
that supplies a pressure less than 2 bar, more liquid will be discharged
than can be supplied. In this case, you must reduce the cross section of
the discharge hose (e.g. with hose clamps) until the rinsing process
once again functions properly.
Reduction of the discharge hose cross section always leads to a
less effective cleaning because the liquid in the ultra-sound bath
no longer discharges completely and is therefore only diluted further. This increases the risk of residues in the sample and therefore
carry-over.
The hose connections must be connected pressure-tight with hose
clamps.
You should check the position of the supply hoses in the device before
the first measurement. To do this, move the cell from the top to the bottom position.
Risk of injury:
A risk of injury by pinching exists for the operator while the positioning drive is operating and the door is open.
Movement of the measuring cell is initiated according to the setting of
the measuring range: e.g. if the smallest measuring range is selected,
the measuring cell moves to the upper stop. When the largest measuring
range is set, it moves to the lower end point. Select "Background Measurement" and press "Start Measurement". The measuring cell moves.
Instructions for selecting the program and adjusting the settings can be
found in the software manual.
"analysette 22" NanoTec / MicroTec
Seite 29
4.2
Selection of the Liquids
The measuring liquid in the device (supply and measuring unit) only
comes into contact with materials that are largely chemically resistant.
Certain organic liquids or saturated inorganic salt solutions may be used
briefly without damaging the device.
(The measuring fluid comes into contact with stainless steel, glass, Teflon, Viton (FPM and FKM) and PA60 (Nylon)). The standard connection
hoses are made of Viton.
For measurement of samples not compatible with water, an appropriate
liquid can be selected from the following list:
• Mono-, di- or tryhydric alcohols (except for methanol), e.g.
ethyl alcohol, isopropyl alcohol, glycol or glycerine
• Benzines (petroleum ether, test benzine, kerosine),
• Mineral and organic oils such as petroleum and soy oil, nut
oil, olive oil
• Cyclic aromatic compounds / ring hydrocarbons (toluene only
briefly - rinse out after the measurement)
• Alkanes
• (Hexane, heptane only briefly - rinse out after the measurement because the connecting hoses will be damaged.)
• Formaldehyde
• Saturated solutions of inorganic salts
Before the planned use of other measuring fluids, the factory must
first be consulted.
In principle, we warn against the use of liquids that are explosive,
combustible or hazardous to health - they cannot be recommended.
The above summary serves only to indicate the chemical compatibility of the device in relation to liquids.
The measuring device and dispersing units are not designed with
explosion protection.
The liquid consumption is significantly reduced through the use of the
small quantity dispersing unit.
The following may not be used:
Ketones (acetone, propanone, butanone, cyclohexanone),
Ether, fluorochlorohydrocarbons,
Amines, freon 21-32, methanol, aniline, benzene
Chlorohydrocarbons such as ethanoic acid and their derivitives,
undiluted acids and bases.
When using measuring liquids hazardous to health, always follow
the applicable safety regulations (MAK values) and place the measuring unit and dispersing units in ventilated safety zones if required.
"analysette 22" NanoTec / MicroTec
Seite 30
4.3
Cleaning
4.3.1 Cleaning the Device
The device can be wiped with a moist cloth or the micro-fibre cloth from
the accessory case.
Do not allow any liquids to flow into the device.
4.3.2 Cleaning the Measuring Cell
The measuring cell has angled surfaces on the side facing the detector
so that light can leave the measuring cell even with large diffraction angles. The window on this side is firmly attached to the metal of the
measuring cell. The opposite window is loosely inserted into a slot in the
measuring cell and can be removed for cleaning.
4.3.2.1 Service Position
In the "Setup" program under "NanoTec / MicroTec Control Window",
select the item "Service Position". The measuring cell is then moved to
the opening area of the doors and the measuring cell is swivelled to the
outside so that it is located outside the device. This prevents any liquid
used during cleaning from flowing into the device.
4.3.2.2 Preparation
Lay out the following:
• Tool for cell disassembly
• Measuring cell storage tool
"analysette 22" NanoTec / MicroTec
Seite 31
Assemble the tool for disassembly of the measuring cell and place the
cell storage tool in a handy location.
4.3.2.3 Preparation
In the "Setup" program under "NanoTec / MicroTec Control Window",
select the item "Open 4/2-way valve to discharge". The liquid in the system then drains out.
"analysette 22" NanoTec / MicroTec
Seite 32
4.3.2.4 Disassembling the Measuring Cell
Although the measuring circuit should now be completely without liquid,
it may be that residual liquid remains in the measuring cell itself. Therefore, you should have a paper towel or something similar ready to directly collect any liquid escaping.
Unscrew the four screws on the underside of the measuring cell. Be
careful to hold the bottom parts of the measuring cell and the front
measuring cell glass firmly while doing so.
Attention:
After removing the last screw, the top measuring cell glass falls
onto the lower part. If the measuring cell is very dirty, it is possible
that you must also apply light pressure from above (with paper
towel).
"analysette 22" NanoTec / MicroTec
Seite 33
Place the flange on the cell storage tool.
Attention:
NEVER place the lower part of the measuring cell with the glass
face down on an unprotected surface. This could scratch the optical glass or destroy the anti-reflex coating. This can make your entire measuring cell unusable.
Place the loose window with the outside down on the optical paper.
"analysette 22" NanoTec / MicroTec
Seite 34
4.3.2.5 Cleaning
It is normally sufficient to rinse the measuring cell with a clear liquid. To
remove stubborn residues, you can also add a cleaning agent to the
cleaning liquid. Usually a few drops of a surface-active household
cleaner (cleanser e.g. Pril™ or liquid soap) is sufficient.
Mechanically adhering contamination can be rinsed out with the addition
of approx. 2 g of fine abrasive. (Household abrasive ATA™, VIM™,....).
Oily residues can be rinsed out with a slightly alkaline cleaning agent.
It can be necessary over time to clean the insides of the measuring cells
as well. This is necessary if, with the measuring cell all the way to the
left (with activated laser beam), you see many small points of light on the
insides of hte window that cannot be removed by rinsing multiple times
or if the window has become matte.
In the "Setup" program, under "Control NanoTec", select the button
"Park Position". The measuring cell is then moved to a distance of
approx. 150 mm so that it is located in the area of the door opening. If
the measuring cell was swivelled into the laser beam path, it is now
swivelled out to a park position.
In the "Setup" program, under "Control NanoTec", select the button
"Service Position"; this swivels the measuring cell out of the device and
you can perform the necessary steps outside of the device.
4.3.2.6 Cleaning the Window
4.3.2.6.1 Loose Window
Before disassembling the measuring cell and cleaning the windows, the
spacer disk and the seal rings, place a spray bottle with distilled water
and the "lens cleaning paper" from the accessory case on a clean work
table.
Great care is required for cleaning the windows. The windows may only
be touched by hand on their edges.
"analysette 22" NanoTec / MicroTec
Seite 35
The following window cleaning method has proven successful:
Rinse the window using the spray bottle of
distilled water until no large contamination is
visible. Then place the special paper against
the inside of the window and moisten it with
distilled water and one drop of tenside (Pril)
so that the paper adheres to the glass surface.
To "wipe off" the surface, slide the paper off
parallel to the surface without pressing the
paper against the glass.
You may need to repeat this wiping process on the glass surface with
fresh paper until contamination can no longer be seen. Sample residue
that adheres very strongly can be "softened" with a tenside (e.g. Pril™)
and very carefully wiped a little with the special paper.
Then rinse the window clean with the spray bottle and dab it off carefully
onto the dry special paper. You should carefully keep the window covered until it is installed again in the measuring cell.
The spacer disk must be handled carefully! It is manufactured to be
plane-parallel with an extremely low tolerance and may not be subjected
to any mechanical stresses. A bent spacer disk cannot be used. You can
rinse the spacer disk under flowing water. Brush off any adhering particles very carefully with a soft brush.
The seal rings can be rinsed under flowing, particle-free (distilled) water
and then dried with lint-free, soft paper.
Assembly of the measuring cell is performed in reverse order: insert the
loose glass with the bluish shimmering anti-reflex coating to the outside (arrows are located on the window edges, see picture, arrow tips
pointing to the outside, to the anti-reflex layer).
You can identify the anti-reflex layer by
holding a window at an angle to a fluorescent lamp. If you see the inner border of the
window shimmer in a bluish colour, the reflex layer is facing up. The coated side is
also marked with an arrow on the edge of the glass.
If the inner border appears whitish, the reflex layer is facing down because the light entering into the window does not appear coloured by the
anti-reflex layer. Then position the spacer disk such that the sample
supply and discharge is not covered - then carefully place the two halves
of the measuring cell together. The screws must be tightened carefully in
a cross pattern.
"analysette 22" NanoTec / MicroTec
Seite 36
You must take care that you "close" the two halves evenly with the four
screws. The spacer disk situated between the two windows holds the
windows in an exactly parallel position. Any contamination remaining
between the windows and the spacer disk must absolutely be removed first. A particle remaining between the glass and the spacer disk
can lead to breaking of a glass when screwing the cell together! It also
prevents the windows from being perfectly parallel.
When moving or sliding the measuring cell to adjust the measuring ranges, the calibration of the laser is disrupted by unparallel
windows. (The calibration is no longer valid for the entire adjustment range of the measuring cell due to the prism effect of the
unparallel measuring cells.)
4.3.2.6.2 Flange Window
The same applies to the window attached in a fixed position with the
metal flange as for the loose window. Handle the optical surfaces very
carefully.
"analysette 22" NanoTec / MicroTec
Seite 37
Also clean all metal surfaces and seals very well. Adhering grains can
lead to the window not being optimally installed and the laser beam is
brought out of calibration by moving of the measuring cell. In extreme
cases, a glass can even break during installation.
4.3.2.7 Installing the Measuring Cell
After you have cleaned both windows and cell halves, you must install
the measuring cell again. Lay the loose glass in the direction of the
channels on the flow disk.
The groove in the picture above perfectly matches the groove in the opposite flange of the measuring cell. Take care to ensure correct positioning.
"analysette 22" NanoTec / MicroTec
Seite 38
Do NOT tighten any screw all at once! Turn the screws a little tighter in
alternation until all screws are tight. If you tighten the screws unevenly,
the windows may break.
4.4
Filling the Measuring Cell
4.4.1 Liquid Dispersing Unit
Select the measurement process "Rinse Before Measurement" and
press "Start Measurement". The ultra-sound bath then rinses itself and
fills itself with clear measuring fluid. The fill level sensor automatically
closes the valve.
4.4.2 Filling the Measuring Cell When Using the
Small Quantity Dispersing Unit
Emptying and filling of the small quantity dispersing unit is performed
manually.
Turn the valve lever to "Drain/Fill". With the supply opened, fresh suspension liquid then flows into the glass container through the connected
"In" hose. The liquid level rises while the pump is switched off.
"analysette 22" NanoTec / MicroTec
Seite 39
4.5
Setting the Measuring Range for Calibration
The calibration of the laser beam is performed with the measuring cell in
a middle position (approx. 200 mm). Inspection of the calibration takes
place at the positions 385 mm (MicroTec: 290 mm) and 9 mm.
If you enter "Set Measuring Range", change the measuring cell distance and close the dialog with "OK", the measuring cell does not
move immediately but only after you have started a new measuring
cycle with "Start Measurement". You can directly halt this with
"Stop Measurement".
To inspect the calibration at 20 and 385 or 290 mm, simply activate
a multiple measurement in Set Measuring Range with 20 mm and
385 or 290 mm. Select "Background Measurement" and press
"Start Measurement". The measuring cell is then moved to the respective positions.
"analysette 22" NanoTec / MicroTec
Seite 40
4.6
Mounting instructions Measuring Range Extension Kit “WET”
1. Configuration, Set Configuration, NanoTec/MicroTec System,
Use Option for extended Measuring Range. Please note the
software instructions.
2. Take the Measuring Extension Kit “wet” from the accessories
case and remove lens caps.
"analysette 22" NanoTec / MicroTec
Seite 41
3
1
2
3. Introduce the body of the tube with locating pin (1) into the drilling
planned for it (2) in the profile of the optical bench. Insert the
measuring range extension kit in such a way that the signature
“cell” shows towards the measuring cell. Put the rider on the
profile and tighten the knurled thumb screw (3).
4. Ready
5. For the disassembly of the measuring range extension kit proceed in reverse order.
"analysette 22" NanoTec / MicroTec
Seite 42
5
Dry Dispersing Unit
5.1
Preparing the Dry Dispersing Unit
5.1.1 Dry Dispersing Nozzle and Measuring Cell
The dry dispersing nozzle with dry measuring cell is mounted on the
right guide rail (while facing the device). This measuring cell also swivels
automatically into the beam path of the laser. To do this, select the item
"Select Dry Dispersing Unit" in the program for the NanoTec / MicroTec.
After you have selected the option Background, Adding Sample or
Measurement, the dry measuring cell swivels automatically into the
beam path after pressing "Start Measurement". If the liquid measuring
cell was swivelled in, this is automatically swivelled out first.
The sample hose, a compressed air hose and the hose for suction are
already connected to the dry dispersing unit.
5.1.2 Connecting the Measuring Device
The dry dispersing unit has rear connections for all required hoses.
Connect your external compressed air supply with the included hose (3
m compressed air hose with compressed air connector).
On the rear side of the device, you will find connectors for all electrical
connections. Connect the measuring unit to the main power supply with
the included cable.
Attention:
NEVER operate the dry dispersing unit without the vacuum. In this
case, the glasses of the measuring cell will become very dirty and
may become unusable.
Connect the control box for the vacuum to the dry dispersing unit (round
connector).
5.1.3 Compressed Air Technical Data
The compressed air must be oil-free, particle-free and dry. If this is
not the case, the measurement results will be inaccurate.
The compressed air supply must be capable of providing an air flow of at
least 7 m³/h (approx. 120 l/min).
We recommend using at least a particle, oil and water filter with a filter
effect in the micron range.
5.1.4 Connection to the Computer
Connect the measuring unit with the included 9-pin data cable to an
RS232 port of your computer.
"analysette 22" NanoTec / MicroTec
Seite 43
5.1.5 Connecting the Vacuum
Connect the control box for the vacuum to the power network and insert
the power plug of the vacuum system into the socket of the control box
(max. 16A).
Vacuums frequently produce disruptions in the power network. For
this reason, it is best to connect the control box to a different
power supply than the rest of the equipment (measuring unit, computer, etc.).
The control box of the vacuum can be delivered with an adapter so that
the various power plugs of different countries will fit.
Insert the hose of the vacuum into the connection provided for this on
the measuring device. The connection has a diameter of 40 mm, appropriate for typical commercial vacuums. Should your vacuum not fit onto
this connection, you must obtain an appropriate adapter from your local
accessory store.
5.1.5.1 Vacuum Technical Data
The following information represents the minimum guiding values to be
fulfilled and may differ depending on the vacuum used. However, the
minimum values must be fulfilled.
Power consumption:
max. 1100 Watts
Air flow:
40 l/s
Vacuum:
23kPa
Vacuum power:
270 W
Filter surface:
2400 cm²
Dust bag capacity:
9.0l
5.1.6 Setting the Pressure
A pressure reduction valve with manometer is located on the front side
of the measuring device. During the measurement, an electrical valve
opens and switches the compressed air to the nozzle.
Use the choke valve to set the pressure according to the material.
The optimal working range of the nozzle is between 3 and 4 bar. For
sensitive samples, 1 bar may already be sufficient.
Do not set the compressed air to a lower value because the system
does not function with lower pressures. A pressure that is too high produces more water in the circuit, which should be avoided. Before setting
the pressure, you must pull on the black button on the front of the controller.
"analysette 22" NanoTec / MicroTec
Seite 44
5.2
Cleaning the Measuring Cell Windows of the
"Dry Dispersing Unit"
Please check the "Beam Alignment" after about every 20 measurements
to control the light intensities. If you discover increasing channels in the
fine area (in the right section of the window toward "Beam Alignment")
with a total level of more than 50%, then the windows should be
cleaned.
5.2.1 Service Position
In the "Setup" program under "NanoTec / MicroTec Control Window",
select the item "Service Position". The measuring cell is then moved to
the opening area of the doors and the measuring cell is swivelled to the
outside so that it is located outside the device. This prevents any liquid
used during cleaning from flowing into the device.
5.2.2 Disassembly of the Measuring Cell
The cell windows consist of saphire glass. Perform the cleaning carefully, although the surface normally cannot be scratched. Because the
windows are treated on their outside surfaces with an anti-reflex coating,
you must still handle them very carefully. A scratch in the anti-reflex
coating has the same effect as a scratch in glass.
Attention:
The anti-reflex coating is very soft, even cleaning with normal paper tissues can damage the windows.
Always use lens cleaning paper from the accessories case.
Take the required tool from the accessory case and lay it ready.
"analysette 22" NanoTec / MicroTec
Seite 45
The next picture shows the service position of the dry measuring cell.
Remove the two screws on the upper cover plate of the dry measuring
cell.
"analysette 22" NanoTec / MicroTec
Seite 46
Remove the upper cover plate and the upper measuring cell window.
Then you can remove both ceramic end pieces that are inserted as parallel stops for the measuring cell windows.
"analysette 22" NanoTec / MicroTec
Seite 47
Now clean the upper window. The cleaning process is the same as described for cleaning of the liquid measuring cell.
Now unscrew the front screw of the cover plate facing down.
Only loosen the rear screw. You can then turn the lower cover plate
around this screw to be able to remove the lower glass.
Attention:
When turning the cover plate, make certain that the window does
not fall out of the holder.
"analysette 22" NanoTec / MicroTec
Seite 48
Now clean the lower window. The cleaning process is the same as described for cleaning of the liquid measuring cell.
There are no seals to be cleaned in the dry measuring cell. The seal is
created by the metal-metal, glass-metal and glass-ceramic surfaces.
Above all, make certain that no dust particles are located on the ceramic
surfaces. All surfaces must be perfectly clean.
Dust particles on the surface cause the measuring cell to no longer
function properly and the beam loses its calibration upon moving
of the measuring cell.
5.2.3 Assembly of the Measuring Cell
Reassemble the measuring cell in reverse order.
"analysette 22" NanoTec / MicroTec
Seite 49
5.3
Measuring with the „Dry Dispersing Unit“
After the measurement starts, the vacuum above its control cabinet is
first switched on. Then the compressed air and finally the vibration dosing channel is switched on. To stop the measurement, repeat the steps
in reverse order. The dosing channel does not operate during the background measurement.
The background measurement takes about 20 seconds because the
measuring cycle is always cleaned first. Immediately after the "background measurement" and still before the actual measurement, the dosing channel is switched on and regulated such that the previously configured value for the beam absorption is maintained. After the measurement is completed, the data is then automatically loaded and the particle
size distribution calculated.
The vibration dosing channel automatically sets the "dosing rate" as a
vibration amplitude and the "quantity" as a distance between the funnel
and the vibration channel. The quantity is set as low as possible and the
dosing rate as high as possible. This ensures the supply of a thin sample layer to the nozzle and results in optimal conditions.
The dry dispersing unit is a fully automatic system.
To apply initial settings to the dosing, select the functions "Setup",
"NanoTec / MicroTec Control Window" to configure specific settings. These settings are overwritten during the measurement.
With an absorption setting of 2 to 5 per cent, the vibration dosing channel supplies as much sample material as possible to fulfill this requirement. First the quantity is increased, and after the value 6 is reached,
the amplitude is also increased by steps of one. The settings for this
measurement are saved in the results file and can be reloaded.
"analysette 22" NanoTec / MicroTec
Seite 50
To add sample material, add your sample material into the funnel. After
clicking on "Start Measurement", the measurement is performed.
The sample moves forward on the dosing channel. Because at the beginning no sample is conveyed into the laser, it may occur that the
measuring device control quickly increases the transport rate. However,
this is very quickly corrected when sample is first transported.
Observe the flow behavior of the sample. For samples that do not flow
well, you should further configure the limits of the beam absorption.
Samples that flow well can be measured, for example, with a minimum
beam absorption of 2% and a maximum beam absorption of 3%. The
more difficult the sample is, the more you should extend the limits, for
instance, up to a maximum beam absorption of up to 6%.
The fluctuations that you permit in this way directly affect the reproducibility of your measurement. If you would like to keep the
limits low with a sample that does not flow well, you need significantly more sample!
"analysette 22" NanoTec / MicroTec
Seite 51
5.4
Mounting instructions Measuring Range Extension Kit “Dry”
1. Configuration, Set Configuration, NanoTec/MicroTec System,
Use Option for extended Measuring Range. Please note the
software instructions.
2. Take the Measuring Extension Kit “dry” from the accessories
case and remove lens caps.
"analysette 22" NanoTec / MicroTec
Seite 52
3
1
2
3. Introduce the body of the tube with locating pin (1) into the drilling
planned for it (2) in the profile of the optical bench. Insert the
measuring range extension kit in such a way that the signature
“cell” shows towards the measuring cell. Put the rider on the
profile and tighten the knurled thumb screw (3).
4. Ready
5. For the disassembly of the measuring range extension kit proceed in reverse order.
"analysette 22" NanoTec / MicroTec
Seite 53
6
Accessories
6.1
"analysette 22 WINDOWS" Program
With the software package "analysette 22 for WINDOWS", all functions
of the COMPACT, COMFORT, ECONOMY NanoTec and MicroTec versions can be programmed and controlled (see user manual "analysette
22 for Windows").
6.2
Small Quantity Dispersing Unit
6.2.1 Connection of the small volume dispersing
unit
The small quantity dispersing unit is connected directly to the measuring
cell in the measuring device. It has four hose connections labelled with:
• "FROM CELL"
• "TO CELL"
• "IN"
• "OUT".
"FROM CELL" and
"TO CELL" must be connected with the measuring cell.
Connect the tube with
the red label Æ to cell
"IN" on the dispersing unit serves to fill the measuring apparatus and is
connected either to a central supply line with, for instance, demineralised, filtered water, or to a storage tank with measuring fluid.
"OUT" serves to discharge the measuring and rinsing fluid;
Attention:
The maximum water pressure in the device is 0.5 bar !
"analysette 22" NanoTec / MicroTec
Seite 54
6.2.2 Small volume dispersing unit for manual
change of the measuring cell "liquid"
For the conversion to the small volume dispersing unit you need to perform the following steps:
1. Drain off the hole system (please see chapter 4.3.2.3 "Preparation")
2. Put the liquid measuring cell to the "park position" (please see
chapter 4.3.2.5 "Cleaning")
3. Release the tubes from the liquid measuring cell and press
the delivered plastic stoppers (3) on the tube openings.
3
3
4. Release the screws (1) at the holding device (2) with the delivered tools.
1
2
5. Put the liquid measuring cell on the measuring cell holder (4).
The tubes stay in the instrument.
4
"analysette 22" NanoTec / MicroTec
Seite 55
6. Then put the small volume dispersing unit on the hood space
on the right hand side of the tower housing.
1.
7. Put the tubes with the measuring cell behind the tower housing on the left hand side of the instrument, where the holes for
the plug-in of the measuring cell tubes are located.
8. Now take the measuring cell of the small volume dispersing
unit and fix it with the screws (1) to the holding device (2)
1
2
9. Then plug the tubes which lead to the measuring cell of the
small dispersing unit through the holes which are located at
the side of the housing.
Please pay attention to the position control clips.
10.The connection of the small volume dispersing unit is effected
as described in chapter 6.2.1. "Connection of the small volume dispersing unit"
"analysette 22" NanoTec / MicroTec
Seite 56
7
Maintenance
The analysette 22 NanoTec and MicroTec requires no maintenance
apart from the regular cleaning.
Before starting the work in the device, switch off the measuring
device and unplug the power cord!
8
Warranty
The warranty card enclosed with the device upon delivery must be completely filled out and returned to the delivering factory so that the warranty can enter into effect. The company FRITSCH GmbH Laborgerätebau, Idar-Oberstein and its "Technical Application Laboratory" or the
corresponding national representatives will be glad to offer advice and
assistence.
Indication of the serial number imprinted on the type plate is required
with any questions.
9
Troubleshooting
9.1
Error List
Error
Lamp
Does not light
9.2
Possible Cause
Power connection
missing
Main switch
Mains fuse
Remedy
Plug in the power plug
Switch on the main switch
Replace the mains fuse
Transferability of Measurement Results
If a measurement of particles is intended to determine which of their
assumed properties are true, the measurer is not only an observer and
the measuring device is not only his tool; rather, both participate actively
in the process. In the determination of particle size distributions, both are
active in generating the result and determining its nature.
In the development of measuring devices, the designer strives to eliminate the influence of the operator as much as possible. However, the
effects of the physical measurement process applied and its realisation
in the device cannot be ignored.
If, for instance, particle size distributions are determined according to the
sedimentation process (scanning photo sediment graph "analysette 20")
and through the evaluation of a diffraction image, results that differ
slightly from each other must be expected at the least.
In the measurement of particle sizes through the analysis of a diffraction
image, all dimensions of irregular particles are "seen" and correspondingly taken into account in the result. For instance, the longitudinal extent of needle-shaped samples are also determined here. In a comparison or the transfer of particle size distributions from various measuring
processes, the particle shape must be taken into consideration.
"analysette 22" NanoTec / MicroTec
Seite 57
9.3
Selection of Liquids for Suspensions
Because the measuring fluid in the entire device can come into contact
with materials that are not chemically resistant, certain organic liquids or
saturated inorganic salt solutions cannot be selected. (The measuring
fluid comes into contact with stainless steel, glass, Teflon, Viton (FPM
and FKM) and PA66 (Nylon). The standard connection hoses are made
of Viton.)
Only water is approved by Fritsch as a suspension liquid for the
dispersing unit.
Before the planned use of other measuring fluids, the factory must first
be consulted. For measuring samples incompatible with water, a liquid
can be selected from the following list:
In principle, the use of explosive or flammable liquids is forbidden they may not be used.
The following summary serves only to indicate the chemical compatibility of the device in relation to liquids.
Mono-, di- or trihydric alcohols (except for methanol, ethyl alcohol,
isopopyl alcohol, gylcol or glycerine),
Mineral and organic oils such (petroleum and soy oil, nut oil, olive oil)
Before the planned use of other measuring fluids, the factory must first
be consulted.
The following may not be used:
Ketones (acetone, propanone, butanone, cyclohexanone),
Ether, fluorochlorohydrocarbons,
Amines, freon 21-32,
Methanol, aniline, benzine
Chlorohydrocarbons
Ethanoic acid and its derivatives,
Undiluted acids and bases.
Even samples present in oil (e.g. oils similar to machine oil) do not also
have to be measured in oil.
Example: Toner in machine oil
The sample is first dispersed in ethylene glycol with a drop of tenside
(Pril) in the ultra-sound bath. Then a mixture is created 1:1 with water
and this is added to the ultra-sound bath of the laser particle sizer "analysette 22".
Example: Raw cocoa mixture
Raw cocoa mixture is typically measured in acetone or benzine (known
from the sieving process). Measurement in the "analysette 22" can also
be performed in peanut oil, for instance. Because peanut oil is suitable
for use with food, the waste oil can also be used as a lubricant on the
rollers, solving the disposal problem.
"analysette 22" NanoTec / MicroTec
Seite 58
Example: Weakly magnetic materials
In general, particle size distributions of magnetic substances cannot be
measured in suspensions due to the mutual attraction of the individual
particles. However, due to the high sensitivity of the "analysette 22", very
low concentrations - in other words relatively large distances between
the individual particles - can be used on one hand, and on the other,
substances can also be suspended with high viscosity liquids due to the
high power of the centrifugal pump.
If larger particles or particles with higher density must be measured, the
share of glycerine can be increased up to a ratio of 7:3. In general, liquids up to a viscosity of 30 cPoise can still be pumped without problems
by the pump system of the dispersing unit.
9.4
Dispersing of Poorly Wettable Samples
Hydrophobic samples can be dispersed despite their water-repulsing
properties if they are first mixed into a paste with a fluid tenside (Pril)
and then dispersed in water under constant stirring.
Agglomerates are also dispersed more easily and more quickly in an
ultra-sound bath because the entire sample is subjected to the ultrasound. In the circuit of the dispersing unit, only the quantity in the bath is
in the area of the ultra-sound.
For soil samples, 0.1 - 0.5% sodium pyrophosphate solution is recommended as a dispersing aid, for example. The sample prepared in this
way in an ultra-sound bath (e.g. "laborette 17" can be measured in pure
water.
9.5
Measurement of Weakly Soluble Samples
Even samples that are weakly soluble in liquid can be measured with the
laser particle sizer "analysette 22". To do this, preparation of a saturated
measuring liquid is recommended. In this liquid, the particle size cannot
change by dissolving - the measurement results therefore remain inaccurate. (However, the saturated solution must be filtered before use.)
For very expensive products, it is sometimes worthwhile to identify a
replacement substance that takes over the task of "saturating" the
measuring liquid.
"analysette 22" NanoTec / MicroTec
Seite 59


