1
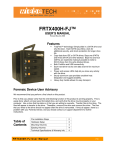
WiebeTech LLC
2.
Take a moment to familiarize yourself with the parts of the RTX100-INT. This will help you to
better understand the remaining instructions for this TrayFree Standard Bay.
Front View
Key lock
Power LED
Access LED
Rear View
Shock absorbing sides
Ejection handle
SATA power connection
SATA connection
All RTX TrayFree Bays accept 1TB SATA
drives, have power and access LEDs, and
connect to the host via a SATA connection.
3.
Mount RTX100-INT into your computer. In an open 5 ¼” bay in your computer, install the RTX-100INT just as you would a CD/DVD ROM.
4.
Plug in the data cable. The RTX100-INT connects to your
computer through SATA. One end of the cable connects to the back
of the unit. Insert the other end into an available port on your
computer’s motherboard or add-in card.
5.
Plug in the power. Take an unused 4-wire Molex power
connector from inside your computer and attach that to the adapter
cable that is included in the packaging. There is a 4-wire power
cable coming off of the adapter cable that plugs into the bridge
board (circled in red) on the back of the unit. This bridge board is
what powers the LEDs.
RTX100-INT User Manual
-2-