1
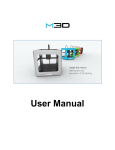
Boardroom User Manual (EN) v1.0 13/05/2014 v2.0 06/11/2014 Effacts: Boardroom User Manual THE SPECIFICATIONS AND INFORMATION REGARDING THE PRODUCTS IN THIS MANUAL ARE SUBJECT TO CHANGE WITHOUT NOTICE. ALL STATEMENTS, INFORMATION, AND RECOMMENDATIONS IN THIS MANUAL ARE BELIEVED TO BE ACCURATE BUT ARE PRESENTED WITHOUT WARRANTY OF ANY KIND, EXPRESS OR IMPLIED. USERS MUST TAKE FULL RESPONSIBILITY FOR THEIR APPLICATION OF ANY PRODUCTS. THE SOFTWARE LICENSE AND LIMITED WARRANTY FOR THE ACCOMPANYING PRODUCT ARE SET FORTH IN THE INFORMATION THAT WAS HANDED WITH THE LICENSE AGREEMENT OF THIS PRODUCT AND ARE INCORPORATED HEREIN BY THIS REFERENCE. IF YOU ARE UNABLE TO LOCATE THE SOFTWARE LICENSE OR LIMITED WARRANTY, CONTACT YOUR EFFACTS REPRESENTATIVE FOR A COPY. IN NO EVENT SHALL EFFACTS OR ITS SUPPLIERS BE LIABLE FOR ANY INDIRECT, SPECIAL, CONSEQUENTIAL, OR INCIDENTAL DAMAGES, INCLUDING, WITHOUT LIMITATION, LOST PROFITS OR LOSS OR DAMAGE TO DATA ARISING OUT OF THE USE OR INABILITY TO USE THIS MANUAL, EVEN IF EFFACTS OR ITS SUPPLIERS HAVE BEEN ADVISED OF THE POSSIBILITY OF SUCH DAMAGES. 2 Effacts: Boardroom User Manual Contents 1 Login details ............................................................................................................................. 5 2 Boardroom App (iPad).............................................................................................................. 6 2.1 Logging in ......................................................................................................................... 6 2.2 Meeting ............................................................................................................................ 8 2.2.1 Agenda items and documents (annexes) ............................................................... 10 2.2.2 Annotations (Notes) ................................................................................................ 13 2.3 3 General Settings (Boardroom App) ................................................................................ 23 Web application (Online Backoffice) ...................................................................................... 24 3.1 Users ............................................................................................................................... 26 3.1.1 Administrators ........................................................................................................ 26 3.1.2 User (Secretary & Committee member) ................................................................. 26 3.2 Registering new users (NEW: LOGIN) ............................................................................ 28 3.3 Registering new committees (NEW: COMMITTEE) ........................................................ 29 3.4 Creating a new meeting (NEW: MEETING) .................................................................... 30 3.4.1 (Sub)Agenda items .................................................................................................. 31 3.4.2 Meeting documents (labelled Annex in the web application) .............................. 33 3.4.3 DocumentViewer .................................................................................................... 34 3.4.4 Additional Boardroom meeting functions .............................................................. 39 3.5 Reports ........................................................................................................................... 40 3.5.1 3.6 4 Create reports ......................................................................................................... 40 General functions (Effacts) ............................................................................................. 44 Effacts Support ....................................................................................................................... 46 4.1 Weblinks ......................................................................................................................... 46 4.2 Effacts Support contact information .............................................................................. 46 3 Effacts: Boardroom User Manual Dear Boardroom user, Your organisation has chosen Effacts Boardroom, a digital meeting application. This document aims to familiarise the user with the functionalities of this meeting solution. The meetings that will be visible to you in the Boardroom App (iPad) and the Boardroom Web application depends on: Your user rights for Effacts Boardroom; The Board(s) / Committee (s) of which you are a member and their related meetings; Meetings to which you (apart from your own committee) are invited to parttake. We wish you much productivity and we are convinced that you have made a good decision towards flexible, useful and secure meetings by using Effacts Boardroom. 4 Effacts: Boardroom User Manual 1 Login details Only the Boardroom Administrator of your organization is authorized to create new login accounts and provide new passwords. You will receive your password via: a) An automatically generated email from Effacts Boardroom which provides you with a temporary password. By clicking on the link in the email, you will go to a new screen, (Figure 1.1) where you can change this password to your preferred version. b) A message from your Boardroom Administrator with your login details. Figure 1.1 Change password screen The first time you are using Boardroom and login, you will be asked to submit your temporarily (current) password and a new password: Via the webbrowser you immediately will be directed to the change password screen 5 Effacts: Boardroom User Manual 2 Boardroom App (iPad) The Boardroom App can be downloaded via the App Store. After installation on your iPad you can start. To start a meeting you need to log into the Boardroom App using your Username and Password 2.1 Logging in When you use the Boardroom App for the first time, use will need to register a new Database on your iPad - once only. This is done by clicking on the + (plus sign) on the start screen - once only. (Figuur 2.1). Figuur 2.1 Login screen Boardroom App (iPad) first time access As soon as you have entered the correct login details, select your own Boardroom title and click on GO. 6 Effacts: Boardroom User Manual After completing the above steps, you will see the following screen every consequent time when you log in (Figure 2.2). Now you only need to enter your Password and then click on Login. Figure 2.2 Login screen Boardroom App (iPad) When a Database is being added in a wrong manner it is also possible to delete a Database. You should always keep in mind that deleting a database also involves deleting all the annotations made in the specified database. To delete a database you swipe the concerned database to the left, by doing this a delete button appears (Figure 2.3). NOTE: If you wish to use Boardroom for additional organisations, you will need to click on the + sign again and repeat the steps in ‘1.1 log-in’. Registrations are linked to the Database. 7 Effacts: Boardroom User Manual Figure 2.3 Login screen Boardroom App (iPad) with Database delete function 2.2 Meeting Once you have logged in successfully, you can commence meetings using the Boardroom App. The home screen for Boardroom is split into two halves (Figure 2.4). Left Here you will find past and future meetings plus the archive. You can switch between these two lists by clicking on “Meetings” or “Archive” (selected label will turn blue) Right This side of the screen displays meeting documents after you have selected the meeting from the left side of the screen along with its documents. It is also possible to bring up the “Online backoffice” via the right screen by clicking on “switch to your online backoffice” (blue text). NOTE: The annotations you make are saved locally to your iPad and linked to the Database that you selected from the list. If you set up more than one Databases for the same organisation, it is possible that your notes are spread over Databases with the same name. Removing one of these Databases or one user account from the list then means that any linked notes / annotations will also be removed. 8 Effacts: Boardroom User Manual Figure 2.4 Home screen Boardroom App 9 Effacts: Boardroom User Manual Your meeting commences and you want to refer to meeting documents. After selecting the relevant meeting, you can see its agenda items and related documents in the meetings screen (Figure 2.5). Figure 2.5 Boardroom App meetings screen 2.2.1 Agenda items and documents (annexes) Meetings include ‘Agenda items’ and related documents (annexes). When selecting certain documents, they will appear in the right hand section of your screen. You can also visualise documents in full screen mode by using the HIDE / SHOW buttons, to display and hide them. (both buttons are at the bottom of the screen. Documents that have already been referred to can be marked as “read”. To do this place a green tick in the tickbox next to the selected document. As soon as a new document replaces the old one, the green tick will disappear. 10 Effacts: Boardroom User Manual It is possible to display a document using the entire screen of your iPad by hiding the meetings list. To do this, select the > Hide button at the bottom of your screen. With this full view activated you can choose to view the document with the iPad in horizontal or vertical position (Figure 2.6 and Figure 2.7). Figure 2.6 Boardroom meetings with separate document screen 11 Effacts: Boardroom User Manual Figure 2.7 Boardroom document in full view modus 12 Effacts: Boardroom User Manual 2.2.2 Annotations (Notes) Annotations can be added to documents. After selecting the document, notes functionalities appear (at the bottom of the screen). There are five ways of adding annotations to a document. Selection of a functionality results in a ‘Pop-up menu’ to allow the notes/ annotation to be entered. Marking text (Figure 2.8) Drag your finger across the text to highlight it. Select the desired colour and select “Done” to apply. The annotations menu for the Marking -function has three buttons. Colour: to change a colour, appearance or line thickness Scroll: to activate the scroll/sleep function Cancel | Done: to cancel an annotation before you start or to save the entry. Figure 2.8 Marking text 13 Effacts: Boardroom User Manual The notes / annotations change menu for the ‘marking text’ function has four buttons. (Figure 2.9) Note: to add a (popup) text balloon to your notes Colour: to change the colour, visibility and line thickness Delete: to remove the annotation/ note Cancel | Done: to cancel the note before you start or to keep the entry. Figure 2.9 Marking text (alterations) The marked or highlighted text area can be adjusted by changing the position of the blue pin. 14 Effacts: Boardroom User Manual Drawing on meeting documents (Figure 2.10) Drag you finger across the screen to draw a freehand line. Various line thicknesses and colours can be selected. The menu for the Drawing function has six buttons. Color: to change colour, visibility or line thickness Undo: to undo the most recent entry Redo: to retrieve the most recent ‘undone’ entry Erase | Draw: to swith between the draw and erase functions. The erase function allows you to ‘rub out’ an entry as per pencil eraser. Cancel | Done: to remove a note before you commence or to confirm the entry. Figure 2.10 Drawing 15 Effacts: Boardroom User Manual The change menu for the Drawing function has five buttons (Figuur 2.11) Note: to add a (popup) textballoon to your notes Color: to change the colour, visibilty and line thickness Resize: to change the size or to rotate a note Delete: to remove the note / annotation Figuur 2.11 Drawing (changes) 16 Effacts: Boardroom User Manual Underlining text (Figure 2.12) Drag your finger across the screen to underline text. Various line thicknesses and colours can be chosen. The menu for the Underline function has three buttons. Color: to change line colour, visibility and thickness. Scroll: to activate the scroll/sleep function Cancel | Done: to cancel the note before you start, or to confirm the entry. Figure 2.12 Underlining text 17 Effacts: Boardroom User Manual The change menu for the Underline function has four buttons. (Figure 2.13) Note: to add a (popup) text balloon to notes Color: to change the colour, visibility and thickness of the lines Delete: to remove the note / annotation Cancel | Done: cancel the annotation before you begin or confirm the entry. Figure 2.13 Underlining text (changes) The underlined text area can be adjusted by moving the blue pins. 18 Effacts: Boardroom User Manual Adding notes (Figure 2.14) Tap on the location in the document to which you want to add a (popup) note in the form of a text balloon. Figure 2.14 Adding notes 19 Effacts: Boardroom User Manual The annotations (changing) menu for the notes function has four buttons. (Figuur 2.15) Note: to add a (pop-up)note Color: to change the colour, visibility and thickness of lines Delete: to remove the annotation Cancel | Done: cancel the annotation before you start or confirm the entry. Figuur 2.15 Notitie toevoegen (wijzig) By clicking on the text balloon, an orange coloured balloon will appear with a textbox for you to type in your text, using the iPad keyboard. You also have the option of temporarily moving the text balloon to another location in the document to continue working. To do this, use the thumbtack; pin it to the balloon and hold it to drag the balloon. Use the screen fold up function – to the right of the thumbtack – to see the balloon only. You can make the note appear again by clicking on the balloon. 20 Effacts: Boardroom User Manual Adding text (Figure 2.16) Tap on a location in the text where you wish to enter text. The notes changes menu for the Typing function has six buttons. Edit: to alter text (boxes) Color: to change the colour, visibility and thickness of lines Font: to change font, font size, outline and font colours. Resize: to resize the annotation Delete: to remove the annotation Figure 2.16 Adding text You can adjust the size of text boxes by dragging the edges / corners together or further apart. 21 Effacts: Boardroom User Manual NOTE: The annotations you make are saved locally to your iPad and linked to the Database that you selected from the list. If you set up more than one Databases for the same organisation, it is possible that your notes are spread over Databases with the same name. Removing one of these Databases or one user account from the list then means that any linked notes / annotations will also be removed. 22 Effacts: Boardroom User Manual 2.3 General Settings (Boardroom App) Via the general settings you are able to set specific settings on the iPad (Figure 2.17) Figure 2.17 General Settings Boardroom App ● Sorting appointments: ○ Ascending/Descending order; sorted by sorting term ○ Sorting Field Index (numerical)/ Time (meeting times) ● Boardroom settings: ○ Timeout: automatic log out afetr a set time (minutes) ○ Sync docs: downloads all documents at login or swipe of meeting list ○ Backup: with backup left on, Boardroom data (Database files and annotation information, but NOT documents) are transferred during backups. See: http://support.apple.com/kb/HT1766?viewlocale=nl_NL ● PDF settings ○ Flatten PDF: PDF exports, with annotations, occur in a format that can be read by most applications without any problems, but can cause loss of quality, and once exported cannot be adjusted. Annotations included in export when on. 23 Effacts: Boardroom User Manual 3 Web application (Online Backoffice) The web application Effacts Boardroom is used mostly by its Administrators to arrange meetings. The web application can be accessed by every webbrowser (Google Chrome, Internet Explorer, Mozilla Firefox, Safari, etc.). You log in via the webbrowser by going to https://login.effacts.com/login/. Via this web address you will find the log in screen where you can enter your Username and Password. (Figure 3.1). Should you be asked to change your password, you will see the “Change password” screen (Figure 3.2). Figure 3.1 Login screen web application Figure 3.2 Change password screen 24 Effacts: Boardroom User Manual Before you can use Effacts Boardroom for meetings, you need to create users, committees and meetings. Persons appointed by your organisation who have been granted the required access rights to the system, can by means of a simple process, set up meetings to enable these by using Effacts Boardroom. Entering new meetings is usually done using the webapplication, therefore this chapter covers the web application approach. The ‘Homepage’ format (Figuur 3.3) should simplify the setting up of a meeting. Use the header NEW to create new users, committees, and meetings. Figuur 3.3 Homepage Boardroom web-application The header OVERVIEWS allows you to find overviews of; committees, login accounts and past meetings. You also have the following functions under REPORTS; ○ pending tasks; all current actions per person per meeting ○ libraries; listing of libraries ○ custom reports; create a summary of specific information ○ other functions; system settings (for advanced users only ) The AgendaViewer shows all meetings that are scheduled during the current month/week/day, and are categorized per Committee with a color. You can filter the agenda items per Committee when you click the colored bars at the right column of the AgendaViewer. When you hit the colored bar once again the filter will be reset and all scheduled meetings will be colored. If you click on a meeting in the AgendaViewer you will be redirected to that specific meeting directly. 25 Effacts: Boardroom User Manual In the AgendaViewer you have several options to navigate: Arrows <>: Navigate through the months/weeks/days. Left for past and Right for future Today button: Navigate directly to the current month/week/day Month: Meetings in month view Week: Meetings in week view Day: Meeting in dayview Fullscreen button: The square arrow button will enable/disable the full screen mode Figuur 3.4 Navigation bar for AgendaViewer 3.1 Users Before being able to have meetings, users have to be created. Once created, these users will be able to access Boardroom for meetings by using their log in. Before we expalin how to create a user, we will cover the different types of users and their access rights. Your organisation’s appointed Administrator controls access to this application by providing users with a Useraccount, consisting of a Username and Password. The Administrators also determines which (system) access rights you will have in Boardroom. 3.1.1 Administrators Your organisation will need to allocate Administrators with the authority to be able to provide Usernames and Passwords for the use of Effacts Boardroom. Users with an Administrator account also have access to all functions of the system, including committees, meetings and documentation. Regardless of their role within a committee (committee member / Secretary), the Administrator retains unlimited user rights in the system. 3.1.2 User (Secretary & Committee member) A user only has access to Boardroom related to the committees and meetings of which they are a formal part. Their participation is determined by the role they play on the committee; Secretary or member. 3.1.2.1 Secretary (User) Secretaries of a committee or meeting can add and remove information. They are the allocated person to chair meetings of the committee(s) which they attend. The Scretary is initially appointed by the Administrator. The Secretary, once added, can make changes to the committee and to meetings. 3.1.2.2 Committee member (User) A committee member user only has access to view records of committees and meetings of which they are a formal part. The appointment of committee members is done by the Administrator or Secretary of a specific committee. Before a user can be classified as a Committee member, they must apply for a user account from the Admistrator. 26 Effacts: Boardroom User Manual Table 1 below represents the access rights associated with a login role for various committee roles in the system (the User role always applies in combination with the committee role) Access to User – committee member User - Secretary Administrator ● ● ● ● ● ● Create/ Edit committees ●/○ ● Create/ Edit meetings ●/○ ● Meetings in Effacts Boardroom App Annotations on the meeting documents in Effacts Boardroom App User Management ● System Configuration Management ● Table 1. Access Rights (RBAC) NOTE: With both a User as well as an Administrator account you can be registered as a Committee member and/or Secretary. However, with an Administrator account you maintain unlimited rights regardless of your committee role. A User account in combination with the committee role is most commonly used for users limiting to allocated committees and meetings. 27 Effacts: Boardroom User Manual 3.2 Registering new users (NEW: LOGIN) New users only and simply need to be set up on the ‘Homepage’. When setting up new users, you need to take care that their email address corresponds to the Username for logging in. (Figure 3.5) A username can only be entered once; it is not possible to make chages to this. Should a change need to be made to an email address, a new account will need to be set up for this user. ATTENTION! Remember that, when deleting an account, all of the notes /annotations related to this user are also deleted. A new user automatically gets the login status of USER. If a user needs Administrator rights, then you need to navigate to the person’s account and make the required changes via > Edit login account. To provide access to Boardroom functions, you just need to send password. To do this, choose > Mail new password (Figure 3.6). This will result in the user receiving an email which will contain an automatically generated password. The user can then login using their already known username and the automatically generated password. Once logged in, the user will be asked to set a new password. To change personal details click on > Edit person. Figure 3.5 Create person scherm NOTE: Any entries made (annotations) are stored locally on your iPad and are linked to your own Boardroom users account. The deletion of an users account means that all notes/data linked to that account are also deleted. 28 Effacts: Boardroom User Manual Figure 3.6 Personal details screen and menu options The > Other functions section is reserved for advanced users only. If you have questions about this, please contact Effacts ([email protected] or call the Effacts Support Phone Desk). 3.3 Registering new committees (NEW: COMMITTEE) A new committee is set up using the Effacts ‘Homepage’. You need to enter a name for the commitee (Figure 3.7), after which you can add a few or several committee members. Using the > More button allows you to nominate a Secretary or to add a library. (Figure 3.8). Figure 3.7 Committee set up screen Figure 3.8 Committee screen and menu options 29 Effacts: Boardroom User Manual 3.4 Creating a new meeting (NEW: MEETING) New meetings can be created in two ways: From an existing committee; by navigating from the Homescreen to ‘Committee overview/list’ and select the required committee for which the meeting will be created. From this committee location, select > NEW MEETING. The committee details will be entered automatically for you in the text input area. Directly from the Homepage; under the heading NEW, select > MEETING. The difference in this way of creating a new meeting is that you yourself need to select the related committee for this new meeting. If you choose option 2 to create a meeting, you need to self-select the committee for which a meeting is being created (Figure 3.9). Figure 3.9 Meeting creation screen 30 Effacts: Boardroom User Manual 3.4.1 (Sub)Agenda items Agenda items ensure structure in your meetings. As soon as you have created a meeting, you can set up a New Agenda. To do this, click on the New Agenda Item (Figure 3.10) button on the newly created meeting page. Figure 3.10 Meeting screen with menu options: Agenda items Sub-item: It is possible to create sub-agenda items and to add a Document tot this subagenda item. To create a sub-agenda item you use the same ‘New (sub)agenda item’ but when creating the sub-agenda item you choose ‘Yes’ at the ‘Is sub-item’ field. 31 Effacts: Boardroom User Manual Figure 3.11 Create Agenda item screen:” Is sub-item?” option Automatic numbering sub-items: The newly created sub-item(s) will be put under the last created Agenda item, it is possible to re-index the sub-agenda items if necessary. The database will automatically add the correct numbers in front of the agenda items. This function works the same for the underlying documents. Figure 3.12 Example automatic numbering of Agenda item and Sub-item 32 Effacts: Boardroom User Manual Entered (sub)agenda items can be sorted by the using “Change Agenda Index” button (Figure 3.10) which allows sorting of the items by dragging, using the cursor. (Figure 3.10). Figure 3.13 (Sub)Agenda index function 3.4.2 Meeting documents (labelled Annex in the web application) Meeting documentation, referred to as Annexes in the web application, are the documents (PDF, MS WORD, MS EXCEL, etc.) or attachments which you add to an Agenda item. You can add more than one attachments to an agenda item. Annexes can also be restructured/reindexed, as described in previous paragraph. To do this you navigate to a specific Agenda item who holds more than one underlying document. 33 Effacts: Boardroom User Manual 3.4.3 DocumentViewer Via the DocumentViewer it is possible to look into documents and add annotations. You can find the DocumentViewer under the tab page ‘Agenda Documents’. Figure 3.14 DocumentViewer example 1 34 Effacts: Boardroom User Manual Figure 3.15 DocumentViewer example 2 35 Effacts: Boardroom User Manual The DocumentViewer offers various navigation buttons and tools and are explained below: Left column: Overview of all agenda items and related documents Document button: Single page view Multi document button: Overview of all pages from the document Double arrows horizontal: Document in viewer page filling horizontal Double arrows vertical: Document in viewer page filling vertical Plus en Minus buttons: Zoom in and out Navigation document: Navigate through document Back/Forth Search bar: Search keywords in document Navigate in DocumentViewer: Navigate to previous or next document Full screen button: Full screen DocumentViewer Highlight tool: Highlight text or words in the document Create note: Add a note to the document Draw tool: Make a drawing in the document Delete tool: Deleting annotations (highlights, notes, drawings) Show annotations: Showing annotations Yes/No 36 Effacts: Boardroom User Manual Below we will describe the annotation functions more extensively: Search: With the search bar you can easily find keywords in the specific document. With the use of the left column that pops up, you can easily navigate through the document. If you keep clicking the magnifier it will navigate you through the documents based on the keyword. Figure 3.16 Search function in the DocumentViewer 37 Effacts: Boardroom User Manual Highlight: In the DocumentViewer you can highlight text and words with use of the highlight tool. You can choose 4 different colours to highlight. Hold down the left mouse button and drag your mouse over the text to highlight. Figure 3.17 DocumentViewer and highlights Note: Creating a note within the document can be done with the ‘Create note’ tool. As soon as the tool is activated you can add the note and add text to it. Your are able to reposition the note if needed. Figure 3.18 DocumentViewer and note 38 Effacts: Boardroom User Manual Draw: It is possible to make a drawing in the document with the use of the drawing tool (Figure 3.19). The drawing tool offers four colours and can easily be used by moving the pencil over the document. Figure 3.19 Draw function in DocumentViewer Delete Annotations: If you want to delete certain annotations you use the ‘Delete tool’. You simply select the annotations in the document or select the text you want to delete and hit the delete button. The system will ask for you confirmation and will delete the annotations permanent. 3.4.4 Additional Boardroom meeting functions Apart from creating a meeting agenda there are also a number of important items that you can run or add to the meeting files / dossier. (Figure 3.20): Send invite: Outlook/Agenda request Add invitee: to invite an existing user (not on this committee) to this meeting Mail agenda: To send out the agenda to committee members or others, using the CC or BCC lists (without attachments) New minutes: to enter the new meeting minutes New resolution: to enter new decisions/resolutions New task: to register one or more new tasks/actions for one or more users, with associated deadlines. Based on the dates, an automatic email Alert will be sent out from the system one week prior to the deadline. Copy meeting: use this function to create a copy of the meeting to relevant committee members (advance this to a new date) 39 Effacts: Boardroom User Manual Figure 3.20 Meeting screen with menu options 3.5 Reports Under the header “Reports” on the Homepage you will see standard and custom overviews of: Current issues: tasks carried over that still need to be actioned. Libraries: Libraries of various committees which store documents and which can only be accessed by those committee members concerned. Create report: use this to work from ‘custom’ / template reports from the database. Other functions: reserved for advanced Boardroom systems users. For questions about this please contact Effacts ([email protected] or phone Effacts Support). 3.5.1 Create reports Create report can be used to generate an overview from selected data from the Boardroom Online Backoffice and is only available to Administrators. The following steps shows how you can create a report. Select type: With ‘Create report’ you can create custom reports based on the selected type. Your user login role determines which ‘Types’ you can select to produce a report (Figure 3.21). The administrator can change this per login role if necessary. 40 Effacts: Boardroom User Manual Figure 3.21 Report: select type The angle of a Report is very important for the selection. In general, the key information needed in the Report relates to one Type. Additional information can relate to other Types. For example: A Report of ‘Agenda item’ shows other fields in comparison with type ‘Document’. View and Filter: At the next page you can define which fields need to be used in the Report and on which fields the Report need to be filtered (Figure 3.22). After selecting the type of Report, you will need to select the information you require by ticking ‘View’. If you need a subset of the information, you need to use the ‘Filter’ option. The filter options are related to the type of information. Figure 3.22 Pick fields screen 41 Effacts: Boardroom User Manual Configuration of report: Below an example from the fields on which the Report can be selected and filtered (Figure 3.23). Field ‘Subject’ will be filtered if the subjects title contains ‘test’ and the Documents of each Agenda item will be shown in the Report by ticking field ‘Annex’. Figure 3.23 Pick fields screen With the ‘show extra options’ feature you are able to add additional information of other types to the Report (Figure 3.24). You can find this feature above the Search and Cancel buttons at the top left. 42 Effacts: Boardroom User Manual Figure 3.24 Pick fields screen When the configuration of the report is done you click on the ‘Search’ button and the system will generate a Report (Figure 3.25). Report overview: Effacts offers several features within the Report: ● You are able to sort the Report by clicking on the grey title of the column. ● You are able to filter the Report by entering a key word in filter at the top of the column. ● You are able to export the Report to WORD, PDF, EXCEL, PRINT and EMAIL. 43 Effacts: Boardroom User Manual Figure 3.25 Example of a report 3.6 General functions (Effacts) This paragraph covers those functions found in all of our products as illustrated in Figure 3.26. Language setting: you have the option to switch between English and Dutch Font sizing: You can reduce font size on screen or leave it as standard. Home: Use this button to return to the Homescreen or use your organisation’s logo. Favourites: You can add the page you want to your favourites by clicking on the star icon – it will light up yellow. Use ‘favourites’ in the black bar so you can go back to this page quickly. Clipboard: You can place documents on the clipboard. By clicking on the icon, it will light up. You can then, via the black bar, mail or transfer your clipboard content to another page to which you have just moved. Switch database: If you have more than one Effacts products, you can switch between these databases by clicking on them and choosing the one you need Logging out: When you want to end your session, you need to log out so that no unwanted changes can be made by unauthorised persons. Search function: By using selected search categories and words, you can search the Effacts Database. 44 Effacts: Boardroom User Manual Figure 3.26 General Effacts functions 45 Effacts: Boardroom User Manual 4 Effacts Support 4.1 Weblinks 4.2 Effacts Support Website: http://www.effacts.com/en/support Effacts Support contact information Effacts Support Portal: https://effacts.freshdesk.com/support/ticke ts/new Effacts instruction videos: http://vimeo.com/effacts/videos Phone: +31 20 330 16 82 Email: [email protected] 46