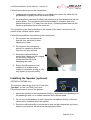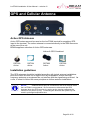
1
LeoTRAK Models: RST450, RST460, RST470, RST480 Alert / Tracking / Monitoring Interface Installation & User Manual Beam Communications Pty Ltd LeoTRAK Installation & User Manual LeoTRAK RST450, RST460, RST470, RST480 Supporting applications for: Ships Security Alert System SSAS Alert/Alarm Systems Vessel Monitoring System VMS Vehicle/Asset Monitoring INSTALLATION & USER MANUAL Beam Communications Pty Ltd 8 Anzed Court, Mulgrave, Victoria, 3170, AUSTRALIA Information furnished by Beam Communications Pty Ltd (Beam) is believed to be accurate and reliable. However, no responsibility is assumed by Beam for its use, or for any infringement of patents or other rights of third parties, which may result from its use. No license is granted by implication or otherwise under any patent or patent rights of Beam. Beam reserves the right to change specifications at any time without notice. Copyright © 2007 Beam Communications Pty Ltd. All rights reserved Product name: LeoTRAK Installation & User Manual Manual revision: 01 Part Number: USRMAN002401 Release date: June 2007 Page 2 of 56 Package contents Check that your LeoTRAK package contains: 1 x LeoTRAK unit 1 x Power & IO Cable Loom 1 x DB9 to DB9 RS232 cable 1 x SD Memory Card (256MB minimum) 1 x Installation & User manual 1 x Quick Start Guide 1 x CDROM (LeoTRAK Management System) In addition, the GSM variants RST460 and RST480 also contain: 1 x GSM right-angle stub Antenna In addition, the SBD variants RST470 and RST480 also contain: 1 x TNC to SMA Antenna adapter Optional Accessories The following optional accessories are available for your LeoTRAK: RST040 – 15WHr Li-Ion Battery Kit RST045 – Control Panel (Button matrix / LCD Screen) Antennas: • • • • Iridium Antenna Active GPS Antenna* Combined Active GPS / Iridium Antenna Combined Active GPS / Cellular Antenna Alert Buttons (IP66 and Guarded, two independent actions to operate) Alert Button cabling (See your Service Provider for pricing and availability of these quality accessories). * GPS Antenna not required if using the GPS feed from an existing device, such as Ships GPS LeoTRAK Installation & User Manual Contents PACKAGE CONTENTS ---------------------- 3 OPTIONAL ACCESSORIES ---------------- 3 CONTENTS-------------------------------------- 4 SAFETY INFORMATION -------------------- 6 SAFETY – IRIDIUM TRANSCEIVER MODELS – RST470, RST480: --------- 6 SAFETY – GSM TRANSCEIVER MODELS – RST460, RST480: -------------------- 7 CONVENTIONS IN THIS MANUAL --------- 9 ABOUT BEAM -------------------------------- 10 WELCOME ------------------------------------ 11 ABOUT THE LEOTRAK ------------------- 12 KEY FEATURES & BENEFITS -----------12 MULTI MODE CAPABILITY ---------------12 IRIDIUM SATELLITE SYSTEM ------------12 INTEROPERABILITY -----------------------13 EVENTS / ACTIONS ----------------------13 TRACKING / MONITORING ---------------13 TRACKING DATA -------------------------13 TRACKING / MONITORING FEATURES -13 ALERTS / ALARMS------------------------13 SUPERSENSE GPS----------------------14 GSM / GPRS (RST460 & RST480 ONLY) --------------------------------------14 GSM – HANDS-FREE VOICE CALLS (RST460 & RST480 ONLY) -----------14 IRIDIUM SBD (RST470 & RST480 ONLY) --------------------------------------14 LEAST COST COMMUNICATIONS -------15 INTELLIGENT POWER MANAGEMENT --15 FRONT & REAR PANELS ---------------- 16 ® U-BLOX ANTARIS LEA-4S GPS MODULE WITH SUPERSENSE® ---------17 LEOTRAK INSTALLATION--------------- 18 INSTALL THE SD-CARD -----------------18 INSTALL SIM CARD ----------------------18 INSTALL BATTERIES ---------------------19 LEOTRAK WIRING CONNECTIONS ----20 LEOTRAK WIRING DIAGRAM FOR POWER/INPUTS/OUPUTS & ALERT BUTTONS ----------------------------------22 INSTALL CONTROL PANEL (OPTIONAL)24 INSTALLING THE DIRECTIONAL MICROPHONE (OPTIONAL) --------------24 INSTALLING THE SPEAKER (OPTIONAL)25 MOUNTING THE LEOTRAK -------------26 INSTALLING THE IRIDIUM ANTENNA 27 PLANNING THE IRIDIUM ANTENNA INSTALLATION-----------------------------27 INSTALLATION OPTIONS -----------------28 GPS AND CELLULAR ANTENNA ------ 29 ACTIVE GPS ANTENNA -----------------29 INSTALLATION GUIDELINES --------------29 CONNECTING NMEA GPS DATA (OPTIONAL)--------------------------------30 CELLULAR GSM ANTENNA -------------30 POWERING UP------------------------------- 31 LED STATUS -----------------------------31 LEOTRAK CONFIGURATION------------ 32 LEOTRAK MANAGEMENT SYSTEM (LMS) -------------------------------------32 LEOTRAK ONLINE (OPTIONAL) --------32 ADDITIONAL FUNCTIONS --------------- 33 DEVICE PORT -----------------------------33 MODE BUTTON ---------------------------33 AUXILARY PORT --------------------------33 CONNECTING TO MONITORED LOOPS ---------------------------------------------------- 34 ALARM CABLE & BUTTON INSTALLATION ------------------------------ 35 CABLE SPECIFICATION ------------------35 CABLE INSTALLATION --------------------36 ASSEMBLY OF THE ALARM BUTTONS--36 SHIP SECURITY ALERT SYSTEM (SSAS) ------------------------------------------ 37 IMPLEMENTATION ------------------------37 ALERT SEQUENCE -----------------------37 TEST MODE -------------------------------37 NORMAL ALERT MODE ------------------37 FORMAT OF ALERT MESSAGES --------38 REMOTE CONTROL FOR LEOTRAK - 39 USING SHORT BURST DATA: SBD ----40 Page 4 of 56 LeoTRAK Installation & User Manual – revision 01 IRIDIUM ANTENNA INSTALLATION GUIDE------------------------------------------- 41 ANTENNA INSTALL EXAMPLES----------41 INSTALLING ANTENNA CABLES ---------42 PROTECTING THE ANTENNA FROM LIGHTNING --------------------------------43 ASSURING QUALITY OF IRIDIUM SERVICE ---------------------------------------------43 OBSTRUCTIONS --------------------------43 CABLING-----------------------------------44 RF INTERFERENCE ----------------------44 SYMPTOMS OF RF INTERFERENCE ----45 MITIGATION OF RF INTERFERENCE ---45 Page 5 of 56 TROUBLESHOOTING THE LEOTRAK 47 BEAM WARRANTY CONDITIONS ----- 49 SPECIFICATIONS --------------------------- 50 GENERAL FUNCTIONAL SPECIFICATIONS ---------------------------------------------50 GPS, IRIDIUM, GSM CELLULAR SPECIFICATIONS -------------------------52 PHYSICAL & ENVIRONMENTAL SPECIFICATIONS -------------------------54 RS232 PINOUTS -------------------------55 USER / INSTALLER INFORMATION--- 56 LeoTRAK Installation & User Manual Safety Information IMPORTANT! Please read the following information carefully before installing and using the BEAM LeoTRAK. Failing to follow instructions may compromise the safety of the product and may result in personal injury and/or equipment damage. Please consult your supplier if you have any further questions. ♦ Your LeoTRAK is a low power radio transmitter and receiver. When it is ON, it receives and sends out radio frequency (RF) signals. ♦ The design of your LeoTRAK system complies with international safety standards. WARNING: DO NOT open equipment. There are no user-serviceable parts inside. If a DC power supply is to be used, its output must comply with the Safety Extra Low Voltage (SELV) requirements of IEC60950, and be within the operational DC voltage range (and power capacity) as specified in this manual. All connectors must only be connected to equipment ports which comply with the Safety Extra Low Voltage (SELV) requirements of IEC60950. ♦ The LeoTRAK system contains (optional) Li-polymer batteries with high energy density. Do not disassemble, puncture, throw, drop, crush, bend, or modify these battery units. The system is designed to automatically safely charge the batteries only if within the temperature range of 0 to 45 degrees Celsius. ♦ Store the system in a cool and dry area. ♦ Do not submerge the system in water. ♦ Do not place foreign metal objects or debris in the system. If debris fall into the system, please return to factory for service. Safety – Iridium Transceiver models – RST470, RST480: ♦ The LeoTRAK RST470 and RST480 have an in-built Iridium transceiver which is designed to be used with an external antenna. This antenna transmits RF energy. The Iridium antenna (fitted via an extension coaxial cable) must be located more than > 0.3 meters (1 foot) from human body (person) when in operation. ♦ International agencies have set standards and recommendations for the protection of public exposure to RF electromagnetic energy. • International Commission on Non-Ionizing Radiation Protection (ICNIRP) 1996 Page 6 of 56 LeoTRAK Installation & User Manual – revision 01 • • • • Verband Deutscher Elektrotechniker (VDE) DIN-0848 United States Federal Commission, Radio Frequency Exposure Guidelines (1996) National Radiological Protection Board of the United Kingdom, GS 11, 1988 American National Standards Institute (ANSI) IEEE. C95. 1-1992 These standards are based on extensive scientific review. For example, over 120 scientists, engineers, and physicians from universities, government health agencies, and industry reviewed the available body of research to develop the updated ANSI standard. ♦ Do not operate your satellite telephone when a person is within 1 foot (30 centimeters) of the antenna. A person or object within 1 foot (30 centimeters) of the antenna could impair call quality and may cause the phone to operate at a higher power level than necessary and expose that person to RF energy in excess of that established by the FCC RF Exposure Guidelines. ♦ As a precaution, please maintain maximum body distance as possible from the antenna during call transmission. ♦ Use only the supplied or an approved replacement antenna. Unauthorized antennas, modifications, or attachments could damage the tranceiver and may violate local agency regulations. Please refer to your Service Provider for further information. Safety – GSM Transceiver models – RST460, RST480: ♦ The LeoTRAK RST460 and RST480 have an in-built Quad Band GSM (cellular) transceiver which is designed to be used with an external antenna. This antenna transmits RF energy. The GSM antenna (fitted directly to the rear SMA connector, or via an extension coaxial cable) must be located more than > 0.3 meters (1 foot) from human body (person) when in operation. ♦ As a precaution, please maintain maximum body distance as possible from the antenna during call transmission. ♦ When in a hospital or other health care facility, observe the restrictions on the use of mobiles. Switch the cellular terminal off, if instructed to do so by the guidelines posted in sensitive areas. Medical equipment may be sensitive to RF energy. ♦ The operation of cardiac pacemakers, other implanted medical equipment and hearing aids can be affected by interference from cellular terminals or mobiles placed close to the device. If in doubt about potential danger, contact the physician or the manufacturer of the device to verify that the equipment is properly shielded. Pacemaker patients are advised to keep their hand-held mobile away from the pacemaker, while it is on. ♦ Switch off the cellular terminal or mobile before boarding an aircraft. Make sure it cannot be switched on inadvertently. The operation of wireless appliances in an aircraft is forbidden to prevent interference with communications systems. Failure to observe these instructions may lead to the suspension or denial of cellular services to the offender, legal action, or both. ♦ Do not operate the cellular terminal or mobile in the presence of flammable gases or fumes. Switch off the cellular terminal when you are near petrol Page 7 of 56 LeoTRAK Installation & User Manual stations, fuel depots, chemical plants or where blasting operations are in progress. Operation of any electrical equipment in potentially explosive atmospheres can constitute a safety hazard. ♦ Your cellular terminal or mobile receives and transmits radio frequency energy while switched on. Remember that interference can occur if it is used close to TV sets, radios, computers or inadequately shielded equipment. Follow any special regulations and always switch off the cellular terminal or mobile wherever forbidden, or when you suspect that it may cause interference or danger. WARNING: Road safety comes first! Do not use a hand-held cellular terminal or mobile when driving a vehicle, unless it is securely mounted in a holder for speakerphone operation. Before making a call with a hand-held terminal or mobile, park the vehicle stationary. Please obey local road laws for hands-free speakerphone operation. Speakerphones (hands-free) must be installed by qualified personnel. Faulty installation or operation can constitute a safety hazard. IMPORTANT! Cellular & Satellite terminals or mobiles operate using radio signals and communication networks. Because of this, connection cannot be guaranteed at all times under all conditions. Therefore, you should never rely solely upon any wireless device for essential communications, for example emergency calls. ♦ Remember, in order to make or receive calls, the cellular terminal or mobile must be switched on and in a service area with adequate cellular signal strength. ♦ Some networks do not allow for emergency calls if certain network services or phone features are in use (e.g. lock functions, fixed dialing etc.). You may need to deactivate those features before you can make an emergency call. ♦ Some networks require that a valid SIM card be properly inserted in the cellular terminal or mobile. NOTE: Refer to the appropriate section of the LeoTRAK Installation & User Manual for additional relevant safety information. Page 8 of 56 LeoTRAK Installation & User Manual – revision 01 Conventions in this Manual Warnings, cautions and notes appear throughout this manual. They are represented by following conventions. WARNING: This symbol and associated text indicate a warning note providing information to prevent personal injury or damage to equipment. NOTE: This symbol and associated text indicate a note providing general operating information. INTERFERENCE: All wireless phones may get interference, which could affect performance. Page 9 of 56 LeoTRAK Installation & User Manual About BEAM BEAM Communications, is an authorised manufacturer of Iridium Satellite products. BEAM develops subscriber products that utilise the Iridium satellite network of Low Earth Orbit satellites, known as LEOs. The Iridium network is extensively used around the world by commercial enterprises and defence agencies. BEAM products address the needs of individuals, communities, government agencies and the corporate sector, providing voice and data access without the need for traditional wire-line or mobile phone infrastructure. As the Iridium satellite network is global, BEAM’s products address global markets, across the spectrum of rural and remote users, including households, motor vehicles, telemetry, maritime and emergency services. BEAM Communications Pty Ltd 8 Anzed Court, Mulgrave, Victoria, 3170, AUSTRALIA Web: Info: Support: Tel: Fax: www.beamcomm.net [email protected] [email protected] +61 3 8851 0400 +61 3 9560 9055 Page 10 of 56 LeoTRAK Installation & User Manual – revision 01 Welcome Welcome to the BEAM LeoTRAK Alert, Tracking & Monitoring system. This Installation and User manual contains all the information you need to install and operate the BEAM LeoTRAK and discover the advantages of BEAM Communications and Iridium Network technology. The LeoTRAK Installation & User Manual is for new and experienced users of wireless network systems. NOTE: For programmable settings configuration information please also refer to the LeoTRAK Management System software. Page 11 of 56 LeoTRAK Installation & User Manual About the LeoTRAK The BEAM LeoTRAK range of terminals incorporate the latest most advanced technology in providing global alert, tracking and monitoring services. Key Features & Benefits • • • • • • • • • • • • • Global Coverage Multi Mode Devices Quad Band GSM / GPS Iridium Satellite / GPS Quad Band GSM / Iridium / GPS Priority GSM / Satellite modes Sensitive GPS engine In-built SD storage upgradeable to 4GB Messaging Capable Battery Back-up “Ready” Up to 90 days sleep mode Up to 7 days standby Up to 6 hours continuous transmit • • • • • • • • • • • • Multi Mode Capability 9 – 32VDC input Intelligent power saving modes Support multiple alert buttons Digital IO Analogue input Multiple alert notifications Support simultaneous tracking Passcode protected Simple Installation / configuration Local & remote configuration Remote diagnostics & testing Remote Control LeoTRAK LeoTRAK is available in 4 main variants: RST450 – GPS Only RST460 – GPS / GSM RST470 – GPS / Iridium SBD RST480 – GPS / GSM / Iridium SBD GPS GSM Iridium RST450 9 x x RST460 9 9 x RST470 9 x 9 RST480 9 9 9 Iridium Satellite System Iridium is the only provider of truly global satellite voice and data solutions with complete coverage of the earth. Iridium delivers essential communications services to and from remote areas where no other form of communication is available. Page 12 of 56 LeoTRAK Installation & User Manual – revision 01 Interoperability Except for the RST450 all of the above terminals are fully operational as standalone terminals as they have an inbuilt communications device. The RST450 can be used with any of the wide range of BEAM Iridium based communication terminals as well as the Iridium handheld 9505A telephone. Events / Actions LeoTRAK has been designed to enable customised programming of the alert, tracking and monitoring capabilities. Using the application supplied with the terminal makes it possible to configure preset alert and tracking equations for various applications and events on the terminal. Tracking / Monitoring LeoTRAK terminals provides an intelligent tracking interface that enables the configuration of individual reporting fields such as lat / long / speed / direction / height as well as the status of alarms or other digital or analog inputs as configured on the terminal. Tracking Data The sending of position and status messages for any asset, vehicle or personnel can be simply and easily reported using one of the various methods available on the selected terminal. For tracking applications the intelligent LeoTRAK allows the unit to be configured so that position reports can be sent upon various activities taking place. Tracking / Monitoring Features Global coverage Terrestrial & Satellite options Tracking messages sent via: GPRS ( GSM Models ) SMS ( GSM Models ) Short Burst Data ( Iridium models) Store up to 4GB of message data Interface directly to LeoTRAK-online o Graphical Information system o o o o o o o o Tracking messages generated by: o Preset periodic interval o Event driven o Digital input o Alert button pressed o Remotely polled o Movement / Simple geo-fencing o System activity Alerts / Alarms The LeoTRAK is designed to support a standalone alert / alarm management system or it can be used in conjunction with a tracking application. This makes it possible to track any asset or personnel on a regular basis whilst having the peace of mind of an alert system operating in the background at all times. Alarm / Alert Inputs Page 13 of 56 LeoTRAK Installation & User Manual The LeoTRAK interface can handle multiple alarm activation points which can be physical buttons or other digital /analog inputs. The use of 3rd party equipment such as ‘man down’ devices can easily be configured to the LeoTRAK terminals. Alert Notification When an alarm is raised this will automatically generate the delivery of an alert notification to the predetermined destination. This delivery destination can be to another Iridium service, another mobile service (Selected Service Providers) or to any email address as specified. Alert/Alarms Features Alert messages sent via: GPRS ( GSM Models ) SMS ( GSM Models ) Short Burst Data ( Iridium models) Interface directly to LeoTRAK-online Graphical Information system Covert secure alert notification No physical signs of alert raised Notification to multiple parties Continuous alerting until reset Passcode protected Alert priority over other comm.’s SuperSense GPS The SuperSense Global Positioning System module inside every LeoTRAK combines high sensitivity, with exceptionally low power consumption. Its -158 dBm tracking sensitivity extends positioning coverage into places where GPS was not possible before and enables solutions using small or covert antennas. GSM / GPRS (RST460 & RST480 only) The LeoTRAK hosts the Siemens MC75 quad band GSM module, supporting; 850/900/1800/1900 MHz EDGE (E-GPRS) multi-slot class 10 Using the USB port of the LeoTRAK terminal will provide access to use the GSM module for accessing GPRS data. GSM – Hands-free Voice Calls (RST460 & RST480 only) In conjunction with the BEAM RST045 Peripheral Control Panel for the LeoTRAK it will be possible to support a GSM hands-free voice call using one of the GSM compatible LeoTRAK terminals. Iridium SBD (RST470 & RST480 only) Through the in-built Iridium 9601 Short Burst Data module makes it possible to send and receive data messages between the LeoTRAK terminal across the web to specific IP addresses or email addresses. Short Burst Data is a truly packet based data service that allows small packets of data to be transmitted and received in a very timely manner to or from the device. Iridium Short Burst Data is charged per byte, (i.e. time charges do not apply). Page 14 of 56 LeoTRAK Installation & User Manual – revision 01 Least Cost Communications Using the intelligence inbuilt in the LeoTRAK RST480 terminal allows you to determine the priority for communications to be through GSM or Satellite communications. Using the SD card storage also allows for position and alarm information to be downloaded locally if real-time communications are not required for some messages. Intelligent Power Management LeoTRAK provides an intelligent suite of effective power management options including the ability to use a high quality 15Whr battery back to provide back up to main power source or for independent operation. The ability to run the unit in both standby and sleep modes provides for extended operational time for reporting specific events at anytime. Page 15 of 56 LeoTRAK Installation & User Manual Front & Rear Panels H I A M N O P Q B R E C F J G D S K T U V Model shown is the RST480. Other LeoTRAK models are a sub-set of this. Please refer to following table for more information. Page 16 of 56 L LeoTRAK Installation & User Manual – revision 01 Item In-built GPS Module A B E F Description u-BLOX ANTARIS® LEA-4S GPS Module with SuperSense® In-built GSM Module Siemens Quad mode GSM module In-built Iridium 9601 Module Iridium Short Burst Data module Microphone Input Speaker Output C Control Panel D Connect Auxiliary Mode Button SD Card G USB Config port RJ45 7pin DIN Push button Connect Intelligent Control Panel 9 9 9 9 Development port for future Beam peripheral devices 9 9 9 9 Configurable button acknowledgments’ / notifications’ 9 9 9 9 SD SD storage card Included, up to 4gb of storage 256mb 256mb 256mb 256mb USB (5pin) Configuration of the LeoTRAK terminal 9 9 9 9 9 9 9 9 K Iridium LED Tri colour Iridium network coverage availability L Configuration port D9 Serial Programming & configuration port M GSM Antenna SMA N Power / IO port D15 HD O Battery / SIM cover T U V SIM Holder GPS Antenna Mounting Holes 9 9 9 9 9 9 9 9 9 9 9 9 9 Antenna connector for GSM module 9 Cable assembly for power & IO input 9 9 9 9 Removable battery door for easy installation 9 9 9 9 9 9 SMA Antenna connector for Iridium 9601 SBD module Support connection of external comm.’s devices 9 9 9 9 D9 Serial For easy removal of battery / SIM cover 9 9 9 9 Li-polymer Battery back up for secure and remote applications (ordered separately) Accesso ry Acces sory Acces sory Accessor yl GSM SIM SIM holder for GSM module R Thumb Screw Batteries 9 9 Battery status indication ( When batteries fitted ) S 9 9 Tri colour Device Port 9 Supports GSM Hands-free voice calls via Control Panel GSM network coverage availability display Q 9 3.5 mono Tri colour Iridium Antenna 9 9 I P 480 9 9 GPS Signal activity Battery LED 470 9 Supports GSM Hands-free voice calls via Control Panel Tri colour J 460 9 2.5 mono H GPS LED GSM LED 450 9 SMA Antenna connector for super-sense GPS module 9 4mm Mounting holes for securing terminal 9 9 9 9 9 9 9 9 Page 17 of 56 LeoTRAK Installation & User Manual LeoTRAK Installation This chapter explains how to install your LeoTRAK. WARNING: Make sure the power to the product is switched off before you install the cables. If you do not, the LeoTRAK may be damaged. Please handle electrostatic sensitive components with care, to avoid electro-static discharge. Please remove the LeoTRAK unit and other contents from their packaging, and place the products on a clean, cleared desktop or work bench. Install the SD-Card The LeoTRAK will operate with/without the card. If installed, the SD card provides logging ability of system status log, message sending log. Insert SD-Card, making sure the pin contacts are facing “upwards”. SD-Card will “click” into position requiring a positive force, to sit flush with the front panel. You may use the tip of a ballpoint pen, or screw-driver to assist. Install SIM Card (This is required only for GSM variants model RST460 or RST480). The SIM is used for registering the GSM Cellular service, and will be supplied by your service provider. Please ensure that the SIM PIN prompt is disabled (you can check this by plugging SIM into a Mobile Handset), so that the GSM engine will register on power-up. Unscrew battery cover Eject card tray (and remove) using a pen Page 18 of 56 LeoTRAK Installation & User Manual – revision 01 Carefully insert SIM in tray with contacts (chip side) facing UP. Then slide back into rail, and push tray fully in. NOTE: ensure that the tray is engaged in the rail (as it is possible for the tray to fall into housing if inserted at wrong angle) Install Batteries Batteries are optional; the LeoTRAK can operate with or without batteries. WARNING: Only use BEAM LeoTRAK Battery Kit. NOTE: BOTH batteries must be installed together to ensure matching charge/voltage levels are maintained in the 2 batteries. DO NOT mix other batteries, or swap battery pairs. A.Turn battery label-side facing DOWN B. Slide first C. Insert second D. Replace battery on the top (label-side facing DOWN) battery on the bottom cover, so it is flush with panel. Ensure the cover is fitted evenly, and its surface should be flush with the back panel when the thumb-screws are fully tightened. After installing the batteries, the LeoTRAK may begin to power-up, and LEDs will start to function. This depends entirely on the power mode which has been programmed into the LeoTRAK (for example it could be programmed to go to sleep when running on batteries, and wake-up on connection of DC power). The batteries will automatically begin to be charged after about 60 seconds of power being applied. The Battery level (voltage) is displayed in the Main screen of the “LeoTRAK Management System” (LMS). The battery level will be anywhere from 3.5V to 4.2V when charging (both battery cells in parallel). They are then automatically switched to both cells in series, being a level of between 7V and 8.4V when LeoTRAK is running in battery mode. Page 19 of 56 LeoTRAK Installation & User Manual NOTE: Charging / Operating Temperature. The Li-Ion battery is designed to be charged only in the range of 0°C ÅÆ 45°C. The LeoTRAK will safely automatically disable charging if the batteries are out of this temperature range. The Li-Ion battery can operate (discharge) between -20°C ÅÆ 60°C. This is stated in the operating conditions in the “Specifications”. NOTE: Charging Time. Please allow up to 10 hours for the batteries to become fully charged. Charging can only occur with DC power connected to the main “Power” port at the rear. The USB port WILL NOT charge the batteries. LeoTRAK Wiring Connections The LeoTRAK is provided with a wiring loom which connects to the DC power source, and also offers various inputs and outputs that can be utilised. If these extra inputs and outputs are not required for your particular application, please DO NOT connect these wires. Before installing or connecting the LeoTRAK, please read the following thoroughly to ensure a quality installation. WARNING: MAKE THE CORRECT CONNECTIONS Failure to make the proper connections may result in fire or product damage. USE ONLY IN NEGATIVE CHASSIS GROUNDED VEHICLES. (Check with your dealer if you are not sure.) Failure to do so may result in fire, etc. BEFORE WIRING, DISCONNECT THE CABLE FROM THE NEGATIVE BATTERY TERMINAL. Failure to do so may result in electric shock or injury due to electrical shorts. DO NOT ALLOW CABLES TO BECOME ENTANGLED IN SURROUNDING OBJECTS. Arrange wiring and cables in compliance with the manual to prevent obstructions when driving. Cables or wiring that obstruct or hang up on places such as the steering wheel, shift lever, brake pedals, etc. can be extremely hazardous. DO NOT SPLICE INTO ELECTRICAL CABLES. Never cut away cable insulation to supply power to other equipment. Doing so will exceed the current carrying capacity of the wire and result in fire or electric shock. DO NOT DAMAGE PIPE OR WIRING WHEN DRILLING HOLES. When drilling holes in the chassis for installation, take precautions so as not Page 20 of 56 LeoTRAK Installation & User Manual – revision 01 to contact, damage or obstruct pipes, fuel lines, tanks or electrical wiring. Failure to take such precautions may result in fire. DO NOT USE BOLTS OR NUTS IN THE BRAKE OR STEERING SYSTEMS TO MAKE GROUND CONNECTIONS. Bolts or nuts used for the brake or steering systems (or any other safetyrelated system), or tanks should NEVER be used for installations or ground connections. Using such parts could disable control of the vehicle and cause fire etc. KEEP SMALL OBJECTS SUCH AS BOLTS OR SCREWS OUT OF THE REACH OF CHILDREN. Swallowing them may result in serious injury. If swallowed, consult a physician immediately. DO NOT INSTALL IN LOCATIONS WHICH MIGHT HINDER VEHICLE OPERATION, SUCH AS THE STEERING WHEEL OR SHIFT LEVER. Doing so may obstruct forward vision or hamper movement etc. and results in serious accident. CAUTION: HAVE THE WIRING AND INSTALLATION DONE BY EXPERTS. The wiring and installation of this unit requires special technical skill and experience. To ensure safety, always contact the dealer where you purchased this product to have the work done. USE SPECIFIED ACCESSORY PARTS AND INSTALL THEM SECURELY. Be sure to use only the specified accessory parts. Use of other than designated parts may damage this unit internally or may not securely install the unit in place. This may cause parts to become loose resulting in hazards or product failure. ARRANGE THE WIRING SO IT IS NOT CRIMPED OR PINCHED BY A SHARP METAL EDGE. Route the cables and wiring away from moving parts (like the seat rails) or sharp or pointed edges. This will prevent crimping and damage to the wiring. If wiring passes through a hole in metal, use a rubber grommet to prevent the wire's insulation from being cut by the metal edge of the hole. DO NOT INSTALL IN LOCATIONS WITH HIGH MOISTURE OR DUST. Avoid installing the unit in locations with high incidence of moisture or dust. Moisture or dust that penetrates into this unit may result in product failure. The following page details the wiring functions. For the Red (+) Vin DC power wire, it is recommended to fit a 2A or 3A fuse at the power output-end of the wire. This will protect the wiring against fire should a short circuit exists in the vehicle. Page 21 of 56 LeoTRAK Wiring Diagram for Power/Inputs/Ouputs & Alert buttons 5000 * GPIO = General Purpose Input or Output, configurable via the LMS. WIRE FUNCTIONS: Ignition / Accessory (yellow): is an input which can be used to switch the LeoTRAK from a “sleep” power mode to “normal” operation. If using batteries, this wire also provides a means to trigger the LeoTRAK to wake from sleep (if configured as such), by connecting this wire to the (+) Vin (red) wire. If Batteries are not being used, and there is not a requirement for sleep mode, then this pin may be left open, or used as another general input. Alarm Loops (Brown/Green/Pink/Grey): can be programmed as alarm monitoring, which then requires that a normally closed switch is used. Breaking this loop (button going open-circuit) causes the alarm to be triggered, which is then used to perform a programmed task (such as sending a position report, or an emergency message). In alarm monitoring mode, the output pin toggles between a high and low state, and each transition is monitored on the input pin. This provides a more robust means of open or closed loop detection. (see also “Connecting to Monitored Loops” page 34). If Alarm mode is not required, then these wires may be used as general inputs / outputs, which again can be programmed by specific events or actions. GPIO 1, GPIO 2 (Blue & Orange): General purpose input or output mode, which again can be programmed by specific events or actions. This output can be used to directly drive a relay coil (connect to the negative side of coil, switching GND). Analog (White): Dedicated analog input which appears as a specific event input. The 5V input voltage range is reported in millivolts (0 to 5000). If analog mode is not required, then this wire may be configured as another general purpose input. Extra Signal Ground (smaller gauge black): this wire is provided as an extra return ground (0 volts) which may be used as an input reference. This can be left floating if not required. CAUTION: The various I/O wires have different electronic interfaces. Refer to the proceeding wiring diagram for the correct voltage range to qualify a logic-high (1) or logic-low (0) input. LeoTRAK Installation & User Manual Install Control Panel (optional) The RST045 Control Panel (button/display) is an optional accessory which provides messaging and Cellular voice call (with the optional Speaker / Microphone) capabilities to the LeoTRAK family. To position the Control Panel, mount the supplied Control Panel bracket to a reachable, unosbstructed location, and then route the joining cable to plug into the “Panel” RJ45 port on the front face of the LeoTRAK. The Control Panel can be programmed (via the LMS) to provide messaging and alerting functions, including pre-programmed “canned” custom messages. Please refer to the “RST045 Control Panel User Manual” for operating procedure. Installing the Directional Microphone (optional) (RST460 or RST480 only) The hands-free directional microphone must be properly positioned in the vehicle to ensure optimum performance. The cable plugs into the 2.5mm jack “Mic” on the LeoTRAK front face. When selecting a location for the microphone, consider these guidelines: ¾ Do NOT position the microphone near a window or in any location where road noise or any ambient background noise may be high (above 85 dB SPL). ¾ Do NOT position the microphone where it will be affected by the output of the speaker (see below). Page 24 of 56 LeoTRAK Installation & User Manual – revision 01 Follow these steps to mount the microphone: 1. installing the microphone cable in a concealed area, where the cable will not get damaged, typically down the drivers A pillar, 2. the microphone can then be simply left exposed to a short distance as per the picture below. The microphone should be installed in a location that is no greater than 45cm / 1’6” away from the driver. Distance greater than this will cause an attenuated voice level received. The microphone can also be installed in the centre of the cabin if required so it is central to the vehicles interior space. Follow these guidelines for positioning the microphone: 1. Do not place the microphone so that the visor can block it when flipped up or down. 2. Do not place the microphone where it is exposed to direct air flow from an open window 3. Route the cable carefully to ensure that it does not get crimped by any heavy objects or enclosures this will avoid damaging the cable. 4. Ensure the Microphone is not installed in a location that is subject to excessive driving or this may impact on the call quality. Installing the Speaker (optional) (RST460 or RST480 only) The speaker cable plugs into the 3.5mm jack “Speaker” on the LeoTRAK front face. Follow these steps to mount the speaker: 1. Mount the speaker to the transmission hump or underneath the dashboard on the passenger side, or on vehicle shoulder above drivers head. 2. Do not mount the speaker so that it faces the microphone directly or this will cause heavy feedback within the system. 3. Route the cable carefully to ensure that it does not get crimped by any heavy objects or enclosures this will avoid damaging the cable. Page 25 of 56 LeoTRAK Installation & User Manual The speaker can be mounted in a convenient safe location where it does no obstruct the driver. The bracket attaches to the Speaker using the bolt supplied. The Bracket itself can be then mounted in a suitable position. Correct microphone/speaker positioning. CORRECT It is advised the speaker be using the mounting bracket supplied with the speaker assembly. When selecting a location for the speaker, consider these guidelines: ¾ Position the speaker so that it does not interfere with vehicle operation or with driver or passenger seating or leg space. ¾ Avoid locating the speaker behind a sound-absorbing barrier (for example, facing upward under a seat or behind a dashboard panel). ¾ Do NOT position the microphone where it will be affected by the output of the speaker. Mounting the LeoTRAK The LeoTRAK enclosure has two (2) slotted mount holes on each side, of 4mm diameter. Self tapping screws, or M3 or M4 machine screws/bolts can be used to mount the LeoTRAK to a flat surface. NOTE: To ensure reliable sturdy fixing: o Mount the LeoTRAK on a clean, even surface. o Use the correct type of screws. o If mounting on brick or poured concrete surface, let the cement completely dry before you mount the unit. o If mounting on a wooden surface, make sure the wood is structurally sound. o Leave enough room around the unit to allow unhindered access to the rear panel. o Do not install the unit in a permanently concealed recess. You must be able to access and remove the unit should future service/configuration be required. Page 26 of 56 LeoTRAK Installation & User Manual – revision 01 Installing the Iridium Antenna The Iridium antenna is required for the RST470 or RST480 LeoTRAK models. Planning the Iridium Antenna Installation The fixed site antenna system consists of a fixed mount antenna and a coaxial cable system that connects the antenna to the LeoTRAK. The antenna system is suitable for both marine and terrestrial applications and is designed to meet Iridium System performance requirements when installed according to the instructions in this guide. The following figure shows a typical terrestrial application: The Fixed Site Antenna is an antenna contained within a weatherproof housing. It is intended to be mast-mounted without any type of ground plane. For proper performance in the Iridium System: The antenna must have a clear line to the sky from the horizon up Mount the antenna vertically Position the antenna so that it is reasonably clear of nearby metal obstructions Minimize horizontal obstructions as much as possible because they can create areas of poor system coverage. These areas of poor coverage can decrease or possibly eliminate the user’s ability to operate the LeoTRAK with predictability. Page 27 of 56 LeoTRAK Installation & User Manual A specialised coaxial cable system is required to connect the Fixed Mast Antenna and LeoTRAK. This cable system is offered as an option to the Fixed Site Antenna. To minimize the loss of radio signal from the antenna to the LeoTRAK, the coaxial cable system between the antenna and the other component should be less than 3dB including connector losses. Installation Options The fixed site antenna system consists of a fixed mount antenna and a coaxial cable system that connects the antenna to the LeoTRAK. Ensure that the antenna cable being used does not exceed 3dB loss. The antenna system is suitable for marine, vehicle and fixed applications and is designed to meet Iridium System performance requirements when installed according to the instructions in this guide. The following figure shows typical Installations: x x Desirable Antenna Location Vehicle Antenna Installation The ideal position for any vehiclemounted application is to capitalise on the greatest ground plane from the surface of the vehicle. Desirable Antenna Location x Marine Antenna Installation In the case of a marine installation, the antenna should me installed without obstruction of other instruments or structures. The antenna should not be positioned within range of radar equipment or other RF interference. See section “Iridium Antenna Installation Guide” on page 41 for further information. Page 28 of 56 LeoTRAK Installation & User Manual – revision 01 GPS and Cellular Antenna Active GPS Antenna Active GPS antennas must be used on the LeoTRAK terminal for supplying GPS input to the terminal. The active antenna is connected directly to the SMA connector at the rear of the unit. BEAM supplies a selection of Active GPS antennas: Iridium & GPS Combined RST900 Active RST901 Active RST903 Active RST902 Active Installation guidelines The GPS antennas should be installed according with typical antenna installations. Be sure to have as clear line of sight to the sky as possible, ensure that high frequency antennas or equipment do not interfere with the signal being received. As a rule, it is best to follow the same principles as Iridium antenna installations. NOTE: Antenna should only be connected to the GPS receiver when the LeoTRAK is not powered. Do not connect or disconnect the GPS Antenna when the GPS receiver is running as the receiver calibrates the noise floor on power-up only. Connecting the antenna after power-up can result in prolonged acquisition time. Page 29 of 56 LeoTRAK Installation & User Manual Connecting NMEA GPS data (optional) An installation may require using an existing GPS data stream instead of using the LeoTRAK internal GPS engine. In this case, a “NMEA” data source, which can come from either an intelligent antenna or from an existing shipboard or other GPS system, can be plugged into the “Device” Port on the rear of LeoTRAK. When connecting an external GPS input such as a ships GPS input, it is important to set the Baud rate (in the GPS configuration of the LMS) to the baud rate of the NMEA data-stream. Cellular GSM Antenna The GSM Cellular antenna is required for the RST460 or RST480 LeoTRAK models. The GSM engine inside the LeoTRAK operates in the bands of 850/900/1800 or 1900 MHz. The supplied Stub antenna may be used, or you may alternatively use an optional cable extension to connect to a mounted higher gain antenna, for improved reception. WARNING: The GSM Cellular antenna must be located more than > 0.3 meters (1 foot) from human body (person) when in operation. As a precaution, please maintain maximum body distance as possible from the antenna during call or message transmission. Page 30 of 56 LeoTRAK Installation & User Manual – revision 01 Powering Up When all previous installation steps have been completed, confirm that the antenna(s) are connected and the power loom active. Once power is connected, the LeoTRAK LED lamps will start to operate, and the GPS, Iridium, and GSM Cellular engines will attempt to register to the service providers, and acquire lock. LED Status *Four (4) LED lamps are present on the front Face, and enabled depending on the LeoTRAK model. LED Lamp GPS Status Description The GPS LED serves two (2) purposes: 1. GPS Lock Status – this is indicated by the blinking state. If the LED blinks RED indicates no lock. If the LED blinks GREEN indicates acquired lock. For a cold power-up, the GPS may need up to 3 minutes to acquire GPS almanac / satellite identification, this also depends on the antenna position and view of sky. 2. System Error in Log – this is indicated by the LED state in the non-blinking time. If ORANGE this indicates an error. (E.g. if the LED blinks GREEN to ORANGE, this indicates GPS lock, plus there is an error in log. Most errors are not critical, and can be checked in the Log list in the LMS). GSM and GREEN = Good Signal ORANGE = Low Signal Iridium RED = No Signal Flashing = Not Registered. Battery When charging, this takes up to 60 seconds from power-up. During this time before charge starts the LED is OFF. When charging the LED slowly blinks ORANGE/GREEN depending on the charge level. GREEN = Full Charged ORANGE = Low Charge RED = No Charge, battery flat If the LED is Flashing = DC power is absent/Off, and LeoTRAK is operating on batteries. In Sleep mode (power-saving) ALL LED’s will be OFF. In no external power or batteries, ALL LED’s will be OFF. * Variants RST450 and RST470 have one LED Lamp un-marked. This can optionally be configured for a custom purpose in the LMS (E.g. to turn on after an event / action). Page 31 of 56 LeoTRAK Installation & User Manual LeoTRAK Configuration LeoTRAK Management System (LMS) To configure the LeoTRAK interface you will need to do the following: • Follow the instructions to install the LeoTRAK Management System Software (LMS), from the CDROM provided, or by downloading from www.beamcomm.net. • Ensure that Power is connected to the terminal. • Connect PC to LeoTRAK “Config” Port via Serial cable (provided) • OR USB cable • USB (5-pin) RS232 Serial (9-pin) Configure LeoTRAK using the LMS program installed on your PC. NOTES: 1. If upgrading LeoTRAK firmware, this can only be done if plugged into the RS232 Serial Port (9-pin D-sub). 2. SD-card uploading / downloading (in “storage device” mode) can only be done with the USB port. 3. The USB cable from the PC will supply phantom power to perform most configuration items, without the need for applying power to the “Power” port at rear. However, in this mode it will not be fully operating to send messages etc. (The Mode button may be required to be pressed to wake up the terminal). LeoTRAK Online (optional) “LeoTRAK Online” is an enhanced tracking solution, providing web-based mapping, messaging, polling, and configuration of your LeoTRAK. This is an optional application, as LeoTRAK hardware can operate fully without this. See your Service Provider to activate this service - additional fees may apply. More info at website: www.leotrak.com Page 32 of 56 LeoTRAK Installation & User Manual – revision 01 Additional Functions The LeoTRAK offers other user-configurable functions, which may be utilized to suit more complex installations. Device Port The Device port is a standard RS232 Serial port which can be used to link other data loggers / devices. It is configured as a male-pin DTE RS232 (same as a PC), with all hardware handshaking lines available. The device port can be connected to other BEAM modem products, such as the RST620 Handsfree Kit, or other modems or data devices. E.g.1. A metering device (connected to the Device Port) may be setup to output a message to the Device Port which is then packaged into an SBD and sent via Iridium. E.g.2. LeoTRAK may be remotely polled (e.g. sent a message from email) which instructs the LeoTRAK to output a message to the Device Port, which then waits for reply, which will then be sent back via GPRS). Mode Button The Mode Button is a general purpose Momentary push-button which can be Programmed in events / actions. (E.g. The button could be programmed To “wake-up” the LeoTRAK from power-save sleep, to then send messages.) Auxilary Port This is a 7-pin BEAM peripheral expansion Port, which will enable additional BEAM peripheral interfaces or custom designed interfaces to access the LeoTRAK system. (Please contact your supplier for more information). Page 33 of 56 LeoTRAK Installation & User Manual Connecting to Monitored Loops Up to two loops may be connected to the LeoTRAK. The system is configured for (normally closed) NC operation. With NC, when using more than one button per loop the buttons (or monitored loop) are wired in series such that any break will trigger the alarm or a change in condition. When using the monitored loops each loop must have a complete circuit, therefore, each loop must have an in and an out connected on the wiring loom. This has the advantage of continuous monitoring of the loop to protect against unintended damage etc. If the monitored loops are being used in an alarm/alert situation then multiple alert buttons can be used upon each loop, ensuring that all buttons or triggers are Normally Closed (NC). To accommodate larger deployments each alert loop can be run up to 500m. Up to 10 buttons/triggers can be installed per loop so long as the standard wiring guidelines are followed. NOTE: You can configure to turn specific loops on and off in the LeoTRAK Management System (LMS) when configuring the terminal for events and actions. Page 34 of 56 LeoTRAK Installation & User Manual – revision 01 Alarm Cable & Button Installation Cable Specification BEAM cable should be used for installation of alert buttons, or cable that complies with the following specification to ensure proper installation and use. Up to 100 metres (300 feet) per loop Use only medium duty polarised figure 8 cables with 19 conductors of 0.193mm or better, for each alarm loop, to 100m in length. Due consideration must be made on using cable with UV stable and/or flame retardant insulation where the installation requires it. In excess of 100 metres (300 feet) per loop The total maximum cable length for the loops 500 metres (1500 feet). Use only heavy-duty polarised figure 8 cables with 24 conductors of 0.2mm or better, for each alarm loop. Due consideration must be made on using cable with UV stable and/or flame retardant insulation where the installation requires it. The total maximum cable length for loops should still not exceed 500 metres (1500 feet) Note: When installing cabling through a noisy electrical environment, it is recommended to consider using a shielded type of the above cables, and/or a twisted pair. Page 35 of 56 LeoTRAK Installation & User Manual Cable Installation The cable for the alert buttons should be installed by a certified marine installer using only the BEAM certified cable, or cable that is within the above specification. The BEAM RST996 Alarm cabling is recommended. To avoid false alarms or inadvertent activation the cable should also be protected where possible, be sure not to secure the cable to fixtures too tightly that may cause damage to the cabling. Assembly of the Alarm Buttons BEAM recommends the use of the BEAM RST995 Alert buttons for the installation of the Alarm system. The BEAM Alert Buttons have been specifically selected and tested for Alarm activation deployment. It is desirable to use the specified button. However if alternate buttons are used in an installation, be sure to consider the following: Are the buttons working in normally-closed operation? Is the button momentary in operation? Is the button guarded? Is the button suitable and rated for use in maritime environments? Connecting the cables to the button Dismantle the alarm button by removing the large screws on the top of the alarm button. It is probably easiest to do this at the location at which the alert button is to be mounted. Drill a hole into the base mount of the alarm button in order to pass the cable through to the terminals for connection. Now is also a good time to secure the base of the alarm button into the mounting position. The base can be secured by drilling screws through the plastic into the location, or alternatively can be secured using adhesive. Ensure that some appropriate sealant is used where the holes have been made in the casing to avoid liquid ingress. Using the specified cable connect the wires into the input of the switch as indicated below. Be sure the connection is firmly and securely made, tightening the screw at the base of the connector. The alarm button should now be secured into place. Page 36 of 56 LeoTRAK Installation & User Manual – revision 01 Ship Security Alert System (SSAS) LeoTRAK supports the SSAS (Ship Security Alert System) requirements, if configured to do so. Implementation The BEAM SSAS implementation is highly configurable and is able to reflect changes in the SSAS Governing Body requirements as they develop. The functionality implemented to conform to current SSAS requirements is as follows: The SSAS solution provides for up to two monitored alarm loops, each of up to 500m in length and able to support in excess of 10 buttons per loop. A test button can be configured separately or the unit may be put into 'test' mode and thereby allow all alarm buttons to be tested end-to-end. The on-board intelligence of the SSAS solution allows SP/operators to determine the behaviour of the unit on alarm and on reset. Full definition of the message construct, method of delivery and remote control behaviour can be configured. Alert Sequence Pressing one of the alert buttons distributed around the ship/vehicle activates the BEAM Alert system. The alarm wiring loops are monitored constantly in order to detect breaks. An alert will also be triggered if the cable is cut. In a normal alert sequence, pressing of any one of the alert buttons will trigger the immediate sending of a preformatted alert to the pre-defined destinations. Multiple destinations are possible, either via SMS, via short burst data/email (SBD) or via GPRS. The delivery methods available depend on the LeoTRAK model variant used, and the satellite / cellular reception where applicable. When an Alarm is raised the unit may be configured to continue to transmit an alert at a configurable rate until reset. A reset may come from either a local or remote reset, as specifically configured via the LeoTRAK Management System. Test Mode The TEST Mode Alert Notification i.e. System armed, In TEST MODE, and ready to report test alert. The TEST Message Alert is sent only to the owner, not the emergency authority. Normal Alert Mode NORMAL OPERATING MODE i.e. System armed and ready to report alert. Upon Alarm being triggered on board the vessel an Alert will immediately be sent and will take priority over any current communication in progress. Page 37 of 56 LeoTRAK Installation & User Manual Format of Alert Messages The SSAS Alert message content will typically contain the following information; however the message contents are configurable as required on a country by country basis. An SSAS message example is: “SSASALERT RST470 MMSI0000 IMO0000 SHIP VE7000 AUS AN040352 FC040357 3749.7958S,14454.1926W 6 146 4” The fields are as follows: <Alert Head> default is “SSASALERT” (unless system is in test mode). This can be configured according to the “Header” field (up to 10 characters + “ALERT”) of the ‘Ship Details’ tab. E.g. If the Header is configured with “Pirate 1”, then the displayed Alert Head will be “Pirate 1ALERT” <Alert System> e.g. “RST470” <MMSI> as configured by end user in the LeoTRAK system (default is “MMSI0000”) <IMO> as configured by end user in the LeoTRAK system (default is “IMO0000”) <SHIP> name as configured by end user in the LeoTRAK system (default is “SHIP”) <Call Sign> as configured by end user in the LeoTRAK system (default is “VE7000”) <Country Code> as configured by end user in the LeoTRAK system (default is “AUS”) <Alert Time> A = Alert, followed by N (New) or O (Old), then date – hour – minute. Time format is UTC. E.g. AN040352 = a new alert at 3:52am UTC, on the 4th of month. <Fix Time> F = Fix, followed by C (Current) or O (Old), then date – hour – minute. E.g. FC040357 = a current position fix at 3:57am UTC, on the 4th of month. <Latitude> in Degrees – Minutes DDMM.MMMM, followed by N (North) or S (South). <Longitude> in Degrees – Minutes DDMM.MMMM, followed by E (East) or W (West). <Speed> in kilometers per hour. <Direction> in Degrees. <Loop> loop number or the alert button which was pressed. NOTE: There may also be a second message sent called “SSASINFO”, if the End User optionally configures this. If sent via SBD, the SSASINFO message will be added to the end of the SSASALERT message. Page 38 of 56 LeoTRAK Installation & User Manual – revision 01 Remote Control for LeoTRAK The BEAM LeoTRAK is designed to handle remote configuration and control commands via SBD/email, SMS, or GPRS. The remote configuration options allow you to control many settings that you can vary within the LeoTRAK Management System, LMS. This enables you to receive an instant status report, make changes, initiate tests, clear alerts, and change some operating parameters. To configure your RST remotely you will need to know its Phone Number or IMEI, Supervisor PIN, SSAS Security Code (If different to supervisor PIN and SSAS to be configured) Multiple configuration commands may be sent in one message. The Supervisor PIN is only required once at the start. Once the PIN has been entered the top of hierarchy for each subsequent command in the message is in the Supervisor menu control. For example, to ask the terminal for a basic status remotely, send an email to the IMEI address containing: “LTK SBD @3170 a” Page 39 of 56 LeoTRAK Installation & User Manual Using Short Burst Data: SBD Short Burst Data, SBD, can be used to delivery Position Tracking reports to predetermined email addresses. The email addresses are programmed with your Service Provider to send directly from the Iridium gateway. SBD must be provisioned for this IMEI for this to operate. SBD email destinations are setup on the SBD provisioning website for your particular Iridium IMEI of your LeoTRAK. Once SBD has been activated with your Service Provider, you can simply activate position tracking via SBD in the LMS. In order to send a MT message from the Vendor Application to the Field Application, the Vendor Application must send the message to the GSS (Gateway Server) where it will be queued for delivery awaiting contact from the ISU (LeoTRAK) to retrieve it. The message will remain in the queue for up to five (5) days awaiting contact from the ISU to retrieve it. After five days the message is removed from the queue automatically by the GSS. • Messages sent to an ISU (LeoTRAK) from the VA are sent to the email address: [email protected] • Placing at least one, and up to a total of four, IMEI(s) into the subject line of the email identifies the destination ISU(s) (LeoTRAK). If there is more than one destination IMEIs then list the additional IMEIs on the subject line separated with a single space between each IMEI. • The email message must contain a properly formatted sender (“From:” address), otherwise the message will be dropped by the Gateway Server. • The data message (e.g. LeoTRAK remote command) to the ISU must be carried as an attachment to the email: • The attachment name must have a ‘.sbd’file name extension: E.g. ‘importantdata.sbd’ • File names can be up to 80 characters. (Including the .sbd extension.) File names are not case sensitive. • The maximum size of the binary message (not the Base64 version) is ISU specific and is between one byte and the maximum MT message size. The GSS will reject message sizes that are too large for a particular ISU type. • The attachment must use standard Multipurpose Internet Mail Extensions (MIME) Base64 encoding as defined in RFC 2045. • Multiple messages may be queued by a single email by including the additional separate attachments in the email message, subject to the maximum number of messages permitted in the queue. o Note that if one of the attachments has an incorrect extension (.sbd), while others are correct then no error indication email will be sent. o A single email with multiple attachments creates a MT-SBD message for each attachment. In other words –one email with ten attachments creates ten MT-SBD messages for the destination ISU. • A maximum of 50 messages may be in any ISU’s queue at any one timeregardless of whether they where sent as an individual message with attachment or a single message with multiple attachments. The GSS will reject any message over this limit. NOTE: The message body plays no role in the message transfer process; any information contained in the body will be discarded by the GSS. Page 40 of 56 LeoTRAK Installation & User Manual – revision 01 Iridium Antenna Installation Guide The following example will provide guidance for antenna installation techniques for specific applications. Proper antenna installation is critical for the successful operation of your BEAM terminal equipment. Whilst it is not always possible to gain clear line of sight to the horizon in all situation due to poor access or environmental conditions, every effort should be made to achieve maximum visibility at all times. As there is a wide range of antenna options available it is always best to talk with your Service Provider about the most appropriate antenna installation for your application. Antenna Install Examples Maritime Installations Fixed Building Installations Page 41 of 56 LeoTRAK Installation & User Manual Mobile / Transport Installations Heavy Machinery Installations Installing Antenna Cables When you install the cables, follow these guidelines: Route and restrain cables to prevent them from vibrating or moving under normal conditions, which could result in damage to the antenna, BEAM terminal, or the coaxial cable connections. Wherever the cables contact structures, protect the cables from chafing or abrasion. When you must bend a cable, avoid kinking it, and ensure that each bend radius follows the cable supplier’s recommended limits. Use coaxial sealant, shrink-wrap tubing, electrical tape, or another suitable product to seal all cable connections appropriately to prevent moisture and corrosion damage from weather exposure. Connectors should be tightened as shown below in the absence of manufacturer advice specific to your cable: Use only specified cables for the Iridium network as supplied by BEAM or refer to the specification table below. Page 42 of 56 LeoTRAK Installation & User Manual – revision 01 Protecting the Antenna from Lightning Antennas mounted in fixed installations can be exposed to lightning strikes in certain geographical and climatic environments. It is not possible to protect the LeoTRAK, the antenna, or surrounding and/or connected equipment or structures from damage from a direct lightning strike (as with most electronic equipment). However, incorporating specialized lightning arrestor/surge suppression components into the antenna system should provide additional protection. Install this suppressor at either of the following locations: Nearest the point at which the coaxial cable enters a building structure Where the cable first passes close to a grounded structure Make the connections to the suppressor according to the installation instructions supplied by the suppressor manufacturer. If you use antenna cables from an alternate source, you must still consider incorporating a device into the antenna cable system to provide protection from lightning strikes and power surges. If you are uncertain about selecting an appropriate method for protection against lightning strikes and power surges, employ the services of a professional antenna installer. Assuring Quality of Iridium Service Iridium is committed to providing users around the world consistent, reliable, quality voice and data access all day every day. The Iridium satellite system is monitored for call performance from numerous locations 24 hours a day, 7 days a week in order to achieve this. Iridium continually strives to provide high quality voice and data communication links for its subscribers. However, there are conditions that can compromise the quality of the service you may receive. There are three common factors regarding the user's environment that can lead to degraded service quality. Obstructions, Cabling and Interference Obstructions For best performance, the user’s antenna must be able to “see” the entire sky from approximately 8 degrees above the horizon. Nearby tall buildings or similar structures, heavily leafed trees, mountains, etc. can degrade performance as they block the signal between the equipment’s antenna and the satellites. Having a completely open view of the sky plays a very important role in maximizing performance, as the Iridium satellites cross the sky from horizon to horizon during a call connection. A good rule of thumb is that all surrounding obstructions should be lower than the top of a fist which is extended at arms length and the bottom of the fist placed on the horizon. Note that Iridium performance is immune from natural environments such as clouds, fog, rain, snow, wind and smoke. Page 43 of 56 LeoTRAK Installation & User Manual Cabling Using an externally (outside) mounted antenna provides an ideal solution for many applications. If you have or plan to install an external antenna, note that it is very important that the cables used for these installations must meet the guidelines that Iridium has established for proper performance. For optimal performance, we recommend using the shortest length of cable and the fewest number of connectors possible. The following table should be used as a guide in selecting the appropriate cabling, if you have not already purchased a certified cable from BEAM. RF Interference All wireless devices, including satellite telephones, are susceptible to RF (radio frequency) interference from other electronic devices. This problem is especially evident when numerous antennas and broadcasting devices are located within close proximity to each other. A good example would be onboard a ship. It is important that certain considerations be taken into account for best performance when an Iridium system is installed. Causes of RF Interference Some subscribers have contacted Iridium regarding the loss of signal quality when they operate their equipment near active INMARSAT terminals. The power with which INMARSAT units transmit can overpower the Iridium unit’s ability to properly maintain a quality connection with the Iridium satellite constellation. INMARSAT terminals are often found in the same locations as Iridium subscribers, such as harbors, airports and especially onboard ships. The location of the INMARSAT unit’s antenna in relation to the Iridium unit’s antenna plays a significant role in determining the degree of signal degradation that an Iridium subscriber can expect to experience. All Iridium units are susceptible to this interference, regardless of the type of antenna being used. Page 44 of 56 LeoTRAK Installation & User Manual – revision 01 Generally speaking, an Iridium unit, be it a handset using its integral antenna or a fixed terminal when attached to an externally mounted antenna and located within 15 and 45 meters (50 to 150 feet, respectively) of an operating INMARSAT mini-M or Standard-C terminal, will likely experience degraded performance. Other sources of RF interference such as Globalstar units, radar devices and broadcast stations can provide interference for Iridium units, but usually are not encountered as frequently as INMARSAT terminals. Symptoms of RF Interference Symptoms of RF interference often resemble those that arise when an Iridium phone is being operated with an obstructed view of the sky. Some of these symptoms include; erratic or no signal strength indication, dropped calls or warbled or otherwise distorted voice. These symptoms may be intermittent or persistent, depending largely on the interference source, its distance, strength and frequency relative to the Iridium unit. Mitigation of RF Interference Degradation of service due to RF interference to the Iridium unit can be significantly improved by either or both of the following: Increasing the distance and moving the Iridium antenna off axis from the source of the interference, and b) Using an external band pass filter and an external antenna. In determining the optimal location for mounting an external Iridium antenna in a location where INMARSAT antennas are also located, be certain that the Iridium antenna is mounted either to the side or behind the INMARSAT antenna, and above or below it. Also note that the length of the feed line (the cable running from the Iridium unit to the antenna) plays an important role in the performance of the unit. In addition to installing the Iridium antenna off-axis and away from the INMARSAT antenna, installing a band pass filter between the Iridium unit and its external antenna will provide the best protection from RF interference and degraded performance. The use of a band pass filter, which at the present time is designed for fixed installations only, will significantly improve the overall performance of the Iridium terminal. Page 45 of 56 LeoTRAK Installation & User Manual Recommended Operating Distances: Inmarsat Mini-M Recommended Distance Between an Iridium Unit and an Active Inmarsat Mini-M Terminal Antenna • Main Lobe = directly in front and in line with the Inmarsat terminal antenna: 225 feet (68 meters) • Side Lobe = directly to the side and in line with the Inmarsat terminal antenna: 100 feet (30 meters) • Rear Lobe = directly to the rear and in line with the Inmarsat terminal antenna: 50 feet (15 meters) Inmarsat M-4 Recommended Distance Between an Iridium Unit and an Active Inmarsat M-4 Terminal Antenna • Main Lobe = directly in front and in line with the Inmarsat terminal antenna: 715 feet (217 meters) • Side Lobe = directly to the side and in line with the Inmarsat terminal antenna: 100 feet (30 meters) • Rear Lobe = directly to the rear and in line with the Inmarsat terminal antenna: 250 feet (76 meters) Inmarsat-C (CAPSAT) Recommended Distance Between an Iridium Unit and an Active Inmarsat-C (CAPSAT) Terminal Antenna. • Main Lobe = directly in front and in line with the Inmarsat terminal antenna: 150 feet (45 meters) • Side Lobe = directly to the side and in line with the Inmarsat terminal antenna: 150 feet (45 meters) • Rear Lobe = directly to the rear and in line with the Inmarsat terminal antenna: 150 feet (45 meters) Page 46 of 56 LeoTRAK Installation & User Manual – revision 01 Troubleshooting the LeoTRAK This chapter provides information to help you troubleshoot problems you may encounter while running the LeoTRAK Q No lights on LeoTRAK A Check the cable between the LeoTRAK and power, check fuses. The LeoTRAK may be in “sleep” or power-saving mode. Check LMS configuration if this is required. Q No GPS Signal A Check the GPS antenna has been installed correctly Check the input is active and not damaged. If NMEA Data input configured, check in LMS for a screen dump of incoming data. Ensure the correct Baud rate is chosen in LMS for NMEA feed. Q No GPS data is discernible via the activity lights. A Check that the GPS data source is connected and active. Allow enough time for GPS engine to acquire lock. Q PC cannot connect to LeoTRAK A Check that the correct cable is used on the correct port. If using a USB to RS232 Serial adapter cable, please ensure it is correctly installed, and the the correct Com port number is chosen in the LMS. Q Cannot access any Menu items on the LeoTRAK A Check that the LeoTRAK is powered up Check that the LeoTRAK is connected correctly to the Config Port of the LeoTRAK Q Monitored Alarms are always alarmed/triggered. A Check that you have installed an always-closed circuit switch. Always open will cause the alarm to be active Ensure that you have not exceeded the cables run distance. Check all the cabling; ensure there are no breaks, stretches, or electrical interference on the line. Ensure that one of the buttons has not been disconnected. Page 47 of 56 LeoTRAK Installation & User Manual Q LeoTRAK keeps powering OFF A Check that the cables to the LeoTRAK and the LeoTRAK are all connected correctly Ensure the power supply to the LeoTRAK is within specification. The LeoTRAK may be in “sleep” or power-saving mode. Check LMS configuration if this is required. Q Triggered Alert cannot be reset A Ensure that the Alarm loop has been returned to a normally-closed position. Page 48 of 56 LeoTRAK Installation & User Manual – revision 01 BEAM Warranty Conditions BEAM Communications gives this express warranty (along with extended warranty endorsements, where applicable) in lieu of all other warranties, express or implied, including (without limitation), warranties of merchantability and fitness for a particular purpose. This constitutes our sole warranty and obligation with regard to our products as well as the Customer’s sole remedy. BEAM Communications expressly disclaims all liability and responsibility for any special, indirect or consequential damages or any further loss of any kind whatsoever resulting from the use of our product(s). The Customer’s sole and exclusive remedy and the limit of BEAM’s liability for any loss whatsoever, shall not exceed the purchase price paid by the Customer for the product to which a claim is made. All products manufactured by BEAM Communications are warranted to be free from defects in material and workmanship in accordance with and subject to the following terms and conditions: This warranty is limited to the original Customer only. It cannot be transferred or assigned to third parties unless the intent to transfer to a third party is expressly indicated in a purchase order and/or warranty-processing arrangements have been agreed upon in writing by BEAM. BEAM Communications does not warrant any installation, maintenance or service of the Products not performed by BEAM, nor does it warrant the use of Products with unapproved ancillary products. BEAM Communications will correct any defects in material or workmanship of products manufactured by BEAM which appear within (12) months, from the date of shipment by BEAM Communications to the Customer. BEAM Communications will repair or replace, at our option, any defective product, provided that our analysis and/or inspection discloses that such defects developed under normal and proper use. This warranty does not extend to goods subjected to liquid or particulate ingress, extreme humidity, misuse, neglect, accident or improper installation, or to maintenance or repair of products that have been altered or repaired by anyone except BEAM Communications unless otherwise stated in writing. The warranty is a return-to-base warranty and freight is paid by the sender. A charge of USD150 including return freight will be made for testing returned product which is not defective or is found to be defective as the result of improper use, maintenance or neglect. BEAM Communications will not accept responsibility for any invoiced goods or services that are not covered by a BEAM Communications written purchase order. Under no circumstances does BEAM Communications agree to pay for labour or other related expenses associated with the troubleshooting and/or repair of our product without prior specific written authorization. Information in our descriptive literature is based on product specifications that are current at the time of publication. Product specifications, designs and descriptive literature are subject to change as improvements are introduced. Although we announce changes as they occur, we cannot guarantee notification to every Customer. BEAM Communications warrants delivered product to conform to the most current specifications, designs and descriptive literature. This warranty policy may be expanded or limited, for particular categories of products or Customers, by information sheets published as deemed appropriate by BEAM Communications. In particular, the warranty for third party Products is that of the third party and not BEAMs warranty. Page 49 of 56 LeoTRAK Installation & User Manual Specifications General Functional Specifications Electrical Power (DC) 9 to 32VDC, 2A Plug-pack (if required / ordered separately) 90-250VAC, 50/60Hz input Power Consumption (Average) Standby Mode 1.3 Watt Talk/Transmit Mode 2.5 Watt Sleep Mode < 1mA current (0.001A) Internal Microprocessor / Memory Microcontroller 60MHz, 32-bit ARM7 512 kB Program Flash 32kB RAM Real Time Clock Power Saving “Sleep” Mode Non-volatile FRAM (on-board) 8 kB SD-Card Storage Up to 2 GB (256 MB card supplied, can hold over 2 million log entries, or 15 years of messages logged every 3 minutes. E.g. message = 100 characters). User Interface I / O (Inputs / Outputs) 2 x Alarm Loops (2 inputs, and 2 outputs) Alarm Mode: “Normally-Closed” Loop IN to OUT Up to 500m cable run / multiple buttons. Input Mode: (MAX3232 +/-23Vdc Tolerant) Logic (1) -23Vdc < +0.5Vdc Logic (0) +5Vdc > +23Vdc Output Mode: (MAX3232 +/-5Vdc) Logic (1) -5Vdc Logic (0) +5Vdc 2 x General purpose I / O Input Mode: (0 to 35Vdc Tolerant) Logic (1) > 3Vdc Logic (0) 0 < 0.4Vdc Output Mode: 0pen Collector Transitor, sinks up to 100mA to Ground: Logic (1) Transistor OFF (collector floating) Page 50 of 56 LeoTRAK Installation & User Manual – revision 01 (weak clamped internal 4k7ohm to 5V1 zener) Logic (0) Transistor ON (pulls to ground via a 6R8ohm current sense resistor) Analogue Input Analog Input Mode: 10-bit Analog to Digital converter 0Vdc to 5Vdc input reported as 0 to 5000 (mV) Digital Input Mode: (0 to 35Vdc Tolerant) Logic (1) > 4Vdc Logic (0) 0 < 0.6Vdc Ignition / Key / Accessory power sense (0 to 35Vdc Tolerant) High (1) > +7Vdc Low (1) 0V < +5Vdc Battery Backup RST040 (Optional) Battery Cell Type Lithium-Ion Polymer Capacity 15 WHr (4000mAHr, 3.7V) Charge Time 6 to 8 hours Safety Voltage / Temperature / Short circuit Protection Installation 2 identical cells, Hot-pluggable Run Time Standby (Registered) > 11 hours Burst Transmission (every 30mins) > 10 hours Sleep* Mode (wakes once event) > 160 days (*Sleeping at 1mA or lower) Additional Interface RS232 Config Port 38,400bps – 9-pin Female D-sub - DCE Sense 1 start bit, 8 data bits, no parity, 1 stop bit, async. RS232 voltage levels. USB Config Port 5-pin Female mini-B USB2.0 slave mode RS232 Device Port 9-pin Male D-sub - DTE Sense Auto-Bauding (up to 448,000bps) 1 start bit, 8 data bits, no parity, 1 stop bit, async. Hardware Flow-Control compatible RS232 voltage levels Mode Button General Purpose momentary push-button Internal Speaker Piezo type – 2.1kHz to 2.7kHz range beeps Panel Port Supports BEAM Control Panel RST045 (Backlit LCD screen / button matrix) Microphone Port (RST460 / 480) 2.5mm mono jack, voltage biased Speaker Port (RST460 / 480) 3.5mm mono jack, 8-ohm, differential mode Auxiliary Port BEAM Peripheral Devices expansion port (7-pin circular DIN) Page 51 of 56 LeoTRAK Installation & User Manual GPS, Iridium, GSM Cellular Specifications GPS Engine Receiver Type 16channel - ANTARIS4 positioning L1 frequency (1575.42MHz), C/A Code (Standard Positioning Service), 8192 time / frequency search windows. Max Navigation Update Rate 4 Hz (default 1Hz) Accuracy Position Position DGPS /SBAS1 2.5m CEP2 2.0m CEP Acquisition4 Cold Start Warm Start Hot Start Re-acquisition 34 s to 41s 33 s <3.5 s <1 s Sensitivity5 Tracking Acquisition & Reacquisition Cold Starts -158 dBm -148 dBm -142 dBm Active Antenna Minimum gain 15 - 20dB (to compensate signal loss in RF cable) Recommendations Maximum noise figure Maximum gain 1.5 dB 50 dB Antenna Supply 3.3 Vdc Antenna Connector SMA Female socket – 50 ohms Antenna Supervisor Short circuit detection; reported to error log Operational Limits Altitude Velocity 18,000 m 515 m/s Iridium 9601 Transceiver Engine (RST470 and RST480) Frequency range 1616MHz to 1626.5MHz Average Power 7W during a transmit slot (max) Average Power 0.6 W during a frame (typical) Receiver Sensitivity -118.5 dBm at 50W (typical) Receiver Spurious Rejection at offsets > 1 MHz (typical) 60 dB Duplexing method TDD (Time Domain Duplex) Oscillator stability: ±1.5ppm Input/output impedance 50 Ohms Multiplexing method: TDMA/FDMA Antenna VSWR 1.5:1 (50 ohms) Antenna Connector SMA Female socket – 50 ohms SBD (Short-Burst Data) Mobile Originated: 205 Bytes Mobile Terminated: 135 Bytes Minimum charge per transmission: 10 Bytes Page 52 of 56 5.0 m SEP3 3.0m SEP LeoTRAK Installation & User Manual – revision 01 GSM Cellular Engine (RST460 and RST480) Frequency bands Quad band: GSM 850/900/1800/1900MHz GSM class Small MS Output power Class 4 (+33dBm ±2dB) for EGSM850 Class 4 (+33dBm ±2dB) for EGSM900 Class 1 (+30dBm ±2dB) for GSM1800 Class 1 (+30dBm ±2dB) for GSM1900 Class E2 (+27dBm ± 3dB) for GSM 850 8-PSK Class E2 (+27dBm ± 3dB) for GSM 900 8-PSK Class E2 (+26dBm +3 /-4dB) for GSM 1800 8-PSK Class E2 (+26dBm +3 /-4dB) for GSM 1900 8-PSK (according to Release 99, V5) The values stated above are maximum limits. According to Release 99, Version 5, the maximum output power in a multislot configuration may be lower. The nominal reduction of maximum output power varies with the number of uplink timeslots used and amounts to 3.0dB for 2Tx, 4.8dB for 3Tx and 6.0dB for 4Tx. Data transfer GPRS Multislot Class 12 Full PBCCH support Mobile Station Class B Coding Scheme 1 – 4 EGPRS (Edge) Multislot Class 12 Mobile Station Class B Modulation and Coding Scheme MCS 1 – 9 CSD V.110, RLP, non-transparent 2.4, 4.8, 9.6, 14.4kbps USSD PPP-stack for GPRS data transfer SMS Point-to-point MT and MO Cell broadcast Text and PDU mode Storage: SIM card plus 25 SMS locations in mobile equipment Transmission of SMS alternatively over CSD or GPRS. Preferred mode can be user defined. IP addresses IP version 6 SIM interface Supported SIM cards: 3V, 1.8V Antenna 50 Ohms – SMA female socket 1 Depends on accuracy of correction data of DGPS or SBAS service. CEP = Circular Error Probability: The radius of a horizontal circle, centered at the antenna’s true position, containing 50% of the fixes. 3 SEP = Spherical Error Probability. The radius of the sphere, centered at the true position, contains 50% of the fixes. 4 Measured with good visibility and -125 dBm signal strength. 5 Demonstrated with a good active antenna. 2 Page 53 of 56 LeoTRAK Installation & User Manual Physical & Environmental Specifications Physical Unit Only Packed Dimensions – mm 177 x 150 x 47 335 x 228 x 69 Dimensions – inches 7.0 x 5.9 x 1.8 13.2 x 11.3 x 2.7 Weight* – kg 0.82 1.6 Weight* – lbs 1.8 3.5 Enclosure Construction Powder-coated Aluminium * These weights are based upon the RST480 (includes GSM & Iridium modules). Other models RST450, 460, & 470 weigh less. Environmental Temperature Degrees ˚C Degrees ˚F Operating Range (without Batteries) -30 to +70 -22 to +158 Operating Range (with Batteries) -20 to +60 -4 to +140 0 to +45 +32 to +113 -35 to +85 -31 to +185 Battery Charging Range Storage Humidity 85 % non-condensing Atmospheric Protection Conformal Coating to Circuit Baord Assembly EMC Compliance CE; IEC60945: 2002 (sections 9 & 10) C-Tick, A-Tick (further compliance specs for transceivers on request) RoHS Full compliant RoHS Directive EU 2002/95/EC (All 6 substances) Flame Retardent UL94.0 Safety – Low Voltage Directive IEC/EN/AS/NZ 60950-1 Page 54 of 56 LeoTRAK Installation & User Manual – revision 01 RS232 Pinouts The LeoTRAK is provided with two RS232 serial ports for configuration and data device connection. Config Port Physical Connection The Config Port is a female 9-pin D-subminiture socket, wired DCE for direct connection to a standard PC with a 1:1 (straight-through) cable. The Config Port has no hardware flow-control and provides loop-back only of the flow control lines. DTR and RI are supported. Pin Signal Direction Description 1 DCD LeoTRAK Æ PC Data Carrier Detect (looped back from pin-4) 2 RXD LeoTRAK Æ PC Received Data 3 TXD PC Æ LeoTRAK Transmitted Data 4 DTR PC Æ LeoTRAK Date Terminal Ready 5 GND 6 DSR LeoTRAK Æ PC Data Set Ready (looped back from pin-4) 7 RTS PC Æ LeoTRAK Request to Send 8 CTS LeoTRAK Æ PC Clear to Send (looped back from pin-7) 9 RI LeoTRAK Æ PC Ring Indicator Signal Ground (Common) Device Port Physical Connection The Device Port is male 9-pin D-subminiture socket, wired DTE for connection to most modems / data logging equipment with a 1:1 (straight-through) cable. Full hardware flow-control is provided. Pin Signal Direction Description 1 DCD Device Æ LeoTRAK Data Carrier Detect 2 RXD Device Æ LeoTRAK Received Data 3 TXD LeoTRAK Æ Device Transmitted Data 4 DTR LeoTRAK Æ Device Date Terminal Ready 5 GND 6 DSR Device Æ LeoTRAK Data Set Ready 7 RTS LeoTRAK Æ Device Request to Send 8 CTS Device Æ LeoTRAK Clear to Send 9 RI Device Æ LeoTRAK Ring Indicator Signal Ground (Common) Page 55 of 56 LeoTRAK Installation & User Manual User / Installer information " Please record your serial number here for future reference: BEAM LeoTRAK Model: Serial no.: RST4 0 # This number can be copied from the white shipping label on the LeoTRAK box Eg. LTK02833 The following PIN codes may be required to use your LeoTRAK, please complete these details for future reference. PIN Name Function Symptom Your PIN SIM PIN Unlocks SIM card to enable calls or messaging to be made over GSM Cellular GSM Signal LED flashes Red # Unlocks a locked SIM card GSM Signal LED flashes Red # Supplied by your Service Provider SIM PUK Supplied by your Service Provider Supervisor Allows access to supervisor menu PIN Supplied here of LeoTRAK via Config port Enter PIN on console or LMS* 3170 Default setting * LMS = LeoTRAK Management System Installation Location: Installation Date: Installation Technician: Place Of Purchase: Page 56 of 56