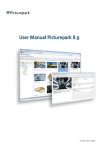
1
Software User Manual EonNAS Pro/1000 Series Web-Based Interface Version 3.1 (August 2012) EonNAS Pro/1000 Series Web-Based Interface Software User Manual Copyright Notice All rights reserved. This publication may not be reproduced, transmitted, transcribed, stored in a retrieval system, or translated into any language or computer language, in any form or by any means, electronic, mechanical, magnetic, optical, chemical, manual or otherwise, without the prior written consent of Infortrend Technology, Inc. Disclaimer Infortrend Technology makes no representations or warranties with respect to the contents hereof and specifically disclaims any implied warranties of merchantability or fitness for any particular purpose. Furthermore, Infortrend Technology reserves the right to revise this publication and to make changes from time to time in the content hereof without obligation to notify any person of such revisions or changes. Product specifications are also subject to change without prior notice. Trademarks Infortrend, the Infortrend logo, SANWatch, ESVA and EonStor are registered trademarks of Infortrend Technology, Inc. Other names prefixed with “IFT” and “ES” are trademarks of Infortrend Technology, Inc. Microsoft Windows and Windows are registered trademarks of Microsoft Corporation. Linux is a trademark of Linus Torvalds. Solaris and Java are trademarks of Oracle, Inc. All other names, brands, products or services are trademarks or registered trademarks of their respective owners. 2 Contact Information Contact Information Customer Support Contact your system vendor or visit the following support sites. EonStor DS / EonStor Support ESVA Support EonNAS Support Headquarters Infortrend Technology, Inc. (Taiwan) 8F, No. 102, Sec. 3, Jhongshan Rd., Jhonghe Dist., New Taipei City 235, Taiwan Tel: +886-2-2226-0126 Fax: +886-2-2226-0020 Email, Technical Support, Website Japan Infortrend Japan, Inc. 6F Okayasu Bldg., 1-7-14 Shibaura, Minato-Ku, Tokyo, 105-0023 Japan Tel: +81-3-5730-6551 Fax: +81-3-5730-6552 Email, Technical Support, Website Americas Infortrend Corporation 2200 Zanker Road, Suite 130, San Jose, CA. 95131, USA Tel: +1-408-988-5088 Fax: +1-408-988-6288 Email, Technical Support, Website US East Coast Office 4 Northeastern Blvd. Suite 21B, Nashua, NH, 03062, USA Tel: +1-603-610-6398 Fax: +1-603-610-6383 Email, Technical Support, Website China Infortrend Technology, Ltd. Room 1210, West Wing, Tower One, Junefield Plaza No.6 Xuanwumen Street, Xuanwu District, Beijing, China Tel: +86-10-6310-6168 Fax: +86-10-6310-6188 Email, Technical Support, Website Europe (EMEA) Infortrend Europe LTD. 1 Cherrywood, Stag Oak Lane Chineham Business Park Basingstoke, Hampshire RG24 8WF, UK Tel: +44-1256-707-700 Fax: +44-1256-707-889 Email, Technical Support, Website Germany/ Infortrend Deutschland GmbH Wappenhalle Business Center Konrad-Zuse-Platz 8, 81829 Munich, Germany Tel: +49-89-2070-42650 Fax: +49-89-2070-42654 Email, Technical Support, Website 3 EonNAS Pro/1000 Series Web-Based Interface Software User Manual Table of Contents Copyright Notice .......................................................................................................... 2 Contact Information ..................................................................................................... 3 Table of Contents ......................................................................................................... 4 About This Manual....................................................................................................... 7 Getting Started with the Web Interface Navigating the Web Interface.....................................................................................11 Understanding Screen Elements ................................................................................. 14 Accessing Support Links.............................................................................................. 16 Accessing the Web Interface .................................................................................... 17 Locating Your NAS System .......................................................................................... 17 When You Cannot Locate Your NAS............................................................................ 22 Logging into the Web Interface .................................................................................... 24 Initializing Your NAS System through Startup Wizard............................................ 26 Managing Your Data through Web Interface Explorer ............................................ 30 Creating a Shared Folder............................................................................................. 31 Creating an iSCSI Target Volume ................................................................................ 35 Uploading/Downloading Files ...................................................................................... 37 Creating a Sharing Setting........................................................................................... 38 Managing Your Data through Desktop File Explorer .............................................. 45 Accessing Major Functions with Shortcut Icons .................................................... 48 Monitoring System Status Viewing System Information ..................................................................................... 51 Viewing System Resource Usage............................................................................. 53 Configuring the System Configuring Services................................................................................................. 57 Configuring Share Services ...................................................................................... 58 Configuring the CIFS Service....................................................................................... 59 Configuring the FTP Service ........................................................................................ 60 Configuring the SFTP Service...................................................................................... 63 Configuring the NFS Service........................................................................................ 64 Configuring the AFP Service ........................................................................................ 64 Using Apple Time Machine with NAS........................................................................... 65 Configuring the iSCSI Service...................................................................................... 70 Configuring the iSCSI Service (Linux).......................................................................... 76 Configuring Directory Services ................................................................................ 79 Configuring the LDAP Service ..................................................................................... 79 Using Microsoft Active Directory (AD) with NAS: Part 1 of 3 ........................................ 81 Using Microsoft Active Directory (AD) with NAS: Part 2 of 3 ........................................ 84 Using Microsoft Active Directory (AD) with NAS: Part 3 of 3 ........................................ 93 Configuring the NIS Service......................................................................................... 99 Configuring Miscellaneous Services ..................................................................... 101 4 Table of Contents Configuring Anti-Virus Engines .................................................................................. 102 Configuring the NDMP Service .................................................................................. 104 Configuring the Rsync Target Service ........................................................................ 105 Configuring System Parameters ............................................................................ 108 Configuring Basic Host Parameters ........................................................................... 108 Setting the Date and Time ..........................................................................................110 Selecting the Language ..............................................................................................112 Changing the Administrator Password ........................................................................112 Managing Certificates .................................................................................................113 Configuring Network Parameters ............................................................................117 Configuring the IP Address, Netmask, MAC Address .................................................117 Configuring the DNS Server .......................................................................................119 Configuring the Gateway (Routing)............................................................................ 120 Configuring Trunking.................................................................................................. 121 Configuring Jumbo Frame ......................................................................................... 124 Configuring Hardware Peripherals......................................................................... 126 Connecting a Printer to Your NAS System................................................................. 126 Connecting an External Storage Device to Your NAS System ................................... 129 Configuring Other Peripherals.................................................................................... 130 Configuring Event Notifications ............................................................................. 134 Receiving Event Notifications by Emails (SMTP)....................................................... 134 Receiving Event Notifications in SNMP Trap ............................................................. 136 Setting Up Storage Pools Creating a Virtual Storage Pool .............................................................................. 140 Creating a Pool with Hybrid RAID Configuration........................................................ 145 Viewing and Replacing Member Drives ..................................................................... 148 Importing Pool Configurations.................................................................................... 149 Creating an iSCSI Target Volume............................................................................ 151 Viewing Disk Drive Profiles..................................................................................... 154 Expanding Storage Capacity (Replacing Disks).................................................... 157 Managing Folders Sharing a Folder....................................................................................................... 161 Customizing the Access Rights.................................................................................. 163 Configuring a Folder................................................................................................ 168 Managing WORM Folders ....................................................................................... 172 Managing Encrypted Folders.................................................................................. 176 Setting Up User Accounts Adding a User Account ........................................................................................... 185 Importing User Accounts (Profiles)............................................................................. 187 Combining User Accounts into a Group ................................................................ 188 Backing up Your Data Working with Snapshot Backup ............................................................................. 191 Working with Pool Mirror Backup .......................................................................... 199 5 EonNAS Pro/1000 Series Web-Based Interface Software User Manual Working with Remote Replication Backup ............................................................ 205 Working with One-Touch Copy Backup ................................................................. 212 Working with External Drive Backup...................................................................... 214 Scheduling Your Data Backup Tasks ..................................................................... 216 Maintaining the System Backing up / Shutting down the System................................................................ 220 Backing up System Configurations through Snapshot ............................................... 220 Updating the Software ............................................................................................... 222 Backing up/ Restoring System Data .......................................................................... 223 Scheduling Power Off / Reboot of NAS ..................................................................... 223 Exporting the System Diagnostic Report ................................................................... 225 Shutting Down / Rebooting NAS ................................................................................ 225 Viewing the Event Log............................................................................................. 227 6 About This Manual About This Manual This manual describes how to install and use the web-based interface of your NAS system. For the following subjects, consult other resources for more information: Components that are not user-serviceable: Contact our support sites. Hardware operation: Consult the Hardware Manual in the product CD-ROM. Version Description Date 1.2.1 Last version for the old user interface May 2011 2.0 Updated to a new set of user interface Aug 2011 2.1 Added new options in the Pool menu. Sep 2011 Modified the Remote Replication menu. Added the NAS Finder menu. 2.2 Separated the Locating Your NAS System menu into two: NAS systems with LCD screen and without LCD screen. Updated the Startup Wizard menu. Added the Data Management through File Explorer section. Updated Explorer GUI. Modified the Explorer > Create Volume menu into Create Folder. Added the Disable Transaction Log option in the following menus: Explorer > Create Folder Explorer > Create iSCSI Storage > Create iSCSI Folder > Share Folder > Configuration Added the NFS > root privileges option in the following menus: Explorer > Sharing Folder > Share Added NIS in Configuration > Service > Directory > NIS menu. Added a warning comment in the Configuration > Network > Trunking menu. Added the Detail button in the Storage > Pool menu. Removed the Creating a Volume section (only Creating an iSCSI Target Volume 7 Oct 2011 EonNAS Pro/1000 Series Web-Based Interface Software User Manual remains) Removed the Folder > Quota menu and added the Folder > Configuration menu. Updated icons for the Maintenance > System Snapshot menu. Updated the Contact Information. 2.3 Updated the Web Interface Explorer GUI. Nov 2011 Updated the section Locating NAS: with LCD Screen. Added the section When You Cannot Locate NAS. Added the LAN port option in the Routing menu. Changed Add Spare into Edit Spare in the Storage > Pool menu. Updated the Desktop Explorer section. Added nested RAID level information in the Creating a Virtual Pool section. Added the Creating a Pool with Nested RAID Levels section. Added the Pool > Viewing and Replacing Member Drives section. Changed icons inside the System Snapshot menu. 2.4 Modified Creating a Pool with Hybrid RAID Configurations.. Dec 2011 Modified the FTP service configurations. Modified the Admin password configurations. Added Mac OS and Linux to the Desktop File Explorer section. Modified the Trunking configurations. Modified the Snapshot configurations. 2.5 Modified the iSCSI service configurations. Jan 2012 Added the iSCSI service for Linux section. Modified the Apple Time Machine with NAS configurations. Modified the Anti-virus engine configurations. Added system process notice in Navigating the Web Interface section. 2.6 Updated the Software Update procedure. Updated the Creating a Pool procedure (minimum drive number: 1) Updated the User Account menu (adding the superuser option). Updated the Host Name menu (multiple login, power saving). Added Wake-on-LAN to the NAS Finder menu. Added the pool capacity expansion function. - Storage menu description - Storage > Pool menu description (Pool expansion vs. Capacity expansion) - Storage > Capacity Expansion menu (new menu) Changed the CIFS/SMB sharing setting into CIFS/FTP - Explorer > Sharing menu - Folder > Sharing menu 8 Feb 2012 About This Manual Updated the document contents into a logo-free format 2.7 Updated the Host Name menu (multiple login, power saving). Feb 2012 Updated the SMTP email notification menu. 2.8 Updated the SMTP email notification menu. March 2012 Updated the Wnen you cannot locate your NAS section. Updated the External drive backup section. Updated the One-Touch Copy section. Updated the External Drive peripherals section. Updated the System Information section. 2.9 Updated the One-Touch Backup function. March 2012 Updated the Startup Wizard function. Updated the Network Basic Settings function. Updated the Network Routing function. Updated the iSCSI Service Configuration function. Updated the LDAP Service function. Updated the Disk Drive profile function. Updated the Certificate Management function. Updated the Snapshot Backup function. Updated the Wake-on-LAN function. Updated the FTP Service function. Updated the Explorer Folder function. Updated the Folder Configuration function Updated the WORM Folder function. Updated Network Basic Setting function. 3.0 Updated the Explorer > iSCSI Target Volume function. Updated the iSCSI Service function. Updated the iSCSI Target function. Updated the Configuration > Service > Share menu. Added the SFTP Service menu. Updated the NFS Service menu. Updated the AFP Service menu. Added the Power Schedule menu. Added the System Diagnostic menu. Added the Folder Encryption menu. Updated the Remote Replication menu. Updated the Explorer > Folder menu. Updated the Folder > WORM menu. 9 June 2012 EonNAS Pro/1000 Series Web-Based Interface Software User Manual Updated the Folder > Configuration menu. Updated the Disk Drive information. Updated the Basic Host Parameters menu. Updated the Configuration > Service > Miscellaneous menu. Updated the Configuration > Service > Directory > LDAP menu. Updated the Other Peripherals menu. Updated When You Cannot Locate Your NAS section. Updated Locating Your NAS System: With an LCD Screen section. Updated the Administrator Password section. Updated the Port Trunking section. Updated the Network Parameters section. Updated the Jumbo Frame section. 3.1 Updated the iSCSI target volume (Explorer) / iSCSI target volume section. Updated the Explorer > User Account section. Updated the Folder > Configuring Access Rights section. Updated the Configuration > Network > Trunking section. Updated the Accessing the Web Interface section. 10 Aug 2012 Getting Started with the Web Interface Getting Started with the Web Interface Navigating the Web Interface Manage your NAS system with embedded utility software which is accessible through the web browser. You do not need to install a desktop application, except for the NAS Finder utility to locate your NAS system’s IP address for first time use. As long as there is an available Internet connection, you can manage your NAS system from anywhere, at anytime. For hardware setup, refer to the hardware manual of your model. When the web interface seems to get stuck processing a task, do not immediately refresh the browser since it might disrupt the ongoing process and cause system errors. Wait for a while until the process completes; refresh the browser only after giving the NAS system enough time. Navigating the The home page shows you the system status on the right side, shortcuts to Home Page useful tasks and pages as well as system events in the middle, and menus on the left side. System Tasks Click these wizard icons to quickly configure your NAS system and to view the system information. 11 EonNAS Pro/1000 Series Web-Based Interface Software User Manual The icons will lead you to the following menus: Add User Account > User > Add Create Shared Folder Folder > Share > Add Backup Data Backup > Snapshot > Add Backup > Remote Replication > Add Backup > Pool Mirror > Add Backup > External Drive > Add View System Information Recent Events Status > System Info View the recent event messages at a glance. 12 Getting Started with the Web Interface Click Show All to view all event messages (Maintenance > Log menu). Capacity Usage Check the current usage of your NAS system’s storage capacity. System View the current hardware and software performance as well as the number of Performance users online. 13 EonNAS Pro/1000 Series Web-Based Interface Software User Manual You can also monitor the hardware and software performance in the Status > Dashboard menu. System Health View the conditions of hardware components and internal temperature. Hover your cursor over each item to see detailed parameters. To view events related to each component, click the History link. You will jump to the relevant information in the Event Log (Maintenance > Log menu). You can also view the same information in the Status > Overview menu. Understanding Screen Elements Menu Bar Allows you to navigate the menu. Click the plus (+) symbol to open submenus. 14 Getting Started with the Web Interface Shortcut / Explorer / Home Button Shortcut Button: Allows you to access major functions with a click. Explorer Button: Allows you to manage your data in a file explorer style. Home Button: Navigates you back to the home page. Logout / Links Menu Logout: Allows you to logout of the interface and brings you to the Login screen. Links: Provides links to useful support-related pages. Online Help Click the question mark icon below the Links menu open an Online Help item describing the current menu. To view all Online Help items, click the Links menu and select Online Help. Main Screen (with Each function icon is accompanied by a short description to aid your Submenus) understanding. Click the icon or title to access its function. Main Screen Read the short description below the title to understand the meaning of the (without menu item. Use the bottom menu bar to configure. Submenus) 15 EonNAS Pro/1000 Series Web-Based Interface Software User Manual Accessing Support Links Click Links at the top right corner of the screen to access support-related pages. Online Help View the online help to understand the functionalities and procedures of your NAS system in detail. About NAS View the software version and service ID of your NAS system. The service ID might be required when you need the device to be investigated by the service personnel. Click OK to close the window. 16 Getting Started with the Web Interface Accessing the Web Interface Computer Requirements Hardware CD-ROM drive LAN access OS Microsoft Windows XP, Vista, 7 (32/ 64 bit), Windows Server 2003 R2, 2008 (32/ 64 bit) Apple Mac OS X 10.5, 10.6 Redhat Linux Browser Internet Explorer 7 or later Firefox 3.5 or later Locating Your NAS System The NAS Finder application allows you to locate your NAS system’s IP address and offers instant connection to your NAS system. The NAS Finder application works only in a Windows OS environment. Prerequisites Make sure your PC and NAS are connected to the same switch / router! Turning off Windows firewall: urn off the Windows firewall, please refer to the instructions below. Windows 7/ Vista: Click on the Start button > Control Panel > Security > Windows Firewall > turn off Firewall. You may be prompted for an administrator password or confirmation, type the password or provide confirmation. Windows XP: Click on the Start button > Control Panel > Windows Firewall > turn off Firewall. Try turning off the antivirus’ firewall (please refer to its manual). 17 EonNAS Pro/1000 Series Web-Based Interface Software User Manual Steps 1. To open the NAS Finder, browse the product CD-ROM and activate NASFinder.exe in the “fscommand” directory. 2. Select your preferred interface language. 3. Wait for your NAS system to appear in the Discovered Device List. 4. Highlight the found NAS device and proceed to the next step. If no NAS device was found, refer to the Prerequisites notes above and make sure that PC and NAS are connected to the same router and firewalls have been turned off. 5. Should the “Connect” button light up, click on it, a browser window will appear. Proceed to the section “Initializing Your NAS through Startup Wizard”. Should the “Set IP” button light up, it means the NasFinder will automatically assign an IP address for your NAS. Click on it and wait for an IP settings window to appear. 6. The IP settings window appears with an IP address, click the Connect button, a browser window will appear. Continue to section “Initializing Your NAS through Startup Wizard”. 18 Getting Started with the Web Interface The IP address assigned here might have already been occupied by one of your network devices. If that happens, you might need to manually adjust the IP address of the NAS system through the Configuration > Network > Basic Settings menu in the web interface. Locating Your NAS System 1. Select your preferred interface language from the Language drop-down menu. 2. Click the Find button. A pop-up window will appear. 3. You have two search options, depending on your network configurations: Choose Find immediately if: You do not know your NAS system’s subnet mask or you want to find all NAS systems on your network. This is the recommended option unless you have a reason not to. 19 EonNAS Pro/1000 Series Web-Based Interface Software User Manual Choose Find inside a subnet if: You already know the subnet mask of your NAS system. 4. If you check the “Clear previous results first” option, the history of previously located NAS systems will be removed from the NAS Finder window (it won’t affect the real NAS systems in any way) 5. Click the Start button. The NAS Finder will start searching for your NAS system. A bar at the bottom left corner will appear, showing the search progress. The Find button turns into “Stop,” allowing you to halt the search if you want. 6. When the search is completed, the bar disappears and the list of NAS systems on the network will appear in the list. If your NAS system does not appear, read the next section to locate it manually. 7. Click (highlight) your NAS system in the list and click Connect. The web interface will open in your computer’s default web browser. Waking Up You can activate a powered-off NAS system and login using the Wake-on-LAN Powered-Off NAS function. Systems The Wake-on-LAN function is applicable to selected models. How Wake-on-LAN Works A special message called Magic Packet will be sent from NAS Finder to the MAC address of the NAS system to power it up over the network. 20 Getting Started with the Web Interface NAS NAS Finder Power On (MAC Address) Magic Packet 1. A previously found, powered-off NAS system will appear in the Discovered Device List in gray color. 2. When you select the device, the “Connect” button will turn into the “Wake” button. 3. Click the Wake button. The NAS system will boot up and the login screen will appear. Notes on Wake-on-LAN Wake-on-LAN works only if (1) the NAS system has been previously located by the NAS Finder and (2) the IP address of the NAS system has not been changed. NAS Finder does not actively monitor the IP address of the NAS system. Therefore, if the IP address of the NAS system changes has been changed since the last search, Wake-on-LAN will not work. 21 EonNAS Pro/1000 Series Web-Based Interface Software User Manual Closing the NAS To close the NAS Finder, click the Close button at the bottom or click the Finder icon at the top right corner. When You Cannot Locate Your NAS When NAS Finder cannot locate your NAS system, follow the procedures to assign a valid IP address to your NAS system manually. The procedures are for Windows-based environments. A similar process should apply for other OS environments. Static IP Address The NAS Finder may not locate a NAS system if its IP address is still the default value, 10.0.0.2 (LAN Port 1) and 10.0.0.3 (LAN Port 2). If the NAS system has been (a) powered on for the first time or (b) reset to factory settings, the system will look for its IP address through DHCP (assigned automatically by the router). If it cannot locate a DHCP address for 3 minutes, it will pick the default static IP address of “10.0.0.2” for LAN Port 1. If the address “10.0.0.2” has been assigned, it means you have to manually assign a valid IP address to your NAS system. Determining a Valid These procedures describe how to find a valid static IP address for your NAS Static IP address system. for Your NAS System 1. Find out your computer’s current IP address. Press the Windows key and r key together (Windows + R) to bring up the Command Prompt. 2. In the Command Prompt, enter ipconfig. The IP address of your computer will appear. 3. Note the IP address and subnet mask down. 22 Getting Started with the Web Interface 4. Decide which IP address you want to assign to your NAS. It should share the first nine digits with the computer’s IP address. For example: Computer: 172.18.6.97 NAS: 172.18.6.1 to 172.18.6.255 (except for 172.18.6.97) 5. Make sure that the chosen IP address has not been used by other devices by pinging it in the same Command Prompt screen. Type ping 172.18.6.xxx. 6. When the message “Request timed out” comes back, it means the chosen IP address has not been used and you can assign it to your NAS. Assigning a Valid IP Address to Your NAS System Follow these steps to reconfigure your NAS’s IP address. 1. Directly connect your NAS system to your computer through the Ethernet cable. 2. Change the computer’s IP address as follows. IP address: 10.0.0.xxx (any number from 1 to 255 except 2) Subnet mask: 255.255.255.0 3. In Windows environment, follow these steps to change the IP address. 3-1. Go to Desktop, right-click on My Network Places icon and select Properties. 3-2. Right-click Local Area Connection and select Properties. 3-3. Double-click the Internet Protocol (TCP/IP) in the General tab. 3-4. Enter the IP address and subnet mask in the General tab. 4. Now you can access your NAS through your web browser. Type in the address 10.0.0.2 in your browser’s address bar and press Enter. You should enter either the Startup Wizard or the standard Web Interface. See each menu section for more details on login. 5. Change the IP address setting to a valid static IP address. Startup Wizard: Step 2 23 EonNAS Pro/1000 Series Web-Based Interface Software User Manual Web Interface: Configuration > Network > Basic Settings menu 6. Reconnect the Ethernet cable of both the NAS system and computer to the switch. 7. Reset the IP address of your computer and reboot. 8. Now you should be able to access your NAS system through the designated address. Logging into the Web Interface Steps Type your NAS system’s IP address in the browser’s address bar and press the Enter key. The login screen will appear. If you are using your NAS system for the first time, you might enter the Startup Wizard instead. Read the instructions after this section. Steps Select your preferred language from the top right corner. You can also change the language in the Configuration > System > Language menu. The links are also available in the Home Page. Enter the following login account. User name: admin Password: (The password of your choice: the default is admin) 24 Getting Started with the Web Interface You may change the password in the Configuration > System > Admin Password menu. Check optional items: Remember User Name: The user name will be automatically filled in from the next time. Remember Password: The password will be automatically filled in from the next time. SSL Login: The user name and password will be encrypted according to the SSL (Secure Sockets Layer) 2.0 protocol for additional protection. Click Login. The home page will appear. Logging Out To log out of the web interface, click the Logout icon at the top right corner. 25 EonNAS Pro/1000 Series Web-Based Interface Software User Manual Initializing Your NAS System through Startup Wizard The Startup Wizard is a step-by-step tutorial function that appears only when you are accessing your NAS system for the first time The Startup Wizard allows you to quickly configure basic system parameters including device name, IP address, current time, and administrator password. You can configure each item step by step. Click Next to move to the next step or Back to move back to the previous step. Step 1: System Parameters The initial screen allows you to configure basic system parameters. Host Name: Enter a unique name for your NAS system. This becomes necessary if there are more than one identical NAS models in your network. Timezone: Select your local time zone from the pull-down menu. Password: Specify a new password for the administrator user (admin) for security. If you do not enter any new password, the default password (admin) will be used. Step 2: Network The current IP address settings will appear. By default, DHCP service will be activated, assigning your NAS system IP addresses automatically. The Link indicator to the right shows which interface is connected to the network. To assign a static IP address (plus netmask and gateway) manually, check the radio in the IP address corner and enter new parameters. Step 3: Storage If an existing storage pool is detected in the hard drives, a popup will ask you to 26 Getting Started with the Web Interface Pool keep using it instead of creating a new one. If you choose to keep the pool, the NAS system will reboot and the web interface will shut down. If you choose not to keep the pool, the pool as well as any user data in it will be deleted. You will create a new pool following instructions in this step. You need at least one storage pool to use your NAS system as a network attached storage system. Pool Name: Enter a unique name for the storage pool. Data Protection Level: Choose the RAID protection level. Note that the higher the protection level becomes, the more disk drives are required due to the redundant drive requirements. The summary of the storage capacity will appear at the bottom. Click Next. All available disk drives will be chosen as the members of this pool. If you want to add more member drives or spare drives, edit the pool or create a new one later in the Storage > Pool menu. Step 4: Users Add at least one user for accessing the storage pool you have created. Note that this user is for accessing and sharing data, not for configuring your NAS system. (The default user account is: username: guest, password: guest.) Name and Password: Enter the user account. 27 EonNAS Pro/1000 Series Web-Based Interface Software User Manual Home Directory: Create a dedicated directory for this user inside the storage pool. Click Next. Step 5: Share Create at least one folder to be shared among users. Folder: Enter the folder name. Access Rights: Specify if users can write into the folder, or only read from it. Click Next. Step 6: Summary The summary of system parameters, IP address, storage pool, user accounts, and shared folder will appear. Click Apply to complete initial configurations or Back to reconfigure them. The initialization might take 10 minutes or less, depending on the storage capacity. When it completes, please refresh the browser screen. You will be redirected to the Login screen (see the previous section). Confirming the To confirm or modify the parameters you have configured, go to the following Settings menus. The Startup Wizard will no longer be available. Host: Configuration > System > Host Timezone: Configuration > System > Date/Time Password: Configuration > System > Admin Password IP Address: Configuration > Network > Basic Settings User: Account > User 28 Getting Started with the Web Interface Share: Folder > Share 29 EonNAS Pro/1000 Series Web-Based Interface Software User Manual Managing Your Data through Web Interface Explorer Manage files (add, delete, share, upload, and download) through a desktop-like file explorer window. For simple file transactions (upload and download), you may do so from your familiar desktop file manager. See the previous section for details. Go to Explorer Overview The Explorer feature shows the data structure in an intuitive manner similar to file organization applications such as Windows Explorer. File Hierarchy The file system is structured around the storage pools and their folders. Pool The pool is the fundamental storage unit in which folders reside. Menu Folder A folder is created under a pool. File A file can reside inside a volume or folder. Create Folder Allows you to create a new volume or folder. Create iSCSI Allows you to create an iSCSI target. Edit Allows you to edit the configurations of an existing 30 Getting Started with the Web Interface volume or folder. Delete Allows you to remove an existing volume or folder. Share Allows you to share an existing volume or folder over the network. Aligns the directories horizontally Window Icons Aligns the directories vertically Goes to the higher directory Virtual pool iSCSI target volume Folder External drive Creating a Shared Folder Manage files (add, delete, share, upload, and download) through a desktop-like file explorer window. Go to Explorer Creating a New Select a pool and click Create Folder. Configure the parameters. Folder 31 EonNAS Pro/1000 Series Web-Based Interface Software User Manual The new folder will appear in the list. Folder Name Enter the name of the new folder. Quota Quota represents the maximum disk capacity allocated for the folder. The default minimum amount (0 GB) actually 32 Getting Started with the Web Interface means “unlimited size.” Deduplication Reduces the amount of space for new data by integrating identical copies of data blocks. Deduplication does not change the size of the original data. Antivirus Enables antivirus scanning on the folder. This option will be disabled if no antivirus software is found on the computer. Compression Enables data compression for new data on the folder. Data compression uses LZJB algorithm, a lossless data compression algorithm, which does not consume much power compared to other algorithms. Compression does not change the size of the original data. Disable NAS supports ZIL (ZIL Intent Log) to check data integrity. Transaction Log On data write, NAS by default writes into the transaction log in parallel to ensure data integrity. You may disable this feature to improve performance at the expense of reduced data integrity for each folder/volume. When this feature is disabled, we recommend you to connect your NAS system to a UPS (Uninterrupted Power Supply) unit to ensure stable power supply. Encryption Enables folder encryption. Mounting Type Specifies how the encrypted folder will be mounted (unlocked). The following describes the mounting type and its status. Status/Mounting Type Unlocked/Automatic: The folder will be mounted automatically when the system boots up. Currently, 33 EonNAS Pro/1000 Series Web-Based Interface Software User Manual the folder is mounted. Locked/Automatic: The folder will be mounted automatically when the system boots up. Currently, the folder is unmounted. Unlocked/Manual: The folder will not be mounted until the user actively mounts it. Currently, the folder is mounted. Locked/Manual: The folder will not be mounted until the user actively mounts it. Currently, the folder is unmounted. Encryption Specifies the password for accessing the encrypted Password folder. The password must be 8 to 32 characters length. WORM WORM stands for Write Once, Read Many. When this option is enabled, the files and sub-folders in the folder cannot be modified or deleted until the retention period expires. To activate the WORM option, follow these steps. 1. Check the WORM checkbox. 2. Check the “I understand…” statement. 3. Set the retention period. If the retention period has been set to forever, the folder cannot be deleted unless the pool is destroyed. To view the list of WORM-enabled folders, go to the Folder > WORM menu. Editing/Deleting a Folder To edit the parameters of a folder, select a folder and click Edit. You cannot change a folder into an iSCSI target (vice versa). To remove a folder, select it and click Delete. 34 Getting Started with the Web Interface Creating an iSCSI Target Volume Create an iSCSI target volume, which enables NAS to be seamlessly integrated into existing iSCSI networks without complicated configurations. Note To use this feature, first enable iSCSI service in the Configuration > Service > Share menu. Go to Explorer Creating a New Select a pool and click Create iSCSI. Enter the parameters and click Next Step. iSCSI Target Volume View the summary of configurations and click Back to modify or OK to complete. The new iSCSI target volume will appear in the list. 35 EonNAS Pro/1000 Series Web-Based Interface Software User Manual Volume Name Enter the name of the new volume. Size Caps the maximum disk capacity allocated for the virtual volume. The default minimum amount (0 GB) actually means “unlimited size.” Thin Provision / Allows the system to allocate actual storage capacity as Reserved needed. The “Thin-Provisioned” size determines the theoretical capacity. The “Reserved” size determines the physical capacity available at the beginning. Make sure that the reserved size does not exceed the hypothetical (thin-provisioned) size. Deduplication Reduces the amount of space for new data by integrating identical copies of data blocks. Deduplication does not change the size of the original data. Compression Enables data compression for new data on the volume. Data compression uses LZJB algorithm, a lossless data compression algorithm, which does not consume much power compared to other algorithms. Compression does not change the size of the original data. CHAP If you want to add password protection, check CHAP Access (Change-Handshake-Authentication-Protocol) and enter the username (CHAP name) and password (CHAP secret) of your choice. The CHAP secret must consist of between 12 to 57 36 Getting Started with the Web Interface ASCII characters. Space is allowed. Disable NAS supports ZIL (ZIL Intent Log) to check data integrity. Transaction Log On data write, NAS by default writes into the transaction log in parallel to ensure data integrity. You may disable this feature to improve performance at the expense of reduced data integrity for each folder/volume. When this feature is disabled, we recommend you to connect your NAS system to a UPS (Uninterrupted Power Supply) unit to ensure stable power supply. Editing/Deleting a Volume To edit the parameters of a volume, select a volume and click Edit. You cannot change a shared volume into an iSCSI (vice versa). To remove a volume, select it and click Delete. About Thin Thin provisioning refers to a technique that automatically allocates storage Provisioning capacity as required. Traditionally, when a virtual pool is initially created, a large amount of physically drive capacity is allocated to each storage element to address future needs. Two shortcomings exist in this method: (1) the unused capacity tend to become wasted, and (2) once the allocated capacity is fully used, expanding it is not straightforward. Thin provisioning eliminates this problem by “virtually” allocating a large capacity to each element, but physically assigning just the amount required at the moment. As the capacity need increases, additional storage will be automatically drawn from the storage pool. Storage utilization will greatly improve and users will remain free from monitoring and adding storage capacity manually. Uploading/Downloading Files Upload files to your NAS system or download files to your local folders. Go to Explorer 37 EonNAS Pro/1000 Series Web-Based Interface Software User Manual Uploading a File Select the folder to which the file will be uploaded. Click Upload at the bottom of the Directory window and select the file you wish to upload. Click Upload. The new file will appear in the list. Downloading a File Select the file you wish to download. Click Download. Creating a Sharing Setting Configure the sharing setting for this folder. Change the share name, add a 38 Getting Started with the Web Interface description, add users and grant access rights, and configure file sharing services. Note At least one shared volume must be present. Go to Explorer Step 1: Selecting In the directory tree, select a folder you want to share. the Folder Click Share at the bottom. A window prompt will appear. Enter the name of this share and a description. 39 EonNAS Pro/1000 Series Web-Based Interface Software User Manual Step 2: Selecting To add a user/group that has access right to this share, click the Add button in the Users/Groups the Access Rights pane. A new window prompt will appear. To add a user or group, highlight it and use the Left/Right arrow icon to move it to the right pane (unselected) or left pane (selected). 40 Getting Started with the Web Interface To search for a user or group, type the name into the search box. Matching users or groups will automatically appear. To run the search again, click the icon. Configure the type of access allowed to this user: Check Allow or Forbid for each item. Step 3: Selecting Select the type of the share in the Share pane. 41 EonNAS Pro/1000 Series Web-Based Interface Software User Manual the File Protocol Click OK to complete the configuration. The new share will appear in the list. (The folder icon will change from CIFS/FTP to ) CIFS (Common Internet File System) enables access to files stored on fileservers across an IP network in Windows OS environments. You can authenticate access through either Windows Domain (for users with Windows Active Directory (AD)) or Windows Workgroup. File Transfer Protocol is a standard network protocol used to exchange and manipulate files over a TCP/IP based network. NFS NFS (Network File System) is a standard file transfer protocol for Unix/Linux networks, which allows users to access network files in a manner similar to accessing local files. AFP AFP (Apple Filing Protocol) is the standard file transfer protocol for Mac OS X and Appleshare servers. (For NFS) In the Share pane, click Setting. Configuring the File Protocol 42 Getting Started with the Web Interface You need to add a subnet setting. Select the file transaction mode, Read-Write or Read-Only, and click Add. A new window will appear. Enter the IP address and subnet mask and click Verify. The subnet information will appear. Click OK. The new subnet setting will be added to the list. Read-Only Allows the user to read. Read-Write Allows the user to read and write. 43 EonNAS Pro/1000 Series Web-Based Interface Software User Manual Root Privileges Allows the user to access the root folder. 44 Getting Started with the Web Interface Managing Your Data through Desktop File Explorer Manage files (add, delete, share, upload, and download) through the familiar file explorer environment in your desktop. You may also manage your data and configure system settings through the Explorer in the web interface. See the next section for details. Prerequisites Make sure you have the following information at your hand. If not, you may log into the web interface to retrieve them. IP address of your NAS system (Web interface: Configuration > Network > Basic Settings menu) Username and password of your account (Web interface: Account > User menu) Host name of your NAS system (Web interface: Configuration > System > Host Name menu) Windows OS 1. Right-click on the Start button and select “Explore.” The Explorer window will open. 2. Enter the IP address of the NAS as in \\xxx.xxx.xxx.xxx. 3. Or you may press the Windows + r key and enter the same information in the command window. 45 EonNAS Pro/1000 Series Web-Based Interface Software User Manual 4. The login prompt will appear. Enter the username and password in the following format: Username: username Password: password 5. For example, if the username is “guest” and the password is “guest,” you will enter the login account as shown. 6. Click OK. 7. You will be able to view and access the shared folders for your account. You may upload and download data just as you do in Explorer. Mac OS 1. From the desktop, select the Go > Connect to Server menu. 2. In the Server Address corner, enter “afp://” followed by the NAS system’s IP address. Example: afp://192.168.5.3 3. Click Connect. Use the login account to access your data. Linux 1. Login as the root user. 2. Enter this command: mount –t nfs “NAS IP address”:/”Network Share”/”Directory” 3. The command example is as follows. mount –t nfs 192.168.5.3:/guest/mnt/guest IP address: 192.168.5.3 Network share: guest 46 Getting Started with the Web Interface Directory: mnt/guest 4. Use the login account to access your data. 47 EonNAS Pro/1000 Series Web-Based Interface Software User Manual Accessing Major Functions with Shortcut Icons Steps Click the Shortcut icon at the top right corner. Shortcuts to major functions will appear. Here are the corresponding menus to the shortcuts. Configuration Configuration > Network Shortcuts Configuration > Service > Share Configuration > Peripheral > Printer Configuration > Peripheral > External Storage Configuration > Service > Misc > Anti-Virus Storage Shortcuts Storage > Pool > Create Storage > Volume > Create iSCSI 48 Getting Started with the Web Interface Folder Shortcuts Folder > Share > Add Account Shortcuts Account > User > Add Account > Group > Add Account > User > Import Backup Shortcuts Backup > Snapshot > Add Backup > Pool Mirror > Add Backup > Remote Replication > Add Backup > External Drive > Add 49 EonNAS Pro/1000 Series Web-Based Interface Software User Manual Monitoring System Status Monitor your NAS’s performance and system status. View the profiles of the components that constitute the NAS hardware. Go to Status System Info View the profiles of hardware components: CPU, memory, and LAN card. Dashboard Monitor the performance of hardware components and file services/protocols in real time. 50 Monitoring System Status Viewing System Information View the profiles of hardware components: CPU, memory, and LAN card. Go to Status > System Info Device Information View the hardware model, software version, and service ID. You may also view the identical information in the Links > About NAS menu accessible from the Home Page. CPU View the CPU configurations. To monitor CPU usage, go to the Status > Dashboard menu. Memory View the memory configurations. To monitor memory usage, go to the Status > Dashboard menu. Network View the LAN interface configurations: IP address, subnet mask, and MAC address. To edit these parameters, go to the Configuration > Basic Settings menu. Peripherals View the profiles of peripheral devices connected to your NAS system’s USB ports or eSATA port. 51 EonNAS Pro/1000 Series Web-Based Interface Software User Manual This feature is available for models with a corresponding USB or eSATA port. 52 Monitoring System Status Viewing System Resource Usage Monitor the performance of hardware components and file services/protocols in real time. Go to Status > Dashboard Hardware Monitor the usage of hardware components: CPU, network bandwidth, internal Parameters memory, and disk drives. CPU Shows the current CPU usage. Network Shows the network traffic measured against the theoretical maximum bandwidth. Memory Shows the cached data against the total memory size. 53 EonNAS Pro/1000 Series Web-Based Interface Software User Manual Disk Shows the drive-side activities against the drive bus bandwidth. Software Monitor the performance of software services (protocols): number connections, Parameters number of users, and the amount of transactions. To configure each protocol, go to the Configuration > Service menu. CIFS Shows the number of connections based on CIFS (Common Internet File System) protocol. NFS Shows the amount of shared volumes based on NFS 54 Monitoring System Status (Network File Sharing) protocol. NDMP Shows backup and recovery network transaction based on on NDMP (Network Data Management Protocol). FTP Shows the number of users logged on via FTP (File Transfer Protocol). Volume Shows the read/write transaction based on iSCSI-based data. 55 EonNAS Pro/1000 Series Web-Based Interface Software User Manual Configuring the System Change the parameters of your NAS system through the comprehensive Configuration menu. Activate network and file protocols to enable file sharing and network access. Configure network parameters to specify your NAS system’s location on the net. And last but not least, receive system events at your email address or through an SNMP trap. Go to Configuration Service Activate and configure network services (protocols) for sharing access to files and directories in your NAS system. System Configure basic system settings including host name, time, language, and administrator password. Network Activate and configure LAN protocols including IP address, DNS server, and gateway. Peripheral Manage external devices connected to your NAS system such as printers, USB/eSATA drives, and UPS devices. Configure system indicators including buzzer and LED. Notification Receive notifications of important system events in your email inbox or via SNMP traps. A list of all system events can be viewed in the Maintenance > Log menu. 56 Configuring the System Configuring Services Activate and configure network services (protocols) for sharing access to files and directories in your NAS system. Go to Configuration > Service Share Activate and configure file service protocols for sharing access to your NAS system on the network. Directory Activate and configure directory protocols to edit directories and system configurations of the NAS system over the network. Miscellaneous Activate and configure NDMP service for direct system backup and external anti-virus engine for data protection. 57 EonNAS Pro/1000 Series Web-Based Interface Software User Manual Configuring Share Services Activate and configure file service protocols for sharing access to your NAS system on the network. Go to Configuration > Service > Share CIFS CIFS or Common Internet File System is a protocol developed by Microsoft for enabling access to files stored on fileservers across an IP network. CIFS evolves from Microsoft’s Server Message Block (SMB). You can authenticate access through either Windows Domain (for users with Windows Active Directory (AD)) or Windows Workgroup. FTP File Transfer Protocol is a standard network protocol used to exchange and manipulate files over a TCP/IP based network. SFTP The SSH File Transfer Protocol (also Secret Transfer Protocol, Secure FTP, or SFTP) is a network protocol that provides file access, file transfer, and file management functionality over any reliable data stream. You may enable SSH protocol from the Configuration > Miscellaneous menu. You may configure the required certificate files in the Configuration > System > Certificates menu. NFS NFS (Network File System) is a standard file transfer protocol for Unix/Linux networks, which allows users to access network files in a manner similar to accessing local files. AFP The AFP (Apple Filing Protocol) is the standard file transfer protocol for Mac OS X and Appleshare servers. iSCSI Activate and configure iSCSI target service, which seamlessly 58 Configuring the System integrates your NAS system into existing iSCSI networks without complicated configurations. iSCSI data will be directly carried over the network from the host to your NAS system. Your NAS system will become part of the iSCSI ecosystem to extend the existing network storage capacity or add a backup solution. Menu Status Online: The service has been enabled. Disabled: The service has been disabled. Maintenance: The service has been temporarily disabled (likely due to inappropriate configurations). Enable a service before configuring it. Clicking this icon enables or disables the service. Clicking this icon restarts the service. Edit Edits parameters of the highlighted service. Start Enables or disables all services at once. All/Stop All Configuring the CIFS Service CIFS or Common Internet File System is a protocol developed by Microsoft for enabling access to files stored on fileservers across an IP network. CIFS evolves from Microsoft’s Server Message Block (SMB). You can authenticate access through either Windows Domain (for users with Windows Active Directory (AD)) or Windows Workgroup. Go to Configuration > Service > Share Steps Click to highlight CIFS in the list. 59 EonNAS Pro/1000 Series Web-Based Interface Software User Manual Click Edit. The configuration window will appear. Enter the Windows Domain name or Windows Workgroup name and click Apply. Windows Domain If you have access to Active Directory (AD) service and provide file access to domain users, join Windows Domain. This option will be enabled when your NAS system is connected with an AD service. Windows If you do not have access to Active Directory (AD) Workgroup service, you may join a Windows workgroup instead. The parameter is the name of the workgroup. Configuring the FTP Service File Transfer Protocol is a standard network protocol used to exchange and manipulate files over a TCP/IP based network. Go to Configuration > Service > Share Secure FTP In addition to the standard FTP protocol, secure FTP protocols are also supported as follows: 60 Configuring the System FTPS FTPS is an extension to the commonly used File Transfer Protocol that adds support for the Transport Layer Security (TLS) and Secure Sockets layer (SSL) cryptographic protocols. SFTP The SSH File Transfer Protocol (also Secret Transfer Protocol, Secure FTP, or SFTP) is a network protocol that provides file access, file transfer, and file management functionality over any reliable data stream. It was designed by IETF as an extension of the Secure Shell protocol (SSH) version 2.0 to provide secure file transfer capacity, but is also intended to be usable with other protocols. Steps Click to highlight FTP in the list. Click Edit. The configuration window will appear. Enter the parameters. To use secure FTP, check th Enable FTP over SSL/TLS option and fill the parameters. Listen Port Specifies the port number on which the user will request the server to initiate data connection. Do not change the 61 EonNAS Pro/1000 Series Web-Based Interface Software User Manual default setting unless necessary. Maximum Number Specifies the maximum number of failed attempts to login of Failed Logins to the FTP server to ensure security. Zero (0) means unlimited number of attempts. Allow Explicit FTP This option is for FTPS and enables users to explicitly over TLS / request security from an FTPS server. By default, the Disallow Plain FTPS server allows users to continue unsecure mode, Unencrypted FTP but by checking the Disallow Plain Unencrypted FTP option, users will be forced to use explicit mode. Explicit FTP over TLS shares the normal FTP port. Force PROT P to File transfers in SSL/TLS mode will be encrypted using Encrypt File the PROT P (Private) command. If “Disallow Plain Transfers in Unencrypted FTP” option has been checked, it is SSL/TLS Mode recommended to check this option too. Listen for Implicit This option allows maintaining compatibility with existing SSL/TLS non-TLS/SSL-aware FTP clients. The default value 990 Connections applies to IANA Well Known Port 990/TCP for the FTPS control channel. About the FTP The FTP (File Transfer Protocol) provides secure file transaction over the Protocol Internet based on a client-server architecture. Compared with the commonly used HTTP (HyperText Transfer Protocol) on which a majority of data transactions on the Internet is based, FTP provides the following advantages: Suitable for large data transactions such as multimedia files Access authority management Easy file sharing On the other hand, setting up an FTP server on a computer has been considered a professional task due to its complexity. Installing an FTP server in Windows OS, for example, involves additional software installation. In addition, the computer has to be active 24/7 in order to fully function as a “server.” Most consumer-oriented computers are not designed for this usage. NAS systems solve this dilemma by providing an integrated FTP server function 62 Configuring the System with simple configurations. In addition, as a network attached storage device, NAS system guarantee the always-on connectivity required for a server. Accessing NAS Open a browser and type in the FTP (IP) address as in ftp://xxx.xxx.xxx.xxx. through FTP Service Enter the admin username and password. The shared volume can be accessed. An FTP client software (such as Filezilla or SmartFTP) can be used for advanced configurations. Configuring the SFTP Service The SSH File Transfer Protocol (also Secret Transfer Protocol, Secure FTP, or SFTP) is a network protocol that provides file access, file transfer, and file management functionality over any reliable data stream. You may configure the required certificate files in the System > Certificates menu. Go to Configuration > Service > Share Steps Click to highlight SFTP in the list and enable it (= make sure its status is Online). The SFTP service does not contain configurable parameters. 63 EonNAS Pro/1000 Series Web-Based Interface Software User Manual Configuring the NFS Service NFS (Network File System) is a standard file transfer protocol for Unix/Linux networks, which allows users to access network files in a manner similar to accessing local files. Go to Configuration > Service > Share Steps Click to highlight NFS in the list and enable it (= make sure its status is Online). The NFS service does not contain configurable parameters. Configuring the AFP Service The AFP (Apple Filing Protocol) is the standard file transfer protocol for Mac OS X and Appleshare servers. Go to Configuration > Service > Share 64 Configuring the System Steps Click to highlight AFP in the list. Click Edit. The configuration window will appear. Parameters File Server Name Specify the server name (the default setting is the name of your NAS system). Login Message Specifies a custom message that appears on login. Options Specifies the degree of control granted to the users. Allow guest login: Allows guest access to the AFP server. Allow transmitting password in clear text: Allows clear text passwords as opposed to encrypted passwords. Using Apple Time Machine with NAS Time Machine is a backup utility available in Mac OS X 10.5 (Leopard) or later. 65 EonNAS Pro/1000 Series Web-Based Interface Software User Manual Time Machine creates differential copies of the most recent states of data in a manner similar to the Snapshot & Rollback features in the Backup menu. To backup data, Time Machine first copies the entire content of the Mac OS primary hard drive into an external storage device, and then adds differential copies of updated data according to scheduled timings. When corrupted data is found, users can roll back the data to a previous state by specifying the point in time. Individual files as well as the whole system can be restored. NAS has a built-in support for AFP (Apple File Protocol), the standard file system for Mac OS X, enabling smooth integration with Time Machine. You can use your NAS system as a network attached storage device for Time Machine. Step 1: Preparing the Environment The following devices should be connected to the same network. A Mac computer with Mac OS X 10.5 or later An NAS system with at least one virtual pool Step 2: Configuring Configure the AFP settings as mentioned above. Activate (check) two options: the AFP Service on Allowing guest login and Transmitting all passwords in clear text. Your NAS System Step 3: Creating a Go to the Account > User menu to create a user account for AFP (Apple File User Account Protocol) access and Time Machine usage. If you already have an account you can use it. Step 3: Selecting Go to the Folder menu to create a new shared folder for the aforementioned Folder to be user account. Backed Up Make sure AFP (Apple File Protocol) has been checked in the Share corner. Enable all access rights for the target user, but disable all access rights for all other users. Step 4: Configuring On your Mac, select the Go > Connect to Server menu to connect to the shared the Virtual File folder you have created. 66 Configuring the System System on Mac Enter the IP address and click the Connect button to connect with the server. Enter the username and password for the shared folder. Locate the shared folder you have created and click the OK button. 67 EonNAS Pro/1000 Series Web-Based Interface Software User Manual The shared volume will appear in your Mac OS. Step 5: Configuring Open System Preferences and activate Time Machine from the System row. Time Machine on Mac The Time Machine utility will appear. Click the Select Disk button to select the place to store your data. 68 Configuring the System Your user account should appear as a remote disk in the list. Select it and then click the Use Backup Disk button. Enter the username and password you have configured in your NAS system. Time Machine will start backing up data into your user account (remote backup disk). 69 EonNAS Pro/1000 Series Web-Based Interface Software User Manual Your Mac’s data will be saved in your NAS system from now on. To configure the backup schedule and other parameters, refer to Apple’s Support Page. Configuring the iSCSI Service Activate and configure iSCSI target service, which seamlessly integrates your NAS system into existing iSCSI networks without complicated configurations. iSCSI data will be directly carried over the network from the host to your NAS system. Your NAS system will become part of the iSCSI ecosystem to extend the existing network storage capacity or add a backup solution. For configuring iSCSI service in Linux systems, read the next section. Go to Configuration > Service > Share Required The following devices should be connected to the same network. Environment for iSCSI Target Service A host computer with Windows Server 2003 or 2008 (initiator) Windows Server 2008: default included; download not necessary. Windows Server 2003: download the initiator program here. An NAS (target) system with at least one virtual pool Step 1: Acquiring If you wish to use CHAP authentication in iSCSI service, you must acquire the the IQN (for CHAP IQN (iSCSI Qualified Name). Authentication) Make sure Microsoft iSCSI Initiator has been installed in your host computer. 70 Configuring the System Go to Start > Administrator Tools to open the iSCSI Initiator Properties window. Copy the Initiator Node Name in the General tab which will become the initiator iqn. Step 2: Configuring Go to the Explorer menu and select a storage pool. Click Create iSCSI and set iSCSI Service up an iSCSI target volume. For details on parameters, see the description for the Explorer > Create iSCSI menu. Step 3: Discovering the Target NAS 1. In your computer, enter the iSCSI Initiator program and select the Discovery tab. Click the Discover Portal button. 2. Add the IP address of the target NAS and click the OK button. 71 EonNAS Pro/1000 Series Web-Based Interface Software User Manual 3. You should see the target added to the Target Portals window. Step 4: Connecting the Target NAS 1. Go to the Targets tab of the iSCSI Initiator Properties window. Start connecting the targets by selecting the target and clicking on Connect. System 2. If CHAP is enabled on the target, click on Advanced to configure CHAP settings. (If CHAP is not enabled, you can move on to the next step.) 72 Configuring the System 3. Click the Advanced button and configure the parameters. 4. If you have checked CHAP, configure the CHAP authentication corner too. Local adapter Select iSCSI Initiator. Source IP Select the IP address of the host computer. 73 EonNAS Pro/1000 Series Web-Based Interface Software User Manual Target Portal Select the IP address of the NAS system. (Optional) CHAP Logon Click Enable CHAP log on checkbox and enter the Information iSCSI target name and secret. Step 5: Initializing Go to Start > Administrative Tools to open Server Manager. Choose Disk and Formatting the Management under Storage in the left-hand menu. When entering the Disk Target Volume Management menu, Windows will automatically show the Initialize Disk window to help you start initializing. Click OK to start. After initialization, right-click on the target volume to start formatting the disk. Select New Simple Volume from the menu. 74 Configuring the System Follow the instructions in the Wizard. You need to: Specify the volume size Assign a drive letter Format the partition Press Finish to complete the new simple volume setting. Windows will start formatting the drive. After formatting has finished, you can start using the new drive in your Windows OS environment. 75 EonNAS Pro/1000 Series Web-Based Interface Software User Manual Configuring the iSCSI Service (Linux) Follow these instructions to use iSCSI service in Linux. System You need to have a Linux system based on SuSE or Red Hat Linux. Requirements Verifying the IQN NAS only supports the Open-iSCSI initiator, which can be downloaded from the Number (for CHAP following link: http://www.open-iscsi.org. After you download the software, you Authentication) can refer to the directions here to install this software. Use the following command to verify the initiator’s IQN number if you wish to use CHAP authentication: #cat /etc/iscsi/initiatorname.iscsi InitiatorName=iqn.2005-03.org.open.iscsi:749e99a14166 Step 1: Starting Open-iSCSI Software Initiator 1. If initiator CHAP has already been configured on the NAS system, stop the iSCSI service in the Linux OS: #/etc/init.d/open-iscsi stop 2. Configure the run levels for iSCSI service, enabling automatic start-up on reboot and shutdown: RedHat: #chkconfig --level 345 open-iscsi on SuSE: #chkconfig -s open-iscsi 345 #chkconfig -s open-iscsi on 3. Start the iSCSI service: #/etc/init.d/open-iscsi start Step 2: Connecting to the Target 1. To discover targets on the NAS system, enter the command given below. (Replace the IP address with your NAS system’s address) #iscsiadm -m discovery -t sendtargets -p 172.18.8.146:3260 The command will return a list of available targets. 172.18.8.146:3260,1 iqn.2002.10.com.xxx:NAS.pool-1.iscsi-vol1 76 Configuring the System 2. Use the commands given below to configure CHAP settings for the target. (Skip these commands if CHAP is not enabled on the iSCSI target volume.) #iscsiadm -m node -T iqn.2002.10.com.xxx:NAS.pool-1.iscsi-vol1 -p 172.18.8.146 --op update -n node.session.auth.authmethod -v CHAP #iscsiadm -m node -T iqn.2002.10.com.xxx:NAS.pool-1.iscsi-vol1 -p 172.18.8.146 --op update -n node.session.auth.username -v test #iscsiadm -m node -T iqn.2002.10.com.xxx:NAS.pool-1.iscsi-vol1 -p 172.18.8.146 --op update -n node.session.auth.password -v 123456123456 3. If you wish to automatically restore iSCSI connection with the target every time the OS is rebooted, use the following command: #iscsiadm -m node -T iqn.2002.10.com.xxx:NAS.pool-1.iscsi-vol1 -p 172.18.8.146 --op update -n node.startup -v automatic 4. To connect to the target, use the following command: #iscsiadm -m node -T iqn.2002.10.com.xxx:NAS.pool-1.iscsi-vol1 -p 172.18.8.146:3260 -l Step 3: Creating a Disk 1. A new drive can be found in the directory /dev after you have successfully connected to the iSCSI target. To identify the iSCSI drive, use the following command: # ls -l /dev/disk/by-path/ You should receive a response something like: total 0 lrwxrwxrwx 1 root root 9 Nov 3 20:10 ip-172.18.8.146:3260-iscsi-iqn.2002.10.com.xxx:NAS.pool-1.iscsi-v ol1 -> ../../sdb lrwxrwxrwx 1 root root 9 Nov 3 16:02 ide-0:0 -> ../../hda lrwxrwxrwx 1 root root 10 Nov 3 16:02 ide-0:0-part1 -> ../../hda1 lrwxrwxrwx 1 root root 10 Nov 3 16:02 ide-0:0-part2 -> ../../hda2 lrwxrwxrwx 1 root root 9 Nov 3 16:02 ide-0:1 -> ../../hdb 77 EonNAS Pro/1000 Series Web-Based Interface Software User Manual 2. The iSCSI drive is mapped to /dev/sdb. To create a partition on the new disk, please use the following command: #fdisk /dev/sdb 3. In this newly created partition, a file system can be created using the following command. Ext3 is used as the example here: #/sbin/mkfs.ext3 /dev/sdb 4. After formatting has finished, you can start using the new drive in your Linux OS environment. 78 Configuring the System Configuring Directory Services Activate and configure directory protocols to edit directories and system configurations of the NAS system over the network. Go to Configuration > Service > Directory LDAP The Lightweight Directory Access Protocol (LDAP) is the standard application protocol for querying and modifying data of directory services implemented in Internet Protocol (IP) networks. NIS The NIS (Network Information Service) protocol supports distributing system configuration data in Unix/Solaris environment. Parameters Status Online: The service has been enabled. Offline: The service has been disabled. Maintenance: The service is temporarily disabled (likely due to inappropriate configurations). Enable a file service before configuring it. Clicking this icon enables or disables the service. Edit Edits parameters of the highlighted service. Stop all Disables all services at once. Configuring the LDAP Service The Lightweight Directory Access Protocol (LDAP) is the standard application protocol for querying and modifying data of directory services implemented in Internet Protocol (IP) networks. 79 EonNAS Pro/1000 Series Web-Based Interface Software User Manual NIS and LDAP service are mutually exclusive. If you enable one, you need to disable the other. To learn how to configure the LDAP service to join Microsoft AD to the NAS system, refer to related application notes on the NAS website. Go to Configuration > Service > Directory Steps Click to highlight LDAP in the list. Click Edit. The configuration window will appear. Enter the parameters. Reboot the NAS system so that the LDAP service will be effective. LDAP Server IP Specifies the IP address of the LDAP server (Directory Address System Agent). If there are multiple IP addresses, they should be separated by a comma, as follows. 111.111.111.111, 222.222.222.222, 333.333.333.333 Domain Name Enter the LDAP server’s domain. The first character of a domain name must be an alphabet. LDAP Server Port Specifies the TCP port of the LDAP server. The default is 389. 80 Configuring the System Proxy User Specifies the Proxy user account to log on to an LDAP Name/Password server account. Using Microsoft Active Directory (AD) with NAS: Part 1 of 3 The NAS systems are compatible with Microsoft AD for the following versions of Windows OS: Windows Server 2003, 2003 R2 Windows Server 2008, 2008 R2 Windows Server 2012 The procedures are separated in three sections. Section 1: Preparing the environment (this section) Section 2: Configuring the AD Server Section 3: Configuring the NAS system About Microsoft AD Microsoft Active Directory (AD) in Windows Server environments is a directory service designed for data management and resource distribution on network environments. Microsoft AD allows storing and sharing data, configuring storage parameters, and managing account information from a central location. Joining your NAS system to Microsoft AD brings the following benefits: Simplified account management The same Microsoft AD account name and password can be used for your NAS system; there is no need to manage separate sets of account information any more. Consolidated access control Read/write rights to shared directories on the network can be controlled from your NAS system. Enhanced security Your NAS system can also benefit from the enhanced data protection protocol integrated in Microsoft AD. 81 EonNAS Pro/1000 Series Web-Based Interface Software User Manual Step 1: Confirm the The procedure described in this application note is applicable to software NAS software version 1.4.27 or later. To check the software version and update it (if version necessary), follow these steps. Go to Maintenance > System > Software Update. Check the software version in the Currently Installed Software Package corner. If the version is 1.4.27 or later, jump to the next section and continue from there. If the version is older than 1.4.27, update the software to the latest version following these steps. 5. Obtain the latest software file from your vendor and store it in your computer. 6. Click the Browse button to select the downloaded software file. 7. Click the Upload to NAS button to upload the software file into your NAS system. The upload progress will appear. 8. When uploading the software has been completed (a message will appear), the new software package information will appear in the screen. 9. Click the Install button to install the software file. The NAS system will reboot after the new version is installed. 10.Close the browser, open it, and log into the NAS system again (it might take several minutes before the NAS system gets back online.) 82 Configuring the System Step 2: Take an This snapshot image will be of use in case the NAS system encounters errors NAS system during user import. snapshot Go to Maintenance > System > System Snapshot. Click on Take Snapshot. Enter a snapshot name and add a description. Click on OK. After creation, the snapshot can be found in the system snapshot list. 83 EonNAS Pro/1000 Series Web-Based Interface Software User Manual In the event this system snapshot has to be used (system recovery), this recovery will require a short amount of downtime in the form of an NAS system reboot. Make sure to properly plan this recovery so that the reboot downtime does not interfere with business applications. For more information about system recovery, please refer to later steps. Step 3: Time The NAS and AD server should be synchronized, with a time difference of no Setting more than 5 minutes. To check the date/time settings of the NAS, go to Configuration > System > Date/Time in the NAS GUI. Step 4: Conduct a Prepare a test AD server to conduct a practice run before doing the Test Run configurations on the operational AD server. In this way, users can ensure that the configurations highlighted in this document work in their specific environments and avoid any damage from unexpected errors that may occur when doing these configurations for the first time. This AD server should include all user accounts. This AD server will be the target server for NAS. Using Microsoft Active Directory (AD) with NAS: Part 2 of 3 Step 1. Open DNS (Windows Server 2003/2008) Go to Start > Administrative Tools > DNS. Manager 84 Configuring the System (Windows Server 2012) Open DNS Manager by going to Tools > DNS. Step 2. Check the The DNS Manager will appear. Locate the DNS server and expand the tree in forward lookup the sidebar. zone 85 EonNAS Pro/1000 Series Web-Based Interface Software User Manual Check the AD server IP settings in the Forward Lookup Zones. In this example, the IP address is 172.18.4.164. Start of Authority (SOA): Make sure this item is included in the list. Name Server (NS): Make sure this item is included in the list. Host (A): The IP address must match that of the AD server. Step 3. Add a Add a zone in Reverse Lookup Zones by right-clicking and selecting New Zone, reverse lookup as shown below. zone The New Zone Wizard will appear. Click Next to proceed. 86 Configuring the System Select the following options and click Next: Primary zone Store the zone in Active Directory Select the following option and click Next: To all domain controllers in this domain 87 EonNAS Pro/1000 Series Web-Based Interface Software User Manual (For Windows Server 2008/2012) Select the following option and click Next: IPv4 Reverse Lookup Zone Enter the first three portions of the server’s IP address as the Network ID and click Next. 88 Configuring the System Select the following option and click Next: Allow only secure dynamic updates The reverse lookup zone will appear in the DNS Manager. Confirm the settings on the screen. 89 EonNAS Pro/1000 Series Web-Based Interface Software User Manual Start of Authority (SOA): Make sure this item is included in the list. Name Server (NS): Make sure this item is included in the list. Step 4. Create a Right-click on the newly created reverse lookup zone and select Other New host record in the Records. reverse lookup zone Select the following option and click Create Record: Host (A or AAAA): Windows Server 2008/2012 Host (A): Windows Server 2003 90 Configuring the System Enter the IP address of the AD server and check “Update associated pointer (PTR) record.” Click OK. 91 EonNAS Pro/1000 Series Web-Based Interface Software User Manual Restart the AD server, and then check that the reverse lookup zone setting has been updated. Start of Authority (SOA): Make sure this item is included in the list. Name Server (NS): Make sure this item is included in the list. Host (A): The IP address must match that of the AD server. Pointer (PTR): The Data column should show the IP address of the AD 92 Configuring the System server. Using Microsoft Active Directory (AD) with NAS: Part 3 of 3 Step 1. Configuring Make sure that the AD user accounts meet the following criteria: AD User Account Settings AD user logon name needs to be the same as the full name. The user logon name can not include the following invalid characters: /\[]:;|=,+*?<>@” Step 2. Adding AD In the NAS GUI, go to Configuration > Network > DNS and click on Add in the server to NAS DNS Server section. Enter the Windows AD server’s IP address and click on OK. Confirm that the DNS server has been added. 93 EonNAS Pro/1000 Series Web-Based Interface Software User Manual Go to Configuration > Service > Share and make sure that the CIFS service has been enabled (Online). If it has been disabled, click the icon to enable it. Go to Configuration > Service > Directory, select the LDAP service and click on Edit. Configure the settings and click OK after finishing the settings. LDAP Server IP Address / Domain Name: Enter either the IP address or the domain name of the AD server to specify it. Example: (IP Address) 172.18.4.164 (Domain Name): test.com 94 Configuring the System LDAP Server Port: Specifies the server port. This parameter will be assigned automatically according to the IP address. Proxy Username: Enter the AD server admin username. Proxy User Password: Enter the AD server admin password. When LDAP configuration is successful, the AD has been added to the NAS system. Go to Configuration > Network > DNS to check the DNS Suffix setting and confirm the Windows domain name. It should appear automatically if the LDAP configuration has been done correctly. Go to Configuration > Service > Share to check CIFS settings and confirm the Windows domain name. It should appear automatically if the LDAP configuration has been done correctly. 95 EonNAS Pro/1000 Series Web-Based Interface Software User Manual Step 3. Importing Go to Account > User and click on Import. Users from AD Server Ensure the AD users are imported from the AD server. Step 4. Allowing Go to Explorer in the NAS GUI and select the folder to be shared. Click on Users to Access Share. Folders 96 Configuring the System Add users that will have permission to access this folder by clicking on Add. Make sure that the CIFS/FTP/SFTP share protocol has been checked. To add users and/or groups, move them to the right-side boxes using the arrow signs. 97 EonNAS Pro/1000 Series Web-Based Interface Software User Manual After configuring the share settings, click OK button to apply the modifications. After that, go back to Windows Server and verify whether the share folder access rights are the same as on the NAS system. To do so, find the relevant network disk, right-click and select Properties. The share folder access settings can be found in the Security tab. Appendix 1: NAS If the system encounters errors during import, recover (rollback) the system as System Recovery follows using the system snapshot image mentioned above. Procedure Go to Maintenance > System > System Snapshot. Select the snapshot image for recovery and click on Rollback. 98 Configuring the System Appendix 2: If joining Windows AD fails after configuring everything, check the following Troubleshooting items again to make sure the configurations are correct. NAS DNS Server IP Address It should be the same as the the Windows AD server’s IP address. The Time Difference between NAS and Windows AD Server It should be less than 5 minutes. Configuring the NIS Service The NIS (Network Information Service) protocol supports distributing system configuration data in Unix/Solaris environment. NIS and LDAP service are mutually exclusive. If you enable one, you need to disable the other. Go to Configuration > Service > Directory Steps Click to highlight NIS in the list. 99 EonNAS Pro/1000 Series Web-Based Interface Software User Manual Click Edit. The configuration window will appear. Enter the parameters. Server Domain Specifies the domain name for the NIS master server and all of its clients. Server IP Address Specifies the IP address of the NIS master server. 100 Configuring the System Configuring Miscellaneous Services Activate and configure NDMP service for direct system backup and external anti-virus engine for data protection. Go to Configuration > Service > Miscellaneous Anti-Virus NAS allows an external engine to scan virus through the ICAP (Internet Content Adaptation Protocol). Two scanning engines are supported: Symantec and TrendMicro. NDMP NDMP (Network Data Management Protocol) allows users to move data directly from a NAS system to backup systems without going through a network server. Network loading can thereby be reduced, and consequently the impact on the system's performance will not be as pronounced as without NDMP. Rsync Target The Rsync Target service allows a 3rd party backup server to become a remote replication source for NAS (= NAS becomes the target device for a 3rd party source device). Enabling this service allows the 3rd party server to connect with NAS through the Daemon mode, as opposed to the Shell (rsh/ssh) mode used in the standard NAS-to-NAS remote replication. Parameters Status Online: The service has been enabled. Offline: The service has been disabled. Maintenance: The service is temporarily disabled (likely due to inappropriate configurations). Before configuring a file service, you must enable it. Clicking this icon enables or disables the service. Edit Edits parameters of the highlighted service. 101 EonNAS Pro/1000 Series Web-Based Interface Software User Manual Stop all Disables all services at once. Configuring Anti-Virus Engines NAS allows an external engine to scan virus through the ICAP (Internet Content Adaptation Protocol). Two scanning engines are supported: Symantec and TrendMicro. Note You can also specify the type of files to be scanned: This allows you to narrow the scope of scanning to reduce the amount of system resource spent on scanning. Go to Configuration > Service > Miscellaneous Steps Click to highlight Anti-Virus in the list. Click Edit. The configuration window will appear. Enter the scan policy parameters. 102 Configuring the System Scan Server Specifies the IP address of a scan engine. NAS Pro can communicate with scan engines installed with anti-virus software supporting the ICAP protocol. Port Specifies the connection port used for the scan engine. Maximum File Size Limits the size of scanned files. When Exceeding Allows or denies files whose size exceeds the limit set in Max File Size the Maximum File Size parameter. File Type Specifies the type of files to be scanned. “+” indicates including a specific file type in scanning. “+*” indicates including all types of files. “-” indicates excluding a specific file type in scanning. “-*” indicates excluding all types of files. Examples “+exe” indicates including executable files. “–jpg” indicates excluding jpeg files. “+*,-exe” indicates including all types of files except for executable files. 103 EonNAS Pro/1000 Series Web-Based Interface Software User Manual “jpg,-*” indicates excluding all types of riles except for JPEG files. For detailed rules, refer to this document. Configuring the NDMP Service NDMP (Network Data Management Protocol) allows users to move data directly from a NAS system to backup systems without going through a network server. Network loading can thereby be reduced, and consequently the impact on the system's performance will not be as pronounced as without NDMP. Go to Configuration > Service > Miscellaneous Steps Click to highlight NDMP in the list. Click Edit. The configuration window will appear. Enable DAR Enables DAR (Direct Access Recovery), which allows you to quickly restore a single file from a backup data file containing millions of files. 104 Configuring the System Ignore File Meta When enabled, ignores data changes that have occurred Changes due to Copy-on-Write backups. NDMP Version Specifies the NDMP revision number. The default is 4. TCP Port Specifies the number of TCP ports leveraged for the NDMP service. The default is 10000. Authentication Specifies the password encryption method: Cleartext or Type Cram-md5. User Name / Specifies the login account. Password Restart Service Restarts the NDMP service after configuration. Configuring the Rsync Target Service The Rsync Target service allows a 3rd party backup server to become a remote replication source for NAS (= NAS becomes the target device for a 3rd party source device). Enabling this service allows the 3rd party server to connect with NAS through the Daemon mode, as opposed to the Shell (rsh/ssh) mode used in the standard NAS-to-NAS remote replication. Configuring There are two ways to configure remote replication, depending on the role your Remote Replication NAS system take. Required environment (either way) An rsync-compatible source device and a source directory (folder) An rsync-compatible target device and a target directory (folder) The capacity of the target directory must be equal to or larger than the source directory. Before configuring remote replication parameters, obtain the following information of the target device. IP address Login user name 105 EonNAS Pro/1000 Series Web-Based Interface Software User Manual Password If your NAS system is the source You need to configure remote replication from the Backup menu. Go to the Backup > Remote Replication menu. If your NAS system is the target Follow the instructions listed below. Go to Configuration > Service > Miscellaneous Steps (Configuring 1. Confirm the size of the source directory/folder you need to replicate in the Remote Replication when NAS is the Target) source device. 2. Click to highlight Rsync Target in the list. 3. Click Edit. The configuration window will appear. 4. Do not change the port number 873 unless you need to. 873 is the default 106 Configuring the System port number used for the rsync Daemon mode, used for the remote replication conducted between the NAS and a 3rd party device. 5. Enter the username and password for your NAS system. The source device uses this account to log into your NAS system and copy the files into the specified directory. 6. Click the Add button and specify the shared folder to which the data will be stored (if you need to create a shared folder, go to the Explorer menu in the Home page). Give the folder an alias in the Share Name box. This will be used by the source device to identify its target folder. 7. Click OK. Your NAS is now configured as the target device. 8. Configure the remote replication setting in the source device. If it is another NAS, you may go to the Backup > Remote Replication menu to do so. If it is a 3rd party device, follow the instructions in its user manual. 107 EonNAS Pro/1000 Series Web-Based Interface Software User Manual Configuring System Parameters Configure basic system settings including host name, time, language, and administrator password. Go to Configuration > System Host Settings Configure basic parameters such as the name of your NAS system, multiple login, and power saving. Date/Time Adjust the date and time to your local environment or synchronize the time with an NTP (Network Time Protocol) server. Language Select your preferred display language. Admin Password Change the administrator password to protect your data and system configurations from unauthorized access. Certificates Manage the certificate file and private key for secure connection protocols. Configuring Basic Host Parameters Configure basic parameters such as the name of your NAS system, multiple login, and power saving. Go to Configuration > System > Host Settings 108 Configuring the System Host Name Assigning a unique name is required when you have multiple identical NAS models connected to the same network. Enter the new NAS system name and click OK. Multiple Login By default, one user can login a NAS system one at a time. By enabling multiple login, the same user may login a NAS system multiple times concurrently. Data transactions will be served on first-come, first-served basis. If there are conflicts among login sessions, operations might be cancelled and failure messages might appear. Power Saving You may put the hard drives to rest when there is little or no data transaction going. Check the option(s) and select the time. Idle mode: Hard drives will enter low-power consumption mode but the drives keep spinning. Standby mode: Hard drives will stop spinning. It will consume even less power than idle mode, but takes more time to get active again. All hard drives will enter the power saving state at once. If a drive is used to store NAS system OS, the drive will never enter into idle or standby mode. 109 EonNAS Pro/1000 Series Web-Based Interface Software User Manual Cache Flush Policy The Cache Flush Policy option controls how frequently the contents of the cache memory is saved into the hard drives of the NAS system. Enabled (checked): The cache memory is flushed (stored) to the hard drives only when the cache buffer is full. This improves system performance but affects data protection. Disabled (unchecked): The cache memory is flushed (stored) to the hard drives at each I/O transaction. This improves data protection but affects system performance. Setting the Date and Time Adjust the date and time to your local environment or synchronize the time with an NTP (Network Time Protocol) server. Go to Configuration > System > Date/Time Steps Date Click the calendar icon in the Date corner. In the calendar that appears, click the current date and click OK. 110 Configuring the System Time To change the time, edit the current setting in the Time corner. The format is HH:MM:SS. Timezone Select your local timezone from the drop-down menu. Synchronizing the Optionally, you can keep your NAS system’s time synchronized to an NTP time with an NTP (Network Time Protocol) server to eliminate manual adjustment. Server Find the address of the NTP server you want to use. NTP.org has a comprehensive list of available servers. Click Edit Server in the NTP Server corner. In the NTP Server window that appears, click Add. Enter the address of the NTP server and click OK. Confirm the new server in the list and click Close. Now the NTP server should appear in the drop-down list. Also check Periodically Synchronize Clock with NTP Server. 111 EonNAS Pro/1000 Series Web-Based Interface Software User Manual Click Sync to synchronize the time or Edit Server to change the NTP server. Click OK. Selecting the Language Select your preferred display language. Note Changing the language is also available in the Login screen. Go to Configuration > System > Language Steps Select the new language from the drop-down menu and click OK. Changing the Administrator Password Change the administrator password to protect your data and system configurations from unauthorized access. Note You cannot change its user name (admin). For configuring other user accounts, go to the Account > User menu. The administrator password will be reset to the default “admin” when the default configurations have been restored through the hardware Restore 112 Configuring the System Default button. Go to Configuration > System > Admin Password Steps Enter the new password. The default settings are: Username: admin Password: admin Managing Certificates Manage the certificate file and private key for secure connection protocols. About Certificate Create, import, or export the certificate file and private key for secure Files connection protocols. SSL (Secure Socket Layer) is used for HTTPS and FTPS protocols. SSH (Secure Shell) is used for SFTP protocol. Go to Configuration > System > Certificates 113 EonNAS Pro/1000 Series Web-Based Interface Software User Manual Creating SSL Certificate 1. Click the Create button in the SSL Certificate pane. 2. Enter the parameters and click OK. 3. The SSL certificate file will appear in the list. Name Specifies the name of the SSL certificate. Key Size Specifies the key size: 1024, 2048, or 4096 bit are available. 2-Digit Country Specifies the country code. Refer to SSL.com for the list of country codes. 114 Configuring the System Full State or Specifies the state or province you are in. Province Locality (City) Specifies the city in which you reside. A space character is not allowed. Organization / Specifies the name of your company and the division Organization Unit you belong to. Common Name Specifies the Fully Qualified Domain Name (FQDN) for which the SSL certificate is being requested. Email Exporting SSL Certificate Specifies your email address. 1. Click the Export button in the SSL Certificate pane. 2. In the popup window, select “Save” and store the certificate to a local folder. 3. Make sure that the *.crt file has been saved. Importing SSL Certificate 1. Make sure that an SSL certification file and matching private key already exists in a local folder. (A password may be required, depending on the privat key) 2. Click the Import button in the SSL Certificate pane. 3. Browse the local folder and select the files. (Enter the password if applicable) 4. Click OK. The certificates will appear in the list. Creating an SSH Key 1. Click the Create button in the SSK Key pane. 2. Enter the parameters and click OK. 115 EonNAS Pro/1000 Series Web-Based Interface Software User Manual 3. The SSH key will appear in the list. Name Specifies the name of the SSH key. Key Size Specifies the key size: 1024, 2048, or 4096 bit are available. Type Specifies the key encryption algorithm: DSA (Digital Signature Algorighm) or RSA. Password Specifies the secret passphrase (password) for the key. 116 Configuring the System Configuring Network Parameters Activate and configure LAN protocols including IP address, DNS server, and gateway. Go to Configuration > Network Basic Settings Enable and configure the LAN interfaces: Internet protocol (IPV4 or IPV6), IP address, subnet mask, and MAC address. DNS Configure DNS (Domain Name Server) settings to use Active Directory services on your NAS system. Routing Configure network routing by specifying the destination, netmask, and gateway that acts as an entrance to other IP networks. Trunking Increase network bandwidth by combining (trunking) two LAN interfaces into one, creating a link aggregation configuration. Jumbo Frame Improve network throughput by increasing the frame size to reduce the number of packets. Configuring the IP Address, Netmask, MAC Address Enable and configure the LAN interfaces: Internet protocol (IPV4 or IPV6), IP address, subnet mask, and MAC address. Go to Configuration > Network > Basic settings 117 EonNAS Pro/1000 Series Web-Based Interface Software User Manual Steps Highlight a network interface and click Edit. The network configuration window will appear. Make sure the interface is enabled, and then specify the IP address: DHCP or static IP. Consult your system administrator regarding the correct IP address assigned to your NAS system. If a static IP address has been entered, the gateway can be left empty. Notes IPV6 does not support CIFS/SMB sharing service. After enabling IPV6, you need to restart the NAS system to make the change effective. See the Maintenance > System > Shutdown menu. Multiple LAN ports must reside in separate subnet masks. Shutting down an interface might disconnect the NAS system from the network: it must be done carefully. 118 Configuring the System At least one interface needs to remain alive. Upon System The network IP addresses will be reset when (a) the default system Initialization configurations are restored through the Restore Default button on the hardware or (2) the system has been reboot following the Startup Wizard (system initialization). The system will try to locate its IP address through DHCP for 3 minutes. If no address is assigned, the system will pick the default static IP address for the LAN ports as follows: LAN 1: 10.0.0.2 LAN 2: 10.0.0.3 For configuring the NAS system properly when the network connections are not configured automatically, see the “When You Cannot Locate Your NAS” in the Home menu. Configuring the DNS Server Configure DNS (Domain Name Server) settings to use Active Directory services on your NAS system. Note The DNS server translates domain names into corresponding IP addresses. The DNS suffix is usually your domain name excluding the host part. The DNS suffix and NetBios name form the FQDN (Fully Qualified Domain Name). Go to Configuration > Network > DNS 119 EonNAS Pro/1000 Series Web-Based Interface Software User Manual Overview Click Add to enter the DNS server/suffix information. Multiple instances are allowed. Configuring the Gateway (Routing) Configure network routing by specifying the destination, netmask, and gateway that acts as an entrance to other IP networks. Note To configure the default gateway with the Netmask value “0.0.0.0”, go to the Configuration > Network > Basic Settings menu. Go to Configuration > Network > Routing 120 Configuring the System Steps Click Add to add a new gateway (routing) profile. Interface Select the LAN port for which you want to configure routing. Destination / The Destination and Netmask address are used to Netmask specify the destination IP address. Gateway Specifies the address the host uses to transfer IP packets to other networks. Dynamic/Static Specifies the new route setting is either Dynamic IP route or Static IP route. Configuring Trunking Increase network bandwidth by combining (trunking) multiple LAN interfaces into one, creating a link aggregation configuration. Benefits Trunking offers the following benefits: Increased bandwidth: bandwidths of multiple interfaces will be added up. Improved security: Even when one LAN interface fails, the other interface will keep the network connection intact. Hardware Two LAN ports on your NAS hardware must be connected to the network. Prerequisites 121 EonNAS Pro/1000 Series Web-Based Interface Software User Manual The network switch must be compatible with trunking. Note The trunking settings will be reset when the default system configurations are restored through the hardware Restore Default button. Go to Configuration > Network > Trunking Steps (Models with Click Configure. The Link Aggregation window will appear. two LAN Ports) Enable trunking and select the LACP (Link Aggregation Control Protocol) mode: Active or Passive. For trunking, each interface must reside in a separate subnet mask. The trunked LAN ports are always LAN 1 and LAN 2. LACP Mode The LACP (Link Aggregation Control Protocol) controls bundling of multiple ports. It automatically bundles links between two devices by sending LACP packets. In Active mode, LACP frames will always be sent along configured links. In Passive mode, one side reacts only when the other side initiates transaction. Steps (Models with Click Configure. The Link Aggregation window will appear. Additional Ports in the I/O Card Slot) 122 Configuring the System Enable trunking, select the LACP (Link Aggregation Control Protocol) mode: Active or Passive and select the combination of LAN interfaces. For trunking, each interface must reside in a separate subnet mask. Aggregation Name Specifies the name for the trunking configuration. LACP Mode The LACP (Link Aggregation Control Protocol) controls bundling of multiple ports. It automatically bundles links between two devices by sending LACP packets. In Active mode, LACP frames will always be sent along configured links. In Passive mode, one side reacts only when the other side initiates transaction. Combination of You may aggregate the LAN interfaces in either of the LAN Interfaces following patterns. LAN1 and LAN2 LAN3 and above (you may combine any of the LAN 123 EonNAS Pro/1000 Series Web-Based Interface Software User Manual interfaces) You cannot combine LAN 1/2 (located on the main board) and LAN 3/4/5/6 (located on the extension slot). When the Network If the switch does not support trunking, the trunked ports may be disconnected Switch is from the network. If this happens, press and hold the Restore button on your Incompatible with NAS hardware to restore default network settings as well as other system Trunking configurations (See the hardware manual for details). User data will not be affected. Configuring Jumbo Frame Improve network throughput by increasing the frame size to reduce the number of packets. Note To enable jumbo frames, all network devices connected to your NAS system must support jumbo frames as well. The actual transfer rate will be determined by the device with the slowest frame size in the network. The jumbo frame settings will be reset when the default system configurations are restored thorugh the hardware Restore Default button. Go to Steps Configuration > Network > Jumbo Frame You must configure one interface at a time: Select the frame size of an interface and click OK, then repeat it for the other interface. Highlight the interface and click Edit. Select the frame size. 124 Configuring the System 125 EonNAS Pro/1000 Series Web-Based Interface Software User Manual Configuring Hardware Peripherals Manage external devices connected to your NAS system. Configure system indicators including buzzer and LED. Go to Configuration > Peripheral Printer Activate a USB printer connected to your NAS system. Configure printing parameters and share the printer with other devices on the network. External Drive View the status of external USB/eSATA storage drives connected to the rear panel of your NAS system. To backup your data to those drives, go to the Backup menu. Miscellaneous Activate and configure the SNMP trap for the UPS (Uninterruptible Power Supply) device connected to your NAS system to protect your data from power outages. Connecting a Printer to Your NAS System Activate a USB printer connected to your NAS system. Configure printing parameters and share the printer with other devices on the network. Note The maximum number of connected printers is 3 even if more USB ports are available. Go to Configuration > Peripheral > Printer 126 Configuring the System Adding a Printer Connect the USB printer to your NAS. Click Add. The printer should appear in the popup. Click Next. Configure the parameters and click Next. Name Set the printer’s name that will be seen on the network. Description Add a simple description for this printer. Connection The connection path will appear automatically. Sharing Check to share this printer with other device on the network. Select the printer brand to specify the driver for this printer. You may also provide a *.ppd (printer driver) file manually. Click Next. 127 EonNAS Pro/1000 Series Web-Based Interface Software User Manual Select the hardware model. Click Finish. The printer will be added to the list. Viewing Printing Click Jobs and view the list of ongoing printing jobs. Jobs 128 Configuring the System Pausing/Resuming Click Pause to disable the printer. Click again (Resume button) to enable it. the Printer Editing/Deleting the To configure printer description and sharing status, click Configuration. Printer To delete the printer, click Remove. Connecting an External Storage Device to Your NAS System View the status of external USB/eSATA storage drives connected to the rear panel of your NAS system. To backup your data to those drives, go to the Backup menu. Note An eSATA port is available only for selected models. Before you use this feature, connect a storage device to your NAS. See the hardware manual for details. You cannot view the status of the storage devices connected to the front panel USB port of your NAS system, if available. Go to Configuration > Peripheral > External Drive 129 EonNAS Pro/1000 Series Web-Based Interface Software User Manual Steps The list of storage device should appear in the list. Dlick Details to view the profile. To remove the storage device from the system, click Remove and then disconnect the device from the NAS hardware. Configuring Other Peripherals Activate and configure the SNMP trap for the UPS (Uninterruptible Power Supply) device connected to your NAS system to protect your data from power outages. Note To activate the UPS, first connect the UPS hardware to your NAS system’s USB port. You can mute or disable the buzzer and system fault LED. Note that we recommend you to keep the indicators active to prevent critical events being unnoticed. 130 Configuring the System Go to Configuration > Peripheral > Miscellaneous Enabling UPS An externally connected UPS (Uninterruptible Power Supply) protects your data Support from power outages. When a power outage occurs, the UPS switches the power supply to its own power source (battery) until the NAS system safely shuts down without losing its data. Configuring the UPS Make sure the following options have been configured in your UPS device. The configuration procedure listed here is for your reference only. For the latest and detailed information, refer to the user manual of your UPS device. Power connection between NAS: Make sure the power cable of your NAS system is connected to the UPS. Data connection between NAS Make sure the UPS and your NAS are connected by one of the following options: - Network: If your UPS has network connectivity, you may connect the LAN port to the same network as your NAS. When a power outage occurs, the NAS system will be triggered via an SNMP trap. - USB: NAS accepts USB connectivity between the UPS. Triggering the NAS system will occur directly via the USB cable (without the SNMP trap). To use the USB connection option, make sure that the NAS system has been updated to the latest version of the software. For details, see the Maintenance > System > Software Update menu. SNMP trap receiver (for network connection): for specifying the NAS 131 EonNAS Pro/1000 Series Web-Based Interface Software User Manual system that receive notifications when a power outage occurs Configuration Example (APC UPS Network Management Card, when NAS and UPS are connected via network): Go to the Administration > Notification > SNMP Traps > trap receivers menu. Click Add Trap Receiver and specify the NAS system as the receiver by entering the IP address and the host name of the NAS system. To obtain the host name of the NAS system, check the Configuration > System > Basic Host Settings menu. SNMP trap listen port number (for network connection): for specifying the trap port number for sending (UPS) and receiving (NAS) trap messages. Recommended setting: 162 Configuration Example (APC UPS Network Management Card): Go to the Logs > Syslog > servers menu. Enter the Syslog port number (recommended: 162) in the port setting. Shutdown at low battery level: for initiating device shutdown when the battery level becomes lower than the threshold. Recommended setting: 5 minutes Configuration Example (APC UPS Network Management Card): Enter the utility and select the UPS tab. Select the Configuration > Shutdown menu from the left sidebar, and set the “Low Battery Duration” period to 5 minutes. Configuring the NAS 1. Make sure that the power cord of your NAS system is connected to the UPS and your NAS system and the UPS are connected via the network or a USB cable, as mentioned in the previous paragraphs. 2. Check Enable UPS Support. If the NAS system and the UPS are connected via the network, make sure that the SNMP trap listen port (default 162) matches that of the UPS. 3. Click Apply to confirm. 132 Configuring the System Disabling/Muting The buzzer sounds when critical system events occur. When you hear the the Buzzer buzzer sound, identify the cause from the system event log (Maintenance > Log), mute the buzzer, and rectify the issue. Click Mute to mute the buzzer (it will sound again at the next event). Click Disable/Enable to turn off/on the buzzer functionality. We strongly recommend keeping the buzzer enabled. Clearing the Click Turn Off to clear the system fault LED. Note that it only resets the current System Fault LED status and does not disable the LED function. 133 EonNAS Pro/1000 Series Web-Based Interface Software User Manual Configuring Event Notifications Receive notifications of important system events in your email inbox or via SNMP traps. A list of all system events can be viewed in the Maintenance > Log menu. Go to Configuration > Notification SMTP Receive notifications of important system events in your email inbox by configuring the SMTP (Simple Mail Transfer Protocol) settings used in common email clients. SNMP Receive notifications of important system events through SNMP (Simple Network Management Protocol) trap. Receiving Event Notifications by Emails (SMTP) Receive notifications of important system events in your email inbox by configuring the SMTP (Simple Mail Transfer Protocol) settings used in common email clients. Note In order to use this feature, you need to have an email account using an SMTP server for sending emails. Go to Configuration > Notification > SMTP 134 Configuring the System Step1: Copying the Account Information Open your email application and obtain the following information. Outgoing mail server (SMTP) address: SMTP Server Login username Login password Email address (used as a sender) Select a valid email address that will be used as the receiver. Step 2: Configuring NAS Parameters Fill in the parameters (described below). Click Send Test Email to test the settings (you should receive a test notification). SMTP Server Specifies the email server’s address. You may enter either the IP address or domain name. IP address example: 192.168.1.18 Domain name SMTP Port Specifies the TCP (Transmission Control Protocol) port number for relaying outbound mail to a mail server. If the SMTP Security is set as SSL, the default port number will be 465. If the SMTP Security is set as None, the default port number will be 25. SMTP Specifies the user name and password to log into the User/Password SMTP server. 135 EonNAS Pro/1000 Series Web-Based Interface Software User Manual SMTP Security Specifies whether to add authentication by enabling SSL. SSL: Communication security will be enhanced with Secure Sockets Layer. The default SMTP port number will be 465. None: There will be no additional transport layer security. The default SMTP port number will be 25. Sender Email Specifies the sender’s email address (must be a valid Address address). Receiver Email Specifies the receiver’s email address. You can enter Address multiple addresses, each separated by a comma. Event Level Specifies the severity level of events. Higher listed items are more important. If you select a level, you will also receive all messages for lower levels. Receiving Event Notifications in SNMP Trap Receive notifications of important system events through SNMP (Simple Network Management Protocol) trap. Go to Configuration > Notification > SNMP Steps Check Enable SNMP and fill in the parameters. 136 Configuring the System Parameters SNMP Trap Host Specifies the IP address of the host which receives SNMP traps (unsolicited SNMP messages generated upon an event). The host must be capable of receiving SNMP traps. SNMP Trap Port Specifies the port listening to SNMP traps. The default is 162. Message Filter Specifies the severity level of events. Higher list items are more important. If you select a level, you will also receive all messages for lower levels. Enable Enables SNMP event notifications. 137 EonNAS Pro/1000 Series Web-Based Interface Software User Manual Setting Up Storage Pools Create and manage virtual pools, the fundamental storage partition on which all file transactions will be performed. The virtual pool allows you to form a consolidated storage area without the physical limitation of disk drives. Create volumes and folders inside a pool to manage your data transactions. Note The capacity can be expanded as per necessary by adding more drives (thin provisioning), without reformatting or repartitioning. Go to Storage Pool Create and manage virtual storage pools. Volume Create volumes to manage your data and share file access with other users. To create an iSCSI target volume, select Create iSCSI. Disk View the list of hard disk drives installed in your NAS system and their ID, model name, size, the storage pool to which they belong, and status. Capacity Expansion Replace the member drives of selected pool with larger capacity drives. The pool size will be expanded when all member drives has been replaced. Overview Parameters Name Shows the name of the virtual pool. Total Space Shows the total capacity of the virtual pool. 138 Setting Up Storage Pools Used Space Shows the capacity being used. Free Space Shows the capacity available for use. Utilization Shows the percentage of the used capacity against the total. Status Shows the status of the virtual pool. ONLINE: The virtual pool has been enabled. OFFLINE: The virtual pool has been disabled. Deduplication Shows the status of data deduplication (removing Ratio duplication and redundancy from data to reduce the size). 139 EonNAS Pro/1000 Series Web-Based Interface Software User Manual Creating a Virtual Storage Pool Create and manage virtual storage pools. Note All disk drives that are currently inserted into your NAS will be automatically used to create the storage pool. Go to Storage > Pool Steps Click Create to configure parameters. Assign a unique name for the pool and select the data protection level (RAID level). To select member drives, choose the Customization option. Otherwise, all available disk drives will be selected as the member drives of this pool. 140 Setting Up Storage Pools Pool Name Enter a unique name for the pool. Data Protection Select the RAID level to protect your data. Level The available RAID level depends on the number of disk drives. RAID level Minimum number of drives RAID 0 1 RAID 1 2 RAID 5 3 RAID 6 4 RAID 10 4 RAID 50 6 141 EonNAS Pro/1000 Series Web-Based Interface Software User Manual RAID 60 8 To create RAID 10/50/60 (nested RAID levels), follow the procedures in the next section: Creating a Pool with Nested RAID Levels. Number of Drives View the number of disk drives inserted into your NAS system. Usable Capacity View the total amount of storage capacity that can be used by the storage pool. Selecting Member Choose the Customization option and click OK. Drives and Spare Drives Enter the pool name and choose the RAID level. Select the member drives from the list. Click Next. You may choose spare disks that will automatically replace member disks in case of errors. 142 Setting Up Storage Pools View the summary and click Back to modify or OK to confirm. The newly created pool will appear in the list. Creating Multiple You can create multiple pools as long as there are available disks (= disks that Pools are not part of a storage pool yet). About RAID Levels RAID level defines data protection and disk utilization. The following list shows the available RAID levels in NAS systems. RAID 0 Stripes the data (segments sequential data to different physical disks) to allow faster data I/O but does not deploy data protection features. RAID 0 offers maximum disk utilization because no disk area is spared for backup. The minimum number of drives for RAID 0 is two (two for data). RAID 1 Mirrors ( keeps identical copy) the whole data, therefore only half of the disk space is usable because the other half is used for backup. RAID 1 offers the least disk utilization but maximum data protection. 143 EonNAS Pro/1000 Series Web-Based Interface Software User Manual The minimum number of drives for RAID 1 is two (one for data, one for mirror). RAID 5 Stripes the data (segments sequential data to different physical disks) to allow faster data I/O and offers parity for data protection against one disk failure. RAID 5 offers good disk utilization (one disk space is reserved for backup). The minimum number of drives for RAID 5 is three (two for data, one for stripe). RAID 6 Stripes the data (segments sequential data to different physical disks) to allow faster data I/O and offers parity for data protection against two simultaneous disk failures. RAID 6 offers good disk utilization (two disk spaces are reserved for backup). The minimum number of drives for RAID 6 is four (two for data, two for stripe). Nested RAID Combines the security enhancement feature of RAID 1, 5, 6 Levels (redundancy) with the performance enhancement feature of (Example: RAID 10, 50, 60) RAID 0 (striping). RAID 10 (1+0), RAID 50 (5+0), RAID 60 (6+0) require more disk drives but offer the best of both levels. For more details on configuring RAID 10/50/60 in NAS, see the next section: Creating a Pool with Nested RAID Levels. Expanding a Pool The Expansion function in the Pool menu allows you to add another RAID configuration inside the same storage pool, as long as disk drives are available. This function DOES NOT expand the size of an existing RAID configuration. See the next section for detailed configuration procedures. The Capacity Expansion menu allows you to expand the size of an existing pool, or an existing hard disk, by replacing a hard disk drive with the one with a bigger capacity. Deleting a Pool To delete a pool, click Delete. Make sure you have backed up user data before deleting the pool. 144 Setting Up Storage Pools Creating a Pool with Hybrid RAID Configuration You may include multiple RAID blocks in a pool to create hybrid RAID configurations for better performance by utilizing data striping across RAID blocks. This feature is not available for NAS Pro 200. Notes You may combine RAID blocks of any RAID levels in a pool (RAID 0 + 1, 1, + 1, 1 + 5, 1 + 6…) and the blocks will be striped automatically. Each RAID block will contain its own parity drive. For example, if you combine two RAID 5 blocks, each block will retain its own parity drives, therefore two drives will be used for parity. (You may get better performance through the RAID 50 architecture). If you want to minimize the number of parity drives, create one RAID 5/6 block with all drives in the beginning. About Hybrid RAID A hybrid RAID level combines the security enhancement feature of RAID 1, 5, 6 Levels (redundancy) with the performance enhancement feature of RAID 0 (striping), offering the best of both worlds. Follow these procedures to create a pool with nested RAID levels. The example shows how to create a RAID 1 + RAID 1 (1+0) pool. Nested RAID Level RAID level Description Examples Minimum Applicable Models drives RAID 1 + RAID 1 RAID 1 + striping 4 (2+2) NAS 1100 NAS Pro 500 NAS Pro 800 Steps RAID 5 + RAID 5 RAID 5 + striping 6 (3+3) NAS Pro 800 RAID 6 + RAID 6 RAID 6 + striping 8 (4+4) NAS Pro 800 4. Go to the Storage > Pool menu. 5. Click the Create button, enter the pool name, and select Customization. Click Next. 145 EonNAS Pro/1000 Series Web-Based Interface Software User Manual 6. Select the appropriate RAID level (in this example RAID 1) and check the disk drives that form the first RAID block. 7. Click OK and skip selecting the spare drives to avoid using up the necessary disks for the second RAID block (you can add spare drives later using the Edit Spare button). 8. Check the summary of the first block and click OK. 146 Setting Up Storage Pools 9. The pool will appear in the list. Click the Expand button. 10.Again, select the Customization option and click Next. 11.Select the same RAID level (in this example, RAID 1) and the matching number of disk drives for the second RAID block. 147 EonNAS Pro/1000 Series Web-Based Interface Software User Manual 12.Click OK. The pool will be expanded with the second RAID block. 13.Click the Detail button to view the pool configuration. You should see two mirrored blocks (RAID 0) of identical RAID level (RAID 1/5/6). Viewing and Replacing Member Drives View the status of this pool's member disk drives. Replace disks if any issues such as checksum errors are found. Go to Storage > Pool Steps Select a virtual pool and click Detail. The list of member disk drives will appear. The Read/Write/Checksum columns shows the number of errors found. 148 Setting Up Storage Pools If you want to replace disk drives, highlight the drive and click Replace. Select an available drive from the drop-down list and click Replace again. The Replace function is used to replace failed member drive of the pool and to notify the server to re-build. Importing Pool Configurations Import the pool configurations of newly added disks that already contain storage pools. Note This feature is useful when you need to move a pack of pre-configured disk drives from one NAS to another. Go to Storage > Pool Steps Insert disk drives that contain storage pools into your NAS system. Click Import. The list of pool settings and their member drive information will appear. 149 EonNAS Pro/1000 Series Web-Based Interface Software User Manual To remove the profile, click Delete. To import the profile, click Import. The imported profile will appear in the Pool list. 150 Setting Up Storage Pools Creating an iSCSI Target Volume Create an iSCSI target volume, which enables NAS to be seamlessly integrated into existing iSCSI networks without complicated configurations. Note To use this feature, first enable the iSCSI service in the Configuration > Service > Share menu. Go to Storage > Volume Creating a New Click Create iSCSI. Enter the parameters and click Next. iSCSI Target Volume View the summary of configurations and click Back to modify or OK to complete. The new iSCSI target volume will appear in the list. 151 EonNAS Pro/1000 Series Web-Based Interface Software User Manual Volume Name Enter the name of the new volume. Size Caps the maximum disk capacity allocated for the virtual volume. The default minimum amount (0 GB) actually means “unlimited size.” Thin Provision / Allows the system to allocate actual storage capacity as Reserved needed. The “Thin-Provisioned” size determines the theoretical capacity. The “Reserved” size determines the physical capacity available at the beginning. Make sure that the reserved size does not exceed the hypothetical (thin-provisioned) size. Deduplication Reduces the amount of space for new data by integrating identical copies of data blocks. Deduplication does not change the size of the original data. Compression Enables data compression for new data on the volume. Data compression uses LZJB algorithm, a lossless data compression algorithm, which does not consume much power compared to other algorithms. Compression does not change the size of the original data. CHAP If you want to add password protection, check CHAP Access (Change-Handshake-Authentication-Protocol) and enter the username (CHAP name) and password (CHAP secret) of your choice. The CHAP secret must consist of between 12 to 57 ASCII characters. Space is allowed. 152 Setting Up Storage Pools Disable NAS supports ZIL (ZIL Intent Log) to check data integrity. Transaction Log On data write, NAS by default writes into the transaction log in parallel to ensure data integrity. You may disable this feature to improve performance at the expense of reduced data integrity for each folder/volume. When this feature is disabled, we recommend you to connect your NAS system to a UPS (Uninterrupted Power Supply) unit to ensure stable power supply. Editing/Deleting a Volume To edit the parameters of a volume, select a volume and click Edit. To remove a volume, select it and click Delete. About Thin Thin provisioning refers to a technique that automatically allocates storage Provisioning capacity as required. Traditionally, when a virtual pool is initially created, a large amount of physically drive capacity is allocated to each storage element to address future needs. Two shortcomings exist in this method: (1) the unused capacity tend to become wasted, and (2) once the allocated capacity is fully used, expanding it is not straightforward. Thin provisioning eliminates this problem by “virtually” allocating a large capacity to each element, but physically assigning just the amount required at the moment. As the capacity need increases, additional storage will be automatically drawn from the storage pool. Storage utilization will greatly improve and users will remain free from monitoring and adding storage capacity manually. 153 EonNAS Pro/1000 Series Web-Based Interface Software User Manual Viewing Disk Drive Profiles View the list of hard disk drives installed in your NAS system and their ID, model name, size, the storage pool to which they belong, and status. Go to Storage > Disk Steps The list of all hard disk drives inserted in your NAS system will appear. View the model name, size, the storage pool they belong, and the status. Select the disk ID and click the Detail button. The disk drive’s basic profile, followed by SMART (Self-Monitoring, Analysis and Reporting Technology) information, will appear. (Example of a SATA drive SMART information) SMART Status If the drive is a SATA drive, the SMART information will be as shown in the (SATA drives) diagram above. Here is the breakdown of the status. Convention: 154 Setting Up Storage Pools T: Threshold CV: Current Value R: Raw Value (n): priority Index Attribute Status OK Warning Bad 0x01 (1) Read Error Rate T <= CV ----- T > CV 0x05 (5) Reallocated Sectors Count others (2) R >= T (1)T > CV 0x07 (7) Seek Error Rate T <= CV ----- T > CV 0x0A (10) Spin Retry Count T <= CV ----- T > CV 0xB8 (184) End-to-End error / IOEDC T <= CV ----- T > CV 0xBC (188) Command Timeout T <= CV ----- T > CV 0xC4 (196) Reallocation Event Count T <= CV ----- T > CV 0xC5 (197) Current Pending Sector Count others (2) R >= T (1)T > CV 0xC6 (198) Offline Uncorrectable others (2) R >= T (1)T > CV 0xC7 (199) UltraDMA CRC Error Count T <= CV ----- T > CV 0xC8 (200) Write Error Rate T <= CV ----- T > CV 0xC9 (201) Soft Read Error Rate T <= CV ----- T > CV SMART Status (SAS/SCSI drives) If the drive is a SAS or SCSI drive, the SMART information will be as follows. I/O Type Index Description Value Read 00h Errors Corrected without Substantial Delay 3454705988 155 EonNAS Pro/1000 Series Web-Based Interface Software User Manual Read 01h Errors Corrected with Possible Delays 3407 Read 02h Errors Corrected by Rereads/Rewrites 0 Read 03h Total Errors Corrected 3454709395 Read 04h Total Times Correction Algorithm Processed 3454709395 Read 06h Total Uncorrected Errors 0 Write 00h Errors Corrected without Substantial Delay 0 Write 01h Errors Corrected with Possible Delays 0 Write 02h Errors Corrected by Rereads/Rewrites 0 Write 03h Total Errors Corrected 0 Write 04h Total Times Correction Algorithm Processed 0 Write 06h Total Uncorrected Errors 0 Verify 00h Errors Corrected without Substantial Delay 3208121 Verify 01h Errors Corrected with Possible Delays 0 Verify 02h Errors Corrected by Rereads/Rewrites 0 Verify 03h Total Errors Corrected 3208121 Verify 04h Total Times Correction Algorithm Processed 3208121 Verify 06h Total Uncorrected Errors 0 156 Setting Up Storage Pools Expanding Storage Capacity (Replacing Disks) Replace the member drives of selected pool with larger capacity drives. The pool size will be expanded when all member drives has been replaced. Your data will NOT be affected. This function is not available for RAID 0 configuration (because of the lack of redundant data) Go to Storage > Capacity Expansion How Capacity 1. Select a disk drive. Expansion Works 2. Replace it with a drive with larger capacity. 3. The NAS system will rebuild the data using redundant information stored in other drives in the pool. 4. Repeat the same for all disks in the same pool. 5. The pool size will be expanded. Note Make sure you have prepared replacement disk drives with the same size and interface type as the existing ones. We strongly recommend that all disk drives in the same pool will be of the same capacity. Because the Capacity Expansion function uses the redundant data in the RAID configuration, RAID 0 is not applicable (RAID 1, 5, 6 are all applicable). Pool Expansion vs. Disk Expansion The Expansion function in the Pool menu allows you to add another RAID configuration inside the same storage pool, as long as disk drives are available. This function DOES NOT expand the size of an existing RAID 157 EonNAS Pro/1000 Series Web-Based Interface Software User Manual configuration. The Capacity Expansion menu allows you to expand the size of an existing pool, or an existing hard disk, by replacing a hard disk drive with the one with a bigger capacity. Steps 1. Highlight a storage pool from the list and click Capacity Expansion. 2. The list of disk drives in the pool will appear. Highlight a drive. 3. Click Replace. The status description will change into “Ready to be removed” mode. (The status of other drives will change into “Don’t Remove” mode.) 4. Check the disk drive slot in your NAS system. The Hard Disk status LED (shown below) should turn red, indicating that it is ready to be disconnected from the system. 5. Pull the disk drive out of the enclosure. You will hear a short beep sound. For detailed procedures of drive removal, see the hardware manual. 6. The disk drive status should show “No disk available.” 158 Setting Up Storage Pools 7. Replace the old hard drive with a new drive. For detailed procedures of disk replacement, see the hardware manual. 8. Insert the new disk drive (attached to the tray) back into the enclosure. 9. The NAS system will automatically start rebuilding the storage pool. DO NOT remove any disk drive from the enclosure until it finishes. 10.When the rebuild process has been completed, the status and description indicate that the drive has been replaced. 11.Select other drives in the storage pool in the same manner. 12.When all drives have been replace, go to the Storage > Pool menu and make sure that the pool size has been updated. 159 EonNAS Pro/1000 Series Web-Based Interface Software User Manual Managing Folders Manage folders inside your NAS system. Create and configure folder sharings. Configure folder parameters: quota, deduplication, compression, anti-virus, and transaction log. Go to Folder Share Share folders among users and control access to folders. Configuration View the list of folders and add, delete, or edit a folder. WORM View, add, or edit the WORM (Write Once, Read Many) folder option to protect your data from tampering. Encryption View the list of encrypted folders and add, delete, or edit an encrypted folder. 160 Managing Folders Sharing a Folder Share folders among users and control access to folders. Go to Folder > Share Steps Click Add to create a folder to be shared and choose how to grant user privileges. Click Options to choose folder options. Pool Name Select the pool to which the folder belongs. You cannot choose the entire storage pool to be shared. Folder Path Enter the folder name. Access Rights Choose who are allowed to access this folder. Quota Quota represents the maximum or minimum disk capacity allocated for the folder. 161 EonNAS Pro/1000 Series Web-Based Interface Software User Manual The default amount (0 GB) actually means “unlimited size.” Deduplication Reduces the amount of space for new data by integrating identical copies of data blocks. Deduplication does not change the size of the original data. Antivirus Enables antivirus scanning on the folder. This option will be disabled if no antivirus software is found on the computer. Compression Enables data compression for new data on the folder. Data compression uses LZJB algorithm, a lossless data compression algorithm, which does not consume much power compared to other algorithms. Compression does not change the size of the original data. Disable NAS supports ZIL (ZIL Intent Log) to check data integrity. Transaction Log On data write, NAS by default writes into the transaction log in parallel to ensure data integrity. You may disable this feature to improve performance at the expense of reduced data integrity for each folder/volume. When this feature is disabled, we recommend you to connect your NAS system to a UPS (Uninterrupted Power Supply) unit to ensure stable power supply. Go to the Folder > Share menu and confirm the new share in the list. 162 Managing Folders Customizing the Access Rights Follow these instructions if you have chosen “Customize” when selecting the users who can access a shared folder. Step 1: Selecting the Folder Step 2: Selecting To add a user/group that has access right to this share, click the Add button in the Users/Groups the Access Rights pane. A new window prompt will appear. 163 EonNAS Pro/1000 Series Web-Based Interface Software User Manual To add a user or group, highlight it and use the Left/Right arrow icon to move it to the right pane (unselected) or left pane (selected). To search for a user or group, type the name into the search box. Matching users or groups will automatically appear. To run the search again, click the icon. Configure the type of access allowed to this user: Check Allow or Forbid for each item. 164 Managing Folders Step 3: Selecting Select the type of the share in the Share pane. the File Protocol Click OK to complete the configuration. CIFS/FTP CIFS (Common Internet File System) enables access to files stored on fileservers across an IP network in Windows OS environments. You can authenticate access through either Windows Domain (for users with Windows Active Directory (AD)) or Windows Workgroup. File Transfer Protocol is a standard network protocol used to exchange and manipulate files over a TCP/IP based network. NFS NFS (Network File System) is a standard file transfer protocol for Unix/Linux networks, which allows users to access network files in a manner similar to accessing local files. AFP AFP (Apple Filing Protocol) is the standard file transfer 165 EonNAS Pro/1000 Series Web-Based Interface Software User Manual protocol for Mac OS X and Appleshare servers. (For NFS) In the Share pane, click Setting. Configuring the File Protocol You need to add a subnet setting. Select the file transaction mode, Read-Write or Read-Only, and click Add. A new window will appear. Enter the IP address and subnet mask and click Verify. The subnet information will appear. Click OK. The new subnet setting will be added to the list. 166 Managing Folders NFS Parameters Read-Only Allows the user to read. Read-Write Allows the user to read and write. Root Privileges Allows the user to access the root folder. 167 EonNAS Pro/1000 Series Web-Based Interface Software User Manual Configuring a Folder View the list of folders and add, delete, or edit a folder. Go to Folder > Configuration Viewing the List of The list of existing folders will appear in a list. View their available size, quota, Folders and other parameters. To add a new folder, click Add. To edit a folder, click Edit or double-click a folder. To delete a folder, click Delete. Before you delete a folder, make sure user data has been backed up or removed. Creating a New Click Add. Configure the parameters. Folder 168 Managing Folders The new folder will appear in the list. Folder Name Enter the name of the new folder. Quota Quota represents the maximum disk capacity allocated for the folder. The default minimum amount (0 GB) actually means “unlimited size.” Deduplication Reduces the amount of space for new data by integrating identical copies of data blocks. 169 EonNAS Pro/1000 Series Web-Based Interface Software User Manual Deduplication does not change the size of the original data. Antivirus Enables antivirus scanning on the folder. This option will be disabled if no antivirus software is found on the computer. Compression Enables data compression for new data on the folder. Data compression uses LZJB algorithm, a lossless data compression algorithm, which does not consume much power compared to other algorithms. Compression does not change the size of the original data. Disable NAS supports ZIL (ZIL Intent Log) to check data integrity. Transaction Log On data write, NAS by default writes into the transaction log in parallel to ensure data integrity. You may disable this feature to improve performance at the expense of reduced data integrity for each folder/volume. When this feature is disabled, we recommend you to connect your NAS system to a UPS (Uninterrupted Power Supply) unit to ensure stable power supply. Encryption Enables folder encryption. Mounting Type Specifies how the encrypted folder will be mounted (unlocked). The following describes the mounting type and its status. Status/Mounting Type Unlocked/Automatic: The folder will be mounted automatically when the system boots up. Currently, the folder is mounted. Locked/Automatic: The folder will be mounted automatically when the system boots up. Currently, 170 Managing Folders the folder is unmounted. Unlocked/Manual: The folder will not be mounted until the user actively mounts it. Currently, the folder is mounted. Locked/Manual: The folder will not be mounted until the user actively mounts it. Currently, the folder is unmounted. Encryption Specifies the password for accessing the encrypted Password folder. The password must be 8 to 32 characters length. WORM WORM stands for Write Once, Read Many. When this option is enabled, the files and sub-folders in the folder cannot be modified or deleted until the retention period expires. To activate the WORM option, follow these steps. 1. Check the WORM checkbox. 2. Check the “I understand…” statement. 3. Set the retention period. If the retention period has been set to forever, the folder cannot be deleted unless the pool is destroyed. To view the list of WORM-enabled folders, go to the Folder > WORM menu. 171 EonNAS Pro/1000 Series Web-Based Interface Software User Manual Managing WORM Folders View, add, or edit the WORM (Write Once, Read Many) folder option to protect your data from tampering. Go to Folder > WORM What is a WORM WORM stands for Write Once, Read Many. When this option is enabled, the folder? files and sub-folders in the folder cannot be modified or deleted until the retention period expires. Viewing the List of The list of existing folders will appear in a list. View their available size, quota, Folders and other parameters. To add a new WORM folder, click Add. To edit a WORM folder, click Edit or double-click a folder. To delete a WORM folder, click Delete. Before you delete a folder, make sure user data has been backed up or removed. You cannot delete a WORM folder until the retention period expires. Creating a New Click Add. Configure the parameters. WORM Folder 172 Managing Folders The new folder will appear in the list. Folder Name Enter the name of the new folder. Quota Quota represents the maximum disk capacity allocated for the folder. The default minimum amount (0 GB) actually means “unlimited size.” Deduplication Reduces the amount of space for new data by integrating identical copies of data blocks. 173 EonNAS Pro/1000 Series Web-Based Interface Software User Manual Deduplication does not change the size of the original data. Antivirus Enables antivirus scanning on the folder. This option will be disabled if no antivirus software is found on the computer. Compression Enables data compression for new data on the folder. Data compression uses LZJB algorithm, a lossless data compression algorithm, which does not consume much power compared to other algorithms. Compression does not change the size of the original data. Disable NAS supports ZIL (ZIL Intent Log) to check data integrity. Transaction Log On data write, NAS by default writes into the transaction log in parallel to ensure data integrity. You may disable this feature to improve performance at the expense of reduced data integrity for each folder/volume. When this feature is disabled, we recommend you to connect your NAS system to a UPS (Uninterrupted Power Supply) unit to ensure stable power supply. Encryption Enables folder encryption. Mounting Type Specifies how the encrypted folder will be mounted (unlocked). The following describes the mounting type and its status. Status/Mounting Type Unlocked/Automatic: The folder will be mounted automatically when the system boots up. Currently, the folder is mounted. Locked/Automatic: The folder will be mounted automatically when the system boots up. Currently, 174 Managing Folders the folder is unmounted. Unlocked/Manual: The folder will not be mounted until the user actively mounts it. Currently, the folder is mounted. Locked/Manual: The folder will not be mounted until the user actively mounts it. Currently, the folder is unmounted. Encryption Specifies the password for accessing the encrypted Password folder. The password must be 8 to 32 characters length. WORM WORM stands for Write Once, Read Many. When this option is enabled, the files and sub-folders in the folder cannot be modified or deleted until the retention period expires. To activate the WORM option, follow these steps. 1. Check the WORM checkbox. 2. Check the “I understand…” statement. 3. Set the retention period. If the retention period has been set to forever, the folder cannot be deleted unless the pool is destroyed. To view the list of WORM-enabled folders, go to the Folder > WORM menu. 175 EonNAS Pro/1000 Series Web-Based Interface Software User Manual Managing Encrypted Folders View the list of encrypted folders and add, delete, or edit an encrypted folder. Go to Folder > Encryption What is An encrypted folder is password-protected with 256-bit AES encryption. The Encryption? encrypted folder can only be used for normal read/ write access with the authorized password. The encryption protects the confidential data from unauthorized access even if the hard drives or the entire server were stolen. You cannot decrypt an encrypted folder; you may need to remove the folder itself. Viewing the List of The list of existing encrypted folders will appear in a list. View their pool, status, Encrypted Folders and mounting type. To add a new encrypted folder, click Add. To edit an encrypted folder, click Edit or double-click a folder. To delete an encrypted folder, click Delete. Creating a New Click Add. Configure the parameters. Encrypted Folder 176 Managing Folders The new folder will appear in the list. Folder Name Enter the name of the new folder. Quota Quota represents the maximum disk capacity allocated for the folder. The default minimum amount (0 GB) actually means “unlimited size.” Deduplication Reduces the amount of space for new data by integrating identical copies of data blocks. 177 EonNAS Pro/1000 Series Web-Based Interface Software User Manual Deduplication does not change the size of the original data. Antivirus Enables antivirus scanning on the folder. This option will be disabled if no antivirus software is found on the computer. Compression Enables data compression for new data on the folder. Data compression uses LZJB algorithm, a lossless data compression algorithm, which does not consume much power compared to other algorithms. Compression does not change the size of the original data. Disable NAS supports ZIL (ZIL Intent Log) to check data integrity. Transaction Log On data write, NAS by default writes into the transaction log in parallel to ensure data integrity. You may disable this feature to improve performance at the expense of reduced data integrity for each folder/volume. When this feature is disabled, we recommend you to connect your NAS system to a UPS (Uninterrupted Power Supply) unit to ensure stable power supply. Encryption Enables folder encryption. Mounting Type Specifies how the encrypted folder will be mounted (unlocked). The following describes the mounting type and its status. Status/Mounting Type Unlocked/Automatic: The folder will be mounted automatically when the system boots up. Currently, the folder is mounted. Locked/Automatic: The folder will be mounted automatically when the system boots up. Currently, 178 Managing Folders the folder is unmounted. Unlocked/Manual: The folder will not be mounted until the user actively mounts it. Currently, the folder is mounted. Locked/Manual: The folder will not be mounted until the user actively mounts it. Currently, the folder is unmounted. Encryption Specifies the password for accessing the encrypted Password folder. The password must be 8 to 32 characters length. WORM WORM stands for Write Once, Read Many. When this option is enabled, the files and sub-folders in the folder cannot be modified or deleted until the retention period expires. To activate the WORM option, follow these steps. 1. Check the WORM checkbox. 2. Check the “I understand…” statement. 3. Set the retention period. If the retention period has been set to forever, the folder cannot be deleted unless the pool is destroyed. To view the list of WORM-enabled folders, go to the Folder > WORM menu. Exporting the Authentication Key File Click Export to download the authentication key file to a local directory. About the Authentication Key File There are two methods to access/modify an encrypted folder: Entering the password (specified when the folder was created) Specifying the authentication key file The authentication key file is a hidden file stored inside the encrypted folder. To use it, you must first download it to a local directory using this Export function. 179 EonNAS Pro/1000 Series Web-Based Interface Software User Manual Editing an Encrypted Folder Select a folder and click Edit in the menu. The Editing screen will appear. This option allows you to configure only the encryption aspect of the folder. To configure other parameters, you may do so from the Explorer menu. Mounting Type You may change the mounting type between Automatic and Manual. Authentication This option is available only when the folder’s mounting type is Automatic. When the mounting type is “Authentic,” you need to verify your setting by entering either the password (specified when creating the folder) or the authentication key file, which can be obtained through the Export function. Mounting/Unmounti ng an Encrypted Folder Unmounting a Folder Select a folder and click Unmount in the menu. The Status of the folder should change accordingly. Locked = Unmounted Mounting a Folder Select a folder and click Mount in the menu. 180 Managing Folders Enter the password or authentication key file to enable mounting. To obtain the authentication key file, use the Export function. The Status of the folder should change accordingly. Unlocked = Mounted When Using An encrypted folder can be used as the source or target folder of remote Encrypted Folders replication, but there are some limitations, as described here. for Remote Replication If the source encrypted folder is unmounted Replication will fail. If the target encrypted folder is unmounted A new target directory with the same name as the encrypted folder will be created. Example: Rsync source: “/Pool-1/FolderA/SourceData/” Rsync target: “/Pool-2/FolderB/TargetData/” Folder “Pool-2/FolderB” is an encrytped folder and unmounted. When remote replication starts, a new directory “TargetData” under “/Pool-2/FolderB/” will be created with replicated data from the source site. When the user wants to mount the encrypted target folder later, a warning message will appear, indicating that a target directory already exists. A folder with the same name as the encrypted target folder already exists in the target directory. If you mount the encrypted target folder, the existing folder and its files will be deleted. 181 EonNAS Pro/1000 Series Web-Based Interface Software User Manual If the user chooses to proceed, the existing target folder and its data will be deleted, and the encrypted folder will be mounted. If the user chooses not to proceed, the encrypted folder will not be mounted until the existing target folder and its data are deleted. 182 Setting Up User Accounts Setting Up User Accounts Create user accounts for accessing shared volumes or files in your network. Two levels of user account exist: User: Allows access for individual users with their own username and password. Admin/Superuser are special users for system configurations and moderation. Group: Allows combining multiple users into a group, which makes it easier for assigning shared volumes and folders for multiple users. Go to Account User Create user accounts for access to shared volumes or files with unique username and password. Groups Combine multiple users into a group, making it easier to assign shared volumes and folders. Parameters Name Lists the user names. Home Directory Lists the home directory for each user. Type Lists the user types: All Users, Local Only (default), and 183 EonNAS Pro/1000 Series Web-Based Interface Software User Manual Network Only. Group Lists the group domain to which the user belongs to. Quota Lists the maximum capacity for the user. Description Lists the descriptions for the user. 184 Setting Up User Accounts Adding a User Account Create user accounts for access to shared volumes or files with unique username and password. Note The maximum number of users you can create is 300. The username “admin” is reserved for the administrator, a special user account for configuring your NAS system, rather than sharing folders and files. Go to Account > User Steps Click Add. The Add User window will appear. If you enable creating the home directory and click the Options button, you can set additional parameters. Enter the parameters and click Next. Select the folders to be shared with this user and click OK. To create a shared folder, go to the Folder > Share menu. 185 EonNAS Pro/1000 Series Web-Based Interface Software User Manual The new user will appear in the list. Parameters User Name Specifies the new user name. No spaces are allowed. Password Enter the password for this user account. Group Specifies the group to which this user belongs. Description Shows a description for this user. Home Directory Creates a home directory (volume) for this user. When you check the box, the home directory path will automatically appear. Superuser Allows this user to have administrative privileges equal to the “admin” user. A superuser can configure system settings and perform advanced operations such as data backup. Options You may configure parameters for the home directory. For details, see the Folder > Configuration menu. Editing/Deleting a User Account To edit a user account, click Edit. To remove an existing user, click Delete. The user’s home directory will also be deleted. Multiple Logins by You may allow a user account to access a NAS system multiple times, the Same User concurrently. Go to the Configuration > System > Host Name menu to enable or 186 Setting Up User Accounts disable this feature. Importing User Accounts (Profiles) Import user accounts from other services such as Microsoft AD (Active Directory). Note To use this feature, LDAP service must be enabled beforehand. Go to the Configuration > Directory > LDAP menu. Go to Account > User Steps To import user profiles, click the Import button at the bottom of the Users window. Select users to be imported. 187 EonNAS Pro/1000 Series Web-Based Interface Software User Manual Combining User Accounts into a Group Combine multiple users into a group, making it easier to assign shared volumes and folders. Go to Account > Group Steps Click Create. A new window will appear. Enter the group name and select the group members from the User List in the left pane. Use the arrow icon to move member users into the Group member area (right pane). Click OK. The new group will appear in the list. Editing a Group To configure the settings of a group, highlight it and click Edit. 188 Backing up Your Data Backing up Your Data Save user data to a safe location through various backup options. You may save data inside your NAS system (Snapshot) or onto a network device (Pool Mirror and Remote Replication). Plan all regular backup jobs ahead through a comprehensive scheduling menu. Go to Note Backup One-Touch Copy function is available for models with a corresponding USB port. Snapshot Create differential copies of your data and quickly recover (rollback) to a specific point in time if necessary. Pool Mirror Mirror your data to another NAS system on the network to keep an identical copy of all your data. Remote Replication Backup your data to an online device with the industry-standard rsync protocol. One-Touch Copy Copy your data to a USB storage device connected to your NAS system, or vice versa, just by using the Backup button/function on your NAS system. External Drive Backup your data to a USB or eSATA storage device connected to your NAS system. Schedule Schedule your backup tasks. You can create a one-time or repeat backup schedule. 189 EonNAS Pro/1000 Series Web-Based Interface Software User Manual Using Shortcuts You can reach major backup tasks from the Home Page from the Backup Data link. Shortcuts to the following four backup tasks are available. Snapshot Remote Replication Pool Mirror 190 Backing up Your Data Working with Snapshot Backup Create differential copies of your data and quickly recover (rollback) to a specific point in time if necessary. Go to Backup > Snapshot Note Only root shared folder can be selected as the backup source. In other words, you can not select a sub-folder or a file as the backup source. The only exception is user’s home directory. You can click into the UserHome folder to select the home directory for a specific user as the backup source. If there are applications such as database, email or virtualization deployed on iSCSI volumes, these applications need to be taken offline before taking snapshots for the iSCSI volumes in order to ensure the snapshot data is host-consistent. Adding a Snapshot Click Add and select the source directories/volumes. You cannot select an entire storage pool. If you want to backup a storage pool, choose the Pool Mirror backup. Backup Source Choose the folders (except for an entire storage pool). Schedule your backup task. 191 EonNAS Pro/1000 Series Web-Based Interface Software User Manual Backup Daily A snapshot will be taken once a day at the specified time. Backup Once A snapshot will be taken immediately after you configure the settings. No further scheduled snapshots will be created. Customize Allows you to configure a more complex schedule. See the descriptions below for details. Click OK. The scheduled snapshot will appear in the list. Customizing the Schedule If you have checked the Customize option The snapshot schedule setting window will appear. You may optionally add a short description of the schedule. Description (Optional) Allows you to enter a short description of the schedule. Start Time Specifies when the snapshot process will take place. Daily: The snapshot will be taken every day at the specified time. Weekly: The snapshot will be taken on a weekly basis on the selected (checked) days of the week, at the specified time. 192 Backing up Your Data Monthly: The snapshot will be taken on a monthly basis on the selected days of the month, at the specified time. 1. Choose the day of the month: 1st – 31st date of the month or the 1st – 4th Monday – Friday. 2. Select the months the snapshots will be taken by clicking “Select Month.” By default, all months are selected. Advanced Schedule Settings Click Advanced to customize the schedule further. To set the Start Date and End Date, click in the column and select the data from a calendar popup. 193 EonNAS Pro/1000 Series Web-Based Interface Software User Manual The Repeat option allows you to checkbox and configure the duration of the backup job. Every: A snapshot will be taken at the specified interval. Until: Specifies when taking snapshots will complete. If “Time” is selected, snapshots will until the specified moment. If “Duration” is selected, spapshots will be taken for the specified period of time. Click Next. You’ll be asked to specify the prune rule. When the number of snapshots (Snapshot Image Count) or the time since the snapshot was taken (Expire Time) reaches the specified value, older snapshots will be deleted to save space. View the summary and click Back to modify or OK to confirm. 194 Backing up Your Data Backup Once and Immediately The NAS system will take a snapshot of the user data and will list it. Backup Daily/Customize Go to the Backup > Schedule menu and confirm the new backup job in the list. Restoring a Click a snapshot image to highlight it. Snapshot Image To rollback the whole data included in this snapshot, click Manage. The snapshot management screen will appear. 195 EonNAS Pro/1000 Series Web-Based Interface Software User Manual To select folders/files, click Preview. The folders and files recorded in the snapshot image will appear. Select the file or folder and, click Rollback. The data will be rolled back to the previous state. You may also use Download to download files into your local directory. Deleting a Snapshot Image To remove a snapshot image, highlight it and click Delete. To delete all snapshot images, click Delete All. Snapshot Recovery Users can restore data with the snapshot functionality using Windows VSS in Windows VSS (Volume Shadow Copy Service). This integration simplifies system management since users working in Windows environments are allowed to 196 Backing up Your Data conduct snapshot data recovery through their Windows interface without having to refer to the NAS UI. When working with Windows VSS, the CIFS status of the NAS system must be online. Go to Configuration > Service > Share in the NAS UI to check this status. In addition, only snapshots created for shared folders that are shared with CIFS can be rolled back with Windows VSS. For information regarding the CIFS shared volumes, please refer to your NAS user manuals. 1. To start the recovery process, first link to the CIFS shared volume via Windows Explorer using your NAS username and password. 2. Right-click on the folder name and select Properties from the menu. 3. Select the Previous Versions tab in the window that appears. Here you will see the previously created snapshots. 197 EonNAS Pro/1000 Series Web-Based Interface Software User Manual 4. Now users can employ the snapshot to open, copy, or restore (rollback) the selected folder. Downloading Files from Snapshots 1. Go to Backup > Snapshot. Select a snapshot schedule and click on Manage. 2. Select the snapshot image and click on Preview. 3. Double-click the icons until you find the file you would like to download. Click Download. 198 Backing up Your Data Working with Pool Mirror Backup Mirror your data to another NAS system on the network to keep an identical copy of all your data. Limitations The target NAS system should have a capacity equal to or larger than the source storage pool. There should be no storage pools in the target NAS system. You can mirror your data only to an identical NAS hardware model. The target NAS system must have a different host name from the source. Go to Backup > Pool Mirror Steps Connect the target NAS system on the network and obtain its IP address. Select the source and target. Backup Source Choose the storage pool to be backed up. Backup Target Enter the location (IP address) of the target NAS. Make sure that the storage capacity of the target is equal to or greater than that of the source. Schedule your backup job. 199 EonNAS Pro/1000 Series Web-Based Interface Software User Manual If you have checked Customize, see the section for the Backup > Schedule menu to learn more. Real-time backup Mirroring will occur synchronously with data transaction. Backup daily at Mirroring will occur on a daily basis at the specified time. Customize Allows you to configure a more complex schedule. See the descriptions below for details. Customizing the Schedule If you have checked the Customize option The snapshot schedule setting window will appear. You may optionally add a short description of the schedule. Description (Optional) Allows you to enter a short description of the schedule. Start Time Specifies when the snapshot process will take place. Daily: The snapshot will be taken every day at the specified time. Weekly: The snapshot will be taken on a weekly basis on the selected (checked) days of the week, at the specified time. 200 Backing up Your Data Monthly: The snapshot will be taken on a monthly basis on the selected days of the month, at the specified time. 1. Choose the day of the month: 1st – 31st date of the month or the 1st – 4th Monday – Friday. 2. Select the months the snapshots will be taken by clicking “Select Month.” By default, all months are selected. Advanced Schedule Settings Click Advanced to customize the schedule further. To set the Start Date and End Date, click in the column and select the data from a calendar popup. 201 EonNAS Pro/1000 Series Web-Based Interface Software User Manual The Repeat option allows you to checkbox and configure the duration of the backup job. Every: A snapshot will be taken at the specified interval. Until: Specifies when taking snapshots will complete. If “Time” is selected, snapshots will until the specified moment. If “Duration” is selected, spapshots will be taken for the specified period of time. Click Next to view the summary of your backup job. Click Back to modify or OK to confirm. The new pool mirror task will appear in the list. 202 Backing up Your Data View the summary of your backup job. Click Back to modify or OK to confirm. Go to the Backup > Schedule menu and confirm the new backup job in the list. Replacing a Target When there are extra disk drives in the target, you may use them to replace the Disk Drive (Editing currently configured drives. the Pool Mirror Setting) 1. Click Edit. The Edit Mirror screen will appear. 2. Highlight the disk drive you want to replace in the Source Disk & Target Disk Mapping window (in this example, Slot 2). 3. Select an available disk in the Target window (in this example, Slot 3). 4. Click the left arrow icon to initiate the replacement. 5. The disk will be replaced in the Source Disk & Target Disk Mapping Window. 6. Click OK. The disk configuration in the list will be updated. Deleting Pool To delete the setting, click Delete. Mirror Settings Starting/Stopping Pool Mirror To start pool mirror manually, click Start. The progress will appear in the “Difference” corner in the list. 203 EonNAS Pro/1000 Series Web-Based Interface Software User Manual To stop an ongoing pool mirror, click Stop. 204 Backing up Your Data Working with Remote Replication Backup Backup your data to an online device with the industry-standard rsync protocol. About Remote The Remote Replication function allows creating an identical backup copy of an Replication NAS system (source) in a target device located at a physically distant place. When system failure occurs, the target can swiftly restore the data and network services to the previous state. The storage area of the target device (could be another NAS system) must be equal to or larger than that of the source NAS system. Data replication is carried in asynchronous mode, which updates the data periodically in bulk (only the differentials will be copied), thus preserving system resource for data transactions. Configuring There are two ways to configure remote replication, depending on the role your Remote Replication NAS system take. Required environment (either way) An rsync-compatible source device and a source directory (folder) An rsync-compatible target device and a target directory (folder) The capacity of the target directory must be equal to or larger than the source directory. Before configuring remote replication parameters, obtain the following information of the target device. IP address Login user name Password If your NAS system is the source Follow the instructions listed below. If your NAS system is the target You need to configure remote replication from the Configuration menu. Go to 205 EonNAS Pro/1000 Series Web-Based Interface Software User Manual the Configuration > Service > Miscellaneous > Rsync Target menu. Go to Backup > Remote Replication Steps (Configuring 1. Select the source directories/volumes. Remote Replication when NAS is the Source) You cannot select an entire storage pool. If you want to backup a storage pool, choose the Pool Mirror. If the target is a 3rd party device, you can cannot select All Shared Folders or Home Directory. You can only select a specific folder. 2. Choose a NAS system or a 3rd party device (Rsync Server) as the target. 3. Enter the target device address and its login account. If you have chosen a 3rd party device, do not change the port number 873 unless you need to. 873 is the default port number used for the rsync Daemon mode, used for the remote replication conducted between the NAS and a 3rd party device. 4. Specify the target directory. Confirm the directory in the target device and enter the full path. 5. Enable data encryption during remote replication if you wish to add 206 Backing up Your Data additional layer of protection. This option is not available when you select a 3rd party device as the target. 6. Schedule your backup job. Backup daily at Replication will occur on a daily basis at the specified time. Backup weekly at Replication will occur on a weekly basis at the specified date and time. Customize Allows you to configure a more complex schedule. See the descriptions below for details. Customizing the Schedule If you have checked the Customize option The snapshot schedule setting window will appear. You may optionally add a short description of the schedule. Description (Optional) Allows you to enter a short description of the schedule. Start Time Specifies when the snapshot process will take place. Daily: The snapshot will be taken every day at the specified time. Weekly: The snapshot will be taken on a weekly basis on the selected (checked) days of the week, at the specified time. 207 EonNAS Pro/1000 Series Web-Based Interface Software User Manual Monthly: The snapshot will be taken on a monthly basis on the selected days of the month, at the specified time. 1. Choose the day of the month: 1st – 31st date of the month or the 1st – 4th Monday – Friday. 2. Select the months the snapshots will be taken by clicking “Select Month.” By default, all months are selected. Advanced Schedule Settings Click Advanced to customize the schedule further. To set the Start Date and End Date, click in the column and select the data from a calendar popup. 208 Backing up Your Data The Repeat option allows you to checkbox and configure the duration of the backup job. Every: A snapshot will be taken at the specified interval. Until: Specifies when taking snapshots will complete. If “Time” is selected, snapshots will until the specified moment. If “Duration” is selected, spapshots will be taken for the specified period of time. Click Next to view the summary of your backup job. Click Back to modify or OK to confirm. More parameters are available from the Edit menu. See the instructions below. Editing the Pair / To reconfigure parameters and add some options, select a remote replication Configuring setting and click Edit. The editing window will open. Options 209 EonNAS Pro/1000 Series Web-Based Interface Software User Manual Click Options to configure additional parameters. Change other parameters if necessary and click OK. Compress File Data Reduces the data size using LZJB, a lossless compression algorithm. Stop Network File Provides additional data protection by pausing network Service while file transactions (such as Samba, AFP, and FTP) while Replicating replication tasks are in process. Delete Extra Files Removes unrelated files in the target directory to create on Remote room and to clear up clutters. Destination Handle Sparse Utilize file allocation effectively by deleting file blocks Files Efficiently mostly made from zeros. Restoring the If the data of the source NAS system becomes corrupted, you can restore it by Original State copying the replicated data in the target device back into the source NAS 210 Backing up Your Data system. To do this, select the remote replication setting in the list and click Restore. Deleting the Pair To remove a remote replication setting, select it and click Delete. Manually Executing Pick a remote replication task from the list and click Execute to start the remote Remote Replication replication manually. You may stop the replication by clicking Stop. When Using An encrypted folder can be used as the source or target folder of remote Encrypted Folders replication, but there are some limitations, as described here. for Remote Replication If the source encrypted folder is unmounted Replication will fail. If the target encrypted folder is unmounted A new target directory with the same name as the encrypted folder will be created. Example: Rsync source: “/Pool-1/FolderA/SourceData/” Rsync target: “/Pool-2/FolderB/TargetData/” Folder “Pool-2/FolderB” is an encrytped folder and unmounted. When remote replication starts, a new directory “TargetData” under “/Pool-2/FolderB/” will be created with replicated data from the source site. When the user wants to mount the encrypted target folder later, a warning message will appear, indicating that a target directory already exists. A folder with the same name as the encrypted target folder already exists in the target directory. If you mount the encrypted target folder, the existing folder and its files will be deleted. If the user chooses to proceed, the existing target folder and its data will be deleted, and the encrypted folder will be mounted. If the user chooses not to proceed, the encrypted folder will not be mounted until the existing target folder and its data are deleted. 211 EonNAS Pro/1000 Series Web-Based Interface Software User Manual Working with One-Touch Copy Backup Copy your data to a USB storage device connected to your NAS system, or vice versa, just by using the Backup button/function on your NAS system. Before You Start This function is available for models with a dedicated USB port for this function. Before using this feature, insert a USB storage device to your NAS system. See the hardware manual for details. Go to Backup > One-Touch Copy Steps 1. Enable One-Touch Copy. 2. Select the direction: from storage device to NAS system or from NAS system to storage device. 3. You may create a new directory designated for the one-touch copy function to avoid overwriting existing directories. 4. Click Apply. 5. On your NAS hardware, press the Backup button for three seconds (the 212 Backing up Your Data status LED should change its color). See the hardware manual for more details. After the first copy, only the updated files will be copied (incremental copy). USB Drive with Multiple Partitions Copy from the USB storage to the NAS system: Each USB drive partition will be stored in a separate directory created inside the NAS system. The directory will be named after the date the partition was created. Example: 2012-01-21, 2012-02-15 (two partitions) Copy from the NAS system to the USB storage: All data will be copied into the first partition. 213 EonNAS Pro/1000 Series Web-Based Interface Software User Manual Working with External Drive Backup Backup your data to a USB or eSATA storage device connected to your NAS system. Note An eSATA port is available only for selected models. Before using this feature, insert a USB/eSATA storage device to your NAS system. See the hardware manual for details. Go to Backup > External Drive Steps Select the source directories/volumes and the destination storage device. You cannot select an entire storage pool. If you want to backup a storage pool, choose the Pool Mirror. Backup Source Choose the folders (except for an entire storage pool). Backup Choose the external USB/eSATA storage device Destination connected to your NAS system. Schedule your backup job. 214 Backing up Your Data If you have checked Customize, see the section for the Backup > Schedule menu to learn more. Go to the Backup > Schedule menu and confirm the new backup job in the list. 215 EonNAS Pro/1000 Series Web-Based Interface Software User Manual Scheduling Your Data Backup Tasks Schedule your backup tasks. You can create a one-time or repeat backup schedule. Note All types of backup except for One-Touch Copy can be scheduled. Go to Backup > Schedule Steps Click Add to create a new set of schedule. Select Snapshot from the list and click Next. The snapshot schedule setting window will appear. Click the Set button to specify the directory for snapshot, enter the schedule name, and optionally add a short description of the schedule. 216 Backing up Your Data Set the start time and click Advanced to customize the schedule. To set the start and end date, click in the column and select the data from a calendar popup. Check the Repeat checkbox and configure the duration of the backup job. 217 EonNAS Pro/1000 Series Web-Based Interface Software User Manual (For snapshot) Specify the prune rule. When the number of snapshots (Snapshot Image Count) or the time since the snapshot was taken (Expire Time) reaches the specified value, older snapshots will be deleted to save space. View the summary and click Back to modify or OK to confirm. The new schedule will appear in the list. Editing/Removing the Schedule To modify a schedule, highlight it and click Edit. To delete a schedule, highlight it and click Remove. To disable a schedule, highlight it and click Disable. You can re-enable it by clicking Enable. 218 Maintaining the System Maintaining the System Backup the system configuration files and perform system software update in the System menu. Shutdown or reboot your NAS hardware in the System > Shutdown menu. View the latest system events in the Log menu. Go to Maintenance System Backup system configurations and update the system software. Log Use the event log to view and export the history of system events. You can also receive notifications of system events by using the Notification function. 219 EonNAS Pro/1000 Series Web-Based Interface Software User Manual Backing up / Shutting down the System Backup system configurations and update the system software. Go to Maintenance > System System Snapshot Create differential backup files of system configurations in a manner similar to the snapshot function in the Backup menu. Software Update Update the system OS (this web interface) in an instant. No complicated installation procedures are required. Backup System Save basic system settings, including network configurations and user Setting accounts, to a local file. Power Schedule Power on, shutdown, or restart your NAS system according with defined schedules. Up to 16 schedule tasks can be configured. Diagnostic Report Export the diagnostic report that contains the current configuration of your NAS system. Shutdown Power off your NAS system or reboot the system. Backing up System Configurations through Snapshot Create differential backup files of system configurations in a manner similar to the snapshot function in the Backup menu. Go to Maintenance > System > System Snapshot 220 Maintaining the System Steps Click Take Snapshot and enter the name of the snapshot image and a small description. Click OK. The new snapshot image will appear in the list. Rolling Back the Click a snapshot image to highlight it. Snapshot 221 EonNAS Pro/1000 Series Web-Based Interface Software User Manual Click Rollback. The system will be restored (rolled back) to the previous state. The system will reboot following the restoration. Editing/Deleting a Snapshot Image To edit a snapshot image, highlight it and click Edit. To remove a snapshot image, highlight it and click Delete. Updating the Software Update the system OS (this web interface) in an instant. No complicated installation procedures are required. Go to Maintenance > System > Software Update Steps Follow these steps to install the new version of the software. 6. Before installing the software, we recommend you to take a system snapshot to save the current system settings from the Maintenance > System > System Snapshot menu. 7. Download the latest software version. 8. Click the Browse button to select the downloaded software file. 9. Click the Upload to NAS button to upload the software file into your NAS system. 10.Click the Install button to install the software file. When software update is completed, check the version in the Current Install 222 Maintaining the System Package corner again. Backing up/ Restoring System Data Save basic system settings, including network configurations and user accounts, to a local file. Go to Maintenance > System > Backup System Setting Backing up System Click Backup and save the system configuration file to a local folder. Settings Restoring System Select a previously stored system settings file and click Restore. Settings Scheduling Power Off / Reboot of NAS Power on, shutdown, or restart your NAS system according with defined schedules. Up to 16 schedule tasks can be configured. Go to Maintenance > System > Power Schedule 223 EonNAS Pro/1000 Series Web-Based Interface Software User Manual Steps Click Add to create a new power schedule and enter the parameters. Click OK. The new power schedule will appear in the screen. Parameters Action Specifies what will occur at the scheduled timing. Power On Power Off Reboot (Power off and then power on) Date Specifies on what day(s) the scheduled task will be executed. Everyday Monday to Sunday Weekday (every day from Monday to Friday) Weekend (Saturday and Sunday) Time Specifies when the scheduled task will be executed. 224 Maintaining the System Postpone Power Checking this option delays the scheduled power Off on/off/reboot task if a data backup or rebuild process is ongoing at the scheduled timing. Exporting the System Diagnostic Report Export the diagnostic report that contains the current configuration of your NAS system. Go to Maintenance > System > Diagnostic Report Steps Click Yes when the confirmation dialog appears. Save the HTML diagnostic report file into a local folder. The file can be opened using a text editor. Shutting Down / Rebooting NAS Power off your NAS system or reboot the system. Go to Maintenance > System > Shutdown 225 EonNAS Pro/1000 Series Web-Based Interface Software User Manual Steps To restart (reboot) the NAS, click Reboot. To shutdown the NAS, click Shutdown. To restart the NAS, you need to turn on the hardware. For details, refer to the hardware manual. Wait for 5 minutes until the system restarts, and then refresh the browser. You will redirected to the login page. 226 Maintaining the System Viewing the Event Log Use the event log to view and export the history of system events. You can also receive notifications of system events by using the Notification function. Go to Maintenance > Log Viewing Older Viewing Older Events (Previous Pages) Events To view older events, go to the bottom and specify the page number. You may also click the icon to move to the next page (next recent events) or the end (oldest events). Viewing More Events Per Page You can choose to view 20, 40, or 80 records per page. Deleting Older The total number of events stored in the system appears at the bottom. To Events delete older events, click Log Setting at the bottom. The Log Setting window will appear. You can limit the amount of events stored in the system either by number of logs or days after the event occurred. 227 EonNAS Pro/1000 Series Web-Based Interface Software User Manual Updating the Log To update the log to the latest status, click Refresh Log at the bottom. Exporting the Log To export the log to a local file, click Export Log at the bottom. The log will be saved in text format as “log.txt.” To view the log in a formatted manner, open the log.txt in Microsoft Excel or any spreadsheet applications. In Excel, select Delimited files (tab or space separates each entry) to properly separate each item into an individual cell. Viewing Latest All changes that occur in your NAS system and its components will be recorded System Events as system events. The latest events are listed in the Recent Alerts pane in the Home page. You may view all past events in the Event Log and receive event notifications via SMTP or SNMP protocols. Severity of Events The severity of events are grouped in three levels. Information events Notifies users of changes that will not affect the security of the storage. Warning events Notifies users of changes that might potentially affect the security of the storage. Error events Notifies users of changes that must be taken care of immediately to protect the storage security. Receiving Event You may receive event notifications through the following channels. For details, Notifications go to the Configuration > Notification menu. SMTP (Simple Mail Transfer Protocol): a standard protocol for email notification 228 Maintaining the System SNMP (Simple Network Management Protocol): a standard protocol for monitoring network devices 229