1
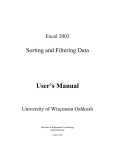
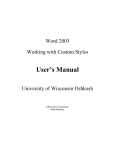
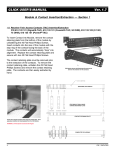
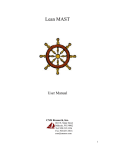
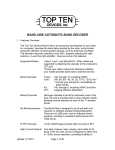
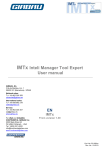
Word 2003
Automating Common Tasks
User’s Manual
University of Wisconsin Oshkosh
Information Technology
Sarah Bradway
Table of Contents
AUTOTEXT ENTRIES ............................................................................................................................... 1
AUTOCORRECT ........................................................................................................................................ 2
MACROS ...................................................................................................................................................... 3
CUSTOMIZING TOOLBARS.................................................................................................................... 6
CUSTOMIZING TOOLBAR BUTTONS.................................................................................................. 7
CREATE A CUSTOM MENU.................................................................................................................... 8
i
AutoText Entries
Microsoft refers to Auto Text Entries as “A storage location for text or graphics you want
to use again.” Basically, any piece of text (or graphic) that is used on a regular basis can
be stored and accessed instantly using this command.
AutoComplete
Word 2003 comes with many AutoText entries already created. Most of these are pieces
of text that are used often in a business setting. For example, start typing the word,
“Monday.” You will notice that as soon as you press the fourth letter, in this case a “D” a
small fly out box will appear. If you press “Enter” on your keyboard, word will
automatically type the rest of the word. Days of the week are stored as AutoText Entries.
Inserting AutoText Entries into a document
Not all AutoText entries have AutoComplete capabilities. Those with less than four
letters in the first word will need to be entered directly into a piece of text using the Insert
Menu.
1. Click the Insert Menu
2. Drag down to AutoText
3. Select the type of AutoText you are searching for
4. Click the piece of text you would like to insert into your document.
Create an AutoText Entry
Word allows you to add AutoText entries that will help you
in your specific position.
1. Type the piece of text you would like to include as an
AutoText entry
2. Select the piece of text
3. Click the Insert Menu
4. Select AutoText
5. Drag to New
6. The Create AutoText dialog box will appear.
7. Type a name for your AutoText entry into the box provided
Note: When naming AutoText entries, those with at least 4 letters in the first
word of the name will have AutoComplete capabilities. All others will need to be
inserted through the insert menu (usually stored under “normal category)
8. Click OK
Page 1 of 8
Edit an AutoText Entry
1. Insert the desired AutoText entry into the
current Document
2. Make the desired changes to the Text
3. Select the modified text
4. Click the Insert Menu
5. Select AutoText
6. Drag to New
7. Type the Original name of the AutoText Entry
8. Click OK.
Delete an AutoText Entry
1.
2.
3.
4.
Click the Insert Menu
Drag down to AutoText
Select AutoText
The AutoCorrect dialog box will open and the
AutoText tab will be activated.
5. Click the AutoText Entry you would like to Delete.
6. Press the Delete button at the right.
7. Click OK.
Autocorrect
When typing a document have you ever noticed that sometimes Microsoft Word corrects
spelling errors for you automatically? Try typing the letters T-E-H, you will notice that
as soon as you press the space bar signaling you are done typing the word, the letters will
rearrange to spell “the”. This is the AutoCorrect feature at work. The point is to cut
down on typing errors either in spelling or punctuation.
Adding AutoCorrect Entries
1.
2.
3.
4.
Click the Tools Menu
Select AutoCorrect Options
Click the AutoCorrect Tab
Type the misspelled version of the word into the
box labeled Replace:
5. Type the correctly spelled word in the box
labeled With:
6. Click Add
7. Click OK
Page 2 of 8
Delete AutoCorrect Entries
1.
2.
3.
4.
5.
6.
7.
Click the Tools Menu
Select AutoCorrect Options
Click the AutoCorrect Tab
Use the scroll bar to locate the appropriate entry in the AutoCorrect list.
Click the entry to select it.
Click the Delete Button.
Click OK
Macros
A macro is a series of actions that can be activated using a single command. For
example, a person working in the College of Education might like to have a certain
Header and Footer inserted into every document. However, this particular header and
footer needs to be in a certain font in a certain size, etc. Entering this exact set of
commands into every document would take a lot of time; however a macro could be
made to do all the commands automatically with just a few clicks of the mouse. Think
about it as a recording, once the series of actions is saved, you can hit play as many times
as you like to get the same result.
Creating a Macro
The most important thing to do in a Macro is to plan it well. What do you want your
macro to accomplish? What are the steps you will need to take to get the desired end
result? It is a good idea to work these issues out before you start to actually record your
macro.
1. Plan out, and if necessary write down, every
action you would like your macro to perform.
2. Click the Tools menu.
3. Drag down to Macro
4. Select Record New Macro
5. The Record Macro dialog box will appear
6. Macro name: Type an identifying name for
your macro
a. Macro name must begin with a letter
b. Macro name must not contain spaces
c. Macro name can contain letters,
numbers and the underscore character.
7. Store macro in: Use the drop down to determine if you would like your macro to
be available to all documents in word or just the current document
8. Description: The description box already contains the date the Macro was created
and who created it. However more details of exactly what actions the Macro
preforms can be added.
9. Click OK
10. You will now be returned to your document.
11. A small toolbar will appear that looks like the one pictured at right.
12. Your mouse pointer will also look like an arrow with a cassette tape.
Page 3 of 8
13. You are now in record mode; every action you make will be recorded in the
macro. Begin completing the series of commands you planned earlier.
Note: While recording your Macro, use the Menu bar and commands as much as
possible. For example, if copying a piece of text instead of using CTRL+C, go to
the Edit menu and drag down to Copy.
14. As you record your macro, feel free to press the pause button
begin recording again just press the same button again.
. When ready to
15. When all the steps in your Macro are complete, click the stop button.
16. Test the Macro using the Run a Macro instructions.
Run a Macro
1.
2.
3.
4.
Click the Tools Menu
Drag down to Macro
Select Macros
The Macros dialog box will
appear.
5. Select the Macro you would
like to use.
Note: The Description box
located near the bottom of the
box may contain more details
of what the Macro does.
6. Click Run
7. The Macro will run and all the
actions recorded in the macro
will be completed.
Delete a Macro
1.
2.
3.
4.
5.
Click the Tools Menu
Drag down to Macro
Select Macros
The Macros dialog box will appear.
Select the Macro you would like to delete.
Note: The Description box located near the bottom of the box may contain more
details of what the Macro does.
6. Click Delete
Page 4 of 8
Modify a Macro
1.
2.
3.
4.
5.
6.
7.
Click the Tools Menu
Drag down to Macro
Select Macros
The Macros dialog box will appear.
Select the Macro you would like to modify
Click the Edit button.
You will immediately be taken into another program called Microsoft Visual
Basic.
In the main window of Visual Basic will be the saved codes for your Macro.
Make the desired modifications
Note: Visual Basic may appear to be quite complicated. However, you will
notice some areas of the Macro are easily identified and therefore can easily
be changed. For example, the font size in the Code below is set to 20, if you
would like the font larger, change the 20 in the code to a higher number,
your macro will then change the font to a larger size.
8. When modifications are complete. Click the File Menu in Visual Basic.
9. Click Close and return to Microsoft Word
10. You will be returned to Word 2003
11. Test the Macro
Page 5 of 8
Customizing Toolbars
Toolbars are one of those things that are used constantly in Microsoft Word. However,
they may not always be conducive to the way you, as an individual, work. Many times,
the commands you use most often are on many different toolbars and it’s just not
practical to have all the toolbars available open at the same time. Word 2003 allows a
user to custom make a toolbar so that it only contains the commands used most often.
Create a New Customized Toolbar
1.
2.
3.
4.
5.
6.
Click the tools Menu
Drag down to Customize
Click the Toolbars tab
Click the New Button
The New Toolbar dialog box will open.
Toolbar Name: give your new toolbar
an identifying name.
7. Make toolbar available to: Use the drop down to determine if you would like
your toolbar available in all Word documents or just the current document.
8. Click OK
9. You will be returned to the
Customize dialog box and a new
blank toolbar will appear
somewhere on the screen.
10. Click the Commands Tab in the
Customize dialog box
11. To add commands to your
customized toolbar simply click
and drag them from the Customize
dialog box to the new toolbar.
Note: commands are stored in
categories according to their
function. If you want a command
usually located under the Edit
Menu, click the Edit category.
12. When finished adding commands
to your toolbar press close on the Customize Dialog Box
13. Your toolbar will now act just like any other toolbar available in word.
Deleting a Custom toolbar
1.
2.
3.
4.
5.
6.
Click the tools Menu
Drag down to Customize
Click the Toolbars tab
Select the toolbar to be deleted so that it is highlighted in blue.
Click the Delete Button
Close the Customize dialog Box.
Page 6 of 8
Customizing Toolbar Buttons
Toolbar buttons can also be customized. Not only can you add new buttons to already
existing toolbars, you can also customize the button itself so that it will look just the way
you want it to.
Create a Custom Button
1.
2.
3.
4.
5.
Display the toolbar to which you will add the custom button.
Click the Tools Menu
Drag down to Customize
The Customize dialog box will appear, click the Commands tab.
Select the appropriate category and subsequent command you would like to add
to the toolbar.
6. Click and drag the command from the customize dialog box to the area on the
toolbar where you would like the button to be located. Notice that an I-beam
signifies exactly where the button will be placed.
7. Click the Modify Selection button in the Customize dialog box to get a list of
modification options for your button. See Right
a. Delete: will delete the button from the toolbar.
b. Name: You can change the name of your button so
that it is more descriptive
c. Copy Button Image: Allows the user to copy the
image (tiny picture) from a button
d. Paste Button Image: Allows the user to paste a
copied image (tiny picture) to a different button
e. Reset Button Image: Will restore button to its
original setting
f. Edit Button Image: Allows you to change the way a
picture looks by changing the colors of pixels
g. Change Button Image: allows you to apply a
premade image to your button
h. Default style: returns a button style to its original
form
i. Text Only (Always): Shows only the text name for a
button, no image is displayed
j. Text Only (in Menus): Shows only text when
command is in a menu, but shows text and image
when command is on toolbar
k. Image and Text: Shows image and text always
l. Begin a Group: Allows the user to put a separator between toolbar
buttons
m. Assign Hyperlink: Allows user to Assign a Hyperlink to a button
8. When finished modifying the button, click Close on the Customize dialog box.
Page 7 of 8
Create a Custom Menu
Making a custom toolbar can be very helpful, but for those people who prefer to use the
dropdown menu system, menus can also be customized.
1. Click the Tools Menu
2. Drag down to Customize
3. The Customize dialog box will appear, click the Commands tab.
4. Scroll to the bottom of the Categories box and click the option labeled New menu.
5. The command New menu, will be listed in the command box.
6. Click and drag the New Menu command up to the Menu bar.
7. Click the Modify Selection Button on the Customize Dialog box to give your
menu a more descriptive title (type the new title into the box labeled Name:)
8. Drag desired commands from the customize window into the blank area below the
new menu.
9. When finished click Close on the Customize Toolbar
Page 8 of 8