Download Manual
Transcript
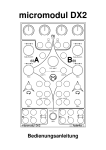
micromodul DX2
User manual
Content
Provision of guarantee and product liability .............................................................................. 2
Safety precautions and servicing................................................................................................ 2
Introduction ................................................................................................................................ 3
Product description..................................................................................................................... 4
System requirements .................................................................................................................. 5
Quick Access.............................................................................................................................. 5
Tips............................................................................................................................................. 6
Power Supply ............................................................................................................................. 6
Connecting to a computer .......................................................................................................... 7
Which software can be controlled.............................................................................................. 7
Settings in the system mode ....................................................................................................... 8
Preparations in Traktor DJ-Studio.............................................................................................. 8
Working with Traktor DJ-Studio ............................................................................................... 9
Working with additional micromodul controllers .................................................................... 10
Controller-Nummern................................................................................................................ 11
Trouble shooting ...................................................................................................................... 12
micromodul DX2
Page 1
User manual
Provision of guarantee and product liability
The seller warrants for faultless material and proper manufacture for a period of 24 months
from the date of sale to the end user.
Excluded from the stated guarantee are defects on parts as the result of normal wear-and-tear.
These parts are mostly faders (sliding guides), potentiometers, encoders, buttons, switches,
and joysticks.
Also excluded from the guarantee are damages that are the result of :
incorrect or inappropriate handling, excessive force, mechanical or chemical influences,
incorrectly connecting the instrument with other instruments, incorrect or inappropriate use.
The warranty is void if the instrument is opened or changed. In addition, there is no warranty
for individual parts and components (in particular, semiconductors) and disposables/
consumables. The seller is not liable for consequential damages which are not the result of
criminal intent or negligence on his part. The following conditions must be met in order to
claim the warranty services:
- Instrument is either in its original packaging or similar packaging.
- Copy of the invoice with the serial number clearly visible.
- Meaningful error report or description of the error is attached.
The buyer assumes all costs and dangers of return shipments to the manufacturer. Since the
user’s manual which is included with each instrument also affects the warranty conditions
(especially regarding safety issues), it is absolutely essential that you read through and follow
all instructions.
Safety precautions and servicing
- Instrument'
s intended use is based on the functions and procedures contained in this manual
- Read all instructions for use as well as all enclosed literature before using the instrument
- Use only in closed rooms (not for outdoor use)
- Never use in a moist or humid environment (laundry rooms, swimming pools, etc, …)
- Not for use in the vicinity of heat sources (radiators, ovens, etc, …)
- Operational temperature is in the range of 0° - + 40° C
- Not for use in the vicinity of flammable material
- The instrument should not be in direct or prolonged contact with sunlight
- Dusty environmental conditions should be avoided
- Only for use with mains adaptors which comply with the specifications in this manual
- Only for use batteries which comply with the specifications in this manual
- Pay attention that batteries do not leak while in the instrument (esp. during extended storage)
- When connecting to other instruments, pay attention to the instructions in this manual
- No foreign objects are permitted inside the instrument casing
- No liquids should get inside the instrument casing
- Never let the instrument fall to the ground (casing and/or control elements may be damaged)
If the instrument must be opened (for example, to remove foreign objects from the casing or
for other repairs), this may only be done by qualified personnel. The batteries must be
removed and the mains cable must be disconnected before opening the instrument. Guarantee
is void for defects that occur if the instrument was opened by an unauthorised or unqualified
person.
Use a soft towel or brush to clean the instrument. Please do not use any cleaning liquids or
water, so you avoid any damages to the instrument.
micromodul DX2
Page 2
User manual
Introduction
It is 2006. After a successful start in 2004 of the first micromodul-line we decided to
demonstrate the second line with a lot of improvements and extensions.
First of all it is due to you, the micromodul-users, that an even better micromodul-line could
be created, caused by your experience with the first equipment and the following suggestions.
Certainly the new instruments are compatible in size and function to the old line. Beyond that
there are a lot of new functions which will supply entertainment.
What do you really need to make your own music?
Taking a DJ as an example, you would need:
A computer (a notebook would be best), DJ-software (Traktor DJ-Studio from Native
Instruments would be best), a pool of your favourite MP3 files, and a hardware controller
(the micromodul DJ2/DX2 would be best). Since this kind of music is actually "hand-made,"
it is absolutely essential to have a controller with sliding guides, knobs and buttons. Almost
nobody wants to use a computer keyboard to drive a car or use a HiFi system. Every type of
activity that is based on human interaction needs to have a special, ergonomic interface.
The computer DJ needs his special control equipment to present an ideal performance. This is
where the micromodul DX2-controller comes into consideration.
Micromodul DX2, also called just DX2, is a small DJ-controller, that was created as a
supplement to the DJ2-controller. While the DJ2 offers a lot of important mix-elements such
as fader and EQ’s, the DX2 expands it through a number of further control elements. But the
DX2 is the right choice if you do not want to mix without your external mixer. It differs from
other DJ-controller on the market in so far, as it has a lot of control-buttons and encoders
instead of the classical mix elements like faders and EQ’s. The DX2 offers a lot of important
control-functions such as transport-keys, pitchbend-keys, encoder to pitch and scratch, a large
loop-section and a FX-section with 4 pots and 4 buttons that was optimized for Traktor 3.0.
The DX2 is not a universal controller. It is a specialist for Djing. The DX2 is very compact
and easy to transport, and you do not even need a mains adapter since it works with standard
and rechargeable batteries.
As of Traktor DJ-Studio version 2.1, you can use the DX2 immediately by using the settings
file which is shipped with the controller - without the lengthy process of programming each
separate control element.
Read this user’s manual thoroughly. Even if the design of the DX2-controller is largely
intuitive and the instrument is self-explanatory, this manual should be able to answer a
question or two. If you should have any sort of other problem with your micromodul, just
contact us via email.
micromodul DX2
Page 3
User manual
Product description
-
-
-
-
-
-
Special controller for DJ software (optimised for Native Instruments Traktor DJ
Studio)
Setup files for Traktor DJ Studio in current versions 2.1 / 2.6 / as of 3.0 are shipped
with the controller
Independent of operating system and computer type (PC or Mac) due to the midi
interface
Complement to DJ2 by loop functions and fx section
FX section with 4 pots and 4 buttons switchable to 2 groups FX1/FX2 (optimised for
Traktor 3.0, also very suitable to Traktor 2.x filter)
5 push-encoders for track browsing, seek/scratch and pitch functions
36 freely reassignable double-function buttons (transport, pitch bend, FX and loop
buttons for each deck)
Independent power supply by standard or rechargeable batteries 3 x AA
cell, lifetime about 100 hours
-
LED battery control
-
Socket for an external mains adapter (4,5-6V DC – min. 50 mA)
-
Midi-merge function
-
-
-
-
Very compact design in a black, plastic casing
(desktop format 180x105x70 mm, 450 g)
Silver aluminium front plate with an anodised coating (abrasion resistant) and
inscriptions
High-quality pots and encoders from ALPS
Expandable system by other micromodul controllers
(easy chaining by midi connections)
Compatible to the 1st micromodul line (same cc/note numbers like DJ1)
micromodul DX2
Page 4
User manual
System requirements
-
PC or Mac with a Midi-Interface (Midi-Input)
-
Native Instruments Traktor DJ Studio or software which allows self-assignments of
midi-controls for continuous parameters or key commands for switching parameters.
(Optimal with Native Instruments Traktor DJ Studio V. 2.1 / 2.6 / as of 3.0 with the
enclosed setup files)
Quick Access
After you did all of the relevant midi-connections and settings in Traktor and loaded one of
our setups (see chapter ‘preparations in Traktor DJ-Studio’), the fun may begin.
Just select a track of your choice by turning the List-select-encoder. By pressing the Load Abutton that track is loaded to deck A. You can start and stop the deck with the Play/Pausebutton. If you do not like the track, just search your browser for another track with the
encoder and load it to deck A.
Now we will try to find a second suitable track. To do so scroll through your browser with the
List-Select-encoder and load a second track to deck B with the Load B-key.
It is the easiest to synchronise both tracks by pressing the black sync-key for deck B.
In order to find the right starting point you can forward the track with the Seek/Scratchencoder. After you found a suitable starting point, stop the deck and start up this point exactly
with the scratch-function (turn the encoder whilst you press it). Then you can start the deck at
this starting point with the cue/play-key or go back to this point with the cue/pause-key. With
this function you can start the track from that point so many times until it is beat-synchron to
the track in deck A. Once it is synchron to the track in deck A you can begin with your mix –
put linefader B up and move the crossfader as fast or slowly as you like to the middle... and
there we go...
Of course another order is possible as well, just as you like to mix.
Because the internal sync-function does not always work well, you can synchronise the tracks
yourself. Use the Pitch-encoder for controlling the tempo. You can adjust the step width very
sensitive with about 0,01 BPM. By turning it more quickly the step width gets bigger.
If the tracks are not synchron anymore, you should accelerate (+) them or slow them down (-)
with the blue pitchbend-keys to adjust them again. Just press the key for a short while.
Want to use an effect from Traktor’s 3.0 collection? It is no problem with the DX2 since you
can control all parameter of the effect-modul. First make sure, that you have two effect-panels
for the traktor-detail-area. You switch one to deck A and the second to deck B. Now you can
see what you control with your pots and buttons at any time.
You can choose the deck-effects with the left or right green key in combination with the shiftkey. The 4 green buttons are assigned to the effect-keys for Traktor 3.0. The functions differ
for the individual effects but with the right button you usually switch the effect on or off.
After you switched on an effect (for example the filter) just move the pots to see what
happens. The left pot controls the cutoff and the right pot controls the amount.
For Traktor-version 2.x you always control the filterparameter with the 4 pots and the
filtermode with the left green button.
micromodul DX2
Page 5
User manual
You can choose which deck you want to use the effects for with the two middle green buttons
and holding the shift-key. The two green LED’s indicate which deck is chosen: (FX1 = deck
A/C; FX2 = deck B/D)
Finally we want to introduce the loop-section. First you fit in two loop-set-panels in the
traktor-detail-area. Again you switch one to deck A and the other one to deck B. You should
allocate useful loop-length to the 4 length-keys. Advisable are 1/8, 1/4, 1/2 and 1. After these
preparations for both panels are done, you can go on.
Choose one of these keys with the 4 black loop-control buttons on the DX2 and activate the
loop-mode with the red button. Now you can change the loop-length at any time or move the
loop to both directions with help of the two grey buttons above. Just switch it off again with
the red button. Enjoy playing around...
Tips
Please always take substitute batteries or rechargeables with you. When the yellow LED starts
blinking, it is time to change the batteries quickly.
Arriving mididata is signalled as a flickering light from the Sys-Mon-LED in the system
mode. This is an easy way to check the correct cable at the midi-in port.
Do not forget the fadermute-function. You can bring the pots into the position, which they
have on the display, without sending a signal by pressing the shift-key. Thereby you can
avoid bigger and audible value-differences.
The monitorlevel lies a bit hidden on the Pitch-encoder. Turn the encoder whilst you press it
inorder to control the monitor-level.
You can also scroll the browser from page to page by pressing the list-select-encoder when
turning it.
Power Supply
The DX2 does not contain an internal mains unit. It was primarily designed for use with
standard or rechargeable batteries (3 x AA cell 1.2-1.5 V alkaline, NiCd, NiMH) which are
inserted into a compartment on the bottom of the instrument. Please pay attention to the
battery poles when changing batteries. This compartment has a safety screw which must be
removed before batteries can be exchanged. Batteries usually last about 100 hours based on
quality and brand. The battery control LED (yellow Sys-Mon LED) blinks when the batteries
need to be replaced.
The DX2 can also be used with an external mains adaptor. The adaptor (regulated or not)
must have a DC voltage of 4.5-6 V and at least 50 mA.
You can find a suitable mains adaptor in our accessories.
micromodul DX2
Page 6
User manual
The adaptor plug (hollow plug: 2.1 mm inner / 5.5 mm outer) must be polarised according to
the information on the connection plate: outer ring = minus, inner pin = plus.
For wrong polarity of the plug the controller will not work. A damage is however impossible.
You switch on the DX2 with the power-switch at the back (LED’s shine). If the power-switch
is on adaptor, the power will be supplied by the external mains adaptor. If the switch is on
battery, the battery will provide the electricity.
Pay attention to always switch off the controller in the battery-mode if not used, because that
increases the durability of the batteries.
Connecting to a computer
A midi cable is used to connect the DX2 to a computer – and to the software. This cable is
connected to the midi-out slot on the controller and the midi-in slot on the computer (sound
card or midi interface). The midi-in slot on the DX2 serves for additional controller or
keyboards that you want to connect to the same midi-port on the computer. Thereby data is
merged in the DX2 (merge-function).
Of course, many users will now wonder why this controller does not have an USB interface.
The micromodul system is a system of multiple controllers that is able to be cascaded via
midi. This is not as easy with USB, especially because the units can control each other due to
the cascading. In addition, many computers with sound cards or USB/Firewire audio
interfaces have a midi interface. This means you would not have to use one or more of your
USB ports to use the whole micromodul system.
If your computer does not have a midi interface, or your sound card does not have one either,
the market offers a number of small and inexpensive solutions in the form of an USB midi
interface that has both a midi-in and a midi-out slot. In combination with the micromodulsystem this is absolutely sufficient. Following recommendable hardware are hardly bigger
than a cable:
M-Audio MidiSport Uno, Edirol UM-1EX, ESI RoMI/O.
Which software can be controlled
The DX2 was primarily designed for use with Traktor DJ-Studio from Version 2.1 (from
Native Instruments). We believe to support one of the leading DJ-programs on the market.
You can find several files with suitable controller-settings on the provided CD. Versions
before 2.1 can not be controlled completly (only faders and pots are useful). The simple
version Traktor DJ can not be controlled via midi at all.
If you want to control other programs, you should first make sure it is possible to
communicate with pots and faders via fixed midi-control-change-numbers. You have to be
able to allocate fixed midi-note-numbers for keyboard-functions.
The DX2-controller sends for all pots fixed control-change-events and for all buttons fixed
note-on (when being pressed) or note-off-events (when letting go). When pressing the shiftkey of the controller at the same time, alternative fixed note-events are sent when activating a
button.
micromodul DX2
Page 7
User manual
You can not program the DX2 or assign controller numbers or key numbers, but that is a
function that is rarely needed with current programs.
The corresponding assignments are noted in the last chapter controller-numbers.
You will find out how many parameters you can control and how you switch modes in the
following chapters.
Settings in the system mode
You can activate the controller’s system mode if you press both of the two black Load-keys.
The yellow Sys-Mon-LED next to shift is on to signal this mode.
No midi signals are sent as long as the controller is in this mode. Only the incoming
commands via midi-in slot are sent directly to the midi-out.
The assignments of the LED’s in the system mode are indicated on the backside of the
controller.
In order to exit the system mode and to restart the controller in the normal operational mode,
just press these two buttons again. The controller will restart in the normal operational mode
after about two seconds (during these two seconds, a flashing light changes between FX1 and
FX2-LED’s).
During this restart procedure, all changes made in the system mode are stored. If you turn the
instrument off while it is in the system mode, all changes will be lost. In the system-mode
following settings are possible:
To choose between two possible setups you have to use the two middle green keys of the FXsection and press the shift-key in the system mode:
-FX1-LED = setup 1 (CC/note-data is sent on channel 16)
-FX2-LED = setup 2 (CC/note-data is sent on channel 1)
Due to these two setups it is possible to control all 4 decks in Traktor 3.0 with 2 DX2controller. Setup 1 controls Deck A & B and setup 2 is used for deck C & D.
Pay attention that you have to use setup 1 for our Traktor 2.x setup-files.
Preparations in Traktor DJ-Studio
First of all copy the TKS-file from the CD directory micromodul/DJ2 to your harddisk.
Following setup-files are available:
- micromodul DJ2-DX2 V01 Traktor21.tks for Traktor vers. 2.1
- micromodul DJ2-DX2 V01 Traktor26.tks for Traktor Vers. 2.6
- micromodul DJ2-DX2 V01 Traktor30.tks for Traktor Vers. 3.0
- micromodul DJ2-DX2 V02 Traktor30.tks for Traktor vers. 3.0 (control of the
linefader for deck C/D with FX-pots 1 & 4 of the DX2)
- micromodul DJ2-DX2 V01 Traktor32.tks for Traktor Vers. 3.2
- micromodul DJ2-DX2 V02 Traktor32.tks for Traktor vers. 3.2 (control of the
linefader for deck C/D with FX-pots 1 & 4 of the DX2)
These files can be used for the DX2 as well as for the DJ2, since both instruments are
compatible concering the used control codes.
After the midi-connection between the DX2 and the computer has been established, start
Traktor DJ-Studio. First you have to choose the appropriate midi-port for interface in the
micromodul DX2
Page 8
User manual
setup-window. After that you have to load the copied TKS-file with the controller settings by
pressing the Load-key. These settings are available even after restarting the program.
After these few steps all supported functions in Traktor should be controllable by the DX2.
Just play around a bit with the controls and buttons on the controller and check the
corresponding reactions on your monitor.
Of course you can create your own assignments between the software and the controller. Use
the Learn-function in Traktor’s Setup-window. You need this function if you want to
control additional functions or make changes to the standard settings. The DX2 can control
alternative functions with all keys (except the 2 middle green keys FX1 and FX2) when
pressing the shift-key at the same time.
To assign the encoder you have to choose the midi control type ‘Rotary Encoder (64)’ in the
midi setup or activate the checkbox ‘incremental’ in Traktor 2.x. Further on the checkbox
‘invert’ has to be activated.
Traktor’s Learn-function is very simple. If you still have any problems, check the Traktormanual.
Do not forget to save these time-consuming changes in a new file.
Working with Traktor DJ-Studio
Generally the DX2 is used for controlling two decks. You can choose whether deck A & B or
deck C & D in Traktor 3.0 should be controlled by the setup in the system mode of the DX2.
Of course the Traktor versions before 3.0 only have deck A & B.
FX-Section
The 4 pots and 4 green keys are used to control the FX-section in Traktor 3.0 or to control
the filter-section in Traktor 2.x. The order of the pots and button corresponds to the order on
the monitor. By switching between FX1 and FX2 (indication via two green LED’s) the FXmodul for deck A/C (FX1) or for deck B/D (FX2) can be controlled with the pots and buttons.
It does not matter which deck is on focus. Use the middle green keys in combination with the
Shift-key to switch between the decks.
An alternative to the assignment of the pots offers our setup-file ‘micromodul DJ2-DX2 V02
Traktor3x.tks’. Both of the outer pots are assigned to the deck-volume-parameter of deck C
& D, as long as you chose setup 2 in the DX2-controller (see chapter settings in the system
mode). This is useful when using both a DJ2 and a DX2 together (control of 4 decks). Then
you have the possibility to always control the volume of deck C & D. Further on the loss of
the two pots for the fx-control is not too bad, since exactly these two parameters can be
controlled with the joystick of the DJ2.
Another function when pressing the Shift-key is that all movements of the controls show no
reaction in Traktor. This is useful to avoid bigger value-differences when changing between
different effects.
Transport-keys
The 12 transport-keys on the lower edge correspond to the control-functions of the two decks,
whereas the blue keys control the pitch bend function.
micromodul DX2
Page 9
User manual
The following double functions are assigned to the deck-control buttons:
Shift + Cue/Pause = Loop Active/Out (only 3.0 setup)
Shift + Play/Pause = Loop Set/In (only 3.0 setup)
Shift + Sync (without label) = Tap
Shift + Cue/Play = Reverse
Shift + Pitchbend - = Pitchbend down without change of tone pitch in keylock-mode (only
3.0 setup)
Setup + Pitchbend + = Pitchbend up without change of tone pitch in keylock-mode (only 3.0
setup)
Loop/Sync-keys
Both of the Sync-keys control the same function in the program. The black Loop-controlkeys are used to choose one of 4 programmed loop-lengths. The grey keys above are assigned
to the loop-move-function and can be used for moving the loop. Most important are both of
the red keys, where you can start and stop a loop.
List/Load-Section
Due to the encoder in the middle of the instrument you can scroll through the Track-Browser
in Traktor. You can scroll pagewise by pressing the encoder when turning it. By pressing the
load-keys you can load the selected track to the decks.
Encoder
The 4 remaining encoders are used for following functions:
Seek/Scratch = spool the deck (scratch if pressing the encoder when turning)
Pitch = tempo-control (tempo-reset if pressing the encoder and Shift at the same time)
The two single grey buttons underneath the FX-section are used to change the deck-focus.
Working with additional micromodul controllers
Additional DX2
Especially for Traktor from Version 3.0 an additional DX2-controller is convenient. Thus all
4 decks can be controlled. Just switch the second DX2 to setup 2 in order to control deck C &
D. (also see ‘settings in the system mode’)
Additional DJ2
You can control the mixer-section in Traktor when using an additional DJ2. You can use the
encoders of the DJ2 for Gains. The effect-control is a lot better with a joystick and the
transportkeys can be assigned to another function, so that they are not double.
For Traktor 3.0 all 4 decks can be controlled this way. Just switch the DX2 to setup 2. Our
setup ‘micromodul DJ2-DX2 V02 Traktor3x.tks’ uses the two outer pots of the DX2-FXsection as ‘linefader’ for deck C & D. The FX-parameter which are usually controlled with
the pots, can be controlled with the joystick of the DJ2.
The optimum setup for a 4-deck-control for Traktor 3.0 consists finally of two DJ2 + two
DX2.
micromodul DX2
Page 10
User manual
Controller-Nummern
Pot / Encoder / Key
CC-No
Deck
A/C
CC-No
Deck
B/D
Note-No
Deck A/C
P – FX A (left)
6
22
P – FX B
4
20
P – FX C
25
26
P – FX D (right)
23
24
E – Seek/Scratch [hold]
14 [16] 15 [17] 9 (A-0)
E – Pitch [hold]
27 [31] 28 [32]
E – List up
11 (H-0)
E – List down
12 (C-0)
E – List up (hold)
124(E-9)
E – List down (hold)
126(F#9)
K – Load
15 (D#0)
K – Cue/Pause
24 (C-1)
K – Play/Pause
26 (D-1)
K – CueSet (blank)
25 (C#1)
K – Cue/Play
99 (D#7)
K – Sync
33 (A-2)
K – Pitch Bend down
28 (E-1)
K – Pitch Bend up
29 (F-1)
K – Loop (red)
85 (C#6)
K – Focus (grey blank)
81 (A-6)
K – Loop (grey left)
86 (D-6)
K – Loop (grey right)
87 (D#6)
K – Loop (black left upper)
88 (E-6)
K – Loop (black right upper)
89 (F-6)
K – Loop (black left lower)
90 (F#6)
K – Loop (black right lower)
91 (G-6)
K – FX A (green)
18 (F#0)
K – FX B (green)
127(G-9)
K – FX C (green)
82 (A#6)
K – FX D (green)
83 (H-6)
Note-No
Deck B/D
10 (A#0)
11 (H-0)
12 (C-0)
124(E-9)
126(F#9)
16 (E-0)
54 (F#3)
56 (G#3)
55 (G-3)
100(E-7)
63 (D#4)
58 (A#4)
59 (H-4)
92 (G#6)
84 (C-6)
93 (A-7)
94 (A#7)
95 (H-7)
96 (C-7)
97 (C#7)
98 (D-7)
57 (A-4)
62 (D-4)
64 (E-4)
67 (G-4)
Note-No
Deck A/C
Shift
Note-No
Deck B/D
Shift
79 (G-5)
80 (G#5)
107(H-8)
39 (D#2)
41 (F-2)
40 (E-2)
48 (C-3)
123(D#9)
43 (G-2)
44 (G#2)
108(C-8)
103(C-7)
109(C#8)
110(D-8)
111(D#8)
112(E-8)
113(F-8)
114(F#8)
101(F-7)
115(G-8)
69 (A-5)
71 (H-5)
70 (A#5)
78 (F#5)
125(F-9)
73 (C#5)
74 (D-5)
116(G#8)
106(A#8)
117(A-9)
118(A#9)
119(H-9)
120(C-9)
121(C#9)
122(D-9)
102(F#7)
105(A-8) 104(G#7)
CC-No means Control-Change-Number.
All midi events are sent to channel 16 (setup 1) or 1 (setup 2).
All polyphonic-aftertouch-events on channel 16 are reserved for internal system
communications. Such mididata should not be used with midi-in, since this could cause
problems with the micromodul system.
These ‘events’ are only used by a few very expensive keyboards.
micromodul DX2
Page 11
User manual
Trouble shooting
1. No pot/key is controllable, even though the right setup-file is loaded.
Probably the midi-port is not activated, to which the DJ2 is connected to. This takes
place in the setup-window ’Midi-interface’.
Maybe the wrong setup in the DJ2 is chosen: setup 1 for deck A & B; setup 2 for deck
C & D, see chapter ’setting in the system mode / setup’.
2. I combined several micromodul-controller, but not all of them work.
Only for the first instrument of the midi-chain with a LV2/LC2/LD2/LX2 the
feedback-killer-function has to be activated. Since DJ2/DX2 do not have this function,
they can not be used as a first instrument in a midi-chain. You can find further
information in the LV2/LC2/LD2/LX2-manuals.
3. The controls in TRAKTOR can not be controlled properly, after assigning the
encoder. They only change between minimum and maximum.
The encoder send relative data, which has to be analyzed as such by Traktor. When
assigning the encoder you have to choose the midi control type ’rotary encoder (64)’
in the midi-setup or activate the checkbox ’incremental’ in traktor 2.x. Further the
checkbox ’invert’ has to be activated.
4. The control of the encoders is too gross.
You should set the rotary sensitivity to 10% (0.2 for traktor 2.x) or less in the midisetup.
5. All encoder-functions like seek/scratch/pitch work inverted in Traktor vers. 3.2.
You must load a suitable setup-file (......Traktor32.tks).
micromodul DX2
Page 12
User manual
micromodul DX2
Page 13
User manual
micromodul DX2
Page 14
User manual
Version 02
Mathias Fuchß Software-Entwicklung
Op’n Idenkamp 13a
22397 Hamburg
Germany
[email protected]
www.faderfox.de
micromodul DX2
Page 15
User manual


