1
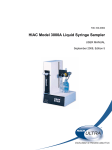
700-100-0040
HIAC Model ABS-2 Automatic Bottle Sampler
USER MANUAL
September 2008, Edition 3
Table of Contents
Section 1 Specifications .................................................................................................................... 3
Section 2 General Information ......................................................................................................... 5
2.1 Disclaimer .................................................................................................................................... 5
2.2 Safety information ........................................................................................................................ 5
2.2.1 Use of hazard information................................................................................................... 5
2.2.2 Precautionary labels ........................................................................................................... 6
2.3 Safety recommendations ............................................................................................................. 6
Section 3 Installation and Device Familiarization ....................................................................... 7
3.1 General ........................................................................................................................................ 7
3.2 System configuration ................................................................................................................... 7
3.3 Installation.................................................................................................................................... 8
3.3.1 Inspection and unpacking ................................................................................................... 8
3.3.2 Positioning .......................................................................................................................... 8
3.3.3 Standard precautions.......................................................................................................... 8
3.3.4 Safety precautions .............................................................................................................. 8
3.4 Device familiarization ................................................................................................................... 9
3.4.1 Controller board .................................................................................................................. 9
3.4.2 Optical level detectors......................................................................................................... 9
3.4.3 Sample transport system .................................................................................................... 9
3.4.4 Front panel........................................................................................................................ 10
3.4.5 Rear panel ........................................................................................................................ 12
3.5 Equipment connections.............................................................................................................. 13
3.5.1 External equipment ........................................................................................................... 13
3.5.2 Accessory kit..................................................................................................................... 14
3.5.3 Front panel connections.................................................................................................... 14
3.5.4 Sensor installation............................................................................................................. 15
3.5.5 Ball valve installation......................................................................................................... 15
3.5.6 Rear panel connections .................................................................................................... 16
3.5.7 External equipment ........................................................................................................... 17
Section 4 Controls and Operations .............................................................................................. 19
4.1 General ...................................................................................................................................... 19
4.2 Operator controls ....................................................................................................................... 19
4.2.1 Description ........................................................................................................................ 20
4.2.2 Sampler operations........................................................................................................... 22
4.2.3 Vacuum operations ........................................................................................................... 24
4.2.4 Electromagnetic stir assembly .......................................................................................... 24
4.2.5 System dead (tare) volume............................................................................................... 24
Section 5 Maintenance and Troubleshooting ............................................................................ 25
5.1 General maintenance................................................................................................................. 25
5.2 Sight tube cleaning .................................................................................................................... 25
5.3 ABS-2 system maintenance....................................................................................................... 26
5.3.1 Line filter (P/N 188-039).................................................................................................... 27
5.3.2 Desiccant chamber (P/N 395-019).................................................................................... 27
5.3.3 Check valve ...................................................................................................................... 27
5.3.4 Micrometer valve bypass for highly viscous fluids ............................................................ 28
5.3.5 Line pressure drier (P/N 570-800-0006) ........................................................................... 29
5.3.6 ABS-2 line fuse ................................................................................................................. 29
5.3.7 Air pump power outlet ....................................................................................................... 30
5.3.8 Air pump fuse.................................................................................................................... 30
5.3.9 Pinouts .............................................................................................................................. 31
5.4 ABS-2 troubleshooting ............................................................................................................... 31
1
Table of Contents
5.5 Spare parts.................................................................................................................................32
Section 6 Warranty and Contact Information .............................................................................33
6.1 Limited warranty .........................................................................................................................33
6.2 Service contact information ........................................................................................................34
6.2.1 U.S.A. customers...............................................................................................................34
6.2.2 International customers .....................................................................................................34
6.2.3 Information required ..........................................................................................................34
6.3 Return for repair .........................................................................................................................34
Section 7 Certification ......................................................................................................................35
2
Section 1
Specifications
Specifications are subject to change without notice.
Performance characteristics
Sample flow rate
1 - 200 mL/min (user adjustable)
Fluid viscosity dependant
Sample volume:
5 - 100mL (user adjustable)
5 mL increments
Dead (Tare) volume:
16 mL
Sample accuracy:
±5% of selected volume
Repeatability:
±1%
Fluid compatibility:
Fluids compatible with stainless steel,
glass, and TeflonTM
Operating pressure range:
Minimum:
20 PSI (34 kPa) recommended
Maximum:
50 PSI (344.7 kPa)
Physical characteristics
Dimensions:
12.75 inches (32.4cm) W
18 inches (45.7cm) L
27 inches (68.6cm) H
Weight:
50Lb.(22.7kg)
Power requirements
Factory set:
90 - 130 V, 47 - 63 Hz ±1% (@ <1.0 A)
180 - 260 V, 47 - 63 Hz ±1% (@ < 0.5 A)
With optional pump:
90 - 130 V, 47 - 63 Hz ±1% (@ < 6.25 A)
180 - 260 V, 47 - 63 Hz ±1% (@ < 5.0 A)
Environmental
Temperature range:
Operating:
+50 to +104°F (+10 to +40°C)
Non-Operating:
-40 to +149°F (-40 to +65°C)
Relative humidity:
Atmospheric pressure:
10 - 80% RH (Non-condensing)
Operating:
Sea Level to 10Kft. (3048m)
Non-Operating:
Sea Level to 50Kft. (15240m)
Input/Output
Host Control I/O:
RS 232 (DB-25 female)
3
Specifications
4
Section 2
General Information
2.1 Disclaimer
The information in this manual has been carefully checked and is believed to be
accurate. However, Hach Ultra assumes no responsibility for any inaccuracies that may
be contained in this manual. In no event will Hach Ultra be liable for direct, indirect,
special, incidental, or consequential damages resulting from any defect or omission in
this manual, even if advised of the possibility of such damages. In the interest of
continued product development, Hach Ultra reserves the right to make improvements in
this manual and the products it describes at any time, without notice or obligation.
Copyright © 2008 by Hach Ultra. All rights reserved. No part of the contents of this
manual may be reproduced or transmitted in any form or by any means without the
written permission of Hach Ultra.
2.2 Safety information
Read this entire manual before unpacking, setting up or operating this equipment. Pay
attention to all danger and caution statements. Failure to do so could result in serious
injury to the operator or damage to the equipment.
To make sure that the protection provided by this equipment is not impaired, do not use
or install this equipment in any manner other than that specified in this manual.
2.2.1 Use of hazard information
DANGER
Indicates a potentially or imminently hazardous situation which, if not avoided, will
result in death or serious injury.
WARNING
Indicates a potentially or imminently hazardous situation which, if not avoided,
could result in death or serious injury.
CAUTION
Indicates a potentially hazardous situation that can result in minor or
moderate injury.
Important Note: Indicates a situation which, if not avoided, can cause damage to the
instrument. Information that requires special emphasis.
Note: Information that supplements points in the main text.
5
General Information
2.2.2 Precautionary labels
Read all labels and tags attached to the instrument. Personal injury or damage to the
instrument could occur if not observed. A symbol, if noted on the instrument, will be
included with a danger or caution statement in the manual.
This symbol, if noted on the instrument, references the instruction manual for operation and/or safety information.
Electrical equipment marked with this symbol cannot be disposed of in European public disposal systems after
12 August of 2005. In conformity with European local and national regulations (EU Directive 2002/96/EC),
European electrical equipment users must now return old or end-of life equipment to the Producer for disposal at no
charge to the user.
Note: To return for recycling, contact the equipment producer or supplier for instructions on how to return end-of-life
equipment, producer-supplied electrical accessories and all auxiliary items for proper disposal.
This symbol, when noted on a product enclosure or barrier, indicates that a risk of electrical shock and/or
electrocution exists.
This symbol, if noted on the product, indicates the need for protective eye wear.
This symbol, when noted on the product, identifies the location of a fuse or current limiting device.
This symbol, if noted on the product, indicates a crush hazard. Keep hands and fingers clear
This symbol, when noted on the product, indicates the presence of devices sensitive to Electro-static Discharge
(ESD) and indicated that care must be taken to prevent damage with the equipment.
2.3 Safety recommendations
WARNING
To reduce the risk of electric shock do not remove the cover or the back while the
instrument is powered. Refer all servicing of this instrument to qualified service
personnel.
Prior to operating this instrument read the Operations Manual to become familiar with the
operation of this instrument. Failure to follow the operating procedures may result in
damage to this instrument and voiding of the warranty.
This instrument requires the operator to be familiar with the operation of analytical
instrumentation and have an understanding of particle counting applications.
Note: This instrument has been tested and found to comply with the limits for a Class A digital
device, pursuant to Part 15 of the FCC rules. These limits are designed to provide reasonable
protection against harmful interference when the instrument is operated in a commercial
environment. This instrument generates, uses, and can radiate radio frequency energy and, if not
installed and used in accordance with the Operations Manual, may cause harmful interference to
radio communications. Operation of this instrument in a residential area is likely to cause harmful
interference, in which case the user will be required to correct the interference at his/her own
expense.
Note: This instrument is Installation Category II as defined by IEC 1010-1, Annex J.
6
Section 3
Installation and Device Familiarization
DANGER
Tasks involving installation of this equipment have electrical related hazards
associated with them. These tasks must only be attempted by individuals trained
and knowledgeable in this particular task and associated hazards.
3.1 General
This chapter explains the installation of the Automatic Bottle Sampler, ABS-2. The ABS-2
is an essential part of a batch fluid analysis system. Check the individual peripheral
equipment manuals for the mechanical/electrical installation and operating procedures
required to incorporate an ABS-2. Consult with Hach Ultra Technical Support to resolve
any compatibility or suitability questions regarding a specific application.
The ABS-2 may be used in conjunction with HIAC particle sensors and counters. The
sampler's design provides a means of metering a known volume of liquid sample through
a sensor while generating start and stop signals for a counter. The operator adjusts the
volume by setting the positions of photoelectric level detectors on the ABS-2 sight tube.
The ABS-2 operates by either pressurizing the sample liquid for transport through the
sensor or by evacuating the sample chamber (vacuum mode), degassing the sample
prior to analysis.
The ABS-2 will operate either manually, with the operator prompting the ABS-2 to begin
and end the sampling procedure, or automatically, with the ABS-2 sampling when
prompted remotely by the host particle counter. The ABS-2, when prompted by a host
counter, can perform multiple sample analyses (batch sampling). The ABS-2 pressure
chamber's electromagnetic stir assembly incorporates solid state technology to ensure
sample stability and reduce particle dropout during analysis.
3.2 System configuration
Figure 1 shows a typical system configuration utilizing the ABS-2 Automatic Bottle
Sampler.
Figure 1 Typical ABS-2 system configuration (not to scale)
7
Installation and Device Familiarization
3.3 Installation
3.3.1 Inspection and unpacking
The ABS-2 is shipped in a single shipping carton. This carton should be retained for use
in case reshipment is required. The carton should be given a visual inspection for signs of
external shipping damage. Deficiencies should be brought to the attention of the carrier.
All materials received within the shipping carton should be verified against the shipping
papers to assure receipt of all materials. An internal inspection should be made of the
carton to determine if there has been damage to the contents or if items are missing.
Damage to the contents should be brought to the attention of the carrier. Missing items
should be brought to the attention of your Hach Ultra representative.
3.3.2 Positioning
The following are suggestions and requirements for the positioning of the ABS-2:
•
The ABS-2 should be mounted on a level surface, at a convenient work level.
•
The ABS-2 should not be placed in an area where it will be subjected to electronic
noise and mechanical vibration.
•
The ABS-2 must be located within seven feet (2.1 meters) of the grounded electrical
power receptacle. Extension cords should not be used.
•
When sampling hazardous materials, the ABS-2 should be located adjacent to or in a
fume hood.
•
Provide adequate access for operation and maintenance.
3.3.3 Standard precautions
The ABS-2 transports fluids through a particle sensor. The following items are standard
precautions that must be considered due to the use of pressure in the ABS-2:
1. Attach all pressure and sampling tubing associated with the ABS2 and tighten the
fittings prior to applying pressure to the system.
2. Always apply power to the electrical components of the system before pressurization
of the fluid system.
3. Never make or break any power or electrical connections when the system is either
powered-on or pressurized.
3.3.4 Safety precautions
The ABS-2 transports and directs fluids under pressure. The operator should always
wear proper safety equipment and clothing when operating or performing any
maintenance on the pressurized fluid system.
CAUTION
Always wear safety glasses and observe safety precautions when working with
glass under pressure. Although a safety shield is built into the glass pressure
vessel, always inspect the glass pressure chamber for any signs of wear,
weakness, or cracking. In the event of glass failure, bubbles will form in the plastic
coating on the glass. Should any questions arise contact Hach Ultra Technical
Support.
WARNING
Do not adjust the chamber release/lock handle while the ABS-2 chamber is under
pressure. Always depressurize the ABS II pressure chamber prior to tightening or
releasing the release/lock handle.
8
Installation and Device Familiarization
3.4 Device familiarization
There are three major components to the ABS-2 system:
•
Controller Board
•
Optical Level Detectors
•
Sample Transport System
3.4.1 Controller board
An internal controller board allows the ABS-2 to communicate with a host counter and
manipulate the flow of the sample. This controller board cycles the system solenoids to
accept the sample material, transfers the sample to the volumetric cylinder, makes a
volumetric determination, and directs the sample through the sensor. A microvalve
located downstream from the sensor ensures sensor backpressure during sampling
operations. After the sample has been transported through the sensor, it is directed to a
user designated fluid drain.
3.4.2 Optical level detectors
The ABS-2 optical level detectors sense the fluid level in the ABS-2 graduated cylinder.
The first level detector discerns that the sample has entered into the ABS-2 graduated
cylinder at the -0- reference level (or other level set by the operator) and, during the
sampling cycle, prompts the counter to start data collection. The second level detector
discerns the arrival of the fluid at the user determined volume point (ml) on the graduated
cylinder and, during the sampling cycle, prompts the counter to stop data collection.
3.4.3 Sample transport system
The sample transport system transfers the sample from the sample chamber through a
delivery tube to the sensor, starts and stops the counter for a pre-determined sample
volume (ml), and diverts the fluid sample to the user designated waste container. The
sampling system consists of a microvalve, two system regulators (pressure and vacuum),
and two 12VDC electric solenoid valves. The microvalve, located downstream from the
sensor, is used to maintain sensor backpressure during sampling operations and to
determine the sample flow rate.
The ABS-2 will operate from either an optional pressure/vacuum pump or from house air
and vacuum lines. The line pressure is not to exceed 60 PSI (413.7 kPa).
9
Installation and Device Familiarization
3.4.4 Front panel
Figure 2 Front panel
10
Installation and Device Familiarization
1.
Sensor Mount
The location where the sensor is mounted in the upper cavity of the ABS-2.
2.
Flow Control Microvalve
The microvalve used to control the flow rate of the sample through the
sensor.
3.
Sample Chamber
The pressure or vacuum chamber that maintains sample integrity during
sampling operations.
4.
Sight Tube
The sight tube is used in determining and measuring the sample volume.
5.
Chamber Release Handle
The release handle will secure the electromagnetic assembly to the pressure
chamber when rotated counterclockwise. When the release handle is rotated
clockwise, the stir assembly will be release for sample removal.
The operator should grasp the stirrer assembly when the assembly is
released to prevent sample spilling.
6.
Stir Bar Speed Control
The stir bar speed control will increase or decrease the stir bar speed.
7.
Stir Assembly
8.
Vacuum/Pressure Mode Switch
The vacuum/pressure mode switch selects the operating mode. When the
switch is depressed, the ABS-2 is in the VACUUM Mode and when released,
is in the PRESSURE Mode.
9.
Manual/Auto Mode Switch
The manual/auto mode switch selects the ABS-2's mode of operation. When
the switch is depressed, the ABS-2 is in the MANUAL Mode; when the
switch is released, the ABS-2 is in AUTOMATIC Mode and under the control
of the counter.
10.
Pump Control Switch
The pump control switch will turn On or Off the optional remote
pressure/vacuum pump.
11.
Volume Detector
12.
Zero Volume Detector
13.
Stir Assembly Slide Bar
14.
Sample Drip Pan
15.
Vacuum Control Valve
The vacuum control valve determines the line vacuum for sampling
operations.
16.
Pressure Control Valve
The pressure control valve determines the line pressure for sampling
operations.
17.
Pressure/Vacuum Gauge
The pressure/vacuum gauge indicates the sample line pressure or vacuum.
11
Installation and Device Familiarization
3.4.5 Rear panel
Figure 3 Rear Panel
Figure 3 shows the service connects on the rear panel of the ABS-2.
12
Installation and Device Familiarization
Their functions are:
1.
Sensor Cable Port
The sensor communications/power cable is placed through this port to the
counter.
2.
Sampler Communications Port
The sample communications cable (P/N 28-0146) is connected to the
sampler communications port and to the counter.
3.
AC Line Filter/Fuse
The AC line cord is connected to the ABS-2 AC line power filter. To replace
the ABS-2 fuse, open the fuse door and pull out the fuse holder marked with
an arrow.
4.
AC Fuse - Pump
The fuse for the line power for the optional remote pump.
5.
Pressure/Vacuum Pump AC Outlet
The port to connect the line power cord from the optional pressure/vacuum
pump (P/N 073210-01 115 VAC, 073210-11 220 VAC).
6.
Sample Drain Port
The sample drain from the sight tube.
7.
Vent Outlet
The vent from the sample chamber.
8.
Vacuum Port
The vacuum line for ABS-2 vacuum operations connection.
9.
Pressure/Vacuum Exhaust
The exhaust for line pressure and vacuum operations. This port must be
capped when using facility air and vacuum sources.
10.
Pressure Port
The pressure line for ABS-2 pressure operations connection.
CAUTION
The line pressure to the ABS-2 must be externally regulated.The maximum line
pressure is 60 psi (443.7kPa). Line pressures exceeding 60 psi will result in
permanent damage to the ABS-2.
3.5 Equipment connections
As part of the sample transport system, the ABS-2 requires several mechanical and
electrical connections. The components to be connected are a regulated pressure line to
the ABS-2, sample lines to and from the particle sensor, a drain line, a vent line from the
sight tube assembly, AC power, AC power to the optional pump, and an electronic
connection to a host counter.
The mechanical connections to and from the ABS-2 require either ¼ inch (6.35 mm) or
3/8 inch (9.5 mm) O.D. compression fittings and tubing. All connections should be finger
tightened, then tightened one quarter turn with a wrench. Overtightening the connectors
will permanently damage the pressure tube seals.
It is recommended that when installing the ABS-2 in the system, the sensor installation
take place prior to connection of the ABS-2 to service lines. The installation of the sensor
into the ABS-2 may be performed before or after the connection of the ABS-2 to the
service pressure/vacuum lines and the fluid drain.
3.5.1 External equipment
The following is a list of HIAC equipment which is commonly used with the ABS-2:
Particle Sensors
Counters
Model HRLD
Model 4100
MicroCount-01, 02, & 05
Model 8000A
Model HR-XXX
Model 9064
13
Installation and Device Familiarization
3.5.2 Accessory kit
The ABS-2 is shipped with an Accessory Kit configured to the power requirements of the
user (115 VAC P/N 073X209-01 or 230 VAC P/N 073X209-11). The following materials
are supplied in the ABS-2 Accessory Kit and will be called out by Item Number during
installation of the ABS-2:
Item No.
Description
Quantity
Part No.
1.
Cap
1
190-029
2.
Fuse (ABS-2):
115 VAC 2 AMP
5X20, MM, SLO-BLO
2
500-150-0200
3.
Fuse (Pump):
250 VAC Kit 6.25 AMP,
3AG, SLO-BLO
2
590-033
4.
Power Cord 7.5 Ft (229 cm)
1
550-019
5.
Cable, Shielded, M/M
1
28-0146
6.
Stir Rod .5 inch
5
10000095
7.
Stir Rod 1.5 inch
5
073138-03
8.
Tube Insert 3/8 OD
1
190-292
9.
Tygon Tube 3/8 OD
4 Feet (122 cm)
401-011
3.5.3 Front panel connections
The front panel connections are located in the top section of the ABS-2. The sensor is
installed on the sample tube connection located in the top of the ABS-2.
Figure 4 Front panel connections
14
Installation and Device Familiarization
Access to the sensor connections is made by depressing two release buttons located on
each side of the top of the ABS-2 (indicated in Figure 4) and placing the cover in an
upright position.
3.5.4 Sensor installation
The sensor is attached to the sensor microcell connector located on the end of the
chamber sampling tube.
The sensor's outlet port is connected to the sensor microcell connector outlet sample line.
The outlet sample line is connected to the microvalve.
Thread the sensor communications cable out through the rear panel of the ABS-2.
3.5.5 Ball valve installation
Install the glass ball valve on the glass sight tube located in the top left corner of the
ABS-2. Place the check valve loop (indicated in the diagram below) towards the front of
the instrument, by gently pressing the ball valve onto the sight tube and turning the ball
valve two degrees in either direction.
Figure 5 Ball valve
15
Installation and Device Familiarization
3.5.6 Rear panel connections
Figure 6 Lower rear panel connections
Vent
The vent outlet connects a ¼ inch (6.35 mm) O.D. (user supplied) vent service line to a
user defined fume exhaust. The vent outlet service line connects to the fume exhaust via
a user supplied nut and ferrule.
When sampling hazardous fluids or fluids that may produce hazardous vapors, the vent
outlet should be connected to a fume exhaust. If the vent outlet is not connected to a
fume exhaust, the vapors from the sample fluid will be released to the sampling room
atmosphere during operations.
Sample drain
The drain line is a 3/8 (9.5 mm) connection. Four feet (122 cm) of TygonTM tubing
(supplied item 8) is included with the ABS-2. To install the tubing:
1. Place the 3/8 inch tube insert (supplied item 9) inside the tubing. The insert is used to
ensure that the connector nut properly grips the tubing.
2. Remove the connector nut from the drain port and thread the nut over the tube.
3. Insert the tubing with the insert inside the tubing in the drain port.
4. While holding the end of the tubing in the port, push the nut onto the vent port
connector and tighten the nut with a wrench.
Vacuum inlet
The vacuum inlet connection is a ¼ inch (6.35 mm) connection. Install the vacuum line
from either the facility's vacuum service or the vacuum line from the vacuum port on the
pressure/vacuum pump. The tubing nut to secure the vacuum line is located on the
vacuum port connector.
16
Installation and Device Familiarization
Pressure inlet
The pressure inlet connection is a ¼ inch (6.35 mm) connection. Install the pressure line
from either the house air (clean dry air) or from the pressure port of the pressure/vacuum
pump. The tubing nut to secure the pressure line is located on the pressure inlet port
connector. The connection provides the ABS-2 with line pressure not to exceed 60 PSI
(413.7 kPa).
Pressure/Vacuum exhaust
If the user is using house air and vacuum, install a ¼ inch (6.35 mm) cap (supplied item1)
on the pressure/vacuum exhaust port.
Instrument power
Connect the line power cord (supplied item 4) to the instrument power port.
WARNING
Do not connect the power cord to the line power receptacle at this time. Extension
cords should not to be used. Do not turn on the ABS-2.
3.5.7 External equipment
Connect all external equipment in accordance with the documentation that accompanies
the equipment. After all equipment has been connected, perform the following system
completion checks:
1. Verify that all line pressure, sample, vent, and drain tubing connections are securely
fastened and do not leak.
Note: During shipment to your facility, the tube connectors may have come loose. It is
recommended that prior to running any sample fluid, all liquid tubing connections be checked by
flushing clean (particle free) water through the instrument to check for leaks.
2. Verify that the line pressure to the ABS-2 does not exceed 60 PSI (413.7 kPa).
17
Installation and Device Familiarization
18
Section 4
Controls and Operations
4.1 General
The ABS-2 is a sample transport system for sampling fluids by pushing the sample liquid
through the sensor under pressure, avoiding the formation of bubbles during sampling.
The sample can be degassed prior to sampling by producing a vacuum in the sample
chamber.
4.2 Operator controls
The ABS-2 will operate in either the manual mode with the operator prompting the ABS-2
to perform sampling operations or the ABS-2 can be connected to a host counter. The
host counter will automatically prompt the ABS-2 to perform sampling operations. The
operator controls are shown in Figure 7 below.
Figure 7 Operator controls
1.
Flow Control Valve
6.
Chamber Release Handle
2.
Sight Tube Volume Level Detector
7.
Stir Bar Speed Controller
3.
Sight Tube Zero Level Detector
8.
Vacuum/Pressure Mode Switch
4.
Electromagnetic Stir Assembly
9.
Manual/Auto Mode Switch
5.
Sample Chamber
10.
Remote Pump On/Off Switch
19
Controls and Operations
CAUTION
Do not adjust the chamber release/lock handle while the ABS-2 chamber is under
pressure. Always depressurize the ABS-2 pressure chamber prior to tightening or
releasing the release/lock handle. Failure to depressurize the ABS-2 Pressure
Chamber prior to moving the release/lock handle may cause the pressure chamber
to fail.
4.2.1 Description
Volume level detector
The volume level detector is the detector that senses when the end of the sampling
volume has been reached and sends the "endcount" message to the counter. It is
adjusted by turning the adjustment knobs on either side of the sight tube. By raising and
lowering this detector, the operator can set the ABS-2 to sample a desired volume (20, 50
ml, etc.).
Zero volume detector
The lower level detector is the detector that senses when the beginning of the sampling
volume has been reached and sends the "start count" message to the counter. This
detector is adjusted by turning the adjustment knobs on either side of the sight tube
assembly. This detector is normally set at the -0- level indication on the sight tube.
The zero detector may be set to a higher level. When the zero (start count) detector is set
at a higher volume level the dead (tare) volume is increased. The operator should add the
volume under the zero detector to the 16 ml existing tare volume when computing the
total tare volume. The operator must move the upper (endcount) detector to a higher
volume level to maintain the same sample volume if the lower detector is raised.
Vacuum/Pressure switch
The vacuum/pressure switch selects the sample chamber atmosphere. The ABS-2 will
create sample head pressure to transport the sample through the sensor, or create a
vacuum in the sample chamber to degas the sample fluid. When the switch is in the down
position, the vacuum mode is selected and when the switch is in the up position, the
ABS-2 is in pressure mode.
Automatic/Manual switch
The automatic/manual switch selects the operating mode for the ABS-2. In the automatic
mode, the ABS-2 communicates with the counter for volumetric particle counting and
performs multiple sample functions. When the switch is in the down position, the manual
mode is selected and when the switch is in the up position the is in the automatic mode.
In the manual mode, the operator primes the ABS-2 sample system and determines the
sample flow rate for volumetric particle counting. The user may switch operating modes
without turning off the ABS-2.
Pump On switch
The Pump On switch controls power to the optional remote pressure/vacuum pump. The
pump is turned on by pressing the switch.
Stir bar speed controller
The stir bar speed controller adjusts the rotation speed of the stir bar. Turning the speed
controller knob fully counter clockwise will turn off the electromagnetic stir assembly.
When the stir bar assembly is turned Off, the magnetic field will not affect the sample.
Chamber release handle
The chamber release handle is used to lock the stir assembly and sample bottle to the
sample chamber. The stir assembly and sample bottle is locked into place by turning the
handle counter clockwise. To unlock the stir assembly and sample bottle, turn the release
handle clockwise.
20
Controls and Operations
CAUTION
The operator should grasp the stir assembly when it is released from the sample
chamber to keep the sample from spilling. Do not adjust the pressure chamber
release/lock handle while the chamber is under pressure.
Flow control valve
The flow control valve is an in-line microvalve for adjusting the flow rate of the sample
through the sensor. The flow control valve is located downstream from the sensor to
maintain sample integrity through the flow cell of the sensor.
When initially performing sampling operations, the flow valve should be completely open,
by rotating the valve counter clockwise until the adjustment knob stops.
CAUTION
Never over-tighten the flow control valve. Over-tightening the flow control valve
will permanently damage the microvalve assembly.
The microvalve has micrometer-style markings on the valve body to assist the operator in
documenting the sample's flow rate.
Pressure regulator
The pressure regulator adjusts the line pressure in the sample chamber. The pressure is
increased by turning the regulator counter clockwise and decreased by turning clockwise.
Pull the red locking ring out when adjusting the pressure. When the proper setting is
reached, secure the regulator by pushing into place the red locking ring. The
pressure/vacuum gauge will indicate the chamber pressure.
Vacuum (negative pressure) regulator
The vacuum regulator adjusts the vacuum in sample chamber. The vacuum is increased
by turning the regulator counter clockwise and is decreased by turning the regulator
clockwise. Pull the red locking ring out when adjusting the vacuum. When the proper
setting is reached, secure the regulator by pushing into place the red locking ring. The
pressure/vacuum gauge will indicate the chamber vacuum.
21
Controls and Operations
4.2.2 Sampler operations
Before operation of the system, the ABS-2, particle counter, and any other associated
equipment should be turned on and all sample lines should be inspected and tested to
ensure that there are not sample leaks in the sample transports system.
Pre-operational checks
The following pre-operational checks should be performed prior to operating the ABS-2:
1. Verify that the ABS-2 and sensor power and communications cables are connected.
2. Verify that all of the ABS-2 sample, drain, pressure, vent, vacuum, and exhaust ports
are connected, capped, and do not leak.
3. Verify that the line pressure to the ABS-2 does not exceed 60 psi (413.7 kPa).
4. Verify that the zero level detector is set at -0- on the sight tube.
4.2.2.1 Flow rate adjustments
The initial setting for the ABS-2 when performing sampling operations are:
•
Flow Valve - Fully Open
•
Line Pressure - 20 psi (137.8 kPa)
For the best results, the sample fluid flow rate should be adjusted to the calibrated
specification for the sensor. The operator may want to use a stopwatch or other timing
device for manually timing the flow rate.
The flow rate adjustment procedure requires the operator to adjust the flow control valve
and line pressure so that a specified volume is filling the sight tube in a specified period
of time.
Flow rate adjustment procedure
1. Set the volume level detector at the calibrated flow rate volume for the installed
sensor.
2. Set the pressure/vacuum switch to pressure.
3. Verify that a clean (particle free) stir bar is in the sample bottle, place the sample
bottle on the stir assembly, and lock the stir assembly to the sample chamber.
4. Turn on the ABS-2. (power switch is located on the rear of the sampler).
5. Set the auto/manual switch to automatic and configure the particle counter for volume
mode operations.
6. Prompt the counter to start the run. The fluid will begin to flow and will be visible in
the sight tube. Begin timing when the sample reaches the -0- in the sight tube.
7. When the sample reaches the volume level detector, the counter will stop the ABS-2,
the pump will turn off (if a remote pump is attached), and the sample chamber will be
vented. Stop timing the sample.
8. If the time required for the sample volume to be achieved is not as expected, for
example 1 minute, adjust the ABS-2 as follows:
•
If the time required to achieve the expected sample volume was more than 1
minute, close the flow control valve by turning it clockwise, or decrease the line
pressure.
•
If the time required to achieve the expected volume was less than 1 minute, open
the flow control valve by turning it counter clockwise, or increase the line
pressure.
Repeat this procedure until the sample volume is achieved in 1 minute.
22
Controls and Operations
4.2.2.2 Manual operations
The ABS-2 may be operated in the manual mode; in this mode, the sampler serves only
as a fluid transport device rather than a volume sampler. In this mode, the sight tube
detectors are not used.
Manual operations procedure
1. Set the pressure/vacuum switch to the pressure mode.
2. Set the automatic/manual switch to automatic.
3. Turn On the ABS-2.
4. Configure the particle counter for manual mode operations.
5. Verify that a clean (particle free) stir bar is in the sample bottle, place the sample
bottle on the stir assembly, and lock the stir assembly to the sample chamber.
6. Press the automatic/manual switch. The pump will start (if connected to a remote
pump) and fluid will begin to appear in the sight tube.
7. Press the start key on the counter when the sample reaches the -0- indicator on the
sight tube.
8. When the sample reaches the desired volume indicator on the sight tube or when
sufficient sample has been analyzed to accumulate valid data, press the
automatic/manual switch to stop the ABS-2.
The counter and remote pump will stop counting when the automatic/manual switch is
pressed.
This procedure may be repeated as often as necessary.
Note: When sampling operations have been completed, a bottle of clean (particle free) water or
other clean liquid that is miscible with the sample liquid should be run through the sampler's system
to flush the sensor, sample lines, and the sight tube.
4.2.2.3 Automatic operation
The ABS-2 may be operated in a mode where the level detectors control the start and
stop of the particle counting process, producing samples of consistent volume.
Automatic operation procedure
1. Verify that the volume level detector is set at the desired sample volume indicator on
the sight tube.
2. Set the pressure/vacuum switch to the pressure mode.
3. Set the automatic/manual switch to automatic.
4. Turn On the ABS-2 and the pump (if connected).
5. Configure the particle counter for volume mode operations.
6. Verify that a clean (particle free) stir bar is in the sample bottle, place the sample
bottle on the stir assembly, and lock the stir assembly to the sample chamber.
7. Prompt the counter to begin sampling. The pump will start (if connected to a remote
pump) and fluid will begin to appear in the sight tube.
•
Counting will begin when the sample level reaches the lower level detector and
will end when the sample level reaches the upper volume level detector on the
sight tube.
•
The sample will be drained from the sight tube automatically, and the ABS-2 will
be ready for the next sample analysis immediately.
23
Controls and Operations
•
If multiple sample runs are to be made, ensure that the total sample volume is
sufficiently large. The total sample volume is equal to the sample volume, plus the
ABS-2 tare volume (16 ml).
Note: When sampling operations have been completed, a bottle of clean (particle free) water or
other clean liquid that is miscible with the sample fluid should be run through the sampler's system to
flush the sensor, sample lines, and the sight tube.
4.2.3 Vacuum operations
When shaking a sample for analysis, the fluid may develop air bubbles.
To remove the entrapped air bubbles (degas), follow this procedure:
1. Place the sample bottle on the stir assembly and lock the stir assembly to the sample
chamber.
2. Set the pressure/vacuum switch to the vacuum mode.
3. Set the automatic/manual switch to automatic.
4. Turn On the ABS-2 and the pump (if connected).
5. Observe the pressure/vacuum gauge and adjust the vacuum regulator until a vacuum
indication is shown.
•
Allow sufficient time (at least 1 minute) for sample degassing. The time required is
dependent upon the fluid's viscosity.
Note: Some fluids contain volatile constituents which may boil off under vacuum (reduced
atmospheric pressure) operations. When a sample appears to "boil," discontinue degassing
operations.
4.2.4 Electromagnetic stir assembly
During sampling operations, it is important that the particles in the sample liquid remain
suspended. The electromagnetic stir assembly performs this function.
The electromagnetic stir assembly creates a magnetic field that rotates a steel or other
magnetic style stir bar. The speed at which the stir bar will rotate, is controlled by the stir
bar speed controller found on the right front side of the ABS-2. By rotating the speed
control knob, the operator can speed up or slow down the rotation of the stir bar.
Stir bars
The operator should use only clean (particle free) stir bars in the sample bottles. The stir
bars (stirring rods) must have two important properties.
1. The stir bars are sensitive to magnetic fields.
2. The stir bars outer covers are made of glass or another material that will not shed
particles.
Note: It is important to ensure that the stir bar is not magnetic. Magnetic stir bars may affect the
distribution of particles in the sample if the particles are sensitive to magnetic fields. When the
electromagnetic stir bar assembly is turned off, the magnetic field is removed and the stir bar will
stop rotating.
4.2.5 System dead (tare) volume
The ABS-2's sample transport tubing will draw 16 milliliters of sample. The operator
should verify that the total volume of the sample contains enough sample for sample
analysis and for ABS-2 operations. To determine the total sample volume use the
following formula:
16 ml (system tare) + sample volume (ml) = total volume (ml)
24
Section 5
Maintenance and Troubleshooting
5.1 General maintenance
When cleaning the ABS-2's sampling system, always use clean (particle free) water or
other clean liquid miscible with the sample material.
The operator should flush the sampling system of the ABS-2 in the following
circumstances:
1. After the completion of a fluid sample analysis and prior to sampling another fluid.
2. If any foreign material has entered or is suspected to have entered the sampling
system.
3. Prior to the opening of any ABS-2 system for maintenance or repair.
5.2 Sight tube cleaning
The ABS-2 sight tube can be cleaned with an apparatus brush and a mild soap solution.
To clean the sight tube:
1. Verify that the ABS-2 has been turned off and the line power cord has been
disconnected.
2. Open the top of the ABS-2 using the release buttons on each side of the top
assembly.
3. Remove the sight tube ball valve, refer to Ball valve installation on page 15.
4. Using a glass tube apparatus brush, gently insert the brush down into the sight tube
assembly.
5. Gently pull and push the brush in an up and down motion 5 to 10 times.
Note: Use caution to avoid any liquid from squirting out of the sight tube assembly and down the
rear panel of the ABS-2.
6. Re-assemble the ABS-2.
7. Flush the sample system as described in the General Maintenance Section.
25
Maintenance and Troubleshooting
5.3 ABS-2 system maintenance
CAUTION
Prior to performing any ABS-2 system maintenance, always verify that the ABS-2 is
turned off, the line power cord has been disconnected, pressure lines have been
secured, and the sample system has been flushed.
The ABS-2 has several items that may require replacement and/or maintenance, as
shown below:
Figure 8 ABS-2 top view with cover removed
26
1
Line Pressure Check Valve
2
Line Filter
3
Line Pressure Desiccant Chamber
4
Sight Tube (Without ball valve)
Maintenance and Troubleshooting
5.3.1 Line filter (P/N 188-039)
The line filter should be replaced when the filter has become wet, if foreign material is
suspected to have contaminated the filter, or when the desiccant filter is replaced. A 9/16
inch or adjustable wrench is required to replace the line filter. The line filter is connected
to the ABS-2 using standard tube fittings. When securing the fittings, hand tighten them
and turn the nut an additional ¼ of a turn with the wrench. Over-tightening these fittings
will result in permanent damage.
To replace the line filter:
1. Verify that the ABS-2 has been turned off, pressure lines have been secured, and the
line power cord has been disconnected.
2. Open the top of the ABS-2 using the release buttons on each side of the top
assembly.
3. Observe the flow direction arrow on the filter so that the new filter can be properly
installed.
4. Using the 9/16 inch wrench, remove the fittings from either side of the line filter.
5. Verify that the flow arrow on the new filter is pointing towards the front of the ABS-2
and install the new filter.
6. Tighten the fittings on the line filter.
5.3.2 Desiccant chamber (P/N 395-019)
The desiccant chamber removes any moisture present in the pressurized line gas. The
desiccant consists of blue indicator beads that indicate when the chamber should be
replaced. When the blue indicator beads turn white or brown, replace the desiccant
chamber. The operator should also replace the line filter when replacing the desiccant
chamber.
A 9/16 inch or adjustable wrench is required to remove the desiccant chamber. To replace
the desiccant:
1. Verify that the ABS-2 has been turned off, all pressure lines have been secured, and
the line power cord has been disconnected.
2. Open the top of the ABS-2 using the release buttons on each side of the top
assembly.
3. Loosen the sample line fittings on each end of the desiccant chamber.
4. Remove the desiccant chamber.
5. Install a new desiccant chamber.
6. Tighten the line fittings to the desiccant chamber.
5.3.3 Check valve
The ABS-2 sample line contains a check valve to ensure consistent line pressure through
the sensor. If the required sample flow rate through the sensor cannot be achieved, or if
the flow rate cannot be maintained, the operator should clean the check valve.
A 7/16 inch or adjustable wrench is required to remove the check valve. To clean the
check valve:
1. Verify that the ABS-2 has been turned off and the line power cord has been
disconnected.
2. Open the top of the ABS-2 using the release buttons on each side of the top
assembly.
27
Maintenance and Troubleshooting
3. Observe the flow direction arrow on the check valve so that the cleaned check valve
will be properly re-installed.
4. Loosen the line connectors and remove the valve.
5. Clean the valve by soaking the valve in a solvent miscible with the sampling solution.
Rinse the valve with water before re-installation.
6. Re-install the check valve with the directional flow arrow facing towards the rear of
the ABS-2.
7. Attach the sample line connectors to the check valve and hand tighten the
connectors.
8. Tighten the sample line fittings with the wrench.
5.3.4 Micrometer valve bypass for highly viscous fluids
When sampling highly viscous or very dirty fluids with the ABS-2, the micrometer valve
may need to be bypassed. The micrometer valve may clog and possibly trap dirt when
used with very viscous fluids. To bypass the micrometer valve:
1. Remove tube and fittings between micrometer valve outlet and the check valve inlet.
2. Remove the micrometer valve inlet tube and fittings from the micrometer valve.
3. Attach the micrometer valve inlet tube to the check valve inlet using the fittings.
Figure 9 Check valve and micrometer valve locations
28
1.
Micrometer Valve
2.
Check Valve
Maintenance and Troubleshooting
5.3.5 Line pressure drier (P/N 570-800-0006)
A line pressure drier is located in the lower assembly of the ABS-2. The line pressure
drier automatically drains when the line pressure is removed from the ABS-2. If any
moisture is collected in the drier bowl, the drier will drain the liquid through the ABS-2
base onto the tabletop. Any liquid found under the ABS-2 is a sign that the line pressure
to the ABS-2 is not clean and dry.
The line pressure drier may require cleaning or filter maintenance if the line pressure
drier is filled with moisture. To clean the line pressure drier, remove the polycarbonate
bowl and clean the bowl with a clean lint free cloth. A filter is located on the line pressure
drier bowl stem.
Note: Make sure the pump is turned off before removing the polycarbonate bowl.
The line pressure drier is accessible by removing the drip pan screws and pulling the drip
pan out of the ABS-2. After the drip pan has been removed, the line pressure drier can be
seen on the upper left side of the lower assembly. The line drier bowl is accessible to the
operator and can be removed with no tools.
To remove the drier bowl:
1. Verify that the ABS-2 has been turned off and the line power cord has been
disconnected.
2. Remove the drip pan screws located on each corner of the drip pan.
3. Remove the drip pan.
4. Grasp the line pressure drier's polycarbonate bowl and rotate the bowl
counterclockwise to remove the bowl.
5. Clean the bowl and/or replace the drier stem filter.
6. Re-assemble the line pressure drier.
7. Re-assemble the drip pan.
5.3.6 ABS-2 line fuse
Verify that the ABS-2 has been turned off and the line power cord has been disconnected
prior to replacing the fuse.
The ABS-2 line power fuse is located in the instrument power assembly. A small flat-head
screwdriver is required to replace the fuse.
When replacing the fuse holder, verify that the fuse holder assembly arrow is pointing in
the same direction as the reference arrows found on the open instrument power
assembly door.
The fuse is replaced by the following procedure:
1. Unplug the sampler's power cord. The fuse box is located within the Power
Cord/Power Switch Assembly on the rear panel of the sampler.
2. Place the screwdriver in the groove on the top of the switch assembly. Pull out on the
screwdriver so that the fuse box door opens. The door has hinges and will swing
down, covering the power cord connector.
3. Inside the fuse box is a fuse holder that is brown with a white arrow. Put the
screwdriver on the side of the fuse box toward which the arrow points, then pull in the
opposite direction from the arrow to free the fuse holder from the fuse box.
29
Maintenance and Troubleshooting
Figure 10 Fuse box and holder
4. Remove the fuse from the fuse holder and verify its failure.
5. Replace with a new fuse with the same rating and tolerances.
6. Replace the fuse holder in the fuse box. Make sure that the arrow on the fuse holder
points in the same direction as the arrows on the fuse box.
7. Close the fuse box. The door will snap into place.
5.3.7 Air pump power outlet
The air pump power outlet supplies fused AC line power to the optional pressure/vacuum
pump. Connect the AC line power cord from the pressure/vacuum pump to the air pump
power outlet.
5.3.8 Air pump fuse
Verify that the ABS-2 has been turned off and the line power cord has been disconnected
prior to replacing the fuse. A small flat-head screwdriver is required to replace the fuse.
The fuse is replaced by the following procedure:
1. Place the blade of the screwdriver in the line fuse holder slot and rotate the fuse
holder counter clockwise. The spring loaded fuse holder will release out of the unit,
allowing replacement of the fuse.
2. Install a new fuse in the fuse holder.
3. Place the fuse holder assembly in the fuse port and re-install the fuse assembly using
the screwdriver.
30
Maintenance and Troubleshooting
5.3.9 Pinouts
The pinout for the sampler connector (DB-25 Connector) on the ABS-2 is identified in the
following table:
1.
Pump Control
13.
N/C
2.
Ground
14.
N/C
3.
Count ON (To Counter)
15.
N/C
4.
N/C
16.
N/C
5.
N/C
17.
N/C
6.
N/C
18.
N/C
7.
Ground (Counter)
19.
N/C
8.
Return to Counter
20.
N/C
9.
N/C
21.
Return to Counter (tied to pin 8)
10.
N/C
22.
Pump Start (From Counter)
11.
N/C
23.
N/C
12.
N/C
24.
N/C
25.
N/C
5.4 ABS-2 troubleshooting
The ABS-2 is a unit containing few complex parts; if the unit is properly setup and the
fuses are intact, the unit should run. The following procedure lists, in order of priority, the
checks the operator should make if the unit fails to operate.
1. Check the power & electrical parts of the unit. Verify that the ABS-2 power switch is
ON, and check the integrity of the fuses.
2. If the power is fine and the unit won't sample fluids, check that the pressure and
vacuum hoses are inserted into the proper ports on the rear of the sampler.
3. There may be a fluid line restriction at the micrometer valve. Verify that the
micrometer valve is "wide" open (around the value "20" on the micrometer scale).
4. Make sure that the sampler is configured properly to run in the desired mode, i.e. that
the "MANUAL" button is not depressed when attempting to run automatically, or
vice-versa.
5. If the operator can get fluid to run through the sensor but the fluid does not generate
count data, a problem may exist with the sensor. See the sensor operations manual
to troubleshoot the sensor.
31
Maintenance and Troubleshooting
5.5 Spare parts
The following are ABS-2 spare parts:
32
Part Number
Description
500-150-0200
Fuse (ABS-2)
115 VAC 2 AMP
5X20,MM,SLO-BLO
590-033
Fuse (Pump)
250 VAC 6.25 AMP
3 AG, SLO-BLO
500-100-0110
Fuse (ABS-2) Europe
250 VAC 1 AMP
5X20,MM,SLO-BLO
590-051
Fuse (Pump) Europe
250 VAC 2.5 AMP
3 AG, SLO-BLO
401-011
Tygon Tubing (.38OD/.25ID)
808-010-200
O RIng Sensor (Viton)
808-152-200
O Ring Pressure Chamber (Viton)
073138-03
Stir Bars 1.5 inch (3.8 cm)
10000095
Stir Bars 0.5 inch (1.7 cm)
395-019
Desiccant Chamber
188-039
Line Filter
570-800-0006
Line Pressure Drier
Section 6
Warranty and Contact Information
6.1 Limited warranty
Hach Ultra warrants this instrument to be free of defects in materials and
workmanship for a period of one year from the shipping date. If any instrument
covered under this warranty proves defective during this period, Hach Ultra will, at
its option either repair the defective part without charge for extra parts and labor or
provide an equivalent replacement in exchange for the defective product.
If any diode covered under this warranty proves defective during this period, Hach
Ultra will, at its option, either repair the defective diode without charge for parts
and labor or provide an equivalent replacement in exchange for the defective
product.
To obtain service under this warranty, the customer must notify the nearest Hach
Ultra service support center on or before the expiration of the warranty period and
follow their instructions for return of the defective instrument. The customer is
responsible for all costs associated with packaging and transporting the defective
unit to the service support center and must prepay all shipping charges. Hach
Ultra will pay for return shipping if the shipment is to a location within the same
country as the service support center.
This warranty shall not apply to any defect, failure or damage caused by improper
use or maintenance or by inadequate maintenance or care. This warranty shall
not apply to damage resulting from attempts by personnel other than Hach Ultra
representatives or factory authorized and trained personnel, to install, repair or
service the instrument; to damage resulting from improper use or connection to
incompatible equipment; or to instruments that have been modified or integrated
with other products when the effect of such modification or integration materially
increases the time or difficulty of servicing the instrument.
THIS WARRANTY IS GIVEN BY HACH ULTRA ANALYTICS WITH RESPECT TO
THIS INSTRUMENT IN LIEU OF ANY OTHER WARRANTIES, EXPRESSED OR
IMPLIED. HACH ULTRA ANALYTICS AND ITS VENDORS DISCLAIM ANY
IMPLIED WARRANTIES OF MERCHANTABILITY OR FITNESS FOR A
PARTICULAR NON-CONTRACTUAL PURPOSE. HACH ULTRA ANALYTICS’
RESPONSIBILITY TO REPAIR OR REPLACE DEFECTIVE PRODUCTS IS THE
SOLE AND EXCLUSIVE REMEDY PROVIDED TO THE CUSTOMER FOR
BREACH OF THIS WARRANTY. HACH ULTRA ANALYTICS AND ITS
VENDORS WILL NOT BE LIABLE FOR ANY INDIRECT, SPECIAL, INCIDENTAL
OR CONSEQUENTIAL DAMAGES EVEN IF HACH ULTRA ANALYTICS OR ITS
VENDORS HAS BEEN GIVEN ADVANCED NOTICE OF THE POSSIBILITY OF
SUCH DAMAGES.
33
6.2 Service contact information
6.2.1 U.S.A. customers
By Telephone:
(541) 472-6500
6:30 a.m. to 5:00 p.m. PST
Monday through Friday
By Fax:
(541) 474-7414
By Mail:
Hach Ultra
481 California Avenue
Grants Pass, Oregon 97526
Email:
[email protected]
Website:
www.hachultra.com
6.2.2 International customers
By Telephone:
41 22 594 64 00
By Fax:
41 22 594 64 99
By Mail:
Hach Ultra
Service Department
6, route de Compois, C.P. 212,
CH-1222 Vésenaz, Geneva, Switzerland
Website:
www.hachultra.com
6.2.3 Information required
•
Your name
•
Model number
•
Your phone number
•
Serial number
•
Your company name
•
Comment or question
•
Your fax number
•
6.3 Return for repair
To facilitate efficient handling of instruments returned for repair, a Return Authorization
Number (RA) is required. Request a Return Authorization Number using the contact
information shown above. Have information on the type/model of instrument and nature
of the malfunction handy. Mark the assigned Return Authorization Number on the outside
of the package and prepay the freight. Pack the instrument carefully, using the original
container and packing material or its equivalent.
Instruments received that were damaged in transit, or with no malfunction found, shall be
subject to an inspection charge at the prevailing rate for such equipment.
34
Section 7
Certification
This section contains a statement of conformity to WEEE requirements and copies of
certification documents.
ENGLISH
Electrical equipment marked with this symbol may not be disposed of in
European public disposal systems after 12 August 2005. In conformity with
European local and national regulations (EU Directive 2002/96/EC), European
electrical equipment users must now return old or end-of-life equipment to the
manufacturer for disposal at no charge to the user.
Note: For return for recycling, please contact the equipment
manufacturer or supplier for instructions on how to return end-of-life
equipment for proper disposal.
DEUTSCH
Elektrogeräte, die mit diesem Symbol gekennzeichnet sind, dürfen in Europa nach dem 12.
August 2005 nicht mehr über die öffentliche Abfallentsorgung entsorgt werden. In
Übereinstimmung mit lokalen und nationalen europäischen Bestimmungen (EU-Richtlinie
2002/96/EC), müssen Benutzer von Elektrogeräten in Europa ab diesem Zeitpunkt alte bzw. zu
verschrottende Geräte zur Entsorgung kostenfrei an den Hersteller zurückgeben.
Hinweis: Bitte wenden Sie sich an den Hersteller bzw. an den Händler, von dem Sie das Gerät
bezogen haben, um Informationen zur Rückgabe des Altgeräts zur ordnungsgemäßen
Entsorgung zu erhalten.
FRANCAIS
A partir du 12 août 2005, il est interdit de mettre au rebut le matériel électrique marqué de ce
symbole par les voies habituelles de déchetterie publique. Conformément à la réglementation
européenne (directive UE 2002/96/EC), les utilisateurs de matériel électrique en Europe doivent
désormais retourner le matériel usé ou périmé au fabricant pour élimination, sans frais pour
l'utilisateur.
Remarque: Veuillez vous adresser au fabricant ou au fournisseur du matériel pour les
instructions de retour du matériel usé ou périmé aux fins d'élimination conforme.
ITALIANO
Le apparecchiature elettriche con apposto questo simbolo non possono essere smaltite nelle
discariche pubbliche europee successivamente al 12 agosto 2005. In conformità alle normative
europee locali e nazionali (Direttiva UE 2002/96/EC), gli utilizzatori europei di apparecchiature
elettriche devono restituire al produttore le apparecchiature vecchie o a fine vita per lo
smaltimento senza alcun costo a carico dell’utilizzatore.
Nota: Per conoscere le modalità di restituzione delle apparecchiature a fine vita da riciclare,
contattare il produttore o il fornitore dell’apparecchiatura per un corretto smaltimento.
DANSK
Elektriske apparater, der er mærket med dette symbol, må ikke bortskaffes i europæiske offentlige
affaldssystemer efter den 12. august 2005. I henhold til europæiske lokale og nationale regler
(EU-direktiv 2002/96/EF) skal europæiske brugere af elektriske apparater nu returnere gamle eller
udtjente apparater til producenten med henblik på bortskaffelse uden omkostninger for brugeren.
Bemærk: I forbindelse med returnering til genbrug skal du kontakte producenten eller
leverandøren af apparatet for at få instruktioner om, hvordan udtjente apparater bortskaffes
korrekt.
35
Certification
SVENSKA
Elektronikutrustning som är märkt med denna symbol kanske inte kan lämnas in på europeiska
offentliga sopstationer efter 2005-08-12. Enligt europeiska lokala och nationella föreskrifter
(EU-direktiv 2002/96/EC) måste användare av elektronikutrustning i Europa nu återlämna gammal
eller utrangerad utrustning till tillverkaren för kassering utan kostnad för användaren.
Obs! Om du ska återlämna utrustning för återvinning ska du kontakta tillverkaren av utrustningen
eller återförsäljaren för att få anvisningar om hur du återlämnar kasserad utrustning för att den ska
bortskaffas på rätt sätt.
ESPANOL
A partir del 12 de agosto de 2005, los equipos eléctricos que lleven este símbolo no deberán ser
desechados en los puntos limpios europeos. De conformidad con las normativas europeas
locales y nacionales (Directiva de la UE 2002/96/EC), a partir de esa fecha, los usuarios
europeos de equipos eléctricos deberán devolver los equipos usados u obsoletos al fabricante de
los mismos para su reciclado, sin coste alguno para el usuario.
Nota: Sírvase ponerse en contacto con el fabricante o proveedor de los equipos para solicitar
instrucciones sobre cómo devolver los equipos obsoletos para su correcto reciclado.
NEDERLANDS
Elektrische apparatuur die is voorzien van dit symbool mag na 12 augustus 2005 niet meer
worden afgevoerd naar Europese openbare afvalsystemen. Conform Europese lokale en
nationale wetgegeving (EU-richtlijn 2002/96/EC) dienen gebruikers van elektrische apparaten
voortaan hun oude of afgedankte apparatuur kosteloos voor recycling of vernietiging naar de
producent terug te brengen.
Nota: Als u apparatuur voor recycling terugbrengt, moet u contact opnemen met de producent of
leverancier voor instructies voor het terugbrengen van de afgedankte apparatuur voor een juiste
verwerking.
POLSKI
Sprzęt elektryczny oznaczony takim symbolem nie może być likwidowany w europejskich
systemach utylizacji po dniu 12 sierpnia 2005. Zgodnie z europejskimi, lokalnymi i państwowymi
przepisami prawa (Dyrektywa Unii Europejskiej 2002/96/EC), użytkownicy sprzętu elektrycznego
w Europie muszą obecie przekazywać Producentowi stary sprzęt lub sprzęt po okresie
użytkowania do bezpłatnej utylizacji.
Uwaga: Aby przekazać sprzęt do recyklingu, należy zwrócić się do producenta lub dostawcy
sprzętu w celu uzyskania instrukcji dotyczących procedur przekazywania do utylizacji sprzętu po
okresie użytkownia.
PORTUGUES
Qualquer equipamento eléctrico que ostente este símbolo não poderá ser eliminado através dos
sistemas públicos europeus de tratamento de resíduos sólidos a partir de 12 de Agosto de 2005.
De acordo com as normas locais e europeias (Directiva Europeia 2002/96/EC), os utilizadores
europeus de equipamentos eléctricos deverão agora devolver os seus equipamentos velhos ou
em fim de vida ao produtor para o respectivo tratamento sem quaisquer custos para o utilizador.
Nota: No que toca à devolução para reciclagem, por favor, contacte o produtor ou fornecedor do
equipamento para instruções de devolução de equipamento em fim de vida para a sua correcta
eliminação.
36
Global Headquarters
6, route de Compois C.P. 212
CH-1222 Vesenaz, Geneva, Switzerland
Tel + 41 (0)22 594 64 00
Fax + 41 (0)22 594 64 99
Americas Headquarters
481 California Avenue
Grants Pass, Oregon 97526 USA
Tel 1 800 866 7889 / +1 541 472 6500
Fax +1 541 472 6170
www.hachultra.com
© 2007 Hach Ultra Analytics, Inc.
All rights reserved. Trademarks are property of their respective owners. Specifications are subject to change without notice.