1
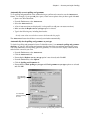
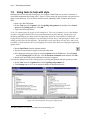
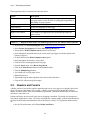
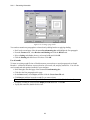
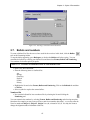
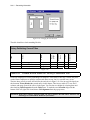
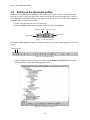
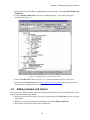
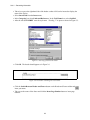
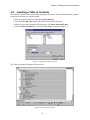
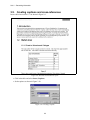
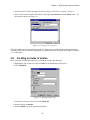
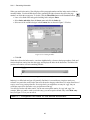
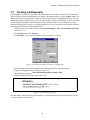
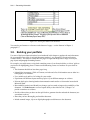
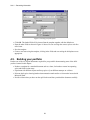
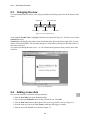
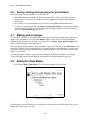
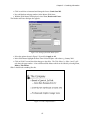
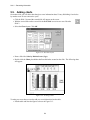
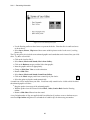
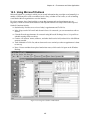
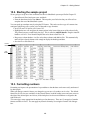
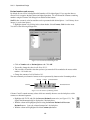
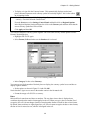
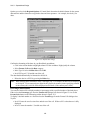
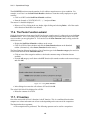
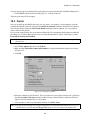
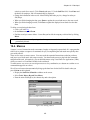
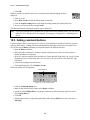
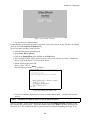
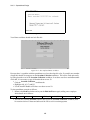
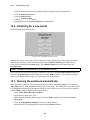
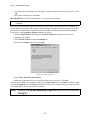
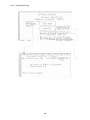
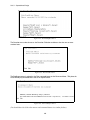
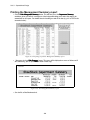
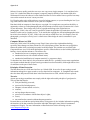
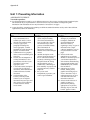
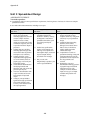
Unit 1 – Presenting Information
Figure 5.15: Text and Clip Art layout
• Use the Drawing toolbar to draw boxes to represent the books. Enter the titles in small text boxes
as shown above.
• Select Insert, Picture, Clip Art and insert some suitable pictures on the ‘book covers’ (resizing
them to fit).
The Clip Art gallery also includes some animated graphics and sounds that can be inserted into your slide
show. Try these out on slide 1.
• Click on the icon for slide 1.
• Select Insert, Movies and Sounds, Movie from Gallery.
• Click on the Business category and the Sales chart graphic.
• Insert the graphic and size it appropriately.
• Change to Slide Show View to see the animation.
• Return to Slide View.
• Select Insert, Movies and Sounds, Sound from Gallery.
• Click on the Music category and insert a sound clip of your choice.
• Select the option to play the sound automatically.
A sound icon will be inserted onto your slide. You do not really want this to be visible so hide it behind
the animated graphic as follows:
• Drag the speaker icon on top of the animated graphic.
• With the speaker icon still selected click on Draw, Order, Send to Back from the Drawing
toolbar.
• Return to Slide Show View to hear the sound.
A very limited number of clips are supplied with PowerPoint but if you have access to the Internet you
can select Clips Online and gain access to hundreds of suitable clips for almost any presentation.
60