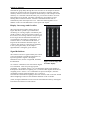
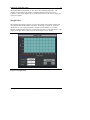
1
EZ-ANC II
User Guide
Causal Systems
User's Guide for the EZ-ANC II
by Scott D. Snyder, Colin H Hansen and George Vokalek
© Copyright 2002 Causal Systems
GPO Box 100
Rundle Mall SA 5000
AUSTRALIA
Phone: 61 8 8377 1641
Fax: 61 8 8295 8299
Email: [email protected]
[email protected]
Http://www.causal.on.net
ALL RIGHTS RESERVED
PRODUCT AND DOCUMENTATION NOTICE: The authors reserve the right to
change this product and its documentation without prior notice.
Information furnished by author and company is believed to be accurate and reliable.
However, no responsibility is assumed by Causal Systems, nor for any infringement
of patents, or other rights of third parties which may result from its use. No license
is granted by implication or otherwise under the patent rights of the authors.
PRINTING HISTORY
First release by Causal Systems
Second release by Causal Systems
Third release by Causal Systems
EZ-ANC II User’s Guide Revision 1.06, 2000
2/2000
9/2002
8/2003
© Causal Systems
Table of Contents
Chapter 1. Installation . . . . . . . . . . . . . . . . . . . . . . . . . . . . . . . . . . . . 1
System Requirements . . . . . . . . . . . . . . . . . . . . . . . . . . . . . . . . . . . . 2
Installing the Interface Software . . . . . . . . . . . . . . . . . . . . . . . . . . 2
Chapter 2. Quickstart . . . . . . . . . . . . . . . . . . . . . . . . . . . . . . . . . . . . . 3
Step 1: Connecting the Hardware to the PC . . . . . . . . . . . . . . . . 3
Step 2: Connecting the Speakers . . . . . . . . . . . . . . . . . . . . . . . . . . 4
Step 3: Connecting the Microphones . . . . . . . . . . . . . . . . . . . . . . 6
Step 4: Setting Input Gains . . . . . . . . . . . . . . . . . . . . . . . . . . . . . . . 6
Step 5: Defining a Reference and Error Signal . . . . . . . . . . . . . 7
Step 6: Setting Up the Control Filter . . . . . . . . . . . . . . . . . . . . . . 8
Step 7: Pairing Error Sensors and Control Channels . . . . . . . . 8
Step 8: Cancellation Path Transfer Function Modeling . . . . . 9
Step 9: Control Filter Adaptation . . . . . . . . . . . . . . . . . . . . . . . . 10
Step 10: Assessing the Result . . . . . . . . . . . . . . . . . . . . . . . . . . . . 11
Step 11: Progressing On . . . . . . . . . . . . . . . . . . . . . . . . . . . . . . . . . 12
Chapter 3. Basic Operation
. . . . . . . . . . . . . . . . . . . . . . . . . . . . . 13
13
15
15
16
16
18
20
21
21
21
21
25
31
31
31
The Front Panel . . . . . . . . . . . . . . . . . . . . . . . . . . . . . . . . . . . . . . . .
Getting Going . . . . . . . . . . . . . . . . . . . . . . . . . . . . . . . . . . . . . . . . . .
Establish Communication . . . . . . . . . . . . . . . . . . . . . . . . . . . . . . .
Try the Signal Generator . . . . . . . . . . . . . . . . . . . . . . . . . . . . . . . .
Get the Basic Input Signals . . . . . . . . . . . . . . . . . . . . . . . . . . . . . .
Setup the Output Channels . . . . . . . . . . . . . . . . . . . . . . . . . . . . . .
Define the Sample Rate . . . . . . . . . . . . . . . . . . . . . . . . . . . . . . . . .
Define the Controller Numbers . . . . . . . . . . . . . . . . . . . . . . . . . .
Define the Reference and Error Signals . . . . . . . . . . . . . . . . . .
Pair the Control and Error Signals . . . . . . . . . . . . . . . . . . . . . . .
Define the Characteristics of the Control Filters . . . . . . . . . . .
Cancellation Path ID On Its Own . . . . . . . . . . . . . . . . . . . . . . . .
Active Control Without On-Line Modeling . . . . . . . . . . . . . . .
Active Control With On-Line Modeling . . . . . . . . . . . . . . . . . .
Save the Setup . . . . . . . . . . . . . . . . . . . . . . . . . . . . . . . . . . . . . . . . . .
EZ-ANC II User’s Guide Revision 1.06, 2000
© Causal Systems
Chapter 4. I/O Setup . . . . . . . . . . . . . . . . . . . . . . . . . . . . . . . . . . . . . 32
Input Filtering . . . . . . . . . . . . . . . . . . . . . . . . . . . . . . . . . . . . . . . . . .
Output Filtering . . . . . . . . . . . . . . . . . . . . . . . . . . . . . . . . . . . . . . . .
Input Gains . . . . . . . . . . . . . . . . . . . . . . . . . . . . . . . . . . . . . . . . . . . . .
Sample Rate Selection . . . . . . . . . . . . . . . . . . . . . . . . . . . . . . . . . .
Display Overrange and Overflow . . . . . . . . . . . . . . . . . . . . . . . .
Signal Definitions . . . . . . . . . . . . . . . . . . . . . . . . . . . . . . . . . . . . . .
Selecting the Controller Output . . . . . . . . . . . . . . . . . . . . . . . . . .
33
34
35
36
37
37
38
Chapter 5. Generator Setup . . . . . . . . . . . . . . . . . . . . . . . . . . . . . 40
Chapter 6. Controller Setup
. . . . . . . . . . . . . . . . . . . . . . . . . . . . 42
43
43
44
46
47
49
Controller Numbers . . . . . . . . . . . . . . . . . . . . . . . . . . . . . . . . . . . . .
Control / Error Combinations . . . . . . . . . . . . . . . . . . . . . . . . . . . .
Control Filter Setup Panel . . . . . . . . . . . . . . . . . . . . . . . . . . . . . . .
Adaptive Algorithm Setup Panel . . . . . . . . . . . . . . . . . . . . . . . . .
Cancellation Path ID Setup Panel . . . . . . . . . . . . . . . . . . . . . . . .
Weights Plot . . . . . . . . . . . . . . . . . . . . . . . . . . . . . . . . . . . . . . . . . . .
Chapter 7. Support Functions
. . . . . . . . . . . . . . . . . . . . . . . . . . 50
Data Plotting . . . . . . . . . . . . . . . . . . . . . . . . . . . . . . . . . . . . . . . . . . . 50
Storing and Reading Setups . . . . . . . . . . . . . . . . . . . . . . . . . . . . . 53
Communications . . . . . . . . . . . . . . . . . . . . . . . . . . . . . . . . . . . . . . . . 53
Chapter 8. Some Notes on Error Messages . . . . . . . . . . . 55
A Note on Parameter Selection and
Overtaxing the Controller . . . . . . . . . . . . . . . . . . . . . . . . . . . . . . . 55
Connecting and Disconnecting the Controller and PC . . . . . 56
Chapter 9. Hardware Description
for the EZ-ANC II . . . . . . . . . . . . . . . . . . . . . . . . 58
Front Panel Switches (Mode Select) . . . . . . . . . . . . . . . . . . . . .
Front Panel Light Emitting Diodes (LEDs) . . . . . . . . . . . . . . .
Signal Inputs . . . . . . . . . . . . . . . . . . . . . . . . . . . . . . . . . . . . . . . . . . .
Signal Outputs . . . . . . . . . . . . . . . . . . . . . . . . . . . . . . . . . . . . . . . . . .
Microphone bias voltages . . . . . . . . . . . . . . . . . . . . . . . . . . . . . . .
RS 232 Connector . . . . . . . . . . . . . . . . . . . . . . . . . . . . . . . . . . . . . .
EZ-ANC II User’s Guide Revision 1.06, 2000
58
60
61
61
61
61
© Causal Systems
Back Panel . . . . . . . . . . . . . . . . . . . . . . . . . . . . . . . . . . . . . . . . . . . . . 62
Appendix. EZ-ANC II Specifications
. . . . . . . . . . . . . . . . . 63
Software . . . . . . . . . . . . . . . . . . . . . . . . . . . . . . . . . . . . . . . . . . . . . . . 63
Hardware . . . . . . . . . . . . . . . . . . . . . . . . . . . . . . . . . . . . . . . . . . . . . . 65
EZ-ANC II User’s Guide Revision 1.06, 2000
© Causal Systems
1
1.
Installation
Thank you for purchasing an EZ-ANC II active control system. The EZ-ANC II is
a professional-level product for research and development, combining hardware
based Analog Devices Sharc processors and a windows interface for parameter
adjustment. In developing the software, we have assumed that the user has a
reasonable degree of knowledge about active noise control and adaptive control
systems. For introductory background information, the reader is referred to The
Active Control Primer, by Scott D. Snyder, available from Springer-Verlag.
The contents of this manual are organized as follows:
Chapter 1: Software Installation. This chapter describes the requirements for, and
installation of, the Windows interface software.
Chapter 2: Quickstart. This chapter is specifically for users who "want to see the
system work" without wading through an entire manual of instructions. It describes
a basic demonstration of active noise control.
Chapter 3: Basic Operation. This chapter describes the basic operation of the
interface, and a simple procedure for approaching controller tuning.
Chapter 4: Basic I/O Setup. This describes topics such as setting the input gains and
output attenuations, as well as filtering and sample rate adjustment.
Chapter 5: Generator Setup. The software includes a simple function generator,
which is described in this chapter.
Chapter 6: Controller Tuning. This chapter describes the core active control features
and how to tune them.
Chapter 7: Support Functions. Data plotting and setup saving are described here.
Chapter 8: Notes on error message
EZ-ANC II User’s Guide Revision 1.06, 2000
© Causal Systems
Chapter 1: Installation
2
System Requirements
The Interface can be installed on platforms running a 32 bit Windows interface, such
as Windows 95, 98, or /NT. The minimum system requirements for these platforms
are as follows:
C
C
C
C
C
C
Microsoft Windows 95, 98 or Windows NT version 3.51 or later.
A personal computer with at least a 33 MHZ 80486 or higher
microprocessor.
A VGA resolution or higher video adapter.
A 600 x 800 pixel monitor or higher.
A minimum of 8 Mbytes RAM.
A minimum of 6 Mbytes of hard disk space.
Installing the Interface Software
The Kit Interface Software provides a simple means of accessing the circuit board
functionality, as well as a number of self-contained analysis routines. The Interface
has been constructed using the National Instruments LabWindows / CVI
development platform, and requires the LabWindows / CVIRun-time Engine to
operate; this will be installed automatically. The software has been written to service
a controller with up to 20 input channels and 16 control outputs and 1 generator
output. The EZ-ANC II is available as a 10 input, 10 output or 4 input, 4 output
system. Channels that are not available or accessible with your particular hardware
system are “greyed out” on the PC screen.
The software installation procedure is as follows:
Step 1. Make sure that your computer and monitor are turned on, and that you have
installed Microsoft Windows.
Step 2. Close all open Windows applications, and leave the operating system
running in Windows.
Step 3. Insert the installation CD into the floppy disk drive.
Step 4. Select the “Run” option from the Desktop Taskbar. Type "x:setup" (where
x is the CD drive being used) in the command line box, and click on OK.
Step 5. Follow the instructions that appear in the dialog boxes.
EZ-ANC II User’s Guide Revision 1.06, 2000
© Causal Systems
3
2.
Quickstart
If, like most people, you do not want to have to read the entire manual before
operating your new purchase, then this chapter is for you. What will be described
here are the bare-bones basics required to get a demonstration of active noise control.
Once you have finished “playing” with the system, please read the rest of the
documentation to receive more detailed instruction.
In addition to the hardware and software you have purchased, you will require the
following to run the quickstart:
1. Two speakers (preferably identical) and an amplifier.
2. A microphone.
Step 1: Connecting the Hardware to the PC
Assuming that software has been installed as per Chapter 1, the first step in running
an active noise control demonstration is connecting up the hardware box to the mains
power supply (110V to 250V, 50Hz or 60Hz), connecting the RS232 plug on the
hardware front panel to the PC, connecting the speakers and amplifiers to the
hardware outputs (note that an amplifier is essential) and connecting the microphones
to the hardware inputs (with the bias voltage turned on if necessary using the dip
switches on the inside of the front panel set “on”).
MAKE SURE THAT SWITCH “A” ON THE FRONT PANEL OF THE
HARDWARE IS SET TO THE DOWN POSITION (3) SO THAT THE PC CAN
COMMUNICATE WITH IT.
A standard RS232 communication to the PC is used. Connect one end of the serial
cable supplied to the 9 pin connector on the front of the EZ-ANC II hardware.
Connect the other end of the cable to the computer COM port which is to be used.
If the controller parameters have been changed since it was last powered-up, press
the hardware reset button to ensure it is in a known state for this exercise. If the
software interface is not yet running on the PC, start the program now.
EZ-ANC II User’s Guide Revision 1.06, 2000
© Causal Systems
Chapter 2: Quickstart
4
If, when the interface is started, it is unable to
establish communications with the controller,
then the communications error pop-up
message shown in Figure 2 will
appear. Once the message is acknowledged,
the software “reset” button shown in Figure
1, which is in the upper left section of the
interface, will “un-dim”. This will also occur Figure 2 The Communications
if communications is lost at any time during Error popup.
operation, such as if the cable is disconnected
or if too many weights are selected for
the control filters when a large number
of control channels are being used
simultaneously. If the latter problem
occurs, then communications can only be
re-established by pressing the “reset”
Reset GUI button
button on the front panel of the
hardware.
Figure 1 The Reset GUI button.
Th e m o s t l i k e l y c a u s e s o f
communications failing during boot-up
are that either the serial cable is not connected correctly, or that the interface is
looking for the controller on the wrong COM port. The COM port option can be
changed via the Communications Menu. Once the correct port option has been
selected, the interface can be reconnected to the hardware by clicking on the reset
GUI button. If the connection is successful, then the button will dim.
It is also possible to reset the connection between the PC interface and the hardware
at any time by selecting the “Reset” option in the Communications Menu. Also, the
connection can be tested at any time by selecting the “Test” option, also in the
Communications Menu.
Step 2: Connecting the Speakers
Once communication between the PC interface and controller hardware have been
established, you can connect the speakers to the unit. The controller has a built-in
signal generator which will be used here to output (from channel 1)the “unwanted”
sound for the active control demonstration.
Before going further, make sure that both the sine wave generator and random noise
generator are switched “off”. This is most easily accomplished by clicking on the
sine wave and random noise buttons, illustrated in Figure 3 and located on the
toolbar on the front panel. Alternatively, the generators can be switched off in the
Generator menu. Note again that the reset GUI button, next to the sine wave button,
should be dimmed as communications have been established.
EZ-ANC II User’s Guide Revision 1.06, 2000
© Causal Systems
5
Chapter 2: Quickstart
sine wave generator and
random noise generator buttons
should be “off” (grey rather than red).
reset GUI button should
now be dimmed
Figure 3 The sine wave and random noise generator on/off buttons.
It will be useful at this stage to first look at the output levels on an (external, usersupplied) oscilloscope, to make sure that they are compatible with the amplifier. The
EZ-ANC II has a maximum output level of 8V P-P, corresponding to an output
attenuator setting of 0dB. The factory preset attenuator setting is 6 (9dB)
corresponding to a maximum output level of 1V rms. This can be easily changed by
changing the output attenuator settings. Connect the signal generator output to the
oscilloscope and turn on the sine wave generator by clicking on the sine button
shown above (the outline should switch to red to indicate it is on). Open the Output
Attenuations panel through the I/O Setup menu and increase or decrease the
Generator output attenuation level until it is approximately one-half of the maximum
allowable value for the amplifier; if the resulting attenuation value for the generator
is less than 4, set it equal to 4. Now, adjust the output attenuation of Control Output
1 (channel 2 on the hardware) until it is 4 less than the Generator attenuation. This
will ensure that the control source has enough output to cancel the unwanted noise.
Turn off the sine wave generator and connect (hardware) one amplifier channel to the
signal generator output (channel 1on the hardware), and the other to control output
1 (channel 2 on the hardware). Connect the speakers to the amplifiers. If there is a
preamplifier, then turn the volume to its minimum level. Now turn on the sine
generator. Turn up the preamplifiers to equal levels. Arrange the speakers and
microphones as shown in Figure 4.
At this stage you may wish to open the Generator Setup panel through the Generator
menu and try adjusting the sine wave frequency. When you are finished, leave Sine
1 on, Sine 2 and Sine 3 off, and set the Sine 1 frequency to 200 Hz.
Step 3: Connecting the Microphones
Select a low cost standard electret microphone available from most hobby electronics
shops. Connect the error microphone to input 2 of the controller hardware. Inside
the EZ-ANC II enclosure are 10 dip switches that turn on a 3.2V bias voltage to the
EZ-ANC II User’s Guide Revision 1.06, 2000
© Causal Systems
6
Chapter 2: Quickstart
50 mm / 2 inches
Two speakers should
be facing each other
75 mm / 3 inches
Microphone lined up with
gap between speakers.
Figure 4 Speaker and microphone arrangement for the quickstart
active control demonstration.
selected input channel. Most electret microphones require a bias voltage of between
1 and 12V. Open the EZ-ANC II enclosure and turn on the dip switch numbered 2
(for error 1 in the software) on the back of the front panel. This is done by following
the procedure below.
1) remove the top panel of the EZ-ANC II
2) place the unit in front of you, back panel facing you, front panel away
from you.
3) look at the connections of the front panel. Behind the 4 toggle switches
(MODE SELECT A/B/C/D as seen from front) of the front panel, you will
see 2 ribbon cables leading from the front panel to the DSP board.
4) unplug the top ribbon cable from the front panel.
5) just below the now-empty ribbon connector, you will see a 10-way DIP
switch which controls the input bias voltage.
6) switch each DIP switch position to OFF
7) replace the ribbon cable to the connector
8) replace the top panel of the EZ-ANCII
9) power up the unit. (Use a voltmeter to confirm zero DC on each input by
touching the voltmeter probe to BNC connectors.)
Step 4: Setting Input Gains
In Step 5 we are going to setup reference and error signals. However, before we do
this we need to setup one of the input gains.
Input signal gains are set via the Input Gains panel in the I/O Setup menu. Open this
panel. Although the hardware is not capable of handling more than 10 inputs and 9
control outputs, the software will handle up to 20 inputs and 16 control outputs.
However, the inputs and outputs not accessible by the hardware will be “greyed out”
on the PC screen.
EZ-ANC II User’s Guide Revision 1.06, 2000
© Causal Systems
Chapter 2: Quickstart
7
Input gain setup is best done using the Data Plot screens, to visualise the signal. Go
to the Data Plot menu, move to the Max Number of Running Plots option, and select
4. This will let us open more plot windows later in the experiment. Now move to
the Open Windows option, and select Plot 1. A Data Plot panel should appear.
Select the Input 2 option in the Data Source window, and turn the plot “on” (the
button on the bottom left). An oscilloscope-like plot should appear. This is the trace
of input 2.
If you have switched off the sine wave generator, switch it back on. Place the
microphone approximately 50mm, or 2 inches, from the primary source speaker
which is now making noise. Observe the signal trace in the plot window. The plot
is scaled so that a value of 1.0 is the maximum allowable. If the signal exceeds 1.0
it is overloading the input, and the overload LED on the front panel will light.
Adjust the input 2 gain up or down until the maximum signal level on the “scope”
is approximately 0.5. This will provide a modest safety margin for the experiment.
When the gain is adjusted, close the Input Gains panel. However, keep the plot
window to one side for future use.
Step 5: Defining a Reference and Error Signal
In order for adaptive feedforward active noise control to work, (at least) 2 input
signals are required: a reference signal, which is a measure of the impending
unwanted disturbance, and an error signal, which measures the residual unwanted
disturbance after the introduction of the control signal. The controller interface
offers a wide scope for adjustment and derivation of these signals. The 10-channel
controller allows up to 4 reference signals, up to 10 error signals and up to 9 control
sources. The 4-channel controller allows up to 2 reference signals, up to 4 error
signals and up to 3 control outputs. One output channel is reserved for a signal
generator output in each case.
Our quickstart experiment will use 1 control signal, 1 reference signal and 1 error
signal. At this point, open the Numbers panel in the Controller menu and make sure
that these numbers are currently installed. If they are not, change them and close the
panel.
Now open the Signal Definitions panel in the I/O Setup menu. In the controller,
reference and error signals are defined as weighted combinations of generic inputs.
This provides scope for advanced experimentation using, for example, modal filters.
For our simple quickstart experiment, we want the single reference signal input from
the on-board signal generator, and the error signal from input 2. To configure the
reference signal, select Ref 1 in the Which Signal button of Signal Definitions panel,
set the Generator input weighting to 1.0, and all other weights to 0.0. The “These
Weightings Not Installed” LED should light as changes are made. The changes are
EZ-ANC II User’s Guide Revision 1.06, 2000
© Causal Systems
8
Chapter 2: Quickstart
not automatically sent to the controller as new values are entered, and the LED serves
as a notice that what appears on the panel is not necessarily what is installed in the
controller. If the panel is closed and re-opened the settings currently being used in
the controller are loaded. Now select Error 1 in the Which Signal button, set the
Input 2 weighting to 1.0, and all other weightings to 0.0. Now click on the red
“Install These Weightings” button to send the values to the controller. The “These
Weightings Not Installed” LED on the panel should dim. Now close the Signal
Definitions panel
Step 6: Setting Up the Control Filter
Now that the I/O portion of the system setup is complete, we can turn our attention
to setting up the active noise control system. The first step in this process is
configuring the control filter, which is responsible for altering the reference signal
input to produce an output control signal.
Our quickstart example will be concerned with the relatively simple problem of
attenuating tonal noise using a reference signal which is immune from feedback from
the control source. For this, a relatively short finite impulse response (FIR) filter can
be used.
The control filter is setup in the Control Filter Setups panel, which is opened through
the Controller menu. Open this panel, and ensure that Control 1 is using reference
signal 1, has 32 feedforward taps, 32 feedback taps, and is actually “on” as indicated
by a red LED in the Current On/Off column. If the source is not “on”, then the LED
in the last column, the Request On/Off, will have to be set. If any changes to
parameters are made, then the red Install These Settings button will have to be
clicked on to send the parameters to the controller.
The final parameter of interest in this panel is the Filter Type, which should be FIR
for this simple experiment. If the alternative, IIR, is presently indicated, then change
it now.
Once the control filter is set up and any new parameters downloaded to the
controller, close the panel.
Step 7: Pairing Error Sensors and Control Channels
The EZ-ANC II controller is designed to handle up to 10 inputs and 10 outputs. One
output is dedicated to a signal generator, leaving a maximum of 9 possible outputs.
If too many filter taps are chosen with the nine channel system, it is possible for the
controller to "stall" and not be able to communicate with the PC. If this happens,
you will need to press the "reset" button on the front panel of the hardware box to
re-establish communications.
EZ-ANC II User’s Guide Revision 1.06, 2000
© Causal Systems
9
Chapter 2: Quickstart
It is not always necessary, or in fact desirable, to use all error signals in the process
of adaptation for each control source. For example, the controller could be used to
attenuate noise in separate duct sections, where physically there is no connection
between some control sources and some sensors. In this case, the cancellation path
modeling would produce a transfer function of essentially “zero”. However, there
is still a computational load associated with the modeling, a load which would be
more useful in some other area of calculation.
The controller interface gives the user the ability to select which error signals will be
used in adapting a given control source. Although for our simple example here the
pairing exercise is somewhat trivial, as there is a single control source and single
error sensor, it is worthwhile including it as a step in the process for purposes of
generalisation.
Control source / error sensor pairing is facilitated through the Control / Error
Combinations panel, opened via the Controller menu. This panel contains an array
of LEDs, with control sources on one side of the array and error sensors on the other.
A lit (red) LED indicates that the error sensor is used in the adaptation of the control
source. For our problem, make sure that error 1 and control 1 are connected with a
red LED. If parameter changes are made, the results will have to be downloaded
using the red Install These Combinations button.
Once the pairing exercise is complete, close the panel.
Step 8: Cancellation Path Transfer Function Modeling
The most common way to implement an active noise control system is to have the
control signal derivation, control filter adaptation and cancellation path modeling
operations occurring simultaneously. However, for our experiment, we will initially
separate the control filter adaptation and cancellation path transfer function modeling
operations for the purposes of demonstration. At the end of the process we will
restart the system with both running.
The cancellation path transfer function modeling operation is concerned with
identifying what happens to the control signal between leaving the digital control
filter and re-entering the control calculation as an error signal. This knowledge is
necessary for correct operation of the algorithms used in control filter adaptation.
To setup the cancellation path transfer function modeling operation, open the
Cancellation Path ID Setup panel, in the Controller Setup menu. There are a
number of parameters which can be adjusted. For this speaker / microphone
arrangement, set the Cancellation Path Model Length to 64, and the Extended ID
Model Length to 32. The Base Convergence Coefficient Value can be set to a value
of 0.1 to start with, and the Modeling Noise Amplitude to 0.02. Select a random
noise Modeling Signal, and “yes” for the Pass Noise Through FB Path option
EZ-ANC II User’s Guide Revision 1.06, 2000
© Causal Systems
Chapter 2: Quickstart
10
(although this will not have any impact upon our experiment, as we will be using an
FIR, and not IIR, control filter). Try an Update Rate of 4
Once these parameters are set, move the Cancellation Path ID Setup panel to one
side, but do not close it.
We are now ready to turn on the
Cancellation path id on
active noise control system.
Control filter adaptation off
Referring to Figure 5, on the
toolbar of the front panel, select
the ID button to be on, and the
ALG button to be off. This will enable
cancellation path modeling (ID)
when the active noise control
Turn the active control
system (ANC) is turned on, while
functionality on/off with this button.
stopping the control filter
adaptation. Now click on the
Figure 5 Button setup to turn on
ANC OFF / ON button (it doesn’t
cancellation
path modeling and turn off
matter if the sine wave generator
is running at this stage - it is control filter adaptation.
easier on the ears if it is off!).
You should hear the random modeling noise coming from the control source speaker.
Let the modeling run for a few seconds. Observe that the actual modeling rate, in
iterations per second, is displayed in a window on the front panel toolbar. Observe
also that this rate can be increased or decreased by changing the Update Rate
parameter in the Cancellation Path ID Setup panel.
After a few seconds have passed, turn off the ANC system by clicking on the ANC
ON/OFF button. Move to the Controller Setup menu, and select the View Weights
option. The Weights Plot window will appear on the screen. To view the impulse
response model of the cancellation path transfer function that has just been
calculated, select TF Model as the Data Source, Control #1, Error #1, and click on
the Fetch Weights button. The impulse response model will be shown.
If the model does not look like an impulse response, try lengthening the cancellation
path model in the Cancellation Path ID Setup panel, or try increasing the Base
Convergence Coefficient value, or simply let the modeling operation run longer.
Remember, clicking the ANC ON/OFF button will continue the operation. If for
some reason you wish to flush the model the start again, click on the red FLUSH
button on the toolbar next to the ANC ON/OFF button.
Once you are happy with the model, turn the ANC OFF, turn off the ID button, and
close the Cancellation Path ID Setup panel. Retain the Weights Plot window, as we
will be using it again shortly.
EZ-ANC II User’s Guide Revision 1.06, 2000
© Causal Systems
Chapter 2: Quickstart
11
Step 9: Control Filter Adaptation
We are now ready to “experience” active noise control by engaging the adaptive
algorithm. Open the Adaptive Algorithm Setup panel via the Controller Setup menu.
We now have a range of algorithm parameters to set up. For our problem, set the
Base Convergence Coefficient Value to be 0.05, and select the Convergence
Coefficient Value to be Normalised. Set the Base Leakage Value to 0.01, and select
the Leakage Type as Variable. Set the Update Rate to be a value of 5.
We are now ready to turn on
Cancellation path id off
the active noise control
Control filter adaptation on
system. Referring to Figure 6,
DO NOT flush
turn the ALG button on and
ID button on. DO NOT click
on the FLUSH button, as this
will clear the cancellation
path model derived in the
Turn the active control
previous step (the algorithm
functionality on/off with this button.
calculation will use this
model). Turn on the sine
wave generator if it has been Figure 6 Button setup to turn off cancellation
turned off, and switch on the path modeling and turn on control filter
active control system by adaptation.
clicking on the ANC ON/OFF
button. You should end up with cancellation.
In general, the performance of an active noise control system with the
initially-chosen parameter settings is not satisfactory; the controller must be
“massaged”, or tuned, to provide the best result. One parameter which has a large
bearing upon system performance is the convergence coefficient value. The
convergence coefficient is basically a measure of how hard the adaptive control
system is pushed to perform. If the value is too low, the attenuation and speed of
response will be sub-optimal. If the value is too large, the system will become
unstable.
At this point, try adjusting the base convergence coefficient. Increase the
convergence coefficient value with ANC ON and notice that the performance
improves. To a point. Then the system may go unstable. If this happens, and it will
be obvious, do the following: (1) don’t panic, because nothing will break; (2) turn
ANC OFF; (3) reduce the convergence coefficient value; (4) click on the red
“FLUSH” button; (5) repeat Step 8 to re-derive the cancellation path transfer
function model; (6) start Step 9 again.
EZ-ANC II User’s Guide Revision 1.06, 2000
© Causal Systems
Chapter 2: Quickstart
12
Step 10: Assessing the Result
It is always of interest to check the results of active noise control. To do this, return
to the two Data Plot windows, and select Error 1 as the Data Source for both. With
the ANC system switched on, turn on one of the plots. Once a trace has been
collected, turn the plot off again. Now, turn the ANC OFF, turn on the other plot,
and weight for a trace. Then turn the plot off. You should now have two plots, one
with active noise control running and one without active noise control.
Now open the FFT Window via the entry in the Data Plot menu. Select Scope 1 for
Data A, Scope 2 for Data B, Autospec A for Analysis 1, and Autospec B for Analysis
2. Now click on the red Go button. The two autospectrum results will appear on
screen. Set the Lock Cursors to On, and drag the cursor in one screen to 200 Hz,
which was the sine wave frequency. Read the amplitudes of this portion of the
spectra from the windows; the difference is the attenuation at the error sensor.
Step 11: Progressing On
Now that the system is operating in a stable fashion, it is time to modify a few
parameters and note the result they have upon the performance of the active noise
control implementation. Use the procedure in Step 10 to assign a specific number
to the change in results. Some parameter changes of general interest include the
following:
(1) The active noise control system is introducing a canceling signal to reduce the
unwanted sound pressure. The specific aim of the control system is to completely
remove the sound at the microphone location. Hence, performance is greatly
influenced by the location of the microphone. Try moving the microphone and see
what happens to the result. You will need to turn on BOTH the ALG and ID to do
this, as the cancellation path transfer function will change when the microphone
position is changed. For something interesting, try moving the microphone to a
position immediately in front of the “Primary” noise source speaker, which is
producing the unwanted noise. Then try moving the microphone to a position
immediately in front of the “Control” source speaker, which is producing the
canceling sound field.
(2) Return the microphone to its original position, and try increasing and decreasing
the separation distance of the speakers. This impacts upon the attenuation of the
unwanted noise at locations remote from the error microphone location.
(3) Change the frequency and harmonic content of the unwanted noise. This is done
through the Generator Setup panel, opened via the Generator menu.
(4) Try adjusting the FIR control filter length in the Control Filter Setup menu,
EZ-ANC II User’s Guide Revision 1.06, 2000
© Causal Systems
Chapter 2: Quickstart
13
opened via the Controller Setup menu. Increasing the filter length can often improve
the attenuation level, at the cost of reduced stability.
(5) Try adding a low pass (LP) filter to input signal 2 (the error signal), using the
Input Filtering Setup panel, and to control signal 1, using the Output Filtering Setup
panel. Both of these panels are opened via the I/O Setup menu.
EZ-ANC II User’s Guide Revision 1.06, 2000
© Causal Systems
14
3.
Basic Operation
The EZ-ANC II interface enables the user to custom tune almost all parameters in the
multi-channel active controller, making the systems usable for a wide variety of
experimental and commercial purposes. However, flexibility can also bring
complexity, and confronting the interface for the first time can appear difficult. The
purpose of this chapter is to overview a logical approach to setting up the system for
the first time. Details of many of the procedures can be found in the Quickstart
Chapter 2, and in the chapters that follow this one.
The Front Panel
When the interface is first booted, the front panel shown in Figure 7 appears. The
front panel is divided into three sections:
C
The top menu bar, through which panels related to specific aspects of the
interface can be opened;
C
The toolbar located immediately below the menus, which contains buttons
and indicators for a handful of common items. These are labeled in the
figure;
C
The “blank canvas”, the black area which occupies the bulk of the panel.
This area is used for placing aspect-specific panels, data plots, etc.
EZ-ANC II User’s Guide Revision 1.06, 2000
© Causal Systems
system id overflow
EZ-ANC II User’s Guide Revision 1.06, 2000
close interface
reset interface
sine wave generator on/off
random noise generator on/off
system identification on/off
control filter adaptive algorithm on/off
active noise control on/off
flush controller data and weights
input overrange led
control signal overflow
Chapter 3: Basic Operation
15
Figure 7 The Front Panel.
© Causal Systems
16
Chapter 3: Basic Operation
Getting Going
Starting the Interface is just the beginning of getting the active control system to
function as required. When beginning a new problem, there is a series of steps that
can be followed to get the system going. Many of these were described in the
previous Quickstart Chapter, which should be referred to. More-or-less in order, the
steps are:
C
Establish communication between the PC and controller hardware.
C
Try the signal generator.
C
Get the basic input signals.
C
Setup the output channels.
C
Define the sample rate of the system.
C
Define the controller “numbers”; the number of reference signals, error
signals and control channels to be used.
C
Define the constituents of the reference and error signals.
C
Pair the control sources and error sensors.
C
Define the characteristics of the control filters; length, reference signal, and
on/off status.
C
Try the cancellation path (system) ID operations in isolation.
C
Using the cancellation path ID results, try active control without on-line
system identification.
C
Try active control using both the cancellation path ID and the control filter
adaptation.
C
Fine tune the setup, and save to disk and/or hardware flash memory.
These operations are described in the chapters that follow. However, a brief
overview of each step will be given here.
Establish Communication
Refer to step 1 in the Quickstart Chapter 2 for a complete description.
EZ-ANC II User’s Guide Revision 1.06, 2000
© Causal Systems
17
Chapter 3: Basic Operation
Try the Signal Generator
Step 2 in the list on the previous page is
trying the signal generator. This is simply
to demonstrate that the interface can control
the hardware. The simplest way to switch
on the signal generator is to click on the sine
wave button on the toolbar, shown in Figure
8. This will produce a sinewave output
from the generator.
A more thorough discussion of the signal
generator is given in Chapter 5.
sine wave generator on (red)
Figure 8 Turn the sine wave
generator on using the toolbar
button.
Get the Basic Input Signals
It is often the case when implementing a control system (of any type) that getting
good quality inputs and outputs is the hardest part of the task. Active noise and
vibration control systems are no exception. The next step in our setup list concerns
acquisition of the input signals; output signals will be handled subsequently.
There are two parts to input signal acquisition:
C
C
Actual signal input; and
Filtering.
In regard to actual signal input, maximising the use of the input voltage range is what
is most important. For the EZ-ANC II, the maximum input voltage (to the hardware)
is 1 volt rms or 1.4V peak.
Input ranges are reflected and altered via gain settings in the Input Gains panel,
discussed on page 35. "Gain" refers to amplification; the larger the gain, the larger
the amplification of the input, and hence the smaller the input voltage range).
The gain settings represent reductions in the input signal voltage range, or an
increase in the amplification provided to the signal. This means that for a given
signal, increasing the settings will increase the amplitude of the input received by the
microprocessor. This will be reflected by an increase in the peak value of the signal
if it is displayed on one of the Data Plots; see page 50 for more details on how to
operate these. The numbers are again multiples of 1.5 dB. So, for example, a
number of 4 means an amplification of (4 x 1.5 = 6 dB. This is equivalent to both
reducing the maximum input voltage range by 50%, and doubling the amplitude of
a given input . The settings can be altered by either pointing to the increment /
decrement arrows on the left of the display and clicking the left mouse button, or by
EZ-ANC II User’s Guide Revision 1.06, 2000
© Causal Systems
18
Chapter 3: Basic Operation
highlighting the number with the mouse and typing in a new value. The gains setting
values can range from 0 (no gain) to 15 (maximum gain).
The question which arises here is, what is a "correct" input gain, and how can it be
determined for a given implementation? Referring to Figure 9, the correct input gain
is one which amplifies the measured signal so that the just fills the voltage range of
the hardware. This voltage range is sometimes referred to as the dynamic range of
the system input; the aim of gain setting is to make the input signal completely fill
the dynamic range. If the gain setting it too small, then the signal will only take up
part of the dynamic range. This will reduce the accuracy and performance of the
system. If the gain is too large, then the signal will be larger than the allowable
voltage range, referred to as an over-range condition. If this happens, then the signal
will be "clipped" at the peaks and troughs. This means that the parts of the signal
which are greater than the allowable range will be cut off, distorting the measured
input and reducing system performance.
+2 V
measurement
too little
gain
to active control system
-2 V
input signal
+2 V
correct
gain
to active control system
-2 V
+2 V
amplifier
to active control system
too much
gain
-2 V
Figure 9 What is a correct gain setting?
While it is simple to draw a picture describing "correct" input gain, how can it be set
in practice? The most straightforward way to set input gains is to use the over-range
display panel, described on page 37, and/or the data plots to look for signal clipping
(ie, too much gain). One possible method for setting the gain is:
1. Place the transducer (microphone, accelerometer, etc) in its desired location in the
target system, and turn up the speaker volume to the maximum level used in the
experiments. This will result in the maximum possible signal coming from the
microphone.
EZ-ANC II User’s Guide Revision 1.06, 2000
© Causal Systems
19
Chapter 3: Basic Operation
2. Open up the Input Gains panel, and begin to increase the input gain.
3. Do this until the corresponding over-range LED begins to flicker. At this point,
the gain is slightly too large, and the signal is beginning to clip.
4. Reduce the input gain at this point by one or two.
When modifying the input gains, it is useful to obtain visual verification that the
setting is acceptable. This can be done using the Data Plots. If, for example, the
Input 1 gain is being adjusted, select Input 1 on the Data Plot to view the signal. The
maximum signal amplitude should be around the 0.3-0.8 mark. Note again that 1.0
is the maximum input level and so a value in the range 0.3-0.8 provides a small
safety margin.
Once the input gains are set to satisfactory levels, the next step is to apply high and
low pass filters to the input signals, if desired. There are some benefits to be had by
isolating the target frequency range using filters. However, there is also a price: an
increase in the group delay of the inputs which means that a larger distance will be
needed between the reference sensor and control source in the physical system
(unless the signal to be controlled is periodic). Some trial and error testing is often
required to maximise the benefits.
Input filtering is applied via the Input Filtering Setup panel, described on page 33.
Setup the Output Channels
Just as the Input Channels require setting up, so too do the outputs. Output setup
differs from input setup, in that the aim of output setup is to produce a signal output
from the controller which is of sufficient magnitude to cancel the unwanted
disturbance. For example, if the sound pressure level at a potential error microphone
position is 120 dB, then the active control system must be able to produce an output
which measures at least 120 dB at this point to function effectively. If it cannot
match the amplitude of the unwanted signals, then the most likely outcome will be
that the digital control filters continually saturate as the adaptive algorithm tries to
increase the magnitude of the output signal to provide optimal attenuation.
Having said this, it may be tempting to setup the control system so that is can
produce much greater disturbance amplitudes than the primary noise or vibration
source. This, too, is a mistake, as it leads to a setup that is far too sensitive to
changes in the controller output. Ideally, the controller should be able to provide
attenuation when it is running at 50% or greater capacity.
Output signal amplitude adjustment is handled via a change in attenuation values,
as opposed to gain values. The output attenuations are reflected and altered in the
EZ-ANC II User’s Guide Revision 1.06, 2000
© Causal Systems
20
Chapter 3: Basic Operation
Output Attenuation Setup panel, described on page 35. The attenuation settings
represent reductions from the maximum hardware signal levels. The numbers in the
displays represent multiples of 1.5 dB reduction in level. So, for example, a number
of 4 means a reduction of (4 x 1.5 = ) 6 dB which is the same as halving the
amplitude of the output signal. The attenuation values can range from 0 (no
attenuation and a maximum output of 8V p-p) to 64 (maximum attenuation).
A procedure for setting the output attenuation values could be as follows:
1. Measure the amplitude of the unwanted (primary) disturbance at the desired
error sensing points without the active control system going.
2. Connect the reference signal to the controller input 1. Open a Data Plot screen
and note the amplitude. Open the FFT panel, as described on page 52. Take the
spectrum of the input signal, and note the amplitude of the spectral peak or
peaks.
3. Turn off the primary noise source.
4. Open the Signal Generator Setup panel, as described on page 40. Set the sine
wave generator frequencies to the same as the spectral peaks in the measured
primary disturbance.
5. Set the sine wave generator amplitude to the amplitude of the primary noise
source.
6. Similar to the inputs, it is also possible to high and/or low pass filter the output
signals. Filter setup is via the Output Filtering panel, discussed on page 34.
Setup whatever filtering is desired at this point.
7. At this point, the control output channels should be connected to an
oscilloscope, to view the actual output voltages before connecting the signals to
amplifiers. Each channel can be adjusted individually, so a single channel
oscilloscope will suffice.
8. Open the Output menu, as described on page 38, and select the “Sine Only”
option. This will copy the output from the sine wave component of the signal
generator to each output. Turning the Sine Wave generator on and off will now
turn all of the controller outputs on and off.
9. Open the Output Attenuations panel, as described on page 35. Moving from
channel to channel, do the following: (1) connect the output to the oscilloscope,
(2) increase or decrease the output attenuation levels until the output is
approximately 50%-75% of the maximum allowable for the amplifiers, (3)
connect the signal to the amplifier, and turn up the amplifier until the sound or
EZ-ANC II User’s Guide Revision 1.06, 2000
© Causal Systems
Chapter 3: Basic Operation
21
vibration levels at the error sensing locations (in closest proximity, if there are
multiple levels) are slightly greater than those measured with only the primary
disturbance operating.
At the end of this procedure, it should be physically possible for the controller to
provide attenuation at the error sensing locations.
Define the Sample Rate
At this point, the controller inputs and outputs should be setup, and the active control
components of the system can be tuned. The first parameter that should be set in any
control system tuning is the sample rate, as it impacts upon the optimal setting of all
other parameters. If the sample rate is adjusted during controller implementation, it
is probable that many other parameters will also have to be re-set.
The sample rate is entered in the Sample Rate Setup panel, described on page 36.
There are two parameters to adjust: a base sample rate, which is set by the hardware,
and whether the base rate needs to be slowed (divided down) by a factor of 8 or 64
to achieve the desired rate.
The question that logically follows is, what is a good sample rate? In active noise
and vibration control, the answer to this is entirely dependent upon your target
frequency. Suppose, for example, the unwanted noise is a tone (sine wave) at 50 Hz.
Theoretically, it is possible to measure and control this frequency with a sample rate
which is twice the target frequency, or 100 Hz. However, this is not an advisable
choice, for a number of reasons. Basically, this is the theoretically extreme case,
which is not always practically achievable. A much better choice is ten times the
target frequency, which in this example is 500 Hz or 500 samples per second.
While experience has shown that a sample rate of ten times the target frequency is
about optimal, an adaptive feedforward active noise control system will work
satisfactorily with sample rates which are between about 3 and 50 times the target
frequency. The precise range is dependent upon a number of hardware and software
factors, but 3-50 is a good starting point. For the 50 Hz tonal problem in the example
above, this means we could expect reasonable performance from a system with a
sample rate somewhere in the range of 150 Hz - 2500 Hz. If it is any slower or faster
it will begin to have a telling effect upon both sound attenuation and controller
speed. Note that if there are a number of discrete target frequencies, or perhaps a
frequency range, then ideally the frequencies should fit within range defined by 1/3
- 1/50 of the sample rate.
Note that it is possible to look at the frequency content of a given signal in the active
controller by opening a Data Plot, capturing a signal, and using the FFT functions
to examine the spectrum. This was described previously in this chapter in the section
entitled “Get the Basic Input Signals”.
EZ-ANC II User’s Guide Revision 1.06, 2000
© Causal Systems
Chapter 3: Basic Operation
22
Define the Controller Numbers
The next step in the controller setup is the enter the controller “numbers”, the
number of control outputs, reference signals and error signals. These entries will
enable the various channels for use; later steps will determine whether or not they are
actually engaged for active control.
Controller numbers are entered in the Controller Numbers panel, described on p. 43.
Define the Reference and Error Signals
The EZ-ANC II software allows the user to define reference and error signals as
combinations of the various inputs to the controller. Reference and error signals can
be as simple as single inputs: for example, input 1 can be the reference signal, and
input 2 the error signal. However, they can also be complicated weighted
combinations of inputs, as would be the case in a modal filtering implementation.
There is also scope to define multiple reference signals, and use different reference
signals for different control channels.
Reference and error signals are defined in the Signal Definitions panel, described on
page 37.
Pair the Control and Error Signals
It is often the case that the active control system designer does not want, nor does not
need, all error signals to be considered in the adaptation of all control channels. For
example, some error sensors may be far removed from one control source but close
to another, or the controller might be used to implement multiple single input, single
output arrangements in a series of duct splitters. Whatever the reason, significant
reductions in computational load are possible if judicious pairing of controls and
errors are made, reductions that can lead to a faster, more responsive controller.
The matching of control and error signals is done via the Control / Error
Combinations panel, described on page 43.
Define the Characteristics of the Control Filters
At this point it is useful to define the characteristics of the control filters: what type
of filter is to be used, how long the filters are to be, which reference signal is to be
used in which filter, and whether the control sources are even to be turned on in a
given implementation. All of this information is entered in the Control Filter Setups
panel, described on page 44.
EZ-ANC II User’s Guide Revision 1.06, 2000
© Causal Systems
23
Chapter 3: Basic Operation
Given the importance of the control filters, it is worthwhile briefly discussing them
here.
Overall, the job of the controller is to calculate a signal to send to the loudspeaker
system in order to generate a suitable canceling sound field. As previously discussed,
this calculation is based upon a reference signal which is in some way related to the
impending disturbance.
As illustrated in Figure 10, the inherent job of the controller is to model the acoustic
(or vibration) system between the reference signal and the control source. That is, the
calculation process in the controller must be able to produce large amplitude outputs
at frequencies where the acoustic system is loud, and small amplitude outputs at
frequencies where the acoustic system is quieter. The amplitudes of the unwanted
sound field and electronically generated sound field must match, and the phases for
the two inverted, for cancellation to take place.
Acoustic (primary) system
Residual
noise
Reference
Signal
Control system
Figure 10 The control system must do the “opposite” of the primary system in
order to generate a cancelling disturbance. In other words, in the figure
above, the control system must model the acoustic system and invert the phase
of the output.
The important questions here are, what is involved in the controller output
calculation process and what parameters are important for influencing the
performance of the system?
The adaptive feedforward active noise controller output is usually calculated by
digital filtering the reference signal, as shown in Figure 11. Filtering refers to the
preferential amplification and attenuation of frequency components in a signal (the
reference signal in this case). Digital filtering simply means that the filtering process
is carried out in the digital domain.
EZ-ANC II User’s Guide Revision 1.06, 2000
© Causal Systems
24
Chapter 3: Basic Operation
Acoustic (primary) system
Residual
noise
Reference
Signal
Digital Filter
does this
Figure 11 Generation of the appropriate output from the reference signal
input is performed by a digital filter.
Digital filtering basically involves collecting a number of input, and possibly output,
signal samples, multiplying the samples by a set of filter coefficients, and adding up
the products to produce a new output sample 1. This idea is illustrated in Figure 12.
Acoustic (primary) system
Residual
noise
Reference
Signal
x weight 1
x weight 2
x weight 3
x weight 4
x weight 5
x weight 6
x weight 7
x weight 8
x weight 9
Sum of
products
Digital Filter
Figure 12 The digital filter calculation involves multiplying samples of the
input reference signal (and possibly the output signal, in the case of an IIR
filter), by a set of weights, or filter coefficients, and outputting the sum of the
products.
EZ-ANC II User’s Guide Revision 1.06, 2000
© Causal Systems
25
Chapter 3: Basic Operation
The filter coefficients are simply a set of numbers, and so this multiplication and
addition process is the same as an elementary school mathematics problem. From this
description, it is intuitive that there are three parameters that are important in
determining the performance of the digital filtering process:
1. The values of the filter coefficients;
2. The "form" of the digital filter; and
3. The length of (number of samples and coefficients in) the digital filter.
Tuning of the first of these parameters, the values of the filter coefficients, is largely
the responsibility of an adaptive algorithm.
To explain the impact that the second of these parameters, the "form", or type, of
digital filter, has upon performance, consider the following: The calculation process
which is running on the microprocessor is simply a set of mathematical operations
(multiplications and additions) which must mirror what happens in the real world.
For example, if in the real world (the acoustic system) the reference signal is altered
in amplitude by 3.2 dB, then the numbers which are output from the mathematical
operations must also have altered in value by a factor of 3.2 dB. In the real world, a
sound pressure wave may travel forward forever, as is the case for radiation into free
space. Alternatively, the sound pressure wave may reflect off of boundaries and/or
take the form of a modal resonance. Each of these characteristics must be mirrored
in the mathematical operations undertaken by the digital filter.
How can the mathematics model sound wave reflections? By including past values
of calculated outputs as well as signal inputs in the calculation process. This type of
arrangement can be referred to as a "feedback loop" in the digital filter, where
outputs are fed back into the calculation process. Digital filters which include a
feedback loop are called Infinite Impulse Response (IIR) filters. Digital filters which
do not include a feedback loop are called Finite Impulse Response (FIR) filters.
It is intuitively sensible that if there are reflections of the sound pressure waves in the
target acoustic environment, then an IIR filter is a more appropriate choice for the
controller output calculation mathematics than an FIR filter. Reflections can be
obvious, as in systems which exhibit modal response characteristics. Reflections can
also be subtle, such as when there is feedback from the control source to the
reference microphone. To the controller, this latter case has the same appearance as
a wave measured by the reference microphone being reflected back off of a wall. If
there are no reflections, then an FIR filter is an appropriate choice.
There is much more to consider in the selection of an FIR or IIR filter than just
"reflections". However, it is a good intuitive starting point.
EZ-ANC II User’s Guide Revision 1.06, 2000
© Causal Systems
Chapter 3: Basic Operation
26
The final parameter which influences the performance of the digital filtering process
is the filter "length". Filter length refers to the number of samples, and hence weight
coefficients, used in the calculation process. The longer the filter, the more accurate
the calculation process. To a point. If the filters are too long, the adaptive algorithm
(described in the next section) is likely to be slow in tuning the weights, or not will
not converge at all, meaning that the weight coefficient values will be (very)
sub-optimal.
What is a suitable filter length? This is dependent upon the frequency characteristics
of the reference signal, and hence the active noise control target. If the target is a
single tone, then a FIR filter of 4 - 20 taps will usually work well. If there are
multiple tones / harmonics, then 4 - 20 taps per tone / harmonic is a good starting
point. The actual number required for a given level of performance is greatly
influenced by the system sample rate. The more appropriate the choice of sample
rate, the less the required number of weights.
If there are resonances in the target frequency band, then 4 - 20 taps in both the
feedforward and feedback paths of an IIR filter is a good starting point. In general,
an IIR filter will require less taps for a given level of performance than a FIR filter.
There is one more point which should be made here. It must be recognized that the
digital filtering process takes a finite amount of time to produce an output. When this
is added to the finite amount of time that is required for the analog-to-digital and
digital-to-analog conversion process, as well as the finite time that is required for a
loudspeaker to produce sound after receiving an electrical input, it can take anywhere
from a few to a few tens of milliseconds between sampling the reference signal and
outputting a canceling sound wave. In this amount of time, a sound wave can travel
between 1-10 meters. The location of the reference microphone relative to the control
loudspeakers must accommodate this delay if the system is to be causal. This means
that for a non-periodic signal, the primary disturbance must reach the reference
sensor between a few and a few tens of milliseconds before it reaches the control
source.
Cancellation Path ID On Its Own
The next step in the procedure described here is to attempt to model the cancellation
path “on its own”, without the adaptive control algorithm running. By separating the
cancellation path modeling from the adaptive algorithm it will be more
straightforward to debug any problems in the physical system. The cancellation path
modeling parameters are found in the Cancellation Path ID Setup panel, described
on page 47. To perform cancellation path identification without running the control
filter adaptive algorithm, set the ID button “on” and the ALG button “off” on the
toolbar, and then switch the ANC button to “ANC ON” (see Figure 13). To see what
the impulse response of the model looks like, use the Weights Plot panel, described
on page 49.
EZ-ANC II User’s Guide Revision 1.06, 2000
© Causal Systems
Chapter 3: Basic Operation
27
If the reference signal is used as the
Cancellation path id on
modelling signal (this is a new
Control filter adaptation off
function in version 1.05, and can be
found in the Cancellation Path ID
Setup panel), there are two ways to
do the cancellation path
identification. The first is to have the
ID button on. By doing this, the
Turn the active control
functionality on/off with this button.
controller sends the reference signal
to all output channels, and does the
identification for transfer functions Figure 13 Button setup to turn on
between all control outputs and all cancellation path modeling and turn off
error inputs simultaneously. The other control filter adaptation.
way is to do the cancellation path
identification in a round-robin way,
which sends the reference signal to each control output, one channel at a time. For
each channel the modelling time is about 5 seconds. To do this, click the GO button
in the Cancellation Path ID Setup panel with ANC ON; the status of the ID button
does not have any effect in this situation.
At this point it is worthwhile briefly discussing what the cancellation path actually
is. This is most easily done by skipping ahead slightly and describing, in
straightforward terms, the function of the control filter adaptive algorithm.
As mentioned previously, the values of the weight coefficients in the digital control
filters are directly responsible for calculating the signal sent to the loudspeaker
system to generate the canceling sound field. How can these coefficient values be
calculated? In theory, it is possible to make a number of measurements in both the
target acoustic system and the active control system prior to operation and calculate
the weight coefficient values. The problem is, the performance resulting from such
a process would not be very good due to non-linearities in the system components
(for example, the response of the loudspeaker system will change slightly when there
is a flow of air across it). Further, the performance will deteriorate over time as
components age, as environmental conditions change, etc. Each of these changes is
reflected by a change in optimum values of the digital filter weight coefficients.
What most feedforward active control systems, including the EZ-ANC II system, use
to overcome this problem is an adaptive algorithm. The purpose of the adaptive
algorithm is to calculate the optimum digital filter weights while the control system
is operating, continually adjusting and tuning the weights to mirror changes in
operating conditions. For the algorithm, the "optimum" values of filter weight
coefficients are those that minimize the amplitude of the disturbance measurement
provided in the form of the error signal. The questions of interest here are, how does
the adaptive algorithm perform this tuning operation and what parameters are
important for it to function well?
EZ-ANC II User’s Guide Revision 1.06, 2000
© Causal Systems
28
Chapter 3: Basic Operation
There are a multitude of possible adaptive algorithms which will work in an active
noise controller, each based upon some different strategy. The cynic might refer to
many of these as "Jaguar juice" algorithms: sounding nice, and perhaps good for
something, but not universal panaceas for the problem. The most widely used
algorithms are referred to as gradient descent algorithms. It will be useful here to
paint a heuristic picture of how a gradient descent algorithm operates, to lead to some
conclusions about "what is important".
Implemented in an active noise or vibration control system, the operation of a
gradient descent algorithm is somewhat analogous to "running down a hill while
looking through a periscope", as depicted in Figure 14. At the bottom of the hill is
the optimum set of digital filter weight values, the "holy grail" of the algorithm. As
the algorithm moves up the hill and away from the optimum values the performance
will decrease.
Periscope
Wind
Optimum filter weights
Figure 14 The operation of the adaptive algorithm is analogous to running
down a hill while looking through a periscope. The optimum filter weights
are at the bottom of the hill; this is where the algorithm wants to go.
The parameters and quantities used by the gradient descent algorithm have a number
of effects, analogous to:
1. Setting a pace at which you run down the hill;
2. Blocking the wind which is trying to blow you back up the hill;
3. Determining whether you have enough energy to actually get down the hill,
and/or whether you are so "hyper" that you are unable to stop at the bottom.
EZ-ANC II User’s Guide Revision 1.06, 2000
© Causal Systems
Chapter 3: Basic Operation
29
4. Determining the direction in which your viewing periscope is pointing (down the
hill as desired, or completely the wrong direction back up the hill).
The parameters that influence effects (1-3) can be lumped together, while the
parameters that influence (4), which are related to the cancellation path transfer
function, should be discussed separately. Consider effect 1, the pace at which you
run down the hill. If you try to run too fast you will become "unstable" and fall over.
If you proceed down the hill too slowly you take an exorbitant amount of time to
reach the optimum values. If the bottom of the hill "moves", which is what happens
to the active control gradient descent algorithm when environmental conditions
change, you never seem to catch up.
The algorithm parameter which is chiefly responsible for the speed of running down
the hill is the convergence coefficient, also referred to as the algorithm step size. This
is arguably the single most important parameter in the algorithm, and usually requires
some form of manual adjustment. If the value is too small the progress down the hill
is too slow. If the value is too large the progress is too fast and the algorithm
becomes unstable.
At this point you may ask, why not simply make the convergence coefficient small?
Does it really matter if the adaptive algorithm takes a few seconds to converge?
There is a problem associated with making the convergence coefficient too small, a
problem which arises from the finite-precision digital environment in which the
algorithm is implemented. If the convergence coefficient is too small, then the
calculation process will actually stop prematurely as the finite precision of the digital
environment will essentially treat small numbers in the calculation of the slope of the
hill as ‘0'. The algorithm will think it has hit "the bottom". The relates to effect (3)
in the list above; the algorithm "runs out of energy" before it reaches the bottom.
This effect may sound funny, but it is quite real. If you take a stable adaptive
algorithm implemented in an active noise control system and increase the
convergence coefficient, you can often hear a marked improvement in the
performance. If you then decrease the convergence coefficient the increased
performance will go away.
The converse effect happens when the convergence coefficient is too large (but still
stable). The adaptive algorithm will have so much energy that it is unable to stop at
the bottom, rather running down and up, down and up, in a steady and stable fashion.
The end result here is that the performance of the control system is never quite as
good as it could be.
Putting together the above factors, the effect which the convergence coefficient value
has upon algorithm performance takes a shape which looks something like what is
shown in Fig. 15. In this figure, performance is quantified by the final mean square
error value, which is basically the average amplitude of the squared error signal.
EZ-ANC II User’s Guide Revision 1.06, 2000
© Causal Systems
30
Final Mean Square Error
Chapter 3: Basic Operation
Optimum convergence
coefficient value
Convergence Coefficient
Figure 15 The value of the convergence coefficient used by the adaptive
algorithm has a significant impact upon the final performance (cancellation)
of the system.
The obvious question that follows is, what is the optimum value of convergence
coefficient and how can it be calculated? The optimum value is unfortunately
application specific, being dependent upon a number of factors: signal powers,
loudspeaker characteristics, characteristics of the response of the acoustic system,
etc. This is why some manual adjustment of the convergence coefficient is usually
required.
Note here that the cancellation path identification also uses a gradient descent
adaptive algorithm, with a similar convergence coefficient.
It is worth mentioning that in an active noise control implementation there is one
specific factor which greatly limits the stability of the calculation process and hence
maximum usable value of the convergence coefficient: the time delay between
calculating a new set of weight values and seeing the effects of the new weight values
registered in the error signal. This time delay comes about from the finite time it
takes for a signal to travel out the controller, be turned into a canceling sound field
by the loudspeaker system, travel to the error microphone location, be measured by
the error microphone, and get through the analog to digital conversion process to be
received by the microprocessor. While this may only be a matter of milliseconds, the
time delay is very significant to a system which is sampling new data every fraction
of a millisecond. It is often the case that the stability and performance of the adaptive
algorithm can be improved by "slowing it down", by not calculating new weight
values every time a new piece of data is taken (maybe instead calculating new
weights after every 5 data samples). Thus, the adaptation rate of the algorithm may
ideally be slower than the sample rate of the system. This is analogous to putting
stairs down the hill, where you make a step down the hill with a new weight
EZ-ANC II User’s Guide Revision 1.06, 2000
© Causal Systems
Chapter 3: Basic Operation
31
calculation and then wait for several samples to make another.
Consider now the analogous condition (2) of "blocking the wind". What is the
"wind", and where does it come from? The wind is basically an unwanted
impediment to progress down the hill, an impediment which "niggles" in the
beginning, but through continual application will eventually lead to instability (in
maybe an hour, or 6 hours, or even a day). The wind in this analogy comes from the
calculation quantization process inherent in the digital environment. All of the "lost
numbers", the small bits and pieces that were dropped off the end of the calculations,
will actually lead to algorithm instability. The simple fix is to add "leakage" to the
algorithm. This continually removes a small percentage of the weight values with
every new calculation, which counteracts the quantization process. Leakage has other
stabilizing effects on the adaptive algorithm, such as limiting the effort that is
expended in trying to minimize the error signal. Leakage is essential in any adaptive
system which is to run for an extended period of time.
Let us turn our attention now to analogous condition (4), the "periscope" part.
Firstly, you may be wondering, why is the operation of a gradient descent algorithm
in an active noise control system like "looking through a periscope" while running
down a hill rather than simply like running down a hill? The answer to this is tied in
with how the "hill", and more precisely the slope of the hill, is calculated
mathematically by the algorithm. As part of the calculation process the algorithm
must be "told" what will happen to the controller output signal between leaving the
digital filter and arriving in the error signal. The in-between part, which sees the
signal pass through the output digital-to-analog conversion process, then through an
amplifier, out the loudspeaker, through the acoustic system, enter into the error
microphone, pass through the error signal analog-to-digital conversion process, and
re- appear in the microprocessor, is referred to as the cancellation path, or error path.
The cancellation path must be "identified", or modeled, by the controller. It is often
the case that the cancellation path must be continually modeled, as it will change
with changing temperature, air flow, and even sound field frequency content. This
modeling process often involves inserting a small amount of random noise into the
canceling signal, as will be outlined in the next chapter.
The quality of the model of the cancellation path determines the "direction of the
periscope". If the model is completely wrong, the periscope will be pointing up the
hill instead of down. As a result, the algorithm will go the wrong way, leading the
weight value saturation and instability. If the model is perfect, the periscope will
point directly down the hill and the algorithm will run in the intended direction.
Fortunately, the model does not have to be perfect for the system to function. It
simply has to point more-or-less down the hill (in theory, simply below the
horizontal line which splits "down" from "up"; in practice, a little bit better than
this).
EZ-ANC II User’s Guide Revision 1.06, 2000
© Causal Systems
32
Chapter 3: Basic Operation
Active Control Without On-Line Modeling
Once a set of reasonable-looking cancellation path models have been derived, it is
useful to try adaptive active noise control without on-line modeling. Once you feel
confident that the problem is achievable, the cancellation path modeling and digital
filter adaptive algorithms can be run simultaneously.
The adaptive algorithm parameters are set in the Adaptive Algorithm Setup panel,
described on page 46. To turn on the active noise control and adaptive algorithm
without on-line cancellation path modeling, switch off the ID button and switch on
the ALG button before turning ANC ON, as shown in Figure 16. As in the previous
step, the Weights Plot will be useful for viewing the final result.
Active Control With
On-Line Modeling
Cancellation path id off
Control filter adaptation on
DO NOT flush
Once the active control and
cancellation path ID sections
are working individually, the
entire system can be run by
selecting both ID and ALG in
Turn the active control
functionality on/off with this button.
the toolbar. Note that when
the reference signal is
selected as the modelling
signal (this is a new function
in version 1.05 and can be Figure 16 Button setup to turn off cancellation
found in the Cancellation path modeling and turn on control filter
Path ID Setup panel), the adaptation.
control filter adaptation ALG
and cancellation path ID
cannot be turned on simultaneously. Normally, you should do the cancellation path
modelling first and then select active control with control filter adaptation ALG ON.
Save the Setup
Once the system has been tuned, it will be useful to save the setting for later use.
There are two ways to do this:
C
Save the settings to disk on the PC, as described on page 53.
C
Save the settings to flash memory inside the controller, as described on page 53.
The settings will then be available for implementation on bootup.
EZ-ANC II User’s Guide Revision 1.06, 2000
© Causal Systems
33
4.
I/O Setup
The I/O Setup Menu items, illustrated
in Figure 17, will open panels
dedicated to various functions
associated with basic input / output
operations:
C
The Input Filtering panel enables
the user to apply high and low
pass filters to the signals entering
the controller.
C
The Output Filtering panel
enables the user to apply high
and low pass filters to the signals
leaving the controller.
C
The Input Gains panel enables
the user to adjust the gains of the
individual input.
C
The Output Attenuations panel enables the user to apply attenuations to the
individual outputs.
C
The Display Overrange and Overflow panel has a series of LEDs which display
the overrange state of the individual inputs, and the overflow state of the
individual control output signals and the transfer function models of the
individual cancellation paths.
C
The Signal Definitions panel is used to define the signals that comprise the
individual references and errors used by the controller.
Figure 17 I/O Setup Menu.
EZ-ANC II User’s Guide Revision 1.06, 2000
© Causal Systems
34
Chapter 4: I/O Setup
Figure 18 Input Filtering Setup menu.
Input Filtering
The Input Filtering Setup menu, illustrated in Figure 18,
facilitates highpass and lowpass filtering of the
individual input signals prior to their use in control
algorithms.
Highpass and lowpass filters are selected separately. To
select a filter, simply click on the highpass (HP) or
lowpass (LP) dropdown menu for the input of interest,
and select; a dropdown menu is shown in Figure 19.
The filters are listed in terms of cutoff frequencies,
expressed as a fraction of the sample rate. So, for
example, if the actual sample rate (see page 36) is 8000
Hz, and the HP option of SR/10 is selected, the input
will be passed through a highpass filter with a cutoff
frequency of 800 Hz.
If the Unlock / Lock button is selected as Unlock, then
input filters can be adjusted individually. If the Lock
option is selected, then all inputs will be forced to have
the same filters.
Figure 19 Filter
selection dropdown
menu.
Once an input filter is selected, the filtering process must be switched on for the
signal to actually pass through it. There are two stages in this process. First, the
EZ-ANC II User’s Guide Revision 1.06, 2000
© Causal Systems
Chapter 4: I/O Setup
35
filter banks must be enabled using the Disable / Enable button. A selection of
Disable means that all inputs will bypass the filter banks. Second, the individual
input must have filtering switched “on” using the OFF/ON selection button.
Output Filtering
The Output Filtering Setup menu facilitates highpass and lowpass filtering of the
individual output signals coming from the controller hardware. The menu is shown
in Figure 20.
Figure 20 Output Filtering Setup menu.
As with the input filtering setup, highpass and lowpass filters are selected separately.
To select a filter, click on the highpass (HP) or lowpass (LP) dropdown menu for the
output of interest, and select; an example of the dropdown menu is shown in Figure
19. The filters are listed in terms of cutoff frequencies, expressed as a fraction of the
sample rate. So, for example, if the actual sample rate (see page 36) is 8000 Hz, and
the HP option of SR/10 is selected, the output will be passed through a highpass
filter with a cutoff frequency of 800 Hz.
Once an output filter is selected, the filtering process must be switched on for the
signal to actually pass through it. There are two stages in this process. First, the
filter banks must be enabled using the Disable / Enable button. A selection of
Disable means that all inputs will bypass the filter banks. Second, the individual
output must have filtering switched “on” using the OFF/ON selection button.
EZ-ANC II User’s Guide Revision 1.06, 2000
© Causal Systems
36
Chapter 4: I/O Setup
Input Gains
The Input Gains panel, illustrated in Figure 21, facilitates adjustment of the
individual input gains. Gains are adjustable from a value of 0 to 15, with each step
representing an increment of 1.5 dB (a 6dB gain represents a doubling of the signal
amplitude).
Figure 21 Input Gains panel.
Gain adjustment is best accomplished while looking at the signal on a Data Plot. For
example, to set the gain on input 1, open a data plot window, select input 1, and
adjust the gain until the signal is near the maximum value of 1.0
The input overrange LED on the front panel will show if a signal is overrange during
operation, implying that the signal gain should be reduced.
The maximum value of the input signal for a gain setting of zero dB is 1V rms.
Output Attenuations
The Output Attenuations panel, illustrated in Figure 22, facilitates adjustment of the
output signal levels through the introduction of an in-line attenuator. The attenuation
has a range of 0-63, with each step increment providing additional attenuation of 1.5
dB.
EZ-ANC II User’s Guide Revision 1.06, 2000
© Causal Systems
Chapter 4: I/O Setup
37
Figure 22 Output Attenuations panel..
The maximum available output level is 8V p-p, corresponding to an atttenuator
setting of 0dB. The factory set output is 1V rms, corresponding to an attenuator
setting of 6 (9dB). Note the output impedance is only 100 ohms so it is incapable
of driving a loudspeaker directly; an external amplifier MUST be used.
Sample Rate Selection
The hardware sample rate is setup in the Sample Rate Setup menu, illustrated in
Figure 23. The final value of sample rate is set using two components:
•
The Base Sample Rate, which can be selected from a set of values determined
by the oscillator frequencies; and
•
The Divide By value, which can decrement the sample rate by a factor of 8 or
64.
EZ-ANC II User’s Guide Revision 1.06, 2000
© Causal Systems
Chapter 4: I/O Setup
38
Figure 23 Sample Rate Setup panel..
The Actual Sample Rate displays the final result, which is (base sample rate) /
(divide by).
Note that decreasing the sample rate will increase the group delay through the box.
Note that the DSP processor is not capable of processing all data for all
configurations at high sample rates. When the “base sample rate” or “divide by” is
set too high, the DSP will cease to function properly and an error message will be
displayed, suggesting that the DSP capability is exceeded and the system must be
rebooted. After this error message (see below for examples of the two possible
messages) is displayed, the DSP is locked up and the system will not function
properly until the hardware reset button on the front panel is pressed and a slower
sample rate selected.
EZ-ANC II User’s Guide Revision 1.06, 2000
© Causal Systems
39
Chapter 4: I/O Setup
Note that the group delay through the A/D converters is 30 samples of the base
sample rate for the inputs and 10 samples for the outputs. The delay when the
divide by function is used is 9 samples for the divide by 8 and 6 samples for the
divide by 64. Note that with the divide by 64, you will not be able to exceed a
base sample rate of 22,000. The main contributors to group delay are antialiasing and reconstruction filters, which are included in the EZ-ANC II
automatically when the sample rate is set. These anti-aliassing filters are in
addition to the user selectable filters on the inputs and outputs.
Display Overrange and Overflow
The Overrange and Overflow Panel, shown in
Figure 24, can be opened to provide detailed
monitoring of overrange inputs, cancellation path
model overflows, and control signal overflows. In
this context, an overrange refers to an input signal
that is larger than the maximum allowable for a
given hardware and software configuration. An
overflow refers to a calculated result which is
larger than the maximum allowable output. An
overflow often points to some form of instability
in the system, particularly in the adaptive
algorithm that is tuning the given channel.
Signal Definitions
The reference and error signals used by the control
system are defined as weighted combinations of
input and generator signals. The Signal
Definitions menu, shown in Figure 25, facilitates
this definition.
Figure 24 Overrange and
Overflow display.
To construct a definition, first select Which Signal
is to be defined. Then set up the appropriate
weightings. For example, if Error 1 is to be defined as simply input number 2,
then Input 2 should have a weighting of 1.0, while all other signals should have a
weighting of 0.0. If Error 1 is a combination of input 2 and input 3, then the
weightings for these signals should be, say, 0.5 and 0.5.
Once the all of the desired weightings have been entered, click on the red “Install
These Weightings” button to download the definition to the controller.
(Total, all signal) definitions can be saved to and loaded from file by clicking the
Load from File and Save to File buttons.
EZ-ANC II User’s Guide Revision 1.06, 2000
© Causal Systems
40
Chapter 4: I/O Setup
Figure 25 Signal Definitions panel..
The Maximum xxx readings in the top right corner are for information only.
Selecting the Controller Output
There are a variety of outputs possible from the controller. The Output menu,
shown in Figure 26, is used to control what signals are output from the control
hardware.
The Active Control System option
switches on the active control system,
including the adaptive algorithm and
cancellation path identification options if
they are selected. A “tick” will be next to
the Active Control System option if it is
currently selected.
Figure 26 Output selection menu.
The None option turns off all outputs.
Again, a “tick” will be next to the option
if it is currently selected.
EZ-ANC II User’s Guide Revision 1.06, 2000
© Causal Systems
41
Chapter 4: I/O Setup
There are numerous “Other” output options available, which can be selected from
the “Other” menu. Referring to Figure 27, these are:
Figure 27 “Other” output options.
C
The Sine Wave ONLY option outputs the sine wave generator component of
the signal generator (only).
C
The Random Noise ONLY option outputs the random noise generator
component of the signal generator (only).
C
The Generator option outputs the entire signal generator signal.
C
The Copy in-to-out copies the signal from input x to output x for all inputs
and outputs. Note output channel numbering begins with channel 1 being
the second from the left BNC connector and continues to the right to give a
total of 9 output channels. Input channel numbering begins with channel 1
being the leftmost BNC connector.
C
The In1 to all option copies the signal from input 1 to all outputs except the
generator output.
In each case, a “tick” next to the option indicates that it is currently selected.
EZ-ANC II User’s Guide Revision 1.06, 2000
© Causal Systems
42
5.
Generator Setup
A combined sine wave - random noise function
generator is provided to aid with active control
experimentation, and while not having the
accuracy and range of many purpose-built
devices, does contain a number of very useful
features.
The Generator Setup Menu has three items as
shown in Figure 28:
Figure 28 Generator Setup
Menu.
C
The Setup item brings up the signal
generator setup panel, which facilitates
adjustment of frequencies, amplitudes, and generator components (tonal
and random noise).
C
The Sine item switches on the sine wave generator component of the
signal generator. A “tick” next to Sine indicates that the sine wave
generator is currently operating.
C
The Random Noise item switches on the random noise generator
component of the signal generator. A “tick” next to Random Noise
indicates that the random noise generator is currently operating.,
The Generator Setup Panel, illustrated in Figure 29, is used to modify the
functioning of the signal generator.
The signal generator is compromised of two components: a sine wave generator
and a random noise generator. The sine wave generator can output up to three
frequencies, which may or may not be harmonically related. The individual
frequencies are turned on and off using the Sine 1, Sine 2, and Sine 3 buttons on
the bottom of the panel. Overall, the sine generator is switched on and off using
the Sine Generator button on the bottom of the panel.
EZ-ANC II User’s Guide Revision 1.06, 2000
© Causal Systems
43
Chapter 5: Generator Setup
Figure 29 Generator Setup panel..
The sine wave generator frequencies are set using the slide controls on the left
side of the panel. If the Harmonic Relationship button is selected as “on”, then
only the Sine Wave 1 frequency needs to be adjusted; the other frequencies will
automatically follow, adjusting to the harmonic selected in the Sine 2 Harmonic
and Sine 3 Harmonic setting. There is a maximum sine wave frequency which is
a function of the sample rate; this is displayed in the window on the bottom left of
the panel. The proportional amplitudes of the sine wave components are
adjusting using the Proportional Amplitude knobs. The total (actual) output value
is set using the slide control on the right side of the panel. Note that the
combined random noise and sine wave amplitudes must not exceed 1.0.
The random noise generator is switched on and off using the Random Noise
button on the bottom right of the panel. The amplitude of the random noise
generator is set using the slide control on the right side of the panel.
Note that the signal generator
random noise source is separate
from the random noise source
used in cancellation path
transfer function modeling, so
adjustment of one will not affect
the other.
Two additional buttons, (see
Figure 30)located on the toolbar,
can be used to switch the sine
wave and random noise
generators on and off.
random noise generator
on (red) and off (grey)
sine wave generator
on (red) and off (grey)
Figure 30 Buttons on the toolbar for
turning the sine wave and random noise
generators on and off..
EZ-ANC II User’s Guide Revision 1.06, 2000
© Causal Systems
44
6.
Controller Setup
At the heart of the controller are a
set of functions that adjust the
fundamental elements of the
adaptive control system. These
functions are accessed via the
Controller Setup Menu, shown in
Figure 31.
The Controller Setup Menu contains
items which open panels dedicated
to various aspects of the active
control system operation:
Figure 31 Controller Setup Menu.
C
The Numbers panel is used to
adjust the number of control, error, and reference signals used.
C
The Control / Error Combinations panel is used to define which error signals
are used in the adjustment of which control signals.
C
The Control Filter Setup panel is used to adjust the length of the control
filters, the reference signal used for a particular control signal, the turning on
and off of individual controls, and the type of control filter used (FIR / IIR).
C
The Adaptive Algorithm panel facilitates adjustment of the various
parameters associated with the control filter adaptive algorithm.
C
The Cancellation Path ID Parameters panel facilitates adjustment of the
various parameters associated with modeling the transfer functions between
the control sources and error sensors.
EZ-ANC II User’s Guide Revision 1.06, 2000
© Causal Systems
45
Chapter 6: Controller Setup
C
The View Weights panel is used for reading and plotting the control filter
weights and the transfer functions between sources and sensors.
Controller Numbers
The Controller Numbers panel, shown in Figure 32, is used to adjust the number
of error signals, reference signals and control signals that can be implemented in a
given control application.
Figure 32 Controller Numbers panel..
It is important to note that the values entered in the Controller Numbers panel
simply enable channels, and do not in themselves mean that the error, reference or
control channel will be used or operating. Specifying that a given error signal is
used in the adaptation of a given control filter is done in the Control / Error
Combinations panel. Defining which reference signal is used by which control
channel is done in the Control Filter Setup menu. The switching on and off of
enabled control channels is also done through the Control Filter Setup menu.
Control / Error Combinations
The Control / Error Combinations panel, shown in Figure 33, is used to define
what error signals are used when adjusting a given control source. A red LED
indicates that the error is used in the adaptive algorithm calculations of the control
source.
Errors are added to the control source cohort by clicking on the LED. Once the
desired setup has been entered, click on the red Install These Combinations button
to download it to the controller.
EZ-ANC II User’s Guide Revision 1.06, 2000
© Causal Systems
46
Chapter 6: Controller Setup
Figure 33 Control / Error Combinations panel..
The Pair All Used Errors and Controls can be used as a shortcut to light the LEDs
between all control sources and error sensors (ie, all control sources use all errors
in the adaptation process). The result must still be downloaded by clicking on the
“Install These Combinations” button.
The numbers information in the bottom left of the menu is for information only.
Control Filter Setup Panel
The Control Filter Setup panel, shown in Figure 34, is used to configure the
control digital filters. The parameters that can be adjusted are:
C
The Reference Signal used by each control source.
EZ-ANC II User’s Guide Revision 1.06, 2000
© Causal Systems
47
Chapter 6: Controller Setup
Figure 34 Control Filter Setup panel.
C
C
The number of Feedforward and Feedback Taps used in each filter (feedback
taps are only used in IIR filters).
Whether the control source is ON or OFF.
Referring to Figure 34, the maximum number of filter taps that can be used is
dependent upon the number of control channels currently running; the current
maximum value is displayed in the bottom left corner. The number limited by
memory requirements is listed in the table below. However, there is a processor
power limitation as well and there may be some controller configurations that
cannot be used with the maximum number of filter taps listed in the table below.
Number of Control Channels
Maximum Number of Filter
Taps
1
2
3
4
5
6
7
8
9
1024
512
340
256
200
170
145
128
113
EZ-ANC II User’s Guide Revision 1.06, 2000
© Causal Systems
48
Chapter 6: Controller Setup
If too many taps are selected so that too many demands are made on the controller
processor, the controller will stop communicating with the PC software and the
"reset" button on the front of the hardware box will have to be pressed. This will
reset all controller parameters to their default values, thus allowing
communications to resume.
Control filters can either be adjusted individually or as a group, depending upon
the state of the “Individual Adjustment” button; if it is selected, the control filters
can be adjusted individually. Otherwise, all control filters will have the same
parameters. Control sources are switched on and off using the Requested On/Off
column entries. The Current On/Off column displays the current state, and is
updated every 5 seconds (note that control sources can be switched off by the
controller automatically if they continually overflow). Once the desired
parameters have been entered, click on the “Install These Settings” button to
download the parameters to the controller. The “Control Filter Type” item selects
whether the control filter is a finite impulse response (FIR) or an infinite impulse
response (IIR) filter.
Adaptive Algorithm Setup Panel
The Adaptive Algorithm Setup Panel, illustrated in Figure 35, facilitates the
adjustment of parameters used in the control filter adaptive algorithm.
The Base Convergence Coefficient Value is the convergence coefficient, or step
size, used in the adaptive algorithm. If the Convergence Coefficient Value is
selected to be Normalised, then the base value will be divided by an estimate of
the power in the filtered reference signal for each control source / error sensor
combination. Normalisation makes the resulting system more robust to changes
in the primary source level.
The Base Leakage Value is the value of leakage coefficient used in the adaptive
algorithm. If the Leakage Type is selected as Variable, then this value will be
multiplied by the value of the output signal squared, effectively giving the error
criterion an effort component which is weighted to the fourth power, as opposed
to squared. This is recommended.
The Update Rate will speed up or slow down the adaptive algorithm. The number
selected will be the number of samples delay between successive algorithm
iterations. Slowing the algorithm can (sometimes dramatically) improve stability
and performance. The actual algorithm update rate, in terms of iterations per
second, is displayed on the front panel
EZ-ANC II User’s Guide Revision 1.06, 2000
© Causal Systems
Chapter 6: Controller Setup
49
Figure 35 Adaptive Algorithm Setup panel.
Cancellation Path ID Setup Panel
The Cancellation Path ID Setup Panel, shown in Figure 36 facilitates the
adjustment of parameters used in the modeling of transfer functions between the
control sources and error sensors.
The Cancellation Path Model Length variable sets the impulse response length of
the transfer function model, in samples at the current sample rate. The Extended
EZ-ANC II User’s Guide Revision 1.06, 2000
© Causal Systems
50
Chapter 6: Controller Setup
ID Model Length sets the length of the extended id component of the model,
EZ-ANC II User’s Guide Revision 1.06, 2000
© Causal Systems
Chapter 6: Controller Setup
51
Figure 36 Cancellation Path ID Setup panel..
EZ-ANC II User’s Guide Revision 1.06, 2000
© Causal Systems
Chapter 6: Controller Setup
52
which accounts for the presence of components correlated with the reference
signal(s). The maximum values of the parameters are dependent upon the number
of control sources. The current maximum values are displayed in the windows. If
selected values exceed the maximum allowable, the controller hardware may
cease to communicate with the PC software. If this happens, the “reset” button on
the front panel of the hardware must be pressed and all controller parameters will
be reset to their default values, thus allowing communications to resume.
The Base Convergence Coefficient Value is the convergence coefficient, or step
size, used in the adaptive algorithm. When used, it will be divided by an estimate
of the power of the input signal.
The Modeling Noise Amplitude variable sets the level of modeling noise used in
the identification operation. The greater the level of modeling noise, the better
will be the model. The minimum practical value is usually around 30 dB below
the outside noise levels.
The Modelling Signal selects the signal for modelling. There are three options in
test version 1.06: Control Signal, Random Noise and Reference Signal 1. The
later two are recommended, where the reference signal 1 option is new in this
version, which is especially useful when the objective is to control tonal noise.
If the reference signal is used as the modelling signal (this is a new function in
version 1.05 and can be found in the Cancellation Path ID Setup panel), there are
two ways to do the cancellation path identification. The first is to have the ID
button on. By doing this, the controller sends the reference signal to all output
channels, and does the identification for transfer functions between all control
outputs and all error inputs simultaneously. The other way is to do the
cancellation path identification in a round-robin way (recommended), which
sends the reference signal to each control output, one channel at a time. For each
channel the modelling time is about 5 seconds. To do this, click the GO button in
the Cancellation Path ID Setup panel with ANC ON; the status of the ID button
does not have any effect.
When the reference signal is used for modelling, the level of the reference signal
can be changed a Menu>>I/O Setup>>Signal Definitions. To do cancellation path
modelling with the reference signal, the level of the modelling signal normally
should be larger than the primary disturbance. For a multiple channel system, if
the locations of the control actuators and error sensors are well conditioned, the
modelling can be done simultaneously for all the control output channels.
However, normally, the round-robin way is recommended.
The “Pass Noise Through FB Path” is used when the control filter is IIR and the
model is short.
EZ-ANC II User’s Guide Revision 1.06, 2000
© Causal Systems
Chapter 6: Controller Setup
53
The Update Rate will speed up or slow down the modelling algorithm. The
number selected will be the number of samples delay between successive
iterations. The actual update rate, in terms of iterations per second, is displayed
on the front panel.
Weights Plot
The Weights Plot panel is used to view and store both control filter weights and
cancellation path model impulse responses. Referring to Figure 37, select the
“Data Source”, the “Control Number”, and the “Error Number” if a transfer
function model impulse response is requested, and click on “Fetch Weights”. The
displayed weight values can be saved to file using the “Save” button.
Figure 37 Weights Plot.
EZ-ANC II User’s Guide Revision 1.06, 2000
© Causal Systems
54
7.
Support Functions
The are a variety of functions in the interface to support ANC activities. These
include:
C
Data plotting facilities.
C
Setup storage, both to hard disk and flash memory on board the controller.
Data Plotting
The Data Plot menu, shown in
Figure 38, contains items related
to data plots.
Data are plotted by opening up
plot windows and placing them
onto the interface. The PC
interface can support up to 4
Figure 38 Data Plot Menu.
data plots at one time.
However, the maximum number
of points in each plot decreases as the maximum number of plots increases, from
512 for only one plot to 128 for four plots. This is reflected in the Max Number
of Running Plots options, as shown in Figure 39.
Data Plot windows are opened using the Open Windows menu, shown in Figure
41. Once a data plot window is open, it has to be configured and switched on.
The Data Plot panels enable various signals to viewed in an “oscilloscope-like”
manner. Referring to Figure 40, once one of the four Data Plot panels is open, the
Data Source is selected, and the window turned on using the button located in the
bottom left of the panel. The data will be updated every 5 seconds.
EZ-ANC II User’s Guide Revision 1.06, 2000
© Causal Systems
Chapter 7: Support Functions
55
Figure 39 Max Number of Running Plots window.
Figure 40 Data Plot window.
Figure 41 Open Windows menu item..
EZ-ANC II User’s Guide Revision 1.06, 2000
© Causal Systems
56
Chapter 7: Support Functions
Plotted data can be saved to file, and reloaded later. To save plotted data, click on
the Save button. To reload saved data, click on the Load button.
Spectral analysis can be performed on the data in the data plot windows. To do
this, select the Open FFT Window option in the Data Plot menu; refer to Figure
38.
The FFT Window, shown in Figure 42, is used to perform spectral analysis on the
data in the Data Plot windows. The source of the data is first selected using the
Data A and Data B options. One or two spectral analysis operations can be
undertaken each time, as selected with the Analysis 1 and Analysis 2 buttons.
Note that the analysis results will overwrite whatever is currently plotted, and so
if the current data is to be kept on screen the “None” option should be selected.
Figure 42 FFT window.
Once the sources and analysis options are set, click on the Go button to perform
the spectral analysis.
Each window has a data cursor which can be dragged across the screen. The
cursor will snap the curve at the given frequency. The cursors can be locked
together using the Lock Cursors button.
EZ-ANC II User’s Guide Revision 1.06, 2000
© Causal Systems
57
Chapter 7: Support Functions
Data on the windows can be saved to disk using the Save 1 (to save window 1
data) and Save 2 (to save window 2 data buttons). Previously saved data can be
reloaded using the Load 1 and Load 2 buttons.
Storing and Reading Setups
The File Menu, shown in Figure 43, contains
elements used for reading and writing a controller
setup from disk, loading or saving a controller setup
to internal flash memory, and closing the interface.
Read Setup reads and loads a controller setup file
from the PC disk drive. Save Setup saves the
current controller parameters (as displayed on the
interface) to the PC disk drive.
Referring to Figure 44, the Flash option can Read a
Figure 43 File Menu.
setup from the flash memory on the controller
hardware, or Save the current setup to flash memory
on the controller hardware. Flash memory is non-volatile, so setups saved to it
will remain intact after the power to the controller has been switched off. Note
that the controller WILL NOT automatically load the setup in flash memory on
power-up when the interface is set to control system operation. This must be
done through the menu option.
Figure 44 Flash options.
The Exit option will close down the interface. Note
that this will NOT affect the operation of the
controller.
Communications
EZ-ANC II User’s Guide Revision 1.06, 2000
Figure 45
Communications
Menu.
© Causal Systems
58
Chapter 7: Support Functions
The Communications Menu, shown in Figure 45, contains items relating to
communication between the controller hardware and the PC interface.
Referring to Figure 46, the Port option is used to select the PC serial port used to
communicate with the controller. Communications take place at 115k baud.
Figure 46 Port options.
The Test option is used to test whether communications between the controller
hardware and the PC interface has been established. A pop-up menu will display
the result.
The Reset button on the PC interface is used to reset or re-establish
communications between the controller hardware and the PC interface. Note that
this will NOT in any way affect the current state of the controller. If
communications are successfully re-established, then the current operating state of
the controller will be read and the PC interface re-configured accordingly.
EZ-ANC II User’s Guide Revision 1.06, 2000
© Causal Systems
59
8.
Some Notes on Error
Messages
A Note on Parameter Selection and Overtaxing the Controller
A wide range of controller parameter adjustments are possible through the EZANC II interface. Unfortunately, not all parameter combinations will be
practically achievable / supportable by the microprocessor. For example, if your
system uses 9 control outputs and 9 error signals, and all error signals are used
when tuning all control filters, then the use of FIR control filters with 100 taps
may be practically possible. However, the use of IIR filters with 100 taps in each
direction may not be practically possible; the load placed upon the CPU to
support this setup may be beyond the capacity of the of the principle
microprocessor.
One way to overcome this problem would be to limit all parameter choices so that
it could be guaranteed that all combinations will work. This, however, is viewed
as too conservative for a research and development tool, and so the only limits
that have been placed upon parameter selection are due to memory restrictions on
the hardware. Therefore, if the parameter combination is beyond the capacity of
the hardware, a few things may happen:
C
In the worst case, the PC interface will lose contact with the controller
hardware. When this happens, a message will pop up, “Board failed to
respond - hardware either disconnected or overloaded. Reboot or
reconnect to PC and reset .” If this happens then the hardware must be
reset by pressing the "reset" button on the front panel of the hardware box
before the PC can re-establish communications with the controller.
EZ-ANC II User’s Guide Revision 1.06, 2000
© Causal Systems
60
Chapter 8: Some Notes on Error Messages
C
If the parameter selection is close, but just a little beyond the capability of
the microprocessor, then a message will pop up, “The board has been
overtaxed - the ANC system has shut down.” If this happens a hardware
reset of the device is not necessary. Instead, the parameters can simply be
changed in software and the device flushed (by clicking on the “flush”
button on the interface) and restarted.
A few tips that may help to rectify the problem of overtaxing the microprocessor
are as follows:
C
An IIR filter is much more computationally intensive to support than an FIR
filter. This is partly because, for the IIR filter, two sets of filter weight
calculations are necessary and partly because the cancellation path
identification must take into account the feedback path in the digital filter.
C
The faster the sample rate, the greater the computational load.
C
If not all error signals are used in the adaptation of all control filters, this
will reduce the computational load.
C
The adaptation rate indicators in the toolbar of the interface can be used to
estimate how taxed the microprocessor is. If the load is high then the
adaptation rates will begin to fall away from the sample rate. Internally, the
controller must be able to perform a control filter weight (algorithm)
adaptive iteration or a cancellation path modeling iteration in approximately
(350 / number of control channels) samples, or the internal buffers will
overflow. Knowing the sample rate and the number of control channels, it is
possible to estimate how close a given setup is to the limit.
Connecting and Disconnecting the Controller and PC
If the controller is disconnected from
the PC at any time, a message will
popup, saying “Board failed to
respond - hardware either
disconnected or overloaded. Reboot
Reset GUI button
or reconnect to PC and reset
interface.” Once this happens, the
Reset GUI button will light on the PC.
Figure 47 The Reset GUI button.
When the physical PC / controller
connection has been re-established, the
interface can be reconnected to the
hardware by pressing the reset GUI button, shown in Figure 47. If the connection
is successful, then the button will dim.
EZ-ANC II User’s Guide Revision 1.06, 2000
© Causal Systems
61
Chapter 8: Some Notes on Error Messages
When communication between the PC and controller is established or reestablished, the PC will interrogate the controller for its current state. The PC
will not change the state of the controller in any way; it will simply read the
current state of the controller and configure itself accordingly.
It is possible to reset the connection between the PC interface and the hardware at
any time by selecting the Reset option in the Communications Menu. Also, the
connection can be tested at any time by selecting the Test option, also in the
Communications Menu.
EZ-ANC II User’s Guide Revision 1.06, 2000
© Causal Systems
62
9.
Hardware Description for
the EZ-ANC II
Front Panel Switches (Mode Select)
On the left hand side of the front panel there are four
switches, labelled A, B, C and D respectively. Each
switch has three positions as described below.
Switch A (MODE)
This switch sets the MODE or state of the controller.
Down - 3: (TERM) The controller is in “terminal mode”
meaning that it is under the control of the PC and
Windows Interface connected through the RS 232
connector. In this mode, NO OTHER switches (“B”,”C”
or “D”) on the front panel have any effect.
Middle - 2: (ANC OFF) The active noise control is
turned OFF. The controller is under the control of the
front panel switches and the Windows Interface is just
EZ-ANC II User’s Guide Revision 1.06, 2000
© Causal Systems
63
Chapter 9: Hardware Description
used for monitoring inputs, outputs and filter weights. The actual output signals
are set by switch “B”.
Up - 1: (ANC ON) The active noise control is turned on. The controller is under
the control of the front panel switches and the Windows Interface is just used for
monitoring inputs, outputs and filter weights. The state of the adaptive algorithms
is controlled by switch “D”.
Note that if the controller is turned on (or the front panel “reset” button pushed)
when switch “A” is down (TERM MODE), then a set of default parameters are
loaded into the controller that will allow it to function. These can be changed
individually by using the Windows Interface or by downloading a stored set from
disk or flash memory. If switch “A” is either in the “middle” or “up” positions,
then when the controller is turned on, the parameters that have been stored in
flash memory will be loaded. If flash memory contains no valid parameters, then
the default parameters will be loaded automatically.
Switch B (AOSIG)
This switch sets the control channel output signals when switch “A” is in the
middle position (ANC OFF). It has no effect if switch “A” is in the down
(TERM) or up (ANC ON) positions
Down - 3: (NONE) No outputs
Middle - 2: (SINE) The sine generator output will be copied to all output channels
Up - 1: (FILT) The outputs will consist of reference signals passed through the
digital control filters. This is the same as having the active control system on with
both adaptive algorithms (control filter and cancellation path modelling) switched
off.
Switch C (SGEN)
This switch sets the state of the signal generator. The frequencies and amplitudes
must be set through the PC Interface. The values are stored in flash memory.
Down - 3: (SINE) Sine wave output only.
Middle - 2: (RN) Random noise output only.
Up - 1: (S&RN) Both sine and random noise output.
EZ-ANC II User’s Guide Revision 1.06, 2000
© Causal Systems
64
Chapter 9: Hardware Description
Switch D (AOALG)
This switch determines the state of the adaptive algorithm when switch “A” is set
to up (ANC ON mode).
Down - 3: (ALG) Control filter adaptive algorithm only running
Middle - 2: (ID) System ID adaptive algorithm only running
Up - 1: (BOTH) Both adaptive algorithms
running.
Front Panel Light Emitting Diodes
(LEDs)
Signal Input LEDs: When the input signal
reaches 10% or more of the full scale level,
the green LED will light. When the input
signal is overrange, the red LED will light.
When the latter happens, the input gain must
be turned down or if this is not possible an
external signal attenuator must be used.
Signal output LEDs: For the left most output
(signal generator, the green LED lit up
indicates that the sine generator is operating and the orange LED indicates that
the random noise generator is operating.
For all other outputs (control channels 1 to 9 respectively when
numbered from the left), the green LED indicates that the channel is
enabled (minimum enable state) and the orange LED will be lit if the
channel is enabled for active control. If the output channel overloads
(Filter weights overloading), the orange LED will go out and the
channel is effectively switched off.
Status LEDs: These yellow LEDs are located to the right of the input
BNCs on the front panel and are labelled L1......L8. They indicate
some operating states of the controller and also controller overload
and malfunction states as described below.
L1: Lights up when ANC is ON (ANC).
EZ-ANC II User’s Guide Revision 1.06, 2000
© Causal Systems
65
Chapter 9: Hardware Description
L2: Lights up when the control adaptive algorithm is enabled (ALG).
L3: Lights up when the cancellation path identification algorithm is enabled
(ID).
L4: Lights up when an overflow of the filter weights has occurred for at least
one control channel (COF). This will normally indicate that at least one
control channel has been switched off. Check which orange LED is out to
find out which one. See end of step 9 in Quickstart in manual for reset
procedure (click on “FLUSH” button).
L5: Lights up when an overflow has been detected in the filter weights for at
least one cancellation path transfer function. (TFOF). This doesn't
necessarily result in a system shut down, but most likely it will eventually
trip the control loop which will shut things down, requiring the “FLUSH”
button to be clicked on (see end of step 9 in Quickstart in the manual).
L6: Lights up when at least one control channel has been switched off due to an
overflow of the control filter weights. See end of step 9 in Quickstart in
manual for reset procedure (click on “FLUSH” button).
L7: Lights up when the controller is overtaxed due to too many filter taps
selected for the particular controller configuration.
L8: Currently not in use.
Signal Inputs
The signal inputs can be either reference signals or error signals. The user
interface signal definition panel is used to define which input signals make up the
reference and error signals used in the controller (see pages 7, 17 and 23).
Signal Outputs
The left most output is reserved for the signal generator output. The remaining
nine outputs correspond to control channel outputs 1 to 9 respectively.
Microphone bias voltages
Electret microphones usually need a bias voltage supplied in the range 1V to 12V.
The EZ-ANC II is factory set to supply +5V (suitable for most electrets) on each
input. If this is not required, the user can turn the appropriate DIP switch to
EZ-ANC II User’s Guide Revision 1.06, 2000
© Causal Systems
66
Chapter 9: Hardware Description
“OFF”. The DIP switches (one for each input channel) are located on the inside
of the front panel with numbers corresponding to the input numbers on the front
panel.
RS 232 Connector
This is where the EZ-ANC II box is connected to the PC.
Back Panel
The connector on the back panel is for power for the EZ-ANC II. The standard
configuration is for power from 90V to 240V AC at 50Hz or 60Hz. There is an
option for an additional variable voltage DC power supply in the voltage range
from 10 to 30V.
EZ-ANC II User’s Guide Revision 1.06, 2000
© Causal Systems
67
Appendix
EZ-ANC II Specifications
Software
The software for the EZ-ANC II includes firmware on EPROM's installed inside
the controller enclosure and a Microsoft Windows interface that can operate on
Windows 95/98, NT3.51, NT4.0, W2000. The version of the software in the
EPROM is version 1.05 and the version of the Windows interface is version
1.05b, which are released in June 2002.
Number of Channels
C 10 analog input channels (reference + error)
C 10 analog output channels
C 4 Reference signals (from software generated signals or from analog input
channels)
C 9 Control signals
C Grouping of control signals and error signals, into control systems achieved
using a 9x10 matrix
C Error and reference signals are defined as the weighted sum of analog input
channels and signal generators
Adaptive Algorithms
Gradient descent feed-forward control
C Filtered-x LMS (FIR)
C Filtered-u LMS (IIR)
Control Filter Types
C FIR
C IIR
Maximum Tap Length for Control Filters
Depends on the number of channels used.
EZ-ANC II User’s Guide Revision 1.06, 2000
© Causal Systems
Appendix: EZ-ANC II Specifications
68
C For 1 error, 1 control and 1 reference signal, then a FIR filter with 1024 taps
can be used.
C For a IIR filter, 512 forward taps and 512 backward taps can be used.
C For 9 error, 8 control and 1 reference signals, then a FIR filter with 113 taps
can be used.
C For a IIR filter, 64 forward and 64 backwards tap can be used.
Adjustable Algorithm Parameters
C Convergence coefficient
C Leakage coefficient
C Cancellation path ID update rate
Cancellation Path System Identification
C Adaptive FIR model
C Cancellation Path Modelling Signal
S Control signal
S Pseudo random noise in the control signal or added to the feedback path in
the IIR filter
S Reference signal - all control channels simultaneously or one channel at a
time
Adjustable Cancellation Path ID Parameters
C The maximum number of filter taps for the model depends on the number of
channels used.
S For 1 error, 1 control and 1 reference signal, then the maximum number of
taps is 1024 for the Cancellation Path Model and 1024 for the Extended ID
model
S For 9 error, 8 control and 1 reference signal, then the maximum number of
taps is 113 for the Cancellation Path Model and 113 for the Extended ID
model
C Convergence coefficient
C Leakage coefficient
Sampling Rates
C The sampling rate range is from 86Hz to 32kHz.
C Hardware sampling rates are from 5513Hz to 32kHz, in 10 steps.
C Sampling rates can be reduced in software by a factor of 8 or 64.
Input and Output Filtering
C The signals can be high pass, low pass and band pass filtered using software
with 19 different filters from 1/3 to 1/100 the sampling rate. The software uses
a FIR filter.
Analog Inputs
C Signal maximum is 1Vrms
C Software selectable input gain from 0dB to 22.5dB, in 16 steps.
EZ-ANC II User’s Guide Revision 1.06, 2000
© Causal Systems
Appendix: EZ-ANC II Specifications
69
C AC coupled inputs
Analog Outputs
C Signal maximum is 8Vp-p
C Factory set output maximum 1V rms (9dB attenuation)
C Software selectable output attenuation from 0dB to 94.5dB, in 64 steps.
C AC coupled outputs
Signal Generator
C 3 Sine wave generators
C 1 Pseudo-random noise generator
C Frequency range 0Hz to 2kHz
C Generator signal is the summation of the sine and pseudo random signal
generators.
Saving Data
C System setup can be saved to disk or in FLASH EPROM
Signal Displays
C 2 Channel FFT analyzer
C 4 time plots
C 1 plot of filter weights
C All plots can be saved to or loaded from disk
Overflow Signals
Software display of over ranges in
C Input signals
C Cancellation path ID model
C Control output
Hardware
Digital Signal Processor
C Main Processor, Analog Devices 33MHz ADSP21062 floating point
C Co-processor, ADSP-2181 fixed point
C 2 Mbit (64K of 32 bit words) on chip memory
C 131K of 48 bit words external memory
Analog Inputs
C 10 analog inputs sampled simultaneously, using 5 Analog Devices AD1847
CODECs (also used for analog output)
C 1Vrms input range
C 16 bit precision
C software controlled input gain
EZ-ANC II User’s Guide Revision 1.06, 2000
© Causal Systems
Appendix: EZ-ANC II Specifications
70
C high input impedance
C switch selectable bias voltage for microphones
C BNC front panel connectors
Analog Outputs
C 10 analog outputs sampled simultaneously, using 5 Analog Devices AD1847
CODECs (also used for analog input)
C 8Vp-p output range
C 16 bit precision
C software controlled output attenuation
C low output impedance for driving power amplifiers
C BNC front panel connectors
Sampling Rate
C The sampling rate range is from 86Hz to 32kHz.
C Hardware sampling rates are from 5513Hz to 32KHz, in 10 steps.
C Sampling rates can be reduced in software by a factor of 8 or 64.
Group Delay
C Minimum of 30 sample periods. However, this will be considerably less when
the /8 and/64 software sample rate divisions are used.
Host Communication
C RS232 connector, 3 wire connection
C 19200 bps, 8 bit, no parity, 1 stop bit
Power Requirements
C Accepts 90V to 240V AC at 50Hz or 60Hz
C Less than 60 Watts power consumption
C IEC power cord connector
C Variable 10-30V DC power supply available as additional option
Size
C 450mm wide x 390mm deep x 90mm high
Weight
C 5.75 kg
EZ-ANC II User’s Guide Revision 1.06, 2000
© Causal Systems
71
Index
INDEX
adaptive algorithm . . . . . . . 23, 26, 46
convergence coefficient . . . . 28, 47
effort limit . . . . . . . . . . . . . . . . . 30
effort weighting . . . . . . . . . . . . . 47
instability . . . . . . . . . . . . . . . . . . 30
leakage . . . . . . . . . . . . . . . . . 30, 47
Normalised . . . . . . . . . . . . . . . . . 47
quantization . . . . . . . . . . . . . . . . 30
stability . . . . . . . . . . . . . . . . . . . . 29
Update Rate . . . . . . . . . . . . . . . . 47
ALG . . . . . . . . . . . . . . . . . . . . . 11, 26
autospectrum . . . . . . . . . . . . . . . . . 12
Cancellation Path
Convergence Coefficient . 9, 10, 47
Extended ID . . . . . . . . . . . . . . . . 47
ID Setup . . . . . . . . . . . . . . . . . . . 26
impulse response . . . . . . . . . . . . 10
model . . . . . . . . . . . . . . . . . . 25, 30
model . . . . . . . . . . . . . . . . . . . . . 47
model length . . . . . . . . . . . . . . . . 47
Modeling . . . . . . . . . . . . . . . . . . . 9
Modeling Noise Amplitude . . . . 47
modeling rate . . . . . . . . . . . . . . . 10
on-line model . . . . . . . . . . . . . . . 31
random noise . . . . . . . . . . . . . . . 30
random noise modeling . . . . . . . 48
Setup . . . . . . . . . . . . . . . . . . . 10, 47
Transfer Function . . . . . . . . . . . . . 9
Update Rate . . . . . . . . . . . . . . 9, 48
communications error . . . . . . . . . . . . 4
COM port . . . . . . . . . . . . . . . . . . . 4
Test . . . . . . . . . . . . . . . . . . . . . . . . 4
communications menu . . . . . . . . . . 53
Reset button . . . . . . . . . . . . . . . . 54
Test option . . . . . . . . . . . . . . . . . 54
control filter . . . . . . . . . . . . . . . . 8, 12
adaptation . . . . . . . . . . . . . . . . . . 10
Convergence Coefficient . . . . . . 10
Individual Adjustment . . . . . . . . 46
Leakage Type . . . . . . . . . . . . . . . 11
Leakage Value . . . . . . . . . . . . . . 11
length . . . . . . . . . . . . . . . . . . . . . 12
Normalised . . . . . . . . . . . . . . . . . 11
EZ-ANC II User’s Guide Revision 1.06, 2000
pairing with control . . . . . . . . . . 21
Setting Up . . . . . . . . . . . . . . . . . . . 8
Setup . . . . . . . . . . . . . . . . . . . 12, 44
stability . . . . . . . . . . . . . . . . . . . . 12
taps . . . . . . . . . . . . . . . . . . . . . . . 45
Update Rate . . . . . . . . . . . . . . . . 11
Control signal
pairing with error . . . . . . . . . 21, 44
Controller
Adaptive Algorithm . . . . . . . 42, 46
Cancellation Path ID . . . . . . . . . 42
Control / Error Combinations 42, 43
Control Filter . . . . . . . . . . . . . . . 42
Disconnect from PC . . . . . . . . . . 56
GUI . . . . . . . . . . . . . . . . . . . . . . . 56
Numbers . . . . . . . . . . . . . 21, 42, 43
Setup . . . . . . . . . . . . . . . . . . . . . . 42
convergence coefficient . . . . . . 28, 47
Normalised . . . . . . . . . . . . . . . . . 47
optimum value . . . . . . . . . . . . . . 29
Copy in-to-out . . . . . . . . . . . . . . . . 39
cursor . . . . . . . . . . . . . . . . . . . . . . . 52
Lock . . . . . . . . . . . . . . . . . . . . . . 52
Data Plot . . . . . . . . . . . . . . . . . . . 6, 11
Data plotting . . . . . . . . . . . . . . . . . . 50
Data Storage . . . . . . . . . . . . 50, 52, 53
delay . . . . . . . . . . . . . . . . . . . . . 25, 29
error messages . . . . . . . . . . . . . . . . 55
hardware capacity . . . . . . . . . . . . 55
Overtaxing Controller . . . . . . . . . 55
overtaxing the microprocessor . . 56
error signal . . . . . . . . . . . . . . . . . 7, 21
pairing with control . . . . . . . 21, 44
feedforward active noise control . . 22
FFT . . . . . . . . . . . . . . . . . . . . . . . . . 52
FFT Window . . . . . . . . . . . . . . . . . 12
filter . . . . . . . . . . . . . . . . . . . . . . . . 23
coefficients . . . . . . . . . . . . . . . . . 23
cutoff frequencies . . . . . . . . . 33, 34
Digital . . . . . . . . . . . . . . . . . . 23, 24
Disable . . . . . . . . . . . . . . . . . . . . 34
enable . . . . . . . . . . . . . . . . . . . . . 34
Finite Impulse Response . . . . . . 24
© Causal Systems
Index
FIR . . . . . . . . . . . . . . . . . . . . . . . 24
highpass . . . . . . . . . . . . . . . . 33, 34
IIR . . . . . . . . . . . . . . . . . . . . . . . 24
Infinite Impulse Response . . . . . 24
length . . . . . . . . . . . . . . . . . . . . . 25
length . . . . . . . . . . . . . . . . . . . . . 23
Lock option . . . . . . . . . . . . . . . . 33
lowpass . . . . . . . . . . . . . . . . . 33, 34
switched on . . . . . . . . . . . . . . . . . 34
taps . . . . . . . . . . . . . . . . . . . . 25, 44
weight coefficient . . . . . . . . . . . . 25
weights . . . . . . . . . . . . . . . . . . . . 25
FLUSH . . . . . . . . . . . . . . . . . . . 10, 11
Front Panel . . . . . . . . . . . . . . . . . . . 13
Generator . . . . . . . . . . . . . . . . . . . . 39
menu . . . . . . . . . . . . . . . . . . . . . . 12
off . . . . . . . . . . . . . . . . . . . . . . . . 41
on . . . . . . . . . . . . . . . . . . . . . . . . 41
random noise . . . . . . . . . . . . 39, 41
Setup . . . . . . . . . . . . . . . . . . . 12, 40
sine wave . . . . . . . . . . . . . . . 39, 41
gradient descent algorithm . . . . 27, 29
stability . . . . . . . . . . . . . . . . . . . . 29
group delay . . . . . . . . . . . . . . . . . . . 18
GUI . . . . . . . . . . . . . . . . . . . . . . . . 4, 5
Hardware . . . . . . . . . . . . . . . . . . . . 58
Back Panel . . . . . . . . . . . . . . . . . 62
front panel . . . . . . . . . . . . . . . . . 58
LEDs . . . . . . . . . . . . . . . . . . . . . 60
Microphone bias voltages . . . . . . 61
power . . . . . . . . . . . . . . . . . . . . . 62
RS 232 Connector . . . . . . . . . . . 61
Signal Inputs . . . . . . . . . . . . . . . . 61
Signal Outputs . . . . . . . . . . . . . . 61
switches . . . . . . . . . . . . . . . . . . . 58
I/O . . . . . . . . . . . . . . . . . . . . . . . . . 12
ID . . . . . . . . . . . . . . . . . . . . . . . . . . 10
impulse response . . . . . . . . . . . . . . 10
input
filter . . . . . . . . . . . . . . . . . . . . . . 12
Filtering . . . . . . . . . . . . . 16, 32, 33
gains . . . . . . . . . . . . . . 6, 16, 32, 35
group delay, filters . . . . . . . . . . . 18
over-range . . . . . . . . . . . . . . . . . . 18
Plots . . . . . . . . . . . . . . . . . . . . . . 18
EZ-ANC II User’s Guide Revision 1.06, 2000
72
signal acquisition . . . . . . . . . . . . 16
voltage range . . . . . . . . . . . . . . . 16
Installation . . . . . . . . . . . . . . . . . . . . 1
Software . . . . . . . . . . . . . . . . . . . . 2
Leakage . . . . . . . . . . . . . . . . . . . . . 47
menu bar . . . . . . . . . . . . . . . . . . . . . 13
Microphone . . . . . . . . . . . . . . . . . . . 6
Microphone bias voltages . . . . . . . . 61
On-Line cancellation path modeling 31
Output . . . . . . . . . . . . . . . . . . . 18, 38
amplitude adjustment . . . . . . . . . 19
Attenuation . . . . . . . . . . . 19, 32, 36
Attenuation Setup . . . . . . . . . . . . 19
attenuator setting . . . . . . . . . . . . . 5
factory set . . . . . . . . . . . . . . . . . . 36
filter . . . . . . . . . . . . . . . . . . . 12, 19
Filtering . . . . . . . . . . . . . . . . . . . 32
maximum . . . . . . . . . . . . . . . 19, 36
menu . . . . . . . . . . . . . . . . . . . . . . 19
output level . . . . . . . . . . . . . . . . . . . . 5
maximum . . . . . . . . . . . . . . . . . . . 5
Overflow . . . . . . . . . . . . . . . . . . . . . 32
Setup . . . . . . . . . . . . . . . . . . . . . . 37
Overrange . . . . . . . . . . . . . . . . . 32, 35
Setup . . . . . . . . . . . . . . . . . . . . . . 37
Pairing errors and controls . . . . . . . . 8
Plot . . . . . . . . . . . . . . . . . . . . . . . 6, 50
Port . . . . . . . . . . . . . . . . . . . . . . . . . 53
Quickstart . . . . . . . . . . . . . . . . . . . . . 3
Reference
multiple . . . . . . . . . . . . . . . . . . . 21
signal . . . . . . . . . . . . . . . . 7, 21, 44
Sample Rate . . . . . . . . . . . . . . . 20, 36
base sample rate . . . . . . . . . . 20, 36
Divide By value . . . . . . . . . . . . . 36
divide factor . . . . . . . . . . . . . . . . 20
optimum . . . . . . . . . . . . . . . . . . . 20
Setup . . . . . . . . . . . . . . . . . . . . . . 36
Save . . . . . . . . . . . . . . . . . . . . . . . . 52
flash memory . . . . . . . . . . . . . . . 50
hard disk . . . . . . . . . . . . . . . . . . . 50
Setup . . . . . . . . . . . . . . . . . . . 31, 53
Signal Definitions . . . . . . . . . . . 32, 37
Signal Definitions panel . . . . . . . . . 7
Signal generator . . . . . . . . . . . . . 4, 16
© Causal Systems
Index
73
off . . . . . . . . . . . . . . . . . . . . . . . . 41
on . . . . . . . . . . . . . . . . . . . . . . . . 41
random noise . . . . . . . . . . . . . 5, 41
Setup . . . . . . . . . . . . . . . . . . . . . . 40
sine wave . . . . . . . . . . . . . . . . 5, 41
sinewave . . . . . . . . . . . . . . . . . . . 16
switch on . . . . . . . . . . . . . . . . . . 16
Specifications . . . . . . . . . . . . . . . . . 63
Hardware . . . . . . . . . . . . . . . . . . 65
Software . . . . . . . . . . . . . . . . . . . 63
Spectral analysis . . . . . . . . . . . . . . . 52
Starting . . . . . . . . . . . . . . . . . . . . . . 15
System Requirements . . . . . . . . . . . . 2
time delay . . . . . . . . . . . . . . . . . . . . 29
toolbar . . . . . . . . . . . . . . . . . . . . . . 13
Update Rate . . . . . . . . . . . . . . . . . . 47
Weights
coefficients . . . . . . . . . . . . . . . . . 26
filter . . . . . . . . . . . . . . . . . . . . . . 25
number . . . . . . . . . . . . . . . . . . . . 25
optimum . . . . . . . . . . . . . . . . 26, 27
Plot . . . . . . . . . . . . . . . . . . . . 26, 49
View . . . . . . . . . . . . . . . . . . . . . . 10
EZ-ANC II User’s Guide Revision 1.06, 2000
© Causal Systems