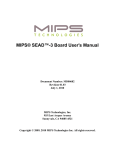
1
MIPS® SEAD™-3 Board Getting Started
Document Number: MD00687
Revision 01.01
March 30, 2009
MIPS Technologies, Inc.
955 East Arques Avenue
Sunnyvale, CA 94085-4521
Copyright © 2009 MIPS Technologies Inc. All rights reserved.
Contents
Section 1: Introduction........................................................................................................................... 7
1.1: Package Contents ....................................................................................................................................... 7
Section 2: Getting Started...................................................................................................................... 8
2.1: Configuring the Board.................................................................................................................................. 8
2.2: Board Setup............................................................................................................................................... 13
2.3: Power-up Sequence .................................................................................................................................. 15
2.4: USB Download .......................................................................................................................................... 15
2.4.1: Linux................................................................................................................................................. 15
2.4.2: Microsoft Windows ........................................................................................................................... 16
Section 3: Development ....................................................................................................................... 17
3.1: Hardware Tools ......................................................................................................................................... 17
3.2: Software Tools........................................................................................................................................... 17
Section 4: Support ................................................................................................................................ 18
Section 5: SEAD™-3 HD Setup............................................................................................................ 18
Section 6: Linux Boot ........................................................................................................................... 20
6.1: Loading Kernel from MicroSD ................................................................................................................... 20
6.2: Boot Linux.................................................................................................................................................. 22
Section 7: References .......................................................................................................................... 23
Section 8: Revision History ................................................................................................................. 23
2
MIPS® SEAD™-3 Board Getting Started, Revision 01.01
Copyright © 2009 MIPS Technologies Inc. All rights reserved.
List of Figures
Figure 1: SEAD™-3 Board Top View........................................................................................................................ 9
Figure 2: SEAD™-3 Board Bottom View................................................................................................................. 10
Figure 3: CPU Module Mating................................................................................................................................. 11
Figure 4: CPU Module Unmating ............................................................................................................................ 11
MIPS® SEAD™-3 Board Getting Started, Revision 01.01
Copyright © 2009 MIPS Technologies Inc. All rights reserved.
3
4
MIPS® SEAD™-3 Board Getting Started, Revision 01.01
Copyright © 2009 MIPS Technologies Inc. All rights reserved.
List of Tables
Table 1: Jumper Settings ........................................................................................................................................ 12
Table 2: Settings of 4-way DIP Switches (SW2) ..................................................................................................... 12
Table 3: Settings of 8-way DIP Switch (SW1)......................................................................................................... 13
Table 4: Windows Support of SEAD-3 Download ................................................................................................... 16
Table 5: Hardware .................................................................................................................................................. 17
Table 6: Software .................................................................................................................................................... 17
MIPS® SEAD™-3 Board Getting Started, Revision 01.01
Copyright © 2009 MIPS Technologies Inc. All rights reserved.
5
6
MIPS® SEAD™-3 Board Getting Started, Revision 01.01
Copyright © 2009 MIPS Technologies Inc. All rights reserved.
1 Introduction
1 Introduction
This document describes how to get started with the MIPS® SOC Evaluation And Development (SEAD) 3 Basic
Package. The SEAD™-3 Basic Package is the ideal solution for designers who are integrating their intellectual property with a MIPS processor core. The package allows designers to verify a design before committing to an ASIC, and
to begin application software development before the final ASIC is manufactured.
SEAD-3 is a development board with an uncommitted Xilinx Virtex-5 FPGA. It can be used as a standalone MIPS
development board by programming a MIPS core + Basic RTL in the FPGA. It can also be use as an IP evaluation
platform, where developers can combine their IP with the provided Basic RTL connecting to the MIPS core though
the CoreBus connector. The external board connected though the CoreBus connector can be either a MIPS siliconbased board called LV, or an FPGA-based board called the FPGA-Module-3. Please check the MIPS Technologies’
website for LV and FPGA availability and options. The core itself can be a MIPS 4K®, M4K®, 24K®, or 34K® processor core.
To ease development, the board is equipped with a number of resources such as UARTs, SRAM, SDRAM, Flash,
Ethernet, LCD display, LEDs, and a MIPS- based PIC32 IO subsystem with access to IIC, SPI, GPIO, ADC, and a
MicroSD card. These may be used as supplied or disabled (to free up relevant resources.)
For development purposes, the standard board is pre-configured with a MIPS core, SEAD-3 BRTL, and in some
cases USB 2.0 and DDR3 controllers. The SEAD-3 BRTL is a sample design which interfaces to the MIPS core and
implements all necessary control logic to interface with all external resources including USB 2.0 and DDR2 controllers. The verilog package of the SEAD-3 BRTL can be found in the mSEAD3_1_0_0 directory of the SEAD-3 CD.
USB 2.0 and DDR2 controller options are only available in the SEAD-3 A80209 package. However, their RTL are
not available from MIPS—for more information, refer to the MIPS® SEAD™-3 Basic RTL Reference Manual
(MD00692).
To show the operation of the board as a CPU system, the package also includes the MIPS YAMON™ monitor, which
allows users to communicate with and control the board. All source code for YAMON is included in the package.
1.1 Package Contents
The SEAD-3 Basic Package contains the following items:
•
•
For A80211:
•
ATX Power Supply
•
USB A to Mini Cable
•
SEAD-3 CD ROM
For A80209:
•
ATX Power Supply
•
USB A to Mini Cable
•
SEAD-3 CD ROM
•
DDR2 5300 SODIMM - 512MB Single Rank
MIPS® SEAD™-3 Board Getting Started, Revision 01.01
Copyright © 2009 MIPS Technologies Inc. All rights reserved.
7
2 Getting Started
•
USB A Female to mini adapter
•
USB 2.0 to SATA Cable Kit
•
HD image with TimeSys Linux Distribution
•
MicroSD 2G with microMIPS and MIPS32 Kernels
Contact MIPS immediately if any of the items for the board package you ordered are missing. Please note that some
items, such as jumpers and memories, will be pre-installed to match the requested MIPS Core and configuration.
Be careful with the CPU module connector—it is a fine pitch connector with 400 pins, and the mating and un-mating
of the CPU module must follow the procedure described later in this document.
The board’s boot Flash contains the configuration for the FPGA and up to two additional FPGAs. It also contains the
YAMON monitor. The board is delivered with the Flash pre-programmed. Please verify that the board can boot
before the Flash is re-programmed. The Flash is re-programmed by file download over USB.
2 Getting Started
The board is delivered with a monitor called YAMON. This monitor allows the user to communicate and control the
board through a Serial to USB Port (J6) and a standard RS232 port. The default port is the Serial to USB J6, which is
tty0 inside YAMON’s environment variable setting: yamontty (R/W) tty0
The heart of the board is the large FPGA that interfaces the CPU to the board resources. The SEAD Basic Package
CDROM contains a complete design called Basic RTL, written in Verilog, which can be synthesized and mapped to
the FPGA.
There is also a secondary CPLD which controls I/O-space decode, switch and LED ports, and the reset logic.
The PIC32 I/O subsystem sits on the peripheral bus and acts as a peripheral on the board. There is a defined APIL for
communication with the main system. The PIC 32 controls the 16-bit GPIO, 8-channel ADC, I2C, SPI ports, and the
MicroSD card slot. The source code of the firmware running on the PIC 32 is also freely available.
2.1 Configuring the Board
Populate the SEAD-3 board as described below. Note that some items may have been mounted by MIPS prior to
shipment, but please check that they have not loosened during transport. Figure 1 and Figure 2 can be used to locate
the jumpers and sockets.
8
MIPS® SEAD™-3 Board Getting Started, Revision 01.01
Copyright © 2009 MIPS Technologies Inc. All rights reserved.
2 Getting Started
Figure 1 SEAD™-3 Board Top View
MIPS® SEAD™-3 Board Getting Started, Revision 01.01
Copyright © 2009 MIPS Technologies Inc. All rights reserved.
9
2 Getting Started
Figure 2 SEAD™-3 Board Bottom View
The heart of the board is the FPGA, which contain the MIPS core + Basic RTL or External IP + Basic RTL that interfaces to the boards peripherals.
•
If using a CPU module. Follow the steps below to mate CPU module with main board. The connectors are guaranteed for at least 50 mating cycles:
• Place the SEAD-3 board on a clean flat surface. Remove protection caps from the connectors.
• Make sure the connectors are clean and that no pins are damaged.
• Find the A1 position marking (a triangle) on both the plug and receptacle. The A1 markings are found on the
side of the connector housing.
• Do a rough alignment before mating, because misalignment of more than 0.8 mm may damage the connector
pins. Use the keys to achieve alignment.
• Application of mating force needs to start at one end of the connector (area 1, and then proceed to the other (area
2). See Figure 3.
10
MIPS® SEAD™-3 Board Getting Started, Revision 01.01
Copyright © 2009 MIPS Technologies Inc. All rights reserved.
2 Getting Started
Area 2
Area 1
Figure 3 CPU Module Mating
•
Use two bolts to fasten the module to the two spacers at the end opposite to the connector. Additional fastening
can be done with two bolts and two nuts at the connector end but don’t use spacers at this end since the spacers
may have a height which is slightly different from the mated connector height. These two optional bolts/nuts
should only be tightened lightly to avoid connector damage. Usually these optional bolts/nuts are not required
because the connector itself provides sufficient retention.
•
To remove the CPU module first release any fasteners holding the assembly together. Then lift the module so
that it is first lifted at the end opposite to the A1 position (Figure 4).
Figure 4 CPU Module Unmating
•
NOTE: MIPS provides the bolts and screws with the CPU Module.
•
DDR II DRAM module. For A80209, mount the SODIMM module in the SODIMM socket. Mount the DRAM
module in the DRAM socket on the underside of the board. Be sure to align the key in the socket with the slot in
the module. The latches will engage when the module is fully fitted in the socket. Please note that the Basic RTL
included with the board assumes that the DRAM is DDR II 533 compatible. So always use this type of module.
•
A 512 MB Single Rank SODIMM is shipped as standard with boards that are configured for DRAM. The will
take a 512 MB SODIMM, but the total addressable memory is only 432 MB
•
NOTE: The board only supports single-sided SODIMMs.
MIPS® SEAD™-3 Board Getting Started, Revision 01.01
Copyright © 2009 MIPS Technologies Inc. All rights reserved.
11
2 Getting Started
The next thing to do is to place jumpers as listed in Table 1. Jumpers should have been placed correctly prior to shipment, but please verify with Table 1. For 3-pin jumpers, pin 1 is marked on the board, and pin 2 is the center pin. The
10-pin jumper has all odd pin numbers on one side and all even pin numbers on the other. The 10-pin jumper has pin
1 and 2 marked on the board.
Table 1 Jumper Settings
Ref
Pins
Default
Position
J19
10
Closed
Closed
Open
Closed
Closed
1-2
3-4
5-6
7-8
9-10
To route power to CPU module.
1-2,3-4 supplies IO power
7-8, 9-10 supplies Core power
J9
2
Open
1-2
Ethernet: Auto-MDIX; closed to DISABLE.
Closed
Closed
Open
Open
Open
1-2
3-4
5-6
7-8
9-10
1-2, 3-4 connects the FPGA temperature to the monitor device.
J12
Description
J16
2
Closed
1-2
Completes the FPGA JTAG chain to isolate user connector A6. If no
external devices are required in the chain this link should be CLOSED.
to allow for programming of an external device think link should be
OPEN and the chain closed on the user board.
J18
2
Open
1-2
2 pin header to allow external reset of the board.
Finally, set the 4 DIP switches in the positions listed in Table 2. Each DIP switch contains 4 individual switches
called S2-1 to S2-4.
Table 2 Settings of 4-way DIP Switches (SW2)
Ref
Setting1
S2-1
OFF
Endian switch, selects Big or Little Endian (default = OFF- LittleEndian).
S2-2
OFF
Xilinx programming mode (default = OFF).
S2-3
A00209 Default = OFF
A00211 Default = ON
S2-4
OFF
Description of setting
Selects at what address range the SRAM is decoded. If DRAM is fitted
this switch should be OFF; if no DRAM fitted, this switch should be ON.
This will map the SRAM to physical address 0x0000.0000, which is
required for normal CPU operation.
FPGA option switch. Function depends on the logic within the FPGA
(default = OFF).
1. A DIP switch is “ON” if it is “Closed”, and “OFF” if it is “Open”.
12
MIPS® SEAD™-3 Board Getting Started, Revision 01.01
Copyright © 2009 MIPS Technologies Inc. All rights reserved.
2 Getting Started
Table 3 Settings1 of 8-way DIP Switch (SW1)
SW[1]
SW[2]
SW[3]
GL_LV_CLK1Frequency Synthesizer1 (U29)
ON
ON
ON
133.33 Mhz
OFF
ON
ON
125.00 Mhz
ON
OFF
ON
100.00 Mhz
OFF
OFF
ON
83.33 Mhz
ON
ON
OFF
75.00 Mhz
OFF
ON
OFF
66.66 Mhz
ON
OFF
OFF
50.00 Mhz
OFF
OFF
OFF
40.00 Mhz
SW[4]
SW[5]
SW[6]
ON
ON
ON
200.00 Mhz
OFF
ON
ON
187.50 Mhz
ON
OFF
ON
175.00 Mhz
OFF
OFF
ON
166.66 Mhz
ON
ON
OFF
150.00 Mhz
OFF
ON
OFF
133.33 Mhz
ON
OFF
OFF
125.00 Mhz
OFF
OFF
OFF
100.00 Mhz
GL_LV_CLK0: Frequency Synthesizer0 (U28)
SW[7]
Module Clock Enabler: MOD_CLK_OE
ON
OFF
Disable - GL_MOD_LV_CLK = Enable
Default
Enable - GL_MOD_LV_CLK = Hi-Z
SW[8]
Clock Selection: MOD_CLK_SEL
ON
OFF
DDR clock: GL_LV_CCLK0 = Synthesizer0-U28
Core and Module clock: GL_LV_CCLK1 = Synthesizer0-U28
Default
DDR clock: GL_LV_CCLK0 = Synthesizer0-U28
Core and Module clock: GL_LV_CCLK1 = Synthesizer0-U29
1. A DIP switch is “ON” if it is “Closed”, and “OFF” if it is “Open”.
NOTE: SW3 and SW4 are user-defined switches and by default are switched OFF
2.2 Board Setup
•
Connect the standard (min 200W) ATX power supply (included) to J10 on the board. A power supply with
standby current supply of minimum 720 mA is required (1A/1.5A peak recommended) for the 5V standby voltage. BEWARE: The CPLD is powered from the standby voltage supply. This allows programming of the device
without powering up the whole board. This is required, because the CPLD controls vital function of the board.
•
Connect the included USB A to Mini Cable between the USB Mini Connector J6 and the host machine.
•
Configure the serial port setting and the terminal program on the host. The preferred terminal program is “minicom” for Linux and “Hyper Terminal” for Window host machine. The default YAMON setting is the following:
MIPS® SEAD™-3 Board Getting Started, Revision 01.01
Copyright © 2009 MIPS Technologies Inc. All rights reserved.
13
2 Getting Started
•
Baud Rate: 38400
•
8 bit
•
No parity
•
1 stop bit
•
No HW Flow Control
•
No SW Flow Control
•
For Windows, the Serial-USB port will automatic be detected and a Communication (COM) port will be
assigned to it. If Windows fails to find the correct driver, it can be downloaded from the FTDI website http://
www.ftdichip.com/Drivers/VCP.htm. To find out which COM port the Serial-USB port is assigned to, go to
Device Manager -> Ports (COM & LPT) and locate USB Serial Port (COM#). The picture below shows the
COM port assigned is COM7.
•
For Linux, the Serial-USB port should be detected automatically and be assigned a tty port. Below is an example
of the detection and assigned port to device “/dev/ttyUSB0” using command “dmseg”.
hub.c: new USB device 00:1d.1-1, assigned address 23
usb.c: USB device 23 (vend/prod 0x403/0x6001) is not claimed by any active driver.
usbserial.c: USB Serial support registered for FTDI SIO
usbserial.c: USB Serial support registered for FTDI 8U232AM Compatible
usbserial.c: USB Serial support registered for FTDI FT232BM Compatible
usbserial.c: FTDI FT232BM Compatible converter detected
usbserial.c: FTDI FT232BM Compatible converter now attached to ttyUSB0 (or
usb/tts/0 for devfs)
ftdi_sio.c: v1.3.2:USB FTDI Serial Converters Driver
•
To use serial port options TTY1, reset the board by pressing the reset button SW10 while holding on to SW6
(West) push button. The board will boot up and Yamon will default the TTY console to TTY1 Serial Interface.
This setting will not be saved unless the environment variable is changed to tty1:
The command to change the port setting to tty1 is: “setenv yamontty tty1”
yamontty
yamontty
•
(R/W) tty0 - Serial USB J6 is the default communication port
(R/W) tty1 - Serial RS232 J7 is the default communication port
For TTY1 RS232 port, a Null Modem cable is required and has the following pin wiring:
• pin 2 to pin 3 (RXD to TXD)
• pin 3 to pin 2 (TXD to RXD)
14
MIPS® SEAD™-3 Board Getting Started, Revision 01.01
Copyright © 2009 MIPS Technologies Inc. All rights reserved.
2 Getting Started
• pin 4 to pin 6 (DTR to DSR) {not required}
• pin 5 to pin 5 (GND to GND)
• pin 6 to pin 4 (DSR to DTR) {not required}
• pin 7 to pin 8 (RTS to CTS) {not required}
• pin 8 to pin 7 (CTS to RTS) {not required}
2.3 Power-up Sequence
When you first connect the power supply and switch it on, only the “STANDBY” LED turns on because the ATX
power supply by default comes up in “standby” mode. Press the switch marked “NMI” to bring up the board. Check
that the 3V3, 5V, and 12V LEDs turn on to indicate good power. Then you will see a welcome message in the ASCII
display saying “SEAD-3, fw rev. xx.yy” where xx.yy is the revision of the SEAD-3 firmware. Next the ASCII display shows “FPGA LD” to indicate that the FPGA is being configured with the configuration code from the Flash.
When the configuration is complete, the display shows “FPGA boot OK”. Finally, the CPU boots the monitor program. The reset LED will turn off, and the ASCII display will show the text “YAMON”.
When the SEAD-3 Board initially boots, the YAMON monitor signs on using tty0 with information about the board
configuration details, i.e., board revision, SDRAM size, etc.
Finally you should arrive at the YAMON prompt. See the YAMON documentation for a full description of the functionality.
The command “help” lists the available commands in the YAMON monitor, and “help <command name>” gives
more detailed information about the specific command.
To power-down the board, press and hold the “NMI” button until the power supply turns off (approximately 4 seconds).
NOTE: During normal operation, this button functions as an NMI signal to the CPU. Do not hold too long, or the
board will power down!.
2.4 USB Download
When you have verified that the board can boot to YAMON with the pre-programmed configuration files and have
requested or created new configuration files, you can try downloading.
2.4.1 Linux
Modern Linux systems include support for USB devices. The SEAD-3 board presents itself as a bi-directional printer,
and therefore it can use the standard printer driver delivered with Linux. The device name used to access the device
depends on the kernel version; recent kernels use the devicename /dev/usb/lp0, and older ones use /dev/
usblp0. If neither of these devices exist on your Linux system, you may need to set them up by hand. Additional
information for doing this can be found at http://www.linux-usb.org/
Once you have the USB system setup, connect the SEAD-3 USB cable and Linux should recognize the SEAD-3 as a
printer. You can now re-program the FPGA configuration stored in the Flash by issuing the command:
cat sead_chipXX.fl1 > /dev/usb/lp02
MIPS® SEAD™-3 Board Getting Started, Revision 01.01
Copyright © 2009 MIPS Technologies Inc. All rights reserved.
15
2 Getting Started
The “USB DL” LED will turn on while the download is active. On completion, the board will re-boot with the new
FPGA configuration.
2.4.2 Microsoft Windows
Table 4 shows the various versions of Windows.
Table 4 Windows Support of SEAD-3 Download
Windows version
Support
Windows ME
Windows ME supports download to the SEAD-3 board. No additional drivers are required.
Windows 2000, XP,
Vista
Windows 2000, XP, Vista all support download to the SEAD-3 board. No additional drivers
are required.
When you plug a CoreFPGA into the USB slot of a Windows XP machine, you must perform a few manual steps to
properly configure it as a USB printer:
Connect the CoreFPGA card to a USB port on your Windows box using a USB cable. Open "Printers and Faxes"
in the Start Menu. Click on "Add a printer". Then click "Next".
Select "Local printer attached to this computer". Uncheck the box that says "Automatically detect and install my
Plug and Play printer". Click "Next".
Select a printer port. Click on "Use the following port", and select USB001 (virtual printer port for USB). If you
have previously installed a USB printer, you may see more than one USBxxx choice. You must choose the one
associated with the port connected to your USB cable. If necessary, use trial and error. When you have finished,
click "Next".
Under "Manufacturers", select "Generic". Under "Printers", select "Generic/Text Only". Click "Next".
You should specify a different name for each different CoreFPGA assembly, namely, Printer-A00066 or PrinterA00064.
To download the bitfile:
Open the bitfile with WordPad
Make sure "Word Wrap" is turned OFF.
Print the document to the appropriate CoreFPGA printer. Be careful not to print to a real printer, or it will print
several hundred pages.
The “USB DL” LED will turn on while the download is active, and on completion the board will re-boot with the
downloaded FPGA configuration active. The download is tested with the Wordpad editor, and we suggest that all
files ending with “.fl” are associated with this editor.
1.
2.
16
(XX=32 for a 4K CPU, XX=64 for a 5K CPU and XX=ocp for 24K CPU)
Use /dev/usblp0 in this and the following examples if you are using an older kernel
MIPS® SEAD™-3 Board Getting Started, Revision 01.01
Copyright © 2009 MIPS Technologies Inc. All rights reserved.
3 Development
3 Development
This section describes the hardware and software tools that are required or useful for development purposes.
3.1 Hardware Tools
Table 5 Hardware
Description
Included
Supplier
SEAD-3 board
Yes
MIPS
DDR II compliant DRAM module, if required by design
512 MByte module included
Yes
MIPS
Serial cable for connection to e.g., PC RS232 port. One cable is included but
there are two serial ports on the board so an extra serial cable is nice to have. Use
wiring shown in Section 2.2, "Board Setup".(NULL modem).
No
USB cable for download of files from host
Yes
MIPS
Yes if
ordered
MIPS
ATX power supply
Yes
MIPS
Xilinx cable for configuration download. Xilinx order no: “DLC5”. Please note
that other cables exists. Contact Xilinx for a full list of cables.
No
Xilinx
A PC running Linux or Windows with USB and USB printer support. The PC is
used to download FPGA configuration files and new software to the board.
No
A workstation running Linux or Windows with all the required software tools
(see later). The flow for the included RTL package is designed to work on a Unix
platform.
No
CPU Module
3.2 Software Tools
The software tools listed in Table 6 are tested with the RTL and YAMON source on the CD and are used successfully
on a Linux workstation running Red Hat Enterprise version 4.3. Other versions/types of tools, operating systems, or
workstations may work, but they are not tested by MIPS and may require modifications to scripts, etc. See the
rel_note.txt file in the SEAD-3 root of the “SEAD” CDROM for a description of specific tool versions.
Table 6 Software
Description
Included
Supplier
Synopsys FPGA Compiler II. Use a version supporting the XCV20006FG680 Virtex FPGA.
No
Synopsys
Xilinx Alliance Standard tool
No
Xilinx
MIPS compiler toolchain
No
Check for information
on: www.mips.com
GNU Make
No
www.gnu.org
MIPS® SEAD™-3 Board Getting Started, Revision 01.01
Copyright © 2009 MIPS Technologies Inc. All rights reserved.
17
4 Support
A terminal program for communication with the board via its Serial-USB ports will be required—any workstation or
PC program should work, although performance can vary. MIPS recommends “Minicom or Screen” for Linux and
“TeraTerm or HyperTerminal” for Windows.
The Errata sheet for the CPU is not included on the CDROM, but it is available upon request from MIPS support.
4 Support
MIPS Technologies provides support for the SEAD-3 Basic Package product through the following channels:
•
WWW documentation pages at http://www.mips.com. This should be your first call when looking for the
answer to any problems or queries you may have. There may be updated versions of the documents available on
the site.
•
Email hotline. Send an email with your name and company details, plus full details of the hardware and software
you have (include revision numbers, serial numbers and as much other information as possible) to:
[email protected]. Remember to include all details of the problem you are seeing, such as status on the LCD
display, and what has been output on the debug serial port.
5 SEAD™-3 HD Setup
1.
YAMON command to set Endianess
a. Big endian: set softendian big
b. Little Endian: set softendian little
2.
Connect Mini USB cable from Host computer to SEAD3 USB Serial Port J6
3.
USB 2.0 to SATA Connection
a. Connect USB cable from SATA HD to USB A to Mini Adapter
b. Connect USB Mini Adapter to SEAD3 USB 2.0 port J2
18
4.
SATA IDE Power: Connect Power from ATX power supply or stand alone power supply
5.
Connect Ethernet cable port to SEAD3 Ethernet Port P1
6.
For Bitfile or YAMON update, connect the Mini USB cable from host PC to SEAD-3 USB Download port J1
7.
Serial Port with Null Modem Cable “tty1” is optional
MIPS® SEAD™-3 Board Getting Started, Revision 01.01
Copyright © 2009 MIPS Technologies Inc. All rights reserved.
5 SEAD™-3 HD Setup
MIPS® SEAD™-3 Board Getting Started, Revision 01.01
Copyright © 2009 MIPS Technologies Inc. All rights reserved.
19
6 Linux Boot
6 Linux Boot
6.1 Loading Kernel from MicroSD
1.
Loading SEAD3 MicroSD boot loader:
copy 0xbfe00000 0x800d0000 0x21000;
2.
Loading Kernel from MicroSD:
There are four kernels stored in the MicroSD:
•
MIPS32 Little Endian: /mips32/el/vmlinux
•
MIPS32 Big Endian: /mips32/eb/vmlinux
•
microMIPS Little Endian: /umips/el/vmlinux
•
microMIPS Little Endian: /umips/eb/vmlinux
To load the kernel:
go 0x800d0000 <kernel location - i.e. microMIPS little endianness
go 0x800d0000 /umips/el/vmlinux
3.
TimeSys HD partition:
microMIPS glibcr Big Endianess: /dev/sda2 ---> be-glibc-umips
microMIPS glibc Little Endianess: /dev/sda3 ---> le-glibc-umips
microMIPS uclibc Big Endianess: /dev/sda6 ---> be-uclibc-umips
microMIPS uclibc Little Endianess: /dev/sda7 ---> le-uclibc-umips
MIPS32 glibc Big Endianess: /dev/sda8 ---> be-glibc-mips32r2
MIPS32 glibc Little Endianess: /dev/sda9 ---> le-glibc-mips32r2
MIPS32 uclibc Big Endianess: /dev/sda10 ---> be-uclibc-mips32r2
MIPS32 uclibc Little Endianess: /dev/sda11 ---> le-uclibc-mips32r2
4.
Examples of YAMON commands to load each of the kernels:
microMIPS Kernel for Big Endian Mode:
copy 0xbfa00000 0x800d0000 0x21000;
For glibc: go 0x800d0000 /umips/eb/vmlinux rootdelay=20 root=/dev/sda2 rw
For uclibc: go 0x800d0000 /umips/eb/vmlinux rootdelay=20 root=/dev/sda6 rw
20
MIPS® SEAD™-3 Board Getting Started, Revision 01.01
Copyright © 2009 MIPS Technologies Inc. All rights reserved.
6 Linux Boot
microMIPS Kernel for Little Endian Mode:
copy 0xbfa00000 0x800d0000 0x21000;
For glibc: go 0x800d0000 /umips/el/vmlinux rootdelay=20 root=/dev/sda3 rw
For uclibc: go 0x800d0000 /umips/el/vmlinux rootdelay=20 root=/dev/sda7 rw
MIPS32 Kernel for Big Endian Mode:
copy 0xbfa00000 0x800d0000 0x21000;
For glibc: go 0x800d0000 /mips32/eb/vmlinux rootdelay=20 root=/dev/sda8 rw
For ulibc: go 0x800d0000 /mips32/eb/vmlinux rootdelay=20 root=/dev/sda10 rw
MIPS32 Kernel for Little Endian Mode:
copy 0xbfa00000 0x800d0000 0x21000;
For glibc: go 0x800d0000 /mips32/el/vmlinux rootdelay=20 root=/dev/sda9 rw
For ulibc: go 0x800d0000 /mips32/el/vmlinux rootdelay=20 root=/dev/sda11 rw
For ease of use, here are the pre-defined YAMON environment variables pre-set by MIPS:
1.
The first step is to set the boot load command to “1”:
set l: copy 0xbfa00000 0x800d0000 0x21000; go 0x800d0000
2.
The second step is to set the location of each of the Kernels:
microMIPS – set ueb: $l /umips/eb/vmlinux
microMIPS – set uel: $l /umips/el/vmlinux
MIPS32 – set meb: $l /mips32/eb/vmlinux
MIPS32 – set mel: $l /mips32/el/vmlinux
3.
The third step is to set the Hard Drive partition:
microMIPS glibc el- set uelg: rootdelay=20 root=/dev/sda3
microMIPS uclibc el- set uelu: rootdelay=20 root=/dev/sda7 rw
microMIPS glibc eb - set uebg: rootdelay=20 root=/dev/sda2
microMIPS uclibc eb - set uebu: rootdelay=20 root=/dev/sda6 rw
MIPS32 glibc el - set elg: rootdelay=20 root=/dev/sda9
MIPS32 uclibc el - set elu: rootdelay=20 root=/dev/sda11 rw
MIPS® SEAD™-3 Board Getting Started, Revision 01.01
Copyright © 2009 MIPS Technologies Inc. All rights reserved.
21
6 Linux Boot
MIPS32 glibc eb - set ebg: rootdelay=20 root=/dev/sda8
MIPS32 uclibc eb - set ebu: rootdelay=20 root=/dev/sda10 rw
4.
Finally, combine all the variables to create a single environment variable to load each of the configurations:
microMIPS Big Endian glibc - set u_geb: $ueb $uebg
microMIPS Little Endian glibc - set u_gel: $uel $uelg
microMIPS Big Endian ulibc - set u_ueb: $ueb $uebu
microMIPS Little Endian uclibc - set u_uel: $uel $uelu
MIPS32 Big Endian glibc - set m_geb $meb $ebg
MIPS32 Little Endian glibc - set m_gel: $mel $elg
MIPS32 Big Endian uclibc - set m_ueb: $meb $ebu
MIPS32 Little Endian uclibc - set m_uel: $mel $elu
6.2 Boot Linux
1.
Pre-set YAMON command to boot Linux with each of the kernels on each of the partitions:
microMIPS Big Endian glibc: $u_geb
microMIPS Little Endian glibc: $u_gel
microMIPS Big Endian ulibc: $u_uel
microMIPS Little Endian uclibc: $u_ueb
MIPS32 Big Endian glibc: $m_geb
MIPS32 Little Endian glibc: $m_gel
MIPS32 Big Endian uclibc: $m_uel
MIPS32 Little Endian uclibc: $m_ueb
2.
To boot Linux on a different port:
By default, the Kernel uses USB tttyS0 as the default port. To use the Serial TTYS1 port, add the console=ttyS1,38400n8r at the end of the boot command:
set serial port: console=ttyS1,38400n8r
22
MIPS® SEAD™-3 Board Getting Started, Revision 01.01
Copyright © 2009 MIPS Technologies Inc. All rights reserved.
7 References
7 References
1.
MIPS® SEAD™-3 Board User’s Manual
MIPS Document: MD00687
2
MIPS® SEAD™-3 Basic RTL User’s Manual
MIPS Document: MD00693
3
MIPS® SEAD™-3 Basic RTL Reference Manual
MIPS Document: MD00692
4
SEAD™-3 IO Processor User’s Manual
MIPS Document: MD00630
5
SEAD™-3 Board Schematics
MIPS Document: MD00648
6
YAMON™ User’s Manual
MIPS Document: MD00008
8 Revision History
Revision
Date
Description
01.00
November 2, 2009
First version.
01.01
March 30, 2010
Added information on board setup and
Linux boot.
MIPS® SEAD™-3 Board Getting Started, Revision 01.01
Copyright © 2009 MIPS Technologies Inc. All rights reserved.
23
Copyright © 2009 MIPS Technologies, Inc. All rights reserved.
Unpublished rights (if any) reserved under the copyright laws of the United States of America and other countries.
This document contains information that is proprietary to MIPS Technologies, Inc. ("MIPS Technologies"). Any copying, reproducing, modifying or use of
this information (in whole or in part) that is not expressly permitted in writing by MIPS Technologies or an authorized third party is strictly prohibited. At a
minimum, this information is protected under unfair competition and copyright laws. Violations thereof may result in criminal penalties and fines.
Any document provided in source format (i.e., in a modifiable form such as in FrameMaker or Microsoft Word format) is subject to use and distribution
restrictions that are independent of and supplemental to any and all confidentiality restrictions. UNDER NO CIRCUMSTANCES MAY A DOCUMENT
PROVIDED IN SOURCE FORMAT BE DISTRIBUTED TO A THIRD PARTY IN SOURCE FORMAT WITHOUT THE EXPRESS WRITTEN
PERMISSION OF MIPS TECHNOLOGIES, INC.
MIPS Technologies reserves the right to change the information contained in this document to improve function, design or otherwise. MIPS Technologies does
not assume any liability arising out of the application or use of this information, or of any error or omission in such information. Any warranties, whether
express, statutory, implied or otherwise, including but not limited to the implied warranties of merchantability or fitness for a particular purpose, are excluded.
Except as expressly provided in any written license agreement from MIPS Technologies or an authorized third party, the furnishing of this document does not
give recipient any license to any intellectual property rights, including any patent rights, that cover the information in this document.
The information contained in this document shall not be exported, reexported, transferred, or released, directly or indirectly, in violation of the law of any
country or international law, regulation, treaty, Executive Order, statute, amendments or supplements thereto. Should a conflict arise regarding the export,
reexport, transfer, or release of the information contained in this document, the laws of the United States of America shall be the governing law.
The information contained in this document constitutes one or more of the following: commercial computer software, commercial computer software
documentation or other commercial items. If the user of this information, or any related documentation of any kind, including related technical data or manuals,
is an agency, department, or other entity of the United States government ("Government"), the use, duplication, reproduction, release, modification, disclosure,
or transfer of this information, or any related documentation of any kind, is restricted in accordance with Federal Acquisition Regulation 12.212 for civilian
agencies and Defense Federal Acquisition Regulation Supplement 227.7202 for military agencies. The use of this information by the Government is further
restricted in accordance with the terms of the license agreement(s) and/or applicable contract terms and conditions covering this information from MIPS
Technologies or an authorized third party.
MIPS, MIPS I, MIPS II, MIPS III, MIPS IV, MIPS V, MIPS-3D, MIPS16, MIPS16e, MIPS32, MIPS64, MIPS-Based, MIPSsim, MIPSpro, MIPS Technologies
logo, MIPS-VERIFIED, MIPS-VERIFIED logo, 4K, 4Kc, 4Km, 4Kp, 4KE, 4KEc, 4KEm, 4KEp, 4KS, 4KSc, 4KSd, M4K, M14K, 5K, 5Kc, 5Kf, 24K, 24Kc,
24Kf, 24KE, 24KEc, 24KEf, 34K, 34Kc, 34Kf, 74K, 74Kf, 74Kc, 1004K, 1004Kc, 1004Kf, R3000, R4000, R5000, ASMACRO, Atlas, "At the core of the
user experience.", BusBridge, Bus Navigator, CLAM, CorExtend, CoreFPGA, CoreLV, EC, FPGA View, FS2, FS2 FIRST SILICON SOLUTIONS logo, FS2
NAVIGATOR, HyperDebug, HyperJTAG, JALGO, Logic Navigator, Malta, MDMX, MED, MGB, microMIPS, OCI, PDtrace, the Pipeline, Pro Series, SEAD,
SEAD-2, SmartMIPS, SOC-it, System Navigator, and YAMON are trademarks or registered trademarks of MIPS Technologies, Inc. in the United States and
other countries.
All other trademarks referred to herein are the property of their respective owners.
Template: nW1.03, Built with tags: 2B
MIPS® SEAD™-3 Board Getting Started, Revision: 01.01
Copyright © 2009 MIPS Technologies Inc. All rights reserved.