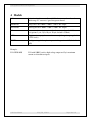
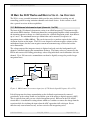
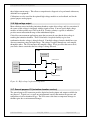
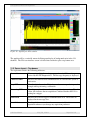
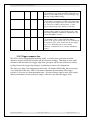
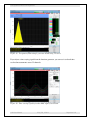
1
I128
Ionization Chamber Controller
User Manual
Pyramid Technical Consultants, Inc.
1050 Waltham Street Suite 200, Lexington, MA 02421 USA
US: TEL: (781) 402-1700 ♦ FAX: (781) 402-1750 ♦ EMAIL: [email protected]
Europe: TEL: +44 1273 492001
PSI System Controls and Diagnostics
1 Contents
1
CONTENTS ........................................................................................................................................................2
2
FIGURES ............................................................................................................................................................6
3
SAFETY INFORMATION ...............................................................................................................................8
4
MODELS ..........................................................................................................................................................10
5
SCOPE OF SUPPLY .......................................................................................................................................11
6
OPTIONAL ITEMS AND RELATED PRODUCTS ....................................................................................12
6.1
6.2
6.3
6.4
6.5
7
IONIZATION CHAMBERS ..................................................................................................................................12
POWER SUPPLIES ............................................................................................................................................12
SIGNAL CABLES AND CABLE ACCESSORIES .....................................................................................................12
DATA CABLES.................................................................................................................................................12
TRIGGER DISTRIBUTION ..................................................................................................................................13
INTENDED USE AND KEY FEATURES .....................................................................................................14
7.1
7.2
INTENDED USE ...............................................................................................................................................14
KEY FEATURES ..............................................................................................................................................14
8
SPECIFICATION ............................................................................................................................................16
9
INSTALLATION .............................................................................................................................................23
9.1 MOUNTING .....................................................................................................................................................23
9.2 GROUNDING AND POWER SUPPLY ...................................................................................................................23
9.3 CONNECTION TO SIGNAL SOURCE ...................................................................................................................24
9.3.1
Typical setup ........................................................................................................................................24
9.3.2
Cables ..................................................................................................................................................27
9.3.3
Signal current path ..............................................................................................................................27
10
HOW THE I128 WORKS AND HOW TO USE IT - AN OVERVIEW......................................................30
10.1
10.2
10.3
10.4
10.5
10.6
10.7
10.8
10.9
10.10
10.11
10.12
10.13
11
MULTICHANNEL ELECTROMETER INPUT (CHANNELS 1 TO 128)..................................................................30
INTEGRAL PLANE ELECTROMETER INPUT (CHANNEL 0 - HCC) ...................................................................31
ACQUISITION MODES .................................................................................................................................32
TRIGGERING ..............................................................................................................................................32
SELF-TESTING AND CALIBRATION ..............................................................................................................32
HIGH VOLTAGE OUTPUT .............................................................................................................................33
GENERAL-PURPOSE I/O (IONIZATION CHAMBER SERVICES) .......................................................................33
GENERAL-PURPOSE I/O (ACTUATOR CONTROL) .........................................................................................34
MAP EXECUTION AND INTERLOCKING ........................................................................................................34
CONTROLLING REMOTE DEVICES – FIBER OPTIC INTERFACES .....................................................................34
MONITOR UNIT OUTPUT .............................................................................................................................35
COMMUNICATION TO THE HOST COMPUTER ...............................................................................................36
EMBEDDED SOFTWARE ..............................................................................................................................36
GETTING STARTED USING THE PTC DIAGNOSTIC G2 HOST PROGRAM ...................................37
11.1
INSTALLATION ...........................................................................................................................................37
I128 User Manual
I128_UM_141014
Page 2 of 121
PSI System Controls and Diagnostics
11.2
CONNECTING TO THE I128 .........................................................................................................................38
11.3
SCREEN LAYOUT – TOP BANNER................................................................................................................42
11.4
SCREEN LAYOUT – RIGHT-HAND TABS .......................................................................................................43
11.4.1
Data tab ..........................................................................................................................................43
11.4.2
Data analysis ..................................................................................................................................45
11.4.3
Ionization chamber .........................................................................................................................46
11.4.4
Setup................................................................................................................................................47
11.4.5
Calibration ......................................................................................................................................50
11.4.6
Interlocks.........................................................................................................................................51
11.4.7
Properties ........................................................................................................................................53
11.5
SCREEN LAYOUT - GRAPHIC DISPLAY ........................................................................................................54
11.5.1
Strip display ....................................................................................................................................55
11.5.2
Scope display ..................................................................................................................................55
11.5.3
Histogram display ...........................................................................................................................56
11.5.4
Cursor .............................................................................................................................................56
11.5.5
Filtering and zero subtraction ........................................................................................................57
11.6
DATA LOGGING ..........................................................................................................................................59
12
I128 CIRCUIT OVERVIEW ..........................................................................................................................60
12.1
PHYSICAL CONFIGURATION........................................................................................................................60
12.2
FUNCTIONS ................................................................................................................................................60
12.2.1
Signal current inputs .......................................................................................................................60
12.2.2
Calibration current switching .........................................................................................................62
12.2.3
Analog signals.................................................................................................................................62
12.2.4
Digital signals .................................................................................................................................62
12.2.5
High voltage ....................................................................................................................................63
12.2.6
Interlocks.........................................................................................................................................63
12.2.7
A60 ..................................................................................................................................................63
12.2.8
Secondary FPGA ............................................................................................................................63
12.2.9
Power supplies ................................................................................................................................64
13
HIGH VOLTAGE SUPPLIES ........................................................................................................................65
13.1
13.2
14
SAMPLES, LOGGED DATA, INTEGRATION AND AVERAGING ........................................................68
14.1
14.2
14.3
14.4
15
SETTING THE HIGH VOLTAGE SUPPLIES .....................................................................................................65
CHANGING THE HIGH VOLTAGE SUPPLY RANGE AND POLARITY ...............................................................66
READINGS AND LOGGED DATA ...................................................................................................................68
INTEGRATION TIME ....................................................................................................................................68
CONVERSIONS PER SAMPLE .......................................................................................................................69
GENERAL PURPOSE ANALOG INPUTS ..........................................................................................................70
TRIGGERS AND DATA BUFFERING.........................................................................................................71
15.1
INTERNAL TRIGGER MODE .........................................................................................................................71
15.2
DATA BUFFERS ..........................................................................................................................................71
15.2.1
I128 internal buffer .........................................................................................................................71
15.2.2
PTC DiagnosticG2 buffer ...............................................................................................................72
15.3
EXTERNAL TRIGGERING .............................................................................................................................72
15.3.1
Custom triggering ...........................................................................................................................72
15.3.2
Pre-defined trigger modes ..............................................................................................................75
15.3.3
Trigger response time .....................................................................................................................76
16
MONITOR PULSE OUTPUT ........................................................................................................................77
17
ACTUATOR CONTROL ................................................................................................................................78
I128 User Manual
I128_UM_141014
Page 3 of 121
PSI System Controls and Diagnostics
18
INTERLOCKS AND DIRECT CONTROL LINES .....................................................................................80
18.1
PROCESS CONTROL OUTPUTS .....................................................................................................................80
18.2
INTERLOCKS ..............................................................................................................................................80
18.2.1
Enable/Status ..................................................................................................................................81
18.2.2
Interlock ..........................................................................................................................................82
18.2.3
Relay ...............................................................................................................................................82
19
CONNECTING SLAVE DEVICES................................................................................................................83
20
CALIBRATION ...............................................................................................................................................84
20.1
20.2
CURRENT CALIBRATION.............................................................................................................................84
OTHER CALIBRATIONS ...............................................................................................................................84
21
PEAK FITTING ...............................................................................................................................................85
22
USING THE TRIANGLE GENERATOR TEST BOARD ...........................................................................87
23
GATE CONNECTIONS ..................................................................................................................................89
24
CONNECTORS................................................................................................................................................90
24.1
FRONT PANEL CONNECTORS ......................................................................................................................90
24.1.1
I/O port (environmental monitors) ..................................................................................................90
24.1.2
Actuator ..........................................................................................................................................91
24.1.3
HCC: High current input (channel 0) .............................................................................................91
24.1.1
Signal inputs (strip inputs) ..............................................................................................................92
24.1.2
High voltage output and input ........................................................................................................94
24.2
REAR PANEL CONNECTORS ........................................................................................................................94
24.2.1
Ethernet communications ................................................................................................................94
24.2.2
RS-232 / RS-485 communications ...................................................................................................94
24.2.3
Gate input and output .....................................................................................................................95
24.2.4
Monitor input ..................................................................................................................................95
24.2.1
Fiber-optic communications ...........................................................................................................95
24.2.2
Enable/Status port ...........................................................................................................................96
24.2.3
Interlock port ..................................................................................................................................96
24.2.4
Relay port ........................................................................................................................................96
24.2.5
Power input, 24 VDC ......................................................................................................................96
24.2.6
Ground lug ......................................................................................................................................96
25
CONTROLS AND INDICATORS .................................................................................................................97
25.1
FRONT PANEL CONTROLS ...........................................................................................................................97
25.1.1
Key switch .......................................................................................................................................97
25.2
REAR PANEL CONTROLS.............................................................................................................................97
25.2.1
Address switch.................................................................................................................................97
25.2.2
Mode switch ....................................................................................................................................97
25.2.3
Reset button .....................................................................................................................................98
25.3
FRONT PANEL INDICATORS ........................................................................................................................98
25.3.1
Power on .........................................................................................................................................98
25.3.2
Mode switch ....................................................................................................................................98
25.3.3
HV on ..............................................................................................................................................98
25.4
REAR PANEL INDICATORS ..........................................................................................................................98
25.4.1
Power ..............................................................................................................................................98
25.4.2
Initiated ...........................................................................................................................................98
25.4.3
Active ..............................................................................................................................................98
25.4.4
Com .................................................................................................................................................98
I128 User Manual
I128_UM_141014
Page 4 of 121
PSI System Controls and Diagnostics
25.4.5
25.4.6
26
COMMUNICATIONS INTERFACES ........................................................................................................100
26.1
26.2
26.3
26.4
26.5
27
Power up LED sequence .................................................................................................................99
RJ-45 indicators ..............................................................................................................................99
ETHERNET ...............................................................................................................................................100
WEB SERVER ...........................................................................................................................................100
RS-232 CONNECTION ..............................................................................................................................101
RS-485 CONNECTION EXAMPLE ...............................................................................................................102
FIBER OPTICS ...........................................................................................................................................102
USING THE I128 ON A NETWORK ..........................................................................................................104
27.1
NETWORK CONFIGURATIONS ...................................................................................................................104
27.2
RECOVERY FROM UNKNOWN IP ADDRESS ...............................................................................................105
27.2.1
Reset at boot time ..........................................................................................................................105
27.2.2
Using the serial port .....................................................................................................................106
27.3
SYSTEM LOG ADDRESS.............................................................................................................................106
28
ASCII COMMUNICATION .........................................................................................................................107
28.1
USING PUTTY TO TEST THE SERIAL ASCII CONNECTION ........................................................................107
29
CREATING A HOST SOFTWARE APPLICATION ................................................................................109
30
FAULT-FINDING..........................................................................................................................................110
31
MAINTENANCE ...........................................................................................................................................115
31.1
31.2
COOLING FAN MAINTENANCE ..................................................................................................................115
CALIBRATION ..........................................................................................................................................116
32
RETURNS PROCEDURE.............................................................................................................................117
33
SUPPORT .......................................................................................................................................................118
34
DISPOSAL ......................................................................................................................................................119
35
DECLARATION OF CONFORMITY ........................................................................................................120
36
REVISION HISTORY ...................................................................................................................................121
I128 User Manual
I128_UM_141014
Page 5 of 121
PSI System Controls and Diagnostics
2 Figures
Figure 1. Serial adaptor cable..................................................................................................................................12
Figure 2. I128 front and rear panels. Dimensions mm. .......................................................................................21
Figure 3. I128 case plan and side views. Dimensions mm.....................................................................................22
Figure 4. Schematic example: basic I128 installation ............................................................................................25
Figure 5. Schematic example: I128 installation for dual IC128-25 ionization chambers ...................................26
Figure 6. Current return path: ionization chamber bias provided by HV module in the I128..........................28
Figure 7. Current return path: ionization chamber bias provided separate HV module ..................................29
Figure 8. Multichannel electrometer input (one of 128 identical parallel inputs, ch1 to 128) ...........................30
Figure 9. HCC (integral plane, ch0) electrometer input........................................................................................31
Figure 10. High voltage loopback arrangement .....................................................................................................33
Figure 11. Schematic example: I128 control of remote devices ............................................................................35
Figure 12. PTC DiagnosticG2 installation ..............................................................................................................38
Figure 13. Direct Ethernet connection. ...................................................................................................................39
Figure 14. Configuring the IP address on the host computer. ..............................................................................39
Figure 15. Ping test of the Ethernet connection. ....................................................................................................40
Figure 16. Discover devices in progress ..................................................................................................................41
Figure 17. Ready to connect to the I128 .................................................................................................................41
Figure 18. Opening the I128 window ......................................................................................................................42
Figure 19. HCC graphic displayed ..........................................................................................................................44
Figure 20. Data analysis display – I128 and PTC DiagnosticG2 calculations .....................................................45
Figure 21. Ionization chamber tab ..........................................................................................................................46
Figure 22. Setup - Measuring sub-tab...................................................................................................................47
Figure 23. Setup - Trigger sub-tab ........................................................................................................................48
Figure 24. Setup - HCC sub-tab ............................................................................................................................49
Figure 25. Calibration source control .....................................................................................................................50
Figure 26. Current input calibrations .....................................................................................................................51
Figure 27. Interlock test functions...........................................................................................................................52
Figure 28. Firmware versions ..................................................................................................................................53
Figure 29. Communication settings .........................................................................................................................53
Figure 30. IP Configuration control........................................................................................................................54
Figure 31. Graphics display with HCC display enabled. ......................................................................................55
Figure 32. Scope mode capture of a pulse...............................................................................................................56
Figure 33. Strip chart data display showing cursor...............................................................................................57
Figure 34. Increasing the low pass filtering of the displayed data........................................................................58
Figure 35. Zero correction of displayed data .........................................................................................................59
Figure 36. I128 physical layout. ...............................................................................................................................60
Figure 37. I128 block schematic. .............................................................................................................................62
Figure 38. High voltage jumper settings .................................................................................................................66
Figure 39. Data feed into samples............................................................................................................................69
Figure 40. Contiguous data number of samples as a function of input data rate................................................72
Figure 41. Signal and trigger used for custom trigger examples ..........................................................................73
Figure 42. Time-varying signal seen in internal mode ...........................................................................................74
Figure 43. Time-varying signal seen in custom buffered mode.............................................................................74
Figure 44. Using trigger signals and burst size to capture a portion of the signal ..............................................75
Figure 45. Examples of monitor output pulse: TTL (left), transformer-coupled (right). ...................................77
Figure 46. I128 actuator control circuit. .................................................................................................................78
Figure 47. Actuator connections for 24 VDC solenoid. .........................................................................................79
Figure 48. Interlock relays in series on multiple devices wired for current loop (top) or 24 V logic (bottom). 81
Figure 49. Enabled/Status interface. .......................................................................................................................81
Figure 50. Interlock interface. .................................................................................................................................82
Figure 51. Relay interface. .......................................................................................................................................82
I128 User Manual
I128_UM_141014
Page 6 of 121
PSI System Controls and Diagnostics
Figure 52.
Figure 53.
Figure 54.
Figure 55.
Figure 56.
Figure 57.
Figure 58.
Figure 59.
Figure 60.
Figure 61.
Figure 62.
Figure 63.
Figure 64.
Figure 65.
Figure 66.
Figure 67.
I128 with two M10 general purpose I/O devices connected as slaves on loop 1 ................................83
I128 real time peak fitting ......................................................................................................................85
Triangle generator test board................................................................................................................87
Test pattern from triangle generator board using 5V source .............................................................88
Time varying signal injected to BNC input of test board....................................................................88
Alternative methods for long-distance trigger delivery: 50 ohm line (top), fiber optic (bottom) ....89
Gate passthrough latency: gate in (yellow), gate out (blue) ...............................................................89
Interrogating the I128 via a web browser. .........................................................................................101
RS-232 cable I128 to PC. .....................................................................................................................101
RS-485 cable I128 to TC100. ...............................................................................................................102
Direct Ethernet connection ..................................................................................................................104
Connection via switch ..........................................................................................................................105
Network including router ....................................................................................................................105
Setup of PuTTY for ASCII serial communication with the I128. ....................................................107
Fan filter removal .................................................................................................................................115
Fan power connector (2 pin Molex) ....................................................................................................116
I128 User Manual
I128_UM_141014
Page 7 of 121
PSI System Controls and Diagnostics
3 Safety Information
This unit is designed for compliance with harmonized electrical safety standard EN610101:2000. It must be used in accordance with its specifications and operating instructions.
Operators of the unit are expected to be qualified personnel who are aware of electrical safety
issues. The customer’s Responsible Body, as defined in the standard, must ensure that operators
are provided with the appropriate equipment and training.
The unit is designed to make measurements in Measurement Category I as defined in the
standard.
CAUTION. According to installed options, the I128 can generate high voltages as follows,
present on the central conductor of the SHV (Safe High Voltage) output connector:
+ or – 2000 V DC at 0.5 mA maximum.
or
+ or – 1000 V DC at 1.0 mA maximum
or
+ or – 500 V DC at 2.0 mA maximum
The hazardous live voltages on the SHV central conductor are not accessible under the
definitions of EN61010 but may nevertheless give a noticeable shock if misuse were to lead you
to come into contact with them. The user must therefore exercise appropriate caution when using
the device and when connecting cables. Power should be turned off before making any
connections.
The unit must not be operated unless correctly assembled in its case. Protection from high
voltages generated by the device will be impaired if the unit is operated without its case. Only
Service Personnel, as defined in EN61010-1, should attempt to work on the disassembled unit,
and then only under specific instruction from Pyramid Technical Consultants, Inc..
The unit is designed to operate from +24VDC power, with a typical maximum current
requirement of 1000 mA. A suitably rated power supply module is available as an option. Users
who make their own power provision should ensure that the supply cannot source more than
3000 mA.
A safety ground must be securely connected to the ground lug on the case.
Some of the following symbols may be displayed on the unit, and have the indicated meanings.
I128 User Manual
I128_UM_141014
Page 8 of 121
PSI System Controls and Diagnostics
Direct current
Earth (ground) terminal
Protective conductor terminal
Frame or chassis terminal
Equipotentiality
Supply ON
Supply OFF
CAUTION – RISK OF ELECTRIC SHOCK
CAUTION – RISK OF DANGER – REFER TO MANUAL
I128 User Manual
I128_UM_141014
Page 9 of 121
PSI System Controls and Diagnostics
4 Models
I128
Ionization chamber controller with 128 electrometer channels, and one
multi-range I-V converter / gated integrator channel.
-XP20/10/5
Add positive 0 to 2000V / 1000 V / 500 V HV output
-XN20/10/5
Add negative 0 to 2000V / 1000 V / 500 V HV output
-Mxx
Increase maximum input current for electrometer channels 1-128 to xx
µA (options 2 µA, 5 µA, 10 µA, 20 µA; default is 550 nA)
-MPN
Monitor unit output pulses transformer-coupled negative-going (default
is TTL levels).
-DSUM
Configure integral dose plane input switching as A or A+B (default is A
or B)
Example:
I128-XP10-M05
I128 User Manual
I128 with 1000V positive high voltage output and 5 µA maximum
current on electrometer inputs.
I128_UM_141014
Page 10 of 121
PSI System Controls and Diagnostics
5 Scope of Supply
I128 model as specified in your order.
PSU24-40-1R 24 VDC power supply with Redel locking connector.
ADAP-D9F-MINIDIN D9 to mini-DIN adaptor for serial communications
ADAP-LEMO-BNC Lemo 00 to BNC coaxial adaptor for gate input
USB memory stick containing:
I128 User manual
PTC DiagnosticG2 software installation files
Test data
Optional items as specified in your order.
OEM customers will receive only components relevant to their application.
I128 User Manual
I128_UM_141014
Page 11 of 121
PSI System Controls and Diagnostics
6 Optional Items and related products
6.1 Ionization chambers
IC128-25 Low-scattering ionization chamber for high-energy positive ion beams with 25 by 25
cm sensitive area, 128 readout strips in each axis and integral readout plane.
IC64-16-2I Low-scattering ionization chamber for high-energy positive ion beams with 16 by 16
cm sensitive area, 64 readout strips in each axis and two integral readout planes.
6.2 Power supplies
PSU24-40-1R +24 VDC 40W PSU (universal voltage input, plug receptacle for standard IEC
C14 three-pin socket) with output lead terminated in two-pin Redel PAG connector.
CAB-LR-3-REDEL Cable Switchcraft LR 2.1mm jack to Redel PAG connector.
PD-8 Eight output +24 VDC power supply unit, 19” rack mounting.
6.3 Signal cables and cable accessories
CAB-D44M-xxLN-D44F Cable, multiway low-noise, DSub 44 pin male to DSub 44 way
female, xx feet long.
CAB-L304M-xxLN-L304M Cable multiway low-noise, Lemo 0B 4-pin to Lemo 0B 4-pin, xx
feet long.
CAB-SHV-xx-SHV Cable, coaxial HV, SHV to SHV, xx feet long.
6.4 Data cables
ADAP-D9F-MINIDIN RS-232 6 pin DIN male to 9 pin D sub female adaptor.
Figure 1. Serial adaptor cable
CAB-ST-xxP-ST Fiber-optic cable 1 mm plastic fiber ST terminated with color-coded sleeves,
xx feet long.
I128 User Manual
I128_UM_141014
Page 12 of 121
PSI System Controls and Diagnostics
CAB-ST-xxHCS-ST Fiber-optic cable pair 200 µm silica fiber ST terminated with color-coded
sleeves, xx feet long.
6.5 Trigger distribution
X22 Bi-directional optical to TTL converter
CAB-L00-xx-L00 Cable, coaxial, Lemo 00 to Lemo 00. xx feet long
I128 User Manual
I128_UM_141014
Page 13 of 121
PSI System Controls and Diagnostics
7 Intended Use and Key Features
7.1 Intended Use
The I128 is intended to provide complete readout and control for position-sensitive ionization
chambers. A single I128 can read out a 64 by 64 cathode strip chamber which also includes an
integral plane cathode. Two I128s can read out a 128 by 128 strip chamber and two integral
planes. Such chambers are typically used to provide beam analysis in particle beam therapy
systems. The integral plane input provides a choice of I-V converter or gated integrator
operation. The former is particularly suited to measurement of continuous beams such as those
delivered by isochronous cyclotrons or slow extraction synchrotrons, and the latter is particularly
suited to measurement of pulsed beams such as those delivered by synchrocyclotrons or fastcycling synchrotrons.
In order to convert measured currents from such ion chambers to the current in the ion beam
passing through the chamber, it is necessary to know the beam energy, the chamber geometry, the
filling gas constituents, and the filling gas pressure and temperature. The I128 includes inputs
that allow it to measure the pressure and temperature directly using sensors that may be
integrated in the chamber. The translation to beam current is typically carried out by the host
computer system.
The I128 can of course by used in any application where a large number of small positive
currents must be simultaneously measured.
The I128 includes a powerful real-time processor which allows it to analyze incoming data as
fast as it is gathered. Interlock decisions can be made based on these analyses, and the condition
of integrated relays can be set accordingly.
The I128 provides fiber-optic communication channels which allow it to control slave devices.
A complete system can be built up around a single I128 in many cases. The fiber-optic channels
can also communicate peer-to-peer with other controllers in larger systems.
The I128 has design features which make it tolerant of electrically noisy environments, but the
place of use is otherwise assumed to be clean and sheltered, for example a laboratory or light
industrial environment. The unit may be used stand-alone, or networked with other devices and
integrated into a larger system. Users are assumed to be experienced in the general use of
precision electronic circuits for sensitive measurements, and to be aware of the dangers that can
arise in high-voltage circuits.
7.2 Key Features
Single highly-integrated and compact device providing all services needed for a positionsensitive ionization chamber.
One hundred and twenty eight fully-parallel electrometer channels.
I128 User Manual
I128_UM_141014
Page 14 of 121
PSI System Controls and Diagnostics
One multi-range current to voltage converter channel (channel 0). By software selection this can
be operated as an I-V converter or as a gated integrator, according to need.
Channel 0 can be switched under software control to take signal from one of two connector pins
with the other grounded. A build-time option allows channel 0 to be switched under software
control to take signal from one of two connector pins, or from both connector pins combined.
Optional high voltage output for detector biasing with remote loopback for verification.
General purpose parallel input/output port with analog and digital lines, available for ionization
chamber monitoring or other purposes.
Pneumatic actuator control port.
Interlock inputs and outputs including one safety-rated relay.
Key-switch to select therapy or experimental modes in medical applications.
Gate input and output for triggering on external events, and trigger distribution.
Monitor output for dosimetry monitor unit (MU) pulse output.
Ethernet interface with TCP/IP and UDP messaging.
Alternative RS-232, RS-485 and fast fiber-optic serial interfaces built-in. Selectable baud rates.
Slave devices can be connected to the I128 via the fiber optic interface.
I128 User Manual
I128_UM_141014
Page 15 of 121
PSI System Controls and Diagnostics
8 Specification
Electrometer inputs
Number
One hundred and twenty-eight, independent parallel
Input impedance
< 3 kohm
Dynamic current range
-50 nA to +550 nA typical, all integration times.
Higher current ranges achieved by input current division can be
chosen as factory-configuration options.
Dynamic charge range
32 pC (55 usec integration) to 500 pC (1 msec integration)
Longer accumulations up to 0.255 sec achieved by numerical
summation.
Noise charge
<= 0.1 pC rms typical at 100 µsec integration, no averaging
<= 0.05 pC rms typical at 1000 µsec integration, no averaging
Input offset current
< 10 pA (+ or -) before zero correction
Offset drift
< 2 pA over one hour, after stabilisation and with temperature
maintained to +/- 2 C. measured with 1 msec integration, 100
sample per reading.
Integration time range
55, 60, 75, 100, 125, …. 975, 1000 µsec
Gain uniformity
Better than 0.1% across all channels after calibration
Calibration current
500.00 +/- 0.1 nA; temperature coefficient <= 5 ppm C-1
Digitization
20 bit delta-sigma, conversion rate linked to integration period.
Conversion rate
18.1 kSa/s maximum
Simultaneity
All channels converted at once (within 200 nsec)
Integral plane input (I-V converter mode)
Number
One (software selectable alternative to gated integrator)
Input impedance
< 1 ohm
Dynamic range
+/- 20 µA down to < +/- 1 nA
Input offset current
< 1 nA (+ or -) before zero correction
Offset drift
< 0.01% relative to full scale in use over one hour, after
stabilisation and with environmental temperature maintained to
I128 User Manual
I128_UM_141014
Page 16 of 121
PSI System Controls and Diagnostics
+/- 2 C.
Ranges
Four; 20 µA, 10 µA, 5 µA, 1 µA
Calibration current
2.5000 +/- 0.0005 nA; temperature coefficient <= 5 ppm C-1
External accuracy
Better than 0.05% of full scale in use
Digitization
16 bit, 250 kSa/s
Downsampling
Block averaging to match the electrometer inputs averaging
time.
Integral plane input (gated integrator mode)
Number
One (software selectable alternative to I-V converter)
Input impedance
< 3 kohm
Dynamic current range
< 1 pA to > 100 µA
Dynamic charge range
< 0.1 pC to >10 nC
Input offset current
< 6 pA (+ or -) before zero correction
Offset drift
< 0.5 pA over one hour, after stabilisation and with
environmental temperature maintained to +/- 2 C; measured
with 10 pF feedback and 100 msec integration.
Noise charge
<= 0.01 pC rms typical at 100 µsec integration, no summation
<= 0.02 pC rms typical at 1000 µsec integration, no summation
Integration time range
55 µsec to 1 msec
Feedback capacitors
100 pF and 3400 pF
Calibration current
500.00 +/- 0.1 nA; temperature coefficient <= 5 ppm C-1
External accuracy
Better than 0.1% of full scale in use
Digitization
16 bit, conversion rate linked to integration period
Environmental monitor / general purpose I/O port
Number
One
Inputs
Three differential analog inputs +/- 10 VDC (for temperature,
pressure and humidity sensing, or other purposes)
Four TTL digital inputs (for general use)
Outputs
Two analog outputs +/-10 VDC (for general use)
Four TTL digital outputs (for remote MUX control or other
purposes)
Actuator control
Number
I128 User Manual
One.
I128_UM_141014
Page 17 of 121
PSI System Controls and Diagnostics
Outputs
Potential free relay contact pair.
+24 VDC output and return.
Inputs
Two opto isolator inputs for limit switch readback.
High voltage outputs
Number
One.
Output power
1 watt
Voltage options
20 to 200 V. Line <0.01%, Load <0.05%, Ripple <0.01%
50 to 500 V. Line <0.01%, Load <0.01%, Ripple <0.01%
100 to 1250 V. Line <0.001%, Load <0.005%, Ripple <0.001%
200 to 2000 V Line <0.01%, Load <0.01%, Ripple <0.001%
HV monitoring
Independent loopback HV input
Monitor unit output
Number
One
Levels
TTL levels into minimum impedance of 50 ohm, or
Transformer-coupled +2.5 V into 50 ohm (build-time option)
Pulse width
50 nsec TTL
Charge increment
User-defined charge measured on integral plane input will
result in one monitor pulse.
Triggers and gating
Trigger modes
Internal (autorun)
Custom control of start, pause and stop conditions using gate
input and internal buffer counts.
Gate input
TTL levels into 10 kohm
Gate output (passthrough)
TTL levels into minimum impedance of 50 ohm
Latency
Less than 50 nsec between gate input and gate output
Interlocks
Safety relay
Potential-free safety-rated relay contact pair (for use in critical
external safety interlock chain).
Relays
General purpose relay contact pair (for general external
interlock use) with internal sensing of relay state.
General purpose relay contact pair (for signalling “enabled”
state of the I128 to external devices)
Enable input
I128 User Manual
Opto-isolated digital input (for receiving command for the I128
I128_UM_141014
Page 18 of 121
PSI System Controls and Diagnostics
to go to “enabled” state)
Communication interfaces
Ethernet
Ethernet 10/100 Base T, TCP/IP and UDP
RS-232
115.2 kbps, serial
RS-485
115.2 kbps, serial
Fiber optic
10 Mbps, binary serial protocol.
For integrating into Pyramid systems architectures.
Controls and indicators
Controls
Normal mode / diagnostic mode keyswitch, front panel.
Position of switch can be sensed directly by external devices
via potential-free contact pair.
Rotary switches for communications mode and fiber optic loop
address, rear panel
Push button processor reset, rear panel
Indicators
Power on illuminated logo, front panel
Eight green status LEDs, rear panel
Power input
Voltage
+24 VDC (+/-2 V)
Current
380 mA typical, 750 mA maximum.
Case
Format and materials
1U 19” 250 mm deep rack mounting steel chassis with Al alloy
front panel and polycarbonate decals.
Fan-cooled.
Protection rating
The case is designed to rating IP43 (protected against solid
objects greater than 1mm in size, protected against spraying
water).
Weight
3.5 kg (7.7 lb)
Dimensions
(see figures 1 and 2).
Environment
Operating
10 to 35 C (20 to 30 C recommended)
< 70% humidity, non-condensing
vibration < 0.1g all axes (1 to 1000Hz)
Shipping and storage
-10 to 50C
< 80% humidity, non-condensing
I128 User Manual
I128_UM_141014
Page 19 of 121
PSI System Controls and Diagnostics
vibration < 2 g all axes, 1 to 1000 Hz
I128 User Manual
I128_UM_141014
Page 20 of 121
PSI System Controls and Diagnostics
I-V AMPLIFIER INPUT (LEMO)
CHANNELS 1-32 (HD44)
"OVERRIDE-ON" LED
ACTUATOR (DB9)
I/O (DB25)
KEY-SWITCH
CHANNELS 33-64
CHANNELS 65-96
CHANNELS 97-128
HV OUT (SHV)
HV IN (SHV)
43.7
(1U)
"HV-ON" LED
482.6
(19")
COMMS SELECTOR
RS-485/232
ADDRESS SELECTOR
ETHERNET
3X FIBER-OPTIC RX ST
3X FIBER-OPTIC TX ST
+24VDC
POWER IN (LEMO-REDEL PXG)
M4 GROUND LUG
RESET SWITCH
STATUS LEDs
GATE IN (LEMO)
RELAY OUT
INTERLOCK
ENABLE/ENABLED
GATE OUT
MONITOR OUT
Figure 2. I128 front and rear panels. Dimensions mm.
I128 User Manual
I128_UM_141014
Page 21 of 121
PSI System Controls and Diagnostics
43.6
(1U)
42.6
19.3
482.6
(19")
448.0
221.0
248.8
3.0
Figure 3. I128 case plan and side views. Dimensions mm.
I128 User Manual
I128_UM_141014
Page 22 of 121
PSI System Controls and Diagnostics
9 Installation
9.1 Mounting
The I128 is intended for 19” rack mounting, but may be mounted in any orientation, or may be
simply placed on a level surface. A fixed mounting to a secure frame is recommended in a
permanent installation for best low current performance, as this can be degraded by movement
and vibration. The length of signal cables from the sensor to the I128 should be minimized for
optimum signal to noise ratio, but you should also attempt to keep the I128 out of known high
radiation zones close to a beamline. For best performance we recommend a maximum cable run
of 10 metres and the use of low-noise cable.
The mounting position should allow sufficient access to connectors and cable bend radii. 60 mm
minimum clearance is recommended at front and back of the device.
Best performance will be achieved if the I128 is in a temperature-controlled environment. No
forced-air cooling is required in addition to the unit’s built-in fan, but free convection should be
allowed around the back and sides of the case.
9.2 Grounding and power supply
A secure connection should be made using a ring lug, from the M3 ground lug to local chassis
potential. This is the return path for any high voltage discharge passing via the I128.
+24 VDC power should be provided from a suitably-rated power supply with the following
minimum performance:
Output voltage
+24 +/- 0.5 VDC
Output current
1000 mA minimum, 3000 mA maximum
Ripple and noise
< 100 mV pk-pk, 1 Hz to 1 MHz
Line regulation
< 240 mV
The I128 includes an internal automatically re-setting PTC fuse rated at 1.1 A. However the
external supply should in no circumstances be rated higher than the connector limit of 5 A.
I128 User Manual
I128_UM_141014
Page 23 of 121
PSI System Controls and Diagnostics
9.3
Connection to signal source
9.3.1 Typical setup
Figure 4 shows an example installation in schematic form. A 64 by 64 strip position-sensing
ionization chamber includes strip electrodes for reading out the position of a high-energy particle
beam, and an integral plane electrode for measuring the total current. The x-axis strips are
connected to channels 1-64 and the y-axis strips to channels 65-128. The integral plane is
connected to the channel 0 (“high current channel”, HCC) input.
When thinking about the current measurement range you will require, you need to include the
gain of the ionization chamber, the size of the beam and the dimensions of readout electrodes.
Gain is typically in the range 30 to 200 for high energy ions which pass through a parallel plate
ionization chamber at normal incidence, depending on electrode spacing, fill gas pressure and ion
species and energy. Thus a beam current of 1 nA for example and a chamber gain of 100 would
produce a measureable total signal of 100 nA. A strip readout electrode where the beam covered
around 10 strips full width would give individual strip currents of 20 to 30 % of this total, thus
20 to 30 nA.
HV is delivered to the high voltage planes and sampled by an independent loopback cable.
Environmental sensors, such as provided in the IC128-25 ionization chamber are connected to
the sensor signals input of the I128.
The I128 delivers data and receives commands from a host computer system over Ethernet. In its
turn the I128 can control slave devices such as the M10 general purpose I/O unit. This can be
used to form a control loop, where some remote device is adjusted in response to the signals
measured by the I128.
A trigger input to the gate connector allows measurements to be synchronized to an external
event such as a “beam present” signal. Hardware interlock signals generated by the I128
(potential-free contacts or 24 V logic) are routed directly to one or more beam abort systems.
The decisions to open these interlocks are made by the I128, for example by comparing beam
position, shape or current to target values, or as a result of internal errors.
The I128 can generate an output “monitor unit” pulse each time it measures a defined increment
of charge, which may be used to drive an independent counter or sounder.
I128 User Manual
I128_UM_141014
Page 24 of 121
PSI System Controls and Diagnostics
Environmental
sensor signals
+24V in
Ionization
chamber
T
P
H
Integral
plane signal
Interlocks
X strip
signals
Y strip
signals
I128
Fiber comms
to slave
device
MU out
Gate in
LAN
HV out / in
Figure 4. Schematic example: basic I128 installation
It is often the case that redundant ion chambers are required in a system for safety. Thus we may
need multiple I128 units. For example, if you have two chambers, each with 128 strips in each
position-sensing axis and an integral plane, such as the IC128-25 chamber, then you would
require a total of four I128s to read them out, as shown in figure 5.
I128 User Manual
I128_UM_141014
Page 25 of 121
PSI System Controls and Diagnostics
Remote device
control
Synch message
Trig in
LAN
Anode 2 HV feed/sense
Env. sensors
Ilok in
LAN
128 X-axis signals
Integral
signal
128 Y-axis
signals
Anode 1 HV feed/sense
LAN
Anode 2 HV feed/sense
Env. sensors
LAN
128 X-axis signals
Ilok out
Integral
signal
Env sense
128 Y-axis
signals
Anode 1 HV feed/sense
Figure 5. Schematic example: I128 installation for dual IC128-25 ionization chambers
In this example we are supplying HV to two independent anode planes in each ionization
chamber assembly, one biasing the X-Y strip readout section and the other biasing the integral
plane section. Primary and redundant environmental sensors (temperature, pressure and
humidity) are being monitored in each ionization chamber assembly. Each I128 reads out one
axis of position sensing, thus we need two per chamber in this case.
The integral plane input (called the HCC in the PTC Diagnostic host software system) is only
used in two of the I128s in this example. It can be used in I-V converter circuit configuration or
gated integrator configuration, as required, to best suit the particle beam current level and time
structure. Some ion chamber assemblies include two integral planes, in which case all the
available integral plane inputs would be used.
I128 User Manual
I128_UM_141014
Page 26 of 121
PSI System Controls and Diagnostics
A hardware trigger signal routes to all the I128s via the gate in / gate out connectors. A system
hardware interlock signal, such as a 20 mA current loop or 24 VDC logic signal passes through
all the I128s. Two further relays are available in each I128, which can be used for different
system interlock levels (not illustrated in the example). A synchronization message, which can
be initiated by the first I128 as shown, or received from another controller such as an A560, is
used to ensure that all the I128s are coordinated in map execution. All the I128s connect to a
local area network, and they receive maps from and deliver data to the relevant servers on the
network.
Each I128 has inputs for environmental sensors that measure the ionization chamber conditions,
and thus it can perform real time correction for temperature and pressure, or it can tag the
measured signals with these values. Other features that could be used in such a system, some
shown earlier in figure 4, include monitor unit signal outputs, additional interlock loops to allow
various levels of shutdown response, control of remote devices via fiber optic, and pneumatic
actuator control.;
9.3.2 Cables
The I128 measures small signals, down to below 1 nA. Cable quality is vital to obtaining good
noise performance. Well-made screened cables are essential for the current inputs, and you
should try to minimize the length, while being mindful to remove the I128 from any areas with a
high radiation background. If there is any risk of vibration or movement, then the use of lownoise anti-triboelectric cables is strongly recommended for the 128 electrometer inputs and the
single channel integral input. You can order suitable 44-way and 4-way terminated cables to
specified length from Pyramid Technical Consultants, Inc.
The high voltage cable should be coaxial with a DC rating sufficient for the maximum voltage
you expect to use. RG-59 is a good choice, with a DC rating of 2.1 kV. However many
photomultipliers do not require a voltage this high, and use a smaller coaxial cable such as RG316 for convenience. SHV connectors that accept this smaller cable size are available from
Pasternack (PE4498) and Tyco (5051426-8 and 51426-8).
Trigger signals to and from the gate connectors should be sent in 50 ohm coaxial cable such as
RG-174 or RG-316. You can use the widely-available RG-58 coaxial cable with BNC
connectors, but you will need a Lemo ABF.00.250.CTA adaptor to the Lemo 00 coax connector
on the I128. This is available from various suppliers such as Digikey (# 1124-1001-ND) or
Farnell (# 3817878).
9.3.3 Signal current path
The currents measured by the I128 must be allowed to return to their point of generation.
Depending upon the application, the return path may be via the high voltage supply, and/or via
The lab ground and the I128 case. If there is no return path, then you will see no current, or
erratic readings. You may see current initially if there is no return path, especially if the signal is
small, as charge can be provided from various stray capacitances, but this may fall away or
become unstable. The currents you are measuring pass along the multiway cable cores to the I128
inputs. The current for the operational amplifier action comes from the local circuit ground via
the power supply providing the voltage rails for the amplifier devices in the I128. The circuit
I128 User Manual
I128_UM_141014
Page 27 of 121
PSI System Controls and Diagnostics
ground is called KGnd for the 128 electrometer channels, and AGnd for the separate single
channel for integral plane readout. KGnd, is connected to AGnd and to the case within the I128.
In the case of an ionization chamber or similar device, where the I128 is providing the bias to an
anode from the optional high voltage module, the subsequent return path for the current is
through the HV module (figure 6), to complete the circuit back to the anode.
Ion
chamber
I128
Zfback
Multiway screened
signal cable
+
PS
KGnd
i
Bias HV
Coaxial
HV cable
AGnd
Case
Figure 6. Current return path: ionization chamber bias provided by HV module in the I128
If you are using an external high voltage supply, then you must ensure that it shares a common
ground with the I128 to complete the current path (figure 7).
I128 User Manual
I128_UM_141014
Page 28 of 121
PSI System Controls and Diagnostics
Ion
chamber
I128
Zfback
Multiway screened
signal cable
+
Coaxial
HV cable
PS
i
KGnd
AGnd
External
bias HV
Case
Figure 7. Current return path: ionization chamber bias provided separate HV module
I128 User Manual
I128_UM_141014
Page 29 of 121
PSI System Controls and Diagnostics
10 How the I128 Works and How to Use it - An Overview
The I128 is a very powerful instrument which provides many facilities for reading out and
controlling position-sensing ionization chambers and related devices. In this section we shall
take a general overview of these capabilities.
10.1 Multichannel electrometer input (channels 1 to 128)
The heart of the 128-channel electrometer section is an ADAS integrated CT electrometer chip
and custom FPGA interface. Each input channel has an integrating amplifier which accumulates
the incoming current as charge on a small capacitor for a defined integration period, from 60 usec
up to 1 msec. The maximum current per channel that can be measured, irrespective of
integration time, is +500 to 600 nA. This can be increased as a purchase option by the addition
of current division on the inputs. The I128 is not designed to measure negative currents on the
multichannel inputs, but has some negative current measurement range to allow for baseline
noise fluctuations.
The voltage output of the integrator circuit is digitized and read out in the background for all
channels, without disrupting the accumulation of charge. The binary values are extracted by the
FPGA and converted to floating point charge values using individual stored calibrations for each
channel. Up to 256 successive accumulations can then be digitally averaged to provide longer
integration times.
Cfback
Reset
logic
Sensor
capacitance
ADC
+
Figure 8. Multichannel electrometer input (one of 128 identical parallel inputs, ch1 to 128)
Like all integrators the charge accumulating on the feedback capacitor must be removed
periodically, or the voltage would rise beyond the span of the analog to digital converter (ADC).
This is typically done once per user-selected integration period. However in the I128 ADAS
circuit there is a conditional resetting scheme which uses switches to remove the charge from the
capacitor while also isolating the input when the ADC approaches full scale input. Resets
therefore only occur when necessary, and are not tied to the integration period.
I128 User Manual
I128_UM_141014
Page 30 of 121
PSI System Controls and Diagnostics
Current still arriving during the short reset event is stored on the input capacitance (cable and
ionization chamber), and is measured when the integration recommences. This means there is
minimal dead time, and any current arriving in the dead time is anyhow measured. Digital
reconstruction produces a version of the integrator output with resets suppressed.
10.2 Integral plane electrometer input (channel 0 - HCC)
The separate single channel electrometer input, labeled channel 0, or HCC (“high current
channel”) is optimized for accurate fast dosimetry from integral plane electrodes. It provides
larger upper dynamic range and faster digitization than is possible with the multichannel inputs,
and it is fully bipolar. The data rate and averaging is coordinated with the multichannel inputs,
so that charge readings from 128 + 1 channels are taken every integration period.
The HCC can be used in one of two modes, selected by software control, and you can choose the
mode best suited to the size and time profile of your signal. One mode is a charge integrating
circuit similar to the multichannel inputs, but with more dynamic range. The feedback capacitor
resets are linked to the integration period, and there is a small deadtime during the reset. This
mode is well-suited to the measurement of small currents (less than 1 nA) at longer integration
times, and for the measurement of regular pulsed beam signals where the capacitor reset can
occur when the beam is absent. The alternative mode uses a current to voltage conversion circuit
(also called an I-V converter or transconductance amplifier). This mode is suited to higher signal
currents (from about 1 nA up to 1 mA), and to continuous signals with time variability that you
need to capture. It reads continuously with no need to reset.
Reset
control
Cfback
-
Integrator
+
ADC
Rfback
+
I-V converter
Figure 9. HCC (integral plane, ch0) electrometer input
I128 User Manual
I128_UM_141014
Page 31 of 121
PSI System Controls and Diagnostics
Signals on the two input pins of the front panel connector can be routed to the required circuit
(only one mode can be in use at one time). You can also cause the two input pins to be
connected together. This is used if you have two signals which sometimes need to be summed,
for example a current density pad in the middle of an integral plane electrode.
The I-V converter section provides four current ranges (full scale 1 µA, 5 µA, 10 µA and 20 µA)
as standard.
10.3 Acquisition modes
The I128 can generate data very quickly, often at a rate higher than can be accepted in real time
by either the communications link or the host computer. The I128 therefore provides buffering
schemes that allow you to capture blocks of data at any rate, for later transfer to the host
computer.
Unbuffered mode does not store any results in the I128. The values are simply transmitted to the
host computer as fast as the I128 can send them, and as fast as the host it can accept them. At the
shortest integration times, some values may be lost because of limitations in the communications
rate, but this is always obvious in any data you take because the readings are individually timestamped.
Buffered mode uses the internal memory of the I128 to store up to 65535 sets of readings from
the 128 electrometer channels, the HCC, the analog and digital inputs. They are transmitted to
the host in groups of not more than 100, so that the data you see on the host computer is always
relatively recent. There is no break in the readings, even at the shortest integration times. If the
integration time is not too small, then the buffer can be unloaded to the host fast enough that it
will never fill.
Burst mode subdivides the buffer memory you allocate into smaller bursts of readings. Each
burst is accumulated in response to an external trigger, or when you have reached a specified
burst count. This mode is useful if you have bursts of high speed data, interspersed with periods
when there is no useful data, for example a pulsed beam accelerator.
10.4 Triggering
The I128 can measure in a free-running mode, or it can wait for an external trigger pulse on its
gate input. The edges of the trigger signal can be assigned to start, pause and end acquisitions.
The gate input is echoed to the gate output with minimal delay, so you can daisy chain units on
the synchronization line.
10.5 Self-testing and calibration
The I128 includes two high precision current sources, set to 500.0 nA and 2.500 µA. They are
used to perform the automated self-calibration process. The gain and offset parameters from the
calibration are stored by the I128 in non-volatile memory, and used to convert incoming data to
accurate charge values in coulombs.
The 500 nA source can also be routed to any individual input, or to the HCC input on its most
sensitive range, under direct user control. The 2.500 µA current can be routed to the HCC on its
I128 User Manual
I128_UM_141014
Page 32 of 121
PSI System Controls and Diagnostics
three higher current ranges. This allows a comprehensive diagnosis to be performed without any
additional test equipment.
Calibrations are also stored for the optional high voltage module set and readback, and for the
general purpose analog inputs.
10.6 High voltage output
Most radiation sensors including ionization chambers require bias voltage, and it is convenient if
the source of this voltage is integrated with the signal readout. You can specify high voltage
modules of either polarity up to 2kV in the I128. Positive polarity is typical, to match the
positive current measurement range of the multichannel inputs.
Critical dose measurement applications mean that you must be sure that the bias voltage is
reaching the ionization chamber. The I128 includes a loop back facility to give clear
confirmation that the voltage is being delivered. Your high voltage electrode should have two
discrete connection points for high voltage. The voltage is applied through one, and sampled
through the other. The I128 measures the sampled voltage. If it is present at the correct level,
you can be almost certain that the bias voltage is being delivered.
I128
HV supply
Sample HV out
Ionization
chamber
anode
ADC
Sample HV return
Figure 10. High voltage loopback arrangement
10.7 General-purpose I/O (ionization chamber services)
The general purpose I/O connector provides digital and analog inputs and outputs available for
any purposes. Typical use is to read out environmental sensors that monitor the pressure and
temperature of an ion chamber fill gas. The I128 can use this data to compensate changes in
chamber gain due to environmental changes.
I128 User Manual
I128_UM_141014
Page 33 of 121
PSI System Controls and Diagnostics
10.8 General-purpose I/O (actuator control)
Ionization chambers are sometime mounted on motion actuators to position them in or out of a
beam path. The I128 includes a pneumatic actuator control port with a switched 24 VDC line to
control a solenoid valve, and opto-isolated inputs for reading back end of travel limit switches.
These I/O points can of course be used for general purposes also.
10.9 Map execution and interlocking
The I128 includes features that support the concept of dose maps, such as radiation therapy
treatment maps. The on-board processors can receive maps from a host computer, and execute
those maps in synchronization with other devices, monitoring the incoming signals from
ionization chambers, and reacting to out of tolerance conditions. Three relays, one of them a
safety-rated type, are available for use in system interlock loops and for general hardware-level
status communication. The relays allow the I128 to respond to various levels of deviation from
the map, or any internal failures, by breaking different system interlock loops that can be
arranged produce the appropriate shutdown response. The safety relay circuit would be allocated
for the most critical
A front panel keyswitch allows you to select a Diagnostic mode for testing, where the response to
deviations is modified. The key cannot be removed when in Diagnostic mode, so that the system
can be locked into Normal mode by removal of the keys. The state of the mode switch is echoed
to a rear panel relay connection.
10.10 Controlling remote devices – fiber optic interfaces
There is a wide range of devices available that communicate over the Pyramid 10 Mbps fiber
optic loop system. The I128 includes two loop ports and can perform a loop controller function.
With a single host computer connection to the I128, you can communicate with up to 30 other
devices (15 per loop).
One example application is the use of a remote M10 or M40 general purpose I/O device to
interface to accelerator controls, to command beam current and read back status. Another use
could be control and monitoring of beam scanning electromagnets, using remote M10, M40 and
H10 devices. Figure 11 shows a possible configuration illustrating these two applications, but
there is an almost unlimited range of possibilities.
I128 User Manual
I128_UM_141014
Page 34 of 121
PSI System Controls and Diagnostics
Hall probe
H10
X-Y scan
magnet
H10
Ionization
chamber
Hall probe
I128
M10
LAN
Scan magnet
power supply
M10
M40
Accelerator
control
Figure 11. Schematic example: I128 control of remote devices
One of the fiber optic loop ports can be allocated to synchronization messages rather than control
of remote devices. One intelligent real time controller in a system, which may be an I128 or
another device, acts as the master for map execution, and sends messages to other devices to
ensure that they all execute the same map point at the same time.
The I128 provides a further two fiber optic transmitters, available for functions such as fast beam
gating control, process status indication using a DC level or frequency, optical version of the
monitor pulse output and so on.
10.11 Monitor unit output
Radiation therapy applications use the concept of a monitor unit, which is an aliquot of dose
delivered by the system. It is generally related to the overall dosing accuracy of the system, and
the maximum amount of charge that could be delivered in error before there would be concern.
The monitor unit of dose can be correlated with the charge measured by the I128 when it is used
in the dosimetry and beam position tracking application. You can define the size of the measured
charge increment that will result in the output of a monitor pulse by the I128. The pulse is
delivered on the monitor output coaxial connector, and can be configured for TTL levels or fast
negative pulses. It can also be transmitted from the process status fiber optic transmitter if
required. Typically these pulses might be used to drive independent dose counters or audible
sounders.
I128 User Manual
I128_UM_141014
Page 35 of 121
PSI System Controls and Diagnostics
10.12 Communication to the host computer
The I128 provides three alternative communications interfaces to the host computer. You must
work with a suitable host computer and software to set up acquisitions on the I128, and read back
and display the results.
The most commonly-used is the standard 1000/100/10BaseT Ethernet interface which supports
TCP/IP and UDP protocols. The I128 can serve multiple clients on the network.
There is also a 10 Mbps serial fiber optic channel which provides compatibility with the Pyramid
Technical Consultants, Inc. fiber optic real-time loop controllers, and thus the complete range of
Pyramid products. The fiber optic interface can alternatively be used to connect slave devices to
the I128, for example the Pyramid M10 device, to provide extended I/O capability,
Finally, a serial interface which can be operated with RS-232 or RS-485 levels provides a simple
interface for applications where high data rates are not needed, such as service diagnostic
operations. The I128 will support parallel communication on Ethernet and serial interfaces.
10.13 Embedded software
The I128 runs an embedded version of the Linux operating system on NIOS processors
implemented in the FPGAs. Four firmware files make up a full release, and you can update with
a single file which integrates all the releases, and thus ensures that you have compatible versions.
Where multiple I128s in a system might be running
I128 User Manual
I128_UM_141014
Page 36 of 121
PSI System Controls and Diagnostics
11 Getting Started using the PTC Diagnostic G2 Host
Program
The PTC DiagnosticG2 is a stand-alone program which allows you to read, graph and log data
from the I128, and set all the important acquisition control parameters. For some applications, or
for initial work, it may be adequate for all of your data acquisition needs. The I128 is designed to
be a key component of a dose measurement and control system, however and thus provides many
functions beyond basic signal acquisition. Most of these functions are exposed in the PTC
DiagnosticG2, so that you can explore their operation, but they are most useful when the I128 is
incorporated into an overall system with appropriate host software. The Diagnostic uses the
same function library that is exposed for users who develop their own host applications, and
therefore also serves as a debugging aid.
PTC DiagnosticG2 was introduced to support the G2 range of Pyramid Technical Consultants,
Inc. products, which feature embedded Linux processors and built-in Ethernet interfaces. It is
not compatible with the PSI Diagnostic program which supports previous Pyramid products.
However the PTC Diagnostic G2 program will be extended in the future to add support for all the
previous products.
Your I128 was shipped with a USB memory stick with the installation files you need. We
recommend that you copy the files into a directory on your host PC. Check the Pyramid
Technical Consultants, Inc. web site at www.ptcusa.com for the latest versions.
Note that updates to the Diagnostic G2 program may introduce new features, so the screens in the
version you are working with may differ from those shown in this user manual.
11.1 Installation
The program runs under the Microsoft Windows operating system, and can be installed from an
msi file using the standard Windows utility. It has been tested on Windows XP and Windows 7.
It also runs under Linux and has been tested with the Ubuntu distribution. There is no installer
for Linux; contact Pyramid Technical Consultants, Inc. to get the latest suite of installation files
and detailed instructions if you wish to run under Linux. The remainder of this section assumes a
Windows installation.
Copy the installer file PTCDiagnosticSetup-Vx_xx.msi to the hard drive of the host computer,
where x_xx is the version of the Diagnostic program. The host PC must have a standard
Ethernet port.
Run the installer and follow the prompts. On Windows 7 systems you will be asked to allow the
installer to make changes to the computer after the confirmation stage. You will require
administrator access to permit this.
I128 User Manual
I128_UM_141014
Page 37 of 121
PSI System Controls and Diagnostics
Figure 12. PTC DiagnosticG2 installation
The installer will create a subdirectory in the Program Files directory containing all the
executables and configuration files, and create shortcuts on your desktop and in the Start menu.
11.2 Connecting to the I128
The following steps take you through the process of connecting to the device.
1) It is simplest to start with a direct connection from your host computer to the I128 using a
CAT5 or CAT6 Ethernet cable as shown below. The network cable can be a patch or a crossover
type – the I128 automatically adjusts itself to suit.
I128 User Manual
I128_UM_141014
Page 38 of 121
PSI System Controls and Diagnostics
I128
Ethernet
+24V in
Figure 13. Direct Ethernet connection.
Once you have established reliable communication, and set a suitable unique IP address, then you
can move the I128 onto a general local area network and work under DHCP address assignment
if required.
2) The device is set with IP address 192.168.100.20 at shipment. Once you have a connection
you can change this setting as required. Set up your host PC Ethernet port with a fixed, nonconflicting IP address in the same subnet range, for example 192.168.100.11.
Figure 14. Configuring the IP address on the host computer.
3) Turn on 24 V DC power to the I128, but make no other connections. The illuminated logo on
the front panel should light up, and the cooling fan will start up. While the device is booting, the
of four LEDs on the rear panel cycle. When the device is ready, the “Active” and power LEDs
only should be illuminated.
I128 User Manual
I128_UM_141014
Page 39 of 121
PSI System Controls and Diagnostics
4) Make the Ethernet connection from the host PC to the I128. You should see activity on the
LEDs that are mounted in the I128 RJ-45 connector. Check that you can ping the device from a
command window prompt.
Figure 15. Ping test of the Ethernet connection.
The Windows firewall may block communication with the I128. It is simplest to start by turning
off the firewall while you are testing. To maintain security, you can disable any wireless adaptor
on the PC while you are doing this. Once you have established communication, then you can try
restoring the firewall if needed, and set up permissions for the PTC Diagnostic and the I128 RPC
(port 111) to communicate through the firewall.
6) Start the PTCDiagnosticG2 software. It will start with the Discover Devices dialog open.
Click on Discover Controllers and the software will search all IP addresses within its available
network looking for compatible Pyramid devices
I128 User Manual
I128_UM_141014
Page 40 of 121
PSI System Controls and Diagnostics
Figure 16. Discover devices in progress
Since you have the simplest possible network, it should find only the I128 you are working with.
In some circumstances the discovered devices may include Pyramid tools such as the A60
recovery utility. You can ignore these.
When you click on the discovered I128 entry in the list to highlight it, the Connect and Discover
Subdevices button is enabled. Double-click on this to establish the connection to the I128.
Figure 17. Ready to connect to the I128
A window for the I128 will open, and you will see messages in the message area as the I128 adds
your PC as a host. Unless you have devices connected on the fiber optic loops, you will see
errors at startup where the I128 has failed to find any slave devices. You can ignore these errors.
I128 User Manual
I128_UM_141014
Page 41 of 121
PSI System Controls and Diagnostics
Figure 18. Opening the I128 window
The graphic will be a vertically autoscaled histogram display of background noise in the 128
channels. The I128 user interface screen is divided into two halves plus a top banner area.
11.3 Screen layout – Top banner
The top banner contains the following indicators:
Comms bar
When moving, this indicates that messages from the I128 are being
received by the PTCDiagnosticG2. The message frequency is displayed.
Connected LED
When lit, this indicates that communications are valid and the system is
not in error.
Busy LED
When lit, this indicates the I128 is busy and cannot respond to inputs, for
example while performing a calibration.
Measuring LED
When lit green, this indicates that data acquisition is occurring. When lit
yellow, this indicates that an acquisition is initiated but that the I128 is
waiting for a trigger.
Error LED
When lit, the I128 has logged a communication error. The details are
displayed in the message area.
Auto Initiate
Checking this box causes the software to automatically initiate a new
acquisition whenever you change any acquisition parameter.
I128 User Manual
I128_UM_141014
Page 42 of 121
PSI System Controls and Diagnostics
Initiate
This button starts data acquisition, if trigger conditions are satisfied.
Abort
This button terminates any acquisition in progress.
On the left below the banner there is a graphic display of the data, with controls for how the data
is plotted below it. This is described in section 11.5 below.
Below the graphic is a message window which reports all the commands issued to the I128 by
the PTC Diagnostic program, and the corresponding acknowledgements. Generally you can
ignore this display, but it will be valuable for diagnosis if you have any operating problems.
On the right there is a screen area which changes according to which display option you select
with the option buttons at the bottom.
11.4 Screen layout – Right-hand tabs
11.4.1 Data tab
The drop down control at the top allows you to choose the units to display the measured signals
for channel 0 and channels 1-128.
The selection of display units has no effect on the way that data is acquired or logged.
There are three data sub-tabs:
All channels: A numeric display of the data on each channel, and check boxes to allow you to
suppress the graphic display of any subset of the channels. Use the scroll bar to view the higher
channels. The color codes correspond to the colors of the traces of the strip chart and scope
mode graphics. Any channel which is highlighted in red is overrange.
Banks: Check boxes allow you to select or de-select display of the channels in banks of 32. The
numeric values are the sums of all the channels in each bank.
Peak: Results from peak fitting by the on-board processor. This is distinct from calculations that
are available from the PTC DiagnosticG2. Parameters for two peaks are displayed, so that you
can read out two positions if the I128 is reading out two axes.
Below the sub-tab area are data displays that area always visible on the Data tab.
The HCC value shows the signal from channel 0. If you check the HCC box
graphic opens to plot this value.
I128 User Manual
I128_UM_141014
, another
Page 43 of 121
PSI System Controls and Diagnostics
Figure 19. HCC graphic displayed
The Dose Remaining, Target reached and Beam Enabled readouts reflect the function of the I128
as a primary dose control device.
On the Setup tab you can enter a target dose to be measured on channel 0, and set the beam
enable bit on (which lights the corresponding rear panel fiber optic transmitter). The I128 will
count down until the target dose is reached, at which point it turns off the beam enable.
Analog input readbacks and output settings (DAC), and digital output and input bits refer to pins
on the front panel I/O connector, which you can use for environmental monitor readout or other
purposes.
The analog setpoints and read values are refreshed when the I128 is acquiring data.
The high voltage readbacks are a continuously refreshed display of the measured high voltage
being sent out by the I128, and the loop back value. The over and under indications flag when
the measured voltage is outside a user-specified range.
I128 User Manual
I128_UM_141014
Page 44 of 121
PSI System Controls and Diagnostics
11.4.2 Data analysis
The PTC DiagnosticG2 can perform position peak analysis on the incoming data on the 128
electrometer channels by three methods, with results displayed on this tab. The positions and
standard deviations (one sigma widths) are given in units of strips. These calculations are
distinct from the similar calculations performed on each measurement by the I128 itself, which
are also displayed, labeled “Gaussian Fit (Device)”.
Figure 20. Data analysis display – I128 and PTC DiagnosticG2 calculations
The Center of Gravity calculation simply computes the center of gravity and standard deviation
of the strip signals out to the points either side of the highest channel where the signal drops
below (noise threshold)% of the peak channel signal. This calculation makes no assumption
about the shape of the peak, but is somewhat prone to noise.
The other two calculations assume that the peak has a Gaussian shape, and do a fit. The fitted
curve is shown on the histogram graphic. In both cases, the algorithm exploits the fact that the
logarithm of a Gaussian curve is a second order polynomial, which can be fitted without iteration
using matrix inversion.
I128 User Manual
I128_UM_141014
Page 45 of 121
PSI System Controls and Diagnostics
The Gaussabola algorithm is very efficient, because it only uses three channels and finds the
unique parabola that passes through the logarithm of the data. The threshold value determines
how far the second and third strips used in the fit are from the highest channel. If the adjacent
channels are nearly the same height as the peak (greater than threshold% of the peak), then the
algorithm steps outwards until it has strips with different heights to fit to. This algorithm is
optimal if the peaks are narrow (a few strips wide), but it takes no information from the tails of
wider peaks, and can be susceptible to noise. For most purposes the Gaussian regression fit is
more dependable.
The Gaussian regression fit performs the best fit out to the points either side of the highest
channel where the signal drops below (noise threshold)% of the peak channel signal, unless
clipped to less by the window setting. You can also set the weighting used in the fit; the nominal
setting is 2, for which the data points are weighted by the square of the raw data. This algorithm
has good noise immunity, and is generally preferred unless the peak shape deviates greatly from
Gaussian. If the window is set to 1, then the regression fit and the three-point fit become
equivalent for practical purposes. The Gaussian regression fit algorithm is the one implemented
in the I128 itself, using fast FPGA calculations.
Checking the Display Full Statistics box turns on display of computed values additional to
position and width for each of the calculation options.
11.4.3 Ionization chamber
The I128 is matched to the IC128-25 ionization chamber. The ionization chamber tab collects
together the signals which are particularly relevant to that application.
Figure 21. Ionization chamber tab
I128 User Manual
I128_UM_141014
Page 46 of 121
PSI System Controls and Diagnostics
Temperature.,
pressure, humidity
The temperature, pressure and humidity values are the readbacks from
the sensors in an IC128-25 that allow you to make gain corrections, and
to monitor the health of the dehumidifier cartridge
Reference
Future use
Correction
Future use
HV
Loopback high voltage monitor
Integral plane
The HCC signal
Strips sum
The sum of the 128 channels. To first order this should match the HCC
value for a chamber with equal electrode gaps.
Peak 1
Results from the Gaussian fit performed by the I128
Gain
Field where you can enter the gain of an ionization chamber – only the
Integral plane and Strips sum fields in this tab are affected; they will
showed measured current/gain or measured charge/gain.
11.4.4 Setup
The Setup tab is where you set up acquisition parameters, control high voltage supplies, establish
trigger settings and control dosimetry. When you have found a useful set of parameters, you can
save the configuration to on-board non-volatile memory
. The
values will be restored when the I128 next starts up, with the proviso that the HV will not be
enabled.
11.4.4.1
Measuring sub-tab
Figure 22. Setup - Measuring sub-tab
I128 User Manual
I128_UM_141014
Page 47 of 121
PSI System Controls and Diagnostics
The Measuring sub-tab is where you select integration time to be used by the ADAS electrometer
chip. The drop down control provides times from 55 usec to 1000 usec. The same time is used
for the HCC. If the HCC is working in I-V converter mode, then it determines the number of
ADC readings that are averaged per charge reading. If the HCC is operating in gated integrator
mode, the time used is the selected integration time minus the times defined to reset the
integrator. You can only use the gated integrator mode when the selected integration time
exceeds the sum of the times that form the reset sequence (setup, reset and settle times), which is
typically about 50 usec.
The time to generate each reading of 128 +1 signals that you see is the product of the integration
time and the conversions per sample that are averaged by the on-board FPGA. The maximum
Conv./Sample value is 255, so the longest accumulation for a single reading is 1000 usec x 255 =
0.255 seconds, or a data rate of 4 Hz. At the other extreme, the highest data rate of 18.2 kHz is
obtained using 55 usec x 1 = 55 usec. As you alter these values, the read backs below show the
resulting full scale current, full scale charge and sample rate, based on the configuration of the
ADAS electrometer chip that produced the desired settings.
The HV controls allow you to set the voltage, enable or disable the supply, and define alarm
limits for the monitored high voltage. If you have a negative HV module installed, then you must
enter negative numbers. The maximum voltage available from the installed HV module is
displayed, as determined by jumper settings in the I128.
11.4.4.2
Trigger sub-tab
The Trigger sub-tab is where you set up the trigger conditions. There are various trigger modes
available. The most useful are the basic Internal triggering without buffering, which will always
show you a real time response on the PSI DiagnosticG2 display. For more complex triggering
requirements, the Custom trigger controls allow you to define in detail the conditions for starting,
stopping and pausing acquisitions.
Figure 23. Setup - Trigger sub-tab
The simplest trigger mode is Internal with no buffering. Once you click Initiate, the I128
acquires data at the rate determined on the Measuring sub-tab, and streams it to the host
I128 User Manual
I128_UM_141014
Page 48 of 121
PSI System Controls and Diagnostics
computer in real time. If the data rate exceeds the communication rate (typically this occurs
around 20 Hz, but it depends in detail on the speed of the computer and network traffic), then
there will be missing points in the record. Using the I128 on-board data buffer by checking
Buffer Contiguous Data allows this rate limitation to be removed, up to file size limits that are
imposed by available memory. See section 15 for full details of triggering and buffering.
11.4.4.3
HCC sub-tab
The HCC sub-tab is where you control the dose input channel, send an enable beam signal to an
accelerator control, and set up a dose target. The gated integrator mode will be supported in a
future software release; the controls in the current software relate to the I-V converter mode for
dose measurement.
Figure 24. Setup - HCC sub-tab
The range drop down allows you to select from the four available current ranges (1, 5, 10, 20
uA). Checking the Combine Channels box causes the two input pins on the channel 0 connector
to be joined, therefore doing a summation of two incoming currents.
The target charge and dose remaining are functions which allow you to exercise precise dose
delivery, provided you can enable and disable the source of current. The sequence is to set the
target charge in measured coulombs, then set the Beam Enable check box, which sends a signal
from the I128 Beam Enable fiber optic output. Dose is then accumulated until the target value is
reached, at which point the enable signal is turned off.
The Monitor Charge parameter sets the quantum of measured charge which results in a pulse
being sent from the I128 Monitor connector.
The Beam Detect Level parameter and U, D counts allow testing of a beam present / absent
detection, which would generally form part of a therapy safety system. They will be fully
supported in a future software release.
I128 User Manual
I128_UM_141014
Page 49 of 121
PSI System Controls and Diagnostics
11.4.5 Calibration
You can direct the internal 500.0 nA calibration current to any selected channel or to the HCC
(channel 0) for diagnostic purposes. On the three higher current ranges of the HCC, the second
2.500 µA calibration current source is used instead.
Figure 25. Calibration source control
The I128 stores linear calibrations for all analog signal inputs, and for the high voltage and
general purpose analog outputs, in non-volatile memory. The calibrations for the 128
electrometer channels and the HCC (channel 0) are obtained by measuring the zero offset with no
signal, and with the accurate internal current source. The gain figures you see when the
calibration is complete are normalized to the nominal gain for channels 1-128. The offsets are in
binary bits. You can calibrate all 128 channels, or any individual channel with the selection
. For the HCC there is a calibration for each current range.
control
Calibration values are written to non-volatile memory when the calibration process completes. In
case you want to keep a record of the electrometer calibration before overwriting, you can save a
copy as a csv file with the Save Calibration Factors control .
I128 User Manual
I128_UM_141014
Page 50 of 121
PSI System Controls and Diagnostics
Figure 26. Current input calibrations
The calibrations for the general purpose analog inputs and outputs, and the high voltage set point
and readback are factory-set. Take a record of the values before making any changes.
Calibration for the gated integrator mode of the HCC will be added in a future software release.
11.4.6 Interlocks
This tab allows you to monitor and test I128 interlock signals, and run test sequences. This is
useful during initial commissioning of a safety system, and should be used in collaboration with
Pyramid engineers.
I128 User Manual
I128_UM_141014
Page 51 of 121
PSI System Controls and Diagnostics
Figure 27. Interlock test functions
Indicators
Fault
I128 is in the fault state.
Enable In
Green when incoming enable line is set (opto-coupler driven)
Enabled Command
Green when enabled relay is closed
CPLD A Error
Red when first of the redundant safety interlock CPLDs is in error state
CPLD B Error
Red when second of the redundant safety interlock CPLDs is in error state
Keyswitch
Red when front panel keyswitch is in Diagnostic setting, green when in
Normal setting
Mode
Red when I128 is in Diagnostic state, green when in Normal state
Interlock status
Green when interlock safety relay is closed, white when open
Interlock Command
Initialize command has been sent to CPLDs.
Interlock Uninitialized
CPLDs have not been initialized
Relay Command
Green when auxiliary relay is closed
Controls
Initialize Off / On
Initialize the CPLD, either leaving the interlock in the open or closed state.
This must be the first command sent to the CPLD.
Enabled Off / On
Clear or set the Enabled relay
I128 User Manual
I128_UM_141014
Page 52 of 121
PSI System Controls and Diagnostics
Diagnostic Mode / Normal Mode
Toggle modes.
Low Failure / High Failure
Low failure causes the interlock to open when triggered only when operating
in normal mode. High failure causes the interlock to open in either mode.
Interlock Off / On
Open or close the interlock safety relay
Test A / Test B
Test A causes only CPLD A to command the interlock safety relay open. Test
B causes only CPLD B to command the interlock safety relay open. This
allows you to confirm that either of the redundant CPLDs can
Test Sequence
(reserved)
11.4.7 Properties
11.4.7.1
Firmware
The Firmware section of Properties tab is where you can see the firmware versions you have
loaded. There are four files (operating system, A60 realtime application, A60 FPGA and
ADAS/secondary FPGA.
Figure 28. Firmware versions
The individual firmware releases are combined as a compatible set into an overall firmware
version. You can update the suite of versions when necessary. The update is carried out via the
Ethernet interface – there is no need to open up the device.
11.4.7.2
Communications
The Communication section of Properties tab is where you can see the Ethernet communication
settings, and change them as needed.
Figure 29. Communication settings
I128 User Manual
I128_UM_141014
Page 53 of 121
PSI System Controls and Diagnostics
Pressing the Configure button allows you to change the communications identity of the I128, the
IP address assignment mode, and the address and mask settings for static addressing. If you alter
these parameters, you will need to re-discover the I128. If you change to a static address outside
your local subnet, you will need to alter your network configuration to discover it again.
The Gateway and System Log address settings are for service and diagnostic purposes, and
should be left at 0,0,0,0 unless you are instructed to change them.
Figure 30. IP Configuration control
See section 27 for more details on network configuration.
11.5 Screen layout - Graphic display
There are three ways of displaying incoming data in a graphical way, as a rolling strip chart, as a
scope display and as a histogram. Only the checked channels are displayed (but all channels are
always measured and logged). You can toggle display of the HCC on or off with the control in
the Data tab
. The HCC display mode can be set independently from the 128 channel
display.
In the peak fitting functions, only the selected channels are used in the fit. You may get
meaningless fits if you remove critical channels from the fit input data!
I128 User Manual
I128_UM_141014
Page 54 of 121
PSI System Controls and Diagnostics
Figure 31. Graphics display with HCC display enabled.
11.5.1 Strip display
Data from the selected channels, with the selected averaging, is plotted onto a rolling strip chart
as it is acquired. The model is a chart recorder. The horizontal axis is the time of acquisition
and the vertical (y) axis is the current. You can select automatic or fixed vertical scaling.
When the data you have acquired exceeds the horizontal axis capacity, a scroll bar appears below
the graphic. This allows you to move backwards and forwards in the data that has been buffered
by the PTC DiagnosticG2. You can do this while the acquisition is taking place, and after it has
completed.
11.5.2 Scope display
The model for the scope mode display is a digital oscilloscope, and it is most useful when you
are working in buffered / burst external triggering mode. If you have a data burst defined, then
the screen is written with the contents of the burst when it completes, and then waits for the next
burst. Thus if there is a repeating signal, such as a beam pulse, then you can obtain a display
I128 User Manual
I128_UM_141014
Page 55 of 121
PSI System Controls and Diagnostics
synchronized with the pulses. If there is no burst size defined, then the screen is refreshed after
each data packet of 256 samples.
The graphic looks the same as the strip display.
Figure 32. Scope mode capture of a pulse.
11.5.3 Histogram display
The count or rate in each channel is displayed as a vertical bar. This mode emulates a graphic
equalizer or ratemeter, and can be useful for instrument tuning. On the 128 channel histogram
you can see the peak shape, and use the peak fitting functions.
11.5.4 Cursor
Clicking in the graphic area adds a cursor, color-coded by channel, which gives the count at that
time (strip display) or continuously in the channel (histogram).
I128 User Manual
I128_UM_141014
Page 56 of 121
PSI System Controls and Diagnostics
Figure 33. Strip chart data display showing cursor.
11.5.5 Filtering and zero subtraction
You can low-pass filter the displayed data with “averaging” value A using the IIR algorithm
Yi = Xi/A + (1 - 1/A)Yi-1,
where Yi is the latest output of the filter, Yi-1 is the prior output of the filter and Xi is the latest
reading from the I128. Note that the data is not altered, only the way it is displayed, so you can
change between various amounts of filtering at any time. Figure 34 illustrates how the display of
a square wave test signal is affected by the filtering setting. The noise reduces, at the expense of
time resolution, in the inevitable way.
I128 User Manual
I128_UM_141014
Page 57 of 121
PSI System Controls and Diagnostics
Figure 34. Increasing the low pass filtering of the displayed data.
You can remove any zero offset present by setting the zero toggle
. All displayed
readings will have the readings at the time you set zero subtracted from them. If you are applying
the zero correction to a completed acquisition you have already captured, then note that this
means the final reading will be subtracted from data.
I128 User Manual
I128_UM_141014
Page 58 of 121
PSI System Controls and Diagnostics
Figure 35. Zero correction of displayed data
These display options can be selected independently of the acquisition mode, and, as mentioned
before, they do not affect the raw data or the logged data, only how it is displayed on the graphic.
11.6 Data logging
The PTCDiagnosticG2 software has a data buffer which can accumulate up to 100000 samples,
at which point it wraps around and starts to overwrite the oldest values. Accumulation starts
automatically when you click Initiate. You can capture the contents to a .csv format file at any
time using the Save button. Pressing the Clear button clears the buffer and restarts the logging.
See section 14.1 for details about the logged data.
Note that the logged data is the raw data: any low-pass filtering or zero offset removal does not
affect the values you save.
I128 User Manual
I128_UM_141014
Page 59 of 121
PSI System Controls and Diagnostics
12 I128 Circuit Overview
12.1 Physical configuration
The I128 circuitry is arranged on four circuit boards:
- main board, including HCC (channel 0) circuits, calibration current sources and routing, trigger
inputs, serial interface, HV power supply, interlock circuits, power supplies
- ADAS electrometer board, the 128-channel electrometer chip and supporting logic, all external
connectors apart from Ethernet and fiber-optics, and local power regulators
- Fiber-optic mezzanine board
- A60 processor board, including the Ethernet port, processor and memory
Figure 36. I128 physical layout.
The boards can be exchanged individually for service or upgrade. We recommend that such
work is only done by a suitably qualified person.
12.2 Functions
12.2.1 Signal current inputs
Channels 1 to 128 come in to the ADAS electrometer chip via a resistive current divider. In the
default configuration the resistors to ground are not fitted, so there is no division. The series
input resistor is then 1 kohm which provides transient protection. For higher maximum current
ratings, the resistors are configured as precision dividers.
I128 User Manual
I128_UM_141014
Page 60 of 121
PSI System Controls and Diagnostics
Channel 0 (“high current channel”, or HCC) provides two inputs on separate pins of the
connector, each protected by clamping diodes. There are two signal processing chains, a multirange I-V converter and a gated integrator. The inputs can be directed in one of the following
ways under software control:
1) Input A to I-V converter, input B to ground
2) Input B to I-V converter, input A to ground
3) Input A to gated integrator, input B to ground
4) Input B to gated integrator, input A to ground
As a build-time option (-DSUM), this can be changed to the following:
1) Input A to I-V converter, input B to ground
2) Inputs A+B to I-V converter
3) Input A to gated integrator, input B to ground
4) Inputs A+B to gated integrator, input A to ground
The I-V converter stage provides four alternative full scale currents. The gated integrator stage
full scale charge is adjusted by controlling the integration period, and it may be optionally
configured at time of manufacture with a different value of feedback capacitor. Larger capacitors
give a higher range, at the expense of reduced low current sensitivity. The output of the input
stages is low-pass filtered with -3 dB at 35 kHz before being delivered to the ADC.
I128 User Manual
I128_UM_141014
Page 61 of 121
PSI System Controls and Diagnostics
General I/O
Analog
I/O (3+2)
Ch0
LP
filter
I-V conv
Ch1-128
Digital
I/O
(4+4)
+5V
+24V
Optoisol
Relay
MUX
LP
filter
Gated int
Current
switches
ADCs
Actuator control
Reset
Current
source 1
Fiber optic board
+2.5V
Current
source 2
A60
FPGA
LEDs
(x32)
ADAS board
ADAS
electrometer
chip
(x32)
(x32)
Mode and
address
NIOS
core
NIOS
core
FPGA
: : : : Jpr
: : : : banks
Serial
TxRx
(x32)
Memory
Gate in
Ethernet
TxRx
+15V,+/-12V, +/-5V,
+3.3V, +2.5V, +1.2V
DACs
Gate out
Mon out
Setpoint
HV PSU
(optional)
CPLD
CPLD
HV on LED
Enable
Ethernet
Safety
relay
UUUU
HV out
HV sense
Relay
Opto
Fuse 1.1A
Mode
keyswitch
UUUU
HV loopback
Enable
DC-DC
converters &
regulators
Relay
HV sense
Relay
RS-232/485
Enabled
Interlock
+24VDC in
Figure 37. I128 block schematic.
12.2.2 Calibration current switching
A matrix of switches allows the currents generated by the two precision calibration current
sources to be routed to the required signal input under software control.
12.2.3 Analog signals
The multichannel ADC also reads the two high voltage signals formed by voltage division, and
the general purpose analog inputs. Three differential analog inputs are provided on the I/O
connector; two of them are switched by a multiplexer (MUX) into one ADC input.
A multichannel DAC (digital to analog converter) provides the setpoint for the high voltage and
the two general purpose analog outputs. All analog inputs and outputs are buffered, the inputs
are also low-pass filtered with -3dB at 35 kHz.
12.2.4 Digital signals
The general purpose digital lines on the I/O connector are all buffered. The TTL digital inputs
are active low, with 50 kohm pull up to +5V. Two of the inputs are read by the A60 and two by
the secondary FPGA. The two opto isolated inputs on the actuator connector, typically “actuator
in” and “Actuator out” are read by the A60.
I128 User Manual
I128_UM_141014
Page 62 of 121
PSI System Controls and Diagnostics
The TTL gate input presents a 2.5 kohm impedance to ground. The gate output is able to drive a
50 ohm load at TTL levels. The monitor pulse output can be configured at time of manufacture
as TTL into a 50 ohm load, or as a transformer-coupled fast negative pulse. Two of the outputs
are set by the A60 and two by the secondary FPGA. The A60 also controls the relay used for
actuator control.
12.2.5 High voltage
High voltage is generated by an EMCO or Ultravolt module of the required rating. The output is
filtered by a 3 kHz RC filter with 33.2 kohm series resistance. The filter is before the sampling
voltage divider, so any voltage drop due to current drawn from the supply is visible in the
readback. The worst case drop with a one watt 2 kV supply is 16.6 V at full current. The current
draw is typically negligible when the load is an ionization chamber.
The voltage divider presents a 20 Mohm load to the supply, thus it will draw 0.1 mA from a 2 kV
supply at full voltage.
HF filtering series chokes are fitted in the outgoing and incoming high voltage lines to suppress
transients due to external arcing.
12.2.6 Interlocks
A pair of redundant CPLD (complex programmable logic device) monitor the health of the A60
processor via a watchdog function, and read the state of the Enable input and Mode keyswitch,
and set the state of the safety relay and the Enabled relay. The remaining relay is driven by the
A60 processor, which can also read the keyswitch state and the CPLD state.
Interlock chains may be run as current loops, using an external current source and the potentialfree contact pairs, or as 24 VDC logic, using the fused 24V available on the interlock connectors.
12.2.7 A60
The A60 processor board contains a high performance FPGA (field-programmable gate array).
Two NIOS processor cores are implemented in the FPGA, one handling the real-time I128
application, running on an embedded Linux version, and the other handling Ethernet
communications. Additional RAM is provided for program execution and data buffering. The
application processor communicates with the secondary FPGA located on the ADAS daughter
board, and with other devices on the main board using a serial bus.
The A60 sets the I-V converter range and the input switch configuration for channel 0. The A60
handles communications on the channels on the fiber optic daughter board, and on the serial port.
It reads the various switches and jumpers and sets the rear-panel status LEDs. It controls the
enable line for the high voltage, which also drives the front panel indicator LED.
12.2.8 Secondary FPGA
The secondary FPGA on the ADAS board manages the 128-channel electrometer chip. It
handles all triggering and timing functions, and the monitor output pulse generation. It also
controls the multichannel ADC, thus taking the data from channel 0, and the multichannel DAC.
I128 User Manual
I128_UM_141014
Page 63 of 121
PSI System Controls and Diagnostics
12.2.9 Power supplies
24 VDC input power enters via a 1.1 A resettable fuse, and is used directly to power the cooling
fan, and any device connected to the relevant pins of the actuator connector. The 24 V input is
protected against polarity reversal by a series diode, and from transients by series inductors and
transorbs to chassis which limit excursions to 6 V (not shown on the block schematic). DC-DC
converters and linear regulators generate the voltage rails required by the I128.
+24V
+15 V
+/-12 V
+5 VD
+5VA
+3.3 V
+2.5 V
+1.8V
+1.2 V
Power input, fan, actuator user supply and general I/O user supply (200 mA fuse), interlock user
supply (200 mA fuse)
High voltage module. Fused at 200 mA.
I-V converter, gated integrator, other analog amplifiers, filter and buffers, ADC, analog input
MUX
Interlock relay coils, actuator relay coil, general I/O user supply (low power), TTL digital inputs
and outputs, monitor pulse output, calibration current select logic
Calibration current sources, calibration current select switches
A60, ADAS board, CPLDs, ADC, DAC, serial transceiver
A60, CPLDs, status LEDs, switch and jumper read, calibration current select logic, general logic
CPLDs
A60
I128 User Manual
I128_UM_141014
Page 64 of 121
PSI System Controls and Diagnostics
13 High Voltage Supplies
13.1 Setting the High Voltage Supplies
The I128 is available with a one-watt high voltage supply suitable for biasing ionization
chambers. The voltage range can be specified at time of purchase from 200, 500, 1000 and
2000V with either polarity. +2000 V is typical for particle tracking chambers. The A60
processor reads internal jumpers on JB2 to detect the supply rating. Note that the supplies are
not intended to deliver output voltage less than about 10% of their maximum rating.
For higher power or more demanding applications, the I128 can be supplied with a 4 watt supply.
Contact Pyramid Technical Consultants, Inc. for further information.
The front panel HV on LED illuminates when the high voltage output is enabled. The set value
can be adjusted at any time.
The outputs of the high voltage modules are filtered by an RC filter to reduce ripple and noise.
The filter time constant is reduced for lower voltage HV supplies, to avoid excessive voltage
drop at large current drains. You can see the actual output voltage because readback is taken
from a voltage divider after the filter, directly on the HV output. The voltage divider places a
fixed 20 Mohm load on the supply.
The following table gives the smallest value of external load resistance that the various one watt
supply options can drive at full voltage, and the volts dropped across the filet series resistor at
maximum current.
HV module
Current
rating
Smallest load
resistance
Filter time
constant
Filter series
resistor
Voltage drop
across filter
no load
Voltage drop
across filter
full load
+2000, 2000
0.5 mA
4.3 Mohm
110 µsec
33.2 kohm
1V
17 V
+1000, 1000
1.0 mA
4.3 Mohm
110 µsec
33.2 kohm
2V
34 V
+500, -500
2.0 mA
250 kohm
16 µsec
4.7 kohm
< 0.1 V
10 V
+200, -200
5.0 mA
40 kohm
0
0
0
0
If the readback value differs from the setpoint by more than the expected drop across the filter
resistor, you know that the output is either being overloaded by a low resistance to ground, or
that it is being driven by another source of higher compliance. Be aware of how the high voltage
readback calibration might affect this. We recommend that the calibration is done with no
connection to the HV outputs. Thus only the no-load voltage drop across the filter is hidden by
the calibration, and when you connect a load you should expect to see small reductions in the
measured voltage, up to the maxima given in the table. The measured voltage is the actual
voltage at the output connector.
I128 User Manual
I128_UM_141014
Page 65 of 121
PSI System Controls and Diagnostics
CAUTION
Do not connect an external power supply to the I128 external high voltage output that will drive
the built-in supply away from the voltage it is trying to regulate, or you may cause damage to the
I128.
13.2 Changing the High Voltage Supply Range and Polarity
The range and polarity of the high voltage supplies is fixed and must be specified at time of
purchase. Units may be returned to the factory to change the high voltage modules if necessary.
It not recommended that users change the high voltage supply modules in case of damage to the
I128. The jumper settings are given here for reference only.
8 7 6 5
+2000 V
8 7 6 5
JB2
JB2
8 7 6 5
+1000 V
8 7 6 5
+500 V
8 7 6 5
-500 V
JB2
JB2
8 7 6 5
-1000 V
JB2
JB2
8 7 6 5
-2000 V
+200 V
8 7 6 5
-200 V
JB2
JB2
Figure 38. High voltage jumper settings
I128 User Manual
I128_UM_141014
Page 66 of 121
PSI System Controls and Diagnostics
No jumpers installed in JB2 is interpreted as no HV option fitted. Position 3 on JB1 is fitted if
the 4 watt HV module option is installed, otherwise the standard 1 watt module is assumed.
I128 User Manual
I128_UM_141014
Page 67 of 121
PSI System Controls and Diagnostics
14 Samples, Logged Data, Integration and Averaging
14.1 Readings and logged data
Each sample taken on the I128 comprises values for all the input signals, plus a range of
computed values. The frequency at which readings are generated is shown on the PTC
DiagnosticG2 screen, and is determined by your selection of integration time and conversions per
sample for the 128 electrometer channels.
Each reading comprises many data fields, which you can see in detail if you examine one of the
csv log files. In summary, these fields are:
timestamp
Time in seconds when the reading was taken, starting from zero when the
acquisition sequence started.
triggercount
A sequential number for the reading, mod 256. These numbers allow you to
see very easily whether you have contiguous data.
overrange_1,2,3,4
Flags that get set if any of the 128 channels goes overrange on any individual
conversion. Grouped in banks of 32 channels.
channel_1,2,…128
Measured charge values in coulombs for each of the 128 electrometer
channels.
centerA , widthA, amplitudeA,
offsetA, confidenceA
Real-time peak fitting results for the first peak in the 128 channels of data.
centerB , widthB, amplitudeB,
offsetB, confidenceB
Real-time peak fitting results for the second peak in the 128 channels of data.
This is primarily used when you have two 64-strip sensors being read by one
I128.
hcc
Measured charge value in coulombs from the high current channel (channel
0).
hcc dose
Dose remaining from the hcc target dose.
analog_in_1,2
Measured signal on the two general purpose analog inputs, typically used for
environmental monitoring of an ionization chamber.
analog_out_1,2
Settings of the two general purpose analog outputs.
digitals
Settings of digital inputs and outputs.
Fields that do not receive data are reserved for future firmware updates.
14.2 Integration time
The I128 allows you to set integration times between 55 µsec and 1000 µsec. For the 128
electrometer channels, this is effectively the period during which the incoming current is
integrated on the feedback capacitors in the ADAS chip. In actuality the integration can take
place over a slightly lesser time, with the exact requested integration period being made up by
on-chip buffer cycles. This is why you will see slightly different full scale currents reported as
you alter the integration time.
I128 User Manual
I128_UM_141014
Page 68 of 121
PSI System Controls and Diagnostics
When the HCC (channel 0) is working in I-V converter mode, the integration time is used to
determine how many ADC readings are averaged. The conversion rate is 250 kHz, thus for
example if you have chosen 100 µsec integration, the HCC reading will be the average of 25
individual ADC conversions.
14.3 Conversions per sample
In order to achieve longer integration than 1000 µsec, you can select up to 255 conversions per
sample. The longest period is therefore 0.255 seconds, for a lowest data rate of about 4 Hz. The
maximum rate is achieved using 55 µsec integrations and one conversion per sample, for a data
rate of over 18 kHz. A single I128 reading is therefore formed from a number (1 to 255) of
integrations (55 µsec to 1000 µsec).
Figure 39 shows how individual integrations are combined into readings. In the example, we
have chosen five conversions per sample to make up one reading. The actual charge integration
time on the ADAS chip is shown slightly less than the integration time you enter, as described
above. Acquisitions on all 128 channels are synchronized. The HCC uses the same integration
time, and in that time it will take many individual ADC results. At the completion of the sample
period you get data from each electrometer channel and from the HCC, which is averaged over
the whole period.
Integration time
Actual integration time
ADAS
ADC
Sample period
Integration time
HCC
One reading
Figure 39. Data feed into samples.
The amount of averaging to use depends, as always, on how you wish to trade off noise against
bandwidth. The longer your averaging period, the more you suppress random noise, but the more
high frequency detail you lose. If you happen to know there is a dominant noise frequency in
your system, say the line frequency, or the switching frequency of a power supply, then you can
suppress this noise in the data if you set the integration period and averaging to match the noise
period, or an integer multiple of the period. As an example, if you have noise at 400 Hz, then
I128 User Manual
I128_UM_141014
Page 69 of 121
PSI System Controls and Diagnostics
choosing 500 µsec integration and five conversions per sample will eliminate it, as will five
conversions per sample at 1000 µsec, 100 conversions per sample at 100 µsec and so on.
If you have a short pulse of signal, then you may decide to try to time-resolve the pulse by using
a burst of contiguous readings that cover the pulse duration. You can then integrate in time in
off-line data post-processing to get the total charge. Alternatively you may not care about the
time structure, but just want to know the total charge in the pulse. In that case you could choose
an integration and conversions per sample combination that contains the whole pulse. The
amount of data you need to handle is thereby reduced. This is not an insignificant consideration
When you are using the gate input to deliver an external trigger, it is beneficial to use the
smallest practical integration time. There can be an uncertainty in the alignment of the data
acquisitions to the trigger edge of up to nearly one integration period. Thus it would be better in
this case to use ten conversions per sample at 100 µsec integration (giving an unpredictable delay
of up to 100 µsec between the trigger edge and the start of the first integration) than one
conversion per sample at 1 msec integration (giving an unpredictable delay of up to 1 msec).
14.4 General purpose analog inputs
The general purpose inputs, whether used to measure ionization chamber environment or other
purposes, generally do not require to measure at the high rates used for the current signal inputs.
You can set the averaging period for these inputs independently. An averaging period of 1/line
frequency is a good choice.
I128 User Manual
I128_UM_141014
Page 70 of 121
PSI System Controls and Diagnostics
15 Triggers and Data Buffering
The I128 offers great flexibility for collecting data and triggering to synchronize with external
events. The primary trigger modes are Internal and Custom. The other modes exposed in the
PTC DiagnosticG2 software are provided mainly for backwards compatibility with other devices;
they can all be achieved with particular custom configurations.
15.1 Internal trigger mode
If you simply want to stream data continuously from the I128, then the Internal trigger mode
achieves this. Don’t check the Burst Count or Stop Count boxes. When you press Initiate, the
I128 will start streaming data to the host computer, and will continue until you abort the
acquisition. The PTC DiagnosticG2 strip mode and histogram graphics will keep up with real
time, shown under the strip mode plot as the time in seconds since the Initiate. The data rate is
limited by communication rates over the Ethernet, however, and by the load on the host
computer. Thus, beyond a particular data sampling rate, there will inevitably be missing readings
in the record. The critical rate will generally be close to the Comms rate displayed on the PTC
DiagnosticG2, normally about 20 Hz. Whether you care about getting contiguous data will
depend upon what you are trying to measure.
15.2 Data buffers
15.2.1 I128 internal buffer
The internal memory of the I128 allows you to acquire time contiguous data at very high rates.
The maximum buffer size you can select is 65,535. However, because the buffer is implemented
as a cascade of memory, and because data is always being sent up to the host computer during an
acquisition, the amount of available buffering can appear to be variable. When you are acquiring
data into the buffer at high rates, the PTC DiagnosticG2 display will generally lag behind real
time, underscoring the fact that you are now taking data faster than it can be delivered to the host
computer.
As an absolute minimum, you can be certain to capture 664 contiguous readings at any data rate
up to the 18.18 kHz maximum, under any network traffic conditions.
For higher numbers of readings, the maximum number of contiguous samples you can acquire
will be the result of a race between the filling of the buffer levels by incoming data, and emptying
of the buffer by data being sent to the host. Under typical moderate network traffic conditions,
you will find that up to 27,000 contiguous samples can be captured even at the shortest
integrations. Setting a higher buffer number will result in buffer overflow, but the level at which
this occurs will depend on the incoming and outgoing data rates. As an illustration, figure 40
shows the percentage of a 65535 sample requested count that was actually reached before
overflow, as a function of integration time between 55 and 1000 µsec (18.18 to 1 kHz).
I128 User Manual
I128_UM_141014
Page 71 of 121
PSI System Controls and Diagnostics
% of target sample count
100%
90%
80%
70%
60%
50%
0
200
400
600
800
1000
1200
Sample period (s)
Figure 40. Contiguous data number of samples as a function of input data rate
Before taking any critical time-resolved data, you should test the available maximum number of
samples under the expected network and host computer worst-case loading. We recommend that
you also set a maximum number of readings (the Stop Count) when using the data buffers, to
avoid arbitrary overwriting of the data.
15.2.2 PTC DiagnosticG2 buffer
The PTC DiagnosticG2 has its own circular data buffer with a maximum of 100,000 entries.
This is independent of the I128 buffering. If you allow an acquisition to run longer than this, and
recover the log file, you will see that the data has wrapped around. The oldest entries will be
overwritten. If you wish to clear the buffer
You can clear the Diagnostic buffer at any time with the “Clear the data buffer button” . You
can save the current buffer contents to a csv format file at any time using the “Save the data
buffer to a file” button .
15.3 External triggering
15.3.1 Custom triggering
The I128 will respond to edges on the gate input to start, pause and stop acquisitions. Using the
Custom trigger mode allows you great flexibility in choosing when and how the I128 should take
data, and how data taking should be synchronized with external events. It is best to set a
maximum number of samples (stop count) when working in buffered and triggered modes, to
keep the data file size under control, and to prevent unexpected buffer overflows.
The rules for start, pause and stop are:
I128 User Manual
I128_UM_141014
Page 72 of 121
PSI System Controls and Diagnostics
Start
Acquisition will either:
- start immediately if Start On: Initiate Command is selected
- start when the first trigger edge is detected after an Initiate command if BNC is
selected. You can choose whether to respond to a rising or falling edge.
Pause
Acquisition will either:
- pause at the end of the individual integration in process when a number of readings
equal to the specified Burst Size has been taken
- pause at the end of the individual integration in process when a trigger edge of
opposite polarity to the start trigger is detected
- not pause if no pause selection is made
The resume after pause conditions are the same as the start conditions
Stop
Acquisition will either:
- stop at the end of the individual integration in process when a number of readings
equal to the specified Stop Count has been taken
- stop at the end of the individual integration in process when a trigger edge of
opposite polarity to the start trigger is detected
- not stop if no stop selection is made
The best way to understand the controls is to look at some examples.
To demonstrate the triggers, we provided a simulated repetitive beam pulse as a Gaussian pulse
(yellow) delivered to a group of channels and to the HCC. The period was 10 msec. This pulse
was synchronized with a TTL trigger (blue), as shown in figure 41.
Figure 41. Signal and trigger used for custom trigger examples
The I128 was set up to measure with 100 µsec time resolution, thus there would be exactly 100
readings per signal repetition period. As a reference, let’s look at the signal in internal mode:
I128 User Manual
I128_UM_141014
Page 73 of 121
PSI System Controls and Diagnostics
Figure 42. Time-varying signal seen in internal mode
The signal appears noisy and there are discontinuities. If you inspect the csv log you will see that
the data is not contiguous, due to the communication speed limitation. If you now select Custom
triggering and a stop count of 10000, you will now see one second contiguous data at 10 kHz
sample rate.
Figure 43. Time-varying signal seen in custom buffered mode
I128 User Manual
I128_UM_141014
Page 74 of 121
PSI System Controls and Diagnostics
Now let’s say you are only interested in the first 5 msec of data in each cycle. With the 50%
trigger duty cycle shown in figure 41, you could select a pause on BNC. However if you set a
burst size of 50, you will achieve the same, but you will also be able to see a stable scope mode
display in the PTC DiagnosticG2, that refreshes for each pulse. The total acquisition time will
now be twice as long, because the 10000 total buffer you defined is consumed at half the rate. If
you inspect the logged data as a function of the time stamps, you will see the bursts of contiguous
data separated by gaps when the I128 was waiting for the next trigger to resume. Clearly if
triggers are infrequent, and the signal has short duration, this is a very effective way of collecting
data.
Figure 44. Using trigger signals and burst size to capture a portion of the signal
15.3.2 Pre-defined trigger modes
The I128 provides a number of pre-defined trigger modes, primarily for backwards compatibility
with other devices that support them. They can all be achieved by appropriate Custom trigger
settings. In the following table, NBuf is the buffer size and NBst is the burst size. For every
trigger mode you can force the I128 to the stopped state at any time by sending the Abort
command.
Mode
Start
Pause
Stop
Notes
Internal
Internal
n/a
n/a
Acquisition will start immediately you send Initiate, and
continue indefinitely if unbuffered, or to the lesser of NBuf
size and NBst if buffered.
Custom
I128 User Manual
Full user control over start, pause, resume and stop.
I128_UM_141014
Page 75 of 121
PSI System Controls and Diagnostics
External Start
BNC
n/a
n/a
Acquisition will start when a valid trigger edge is seen after
you send Initiate, and continue indefinitely if unbuffered. If
buffered, it will do NBst readings on each valid trigger edge
until it has acquired NBuf readings.
External StartStop
BNC
n/a
BNC
Acquisition will start when a valid trigger edge is seen after
you send Initiate. If unbuffered, readings will continue until
the opposite polarity trigger edge is seen. If buffered, it will
stop on the lesser of NBst or Nbuf readings, or on the
opposite polarity trigger edge, whichever comes first.
External StartHold
BNC
n/a
n/a
NBst is forced to a value of 1 in this mode.
A single reading is taken for each valid trigger edge. This
will continue indefinitely if unbuffered. If buffered, it will
continue until NBuf is reached.
External Windowed
BNC
BNC
n/a
Acquisition will start when a valid trigger edge is seen after
you send Initiate. They continue until either NBst is
reached, or the opposite polarity edge is seen, at which point
the acquisitions pause. They resume when the next trigger
edge is seen. In unbuffered mode, this continues
indefinitely. In buffered mode, it continues until NBuf is
reached.
15.3.3 Trigger response time
The I128 is always integrating the incoming signal, even if the data is not being recorded,
otherwise charge can build up in cables and give incorrect readings. Thus there is some small
variation in the time between a trigger edge at the gate input, and the start of the first recorded
reading, because the trigger edge timing is asynchronous relative to the integrations.
The worst case delay is one integration period of the 128-channel ADAS chip, but on average it
is less than half of this time. Thus if you want to minimize the uncertainty in the trigger
response, it is best to use short integration times. If you need better signal to noise ratio, simply
increase the number of conversions per sample, as this does not affect the trigger delay.
I128 User Manual
I128_UM_141014
Page 76 of 121
PSI System Controls and Diagnostics
16 Monitor Pulse Output
The monitor output allows the I128 to output “Monitor Units” (MU), analogous to earlier
electronics. A counter can be connected to this output to provide an independent log of measured
dose in a medical application. If there is a dramatic failure during an irradiation, the count of
monitor pulses permits you to make some assessment about the dose delivered up to that point.
The size of one MU is a configurable amount of charge accumulated on the HCC.
The signal is available as a one µsec TTL logic pulse into a 50 ohm load, or as a transformer –
coupled 50 nsec negative-going pulse. The selection is made at time of manufacture.
Figure 45. Examples of monitor output pulse: TTL (left), transformer-coupled (right).
I128 User Manual
I128_UM_141014
Page 77 of 121
PSI System Controls and Diagnostics
17 Actuator Control
The I128 actuator port provides the control and feedback needed for a typical pneumatic actuator
system. This is provided for sensor systems that can be moved in and out of their measurement
position.
The circuit provides a 24 VDC output on the connector, so controlling a 24 VDC on/off solenoid
is simple. A solenoid valve type known to work correctly is the SMC SY5120-5LN-N7T-F2.
However solenoids using other voltages can be accommodated, within the rating of the
connector, using the potential-free relay contact pair and an externally-sourced voltage.
8
10K
1
2
1
0805
10K
Optoisolator
2
1
3
VO 6
VB 7
ACTUATOR_OPTO_A-
4
5
0805
10K
2
+5VD
2
0805
1
+5VD
+5VD
10K
5
9
4
8
3
7
2
6
1
10
CHASSIS
OPTO_IN_A
1
2
Optoisolator
2
1
3
0805
VO 6
VB 7
5
11
DGND
8
DB9F
USER_V+
4
ACTUATOR_OPTO_B200 mA f use
1
OPTO_IN_B
24V_RTN
ACT_RELAY _B
ACT_RELAY _A
DGND
CHASSIS
2
24V
24V_RTN
Relay
9
ACT_RELAY _A
SHIELD
1
14
DGND
8
7
13 NC
6
2
Figure 46. I128 actuator control circuit.
A typical arrangement to control a 24V solenoid valve and read back end of travel limit switches
is shown in figure 47.
I128 User Manual
I128_UM_141014
Page 78 of 121
PSI System Controls and Diagnostics
Opto A input
+24 VDC
0V
Solenoid
5
1
9
+24 VDC
switched
6
Opto B input
+24 VDC
Figure 47. Actuator connections for 24 VDC solenoid.
I128 User Manual
I128_UM_141014
Page 79 of 121
PSI System Controls and Diagnostics
18 Interlocks and Direct Control Lines
The I128 includes a suite of interlock features to enable it to form part of a dosimetry system
where irradiation must stop if there is a failure or out of tolerance condition. It also provides two
fiber optic digital level outputs intended for process control. A front panel keyswitch allows the
I128 to operate in two interlock modes, one intended for normal use, the other, intended for
engineering or diagnostic use, in which some computed interlocks may be ignored.
CAUTION
A safety system must be subject to a full and documented risk analysis specific to the application
and the regulatory environment. The I128 in isolation is not intended to implement a safety
system. However it may form part of such a system, for the particular activity of tracking
delivered dose, subject to risk analysis and approval by the appropriate bodies.
18.1 Process control outputs
Both the fast fiber optic outputs can be programmed in the I128 to perform any function. The
nominal use is as follows:
- The Process Status fiber optic output is a general-purpose direct signal to any remote system of
the computed status of some dose map execution stage.
- The Enable Beam fiber optic output is intended to gate a remote beam delivery device, so that
the I128 can control the amount of dose delivered to some location.
18.2 Interlocks
The I128 provides four isolated relay contacts and one opto-isolated digital input that are
intended for interfacing interlock signals. The connectors are Weidmuller 3.81mm type with
different pin counts to prevent accidental swapping. The relays can be configured to work in
current loops, or as 24V logic. A +24 VDC supply is provided, fused at 300 mA. In either case,
it is a simple matter to put multiple I128s and A560s into a series interlock loop such that any
one of them can interrupt the line, and thus provide redundant interlocking.
I128 User Manual
I128_UM_141014
Page 80 of 121
+24
RET
+24
RET
RET
+24
PSI System Controls and Diagnostics
+24
RET
+24
RET
+24
RET
(To interlocked device)
(To interlocked device)
Figure 48. Interlock relays in series on multiple devices wired for current loop (top) or 24 V
logic (bottom).
18.2.1 Enable/Status
-
24 V
+
Enable
Cmd
Enabled
Status
Mode
Key
Figure 49. Enabled/Status interface.
This group of signals receives an enable command from the overall system containing the I128
via an opto-isolated input, and echoes out the enabled state, when it is reached, on a floating relay
contact pair. The input and output signals are processed by the redundant CPLDs in the I128. In
addition, another contact pair is brought to this connector directly from the front panel keyswitch
so that a remote system can detect if the I128 has been placed in diagnostic mode.
The enable input opto-isolator input requires a minimum of 1 mA to switch with 1.5 V forward
bias, and has a 2.5 kohm series resistor. It will respond to typical CMOS TTL-compatible
outputs, for example, and is also compatible with 24 VDC logic.
I128 User Manual
I128_UM_141014
Page 81 of 121
PSI System Controls and Diagnostics
18.2.2 Interlock
-
+
ILK
24 V
n/c
Figure 50. Interlock interface.
Weidmuller Omnimate SL 179345000 5 pin connector. The relay is a safety-rated type
(SR4D4005) with force-guided contacts according to EN 50205. The minimum wetting current
and voltage for the contacts is 10 mA, 5 V. One n/o contact pair is brought to the connector, and
a second pair is read by the I128 A60 to confirm operation. The relay is controlled by the
redundant CPLDs, and is typically used for major failures such as processor watch dog timeouts,
or loss of power.
18.2.3 Relay
-
24 V
+
Relay
Figure 51. Relay interface.
Weidmuller Omnimate SL 179344000 4 pin connector. The relay is a standard type and is
controlled by the A60 processor. It is typically responsive to computed out of tolerance
conditions in map execution.
I128 User Manual
I128_UM_141014
Page 82 of 121
PSI System Controls and Diagnostics
19 Connecting Slave Devices
The I128 implements a full fiber optic loop controller capability. You can connect up to 15
devices and access them via the I128 Ethernet port. To use a slave device, you simply connect it
to one of the two fiber-optic ports on the I128 using suitable ST-terminated fiber-optic cable and
run the normal Discover sequence in the PTC DiagnosticG2. The device will be shown as a
slave of the I128, and you can open its window and control it in the normal way.
Figure 52. I128 with two M10 general purpose I/O devices connected as slaves on loop 1
The slave device simply passes its data through the I128. It is not constrained by the I128’s
acquisition settings.
I128 User Manual
I128_UM_141014
Page 83 of 121
PSI System Controls and Diagnostics
20 Calibration
20.1 Current calibration
The I128 is designed to produce very accurate current readings. The automated internal
calibration process measures the background offset and the response to one of two very
accurately known internal current sources. Multiple readings are taken and averaged with an
integration period that nulls any 50 or 60 Hz noise. You should not have any connection to the
inputs when doing a calibration. The resulting linear gain and offset values for each channel and
each range are stored in non-volatile memory.
The calibration process does rely on the stability and absolute accuracy of the internal sources.
These use high precision resistors with very small temperature coefficients. It is of course
inherently impossible to detect any error in the internal sources by simply measuring with the
I128 them after completing a calibration. You need to use an independent external source, which
must itself have very good accuracy and stability. If your I128 is used for critical measurements
where absolute accuracy is important, we recommend that you make such an external check once
per year, or more frequently if local procedures dictate.
20.2 Other calibrations
The calibrations of the analog inputs and outputs, and the high voltage setpoint, are factory-set
and should be left unchanged. If they do need to be corrected, the process is similar to sensor
calibration. You will require an accurate voltmeter with at least 5½ digit resolution. Set the
monitor mode to PID/Manual. Calibrate the zero offsets of the outputs until you read 0.00V with
zero demand set. Then set 9.00 volts demand and set the gain so that the voltmeter reads this
value. Check at -9.00 volts and iterate as necessary to minimize the error. Having calibrated the
outputs, you can use a loopback connection to calibrate the inputs against the accurate outputs.
I128 User Manual
I128_UM_141014
Page 84 of 121
PSI System Controls and Diagnostics
21 Peak Fitting
The I128 implements a peak fitting algorithm as a fast FPGA calculation, and the results are
available for dosimetry decision making at rates up to the incoming data rate. The results are
displayed in the PTC DiagnosticG2 histogram display. This is
Figure 53. I128 real time peak fitting
The algorithm fits a Gaussian curve to the data based on the channel with the highest signal. For
speed the calculation converts the data to a polynomial, then performs a weighted regression fit
using matrix inversion. The fit constants are then converted back to the three defining
parameters for a Gaussian curve, the mean (peak position), sigma (width) and amplitude (height).
If the peak in the data deviates significantly from Gaussian shape, for example by being
significantly skewed, or if it sits on a pedestal or halo, then the fit will not be so reliable. A chisquared statistic is used to show how well the fitted Gaussian curve models the data; if the data is
close to Gaussian, then the statistic will be close to 100%. The peak shown in figure 53 does not
I128 User Manual
I128_UM_141014
Page 85 of 121
PSI System Controls and Diagnostics
have the correct shape, so the statistic is relatively low (68%). Nevertheless the position is a
good reflection of the peak position, and this will be generally true for non-skewed peaks.
The PTC DiagnosticG2 implements the same algorithm on data it receives from the I128, and
allows you to adjust the fit settings.
I128 User Manual
I128_UM_141014
Page 86 of 121
PSI System Controls and Diagnostics
22 Using the Triangle Generator Test Board
It can be useful to inject a signal of approximately-known current into multiple channels of the
I128 as a simple diagnostic that the channels are functional, and that there is no gross systematic
error in the calibration. The Pyramid Triangle Generator test board plugs into one 44-pin
connector and creates a triangle distribution of currents across the bank of 32 channels on that
connector.
Figure 54. Triangle generator test board
Genuine Advantage Pyramid test boards are identifiable by a small irregularity on the last two
channels. A voltage source is required, which can either be a 5V power supply connected to the
power in connector, or the signal from a function generator injected at the BNC connector. If
you use a function generator, you can give any desired time profile to the signal.
If you connect a 5 V source and set the first switch down, you should see a steady triangular
pattern with peak about 500 nA. If you remove the 5 V source and instead put a 1 V signal into
the BNC connector, you should see the triangle pattern but with peak about 345 nA.
I128 User Manual
I128_UM_141014
Page 87 of 121
PSI System Controls and Diagnostics
Figure 55. Test pattern from triangle generator board using 5V source
If you inject a time varying signal from the function generator, you can use it to check time
resolved measurements across 32 channels.
Figure 56. Time varying signal injected to BNC input of test board
I128 User Manual
I128_UM_141014
Page 88 of 121
PSI System Controls and Diagnostics
23 Gate connections
The I128 provides a gate input and gate output connection. The input is terminated with 2.5
kohm, suitable to be driven by a standard TTL source. If the incoming gate signal is on a long
coaxial transmission line, you should use a source able to drive a 50 ohm impedance, and provide
50 ohm termination at the I128. Alternatively, you can convert the signal to optical, then convert
back to TTL near the I128. This allows very long signal runs with excellent noise immunity.
The Pyramid Technical Consultants X22 bidirectional converter provides the necessary signal
conversions.
I128
50 ohm source
I128
I128
I128
I128
50 ohm coax
50
50
I128
TTL source
Fiber-optic
X22
X22
Coax
Figure 57. Alternative methods for long-distance trigger delivery: 50 ohm line (top), fiber optic
(bottom)
Using the gate output, you can daisy chain a local group of I128s with short Lemo to Lemo
coaxial cables. The latency between the gate input and output is about 25 nsec, which is
negligible compared to even the shortest I128 integration period.
Figure 58. Gate passthrough latency: gate in (yellow), gate out (blue)
I128 User Manual
I128_UM_141014
Page 89 of 121
PSI System Controls and Diagnostics
24 Connectors
24.1 Front panel connectors
24.1.1 I/O port (environmental monitors)
One 25-pin DSub female.
Pin 1
Pin 13
Pin 25
Pin 14
(External view on connector / solder side of mating plug)
1
24 V return
14 +24 VDC out
2
Chassis
15 AGnd
3
Analog in 1 +
16 Analog in 1 -
4
Digital out 1
17 Digital out 2
5
Analog in 2 +
18 Analog in 2 -
6
Analog in 3 +
19 Analog out 1
7
Analog in 3 -
20 Analog out 2
8
AGnd
21 + 5 VDC out
9
DGnd
22 Digital out 3
10
Digital out 4
23 DGnd
11
Digital in 4
24 Digital in 3
12
Digital in 2
25 Digital in 1
13
DGnd
24 V out fused 200 mA (combined load on this connector and actuator connector).
Allocation of signals when this connector is used for IC128-25 ion chamber environmental
monitors:
Analog in 1
Digital out 2,1
Digital in 2,1
+ 5VDC out
Chassis
I128 User Manual
Temperature / Pressure / Humidity / Reference
Multiplex control for signals delivered to analog in 1
00 Temperature
01 Pressure
10 Humidity
11 Reference
Ionization chamber board revision
Power to IC sensors
Ionization chamber chassis
I128_UM_141014
Page 90 of 121
PSI System Controls and Diagnostics
An adaptor cable or board is required to convert from D25 at the I128 to D9 at the ionization
chamber.
24.1.2 Actuator
One Dsub 9 pin female.
Pin 5
Pin 1
Pin 9
Pin 6
(External view on connector / solder side of mating plug)
1
Actuator relay pole A
6
Actuator relay pole B
2
24 V return
7
Opto input B anode
3
n/c
8
24 V return
4
+24 VDC out
9
+24 VDC out
5
Opto input A anode
Opto isolator cathodes have internal connection to 24 V return.
24 V out fused 200 mA (combined load on both pins plus I/O connector).
24.1.3 HCC: High current input (channel 0)
One four pin Lemo 0B female. Suitable mating connectors Lemo FGG.0B.304.CLCD52Z
(crimp) or FGG.0B.304.CLAD52Z (solder).
Pin 1
Pin 4
Pin 2
Pin 3
(External view on connector / solder side of mating plug)
1
I-V converter input A
2
AGnd
3
I-V converter input B / Gated integrator input
4
Chassis
Internal software controlled switches allow the input to be configured as:
- I-V converter, pin 1
- I-V converter summing pin 1 and pin 3
- Gated integrator, pin 3
This input is generally used to read out the integral, or dosimetry, plane of an ionization chamber.
I128 User Manual
I128_UM_141014
Page 91 of 121
PSI System Controls and Diagnostics
24.1.1 Signal inputs (strip inputs)
Four 44-pin high density DSub female. Color-coded on decal. Software channel count is 1 to
128; electrical schematic input count is 0 to 127.
Pin 15
Pin 1
Pin 16
Pin 30
Pin 44
Pin 31
(External view on connector / solder side of
mating plug).
Channels 1-32 (red) – inputs 00 to 31
1
Ch 29 (In 28)
16
Ch 31 (In 30)
31
Ch 32 (In 31)
2
Ch 28 (In 27)
17
Ch 30 (In 29)
32
Shield
3
Ch 26 (In 25)
18
Ch 27 (In 26)
33
KGnd
4
Ch 24 (In 23)
19
Ch 25 (In 24)
34
KGnd
5
Ch 22 (In 21)
20
Ch 23 (In 22)
35
KGnd
6
Ch 20 (In 19)
21
Ch 21 (In 20)
36
KGnd
7
Ch 18 (In 17)
22
Ch 19 (In 18)
37
KGnd
8
Ch 16 (In 15)
23
Ch 17 (In 16)
38
KGnd
9
Ch 14 (In 13)
24
Ch 15 (In 14)
39
KGnd
10
Ch 12 (In 11)
25
Ch 13 (In 12)
40
KGnd
11
Ch 10 (In 09)
26
Ch 11 (In 10)
41
KGnd
12
Ch 08 (In 07)
27
Ch 09 (In 08)
42
KGnd
13
Ch 06 (In 05)
28
Ch 07 (In 06)
43
Shield
14
Ch 04 (In 03)
29
Ch 05 (In 04)
44
Ch 03 (In 02)
15
Ch 02 (In 01)
30
Ch 01 (In 00)
I128 User Manual
I128_UM_141014
Page 92 of 121
PSI System Controls and Diagnostics
Channels 33-64 (green) – inputs 32 to 63
1
Ch 61 (In 60)
16
Ch 63 (In 62)
31
Ch 64 (In 63)
2
Ch 60 (In 59)
17
Ch 62 (In 61)
32
Shield
3
Ch 58 (In 57)
18
Ch 59 (In 58)
33
KGnd
4
Ch 56 (In 55)
19
Ch 57 (In 56)
34
KGnd
5
Ch 54 (In 53)
20
Ch 55 (In 54)
35
KGnd
6
Ch 52 (In 51)
21
Ch 53 (In 52)
36
KGnd
7
Ch 50 (In 49)
22
Ch 51 (In 50)
37
KGnd
8
Ch 48 (In 47)
23
Ch 49 (In 48)
38
KGnd
9
Ch 46 (In 45)
24
Ch 47 (In 46)
39
KGnd
10
Ch 44 (In 43)
25
Ch 45 (In 44)
40
KGnd
11
Ch 42 (In 41)
26
Ch 43 (In 42)
41
KGnd
12
Ch 40 (In 39)
27
Ch 41 (In 40)
42
KGnd
13
Ch 38 (In 37)
28
Ch 39 (In 38)
43
Shield
14
Ch 36 (In 35)
29
Ch 37 (In 36)
44
Ch 35 (In 34)
15
Ch 34 (In 33)
30
Ch 33 (In 32)
Channels 65-96 (blue) - inputs 64 to 95
1
Ch 93 (In 92)
16
Ch 95 (In 94)
31
Ch 96 (In 95)
2
Ch 92 (In 91)
17
Ch 94 (In 93)
32
Shield
3
Ch 90 (In 89)
18
Ch 91 (In 90)
33
KGnd
4
Ch 88 (In 87)
19
Ch 89 (In 88)
34
KGnd
5
Ch 86 (In 85)
20
Ch 87 (In 86)
35
KGnd
6
Ch 84 (In 83)
21
Ch 85 (In 84)
36
KGnd
7
Ch 82 (In 81)
22
Ch 83 (In 82)
37
KGnd
8
Ch 80 (In 79)
23
Ch 81 (In 80)
38
KGnd
9
Ch 78 (In 77)
24
Ch 79 (In 78)
39
KGnd
10
Ch 76 (In 75)
25
Ch 77 (In 76)
40
KGnd
11
Ch 74 (In 73)
26
Ch 75 (In 74)
41
KGnd
12
Ch 72 (In 71)
27
Ch 73 (In 72)
42
KGnd
13
Ch 70 (In 69)
28
Ch 71 (In 70)
43
Shield
14
Ch 68 (In 67)
29
Ch 69 (In 68)
44
Ch 67 (In 66)
15
Ch 66 (In 65)
30
Ch 65 (In 64)
I128 User Manual
I128_UM_141014
Page 93 of 121
PSI System Controls and Diagnostics
Channels 97-128 (white) - inputs 96 to 127
1
Ch 125 (In 124)
16
Ch 127 (In 126)
31
Ch 128 (In 127)
2
Ch 124 (In 123)
17
Ch 126 (In 125)
32
Shield
3
Ch 122 (In 121)
18
Ch 123 (In 122)
33
KGnd
4
Ch 120 (In 119)
19
Ch 121 (In 120)
34
KGnd
5
Ch 118 (In 117)
20
Ch 119 (In 118)
35
KGnd
6
Ch 116 (In 115)
21
Ch 117 (In 116)
36
KGnd
7
Ch 114 (In 113)
22
Ch 115 (In 114)
37
KGnd
8
Ch 112 (In 111)
23
Ch 113 (In 112)
38
KGnd
9
Ch 110 (In 109)
24
Ch 111 (In 110)
39
KGnd
10
Ch 108 (In 107)
25
Ch 109 (In 108)
40
KGnd
11
Ch 106 (In 105)
26
Ch 107 (In 106)
41
KGnd
12
Ch 104 (In 103)
27
Ch 105 (In 104)
42
KGnd
13
Ch 102 (In 101)
28
Ch 103 (In 102)
43
Shield
14
Ch 100 (In 99)
29
Ch 101 (In 100)
44
Ch 99 (In 98)
15
Ch 98 (In 97)
30
Ch 97 (In 96)
24.1.2 High voltage output and input
Two SHV male. To mate with standard SHV connector.
Core: high voltage
(2 kV max)
Outer screen: shield
(at chassis GND)
24.2 Rear panel connectors
24.2.1 Ethernet communications
RJ-45 jack. To mate with standard RJ-45 plug.
Auto MDIX facility - cable can be direct or crossover type.
24.2.2 RS-232 / RS-485 communications
Six pin mini-DIN socket (PS/2 mouse/keyboard type).
I128 User Manual
I128_UM_141014
Page 94 of 121
PSI System Controls and Diagnostics
Pin 6
Pin 5
Pin 4
Pin 3
Pin 2
Pin 1
(External view on connector / solder side of mating plug)
1
RS-232 Tx / RS-485 Tx-
4
n/c
2
RS-232 Rx / RS-485 Rx+
5
RS-485 Tx+
3
Gnd
6
RS-485 Rx-
The socket incorporates a sensor switch that allows the I128 to detect that a plug has been
connected. When a connection is made, the RS-232 / RS-485 transceiver is active, and the
communication mode is set by the mode switch.
24.2.3 Gate input and output
Two Lemo coax 00 jack (female). Input termination 2.5 kohm. Output is able to drive 50 ohm
load.
In
Out
24.2.4 Monitor input
One Lemo coax 00 jack (female). Output can be configured at time of manufacture to be a TTLlevel pulse (1 µsec at logic high, able to drive a 50 ohm load), or a 50 nsec transformer-coupled
negative-going pulse.
24.2.1 Fiber-optic communications
Six HFBR ST bayonets suitable for 1 mm plastic or 200 µm silica fiber. 664 nm (visible red)
light.
Dark casing = receiver, light casing = transmitter.
Out
In
Channel 1
Out
In
Channel 2
Out
Out
Process
Status
Enable
Beam
Two loop controller ports, plus two individual digital output lines. Note: the fiber optic ports are
mounted on a daughter board, which allows other configurations of transmitters and receivers to
be installed for particular applications.
I128 User Manual
I128_UM_141014
Page 95 of 121
PSI System Controls and Diagnostics
24.2.2 Enable/Status port
One Weidmuller Omnimate SL 179348000 8 pin connector.
-
+
Enabled
Status
Enable
Cmd
24 V
Mode
Key
24.2.3 Interlock port
One Weidmuller Omnimate SL 179345000 5 pin connector (four pins used).
-
+
ILK
24 V
n/c
24.2.4 Relay port
One Weidmuller Omnimate SL 179344000 4 pin connector.
-
24 V
+
Relay
24.2.5 Power input, 24 VDC
Two-pin Redel PXG.M0.2GG.NG female. To mate with Redel PAG.M0.2 type or PFG.M0.2
type free plugs. Suitably terminated 24 V power supplies and leads are available from Pyramid
Technical Consultants, Inc.
Pin 1: +24 VDC
Pin 2: 24 V return (PSU 0V)
24.2.6 Ground lug
M4 threaded stud. To mate with M4 ring lug.
I128 User Manual
I128_UM_141014
Page 96 of 121
PSI System Controls and Diagnostics
25 Controls and Indicators
25.1 Front panel controls
25.1.1 Key switch
Two position switch to select Normal operation mode or Diagnostic mode. Key is retained when
in Diagnostic Mode.
25.2 Rear panel controls
25.2.1 Address switch
16 position rotary switch setting device address for use when you have the I128 on a fiber optic
loop. Choice of address is arbitrary, but each device in a fiber-optic loop system must have a
unique address. This communication mode is not currently supported in the I128.
Setting
Function
0
1-15
(Reserved to loop controller)
Available address settings.
If you are using the I128 as a loop controller, the address switch has no function.
25.2.2 Mode switch
10 position rotary switch setting for serial communications mode. This switch is read if a
connection is made to the serial connector. The ASCII protocol is provided for diagnostics using
simple terminal programs.
Setting
0
1
2
3
4
5
6
7
8
9
Function
8 bit binary, 115 kbps, RS-232
8 bit binary, 57.6 kbps, RS-232
8 bit binary, 19.2 kbps, RS-232
ASCII, 115.2 kbps , RS-232
ASCII, 57.6 kbps , RS-232
ASCII, 19.2 kbps, RS-232
8 bit binary, 115 kbps, RS-485
8 bit binary, 57.6 kbps, RS-485
ASCII, 115.2 kbps , RS-485
ASCII, 57.6 kbps , RS-485
I128 User Manual
I128_UM_141014
Page 97 of 121
PSI System Controls and Diagnostics
25.2.3 Reset button
Momentary push-button that forces a warm reset of the on-board processor. Holding the button
for 5 seconds at the start of boot up forces the I128 to the default IP address (192.168.100.20
static).
25.3 Front panel indicators
25.3.1 Power on
The Pyramid triangle fractal logo illuminates when the unit is powered up (+ 5 V digital voltage
rail is present).
25.3.2 Mode switch
One amber LED. Illuminated if the mode switch is in the diagnostic position.
25.3.3 HV on
One amber LED. Illuminated if the HV supply is enabled.
25.4 Rear panel indicators
Four green LEDs.
Power
Initiated
Active
Comm
25.4.1 Power
Green LED. 24 VDC power is present and 2.5 V rail is present.
25.4.2 Initiated
Green LED. Unit has been initiated and triggered to acquire data.
25.4.3 Active
Green LED. I128 processor has booted and is running normally.
25.4.4 Com
Green LED. A host communication channel is active.
I128 User Manual
I128_UM_141014
Page 98 of 121
PSI System Controls and Diagnostics
25.4.5 Power up LED sequence
On power-up, the Power LED illuminates, and the remaining three status LEDs cycle in sequence
during the boot up. When the unit has booted, the Power and Active LEDs should be
illuminated. The Com LED will illuminate when a host communication link is active, and the
final LED will illuminate when measurement is in progress.
25.4.6 RJ-45 indicators
Green LEDs incorporated in the Ethernet connector show that a connection has been established
(left hand LED) and that messages are passing (right hand LED).
I128 User Manual
I128_UM_141014
Page 99 of 121
PSI System Controls and Diagnostics
26 Communications Interfaces
The I128 is a member of the PSI G2 range of devices. The unit is provided with four hardware
interfaces, RS-232, RS-485, two fiber-optic receiver/transmitter ports and Ethernet. The RS-232
and RS-485 interfaces are intended for simple direct connection to PCs, with no other equipment
necessary.
The fiber-optic interfaces are provided on the I128 to allow it to act as a loop controller, and thus
control multiple slave devices, and allows multiple devices to be connected to a host computer
via the I128 in a looped topology. The fiber-optic interface is well-suited to large systems and
experiments.
The Ethernet interface is provided to allow direct connection to systems which are integrated
using standard local area network hardware and protocols.
The I128 can support multiple clients, and in particular you can be connected via Ethernet and
the serial port at the same time.
If the serial connector is attached, then the serial port becomes active, irrespective of any other
connections. The baud rate, type of protocol and choice of RS-232 or RS-485 levels is made
using the mode switch.
If the Ethernet connection is made then the Ethernet port becomes active. The mode switch and
address switch have no function when using Ethernet communications. LEDs incorporated in the
RJ-45 jack indicate activity on the port.
26.1 Ethernet
The Ethernet port is a standard RJ-45 jack. The I128 supports auto MDIX, so you do not need to
worry about whether your cable is a patch cable or a crossover. The I128 will negotiate
connection speed with the device it is connected to, and the highest speed that both ends can
support will be used. Communication uses standard TCP/IP and UDP messaging. See section
27 for further information on using the I128 in a network.
26.2 Web server
You can connect to the I128 using a standard browser program by typing in its IP address. The
device responds with a screen showing connection details, firmware versions and a list of any
connected devices on the fiber optic ports. If you add new looped devices, they can be connected
from this screen, and you can interrogate them by clicking their entries in the list.
I128 User Manual
I128_UM_141014
Page 100 of 121
PSI System Controls and Diagnostics
Figure 59. Interrogating the I128 via a web browser.
26.3 RS-232 connection
A basic three-wire RS-232 connection is all that is required to communicate with the I128. The
I128 uses a 6-pin mini-DIN connector. An adaptor to a 9-pin female DSub is available from
Pyramid; a standard pin to pin male to female 9-pin DSub cable can them be used to connect to
the PC. The cable length should not exceed about 5m, especially at the maximum baud rate. For
longer serial cable runs you should use RS-485.
5
6
3
4
6 pin mini-DIN male
1 2
9 pin D female
RX
TX
TX
GND
5
4
9
RX
3
2
1
6
Figure 60. RS-232 cable I128 to PC.
I128 User Manual
I128_UM_141014
Page 101 of 121
PSI System Controls and Diagnostics
26.4 RS-485 connection example
RS-485 is used to extend a serial connection over a long distance. If you have a RS-232 serial
port on the host PC, then an RS-232 to RS-485 converter is used at the host PC end. The built-in
RS-485 of the I128 allows a direct connection at its end.
A commonly-used converter is the MOXA TC100. The Moxa TCC-80 is a low-cost alternative
for less critical applications. The converter should be configured for four wire (full duplex) RS485 operation. The I128 provides parallel termination for transmit and receive. It is therefore
optional whether you also terminate at the TC100 end, but there is no harm if you do. The
recommended Dip switch setting for the TC100 is:
Sw1
Sw2
Sw3
OFF
ON
ON
The recommended Dip switch setting for the TCC-80 is:
Sw1
Sw2
Sw3
ON
OFF
ON
1 :Tx2: Rx+
3: Gnd
4: n/c
5: Tx+
6: Rx-
5
Tx+ (B)
Tx- (A)
Rx+ (B)
Rx- (A)
6
3
4
1 2
SGnd
I128
TC100
Figure 61. RS-485 cable I128 to TC100.
In order to enable the RS-485 interface on the I128, you must have a physical connection to the
serial port, and you must select one of the relevant modes (modes 6 through 9). If you have
trouble getting the RS-485 connection to work, check carefully to ensure that you have all the
transmit and receive lines connected as shown.
26.5 Fiber optics
Two fiber optic ports are provided for connecting slave devices such as M10 and M40 general
purpose I/O devices, H10 Hall probes and others. Up to 15 devices can be connected in a loop
on each port, although the available bandwidth must be shared between them. Messaging uses
the Pyramid Technical Consultants 10 Mbps deterministic 8-bit serial protocol. It is particularly
suited to real time systems, where the slave devices must work in synchronization with the I128.
I128 User Manual
I128_UM_141014
Page 102 of 121
PSI System Controls and Diagnostics
The fiber optic ports can be used for peer to peer communication between I128s, or between
I128s and loop controllers such as the A560. This permits activities such as map execution to be
coordinated across multiple devices.
One of the fiber optic ports may also be used to allow the I128 to be a client on a fiber optic loop.
This feature is not supported in the current firmware.
I128 User Manual
I128_UM_141014
Page 103 of 121
PSI System Controls and Diagnostics
27 Using the I128 on a network
27.1 Network configurations
The I128 uses TCP/IP and UDP communication over standard local area network hardware.
Addressing is using the IP4 standard, and it supports static and dynamic (DHCP) address
assignment. The device can be configured via the PTC DiagnosticG2, via the serial interface, or
by your own host software using the appropriate procedure calls.
Most control and data acquisition systems are set up with fixed addresses assigned by the
network administrator. It is also typical to isolate such networks from the internet to prevent
unauthorized access, and to allow operation without firewalls which can disrupt communications.
In order for the host computer and the I128 to communicate, they must be within the same
subnet. It is typical to limit a local network to 256 addresses by setting the IP4 subnet mask to
255.255.255.0. Then the I128 and the host must have the first three bytes of their addresses
common, and must differ in the last byte. For example, the host could be 192.168.100.11 and the
I128 at 192.168.100.20. The last byte must also not conflict with any other devices on the same
subnet. Addresses with last byte 0 and 255 are reserved for special functions in TCP/IP.
Note that if you are communicating with the I128 using Ethernet and you change its IP address,
then your communication channel immediately becomes invalid. You need to rediscover the
device if using the PTC DiagnosticG2, or otherwise change your host software setup as needed.
If you have moved the I128 into a different subnet, for example by setting it to a static address of
192.168.1.20 in the prior example, then will also need to the host PC’s IP address into the same
subnet before you can reconnect.
The simple static IP arrangement allows you to connect using a direct cable connection as shown
in figure 62, or via a network switch, as shown in figure 63.
I128
Figure 62. Direct Ethernet connection
I128 User Manual
I128_UM_141014
Page 104 of 121
PSI System Controls and Diagnostics
I128
Switch
Figure 63. Connection via switch
Static addressing will also work if the network includes a router, but this arrangement also allows
dynamic address assignment by the router. If your host software expects devices to be at specific
addresses, this is not appropriate, but it can be helpful for initial testing and for fluid setups. The
router will ensure that there are no address conflicts. The Discover utility in the PTC
DIagnosticG2 makes the use of DHCP-assigned addresses practical.
I128
Switch
Router
Figure 64. Network including router
You may wish to define the address of this router, or some other access point on the network, as
the default gateway, if you want the I128 to be accessible from another network. This is
optional.
27.2 Recovery from unknown IP address
There are two ways to restore the I128 to a known IP address.
27.2.1 Reset at boot time
If you keep the reset button depressed for the first five seconds while the I128 is powering up, it
will return to its default IP setting, which is a static address of 192.168.100.20.
I128 User Manual
I128_UM_141014
Page 105 of 121
PSI System Controls and Diagnostics
27.2.2 Using the serial port
You can query and set the I128 network configuration via the serial port. This capability will be
added in a future firmware update.
27.3 System log address
The system log address is the IP address of a syslog server that can log status and error messages
from the I128, for diagnostic purposes. You should leave this set to 0.0.0.0 unless you are doing
diagnostic investigations directed by Pyramid Technical Consultants.
I128 User Manual
I128_UM_141014
Page 106 of 121
PSI System Controls and Diagnostics
28 ASCII Communication
The I128 includes a serial interface for service and diagnostic work. This port is not useful for
taking data from the I128 due to the Future firmware versions will add features such as serial
number and firmware version interrogation, and the ability to query and set the Ethernet
configuration. The feature will use ASCII commands that can be sent from a standard terminal
host application.
28.1 Using PuTTY to test the serial ASCII connection
Microsoft Windows no longer includes a terminal emulator that you can use to test the ASCII
communications. Hyperterminal may be transferred from an unused prior Windows version by
copying the files hypertrm.exe and hypertrm.dll. Various public domain programs are also
available to perform this task. Pyramid has tested PuTTY and Realterm with G2 devices. The
following screenshots show the configuration of PuTTY with 115kbps baud rate.
Figure 65. Setup of PuTTY for ASCII serial communication with the I128.
I128 User Manual
I128_UM_141014
Page 107 of 121
PSI System Controls and Diagnostics
You can be connected to the I128 via ASCII serial and the PTC DiagnosticG2 via Ethernet at the
same time. Some behavior may be unusual, so this is only recommended for fault finding, not
routine measurement.
I128 User Manual
I128_UM_141014
Page 108 of 121
PSI System Controls and Diagnostics
29 Creating a Host Software Application
Pyramid Technical Consultants, Inc. provides a full application programming interface for the
I128, based upon a C++ library. Full details are available upon request.
I128 User Manual
I128_UM_141014
Page 109 of 121
PSI System Controls and Diagnostics
30 Fault-finding
Symptom
Possible Cause
Confirmation
Solution
High noise levels
Environmental noise source
Try using other integration
periods, especially 1/line
frequency.
Use low-noise (antitriboelectric cable). Use
longest integration period
compatible with your required
time resolution.
Not using low noise cable
Check noise without cable.
Remove any source of cable
vibration.
Use low-noise (antitriboelectric cable).
Bad cable signal cable screens
Turn off potential source of
interference. Check screens.
If good, try interrupting screen
at one end of the cable to
break ground loop.
Use good quality cable.
Investigate your particular
situation to find the optimum
connections for minimum
noise. Re-route cables away
from sources of interference.
Consider double-screening.
Ground loops or large ground
currents creating potential
differences.
Make or break obvious ground Use good quality cable.
paths.
Investigate your particular
situation to find the optimum
connections for minimum
noise. Re-route cables away
from sources of interference.
Consider double-screening.
Interference from other
equipment
I128 User Manual
I128_UM_141014
Page 110 of 121
PSI System Controls and Diagnostics
No signal when expected, or
very small signal.
No signal when expected on
HCC
No return path for current
Check cabling. Try a direct
ground connection from the
I128 to the sensor body or
external high voltage supply
ground, if you are using one.
Ensure you understand and
implement the complete
circuit for the measured
current.
HV bias not being applied to
ionization chamber
Check setting and loopback
voltage.
Apply appropriate bias
voltage.
Small signal is lost in noise
Use longer integration and
more conversions per sample
to improve signal to noise.
Using higher current range
when signal is small
Check range setting
Use an appropriate range for
the expected signals.
Poor quality signal cables
Check with cables
disconnected
Use good quality low-noise
cables if attempting to
measure small signals.
Bad calibration
Re-calibrate (cables should not Re-calibrate (cables should not
be connected during
be connected during
calibration)
calibration)
Inadvertent selection of zero
subtraction on the
DiagnosticG2 software.
Check setting.
Connected to wrong pins on
connector
High offset currents
Internal contamination of
I128.
Inaccurate readings.
I128 User Manual
Bad calibration
I128_UM_141014
Do not select zero subtraction
if valid signals are present.
Return unit to Pyramid
Technical Consultants, Inc. for
servicing.
Compare latest calibration
factors with previous ones.
Page 111 of 121
Re-calibrate (cables should not
be connected during
PSI System Controls and Diagnostics
Re-calibrate (cables should not calibration)
be connected during
calibration)
Unit not collecting data
Inappropriate trigger mode
(waiting for external trigger
when none present)
Select internal trigger mode.
Use appropriate trigger mode.
Missing data in csv log
Data rate exceeds
communication rate
Use buffered acquisition.
Use buffered acquisition when
appropriate.
No monitor pulse output
Incorrect configuration of
charge per pulse value
Check setting
Use appropriate setting.
No signal at HCC input –
monitor pulses are derived
from HCC signal.
Check connections.
Connect relevant signal to
HCC.
Unit is not measuring’
Check I128 state
Ensure I128 is initiated and
triggered when necessary.
Unit is configured for wrong
type of monitor pulse.
Check purchase specification.
Return unit to Pyramid
Technical Consultants, Inc. for
modification if necessary.
Incorrect gate polarity
selected.
Check settings
Use correct polarity.
Incorrect trigger mode setting
Check settings
Use a suitable trigger mode
No or incorrect response to
external gate
Source of gate signal unable to Tee off signal and check
drive the I128 input
amplitude on oscilloscope.
impedance (2.5 kohm) or any
added terminating impedance.
I128 User Manual
I128_UM_141014
Page 112 of 121
Use suitably rated trigger
source.
PSI System Controls and Diagnostics
No or low high voltage
Shorted to ground in external
circuit
Monitor HV reading zero or
very low relative to setpoint.
Monitor value recovers if
C400 disconnected from the
external circuit.
Eliminate shorts to ground.
External load resistance too
low.
Voltage recovers if setting is
reduced.
Do not attempt to draw more
than 1 watt from each high
voltage supply. Higher power
modules are available to
special order.
High voltage not at setpoint
A high compliance source
such as a charged particle
beam is driving the HV
electrode.
Monitor value recovers if
C400 disconnected from the
external circuit.
Change geometry to reduce
beam strike.
Cannot set high voltage
Trying to set above the
maximum allowed value soft
limit.
Sets OK if a lower value is
chosen.
If allowed, increase the
maximum allowed value.
Unable to communicate via
Ethernet
Incorrect IP address for I128
or host (not in the same
subdomain).
Check settings of I128 host
PC.
Use consistent IP addresses.
Messages being blocked by
anti virus software.
Disable anti-virus software
Set up allowed channels for
I128 messages.
Another host is
communicating with the I128.
Change IP address.
Set up IP addresses and subnet
masks to prevent conflicts.
Unexpected changes to I128
state
I128 User Manual
I128_UM_141014
Use a direct cable connection
instead of a network.
Page 113 of 121
PSI System Controls and Diagnostics
Communications interruptions
Other processes on PC host
interfering with comms ports.
Unable to connect on serial
port
Another program is using the
COM port.
Unexpected behavior
Device will not boot or
communicate
Device does not activate
interlock when expected
I128 User Manual
Use a dedicated PC with
simple configuration and
minimum number of processes
running.
Try to access the required port
with a terminal program.
Choose another port or close
down the other program.
Incorrect port settings.
Correct the settings.
Incorrect cable.
Make up a suitable cable.
Serial communication not
supported by firmware.
Check firmware version.
Unit is overheating due to
failed fan
Unit feels warm. Fan stopped.
Return unit for fan
replacement.
Unit is overheating due to
airflow blockage
Unit feels warm. Performance
improves when operated on
the bench.
Clear space around the unit
and improve airflow.
Soft radiation events
disrupting processor.
Turn off radiation source.
Locate I128 in a place where
errors do not occur.
Damage to A60 processor.
Contact Pyramid Technical
Consultants, Inc.
Failed firmware update.
Contact Pyramid Technical
Consultants, Inc.
Mode switch is in diagnostic
setting
I128_UM_141014
Check switch setting.
Page 114 of 121
Only operate in diagnostic
mode under carefully
controlled conditions, remove
key at other times.
PSI System Controls and Diagnostics
31 Maintenance
The I128 does not require routine maintenance, except to clear any dust accumulation in the fan
filter.
There are no user-serviceable parts inside.
CAUTION. High voltages may be present inside the case. Do not open the case when power is
applied.
31.1 Cooling fan maintenance
If there is buildup of dust in the filter, you should clear this by vacuum cleaning in situ, or by
removing the filter element and cleaning it separately with an air jet. Note that detaching the
filter element also detaches the fan from the case.
Figure 66. Fan filter removal
If the fan fails, it is necessary to open remove the lid of the case to access the power connector.
Due to risk of contamination or electrostatic discharge damage, we recommend that you consult
Pyramid Technical Consultants, Inc. before attempting this.
I128 User Manual
I128_UM_141014
Page 115 of 121
PSI System Controls and Diagnostics
To remove the lid of the case, remove four M2.5 cross-head screws from the rear top surface, and
slide the cover backwards to disengage from the front panel.
Figure 67. Fan power connector (2 pin Molex)
The I128 is fitted with a 1.1 amp automatically resetting positive temperature coefficient (PTC)
fuse in the 24 VDC input. No user intervention is required if the fuse operates due to
overcurrent. The fuse will reset when the overcurrent condition ends.
31.2 Calibration
Run the internal calibration function of the I128 periodically. Make sure there are no signals
present at the inputs when doing this. It is good practice to note any changes in the gain and
offset parameters, because any trend would indicate that the affected channel might be out of
specification.
Depending upon your application and your operational procedures, you may need to check the
accuracy of the I128 against an external traceable current standard periodically. This is
particularly the case for the high current channel (HCC) which is typically used for dosimetry.
External calibration can be done with any suitably-rated true current source such as the models
available from Keithley. Since the I128 has high inherent accuracy, you must ensure that your
reference source is in calibration. The compliance voltage of the reference source should be set
to between 1.00 and 5.00 V, and you should ensure that there is a well-defined current return path
from the I128 back to the source.
Pyramid Technical Consultants Inc. offers a back to base calibration service for the I128.
I128 User Manual
I128_UM_141014
Page 116 of 121
PSI System Controls and Diagnostics
32 Returns procedure
Damaged or faulty units cannot be returned unless a Returns Material Authorization (RMA)
number has been issued by Pyramid Technical Consultants, Inc. If you need to return a unit,
contact Pyramid Technical Consultants at [email protected], stating
- model
- serial number
- nature of fault
An RMA will be issued, including details of which service center to return the unit to.
I128 User Manual
I128_UM_141014
Page 117 of 121
PSI System Controls and Diagnostics
33 Support
Manual and software driver updates are available for download from the Pyramid Technical
Consultants website at www.ptcusa.com. A secondary site can be found at
www.ptceurope.com. Technical support is available by email from [email protected].
Please provide the model number and serial number of your unit, plus relevant details of your
application.
I128 User Manual
I128_UM_141014
Page 118 of 121
PSI System Controls and Diagnostics
34 Disposal
We hope that the I128 gives you long and reliable service. The I128 is manufactured to be
compliance with the European Union RoHS Directive 2002/95/EC, and as such should not
present any health hazard. Nevertheless, when your I128 has reached the end of its working life,
you must dispose of it in accordance with local regulations in force. If you are disposing of the
product in the European Union, this includes compliance with the Waste Electrical and
Electronic Equipment Directive (WEEE) 2002/96/EC. Please contact Pyramid Technical
Consultants, Inc. for instructions when you wish to dispose of the device.
I128 User Manual
I128_UM_141014
Page 119 of 121
PSI System Controls and Diagnostics
35 Declaration of Conformity
I128 User Manual
I128_UM_141014
Page 120 of 121
PSI System Controls and Diagnostics
36 Revision History
The release date of a Pyramid Technical Consultants, Inc. user manual can be determined from
the document file name, where it is encoded yymmdd. For example, B10_UM_080105 would be
a B10 manual released on 5 January 2008.
Version
Changes
I128_UM_130312
First general release
I128_UM_141014
Update to cover revision 4 hardware: channel 0 reduced input impedance
and mode switching.
I128 User Manual
I128_UM_141014
Page 121 of 121