
1
User Guide Supplier Quality Assurance Software version 4.6 User Guide Supplier Quality Assurance Software version 4.6 CyberMetrics Corporation 1523 W. Whispering Wind Drive, Suite 100 Phoenix, Arizona 85085 USA Toll-free: 1-800-777-7020 (USA) Direct: (480) 922-7300 Fax: (480) 922-7400 www.CyberMetrics.com Entire Contents Copyright 1988-2011, CyberMetrics Corporation All Rights Reserved Worldwide. U.S. GOVERNMENT RESTRICTED RIGHTS This software and documentation are provided with RESTRICTED RIGHTS. Use, duplication, or disclosure by the Government is subject to restrictions as set forth in subdivision (b)(3)(ii) of The Rights in Technical Data and Computer Software clause at 252.227-7013. Contractor/manufacturer is CyberMetrics Corporation. QUESTIONS Should you have any questions concerning this agreement, or if you wish to contact CyberMetrics Corporation for any reason, please write or call: CyberMetrics Corporation 1523 West Whispering Wind Drive, Suite 100 Phoenix, AZ 85085 Tel: (480) 922-7300 USA Toll Free: 1-800-777-7020 Fax: (480) 922-7400 TECHNICAL SUPPORT If you need technical support, please call or write our product support and development office: CyberMetrics Corporation 1523 West Whispering Wind Drive, Suite 100 Phoenix, AZ 85085 Tel: (480) 922-7300 USA Toll Free: 1-800-777-7020 Fax: (480) 922-7400 Technical support is available by telephone during normal business hours, Mountain/Central time. Email and Internet Support Electronic support is also available 24 hours a day to all registered users; contact Technical Support at: Email: [email protected] Internet: www.cybermetrics.com NOTE: TECHNICAL SUPPORT CANNOT BE PROVIDED UNLESS THE USER HAS FULLY COMPLETED AND MAILED IN THE ACCOMPANYING REGISTRATION CARD. TRADEMARK ACKNOWLEDGMENTS All CyberMetrics Corporation products are trademarks or registered trademarks of CyberMetrics Corporation. All other brand and product names are trademarks or registered trademarks of their respective holders. Single User Software License Agreement This is a legal agreement between you, the end user and CyberMetrics Corporation (“CyberMetrics”). BY USING THIS SOFTWARE, YOU ARE AGREEING TO BE BOUND BY THE TERMS OF THIS AGREEMENT. IF YOU DO NOT AGREE TO THE TERMS OF THE AGREEMENT, PROMPTLY RETURN THE DISKS AND THE ACCOMPANYING ITEMS (including written materials and binders or other containers) TO THE PLACE FROM WHICH YOU OBTAINED THEM FOR A FULL REFUND. SOFTWARE LICENSE 1. GRANT OF LICENSE. CyberMetrics grants to you the right to use one copy of the enclosed software program (the “SOFTWARE”) on a single computer. If you wish to put the SOFTWARE on a network server, you must purchase the same number of copies as computers attached to the network that use the SOFTWARE. 2. COPYRIGHT. The SOFTWARE is owned by CyberMetrics or its suppliers and is protected by United States copyright laws and international treaty provisions. Therefore, you must treat the SOFTWARE like any other copyrighted material (e.g., a book or musical recording) except that you may (a) make copies of the SOFTWARE solely for backup or archival purposes and (b) transfer the software to hard disks provided that only one copy of the SOFTWARE is used at any time. You MAY NOT COPY the written materials accompanying the SOFTWARE. 3. OTHER RESTRICTIONS. You may not rent or lease the SOFTWARE, but you may transfer the SOFTWARE and accompanying written materials on a permanent basis provided you retain no copies and the recipient agrees to the terms of this Agreement. LIMITED WARRANTY CyberMetrics warrants that (a) you may return the SOFTWARE and all accompanying written materials, for any reason, for a full refund, for a period of 30 days from the date of receipt; and (b) the SOFTWARE will perform substantially in accordance with the accompanying written materials for a period of 90 days from the date of receipt; and (c) any hardware accompanying the SOFTWARE will be free from defects in materials and workmanship under normal use and service for a period of one year from the date of receipt. Any implied warranties on the software and hardware are limited to 90 days and one (1) year, respectively. Some states do not allow limitations on duration of an implied warranty, so the above limitation may not apply to you. CUSTOMER REMEDIES. CyberMetrics’ entire liability and your exclusive remedy shall be, at CyberMetrics’ option, either (a) return of the price paid or (b) repair or replacement of the SOFTWARE or hardware that does not meet CyberMetrics Limited Warranty and which is returned to CyberMetrics with a copy of your invoice or receipt. This Limited Warranty is void if failure of the SOFTWARE or hardware has resulted from accident, abuse, or misapplication. Any replacement SOFTWARE will be warranted for the remainder of the original warranty period or 30 days, whichever is longer. NO OTHER WARRANTIES. CyberMetrics DISCLAIMS ALL OTHER WARRANTIES, EITHER EXPRESSED OR IMPLIED, INCLUDING BUT NOT LIMITED TO IMPLIED WARRANTIES OF MERCHANTABILITY AND FITNESS FOR A PARTICULAR PURPOSE, WITH RESPECT TO THE SOFTWARE, THE ACCOMPANYING WRITTEN MATERIALS and ANY ACCOMPANYING HARDWARE. THIS LIMITED WARRANTY GIVES YOU SPECIFIC LEGAL RIGHTS; YOU MAY HAVE OTHERS WHICH VARY FROM STATE TO STATE. NO LIABILITY FROM CONSEQUENTIAL DAMAGES. In no event shall CyberMetrics, its distributors, its representatives, or its suppliers be liable for any damages whatsoever (including, without limitation, damages for the loss of business profits, business interruption, loss of business information, or other pecuniary loss) arising out of the use or inability to use this CyberMetrics product, even if CyberMetrics has been advised of the possibility of such damages. Because some states do not allow the exclusion or limitation of liability for consequential or incidental damages, the above limitation may not apply to you. Copyright © CyberMetrics Corporation. All Rights Reserved. Table of Contents U.S. GOVERNMENT RESTRICTED RIGHTS..................................................................................................... ii TABLE OF CONTENTS......................................................................................................................V CHAPTER 1: INTRODUCTION......................................................................................................... 13 CHAPTER 2: INSTALLING AND RUNNING SUPPLIERTRAK............................................................ 15 PROGRAM REQUIREMENTS .....................................................................................................................................15 UPGRADING ..........................................................................................................................................................15 PROGRAM INSTALLATION .......................................................................................................................................15 Installing SUPPLIERtrak ...............................................................................................................................15 Network Installations ...................................................................................................................................16 RUNNING SUPPLIERTRAK ....................................................................................................................................17 STARTING SUPPLIERTRAK FROM THE START MENU .................................................................................................17 SUPPLIERtrak Logon....................................................................................................................................17 SUPPLIERtrak Serial Number......................................................................................................................17 SUPPLIERTRAK MAIN MENU ................................................................................................................................18 SUPPLIERTRAK SETTINGS................................................................................................................................... 20 Database Security ........................................................................................................................................ 20 Date Formats ............................................................................................................................................... 20 CHAPTER 3: SUPPLIER MASTER RECORDS................................................................................... 21 SUPPLIER MASTER RECORD FIELDS ....................................................................................................................... 22 SUPPLIER RATING HISTORY ................................................................................................................................... 24 SUPPLIER PROCEDURES ........................................................................................................................................ 24 SUPPLIER ALARMS ............................................................................................................................................... 25 Skip Lot/Rejection Alarm ............................................................................................................................ 26 Supplier Calendar Date Alarm .................................................................................................................... 27 CHAPTER 4: SUPPLIER PART ENTRY............................................................................................ 29 SUPPLIER PART RECORDS ..................................................................................................................................... 29 Supplier Part Record Fields ........................................................................................................................ 30 Inspection Characteristics Table..................................................................................................................31 SUPPLIER PART PROCEDURES ................................................................................................................................31 PART ALARMS ..................................................................................................................................................... 32 Part Counter Alarm...................................................................................................................................... 32 Part Calendar Alarm.................................................................................................................................... 33 PART ENTRY ATTACHMENTS .................................................................................................................................. 33 PART ENTRY RECEIVING HISTORY ........................................................................................................................... 34 CLONE PART FEATURE .......................................................................................................................................... 35 CHAPTER 5: RECEIVED MATERIAL ENTRY .................................................................................... 37 RECEIVED MATERIAL RECORDS .............................................................................................................................. 37 Received Material Record Fields ................................................................................................................ 38 VIEWING RECEIVING HISTORY ................................................................................................................................. 39 vi Table of Contents VIEWING SUPPLIER RATING HISTORY ...................................................................................................................... 39 INSPECTION FORMS .............................................................................................................................................. 40 VIEWING PROCEDURES ...........................................................................................................................................41 ENTERING INSPECTION RESULTS ............................................................................................................................ 42 Inspection Results Header .......................................................................................................................... 42 Inspection Measurement Table................................................................................................................... 43 ENTERING REJECTION RECORDS ............................................................................................................................ 43 Rejection Record Fields............................................................................................................................... 44 REJECTION ALARM ............................................................................................................................................... 44 REJECTION NOTICES ............................................................................................................................................. 45 ACCEPT AND REJECT TAGS .................................................................................................................................... 45 Accept/Reject Tag Layouts .......................................................................................................................... 46 Printing Accept Tags.................................................................................................................................... 46 Printing Reject Tags..................................................................................................................................... 47 CHAPTER 6: CONCLUSION ............................................................................................................ 49 USER’S MANUAL........................................................................................................................... 51 CHAPTER 1: REQUIREMENTS AND INSTALLATION ...................................................................... 53 PROGRAM REQUIREMENTS .................................................................................................................................... 53 UPGRADING ......................................................................................................................................................... 53 PROGRAM INSTALLATION ...................................................................................................................................... 53 Installing SUPPLIERtrak .............................................................................................................................. 53 NETWORK INSTALLATIONS..................................................................................................................................... 54 RUNNING SUPPLIERTRAK ................................................................................................................................... 55 Starting SUPPLIERtrak from the Start Menu ............................................................................................. 55 SUPPLIERtrak Logon................................................................................................................................... 55 SUPPLIERtrak Serial Number..................................................................................................................... 55 SUPPLIERTRAK MAIN MENU ............................................................................................................................... 56 SUPPLIERTRAK SETTINGS................................................................................................................................... 58 Database Security ........................................................................................................................................ 58 Date Formats ............................................................................................................................................... 58 CHAPTER 2: PROGRAM CONVENTIONS ......................................................................................... 59 RECORD SEARCH WINDOWS ................................................................................................................................... 59 Supported Wildcard Characters in Search Fields ....................................................................................... 59 FLOATING TOOLBAR.............................................................................................................................................. 60 DISPLAYING COMPLETE FIELDS ...............................................................................................................................61 POP-UP CALENDAR FOR DATE ................................................................................................................................61 FORM VIEWS.........................................................................................................................................................61 Elements of a Record Form......................................................................................................................... 62 DATASHEET VIEWS OF RECORDS............................................................................................................................. 64 Elements of a Datasheet Window................................................................................................................ 64 Hiding and Displaying Columns ................................................................................................................... 65 Changing the Font in Table View ................................................................................................................. 65 Hiding and Displaying Gridlines .................................................................................................................. 65 Changing the Row Height............................................................................................................................. 65 Changing the Column Width ........................................................................................................................ 65 To Freeze Columns ...................................................................................................................................... 65 To Unfreeze Columns................................................................................................................................... 66 OUTPUT TO COMMAND .......................................................................................................................................... 66 SEND COMMAND (E-MAIL REPORTS) ...................................................................................................................... 67 SELECT RECORD COMMAND ................................................................................................................................... 67 SUPPLIERtrak Supplier Quality Management Software vii SELECT ALL RECORDS COMMAND ........................................................................................................................... 67 FIND COMMAND ................................................................................................................................................... 67 Replace Command ....................................................................................................................................... 68 QUICK SORT COMMAND ......................................................................................................................................... 69 FILTER/SORT COMMAND ....................................................................................................................................... 69 ADDING NEW RECORDS ......................................................................................................................................... 70 Adding Records while in Form View............................................................................................................ 70 Adding Records while in Table View ........................................................................................................... 70 GO TO COMMAND ................................................................................................................................................. 70 SHOW ALL RECORDS COMMAND ..............................................................................................................................71 COPYING RECORDS ................................................................................................................................................71 DELETING RECORDS ..............................................................................................................................................71 UNDOING CHANGES TO FIELDS AND RECORDS ...........................................................................................................71 SAVING RECORDS ..................................................................................................................................................71 EDITING AND SHORTCUT KEYS ................................................................................................................................71 Keyboard Shortcuts – General .....................................................................................................................71 Field Editing and Selection Keys ................................................................................................................. 72 Datasheet (Table) Keyboard Shortcuts ....................................................................................................... 72 CHAPTER 3: SUPPLIER MASTER RECORDS................................................................................... 73 Supplier Master Record Fields.................................................................................................................... 74 SUPPLIER RATING HISTORY ................................................................................................................................... 75 SUPPLIER PROCEDURES ........................................................................................................................................ 75 SUPPLIER ALARMS ............................................................................................................................................... 76 Skip Lot/Rejection Alarm ............................................................................................................................ 77 Supplier Calendar Date Alarm .................................................................................................................... 77 CHAPTER 4: SUPPLIER PART ENTRY............................................................................................ 79 SUPPLIER PART RECORDS ..................................................................................................................................... 79 Supplier Part Record Fields ........................................................................................................................ 80 Inspection Characteristics Table..................................................................................................................81 SUPPLIER PART PROCEDURES ................................................................................................................................81 PART ALARMS ..................................................................................................................................................... 82 Part Counter Alarm...................................................................................................................................... 82 Part Calendar Alarm.................................................................................................................................... 83 PART ENTRY ATTACHMENTS .................................................................................................................................. 83 PART ENTRY RECEIVING HISTORY ........................................................................................................................... 84 CLONE PART FEATURE .......................................................................................................................................... 85 CHAPTER 5: RECEIVED MATERIAL ENTRY .................................................................................... 87 RECEIVED MATERIAL RECORDS .............................................................................................................................. 87 Received Material Record Fields ................................................................................................................ 88 Receiving and Reject records imported from earlier versions of SUPPLIERtrak: ................................... 89 VIEWING RECEIVING HISTORY ................................................................................................................................. 90 VIEWING SUPPLIER RATING HISTORY .......................................................................................................................91 INSPECTION FORMS ...............................................................................................................................................91 VIEWING PROCEDURES .......................................................................................................................................... 92 ENTERING INSPECTION RESULTS ............................................................................................................................ 93 Inspection Results Header .......................................................................................................................... 93 Inspection Measurement Table................................................................................................................... 94 ENTERING REJECTION RECORDS ............................................................................................................................ 94 Rejection Record Fields............................................................................................................................... 95 REJECTION ALARM ............................................................................................................................................... 95 viii Table of Contents REJECTION NOTICES ............................................................................................................................................. 96 ACCEPT AND REJECT TAGS .................................................................................................................................... 96 Accept/Reject Tag Layouts .......................................................................................................................... 96 Printing Accept Tags.................................................................................................................................... 97 Printing Reject Tags..................................................................................................................................... 97 CHAPTER 6: PROCEDURE ENTRY ................................................................................................. 99 PROCEDURE ENTRY .............................................................................................................................................. 99 Procedure Entry—Procedure Text.............................................................................................................. 99 Procedure Entry—Procedure Image .........................................................................................................100 Procedure Entry—Procedure Attachments............................................................................................... 101 CHAPTER 7: STAFF ENTRY......................................................................................................... 103 STAFF ENTRY .....................................................................................................................................................103 Staff Entry—Information ............................................................................................................................103 Staff Entry—Training ..................................................................................................................................104 Training History ..........................................................................................................................................105 Staff Entry—Photo ......................................................................................................................................105 CHAPTER 8: RATINGS ENTRY..................................................................................................... 107 RATING RECORDS ................................................................................................................................................107 Defining Rating Setups ...............................................................................................................................107 Entering Rating Records ............................................................................................................................109 CHAPTER 9: SURVEY ENTRY ...................................................................................................... 111 SURVEY RECORDS ................................................................................................................................................111 Defining Survey Setups................................................................................................................................111 ENTERING SURVEY RECORDS ................................................................................................................................ 113 CHAPTER 10: LISTINGS AND REPORTS ...................................................................................... 115 LISTINGS AND REPORTS MENU ............................................................................................................................. 115 Print Setup .................................................................................................................................................. 115 Output To ..................................................................................................................................................... 116 Send............................................................................................................................................................. 117 VIEWING REPORTS............................................................................................................................................... 117 Print Preview Keyboard Shortcuts............................................................................................................. 117 To view different pages in Print Preview when zoomed-out: ................................................................... 117 To view different parts of the current page when zoomed-in:.................................................................. 117 Supplier Performance Report .................................................................................................................... 118 Supplier Part Performance Report ............................................................................................................ 118 Received Material Report ........................................................................................................................... 119 Rejected Material Report............................................................................................................................120 Rejection Notice Report.............................................................................................................................. 121 Rejection Cost Report .................................................................................................................................122 Rating Report ..............................................................................................................................................122 Rating Report (Current and Previous)........................................................................................................123 Survey Report .............................................................................................................................................124 Supplier Listing Report...............................................................................................................................124 Supplier Part Listing Report ......................................................................................................................125 Supplier Procedure Cross Reference Listing ............................................................................................125 Supplier Procedure Report ........................................................................................................................126 Part Procedure Cross Reference Listing ...................................................................................................126 Part Procedure Report ...............................................................................................................................126 SUPPLIERtrak Supplier Quality Management Software ix Active Supplier Alarm Listing.....................................................................................................................127 Active Part Alarm Listing............................................................................................................................127 Corrective Action Listing ............................................................................................................................127 Supplier Detail Report ................................................................................................................................128 CHAPTER 11: GRAPHS AND CHARTS .......................................................................................... 129 VIEWING CHARTS ................................................................................................................................................129 Print Preview Keyboard Shortcuts.............................................................................................................129 Print Setup ..................................................................................................................................................130 Output To .....................................................................................................................................................130 Send.............................................................................................................................................................130 REPORTS—DESCRIPTIONS ................................................................................................................................... 131 Worst Supplier Chart .................................................................................................................................. 131 Parts Comparison Chart ............................................................................................................................. 131 Supplier Performance Chart ......................................................................................................................132 Supplier Comparative Chart .......................................................................................................................133 CHAPTER 12: SETUP................................................................................................................... 135 SETUP MENU ......................................................................................................................................................135 SETTINGS ...........................................................................................................................................................136 User Information Entry...............................................................................................................................136 General ........................................................................................................................................................137 Settings—Interface.....................................................................................................................................138 Settings—Skip Dates and Days ..................................................................................................................139 RATING/SURVEY WIZARD .....................................................................................................................................140 SET UP USERS ....................................................................................................................................................142 User Information.........................................................................................................................................142 Record Access.............................................................................................................................................143 REPORT CONTROL ID ENTRY.................................................................................................................................144 Report Control IDs ......................................................................................................................................144 RATINGS DEFINITION ...........................................................................................................................................144 SURVEY DEFINITION ............................................................................................................................................145 REJECTION CODING SETUP ...................................................................................................................................146 CORRECTIVE ACTION STATEMENT ENTRY ................................................................................................................146 CHAPTER 13: DATA TOOLS ......................................................................................................... 149 DATA TOOLS MENU .............................................................................................................................................149 BACKING UP YOUR DATABASE FILE .......................................................................................................................149 Restoring Data ............................................................................................................................................150 IMPORT/EXPORT UTILITY......................................................................................................................................152 Exporting Data ............................................................................................................................................152 Importing Data ............................................................................................................................................153 CHAPTER 14: UTILITIES .............................................................................................................. 155 UTILITIES MENU .................................................................................................................................................155 ARCHIVE/UN-ARCHIVE RECEIVING DATA ................................................................................................................155 Archiving Receiving Records......................................................................................................................155 ARCHIVE/UN-ARCHIVE SUPPLIERS ........................................................................................................................156 EDIT ALL TABLES ................................................................................................................................................157 RESET EARLY/LATE.............................................................................................................................................157 UPDATE SUPPLIER NEXT RATING DUE ...................................................................................................................157 APPENDIX ................................................................................................................................... 159 x Table of Contents DATA TRANSFER UTILITY .....................................................................................................................................159 Running the Data Transfer Utility: .............................................................................................................159 Client/Server Versions—Before You Run the DTU:...................................................................................159 Data Transfer Instructions Versions 4.ox and 4.5x to New Version 4.6x: ................................................ 161 Verify Data Transfer....................................................................................................................................165 DATABASE MANAGEMENT ....................................................................................................................................166 Create a New SUPPLIERtrak Database......................................................................................................166 Loading Database Files ..............................................................................................................................166 Compact/Repair Database..........................................................................................................................167 SUPPLIERtrak Help ....................................................................................................................................167 Data Table Record Formats........................................................................................................................167 Compacting Your Data File .........................................................................................................................170 Troubleshooting Problems......................................................................................................................... 171 Network Installation ................................................................................................................................... 171 SYSTEM ADMINISTRATOR’S GUIDE............................................................................................. 173 CHAPTER 1: INSTALLATION ........................................................................................................ 175 PROGRAM REQUIREMENTS ...................................................................................................................................175 INSTALLATION ....................................................................................................................................................175 Files .............................................................................................................................................................175 Installation Options.....................................................................................................................................175 AFTER YOU INSTALL SUPPLIERTRAK ................................................................................................................... 181 Administrator Installation .......................................................................................................................... 181 CONFIGURATION FILE SETTINGS ............................................................................................................................182 Sample Configuration .................................................................................................................................183 CHAPTER 2: MS SQL INSTALLATION........................................................................................... 184 CREATE DATA SOURCE NAME (DSN) FOR MS SQL .................................................................................................184 SUPPLIERtrak Supplier Quality Management Software Quick Start Guide 1523 W. Whispering Wind Dr., Suite 100 Phoenix, AZ 85085 (480) 922-7300 Fax: (480) 922-7400 www.cybermetrics.com 11 TM Chapter 1: Introduction SUPPLIERtrak is the most comprehensive supplier quality assurance software available. It helps gather information to create performance reports on any supplier over any time frame, so users can identify the best and worst performers, according to criteria they set themselves. SUPPLIERtrak records incoming inspection results and generates accept and reject tags for incoming parts and materials; it also creates rejection notices, inspection sheets and supplier rating reports. Users can set up skip-lot, rejection, and calendar alarms for inspections. On-line inspection procedures ensure that items are checked accurately and consistently. This new version offers an improved, reorganized interface, tabbed so data is more accessible. Two userdefinable fields in Supplier Entry let users record critical information unique to their industry. New reports and charts with flexible formatting to meet your needs better, and data import and export features to help you work with your data outside of SUPPLIERtrak. New database management features help keep your data safe, secure, and up-to-date. SUPPLIERtrak is an easy-to-use, easy-to-learn tool that helps analyze supplier data in ways you may not have considered before. 13 Chapter 2: Installing and Running SUPPLIERtrak You can install SUPPLIERtrak onto your hard drive and optionally place the database on the network. This chapter gives you the installation instructions. Program Requirements SUPPLIERtrak requires the following: Microsoft Windows 98 SE/2000/XP Pentium 800 MHz CPU required; 1 GHz or faster recommended Hard disk with 250 MB of free space for program files and 50-75 MB of free space for typical database 256 MB RAM required; 512 MB recommended SVGA or compatible display monitor at 800 X 600 resolution or higher Mouse or compatible pointing device Default Windows Printer (if you want to print reports) SUPPLIERtrak Network Requirements: Optional: This section will only apply if the data file will be shared over the network or will be part of a regular network backup. Network folder with full rights for each SUPPLIERtrak user 100 MB LAN Upgrading If you are upgrading from an older version of SUPPLIERtrak, perform the program installation as described in the next section, then refer to the “Data Transfer Utility” in the Appendix for details on transferring your current database records to this version of SUPPLIERtrak. Program Installation Installing SUPPLIERtrak Note: If Auto Run is enabled on your computer, the Setup program will run automatically and you can skip to number 5 below. 1. Close out of all other programs, and click the Windows Start button. 15 16 Chapter 2: Installing and Running SUPPLIERtrak 2. Select the Run... command. 3. Place the SUPPLIERtrak CD into your CD-ROM drive. Next, click Browse... and Browse for the CDROM drive letter. Select SETUP.EXE from the file listing. It will appear in the Open field of the Run box. You can also type the drive letter and file name here. The example here shows the D drive as the CD-ROM drive, with Setup file selected. 4. 5. 6. Click the OK button. Follow the setup instructions on the screen. By default, the program will be installed to the C:\Program Files\SPW46 directory. If you experience problems during installation, please see the Trouble Shooting section in the Appendix. Network Installations If you want your database file to be stored on a network drive, then do the following before running SUPPLIERtrak for the first time (repeat these steps for each workstation installation): 1. Install the program to the workstation’s local hard drive, as described above. 2. Create a data directory on the server (the directory name should still be SPW46. Make sure the workstation user has full rights in the directory). 3. Move the SPDATA46.MDB file from the workstation’s local SUPPLIERtrak program directory to the network server‘s data directory that you created in Step 2. 4. Run SUPPLIERtrak for the first time, go to the File menu, and then select Open Database. Browse to the folder SPW46, then the SPDATA46.MDB file on the server. SUPPLIERtrak™ Quick Start Guide Running SUPPLIERtrak 17 To run SUPPLIERtrak, execute the SUPPLIERtrak icon in the SUPPLIERtrak Program Group or double-click the SUPPLIERtrak shortcut icon on your Windows Desktop. Starting SUPPLIERtrak from the Start Menu 1. Click the Start button. 2. Select Programs. 3. 4. Select the SUPPLIERtrak 4.6 program group. Then choose SUPPLIERtrak 4.6. SUPPLIERtrak Logon When you run SUPPLIERtrak, a logon window may appear, as shown here (only if you have set up security): Enter your PIN number and click the OK button. See the section on User Settings for more information about setting up this security feature. SUPPLIERtrak Serial Number If you have not entered your program serial number into the About box, the following message screen will appear to remind you to enter it. 18 Chapter 2: Installing and Running SUPPLIERtrak Click the OK button, and the About window will appear. Enter the serial number for your copy of SUPPLIERtrak (the serial number is located in your manual or on the packing list that came with your package). If you cannot locate your serial number, please contact CyberMetrics Technical Support at (480) 922-7300. The About window, shown above, gives you information about the current number of users that have been set up, in addition to information about your number of records. SUPPLIERtrak Main Menu The SUPPLIERtrak main menu is shown below. Note that the name of the currently logged-in user is displayed towards the lower left corner. The full path to the currently open data file is displayed in the lower right corner. SUPPLIERtrak’s Outlook style interface is easy to learn and use, with clean, clear graphics and an intuitive approach that makes extensive training sessions and manuals unnecessary. SUPPLIERtrak™ Quick Start Guide 19 This table shows how the different SUPPLIERtrak menus are organized. Menu Button Main Records Ratings and Surveys Reports Graphs Setup Data Tools Utilities Options Supplier Entry Supplier Part Entry Received Material Entry Procedure Entry Staff Entry Ratings Entry Survey Entry Supplier Reports Part Reports Received Reports Rejections Reports Survey and Rating Reports Miscellaneous Reports Inspection Reports Staff Reports Part Comparison Chart Supplier Performance Chart Supplier Comparative Chart Worst Supplier Chart Settings Rating / Survey Wizard Setup Users Report Control ID Entry Ratings Definition Survey Definition Rejection Coding Setup Corrective Action Statement Entry Backup/Restore Import/Export Compact/Repair Data Modify License Archive/Un-Archive Receiving Data Archive/Un-Archive Suppliers Edit All Tables Reset Early / Late Update Supplier Next Rating Due If you installed to a directory other than C:\Program Files\SPW46, or the program cannot find your database file, then the Where Is The Data File? window will appear. In this case, you will need to tell SUPPLIERtrak where to find the database file named “SPDATA46.MDB”. The Where Is The Data File? window is shown below: Note: Users who have their database file located on the network server must be logged into the network operating system before they can open the database file. 20 Chapter 2: Installing and Running SUPPLIERtrak If this window appears, click the local or network directory under the Look In box, and then navigate through the folders to the database location. Choose the database file name, “SPDATA46.MDB”, so it will appear in the File Name dialog box, and click Open. The database should then successfully connect. SUPPLIERtrak Settings To enter your company name and insert a logo, go to the Tools and Utilities menu and select Settings. You can also Enable an Audit Trail and change the Corrective Action Statement in Settings. Please see the Tools and Utilities chapter for information on Settings. Database Security When you select Set Up Users from the Tools and Utilities menu, the User Entry screen will appear. The Set Up Users feature allows you to add new SUPPLIERtrak users and set each one’s rights for each of the program areas. User Information, Record Access and Security are found in the Tools and Utilities section of the manual. Date Formats SUPPLIERtrak supports all of the available numeric date formats within Windows. For example, you can represent the date of November 1, 2002 as: 11/1/02, 11/01/02, 11/1/2002, 02/11/1, 02/1/11, or 2002/11/1, depending on your preference. As a precaution, you may wish to verify the date settings in Windows Control Panel. The date formats that are entered into SUPPLIERtrak must match the Windows Control Panel date setting; otherwise, errors will occur while you’re running the program. Begin by clicking the Start button, go to Settings, and then select the Control Panel. Double-click on Regional Settings icon, and then click the Date tab. Place your cursor in the Short Date Style field, click the arrow, and select a format with a four-digit year, such as M/d/yyyy or MM/dd/yyyy. Chapter 3: Supplier Master Records Use supplier master records to store information about your suppliers. Each supplier needs a unique code number (the code can include both numbers and letters). Each supplier requires a code number because: 1. Some suppliers may have the same name (or very similar names). A code number will help prevent ambiguity and mistakes. 2. Larger suppliers can have the same name, but may ship from multiple plants or divisions. You will probably want to track each supplier’s shipping location separately. Due to the relational hierarchy of the SUPPLIERtrak database, supplier master records must be created before you can enter receiving records, supplier part records, rating records, and survey records. To enter supplier master records, select Supplier Master Entry from the Enter/View Records menu. Next, enter any search fields (just click the Find button if you are entering new records). 21 22 Chapter 3: Supplier Master Records The record entry form will appear, showing your first record. Click the New button on the upper right corner of the screen to add a new record. If you are looking for a certain record, use the navigation buttons to scroll through the records, or use either the Find or Edit Filter/Sort options in the Record menu. Supplier Master Record Fields The following fields are used in the supplier master record: Field/Button Name Supplier Code Supplier Name Contact Phone Address City State Zip Country Last Survey Last Rating Last Received Last Reject Enabled Supplier User 1 and 2 Rating Frequency Description A unique alpha/numeric identification entry that must be placed in a record in order to store it. Of course, you will have to develop a numbering system. Important: To ensure proper sorting of records, you should make sure that all supplier codes are the same length. For example, do not use codes like A-1, A-2, A-100; instead, use codes that are the same length, such as A-001, A-002, A-100. Try to keep your coding system simple. The name of the supplier company. The name of the contact person at the supplier company. The telephone number of the supplier. The street address of the supplier company. The city of the supplier company. The state (or province) of the supplier company. The zip code (or postal code) of the supplier company. The country of the supplier company (optional). The date of the last Survey. Can be entered manually, but also is updated by the software. The date of the last Rating Can be entered manually, but also is updated by the software. The date of the last Receiving Record. Can be entered manually, but also is updated by the software. The date of the last Reject Record. Can be entered manually, but also is updated by the software. Is this Supplier current, But not yet archived? User defined fields that relate to this particular Supplier. At what interval does a Rating have to be completed for this Supplier? SUPPLIERtrak™ Quick Start Guide Field/Button Name Rating Frequency UOM Next Rating Due Parts Table Description Enter the frequency of ratings, using the unlabeled list box field on the right for the frequency units (for example, “45 DAYS”). When the software calculates the next rating due date, it uses this value. Your choices for the Units field are explained below: Days—schedule is based on elapsed calendar days Weeks—each week equals seven days; schedule is based on elapsed calendar weeks Months—schedule is based on elapsed calendar months EOM—rounds the next due date to the end of the month in which it occurs. For example, “6 EOM” means every 6 months, but the program extends the due date to the end of the sixth month (or the last working day of the month if you’re using skip days – see the System Administrator’s Guide for more information) Years—each year equals 365 days; schedule is based on elapsed calendar years The next Rating due date, entered manually or calculated by the software. This is an embedded table of supplier part records. 23 24 Chapter 3: Supplier Master Records Supplier Rating History This tab will display a sub form of the details of this supplier’s historical rating. Supplier Procedures If needed, you can set up receiving inspection procedures for suppliers. These procedures can be shared with many suppliers or can be specific to one supplier. For example, you may have special tests that must be done on all incoming materials from a certain supplier (supplier-specific procedures). On the other hand, you may have other tests that must be done on incoming materials from a certain group of suppliers (shared procedures). If the inspection procedure is part specific, then you’ll need to enter the part procedure into the Supplier Parts Entry form. Note: If you’re entering a new supplier record, then make sure that you first save the supplier record (i.e., click on the record selector bar on the left side of the form or do a PAGE DOWN/PAGE UP sequence on the keyboard) before attempting to enter a procedure record. SUPPLIERtrak™ Quick Start Guide 25 To create relationships between suppliers and procedures, click on the Procedures tab, and the Procedure Entry sub form will appear. Select the procedure name and then the text of the procedure (there is no limit to the number of lines of procedure text). If you want to use a procedure that you entered previously on another supplier, then use the same procedure name. On the Procedure Image tab of this window is the OLE Box field. “OLE” stands for Object Linking and Embedding. This means that you can view any Linked valid Windows object (such as a graph, picture, or digitized movies) that has been placed into this field when the procedure was created in Procedure Entry. Also in this sub form is the Attachments tab. This allows you to view any file attachment attached to this procedure when it was created in Procedure Entry. If you want to enter another procedure for the same supplier, then click on the right navigation button of the procedure window. Click the Exit button (or double-click the procedure window’s Control Menu icon) when you are through entering procedures, and you will be returned back to the underlying Supplier Entry form. Supplier Alarms There are two kinds of supplier alarms that can be set up. The first kind is a skip-lot alarm that will be triggered after you receive a user-defined number of shipments (lots). The second kind of alarm is calendar-based and will be triggered when you enter a receiving record for the supplier on or beyond a user-specified date. Alarms are triggered in the Received Material Entry form. Whenever an alarm is triggered, the user has the option of resetting the alarm (click the Clear button) or postponing the alarm (click the Snooze button). If the alarm is postponed, it will continue to be triggered with each shipment from the supplier until you reset it. Choosing the Reset button will reset the count to zero. Note: As with procedures, if you are entering a new supplier record, make sure that you first save the supplier record (i.e., click on the record selector bar on the left side of the form or do a PAGE DOWN/PAGE UP sequence on the keyboard) before attempting to enter an alarm record. 26 Chapter 3: Supplier Master Records To enter supplier alarms, click on the Alarms tab, and the Supplier Master Alarm Entry sub form will appear. Skip Lot/Rejection Alarm The supplier counter alarm fields are explained below: Field/Button Name Skip Lot Alarm Current Shipment Count Description This is the point at which the counter alarm is triggered. When the value entered here is reached, the alarm is displayed. If this is set to an extremely high value (i.e., a value that will never be reached), then the alarm will not be triggered. When you click the Clear button, this field is set to 2,000,000,000 (two billion) - a value that for all practical purposes, will never be reached. When this field is set to 2,000,000,000, or blank the counter alarm is turned off. This is the current count of shipments (lots) received since the alarm was last reset. This is set to 0 (zero) when you click the Clear button. SUPPLIERtrak™ Quick Start Guide 27 Supplier Calendar Date Alarm The supplier calendar alarm fields are explained below: Field/Button Name Calendar Alarm Date Alarm Date Message Description The calendar alarm will be triggered on this date. If a receiving record for the supplier is entered on or beyond this date, the alarm will be displayed. If this field is blank or set to a date far into the future (such as the year 2100), then the alarm will not be activated. This is the message that will be displayed when the calendar alarm is triggered. This is set to blank when you click the Clear button. Remember that you must press CTRL-ENTER to insert new lines into memo fields. The Supplier Calendar Date Alarm is triggered when the user receives material on or after the date entered from the Receiving screen. Under QS-9000 rules, a supplier does not normally need to have shipments inspected. However, if a rejection is made, they are to inspect the Supplier’s next five shipments. When you have completed the entry of the Alarms for the supplier, click on the Close button to save your alarm settings and return to the underlying Supplier Entry form. Chapter 4: Supplier Part Entry Supplier Part Records Use Supplier Part records to store information about your supplier parts (and materials). You must set up your Supplier Part records before you can enter them in the receiving records. In the receiving records, you can select both the supplier and supplier parts from list boxes (to save time from manually typing them and to avoid data entry errors). The program does allow for part numbers to be duplicated between suppliers; however, they cannot be duplicated for the same supplier. In other words, two suppliers can share the same part number, but you cannot repeat the same part number for the same supplier. You can enter part records either from the Supplier Master Entry form (described earlier), or from the Supplier Part Entry form (discussed next). To enter part records, select Supplier Part Entry from the Enter/View Records menu. In the filter window, enter any search fields (just click the Find button if you are entering new records). 29 30 Chapter 4: Supplier Part Entry The record entry form will appear, showing the first record. Click the New button on the navigation panel to add a new record. If you are looking for a certain record, use the navigation buttons to scroll through the records, or use either the Find or Edit Filter/Sort options in Record menu. Supplier Part Record Fields The following fields are used in the supplier part record: Field/Button Name Supplier Code Supplier Name Supplier Part No. Company Part No. Description Unit of Meas. Sampling Plan Unit Cost Currency Drawing Date Drawing Number Change Date Change Level Last Received Date User Defined 1 and 2 Description The supplier code from the supplier master record. Click on the list box arrow to choose from available suppliers. The program looks up and displays the supplier name after you enter the supplier code for the part. The number that the supplier uses to identify the part or material. As described earlier, this number can be duplicated for different suppliers. The number that your company uses internally to identify the part or material. This number also can be duplicated for different suppliers. The description that your company uses internally to identify the part or material. This description also can be duplicated for different suppliers. The unit of measure in which you track the part (such as each, pounds, feet, or gallons). This field creates a self-building, drop-down list box that will display all previously entered information to save typing time and avoid data entry errors. The sampling plan code associated with this supplier part. The unit cost of the part (rounds to nearest penny). The currency symbol associated with this supplier part. The Drawing revision date associated with this supplier part. The historical drawing revision information is stored in the Receiving table for each receiving record throughout a part’s receiving history. The current Drawing revision number associated with this supplier part. The Change revision date associated with this supplier part. The historical change revision information is also stored in the Receiving table for each receiving record throughout a part’s receiving history. The current Change revision number associated with this supplier part. Can be entered manually, but is also updated by the software. User defined fields that relate to this supplier part. SUPPLIERtrak™ Quick Start Guide 31 Inspection Characteristics Table Located at the bottom of the form is an embedded table of inspection characteristics. You can set up a list of as many items as needed to check for when receiving the part. Each characteristic has the following fields: Field/Button Name Characteristic Value Minimum Nominal Maximum Description The name of the characteristic being checked, such as width or viscosity. This list is maintained alphabetically (not in the order in which you originally entered them). If you want to control the order, then you should prefix each entry with a number and period, such as 1. Width, 2. Height, 3. Length. V is usually used for Variable numeric data; A is usually reserved for Attribute (visual inspection etc.) data. The minimum acceptable value of the characteristic (lower specification limit). The nominal value for the characteristic (target or best value). The maximum acceptable value of the characteristic (upper specification limit). Supplier Part Procedures If needed, you can set up receiving inspection procedures for parts and materials in Procedure Entry. These procedures can be shared with many other parts or can be specific to one part. For example, you may have special tests that must be done only on a certain part from a certain supplier (part-specific procedures). On the other hand, you may have checks that must be done on incoming materials from a certain type of part or material coming from a variety of suppliers (shared procedures). Note: If you are entering a new part record, then make sure that you first save the part record (i.e., click on the record selector bar on the left side of the form or do a PAGE DOWN/PAGE UP sequence on the keyboard) before attempting to enter a part procedure record. Failure to do so will result in the error message “Can’t Have Null Value in Index” when you try to enter the procedure. To select part procedures, click on the Procedures tab, and a procedure entry sub form will appear. Select the procedure name and then the text of the procedure will appear. If you want to use a procedure that you entered previously on another part, then use the same procedure name. 32 Chapter 4: Supplier Part Entry Also in this sub form is the Procedures OLE tab. “OLE” stands for Object Linking and Embedding. This means that you can view any linked valid Windows object (such as a graph, picture, or digitized movie) that has been entered into this field when the procedure was created in procedure Entry. Also in this sub form is the Attachments tab. This allows you to view any file attachment attached to this procedure when it was created in Procedure Entry. Click the Exit button when you are through entering procedures, and you will be returned back to the underlying Supplier Part record entry form. Part Alarms As with supplier alarms, there are two kinds of part alarms that can be set up. The first kind is a skip-lot alarm that will be triggered after you receive a user-defined number of shipments (lots) of a part. The second kind of alarm is calendar-based and will be triggered when you enter a receiving record for the part that is on or beyond a user-specified date. To enter part alarms, click on the Alarms tab of Supplier Parts, and the Alarm Entry sub form will appear. Alarms are triggered in the Receiving Entry form. Whenever an alarm is triggered, you can reset the alarm (click the Clear button) or postpone the alarm (click the Snooze button). If the alarm is postponed, it will continue to be triggered with each shipment from the supplier until you reset it. The example provided above shows a supplier part for which the default of no realistic alarms will ever be reached (20000000 receiving records?, or a date beyond the year 2100?), thereby sequestering the alarm capabilities of the software for this supplier part. Note: As with procedures, if you are entering a new part record, then make sure that you first save the part record (i.e., click on the record selector bar on the left side of the form or do a PAGE DOWN/PAGE UP sequence on the keyboard) before attempting to enter an alarm record. Failure to do so will result in the error message “Can’t Have Null Value in Index” when you’re trying to enter the alarm. Part Counter Alarm The part counter alarm fields are explained below: Field/Button Name Skip Lot Alarm Description This is the point at which the counter alarm is triggered. When the value entered here is reached, the alarm is displayed. If this is set to an extremely high value (i.e., a value that will never be reached), then the alarm will not be triggered. When you SUPPLIERtrak™ Quick Start Guide Field/Button Name Current Shipment Count 33 Description click the Clear button, this field is set to 2,000,000,000 (two billion) - a value that for all practical purposes, will never be reached. When this field is set to 2,000,000,000, or blank the counter alarm is turned off. This is the current count of shipments (lots) received since the alarm was last reset. This is set to 0 (zero) when you click the Clear button. Example of Part Rejection Alarm when triggered: Part Calendar Alarm The part calendar alarm fields are explained below: Field/Button Name Calendar Alarm Date Alarm Date Message Description The calendar alarm will be triggered at this date. If a receiving record for the part is entered on or beyond this date, the alarm will be displayed. If this field is blank or set to a date far into the future (such as the year 2100), then the alarm will not be activated. This is the message that will be displayed when the calendar alarm is triggered. This is set to blank when you click the Clear button is clicked. Remember that you must press CTRL-ENTER to insert new lines into memo fields. Example of Part Calendar Alarm when triggered: When you have completed the entry of the Alarms for the part, click on the Close button to save your alarm settings and return to the underlying Supplier Parts Entry form. Part Entry Attachments The Attachments tab of Supplier Part Entry is similar to procedure and supplier attachments. The files used for attachments can be of any file type that is supported on user’s workstations and registered in the Windows Registry. For example, if a CAD file is attached, and a user of SUPPLIERtrak does not have CAD software installed on their workstation, the file will not be able to be viewed or printed from that workstation. Files used in Part or any other attachment area in the software should reside on a common network drive, with common drive mappings between the range of SUPPLIERtrak users. Case in point is the example above. If the attachment is C:\Drawings\Part001.drg on one user’s pc and it is attached in SUPPLIERtrak, then another user of SUPPLIERtrak will not be able to see it due to it is not at C:\Drawings on their workstation. If the File is on G:\Products\Specifications\Part001.drg, and is attached in SUPPLIERtrak, then if at another user’s workstation the same folder is mapped differently, say M:\Specifications\Part001.drg, they will not be 34 Chapter 4: Supplier Part Entry able to view the attachment as it is stored in the database due to the fact that this second user has his Drive M mapped to the first (attaching) user’s G:\Products directory on the network file server. Part Entry Receiving History The Receiving History tab shows a form with the complete receiving history with rejection records for this supplier part. The example screenshot below shows a part that has been received once that just happens to have a single rejection record associated with that receiving record. SUPPLIERtrak™ Quick Start Guide 35 Clone Part Feature Part cloning allows you to create additional identical parts that have a different part number or to create exactly the same part for a different supplier. After you have entered all of the information for the part to be cloned, click the Clone Part button on the lower right corner of the Supplier Parts entry screen. Field/Button Name Description New Supplier Code Enter the supplier code for the new part, or select it from the list. New Part No. Enter the part number for the new part. Next, click the Clone button. All of the information that was entered for the original part will be copied to the part record for the cloned part, including Part Characteristics, Part Alarms, and Procedures. If you have several similar or identical parts, you can use Clone Part as many times as necessary. Chapter 5: Received Material Entry Received Material Records Use the Received Material records (receiving records) to track and log all incoming parts and materials. The program automatically assigns a receiving log number to each record. This number is incremented by a value of one each time a new record is added. To save time, the program automatically enters the current date into both the Received Date and Due Date fields as well as the name of the current user into the Inspected By field. To enter receiving records, select Received Material Entry from the Enter/View Records menu. Next, enter any search fields (just click the Find button to see all un-archived receiving records or insert a 0 (zero) in the Receiving Log No field to enter a new record). The record entry form will appear, showing either a new record or the first record. Click the New button on the navigation panel to add a new record after reviewing existing records. If you are looking for a certain record, use the navigation buttons to scroll through the records or use either the Find or Edit Filter/Sort options in the Record menu. 37 38 Chapter 5: Received Material Entry Received Material Record Fields The following fields are used in the received material record: Field/Button Name Receiving Log No. Supplier Code Supplier Part No Fields In Gray Receive Date Quantity Received Quantity Inspected Received By Inspected By Rejection Code User Defined 1 and 2 Shipper Number Lot No Carrier Description The receiving log number is used to uniquely identify each receiving record. The value is incremented by one each time a new record is added. This field will display “(Counter)” until a supplier code and part number have been entered. This log number is used to relate the receiving record to both inspection measurement records and rejection records (if entered). This field cannot be edited. Enter the supplier code or use the list box to select a supplier code. Entry required. Click on the list box button to choose from the available list of part records for the supplier code that was chosen. Note: if you enter a part number that does not yet exist for this supplier, you can add it from this screen. Company Part No, Description, Drawing No, Change Level, Sampling Plan and Unit of Measure are all related to the Supplier Part information at the time of creation of this particular receiving record and are un-editable. Fields in Gray that are un-editable by the user because they are calculated solely by the software are the Lead Time, Days Early or Late, Quantity Rejected and Quantity Accepted fields. Quantity Rejected is updated by creating rejection records on the Rejects tab of the Received Material entry form, and is the sum of all Quantity Rejected from the associated rejection records. Quantity Accepted is calculated as Quantity Received minus total Quantity Rejected for each particular receiving record. The receive date of this receiving record, When a new record is created, the default date is always today. The quantity received of this supplier part that relates to this receiving record. The quantity inspected of this supplier part that relates to this receiving record. Usually, this number is dictated by the sampling plan that is chosen for this supplier part. The person receiving this shipment(s). This is a general field for the receiving record. The Inspection records for each part selected of the Quantity Inspected can each have their own Inspected by code, indicating possibly different inspectors, and different times of inspection This is also a general field for the receiving record. The Rejection records for each part selected of the Quantity Rejected can each have their own Rejection code, indicating possibly different rejection reasons, and different times of rejection User defined fields that relate to this receiving record. Used to document the Shipper if fulfillment is used and FOB, for example. Tracks the assigned Lot number of this shipment of this supplier part. This receiving record may be only a portion of the total number ordered, or may contain items backordered from an earlier order. Used to document the Carrier of the shipment that relates to this receiving record. SUPPLIERtrak™ Quick Start Guide Field/Button Name PO Number Order date Due Date Comments 39 Description Purchase Order number of shipment / lot received. Manually entered. The order date of this material. The difference between the Order Date and the Receive Date is used to calculate the Lead Time. There are no skip Days / Dates associated in the software for the calculation of Lead Time because it depends on shippers and suppliers and elements outside of the scope of the software. Manually entered. The expected due date of the arrival of this material. The difference between the due date and the receive date (minus the grace periods selected in Setup – Settings) is used to calculate early or Late. Enter any comments. Remember to press CTRL-ENTER to insert new lines of text into the Comments field. Viewing Receiving History To view the complete history of receiving records for the part or material, click on the View History button. A pop-up window will appear, as shown here (click the Close button when you’re finished viewing the history): Viewing Supplier Rating History To view the complete history of rating records for the supplier of this part or material, click on the small ellipsis button to the right of the Supplier Code selected for this receiving record. A pop-up window will appear, as shown here (click the Close button when you’re finished viewing the history): 40 Chapter 5: Received Material Entry Inspection Forms To print an inspection form, click on the Insp. Form button. This form is useful for data collection purposes. It will include important information describing the part as well as a list of characteristics to inspect. An area for recording your results is provided. SUPPLIERtrak™ Quick Start Guide Viewing Procedures 41 To view either supplier or part procedures, click on the corresponding tab—either the Supplier Procedures tab or the Part Procedures tab. There are two buttons that allow you to print or view the procedure. 42 Chapter 5: Received Material Entry The display report has the same appearance as the procedure report. Entering Inspection Results To enter inspection results, click on the Inspect Material tab, and the parts inspection sub form will appear. This form consists of a top header portion and an imbedded table of inspection characteristics at the bottom for entering measurements. Each form represents the inspections on a single part. The entry fields are as follows: Inspection Results Header Field/Button Name Lot No Part ID Inspected By Inspected By Name Inspection Date Accepted Description This will default to the information that’s entered on the underlying receiving record form. It is used in the event that each sample part comes from different lots. This field can also be used to track other information as well; however, you must not leave it blank. This field will automatically number starting at 1 and continue up to the number of parts inspected. It can be manually overridden with user data, usually dictated by the sampling plan associated to this supplier part. Select who is performing the inspection on this part this inspection date. Grayed out – Filled in by the software program after an employee code (from the Staff Table) is selected in the Inspected By field. Enter the date of this part’s inspection. This field is used to track whether or not the part has been accepted. SUPPLIERtrak™ Quick Start Guide Inspection Measurement Table 43 To enter the list of pre-defined inspection characteristics, click on the button called Insert Characteristics List. Of course this works only if you set up a list of characteristics in the supplier part records. Otherwise, you will have to manually enter the characteristic names, minimums, nominals and maximums. The table fields are as follows: Field/Button Name Characteristic Type Minimum Nominal Maximum Value Description The name of the characteristic being measured, such as width or Viscosity. This list is maintained alphabetically (not in the order in which you enter each item). If you want to control the order, then you should prefix each entry with a number and period such as 1. Width, 2. Height, 3. Length. The type of characteristic where V=Variable and A=Attribute (pass/fail). The minimum acceptable value of the characteristic (lower specification limit). The nominal value for the characteristic (target or best value). The maximum acceptable value of the characteristic (upper specification limit). The actual measured value of the characteristic or text, such as PASS or FAIL. Click on the navigation panel’s New button to add another inspection record for another part. Click on the navigation panel’s Close button to save your entries and return back to the underlying receiving record. Entering Rejection Records To enter rejection records, click the Reject Material tab, and the rejection entry sub form will appear. Note: You can enter multiple rejection records for a single receiving record, the reject ion codes and reasons for rejections can vary for any given receiving log entry. Each rejection record by default will have the default Corrective Action statement from the Setup > Settings > General tab, but each reject record can have this Statement changed to any other Corrective Action statement entered from Corrective Action statement entry also in the setup area of the software. 44 Chapter 5: Received Material Entry Rejection Record Fields Field/Button Name Reject No. Reject Date Reject Type Disp Code Reject Code Auth Date Auth No Auth. By Qty Rejected Qty Returned Qty Scrapped Qty Reworked Rejection Cost Fields Currency User Defined 1 and 2 Closed C A Date Close Date Response I n Days Comments Rejection Alarm Description As with receiving log numbers, this field increments by one each time a rejection record is added - it will say “0” until you save the record. This allows each rejection to be automatically uniquely identified. The date that the rejection was issued. It is automatically set to the current date. This field is used for tracking the type of rejection (such as warning or return for credit). You should create a code system for identifying the types of rejections that your company normally issues. The Reject Type Description will appear to the right of the Reject Type code after selecting from the drop down list. Enter a code indicating the disposition of the material (open, closed, return to supplier, scrap, or rework). The Disposition code Description will appear to the right of the Disposition code after selecting from the drop down list. Select a Reject code indicating the reject type that pertains to this rejection record, this will usually be dependent on the sampling plan that relates to this supplier part. The Reject Code Description will appear to the right of the Reject code after selecting from the drop down list. The date on which the supplier authorized the disposition. Authorization number issued by the supplier (if applicable). The name of the person at the supplier company that authorized the disposition. Information entered into this field creates a self-building list. The quantity rejected from this shipment due to this reason (Corrective Action, Disposition) The quantity of material being returned. The quantity of material being scrapped or discarded. The quantity of material being reworked or repaired. These fields reflect the breakdown of the costs being charged back to the supplier for the reason s specified for this rejection record. The default currency symbol is taken from the Supplier Part record for this supplier part. It can be edited for each rejection record separately without changing the default entry in Supplier Part Entry. User defined fields that relate to this rejection record. Click this radio button to indicate that the rejection notice is closed. The date the Corrective Action Letter was Created and Corrective Action response tracking begins The date the Corrective Action is responded to and closed by the Supplier. This is calculated by the software. It is the response time difference between the CA Date and the Close date in Days. There are no skip Days / Dates associated in the software for the calculation of Response time because it depends on suppliers and elements outside of the scope of the software. Enter any comments. Remember to press CTRL-ENTER to insert new lines of text into the Comments field. The way this alarm feature works, you can set it up so that on the fifth shipment following the rejection, the alarm will ask if you need to inspect the next five shipments. By pressing the Yes button, you have accepted the alarm, and on the sixth shipment you will be reminded to inspect it. SUPPLIERtrak™ Quick Start Guide 45 Rejection Notices To print a rejection notice for the supplier, click on the Print Rejection Notice button in this screen. After the print dialog window appears, click on the checkboxes for either including or excluding the inspection results and corrective action statement along with the rejection notice form. If you need to print a batch of rejection notices for a number of different suppliers, you can choose Reject Notice from the Listings and Reports submenu in the main menu. You can preview rejection notices on-screen before you print them. Example of Reject Notice: Accept and Reject Tags You can print both Accept and Reject tags for identifying incoming materials that have been inspected. Tags are designed so that they print one per page (regardless of page size). Since you have complete control over the orientation, paper size, and margins, you can, in most cases, use standard off-the-shelf label stock or card stock. Before actually printing, you may want to view label on-screen and then experiment with the Print Setup settings before actually printing (go to the File menu and select Print Setup). If you need customized tags, please contact Technical Support for other options. 46 Chapter 5: Received Material Entry Accept/Reject Tag Layouts There are several tag layouts to choose from, depending on the type of paper stock and printer that you want to use. These layouts are explained below: Laser—This is designed for use on stock that is ¼ the size of an 8½” x 11” sheet of paper (5½” W x 4¼” L). Remember to place your tag into the printer in landscape orientation. Dot Matrix—This is designed for use on stock of 4” W x 3” L labels (pin feed roll or fanfold stock). First, you will have to set up a User Defined paper size in the Printers icon of the Windows Control Panel. The User Defined paper size must match your label’s exact top-to-top length dimension (width is not important). Also, make sure you enter the dimensions in 1/100ths of an inch (enter 3 inches as 300). Next, preview the label within SUPPLIERtrak and use File | Print Setup to set up the User Defined paper size for both the Accept and Reject tags. When you close the preview window, you will be able to save the printer settings to the program (this only needs to be done once, unless you re-install or update SUPPLIERtrak). Field/Button Name Standard Custom Description This layout is 1/3 page (6” W x 2½” L). Place your tag into the printer in the normal (portrait) orientation. This is used for custom-designed tags (contact CyberMetrics or your distributor for information on custom-designed tags). Printing Accept Tags To print Accepted Material tags, click on the Print Accept Tags button. Next, enter the quantity of tags to be printed. To preview tags on-screen before printing, click the View button. SUPPLIERtrak™ Quick Start Guide Printing Reject Tags To print Rejected Material tags, click on the Print Reject Tags button. Next, enter the quantity of tags to be printed. To preview tags on-screen before printing, click the View button. 47 Chapter 6: Conclusion We hope that you’re more familiar with SUPPLIERtrak now and that this guide has helped you understand more about how SUPPLIERtrak can help you organize and document your supplier information records. Please consult your User’s Manual and System Administrator’s Guide for detailed instructions on other entry screens, reports, program setup options, and other features. If you have any questions about or problems with your software, please contact CyberMetrics Technical Support at (480) 922-7300. 49 SUPPLIERtrak TM Supplier Quality Management Software User’s Manual Chapter 1: Requirements and Installation You can install SUPPLIERtrak onto your hard drive and optionally place the database on the network. This chapter gives you the installation instructions. Program Requirements SUPPLIERtrak requires the following: Microsoft Windows 98 SE/2000/XP Pentium 800 MHz CPU required; 1 GHz or faster recommended Hard disk with 250 MB of free space for program files and 50-75 MB of free space for typical database 256 MB RAM required; 512 MB recommended SVGA or compatible display monitor at 800 X 600 resolution or higher Mouse or compatible pointing device Default Windows Printer (if you want to print reports) SUPPLIERtrak Network Requirements: Optional: This section will only apply if the data file will be shared over the network or will be part of a regular network backup. Network folder with full rights for each SUPPLIERtrak user 100 MB LAN Upgrading If you are upgrading from an older version of SUPPLIERtrak, perform the program installation as described in the next section, then refer to the “Data Transfer Utility” in the Appendix for details on transferring your current database records to this version of SUPPLIERtrak. Program Installation Installing SUPPLIERtrak Note: If Auto Run is enabled on your computer, the Setup program will run automatically and you can skip to number 5 below. 2. Close out of all other programs, and click the Windows Start button. 53 54 Chapter 1: Requirements and Installation 3. Select the Run... command. 4. Place the SUPPLIERtrak CD into your CD-ROM drive. Next, click Browse... and Browse for the CDROM drive letter. Select SETUP.EXE from the file listing. It will appear in the Open field of the Run box. You can also type the drive letter and file name here. The example here shows the D: drive as the CD-ROM drive, with Setup file selected. 5. 6. 7. Click the OK button. Follow the setup instructions on the screen. By default, the program will be installed to the C:\Program Files\SPW46 directory. If you experience problems during installation, please see the Trouble Shooting section in the Appendix. Network Installations If you want your database file to be stored on a network drive, then do the following before running SUPPLIERtrak for the first time (repeat these steps for each workstation installation): 1. Install the program to the workstation’s local hard drive, as described above. 2. Create a data directory on the server (the directory name should still be SPW46. Make sure the workstation user has full rights in the directory). 3. Move the SPDATA46.MDB file from the workstation’s local SUPPLIERtrak program directory to the network server‘s data directory that you created in Step 2. 4. Run SUPPLIERtrak for the first time, go to the File menu, and then select Open Database. Browse to the folder SPW46, then the SPDATA46.MDB file on the server. SUPPLIERtrak™ User’s Manual 55 Running SUPPLIERtrak To run SUPPLIERtrak, execute the SUPPLIERtrak icon in the SUPPLIERtrak Program Group or double-click the SUPPLIERtrak shortcut icon on your Windows Desktop. Starting SUPPLIERtrak from the Start Menu 1. Click the Start button. 2. Select Programs. 3. 4. Select the SUPPLIERtrak 4.6 program group. Then choose SUPPLIERtrak 4.6. SUPPLIERtrak Logon When you run SUPPLIERtrak, a log on window may appear, as shown here (only if you have set up security): Enter your PIN number and click the OK button. See the section on User Settings for more information about setting up this security feature. SUPPLIERtrak Serial Number If you have not entered your program serial number into the About box, the following message screen will appear to remind you to enter it. 56 Chapter 1: Requirements and Installation Click the OK button, and the About window will appear. Enter the serial number for your copy of SUPPLIERtrak (the serial number is located in your manual or on the packing list that came with your package). If you cannot locate your serial number, please contact CyberMetrics Technical Support at (480) 922-7300. The About window, shown above, gives you information about the current number of users that have been set up, in addition to information about your number of records. SUPPLIERtrak Main Menu The SUPPLIERtrak main menu is shown below. Note that the name of the currently logged-in user is displayed towards the lower left corner. The full path to the currently open data file is displayed in the lower right corner. SUPPLIERtrak’s Outlook style interface is easy to learn and use, with clean, clear graphics and an intuitive approach that makes extensive training sessions and manuals unnecessary. To add, change or delete records, click on the Main Records icon or the Ratings and Surveys icon. To view or print reports, click on the Reports icon. To view or print Graphs, click on the Graphs icon. To configure SUPPLIERtrak, and set up users click on the Setup icon. To edit your data tables, archive/un-archive records, click on the Data Tools or Utilities icons. To exit the program, click on File | Exit. Important: To view information about what version of the program you have, your serial number, information about your computer and operating system, and how many records are in your SUPPLIERtrak database, select the About menu item under the Help menu. SUPPLIERtrak™ User’s Manual 57 This table shows how the different SUPPLIERtrak menus are organized. Menu Button Main Records Ratings and Surveys Reports Graphs Setup Data Tools Utilities Options Supplier Entry Supplier Part Entry Received Material Entry Procedure Entry Staff Entry Ratings Entry Survey Entry Supplier Reports Part Reports Received Reports Rejections Reports Survey and Rating Reports Miscellaneous Reports Inspection Reports Staff Reports Part Comparison Chart Supplier Performance Chart Supplier Comparative Chart Worst Supplier Chart Settings Rating / Survey Wizard Setup Users Report Control ID Entry Ratings Definition Survey Definition Backup/Restore Import/Export Compact/Repair Data Modify License Archive/Un-Archive Receiving Data Archive/Un-Archive Suppliers Edit All Tables Reset Early / Late Update Supplier Next Rating Due If you installed to a directory other than C:\Program Files\SPW46, or the program cannot find your database file, then the Where Is The Data File? window will appear. In this case, you will need to tell SUPPLIERtrak where to find the database file named “SPDATA46.MDB”. The Where Is The Data File? window is shown below: Note: Users who have their database file located on the network server must be logged into the network operating system before they can open the database file. 58 Chapter 1: Requirements and Installation If this window appears, click the local or network directory under the Look In box, and then navigate through the folders to the database location. Choose the database file name, “SPDATA46.MDB”, so it will appear in the File Name dialog box, and click Open. The database should then successfully connect. SUPPLIERtrak Settings To enter your company name and insert a logo, go to Setup and select Settings. You can also Enable an Audit Trail, Format Reports and change the Default Corrective Action Statement in Settings. Please see the Tools and Utilities chapters for information on Settings. Database Security When you select Set Up Users from the Settings menu, the User Entry screen will appear. The Set Up Users feature allows you to add new SUPPLIERtrak users and set each one’s rights for each of the program areas. User Information, Record Access and Security are found in the Utilities section of the manual. Date Formats SUPPLIERtrak supports all of the available numeric date formats within Windows. For example, you can represent the date of November 1, 2002 as: 11/1/02, 11/01/02, 11/1/2002, 02/11/1, 02/1/11, or 2002/11/1, depending on your preference. As a precaution, you may wish to verify the date settings in Windows Control Panel. The date formats that are entered into SUPPLIERtrak must match the Windows Control Panel date setting; otherwise, errors will occur while you’re running the program. Begin by clicking the Start button, go to Settings, and then select the Control Panel. Double-click on Regional Settings icon, and then click the Date tab. Place your cursor in the Short Date Style field, click the arrow, and select a format with a four-digit year, such as M/d/yyyy or MM/dd/yyyy. Chapter 2: Program Conventions To save time and provide consistency, the program uses certain operational conventions. You should try to become familiar with these conventions before you begin using the software. Conventions are used for navigating through records, adding new records, editing existing records, and deleting records. Other conventions are used for retrieving and printing records. Shortcut keys are also available to save data entry time and avoid mistakes. Rather than repeating the same information in each section of this manual, these program conventions and others are described only in this section. Other sections of this manual (those that deal with the various records) will explain each record’s purpose, its fields, special purpose buttons, and any other record-specific information. Record Search Windows Use the record search windows to find a subset (also called dynaset) of records that match the criteria you enter. Although this may not seem useful at first, you will later find this feature to be quite valuable when you have several hundred (or several thousand) records from which to select. If you simply want to search all records, then leave all of the search fields blank and click the Find button. For example, you may want to view only suppliers that have a name exactly equal to “Acme”. In this case, you would enter “Acme” into the supplier name search field. Similarly, if you wanted to search for all suppliers that started with “Acme” (such as “Acme Plastics”, “Acme Stamping”, and “Acme Electronics”) then you would enter a search value of “Acme*”. The asterisk (*) character is a wildcard character, which indicates, in this example, that you want all supplier records that have a name starting with the word “Acme”. Likewise, if you enter “*Electronics”, then this would tell the program that you want all suppliers ending in the word “Electronics”. Furthermore, if you enter “*Plastics*”, then this would tell the program that you want all supplier records containing the word “Plastics”. You can specify as many search fields as you wish, depending on how selective you want the search operation to be. If you enter any criteria in a given filter field, SUPPLIERtrak will return all records that match that criteria for that field and also all records where that field is NULL (empty). This capability does not extend to Date (To and From) fields in the Filter forms. Other wildcard characters besides the asterisk are supported. Shown below is a complete list of all wildcard characters supported in search fields: Supported Wildcard Characters in Search Fields The asterisk (*), question mark (?), number sign (#), exclamation point (!), hyphen (-), and brackets ([ ]) are all considered wildcard characters. You can use these characters in record searches and Find/Replace commands to include all records that begin with specific characters or match a certain wildcard pattern. Shown below are some wildcard character examples: Wildcard Character * * Example Search/Find wh* *at Example of What Would Be Found Finds what, white, and why; works like MS-DOS commands Finds cat, bat, and what 59 60 Chapter 2: Program Conventions Wildcard Character * Example Search/Find */*/2000 * ? # 11/*/* b?ll 1#3 [] b[ae]ll ! b[!ae]ll - b[a-c]d Example of What Would Be Found Finds records with any date in 2000 Note: The date format you enter in the filter must match your Windows date setting. Finds records with any date in the month of November Finds ball, bell, and bill; this symbol matches any single character Finds 103, 113, 123; matches any single digit (not for use with date fields use asterisk (*) character instead) Finds ball and bell, but not bill; matches any single character within the brackets. This is useful if you want to find records that contain wildcard characters (i.e., it allows a literal search on wildcard characters; for example, to find “Machine #1”, you would enter “Machine [#]1”). Finds bill and bull, but not bell; matches any character not in the list between the brackets Finds bad, bbd, and bcd; matches any one of a range of characters Floating Toolbar To make using basic commands easier, common program functions have been placed on a floating toolbar. The tool bar allows you to perform a variety of tasks. You can move the toolbar by clicking on its title bar and dragging it to any desired location. If you do not want the tool bar to display, you can disable it by clicking the in the corner of the toolbar. To display the toolbar again, click on the View menu at the top of the screen and choose Show/Hide Toolbar. Repositioning the Toolbar: To move the toolbar, click its title bar and drag it to its new location. Shown in Horizontal Mode Button Form View Table View Find Find Next Replace Filter Records Resizing the Toolbar: Click one of the edges of the toolbar and drag it to the desired size. Description Click this button to display your records in Form view (the default presentation of your records). In Form view, you can see all of the fields for a record, but you can see only one record at a time. To display your records in a tabular format, click this button. Table views allow you to view many records at a time (available only in certain record entry screens). Use this command to search for specific information. Place your cursor in the field containing the category by which you want to search, and then click this button. The Find window opens, and you can enter the information that you want to locate. After you’ve closed the Find window, click the Find Next button to locate the next instance of the information for which you’re searching. Place your cursor in the field containing the information you want to replace. The Replace window will prompt you for Find What and Replace With. You can replace any or all occurrences of the same information. Use this button to re-open the filter window for the record window. You can then filter for a group of records that match the criteria you enter. Sort Ascending Select this button to sort all of your records in ascending order (numbers show before letters). Sort Descending Click this button to sort all of your records in descending order (numbers show after letters). Undo Click this button to undo your changes to the current record. New Record Use this button to add a new record. SUPPLIERtrak™ User’s Manual 61 Displaying Complete Fields Although you can enter a large number of text characters into some of your entry fields, your forms and reports may not be able to display the complete contents of every field. In the entry screens, you can view the complete field contents by pressing SHIFT-F2 (this displays a pop-up Zoom window). Also, you can view your records in Datasheet mode and widen the column widths to an appropriate width. Pop-Up Calendar for Date The pop-up calendar feature allows you to enter dates by choosing them from a calendar instead of manually typing them. Whenever you are entering information in a filter form or a data entry form, you can double-click on the date field to view the calendar (this only works in date fields). When the calendar first appears, it will display the current date. To select another date, click the up or down arrow buttons to scroll to the desired month and year, then click the day of the month. Click the OK button to accept the date; otherwise click the Entry Fields Cancel button. Form Views After you enter any optional filter fields in the Filter window, the program will search the database and present the first record it finds in a record form. Form views of records allows you to see only one record at a time, whereas Table (also called “Datasheet”) views allow you to see many records at a time (i.e., each row represents a record and many rows (records) are displayed at once). 62 Chapter 2: Program Conventions Example of Supplier Record in Form View Elements of a Record Form All record forms have the following common elements: Form Title Bar Located at the top of each form, it contains the title of the current form (Supplier Master Entry in the above Form View example). You can move the form by clicking on the title bar and then dragging it to a new location. Menu Bar Located above the title bar of each form, the menu bar typically has menus for File, Edit, View, Records, and Help. To select a menu, click on the menu title, and a drop-down list of menu items will appear. Some menu items may not be available. “Unavailable” menu items are not appropriate in Form view. Control Menu Icon This icon is located to left of the title bar. If you click on this icon, a menu will appear, allowing you to manipulate the form’s size and location. This also allows you to close the form. Record Selector Bar This is a vertical bar located on the left side of the form. You can use it to select the entire record for subsequent copying or deletion. You can also use it to save any changes made to the record. If any fields have been changed on the form, an icon of a pencil will appear on the bar indicating that you can click on the bar to write your changes to the database. When the bar appears a darker gray with the arrow, this means the record has been saved or selected. SUPPLIERtrak™ User’s Manual 63 Record Selector Bar Symbols Current Record New Record Record changed but not saved yet Record locked and in use by another user Navigation Buttons Navigation buttons are used to navigate back and forth through your records. They are located in the bottom left corner of the form. The five buttons have arrows on them that indicate each one’s navigation direction: First Record Previous Record Next Record Last Record New Record Record: Allows you to type in the record number that you want to go to. Navigation Panel The navigation panel is located in the upper right portion of the form. It has record navigation buttons, but also has extra buttons for commonly used operations, such as: New - For starting a new record (presents a blank form to be filled in). Delete - Deletes the record currently shown in the form. Close - Saves any changes, closes the form, and returns to the main menu. Scroll Bars Scroll bars may be displayed on the right, bottom, or both sides of a form. Scroll bars are used to scroll to portions of the form that are not currently visible (this can happen if you reduce the form to a size that is smaller than the form’s original design). Maximize/Minimize Buttons These are buttons located in the upper right corner of the form. They are used to either maximize the form’s size to largest size allowed (click the up arrow or the square with the top border) or to minimize the form to an icon (click the down arrow or the short horizontal line). If you maximize the form, then only one button is displayed, having both an up and down arrow. Click on this button to return the form back to original size. If you minimize the form, then it turns into a Form icon. Double-click the Form icon to return it back to original size. List Box Buttons These are buttons that indicate that a list of items is available to choose from. When you click on the button, it presents a list of items in a scrollable box. Click on any item shown in the box to select it. 64 Chapter 2: Program Conventions Datasheet Views of Records Datasheet view allows you to see many records at a time. Datasheets operate much like spreadsheet programs. Each row represents a record, and each column represents a field. Records can be viewed, added, and changed in Datasheet views. Datasheets offer more flexibility in that you can resize column widths and row heights, rearrange column positions, hide columns, and even change the fonts. Datasheets can be a more efficient interface for adding or modifying your records. One drawback of Datasheet views, however, is that they cannot display the related records in an embedded datasheet (i.e., the Form view of supplier master records contains an embedded datasheet of part records for that supplier - you can see both supplier record and part records in a single window). Since the program automatically presents records in Form view, you’ll need to select the View menu from the top menu bar and then choose Datasheet to place your records in Datasheet view. Example Datasheet View of Supplier Records Elements of a Datasheet Window All datasheet windows have the following common elements: Datasheet Title Bar Located at the top of each datasheet, it contains the title of the datasheet. You can move the datasheet window by clicking on the title bar and then dragging it to the new location. Menu Bar Located above the datasheet title bar, the Menu bar typically has menus for File, Edit, View, Records, and Help. To select a menu, click on the menu title, and a drop-down list of menu items will appear. Some menu items may not be available (they will have a “gray” appearance). Control Menu Icon This icon is located to left of the title bar. If you click on this icon, a menu will appear, allowing you to manipulate the datasheet’s size and location. It also allows you to close the datasheet window. Record Selector Button This is a small rectangular button located on the leftmost side of each row. You can use this button to select the entire record for subsequent copying or deletion. You can also use it to store any changes made to the record (if any record’s fields have been changed, an icon of a pencil will appear on the button - indicating that you can click on the button to write your changes to the database). You can select multiple records by clicking and dragging your mouse pointer over the desired records. To select all records between two records, first click on the first record, then hold the SHIFT key while you click on the last record. All records between the first and last will be selected. A selector button with an asterisk (*) indicates on it that this is a new record position (always located at the bottom of the datasheet). All Records Selection Button This is a small rectangular button located on the upper left portion of the datasheet, just below the control menu icon. Click this button to select all records in the table. Column (Field) Selector Buttons These are small rectangular buttons located at the top of each column. The name of the field that the column represents is labeled on each button. When you click on one of these buttons, the entire column is selected and an operation, such as moving the column or hiding the column, can be performed. Note: The contents of one column cannot be copied or moved to another column. Navigation Buttons Navigation buttons are used to navigate back and forth through the records in the datasheet. They are located in the bottom left corner of the window. Each of the buttons has an arrow on it that indicates the navigation direction. SUPPLIERtrak™ User’s Manual 65 Scroll Bars Scroll bars may be displayed on the right, bottom, or both sides of the datasheet. The vertical (up/down) scroll bars are used to scroll to different records. The horizontal (left/right) scroll bars are used to scroll to portions of the datasheet that are not currently visible. Maximize/Minimize Buttons These are buttons located in the upper right corner of the datasheet. They are used to either maximize the datasheet’s size to largest size allowed (click the up arrow or the square with the top border) or to minimize the datasheet to an icon (click the down arrow or the short horizontal line). If you maximize the datasheet, then only one button is displayed, having both an up and down arrow. Click on this button to return the datasheet back to original size. If you minimize the datasheet, then it turns into a Datasheet icon. Double-click the Datasheet icon to return it back to original size. Saving Datasheet View Changes Changes to datasheet attributes, such as column widths, displayed/hidden columns, column locations, gridlines, and fonts can be saved. The program will prompt you to “Save Changes to Form?” when closing a datasheet that has been modified. Printing Datasheets of Records Printing is allowed while in either Datasheet or Form view. To print, select Print from the File menu. Print Setup and Print Preview can also be chosen from the File menu. These commands, combined with the Filter/Sort command, will prove useful when you’re designing custom datasheet reports. Hiding and Displaying Columns You can temporarily hide columns while in Table view. This is useful for removing extraneous data from the screen and for reducing the report’s width when you’re designing a custom report. To Hide Columns: 1. Click anywhere in the column, or click the field selector of the column (located at the top of the column) you want to hide. To hide multiple columns, drag across the field selectors. 2. From the Format menu, choose Hide Current Column. To Display Hidden Columns: 1. 2. 3. From the Format menu, choose Show/Hide All Columns. In the Columns box, select the column you want to hide by clicking that box. To Unhide columns, click the box beside the column and a checkmark will appear. When you have selected all the columns you want, click the Close button. Changing the Font in Table View You can change the typeface while in Table view mode. You can change the font, font size, style, and also add options, such as underlining. Changes will not affect the Form view of your records. To change the font: 1. 2. From the Format menu, choose Font. Select changes to be made from the Font Change window. Hiding and Displaying Gridlines By default, the program displays gridlines around each field cell while in Table view. You can hide the gridlines by choosing Gridlines from the Format menu. A checkmark will appear if gridlines are active. Changing the Row Height Choose Row Height from the Format menu. This changes the height of all rows in a datasheet. Changing the Column Width Choose Column Width from the Format menu. This changes the width of the selected columns in a datasheet. To Freeze Columns Choose Freeze Columns from the Format menu. This freezes the selected columns on the left side of the window to prevent them from scrolling off the screen. If no columns are selected when you choose this 66 Chapter 2: Program Conventions command, the column containing the insertion point will be frozen. New frozen columns are added to the right of existing frozen columns. A bold line separates the frozen and unfrozen columns. To Unfreeze Columns Choose Unfreeze Columns from the Format menu. This unfreezes all frozen columns. When you unfreeze columns, they remain in the same order they were in while frozen. You cannot unfreeze specific columns; you can only unfreeze all frozen columns. Output To Command The Output To command from the File menu allows the output of reports to a text file, Microsoft .RTF file, or Microsoft Excel spreadsheet file. If you save a file in .RTF format and then open that file in a word processing application, such as Microsoft Word, your data appears in a formatted table. When you save the output in .XLS or .RTF format, it includes fonts, layout, and other formatting elements. The output does not include sub forms and sub reports. This is a great way to chart your data. See the Microsoft Excel manuals for working with Excel and creating charts. You can easily analyze receiving records with Microsoft Excel. For example: Step 1. From the main menu, select Received Material Entry. Enter any search criteria in the Receiving Entry search window and select the Find button. Step 2. The Received Material Entry screen will appear. Select File | Output To... from the menu. Select Microsoft Excel (*.xls) from the Output To dialog. Give the output a file name. SUPPLIERtrak™ User’s Manual 67 Step 3. Open the created .XLS file in Microsoft Excel. Send Command (E-mail Reports) The Send command from the File menu allows the output of reports to Microsoft Outlook (or any MAPI compatible e-mail program). When you save the output in .XLS or .RTF format, it includes fonts, layout, and other formatting elements. Select Record Command You can use the Select Record command from the Edit menu item to select (highlight) the current record, allowing you to work with it as a whole. For example, you can select a record you want to copy into the clipboard. Select All Records Command You can use the Select All Records command from the Edit menu item to select (highlight) all records in a form or datasheet so that you can work with them as a group. For example, you can select all the records in one table and then copy them to another table. Find Command While in Form view or Datasheet view, the Find command is available via the pull-down Edit menu. You could use the Find command to search for a certain record or group of records – for example, you could search the database for suppliers located in a certain state or for suppliers that shipped to you last month. You can search for any text string, including a phrase, a word, or part of a word. You can also use wildcard characters to make the search more general. For the fastest searches, search for the first few characters within a single field. Because the Find dialog box remains on the screen during searches, you can find as many records as you want without having to choose the Find command repeatedly. If necessary, drag the box out of the way to see your records. To find data: 1. 2. Display the datasheet or form for the records you want to search. Select the field (column) you want to search, unless you intend to search all fields. Searching a single field is faster than searching in all fields. 68 Chapter 2: Program Conventions 3. From the Edit menu, choose Find. The program displays the Find dialog box. 4. In the Find What box, type the text you want to find. Use wildcard characters to make your search more general. Set other Find dialog box options if necessary. To find the first occurrence of the text, choose the Find First button. To find the next occurrence of the text and all subsequent occurrences, choose the Find Next button. When you’ve finished, click the Close button. 5. 6. 7. Replace Command While in either Form or Datasheet views, the Replace command is available via the Edit menu. Within a database table, you can search for and replace all or some occurrences of a specified text string, including a phrase, a word, or part of a word. You can use wildcard characters to make the search more general. For example, you might want to change all occurrences of the word “bolt” to “washer” in a part description field. To replace data in a table: 1. 2. 3. Display the datasheet or form containing the record data you want to replace. Select the field (column) in which you want to replace data, unless you intend to search all fields. From the Edit menu, choose Replace. The program displays the Replace dialog box. 4. In the Find What box, type the text you want to find. If you use wildcard characters, you may want to confirm text replacements to ensure the replacements are correct. In the Replace With box, type the replacement text. Under Search In, select Current Field or All Fields. If you select Current Field, the program searches for data in the field in which the insertion point is located. Set other Replace dialog box options if necessary. 5. 6. 7. You can confirm each replacement, or you can replace all occurrences without confirmation. To confirm each replacement: 1. Choose the Find Next button to find the first occurrence of the text. The program finds the first occurrence of the text and highlights it. 2. Choose the Replace button to replace the highlighted text with the text in the Replace With box. If you don’t want to replace this occurrence of the text, choose the Find Next button to find the next occurrence. To replace all occurrences without confirmation: Choose the Replace All button. SUPPLIERtrak™ User’s Manual 69 Quick Sort Command You can use the Quick Sort command from the Records menu to perform a simple sort of the records based on the currently selected field or fields. A sub menu is displayed that enables you to sort in ascending or descending order. The sorted records return to their original order when you close the form (or table). Ascending: A-Z or 0-100 Descending: Z-A or 100-0 Filter/Sort Command You can use the Edit Filter/Sort command to sort records in either Form or Datasheet view modes. Sorting can be done in ascending order (A-Z, 0-100) or descending order (Z-A, 100-0). The sorted records return to their original order when you close the form (or datasheet). To Sort Records: 1. Choose the Edit Filter/Sort option from the Records menu. The Filter window appears with a list of available fields. 2. In the Field row in the filter window’s grid, add the fields for which you want to specify a sort order. You can drag fields from the field list, or you can click a cell in the Field row, then click the drop-down arrow, and choose a field from the list. For each field whose data you want to sort, click the drop-down arrow in the Sort row to select a sort option. If you sort on multiple fields, the program sorts on the fields you specify in order from left to right. 3. Note: You can also sort on a hidden field. 5. Select Apply Filter/Sort in the Records menu (this menu is available while the Filter window is open). Alternately, you can also choose Apply Filter/Sort from the Records menu. To undo a sort, click on the floating toolbar Filter button and clear the filter values. Then click on the Find button. Entering Filter Criteria In addition to sorting, you can enter a criteria expression to show only those records that match your specific conditions. Criteria expressions are entered into the Criteria cell row and, optionally, into the OR cell row. If using field names in the criteria expression, then choose only those fields displayed in the field list (field names must be spelled exactly as shown). 70 Chapter 2: Program Conventions Criteria Expression Examples Field Example Expression Records That Are Found Supplier Code Supplier Code Receive Date Receive Date Description Description Receive Date “100-*” Receive Date Receive Date Description Description Description Supplier Code Description Description Year([Receive Date]) = 2000 DatePart(“q”, [Receive Date]) = 4 Like “C*” Like “*1 Inch” Like “[A-D]*” Right([Supplier Code],2) = “99” Is Null Is Not Null Suppliers with codes starting with “100-” Suppliers with codes starting with “100-”or with”200-” Parts received on March 2, 2000 Parts received between the 1st and 31st of March, 2000 Parts that are bolts or washers Parts other than bolts Parts received over 30 days ago; Date() represents the current (today’s) date Parts received in 2000 Parts received in the fourth calendar quarter Parts whose descriptions start with the letter “C” Parts whose descriptions end with “1 Inch” Parts whose descriptions are between A and D Supplier Codes that have “99” in the last two field positions Parts whose descriptions are null (blank) Parts whose descriptions are not null (not blank) “100-*” or “200-*” = #3/2/00# Between #3/1/00# And #3/31/00# In (“Bolts”, “Washers”) Not “Bolts” < Date( ) - 30 Adding New Records Adding Records while in Form View To add new records in Form view you can: 1. Click on the New 2. Click on the Last Record 3. Use the keyboard shortcut: CTRL + or or button in the floating toolbar. navigation button, then click on the Next Record navigation button. Enter the information into the record and then repeat either of the above steps to add another new record. Adding Records while in Table View To add new records in Table view you can: 1. Click on the Last Record navigation button, and then click on the Next Record navigation button. 2. Scroll to the very bottom row (the record selector button will have an asterisk shown on it). or Enter the information into the record and then repeat either of the above steps to add another new record. Go To Command You can use the Go To command from the Records menu to quickly move to different records. A sub menu is displayed with choices that help you navigate through your records. First: Moves the insertion point from a field in the current record to the same field in the first record. Last: Moves the insertion point from a field in the current record to the same field in the last record. Next: Moves the insertion point from a field in the current record to the same field in the next record. Previous: Moves the insertion point from a field in the current record to the same field in the previous record. New: Moves the insertion point to the blank record at the end of your form or datasheet, allowing you to enter a new record. SUPPLIERtrak™ User’s Manual 71 Show All Records Command You can use the Show All Records command from the Records menu to display the most current records in a form or datasheet. This command removes a filter if one is currently applied (including a sort created with the Quick Sort command). It requires the underlying records to display the most current data and moves to the first record. Copying Records You can easily copy records to save time and reduce mistakes. However, remember that certain records require that certain fields must be unique. In these cases, go ahead and copy the record, but make sure that the new record has the required unique fields before saving (otherwise you may get an error message). To copy a record: 1. 2. 3. 4. 5. Go to the record you want to copy and click on the record’s selector bar (or button). Choose Copy from the Edit menu (or press CTRL-INS on your keyboard). Go to a new record. Click on the new record’s selector bar (or button). Choose Paste from the Edit menu (or press SHIFT-INS on your keyboard). Deleting Records To delete records, do the following: 1. 2. 3. Go to the record you want to delete and click on the record’s selector bar (or button). Choose Delete from the Edit menu, click on the Delete button in the Navigation Panel, or press the DELETE key on your keyboard. You will be asked to confirm the deletion (in certain cases you will be asked twice). In Datasheet views, more than one record can be deleted by selecting more than one record. Use the record selector buttons to select all the records to be deleted, and then perform Steps 2 and 3. Undoing Changes to Fields and Records If you want to undo changes to a field (and you have not yet left the field) either press the ESC key on the keyboard, or select Undo Current Field from the Edit menu. If you have changed more than one field on a record and want to undo all the changes to the record, then select Undo Current Record from the Edit menu. If you are still in one of the fields that have been changed, then you will first have to select Undo Current Field and then select Undo Current Record from the Edit menu. Saving Records Although records are automatically saved whenever you go to a different record or close the form (or datasheet), you may choose to manually save records by clicking on the record selector bar (or selector button if in Datasheet view). You can also select Save Record from the File menu in the top menu bar. Editing and Shortcut Keys Listed below are some keyboard shortcuts that you can use to save time when you are entering records. Note: Where indicated by “CTRL”, hold down the CTRL key while pressing the other key: Keyboard Shortcuts – General Press To do this PAGE DOWN PAGE UP CTRL PAGE DOWN CTRL PAGE UP CTRL ‘ CTRL ; Go to next record in Form view (next page of records in Table view) Go to prior record in Form view (prior page of records in Table view) Go to next record, but keep cursor in same field Go to prior record, but keep cursor in same field Copy field data from the prior record’s field Insert the current date 72 Chapter 2: Program Conventions Press To do this CTRL : CTRL + SHIFT ENTER CTRL CTRL ENTER F2 F5 SHIFT SPACE Insert the current time Add a new record Save changes to the current record Delete the current record Add a new line to a memo field Switch between field editing and navigation modes Move to the record number entry box Select the current record Field Editing and Selection Keys Press To do this SHIFT RGT ARROW CTRL SHIFT RGT ARROW SHIFT LFT ARROW CTRL SHIFT LFT ARROW CTRL C or CTRL INSERT CTRL V or SHIFT INSERT Extend the selection or deselect one character to the right Extend the selection or deselect one word to the right Extend the selection or deselect one character to the left Extend the selection or deselect one word to the left Copy the selection into the Windows Clipboard Paste text from the Windows Clipboard Datasheet (Table) Keyboard Shortcuts Press To do this TAB, ENTER, or RGT ARROW END SHIFT TAB or LFT ARROW HOME DN ARROW CTRL DN ARROW CTRL END UP ARROW CTRL UP ARROW CTRL HOME Move to the next field Move to the last field in the current record (Table view) Move to the previous field Move to the first field in the current record (Table view) Move to the current field in the next record Move to the current field in the last record Move to the last field in the last record Move to the current field in the previous record Move to the current field in the first record Move to the first field in the first record Chapter 3: Supplier Master Records Use supplier master records to store information about your suppliers. Each supplier needs a unique code number (the code can include both numbers and letters). Each supplier requires a code number because: 1. Some suppliers may have the same name (or very similar names). A code number will help prevent ambiguity and mistakes. 2. Larger suppliers can have the same name, but may ship from multiple plants or divisions. You will probably want to track each supplier’s shipping location separately. Due to the relational hierarchy of the SUPPLIERtrak database, supplier master records must be created before you can enter receiving records, supplier part records, rating records, and survey records. To enter supplier master records, select Supplier Master Entry from the Enter/View Records menu. Next, enter any search fields (just click the Find button if you are entering new records). 73 74 Chapter 3: Supplier Master Records The record entry form will appear, showing your first record. Click the New button on the upper right corner of the screen to add a new record. If you are looking for a certain record, use the navigation buttons to scroll through the records, or use either the Find or Edit Filter/Sort options in the Record menu. Supplier Master Record Fields The following fields are used in the supplier master record: Field/Button Name Supplier Code Supplier Name Contact Phone Address City State Zip Country Last Survey Last Rating Last Received Last Reject Enabled Supplier User 1 and 2 Rating Frequency Description A unique alpha/numeric identification entry that must be placed in a record in order to store it. Of course, you will have to develop a numbering system. Important: To ensure proper sorting of records, you should make sure that all supplier codes are the same length. For example, do not use codes like A-1, A-2, A-100; instead, use codes that are the same length, such as A-001, A-002, A-100. Try to keep your coding system simple. The name of the supplier company. The name of the contact person at the supplier company. The telephone number of the supplier. The street address of the supplier company. The city of the supplier company. The state (or province) of the supplier company. The zip code (or postal code) of the supplier company. The country of the supplier company (optional). The date of the last Survey. Can be entered manually, but also is updated by the software. The date of the last Rating Can be entered manually, but also is updated by the software. The date of the last Receiving Record. Can be entered manually, but also is updated by the software. The date of the last Reject Record. Can be entered manually, but also is updated by the software. Is this Supplier current, But not yet archived? User defined fields that relate to this particular Supplier. At what interval does a Rating have to be completed for this Supplier? SUPPLIERtrak™ User’s Manual 75 Field/Button Name Rating Frequency UOM Next Rating Due Parts Table Description Enter the frequency of rating, using the unlabeled list box field on the right for the frequency units (for example, “45 DAYS”). When the software calculates the next rating due date, it uses this value. Your choices for the Units field are explained below: Days—schedule is based on elapsed calendar days Weeks—each week equals seven days; schedule is based on elapsed calendar weeks Months—schedule is based on elapsed calendar months EOM—rounds the next due date to the end of the month in which it occurs. For example, “6 EOM” means every 6 months, but the program extends the due date to the end of the sixth month (or the last working day of the month if you’re using skip days – see the System Administrator’s Guide for more information) Years—each year equals 365 days; schedule is based on elapsed calendar years The next Rating due date, entered manually or calculated by the software. This is an embedded table of supplier part records. Supplier Rating History This tab will display a sub form of the details of this supplier’s historical rating. Supplier Procedures If needed, you can set up receiving inspection procedures for suppliers. These procedures can be shared with many suppliers or can be specific to one supplier. For example, you may have special tests that must be done on all incoming materials from a certain supplier (supplier-specific procedures). On the other hand, you may have other tests that must be done on incoming materials from a certain group of suppliers (shared procedures). If the inspection procedure is part-specific, then you’ll need to Select the part procedure into the Supplier Parts Entry form. Note: If you’re entering a new supplier record, then make sure that you first save the supplier record (i.e., click on the record selector bar on the left side of the form or do a PAGE DOWN/PAGE UP sequence on the keyboard) before attempting to enter a procedure record. 76 Chapter 3: Supplier Master Records To select supplier procedures, click on the Procedures tab, and a procedure entry sub form will appear. Select the procedure name and then the text of the procedure (there is no limit to the number of lines of procedure text) will appear below. If you want to use a procedure that you entered previously on another supplier, then use the same procedure name. On the Procedures OLE tab of this window is the OLE Box field. “OLE” stands for Object Linking and Embedding. This means that you can view any linked valid Windows object (such as a graph, picture, or digitized movie) that has been entered into this field when the procedure was created in procedure Entry. Also in this sub form is the Attachments tab. This allows you to view any file attachment attached to this procedure when it was created in Procedure Entry. If you want to enter another procedure for the same supplier, then click on the right navigation button of the procedure window. Click the Exit button (or double-click the procedure window’s Control Menu icon) when you are through entering procedures, and you will be returned back to the underlying Supplier Entry form. Supplier Alarms There are two kinds of supplier alarms that can be set up. The first kind is a skip-lot alarm that will be triggered after you receive a user-defined number of shipments (lots). The second kind of alarm is calendar-based and will be triggered when you enter a receiving record for the supplier on or beyond a user-specified date. Alarms are triggered in the Received Material Entry form. Whenever an alarm is triggered, the user has the option of resetting the alarm (click the Clear button) or postponing the alarm (click the Snooze button). If the alarm is postponed, it will continue to be triggered with each shipment from the supplier until you reset it. Choosing the Reset button, will reset the count to zero. Note: As with procedures, if you are entering a new supplier record, make sure that you first save the supplier record (i.e., click on the record selector bar on the left side of the form or do a PAGE DOWN/PAGE UP sequence on the keyboard) before attempting to enter an alarm record. SUPPLIERtrak™ User’s Manual 77 To enter supplier alarms, click on the Alarms tab, and the Supplier Master Alarm Entry sub form will appear. Skip Lot/Rejection Alarm The supplier counter alarm fields are explained below: Field/Button Name Skip Lot Alarm Current Shipment Count Description This is the point at which the counter alarm is triggered. When the value entered here is reached, the alarm is displayed. If this is set to an extremely high value (i.e., a value that will never be reached), then the alarm will not be triggered. When you click the Clear button, this field is set to 2,000,000,000 (two billion) - a value that for all practical purposes, will never be reached. When this field is set to 2,000,000,000, or blank the counter alarm is turned off. This is the current count of shipments (lots) received since the alarm was last reset. This is set to 0 (zero) when you click the Clear button. Supplier Calendar Date Alarm The supplier calendar alarm fields are explained below: Field/Button Name Calendar Alarm Date Alarm Date Message Description The calendar alarm will be triggered on this date. If a receiving record for the supplier is entered on or beyond this date, the alarm will be displayed. If this field is blank or set to a date far into the future (such as the year 2100), then the alarm will not be activated. This is the message that will be displayed when the calendar alarm is triggered. This is set to blank when you click the Clear button. Remember that you must press CTRLENTER to insert new lines into memo fields. The Supplier Calendar Date Alarm is triggered when the user receives material on or after the date entered from the Receiving screen. Under QS-9000 rules, a supplier does not normally need to have shipments inspected. However, if a rejection is made, they are to inspect the Supplier’s next five shipments. 78 Chapter 3: Supplier Master Records When you have completed the entry of the Alarms for the supplier, click on the Close button to save your alarm settings and return to the underlying Supplier Entry form. Chapter 4: Supplier Part Entry Supplier Part Records Use Supplier Part records to store information about your supplier parts (and materials). You must set up your Supplier Part records before you can enter them in the receiving records. In the receiving records, you can select both the supplier and supplier parts from list boxes (to save time from manually typing them and to avoid data entry errors). The program does allow for part numbers to be duplicated between suppliers; however, they cannot be duplicated for the same supplier. In other words, two suppliers can share the same part number, but you cannot repeat the same part number for the same supplier. You can enter part records either from the Supplier Master Entry form (described earlier), or from the Supplier Part Entry form (discussed next). To enter part records, select Supplier Part Entry from the Enter/View Records menu. In the filter window, enter any search fields (just click the Find button if you are entering new records). The record entry form will appear, showing the first record. Click the New button on the navigation panel to add a new record. If you are looking for a certain record, use the navigation buttons to scroll through the records, or use either the Find or Edit Filter/Sort options in Record menu. 79 80 Chapter 4: Supplier Part Entry Supplier Part Record Fields The following fields are used in the supplier part record: Field/Button Name Supplier Code Supplier Name Supplier Part No. Company Part No. Description Unit of Meas. Unit Cost Currency Drawing No. Drawing Date Change Level Change Date Last Received Date Sampling Plan User Defined 1 and User Defined 2 Description The supplier code from the supplier master record. Click on the list box arrow to choose from available suppliers. The program looks up and displays the supplier name after you enter the supplier code for the part. The number that the supplier uses to identify the part or material. As described earlier, this number can be duplicated for different suppliers. The number that your company uses internally to identify the part or material. This number also can be duplicated for different suppliers. The description that your company uses internally to identify the part or material. This description also can be duplicated for different suppliers. The unit of measure in which you track the part (such as each, pounds, feet, or gallons). This field creates a self-building, drop-down list box that will display all previously entered information to save typing time and avoid data entry errors. The unit cost of the part (rounds to nearest penny). The currency symbol associated with this supplier part. The drawing number of the part (this field can be used for other purposes). The Drawing revision date associated with this supplier part. The historical drawing revision information is stored in the Receiving table for each receiving record throughout a part’s receiving history. The engineering change level of the part (this field can be used for other purposes). The Change revision date associated with this supplier part. The historical change revision information is also stored in the Receiving table for each receiving record throughout a part’s receiving history. The last date on which this part was received from the supplier. The program automatically maintains this date every time a receiving record is created for the part. The sampling plan used when inspecting this part. This field is automatically copied from the part record to the receiving record when you enter receiving records for the part. These fields have been added to allow you to keep track of additional information about your parts. SUPPLIERtrak™ User’s Manual 81 Inspection Characteristics Table Located at the bottom of the form is an embedded table of inspection characteristics. You can set up a list of as many items as needed to check for when receiving the part. Each characteristic has the following fields: Characteristic Value Minimum Nominal Maximum The name of the characteristic being checked, such as width or viscosity. This list is maintained alphabetically (not in the order in which you originally entered them). If you want to control the order, then you should prefix each entry with a number and period, such as 1. Width, 2. Height, 3. Length. V is usually used for Variable numeric data; A is usually reserved for Attribute (visual inspection etc.) data. The minimum acceptable value of the characteristic (lower specification limit). The nominal value for the characteristic (target or best value). The maximum acceptable value of the characteristic (upper specification limit). Supplier Part Procedures If needed, you can set up receiving inspection procedures for parts and materials. These procedures can be shared with many other parts or can be specific to one part. For example, you may have special tests that must be done only on a certain part from a certain supplier (part-specific procedures). On the other hand, you may have checks that must be done on incoming materials from a certain type of part or material coming from a variety of suppliers (shared procedures). Note: If you are entering a new part record, then make sure that you first save the part record (i.e., click on the record selector bar on the left side of the form or do a PAGE DOWN/PAGE UP sequence on the keyboard) before attempting to enter a part procedure record. Failure to do so will result in the error message “Can’t Have Null Value in Index” when you try to enter the procedure. To select part procedures, click on the Procedures tab, and a procedure entry sub form will appear. Select the procedure name and then the text of the procedure will appear below. If you want to use a procedure that you entered previously on another part, then use the same procedure name. On the Procedures OLE tab of this window is the OLE Box field. “OLE” stands for Object Linking and Embedding. This means that you can view any linked valid Windows object (such as a graph, picture, or digitized movie) that has been entered into this field when the procedure was created in procedure Entry. Also in this sub form is the Attachments tab. This allows you to view any file attachment attached to this procedure when it was created in Procedure Entry. 82 Chapter 4: Supplier Part Entry Click the Exit button when you are through entering procedures, and you will be returned back to the underlying Supplier Part record entry form. Part Alarms As with supplier alarms, there are Two kinds of part alarms that can be set up. The first kind is a skip-lot alarm that will be triggered after you receive a user-defined number of shipments (lots) of a part. The second kind of alarm is calendar-based and will be triggered when you enter a receiving record for the part that is on or beyond a user-specified date. To enter part alarms, click on the Alarms tab of Supplier Parts, and the Alarm Entry sub form will appear. Alarms are triggered in the Receiving Entry form. Whenever an alarm is triggered, you can reset the alarm (click the Clear button) or postpone the alarm (click the Snooze button). If the alarm is postponed, it will continue to be triggered with each shipment from the supplier until you reset it. The example provided above shows a supplier part for which the default of no realistic alarms will ever be reached (20000000 receiving records?, or a date beyond the year 2100?), thereby sequestering the alarm capabilities of the software for this supplier part. Note: As with procedures, if you are entering a new part record, then make sure that you first save the part record (i.e., click on the record selector bar on the left side of the form or do a PAGE DOWN/PAGE UP sequence on the keyboard) before attempting to enter an alarm record. Failure to do so will result in the error message “Can’t Have Null Value in Index” when you’re trying to enter the alarm. Part Counter Alarm The part counter alarm fields are explained below: Field/Button Name Skip Lot Alarm Current Shipment Count Description This is the point at which the counter alarm is triggered. When the value entered here is reached, the alarm is displayed. If this is set to an extremely high value (i.e., a value that will never be reached), then the alarm will not be triggered. When you click the Clear button, this field is set to 2,000,000,000 (two billion) - a value that for all practical purposes, will never be reached. When this field is set to 2,000,000,000, or blank the counter alarm is turned off. This is the current count of shipments (lots) received since the alarm was last reset. This is set to 0 (zero) when you click the Clear button. SUPPLIERtrak™ User’s Manual 83 Example of Part Rejection Alarm when triggered: Part Calendar Alarm The part calendar alarm fields are explained below: Field/Button Name Calendar Alarm Date Alarm Date Message Description The calendar alarm will be triggered at this date. If a receiving record for the part is entered on or beyond this date, the alarm will be displayed. If this field is blank or set to a date far into the future (such as the year 2100), then the alarm will not be activated. This is the message that will be displayed when the calendar alarm is triggered. This is set to blank when you click the Clear button is clicked. Remember that you must press CTRLENTER to insert new lines into memo fields. Example of Part Calendar Alarm when triggered: When you have completed the entry of the Alarms for the part, click on the Close button to save your alarm settings and return to the underlying Supplier Parts Entry form. Part Entry Attachments The Attachments tab of Supplier Part Entry is similar to procedure and supplier attachments. The files used for attachments can be of any file type that is supported on user’s workstations and registered in the Windows Registry. For example, if a CAD file is attached, and a user of SUPPLIERtrak does not have CAD software installed on their workstation, the file will not be able to be viewed or printed from that workstation. Files used in Part or any other attachment area in the software should reside on a common network drive, with common drive mappings between the range of SUPPLIERtrak users. Case in point, the example above. If the attachment is C:\Drawings\Part001.drg on one user’s pc and it is attached in SUPPLIERtrak, then another user of SUPPLIERtrak will not be able to see it due to it is not at C:\Drawings on their workstation. If the File is on G:\Products\Specifications\Part001.drg, and is attached in SUPPLIERtrak, then if at another user’s workstation the same folder is mapped differently, say M:\Specifications\Part001.drg, they will not be able to view the attachment as it is stored in the database due to the fact that this second user has his Drive M mapped to the first (attaching) user’s G:\Products directory on the network file server. 84 Chapter 4: Supplier Part Entry Part Entry Receiving History The Receiving History tab shows a form with the complete receiving history with rejection records for this supplier part. The example screenshot below shows a part that has been received once that just happens to have a single rejection record associated with that receiving record. SUPPLIERtrak™ User’s Manual 85 Clone Part Feature Part cloning allows you to create additional identical parts that have a different part number or to create exactly the same part for a different supplier. After you have entered all of the information for the part to be cloned, click the Clone Part button on the lower right corner of the Supplier Parts entry screen. Field/Button Name Description New Supplier Code Enter the supplier code for the new part, or select it from the list. New Part No. Enter the part number for the new part. Next, click the Clone button. All of the information that was entered for the original part will be copied to the part record for the cloned part, including Part Characteristics, Part Alarms, and Procedures. If you have several similar or identical parts, you can use Clone Part as many times as necessary. Chapter 5: Received Material Entry Received Material Records Use the Received Material records (receiving records) to track and log all incoming parts and materials. The program automatically assigns a receiving log number to each record. This number is incremented by a value of one each time a new record is added. To save time, the program automatically enters the current date into both the Received Date and Due Date fields as well as the name of the current user into the Inspected By field. To enter receiving records, select Received Material Entry from the Enter/View Records menu. Next, enter any search fields (just click the Find button to see all un-archived receiving records or insert a 0 (zero) in the Receiving Log No field to enter a new record). The record entry form will appear, showing either a new record or the first record. Click the New button on the navigation panel to add a new record after reviewing existing records. If you are looking for a certain record, use the navigation buttons to scroll through the records or use either the Find or Edit Filter/Sort options in the Record menu. 87 88 Chapter 5: Received Material Entry Received Material Record Fields The following fields are used in the received material record: Field/Button Name Receiving Log No. Supplier Code Supplier Part No Fields In Gray Receive Date Quantity Received Quantity Inspected Received By Inspected By Rejection Code User Defined 1 and 2 Shipper Number Lot No Description The receiving log number is used to uniquely identify each receiving record. The value is incremented by one each time a new record is added. This field will display “(Counter)” until a supplier code and part number have been entered. This log number is used to relate the receiving record to both inspection measurement records and rejection records (if entered). This field cannot be edited. Enter the supplier code or use the list box to select a supplier code. Entry required. Click on the list box button to choose from the available list of part records for the supplier code that was chosen. Note: if you enter a part number that does not yet exist for this supplier, you can add it from this screen. Company Part No, Description, Drawing No, Change Level, Sampling Plan and Unit of Measure are all related to the part information at the time of creation of this particular receiving record and are un-editable. Fields in Gray that are un-editable by the user because they are calculated solely by the software are the Lead Time, Days Early or Late, Quantity Rejected and Quantity Accepted fields. Quantity Rejected is updated by creating rejection records on the Rejects tab of the Received Material entry form, and is the sum of all Quantity Rejected from the associated rejection records. Quantity Accepted is calculated as Quantity Received minus total Quantity Rejected for each particular receiving record. The receive date of this receiving record, When a new record is created, the default date is always today. The quantity received of this supplier part that relates to this receiving record. The quantity inspected of this supplier part that relates to this receiving record. Usually, this number is dictated by the sampling plan that is chosen for this supplier part. The person receiving this shipment(s). This is a general field for the receiving record. The Inspection records for each part selected of the Quantity Inspected can each have their own Inspected by code, indicating possibly different inspectors, and different times of inspection This is also a general field for the receiving record. The Rejection records for each part selected of the Quantity Rejected can each have their own Rejection code, indicating possibly different rejection reasons, and different times of rejection User defined fields that relate to this receiving record. Used to document the Shipper if fulfillment is used and FOB, for example. Tracks the assigned Lot number of this shipment of this supplier part. This receiving record may be only a portion of the total number ordered, or may contain items backordered from an earlier order. SUPPLIERtrak™ User’s Manual 89 Field/Button Name Carrier PO Number Order date Due Date Comments Description Used to document the Carrier of the shipment that relates to this receiving record. Purchase Order number of shipment / lot received. Manually entered. The order date of this material. The difference between the Order Date and the Receive Date is used to calculate the Lead Time. There are no skip Days / Dates associated in the software for the calculation of Lead Time because it depends on shippers and suppliers and elements outside of the scope of the software. Manually entered. The expected due date of the arrival of this material. The difference between the due date and the receive date (minus the grace periods selected in Setup – Settings) is used to calculate early or Late. Enter any comments. Remember to press CTRL-ENTER to insert new lines of text into the Comments field. Receiving and Reject records imported from earlier versions of SUPPLIERtrak: When viewing a historical receiving record imported from a previous version, a separate control will show to the right of the field for Quantity Rejected on the main Received Material Entry form. If there is no reject record associated with the imported receiving record, the second control will be blank. The Quantity Rejected field will show as White to indicate a discrepancy between the main receiving record and the sum (tally) of Quantity Rejected from all related Reject Records, and will be editable if there is no data in the Quantity Rejected field for this receiving record. If there is a value in the receiving record for Quantity Rejected, but no associated reject record, the Quantity Rejected field is flagged in Yellow to signify the discrepancy. You can choose to enter a reject record associated with this receiving record at any time to coordinate the Quantity Rejected to a tally of all reject records individual Quantities Rejected if the historical data is still available to you. If there is a value in the receiving record for Quantity Rejected and there is an associated reject record, it should be the same as the value in the main Quantity Rejected and then both controls will show as gray and will be not be editable. If you should choose to add / modify any reject records associated with any historical (imported from previous versions) receiving record, and there is a discrepancy between the Tally of the individual reject records and the Quantity Rejected on the main form, the Quantity Rejected field will display as 90 Chapter 5: Received Material Entry Yellow and will allow editing. The second control to the right, the tally, will always be gray and not editable by the user. Viewing Receiving History To view the complete history of receiving records for the part or material, click on the View History button. A pop-up window will appear, as shown here (click the Close button when you’re finished viewing the history): SUPPLIERtrak™ User’s Manual 91 Viewing Supplier Rating History To view the complete history of rating records for the supplier of this part or material, click on the small ellipsis button to the right of the Supplier Code selected for this receiving record. A pop-up window will appear, as shown here (click the Close button when you’re finished viewing the history): Inspection Forms To print an inspection form, click on the Insp. Form button. This form is useful for data collection purposes. It will include important information describing the part as well as a list of characteristics to inspect. An area for recording your results is provided. 92 Chapter 5: Received Material Entry Viewing Procedures To view either supplier or part procedures, click on the corresponding tab—either the Supplier Procedures tab or the Part Procedures tab. There are two buttons that allow you to print or view the procedure. SUPPLIERtrak™ User’s Manual 93 The display report has the same appearance as the procedure report. Entering Inspection Results To enter inspection results, click on the Inspect Material tab, and the parts inspection sub form will appear. This form consists of a top header portion and an imbedded table of inspection characteristics at the bottom for entering measurements. Each form represents the inspections on a single part. The entry fields are as follows: Inspection Results Header Field/Button Name Lot No Part ID Inspected By Inspected By Name Inspection Date Accepted Description This will default to the information that’s entered on the underlying receiving record form. It is used in the event that each sample part comes from different lots. This field can also be used to track other information as well; however, you must not leave it blank. This field will automatically number starting at 1 and continue up to the number of parts inspected. It can be manually overridden with user data, usually dictated by the sampling plan associated to this supplier part. Select who is performing the inspection on this part this inspection date. Grayed out – Filled in by the software program after an employee code (from the Staff Table) is selected in the Inspected By field. Enter the date of this part’s inspection. This field is used to track whether or not the part has been accepted. 94 Chapter 5: Received Material Entry Inspection Measurement Table To enter the list of pre-defined inspection characteristics, click on the button called Insert Characteristics List. Of course this works only if you set up a list of characteristics in the supplier part records. Otherwise, you will have to manually enter the characteristic names, minimums, nominals and maximums. The table fields are as follows: Field/Button Name Characteristic Type Minimum Nominal Maximum Value Description The name of the characteristic being measured, such as width or Viscosity. This list is maintained alphabetically (not in the order in which you enter each item). If you want to control the order, then you should prefix each entry with a number and period such as 1. Width, 2. Height, 3. Length. The type of characteristic where V=Variable and A=Attribute (pass/fail). The minimum acceptable value of the characteristic (lower specification limit). The nominal value for the characteristic (target or best value). The maximum acceptable value of the characteristic (upper specification limit). The actual measured value of the characteristic or text, such as PASS or FAIL. Click on the navigation panel’s New button to add another inspection record for another part. Click on the navigation panel’s Close button to save your entries and return back to the underlying receiving record. Entering Rejection Records To enter rejection records, click the Reject Material tab, and the rejection entry sub form will appear. Note: You can enter multiple rejection records for a single receiving record, the reject ion codes and reasons for rejections can vary for any given receiving log entry. Each rejection record by default will have the default Corrective Action statement from the Setup > Settings > General tab, but each reject record can have this Statement changed to any other Corrective Action statement entered from Corrective Action statement entry also in the setup area of the software. AlsoNote: Previous versions of SUPPLIERtrak had no facility for entering the number rejected for any reason on the rejected materials form. Version 4.6 calculates the total Quantity Rejected from each rejection record entered for any given receiving record and tallies this result on the main Received Material Entry form. To allow for this difference between versions, please see the above breakdown of how version 4.6 allows users to review and update any discrepancies between the Quantity Rejected on the Received Material Entry form with reject records imported from previous versions by running the Data Transfer Utility. Please refer to the Data Transfer Utility section in the Appendix on page 166 for how the Data Transfer Utility populates the Quantity Rejected field in the Rejects table from the Quantity Rejected field in the Receiving table when transferring data from previous versions. SUPPLIERtrak™ User’s Manual 95 Rejection Record Fields Field/Button Name Reject No. Reject Date Reject Type Disp Code Reject Code Auth Date Auth No Auth. By Qty Rejected Qty Returned Qty Scrapped Qty Reworked Rejection Cost Fields Currency User Defined 1 and 2 Closed C A Date Close Date Response I n Days Comments Rejection Alarm Description As with receiving log numbers, this field increments by one each time a rejection record is added - it will say “0” until you save the record. This allows each rejection to be automatically uniquely identified. The date that the rejection was issued. It is automatically set to the current date. This field is used for tracking the type of rejection (such as warning or return for credit). You should create a code system for identifying the types of rejections that your company normally issues. The Reject Type Description will appear to the right of the Reject Type code after selecting from the drop down list. Enter a code indicating the disposition of the material (open, closed, return to supplier, scrap, or rework). The Disposition code Description will appear to the right of the Disposition code after selecting from the drop down list. Select a Reject code indicating the reject type that pertains to this rejection record, this will usually be dependent on the sampling plan that relates to this supplier part. The Reject Code Description will appear to the right of the Reject code after selecting from the drop down list. The date on which the supplier authorized the disposition. Authorization number issued by the supplier (if applicable). The name of the person at the supplier company that authorized the disposition. Information entered into this field creates a self-building list. The quantity rejected from this shipment due to this reason (Corrective Action, Disposition) The quantity of material being returned. The quantity of material being scrapped or discarded. The quantity of material being reworked or repaired. These fields reflect the breakdown of the costs being charged back to the supplier for the reason s specified for this rejection record. The default currency symbol is taken from the Supplier Part record for this supplier part. It can be edited for each rejection record separately without changing the default entry in Supplier Part Entry. User defined fields that relate to this rejection record. Click this radio button to indicate that the rejection notice is closed. The date the Corrective Action Letter was Created and Corrective Action response tracking begins The date the Corrective Action is responded to and closed by the Supplier. This is calculated by the software. It is the response time difference between the CA Date and the Close date in Days. There are no skip Days / Dates associated in the software for the calculation of Response time because it depends on suppliers and elements outside of the scope of the software. Enter any comments. Remember to press CTRL-ENTER to insert new lines of text into the Comments field. The way this alarm feature works, you can set it up so that on the fifth shipment following the rejection, the alarm will ask if you need to inspect the next five shipments. By pressing the Yes button, you have accepted the alarm, and on the sixth shipment you will be reminded to inspect it. 96 Chapter 5: Received Material Entry Rejection Notices To print a rejection notice for the supplier, click on the Print Rejection Notice button in this screen. After the print dialog window appears, click on the checkboxes for either including or excluding the inspection results and corrective action statement along with the rejection notice form. If you need to print a batch of rejection notices for a number of different suppliers, you can choose Reject Notice from the Listings and Reports submenu in the main menu. You can preview rejection notices on-screen before you print them. Example of Reject Notice: Accept and Reject Tags You can print both Accept and Reject tags for identifying incoming materials that have been inspected. Tags are designed so that they print one per page (regardless of page size). Since you have complete control over the orientation, paper size, and margins, you can, in most cases, use standard off-the-shelf label stock or card stock. Before actually printing, you may want to view label on-screen and then experiment with the Print Setup settings before actually printing (go to the File menu and select Print Setup). If you need customized tags, please contact Technical Support for other options. Accept/Reject Tag Layouts There are several tag layouts to choose from, depending on the type of paper stock and printer that you want to use. These layouts are explained below: Laser—This is designed for use on stock that is ¼ the size of an 8½” x 11” sheet of paper (5½” W x 4¼” L). Remember to place your tag into the printer in landscape orientation. SUPPLIERtrak™ User’s Manual 97 Dot Matrix—This is designed for use on stock of 4” W x 3” L labels (pin feed roll or fanfold stock). First, you will have to set up a User Defined paper size in the Printers icon of the Windows Control Panel. The User Defined paper size must match your label’s exact top-to-top length dimension (width is not important). Also, make sure you enter the dimensions in 1/100ths of an inch (enter 3 inches as 300). Next, preview the label within SUPPLIERtrak and use File | Print Setup to set up the User Defined paper size for both the Accept and Reject tags. When you close the preview window, you will be able to save the printer settings to the program (this only needs to be done once, unless you re-install or update SUPPLIERtrak). Field/Button Name Standard Custom Description This layout is 1/3 page (6” W x 2½” L). Place your tag into the printer in the normal (portrait) orientation. This is used for custom-designed tags (contact CyberMetrics or your distributor for information on custom-designed tags). Printing Accept Tags To print Accepted Material tags, click on the Print Accept Tags button. Next, enter the quantity of tags to be printed. To preview tags on-screen before printing, click the View button. Printing Reject Tags To print Rejected Material tags, click on the Print Reject Tags button. Next, enter the quantity of tags to be printed. To preview tags on-screen before printing, click the View button. Chapter 6: Procedure Entry Procedure Entry In Procedure Entry, you can enter and view detailed procedure records for use with both Suppliers and Parts, including pictures and attachment records to files stored in a common area on a network drive. Procedure Entry—Procedure Text In this screen, you can copy or enter the text of each procedure. If Maintain Receiving Procedure History is set to true (checked), then the text of a specific procedure can be edited until it is used in a receiving record. Once it has been used in an historical receiving record, the procedure is locked down so no changes can be made to it, and it cannot be deleted. If Maintain Receiving Procedure History is set to false (unchecked), then edits can be made any time even if the procedure is used in a receiving record, and you can delete the procedure as well. To learn more about the Maintain Receiving Procedure History control see section “Settings – General” of Chapter 12 on page 137. The following table explains each of the fields and buttons in this screen: Field Name Procedure Name Procedure Current New Description Enter a unique title for each procedure. If you try to create two procedures with the same name, GAGEtrak prompts you that you can’t have duplicate index values. If this happens, enter a unique procedure name or click Undo. In this field, enter the text of the procedure. You can copy and paste from another textual format document. Check this box to show that this procedure is currently active. If you don’t mark the procedure as active, it will not be available for future attachment to either Parts Or Suppliers. To create a new record. This button will create a new record for the entering of a new procedure. 99 100 Chapter 6: Procedure Entry Field Name Undo Delete Remove Clone Exit Description This button is only enabled when a procedure is not used for any historical receiving records and also the checkmark for Maintain Receiving Procedure History in Settings is checked. This will undo any changes made by the user after the record was last saved / created. This button is only enabled when a procedure is not used for any historical receiving records and also the checkmark for Maintain Receiving Procedure History in Settings is checked. This will Delete the current procedure if the user has rights to delete Procedures if Security is enabled. The procedure will be deleted from all supporting tables as well. This button will not delete the current procedure; just remove its reference to any Parts Or Suppliers it is currently linked to. This will not undo historical receiving records, but will affect future receiving records after removal. This Button will clone a procedure and allow you to create a new procedure from the original without re-creating it from scratch. Useful if a procedure has been used historically and it is deemed necessary to update the procedures followed to current standards. Give the cloned new procedure the new revision code / date as part of the new unique Procedure Name. Close the Procedure Entry Form. Procedure Entry—Procedure Image In the Procedure Image screen, you can attach a picture or map to each procedure. To do so, double-click in the OLE box. “OLE” stands for “Object Linking and Embedding”. This means that you can link any valid Windows object (such as a graph, picture, or digitized movie) into this field. When you double-click in the OLE field, the Insert Object box appears, and you can select the program in which you created (or will create) the object. Note: The list of object types varies, depending on which programs are on your computer. Use the scroll bar to select the type of object you want associated with the procedure, and then click OK. When you select an object type, the program in which you created the object opens so that you can edit the image (if necessary). When you’re finished, just click inside the OLE object box which links the object to the associated procedure, this returns you to Procedure Image. SUPPLIERtrak™ User’s Manual 101 Procedure Entry—Procedure Attachments In the Procedure Attachments screen, you can attach additional information related to the specific procedure name, for example an amendment to the existing procedure explaining revised processes. Use the File—Control for the selected record to view the attachment if the path is the same at your local client PC and also if you have the associated application installed on your PC. Although the example shown above shows paths to files on a local C:\ drive, it is advisable to have all procedure attachments on a network drive that is mapped similarly from all clients expected to run the SUPPLIERtrak application. Chapter 7: Staff Entry Staff Entry In Staff Entry, you can enter and view detailed employee records for your staff, including information like training, ID photo, what gages their authorized to use, and whether a gage has been issued to them. Staff Entry—Information The following table explains each of the fields and buttons in this screen: Field Name Employee ID Name Active Address, City, State, and Zip Description Enter a unique alphanumeric identifier for each employee. In this field, enter the employee’s full name. Check this box to show that the employee is currently active. If you don’t mark the employee as active, his or her name won’t appear on reports that list available employees. Enter the employee’s mailing address, including city, state, and zip code. E-Mail Home/Pager and Work Phone/Ext. Emergency Contact Name and Phone Enter the employee’s e-mail address. Craft Use this field to categorize your workers by profession. You can use a description, such as welder or electrical engineer; a code, like MIG-3; or a union number combined with a classification, such as 786-Journeyman or 786-Apprentice. Enter the employee’s hourly rate. Rate Enter the employee’s home phone number, pager number, work number and extension. Enter a person’s name and phone number to contact in case of emergency. 103 104 Chapter 7: Staff Entry Field Name Description Enter the seniority or other work status of the employee. You could use this field to store the date that determines seniority. Using either an internal or external classification system, assign a skill level to each employee. You could also use this field to indicate multiple skills for your employees, assigning letters or numbers for different skills. Enter the employee’s social security number. Seniority Skill Level SS No. Job Title DOB Date Hired and Date in Job Department Supervisor Shift Crew Enter the employee’s official job title. Employee’s date of birth. Enter the date(s) in which you hired the employee and when the employee started his or her current position. Enter the primary department the employee belongs to. Enter the name of the employee’s direct supervisor. Indicate the shift(s) for which this employee is available. Use this field to track the name of the crew(s) to which this employee either belongs or is qualified to belong. Use these two fields to store any additional employee related information. Staff User 1 and Staff User 2 Staff Entry—Training Use the Staff Entry—Training screen to keep track of the employee’s current and continuing education. The table below describes the fields in this screen: Field Name Education Industry Experience Related Experience Management Experience Description Give a basic description of the employee’s education, for example: BS – Mechanical Engineering. Enter the employee’s work experience, for example: 6 years Inspection Technician, Grade II. Use this field to track any other useful experience, such as AutoCAD 3-dimensional wire diagramming. Enter any management experience that the employee has–for example, Supervised Inspection Dept. in 2000. SUPPLIERtrak™ User’s Manual 105 Training History In this section, you can track classes or certifications that each employee has completed. Use the scroll bar at the bottom of the screen to see the different fields. Field Name Description Start Date and End Date School Cost Status Certification Cert. Expiration Date Hours CEUs (Continuing Education Units) Comments Description Enter a brief description of the training. Beginning and ending dates of the training. Enter the name of the school where the employee attended training. Enter the cost of the class. Use this field to indicate whether the employee has finished this particular class. If this training was for a particular certification, enter the type of certificate. If the certification is good for only a specified length of time, enter the expiration date in this field. Enter how many hours the training was worth or how long it lasted. In this field, enter the number of credit units earned for the training. Enter any other relevant information for this training or certification. Staff Entry—Photo Click this tab to attach a personnel photo; for more information, see Insert Object and Paste Logo In Settings – LOGO section for more information. Chapter 8: Ratings Entry Rating Records Use the Supplier Rating records to track the rating results on your suppliers. If needed, the program allows you to define one or more rating setups (you may want one setup for parts suppliers and another setup for service suppliers). Each rating setup is identified by a unique rating code (most companies will use only one rating setup, in which all their suppliers are subjected to the same rating guidelines). Defining Rating Setups You can define a very simple rating setup that has just a few criteria, or a more elaborate setup with multiple sections and multiple criteria. SUPPLIERtrak also allows you to define the rating formula. Rating formulas may consist of just a simple total of all rating criteria scores, or a more complex scheme with tallied rating section criteria and a weighted average of each section for the overall score. Before you can enter rating records, you must first define the rating setup. This is done by selecting Ratings Definition from the Tools & Utilities menu. After the search window appears, click on the Find button. As an example of a very simple rating definition, suppose that you wanted to create a rating setup that would end up looking like this: RATING RATING CRITERIA 1. Quality 2. Delivery 3. Price 4. Service Overall Score (Average) SCORE 90 95 90 92 91.7 Steps to create this rating definition: 1. 2. 3. Select Ratings Definition from the main menu Tools & Utilities submenu. After the search window appears, click on the Find button. After the Rating Definition form appears, enter the following: Field/Button Name Rating Code Category Formula Criteria Table Description Enter R1 (this is the how the system identifies a definition setup) Enter 01 (this is the first and only category for this setup). Enter [01]+[02]+[03]+[04] (the numbers in square brackets correspond to the criteria numbers (i.e., there are four criteria and these need to be totaled at first). This table holds the criteria numbers and their corresponding descriptions. Set these up as follows: Criteria Descriptions* 01 01. Quality 02 02. Delivery 03 03. Price 0404. Service *Note that each description starts with a number and period. This is done to control the sort order. Without the numbers, the sort order would be “Delivery, Price, Quality, Service” (alphabetically sorted) on your reports. 107 108 Chapter 8: Ratings Entry Your rating definition form should look like the one shown below: 4. Next, click the New button on the navigation panel. Now the overall formula will be added. Set this form up as follows: Field/Button Name Rating Code Category Category Description Formula Criteria Table Description Enter R1 (use the same code to link the two rating category records). Enter 99 (this tells the system that this is an overall score category for this rating setup; remember, each rating definition can have only one overall category of 99). Enter Rating as your Category Description. Enter [01] / 4 to have the overall score be an average (because this is a 99 category, the number in the square brackets represents the category numbers, not the criteria numbers). Leave blank (not needed for overall score category). The rating definition form for the Overall category should look like the one below: Now that the rating setup has been defined, you can enter the supplier’s actual score results into the rating records. To do this, click on the Close button and return to the main menu. Note: You only have to set up the rating definitions once, unless you want to add more rating definitions, such as having one setup for your part and materials suppliers and another for your service suppliers. SUPPLIERtrak™ User’s Manual 109 Entering Rating Records The rating records are used to store your actual supplier rating results (scores). Select Ratings Entry from the Enter/View Records menu. Click the Find button after the Rating Search form appears, then click on the New button to create a new rating record. Here is an example of a Rating record created with the criteria entered in the Rating Definition. The rating entry fields are as follows: Field/Button Name Description Rating Log No Rating Code This is a counter field that is automatically incremented by 1 with each new rating record. Enter the rating code here (enter S1 to bring up the rating for the sample rating definition). You can also use the drop-down list box to select from available rating codes. Enter the supplier code of the supplier you are rating (use the drop-down list box to select from available suppliers). The name of the supplier will be looked up and displayed. Enter the date of the rating (the current date will be inserted automatically). The date entered here is automatically posted to the Supplier Master record in the Last Rating date field. Enter the name of the person performing the rating (your name). This field creates a selfbuilding list displaying all unique entries. Enter any comments (remember to press CTRL-ENTER to insert new lines into memo fields). As soon as you click in the first column of this table, the list of rating category criteria will be inserted here. Enter the scores for each rating criterion into the last column, labeled “Scores”. The summary table will be filled in with names of the categories defined for the rating. First, click the Update button to insert the categories. The category scores will be automatically calculated using the formulas you defined and will be displayed in the rightmost Scores column of this table. Supplier Code Supplier Name Rating Date Rated By Comments Rating Score Table Summary The completed rating record should look like the one shown above. 110 Chapter 8: Ratings Entry Chapter 9: Survey Entry Survey Records Use the Supplier Survey records to track the results of your on-site surveys. If needed, the program allows you to define one or more survey setups (you may want one type of survey setup for parts and materials suppliers and another survey setup for your service suppliers). As with rating setups, each survey setup is identified by a unique code. The format of survey records is exactly like that of the rating records, except that the Criteria field is called a Question in the survey records. Rather than duplicate the information here, please see the prior section on Rating Records for instructions on setting up your survey definitions and on entering survey results. You can use the Rating/Survey Wizard to create a new rating or survey or to modify one that has previously been created using the Wizard. To enter a new rating or survey using the Wizard, choose Rating/Survey Wizard from the Tools and Utilities menu. Defining Survey Setups You can define a very simple survey setup that has just a few criteria, or a more elaborate setup with multiple sections and multiple criteria. SUPPLIERtrak also allows you to define the survey formula. Survey formulas may consist of just a simple total of all rating criteria scores, or a more complex scheme with tallied rating section criteria and a weighted average of each section for the overall score. Before you can enter survey records, you must first define the survey setup. This is done by selecting Survey Definition from the Tools & Utilities menu. Steps to create this rating definition: 1. Select Survey Definition from the main menu Tools & Utilities submenu. 2. After the search window appears, click on the Find button. 3. After the Survey Definition form appears, enter the following: Field/Button Name Survey Code Category Category Description Formula Description Enter S1 (this is the how the system identifies a definition setup) Enter 1 (this is the first and only category for this setup). Enter Delivery for the description. Enter: [01]+[02]+[03]+[04]+[05]+[06]+[07]+[08]+[09]+[10]+[11]+[12]+[13]+[14]+[15]+[16]+[17] 111 112 Chapter 9: Survey Entry Field/Button Name Questions Description This table holds the criteria numbers and their corresponding descriptions. Set these up as follows: Criteria Descriptions* 01 Management Responsibility 02 Quality System 03 Contract Review 04 Design Control 05 Document and Data Control 06 Purchasing 07 Control of Customer-Supplied Product 08 Product Identification and Traceability 09 Process Control 10 Inspection and Testing 11 Control of Inspection, Measuring and Test Equipment 12 Inspection and Test Status 13 Control of Nonconforming Product 14 Corrective and Preventive Action 15 Handle, Store, Package, Preserve and Delivery 16 Control of Quality Records 17 Internal Quality Audits Taken from the QS-9000 Requirements, August 1994. Example of this Survey Definition with formula: 4. Next, click the New button on the navigation panel. Now the overall formula will be added. Set this form up as follows: Field/Button Name Survey Code Category Category Description Formula Criteria Table Description Enter S1 (use the same code to link the two rating category records). Enter 99 (this tells the system that this is an overall score category for this survey setup; remember, each survey definition can have only one overall category of 99). Enter Quality as your Category Description. Enter [01] /17 to have the overall score be an average (because this is a 99 category, the number in the square brackets represents the category numbers, not the criteria numbers). Leave blank (not needed for overall score category). SUPPLIERtrak™ User’s Manual 113 The survey definition form for the Overall category should look like the one below: Now that the survey setup has been defined, you can enter the supplier’s actual score results into the survey records. To do this, click on the Close button and return to the main menu. Note: You only have to set up the survey definitions once, unless you want to add more definitions, such as having one setup for your part and materials suppliers and another for your service suppliers. Entering Survey Records The rating records are used to store your actual supplier rating results (scores). Select Ratings Entry from the Enter/View Records menu. 114 Chapter 9: Survey Entry The completed rating record should look like the one shown below: The fields for the Survey Entry screen are as follows: Field/Button Name Survey Log No. Survey Code Supplier Code Supplier Name Survey Date Surveyed By Comments Questions Summary Update Description This is a counter field that is automatically incremented by 1 with each new survey record. Enter the survey code here (enter S1 to bring up the rating for the sample survey definition). You can also use the drop-down list box to select from available survey codes. Enter the supplier code of the supplier you are surveying (use the drop-down list box to select from available suppliers). The name of the supplier will be looked up and displayed. Enter the date of the survey (the current date will be inserted automatically). The date entered here is automatically posted to the Supplier Master record in the Last Survey date field. Enter the name of the person performing the survey (your name). This field creates a selfbuilding list displaying all unique entries. Enter any comments (remember to press CTRL-ENTER to insert new lines into memo fields). These are the questions asked on the survey of the Supplier. The Questions field shows the question number it was on the survey. The Description of the question and the score is the percentage or other number representing the answer. The summary table will be filled in with names of the categories defined for the survey. First, click the Update button to insert the categories. The category scores will be automatically calculated using the formulas you defined and will be displayed in the rightmost Scores column of this table. Click this button to Update the Summary fields. Chapter 10: Listings and Reports Listings and Reports Menu SUPPLIERtrak includes a variety of standard reports. Most reports allow you to select the sort order by clicking on the appropriate sort button. You can also enter optional search filters for printing subsets of your records. Some reports are time-based (such as the Received Material Listing), and you can enter the date range of interest into the From Date and To Date filter fields. All reports have been designed using the standard Windows True Type fonts. The fonts used in the reports cannot be changed. Click on the main report types, to see the reports under each category. Print Setup Certain reports settings, such as orientation (portrait or landscape) and margins can be modified. Report settings can be modified by selecting Print Setup from the File menu. Some options are controlled by the type of printer and the Windows printer driver that you have, but a typical setup window looks like this: 115 116 Chapter 10: Listings and Reports Tip: To save paper and time, you may want to first view the report on-screen and then adjust the print setup values. You can immediately see any changes on-screen after you click the OK button. The program will ask you if you want to save the new settings when you close the report window. Output To The Output To command from the File menu allows the output of reports to a text file, Microsoft .RTF file, or Microsoft Excel spreadsheet file. For reports, output in .TXT or .RTF format includes the contents of text boxes as well as the text box labels. If you save a file in .RTF format and then open that file in a word processing application, such as Microsoft Word, your data appears in a formatted table. When you save the output in .XLS or .RTF format, it includes fonts, layout, and other formatting elements. When you choose the type of file you want to Output the report as, click Export button on the right. You should find the exported report file in the same location as your database. SUPPLIERtrak™ User’s Manual 117 Send The Send command from the File menu allows the output of reports to Microsoft Mail (or any MAPI compatible mail program). The output does not include sub forms and sub reports. When you save the output in .XLS or .RTF format, it includes fonts, layout, and other formatting elements. After you choose the format to Send the file in, it will open a new email message with the report as an attachment to the message. Viewing Reports You can preview all reports on-screen by clicking the View button. After the report appears, you can scroll through it in any direction by using the scroll bars. You can go to other pages by clicking on the navigation buttons in the lower left corner of the viewing window. To zoom in (or out of the report), click anywhere on the body of the report. Keyboard shortcuts are listed below: Print Preview Keyboard Shortcuts Press P S Z C or ESC To Print the report Open the Setup dialog box Zoom in (or out) for a magnified view of part of the page Cancel Print Preview To view different pages in Print Preview when zoomed-out: Press F5 PAGE DOWN or DOWN ARROW END PAGE UP or UP ARROW HOME To Move to the page number box; then type the page number you want to go to and press ENTER Move to the next page (when zoomed out) Move to the last page Move to the previous page (when zoomed out) Move to the first page To view different parts of the current page when zoomed-in: Press DOWN ARROW PAGE DOWN CTRL DOWN ARROW UP ARROW PAGE UP CTRL+UP ARROW RIGHT ARROW CTRL RIGHT ARROW or END CTRL+END LEFT ARROW CTRL+LEFT ARROW or HOME CTRL+HOME To Scroll down in small increments Scroll down in large increments Move to the bottom of the page Scroll up in small increments Scroll up in large increments Move to the top of the page Scroll to the right in small increments Move to the right edge of the page Move to the lower-right corner of the page Scroll to the left in small increments Move to the left edge of the page Move to the upper-left corner of the page 118 Chapter 10: Listings and Reports Supplier Performance Report The Supplier Performance report is a management summary report that tells you how well or how poorly suppliers have been performing. The report provides information on quantity rejections, lot rejections, and delivery for any given time frame. Typically, you will run this report on a monthly or quarterly basis. Received material that is later rejected is included in the report for same time period during which it was received. Received material can be inspected and rejected at any time and still be included in the performance calculations. Supplier Part Performance Report This report summarizes performance by part number for any given date range. The Supplier Part Performance report allows you to filter on both the supplier code (to generate for one supplier) and on the supplier part number (if you only want results on a single part number). Received material that is later rejected is included in the report for same time period during which it was received. Received material can be inspected and rejected at any time and still be included in the performance calculations. SUPPLIERtrak™ User’s Manual 119 Received Material Report The Received Material report is simply a listing of your received materials log. It can optionally include the inspection results along with each receiving record. 120 Chapter 10: Listings and Reports Rejected Material Report The Rejected Material report is simply a listing of your rejection records. It can optionally include the inspection results along with each rejection record. If you use a code, such as “Open”, in the rejection record’s disposition code, you can use this report to generate a list of open (meaning that the supplier hasn’t responded yet) rejections. Enter the word “Open” into the Disp Code filter field. SUPPLIERtrak™ User’s Manual 121 Rejection Notice Report This report is used to print a batch of rejection notices (you can also print the notice from within the rejection entry window, but only one at a time). You can run this report to print all of your rejection notices at the end of the day. This report allows you to optionally include the inspection results and the Corrective Action statement (used for requesting a written action plan from your suppliers - the text of this statement can be modified in the SUPPLIERtrak Settings screen). 122 Chapter 10: Listings and Reports Rejection Cost Report The Rejection Cost Report is a listing of your costs for each Supplier. It can display results for one Supplier by selecting from the drop down list, or for all suppliers by choosing Clear Fields. You can include a certain date range to be displayed and choose to sort by Supplier Code or by Supplier Name. Rating Report The Rating report is used to generate either a summary listing or forms of your rating records. Click the Print Form option box if you want one rating per page to be printed. SUPPLIERtrak™ User’s Manual 123 Rating Report (Current and Previous) This report allows you to print both the current and previous ratings on a supplier. The report also allows you to include a performance summary if needed. 124 Chapter 10: Listings and Reports Survey Report The Survey report is used to generate either a summary listing or forms of your survey records. Click the Print Form option box if you want one survey per page to be printed. Supplier Listing Report The Supplier Listing report is used to print a list of your supplier records. You have the option of including the list of supplier part records with each supplier record (the list of parts is printed below each supplier record). SUPPLIERtrak™ User’s Manual 125 Supplier Part Listing Report Use the Supplier Part Listing report to print a list of your part records. You have the option of including the inspection characteristics for each part record (the list of characteristics is printed below each part record). Supplier Procedure Cross Reference Listing Use this report to print a summary listing of your supplier procedures. Depending on how you sort it, you can use it to see which suppliers are sharing the same procedures. 126 Chapter 10: Listings and Reports Supplier Procedure Report Use the Supplier Procedure report to print a listing of your supplier procedures, including the body of text in the procedures. An option is available that allows you to print one procedure per page. Part Procedure Cross Reference Listing Use the Part Procedure Cross-Reference report to print a listing of your part procedures. Depending on how you sort it, you can use it to see which parts are sharing the same procedures. Part Procedure Report Use the Part Procedure report to print a listing of your part procedures, including the body of text in the procedures. An option is available that allows you to print one procedure per page. SUPPLIERtrak™ User’s Manual 127 Active Supplier Alarm Listing Use this report to print a listing of active supplier alarms. Only those supplier records that have an active counter or a calendar-based alarm will be printed. Active Part Alarm Listing Use this report is used to print a listing of active part alarms. Only those part records that have an active counter or a calendar-based alarm will be printed. Corrective Action Listing Use this report to print a listing of open corrective action notices. Only those rejection records that have a date in the Date C.A. Sent field, with the Closed radio button field not checked, will be printed. 128 Chapter 10: Listings and Reports Supplier Detail Report Use the Supplier Detail report to print a list of your supplier records. This report gives you all of the supplier master information on a single page printout per supplier. Chapter 11: Graphs and Charts To generate charts, go to the main menu and select the Graphs and Charts menu. You can view, print, and send, all charts. As in the entry screens, each report starts with a filter window that allows you to define the subset of records that you wish to print. Each chart does include the option to enter the date range of interest into the From Date and To Date filter fields. All reports were designed using standard Windows True Type fonts. Viewing Charts After entering the filter criteria, click the Chart button, and the charted report appears. The charts can be viewed in any direction by using the scroll bars. You can go to other pages by clicking on the navigation buttons in the lower left corner of the viewing window. A magnifying class will replace your mouse cursor, this is to be used to zoom in (or out) of the chart by clicking anywhere on the body of the report. Print Preview Keyboard Shortcuts Print Preview keyboard shortcuts are listed below. Press P S Z C or ESC To Print the report (brings up the print dialog box) Open the Setup dialog box Zoom in (or out) for a magnified view of part of the page Cancel Print Preview To view different pages in Chart view when zoomed-out: Press F5 PAGE DOWN or DOWN ARROW END PAGE UP or UP ARROW HOME To Move to the page number box; then type the page number you want to go to and press ENTER Move to the next page (when zoomed out) Move to the last page Move to the previous page (when zoomed out) Move to the first page To view different parts of the current page using the zoomed-in feature in Print Preview: Press DOWN ARROW PAGE DOWN CTRL DOWN ARROW UP ARROW PAGE UP CTRL+UP ARROW RIGHT ARROW CTRL RIGHT ARROW or END To Scroll down in small increments Scroll down in large increments Move to the bottom of the page Scroll up in small increments Scroll up in large increments Move to the top of the page Scroll to the right in small increments Move to the right edge of the page 129 130 Chapter 11: Graphs and Charts Press CTRL+END LEFT ARROW CTRL+LEFT ARROW or HOME CTRL+HOME To Move to the lower-right corner of the page Scroll to the left in small increments Move to the left edge of the page Move to the upper-left corner of the page Print Setup You can change certain reports settings, such as orientation (Portrait or Landscape) or margins, by selecting Print Setup from the File menu. Some options are controlled by the type of printer and the Windows printer driver that you have, but a typical setup window looks like this: Tip: To save paper and time, you can first view the report on-screen and then adjust the print setup values. You’ll immediately see any changes on-screen after you click the OK button. When you close the report window, the program will save the new settings. Output To The Output To command from the File menu allows you to output reports to a text file, Microsoft .RTF file, Microsoft Excel spreadsheet file, Snapshot file, HTML or Microsoft Database file. If you save a file in .RTF format and then open that file in a word processing application, such as Microsoft Word, your data appears in a formatted table. When you save the output in .XLS or .RTF format, it includes fonts, layout, and other formatting elements. Send The Send command from the File menu allows the output of reports to Microsoft Mail (or any MAPI compatible mail program). The output does not include sub forms and sub reports. When you save the output in .XLS or .RTF format, it includes fonts, layout, and other formatting elements. SUPPLIERtrak™ User’s Manual 131 Reports—Descriptions Worst Supplier Chart This report is based off the percent of the supplier lots rejected or by the percent of lots that are late. You can choose the top worst supplier or up to 20 of your worst suppliers. By adding a date range, you can get a time frame of when a supplier(s) may have performed better or worse. When choosing the Clear Filter button, this will erase the date fields and only include the Analysis Of and No. of Suppliers fields. In the example shown below, the charted report shows the top five Suppliers with the highest percent of lots rejected at present. Notice no date range was given. Parts Comparison Chart Use this chart to create a comparison of one company part number supplied by several suppliers. It will chart the percentage of rejection or the percent late, for those suppliers that supply the part. You must first select a part number from the drop down list, and then optionally place a date range. 132 Chapter 11: Graphs and Charts In the example shown below, the part number of E-108-C, is shown to have a 42 percent rejection rate when supplied by supplier “Company A”. Supplier Performance Chart Grouped by Month, Week or Quarter, you can display an individual Supplier’s Performance. There will be four charts produced for this one Supplier Code, they are the Percent Rejected By (Week, Month, Quarter) Top 10 Rejection Reasons (with reject code), 10 Worst Part Numbers and Late Deliveries By (Week, Month, Quarter). You must choose a supplier code to produce a report. SUPPLIERtrak™ User’s Manual 133 Supplier Comparative Chart This chart will show the difference between one date range and another date range for a specific Supplier. This would be good for showing the improvements or failure rates of a certain supplier and how they have been doing this quarter compared to last quarter. Choose the Supplier Code, an Analysis of Percent Rejected or Percent late and choose Grouped By Week, Month or Quarter, click the Chart button and a chart will appear comparing the two time frames. The example shown here is a Supplier with 70 percent rejection of materials received from August to November of 1999 and from 10 to 100 percent rejected in the months of February to July of 2000. 134 Chapter 11: Graphs and Charts Chapter 12: Setup Setup Menu 135 136 Chapter 12: Setup Settings To set up SUPPLIERtrak, go to the Setup icon on the Main Menu and select Settings. Settings are where you enter the Company information, the contact name, the logo and user defined fields. The following window will appear, showing the four tabs, the first is for User Information: User Information Entry Field/Button Name Company Information Paste Logo and Insert Object Description Enter your company name, address, phone/fax numbers, and logo (optional). The two lines for your company name and logo will appear at the top of all reports. If you have not set up the users, the information from the Contact field will be displayed next to “User” in the lower left corner of the main menu. To enter your company logo, use the Insert Object or Paste buttons. Use Insert Object if you already have a logo file or want to create the logo in a graphics program and link it to SUPPLIERtrak. Use the Paste button if you’ve copied the logo to Windows Clipboard. Try to insert a logo graphic about the same size as the logo region shown. Otherwise, you might not have enough memory available to print the logo on your reports. Also, to avoid wasting memory, don’t use a logo with more colors than your printer can print. You can use a scanner to obtain your logo. A logo created this way can become a huge file that uses an excessive amount of memory. To conserve memory, paste your logo into SUPPLIERtrak as a .BMP file, even if you created it in a graphics program. Pasting your logo as a bitmapped object uses less memory. If you can view your logo in the Settings window, but it doesn’t appear on your reports, you don’t have enough memory for the logo size (in bytes) that you’ve used. SUPPLIERtrak™ User’s Manual 137 Field/Button Name Close Cancel Description If you want to save your changes, click Exit to return to the main menu. To exit this screen without saving your changes, click the Cancel button. General Field/Button Name Enable Audit Trail Select Text Editor Audit Location Description The Audit Trail feature, when enabled, will keep a text file of actions taken during use of the program, such as record modifications and deletions. The user who performs each action will also be listed. Click in this box to enable the Audit Trail feature. Choose a default text editor program, such as NotePad, to use for viewing the audit trail file. SUPPLIERtrak puts the audit trail file in the directory you designate in this field. Tip: If you are sharing the SUPPLIERtrak database on a network drive, locate your audit log in the same folder. View Audit Trail User Defined Fields User 1 and User 2 Late and Early Grace Period Corrective Action Statement Page Employee Alarms Click this button to see your audit trail file. These user-defined fields will change the two User Defined field names in Supplier Entry, Part Entry, Received Material Entry and Reject Material Entry respectively. The fields have a 50-character limit. Whenever a received material record is added, the program will examine the Due Date and Received Date and mark the record as either Early or Late. The program allows you to set up both Early and Late grace periods for your suppliers. The Late Grace Period is the number of days that a supplier is allowed to be late. The Early Grace Period is the number of days that a supplier is allowed to ship early. Companies that are using Just-In-Time (JIT) policies with their suppliers may want to allow them be early without penalty. Set the Early grace period to the desired number of days. If you don’t want to penalize the supplier for shipping early, then set the Early grace period to 999 days. At the bottom of the window is the default corrective action statement, which will be included when creating rejection records (discussed on page Error! Bookmark not defined. of this manual). As with all memo fields in SUPPLIERtrak, press CTRL-ENTER to insert new lines into this field (pressing ENTER by itself takes you to the next field). This field will scroll up (and down) to allow for longer statements. Number of Seconds to pause when calling an employee pager. Requires AT compatible modem installed and configured on workstation. These three checkboxes will globally either enable (checked) or disable the alarm features in SUPPLIERtrak. 138 Chapter 12: Setup Field/Button Name Currency Maintain Receiving Procedure History Description Enter Currency Symbols, a description and conversion factor for the currencies you expect to be using in SUPPLIERtrak. Copy and Paste from the Windows Character Map. Remember to update your conversion factors to their current values before running Rejection reports. This checkmark controls whether or not Receiving Procedure History is enforced on the Procedure Entry form. The default for this checkmark will be checked and locked. Settings—Interface Changing Field Labels in SUPPLIERtrak You can rename any SUPPLIERtrak field to better suit your needs. For example, your company might use the term “Dock Entry code” instead of “Receiving Log No”. You can then change the Receiving Log No field to “Dock Entry Code”. To change field names, go to the main information screen for any record entry form, and then click in the upper left corner of the form. Another screen will open: In this screen, you can change any of the field names that appear. Your changes will appear anywhere in SUPPLIERtrak where the field appears. To change a field’s label, go to its Label Text box and make the necessary changes. You can also choose to make field labels bold or normal in appearance. The fields and buttons in this screen are explained in the following table: Field/Button Name Font Weight Open Normally Open with default label text Description Click this button to change the font weight of other labels to the opposite of the current field. For example, if you click this button while in a field marked “Bold”, SUPPLIERtrak asks if you want to change the weight of the other fields to “Normal.” Select this option to see your custom field labels. Use this button to temporarily change field labels back to their default names. This button is useful if, for example, you need to contact Technical Support about a question on a particular field and need the original field name. The Settings—Interface window displays a complete list of user customizable interface elements. These are broken down into the following tabs: Custom Labels, Form Captions, Form Tabs, Main Menu, Menu Bar, Messages and Menu Colors. All of these elements are completely customizable. You can use these to rename interface elements to fit your company’s terminology, or even translate SUPPLIERtrak’ interface into a language other than English. Changing Menu Colors on SUPPLIERtrak You can also customize the user interface of your application. For example, you find the green background a bit dull for your tastes you can change the color in the Menu Colors tab in Settings—Interface. SUPPLIERtrak™ User’s Manual 139 This screen allows you to modify the icons’ foreground and background shades, as well as font colors to something more visually pleasing for you. As you customize the user interface, your choices for each element you modify are displayed in the Preview window to your right. This allows you to view your changes immediately, saving you time and effort. Settings—Skip Dates and Days Entering Skip Days and Dates in SUPPLIERtrak On the Skip Days tab of Settings, you can use the checkboxes for the days of the week your facility wants to remove from the calculation of Early and Late for receiving Records, and Next Rating due dates for Suppliers. Also, choose the global skip direction for calculating next rating due dates for suppliers when the calculated date falls on either a skip day or date. Enter Skip Dates in the table on the right. For example, enter each holiday in the coming year when the plant will be shut down, also one entry for each day of a two week planned plant shutdown during the summer. 140 Chapter 12: Setup Rating/Survey Wizard You can use the Rating/Survey Wizard to create a new rating or survey or to modify one that has previously been created using the Wizard. To enter a new rating or survey using the Wizard, choose Rating/Survey Wizard from the Tools and Utilities menu. Important Note: Ratings or surveys created without the Wizard cannot be modified using the Wizard. Any ratings or surveys that are modified will affect future ratings or surveys only; previous supplier ratings or surveys will not be changed. In the first field, enter your two-character identifier for the rating code or survey code. In the center field, indicate whether you are creating or modifying a new rating or a new survey. Use the rightmost field to enter a description for your new rating or survey. After you have filled in these three fields, click the Next button to open the next entry screen. You can enter as many categories as you need for your rating or survey. You must assign a category weight to each of your categories; this figure can be a whole number or a decimal. Click the Next button when you have finished entering all of the categories and category weights. Click the Rating/Survey Structure button to view the relationship of categories and their criteria. SUPPLIERtrak™ User’s Manual 141 You may enter as many criteria for each category name as is necessary. The criteria weight can be a whole number or a decimal. When you have finished entering your criteria names and criteria weights for your first category, click the right pointing arrow above Criteria Weight entry. Use the left and right navigating arrows above Criteria Weight entry to enter and view all criteria records for your different categories. 142 Chapter 12: Setup When you have finished entering criteria for your last category, click the Finish button to create the new rating or survey. The following Record Created message will appear to confirm that the new rating or survey was created: Set Up Users When you select Set Up Users from the Tools and Utilities menu, the User Entry screen will appear. The Set Up Users feature allows you to add new SUPPLIERtrak users and set each one’s rights for each of the program areas. User Information Field/Button Name New Undo Delete Close Description Click the New button to add a new user to SUPPLIERtrak. Click the Undo button to undo any changes or typing to the field, or press the ESC key. Click the Delete key of the record of the user you are viewing, and this will remove that user. Click the Close button to save the settings and return to the main menu. The User Information screen allows you to enter each user that will be using SUPPLIERtrak, and assign a PIN to each, as seen below: Field/Button Name PIN Name, Title, Location, and Phone Description Each user should have a unique PIN (Personal Identification Number), a four-digit number used to log on to SUPPLIERtrak. In these fields, enter information about the user, including his or her name, job title, location (or department), and phone number. SUPPLIERtrak™ User’s Manual 143 Record Access The Record Access screen lists each of the program areas for the user’s privileges. After entering the User Information and PINs in User Information, proceed with this screen to complete the process for each user. The privileges are as follows: Field/Button Name Description Access Access indicates that the user can get into this area of the program. If the user has only this Add Modify Delete box checked, he or she can only view records. Mark this box to let the user add new records in that area of the program. Check this box to let the user edit existing records in this program area. If you check this box, you allow the user to delete records in this area. Important: If the user has permission to delete records, then the user automatically has permission to modify records. Access to Reports Printing Menu The Access to Reports Menu and Printing checkbox allows the user to print reports from the Reports menu as well as printing from the data entry screens (i.e., selecting File | Print while in a data entry screen). Access to Graph Printing Menu The Access to Graph Printing Menu checkbox allows the user to get into all graphs and charts in that menu. Access to Data Tools and Utilities Menu The Access to both the Data Tools and the Utilities Menus checkbox allows the user to get into all program data tools and utilities, including the access to the Modify License screen. Mainly supervisors should be given this permission. Access to Setup Menu The Access to the Program Setup Menu checkbox allows the user to get into all program setup utilities, including the access to the User Setup screen. Only supervisors should be given this permission. Time-Saving Tip: You can click on any of the vertical (Access, Add, Modify, Delete) or horizontal (Suppliers, Parts, Rec. Material, Ratings, Surveys) items to toggle the entire column or row on or off. When you have completed the Access rights for the user, click Close to return to the Main Menu. 144 Chapter 12: Setup Report Control ID Entry Report Control IDs If your company needs to comply with ISO or QS 9000 Document Identification and Control requirements, select this option from the Tools and Utilities menu. Each report in SUPPLIERtrak can be uniquely identified with a different document number. The Document Control ID will appear at the bottom of reports, using the alignment you have chosen for that particular report. If you are not required to use document control numbers, you might want to enter your company’s address and telephone numbers as control text to appear on the bottom of your reports. Ratings Definition Under the Definition Search you can choose a Rating, its Category or Description to view the Definition of the Rating as it was entered in the wizard. By pressing the Find button with no other options entered; you will view all of the Rating Definitions available. After choosing the Rating, Category or Description, click the Find button. You will see the Rating Code, Category, Description, Formula, and Criteria as they were entered in the Rating/Survey Wizard. SUPPLIERtrak™ User’s Manual 145 Survey Definition Under the Definition Search you can choose a Survey Code, its Category or Description to view the Definition of the Survey as it was entered in the wizard By pressing the Find button with no other options entered; you will view all of the Survey Definitions available. After choosing the Survey, Category or Description, click the Find button. You will see the Survey Code, Category, Description, Formula, and Criteria as they were entered in the Rating/Survey Wizard. 146 Chapter 12: Setup Rejection Coding Setup Click this button to bring up the Rejection Coding Setup form. This form allows you to edit and add or delete Rejection codes from the application. However, any modifications here will not affect previously created receiving or reject records in the database. Their historical data integrity will remain intact, and only future records will be affected by the modifications made here. Corrective Action Statement Entry Click this button to bring up the Corrective Action Statement entry form filter. Select the CA Statement you wish to review or edit from the dropdown list, or enter Text in the Corrective Action Statement field to search the previously entered statements for occurrences of the criteria text string. Hit Find with nothing in the criteria fields to see all CA Statements entered in the CA Statement Entry Form: SUPPLIERtrak™ User’s Manual 147 This form allows you to edit and add or delete Corrective Action Statements (other than the main Default Corrective Action Statement found in the Setup – Settings – General Tab) from the application. However, any modifications here will not affect previously created reject or reject corrective action records in the database. Their historical data integrity will remain intact, and only future records will be affected by the modifications made here. 148 Chapter 12: Setup Chapter 13: Data Tools Data Tools Menu Backing Up Your Database File You should periodically make a backup of your SPDATA46.MDB database file (we recommend doing this every day). You can use the built-in Backup/Restore function that is part of the program for accomplishing your backup. If you have purchased specialized backup software (such as Colorado Backup tape drive or a zip drive), use it instead. 1. First, gather several pre-formatted, blank diskettes (several may be needed, depending on how many records are in your database). To back up, click on the Tool and Utilities button from the main menu and select Backup/Restore. This will bring up the Backup/Restore utility. 2. The file name dialog box will appear. 3. Enter the drive and a name for the backup Zip file (if you like, you can use the current date as your filename (you could name it like this: YYMMDD.ZIP - for example, August 25, 1999 would be saved as 990825.ZIP). 149 150 Chapter 13: Data Tools NOTE: The drive that you are backing up to must be removable media such as floppy disks or SyQuest cartridges - you cannot back up onto your hard drive. It is a good idea to alternate your backup diskettes, so that you always have at least your last two backups available. Another way to keep track of your backups is to have five or six sets of diskettes (one set labeled for each day of the week) and backup your database as SPDATA46.ZIP every day. This way, you will always have a week’s worth of backups. You may also want to archive a permanent set of backups on a regular basis as well, perhaps once a month. 1. Next, select the database file to add to your Zip file. Choose your data file (SPDATA46.MDB) and click the OK button. Important Note: If your SUPPLIERtrak database is on your server, you must change the drive letter to your network drive and select the appropriate folders, then highlight your SPDATA46.MDB. If you do not know, or are not sure, where your SUPPLIERtrak database is located, look at the database location on the lower right corner of the SUPPLIERtrak main menu before backing up your database. If you use more than one database with your SUPPLIERtrak program, you will want to back up each one of your databases on a separate set of labeled diskettes. 2. Place a blank, pre-formatted diskette in the drive and click the OK button when ready. 3. A progress meter will be displayed that will show you the percentage completion. If the backup requires more than one diskette, you will be prompted to insert another. Your data is now backed up. You should clearly label the backup diskette(s) with the date (or day of the week) and diskette number for future reference. The resultant backup files will be in a highly compressed, industry standard ZIP format. This means that other utilities, such as PKZIP, PC-Tools, WinZip, and Norton, can also be used to restore your backup file. Restoring Data If you need to restore your database file, place your backup diskette in the drive and click on the Restore button found in the Backup/Restore menu. If your backup took more than one diskette, then insert the last disk of the set. A dialog box will appear, and you can choose the file you want to restore. Highlight your data file and click the Open button. SUPPLIERtrak™ User’s Manual 151 Now choose the drive and directory to which you want to restore the backup Zip file. Important Note: When you restore your database, you must restore it to a different location than your current database location. This will prevent you from accidentally overwriting your current database. This safeguard will allow you to alternately open your restored and current databases to compare them in the event of suspected data loss caused by a corrupted database. Click the OK button to begin the restore operation. Note: If your hard drive has been replaced (or you are installing the software to another computer), you will need to first re-install the SUPPLIERtrak program —then restore your backup database file. 152 Chapter 13: Data Tools Import/Export Utility Exporting Data For your convenience, SUPPLIERtrak includes an automated export program. To export or import data, go to the Tools and Utilities menu and select Export/Import. This screen will appear: To export information from SUPPLIERtrak, select the Export tab. You can copy data from SUPPLIERtrak into a new text file or spreadsheet. Each table that you can export has a corresponding filename, so you don’t need to name your export files. The filenames are based upon the destination/source tables plus the appropriate extension for the file type. For example, a text file from the Parts Master table will be named PARTS.TXT; the same file sent to an Excel file will be named PARTS.XLS. Table Name Receiving Export Filename Receiv Rejects Supplier Master Rejects Supplier Supplier Parts Parts Helpful Information Includes all of the information seen on the Received Material Entry screen for all log numbers. Shows Rejected Material Log numbers, Dates, Type, Code and Part numbers. The Supplier table stores all of your supplier information, as in Supplier Master Entry. Table includes the Part Number, Company, Description and Dates. After you’ve selected one or more tables to export, click the Export Table(s) button. The Export program automatically sends the file(s) to the same directory as your database file. In this case, you would find two files in your directory called receiv.xls and supplier.xls. When it’s finished, a message tells you that SUPPLIERtrak successfully exported the tables. SUPPLIERtrak™ User’s Manual 153 Importing Data You can import data into the same tables from which you can export, using the same filenames and file types as for the Export utility. The easiest way to import data is to first export data from SUPPLIERtrak’s empty database to the file format of your choice. You’ll then have the exact import configuration in place for the file. Next, open the file and duplicate its configuration for a file you already have or add the records you want to import to the file created by the export. In order to import files, you must name them as shown, with the appropriate file extension of .TXT or .XLS. Do not rename the files you Export, if you plan to Import them back in, the result would be an unsuccessful import of data. Make sure that you put the files you’re importing into the same directory as your SUPPLIERtrak database file. Chapter 14: Utilities Utilities Menu Archive/Un-Archive Receiving Data Archiving Receiving Records The Archiving function in SUPPLIERtrak no longer moves your old receiving records from your working database file into a separate archive file. For your convenience, archived records are now stored in your SUPPLIERtrak database, SPDATA46.MDB. As with the previous archiving method, this will speed up your reports and data entry forms since they will not have to work with as many records. Use this utility to archive or un-archive your receiving records. Archive moves your records from the current group and puts them in a storage location within the database. This makes your current group of records smaller and your database faster. An archive is not the same as a backup. To un-archive your receiving records and combine them with your current records, you can use the UnArchive function. Remember: Always make a backup copy of your SPDATA46.MDB file before you archive it! When you select this feature from Tools and Utilities, the following filter will appear: You can archive your records either by Log Numbers or by known dates received. To archive, enter the beginning date in the From Date Received field and the ending date in the To Date Received field. Click the Archive button when you’re ready. Archived records are stored within the database. After you archive records, you can decrease the size of your data file by running Compact Database from the SUPPLIERtrak program group or from the Data Tools Section. To view the archived records, click the View Receiving or View Reject buttons. To put archived records back into the current record group, set up the criteria in this screen and click Un-Archive. 155 156 Appendix Archive/Un-Archive Suppliers The Suppliers archive works the same as the Receiving Data Archive; the archived records are stored in your SPDATA46.MDB database. Use this utility to archive or un-archive your supplier records. An archive is not the same as a backup. Remember: Always make a backup copy of your SPDATA46.MDB file before you archive it! 1. When you choose the Archive/Un-archive Supplier from Tools and Utilities, you will see the following window. Your first step is to choose a Supplier to Archive from the Suppliers drop down list. 2. 3. 4. 5. After selecting a Supplier, click the Archive button. The message: “Archive Complete” will appear when the Archive is done. To return to the main menu, click the Close button. To un-archive your supplier records and combine them with your current records, you can use the Un-Archive function. To Un-Archive, choose a Supplier that has already been archived, from the drop down list. 6. Next, click the Un-Archive button. 7. When the Un-Archive is complete, you will see a message. 8. You can verify the data has been Un-Archived by going back to the Supplier Master Entry and choosing the Supplier from the drop down list. SUPPLIERtrak™ User’s Manual 157 Edit All Tables To edit data tables directly, choose Edit All Tables from the Tools and Utilities menu. The Edit All Tables menu will appear. This utility allows you to enter data or modify SUPPLIERtrak’s data tables. WARNING! When editing data from this utility, you are editing the tables directly - none of the SUPPLIERtrak features and safeguards that protect users from various data entry errors or relational integrity corruption are in place. Exercise extreme caution when using this feature. Double-click on the name of the table you wish to edit, and you will be presented with a spreadsheet-like view of the information. Reset Early/Late This utility will mark the early or late flags of all receiving records based upon the early and late grace periods in 'Settings'. This Utility is usually used when wishing to update all past historical Receiving records that are unarchived after updating the Early or Late Grace period settings in Setup – Settings – General tab. Update Supplier Next Rating Due This utility will reset all Supplier Next Rating Due dates for those Suppliers with Ratings Frequencies selected and also a valid Last Rating date entered. Appendix Data Transfer Utility The Data Transfer Utility Wizard has three options: • Run Scripts—this option is for users who have opted to use an ODBC database to store their data. When the Run Scripts utility is ran the utility will run the scripts needed to build the tables. • Transfer Data—this option is used to migrate data from older versions of our software to upgraded versions e.g. SUPPLIERtrak 4.5x to SUPPLIERtrak 4.6. Use this utility only once—when you install your new SUPPLIERtrak and need to transfer your data from an older version of SUPPLIERtrak. Running the DTU overwrites your SUPPLIERtrak destination database. You need to run the DTU because new fields and tables have been added to SUPPLIERtrak. After you run the DTU, your records will be in both your old and new versions of SUPPLIERtrak. However, don’t use your old version of SUPPLIERtrak; enter all new records into your new version of SUPPLIERtrak. Running the Data Transfer Utility: To run the Data Transfer Utility, click the Start button, select Programs, and then select the SUPPLIERtrak 4.6 program group. Choose Data Transfer Utility from this program group to use the Data Transfer Utility. Client/Server Versions—Before You Run the DTU: If you’re using a client/server version of SUPPLIERtrak, you must run scripts to set up your database and tables before you transfer your data. To do so, click the Run Scripts button on the main DTU screen. 160 Appendix The Run Scripts screen will appear. The table below contains information about the fields and buttons in this screen. Field/Button Name Script Path and Browse Data File Name Log File Name (MS SQL only) Administrator User ID and Password Server (MS SQL only) Service Name Run Test Connection Cancel Description This field contains the location of the “Scripts” file for the current workstation. It defaults to the same path that the DTU is in for the current workstation. If this path is incorrect, a message similar to the message below will appear: Select OK, and then click on Browse to find the directory where the “Scripts” file is located. Enter the name and server location of the GAGEtrak 6 data file. The letter for the drive must be its physical drive letter, not a mapped letter. For example, if your server has a physical drive (D) that’s mapped to as a different letter (F), enter D followed by the rest of the path. Remember to include “.MDF “ (master database file) as the file extension. MS SQL users should enter the name and server location of the log file. We recommend that you use the same path as for the data file (again, using the drive letter of the physical drive). Remember to include “.LDF “ (library definition file) as the file extension. Enter the Administrator User ID = SA, and password of your database administrator. MS SQL users must enter the server name in this field. For example, if the server name is “Company_NT”, enter that name in this field. Not supported. When you’ve finished entering all of the necessary information, click this button to run the scripts. Click this button to make sure that you’re connected to the correct path before you run the scripts. To exit this screen without running the scripts, click Cancel to return to the main DTU screen. When you’re finished running the scripts, you can begin transferring data and/or updating or adding reports. SUPPLIERtrak™ User’s Manual 161 Data Transfer Instructions Versions 4.ox and 4.5x to New Version 4.6x: Converting your database file—SPDATA40.MDB and SPDATA45.MDB 1. 2. Select Next to bring up Page Two of Three of the DTU to select your source Database. The DTU must be run twice only for customers with New ODBC databases. Then you must select Version 4.6 NEW as the source on Page Two, this will disable the Browse button to select a source database because the Source of the NEW is default tables contained within the DTU. 162 Appendix For users transferring existing data to the new 4.6 Destination database, the instructions are different from selecting Version 4.6 NEW. 1. 2. Select the version of the source database, 4.0 or 4.5 or 4.6 from the source database dropdown on page two. Use the browse button to search for your source data file. Browse will bring up a common dialog File Open window: SUPPLIERtrak™ User’s Manual 163 After selecting the file, Select the large Test button at the bottom of the Open Database form. If the connection fails for any reason, this pop up error will appear: If the Test returns successful, this Pop Up will appear: Then, Click OK to select this database as your source database. This will bring you back to page Two of the DTU with your selection of the source data displayed in the Source Connection Information control. 164 Appendix Then, click Next to go to Page Three of the DTU to select your destination database. This data will always have to be selected from the dropdown list and the only Item in the list is Version 4.6 Data. Again, select the browse button to bring up the Open Database form to select the Destination version 4.6 database. The example shown here shows connection information for an ODBC Database with a text Alternate field shown for clarity. SUPPLIERtrak™ User’s Manual 165 Then, Click Test and OK just as when selecting the Source Database and Then, when returned to Page Three of the DTU with a successful destination connection, the Transfer Data Button will be Enabled. Click Transfer Data to begin the data transfer. You will get the following Pop Up warning: Click OK to continue with the transfer. Note: If the Source and Destination file path are identical you will be presented with the following message and you must redefine you file paths: Verify Data Transfer After you click Transfer Data, SUPPLIERtrak automatically moves your records into the new database. The DTU will give you a complete acknowledgement of its activities in the lower left windows status bar during the entire transfer operation. When it is complete, you will see this message: Click OK, then SUPPLIERtrak will show you a screen where you can check the transfer and verify that it was successful. This screen is different for each version, but the general instructions are the same. The Record Count values should match in both the Source and Destination tables for those table names that appear in both sections. You can ignore the table names on the Destination list that have no corresponding name on the Source list; these are SUPPLIERtrak’s new tables (the report control table will always be higher on the Destination side when you are transferring data from Version 3). If the counts for the tables that appear in both sections don’t match, print the form (select File | Print) and contact Technical Support at (480) 922-7300 for assistance. 166 Appendix Note: Due to previous versions of SUPPLIERtrak not maintaining a field for Quantity Rejected in the Rejects table, the Data Transfer Utility will populate the field for Quantity Rejected for each reject record related to any given receiving record from the Quantity Rejected field on the main Received Material Entry form (Receiving table). Please refer to the description of how version 4.6 handles tallying of individual Quantity Rejected amounts from all reject records associated to any given receiving record in the Received Material Entry section of the manual on page 94. Click the Finish button to return to the main DTU window. Sample of Data Transfer: Database Management Create a New SUPPLIERtrak Database You can use multiple databases with SUPPLIERtrak. For your convenience, the program installs an empty data file in the same location as your database (named SPDATA46.EMP). Copy this empty data file for each additional database that you want to use. Important: Currently, no easy method exists for transferring records between databases. Although you can use the Copy and Paste approach, it’s cumbersome and error-prone; you must be extremely careful and fully understand the data table relationships. Please consider this if you decide to use multiple databases. If you do use multiple database files and later want to merge them, please contact Technical Support for assistance (there may be a small charge for this service). Loading Database Files Creating Another Database File SUPPLIERtrak can be used with multiple databases if you wish. To do so: 1. Create a new directory in which to store your new database file. Use File Manager, My Computer, or Windows Explorer to create the new directory. 2. Copy the file SPDATA46.EMP from the C:\SPW46 directory to your new directory (SPDATA46.EMP is an empty database file without any records in it). Then, change the file name in your new SUPPLIERtrak™ User’s Manual 167 directory to “SPDATA46.MDB”. This can most easily be done using the Windows File Manager, My Computer or Windows Explorer program. To Load a Different Database File To attach to a new data file select File | Open Database from the main menu. This will bring up a file open dialog so you can choose a data file. Viewing the Current Database File To see which database file you are currently using, look at the bottom of the main menu screen. Compact/Repair Database Click on the Start menu, go to Programs, and choose the SUPPLIERtrak 4.6 menu and then Repair Database. When the repair is complete, you will see a message saying the repair was successful. Click OK, and return to SUPPLIERtrak. Whenever you delete a record, the program doesn’t actually delete the record—it only marks it as deleted and then re-uses it whenever you add new records (i.e., your data file size does not decrease). If you delete many records, you should compact your data file so that the program actually removes these records, decreasing the size of the data file. SUPPLIERtrak Help You can use SUPPLIERtrak’s on-line Help feature by selecting the Help menu or pressing the F1 function key. You can select from different topics listed in the Help Contents or you can search through an alphabetical list of program features. For your convenience, there is a back navigation button and history listing, so you can quickly return to recent items. You can print any topic found in SUPPLIERtrak Help. Data Table Record Formats Key Fields A key is a field or combination of fields that is used to uniquely identify each record in a table. If the Data Type column contains the word “(Key)”, it means that this field or combination of fields is considered to be a key field. Combination Key Fields The example table format below shows combination key fields (there are two key fields identified). Name Supplier Code Supplier Part No Data Type Text (Key) Text (Key) This means that the following data table would be acceptable: Supplier Part No Supplier Code 100-10-E 86A-1276-D 100-10-E 55Q-5543-X Whereas the following data table would not be acceptable: Supplier Part No Supplier Code 100-10-E 86A-1276-D 100-10-E 86A-1276-D Size 16 20 168 Appendix Data Table Record Formats The formats of the records within three of the database tables are summarized below. Table Name: Supplier Master Key Field: Supplier Code Columns: SUPPLIERtrak™ User’s Manual 169 Table Name: Supplier Parts Key Field: Supplier Code Key Field: Supplier Part No Columns: 170 Appendix Table Name: Receiving Key Field: Receiving Log No Columns: If you need data table formats for other tables, please contact Technical Support at (480) 922-7300. Compacting Your Data File Whenever you delete a record, the record is not actually deleted - it is only marked as deleted and then re-used whenever you add new records (i.e., the data file size does not decrease). In the event that you delete many records, you may want to compact your data file so that all the records that are marked as deleted are actually deleted, and the data file is reduced in size. This can be done from within the Running Application. Just go to the Data Tools area, and then click on Compact / Repair Data. When this Tool Executes, your company name at the top of the Main Menu will change to #Name? It will remain that way until the Repair tool terminates, then the Main Menu will reconnect to the database and your company name will re-appear just as it was before. The Compact / Repair can also be done by clicking on the Compact Data icon found in the SUPPLIERtrak program group window. If you receive any error messages when running the Compact Data utility, write them down and contact Technical Support immediately at (480) 922-7300 for additional instructions. SUPPLIERtrak™ User’s Manual 171 Troubleshooting Problems Repairing Data Files Although SUPPLIERtrak has been designed to be as trouble-free as possible, error messages may appear because of occurrences like power outages, accidental resetting of your computer, network disconnects, and other mishaps. In these cases, it is possible that your data file (SPDATA46.MDB) will need to be repaired and compacted. You can do this by clicking on the Compact Data icon in the SUPPLIERtrak group window. Depending on the size of your file, this may take several minutes to complete. Network users should make sure that no one else is running SUPPLIERtrak while performing this operation. If you receive any error messages during the repair process, be sure to write them down, and if the original error message persists when you’re trying to run the program, contact Technical Support immediately at (480) 922-7300 for additional instructions. Duplicate Value in Index - Error Message This error message may appear when you enter two records with the same key field values (see page 167 for more information about key fields). Examples include: Entering two suppliers with the same supplier code. Entering two parts with the same part number for the same supplier. Entering two procedures with the same procedure name for the same supplier or part. If this error message appears, click the OK button, then click the Undo button, or choose Undo from the pulldown Edit menu. Network Installation Before you install SUPPLIERtrak on a network, you must be familiar with the network policies for file and program locations, and you must be certain that all users have full rights (create, change, and delete rights) for the appropriate files and directories. You must also have a network license of the SUPPLIERtrak software. Normally, the SUPPLIERtrak software must be installed to each workstation that will use the program. For maximum performance of SUPPLIERtrak with multiple users, we recommend installation of SUPPLIERtrak program files on each local workstation, with a shared database file (SPDATA46.MDB) on your server. Windows Is Located on Each Local Workstation Typically, each user on a network runs Windows from their local workstation’s hard drive. SUPPLIERtrak must be installed on that local workstation and every other workstation on the network on which it will be used. Installing SUPPLIERtrak onto one workstation and simply copying the files to another workstation from the network will not work. SUPPLIERtrak’s setup program needs to register entries in the Windows Registry, update out-of-date DLL files, font files, create icons, and perform other setup tasks. However, to make things easier, you may copy the contents of the program CD to a designated network directory and have each workstation run the installation program “SETUP.EXE” from the network. For example, you could copy all of the SUPPLIERtrak diskettes to the network server directory F:\STWSETUP, and then instruct your SUPPLIERtrak users to run the SETUP.EXE file located in F:\STWSETUP. Windows Run From the Server (“Served Copy of Windows”) If your network is set up so that Windows is located and run exclusively from your network server, then SUPPLIERtrak may be installed and run on the server. However, whoever installs SUPPLIERtrak to the server must be a supervisor with full rights to the shared Windows registry and the shared Windows DLL files. Be advised that SUPPLIERtrak will run slowly in this configuration since both the program and data must be delivered to the user workstation via the network cable. SUPPLIERtrak Supplier Quality Management Software System Administrator’s Guide 1523 W. Whispering Wind Dr. Suite 100 Phoenix, AZ 85085 (480) 922-7300 Fax: (480) 922-7400 www.cybermetrics.com TM Chapter 1: Installation You can use SUPPLIERtrak 4.6 on a single workstation, on a network, or in a client/server environment – installation will vary slightly for each of these options. This chapter gives you general installation instructions for all options. Chapter 2 deals with setting up a MS SQL client server system. Program Requirements SUPPLIERtrak 4.6 for Windows requires the following: • Microsoft Windows 98SE, 2000, XP • Hard disk with 700 MB of free space for program files and 25-50 MB of free space for typical • • • • • • database 512 MB RAM or more VGA or compatible display monitor Mouse or compatible pointing device Printer (if you want to print reports; ink jet, bubble jet, or laser printer is best) IBM PC or 100% compatible computer Pentium 133 MHz or higher CPU Installation Files The setup consists of three files: SETUP.EXE contains all the files required to run SUPPLIERtrak; G_CONECT.INI is the initialization file used during installation to configure the user’s database settings; and README.TXT notes special features or changes to the program. Installation Options You can use SUPPLIERtrak 4.6 as a client/server program, with one centralized, dedicated computer hosting the database and one or more user workstations accessing the database from that server. You can also choose to install and use SUPPLIERtrak on only one PC (a single-user setup). If you have a multi-user license of SUPPLIERtrak, you and your other SUPPLIERtrak users can install the program from the CD or from a network location. If you want your users to install from a network location, copy the SETUP.EXE and G_CONECT.INI files to the same network location, and then instruct users to run SETUP.EXE from that location. You can find the Access or MS SQL G_CONECT.INI file on the CD under the directory of the database name (i.e., the Access G_CONECT.INI file is in the Access directory on the CD). To install SUPPLIERtrak, follow these instructions: 1. To begin installation, click the Windows Start button and select the Run . . . command. Click the Browse button to navigate to your CD-ROM or network drive, then select SETUP.EXE The sample screens show a CD and a network installation. 176 Chapter 3: MS SQL Installation 2. Next, you’ll see the Welcome screen. Make sure that you’ve closed all other programs, and then click Next. In the next screen, enter the install code for your copy of SUPPLIERtrak. You can find this code on the CD envelope that came with your software package. Tip: If you don’t have an install code, leave this field blank. 3. Now the installation program will tell you that you will be choosing the location for the program on your hard drive. Since this location is specific to each workstation, do not select a network location. We recommend using the default directory—C:\Program Files\SPW46. 4. Unless you’re using the program with a MS SQL database, the installation program will now let you select a location for the SUPPLIERtrak database. If you are using SUPPLIERtrak in a client/server environment, skip to step 5. SUPPLIERtrak™ User’s Manual 177 If you are using the program on a single workstation, select the default directory – C:\Program Files\SPW46. If you have a network license of the program and are using it with an Access database, click the Browse button and select the network directory where you will store your database. If you are running the setup from a network drive, the path to the SETUP.EXE file will be the default database location. Note: If your Windows Registry already lists a directory for the SUPPLIERtrak 4.6 database file, that directory information will appear in this screen. Go to step 5. 178 Chapter 3: MS SQL Installation The Browse button will allow you to specify a location on any file server directory where the anticipated range of SUPPLIERtrak users have been given Full Rights. This form is a directory level browse only: 1. Next, SUPPLIERtrak will ask if you want it to create backup copies of all of the files that it overwrites on your system. We recommend that you select Yes and use the default location (C:\Program Files\SPW46\BACKUP). 2. If you’re using a SQL version of SUPPLERtrak, the installation program now asks where you want to install the database scripts. Click the Browse button to select a location. If you don’t want to install the scripts, remove the check from the Install MS SQL Scripts box. 3. Next, SUPPLIERtrak will ask if you want to install under the Common Users Group or the Current User only. It is recommended that you install under the Common User Group. 4. Now the program will ask you to select the Program Manager group to add SUPPLIERtrak’s icons to. We recommend that you select the default—SUPPLIERtrak 4.6. 5. Click Next, and this screen will appear: SUPPLIERtrak™ User’s Manual 179 180 Chapter 3: MS SQL Installation 10. Click Next to begin the installation. During Installation you will see the following Windows Installer popup; this will appear when the installer is almost done: When it’s finished, you’ll see this screen: SUPPLIERtrak™ User’s Manual 181 After you’ve read the information about the database location, click Finish. If additional files are required for SUPPLIERtrak 4.6 to run, they will install now. Follow the instructions on your screen to install any additional files. Important Note: During user workstation installations from your network, SUPPLIERtrak will look for the appropriate program settings in the configuration file (G_CONECT.INI) in the network directory. If it doesn’t find them there, it will check the workstation’s Windows Registry and use the settings there. If the settings aren’t in either of these locations, the program will use the default information (MS Access). Please note that Technical Support is not available for the creation of your client/server database. After You Install SUPPLIERtrak If you’re upgrading from a previous version of SUPPLIERtrak, you will need to run the Data Transfer Utility before you begin using the program. Please see Appendix A: Data Transfer Utility, beginning on page 209, for complete instructions. If you’re using SUPPLIERtrak in a client/server environment, first follow these steps to configure it with your MS SQL database: Administrator Installation To complete the administrator setup, follow these steps: Note: You will need to do this only once for an administrator setup. To set up each workstation, follow steps 3-10. 1. Run the appropriate scripts for your server to create the database and tables. The scripts are located in the GTW4\SCRIPTS directory. The files have prefixes to their names (Step1, Step2…) to indicate the order in which you should run them. You might need to modify the data file in the table space for your system. See the Step 1 script for details. 2. Next, run SUPPLIERtrak’s Data Transfer Utility Version 4.6 to import existing data from a previous version or pre-fill the database. 3. Open SUPPLIERtrak 4.6 and select Open Database from the File menu. 4. In the Open Database screen, check the Use ODBC checkbox. 5. Place a check in the Use DSN checkbox. Important: If you used a different Database Name, DSN, User ID, and/or Password during installation, enter the information you used instead of the values listed below. If you set up the configuration file (G_CONNECT.INI), GAGEtrak will automatically fill in these fields in this screen. 6. 7. 8. The Database Name should read spw46 (or the name that you entered during installation). The DSN field should show MSSQL_SPW46 (the DSN that you entered during installation; this value may be different). Your user ID should be spw46 (this field may also vary according to your setup). 182 Chapter 3: MS SQL Installation The Password field should contain the password you entered during installation. Note that the password is displayed as asterisks for security purposes. 10. Your screen should look similar the one below (shown set up for a SQL version). When you’re finished, click OK. 9. Configuration File Settings If you want to reconfigure your G_CONECT.INI file, follow these guidelines: Note: The brackets (<x>) contain instructions about the information you should enter after the equal sign (=) on each line. [Database] dbType=<0 for a Microsoft Access Database, 1 for a client/server database> UseDSN=<0 for No, 1 for Yes (used only for client/server)> UseFileDSN=<0 for No, 1 for Yes (used only for client/server)> File=<Name of the database file (used for Microsoft Access Database)> Path=<Path (mapped drive or UNC) to the database file (used for Microsoft Access Database)> DSN=<Data Source Name for the database (used for DSN)> FileDSN=<Name and path (mapped drive or UNC) of the DSN file (used with FileDSN)> Driver=<Driver name (only if not using FileDSN or DSN)> Server=<Name of the server (used for Microsoft SQL Sever)> Database=<Name of the database (used for client/server)> UID=<User ID (used only for client/server)> PWD=<Password (used only for client/server)> APA=<Application Attributes (used only for client/server) (not required)> DBA=<Database Attribute (used only for client/server) (not required)> DBQ=<Service Name (required in some instances if not using DSN or FileDSN)> PFC=<Prefetch Count (used only for client/server) (not required)> TLL=<Translation Library Name (used only for client/server) (not required)> TLO=<Translation Option (used only for client/server) (not required)> [Network] LicensePath=<Path (mapped drive or UNC) to the license file.> SUPPLIERtrak™ User’s Manual 183 Sample Configuration The following sample is for a single-user, Access database version of SUPPLIERtrak 4.6. [Database] dbType=0 UseDSN= UseFileDSN= File=SPData46.mdb Path=C:\Program Files/SPW46 DSN= FileDSN= Driver= Server= Database= UID= PWD= APA= DBA= DBQ= PFC= TLL= TLO= [Network] LicensePath=C:\Program Files\SPW46 184 Chapter 3: MS SQL Installation Chapter 2: MS SQL Installation If you’re going to use SUPPLIERtrak on a MS SQL client/server system, first install SUPPLIERtrak (see chapter 1 for instructions), then create the data source name (DSN) for your setup, following the instructions in this chapter. Create Data Source Name (DSN) for MS SQL If you’re using SUPPLIERtrak with an MS SQL server, follow these steps to create your DSN. 1. Click Start, then select Settings | Control Panel. Double-click the ODBC icon, and the ODBC Data Source Administrator window will appear. 2. Go to the System DSN tab. 3. Click the Add button. You’ll see a screen similar to this one: SUPPLIERtrak™ User’s Manual 185 4. Select the SQL Server ODBC driver and click Finish. This screen will appear: 5. Enter MSSQL_GAGEMGR for the data source Name. 6. In the Description field, enter a brief explanation about the data source. 7. After you enter the name of the MS SQL server, click Next. This screen will appear: 8. Enter the Login ID and Password for your SQL server, and then click Next. 9. You’ll see the Configuration screen. If needed, change the default database (check the box next to this field and enter or select a new database). 186 Chapter 3: MS SQL Installation 10. Now, click the Next button. You should see a screen similar to this one: 11. Click Finish. The SQL Server Setup screen will appear. 12. To check the data source, click Test Data Source. If you don’t want to test it, click OK. 13. When you’re finished, close the ODBC Data Source Administrator. SUPPLIERtrak™ User’s Manual 187 Index A About window...............................................................18, 56 Accepted Material tags ...............................................46, 97 active part alarms ...........................................................127 active supplier alarms ....................................................127 Adding Records................................................................167 Alarm Count .................................................................26, 77 Alarm Date .......................................................27, 33, 77, 83 All Records Selection Button..........................................64 Apply Filter/Sort ................................................................69 archived records......................................................155, 156 Attribute........................................................................43, 94 Audit Trail .................................................................137, 142 B Backing Up Data ......................................................155, 156 Backup ......................................................................149, 150 C Client/Server Versions ...................................................159 Clone Part ....................................................................35, 85 Column (Field) Selector Buttons....................................64 Column Width.....................................................................65 Compact Data...................................................................170 Control Menu Icon.............................................................64 copy records.......................................................................71 Criteria ................................. 69, 70, 107, 108, 111, 112, 141 currently logged-in user ............................................18, 56 D Database Creating a New Database ..........................................166 Datasheet Title Bar ...........................................................64 Datasheet view...................................................................64 Datasheet View ..................................................................60 date formats.................................................................20, 58 Display Hidden Columns..................................................65 Document Control ID ......................................................144 Document Identification and Control ............................144 E Early grace period ...........................................................137 Edit All Tables ..................................................................157 Edit Filter/Sort ............................... 22, 30, 37, 69, 74, 79, 87 Employee ID Creating ..................................................................99, 103 Error Message Duplicate Value in Index............................................171 Export ............................................................................... 152 F Filter Archive/Un-Archive.................................................... 155 Reports ........................................................................ 129 Toolbar Command........................................................ 60 Find command .................................................................. 67 Form view ...................................................61, 64, 65, 67, 70 Form View.......................................................................... 60 Freeze Columns ................................................................ 65 G Gage ID Archiving by................................................................. 155 Go To Command................................................................ 70 Graphs Menu Options..................................................................... 19, 57 Gridlines............................................................................. 65 H Hide Current Column ....................................................... 65 I Importing Data................................................................ 153 Insert Object .................................................................... 136 Inspect Material .......................................................... 42, 93 inspection characteristics ......................................... 31, 81 inspection form ........................................................... 40, 91 inspection procedure ................................................. 24, 75 Installation .................................................................. 15, 53 K Keyboard shortcuts ........................................................ 117 L Last Rating .............................................................. 109, 114 Last Received .................................................................... 80 Late grace period............................................................ 137 Link Company Logo - OLE.................................................. 136 Logo.................................................................................. 136 Logon................................................................................ 142 M Main Records Menu Options..................................................................... 19, 57 188 Index Maximize/Minimize Buttons ............................................65 Menu Bar............................................................................64 Menus Organization.............................................................19, 57 multiple databases..........................................................166 N Navigation buttons ......................................................63, 64 Navigation Buttons............................................................64 Network ............................................................................171 Network Installation.......................................................171 network server......................................... 16, 19, 54, 57, 171 No Database Found window.......................................19, 57 Null Value ....................................................................31, 81 O Object, Insert....................................................................136 OLE....................................................................25, 32, 76, 81 open corrective action notices.......................................127 output of reports................................................................66 Output To ..........................................................................130 P part alarms ..................................................................32, 82 part calendar alarm ....................................................33, 83 Part cloning..................................................................35, 85 part counter alarm ......................................................32, 82 Part Procedure Cross-Reference report......................126 Part Procedure report ....................................................126 PIN.........................................................................17, 55, 142 Pop-Up Calendar...............................................................61 Print Preview Keyboard Shortcuts ..............................129 Printing Print Setup...................................................................130 Printing Datasheets ..........................................................65 Q Quick Sort .....................................................................69, 71 R Rating Code ..............................................................108, 109 rating setup ..............................................................107, 111 Rating/Survey Structure.................................................140 Rating/Survey Wizard .............................................111, 140 Ratings Definition ....................................................107, 111 Ratings report..................................................................122 received material records ..........................................37, 87 Received Material report................................................119 Receiving History ..................................................39, 90, 91 receiving inspection procedures ...................24, 31, 75, 81 Receiving Log No .................................................38, 88, 170 Record Selector Button ...................................................64 Records Archive/Un-Archive.....................................................155 Receiving Records ......................................................155 Supplier Records........................................................ 156 Reject No ..................................................................... 44, 95 Reject tags ........................................................45, 46, 96, 97 Rejected Material report........................................ 120, 122 Rejected Material tags ............................................... 47, 97 rejection notice ........................................................... 45, 96 Rejection notice .......................................................... 45, 96 rejection notices ............................................................. 121 rejection records ........................................................ 43, 94 Repairing Data Files ...................................................... 171 Replace command...................................................... 59, 68 Report settings................................................................ 115 Reports Menu Options..................................................................... 19, 57 Restore..................................................................... 149, 150 Restoring Data ................................................................ 150 Row Height ........................................................................ 65 S Sampling Plan ................................................................... 80 Save Changes .................................................................... 65 save records ...................................................................... 71 Scroll bars ................................................................... 63, 65 security ........................................................................ 17, 55 Select All Records ............................................................ 67 Select Record .................................................................... 67 Send.....................................................................67, 117, 130 serial number.............................................................. 17, 55 Set Up Users.........................................................20, 58, 142 Settings .........................................................20, 58, 130, 136 Setup Menu Options..................................................................... 19, 57 Show All Records.............................................................. 71 Staff Entry.................................................................. 99, 103 supplier alarms........................................................... 25, 76 supplier counter alarm .............................................. 26, 77 Supplier Detail report .................................................... 128 Supplier Listing report................................................... 124 Supplier Master records............................................ 21, 73 Supplier Part Listing report .......................................... 125 Supplier Part No ......................................................... 30, 80 Supplier Part Performance report ............................... 118 Supplier Part records................................................. 29, 79 Supplier Performance report........................................ 118 Supplier Procedure report ............................................ 126 supplier procedures ....................................25, 76, 125, 126 supplier rating records .................................................. 107 supplier survey records ................................................. 111 Survey report................................................................... 124 T Table View.............................................................. 60, 65, 70 Technical Support....................................165, 166, 170, 171 Training Staff Records .............................................................. 104 SUPPLIERtrak™ User’s Manual 189 U undo changes.....................................................................71 Unfreeze Columns.............................................................66 User Rights ......................................................................143 Utilities and Data Tools Menu Options .....................................................................19, 57 W wildcard characters ..........................................................59 Work Orders Menu Options..................................................................... 19, 57 Z Zip ..................................................................................... 150 Zip file................................................................149, 150, 151 Zoom................................................................................... 61


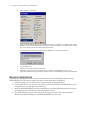
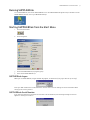
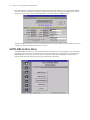
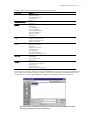
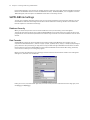
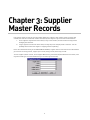
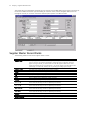

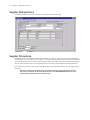
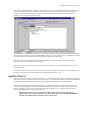
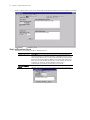
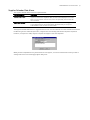
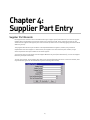
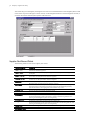
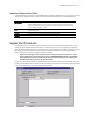
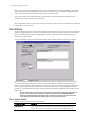
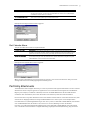
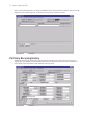
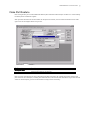

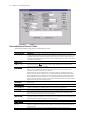
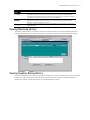
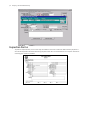
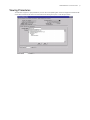
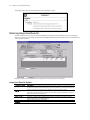
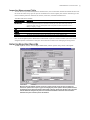

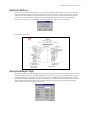
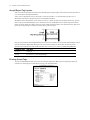
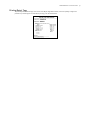


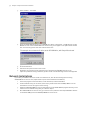
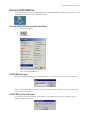
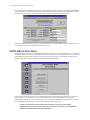
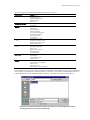
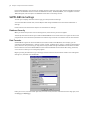
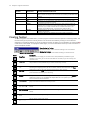
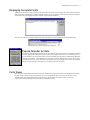
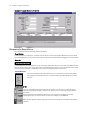
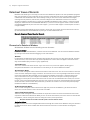
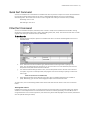
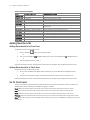
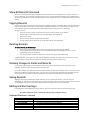
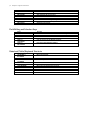
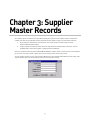
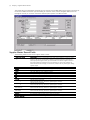

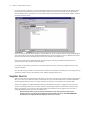
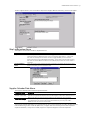

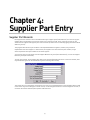
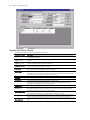
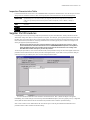
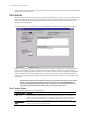
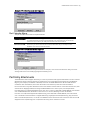
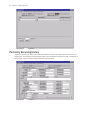
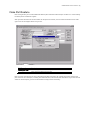

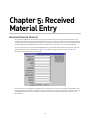
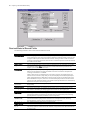
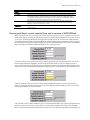
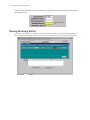
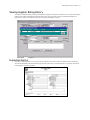
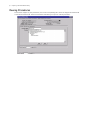
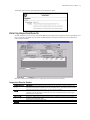
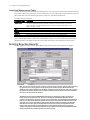

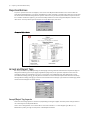


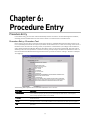
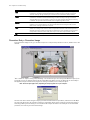
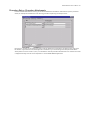

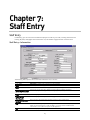
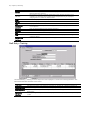
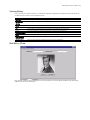

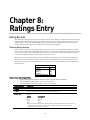
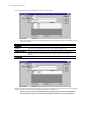
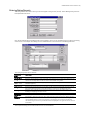

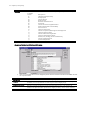
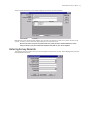
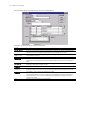

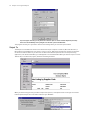
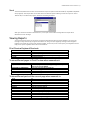
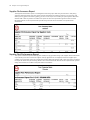

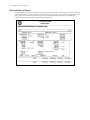
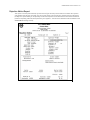
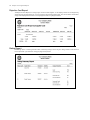
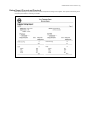
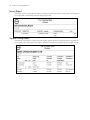
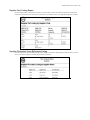
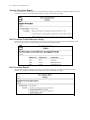
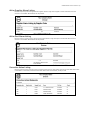
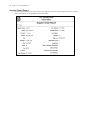

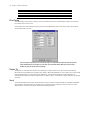
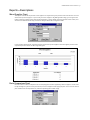
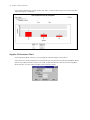
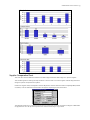
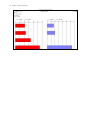
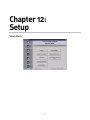

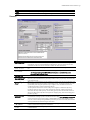
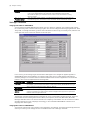
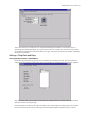
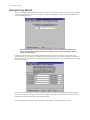
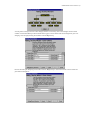

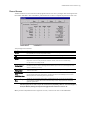
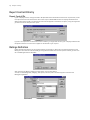
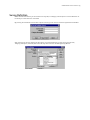
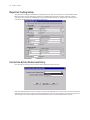

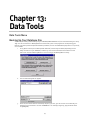
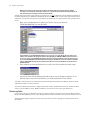
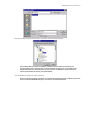
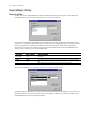
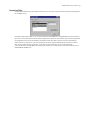

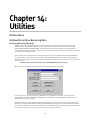
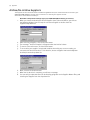
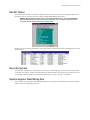

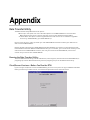
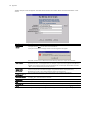
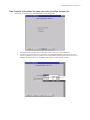
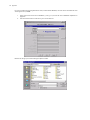
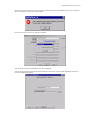
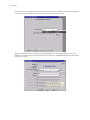
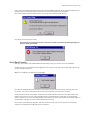
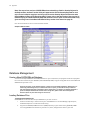
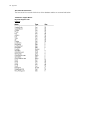
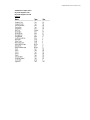
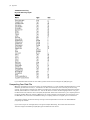
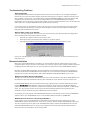


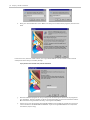
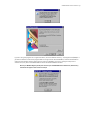

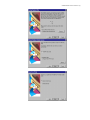
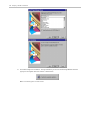
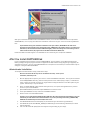
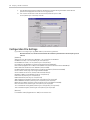

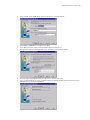
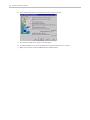


![Intergraph Geomedia [6.1-2013] User manual](http://vs1.manualzilla.com/store/data/005689587_1-58c82d14f3ba8ebe92b5c45af00d079c-150x150.png)