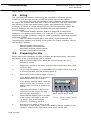
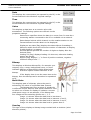
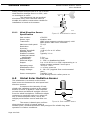
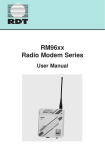
1
May 2002
NOMAD Portable Weather Station
Users Handbook
NOMAD
Portable Weather Station
Users Handbook
HB3289-01
COPYRIGHT
The copyright in this document which contains proprietary information is vested in
CASELLA CEL. The contents of this document must not be used for
purposes other than for which it has been supplied or reproduced or disclosed wholly
or in part without the prior written permission of
CASELLA CEL
CASELLA CEL
Regent House
Wolseley Road
Kempston
Bedford
MK42 7JY U.K.
Phone: +44 (0)1234 844100
Fax:
+44 (0)1234 841490
E-Mail: [email protected]
Web:
www.casellagroup.com
CASELLA USA
17 Old Nashua Road #15
Amherst
NH 03031
U.S.A.
Toll Free: +1 800 366 2966
Fax:
+1 603 672 8053
E-mail: [email protected]
Web:
www.casellausa.com
Contents
Page 2 of 68
NOMAD Portable Weather Station
Users Handbook
NOMAD Portable Weather Station
Users Handbook
Warnings
WARNINGS !
The Nomad Weather Station is not intended for projects that
extend for durations longer than six months, without
maintenance.
Page 3 of 68
Warnings
Page 4 of 68
NOMAD Portable Weather Station
Users Handbook
NOMAD Portable Weather Station
Users Handbook
Contents
1.
2.
. . . . . . . . . . . . . . . . . . . . Page
INTRODUCTION TO THE NOMAD . . . . . . . . . . . . . . . .
7
1.1
1.2
Three Versions . . . . . . . . . . . . . . . . . . . .
Features and Applications . . . . . . . . . . . . . . .
7
7
COMMISSIONING . . . . . . . . . . . . . . . . . . . . . . .
9
2.1
2.2
2.3
2.4
3.
Contents
Schedule of Parts . .
Siting
. . . . . . .
Preparing for Use . .
Deploying the Sensors
.
.
.
.
.
.
.
.
5
6.
.
.
.
.
.
.
.
.
.
.
.
.
.
.
.
.
.
.
.
.
.
.
.
.
.
.
.
.
.
.
.
.
.
.
.
.
.
.
.
.
.
.
.
.
.
.
.
.
.
.
.
.
. 9
. 10
. 10
. 11
OPERATION USING A DIRECT LINK BETWEEN PC AND NOMAD, VIA
FLASH CARDS, CABLE, GSM MODEM, OR HIGH POWER RADIO . . 15
3.1
3.2
4.
.
.
.
.
Start Logging . . . . . . . . . . . . . . .
Get Stored Data . . . . . . . . . . . . . .
3.2.1 Download Sensus Store . . . . . .
3.2.2 Download to a CompactFlash Card .
3.2.3 Download CompactFlash Cards . . .
3.3
Read Data from the Sensus Display . . . . .
3.4
Display Real-Time Data . . . . . . . . . .
3.5
View Downloaded (Cloned) Data . . . . . .
OPERATION USING A PASSIVE RADIO LINK BETWEEN
AND NOMAD . . . . . . . . . . . . . . . . . . .
4.1
Start Logging . . . . . . . . . . . . . . .
4.2
Display Real-Time Data . . . . . . . . . .
4.3
View Downloaded (Cloned) Data . . . . . .
. .
. .
. .
. .
. .
. .
. .
. .
PC
. .
. .
. .
. .
.
.
.
.
.
.
.
.
.
.
.
.
.
.
.
.
.
.
.
.
.
.
.
.
.
.
.
.
.
.
.
.
15
15
16
16
16
16
17
18
.
.
.
.
.
.
.
.
.
.
.
.
.
.
.
.
19
19
19
20
ONLINE PRO APPLICATION SOFTWARE . . . . . . . . . .
5.1
Introduction to Online Pro, Version 1.2 . . . . . .
TM 95, 98,
5.2
Installation / Un-Installation on Windows
ME, NT 4 & 2000 . . . . . . . . . . . . . . . .
5.2.1 Installation . . . . . . . . . . . . . . .
5.2.2 Un-Installation . . . . . . . . . . . . . .
5.2.3 Starting Online Pro for the First Time . . .
5.2.4 Password Protection . . . . . . . . . . .
5.2.5 Loading a Default File . . . . . . . . . .
5.3
Operation in Real-Time . . . . . . . . . . . . .
5.3.1 Viewing Pages and Operating in Real-Time
5.3.2 Setting Up Pages . . . . . . . . . . . . .
5.3.3 Adding Real Time Display Items . . . . .
5.3.4 Saving the Display File . . . . . . . . . .
5.3.5 Web Page Output . . . . . . . . . . . .
5.4
Working with Historic Data . . . . . . . . . . . .
5.4.1 Downloading (Cloning) Data . . . . . . .
TM Cards .
5.4.2 Downloading from CompactFlash
5.4.3 Converting Online and CompactFlash Files .
5.4.4 Viewing Historic Data . . . . . . . . . . .
5.5
Dynamic Data Exchange . . . . . . . . . . . . .
THE NOMAD SYSTEM COMPONENTS
6.1
6.2
6.3
. . . 21
. . . 21
.
.
.
.
.
.
.
.
.
.
.
.
.
.
.
.
.
.
.
.
.
.
.
.
.
.
.
.
.
.
.
.
.
.
.
.
.
.
.
.
.
.
.
.
.
.
.
.
.
.
.
.
.
.
22
23
23
23
24
24
25
26
28
29
33
34
35
35
36
36
37
40
. . . . . . . . . . . . . . 41
The Sensors Used with Nomad Systems . . . . .
Combined Air Temperature and Relative Humidity
6.2.1 Temperature Sensor Specification . . . .
6.2.2 Humidity Sensor Specification . . . . .
6.2.3 General Specification . . . . . . . . . .
Wind Speed Sensor . . . . . . . . . . . . . .
. . . .
Sensor
. . . .
. . . .
. . . .
. . . .
41
42
42
42
43
43
Page 5 of 68
NOMAD Portable Weather Station
Users Handbook
Contents
Contents
6.4
6.5
6.6
6.7
6.8
6.9
6.10
7,
. . . . . . . . . . . . . . . . . . . . Page
6.3.1 Wind Speed Sensor Specification . . . . .
Wind Direction Sensor . . . . . . . . . . . . . .
6.4.1 Wind Direction Sensor Specification . . . .
Global Solar Radiation Sensor . . . . . . . . . .
6.5.1 Global Solar Radiation Sensor Specification
6.5.2 Sunshine Duration . . . . . . . . . . . .
Barometric Pressure Sensor . . . . . . . . . . .
6.6.1 Barometric Pressure Sensor Specification .
Rainfall Sensor . . . . . . . . . . . . . . . . .
6.7.1 Rainfall Sensor Specification . . . . . . .
Soil Temperature Sensor . . . . . . . . . . . . .
6.8.1 Soil Temperature Sensor Specification . . .
Leaf Wetness Sensor . . . . . . . . . . . . . . .
6.9.1 Leaf Wetness Sensor Specification . . . .
Grass Temperature Sensor . . . . . . . . . . . .
6.10.1 Grass Temperature Sensor Specification . .
.
.
.
.
.
.
.
.
.
.
.
.
.
.
.
.
.
.
.
.
.
.
.
.
.
.
.
.
.
.
.
.
.
.
.
.
.
.
.
.
.
.
.
.
49
50
50
50
51
52
52
52
53
53
54
54
54
57
8.1
8.2
8.3
.
.
.
.
.
.
.
.
.
.
.
.
.
.
.
.
.
.
.
.
.
.
.
.
58
58
58
58
59
59
59
59
59
60
61
61
8.5
11.
Page 6 of 68
Direct Cable Link . . . . . . . . . . . . . . . .
CompactFlash Cards . . . . . . . . . . . . . . .
High Power Radio Link . . . . . . . . . . . . . .
8.3.1 High Power Radio Transmitter Specification
8.3.2 High Power Radio Modem Specification . .
8.3.3 High Power Radio General Specification . .
8.3.4 High Power Radio LED Indicators . . . . .
8.3.5 High Power Radio Standard Settings . . .
Low Power Radio Link . . . . . . . . . . . . . .
8.4.1 Low Power Radio Transmitter Specification
8.4.2 Low Power Radio Receiver Specification . .
GSM Link . . . . . . . . . . . . . . . . . . . .
.
.
.
.
.
.
.
.
.
.
.
.
POWER SUPPLIES . . . . . . . . . . . . . . . . . . . . . . . 63
9.1
9.2
9.3
10.
43
43
44
44
45
45
45
45
45
46
46
46
47
47
47
48
Brief Introduction to the Sensus Data Logger . . . .
Commands . . . . . . . . . . . . . . . . . . . .
Logging . . . . . . . . . . . . . . . . . . . . . .
7.3.1 Internal Capacity . . . . . . . . . . . . .
7.3.2 External Capacity . . . . . . . . . . . . .
7.4
Input Connections . . . . . . . . . . . . . . . . .
7.4.1 Wire Preparation and Insertion . . . . . . .
7.4.2 Standard Sensus Settings for Nomad Systems
7.5
Sensus Communications . . . . . . . . . . . . . .
7.5.1 RS 232 Command . . . . . . . . . . . . .
7.5.2 Sleep mode . . . . . . . . . . . . . . . .
7.5.3 Display . . . . . . . . . . . . . . . . . .
TM Cards . . . . . . . . . . . . . . .
7.6
CompactFlash
COMMUNICATION . . . . . . . . . . . . . . . . . . . . .
8.4
9.
.
.
.
.
.
.
.
.
.
.
.
.
.
.
.
.
THE SENSUS DIGITAL DATA LOGGER . . . . . . . . . . . . . . 49
7.1
7.2
7.3
8.
.
.
.
.
.
.
.
.
.
.
.
.
.
.
.
.
Solar Power . . . . . . . . . . . . . . . . . . . . . . 63
Battery . . . . . . . . . . . . . . . . . . . . . . . . 63
Direct Landline Connection . . . . . . . . . . . . . . . 63
ROUTINE CARE . . . . .
1.1
General . . . . .
1.2
The Rain Gauge .
SERVICING & WARRANTY
.
.
.
.
.
.
.
.
.
.
.
.
.
.
.
.
.
.
.
.
.
.
.
.
.
.
.
.
.
.
.
.
.
.
.
.
.
.
.
.
.
.
.
.
.
.
.
.
.
.
.
.
.
.
.
.
.
.
.
.
.
.
.
.
.
.
.
.
.
.
.
.
.
.
.
.
65
65
65
67
NOMAD Portable Weather Station
Users Handbook
1.
Introduction
INTRODUCTION TO THE NOMAD
The Nomad Portable Weather Station designed and manufactured by Casella
CEL, is a truly portable monitoring station. With a total weight of around 13 kg
(36.5 lb), the station is specifically designed for ease of transportation, rapid
deployment and quality of measurement. It is supplied in two customised carry
bags plus a separate weather-proof case, all of which can be carried together by
one person when necessary.
Nomad is intended to satisfy YOUR professional monitoring needs.
Once on site, the Nomad can be deployed and collecting data in less
than five minutes. Disassembly and re-packing is just as quick, allowing you to
be packed and on-route to the next monitoring location without delay.
Quality construction and an integrated solar-panel gives Nomad the
independence required for prolonged operation in isolated or inhospitable
environments.
Due to the worldwide increase in environmental legislation, many
industrial activities, including construction, demolition and land remediation now
have new requirements to monitor local meteorological conditions. The
environmental conditions impact on many other areas, including agrochemical
research, ecological projects, recreational and sporting activities.
The Nomad’s portability allows the user to monitor any location and as
standard measures: temperature, humidity, pressure, wind speed, wind
direction, solar radiation and rainfall
1.1
Three Versions
Three versions of the Nomad are available.
Standard System
Wind System
Special System
1.2
Sensors to measure:
Air temperature,
Relative humidity,
Wind speed,
Wind direction,
Solar radiation,
Barometric pressure,
Rainfall (a separate unit).
Sensors to measure:
Wind speed,
Wind direction,
Barometric pressure.
All of the sensors used in the standard
system, plus up to four further sensors to
measure:
Soil temperature,
Leaf wetness,
Grass minimum temperatures.
Features and Applications
The Nomad has the following main features.
¤ Portable and lightweight construction to allow rapid system deployment
¤ High quality anodised aluminium and stainless components
¤ Latest logging technology records approximately 15 k data sets as
standard
¤ Compact Flash Expansion Slot for prolonged monitoring applications
¤ Integrated solar-panel/charger allows extended operation
Page 7 of 68
Introduction
NOMAD Portable Weather Station
Users Handbook
¤ Pre-configured 32-bit Online Pro PC software, for real-time and
historic data analysis
¤ Protective carry bags for ease of transport
¤ Quality external connectors to IP68
¤ Telemetry options include: RS232, RS485, low power radio or global
access using GSM modem
Potential applications are monitoring and checking, as follows.
¤
¤
¤
¤
¤
¤
¤
¤
¤
¤
¤
¤
¤
¤
Page 8 of 68
Environmental consultancy
Site boundaries
Landfill sites
Emergency services
Military operations
Conditions at ports and harbours
Airports gliding clubs
Agrochemical field trials
Fruit growing
Hydrological studies
Schools & colleges for field studies
Geotechnical studies
Golf courses
Athletics meetings
NOMAD Portable Weather Station
Users Handbook
2.
2.1
Commissioning
COMMISSIONING
Schedule of Parts
The Nomad Portable Weather System consists of the following items.
Sensus data logger (installed in environmental case)
Tripod
Internal lead acid battery
Solar panel
Aerial sensor array with sensors for:
Air temperature
Relative humidity
Wind speed
Wind direction
Solar radiation
Barometric pressure sensor, integral to the data logger
Tipping bucket rain gauge (0.2 mm), separate unit with 9 m cable
Anchoring kit, with tools and compass
Large transit bag for tripod plus sensors
Smaller transit bag for raingauge
Online Pro PC Application Software and download cable
The Nomad Wind System consists of the following items.
Sensus data logger (installed in environmental case)
Tripod
Internal lead acid battery
Solar panel
Aerial sensor array with sensors for:
Wind speed
Wind direction
Barometric pressure sensor, integral to the data logger
Anchoring kit, with tools and compass
Large transit bag for tripod plus sensors
Online Pro PC Application Software and download cable
The Special Nomad Monitoring Systems are defined as any that requires some
other combination of sensors, such as the following items.
Sensus data logger (installed in environmental case)
Tripod
Internal lead acid battery
Solar panel
Aerial sensor array with sensors for:
Air temperature
Relative humidity
Wind speed
Wind direction
Solar radiation
Barometric pressure sensor integral to the data logger
Tipping bucket rain gauge (0.2 mm), separate unit with 9 m cable
Soil temperature sensor
Leaf wetness sensor
Grass minimum temperature sensor
Anchoring Kit, with tools and compass
Large transit bag for tripod plus sensors
Smaller transit bag for raingauge
Online Pro PC Application Software and download cable
Page 9 of 68
NOMAD Portable Weather Station
Users Handbook
Commissioning
Check that all of the components have been delivered.
2.2
Siting
The measurements used in meteorology are intended to represent general
conditions over as large an area around the measuring point as possible.
To achieve the most representative local conditions, the Nomad should
be sited in an unobstructed area open to the sun and wind. This also maximises
the efficiency of the solar-panel power supply. Sites sheltered by trees or
buildings, in hollows or on the sides of hills are not recommended, neither are
sites on buildings, as none of these locations will give representative
measurements.
The Nomad Portable Weather Station is designed to meet these
conditions. It’s sensors are mounted on a cross-bar 2.0 m above the ground.
Undere severe wind conditions, using guy ropes or attaching sand bags will offer
additional stability.
The U.K. Meteorological Office (Met Office) recommends that the
instruments be installed over closely mown grass. For further guidance, refer to
the Met Office leaflets:
Making weather observations,
Manual weather measurements,
Automatic weather measurements,
Voluntary observations network.
2.3
Preparing for Use
Before leaving the laboratory or office to deploy the Nomad system, check that
the battery in the environmental case is charged.
1.
With the handle uppermost, stand the environmental case on a
horizontal surface.
2.
Support the weight of the door, undo the clips which hold it shut, then
lower the door.
3.
Tilt the case backwards, to counterbalance the weight of the door as it
is opened forwards until the chains support it.
4.
Press key 1 on the Sensus logger (Figure 1).
If the display backlight is lit and menu
information shown, go to step 8.
If the display remains blank, then the
battery in-line fuse is missing, or the
battery level is too low to operate the
system.
(Normally the battery in-line fuse is
removed from the Logger for long
term storage and transit.)
5.
6.
Page 10 of 68
Check that the battery fuse is in place
in the in-line fuse holder in the red
(or brown) line, to the battery
(Figure 2). If missing, insert it.
13:45:00
22/12/2001
01096
Key 1 Key 2 Key 3 Key 4
Figure 1: Sensus logger - display
and keys
With the fuse in place, if there is still
no activity on the display, connect the battery charger supplied to the
“Charge” socket on the right hand panel of the Sensus unit.
NOMAD Portable Weather Station
Users Handbook
7.
Commissioning
Charge the battery for at least 24
hours before using it in the field,
then disconnect the charger.
8.
When sufficient power is available,
the logger will start logging data
immediately.
9.
When you do not want to start logging
at this time, press Key 1 to display the
Power control menu.
(The keys implement the options
shown immediately above them on the
menus. The menu structure is shown
in Figure 6.)
Charge
Socket
In-Line
Fuse Holder
WARNING
ALWAYS REMOVE
THE FUSE WHEN
CONNECTING OR
DISCONNECTING
THE BATTERY.
1 AMP FUSE
02001
10.
Press Key 3 to display the Switch off ? Figure 2: Location of the Charge
menu.
socket and in-line fuse
11.
Press Key 2 (Y = yes) to switch the power off.
The Sensus is switched off with the message Switching off confirming
the command.
12.
When data is to be stored
on a CompactFlashTM,
check that a card is
present in the slot in the
right hand panel of the
Sensus Data Logger.
If no card1 is present,
insert one as shown in
Figure 3.
Narrow Slot
Connector
01095
When a CompactFlash card
Wide Slot
is used, the logger will
Figure 3: Installing a CompactFlash card
store data only on the
card1 and not in its on-board memory. (Also see Section 4.8.)
2.4
Deploying the Sensors
The equipment is contained in three packages that can be carried by a single
person.
Large Bag (1050 x 300 mm footprint) with shoulder strap that contains
the sensor head, complete with sensors, inverted in a fitted foam
housing plus the folded tripod and extension post,
Small Bag (300 x 300 mm footprint) with handles that contains the
tipping bucket rain gauge,
Environmental Case (polypropylene) with handle that contains the data
logger, barometer and the external solar panel.
The Nomad can be deployed and logging data within five minutes. However, it is
strongly recommended that you run through the installation procedure in the
Note 1:
A CompactFlash card which has already stored or download data, cannot function with
a measuring station that has a different configuration from the last used station.
Therefore, either clear the card before starting operations with a different station, or
select only a card that has previously been used with the same station.
Page 11 of 68
NOMAD Portable Weather Station
Users Handbook
Commissioning
laboratory or office before attempting it
in the field. Referring to Figure 4,
deploy the equipment as follows.
Tripod
1.
Taking care not to disturb the
sensor head in its foam
packing, remove the tripod
from the large carrying bag.
2.
Release the winged lockingscrews and spread the three
legs, pulling upwards on the
upright until the support
struts are horizontal, then
lock in place.
3.
Stand the tripod on its feet in
the required location.
"N"
Clamp
Fixtures
Sensor
Head
Clamp
Screws
Env.
Case
Colour
Coded
Connectors
Tripod
Extension
Winged
LockingScrews
Support
Struts
Legs
Pegs
For siting advice, refer to
Section 2.1.
Sensor Head
01054
4.
Carefully remove the sensor
head from the foam protection
in the large carrying bag.
5.
Insert the foot of the sensor head into the clamp fixture in the top of
the tripod extension tube and clamp it securely in place.
6.
Carefully raise the tripod extension tube, complete with sensor head, as
high as it will go and clamp it in place.
Figure 4: Deploying the tripod and
sensor head
A stop prevents the tube from being removed from the upright.
7.
When additional sensors are supplied with a Nomad Special System,
they will all be connected to a common auxiliary junction box. Remove
this from the bag.
Connection
8.
Remove the rain gauge from the small bag.
9.
Tip the environmental case on to its back to reveal the colour-coded
connectors in the bottom panel.
10.
Remove the blanking plug from the 8-pin (red) socket and plug in the
cable from the sensor head (red plug).
11.
Remove the blanking plug from the 4-pin (blue) socket and plug in the
cable from the rain gauge (blue plug).
12.
When additional sensors are to be used, remove the blanking plug from
the 7-pin (yellow) socket and plug in the output cable from the
auxiliary box (yellow plug).
13.
Open the two clamp screws on the rear of the environmental case,
engage them on the tripod upright then clamp the case loosly in place
on the tripod upright.
Page 12 of 68
NOMAD Portable Weather Station
Users Handbook
Commissioning
Orientation
14.
Guided by the compass supplied, rotate the case on the upright so that
the solar panel faces towards the sun. (Face it towards the centre of
the sun’s anticipated course, when longer measurements are to be
performed.) Then clamp the case securely in place as high on the
upright as possible.
It’s weight will stabilise the tripod, however for additional stability, the
pegs provided can be used to peg down the tripod feet.
Under severe wind conditions, guy lines (not provided) may also be
needed to stabilise the upper part of the tripod when extended.
15.
When additional sensors are to be used, clip the auxiliary box to the
lower part of the tripod.
16.
Loosen the locking screw, then rotate the sensor head and extension
tube, until the red “N” mark on the Wind Direction sensor (weather
vane) is pointing directly north.
17.
Use the compass to confirm that the sensor head cross bar is now
running due north - south.
18.
When the sensor head is correctly aligned, clamp the extension tube
securely in place.
Rain Gauge
19.
Deploy the rain gauge at least 4 m from the tripod.
20.
Release the two catches securing the outer cover to the base of the rain
gauge.
21.
Carefully lift off the cover and stand it in a safe place.
22.
With the base plate mounted in its correct location on site, adjust the
three levelling screws until the built-in spirit level indicates that the
unit is level.
23.
Once the unit is level secure the locknuts.
24.
A restriction, such as an elastic band, may have been fitted to prevent
the bucket from moving during transit.
Carefully remove any restriction
and check that the bucket pivots
freely.
Sun
Rays
25.
Replace the outer cover and
engage the catches in the cutouts
in the base plate.
Right
Angle
26.
When additional sensors are
supplied with a Nomad Special
System, deploy them as required.
Locking
Wheel
27.
Loosen the locking wheel on the
solar panel attachment and gently
pull the bottom of the panel
outwards until it is at right angles
to the radiation from the sun as
shown in Figure 5.
Aux.
Junction
Box
01055
Figure 5: Adjusting the solar panel
Page 13 of 68
Commissioning
NOMAD Portable Weather Station
Users Handbook
(Set it at right angles to the centre of the sun’s anticipated course,
when longer measurements are to be performed.) Then lock the wheel
again.
28.
Remove the protective cover from
the solar panel, and keep it in a safe place.
Security
29.
For additional security, the winged
locking-screws on the tripod can be replaced by Allen screws
(supplied), the case padlocked (not supplied) and the case clamp
screws locked with additional Allen screws (supplied).
The Nomad is now deployed and ready for operation.
Dismantling the system and re-packing it in the carrying bags will be
the reverse of this procedure. Make sure the cover is replaced on the solar
panel, and the locking wheel is tightened to prevent the panel moving in transit.
When dismantling your system, if it is wet ensure that all
components are dried before re-placing them in the carrying bags, or on
return to the laboratory or office. Make sure the bags are dried too.
Page 14 of 68
NOMAD Portable Weather Station
Users Handbook
3.
Operation via Direct Link
OPERATION USING A DIRECT LINK BETWEEN
PC AND NOMAD, VIA FLASHCARDS, CABLE,
GSM MODEM, OR HIGH POWER RADIO
The procedures described in this chapter may be used with any Nomad system
that is connected to the PC by RS 232 cable, connected via a GSM (Global
System for Mobile communications) modem, or connected via a high power
2
radio link . Cable connection may be temporary when a technician is visiting any
Nomad system in the field, or a permanently connected system.
Assemble the system and deploy the sensors as described in
Chapter 2. When full communication via a high power radio link is required,
supply 24 V DC to the Nomad station. For example use the standard W4/1602/4
Cable (500 m) and 142009C Landline Interface mentioned in Section 9.3.
Once the Nomad system has stored the required data in the Sensus
data logger, the user can visit the System to download data, data can be
downloaded via a permanent RS 232 cable link (when one exists), or
downloaded over a GSM modem or high power radio link with landline power.
Ensure that Online Pro has been installed on the PC and that the
configuration file for the Nomad weather station has also been loaded (see
Chapter 5).
When visiting the Nomad for download, connect the communications
cable from your PC to the RS 232 port on the right hand side of the Sensus unit.
See Chapter 8 for a review of the available communication methods.
3.1
Start Logging
When the Sensus data logger was left running after checking the battery voltage
as described in Section 2.3, it will already be logging (storing) data.
If the battery in-line fuse was removed for transit, or the Sensus data
logger switched off, start logging data to the Sensus as follows.
1.
Support the weight of the environmental case door, undo the clips
which hold it shut, then lower the door until the chains support it.
Do not put or hang anything heavy on the lowered door !
2.
Replace the in-line fuse if it has been removed.
3.
Press key 1 on the Sensus logger (shown in Figure 1).
When sufficient power is available, shown by activity on the display,
the logger will wait one minute before starting to store data at the rate
specified by the active configuration. The default rate stores data at 5
minute intervals.
The Nomad will continue storing data until stopped by the logger keys
or lack of power.
4.
Close and re-clip the door of the environmental case.
3.2
Get Stored Data
The Nomad system can store data on-board by logging data into the Sensus
data logger memory or by storing data on CompactFlash cards plugged into the
Sensus data logger.
Note 2:
Because of power constraints, when the Nomad system is powered by the solar panel
and internal battery, it is configured to operate as a semi-passive data transmission
system in the same way as the low power radio link. See chapter 4.
Configuration for full two-way operation with a high power radio link, as described in
this chapter, is possible ONLY when the Nomad system receives its power from a
landline.
Page 15 of 68
Operation via Direct Link
3.2.1
NOMAD Portable Weather Station
Users Handbook
Download Sensus Store
Data can be downloaded from the Sensus store to a PC only while the Nomad
and PC are connected directly via an RS 232 cable link landline interface, a GSM
modem link, or a high power radio link with landline power.
Data cannot be downloaded while the Online Pro Application
Software is operating in real-time mode, (or connected via a low power
radio link).
1.
With PC and Sensus connected as described above, start Online Pro.
2.
Use the Download... (Clone... on early software) option on the
WeatherStations menu.
The Download Weather Station dialog is displayed.
3.
Highlight the name of the Nomad station to be downloaded and press
the Download (Clone) button.
(When the Nomad is connected via a GSM modem or high power radio
link, Online Pro will call the relevant system automatically.)
4.
Specify a filename for the downloaded data and choose a directory in
which to save it.
5.
Press the Save button.
The data from the Nomad system is downloaded to your PC and
converted into a log file format for further use by Online Pro.
3.2.2
Download to a CompactFlash Card
When visiting the Nomad, data can be downloaded from the Sensus store to a
3
CompactFlash card merely by plugging an empty card into the slot in the right
hand panel of the Sensus Data Logger. Wait until the activity on the Sensus
display finishes then remove the card.
3.2.3
Download CompactFlash Cards
CompactFlash cards can be removed from the Sensus unit for downloading so
that the stored data can be downloaded to your PC in two ways.
If the PC has a PCMCIA socket, a flash card adaptor can be plugged
into the socket. Alternatively a stand-alone FlashCard Reader can be plugged
into one of the PC communication ports.
Once connected, both of these devices will log on to your PC as an
TM Explorer.
additional drive which can be accessed using Windows
Data downloaded from cards must be converted for use with Online
Pro Application Software.
3.3
Read Data from the Sensus Display
When visiting the measuring station, the display keys on the Sensus Data
Logger can be used to show data (and other information) on the display.
1.
Press key 1 (see Figure 1).
The first screen of the Sensus menu system will be displayed. This is
shown at the top left of the menu structure diagram in Figure 6.
Note 3:
A CompactFlash card which has already stored or download data, cannot function with
a measuring station that has a different configuration from the last used station.
Therefore, either clear the card before starting operations with a different station, or
select only a card that has previously been used with the same station.
Page 16 of 68
NOMAD Portable Weather Station
Users Handbook
Operation via Direct Link
13:45:00
22/12/2001
Power control
Switch off ?
Y
N
Switching off
System information
80-XXXXXXA-22
Temp.: +22.7oC
Supply: 13.6 V
Logging information
Int. record count:
254
First record
03:10:00, 30/06/2001
Last record:
13:30:00, 15/12/2001
See Note A
Ext. record count:
254
First record
03:10:00, 30/06/2001
Last record:
13:30:00, 15/12/2001
Logging control
Enabled
(Pause)
Enabled (paused)
(Run)
See Note B
Disabled
(Pause)
Disabled (paused)
(Run)
Data values
Ch: 01,
0.0 mm
Ch: 02,
1.3 m/s
Ch:...
...
Ch:...
...
Ch: 07,
995.0 mbar
See Note C
CF slot empty
CF card detected
CF card present
CF card ? serial ?
CF card ? version ?
CF card *BUSY*
CF card ? unknown ?
CF card full
CF card error
02004
Notes A. If a CF card is present in the slot when this option is selected, then the six screens will display information relating to the
data stored on the card. If there is no card present, the screens will display information relating to data stored internally in the
Sensus logger.
B. If logging is currently enabled, then the top two screens will be shown. When logging is NOT enabled, the bottom two will be
shown.
C. The CF display screens change automatically, depending on the current state of the CF card installed (if any). Apart from
inserting or removing a CF card, the user has no control over which of these screens is displayed.
Figure 6: Menu structure of the Sensus Data Logger installed in
Nomad Weather Stations
The keys implement the options shown immediately above them on the
menus. The arrow options move the display to adjacent menus in the
indicated direction.
2.
Use the down arrow options to move to the Logging information
menu.
3.
Use right and left arrow options to check the number of data records
(samples) stored and to inspect the the first and last records.
4.
Inspect further information from the Sensus by using the required
options to move about the menu system.
5.
The display may safely be left active when you have finished inspecting
information, as the Sensus will switch the display off automatically
after one minute when it detects no further key activity.
3.4
Display Real-Time Data
1.
With PC and Sensus connected via an RS 232 cable, GSM modem, or
high power radio with landline power, start Online Pro.
2.
Select the Open... option from the File menu.
3.
Select Display.onl from the Online Pro directory.
This opens the default screens for data viewing.
4.
Select the required page from the Pages menu displayed via the View
menu.
5.
Click the clock icon to display data in real-time.
The values on screen should be updating live.
Page 17 of 68
Operation via Direct Link
NOMAD Portable Weather Station
Users Handbook
Remember that if you are using a system connected via a GSM
modem, displaying data in real-time for periods of more than a
few minutes may incur high call charges.
6.
End real time operation by clicking the clock icon again.
7.
Disconnect your PC from the Nomad station after use.
3.5
View Downloaded (Cloned) Data
Once the data has been downloaded, it is no longer necessary to have the PC
and Sensus connected together while viewing downloaded data.
1.
Select the Historic option from the View menu.
2.
Select the Table option.
3.
Select the file required from the Open dialog.
Data from the file will be displayed.
4.
Page 18 of 68
Close down Online Pro after use.
NOMAD Portable Weather Station
Users Handbook
4.
Operation via Passive Radio Link
OPERATION USING A PASSIVE RADIO
LINK BETWEEN PC AND NOMAD
The procedures described in this chapter may be used only with Nomad systems
that are connected to the PC by low power radio link or by a high power radio
4
link configured for transmission only .
These links are semi-passive systems that transmit data but cannot be
controlled by the PC. Once the Nomad system is storing the required data in the
Sensus data logger, these links will also be transmitting data every 20 seconds
to the radio link on the PC.
When a technician is visiting the Nomad to download the memory in
the field, use the procedures given in Chapter 3.
Assemble the system and deploy the sensors as described in
Chapter 2. Ensure that Online Pro has been installed on the PC and that the
configuration file for the Nomad weather station has also been loaded (see
Chapter 5).
See Chapter 8 for a review of available communication methods.
4.1
Start Logging
When the Sensus data logger was left running after checking the battery voltage
as described in Section 2.3, it will already be logging (storing) data and the
radio transmitting it.
If the battery in-line fuse was removed for transit, or the Sensus data
logger switched off, start logging data to the Sensus as follows.
1.
Support the weight of the environmental case door, undo the clips
which hold it shut, then lower the door until the chains support it.
Do not put or hang anything heavy on the lowered door !
2.
Replace the in-line fuse if it has been removed.
3.
Press key 1 on the Sensus logger (see Figure 1).
When sufficient power is available, shown by activity on the display,
the logger will wait one minute before starting to store data at the rate
specified by the active configuration. The default rate stores data at 5
minute intervals.
The radio will also start to transmit data at 20 second intervals.
The Nomad will continue storing data and the radio link continue
transmitting until stopped by the logger keys or lack of power.
4.
Close and re-clip the door of the environmental case.
4.2
Display Real-Time Data
1.
Start Online Pro.
2.
Select the Open... option from the File menu.
3.
Select Display.onl from the Online Pro directory.
This opens the default screens for data viewing.
Note 4:
Because of power constraints, when the Nomad system is powered by the solar panel
and internal battery, it is configured to operate as a semi-passive data transmission
system in the same way as the low power radio link, described in this chapter.
Configuration for full two-way operation with a high power radio link, is possible ONLY
when the Nomad system receives its power from a landline, as described in Chapter 3.
Page 19 of 68
Operation via Passive Radio Link
NOMAD Portable Weather Station
Users Handbook
4.
Select the required page from the Pages menu displayed via the View
menu.
5.
Click the clock icon to display data in real-time.
The values on screen should be updating live.
6.
End real time operation by clicking the clock icon again.
4.3
View Downloaded (Cloned) Data
Once the data has been downloaded, it is no longer necessary to maintain the
link between PC and Sensus while viewing downloaded data.
1.
Select the Historic option from the View menu.
2.
Select the Table option.
3.
Select the file required from the Open dialog.
Data from the file will be displayed.
4.
Page 20 of 68
Close down Online Pro after use.
NOMAD Portable Weather Station
Users Handbook
5.
5.1
Online Pro Software
ONLINE PRO APPLICATION SOFTWARE
Introduction to Online Pro, Version 1.2
Casella Online Pro Application Software V1.2 provides users of Casella Automatic
Weather Stations and Nomad Portable Stations, Multimet instruments and Wind
Speed and Direction Systems with a powerful and versatile program for the
accumulation, processing and presentation of environmental data.
Replacing the earlier Casella “Online” application, Online Pro has been
completely rewritten to take advantage of the 32 bit facilities available from
current versions of Windows and provide greater ease of use. This allows the
operator to concentrate on the data, while maintaining and extending the
flexibility with which data can be gathered and displayed. Data from multiple
sources can be viewed on common screens in real time, allowing easy
comparison of environmental conditions.
This software integrates the functions of real time data presentation,
data archiving and historical presentation into an easily used package. It is
TM
TM
TM
designed to run on Windows 95 , Windows 98 , Windows NT 4 , Windows
TM
TM
and Windows 2000 . Online Pro offers the following Display features:
ME
¤ Real time display showing prevailing conditions that provides critical
information for on-site decisions
¤ Dynamic Data Exchange that allows real-time data to be viewed in
another program
¤
¤
¤
¤
Automatic switching between user specified display screens
Alarm display
Save function for screen layout
Windows bit map (.bmp) image presentation for displaying site maps,
company logos, hazards etc
¤ Multi-section bit maps, where the displayed section is dependant upon
the condition of a data input value
¤ Individual site maps with dynamic wind direction overlay
Plus the following features for User Convenience:
¤
¤
¤
¤
¤
¤
¤
Standard screen layouts loaded as default
Password protection
Comprehensive on-line help
File loading displayed automatically
Convertion of on-line log files
Archiving of data to disk at user defined intervals
Dynamically changing screens including scrolling graphs and alarm
warnings
¤ Production of line graphs based upon historical data
¤ Tabular report presentation of data files
The versatility of the Online Pro application enables a variety of other
parameters to be incorporated and mathematically determined from basic
sensor values.
¤ Linear Scaling maths functions (y = mx + c)
¤ Vapour pressure and Dew Point calculation, based upon Temperature
and Humidity
Page 21 of 68
Online Pro Software
NOMAD Portable Weather Station
Users Handbook
¤ Heating / Cooling Degree Day calculations based upon measured
temperature values and a user defined threshold
¤ Rolling averages over user selected time period
¤ Vectored rolling averages for wind direction
¤ Cross wind component calculation using wind speed, direction and
reference heading
The program loads a set of eight standard screen layouts (pages) automatically.
These pages can be user configured to suit your specific requirements. Simple
mouse controlled operations enable display elements to be added, customised or
deleted.
Data files created by the software employ a standard ASCII plain text
format allowing them to be incorporated into many commercial spreadsheet,
word processing or data base applications. The software can be supplied to
operate in network mode so that real time values can be accessed and displayed
by multiple users.
For more information on using the Online Pro application,
please refer to the help available via the software help buttons.
These are the recommended steps for getting your system started.
Install the software
Configure the software for your system
Load the configuration files from the
configuration disks supplied when software
and measuring system have been supplied at
the same time.
Refer to Part 2 of the Online Pro User Manual
for configuring your software when changes
have been made to the system or are
required, or new stations have been added.
Specify required data
Select the measurements and information you
want to display
Set up display pages
Add real time display items
Operate the software
Display real time data
View historic data.
5.2
Installation / Un-Installation on
WindowsTM 95, 98, ME, NT 4 & 2000
System Requirements
IBMTM compatible PC with Pentium II or better processor,
At least 8 MB of free RAM space,
Microsoft Windows 98/ME/2000 and NT 4/95 with IE4 or later,
Hard drive with at least 5 MB of free space,
31/2“ high density (1.4 MB) floppy disk drive for program installation,
Super VGA colour monitor (1024 x 768 16 M colours recommended),
Mouse or other Windows compatible pointing device,
Printer - optional.
Before installation, it is recommended that a back-up copy be made of the
program disks. Keep the originals in a safe place and use the copies to install
the software. It is also advisable to ensure that no other applications are running
while installation takes place. The Setup program for Online Pro will install files
in the specified Program directory and the Windows\System directory. It will also
add an icon to the desktop and a new folder and item to your Programs menu,
either of which can be used to start Online Pro.
Page 22 of 68
NOMAD Portable Weather Station
Users Handbook
Online Pro Software
If installing on Windows 95, first run the program TapiUpdate.exe
placed in the installation folder. This updates the version of TAPI on the PC to
the version required by Online Pro. When installing on Windows 98, Windows NT
or later systems, this update is not required and SHOULD NOT be performed.
1
Online Pro is supplied on three 3 /2“ floppy disks. (This does not
include disks supplied to configure any specific measuring stations.)
5.2.1
Installation
CASELLA CEL licence this software for single-site use.
For the convenience of the user, the software may
be copied for back-up purposes, and installed
simultaneously on one desk-top computer (the site)
and one portable computer.
SFT-4
1.
Start Windows.
2.
Insert Online Pro Disk 1 into the floppy disk drive.
3.
Click the Start button on the task bar, then click the Run... option.
4.
Type a:\setup, where “a” identifies the floppy disk drive, then press
Enter.
5.
Wait for the Casella welcome screen to be displayed, then follow the
on-screen instructions.
Once installation is complete, you will find the Online Pro icon
your Windows desktop.
on
5.2.2
Un-Installation
1.
Click the Start button on the task bar.
2.
Select the Settings... option and click on the Control Panel option.
3.
Double click on Add/Remove Programs icon.
4.
In the list of installed software, select Online Pro and click the
Add/Remove button.
5.
Follow the on-screen instructions.
5.2.3
Starting Online Pro for the First Time
Start Online Pro by double clicking on its desktop icon, by entering its name in
the Run menu obtained via the Start button Run option, or using the Start Programs... option.
When this is the first time you open the newly installed software, the
measuring station and software will not be configured to match each other and
the following message will be displayed.
“Your Online Pro configuration files need to be installed.
You should only need to do this when you first run Online Pro.
“Please insert your first configuration disk, click on OK, then
select the drive containing the configuration disk and click on OK.”
When both software and measuring system have been supplied
together, a configuration disk (or disks) will also have been supplied
that include configuration files to match the particular sensors in your
measuring system and their method of telemetry, as described here.
However, if Online Pro was supplied on its own (perhaps to be used
with an existing measurement system) the configuration disk supplied contains
Page 23 of 68
Online Pro Software
NOMAD Portable Weather Station
Users Handbook
non-specific
configuration files
that must be edited
after installation as
described in the
Online Pro User
Manual.
Insert your
first configuration
disk and follow the
instructions given by
the on-screen
message. The
Message line
configuration files
will be loaded, and
the top level window
shown, in Figure 7
displayed.
Figure 7: The top level window
As the
cursor is moved to each button, the relevant function will be displayed on the
message line at the bottom left of the display.
5.2.4
Password Protection
This limits access to measuring station definitions and configurations only to
password holders, which stops unauthorised users from changing weather
station properties.
1.
To enable weather station protection, select the Protection option
from the Weather Stations menu.
2.
Enter a password into the Password dialog, twice (for verification).
Note that the password is case sensitive.
Once the password has been enabled in this way, access to the
measuring station definitions and configurations via the Weather
Stations / Properties… option requires use of the password.
3.
Disable the enabled weather station protection by re-selecting the
Protection option from the Weather Stations menu, then enter the
password again when prompted.
5.2.5
Loading a Default File
OnlinePro can be set so that it loads a specified configuration file, shows the
display screen for the file, and enter real time mode whenever it is started.
1.
Select the Default... option from the File menu.
The Default File dialog is displayed.
2.
Page 24 of 68
Tick the box to enable loading of a default file.
NOMAD Portable Weather Station
Users Handbook
Online Pro Software
3.
Select the configuration file that you wish to load on start up by clicking
on Browse then selecting the filename from the Default File open
dialog.
4.
Click OK to confirm your choice.
Now when Online Pro is started, the selected configuration is loaded,
the system enters Real-Time mode and the first enabled page (see
Section 5.3.1) of the screen is displayed.
Provided the data sources required by the layout are defined,
connected and operating, the display will show real time data from
them.
5.
Disable Default File loading by un-ticking the check box.
5.3
Operation in Real-Time
When a permanent or regular link is made between the system and the PC, data
from measuring stations configured and connected via Online Pro can be viewed
in real-time (or “near real-time") on a display screen that has eight pages.
The link can be a direct cable connection or passive radio modem. The
display is updated each time the link is made, so the passive radio link gives a
near real-time display, updated typically every 20 seconds, while the high power
radio link with landline to the Nomad transmits as fast as possible.
Page
identity
Figure 8:
Real-time pages from the
standard Nomad
configuration file
Page 25 of 68
NOMAD Portable Weather Station
Users Handbook
Online Pro Software
Quarry Site B
Real Time Dust
14:47
23 July 01
Air Pressure
1104.6
mB
Rainfall
Humidity
37.4
in
%
mg / m^3
01050
0.28
Prevailing Direction 80 deg, Wind Run 20 N miles
Prevailing Direction 45 deg, Wind Run 30 N miles
Real-time windroses with bitmap
backgrounds are positioned on the
main bitmap, adjusted for size, then
the borders are set to “None”
Prevailing Direction 55 deg, Wind Run 30 N miles
Cowes
Prevailing Direction 95 deg, Wind Run 30 N miles
01051
Bembridge
The Needles
St Catherines Point
Ski Slope #6
23 Jan 01
14:47
Start ALARM
Finish ALARM
Deg. C
Figure 9: Examples of
real-time pages
A GSM system with a suitably short call-up interval can be used, but
may incur high call charges. Such systems are best used to download date once
or twice each day. Note also that if the GSM is set to read data once each hour,
the display will update only once each hour.
A set of eight standard pre-configured real-time display screen pages
are included for Nomad systems and these will be installed by the configuration
file loaded into Online Pro the first time it is started. Figure 8 shows some of the
standard pages.
When required, the standard screen pages can be edited or completely
new page layouts prepared by the user. The data from several measuring
stations can be presented on the same screen page, where the only limitation is
the user’s ingenuity in positioning the required items on the page. Figure 9
shows some of the possibilities. Sections 5.3.2 and 5.3.3 describe how to edit or
add to the screen settings.
The application can switch between real-time pages automatically to
allow the data from all stations to be monitored constantly in a specified
sequence.
5.3.1
Viewing Pages and Operating in Real-Time
1.
Select the File menu and click the Open option.
Page 26 of 68
01052
Air Temp. -3.7
NOMAD Portable Weather Station
Users Handbook
2.
Online Pro Software
On the Open dialog, click the name of the configuration file you want
to display, (for example display.onl which is the standard
configuration supplied for Nomad systems).
The first screen page of the specified configuration will be displayed.
When using the standard Nomad configuration, the Instantaneous
values page will be shown.
(When the selected stations are linked via radio, the default setting
transmits real-time data every 20 seconds.)
3.
Display further pages from the selected configuration by selecting the
View menu, clicking the Pages option then selecting the required
page from the flyout menu.
The following pages are available from the standard Nomad
configuration:
Instantaneous Values
2 minute averages
10 minute averages
Map overlay
Real-time windrose
Temp. / humidity graph
Pressure graph
Solarimeter graph.
4.
To make the application switch automatically between selected pages
in real time mode, click the Auto switch... option on the Pages menu.
The Automatic page switching dialog is displayed with the following
options.
Tick box
Page numbers
Time interval
Enables automatic page switching.
Identifies the page numbers to be
displayed and the order in which they will be
displayed.
Specifies a time interval between page
changes (in seconds).
5.
Click the check box to enable page switching.
6.
Enter the required page numbers separated by commas “ , ” in the
order they are to be displayed, for example: 1, 4, 5, 2, 3.
7.
Enter a suitable time interval, in seconds, for each page to be
displayed.
8.
Click OK to confirm your choices.
The remaining options on the View menu are described in later
Sections.
Page 27 of 68
Online Pro Software
NOMAD Portable Weather Station
Users Handbook
When a permanent or regular link is made between the system and
the PC, all items required for the display page or pages have been
added and positioned, the data sources required by the layout are
defined, connected and operating, the system can be operated in
real-time mode.
Real time operation can be switched on or off in three ways:
Icon
Menu Option
Press the clock icon
,
Use the Realtime option on the
Weather Stations menu,
Keyboard
Press Ctrl + R keys at the same time.
When in operating in real-time mode, the display will be updated each time the
link is made, so the low power radio link gives a near real-time display, updated
typically every 20 seconds.
A GSM system is not really suitable because when it is set to read data
once per hour, the display will update only once per hour.
5.3.2
Setting Up Pages
The following procedure details how to set up and add items to the real time
display pages, also see Figure 10.
1.
Select the View menu and click the Pages option.
2.
To change the page names, click the Rename option.
The Page Names dialog will be displayed.
By default pages are identified as Page 1, Page 2, etc. but can be
given more suitable names, such as site identity or measurement
group (as used by the Nomad configuration shown).
3.
Make suitable entries for the pages.
4.
When all entries have been made, confirm them be clicking OK.
5.
To change the background colour of a page, click the
Background Colour option on the Pages menu.
A further menu is displayed with options to specify Normal Colour...,
Alert Colour... and Alarm Colour .... Each option displays a Colour
selection dialog.
6.
Make suitable choices, for example: green - normal, yellow- alert and
red - alarm.
7.
Confirm each selection by clicking OK.
Page 28 of 68
NOMAD Portable Weather Station
Users Handbook
8.
Online Pro Software
To add a bitmap image for use as the page background, click the
Background Bitmap... option on the Pages flyout menu.
The Background Bitmap dialog is displayed. This allows you to use
your company logo or some suitable map or scene as a background to
identify the page.
9.
Click the Background bitmap check box to enable further bitmap
options.
10.
Use the Browse... option to locate a suitable bitmap.
11.
Click the Position option to determine how the bitmap will be
placed on the page from the following options:
Centre
Tile
Top Left
Stretch
Centres the bitmap at its imported size,
Tiles a small bitmap to fill the window,
Locates the bitmap at its imported size,
Stretches the bitmap to fit the window.
12.
Make a choice and click OK.
5.3.3
Adding Real-Time Display Items
Normally when software and measuring system are ordered and delivered
together, the required real time items are specified by the configuration file
loaded when Online Pro was started for the first time. However, if you want to
5
add to the display items, there are two ways to do so.
Use the View menu and select the Pages/Add Display Item... or
right click in the page and select Add... from the context menu. Both methods
display the Add Display Item? dialog so you can select the type of display item
required from the following options.
Text,
Date,
Time,
Value,
Bitmap,
Multi-State,
Overlay,
Windrose,
Graph,
Realtime Windrose,
Realtime Dustrose.
A specific Properties dialog for each selected type of item will be displayed,
allowing you to define the appearance of the item and fill in the relevant details.
Display items can be re-sized by dragging their borders, and can be
moved by dragging the main area. The background colour, text font, size and
colour can be specified for each item via a Basic properties page.
To copy or delete a display item, right click on the item and select
either Copy or Delete... from the displayed context menu. To edit a display
item’s properties after it has been created select Properties... from the context
menu. Use these methods to load, edit and delete the items described in the
following sections.
Text
This provides a means of displaying a fixed text on your
document page, suitable for identification.
Note 5:
Display items cannot be added while in Real Time mode
Page 29 of 68
NOMAD Portable Weather Station
Users Handbook
Online Pro Software
Once the stations have
been configured, set up
real-time display pages
and add display items.
Is the
data channel on
a remote PC connected
via a network
?
Yes
No
Start Online Pro
on the remote PC
and
enable data sharing
Yes
No
Is
the data
channel connected
directly, via gsm modem or
radio modem to the
local PC
?
Is the
remote PC
running Online Pro
with sharing
enabled
?
No
Make the
necessary
connections.
Yes
Is the
local PC
running
Online Pro
?
No
Start Online Pro
on the local PC and
open the relevant
configuration file.
Yes
Are
the real-time
data pages
set up
?
No
Use Online Pro to
set up the
required pages.
Yes
Use Online Pro to
add the
required items.
Yes
Are
items for
real-time viewing to
be added
?
Figure 10: Steps to set up
real-time display pages and add
data items
No
Is
automatic switching
between pages
required
?
Yes
Use Online Pro to
select and enable
automatic switching.
No
Go on to use
Online Pro
to view display pages
in real-time
Page 30 of 68
01046
NOMAD Portable Weather Station
Users Handbook
Online Pro Software
Date
This displays the current date (as reported by the PC) in the
format selected in the Windows regional settings.
Time
This displays the current time (as reported by the PC) in the
format selected in the Windows regional settings.
Value
This displays a data item as a numeric value with
annotations. The following options are offered via the
properties settings.
Data source specifies where the data is to come from. It must be a
measuring station connected to the PC or available via a network.
Data channel selects which channel on the weather station to use.
Format defines how the data is to be displayed.
Display as raw data (flag) displays the data without formatting it.
Minimum width shows the minimum number of characters to display.
It adds leading 0 or spaces.
Decimal places specifies the number of digits to display after the
decimal point.
Leading 0’s (flag) displays leading 0’s when set, otherwise leading
spaces are shown.
Signed (flag) displays “+” in front of positive numbers, negative
numbers always have “-”.
Bitmap
This displays a Windows bitmap file, for example your
company logo, a map; background scene, or some
indicator diagram as described in Multi-State below.
A Browse option enables selection of the
bitmap.
If the display item is not the same size as the
bitmap, then the bitmap can be stretched or squashed
to fit.
Multi-State
This displays part of a bitmap, where the part is
selected by the value of a specified data channel.
The bitmap may have a series of windsocks
in different colours where a wind speed channel is used
to select one of them for display to indicate a current
wind speed range. As an example, if the bitmap has
four images aid the switching points are 1, 2, 3.
Image
Image
Image
Image
1
2
3
4
is
is
is
is
shown
shown
shown
shown
when
when
when
when
the
the
the
the
data
data
data
data
level
level
level
level
is
is
is
is
less than 1,
between 1 and 2,
between 2 and 3,
greater than 3.
Overlay
This type of item displays a bitmap image overlaid with a windrose (wind
direction pointer).
Page 31 of 68
Online Pro Software
NOMAD Portable Weather Station
Users Handbook
Usually the bitmap will be a map allowing the
wind direction to be compared with some physical
feature such as a harbour mouth or runway at an
airport. Initially the size of the item is set to that of the
bit map but it can be re-sized as required.
The wind direction options allow you to
specify the measuring station that is to be the source
of the wind direction data plus a data channel.
The position, size and colour of the rose on
the overlay are determined by options on the Overlay dialog. The width, length
and colour of the pointer can be specified in a similar way.
Each overlay can show only a single windrose. However, overlays can
be positioned together to indicate wind directions from several points around an
area, as shown in Figure 9.
Windrose
A windrose displays the wind direction both numerically
and graphically. The numerical representation will always
be three digits with leading zeros.
The wind direction options allow you to specify
the measuring station that is to be the source of the wind
direction data plus a data channel. The colour of the rose
and of the pointer can be specified via windrose options.
Graph
This displays a graph of one or two data values
against time.
If the data source is a wind direction,
then the axis can display directions (as opposed
to numeric values) and covers 720 degrees to
reduce the chance of discontinuities when the
o
direction passes through north (0 ).
Data source 1 and 2 options allow you
to specify the measuring stations that are to be
the sources of the data plus relevant data
channels. Trace 1 and 2 options specify the axis title and line colour. The use of
autoranging or a manual setting with minimum and maximum range values can
also be specified.
Timebase options allow you to display the values taken during the
most recent period, defined in terms of hours, minutes and seconds (up to 23
hours, 59 minutes and 59 seconds). When the time base is less then 4 hours,
data is displayed at a 1 second resolution. When the time base is 4 or more
hours, it is displayed at a 1 minute resolution.
Initially the graph will display any relevant data that has been logged
by the program in the time period that it is being displayed.
Realtime Windrose
This provides information about the wind speed and
direction. The data can be overlaid on a bitmap image
(usually a map).
A windrose is drawn, divided into 16 direction
sectors filled in proportion to the distance (time x
speed) that the wind has blown from the specified
direction. In addition, the text displayed at the top left
of the item is automatically produced, and shows the prevailing wind direction
and the total wind run.
Page 32 of 68
NOMAD Portable Weather Station
Users Handbook
Online Pro Software
The wind direction options allow you to specify the measuring station
that is to be the source of the wind direction data plus a data channel. Similarly,
4
wind speed options allow you to specify the measuring station that is to be the
source of the wind speed data plus a data channel. The position, size, colour and
distance between the circles of the windrose are determined by options on the
Overlay dialog.
A units dialog offers three options. Read as, so you can tell the PC
which units the station is using to measure the data, and Display so you can
specify the units in which you want to display the wind run. Duration sets the
rolling duration used in the display and calculations so that all data displayed is
from this period. Initially, the realtime windrose will display any relevant data
that has been logged by the program in the time period that it is displaying.
Each item can show only a single real time windrose. However,
windrose overlays can be positioned together to show wind directions from
several points around an area (see Figure 9).
Realtime Dustrose
Dust Concentration
This provides information about the dust concentrations
compared with wind direction. The data can be overlaid
on a bitmap image. A dustrose is drawn, divided into
16 direction sectors filled in proportion to the dust
concentration from the specified direction.
The wind direction options allow you to
specify the measuring station that is to be the source of
the wind direction data plus a data channel. Similarly,
dust concentration options allow you to specify the
gm / m^3
6
measuring station that is to be the source of the dust
concentration data and the channel to transmit it.
The position, size, colour and distance between the circles of the
windrose are determined by options on the Dustrose dialog. There is also a
duration option that sets the rolling duration used in the display and
calculations, so that all data displayed is from this period.
Initially, the real time dustrose will display any relevant data that has
been logged by the program in the time period that it is displaying. Each item
can show only a single real time windrose. However, windrose overlays can be
positioned together to show wind directions from several points around an area.
5.3.4
Saving the Display File
When all items required for the display page or pages have been added and
positioned, you can save the screen layout for re-use.
1.
Select the File menu and use the Save As... option.
2.
Enter a suitable filename and file path in the Save As dialog.
3.
Press Save to save your choice.
The screen layout, including all pages, will be saved, and can be
loaded for use at any time via the File menu and the Open... option.
If required, a screen layout can be loaded automatically and switched to run in
real-time mode when you start the Online Pro software as described in Section
5.2.5. The Save Screen Image... option on the File menu allows the, current
screen to be saved as a bitmap. In addition to general record keeping, this
feature is particularly useful for recording special events.
Note 6:
Different stations can be selected, but will probably give meaningless results.
Page 33 of 68
Online Pro Software
5.3.5
NOMAD Portable Weather Station
Users Handbook
Web Page Output
This option allows real-time information to be written to an HTML file for viewing
via an intranet or the internet.
The output is configured via the Web Page Output dialog obtained by
using the Web page output... option on the View menu.
Online Pro outputs data in real-time to an intranet/internet page by
replacing text in a template file with the measured data. This allows you to have
full control over the format of the page. (Note that Online Pro can only publish
an internet page to a server if they are connected via a network, it cannot
publish a page via ftp.)
To enable web output, select the check box, use the first Browse
button to select the template HTML file, then use the second Browse button to
specify the name/location of the output file. (Usually this will be on a server. You
must obtain suitable access rights to create files in this folder.) Finally, set the
update interval, Online Pro will update the web page at this interval.
Template file format
Usually, the template file will be a standard HTML file. Online Pro reads this
template and replaces certain portions of text with the real-time values gathered
from weather stations. It can also give the date and time that the file was
updated.
Date/time
To get Online Pro to output the date/time when the web page was written, you
must include the following items of text in the template file:
{ONLINEPRO:#DATE} and {ONLINEPRO:#TIME}
The date/time will be output in the standard format defined on the PC running
Online Pro.
Real time values
To output real time values you must insert text like this:
{ONLINEPRO:ws_name:channel_name}
where ws_name is the name of the weather station and channel_name is the
name of a channel on that weather station. This will output the raw data values
coming from the weather station with no further formatting.
Formatting real time values
If you do not want to display the raw channel, values you can control the output
format by adding the formatting instructions between the channel_name and the
} in the above format (note there must be no spaces between the channel name
and the format specifier or between the format specifier and the }). This
formatting specifier has the format (x.y), where x is the minimum number of
Page 34 of 68
NOMAD Portable Weather Station
Users Handbook
Online Pro Software
characters output (padded with leading 0’s) and y is the number of decimal
places displayed.
So to output wind direction as three digits with leading 0’s and no
decimal point you would use (3.0), to output a temperature to one decimal place
you would use (0.1).
Refreshing the web page
It is possible to get a web browser to refresh (reload) a page periodically and so
display undated data. To do this you must add
<meta HTTP-EQUIV="REFRESH" CONTENT="x">
into the template file in the <HEAD> section. Where x is the number of seconds
between refreshes, The frequency of the refreshes should be set to balance the
time it takes to refresh the page with the importance of have the data in real
time.
5.4
Working with Historic Data
Historic data is any data not being displayed in real time. It is not possible to
look at historic data while the program is gathering and displaying real time data.
There are three methods of obtaining historic data, from logged PC
records stored by Online Pro, from logged records stored by the measuring
station and from logged records stored on Compact Flash Memory Cards by the
Sensus Data Logger.
The ability to download data from the logger built into the measuring
station is a useful option that allows you to compare it with data logged by
Online Pro, or to obtain an alternative set of data should anything have
interrupted the communication link.
To access data logged by the measuring station, you must download
the data, (early software used the term “Clone”).
5.4.1
Downloading (Cloning) Data
The downloading (cloning) operation copies the contents of the measuring
station’s built in logger into a log file that can be read by the historic data viewer
in Online Pro.
Data from the station can be downloaded (cloned) only when the
measuring station is connected directly (via RS232), via a modem or via some
radio links. Downloading data is not possible via a low power or high power radio
modem configured as a passive link, or while operating in real time mode.
1.
Use the Download (Clone...) option on the WeatherStations menu.
The Download (Clone) Weather Station dialog is displayed.
2.
Highlight the name of the station to be download and press the
Download (or Clone) button.
The Download (Clone) Filename dialog is displayed.
Page 35 of 68
NOMAD Portable Weather Station
Users Handbook
Online Pro Software
3.
Specify a filename for the downloaded (cloned) data and choose a
directory in which to save it.
Online Pro downloads the data from the logger in the measuring station
and converts it into log file format. During download, a progress
indicator will be displayed.
TM
5.4.2
Downloading from CompactFlash
Cards
When data from the Sensus Data Logger has been stored on a CompactFlash
7
Card , it can be downloaded to a PC in two ways.
When your PC has a PCMCIA socket, you can use a Flash Card Adaptor
that plugs into the socket, otherwise a stand-alone Flash Card Reader can be
plugged into one of the PC communication ports. Once connected, both of these
devices will log on to your PC system as an additional drive which can be
TM
accessed via your normal Windows Explorer . Note that the file format of
FlashCard files must be converted for use with Online Pro.
The conversion can be performed at the same time as the files are
transferred to your PC, converted as described in Section 5.4.3, or the files may
be be copied from drive to drive for later conversion.
5.4.3
Converting Online and CompactFlash Files
Different formats are used for the log files produced by earlier versions of Online
software, for CompactFlash files, and for the log files produced by Online Pro.
Online Pro can convert files produced by earlier Online software and
the files stored on a Flash Card into .log files that can be used by Online Pro.
1.
Use the Convert... option on the File menu.
Options for Online Log File... and Compact Flash... are offered.
2.
Select the required conversion.
A standard Windows Open dialog is displayed.
3.
For Online files, select the file (.dat) to be converted, or for FlashCard
files, select the header (.txt) and data (.dat) files for the card
information to be converted.
A standard Windows Save dialog is displayed.
4.
Specify a filename and location for the converted file.
To avoid confusion DO NOT USE the same naming convention for the
new file(s) as used for Online Pro log files:
name-yyyymmdd.log
Where:
name
yyyy
mm
dd
name of the weather station,
four digit year number,
two digit month number (with leading 0
if required),
two digit day of the month (with leading 0
if required).
For example: Bedford-20010905.log indicates a weather station
called Bedford on the 5th September 2001.
Note 7:
A CompactFlash card which has already stored or download data, cannot function with
a measuring station that has a different configuration from the last used station.
Therefore, either clear the card before starting operations with a different station, or
select only a card that has previously been used with the same station.
Page 36 of 68
NOMAD Portable Weather Station
Users Handbook
Online Pro Software
4.
Press Save to confirm your choice, convert the data and save the file
in the specified directory.
5.4.4
Viewing Historic Data
Data logged by Online Pro will be saved in files containing one day’s data for one
measuring station, including actual data channels and virtual (processed) data
channels. Usually, data logged by the measuring station will contain several
days’ data but will not include virtual channels as these are produced at run time
by the Online Pro application.
The table, graph and windrose displays can use data from either type
of logging, allowing you to choose which log file to open. However rainfall totals
will use only data logged by Online Pro, where the rainfall totals open log files
based on the settings for a selected measuring station. Use the View menu,
select the Historic option, then select one of the following.
Historic Table
This displays an Open dialog which allows you to select a log file (.log). All data
in the file will be displayed in a tabular format.
Historic Graph
This displays a Historic Data Range dialog which allows you to select the time
and date period you wish to be displayed on the graph. It will also allow you to
specify whether the data is to be obtained from the on-line PC or by
downloading (cloning) data stored in the specified station.
When the graph is plotted from Logged data, the software selects the
only stored file from the selected measuring station that covers the specified
Page 37 of 68
Online Pro Software
NOMAD Portable Weather Station
Users Handbook
time range, then displays the Properties dialog. When downloaded (cloned)
data is used, the Browse... button enables you to select the required file, then
the software displays the Properties dialog. This allows you to specify up to two
channels for display as separate line graphs plotted against time.
The trace colours can be specified, and the “Y” scale can be manually
set or auto ranged.
Historic Windrose
This also displays the Historic Data Range dialog which allows you to select
the time and date period you wish to be displayed on the windrose.
This dialog also allows you to specify whether the data is to be
obtained from the on-line PC, logged data from a specified weather station, or
from a downloaded (cloned) data file.
When the graph is plotted from Logged data, the software selects the
only stored file from the selected measuring station that covers the specified
time range, then displays the Properties dialog (opposite). When Cloned data is
used, the Browse button allows you to select the required file, then the
software displays the Properties dialog.
This allows you to select data sources, rose details, whether to show
data in a table alongside the rose, and to load a background bitmap for a display
of the relative distance the wind has travelled from different directions.
Page 38 of 68
NOMAD Portable Weather Station
Users Handbook
Online Pro Software
Weekly Rainfall Total
This displays a Weekly Rainfall Total dialog that allows you to select the start
day month and year of the week you want to display, plus the measuring station
(AWS) and data channel from which to obtain the rainfall data.
You must also specify the units in which rainfall was measured and the
units in which you want it displayed. The total amount of rain measured in the
week starting from the given date will be displayed in a Weekly Rainfall Total
field, provided log files for the selected period were created by the application.
Monthly Rainfall Total
This displays a Monthly Rainfall Total dialog that allows you to select the year
and month you want to display, plus the measuring station (AWS) and data
channel from which to obtain the rainfall data.
You must also specify the units in which rainfall was measured and the
units in which you want it displayed.
The total amount of rain measured in the selected month will be displayed in a
Monthly Rainfall Total field, provided log files for the selected period were
created by the application.
Page 39 of 68
Online Pro Software
5.5
NOMAD Portable Weather Station
Users Handbook
Dynamic Data Exchange
Dynamic Data Exchange (DDE) allows one application to access data and / or
control another. The application providing the data is called the server and the
one requesting the data is the client. Online Pro acts as a server.
Online Pro allows other applications to request information from it
about the real time data it is collecting from measuring stations. This data can
then be used for calculations in a spreadsheet, included in a word processor
report, or even used to keep a web site updated. For details of how to use your
applications as DDE clients, please refer to their individual documentation.
DDE data transactions are based on a three level hierarchy, the top
level being the application (or service) name, then the topic and item names.
The Online Pro application / service name is OnlinePro (no space). It
always has available the topic information, that provides general information
about the state of the application. In addition, it has one topic for each weather
station defined in the system, with the topic name being the same as the
weather station name.
The Information Topic can be used to obtain these names. It provides
basic information about the application with the following items:
Item name
Description
Realtime
Gives the string “Yes” if Online Pro is
currently in real time mode, or “No” if not.
WeatherStations
Gives the number of weather stations
defined in the application.
WeatherStation#
Gives the name of the numbered weather
station (e.g. item WeatherStation2 gives the
name of the second weather station).
This name can then be used itself as a topic
name to request information about individual
weather stations.
# is a number between 1 and the number
returned by the WeatherStations item.
The Weather Station Topic gives the following information about the
channels on the weather stations:
Item name
Description,
Channels
Gives the number of channels on the
weather station,
Name#
Gives the name of the channel,
Channel#
Gives the latest data value of the weather
station channel.
# is a number between 1 and the number
returned by the Channels item.
Page 40 of 68
NOMAD Portable Weather Station
Users Handbook
6.
Standard Sensors
THE NOMAD SYSTEM COMPONENTS
A complete system can consist of the following basic components.
Sensors
Mounted in an array on the Sensor Head,
plus one inside the Environmental Case,
and the remainder deployed nearby,
see this chapter.
Tripod
Supports the Sensor Head and Environmental
Case,
see Chapter 2.
Data Logger
Sensus unit inside the Environmental Case
stores data continuously when switched on
with sufficient voltage level,
see Chapter 7.
Communication facilities Two-way via a direct cable during visits by a
technician for downloading,
Two-way via a permanent direct cable to a
nearby PC,
Two-way via a GSM modem link to a PC,
Two-way via a high power radio modem link
to a PC when power is supplied to the Nomad
by a landline,
Data download only via passive low power or
high power radio modem links to a PC,
Data download during visits by a technician
by replacement of a CompactFlash Card,
see Chapter 8.
Power supply
Lead acid battery inside the Environmental
Case, with level maintained from a solar
panel attached to the case,
Battery charger,
Other supplies may be arranged,
see Chapter 9.
PC
Portable for downloading visits to the Nomad,
or situated remotely with communication
facilities as described above.
6.1
The Sensors Used with Nomad Systems
The Standard Nomad Portable Weather System is equipped with sensors to
measure the following parameters.
Air temperature8
Relative humidity8
Wind speed
Wind direction
Solar radiation
Barometric pressure
Rainfall (separate tipping bucket unit).
The Nomad Portable Wind System is equipped to measure:
Wind speed
Wind direction
Barometric pressure.
Note 8:
Air temperature and relative humidity are measured by a combined sensor.
Page 41 of 68
NOMAD Portable Weather Station
Users Handbook
Standard Sensors
Additional sensors are available for use with “Special Nomad Weather
Systems. They may include sensors to measure:
Soil temperature
Leaf wetness
Grass temperature.
The additional sensors should be ordered at the same time as the weather
station as a “special” system. However, if they are added at a later date, extra
hardware is required in the environmental case for connection and the new
sensors must be configured via the logger or via Online Pro.
Please consult the Casella CEL Sales Office for information on
additional sensor options.
This chapter is divided into separate sections that each describe one of
the sensors available.
Note that Casella equipment is guaranteed for 12 months from date of
dispatch, with the exception of the actual humidity sensing element. It is
impossible for Casella to control or know the environment in which the sensing
element has been used in relation to its performance constraints.
6.2
Combined Air Temperature and Relative
Humidity Sensor
The combined air temperature and relative
humidity sensor is installed within a single
radiation screen that is mounted on a
bracket below the sensor cross arm. Both
transducers are unaffected by condensation
and are resilient to airborne pollution.
The hygrometer is of the
capacitative type and is largely free from
drift. It offers high repeatability over large
ranges of humidity for long periods.
01056
The temperature sensor is based
upon a platinum resistance element to
Figure 11: Combined temperature
BS1904, DIN 43760, and incorporates
and relative humidity sensor
linearisation electronics within the sensor.
The output from the temperature sensor is
used to compensate the hygrometer for temperature effects.
Outputs from both of these sensors are led to a terminal box on the
sensor cross arm, from where a single sensor cable is taken to the 7-pin socket
on the bottom panel of the environmental case.
6.2.1
Temperature Sensor Specification
Sensor type:
Measurement range:
Accuracy:
Thin film platinum resistance
-40°C to 60°C
±0.3°C at 0°C
±0.55°C at 50°C
Operating Temperature -40°C to +60°C
6.2.2
Humidity Sensor Specification
Sensor type:
Measuring range:
Calibrated accuracy:
Hysteresis:
Linearity:
Time constant:
Page 42 of 68
Capacitative
0 - 100% RH
±3% RH
±1%
±1.5% RH between 5% - 95% RH
<10 s between 10% and 90% RH
NOMAD Portable Weather Station
Users Handbook
Standard Sensors
Operating temperature: -25° to +80°C
6.2.3
General Specification
Part number:
Supply voltage:
Power consumption:
Output calibration
Temperature:
Humidity:
6.3
187012B
8 to 24 V (supplied from environmental case)
Typically 10 mA at 12 V
0 to 1 V for -40 to + 60°C
0 to 1 V for 0 to 100% RH
Wind Speed Sensor
The sensitive three cup anemometer is
mounted at one end of the sensor head
cross-arm. The rotational speed is monitored
using an infra-red light source, interrupter
and optical sensor that provides 20 pulses
from 0 to 5 V per revolution. This
non-contacting design can measure wind
speeds up to 75 m/sec.
The instrument has an anodised
aluminium alloy outer case that offers a
durable, all-weather construction suitable for
installation in harsh environments.
01057
An output from this sensor is led to
Figure 12: Wind speed sensor
a terminal box on the sensor cross arm, from
where a single sensor cable is taken to the
7-pin socket on the bottom panel of the environmental case.
6.3.1
Wind Speed Sensor Specification
Part number:
Sensor type:
Transducer:
Maximum wind speed:
Starting velocity:
Distance constant:
Time constant:
Resolution:
Non-linearity:
Accuracy:
Output calibration:
Output:
Operating temp:
Stabilisation time:
Supply voltage:
Power consumption:
6.4
178031C
Three cup anemometer
Optical interrupter
75 m/s
Typically 0.3 m/s
Typically 3.5 m/s
Typically <0.5 s
7.84 cm
<±0.6 %
±0.3 m/s below 3 m/s
±3% over 3 m/s
12.75 Hz/m/s
20 pulses per revolution 0 to 5 V
-20°C to + 70°C
<1 sec from power on
6 - 28 V DC (supplied from environmental
case)
3 mA
Wind Direction Sensor
The weather vane is mounted at the other end of the sensor head cross-arm
from the anemometer.
DO NOT loosen the fitting of the weather vane, as this carries a
guide mark “N” that must point north to orient the cross arm correctly.
The wind vane is a small lightweight GMR design that offers a rapid
response to changes in wind direction with virtually friction free sensing. The
Page 43 of 68
NOMAD Portable Weather Station
Users Handbook
Standard Sensors
analog output changes from 0 to 1.8 V as the
wind direction changes from 0 to 359°, with
no dead-band at north.
The instrument has an anodised
aluminium alloy outer case that offers a
durable all-weather construction suitable for
installation in harsh environments.
01058
6.4.1
Wind Direction Sensor
Specification
Part number:
Sensor type:
Transducer:
Maximum wind speed:
Resolution:
Accuracy:
Aligning threshold:
Damping ratio:
Distance constant:
Undamped natural
wavelength:
Repeatability:
Electrical Angle:
Output:
Operating temp:
Stabilisation time:
Supply Voltage:
Power consumption:
6.5
Figure 13: Wind direction sensor
178035C
Weather vane
GMR (giant magneto resistive sensor) solid
state system with micro-controller
75 m/s
1°
<±2°
<0.8 m/s for a 10° offset
0.25
Typically 3.0 m
2.2 m
0.5% FSD
0 - 359° no deadband at North
0 to 1.8 V DC for 0 to 359° representing a 1 s
rolling average updated 5 times per s
-20°C to +70°C
<1 s from power on
6 - 28 V DC (supplied from environmental
case)
Typically 3 mA
9 mA during first 60 s after power on
Global Solar Radiation Sensor
The solarimeter is mounted on the sensor
head cross-arm between the wind speed and
direction sensors.
It measures the intensity of total
global solar radiation received at the earth’s
surface in terms of Watts/m² and responds
to both direct and diffused sunlight received
from the whole hemisphere. Diffused sunlight
continues to reach the earth even when the
sun is obscured behind cloud, and in the
01059
twilight period before sunrise and after sun
set.
Figure 14: Solar radiation sensor
The sensor is based upon a silicon
photo detector which is housed within a
weather proof, anodised aluminium body designed for reliable long term
operation in outdoor conditions.
Page 44 of 68
NOMAD Portable Weather Station
Users Handbook
6.5.1
Global Solar Radiation Sensor Specification
Part number:
Spectral range:
Range:
Sensitivity:
Response time:
Cosine response:
Operating temp:
Supply voltage:
Output calibration:
6.5.2
Standard Sensors
187010B
0.4 to 1.1 µm
0 - 2000 W/m²
Typically 100 µV/W/m²
<1 s
Typically <10% from normal to 80° of normal
-40°C to +80°C
Passive device, no supply is required
Typically 100 µV/W/m², supplied with
individual calibration details
Sunshine Duration
The internal logger can determine daily Sunshine hour values. The accumulated
total is determined based upon the time during which the solarimeter has been
exposed to a radiation level exceeding a threshold of 200W/m².
6.6
Barometric Pressure Sensor
The new Casella barometer is mounted on a
circuit board in the data logger, which itself
is inside the environmental case. A 1 mm
ventilation hole in the case ensures the
internal pressure remains at ambient.
A monolithic silicon transducer
senses pressure by means of a silicon
diaphragm into which a “bridge” of piezo
resistors have been defused.
The silicon crystal, which
constitutes the diaphragm, being a perfect
device does not suffer from hysteresis. The
high signal level obtained is further
conditioned to give an exceptional degree of
accuracy, repeatability and linearity.
The pressure transducer is
temperature stabilised at 60°C to minimise
temperature effects on the overall accuracy.
6.6.1
Figure 15: Barometric pressure
Barometric Pressure Sensor Specification
Part number:
Transducer:
Range:
Operating temp:
Accuracy:
Temperature drift:
Supply voltage:
Power consumption:
6.7
The pressure sensor board
183014B
The pressure sensor is temperature stabilised
at 60oC
800 to 1100 hPa (mB)
-40°C to + 85°C
<1 hPa (mB)
Typically <0.15 mB/°C
9 - 12 V nominal
Approx. 10 mA at 12 V
Rainfall Sensor
The tipping bucket raingauge should be positioned horizontally at least twice the
height of any obstruction (weather station tripod) away from the obstruction.
Connect it to the 4-pin socket via the 9 m cable supplied.
The tipping bucket is a well proven method of monitoring rainfall whith
a divided bucket assembly mounted on pivots.
Page 45 of 68
NOMAD Portable Weather Station
Users Handbook
Standard Sensors
The bucket assembly is adjusted to
tip each time an amount of water
proportional to 0.2 mm of rainfall has
collected in one or other side of the bucket.
Therefore, each time the bucket tips, a signal
proportional to precisely 0.2 mm of rainfall is
sent to the logger.
The gauge has a body and funnel
constructed of aluminium alloy, with an
accurately machined “Septum Ring”.
The aluminium base plate is
equipped with levelling screws and a spirit
level for precise adjustment.
02024
6.7.1
Rainfall Sensor Specification
Part number:
Transducer:
Aperture:
Resolution:
Accuracy:
Capacity:
Operating temp:
Supply Voltage:
Power Consumption:
Output calibration:
Cable:
6.8
Figure 16: Tipping bucket rainfall
sensor
187060D
Tipping Bucket
400 cm²
0.2 mm per tip
±1%
Unlimited
1°C to 85°C
7 - 20 V DC (supplied from environmental
case)
Typically 2-3 mA
Debounced 0 to 5 V pulses.
9 m cable supplied
Soil Temperature Sensor
This is an additional sensor available for use
with “Special” Nomad Weather Systems.
The soil temperature sensor is
01061
connected by cable to an auxilliary junction
box. Clip this box to the lower part of the
tripod, and connect the output cable to the
Figure 17: Soil temperature sensor
7-pin socket in the bottom panel of a special
system environmental case.
The sensor is designed to be installed at any depth, by digging a small
hole to the required depth, locating the sensor then back filling. This technique
avoids the requirement for multi-length probes, and is simpler and more reliable
than attempting to insert long thin probes into hard soil. The sensor may be
used to measure ground surface temperature by installing in the top 1 cm of the
soil sample.
6.8.1
Soil Temperature Sensor Specification
Part number:
Sensor type:
Measuring range:
Calibrated accuracy:
Supply voltage:
Power consumption:
Output calibration:
Page 46 of 68
120620B
Semi conductor current generator
-40°C to 60°C
±0.5°C between -20 to + 50°C
7 to 15 V
Typically <1 mA
Nominally 1.5 V at 0°C and 1.8 V at 50°C
NOMAD Portable Weather Station
Users Handbook
Cable:
6.9
Optional Sensors
Units are individually calibrated and provided
with offset and multiplier values
3 m cable supplied
Leaf Wetness Sensor
This is an additional sensor available for use
with “Special” Nomad Weather Systems.
The leaf wetness sensor is
01062
connected by cable to an auxilliary junction
box. Clip this box to the lower part of the
tripod, and connect the output cable to the
Figure 18: Leaf wetness sensor
7-pin socket in the bottom panel of a special
system environmental case.
The leaf wetness sensor is a low power electronic module in a
waterproof probe, where the active part of the probe consists of three carbon
electrodes. In effect, the sensor is a digital device, being either ON or OFF with
virtually no graduation between the two states. Free water on the sensing
element changes the conduction, switching the output from OFF to ON.
The device is not sensitive to changes in atmospheric humidity.
The installed device may be specified as optimised for either rain, frost
or dew. The rain sensing version incorporates a heater to dry the surface once
rain has ceased, and also to eliminate it’s sensitivity to the formation of dew.
The sensor will respond to a single 1 mm diameter droplet of distilled
water.
6.9.1
Leaf Wetness Sensor Specification
Part number:
Transducer:
Length:
Supply voltage:
Power consumption:
Output Calibration
Sensing area
Operating temp.
Cable:
187081B
Three element carbon electrode
150 mm
9 - 18 V DC
5 mA Max
Wet =1.5 V approximately
Dry = 0 V
15 x 30 mm
-10°C to +55°C
3 m cable supplied
6.10 Grass Temperature Sensor
This is an additional sensor available for use
with “Special” Nomad Weather Systems.
The “grass minimum” sensor is
connected by cable to an auxilliary junction
box. Clip this box to the lower part of the
tripod, and connect the output cable to the
7-pin socket in the bottom panel of a special
system environmental case.
Grass minimum temperature
measurement is achieved by locating a
shielded thermometer at a fixed height
above the grass, supported on a small frame.
02025
Figure 19: Grass temperature sensor
Page 47 of 68
NOMAD Portable Weather Station
Users Handbook
Optional Sensors
Grass Temperature Sensor Specification
Part number:
Sensor type:
Measuring range:
Calibrated accuracy:
Supply voltage:
Power consumption:
Output calibration:
Cable:
Page 48 of 68
120650B
Semi conductor current generator
-40°C to 60°C
±0.5°C between -20 and +50°C
7 to 15 V
Typically <1 mA
Nominally 1.5 V at 0°C and 1.8 V at 50°C
Units are individually calibrated and provided
with offset and multiplier values
3 m cable supplied
NOMAD Portable Weather Station
Users Handbook
7.
Sensus Data Logger
THE SENSUS DIGITAL DATA LOGGER
WARNINGS !
The SENSUS Logger contains no user serviceable components. If an
electrical fault is suspected the instrument must be returned to Casella
CEL for repair.
The Logger should not be dropped or subjected to mechanical
shock. Failure to comply will render the warranty invalid.
7.1
Brief Introduction to the Sensus Data Logger
The SENSUS Digital Data Logger from Casella CEL is a professional instrument
specifically designed to monitor and record measurements from a comprehensive array of sensor technologies, whether measuring process temperatures
using simple resistance thermometers or airport traffic noise levels from a sound
level meter the SENSUS Logger is more than capable.
From beginning to end the SENSUS has been designed with the user in
mind.
Figure 20: The Sensus Data Logger
Secure spring loaded connector blocks attach the all-important sensor
outputs to the SENSUS input stage, precision analog circuitry transfers these
values to the high-speed microprocessor which processes and stores the data in
reliable Flash memory.
A comprehensive set of alarm functions allow the Sensus Logger to
make decisions based on a wide range of input data, the results of these
decisions can then be broadcast to other computer/control systems via modem
or to specified operators using a GSM modem/SMS service.
The Sensus is designed to start processing/logging data as soon as
power is applied to it and to continue to do so until power is removed. This
means that should power to the logger be interrupted for any reason, the unit
will recover and continue collecting data when power is restored without any
user intervention.
When the Sensus Logger is powered-up, it re-configures itself
automatically, based upon a set of operating parameters held in its internal
profile. Once the contents of the profile have been processed the logger begins
its task of collecting/logging data.
Most aspects of the logger’s operation can be changed by the user,
either by the menu system accessed via hyperterminal or the command line
interface. Both of these configuration tools are accessible via the RS232
command interface. The menu system is more useful for manual reconfiguration
where a few parameters are to be changed or a new sensor added. The
command line interface is of more use where an automatic configuration is
Page 49 of 68
Sensus Data Logger
NOMAD Portable Weather Station
Users Handbook
needed and it is this approach that is used by the Online Pro application to
provide automated configuration. The menu system is activated by default but it
can switch between the two as and when required.
While the Sensus Logger is running it is at all times performing a series
of tasks in the background.
Sensor scanning:
This task is performed at regular intervals
determined by the period set in the profile.
Each time it runs fresh data is collected from
the attached sensors, this data is in turn
processed to provide the values logged by the
system and used in alarm comparisons.
Logging:
Again, this task is performed at an interval
defined in the profile. While running, all data
values marked to be logged are moved to a
buffer store then written either to the internal
memory or to external CompactFlash™ card.
Alarms:
At fixed intervals current data values are
compared against active alarm channels and
alarm states and actions are updated at this
time.
A comprehensive description of Sensus Operations will be found in the
“Sensus Digital Data Logger - User Manual”.
7.2
Commands
A detailed description of all the commands available on the Sensus Logger is
beyond the scope of this manual. When this information is essential to your
particular application, please contact Casella CEL and request a copy of the
document: “Sensus - A Programmers Guide”.
7.3
Logging
By default, the Sensus logs data to its internal record store at an interval
specified by the user. If the logger detects the presence of a compatible
CompactFlash™ card, it automatically uses this instead. When the card is
removed, the logger reverts to using its internal store.
For information on the use of CompactFlash™ cards please refer to
Section 7.6.
The logger operates with two logging rates, one normal rate and one
fast rate. Switching between these two rates is handled automatically by the
alarm system. For further information about alarms, please refer to the Sensus
User Manual. Both logging rates can be set to any value between 5 seconds and
24 hours.
Any data channel that has its “log active” flag set will be included when
the next log event occurs. Logging globally can be disabled/enabled by changing
the “log active” flag held in the logging configuration. This allows logging to be
suspended temporarily without changing all the channel flags.
7.3.1
Internal Capacity
The Sensus Logger has 512 kBytes of internal Flash storage available to hold
logged information. This store is updated in a first-in-first-out manner so that
the earliest records are always being replaced with the newest ones. While this
means the logger will never stop recording data, only a set period of time will
remain available for collection at any time.
The number of records held and the period of time covered by the
internal store depend on both the number of channels being logged and the
logging interval.
Page 50 of 68
NOMAD Portable Weather Station
Users Handbook
Sensus Data Logger
The following equations let the user calculate the record capacity and
the store duration.
524288
= Re cord Capacity
7 + ( Channels x 4 )
Re cord Capacity x Logging Interval = Store Duration
These equations should be used only as a guideline as the logging interval may
change during operation, especially if the “fast mode” option has been enabled
in the alarms.
Some example internal result capacities are shown in Table 1.
Table 1: Internal Store Capacity (512 kB)
Number of
Channels
7.3.2
Logging Interval
(mins)
Record Capacity
Storage Capacity
1
1
47662
33 days
1
10
47662
33 days
1
60
47662
5.4 years
7
1
14979
10 days
7
10
14979
104 days
7
60
14979
1.7 years
External Capacity
When logging to external media such as CompactFlash™ cards, the store is
updated with data being added to the card until it becomes full. Logging will
then stop until the card has been replaced with an empty one.
The following equations let the user calculate the record capacity and
the store duration for external media.
( Capacity in MB x 1048576 x 0.95 )
= Re cord Capacity
7 + ( Channels x 4 )
Re cord Capacity x Logging Interval = Store Duration
Again, these equations should be used only as a guideline, for the same reasons
as given for the internal store and also because of the approximation that only
95% of the card’s capacity is available for actual data storage. Some example
CompactFlash result capacities are given in Table 2.
Table 2: External Store Capacity (16 MB)
Number of
Channels
Logging Interval
(mins)
Record Capacity
Storage Capacity
1
1
1448941
2.7 years
1
10
1448941
27 years
1
60
1448941
165 years
7
1
455381
316 days
7
10
455381
8.6 years
7
60
455381
51 years
Page 51 of 68
NOMAD Portable Weather Station
Users Handbook
Sensus Data Logger
7.4
Input Connections
Nomad Weather Stations are normally delivered with all required channels
connected to the Sensus unit. However, in the event of cables becoming
disconnected, the following sections give guidance for re-connection.
Remove the connector cover plate to gain access to the input
connector array. It consists of 3, 4 and 5-way detachable connector blocks to
which sensor outputs are wired. The combination of spring-clamp technology
and plug-in modules allow for rapid and secure attachment of a variety of
sensors.
Channel numbering starts from the left-side, bottom-row and
alternates between the bottom and top row, from left to right. In addition the
pins of each connector are numbered from left to right. A copy of this
connector/pin assignment diagram is located on the reverse of the connector
cover plate for reference in the field. (Also see Figure 28: Chapter 9.)
7.4.1
Wire Preparation and Insertion
To insert a wire into a
spring terminal, first strip
back the insulation
leaving 10 mm of bare
wire exposed as shown in
Figure 21.
Using a small
flat headed screw- driver
(or similar) fully depress
the orange plunger
located above the hole
into which the wire is to
be inserted and insert the
wire into the hole as far
as it will go, as shown in
Figure 22.
Release the
orange plunger and the
wire is held captive by
the connector (Figure 23).
A gentle tug on
the wire will confirm that
it is held firmly.
7.4.2
Figure 21: Stripped
conductor
10 mm
Figure 22 :
Depressing clamp
while inserting
Stripped
iConductor
01083
Remove the
iscrewdriver to
iirelease the
iiiclamp and
iiiigrip the
iiiiiconductor
Use a small
iscrewdriver to
iidepress the
iiiorange clamp
iiiiwhile inserting
iiiiithe stripped
iiiiiiend of the
iiiiiiiconductor
01085
Figure 23: Conductor firmly
held
01084
Standard Sensus Settings for Nomad Systems
Table 3: Standard configuration and channel limits used for Nomad Systems.
Channel
Description
Units
Type
Information
Page 52 of 68
1
Rainfall
2
3
Wind speed Pressure
4
Direction
5
Air
temperature
o
mm
m/s
mbar
degrees
C
Counter
Analog
Analog
Analog
Analog
Single ended
Single
Pulse count Frequency Single
Gain x 1
ended
Reset at
Reset on ended
Gain x 1 No current
midnight scan
Gain x 1
No current No current source
source
source
6
7
Humidity
Solarimeter
%RH
Analog
Single
ended
Gain x 1
No current
source
W/m2
Analog
Single
ended
Gain x 10
No current
source
NOMAD Portable Weather Station
Users Handbook
Channel
Input
Channel
Display
Format
Polynomial
Enabled
Logged
Minimum
Limit
Maximum
Limit
1
1
2
2
###.#
##.#
0, 0.2
Sensus Data Logger
3
3
####.#
4
4
5
5
6
6
7
7
###
+##.#
###.#
####.#
0, 0.07246 350, 500
(sensor
specific)
0, 199
-40, 100
0, 100
Yes
Yes
0.0
Yes
Yes
0.0
Yes
Yes
800.0
Yes
Yes
0.0
Yes
Yes
-40.0
Yes
Yes
0.0
-27,
11990.4
(sensor
specific)
Yes
Yes
0.0
100.0
100.0
1100.0
360.0
+60
100.0
2000.0
General Information
Station ID:
Nomad XXXXXX, (XXXXX is replaced with a
serial number when profile transferred)
Station number:
1
Sensor scan rate:
Default: 5 seconds
Fast: 2 seconds
Logging rate:
Default: 5 minutes
Fast: 30 seconds
Logging enabled:
Yes
Alarms defined:
None
Alarms enabled:
No
Serial communications All ports 9800, 8, 1, N, no flow control
Modem definition:
Default settings
Modem enabled:
No
Auto transmit mode enabled:
No
Idle time:
60 seconds
Transmit period:
20 seconds
Radio enable:
Active low (for interface to low power radio).
7.5
Sensus Communications
The Sensus Logger is fitted with several communications interfaces, two RS 232
and one RS 485. These interfaces allow both control of the logger via different
media and data to be logged from other instruments with similar interfaces.
7.5.1
RS 232 Command
The primary command interface to the Sensus Logger is located on the right
hand end of the logger case, marked “RS 232 Command". This 9-way D-type
connector has the same pin-out as a similar 9-way connector found on most
modern PCs. The pin connections for the RS 232 Command 9-way D-type
connector are as follows.
Pin
Assignment
2
Receive data (out)
3
Transmit data (out)
4
DTR (out) (linked internally to 7)
5
Ground
7
RTS (out) (linked internally to 4)
8
CTS (in)
Page 53 of 68
Sensus Data Logger
NOMAD Portable Weather Station
Users Handbook
It is to this port that a PC is usually connected in order to
program/interrogate the logger. The Sensus Logger is shipped from Casella CEL
with this primary command interface set to the following parameters:
Default parameters - Primary command interface
Baud rate
9600
Data bits
8
Parity
None
Stop bits
1
Handshake
None
All of these parameters may be changed using commands built into the logger
software interface.
The same command channel is also accessible from the connector
array. This time the interface signals appear on a 5-way spring terminal block.
This is of use where power and communication are supplied via a fixed
cable. The communications signals can be connected to a 9-way D-type
connector without the need to prepare the ends of the cable.
The pin connections for the RS 232 Command - Spring terminal
connector are as follows.
Pin
Assignment
1
Ground
2
Transmit data (out)
3
Receive data (out)
4
DTR (out) (linked internally to 7)
5
CTS (in)
7.5.2
Sleep Mode
When enabled, the logger will conserve power by switching off the RS 232
interface circuitry after a period of inactivity. While in this state the logger is still
able to detect the arrival of characters over the command interface and when
the first character arrives, the logger will waken and switch on the RS 232
interface again.
However this can mean that the logger may not interpret the
first character correctly.
7.5.3
Display
The Sensus Logger supports a 2-line by 20-character LCD module, 4 keys and a
buzzer. The LCD incorporates a back light that is lit for a few seconds on every
key press.
The display provides information about the internal status of several of
the key functions of the logger, these include date/time, active channels and
logging summary.
The LCD will always show something, unless the logging period has
been set to one minute or more, whereupon an internal power-save function
comes into effect and the LCD becomes blank, switching on again only as data is
logged.
Should the LCD be blank, it can be reactivated immediately (without
having to wait for a log cycle) by pressing any one of the front panel keys.
7.6
CompactFlash™ Cards
CompactFlash memory cards are lightweight, small form factor, removable data
storage devices built around reliable Flash storage technology.
The Sensus Logger’s integrated CompactFlash slot allows it’s storage
capacity to be increased and in addition provides a compact and reliable method
of transporting data from site for analysis. The slot is located on the right-hand
Page 54 of 68
NOMAD Portable Weather Station
Users Handbook
Sensus Data Logger
side of the unit directly above the primary RS 232 9-way D-Type port as shown
in Figure 2 (Chapter 2).
The unit has been designed to recognise CompactFlash ATA cards and
treat them as IDE hard disk drives, thereby simplifying the process of data
transfer to PCs. The same card can be connected to a suitably equipped PC and
the files transferred without the need for specialist software.
The current technical specification for suitable CompactFlashTM cards
is outlined below.
Operating voltage
3.3 V DC
Temperature range
-20 to +70oC
Physical size
CompactFlash CF Type 1
Capacity
4 MB to 256 MB
Note: capacity is limited by file system, only
FAT12 and FAT16 are supported.
A card can hold data from only one logger at any time, irrespective of
the capacity of the card or the amount of data it holds. When a logger
writes data to the card, it also writes an electronic signature uniquely
identifying this logger. From then on (or until the card is erased) the
card can be used only with this particular logger.
The electronic signature also identifies the logger configuration
used to create any data on the card. If the configuration has changed
since the card was last used, then the signature will not be accepted as
this could result in a misinterpretation of the stored data later on. This
ensures the integrity of the data until off-loaded to a PC.
Before use, all cards must be formatted on a suitable PC.
The logger automatically checks the type of card, signature and
configuration every time a new card is inserted. The correct orientation for
inserting the card is shown in Figure 2 (Chapter 2).
Having accepted the card as suitable for data storage, the logger
transfers any stored data to the card. In addition while the card remains
inserted all new data will be logged to the card, rather than stored internally.
The card can be removed any time the logger is not actively writing
new data to it. During these periods, the LCD shows a card busy message and
the card should not be removed.
Once removed, the card can be inserted into a suitably equipped PC
and the data and control files copied in exactly the same way as any other disk
drive.
Page 55 of 68
Sensus Data Logger
Page 56 of 68
NOMAD Portable Weather Station
Users Handbook
NOMAD Portable Weather Station
Users Handbook
8.
Communication
COMMUNICATION
On delivery, the Nomad systems are pre-configured for manual data download
9
via cable (provided) directly to a PC. Other telemetry options are illustrated in
Figure 24. They are as follows.
Direct cable link
Full control and real-time data download
Compact Flash cards
Simple download of stored data
Direct Cable:
Continuous Two-Way Communication
Nomad
Units
PC
Running
Online Pro
Software
CompactFlash Card:
Download Data Only During Visit
Nomad
Unit
PC
Running
Online Pro
Software
High Power Radio with Landline
to Nomad / GSM:
Continuous Two-Way by Radio
Continuous Two-Way when Dialled by GSM
Nomad
Units
PC
Running
Online Pro
Software
Passive High or Low Power Radio:
Continuous Data Download Only
Nomad
Units
PC
Running
Online Pro
Software
02005
Figure 24: Nomad to PC communication possibilities
Note 9:
These options can be ordered initially or fitted retrospectively by returning the system
to Casella CEL.
Page 57 of 68
NOMAD Portable Weather Station
Users Handbook
Communication
High power radio with power supplied to the nomad via landline
Full control and real-time data download
Passive high or low power radio
Continuous “near real-time” data download
GSM
Full control and real-time data download on
dial-up (customer to arrange contract etc.)
8.1
Direct Cable Link
A direct cable link is able to provide continuous full-time communication
between the Nomad weather station and the PC. Temporay connection is made
when visiting the Nomad unit to download stored data.
A simple permanent cable link can be used when the PC and Nomad
are located no more than 50 m (160 ft) apart, for example when the PC is in a
nearby shelter.
A land-line interface (Part number 142009C) is available for distances
up to 500 m. This is connected via a single cable (Part number W4/1602/4) that
carries both 24 V DC power for the Nomad unit and communication signals that
use the RS485 protocol. (Please consult Casella CEL for further details or when
greater distances are required.)
Operation with these methods of communication are described in
Chapter 3.
8.2
CompactFlash Cards
CompactFlash Cards enable a larger quantity of data to be stored by the Nomad
unit. The standard Sensus Digital Data Logger installed in a Nomad system can
store up to 516 kB of data. CompactFlash Cards can store up to 256 MB.
CompactFlash Cards also allow simple transfer of data when visiting
the Nomad unit, as the card can be removed - complete with data - and taken
back to the laboratory or office for downloading to the PC.
Inserting CompactFlash Cards is detailed in Section 2.3, operation is
described in Chapter 3, while brief technical details are given in Section 7.6.
8.3
High Power Radio Link
Casella CEL can supply a High Power
Radio link that communicates
between Nomad and PC over a
line-of site range up to 20 km (12
miles).
When the Nomad weather
station is powered via a landline, the
high power radio will be configured
at the factory, ready for use with
continuous two-way communication.
Control and data download will be as
described in Chapter 3.
When the Nomad system
Figure 25: The high power radio transmitter
must depend for power only on the
solar panel and internal battery, the high power radio will be configured at the
factory for use as a passive link. This will allow only one-way communication,
with data being transmitted continuously to the PC as described in Chapter 4.
8.3.1
High Power Radio Transmitter Specification
RF Frequency
RF Power
Page 58 of 68
400 MHz - 480 MHz
5 mW to 12 W
NOMAD Portable Weather Station
Users Handbook
Number of RF channels
Channel Separation
Modulation
Receiver Sensitivity
Antenna Connector
8.3.2
19200, 9600; 4800, 2400, 1200
600, 300, 150
8 bits
Odd, even, none
1
Gaussian minimum shift keying
RS232/RS422
10 kbits/sec, 5 kbits/sec
High Power Radio General Specification
DC Supply Voltage
DC Supply Current
Transmitting
Receiving
Stand By
Size without base plate
Size overall
Operating Temperature
8.3.4
17
25 kHz / 12 kHz
F3D
0.3 µV for 10 dB SINAD
BNC/TNC
High Power Radio Modem Specification
Interface Baud Rate
(standard)
(extended)
Data Word
Parity
Stop Bits
Modulation
Interface
Transmission speed
8.3.3
Communication
8.5 V to 14 V (12 V nominal)
330 mA
80 mA
0.1 mA
114 mm x 65 mm x 26 mm
140 mm x 65 mm x 26 mm
-10 to +55oC
High Power Radio LED Indicators
Three LEDS on the front of the modem indicate the following states:
TX Green
On when modem is transmitting data.
RX Green
On when an RF carrier of greater than
0.9 µV is detected by the modem.
This threshold can be adjusted by a
potentiometer inside the modem.
POWER Red
On when power is applied to the modem.
8.3.5
High Power Radio Standard Settings
The radio modem is supplied pre-configured with the following settings:
Baud Rate
9600
Parity
None
Stop bits
1
Local
Echo
Repeater mode
OFF
XON /XOFF
OFF
RTS/CTS
OFF (no handshake)
Error Correction
OFF
Address Mode
OFF
Transmitter Test Mode OFF
Transmission speed
SLOW (5K bits/sec)
RF Frequency (UK)
458.925MHz
RF Power
500 mW
8.4
Low Power Radio Link
Casella CEL can supply a Low Power Radio link that communicates between
Nomad and PC over a line-of site range up to 2 km (1.2 miles). It allows only
Page 59 of 68
NOMAD Portable Weather Station
Users Handbook
Communication
one-way communication, with data being transmitted continuously to the PC, as
described in Chapter 4. The default rate is to download at 20 second intervals.
Nomad systems fitted with a Low Power Radio link are delivered
pre-configured ready for use.
The low power radio operates at a nominal frequency 458 MHz, on
eight channels that can be selected by the user. Channel selection is
accomplished by setting a 3 X 3 pin header on the Transmitter Module as
detailed in Table 4.
Table 4: Selection of low power radio channels
CS0
CS1
CS2
Channel
Frequency (MHz)
1-2
1-2
1-2
7
458.6000
1-2
1-2
2-3
6
458.5750
1-2
2-3
1-2
5
458.5625
1-2
2-3
2-3
4
458.5500
2-3
1-2
1-2
3
458.5375
2-3
1-2
2-3
2
458.5250
2-3
2-3
1-2
1
458.5125
2-3
2-3
2-3
0
458.5000
These frequencies are those programmed for UK standard MPT1329
license exempt equipment.
8.4.1
Low Power Radio Transmitter Specification
Frequency range
Frequency stability
Number of RF channels
RF output power
into 50 Ω
Adjacent channel power
TX switching time
Modulation input
analogue
digital
Frequency response
Deviation with 12.5 kHz
channel spacing
Channel switching delay
Channel spacing
Modulation type
Spurious emissions
conducted & radiated
Supply voltage
Supply current at 7.2V
Interface connections
RF connection
Operating temperature
Storage temperature
Size overall
Weight
Type approval
Page 60 of 68
458.5 to 458.6 MHz (8 channels)
±2 ppm
RS232 or 1 of 8 parallel select
100 mW
<200 mW (-37 dBm)
<60 ms
200 mV to 5 V p-p AC coupled
+3 to 12 V square wave DC coupled
9 Hz to 3 kHz at -3 dB
±1.5 kHz nominal (±2.5 kHz max)
<50 mS across switching bandwidth
12.5 kHz/20 kHz/25kHz available
FID/F2D/F3D
In accordance with ETS/CEPT specifications
6 - 15 V DC -ve earth
<100 mA for 100 mW output
2- and 10-pin 0.1" header
3-pin 0.1" header
-20°C to +55°C
-30°C to +70°C
60 x 39 x 15 mm
2.36 x 1.53 x 0.59 inches
30 gm
Designed to meet ETS 300/220 and MPT 1329
NOMAD Portable Weather Station
Users Handbook
Communication
General facilities
8.4.2
+5 V output
Analogue and digital inputs
Direct TT500 replacement.
Low Power Radio Receiver Specification
Frequency range
Frequency stability
Number of RF channels
Channel switching delay
Channel spacing
Modulation type
Spurious emissions
conducted & radiated
Supply voltage
Supply current at 7.2 V
Interface connections
RF connection
Operating temperature
Storage temperature
Weight
Size
458.5 to 458.6 MHz (8 channels)
±2 ppm
RS232 or 1 of 8 parrallel select
<50mS across switching bandwidth
12.5 kHz
F1D/F2D/F3D
In accordance with ETSICEPT specifications
6-15 DC, -ve earth
<40 mA
2- and 10-pin 0.1" header
3-pin 0.1" header
-20°C to +55°C
-30°C to +70°C
35g
60 x 39 x 15 mm
2.36 x 1.53 x 0.59 inches
Type approval
MPT1329
Sensitivity
<-115 dBm for 12 dB SINAD (12.5 kHz)
<-117 dBm for 12 dB SINAD (25 kHz)
(Measured with a flat audio response)
Image/spurii
>60 dB
Intermodulation response
rejection
>60 dB
Blocking
>75 dB
Intermediate frequencies 45 MHz and 455 kHz
Adjacent channel
selectivity
>60 dB for 12.5 kHz channel spacing
>70 dB for 25 kHz channel spacing
Audio response
9 Hz to 6 kHz at -3 dB (25 kHz channels)
Recovered audio level
>250 mV p-p (±20%) into 10 kΩ
Squelch type
Noise operated open collector output
General facilities
RSSI output (0.5 to +2 V nominal)
+5V output
Independent data output
8.5
GSM Link
Casella CEL can supply a GSM
modem (Global System for Mobile
communications) that
communicates via the GSM mobile
phone network. This arrangement
allows continuous two-way
communication, with control and
data download as described in
Chapter 3.
Please remember that
the GSM link operates via a
commercial carrier, so that
although continuous on-line
Figure 26: The GSM modem
Page 61 of 68
Communication
NOMAD Portable Weather Station
Users Handbook
operation is possible, line charges may have to be taken into
consideration.
The purchaser must obtain a suitable SIM card, and it is recommended
that this be sent to Casella CEL so that the Nomad system can be completely
configured, ready for use.
Normally the modem used with a GSM Nomad system will be
configured as a standard “Haynes compatible” unit as follows.
Initialisation
ATZ
Dial
ATD
Connect
connect
OK
ok
Busy
busy
No carrier
no carrier
No dialtone
no dialtone
No answer
no answer
When a different type of modem is to be used, these details may differ; refer to
data available from the modem supplier.
The rate that Online Pro communicates with a GSM modem may not be
the same as the speed set in the Sensus unit.
Page 62 of 68
NOMAD Portable Weather Station
Users Handbook
Power Supplies
9.
POWER SUPPLIES
9.1
Solar Power
The Sensus Logger incorporates a solar power regulator as standard. This can
operate with nominal 12 V solar panels with outputs up to 30 W. with a short
circuit current of no more than 2 A.
The BP Solar Panel suppled with the Nomad system has an output of 5
W. It should be wired to the “solar” connector identified in Figure 27.
The pin assignments for the solar panel connector are as follows.
Pin
Assignment
1
Solar panel negative terminal,
2
Solar panel positive terminal.
9.2
Battery
The Sensus Logger incorporates a 12 V lead-acid battery charger as standard.
This charger is designed to operate in conjunction with a nominal 12 V lead-acid
battery and supplies a maximum charge current of 0.5 A.
The battery should be wired to the “batt” connector identified in Figure
28.
The pin assignments for the 12 V lead-acid battery connector are as
follows.
Pin
Assignment
1
Battery negative terminal,
2
Battery positive terminal.
AN1
AN3
AN5
AN7
AN9
AN11
CNT1
CNT3
ALARMS
CHARGER
0V
-A3
+A3
+Vsw
0V
-A5
+A5
+Vsw
0V
-A7
+A7
+Vsw
I1
0V
-A9
+A9
+Vsw
I3
0V
-A11
+A11
+Vsw
I5
0V
C1
+V
0V
C3
+V
0V
AL1
AL2
A2
0V
0V
-A
0V
TXD
RXD
DTR
CTS
RS232
-B
A1
AN.OUT
SOLAR RS485
BATT
+CHG
+CHG
C4
CNT4
-SP
+SP
C2
CNT2
0V
0V
0V
-A12
+A12
+Vsw
I6
AN12
+CHG
+CHG
0V
-A10
+A10
+Vsw
I4
AN10
0V
0V
0V
-A8
+A8
+Vsw
I2
AN8
VSS
0V
-A6
+A6
+Vsw
AN6
+V
0V
-A4
+A4
+Vsw
AN4
+V
0V
-A2
+A2
+Vsw
AN2
0V
-A1
+A1
+Vsw
Solar Panel connector
01072
Battery connector
Figure 27: Solar panel and battery connection (in the Sensus logger)
9.3
Direct Landline Connection
Power for the Nomad unit can be supplied via a land-line interface (Part number
142009C) which is suitable for distances up to 500 m. The connection is made
via a single cable (Part number W4/1602/4) that carries both 24 V DC power for
the Nomad and communication signals. (Please consult Casella CEL for further
details or when greater distances are required.)
Page 63 of 68
Power Supplies
Page 64 of 68
NOMAD Portable Weather Station
Users Handbook
NOMAD Portable Weather Station
Users Handbook
Routine Care
10.
ROUTINE CARE
10.1 General
Make sure all components are kept clean and free from staining, algae etc.
Cleaning should be carried out using a soft damp cloth.
If the Nomad is to be left on location for long periods, the tripod and
metal parts may be wiped with mild detergent, and possibly a small quantity of
disinfectant, to discourage algae growth.
Solvents or other cleaning products must not be used on the
environmental enclosure.
When dismantling the system after use, if the components are wet,
make sure they are dried before re-placing them in the carrying bags. If this is
not possible, dry them on return to the laboratory or office, and dry the bags
too !
10.2 The Rain Gauge
Check for debris, leaves, etc and clear out the funnel regularly.
Page 65 of 68
Routine Care
Page 66 of 68
NOMAD Portable Weather Station
Users Handbook
NOMAD Portable Weather Station
Users Handbook
11.
Service
SERVICE AND WARRANTY
To ensure its conformity with the specification, this instrument is thoroughly
inspected and it’s accuracy verified prior to dispatch. All technical information is
filed under the instrument serial number, which should, therefore, be quoted in
any correspondence.
The manufacturers undertake to rectify any defect in the instrument
that is directly attributable to faulty design or assembly, and which becomes
apparent during the warranty period. In order to take advantage of this
warranty, the instrument must be returned, carriage paid, to the manufacturer’s
factory or accredited agent, where necessary repairs will be carried out.
The warranty period runs for 12 months from the date of receipt of
goods, with exceptions on certain specialised components supplied by other
manufacturers which may be warranted for shorter or longer periods by their
actual manufacturers. In all such cases, the benefit of these undertakings will be
passed on to the user.
CASELLA CEL’s liability is limited to items of their own manufacture,
and they do not accept liability for any loss resulting from the operation or
interpretation of the results from this equipment.
To obtain repair under warranty or for servicing, the instrument should
be packed and returned in it’s original packing or an equivalent. Insure to full
value and ship pre-paid to Casella CEL Customer Services Department at
Bedford. For repair or service outside the United Kingdom, please return to
Casella CEL’s locally appointed distributor.
Please include a letter giving full details with your packing list. It
should contain the following information:
Instrument Type(s), Serial Number(s) and Firmware
Version Number(s),
Customer name and address,
Contact name and phone number,
Details of any PC and Software involved, including
Version Number(s),
Reason for returning the equipment with a detailed
description of the fault,
List of any error messages that may have been displayed.
The necessary adjustments or repairs will be carried out, and the instrument
returned as soon as possible.
After the warranty has expired (except on approved accounts) service
work is undertaken against quotations, and all packing and transit costs are
charged extra.
Casella CEL’s in house service department offers a comprehensive
range of repair and calibration services, designed to effect a fast and efficient
back-up for all our products. The Service Department is operated under the
scope of our BSI registration for products manufactured by us. We will however,
undertake the repair of other manufacturers equipment.
For further information please contact the service department at our
Bedford headquarters, who will be happy to provide quotations for individual
repairs or provide annual maintenance under contract.
Because of their policy of continuous product development, Casella CEL reserves the
right to change the contents of this Handbook without notice.
Page 67 of 68
Service
Page 68 of 68
NOMAD Portable Weather Station
Users Handbook