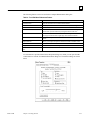
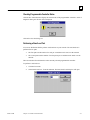
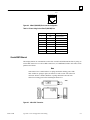
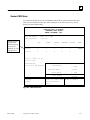
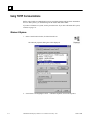
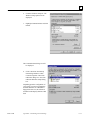
1
GE Fanuc Automation CIMPLICITY Systems Products CIMPLICITY® Display Station User's Manual GFK-1220B February 1997 GFL-002 Warnings, Cautions, and Notes as Used in this Publication Warning Warning notices are used in this publication to emphasize that hazardous voltages, currents, temperatures, or other conditions that could cause personal injury exist in this equipment or may be associated with its use. In situations where inattention could cause either personal injury or damage to equipment, a Warning notice is used. Caution Caution notices are used where equipment might be damaged if care is not taken. Note Notes merely call attention to information that is especially significant to understanding and operating the equipment. This document is based on information available at the time of its publication. While efforts have been made to be accurate, the information contained herein does not purport to cover all details or variations in hardware or software, nor to provide or every possible contingency in connection with installation, operation, or maintenance. Features may be described herein which are not present in all hardware and software systems. GE Fanuc Automation assumes no obligation of notice to holders of this document with respect to changes subsequently made. GE Fanuc Automation makes no representation or warranty, expressed, implied, or statutory with respect to, and assumes no responsibility for the accuracy, completeness, sufficiency, or usefulness of the information contained herein. No warranties of merchantability or fitness for purpose shall apply. The following are trademarks of GE Fanuc Automation North America, Inc. Alarm Master CIMPLICITY CIMPLICITY PowerTRAC CIMPLICITY 90–ADS CIMSTAR Field Control GEnet Genius Genius PowerTRAC Helpmate Logicmaster Modelmaster ProLoop PROMACRO Series Five Series 90 ©Copyright 1997 GE Fanuc Automation North America, Inc. All Rights Reserved. ii Series One Series Six Series Three VuMaster Workmaster Product Identification Information CIMPLICITY Display Station Products This manual provides operating information for the following CIMPLICITY Display Station products: Touch Display (IC751ATS200 and IC751ATS350), Touch Station (IC751BTS200, IC751BTS300 and IC751BTS350), and Glide Station (IC751BGP200 and IC751BGP300). The following information should be recorded and retained for future reference. The catalog and serial numbers are located on the back of the unit enclosure (see sketch below). This information is also provided on the data sheet provided with your Display Station product. Keep the data sheet, because it contains additional important information about the Display Station product. Product name: _________________________________________________________ (Touch Display, Touch Station, Glide Station) Catalog Number: IC_______________________________________________________ Serial Number: _________________________________________________________ Date of Purchase:_________________________________________________________ Catalog Number Serial Number RFI Statement GFK-1220B iii Preface Revisions to This Manual Changes made in this revision (GFK-1220B) describe new features of the CIMPLICITY Display Station system. Additionally, corrections have been made where necessary. The following list describes the major revisions in this manual, as compared to the previous version (GFK-1220A). • The Display Station products now incorporate release 3.0 CIMPLICITY MES/SCADA and HMI for Windows software and either Microsoft Windows® 95 or Microsoft Windows NT software (depending on model). (Chapter 4) • Mounting hole dimensions drawing for Touch Station and Glide Station units has been revised to show correct center-to-center distance between holes of 11.25" (27.94mm). (Figure 2-6) • Phone numbers for Customer Support have been revised (Chapter 1). Content of This Manual Chapter 1. Introduction: Presents an overview of the CIMPLICITY Display Station system. Chapter 2. Getting Started: Provides basic information needed to install your CIMPLICITY Display Station system and get it running. Chapter 3. Copying a CIMPLICITY Project to a Runtime System: Provides instructions for copying a project from the CIMPLICITY configuration cabinet. Chapter 4. Running CIMPLICITY Software: Provides an overview of essential tasks performed with CIMPLICITY software. Chapter 5. Installing Memory Upgrades: Provides instructions for upgrading the Display Station memory. Chapter 6. System Operation: Presents details pertaining to the operation of specific Display Station features that are not covered in Chapter 2. Chapter 7. SNP Device Communications: Describes hardware setup for Series 90 Protocol (SNP) communications between the Display Station and a Series 90 PLC. Chapter 8. TCP/IP Communications: Describes hardware setup for TCP/IP communications between the Display Station and a Series 90 PLC. Chapter 9. MODBUS RTU Device Communications: Describes how to set up multidrop communications using the MODBUS RTU protocol. Chapter 10. Diagnostics and Troubleshooting: Describes self-test diagnostics. Provides troubleshooting tables organized by symptom. Appendix A. Port Configuration and Cabling: Provides port configuration and cable assembly information for the CIMPLICITY Display Station products. iv Microsoft and Windows are registered trademarks of Microsoft Corporation. CIMPLICITY® Display Station User's Manual–February 1997 GFK-1220B Preface Appendix B. Computer Setup: Provides listings of the default settings as the CIMPLICITY Display Station was configured from the factory. Instructions for infrequently performed computer setup tasks are also provided. Appendix C. Customizing Network Settings: Provides setup information for Display Station communications. Appendix D. Interrupt Requests: Provides a table of IRQ assignments. Appendix E. Software System Overview: Describes the software that is bundled with the CIMPLICITY Display Station. Appendix F. Specifications: Summarizes the design, electrical, and physical specifications of the CIMPLICITY Display Station products. All of the products and features referenced in this manual may not be available when this manual is printed. For current availability of features and products, consult your local GE Fanuc distributor or GE Fanuc sales representative. GFK-1220B Preface v Preface Related Publications GFK-1221 CIMPLICITY® Display Station Products Important Product Information GFK-1189 CIMPLICITY® HMI for Windows NT™ and Windows® 95 Important Product Information GFK-1180 CIMPLICITY® HMI for Windows NT™/CIMPLICITY HMI for Windows® 95/CIMPLICITY Server for Windows NT™ Base System User Manual GFK-1181 CIMPLICITY® HMI for Windows NT™/CIMPLICITY HMI for Windows® 95/CIMPLICITY Server for Windows NT™ Device Communications Manual GFK-1134 CIMPLICITY® HMI for Windows NT™ Event Manager API Open Architecture Application Developer Guide GFK-1201 CIMPLICITY® HMI for Windows NT™/Windows® 95/Server for Windows NT Point Management API Application Developer Guide GFK-1202 CIMPLICITY® HMI for Windows NT™/Windows® 95/Server for Windows NT Device Communications Driver Toolkit API Application Developer Guide GFK-0262 Series 90™-70 Programmable Controller Installation Manual GFK-0263 Logicmaster 90™-70 Programming Software User’s Manual GFK-0265 Series 90™-70 Programmable Controller Reference Manual GFK-0356 Series 90™-30 Programmable Controller Installation Manual GFK-0466 Logicmaster 90™-30/20/Micro Programming Software User’s Manual GFK-0467 Series 90™-30/20/Micro Programmable Controllers Reference Manual GFK-1004 TCP/IP Ethernet Communications for the Series 90™-70 PLC GFK-1260 CIMPLICITY® Server for Windows NT Trending Option Operation Manual GFK-1396 CIMPLICITY HMI for Windows NT and Windows 95 CimEdit Operation Manual At GE Fanuc Automation, we strive to produce quality technical documentation. After you have used this manual, please take a few moments to complete and return the Reader's Comment Card located on the next page. Libby Allen Senior Technical Writer vi CIMPLICITY® Display Station User's Manual–February 1997 GFK-1220B Contents Chapter 1 Introduction..................................................................................................... 1-1 What You Receive ........................................................................................................ 1-2 CIMPLICITY Display Station Products ........................................................................ 1-2 System Configurations............................................................................................ 1-2 Accessories............................................................................................................. 1-4 Software Licenses................................................................................................... 1-5 Options and Upgrades............................................................................................. 1-6 System Architecture ...................................................................................................... 1-7 Hardware Description ................................................................................................... 1-9 Customer Support ....................................................................................................... 1-12 Chapter 2 Getting Started ................................................................................................ 2-1 Unpacking the Display Station Products ........................................................................ 2-2 Hardware Installation.................................................................................................... 2-3 Mounting the Display Station Unit .......................................................................... 2-3 Mounting Location ............................................................................................... 2-3 Equipment Panel Cutout ....................................................................................... 2-4 Display Station Connections ................................................................................... 2-7 Powering Up the Display Station................................................................................. 2-10 Controls and Indicators ......................................................................................... 2-10 First-Time Powerup .............................................................................................. 2-11 Windows 95 Systems .......................................................................................... 2-13 Windows NT Systems......................................................................................... 2-16 How to Use the Touch Screen...................................................................................... 2-17 Operation ............................................................................................................. 2-17 Touch Screen Settings........................................................................................... 2-17 Windows 95 Systems .......................................................................................... 2-18 Windows NT Systems......................................................................................... 2-19 How to Use the Touch Pad Mouse............................................................................... 2-20 About the Touch Pad Mouse................................................................................. 2-20 Operation ............................................................................................................. 2-20 Touch Pad Mouse Special Features....................................................................... 2-21 TouchMeter Icon ................................................................................................ 2-21 Scrolling Feature ................................................................................................ 2-21 Cursor Control Feature ....................................................................................... 2-21 Touch Pad Mouse Settings.................................................................................... 2-22 How to Operate the Keypad ........................................................................................ 2-25 Shutting Down the Computer ...................................................................................... 2-27 Moving the Display Station ......................................................................................... 2-28 Summary .................................................................................................................... 2-28 GFK-1220B vii Contents Chapter 3 Copying a CIMPLICITY Project to a Runtime System................................ 3-1 CIMPLICITY Project Structure .................................................................................... 3-2 Copying a Project from the CIMPLICITY Configuration Cabinet.................................. 3-3 Setting up a Network Connection with Direct Cable Connection..................................... 3-4 Copying a Project onto Floppy Disks............................................................................. 3-7 Windows 95 Systems.............................................................................................. 3-7 Windows NT Systems........................................................................................... 3-10 Chapter 4 Running CIMPLICITY Software................................................................... 4-1 Setting CIMPLICITY Options ...................................................................................... 4-2 Setting Project Options ........................................................................................... 4-2 Start as a Viewer................................................................................................... 4-3 Connecting to Another Computer ......................................................................... 4-3 Stop a Running Project ......................................................................................... 4-3 Add a Project to the Projects List .......................................................................... 4-4 Start a Project in the Projects List ......................................................................... 4-4 Setting Startup Options........................................................................................... 4-5 Setting Connection Options .................................................................................. 4-5 Selecting Bootup Projects...................................................................................... 4-6 Starting CIMPLICITY Automatically at Bootup ........................................................... 4-7 Disabling the Network Login Prompt (Windows 95 Systems) .................................. 4-7 Setting CIMPLICITY Startup Options.................................................................. 4-10 Selecting a Default Project and CimView Options ................................................. 4-12 Starting CimView Manually........................................................................................ 4-12 Setting Command Line Options for Windows 95 Systems...................................... 4-14 Setting Command Line Options For Windows NT Systems.................................... 4-15 Installing A Screen for CimView ........................................................................ 4-15 Using Command Line Options for Installed Screens ........................................... 4-15 Creating A New Project .............................................................................................. 4-16 New Project Options ............................................................................................. 4-16 Setting Project Properties ...................................................................................... 4-17 General Properties .............................................................................................. 4-18 Options Properties .............................................................................................. 4-19 Using the Project Wizard ...................................................................................... 4-19 Installing A Project ............................................................................................... 4-20 Running the Demo Project........................................................................................... 4-21 Changing the Computer Name..................................................................................... 4-22 viii CIMPLICITY® Display Station User's Manual–February 1997 GFK-1220B Contents Chapter 5 Installing Upgrades ......................................................................................... 5-1 Opening the Rear Panel................................................................................................. 5-2 Before disassembling your Display Station:.................................................... 5-2 Installing a Memory Upgrade ........................................................................................ 5-4 Specifications ......................................................................................................... 5-4 SIMM Installation Procedure .................................................................................. 5-5 For 32MB Upgrades ............................................................................................. 5-5 SIMM Removal Procedure...................................................................................... 5-8 Installing an ISA Board................................................................................................. 5-9 Specifications ......................................................................................................... 5-9 Installation Procedure ............................................................................................. 5-9 Removal Procedure............................................................................................... 5-11 Chapter 6 System Operation ............................................................................................ 6-1 External Keyboard Operation ........................................................................................ 6-2 Setting Up External Display Operation .......................................................................... 6-4 Changing Video Display Settings................................................................................... 6-4 Operating an External Mouse (Windows 95 Systems Only)............................................ 6-4 Installing Printer Drivers ............................................................................................... 6-5 Chapter 7 SNP Device Communications.......................................................................... 7-1 Overview ...................................................................................................................... 7-2 Supported Devices .................................................................................................. 7-2 Supported Memory Types....................................................................................... 7-2 SNP Hardware Configuration Requirements............................................................ 7-3 Series 90-30.......................................................................................................... 7-3 Series 90-70.......................................................................................................... 7-3 Required Documents............................................................................................... 7-4 Hardware Installation.................................................................................................... 7-5 Application Configuration ............................................................................................. 7-6 Port Configuration .................................................................................................. 7-6 General Properties ................................................................................................ 7-6 Default Properties ................................................................................................. 7-7 SNP Device Configuration ...................................................................................... 7-8 General Properties ................................................................................................ 7-8 Default Properties................................................................................................... 7-9 SNP Point Configuration ........................................................................................ 7-9 SNP Performance Notes.............................................................................................. 7-10 Impact on Series 90 Performance .......................................................................... 7-10 Performance Using the SNP Communications Enabler........................................... 7-10 Tuning SNP Protocol Throughput......................................................................... 7-10 GFK-1220B Contents ix Contents SNP Data Size...................................................................................................... 7-10 Time Between SNP Messages ............................................................................... 7-11 SNP Special Notes................................................................................................ 7-11 Logging Controller Information.......................................................................... 7-11 Enabling Protocol Level Debugging.................................................................... 7-12 Disabling Protocol Level Debugging................................................................... 7-12 Chapter 8 TCP/IP Communications ................................................................................ 8-1 Overview ...................................................................................................................... 8-2 Supported Devices .................................................................................................. 8-2 Supported Memory Types....................................................................................... 8-2 Hardware Configuration Requirements.................................................................... 8-3 Related Documents ................................................................................................. 8-3 Installation Verification Procedures ............................................................................... 8-4 Toggling Between Data Update Modes ................................................................. 8-6 Requesting Manual Reads of Domain Data ........................................................... 8-6 Writing Test Data to the Programmable Controller ............................................... 8-6 Checking Programmable Controller Status ........................................................... 8-7 Performing a Read Load Test................................................................................ 8-7 Performing a Write Load Test............................................................................... 8-9 Application Configuration ........................................................................................... 8-10 Port Configuration ................................................................................................ 8-10 General Properties .............................................................................................. 8-10 TCP/IP Properties ............................................................................................... 8-11 Device Configuration ............................................................................................ 8-12 General Properties .............................................................................................. 8-12 TCP/IP Properties ............................................................................................... 8-13 Device Point Configuration ................................................................................... 8-13 Chapter 9 MODBUS RTU Device Communications....................................................... 9-1 Overview ...................................................................................................................... 9-2 Supported Devices .................................................................................................. 9-2 Memory Types ....................................................................................................... 9-2 Series Six.............................................................................................................. 9-2 Modicon ............................................................................................................... 9-2 Double Precision Notes........................................................................................... 9-3 Required Documents............................................................................................... 9-4 Hardware Configuration Requirements.................................................................... 9-4 Hardware Installation.................................................................................................... 9-5 Controller Configuration ......................................................................................... 9-5 CIMPLICITY Hardware Configuration................................................................... 9-5 Connect the PC to the Controller ............................................................................. 9-5 Serial Port Configuration ........................................................................................ 9-5 Validating Communications........................................................................................... 9-6 x CIMPLICITY® Display Station User's Manual–February 1997 GFK-1220B Contents Application Configuration ............................................................................................. 9-7 Port Configuration .................................................................................................. 9-7 General Properties ................................................................................................ 9-7 Default Properties ................................................................................................. 9-8 Device Configuration .............................................................................................. 9-8 General Properties ................................................................................................ 9-8 Default Properties ................................................................................................. 9-9 Point Configuration............................................................................................... 9-10 Chapter 10 Diagnostics and Troubleshooting...................................................................10-1 Self-Test Diagnostics .................................................................................................. 10-2 System Test and Initialization ............................................................................... 10-2 System Configuration Verification ........................................................................ 10-2 Troubleshooting .......................................................................................................... 10-3 Powerup ............................................................................................................... 10-3 Display................................................................................................................. 10-4 Memory................................................................................................................ 10-5 Touch Screen........................................................................................................ 10-5 Touch Pad Mouse................................................................................................. 10-6 External Serial Mouse (Windows 95 Systems Only) .............................................. 10-7 Keyboard.............................................................................................................. 10-7 Communications ................................................................................................... 10-8 PLC/CPU Connection ......................................................................................... 10-8 MODBUS RTU Communications ....................................................................... 10-9 Network Communications................................................................................... 10-9 Printing .............................................................................................................. 10-10 Corrective Actions .................................................................................................... 10-11 Enabling Touch Screen Operation ....................................................................... 10-11 Reloading the Touch Screen Driver (Windows 95)............................................ 10-11 Reloading the Touch Screen Driver (Windows NT) .......................................... 10-14 Calibrating the Touch Screen .............................................................................. 10-14 Deleting the PS/2 Mouse Driver (Windows 95 Systems) ...................................... 10-16 Installing the Serial Mouse Driver ....................................................................... 10-18 Enabling Touch Pad Mouse Operation ................................................................ 10-20 How To Install the Driver Software................................................................... 10-20 Making an Installation Floppy Disk ........................................................... 10-20 Installing the Driver from Floppy Disk or the Hard Drive .......................... 10-20 Touch Pad Mouse Setup.................................................................................... 10-21 CMOS Checksum Error...................................................................................... 10-22 GFK-1220B Contents xi Contents Appendix A Port Configuration and Cabling .....................................................................A-1 Port Configurations...................................................................................................... A-2 Ethernet................................................................................................................. A-2 Coaxial BNC Ethernet ........................................................................................... A-3 AC Power.............................................................................................................. A-4 External Display .................................................................................................... A-4 External Keyboard................................................................................................. A-5 Serial Port 2 (COM2) ............................................................................................ A-6 Connector Layout ................................................................................................ A-6 Changing the Serial Port 2 Configuration (Touch Display Units Only) ................ A-7 Serial Port 1 (COM1) .......................................................................................... A-10 Parallel Port......................................................................................................... A-11 Accessory Port..................................................................................................... A-12 Cable Specifications................................................................................................... A-13 Cable Diagrams ......................................................................................................... A-14 Serial Port 2 (RS-422/232) .................................................................................. A-14 Serial Port 2 (Configured for RS-232).................................................................. A-15 Serial Port 1 (RS-232) ......................................................................................... A-16 Connecting to a PLC Directly Through Serial Port 1 ............................................ A-17 RS-422/RS-485 to RS-232 Converter .................................................................. A-19 Miniconverter Kit ................................................................................................ A-19 Communications Coprocessor Module Interface ................................................... A-20 Appendix B Computer Setup ..............................................................................................B-1 Default Settings ........................................................................................................... B-2 Standard CMOS Setup .......................................................................................... B-3 BIOS Features Setup ............................................................................................. B-4 CHIPSET Features Setup ...................................................................................... B-5 Loading BIOS Defaults................................................................................................ B-6 Changing the Default Boot Sequence ............................................................................ B-7 Setting and Changing the Setup Password..................................................................... B-7 Disabling the Setup Password ...................................................................................... B-8 Using the Hard Disk Configuration Utility .................................................................... B-9 Save & Exit Setup ....................................................................................................... B-9 Exit Without Saving..................................................................................................... B-9 xii CIMPLICITY® Display Station User's Manual–February 1997 GFK-1220B Contents Appendix C Customizing Network Settings........................................................................C-1 Installed Network Components ..................................................................................... C-2 Using Microsoft NetBEUI............................................................................................ C-3 Windows 95 Systems............................................................................................. C-3 Windows NT Systems............................................................................................ C-5 Using TCP/IP Communications.................................................................................... C-6 Windows 95 Systems............................................................................................. C-6 Windows NT Systems............................................................................................ C-8 Setting Up Direct Cable Connection (Windows 95 Systems) ......................................... C-9 Setting Up Direct Cable Connection on a CIMPLICITY Development System........ C-9 Installing Direct Cable Connection in Windows 95 ............................................... C-12 Appendix D Interrupt Requests ..........................................................................................D-1 Appendix E Software System Overview..............................................................................E-1 Windows Software Components ....................................................................................E-2 Windows 95 Software Components.........................................................................E-2 Windows NT Software Components........................................................................E-2 Enabling/Disabling Automatic Login in Windows NT....................................................E-3 CIMPLICITY Software Components ............................................................................E-4 Utilities Disk.................................................................................................................E-5 Installing Logicmaster 90 Software ...............................................................................E-5 Appendix F Specifications ................................................................................................... F-1 Physical Specifications..................................................................................................F-2 Functional Specifications ..............................................................................................F-3 Environmental Specifications ........................................................................................F-4 Touch Screen Specifications..........................................................................................F-5 General Features.....................................................................................................F-5 Protective Film .......................................................................................................F-5 Touch Pad Mouse Specifications...................................................................................F-6 Operating Specifications .........................................................................................F-6 Cleaning .................................................................................................................F-6 Protective Film .......................................................................................................F-6 Keypad Specifications...................................................................................................F-8 GFK-1220B Contents xiii Contents Figure 1-1. Integration Levels in CIMPLICITY Monitoring and Control Software.................................... 1-8 Figure 1-2. CIMPLICITY Touch Display System .................................................................................. 1-10 Figure 1-3. CIMPLICITY Touch Station and Glide Station Systems ...................................................... 1-11 Figure 2-1. Mounting Hole Dimensions, Touch Display Unit.................................................................... 2-5 Figure 2-2. Mounting Hole Dimensions, Touch Station and Glide Station Units ........................................ 2-6 Figure 2-3. Display Station Side View ..................................................................................................... 2-7 Figure 2-4. Connection Diagram .............................................................................................................. 2-9 Figure 2-5. Using the Touch Pad Mouse ................................................................................................ 2-20 Figure 2-6. Keypad Layout .................................................................................................................... 2-25 Figure 5-1. Opening the Display Station Rear Panel ................................................................................. 5-3 Figure 5-2. Location of SIMMs in Display Station Enclosure................................................................... 5-7 Figure 5-3. Detail of SIMM Installation................................................................................................... 5-7 Figure 5-4. SIMM Removal..................................................................................................................... 5-8 Figure 5-5. ISA-Compatible Board Installation ...................................................................................... 5-10 Figure A-1. AUI Ethernet Port Connector Configuration ......................................................................... A-2 Figure A-2. 10BaseT (MAU MDI) Port Connector Configuration ........................................................... A-3 Figure A-3. AUI to BNC Transceiver .................................................................................................... A-3 Figure A-4. External Display Port.......................................................................................................... A-4 Figure A-5. External Keyboard Port....................................................................................................... A-5 Figure A-6. Serial Port 2 (RS-422/232) .................................................................................................. A-6 Figure A-7. Default Settings for System Board Jumpers .......................................................................... A-9 Figure A-8. Serial Port 1 (RS-232) ....................................................................................................... A-10 Figure A-9. Parallel (Printer) Port Configuration................................................................................... A-11 Figure A-10. Accessory Port Configuration........................................................................................... A-12 Figure A-11. Display Station RS-422 Host to PLC Connection (no handshaking) .................................. A-14 Figure A-12. Display Station to CMM without Flow Control (RS-422/RS-485) ................................... A-14 Figure A-13. RS-232 Serial Port to CMM Interface without Flow Control ........................................... A-15 Figure A-14. PCM, ADC, or CMM to Display Station without Flow Control ........................................ A-16 Figure A-15. PCM, ADC, or CMM to Display Station with Flow Control............................................. A-16 Figure A-16. Display Station to RS-232 Converter................................................................................ A-17 Figure A-17. Display Station to RS-422/RS-232 Isolated Repeater/Converter ....................................... A-17 Figure A-18. RS-232 Converter to Series 90 CPU Point-to-Point .......................................................... A-18 Figure A-19. RS-232 Converter to Series 90 CPU Point-to-Point (External Supply Required)................ A-18 Figure A-20. Example: RS-422/RS-485 to RS-232 Converter in a Series 90 PLC System ..................... A-19 Figure A-21. Series 90 SNP Port to RS-232 Adapter ............................................................................ A-20 xiv CIMPLICITY® Display Station User's Manual–February 1997 GFK-1220B Contents Figure B-1. Initial Setup Menu ............................................................................................................... B-2 Figure B-2. CMOS Setup Screen ............................................................................................................ B-3 Figure B-3. BIOS Features Default Settings............................................................................................ B-4 Figure B-4. Chipset Features Default ...................................................................................................... B-5 Figure B-5. Load BIOS Defaults Screen ................................................................................................. B-6 Figure B-6. Hard Disk Drive Autodetection Utility.................................................................................. B-9 GFK-1220B Contents xv Contents Table 1-1. CIMPLICITY Display Station Product Listing........................................................................ 1-3 Table 1-1. - Continued............................................................................................................................. 1-4 Table 1-2. Accessory Products................................................................................................................. 1-4 Table 1-3. Software Configurations ......................................................................................................... 1-5 Table 1-4. Software Options and Upgrades .............................................................................................. 1-6 Table 2-2. Control Functions ................................................................................................................. 2-10 Table 2-3. Indicator Functions ............................................................................................................... 2-11 Table 2-4. Touch Pad Mouse Enhancement Features.............................................................................. 2-23 Table 2-5. Touch Pad Mouse Control Panel Features ............................................................................. 2-24 Table 2-6. Keyboard Key Functions....................................................................................................... 2-26 Table 6-1. Selected Keyboard Shortcuts................................................................................................... 6-3 Table A-1. Pinout Listing for the AUI Port ............................................................................................. A-2 Table A-2. Pinout Listing for the 10BaseT (MAU MDI) Port.................................................................. A-3 Table A-3. Pinout Listing for the External Display Port .......................................................................... A-4 Table A-5. Pinout Listing for Serial Port 2.............................................................................................. A-7 Table A-6. Mode Selection ..................................................................................................................... A-8 Table A-7. Serial Port Default Settings ................................................................................................... A-8 Table A-8. Pinout Listing for RS-232 Serial Port .................................................................................. A-10 Table A-9. Parallel Port Pin Assignments............................................................................................. A-11 Table A-10. Accessory Port Pinout Listing ........................................................................................... A-12 Table A-11. Recommended Cables and Connectors ............................................................................... A-13 Table D-1. Contents of IRQ Table .......................................................................................................... D-1 Table F-1. Touch Display Physical Characteristics ..................................................................................F-2 Table F-2. Touch Station/Glide Station Physical Characteristics ..............................................................F-2 Table F-3. Display Station Functional Specifications ...............................................................................F-3 Table F-4. Display Station Environmental Specifications .........................................................................F-4 Table F-5. Touch Screen Protective Film Specifications ...........................................................................F-5 xvi CIMPLICITY® Display Station User's Manual–February 1997 GFK-1220B Chapter Introduction 1 Welcome to GE Fanuc’s CIMPLICITY Display Station products. The package you receive contains an integrated hardware and software platform for running CIMPLICITY HMI applications, plus all the documentation you need to customize and maintain your CIMPLICITY Display Station system. This revision of the Display Station incorporates CIMPLICITY HMI software for Windows and either Microsoft Windows 95 or Microsoft Windows NT software (depending on model). This chapter provides an introduction to your CIMPLICITY Display Station system, plus an overview of the CIMPLICITY HMI software and its relationship to the entire family of CIMPLICITY Monitoring and Control products. The following topics are presented: What You Receive ......................................................................................................1-2 CIMPLICITY Display Station Products ......................................................................1-2 System Architecture....................................................................................................1-7 Hardware Description.................................................................................................1-9 Customer Support.....................................................................................................1-12 GFK-1220B 1-1 1 What You Receive Note Please refer to the Data Sheet and Important Product Information (IPI) documents provided with your CIMPLICITY Display Station system for specifics pertaining to the hardware and software delivered with your particular system. The information in the Data Sheet and IPI supersedes information in this manual. When you purchase a CIMPLICITY Display Station system, you receive: • CIMPLICITY Display Station industrial computer with CIMPLICITY HMI and Operating System software installed. • Power cord • Installation hardware package (includes washers, springs, and nuts) • CIMPLICITY Display Station Data Sheet and IPI documents, which describe specifics of the hardware and software for your particular system • CIMPLICITY Display Station system documentation • CIMPLICITY software licenses and license agreements • Microsoft Windows documentation, software distribution, Certificate of Authenticity and license agreement • CIMPLICITY software (distributed on floppy disks) • Utilities disk If you believe that items are missing from your shipment, contact your distributor. CIMPLICITY Display Station Products System Configurations The CIMPLICITY Display Station products consist of an industrial operator interface coupled with CIMPLICITY HMI software. The Display Station product family incorporates CIMPLICITY MES/SCADA and HMI for Windows and either Microsoft Windows 95 or Microsoft Windows NT. Display Station products are offered in the configurations listed in Table 1-1. 1-2 CIMPLICITY® Display Station User's Manual – February 1997 GFK-1220B 1 Table 1-1. CIMPLICITY Display Station Product Listing Touch Display IC751ATS200 Windows 95 Windows NT HMI Multiple Device Runtime System IC646MRT000 – Trending Series 90 Protocol (SNP) IC646MTR000 (included in base) – – Series 90 Ethernet (TCP/IP) (included in base) – Windows 95 Windows NT Series 90 Protocol (SNP) – – – IC646TMN010 IC646TTR000 (included in base) Series 90 Ethernet (TCP/IP) – (included in base) Windows 95 Windows NT IC751ATS350 HMI Development & Runtime System Trending Touch Station IC751BTS200 HMI Multiple Device Runtime System IC646MRT100 – Trending Series 90 Protocol (SNP) IC646MTR000 (included in base) – – Series 90 Ethernet (TCP/IP) (included in base) – Windows 95 Windows NT IC751BTS300 HMI Development & Runtime System IC646MRT100 – Trending Series 90 Protocol (SNP) IC646MTR000 (included in base) – – Series 90 Ethernet (TCP/IP) (included in base) – Windows 95 Windows NT Series 90 Protocol (SNP) – – – IC646TMN010 IC646TTR000 (included in base) Series 90 Ethernet (TCP/IP) – (included in base) IC751BTS350 HMI Development & Runtime System Trending GFK-1220B Chapter 1 Introduction 1-3 1 Table 1-1. - Continued Glide Station IC751BGP200 Windows 95 Windows NT HMI Multiple Device Runtime System IC646MRT000 – Trending Series 90 Protocol (SNP) IC646MTR000 (included in base) – – Series 90 Ethernet (TCP/IP) (included in base) – Windows 95 Windows NT IC751BGP300 HMI Development & Runtime System IC646MRT100 – Trending Series 90 Protocol (SNP) IC646MTR000 (included in base) – – Series 90 Ethernet (TCP/IP) (included in base) – Accessories Table 1-2. Accessory Products 1-4 CIMPLICITY parallel application transfer cable IC751BCL200 CIMPLICITY SNP cable (RS-422) IC751BCL300 CIMPLICITY HMI Ethernet transceiver (thinwire) 15-pin AUI to thinwire (10Base2) transceiver 3-foot AUI extension cable IC751BET000 CIMPLICITY® Display Station User's Manual – February 1997 GFK-1220B 1 Software Licenses CIMPLICITY System software for this system is licensed in one of configurations listed in Table 1-3. Table 1-3. Software Configurations License Features Runtime - Multiple Devices (Windows 95) Full CIMPLICITY Base System runtime features plus Communications to unlimited GE Fanuc PLCs via SNP or TCP/IP protocols (16 MB memory) Development & Runtime (Windows NT) Full CIMPLICITY Base System runtime and project development features plus Communications to unlimited GE Fanuc PLCs via SNP or TCP/IP protocols (32 MB memory) If you purchase additional product options (see “Options and Upgrades”) to run on the Display Station, it is necessary to contact GE Fanuc to update the system licensing. Use one of these two numbers to reach GE Fanuc to update your registration: Phone: 518-464-4619 Fax: 518-464-4581 Faxes and phone calls will be processed between 8 AM and 5 PM Eastern time, Monday through Friday, except for regularly scheduled holidays. Faxes and calls received after hours, on weekends, or holidays will be processed as soon as possible on the following business day. When you phone, please be prepared to provide GE Fanuc with the following information: GFK-1220B • Your User information • CIMPLICITY serial numbers • The System Key Code generated during the registration procedure Chapter 1 Introduction 1-5 1 Options and Upgrades The following CIMPLICITY Software Options can be purchased for use with CIMPLICITY Display Station products: Table 1-4. Software Options and Upgrades Application Options Windows 95 Windows NT Alarm Management API IC646MAA000 IC646TAA000 BASIC Control Engine IC646MCS000 IC646TCS000 Database Logger — IC646TDL000 Device Communications Driver Toolkit API IC646MDC000 IC646TDC000 Point Management API IC646MPM000 IC646TPM000 Communications Options Windows 95 Series 90 Ethernet (TCP/IP) — option for IC751ATS100, IC751BTS100, IC751BGP100 IC751BUU500 MODBUS RTU IC646MMR000 Windows NT – IC646TMR000 You can easily upgrade your system to 24 or 32MB. (Installation instructions for memory upgrades are provided in Chapter 5.) For more information about purchasing GE Fanuc products, please call your distributor. You can call the GE Fanuc Information Centers at one of the following numbers for the location of your nearest GE Fanuc sales representative authorized distributor: USA and Canada Europe Asia Pacific 1-6 1-800-648-2001 352-727979-1 65-566-4919 CIMPLICITY® Display Station User's Manual – February 1997 GFK-1220B 1 System Architecture CIMPLICITY Monitoring and Control software is designed for scalability — you can expand your system from a single Display Station to an enterprise-wide supervisory control and data acquisition system. The CIMPLICITY HMI software is one of four components within CIMPLICITY Monitoring and Control software. • CIMPLICITY HMI • CIMPLICITY MES/SCADA (Manufacturing Execution Systems/Supervisory Control and Data Acquisition) • CIMPLICITY Control • CIMPLICITY Motion Provides local data collection and monitoring. Easily integrates with MES/SCADA systems. Provides client/server architecture for enterprisewide supervisory monitoring. Programming, configuration, diagnostic and development software for PLC, CNC, and PC controllers. Motion profiler, configuration, and diagnostic software for general purpose motion controllers. The networking capabilities that are provided throughout the CIMPLICITY Monitoring and Control product line are designed to allow well-defined levels of integration (Figure 1-1). This architecture allows a Server to seamlessly collect or distribute data to Display Station products and to support Viewers. And, a Display Station can seamlessly network to other HMI systems. These capabilities allow you to eliminate redundancies within your network. For example: Each HMI system can display screens from any other HMI system on the network with no additional configuration. Points are configured only once on an HMI or Server. Screens can be developed and stored in a single location on the network and accessed by any other CIMPLICITY HMI, Server, or Viewer on the network. GFK-1220B Chapter 1 Introduction 1-7 1 LAN Device Communication Ethernet r we Vie r rve Se I MM ial str llers u Ind ntro Co •Status Monitoring and Control •Graphics Configuration •Viewer Options Available •Connects to Server •Status Monitoring and Control •Graphics Configuration •Data Collection •Server / MMI Options Available •Connects to Server, MMI, Viewer •Status Monitoring and Control •Graphics Configuration •Data Collection •Server / MMI Options Available •Connects to Server, MMI Communication Protocols available for a wide variety of Industrial controllers Figure 1-1. Integration Levels in CIMPLICITY Monitoring and Control Software Three levels of licensing are available to support the levels of integration: 1-8 HMI Provides local data collection and control capabilities while permitting you to view the entire facility through the Server. The HMI supports networking among multiple HMIs, data processing options such as ODBC database logging, and Server viewing capabilities. Server Provides data collection, data processing and data storage capabilities for a multi-user environment. The Server can be connected to networks of Viewers and HMIs to provide an overall picture of an entire production process. Viewer Provides the graphic user interface to the CIMPLICITY Server. In a client/server architecture, the graphics applications run native on the Viewer system, significantly reducing the load on the server, and distributing the processing power over several computers. CIMPLICITY® Display Station User's Manual – February 1997 GFK-1220B 1 Hardware Description The primary characteristics of the CIMPLICITY Display Station products are: High Performance The CIMPLICITY Display Station products are high-performance, IBMcompatible PCs that are designed to work with CIMPLICITY software. The system architecture is based on the 80486DX2-66 microprocessor. Each CIMPLICITY Display Station system contains the following components: 486DX2-66 CPU • 500MB or larger hard disk with CIMPLICITY and Microsoft Windows operating system software installed • 3.5" floppy disk drive • 10.4" High brightness, dual scan, color flat panel display • Touch screen or Touch Pad mouse • One RS-232 port • One RS-422/RS-232 port • Parallel printer port • Ethernet port (10baseT and AUI connectors) • PS/2 External Keyboard port • Removable plate that can be modified to allow access to user-added Industry Standard Architecture (ISA)-compatible board (3/4 length, maximum) — Glide Station and Touch Station units only). Rack Mounting CIMPLICITY Display Stations are packaged in a single-unit, steel enclosure that has a flange for secure fit in a rack. The Touch Display unit weighs approximately 14 pounds (6.4kg). The Touch Station and Glide Station Units weigh approximately 18.5 pounds (8.4kg). Ease of Operation Each CIMPLICITY Display Station comes ready to run, with CIMPLICITY software and the operating system software installed on the hard disk. GFK-1220B • PS/2 is a registered trademark of IBM Corporation. Chapter 1 Introduction 1-9 1 0.25 (0.63) 12.00 (30.68) 5.06 (12.85) a45550 10.88 (27.64) 11.88 (30.18) 13.00 (33.02) Figure 1-2. CIMPLICITY Touch Display System 1-10 CIMPLICITY® Display Station User's Manual – February 1997 GFK-1220B 1 a45552 0.25 (0.63) 16.00 (40.64) 5.06 (12.85) Q R 1 T S 2 3 U 4 W V 5 6 X 7 Touch Screen (some models) Y 8 9 Z SP 13.00 (33.02) 0 DEL 14.00 (35.56) TAB BACK CAN ENTER CTL UP FCN A B F1 I C F2 J F9 F10 D F3 K F11 E F4 L F12 F F5 M F13 G F6 N H F7 O F14 F15 ALT DN F8 P F16 Touch Pad Mouse (some models) 17.00 (43.18) Figure 1-3. CIMPLICITY Touch Station and Glide Station Systems GFK-1220B Chapter 1 Introduction 1-11 1 Customer Support GE Fanuc takes pride in the high quality of the CIMPLICITY software. Great emphasis has been placed on ensuring the quality of this system throughout development and testing. In spite of this, from time to time you may encounter problems or deficiencies in the software or documentation. If your CIMPLICITY software system is under warranty or is covered by a valid support contract, you may report problems to the CIMPLICITY Technical Support Hotline at one of the following numbers: USA and Canada 1-800-GEFANUC (1-800-433-2682) All others 804-978-6036 Fax 804-978-5099 Internet address [email protected] The CIMPLICITY Hotline is available from 8 A.M. to 8 P.M. Eastern time, Monday through Friday, except for regularly scheduled holidays. 1-12 CIMPLICITY® Display Station User's Manual – February 1997 GFK-1220B Chapter Getting Started 2 This chapter provides the basic information that you need to set up your Display Station product and begin using it. You may need to refer to other chapters in this manual for information pertaining to specific requirements of your system. Unpacking the Display Station Products .....................................................................2-2 Hardware Installation .................................................................................................2-3 Powering Up the Display Station ..............................................................................2-10 Shutting Down the Display Station ...........................................................................2-16 How to Use the Touch Screen (Touch Station and Touch Display Products)..............2-17 How to Use the Touch Pad Mouse (Glide Station Products) ......................................2-20 How to Operate the Keypads (Touch Station and Glide Station Products) .................2-25 Moving the Display Station ......................................................................................2-27 Summary..................................................................................................................2-27 Note A standard PS/2-type keyboard is required for first-time power up. If you have a Windows 95 system, you will be required to enter the Product ID on the Windows 95 Certificate of Authenticity, and other data, to set up your system. If you have a Windows NT system, you will simply need to log on. GFK-1220B 2-1 2 Unpacking the Display Station Products Caution Electrostatic discharge (ESD) is a major cause of electronic component failure. Extreme care should be taken to avoid damaging the Display Station with static electricity. A small, imperceptible electrostatic discharge could occur without your knowing and could be enough to damage electronic components. To avoid damage from electrostatic discharge, adhere to the following precautions. 2-2 • Wear a properly functioning antistatic strap and be sure that you are fully grounded before touching the connectors on the Display Station. • Extra caution should be taken in cold dry weather, when static charges can easily build up. 1. Unpack the Display Station. Make sure that you have the following items: Display Station system hardware, power cord, CIMPLICITY software distribution, Microsoft Windows software distribution, user’s manuals, and datasheet. 2. File that datasheet in a safe place. 3. Inspect for damage. 4. Read the software license agreement(s) on the document package(s). If unacceptable, do not proceed; Return the system. 5. Record the computer serial number in the space provided in the “Preface” of this manual. The serial number is located on the back of the unit enclosure. 6. Review the hardware description. 7. Perform the procedure described in “Hardware Installation.” CIMPLICITY® Display Station User's Manual – February 1997 GFK-1220B 2 Hardware Installation You may want to complete the “First-Time Powerup” procedure, described on page 2-11, before you install the Display Station in an equipment panel. (This procedure includes software license registration.) Mounting the Display Station Unit Mounting Location When selecting a location for the Display Station, make sure that there will be enough space for access to the floppy disk drive and connectors located on the right side panel of the unit. Allow approximately 6 inches (15.2 cm). For overall unit dimensions, refer to Figures 1-2 and 1-3. Allow 2 inches (5.1 cm) depth for the power cord that is provided with the Display Station. If you don’t have this amount of space, a lower profile power cord that requires less space can be purchased. The mounting location for the Display Station should meet the following requirements: Caution For Touch Display and Touch Station products: The protective film covering on the touch screen is not suitable for use in conditions of prolonged exposure to direct sunlight. (Exposure to sunlight through window glass will not harm the protective film.) Caution Temperature in the Display Station operating environment should not exceed 45°C/113°F. Exposing the Display Station to ambient temperatures greater than this limit could damage the hardware or cause data to be lost. You should monitor the temperature in the operating environment to ensure that it does not exceed 45°C/113°F. The overtemperature indicator on the Display Station is provided only as a secondary precaution. The Display Station does not automatically shut down when the overtemperature indicator is lighted. Temperature rise should not exceed 20°C (68°F) per hour. Exposing the Display Station to thermal shock could damage the disk drives. Note that the operating temperature range of the Display Station is 0 to 45°C (32.0 to 113°F). The operating temperature range of floppy disks is 5 to 40°C (41 to 104.0°F). Operating the floppy disk drive when the ambient temperature is outside this range could damage the disk medium as well as cause permanent damage to the floppy drive heads. GFK-1220B Chapter 2 Getting Started 2-3 2 Equipment Panel Cutout The Display Station unit is designed to be installed in a cutout in an equipment panel. Dimensions for the mounting hole cutout and the locations of screw holes for the Touch Display are provided in Figure 2-1. The Touch Station and Glide Station require the mounting hole cutout and screw holes shown in Figure 2-2. Caution When installing the Display Station, do not over-tighten the nuts on the mounting studs. This could damage the studs or the front panel of the Display Station. The Display Station has mounting studs for securing the unit to the equipment panel. To install the unit, you will need the following hardware, which is provided with the Display Station: Quantity Touch Display Touch Station/ Glide Station Washer 14 18 Springs 14 18 Nut 14 18 Item Mounting stud specifications: 2-4 #6 (32 threads/inch) 0.138 inch OD CIMPLICITY® Display Station User's Manual – February 1997 GFK-1220B 2 a455 75 1 2.50 0 (31.7 50) .210 (0.533 ) 1.62 5 (4.1 28) 12.08 0 (3 0.68 3) .210 (0.533 ) .154 D IA . (0.391 ) Q ty. 14 .1 9 (0 .48) R . (typic al) 4.0 63 (10 .320) 10.9 55 (27 .826 ) 11.375 (28 .893 ) 4.0 63 (10 .320) 1.62 5 (4.1 28) 1 .000 (2.54 0) 3 .500 (8.890 ) 3 .500 (8.89 0) 3.50 0 (8.8 90) 1 .000 (2.54 0) D im ension s in in ches /ce ntim ete rs a re in p arenthe sis Figure 2-1. Mounting Hole Dimensions, Touch Display Unit GFK-1220B Chapter 2 Getting Started 2-5 2 a45576 0.25 (0.63) 16.50 (41.91) 16.08 (40.64) 0.25 (0.63) 0.25 (0.63) .154 DIA. (0.391) Qty. 18 1.13 (2.87) .19 (0.48) R. (typical) 3.75 (9.53) 13.50 (34.29) 13.08 (33.02) 11.25 (28.58) 3.75 (9.53) 3.75 (9.53) 1.13 (2.87) 0.25 (0.63) 1.25 (3.17) 3.50 (8.89) 3.50 (8.89) 3.50 (8.89) 3.50 (8.89) 1.25 (3.17) Dimensions in inches /centimeters are in parenthesis Figure 2-2. Mounting Hole Dimensions, Touch Station and Glide Station Units 2-6 CIMPLICITY® Display Station User's Manual – February 1997 GFK-1220B 2 Display Station Connections Display Station connectors and their functions are described in this section. As shown in Figure 2-3, all connectors are located on the side panel of the unit except for AC power, which is located on the rear panel. Table 2-1 lists the connectors and Figure 2-4 provides a connection diagram. Details of port and cabling configurations are provided in Appendix A. Warning Each Display Station product is equipped with a three-wire power cord and plug for your safety. Use this power cord with a properly grounded electrical outlet to avoid electrical shock. The Display Station and all associated devices should be connected to a common ground. a45570 RESET CONTRAST ACC KEYBD VGA Caution The Display Station is shipped with ESD-protective caps on its ports. Do not remove the ESD cap from a port if you do not plan to use the port. Store the removed ESD caps with the original packing material for use if you need to store or ship the Display Station. NET COM1 NET COM2 PARALLEL Note To comply with FCC regulations and CE mark requirements, shielded cables must be used for all connections to the Display Station. GFK-1220B Chapter 2 Getting Started Figure 2-3. Display Station Side View 2-7 2 Table 2-1. Display Station Connectors Location Side Rear Label Type Function ACC female 8-pin DIN External RESET, external speaker, and watchdog timer. KEYBD female 6-pin mini DIN External keyboard connection. NET* RJ-45 (10baseT) MAU MDI Ethernet connection. VGA female 15-pin high density D-type Connection for external VGA monitor. See “External Display” in Chapter 6 for details. COM1 male 9-pin D-type Windows 95 systems: Serial (RS-232) port. Connection for serial mouse. (COM1 is set up to be compatible with a Logitech™ serial mouse.) Windows NT systems: COM1 is dedicated to touch screen operation. NET* female 15-pin D-type AUI Ethernet connection. COM2 male 25-pin D-type Serial (RS-422/232) port. Connection for SNP communications. PARALLEL female 25-pin D-type Connection to CIMPLICITY Windows 95 Development systems via Windows 95 Direct Cable Connection, CD ROM drive, or printer. (Windows NT systems do not support Direct Cable Connection.) male 3-prong AC in. — * Only one network (NET) connector can be used at a time. 2-8 CIMPLICITY® Display Station User's Manual – February 1997 GFK-1220B 2 a45573 Display Station (right panel) RESET CNTRST Floppy Disk External VGA Monitor ACC External keyboard 1 KEYBD 2 VGA NET 7 Ethernet Twisted Pair COM1 3 External Modem or other RS-232 device NET External AUI/Coax converter Port 4 COM2 6 Ethernet Coax PLC RS-422 5 PARALLEL External CD-ROM, printer, or parallel connection to another computer (for file transfer) Figure 2-4. Connection Diagram Notes 1. Standard keyboard and cable. Key Tronic® keyboards are recommended. GFK-1220B 2. External VGA monitor. See Chapter 6 for details. 3. The COM 1 connector is a standard 9-pin RS-232 configuration. See Appendix A for details. 4. The 25-pin COM 2 port connector does not use a standard pinout configuration. You must review the pinout to make sure that the device that you want to use will function properly. See Appendix A for details. 5. Standard 25-pin, D-type female connector. See Appendix A for details. 6. AUI Ethernet connection. See Appendix A for details. 7. 10BaseT (MAU MDI) Ethernet connection. See Appendix A for details. Chapter 2 Getting Started 2-9 2 Powering Up the Display Station Controls and Indicators Operation of the controls and indicators, listed in Tables 2-2 and 2-3, is for all Display Station models. For the locations of controls and indicators, see Figure 2-3 on page 2-7. Table 2-2. Control Functions Designation Function RESET Resets the CPU CONTRAST Adjusts the display contrast. none Ejects a floppy disk Caution Temperature in the Display Station operating environment should not exceed 45°C/113°F. Exposing the Display Station to ambient temperatures greater than this limit could damage the hardware or cause data to be lost. You should monitor the temperature in the operating environment to ensure that it does not exceed 45°C/113°F. The overtemperature indicator on the Display Station is provided only as a secondary precaution. The Display Station does not automatically shut down when the overtemperature indicator is lighted. Caution Temperature rise should not exceed 20°C (68°F) per hour. Exposing the Display Station to thermal shock could damage the disk drives. Note that the operating temperature range of the Display Station is 0 to 45°C (32.0 to 113°F). Note The overtemperature indicator on the Glide Station and Touch Station units will light if the internal temperature is between 48 and 52°C (118—126°F) and will not go off until the temperature drops below approximately 45°C (113°F). This feature is not implemented on the Touch Station units. Note For best performance, high temperature, long life floppy disks should be used. Lower quality floppy disks could fail during repeated read/write cycles. 2-10 CIMPLICITY® Display Station User's Manual – February 1997 GFK-1220B 2 Table 2-3. Indicator Functions Designation Function Hard disk drive access indicator light. Lights when the hard disk is in use. Overtemperature indicator light. When lighted, the temperature inside the unit has exceeded manufacturer’s requirements. Shut down the Display Station and correct the temperature problem in the operating environment (or move the unit to a cooler location) before continuing to operate Power on indicator light. Lights when system power is ON. First-Time Powerup Note The unit’s nonoperating and shipping temperature range (-20 to 60°C) exceeds the operating temperature (0 to 45°C) range. If the product is at a temperature above or below the operating range, you should allow the unit to stabilize at the operating temperature for eight hours before applying power to the Display Station system. Note A standard PS/2-style keyboard is required for first-time power up. When you power up the system, you will need to enter the product ID on the Windows 95 Certificate of Authenticity. To do so, you will need to use the keyboard. If you have a Touch Station or Glide Station computer, it is possible to register the license using the industrial keypad. If you have a Windows NT system, you will not be required to enter Certificate of Authenticity information, but you will need a keyboard to log on. Note It is recommended that you log onto the system as Administrator. Doing so eliminates the requirement to log onto CIMPLICITY when you run the CIMPLICITY Demo. All CIMPLICITY projects are configured with an Administrator user by default. 1. Connect an external keyboard to the KEYBD connector. 2. GFK-1220B Connect the computer to AC power — it will power up automatically. The computer performs self-test diagnostics each time it is powered up. The self-test is a series of checks that verify correct performance of the computer hardware. When the self-test is being performed, you will see the message XXXX KB OK displayed on the screen, where XXXX is a number that increases until it matches the amount of usable memory. Chapter 2 Getting Started 2-11 2 3. Following the system self test, Windows software will be booted and the Windows 95 screen or Windows NT screen will be displayed. Note After permanent installation, you should wait until the unit has been powered up for an hour and then make your final adjustment of the display contrast. (To adjust, turn the CONTRAST knob on the right side of the unit.) If the unit will be used in an environment where the ambient temperature is likely to vary, adjust for best viewing when the unit has stabilized at the middle of the temperature range. For example, if you expect the ambient temperature to vary from 0 to 45°C, let the unit stabilize at 23°C, then make the adjustment. This provides acceptable viewing at 0 to 45°C. If you expect the temperature to vary from 25 to 45°C, adjust the contrast at 35°C. The description of the first-time powerup sequence for Windows 95 systems starts on page 2-13. For the Windows NT sequence, go to page 2-16. 2-12 CIMPLICITY® Display Station User's Manual – February 1997 GFK-1220B 2 Windows 95 Systems GFK-1220B 1. When the Welcome to Windows 95 screen is displayed, press the RETURN key to continue. The Windows 95 Setup screen will appear. 2. You will be asked to enter the Region Settings and select the type of keyboard you will be using with the system. Press ENTER to select the defaults. 3. You must then enter your Name and Company. Use the TAB key to move between fields. (The field that is active will be highlighted.) To return to the previous field press SHIFT + TAB. Press ENTER to continue to the next screen. 4. Review the Windows 95 End User License Agreement and press ENTER to continue. 5. Press the TAB key to indicate that you Accept the agreement and press ENTER to continue. Chapter 2 Getting Started 2-13 2 6. Type the product ID on the Certificate of Authenticity (the number next to the Product ID in the Windows 95 distribution pack) and press ENTER to continue. 7. The system automatically installs devices and network parameters. When the setup is complete, the system will prompt you to restart the system. Press ENTER to restart the system. 8. The system reboots, completes the self-test sequence, and displays the Windows Login dialog box. Type a user name and, if desired, a password. It is recommended that you log on as Administrator (admin, no password). 9. The Add Printer Wizard is displayed. If you know the type of printer you will be using, press ENTER now to add a printer. Otherwise press ESC; you will be able to configure a printer later. 10. Select your Time Zone. Use the left and right arrow keys to select your time zone and press ENTER. 11. The Welcome to Windows 95 dialog box is displayed. 12. Press ALT-S to prevent this dialog box from being displayed in the future. Press ENTER to close the display. 2-14 CIMPLICITY® Display Station User's Manual – February 1997 GFK-1220B 2 13. The Windows 95 first-time powerup process is complete. To access programs, documents, computer settings and utilities, click the Start button on the Windows 95 toolbar. The Start menu will appear. The icons for CIMPLICITY and related software are listed above the dividing line. The icons below the dividing line are provided with Windows 95. To access the features of CIMPLICITY software, click the CIMPLICITY icon. The following menu will appear. For information about running CIMPLICITY software, refer to Chapter 4. GFK-1220B Chapter 2 Getting Started 2-15 2 Windows NT Systems When you power up the Display Station, the following message will appear: Microsoft ® Windows NT (™) version x.xx (Build xxxx) 1 System Processor [xxxxx Kb memory] This message will be followed by the Microsoft Windows NT screen, and the following dialog box: Welcome Press Ctl-Alt-Del to log on. Press CTL-ALT-DEL. A dialog box requesting the following information will be displayed: USERNAME FROM: PASSWORD: 2-16 Enter a valid user name (See your system administrator) or log on as administrator (admin). If you are connected to a network, select the domain where your account is established. (See your system administrator.) Otherwise, log onto the default domain. Enter your password. The first time you log on you will be prompted to verify your password. CIMPLICITY® Display Station User's Manual – February 1997 GFK-1220B 2 How to Use the Touch Screen Operation To use the touch screen, lightly tap on the surface or lightly glide your finger across the surface. The mouse pointer should follow your finger. To execute a click, gently and quickly tap the surface of the touch screen. Tap with a light touch and lift your finger sharply. A single tap executes a single click, and two rapid taps execute a double click. (Or, lightly rest your finger on the screen, then quickly apply pressure twice.) To drag, or highlight an area, lightly tap and then glide your finger across the surface. Hint: If you need to adjust the cursor position, you may find it helpful to roll your fingertip slightly when pressing it on the screen. The touch screen is covered by a protective film that prevents damage from dust, moisture and solvents. Refer to Appendix F for specifications for the protective film. Note The touch screen does not operate while the Windows task list is displayed. This window is only accessed by pressing CTRL-ALT-DEL (Windows 95 systems) or CTRL-ESC (Windows NT systems) on the keyboard. You can cancel this window using the keyboard. See Chapter 6 for details of external keyboard operation. Touch Screen Settings Your Display Station comes with the touch screen configured and ready to use. The procedures in this section are required only if you want to change the touch screen settings to suit your preferences. Note Operating temperature may affect touch screen calibration. Refer to Chapter 10 for calibration instructions. GFK-1220B Chapter 2 Getting Started 2-17 2 Windows 95 Systems To activate, and then adjust and test the touch screen settings, open the Windows Control Panel and double-click the Mouse icon. The following Mouse Properties window will appear. To adjust the touch screen settings, select the General tab. From the General Tab, select Options. This displays the dialog used for adjusting the touch screen. This screen allows you to adjust the double click rate for the touch screen or calibrate the touch screen. You can also enable the Button Selector window which lets you change the touch screen taps from left mouse button clicks to right mouse button clicks, and back again. (This feature is useful for Windows-related tasks that require the right button functions. It is not needed to operate CIMPLICITY HMI software.) 2-18 CIMPLICITY® Display Station User's Manual – February 1997 GFK-1220B 2 To enable the Button Selector window, click the Options button on the General tab. The Touch Screen dialog box will appear. Click the Enabled box under Button Selector Window. To select the Button Selector position and size, scroll the selector windows that are located immediately below the Enabled box. The Button Selector will immediately appear in the location that you specify. Click OK to return to the Mouse Properties window. Windows NT Systems Touch screen settings are set from the Touchscreen Control application in the Touch (Common) program group. This application provides the ability to calibrate the touch screen and set parameters such as the double click rate. Online Help information is available in this application. It is recommended that you use the touch screen settings and not the Mouse setting in the Control Panel to change the system settings because the touch screen uses the same set of system parameters. GFK-1220B Chapter 2 Getting Started 2-19 2 How to Use the Touch Pad Mouse About the Touch Pad Mouse The Touch Pad mouse, located at the bottom of the right-hand keypad on the Glide Station unit, detects the position of a finger over a touch-sensitive area. Like a mouse, this device controls the movements of the cursor on the screen. The Touch Pad mouse is a capacitive sensor. Your finger is detected by measuring its effect on an array of capacitive lines integrated into the PC board. The Touch Pad mouse senses both the finger’s position and its contact area. The area of contact is a measure of applied pressure. On the Display Station units, pressure on the Touch Pad mouse controls the speed of cursor movement. The Touch Pad mouse provides a durable surface with no moving parts to collect dirt or wear out. It is sealed to the Glide Station front panel and protected by a mylar film that prevents damage from dust, moisture, and solvents. For specifications and cleaning instructions for the protective film, refer to Appendix F. Operation To use the Touch Pad mouse, lightly glide your finger across the surface. No pressure is required The Touch Pad mouse responds best to a light touch. Roll your fingertip slightly for fine positioning. To execute a click, gently and quickly tap the surface of the pad. Tap with a light touch and lift your finger sharply. As shown in Figure 2-5, a single tap executes a single click and two rapid taps execute a double click. To drag, or highlight an area, double tap on the surface, holding your finger down on the second tap. You can drag anywhere along the surface. The Touch Pad mouse has a special “edge-motion” feature that allows you to extend a drag operation when your finger reaches the edge of the sensor pad. When you hold the finger against the edge, the cursor continues to move in the indicated direction. a45553 S in g le -ta p p in g D o u b le -ta p p in g D o u b le -ta p p in g a n d d ra g g in g Figure 2-5. Using the Touch Pad Mouse 2-20 CIMPLICITY® Display Station User's Manual – February 1997 GFK-1220B 2 Touch Pad Mouse Special Features The Touch Pad mouse has many advanced features, which are described in this section. These features are included on the Touch Pad mouse table of the Mouse icon in the Control Panel. • Scrolling feature (Virtual Scroll Bar) • Cursor-control feature (Edge Finder) • Pressure-meter icon in Windows 95 Taskbar – has right-click popup menu • Tutorial and integrated help for enhanced features TouchMeter Icon When the Touch Pad mouse Enhancement software is enabled, the TouchMeter icon appears on the right side of the Windows 95 Taskbar, near the clock. The appearance of the icon varies, depending on the amount of finger contact area (related to pressure) the Touch Pad mouse detects. The TouchMeter icon also allows rapid access to the standard Windows mouse control panel. To open the Touch Pad mouse Enhancements control panel, click this icon. Scrolling Feature The advanced scrolling feature (Virtual Scroll Bar) allows you to scroll through documents without moving the mouse away from your work. By simply sliding your finger up and down the right edge of the Touch Pad mouse, the contents of the current window will scroll. You no longer need to maneuver the cursor to the scroll bar – you can scroll no matter where the cursor happens to be. Virtual Scroll Bar works with document windows, file lists, font lists, and other scrollable items. As a rule, you can use Virtual Scroll Bar when you’re working in any window that has a scroll bar. For a complete description of the configurable options for Virtual Scroll Bar, refer to the online help documentation included with the Touch Pad mouse enhancement software. To open the help file, right-click on the TouchMeter icon in the Taskbar, and select Help from the popup menu. (When the Corner Taps feature in the Touch Pad mouse Control Panel is enabled, right mouse button features can be accessed by tapping in the upper right corner of the Touch Pad mouse — see page 2-23.) Cursor Control Feature The advanced cursor control feature (Edge Finder) makes it easy to access the controls on the edges of windows. Many window controls, such as menu, close, and minimize buttons, scroll bars, and resize borders, lie around the edge. Edge Finder constrains the mouse cursor to stay inside the active window. The first time the cursor tries to move outside the window, it is held at the edge. The next time the cursor moves, it can leave the window. When Edge Finder is active, it is very easy to close or resize a window, or access the menus. GFK-1220B Chapter 2 Getting Started 2-21 2 For a complete description of how to use Edge Finder, refer to the online help documentation included with the Touch Pad mouse enhancement software. (To open the help file, right-click on the TouchMeter icon in the Taskbar and select Help from the popup menu.) Touch Pad Mouse Settings Your Glide Station system comes with the Touch Pad mouse configured and ready to use. The procedures in this section are required only if you want to change the Touch Pad mouse settings to suit your preferences. The tutorial and configuration software provided with the Touch Pad mouse is already loaded on the Glide Station unit. The configuration software allows you to: • Adjust touch sensitivity from light to heavy • Turn edge motion on or off • Select either 40 or 80 samples/second report rate Click the TouchMeter icon in the Taskbar to open the Touch Pad Enhancements or use the Enhancements button on the TouchPad tab of the Windows Mouse Control Panel. The controls are described in the online Help documentation, which you can open by pressing the Help button at the bottom of the Touchpad Enhancements dialog box. You can also use the content-sensitive help feature (click the ? button on the title bar to obtain more information about all the controls). A tutorial is included with the Touch Pad mouse to help you learn to use Virtual Scroll Bar. To run the tutorial, click the Tutorial button on the Touch Pad mouse Enhancement control panel. When the tutorial is running, Virtual Scroll Bar gives you feedback about its operation. You can leave the tutorial open while you work in other windows; the messages will continue to give feedback about your actions. 2-22 CIMPLICITY® Display Station User's Manual – February 1997 GFK-1220B 2 The following features can be accessed in the Touchpad Enhancements dialog box. Table 2-4. Touch Pad Mouse Enhancement Features Feature Function Tutorial button Starts the tutorial for the Virtual Scroll Bar feature. Mouse Control Panel button Returns you to the TouchPad tab in the Mouse Properties dialog box. Goodies button Provides access to Mood Pad and Pressure Meter features. Momentum check box When checked, causes the Virtual Scroll Bar to continue scrolling a window after you have removed your finger from the scroll zone. Edge Motion check box When checked, causes the cursor to continue moving on the screen when your finger reaches the left or right edge of the Touch Pad mouse. Scroll Zone slide bar Allows you to adjust the width of the scroll zone on the Touch Pad mouse. Speed slide bar Allows you to adjust the speed at which the Virtual Scroll Bar scrolls. Enable Enhancements check box When checked, enables all of the Enhancement features. Edge Finder check box When checked, enables the Edge Finder feature. Animated Taskbar Icon check box When checked, enables the Touch Meter icon in the Windows Taskbar. A Touch Pad tab is provided on the Mouse Properties dialog box, which you can open from the Control Panel or from the TouchPad Enhancements dialog box. The default settings are shown below. GFK-1220B Chapter 2 Getting Started 2-23 2 The following features can be accessed on the TouchPad tab. Table 2-5. Touch Pad Mouse Control Panel Features Feature 2-24 Function Taps selection boxes The default selection is Tap and Drag. Changing this selection is not recommended. If Taps is accidentally disabled (None is selected), you will not be able to click on items. Corner Taps check box When checked, enables the right mouse button function in the upper right corner of the Touch Pad mouse. 3-Button Mode check box Has no effect on Glide Station products. Edge Motion selection boxes Allow you enable/disable the Edge Motion feature and select its operating characteristics. (Edge Motion causes the cursor to continue moving when your finger reaches the left or right edge of the Touch Pad mouse.) Pressure Sensitive check box This box must be checked for the Touch Pad mouse to operate correctly. Performance High Report Rate check box When checked, a report rate of 80 samples/second is selected. When not checked, 40 samples/second is selected. This box must be checked for the Touch Pad mouse to operate correctly. Touch Threshold ( ) slide bar The number in parenthesis changes with the setting. A setting of approximately 46 is recommended. Enhancements button Opens the Touchpad Enhancements dialog box. CIMPLICITY® Display Station User's Manual – February 1997 GFK-1220B 2 How to Operate the Keypad The keypad provided on Touch Station and Glide Station computers is shown in Figure 2-6. Operation of the keypad is similar to that of a standard keyboard. The difference is that the keypad does not include all the keys of a QWERTY keyboard and typing alphabetic characters requires that you hold the FN key while pressing F1—F16 (on the machine control pad) and 0—9. Table 2-4 lists the keys and their functional equivalents on a PC keyboard. The keypad also has 16 function keys. CIMPLICITY software allows you to create a procedure and assign it to a function key using CimEdit. (Refer to “Assigning a Key Sequence to a Procedure” and “Procedures” in Chapter 3 of GFK-1180. The keypad is covered by a protective film that prevents damage from dust, moisture and solvents. Refer to Appendix F for specifications for the protective film. Q R 1 S 2 T 4 U W 7 X 3 V 5 6 8 Y 9 Z 0 DEL TAB SP BACK CAN ENTER CTL UP FCN ALT A B F1 I C F2 J F9 D F3 K F10 F11 E F4 L F F5 M F12 G F6 N F13 F14 DN H F7 O F8 P F15 F16 Touch Pad Mouse (some models) Figure 2-6. Keypad Layout GFK-1220B Chapter 2 Getting Started 2-25 2 Table 2-6. Keyboard Key Functions Keypad Key 1 .. 9 1 .. 9 F1 .. F8 F1 .. F8 F9 .. F16 CTRL + F1 .. CTRL + F8 - - (minus or dash) 0 0 . . DEL DELETE BACK ← (backspace) CAN ESC TAB TAB ENTER CTL ↑ ENTER ↵ CTRL ↑ (up cursor key) UP PAGE UP ← ← (left cursor key) FCN → ALT ↓ DN 2-26 PC Key Equivalent function key → (right cursor key) ALT ↓ (down cursor key) PAGE DOWN FCN + - + FCN + . Space FCN + F1 — F16 A—P FCN + 1— 9, 0 Q—Z CIMPLICITY® Display Station User's Manual – February 1997 GFK-1220B 2 Shutting Down the Computer Caution To avoid damaging files, always shut down Windows software before removing power from your Display Station product. To shut down Windows 95: 1. From the Windows 95 Start menu, select the Shut Down option. The Shut Down Windows dialog box will appear. The default selection is Shut down the computer. 2. Click the Yes button. 3. Wait until the following message appears before removing power from the Display Station. It’s now safe to turn off your computer. To shut down Windows NT: 1. In the Program Manager File pulldown menu, select the Shutdown option. 2. A dialog box with the following message will appear: Shutting down will end your Windows NT session and prepare your computer to be turned off. 3. Select the Shutdown option and click OK. 4. Wait until the following message appears before removing power from the Display Station. It is now safe to turn off your computer. GFK-1220B Chapter 2 Getting Started 2-27 2 Moving the Display Station The Display Station products should be mounted as described in “Hardware Installation.” If you need to move the unit, follow these instructions: Caution To avoid damaging files, always shut down Windows before removing power from your Display Station product. The procedure detailed on page 2-27 must be followed to ensure proper shutdown. 1. Shut down the Windows operating system. 2. Turn OFF all power on the computer and associated devices. 3. Disconnect all cords and cables from the Display Station. The Display Station must be completely disconnected before relocating it. 4. Remove the Display Station from its mounting location. 5. If there is a floppy disk in the disk drive, remove it. Caution For shipping, it is recommended that you pack the Display Station system using the original boxes and packing material, if available. When using different boxes, cushion the computer well to avoid damage. Summary When you have completed the unpacking, installation, and powerup procedures in this chapter, the setup for CIMPLICITY and Windows software should be complete. You can now copy a project from a CIMPLICITY Development system to this system, configure startup options, run the CIMPLICITY demo, or (if your system is licensed for CIMPLICITY Runtime and Development) create a new project. To copy a project from a CIMPLICITY Development system, refer to Chapter 3. To configure startup options, run the demo or create a new project, refer to Chapter 4. 2-28 CIMPLICITY® Display Station User's Manual – February 1997 GFK-1220B Chapter 3 Copying a CIMPLICITY Project to a Runtime System If your CIMPLICITY Display Station is a runtime only system, you will need to copy a CIMPLICITY project to it from a CIMPLICITY runtime and development system. This chapter describes the options available for doing that. A CIMPLICITY project is simply a collection of files and directories (see “CIMPLICITY Project Structure” on page 3-2). Moving the project requires copying those files and directories to the target runtime system. Any method you use that copies all the files and preserves the directory structure and file names will work. You cannot use a utility that is Windows 3.1/3.11 or DOS based because it will truncate CIMPLICITY file names to DOS 8.3 format. In either a Windows NT or a Windows 95 system, projects can be copied from the CIMPLICITY Configuration Cabinet. If you have a Windows 95 system, you can use either the Direct Cable Connection utility or an Ethernet connection to copy projects. Because Direct Cable Connection is not supported in Windows NT, we recommend that you use an Ethernet connection to transfer projects for these systems. You can also copy a project created on Windows 95 or Windows NT onto floppy disks. Projects can be transferred to a Windows NT based Display Station via floppy disk. However, the Windows NT Backup utility cannot be used for this purpose. Backup sets created on a Windows 95 system are not compatible with the Windows NT Backup utility. The following topics are discussed in this chapter: CIMPLICITY Project Structure ..................................................................................3-2 Copying a project from the CIMPLICITY Configuration Cabinet ...............................3-3 Setting Up a Network Connection with Direct Cable Connection................................3-4 (Windows 95 only) Copying a Project onto Floppy Disks ..........................................................................3-7 Note We do not recommend copying a project while it is running. All files will be copied, but the project will not start properly. If this happens, delete the copy of the project, stop the original project, and copy it again. GFK-1220B 3-1 3 CIMPLICITY Project Structure When you create a CIMPLICITY project, a set of files and folders (directories) is created. The following window shows the files and directories within the project, HMI Project, which was created in the CIMPLICITY directory: The standard project subdirectories are: alarm_help If you are creating operator Help files for alarms, put them in this directory arc directory If you are using the Database Logger option, archive files are put in this data All run-time configuration files reside in this directory lock The project lock files reside in this directory log All status log files, and program error files reside in this directory master All the master copies of configuration files reside in this directory screens All CimView screens reside in this directory scripts default. All Basic Control Engine scripts for this project reside in the directory by Refer to “Using CIMPLICITY Software” in the users manual (GFK-1180) for information about CIMPLICITY projects. 3-2 CIMPLICITY® Display Station User's Manual – February 1997 GFK-1220B 3 Copying a Project from the CIMPLICITY Configuration Cabinet The easiest way to copy a CIMPLICITY project to a CIMPLICITY Display Station is from the CIMPLICITY Configuration Cabinet. Before attempting to copy, you must establish a network connection between the CIMPLICITY Development System and the Display Station. The connection can be either via Ethernet or, if your CIMPLICITY development system runs Windows 95, Direct Cable Connection. The following section describes the process of copying a project from the Configuration Cabinet. See page 3-4 for information on using Direct Cable Connection between a Development System and the Display Station. To copy a project from the Configuration Cabinet, complete the following procedure: GFK-1220B 1. Open the project and select the “Copy to Project...” command under the File menu: 2. When the Copy to New Project dialog box is displayed, select the disk drive on the target Display Station System, select the directory where the project will be copied, and enter the project name. Click the Create... button. The new project will be created on the target Display Station. Chapter 3 Copying a CIMPLICITY Project to a Runtime System 3-3 3 Setting up a Network Connection with Direct Cable Connection The Windows 95 Direct Cable Connection utility provides a means of establishing a network connection between two Windows 95 systems via parallel or serial cables. This utility is installed and configured for use on your CIMPLICITY Display Station and on most laptops running Windows 95. It must also be installed and configured on your CIMPLICITY Development System before you can use it to transfer a project to your runtime system. (See Appendix C for information on installing and configuring Direct Cable Connection on your CIMPLICITY Development System.) When Direct Cable Connection is set up on both your CIMPLICITY development and run-time systems, you can use it to establish a network connection and copy a project between systems. When you run Direct Cable Connection, it is recommended that you set up the CIMPLICITY HMI to be the Host computer with the CIMPLICITY development system as the Guest. When you have established a connection, files may be copied to the runtime system using the drag and drop capabilities of Windows 95. Projects can be copied to the CIMPLICITY Display Station using the Project Copy facility of the CIMPLICITY configuration cabinet. Following are the steps for running Direct Cable Connection on the CIMPLICITY Display Station. 1. Connect the Parallel Technologies Windows 95 Direct Cable Connection cable to the parallel ports of the CIMPLICITY Display Station and the CIMPLICITY development system where the project is currently loaded. 3-4 2. Click the Start button. 3. Click the Direct Cable Connection icon in the Windows Start menu. The Direct Cable Connection dialog box will appear. CIMPLICITY® Display Station User's Manual – February 1997 GFK-1220B 3 GFK-1220B 4. Click on Host or use the TAB key to select Host. Then select Next to continue. The system will display the following dialog box to set up a cable. This example assumes the use of the parallel port, but you could also use the serial cable connections with the appropriate cables. 5. To select the Parallel port, click on Next to continue. The next dialog box will be displayed. Chapter 3 Copying a CIMPLICITY Project to a Runtime System 3-5 3 6. Click the Finish button. The CIMPLICITY HMI system will display the following message and will wait for another Windows 95 system to connect using Direct Cable Connection. 7. Repeat steps 1–6 on your CIMPLICITY Development System, selecting Guest in place of Host. When you have finished the initial setup for Direct Cable Connection, you will see the following message displayed: 8. When the connection is complete, the folder for the C drive will be displayed. Highlight the C drive on the Display Station and select Map Network Drive... from the File menu: C: 9. 3-6 Click OK to map the network drive. Do not click on Reconnect at Logon unless you intend to keep the systems permanently connected. CIMPLICITY® Display Station User's Manual – February 1997 GFK-1220B 3 Copying a Project onto Floppy Disks If your project is less than 1.44 MB, you can simply copy the project folder to a single floppy disk using the standard file copy capabilities of Windows 95 or the File Manager in Windows NT. To determine the size of your project: Windows 95 In My Computer or Explorer, select the folder or files and select Properties from the File menu. Windows NT Open the File Manager in the Main program group. Double click on the folder for the project you wish to copy to view sizes of the files. Windows 95 Systems To make a copy of your project on floppy disks, do the following: 1. Select the project folder. 2. Click the Right Mouse button, and select the 3.5” floppy option. If your project is larger than (1.44 MB), Windows will copy the project to multiple floppy disks. You can also use the Windows 95 Backup utility to backup a project to floppy disk and then to restore the project to the Display Station. Windows 95 backup compresses data by default. For most projects, 5MB of project files will fit on a single floppy disk. If your project cannot fit on a single floppy disk, Windows 95 will backup the project over multiple floppy disks. If your project contains compressed data files (such as the .AVI file that is distributed with the CIMPLICITY Demo project) you will need more floppy disks. GFK-1220B Chapter 3 Copying a CIMPLICITY Project to a Runtime System 3-7 3 To use the Backup utility: Note The Windows NT Backup utility can only be used to transfer projects to systems that run Windows NT (IC751ATS350, BTS350, and BGP350). Backup sets created on a Windows 95 system are not compatible with Windows NT backup. 3-8 1. From the Windows 95 Start menu, select Programs, then Accessories, and System Tools. 2. In the System Tools menu, click the Backup icon. The Windows 95 Backup utility will start and the Microsoft Backup screen, with the Backup tab selected, will be displayed. (The first time you run backup, you will see several informational dialog boxes, which you can ignore.) 3. In the Backup tab, click the folder containing the files that you want to copy. 4. To select the files you want to copy, click a check mark in the box next to the file. 5. Click the Next Step> button. You will be prompted to select a destination. 6. Click the Floppy (A:) icon. 7. Click the Start Backup button. You will be prompted to enter a Backup Set Label. CIMPLICITY® Display Station User's Manual – February 1997 GFK-1220B 3 8. Type a label in the Backup set field and click OK. The Backup utility will finish the copy process and display an Operation Complete box. 9. Click OK twice to return to the Microsoft Backup dialog box. To copy a project from floppy disks to your Display Station: 1. In the Microsoft Backup dialog box, select the Restore tab. GFK-1220B 2. Click the backup set in the left hand column. (Be sure to select everything in the folder to be restored.) The project will automatically be restored to the same directory location as on the system where the project was created. For example, if the project was backed up from C:\CIMPLICITY\PROJECTS\MYPROJECT, it will be placed in that path by default. 3. Click Next Step to start restoring files to the target system. Chapter 3 Copying a CIMPLICITY Project to a Runtime System 3-9 3 Windows NT Systems To make a copy of your project on floppy disks, do the following: Note If you are backing up a running project: There is a file that is locked when the project is running. This file will not be copied, and an error message to that effect will be displayed. You should ignore the message and continue the backup, as this file is created automatically whenever a CIMPLICITY project is started. 3-10 1. Open the File Manager in the Main program group. 2. Open two Windows, one for the drive where the CIMPLICITY project is located, and one for the floppy drive. 3. Locate the project directory for the project you want to back up 4. To save space on your floppy disk, you should delete all log files from the project’s log directory before making the backup. 5. Copy the project’s directory to the floppy drive. If more than one disk is needed, you will be prompted to insert another disk. CIMPLICITY® Display Station User's Manual – February 1997 GFK-1220B Chapter Running CIMPLICITY Software 4 This chapter provides an overview of CIMPLICITY HMI software to help you get started. For detailed instructions for operating the software, refer to GFK-1180. The topics presented in this chapter describe how to perform the following tasks: Setting CIMPLICITY Options ....................................................................................4-2 Starting CIMPLICITY Automatically at Bootup .........................................................4-7 Starting CimView Manually .....................................................................................4-12 Creating a New Project .............................................................................................4-16 Running the Demo Project........................................................................................4-21 Changing the Computer Name ................................................................................. 4-22 GFK-1220B 4-1 4 Setting CIMPLICITY Options To configure CIMPLICITY options, or to start or stop projects, select the CIMPLICITY Options icon from the CIMPLICITY folder. The CIMPLICITY Options dialog will open. You can use this dialog to: • Halt a currently running project on your Server. • Start a project on your Server. • Start a project as a Viewer. • Select a default project to be run on your Server. You can also: • Display the currently running projects on Servers in your network. • Halt a currently running project on a Server in your network. • Start a project on a Server in your network (subject to restrictions). Setting Project Options 4-2 CIMPLICITY® Display Station User's Manual – February 1997 GFK-1220B 4 Use the Projects properties to display, start, and stop projects on a computer. When you open the CIMPLICITY Projects dialog, it is connected to your computer and shows you the currently running projects as well as the projects available for running. You can: • Start as a Viewer. • Connect to another computer in your network • Stop a running project • Add projects to the list of projects • Start projects in the Projects list. Start as a Viewer To start as a Viewer, select Start Viewer. When you do this, only the Router starts on your computer. Connecting to Another Computer Important You can only connect to a project on a remote computer in Windows NT. You can display the projects currently running on any Server in your network. To do this: 1. Click the drop-down list button to the right of the Computer Name field. 2. Select the computer you want to connect to from the list of computers that are currently running CIMPLICITY software. If the computer name does not appear in the list, you can type it in the Computer Name field. 3. Select Connect. The projects that are currently running on that computer are displayed in the Running Projects field. Stop a Running Project You may stop any project that is currently running the computer you are currently connected to. To halt a running project: 1. Select the project in the Running projects list. 2. Select Stop. A confirmation dialog opens. 3. Select Yes to confirm that you want to proceed with the shutdown. After the project is halted, the project is removed from the Running projects list. GFK-1220B Chapter 4 Running CIMPLICITY Software 4-3 4 Add a Project to the Projects List You may add projects to the Projects list. To do this: 1. Select Add. The Open dialog opens. 2. Use the Open dialog to search for the project (.gef) file you want. When you find it, select OK. The project you select is added to the Projects list. Start a Project in the Projects List To start a project in the Projects list: 1. Select the project. 2. Select Start. 3. Verify that you want to start the project. The project you select is started. When startup is complete, the project name is listed in the Running projects list. 4-4 CIMPLICITY® Display Station User's Manual – February 1997 GFK-1220B 4 Setting Startup Options Use the Startup Options page to • Set the connection options for the computer. • Select projects to start at computer bootup. Setting Connection Options You can select one of the following options: GFK-1220B Stand alone Select this option if you do not want to connect to other projects in your enterprise, and you do not want other projects in your enterprise to connect to this project. Accept connections Select this option if you want to connect to other projects in your enterprise and you want other projects to connect to this project. Chapter 4 Running CIMPLICITY Software 4-5 4 Selecting Bootup Projects Bootup projects are projects on your computer's local drive that you want to start when the computer boots. To add a project to the list of Bootup projects, select Add. The CIMPLICITY Default Project dialog opens. Use this dialog to browse for projects to add to your list of Bootup projects. When you locate a project, select OK to add it to the list and close the CIMPLICITY Default Project dialog. Select Cancel to close the dialog without selecting a project. To delete a project from the Bootup projects list, select the project, then select Delete. The project is removed from the list. You can also select the following check boxes: Start as viewer Start at boot 4-6 This check box is checked automatically if you have chosen Start at boot, and no projects have been added to the Bootup projects list. At bootup, the system will start as a Viewer (that is, only start the Router). This check box is always enabled. Select this check box if you want to projects in the Bootup projects list to start when the computer boots. If there are not projects in the list, only the Router starts. CIMPLICITY® Display Station User's Manual – February 1997 GFK-1220B 4 Starting CIMPLICITY Automatically at Bootup On a Windows 95 system, you can configure a CIMPLICITY HMI project to automatically start at system boot and display an initial CimView screen. To do this you will need to: • Disable the Microsoft Network Login prompt • Set the CIMPLICITY startup options to start a project and load an initial CimView screen. Note In Windows NT systems, CimView cannot be started at boot time using the CIMPLICITY Startup Options application. To set Windows NT up for automatic login, see “Enabling/Disabling Automatic Login in Windows NT” in Appendix E. Disabling the Network Login Prompt (Windows 95 Systems) To have your Display Station start CIMPLICITY and CimView when the unit boots up, you must first bypass the Microsoft Network Login prompt. To do so: 1. Log on to the Display Station (Microsoft Network login) with a user ID that is identical to the CIMPLICITY user ID. We recommend that you log on as Administrator when you power up the system. Doing so eliminates the requirement to log on the CIMPLICITY when you run the CIMPLICITY Demo or any other CIMPLICITY project that includes a user named Administrator. All CIMPLICITY projects are configured with an Administrator user by default. 2. GFK-1220B Open the Control Panel and click the Passwords icon. Chapter 4 Running CIMPLICITY Software 4-7 4 The Passwords Properties dialog box will be displayed. 4-8 3. Click the Change Windows Password button. 4. Enter the old Password (or leave it blank if you never entered a password). Leave the New Password and Confirm New Password fields blank. And click OK. The Change Windows Password dialog closes. 5. Close the Passwords Properties dialog by clicking OK. CIMPLICITY® Display Station User's Manual – February 1997 GFK-1220B 4 GFK-1220B 6. Click the Network icon in the Control Panel. The Network properties dialog box will be displayed. 7. In the Primary Network Logon field, select Windows Logon. 8. Click OK. You will be prompted to reboot your system so that changes will take effect. After you have rebooted, you will no longer be prompted to log on. Chapter 4 Running CIMPLICITY Software 4-9 4 Setting CIMPLICITY Startup Options Select CIMPLICITY Options from the CIMPLICITY shortcut menu. The CIMPLICITY Options dialog opens. 1. Select the Startup Options page. 2. In the Options box, select whether you want to start a stand alone project, or accept connections from other projects in your enterprise. 3. In the Bootup projects box: A. Make sure the project(s) you want to start a system boot are listed in the Bootup projects list. To browse for projects and add them to the list, click the Add button. B. Select the Start at boot check box. C. Select CimView to set a default CimView screen and display options. The Dialog dialog box opens. 4-10 CIMPLICITY® Display Station User's Manual – February 1997 GFK-1220B 4 D. Enter the starting CimView screen in the Screen field. You can also select Browse to the right of this field to search for the screen you want. E. Click an "X" in the Start at boot field if you want the CimView screen to be started automatically when the system boots. F. Click an "X" in the following fields as needed: Always Maximized No Exit Keypad Zoom to Best Fit No Menu/Title No Open No Resize Touch Active Touch Dynamic Touch Static This option always maximizes the initial window to fill the user's terminal screen. The user cannot resize the primary window, and the window will not rise to the top when a user clicks on it (this prevents it from obscuring other windows on the terminal screen). This option does not let the user exit the primary CimView window. The Exit menu item is removed from the File menu, and the Close menu item and Alt+F4 shortcut key are removed from the Control menu. Also, the Close Screen action is ignored in the primary window. This option opens the popup keypad whenever the user needs to enter data for Variable setpoints. This option is required for systems with no keyboard or keypad. For Touch Display systems: Select the Keypad option to enable a popup keypad for entering values for variable setpoints. This option sizes the CimView screen to best fit the window in which it is displayed. This option removes the Menu and Title bars from the primary CimView window and all subsequent windows. For Touch Display systems: If you select the No Menu/Title option, you must include a Close procedure in your CimView application. For example, on some screens, include a button that executes a CLOSE procedure to close the CimView window. This option prevents users from opening CimView screens not explicitly identified in Open Screen or Overlay Screen procedures. Open and Open Window menu items are removed from the File menu and the File Open toolbar button is disabled. This option prevents users from resizing CimView windows that are displayed. Keeps CimView screens currently being displayed swapped in. Without this flag, only documents in the cache are touched periodically to keep them swapped into memory. Keeps CimView screens with many dynamic objects swapped into memory. Keeps CimView screens with many static objects swapped into memory. For more information about these options, see the CIMPLICITY HMI for Windows NT and Windows 95 CimEdit Operation Manual (GFK-1396). G. If you want to pre-load the screen cache with selected files, enter the name of the cache file in the Cache File field. You can also select Browse to the right of this field to search for the cache file you want. H. Select OK to save your changes and return to the CIMPLICITY Options dialog, or select Cancel to close the Dialog dialog and return to the CIMPLICITY Options dialog without making any changes. 4. GFK-1220B Select OK to save the startup options and close the CIMPLICITY Options dialog. Chapter 4 Running CIMPLICITY Software 4-11 4 Selecting a Default Project and CimView Options Note In Windows NT systems, CimView cannot be started at boot time using the CIMPLICITY Startup Options application. This procedure configures a default project and CimView to start automatically at bootup. Projects and CimView can also be started manually. See “Starting a Project” (page 4-12) and “Starting CimView Manually” (page 4-12). Starting CimView Manually You can customize the Start menu so that, when you start CimView, it will automatically open with a specific screen and with various options enabled. These CimView start options are configured by editing the command line in the CimView Properties Shortcut screen. The command line format is: cimview.exe <option> <pathname> [<pathname>...] The options are recognized only when they are used with the primary (first) CimView window you launch. If multiple CimView screens are launched from a single command line and command line options are used, the first screen in the list is considered to be the primary window. For example, if the option /alwaysmaximized is used, the first screen in the list will be maximized, and all other screens will be displayed in their normal windows. The following command line options can be associated with a CimView icon: Argument Description /alwaysmaximized Displays the primary CimView window in a maximized state. You will not be allowed to resize the primary window. The window will not rise to the top when you click on it (this prevents it from obscuring other windows on your terminal screen). This option is only applied if it is used with the first CimView window opened. This window is known as the primary window. If used with subsequent open commands, it will be ignored. /keypad Displays a keypad window on the user’s screen whenever the user has to perform a Variable Setpoint action in a procedure. To enter a new setpoint value, the user clicks on the appropriate keys in the keypad window rather than entering them from a keyboard. This option is only applied if it is used with the first CimView window opened. This window is known as the primary window. If used with subsequent open commands, it will be ignored. /noexit For Touch Display systems: Select the Keypad option to enable a popup keypad for entering values for variable setpoints. Will not let you exit the primary CimView window. The Exit menu item is removed from the File menu, and the Close menu item and its Alt+F4 shortcut key are removed from the Control menu. Close Screen actions are ignored in the primary window. This option is only applied if it is used with the first CimView window opened. This window is known as the primary window. If used with subsequent open commands, it will be ignored. 4-12 CIMPLICITY® Display Station User's Manual – February 1997 GFK-1220B 4 /nomenutitle Removes the Menu Bar and Title Bar from the primary CimView window and all subsequent windows that you open. This option is applied to the new windows and also any windows that are opened from within CimView. If a later CimView command is executed without the option, the option is disabled for those windows and any new windows opened from within CimView. For Touch Display systems: If you select the No Menu/Title option, you must include a Close procedure in your CimView application. For example, on some screens, include a button that executes a CLOSE procedure to close the CimView window. In this case you should not select the /NoExit option since that will prevent the Close procedure from functioning. /noopen /noresize /project <name> /zoomtobestfit GFK-1220B Lets you open only the CimView screens that are explicitly mentioned in Open Screen and Overlay Screen actions. Open Screen and Overlay Screen actions that do not specify a screen are ignored. In addition, the Open and Open Window menu items and the file list are removed from the File menu, and the File Open Toolbar button is disabled. This option is applied to the new windows and also any windows that are opened from within CimView. If a later CimView command is executed without the option, the option is disabled for those windows and any new windows opened from within CimView. Prevents you from resizing any CimView windows that you display. This option is applied to the new windows and also any windows that are opened from within CimView. If a later CimView command is executed without the option, the option is disabled for those windows and any new windows opened from within CimView. Sets the base project to <name>. The data for all unqualified points on the windows you display will be requested from the named project. This option is applied to the new windows and also to any windows that are opened from within CimView. If a later CimView command is executed without the option, the previous value for the default project continues to be used. Initially places the primary CimView window in Zoom To Best Fit mode. All subsequent windows are also displayed in this mode. This option is applied to the new windows and also any windows that are opened from within CimView. Chapter 4 Running CIMPLICITY Software 4-13 4 Setting Command Line Options for Windows 95 Systems 1. In Windows Explorer, open the folder Start Menu in the path C:\Windows\. 2. Click (highlight) the file CimView.exe. 3. Select Properties from the Explorer File menu and then click the Shortcut tab. In the field labeled Target, you should see a command similar to the following: c:\cimplicity\CimView.exe /Keypad C:\cimplicity\Myproject\StartScreen.cim. 4. Edit the command line in the Target field to include the options and project screen that you want to use. In the example above, the Keypad option is specified. The screen that will be automatically launched is StartScreen.cim in Myproject. 5. Click the Apply button and then click OK to enable this option. 6. When you have this option enabled, CimView will start with the specified screen and with the Keypad option. If CIMPLICITY is not running when you start CimView, you will be prompted to start the project associated with the screen. For more information about CimView, see the chapter, “Using CimView” in the CIMPLICITY HMI Base System User’s Manual (GFK-1180). 4-14 CIMPLICITY® Display Station User's Manual – February 1997 GFK-1220B 4 Setting Command Line Options For Windows NT Systems Installing A Screen for CimView Once you have saved a CimEdit screen, you can use the Install option on the CimEdit File menu to install the screen in a program group for users to access. When you select Install from the File menu, the Program Groups dialog box is displayed. You can select the program group from the list of existing program groups, or you can enter the name of a new program group in the Program Group input field. When you click OK, the CimView icon for the screen will be placed in the program group that you specify. If you entered the name of a new program group, the group will be created and placed in the Program Manager. Using Command Line Options for Installed Screens Once you have installed a CimView icon in a program group, you can add arguments to the command line to control user access. To add arguments to the command line for an icon: 1. Click the CimView icon to select it. 2. Select Properties... from the File menu in the Project Manager. The Program Item Properties dialog box will open. 3. Insert the option (or options) you want between the executable name and the CimView screen name in the Command Line input field. (See the table on page 4-12.) For more information, refer to “Installing a Screen for CIMView” and “Using Command Line Options for Installed Screens” in the “Using CimEdit” chapter of the CIMPLICITY HMI Base System User’s Manual (GFK-1180). GFK-1220B Chapter 4 Running CIMPLICITY Software 4-15 4 Creating A New Project To create a new local or remote project, double-click the New Project icon in the CIMPLICITY shortcut menu. The project creation procedure displays a series of dialogs that let you: • Select the project type, name, and path. • Set project properties. • Use the project wizard to do initial configuration of ports, devices, and points for the new project. When the creation procedure is complete, select Install from the File menu to install the project in a folder. New Project Options When you create a new project, the New Project dialog opens. 4-16 CIMPLICITY® Display Station User's Manual – February 1997 GFK-1220B 4 Enter information in the following fields to create a new project: Project Type Select the type of project you want to create. The type of project you can create is controlled by the product option you have installed. For example, if you have installed the HMI Server option, then you can only create HMI Server base projects. Project Name New Subdirectory Enter the project name in this field. The project name you enter will also be used as the default subdirectory name for the project. If you want to use another name for your subdirectory, enter it in this field. You can select the options you want to be available in this project from the list of all installed options. Click an "X" in the box for each option you want to select. You can select the protocols you want to be available in this project from the list of all installed protocols. Click an "X" in the box for each protocol you want to select. Use the Drives and Directory input fields to select a directory path for the project directory you are creating. If you want to create the project on another disk in your network, click Network... to define the network path. Options Protocols Project Path When you have entered your information, click Create... to create the new project or click Cancel to cancel the create request. When you click Create..., the Configuration Cabinet for the project is created, and the Project Properties dialog opens to display the Options properties. Setting Project Properties The Project Properties dialog opens when you: • Are creating a new project, and you click Create... from the New Project dialog box. • Select Properties... from the Project menu for a project. • Click the Settings button on the project Toolbar. Use the Project Properties to choose or change general properties and options for a project. After you have modified the properties, you can select OK to accept the modifications, or select Cancel to close the Project Properties without accepting any changes. GFK-1220B Chapter 4 Running CIMPLICITY Software 4-17 4 General Properties The General properties you can change are: Project Type Project Name Options Protocols 4-18 If you want to change the project type, enter the new type in this field. Use the drop-down list button to the right of the input field to display the list of currently available project types and select the one you want. If you want to change the project name, enter the new name in this field. Select the options you want for this project from the list of available options. Click an "X" in the box to select an option. Otherwise, click the box blank. Select the device communication protocols you want to use for this project from the list of available protocols Click an "X" in the box to select an option. Otherwise, click the box blank. CIMPLICITY® Display Station User's Manual – February 1997 GFK-1220B 4 Options Properties The Options properties you can change are: Enable Project Broadcast Computer Name Click an "X" in this box if you want to broadcast the project name on the network. When you broadcast the project name, users on other nodes that request point data can use the project name in fully qualified points. Otherwise, they can only use the node name in fully qualified points. Select the computer the project is to run on when the project is started. For all installations, you may run the project on your computer. Using the Project Wizard The Project Wizard dialog opens when you: • Are creating a new project, and you click OK from the Program Groups dialog box. • Select Project Wizard... from the Project menu for a project. • Click the Project Wizard button on the project Toolbar. • Press Ctrl+W in the project. You can use the Project Wizard to define ports, devices, and points for a project. GFK-1220B Chapter 4 Running CIMPLICITY Software 4-19 4 Installing A Project Once you create a project, you will want to install it in a folder for easy access. To do this, in the Configuration cabinet for your project: 1. Select the File menu. 2. Select Install. The Folders dialog opens and lets you select the folder where you want to install the project. Enter information in the following fields: Program Group Enter the name of the program group where you want to install the project. The default program group will have the same name as your project. You can choose to keep that name, enter a new name, or select a name from the Existing Groups list. Select OK to install the object in the program group, or select Cancel to continue the installation without installing the object into a program group. When you select OK, the program group for your project will be created and placed in the Program Manager, and the Configuration cabinet for your project will be put in the program group. 4-20 CIMPLICITY® Display Station User's Manual – February 1997 GFK-1220B 4 Running the Demo Project Note You will need to use a keyboard to logon to the demo project. Before running the demo, attach a standard PS/2-type keyboard to the KEYBD port on the Touch Display system. A Demo project that showcases the features of CIMPLICITY HMI software is automatically loaded with your installation unless you select otherwise. To start the Demo project: On a Windows NT system, open the CIMPLICITY HMI program group, then select the Start Demo icon. On a Windows 95 system, click Start, select Program from the Start menu, select CIMPLICITY from the Program menu, then select the Start Demo icon. When the Select CIMPLICITY Project dialog opens: GFK-1220B 1. Select the CIMPDEMO project. 2. Select Start. The Starting CIMPDEMO dialog opens and displays the status of the CIMPLICITY processes as they start. 3. Wait for the CIMPLICITY Login dialog to be displayed. 4. Enter ADMINISTRATOR in the Username input field and click OK. 5. When the main menu screen opens, select any topic to proceed. Chapter 4 Running CIMPLICITY Software 4-21 4 Changing the Computer Name If you change the Computer Name of your Display Station, you will be prompted to reboot the system so that the change may take effect. When you are prompted, respond by selecting No. Then, shut down the system and reboot using the Shutdown option on the Windows 95 Start Menu or the Windows NT File menu. If you select Yes at the prompt, the system will fail to reboot in its initial attempt. If this occurs, simply reboot the system again and select a Normal reboot from the menu. Computer names must be less than or equal to ten characters to run CIMPLICITY software. To verify that your computer name is the correct length: • For Windows NT systems, use the Network Settings option in the Control Panel program group. • For Windows 95 systems, use the Network option in the Control Panel program group. In Windows 95 systems, for Viewers and HMIs to be able to browse remote nodes, the local computer name must be entered into the /WINDOWS.000/HOSTS file. 4-22 CIMPLICITY® Display Station User's Manual – February 1997 GFK-1220B Chapter Installing Upgrades 5 Up to 32MB memory can be installed in a Display Station product. All CIMPLICITY Display Station products contain two SIMM (single in-line memory module) slots, each of which can be filled with a 4, 8, or 16MB SIMM. Systems that have 16MB memory are shipped with one SIMM installed, so that a SIMM slot is available for an upgrade. These systems can be upgraded to 24MB by installing an 8MB SIMM or to 32MB by installing a 16MB SIMM. An ISA-compatible board can be installed in Glide Station and Touch Station products. These products feature a removable plate, located below the port connectors, that can be modified to provide cable access to the ISA board (Figure 1-3). The following topics are covered in this chapter: Opening the Rear Panel ..............................................................................................5-2 Installing a Memory Upgrade .....................................................................................5-2 Specifications ......................................................................................................5-4 Installation Procedure ..........................................................................................5-5 Removal Procedure ..............................................................................................5-8 Installing an ISA-Compatible Board...........................................................................5-9 Specifications ......................................................................................................5-9 Installation Procedure ..........................................................................................5-9 Removal Procedure ............................................................................................5-11 GFK-1220B 5-1 5 Opening the Rear Panel 1. If a floppy disk is installed in the disk drive, remove it from the drive. Caution To avoid damaging files, always shut down Windows before removing power from your Display Station product. 2. Shut down the Windows operating system (see “Shutting Down the Computer” in Chapter 2). 3. Turn OFF all power to the computer and associated devices. 4. Disconnect all cords and cables from the Display Station. 5. Remove the Display Station from its mounting location and place it display-side-down on a padded work surface. Caution This procedure should be performed in a clean, dust-free environment. Caution The rear panel must be supported when you remove it from the Display Station enclosure. The hardware components that are mounted on the rear panel are connected by cables to circuit boards in the unit enclosure. Careless handling could dislocate or damage cabling or components. Before disassembling your Display Station: To avoid placing strain on cables and components, make sure the rear panel is securely supported at all times. (Cable lengths may not allow removal of the rear panel from the Display Station enclosure.) We strongly recommend having another person steady the rear panel while you are working inside the enclosure. In some Touch Display products, cable lengths will allow placing the rear panel on the work surface directly next to the enclosure. Before disassembling these units, make sure that there is room to place the panel on your work surface. 5-2 CIMPLICITY® Display Station User's Manual – February 1997 GFK-1220B 5 6. Open the rear panel. A. Remove the 14 Phillips-head screws from around the outside edge of the rear panel. Do not remove other screws, which secure hardware components that are mounted on the inside of the rear panel. B. To free the rear panel from the unit enclosure, insert a small flat blade screwdriver under the edge of the rear panel (Figure 5-1). a4 5 5 7 7 Figure 5-1. Opening the Display Station Rear Panel C. The floppy disk drive and other components mounted on the rear panel will have to clear the edge of the enclosure. Lift the panel slightly, shifting it away from the port connector side of the enclosure and then back toward the port connector side. Suppport here D. Being careful not to place strain on the wiring, rotate the panel up and away from the port connector side, supporting it on the opposite edge of the enclosure. If cable lengths permit, lay the panel on the work surface next to the Display Station. Otherwise, have another person support the rear panel in a tilted position on the edge of the unit enclosure while you install (or remove) the upgrade. GFK-1220B Chapter 5 Installing Upgrades 5-3 5 Installing a Memory Upgrade Specifications Note Memory installed in the CIMPLICITY Display Station products must meet the following specifications. Slower memory will not work in the Display Station products. Type: 72-pin SIMM Contacts: Tin-plated contacts Access Time: 70ns or less The following default BIOS settings are based on the use of memory with the above specifications: Fast DRAM: Enabled DRAM Timing Control: Fast Note Parity is disabled for the CIMPLICITY Display Station. Therefore, the Display Station will accept SIMMs that either have or do not have parity. When you purchase additional product options to run on the Display Station, it is necessary to contact GE Fanuc to update the system licensing. Use one of the following numbers to reach GE Fanuc to update your registration: Phone: 518-464-4619 Fax: 518-464-4581 You will need: • original licenses you received with the Display Station product. • license(s) provided with the upgrade products • System Key Code generated during the registration procedure For more information about completing your registration, refer to “Registering CIMPLICITY Software” in the CIMPLICITY Online Help or in the CIMPLICITY Base System User Manual, GFK-1180. 5-4 CIMPLICITY® Display Station User's Manual – February 1997 GFK-1220B 5 SIMM Installation Procedure Caution Electrostatic discharge is a major cause of electronic component failure. From the time the SIMM is removed from its antistatic bag to the time it is installed, extreme care should be taken to avoid damaging the SIMM or the Display Station with static electricity. A small, imperceptible electrostatic discharge could occur without your knowing and could be enough to damage electronic components. To avoid damage from electrostatic discharge, adhere to the following precautions when performing this procedure: • The SIMM is packaged in a static-safe bag which protects the product during shipping. Before removing the SIMM from this bag, be prepared to handle it in a static-safe environment. • Wear a properly functioning antistatic strap and be sure that you are fully grounded. Never touch the SIMM, or any components inside the Display Station, unless you are wearing an antistatic strap. • Any surface upon which you place the unprotected SIMM should be static-safe, facilitated by antistatic mats, if possible. • Extra caution should be taken in cold, dry weather, when static charges can easily build up. For 32MB Upgrades Display settings: To run Windows 95 or Windows NT with more than 24MB of memory, the video display settings must be configured for 16 colors. All 32MB systems are shipped with the video display configured for 16 colors. If you are upgrading your system to 32MB, you must first change the display settings as follows: GFK-1220B 1. From the Windows 95 Start menu, select Settings and then select Control Panel. 2. Click the Display icon. 3. Select the Settings tab. 4. Set the Color Palette to 16 colors and click OK. 5. When the system asks if you want to restart the computer, click No. Shut down the system using the Shutdown option on the Windows 95 Start menu or the Windows NT File menu. 6. Add the additional memory as described on page 5-6 and reboot. Chapter 5 Installing Upgrades 5-5 5 To install the memory upgrade, complete the following procedure: 1. Open the Display Station enclosure (see “Opening the Rear Panel”). 2. Install the new memory board in the empty SIMM slot in the Display Station enclosure (see Figure 5-2 for location). A. Line up the key slots in the memory card with the matching points in the SIMM slot, as shown in Figure 5-3. (The SIMM’s chips should be facing away from the CPU and its pins should point down into the SIMM socket.) B. Slip the SIMM into the socket at a 45-degree angle and carefully press the bottom of the card into the connectors. C. Gently push the SIMM into a perpendicular position until the clips on the ends of the SIMM sockets snap into place. D. Check to ensure that the SIMM is correctly seated and that connector contacts touch. The SIMM should not move around in its socket. 3. Replace the rear panel on the unit enclosure and secure it using the screws that you removed in step 6. 4. Install the Display Station in its mounting location and connect the power, control and peripheral connections. (Refer to “Installation Procedure” in Chapter 2.) At this point, you can power up the Display Station and begin operating with the new memory. No software configuration is required because the system automatically detects the added memory. You can verify the memory installation by watching the powerup sequence. When you power up the Display Station, you will see the message XXXX KB OK, where XXXX is a number that increases until it matches the amount of usable memory. This number, which is displayed for a brief time, should include the memory that you just added. If your system is running Windows 95, you can also see how much memory is installed in the Display Station as follows: 1. Click the Start button. 2. Click Settings. 3. Click Control Panel. 4. Double click the System icon. The System Properties window will be displayed. The amount of memory installed is listed under the heading, Computer. Note It is the customer’s responsibility to remove any upgrades from the Display Station before returning the unit to GE Fanuc for repair or warranty administration. We recommend that, next to the serial number on the rear panel of the Display Station, you place a label identifying installed upgrades. 5-6 CIMPLICITY® Display Station User's Manual – February 1997 GFK-1220B 5 a45578 Expansion SIMM Figure 5-2. Location of SIMMs in Display Station Enclosure a45581 KEYS Figure 5-3. Detail of SIMM Installation GFK-1220B Chapter 5 Installing Upgrades 5-7 5 SIMM Removal Procedure Caution Electrostatic discharge is a major cause of electronic component failure. Extreme care should be taken to avoid damaging the SIMM or the Display Station with static electricity. A small, imperceptible electrostatic discharge could occur without your knowing and could be enough to damage electronic components. To avoid damage from electrostatic discharge, adhere to the following precautions. • Wear a properly functioning antistatic strap and be sure that you are fully grounded. Never touch the SIMM, or any components inside the Display Station, unless you are wearing an antistatic strap. • Any surface upon which you place the unprotected SIMM should be static-safe, facilitated by antistatic mats, if possible. • SIMM(s) should be placed in a static-safe bag after removal from the Display Station. • Extra caution should be taken in cold, dry weather, when static charges can easily build up. To remove the SIMM(s), complete the following procedure: 1. Shut down the Display Station, remove it from its mounting location, and open the rear panel. (See “Opening the Rear Panel” on page 5-2 for these procedures.) 2. Remove the SIMM(s) as follows: A. Press down on the clips at the ends of the SIMM sockets so that the SIMM is released. B. Lift the SIMM up slightly to disengage it from the connector contacts and then tilt the SIMM so that it’s key slots are disengaged from the SIMM socket keys. C. Gently remove the SIMM from the socket. KEYS Figure 5-4. SIMM Removal 3. 5-8 To protect the SIMM during handling and storage, place it in an antistatic bag. CIMPLICITY® Display Station User's Manual – February 1997 GFK-1220B 5 Installing an ISA Board Specifications Maximum length: 9.75 inches (24.77cm) Maximum power draw: 1.0A at +5V 0.64A at +12V 0.43A at -12V Installation Procedure Caution Electrostatic discharge is a major cause of electronic component failure. The Display Station with static electricity. A small, imperceptible electrostatic discharge could occur without your knowing and could be enough to damage electronic components. To avoid damage from electrostatic discharge, adhere to the following precautions when performing this procedure: • Wear a properly functioning antistatic strap and be sure that you are fully grounded. Never touch any components inside the Display Station, unless you are wearing an antistatic strap. • Extra caution should be taken in cold, dry weather, when static charges can easily build up. Note Refer to documentation provided by the manufacturer of your ISA-compatible board for additional cautions and procedures. To install the ISA board, complete the following procedure: GFK-1220B 1. Shut down the Display Station, remove it from its mounting location, and open the rear panel. (Refer to “Opening the Rear Panel” on page 5-2 for these procedures.) 2. Hold the ISA board by its bracket. The component side of the ISA board should be facing down. 3. Carefully press the ISA board contacts into the ISA slot in the Display Station unit, as shown in Figure 5-5. 4. Press the bracket down until it engages the mounting screw on the ISA slot. 5. Tighten the mounting screw using a Phillips-head screwdriver. Chapter 5 Installing Upgrades 5-9 5 6. If you require external access to ports on the ISA board: A. Remove the access plate from the Display Station enclosure. (The panel is secured by four Philips-head screws.) B. Modify the plate to accommodate cable connectors. C. Re-install the access plate in the Display Station enclosure. 7. Install the rear panel on the unit enclosure. 8. Install the Display Station in its mounting location and connect the power, control and peripheral connections. (Refer to “Installation Procedure” in Chapter 2.) Note It is the customer’s responsibility to remove any upgrades from the Display Station before returning the unit to GE Fanuc for repair or warranty administration. We recommend that, next to the serial number on the rear panel of the Display Station, you place a label identifying installed upgrades. a45651 1 2 1 Press the ISA board contacts into the ISA slot. 2 Press the bracket down until it engages the mounting screw on the ISA slot. Figure 5-5. ISA-Compatible Board Installation 5-10 CIMPLICITY® Display Station User's Manual – February 1997 GFK-1220B 5 Removal Procedure Note GE Fanuc recommends minimal insertion and removal of ISA boards because it puts strain on the connectors. To remove the ISA board, complete the following procedure: GFK-1220B 1. Shut down the Display Station, remove it from its mounting location, and open the rear panel. (Refer to “Opening the Rear Panel” on page 5-2 for these procedures.) 2. Using a Phillips-head screwdriver, loosen the mounting screw on the ISA slot mounting bracket. 3. Disengage the bracket of the ISA board from the mounting screw. (You might need to use your thumb and forefinger to press up on the board’s mounting bracket while pressing down on the ISA slot bracket.) 4. Carefully pull the board out of the ISA slot. Chapter 5 Installing Upgrades 5-11 Chapter System Operation 6 This chapter presents details pertaining to the operation of specific Display Station features that are not covered in Chapter 2, “Getting Started.” The following topics are discussed in this chapter: External Keyboard Operation .....................................................................................6-2 Setting Up External Display Operation .......................................................................6-4 Changing Video Display Settings ...............................................................................6-4 Operating an External Mouse (Windows 95 Systems Only) ........................................6-4 Installing Printer Drivers ............................................................................................6-5 GFK-1220B 6-1 6 External Keyboard Operation Most standard PS/2 keyboards with the appropriate DIN connector are compatible with Display Station systems. However, if you experience problems with an external keyboard, we recommend that you use one manufactured by KeyTronic®. These are commercially available through various outlets. An external keyboard provides access to the entire ASCII key set and a better ergonomic layout for development work and for situations that require data entry. On Display Station products that have a built-in keyboard, the built-in and external keyboards are wired together through a buffer that sends key code information to the controller. Table 6-1 lists commonly used keyboard shortcuts that are available in Windows software. For a more complete listing of keyboard shortcuts, refer to the appropriate software documentation. Keyboard shortcuts are also listed on the pulldown menus in applications that provide them. (Pulldown menus can be accessed using the mouse or by pressing the ALT key plus the underlined letter in the menu title.) Note If you are using Windows 95, you can set the numeric keypad on an external keyboard to operate the mouse cursor. (This does not work with the internal keypad on Glide Station and Touch Station systems.) When you have completed this setup, the 4, 8, 6, and 2 keys (← ↑ → ↓) will move the cursor and the 5 key will operate as the left mouse button. To set up your system for this type of operation, perform the following procedure: 1. Click the Start button. 6-2 2. Click the Control Panel icon. 3. Select the Settings option. 4. Double click the Accessibility Options icon. 5. Click the Mouse tab. 6. Click the Use MouseKeys check box. 7. Click the Settings... box to enable a keyboard shortcut, change pointer speed , etc. (The default setting enables this feature when NUMLOCK is on.) 8. Click OK twice. CIMPLICITY® Display Station User's Manual – February 1997 GFK-1220B 6 Table 6-1. Selected Keyboard Shortcuts In To Press Windows (any Windows See Help on a selected dialog box item F1 program) Allows you to change the name of the selected icon. F2 Brings up a Find window F3 Refreshes the screen F5 Toggles the screen F6 View the Task window CTL + ALT + DEL Quit a program ALT + F4, or CTL + ALT + DEL (from the Task window) SHIFT + F10 (or click the right mouse button) Display the Start menu CTRL + ESC Switch to the window you last used ALT + TAB Switch to the next window ALT while repeatedly pressing TAB Cut CTRL + X Copy CTRL + C Paste CTRL + V Delete DEL Undo CTRL + Z Windows 95 My Computer and Select all CTRL + A Explorer Refresh a window F5 View the folder one level up BACKSPACE Close the selected folder and all its parent folders SHIFT while clicking the Close button Switch between left and right panes F6 Go to CTRL + G Expand current selection if it’s collapsed RIGHT ARROW Windows 95 Explorer only GFK-1220B View the shortcut menu for the selected item Collapse current selection if it’s expanded LEFT ARROW DOS box Toggle the printer on and off CTRL + P Backspace CTRL + H During Startup Bring up the Setup utility F8 while booting Bypass CONFIG.SYS and AUTOEXEC.BAT and go directly to the DOS prompt. F13 (CTRL + F3) Select line-by-line query of the boot files F16 (CTRL + F8) Chapter 6 System Operation 6-3 6 Setting Up External Display Operation Note The Display Station system does not support simultaneous use of the Flat Panel display and an external CRT monitor. Only one display can be active at a time. Two executable files (CRT.COM and STN.COM) that allow you to switch between the internal Flat Panel display and an external CRT monitor are provided in the GEFUTIL folder on the hard disk and on the Utilities disk that is provided with the Display Station. To switch to the external monitor, you must run the CRT executable program. To switch back to the internal video screen, you must run the STN executable program. If power is cycled, the Display Station will power up with the internal screen active. To run CRT.PIF or STN.PIF: 1. Using My Computer or Explorer, open the C:\GEFutil folder. 2. Double click the CRT or STN file. Changing Video Display Settings Display Station products are shipped with the video display settings configured for 16 colors. If your Display Station has 24MB or less memory, you can use the 256-color setting. To change the display settings: 1. Click on the Display icon in the Control Panel. 2. Select the Settings tab. 3. Set the Color Palette to 256 colors and click OK. 4. When the system asks if you want to restart the computer, click No. Then shut down the system using the Shutdown option on the Start Menu. Note If your Display Station has 32 MB memory, you must use the 16-color display setting. For information on installing memory upgrades, refer to Chapter 5. Operating an External Mouse (Windows 95 Systems Only) On Display Station systems that run Windows 95 software, the COM1 port is set up to be compatible with a Logitech™ serial mouse. To use an external mouse, the Display Station must be powered up or restarted with the mouse connected to the COM1 port. During bootup, the software will automatically detect the presence of the external mouse. (To restart the computer, select Shutdown from the Windows Start menu, then select the option, Restart the Computer.) 6-4 CIMPLICITY® Display Station User's Manual – February 1997 GFK-1220B 6 Installing Printer Drivers Windows 95 systems: To install printer drivers, double click on the My Computer icon on the Windows 95 desktop. Double click on the Printers icon in the My Computer window. Double click on the Add Printer icon in the Printers window. The Add Printer Wizard screen will appear. Follow the prompts provided by the Wizard screens to finish installing the printer driver for your printer. Windows NT systems: To install printer drivers, double click on the Print Manager icon in the Main program group. 1. From the Window menu, select the printer. 2. From the Printer menu, select Properties. 3. In the Printer Properties dialog box, select Other in the Driver box. 4. In the Install Driver dialog box, specify the drive and path where the printer driver is located and click the OK button. For more information about installing printer drivers, refer to the “printer drivers, installing” topic in Windows NT online help. GFK-1220B Chapter 6 System Operation 6-5 Chapter SNP Device Communications 7 The Series 90 device communications enabler uses the Series Ninety Protocol (SNP) to communicate with Series 90 programmable controllers over a serial line. Standard serial communication ports are used to communicate between a Series 90 programmable controller and CIMPLICITY software. SNP is a half-duplex protocol that uses the RS-485 (enhanced version of RS-422) and RS-232 electrical interfaces. The protocol permits communication between one master and one or more slaves. Communication between CIMPLICITY software and Series 90 controllers can be set up as a point-to-point connection or in a multidrop configuration, using Serial Port 2 configured for RS-422. Connections can be established on the RS-485 CPU port of the Series 90 programmable controller, or via a Communications Coprocessor Module (CMM) card. The following topics are presented in this chapter: Overview ....................................................................................................................7-2 Hardware Installation .................................................................................................7-3 Application Configuration ..........................................................................................7-6 SNP Performance Notes............................................................................................7-10 GFK-1220B 7-1 7 Overview Supported Devices The SNP device communications enabler supports reading and writing point data to the following Series 90 controllers: S90-20 Model 211 S90-30 Model 311 S90-70 Model 731 S90-70 Model 732 S90-30 Model 313 S90-30 Model 321 S90-70 Model 771 S90-70 Model 772 S90-30 Model 323 S90-30 Model 331 S90-30 Model 341 S90-70 Model 781 S90-70 Model 782 S90-70 Model 914 S90-70 Model 924 Supported Memory Types Data may be read from the following memory types: Data may be written to the following memory types: %AI %AQ %G %I %M %Q %R %S %SA %SB Analog Inputs Analog Outputs Genius Global Data Discrete Inputs Discrete Internals Discrete Outputs Registers Discretes Discretes Discretes %AI %AQ %G %I %M %Q %R %T %SC %T Discretes Discrete Temporaries Analog Inputs Analog Outputs Genius Global Data Discrete Inputs Discrete Internals Discrete Outputs Registers Discrete Temporaries Caution Do not write data into the system registers (%S, %SA, %SB, %SC). Doing so may interfere with the normal operation of the programmable controller. 7-2 CIMPLICITY® Display Station User's Manual – February 1997 GFK-1220B 7 SNP Hardware Configuration Requirements Original CMM cards did not support the SNP protocol. The following versions (or later) of software/hardware are needed to use this feature. Other modules in the Series 90 CPU rack may need to be upgraded when upgrading the CPU firmware. Series 90-30 The versions for Series 90-30 are: CPU IC693CPU331K IC693CPU341 V3.03 or higher firmware. Version 4.02 or higher firmware. Note 331 and 341, and 351 CPUs are the only members of the 90-30 family that support a CMM card. CMM IC693CMM311D Version 3.50 or higher version of Logicmaster 90-30 Software Package Programmer and Configurator. This is optional if a Hand-Held Programmer for Series 90-30 and 90-20 Programmable Controllers is available. The Hand-Held Programmer may be used to configure the CMM. IC641SWP301L 3.5I 2DD, 5.25I 2S/HD (WSI Version) IC641SWP304J IC641SWP306F IC641SWP307F 5.25I 2S/2D (WSI Version) 3.5I 2DD, 5.25I 2S/HD Standard Serial COM port 5.25I 2S/2D Standard Serial COM port Series 90-70 All CPU modules require V4.02 or higher firmware. CPU CMM IC697CPU731N IC697CPU732C IC697CPU771L IC697CPU772C IC697CPU781D Series 90-70 Model 731 Series 90-70 Model 732 Series 90-70 Model 771 Series 90-70 Model 772 Series 90-70 Model 781 IC697CPU782D IC697CPM914 IC697CPM924 Series 90-70 Model 782 Series 90-70 Model 914 Series 90-70 Model 924 IC697CMM711E PCMA2 H/W only IC697CMM711EX PCMA1 H/W only Version 4.01 or higher of the Logicmaster 90-70 Software Package Programmer and Configurator is required to configure a CMM card. IC641SWP701L 3.5I 2DD, 5.25I 2S/HD (WSI Version) IC641SWP704J IC641SWP706B GFK-1220B Chapter 7 SNP Device Communications 5.25I 2S/2D (WSI Version) 3.5I 2DD, 5.25I 2S/HD Standard Serial COM port 7-3 7 Required Documents You should have one or more of the following documents available when configuring your SNP communications network: Series 90-20 Programmable Controller User’s Manual (GFK-0501). Series 90-30 Programmable Controller Installation Operator’s and User’s Manual (GFK-0356). Series 90-70 Programmable Controller Installation Manual (GFK-0262 ). If you are using a CMM card, you should also have the following manual available: Series 90 PLC Serial Communications User’s Manual (GFK-0582). 7-4 CIMPLICITY® Display Station User's Manual – February 1997 GFK-1220B 7 Hardware Installation The CIMPLICITY SNP Device Communications enabler supports point-to-point configurations of Series 90 controllers. When you configure the SNP port, you will need to know the baud rate and parity being used by the Series 90 programmable controllers. Also, CIMPLICITY software uses 8-bit characters with 1 stop bit for communicating with Series 90s. If a CMM card is used, it may be desirable to configure an SNP ID different from that of the attached port. The Series 90 PLC Serial Communications User’s Manual (GFK-0582) describes the ladder logic required to change the SNP ID. If this is done, be sure that the Series 90 is in a RUN state, and the SNPIO ladder logic has successfully completed before attempting to communicate with the device via CIMPLICITY software or device communications will fail. In general, a baud rate of 9600 or less is recommended. If both ports on the CMM module are in use, the baud rate must be 9600 or less. Caution Serial ports on the Series 90 programmable controllers and on the CIMPLICITY Display Station are not isolated. Potential differences above 7 volts will cause damage. Isolators should be employed on long distance runs to guard against equipment damage. Refer to Appendix A for cable and connector information. Also refer to the cable diagrams in the manual for your programmable controller communication module. GFK-1220B Chapter 7 SNP Device Communications 7-5 7 Application Configuration When you are configuring ports, devices, and device points, you will be asked for some information that is specific to SNP device communications. Refer to the CIMPLICITY for Windows Base System User’s Manual (GFK-1180) for details of configuring ports, default properties, and devices in a CIMPLICITY project. Port Configuration When you create a new port for SNP device communications, enter the following information in the New Port dialog box: 1. In the Protocol field, select “SNP” from the list of protocols available. 2. In the Port field, select the communication port (COM1 or COM2) that will be used for SNP communications. When you click Enter to create the port, the Port Properties dialog box for the protocol will be displayed. General Properties 7-6 CIMPLICITY® Display Station User's Manual – February 1997 GFK-1220B 7 Use the General properties tab to enter general information for the port. You can define the following: Description Scan Rate Retry Count Enable Enter an optional description to help you identify the port. Enter the base scan rate for the port. Point scan rates will be in multiples of the base rate. You can specify a scan rate in Ticks, Seconds, Minutes, or Hours. If communications cannot be established to a device on the port, the device is considered to be down and a $DEVICE_DOWN alarm is generated. Once a device is down, periodic attempts are made to resume connections to it. Enter the number of scans to wait before attempting to reconnect to a device after a communications error has been detected. Click an “X” in this box if you want the port to be enabled when the project starts. If you leave this box blank, the port will not be enabled when the project starts, and points will not be available for devices on the port. Default Properties Use the Default properties tab to enter information about the SNP communications for the port. You can define the following: Baud Rate Parity Enter the baud rate for communications. Click the drop-down list to the right of the input field and select a rate from the list. Select the parity for communications. Note Make sure the baud rate and parity you select match those on the Series 90. Series 90s are normally shipped with the RS-485 and CMM ports configured for a baud rate of 19.2 Kbaud, and odd parity. GFK-1220B Chapter 7 SNP Device Communications 7-7 7 SNP Device Configuration When you create a new device for SNP device communications, enter the following information in the New Device dialog box: 1. In the Device field, enter the name of the device you are configuring. 2. In the Port field, select the SNP port to be used by the device. When you click Enter to create the port, the Device Properties dialog box will be displayed. General Properties Use the General properties tab to enter general information for the device. You can define the following: Description Resource Model Type Enter an optional description to help you identify the device. Enter a resource that can be associated with this device for alarm generation. Select the type of device. Click the drop-down button to the right of the input field to display your choices, then make a selection. For this protocol, the choices are: GE Fanuc Series 90-30 GE Fanuc Series 90-70 7-8 CIMPLICITY® Display Station User's Manual – February 1997 GFK-1220B 7 Default Properties Use the Default properties to enter information about SNP device communications for the device. You can define the following: SNP ID Access Mode Enable For multidrop communications: Click an "X" in the Multidrop check box. Enter the ID of the programmable controller in SNP ID. For point-to-point communications: Clear the Multidrop check box. Select Read or Read/Write in Access Mode. For all communications: Select Yes in this box to enable the device when the project starts. Select No to disable the device. The points associated with the device will be unavailable. SNP Point Configuration When you define a point, the following fields have values that are unique to or have special meanings for SNP device communications: Access Update Criteria Address A point may be configured for READ or WRITE access. The update criteria determines how the data will be requested. Enter ON_CHANGE or ON_SCAN for points whose value should be polled by the SNP driver at regular intervals. Point address requirements are device-dependent. For SNP device communications, the address format is <memory_type><offset>. When you are configuring DIGITAL points, you must also enter data in the following fields: Address Offset GFK-1220B Enter the bit offset that corresponds to the bit position within the word. Chapter 7 SNP Device Communications 7-9 7 SNP Performance Notes Impact on Series 90 Performance When the attached port of a Series 90 is being used to support serial communications, a maximum of 5 milliseconds will be added to the scan on the controller. This should be taken into account in any application. Performance Using the SNP Communications Enabler The CIMPLICITY SNP communications enabler is a serial communications enabler which supports access to most memory types in a Series 90 controller. The amount of data that can be transferred between CIMPLICITY software and the Series 90 controller will be limited by the baud rate and some protocol level tunables (discussed in the next section). In addition, when communicating to multiple Series 90 controllers in a multidrop configuration, certain transactions between the CIMPLICITY software and the Series 90 controller must occur each time communication is switched to a different Series 90 controller. These transactions occupy a significant amount of time (typically 0.4 to 1 seconds). When designing the CIMPLICITY system, the throughput via SNP should be taken into account. Tuning SNP Protocol Throughput The protocol supports the ability to tune certain protocol level parameters which significantly impact performance. These parameters, along with the baud rate, are dominant factors in polling throughput. SNP Data Size One parameter controls the amount of data that can be sent between the host and the Series 90 controller. For CIMPLICITY based systems, CIMPLICITY software will attempt to negotiate a data size of 4000 bytes. This value was selected in order to optimize the I/O performance within CIMPLICITY software’s host computer. If a lower value is configured on the Series 90 controller, the lower value will be used. 7-10 CIMPLICITY® Display Station User's Manual – February 1997 GFK-1220B 7 Time Between SNP Messages The parameter controls the time between SNP messages. By default, CIMPLICITY software will attempt to negotiate a value of 5 milliseconds. A higher value may be configured by defining a logical entity named BSM$SNP_T1_TIME. The logical is defined by adding a line to the project’s DATA\LOG_NAMES.CFG file. The line should be in the following format: BSM$SNP_T1_TIME|S|default|3|<time> where <time> is the desired time in milliseconds between messages. If the logical is created, or the value for the logical is modified, CIMPLICITY software must be stopped and restarted before the new value will take effect. As with the data size parameter, the time between SNP messages is a negotiated value. A higher value on the Series 90 controller will result in the higher value being used. SNP Special Notes In earlier versions of the Series 90 controller, the protocol limited the number of retries to three. If the CPU firmware on the Series 90 controller is earlier than V3.03 for the Series 90-30 or V4.02 for the Series 90-70, or when using a Series 90-20, be sure to configure the retry count on the port to a value of 3 or less. Logging Controller Information When the CIMPLICITY system first establishes communication with a Series 90 programmable controller, it will print out the controller’s model, SNP timer values, the internal data transfer size and the number of elements for each memory type available in CIMPLICITY software. This information will appear in the <PORT>.OUT file in the project’s LOG directory, where <PORT> is the name of the port configured for SNP communications. For example, if SNP is configured to run on COM1, the output file will be COM1.OUT. GFK-1220B Chapter 7 SNP Device Communications 7-11 7 Enabling Protocol Level Debugging In addition to this information, the SNP communications enabler supports the ability to dynamically enable/disable the logging of protocol level errors as they occur. This information is logged in the Status Log file. By default, the logging of protocol level errors is disabled. When difficulties are encountered in communicating with a device, it may be useful to enable the protocol level debugging. This may be done by creating the <PORT>.DEBUG file in the project’s LOG directory, where <PORT> is the name of the port configured for SNP communications. To create the file, select Command Prompt... from your project’s Tools menu, then type the following commands: cd .\log copy nul <PORT>.debug where <PORT> is the name of the port configured for SNP communications. For example, if SNP is configured to run on COM1, the file name will be COM1.DEBUG. The debugging will begin immediately; you do not need to restart CIMPLICITY software. Disabling Protocol Level Debugging To turn off the logging of protocol level information, remove the COM1.DEBUG file from the project’s \LOG directory. To remove the file, select Command Prompt... from your project’s Tools menu, then type the following commands to create the file: cd .\log del <PORT>.debug where <PORT> is the name of the port configured for SNP communications. 7-12 CIMPLICITY® Display Station User's Manual – February 1997 GFK-1220B Chapter TCP/IP Communications 8 The Series 90 TCP/IP Device Communications enabler supports TCP/IP communication over Ethernet to Series 90-70 and Series 90-30 programmable controllers. This device communication enabler employs the Series 90 Host Communication Toolkit (HCT) as its underlying communication layer. The following topics are covered in this chapter: Overview ....................................................................................................................8-2 Installation Verification Procedures ............................................................................8-4 Application Configuration ........................................................................................8-10 Note A standard PS/2-type keyboard is required for configuration of TCP/IP parameters. Use of a keyboard is also recommended with the HCT diagnostic program. GFK-1220B 8-1 8 Overview Supported Devices The Series 90 TCP/IP Device Communications enabler supports the following devices: • GE Fanuc Series 90-70 programmable controllers • GE Fanuc Series 90-30 programmable controllers Supported Memory Types The Series 90 TCP/IP Device Communications enabler supports reading and writing point data to the Series 90-70 and Series 90-30 controllers. Data may be read from the following memory types: Memory Type Description Memory Type Description %AI Analog Input Table %Q Discrete Output Table %AQ Analog Output Table %R Register Memory %G Genius Seamless %S System Fault Table %I Discrete Input Table %SA Special Contacts A %L Local Memory * %SB Special Contacts B %M Discrete Internal %SC Special Contacts C %T Discrete Temporary * %L may only be used on Series 90-70 Caution Do not write data to the system registers (%S, %SA, %SB, and %SC). Doing so may interfere with the normal operation of the programmable controller. Data may be written to the following memory types: Memory Type Description Memory Type Description %AI Analog Input Table %M Discrete Internal %AQ Analog Output Table %Q Discrete Output Table %G Genius Seamless %R Register Table %I Discrete Input Table %T Discrete Temporary %L Local Memory * * %L may only be used on Series 90-70 8-2 CIMPLICITY® Display Station User's Manual – February 1997 GFK-1220B 8 Hardware Configuration Requirements Target Series 90-70 programmable controllers require the following: • A TCP/IP Ethernet communications module (IC697CMM741H, PROM version 1.12 or later). • Supporting LAN software (IC651ENS042, containing GSM version 2.09 or later, TCP executive 1.28 or later, and TCP/IP configuration editor 1.02 or later) • CPU firmware must be release 4.12 or later Target Series 90-30 programmable controllers require the following: • A TCP/IP Ethernet communications module (IC697CMM321). • CPU firmware must be release 5.0 or later If you are using Logicmaster 90 software: • Logicmaster 90 version 4.0 or later must be used with Series 90-70 programmable controllers. • Logicmaster 90 version 6.0 or later must be used with Series 90-30 programmable controllers. Caution Do not use the Series 90 TCP/IP Communications Interface with a Series 90-70 programmable controller using C-blocks in the ladder unless the programmable controller CPU has been upgraded to version 6.0 firmware. The programmable controller may crash otherwise. Related Documents You should have the following document available when configuring your communications network: Series 90-70 Programmable Controller Installation Manual (GFK-0262) If you are using an Ethernet Module, you should also have the following manual available: TCP/IP Ethernet Communications for the Series 90-70 PLC (GFK-1004) GFK-1220B Chapter 8 TCP/IP Communications 8-3 8 Installation Verification Procedures The Series 90 Diagnostic Program (HCTDIAG.EX) is a program provided with the Series 90 TCP/IP device communication enabler that you can use to check the basic operation and configuration of your network without starting CIMPLICITY software. You can perform the following functions: • Live update of the currently displayed domain • Read load test • Write load test For this program to function, CIMPLICITY software's Series 90 TCP/IP device communications enabler must be successfully installed, and you must have configured the TCP/IP port and Series 90 devices using CIMPLICITY application configuration functions. To start the diagnostic program, click the Series 90 Diagnostics icon in the CIMPLICITY Configuration cabinet. The HCTDiag window will be displayed To connect to a Series 90 programmable controller in the TCP/IP network: 8-4 1. Click the drop-down list button to the right of the Device input field to display the list of currently configured devices, and select a Series 90 device from the list. 2. Click the drop-down list button to the right of the Port input field to display the list of currently configured ports, and select the TCP/IP port to use. 3. Click the drop-down list button to the right of the Domain input field to display the list of currently supported domains (memory types), and select a domain to display. 4. Click the Connect button. CIMPLICITY® Display Station User's Manual – February 1997 GFK-1220B 8 The program will make the connection with the programmable controller, and display the values contained in the requested domain. To display the data for another domain, just select the domain from the drop-down list in the Domain input field. The data for the new domain will automatically be read and displayed in the data box. You can use the menus and pushbuttons to do the following: GFK-1220B • Toggle between manual and automatic data update modes. • Request manual reads of domain data • Request writes to the programmable controller • Display programmable controller status • Perform a read load test • Perform a write load test Chapter 8 TCP/IP Communications 8-5 8 Toggling Between Data Update Modes Normally, domain data is only read when the domain display is initiated or when you click on the Read from PLC or Write to PLC buttons. You can have data updated automatically by doing the following: 1. Click the File menu. 2. Select Live Update from the submenu. When Live Update is enabled, the domain values will be read and updated automatically approximately every three seconds. To return to manual mode: 1. Click the File menu. Note that Live Update has a check mark next to it. 2. Select Live Update again to turn off the Live Update mode. Requesting Manual Reads of Domain Data If you are not in Live Update mode, you can manually request reads of the domain by clicking the Read from PLC button. Writing Test Data to the Programmable Controller You can use this window to write test data to the Series 90 programmable controller. 1. Select the domain to write to. Note that if you select a domain that is read-only, the Write to PLC button will be disabled (grayed out). 2. Enter the memory location offset that you want to write to in the Offset input field. 3. Enter the value you want to write in the Value input field. 4. Click the Write to PLC button. The value will be written to the offset location, and the data display box will be updated to reflect your write request. 8-6 CIMPLICITY® Display Station User's Manual – February 1997 GFK-1220B 8 Checking Programmable Controller Status Click the PLC Status button to display the current status of the programmable controller. An HCT Diagnostic dialog box like this will be displayed: Click OK to close the dialog box Performing a Read Load Test You can use HCTDIAG.EXE to perform read load tests on your network. The read load test is performed in two parts: • The first part tests the number of words per second that can be read over the network • The second part tests the number of read requests per second that can be made over the network. The test reads data from all domains on the currently selected programmable controller. To perform a read load test: 1. Click the Test menu. 2. GFK-1220B Select Read Load Test... from the submenu. The Read Load Test dialog box will open. Chapter 8 TCP/IP Communications 8-7 8 8-8 3. Enter the number of seconds you want to run the test in the Number of Seconds input field, and click on OK to start the test. The test will cycle through reads of all memory types on the current device for the number of seconds you specify. At the end of the time period, an HCT Diagnostic dialog box is displayed, telling you the average number of words read per second over the test period. 4. Click OK to proceed to the second part of the read test. The test will again cycle through reads of all memory types on the current device for the number of seconds you specified on the Read Load Test screen. At the end of the time period, an HCT Diagnostic dialog box is displayed, telling you the average number of read requests made per second over the test period. 5. Click OK to terminate the test. CIMPLICITY® Display Station User's Manual – February 1997 GFK-1220B 8 Performing a Write Load Test Warning This test will overwrite the contents of the register domain (%R). Do not run this test if the register domain of the programmable controller contains important information. You can use HCTDIAG.EXE to perform write load tests on your network. The write load test tests the number of words per second that can be written over the network. The test writes data to the register domain (%R) on the currently selected programmable controller. To perform a write load test: 1. Click the Test menu. GFK-1220B 2. Select Write Load Test... from the submenu. The Write Load Test dialog box will open. 3. Enter the number of seconds you want to run the test in the Number of Seconds input field, and click on OK to start the test. The test will cycle through writes of register memory on the current device for the number of seconds you specify. At the end of the time period, an HCT Diagnostic dialog box is displayed, telling you the average number of words read per second over the test period. 4. Click OK to terminate the test. Chapter 8 TCP/IP Communications 8-9 8 Application Configuration When you are configuring ports, devices, and device points, you will be asked for information that is specific to Series 90 TCP/IP device communications. Refer to the CIMPLICITY for Windows Base System User’s Manual (GFK-1180) for details of configuring ports, default properties, and devices in a CIMPLICITY project. Port Configuration When you configure a port for Series 90 TCP/IP device communications, the Port Properties screen for the protocol will be displayed. General Properties Use the General properties tab to enter general information for the port. You can define the following: Description Enter an optional description to help you identify the port. Scan Rate Enter the base scan rate for the port. Point scan rates will be multiples of the base rate. You can specify a scan rate in Ticks (100 ticks = 1 second), Seconds, Minutes, or Hours. Retry Count Enter the number of scans to wait before attempting to reconnect to a device on this port after a communications error is detected. If communications cannot be established by a device on this port, the device is considered to be down and a $DEVICE_DOWN alarm is generated. Once a device is down, periodic attempts are made to resume connections to it. Enable 8-10 Click an "X" in this box if you want the port to be enabled when the project starts. If you leave this box blank, the port will not be enabled when the project starts, and points will not be available for devices on the port. CIMPLICITY® Display Station User's Manual – February 1997 GFK-1220B 8 TCP/IP Properties Note The Display Station is configured with TCP/IP communications enabled and the IP address set to 1.1.1.1. If you are using TCP/IP, you should modify this address for your network configuration. If you place multiple Display Stations on a network without modifying this address, a “Conflicting Address” warning message will be displayed at startup. Use the TCP/IP properties tab to enter information about TCP/IP communications for the port. You can define the following: Connect Time Out Enter the number of milliseconds to wait when making a connect request to a device. Request Time Out Enter the number of milliseconds to wait when waiting for a request to complete. Note Connect Time Out and Request Time Out values apply to all Series 90 TCP/IP ports in your project. You can enter your own values or click Default Values to use the factory default values. The default values are: GFK-1220B Connect Time Out 10000 ms (10 seconds) Request Time Out 5000 ms (5 seconds) Chapter 8 TCP/IP Communications 8-11 8 Device Configuration When you configure a Series 90 for TCP/IP device communications, the Device Properties screen for devices using this protocol will be displayed. General Properties Use the General properties tab to enter general information for the device. You can define the following: Description Enter an optional description to help you identify the device. Resource Enter a resource that can be associated with this device for alarm generation. Model Type Select the type of device. Click the drop-down button to the right of the input field to display your choices, then make a selection. For this protocol, the choices are: GE Fanuc Series 90-70 GE Fanuc Series 90-30 8-12 CIMPLICITY® Display Station User's Manual – February 1997 GFK-1220B 8 TCP/IP Properties Use the TCP/IP properties tab to enter information about TCP/IP communications for the device. You can define the following: IP Address Enter the IP address of the Ethernet card on the Series 90 device in these four fields. Enable Click an "X" in this box to enable the device when the project starts. If you leave this box blank, the device will not be enabled and points associated with the device will be unavailable. Device Point Configuration For all memory types except %L, enter the memory type and offset in the Address field. The address format is: <memory type><address> For example, to specify Register 1, the address is %R1. All offsets have a minimum value of 1. The address of %L memory types requires the block name. Block names must be unique over all programs in the programmable controller. Block names cannot begin with a numeric character. The address format is: %L<address><block name> For example, to specify the fifth word in the %L domain in the program block ABC, the address is %L5ABC. GFK-1220B Chapter 8 TCP/IP Communications 8-13 Chapter MODBUS RTU Device Communications 9 The MODBUS RTU protocol supports a multidrop configuration with one master. In this application, the CIMPLICITY MODBUS RTU Device Communications Enabler functions as the master. A CIMPLICITY device must be configured for each physical device (or slave) from which data will be collected. This chapter provides installation and configuration information for the MODBUS RTU Communications Enabler. The following topics are presented: Overview ....................................................................................................................9-2 Hardware Installation .................................................................................................9-4 Validating Communications .......................................................................................9-6 Application Configuration ..........................................................................................9-7 Device Configuration..................................................................................................9-8 Point Configuration ..................................................................................................9-10 GFK-1220B 9-1 9 Overview Supported Devices The MODBUS RTU Communications Enabler supports communications to the following programmable controllers: • GE Fanuc Series Six PLC with CCM3 card (Version 1.06 or later) • Modicon 584 • Modicon 884 • Modicon 484 • Modicon 984 • Modicon 584 • Modicon Micro 80 Memory Types The MODBUS RTU Communications Enabler supports the following memory types on GE Fanuc Series Six and Modicon programmable controllers: Series Six Reads from the following memory types on Series Six with CCM3 in RTU mode: Output Table Input Table Registers 0xxx(x) 1xxx(x) 3xxx(x) or 4xxx(x) Writes to the following memory types on Series Six programmable controllers with CCM3 in RTU mode: Output Table Registers 0xxx(x) 4xxx(x) Modicon Reads from the following memory types on Modicon controllers: Coils 0xxx(x) Inputs Holding Registers Input Registers 1xxx(x) 4xxx(x) 3xxx(x) Writes to the following memory types on Modicon controllers: 9-2 Coils 0xxx(x) Holding Registers 4xxx(x) CIMPLICITY® Display Station User's Manual – February 1997 GFK-1220B 9 Caution When writing to Coils (0xxxx), memory protect and coil disable are overwritten. On Modicon controllers, coils that are not programmed in the controller logic program are not automatically cleared on powerup. This means that if a coil is set to 1, the output will remain HOT until explicitly set to 0. Writing to Holding Registers overrides the controller memory protect. Double Precision Notes D4xxxx points are Holding Register Points interpreted as Double Precision. Two registers are used for each point with both registers are assumed to have a positive value. Because of this mapping: • Do not declare Double Precision points with overlapping addresses. For example, D40001 and D40002 overlap, while D40001 and D40003 do not. • Do not define points that use the same Holding Register and Double Precision point address (for example, defining one point with the address D40001 and another with the address 40001). Configure Double Precision points as DINT or DUINT point. Arrays are not supported for Double Precision points. GFK-1220B Chapter 9 MODBUS RTU Device Communications 9-3 9 Required Documents You should have the following document available when configuring a Series Six for MODBUS RTU communications: Series Six Programmable Controllers Data Communications Manual (GFK-25364) For all other programmable controllers, you should have the documentation for the controller available. Hardware Configuration Requirements The MODBUS RTU protocol allows one master and up to 247 slaves on a common line. The CIMPLICITY MODBUS RTU Communications Enabler is the master. Many configurations limit the number of slaves to a smaller number. For example, Goulds's J478 modem restricts the number of slaves to 32. Contact your hardware vendor for information about the number of slaves that your hardware configuration can support. 9-4 CIMPLICITY® Display Station User's Manual – February 1997 GFK-1220B 9 Hardware Installation Controller Configuration When configuring controllers for use with CIMPLICITY, the following steps should be taken: 1. Configure the controller/communications card for MODBUS RTU communications. 2. Assign each slave within the configuration a unique slave address between 1 and 247 (decimal). 3. Configure all slaves at the same baud rate and parity as the master (CIMPLICITY). CIMPLICITY Hardware Configuration The MODBUS RTU Communications Enabler communicates via a serial connection between the CIMPLICITY host computer and the slave controllers. Connect the PC to the Controller To connect the Display Station to a Series Six PLC with a CCM3 card installed, refer to the Series Six Programmable Controllers Data Communications Manual (GFK-25364). Serial Port Configuration The Display Station has two serial communication ports, COM1 and COM2. On Display Station products that run Windows 95, you can use either port for MODBUS RTU device communications. On systems that run Windows NT, the COM1 port is dedicated to the touch screen. No special port configuration is required. GFK-1220B Chapter 9 MODBUS RTU Device Communications 9-5 9 Validating Communications You can use the MODBUS RTU Diagnostic Program, MB_TEST, provided with the MODBUS RTU device communication enabler to check the basic configuration and operation of your network without starting CIMPLICITY software. You can perform the following functions: • Read test • Write test For this program to function, CIMPLICITY software's MODBUS RTU device communication enabler must be successfully installed, and you must have configured the MODBUS RTU ports and devices using CIMPLICITY application configuration functions. This program cannot be used at the same time as the MODBUS RTU device communication enabler over the same communications port. To start the program: 1. Open the Configuration Cabinet for the project where the MODBUS RTU driver is configured. 2. Stop the project. 3. From the Tools menu, select Command Prompt.... 4. In the Command Prompt window, type the command to invoke the diagnostic test you wish to perform. The format for the command is: mb_test [-B<baud rate>] [<parity>] [-T<port_id>] [-S<slave id>] [-R<address>] [-C<count>] where: -B<baud rate> <parity> -T<port id> -S<slave id> -R<address> -C<count> Defines the speed of the terminal line. (Default value is 9600. ) Defines the parity for communications. Choose one of the following: -E Defines EVEN parity -O Defines ODD parity -N Defines NO parity If no parity is specified, the default is EVEN parity. Defines the port to be used for communications. (Default value is COM1) Defines the slave to be addresses (Default value is 1.) Defines where on the slave controller a read should begin. (Default is no read, just device connect.) Defines the number of elements to read (Default is 1 element. ) For example, to read the first five holding registers on slave 7 from COM2 at 4800 baud using ODD parity, the command would be: $ mb_test -B4800 -O -S7 -TCOM2 -R40001 -C5 9-6 CIMPLICITY® Display Station User's Manual – February 1997 GFK-1220B 9 Application Configuration When you configure ports, devices, and points that use the MODBUS RTU device communication enabler, some fields must contain unique values for the communications to work successfully. These are detailed below. Refer to the CIMPLICITY for Windows Base System User’s Manual (GFK-1180) for details pertaining to configuring ports, default properties, and devices in a CIMPLICITY project. Port Configuration When you configure a port for MODBUS RTU device communications, the Port Properties dialog box for the protocol will be displayed. General Properties Use the General properties tab to enter general information for the port. You can define the following: Description Scan Rate Enter an optional description to help you identify the port. Retry Count Enter the number of times to retry communications to a device on this port after a communications error is detected. Enter the number of scans to wait before attempting to reconnect to a device after a communications error has been detected. If communications cannot be established for a device on the port, the device is considered to be down and a $DEVICE_DOWN alarm is generated. Once a device is down, periodic attempts are made to resume connections to it. Click an "X" in this box if you want the port to be enabled when the project starts. If you leave this box blank, the port will not be enabled when the project starts, and points will not be available for devices on the port. Enable GFK-1220B Enter the base scan rate for the port. Point scan rates will be multiples of the base rate. You can specify a scan rate in Ticks, Seconds, Minutes, or Hours. Chapter 9 MODBUS RTU Device Communications 9-7 9 Default Properties Use the Default properties tab to enter general information for the port. You can define the following: Baud Rate Parity Enter the baud rate for communications. Click the drop-down list to the right of the input field and select a rate from the list. Select the parity to be used for communications. Device Configuration When you configure a Modicon or GE Fanuc programmable controller for MODBUS RTU communications, the Device Properties dialog box for devices using this protocol will be displayed. General Properties 9-8 CIMPLICITY® Display Station User's Manual – February 1997 GFK-1220B 9 Use the General properties tab to enter general information for the device. You can define the following: Description Resource Model Type Enter an optional description to help you identify the device. Enter a resource that can be associated with this device for alarm generation. Select the type of device. Click the drop-down button to the right of the input field to display your choices, then make a selection. For this protocol, the choices are: GOULD 484 GOULD M84 GOULD 584 GOULD 884 GOULD 984 STAT_PLC DYN_PLC If you select STAT_PLC, the size of the registers is fixed at the maximum possible size. If you select DYN_PLC, the size of the registers is determined at run time. Default Properties Use the Default properties tab to enter information about MODBUS RTU communications for the device. You can define the following: Address Not used CPU ID Enter the slave address of the device. For the Series Six, it should correspond to the CPU ID of the attached Series Six. Valid slave addresses range from 1 to 247 decimal. Broadcast mode (slave address 0) is not supported by the MODBUS RTU Device Communications enabler. Enable GFK-1220B Select Yes to enable the device when the project starts. If you select No, the device will not be enabled and points associated with the device will be unavailable. Chapter 9 MODBUS RTU Device Communications 9-9 9 Point Configuration Once your devices are configured, you may configure points for them. Through device point configuration, you may configure the following: • Points that read or set Coils • Points that read Discrete Inputs • Points that read Input Registers • Points that read or set Holding Registers • Points that read or set General Reference • Points that read or set Holding Registers as Double Precision The fields described below have configuration values that are unique to, or have special meaning for MODBUS RTU communications. Access Update Criteria Address The type of access depends on the point address. Enter READ for points from Discrete Inputs or Input Registers. Enter READ or WRITE for points from Coils or Holding Registers. The update criteria determines how the data will be requested. Enter ON_CHANGE or ON_SCAN for all points. Enter the point address of the data as follows: 0xxxx for Coils 1xxxx for Discrete Inputs 3xxxx for Input Registers 4xxxx for Holding Registers where xxxx is the bit number or register number of the point. For example, the address of Holding Register one is 40001, and the address of Coil one is 00001. All address must contain exactly five digits to be valid. If you are configuring an ANALOG point type in Discrete Inputs or Coils, the address entered in this field must be that of the least significant bit of the point. For example, if you configure a 16-bit analog point for Coils 17 through 32, enter 00017 in this field. When you configure DIGITAL points in Holding Registers or Input Registers, you must also enter data in the following field: Bit Offset 9-10 Enter the bit offset in the Holding Register or Input Register that defines the point, where 0 is the least significant bit, and 15 is the most significant bit. CIMPLICITY® Display Station User's Manual – February 1997 GFK-1220B Chapter Diagnostics and Troubleshooting 10 This chapter consists of three sections: “Self-Test Diagnostics,” “Troubleshooting,” and “Corrective Actions.” The first section describes how to respond to errors that could be detected by the automatic self test that is performed each time the Display Station powers up. The “Troubleshooting” section contains tables of symptoms, their possible causes, and recommended corrective actions. The “Corrective Actions” section contains detailed procedures that are too lengthy to include in the Troubleshooting tables. Self-Test Diagnostics................................................................................................10-2 System Test and Initialization............................................................................ 10-2 System Configuration Verification.....................................................................10-2 Troubleshooting .......................................................................................................10-3 Powerup.............................................................................................................10-3 Display ..............................................................................................................10-4 Memory .............................................................................................................10-5 Touch Screen.....................................................................................................10-5 Serial Mouse (Windows 95 Systems Only).........................................................10-6 External Keyboard .............................................................................................10-7 Communications................................................................................................10-8 Printing .............................................................................................................10-9 Corrective Actions..................................................................................................10-11 Enabling Touch Screen Operation ................................................................... 10-11 Calibrating the Touch Screen ..........................................................................10-14 Deleting the PS/2 Mouse Driver.......................................................................10-16 Installing the Serial Mouse Driver ................................................................... 10-18 Enabling Touch Pad Mouse Operation............................................................. 10-20 CMOS Checksum Error................................................................................... 10-22 GFK-1220B 10-1 10 Self-Test Diagnostics The computer automatically performs self-test diagnostics each time it is powered up. The self-test consists of a series of checks that verify correct performance of the computer hardware. When the self-test is being performed, you will see the message XXXX KB OK displayed on the screen, where XXXX is a number that increases until it matches the amount of usable memory. System Test and Initialization These routines test and initialize board hardware. If the routines encounter an error during the tests, you will see an error message on the screen. There are two kinds of errors: fatal and nonfatal. If a non-fatal error occurs, the system can usually continue the boot up sequence. Non-fatal error messages usually appear on the screen with the following instruction: press <F1> to RESUME Write down the message and press the F1 key to continue the bootup sequence. System Configuration Verification These routines check the current system configuration against the values stored in the CMOS memory. If they don’t match, the program will generate an error message. To correct this condition, you will need to run the BIOS setup program and correct the configuration information in memory. (Refer to Appendix B.) There are three situations in which you might need to change the CMOS settings: 1. You are starting your system for the first time. 10-2 2. You have changed the hardware attached to your system. 3. The CMOS memory had lost power and the configuration information has been erased. If this has happened, call GE Fanuc’s CIMPLICITY hotline. (Please see “Customer Support” in Chapter 1.) CIMPLICITY® Display Station User's Manual – February 1997 GFK-1220B 10 Troubleshooting Powerup Symptom Possible Causes Display Station does not power up. Power supply not on (PWR indicator not lighted). Make sure that Display Station is plugged in. Make sure that power supply is functioning properly. Display is blank (PWR indicator is lighted). Non-System disk or disk error message displayed. See “Display” on page 10-4. See “Display” on page 10-4. Disk in floppy disk drive. Remove floppy disk and press any key. Or, remove floppy disk and then reboot or power cycle. Safe Recovery Error message displayed. Occurs on initial power up if the unit is accidentally turned off without first shutting down the Windows 95 or Windows NT software. Press ENTER (Continue). The Display Station will power up normally. Memory count during powerup self-test is incorrect. Optional SIMM is installed incorrectly or is incompatible with the Display Station CPU. Make sure that the appropriate memory card is installed correctly. CMOS checksum error — Defaults loaded CMOS battery failed CMOS battery failure. Note: This battery has a lifetime of up to 10 years under normal operating conditions. The battery is not field replaceable. For more information, see “CMOS Checksum Error” on page10-22. A screen appears just after powerup, or just after reset, which has the title “CMOS Setup Utility.” The DEL key has been accidentally pressed. Press the RESET button and power up again. Or, press the CAN (Cancel) key once or twice, until prompted to exit without saving. Then, press SHIFT + 9 (for yes) and the ENTER key. The Display Station will then power up normally. A DOS prompt, C:>, appears on the screen instead of the software. The F5 or F8 function key has been accidentally pressed during powerup or after the RESET switch was pressed. Press the RESET switch and do not press any keys until after the screen for the system software appears. The Display Station reset even though the power was not interrupted and the reset button was not pressed. The CTRL-ALT-DEL keys were pressed twice at the same time. This should never be done, unless you are attempting to reset the Display Station. message displayed. GFK-1220B Solution Chapter 10 Diagnostics and Troubleshooting 10-3 10 Display Note Wait until the unit has been powered up for an hour before making final adjustment of the contrast. (To adjust, turn the CONTRAST knob on the right side of the unit.) If the unit will be used in an environment where the ambient temperature is likely to vary, adjust for best viewing when the unit has stabilized at the middle of the temperature range. For example, if you expect the ambient temperature to vary from 0 to 45°C, let the unit stabilize at 23°C, then make the adjustment. This provides acceptable viewing at 0 to 45°C. If you expect the temperature to vary from 25 to 45°C, adjust the contrast at 35°C. Symptom Characters are dim. Display is blank (PWR indicator is lighted). Video appears scrambled while CIMPLICITY is loading. 10-4 Possible Causes Solution Contrast control is not set properly. Adjust the Contrast control, located on the right panel of the Display Station. Computer screen is in direct light. Change lighting or adjust contrast. Contrast needs adjusting. Adjust the Contrast control. Screen has overheated. If Display Station is in direct sunlight, move it and allow it to cool. Display Station is set up for external display. Using an external display, run STN.COM in the GEFUTIL directory to reset the Display Station. If you don’t have an external display, reset the computer (press the RESET button on the right panel of the Display Station). Screen saver is active. Touch the touch screen, Touch Pad mouse, or a key on the keypad . Display Station was not configured for 16 colors before upgrading to 32MB memory. Refer to “For 32MB Upgrades” under “Installation Procedure” in Chapter 5. CIMPLICITY® Display Station User's Manual – February 1997 GFK-1220B 10 Memory Symptom Possible Causes Solution Memory count during powerup self-test is incorrect. Optional SIMM is installed incorrectly or is incompatible with the Display Station CPU. Make sure that the appropriate memory card is installed correctly. Out of Memory message is displayed or insufficient memory error occurs during operation. System ran out of memory for the application. Check the memory requirements for the application. (Refer to the application documentation.) Install additional memory. Too many terminate and stay resident (TSR) programs running. Modify the startup folder to use only those TSR applications that are really needed. Touch Screen Note Operating temperature can affect touch screen calibration. Calibrating the touch screen is an easy procedure. Simply recalibrate it if it is slightly off. (See page 10-14.) Symptom Cursor does not respond at all to touch. GFK-1220B Possible Causes Solution Touch screen disabled. Set up for touch screen operation (see “Enabling Touch Screen Operation”). Touch screen driver accidentally deleted. Reinstall touch screen driver System is busy. Press CTRL-ALT-DELETE to view task list. Cursor moves but does not follow your touch accurately. Touch screen not calibrated properly. Run calibration program. See “Calibrating the Touch Screen.” Touch screen responds erratically to touch; cursor might not be visible. Display Station is set up for PS/2 mouse. Note: This occurs if the Auto Hardware Detect utility is run. GE Fanuc does not recommend using the Auto Hardware Detect utility when adding options. Perform procedure in “Deleting the PS/2 Mouse Driver.” Then set up for touch screen operation (see “Enabling Touch Screen Operation”.) Chapter 10 Diagnostics and Troubleshooting 10-5 10 Touch Pad Mouse Symptom Cursor does not respond at all to touch. Solution Mouse driver accidentally deleted. Reinstall mouse driver. See “Enabling Touch Pad Mouse Operation” on page 10-20. System is busy. Press CTRL-ALT-DELETE to view task list. Grease or other chemical residue is on the surface. Clean the surface with alcohol or ammoniabased glass cleaner. Gloves, chemicals, or dirt on hands. Remove gloves, or clean your hands. The pointer bounces back after you remove your finger. Mouse Properties not set up correctly. Refer to “Touch Pad Mouse Setup” on page 10-21. Touch Pad mouse responds erratically Mouse Properties not set correctly Refer to “Touch Pad Mouse Setup” on page 10-21. Make sure that the Pressure Sensitive box is checked. Adjust the Touch Threshold setting toward the Heavy end of the scale. Virtual Scroll Bar feature does not work. Mouse Properties not set correctly. Refer to “Touch Pad Mouse Setup” on page 10-21. In the Touchpad Enhancements dialog, the Enable Enhancements box should be checked. Adjust the scroll zone if necessary. (Virtual Scroll Bar will not work if the scroll zone is not wide enough to be visible on the right side of the adjustment window.) Mouse does not respond to taps. Taps feature has been disabled in Mouse Properties screen. Refer to “Touch Pad Mouse Setup” on page 10-21. Make sure the Tap and Drag feature is selected. The High Report Rate box is not checked. Make sure this box is checked. (See “Touch Pad Mouse Setup” on page 10-21.) Edge Finder feature is enabled. Try moving the cursor a second time. With Edge Finder feature enabled, cursor moves out of window the second time you move it. If you want to disable Edge Finder feature, see “Touch Pad Mouse Setup” on page 10-21. The cursor is stuck in a window. 10-6 Possible Causes CIMPLICITY® Display Station User's Manual – February 1997 GFK-1220B 10 External Serial Mouse (Windows 95 Systems Only) Symptom Cursor does not respond to mouse movement Possible Causes Solution Serial mouse not plugged in. Plug mouse into COM1 port on Display Station. The type of mouse is not supported. Use a serial mouse. System is busy. Press CTRL-ALT-DELETE to view task list. Mouse not detected. Restart Display Station product with external mouse connected. Correct driver not installed. Make sure that Logitech Serial Mouse driver is loaded. Refer to “Installing the Serial Mouse Driver” on page 10-18. Keyboard Symptom External keyboard locks up Internal Keyboard GFK-1220B Possible Causes Solution The type of keyboard is not supported. Use a Key Tronic keyboard. (Most PS/2 keyboards will work. However, we recommend a keyboard manufactured by Key Tronic.) Keyboard not plugged into keyboard port on Display Station. Plug keyboard in. System is busy. Press CTRL-ALT-DELETE to view task list. System is busy. Press CTRL-ALT-DELETE to view task list. Chapter 10 Diagnostics and Troubleshooting 10-7 10 Communications PLC/CPU Connection Symptom CIMPLICITY does not communicate with a PLC that has been autoconfigured (AUTOCONFIG/DEFAULT/I/O error). Possible Causes The system is attempting to communicate with a 90-30 PLC using the SNP driver and a CIMPLICITY project. Solution 1. With the PLC powered up and connected to the Display Station, establish communication between the Display Station and PLC via the 90-30 SNP driver. 2. Using a Hand-Held Programmer, toggle the Default I/O (Enable or Disable) configuration parameter for the CPU. Communications between the Display Station and the PLC will be stopped. (Communications are stopped when you toggle from Enable to Disable, or vice versa.) 3. Power cycle the PLC. Communications between the host computer and the controller are unsuccessful. 10-8 COM port not configured in system. Verify that the COM port is configured in the system. Cabling between computer and controller. Verify that the cable between the computer and the controller is correctly wired. Baud rate and parity configured incorrectly. Verify that the baud rate and parity on the computer are consistent with those on the controller. Wrong address. Verify that the slave address is correct. CIMPLICITY® Display Station User's Manual – February 1997 GFK-1220B 10 MODBUS RTU Communications Symptom Communications between the host computer and the controller are unsuccessful. Possible Causes Solution COM port not configured in system. Verify that the COM port is configured in the system. Cabling between computer and controller. Verify that the cable between the computer and the controller is correctly wired. Baud rate and parity configured incorrectly. Verify that the baud rate and parity on the computer are consistent with those on the controller. MODBUS port not configured for RTU communications. Verify that the controller's MODBUS port is configured for RTU communications. Wrong address. Verify that the slave address is correct. Network Communications Symptom Conflicts on network. GFK-1220B Possible Causes IP Address not unique. Chapter 10 Diagnostics and Troubleshooting Solution Change the IP address to a unique address. (See “Using TCP/IP Communications” in Appendix C.) 10-9 10 Printing Symptom 10-10 Possible Causes Solution Printer will not turn on. Cables not connected properly. Printer power cord not plugged in. Ensure that the cables are properly connected and that the power cord is connected to the electrical outlet. Printer will not print. Printer is not turned on. Turn on the printer Printer is not online. Set the printer to online. The device drivers for your application are not installed. Install the correct printer drivers for your application in Windows. Printer that is set up for a network is not connected to the network. Connect the printer to the network. Printer cable is too long, unshielded, or defective. Replace the cable. Printer is offline. Paper tray is empty. Fill the paper tray with paper. Set printer to online. Printer prints garbled information. Correct printer drivers not installed. Install the correct printer driver. Cable is not connected properly. Ensure that the printer cable is connected properly to the computer. Problem specific to printer. Run a printer self-test. Refer to the documentation provided with your printer for instructions. If the self-test fails, the problem is printer-specific. The printing section of the software documentation and in Windows online Help may also be helpful. CIMPLICITY® Display Station User's Manual – February 1997 GFK-1220B 10 Corrective Actions Enabling Touch Screen Operation Reloading the Touch Screen Driver (Windows 95) From the Hard Disk 1. Plug a standard PS/2-type keyboard into the Display Station’s KEYBOARD port. GFK-1220B 2. To display the Start menu, press CTRL + ESC. 3. Press the down cursor key (↓ ↓) until the Settings option is selected. Press ENTER. 4. Select the Control Panel option and press ENTER. The Control Panel window will be displayed. 5. Press the right cursor key (→ →) until the Add New Hardware icon is selected. Press ENTER. The Add New Hardware Wizard window will be displayed. 6. The Next option should be selected by default. (If the Next option is not selected, press TAB until it is.) Press ENTER The following dialog box will be displayed. Chapter 10 Diagnostics and Troubleshooting 10-11 10 7. The dialog box shown in step 6 asks you: Do you want Windows to search for your new hardware? Caution Do not select the Yes option. If you select the Yes option, the software will default to the standard PS/2 mouse, which will conflict with the touch screen. If this happens, you will need to delete the PS/2 mouse and restart the Display Station. (See “Deleting the PS/2 Mouse Driver” page 10-14.) If you accidentally select the Yes option and go to the next screen, click the Back button to return to the first Wizard window and select the No option. Press the ↓ key to select the No option. 8. Press ENTER. The following dialog box will be displayed. 9. Press the ↓ key to select Mouse. Press ENTER. The next dialog box in the Add New Hardware Wizard will be displayed. 10. Press the ↓ key to select Dynapro in the list of Manufacturers. In the Models list, DTF PS/2 Port Touch Screen Driver should be displayed. 10-12 CIMPLICITY® Display Station User's Manual – February 1997 GFK-1220B 10 11. Press ENTER (Next). The following screen will be displayed. 12. Press ENTER (Finish). The Add New Hardware Wizard will finish the hardware installation. 13. The driver will start to load. It will then stop and ask for the location of the ECAL.DAT file. Type c:\ for the directory and press ENTER. 14. The driver will stop again and ask for the location of more files. Type c:\windows\system for the directory. 15. After the driver has completed its load process, you must restart Windows for the touch screen to function. From the Utilities Disk If you cannot load the touch screen driver from the hard disk, you can load it from the Utilities disk provided with the Display Station. To load the driver from the Utilities disk, select the Have Disk option in the Add New Hardware Wizard dialog box. Insert the Utilities disk in the external drive (a:). In the Copy Manufacturer’s Files From dialog box, change the path to A:\TOUCH and press ENTER. GFK-1220B Chapter 10 Diagnostics and Troubleshooting 10-13 10 Reloading the Touch Screen Driver (Windows NT) The touch screen driver can be re-installed from the hard drive by running the setup utility, C:\TOUCH\TNSETUP.EXE. Or, you can install it from the Utilities disk provided with the system by running A:\TOUCH\TNSETUP.EXE. 1. From the Windows NT File menu, select Run. 2. In the Run window, type the command line and press Enter. 3. Select COM1 and the default parameters provided for COM1 in the setup. Calibrating the Touch Screen Note Operating temperature can affect touch screen calibration. Wait until the Display Station has been powered up for a few hours before deciding whether you need to calibrate the touch screen. Calibrating the touch screen is an easy procedure. If it is slightly off, simply recalibrate it using the following procedure. 1. Open the Windows Control Panel and double-click the Mouse icon. The following Mouse Properties window will appear 10-14 CIMPLICITY® Display Station User's Manual – February 1997 GFK-1220B 10 2. Select the Tab labeled General. 3. From the General tab, select Options. This displays the Touch Screen dialog box, which allows you to adjust the double click rate for the touch screen or calibrate the touch screen. 4. Click Calibration . . . in the Touch Screen dialog box. The following message will appear: Caution Do not use a sharp object to touch the touch screen. The calibration program will prompt you to touch the dot on all four sides of the screen. Be sure to gently touch the very edge of the screen, otherwise the cursor will not follow your finger properly when you move it across the screen. When you have finished, the Touch Screen dialog box will reappear. 5. GFK-1220B Click OK to save your touch screen settings. Chapter 10 Diagnostics and Troubleshooting 10-15 10 Deleting the PS/2 Mouse Driver (Windows 95 Systems) If you have accidentally installed the PS/2 mouse driver, you will need to delete it before you can reinstall the touch screen driver. This procedure is necessary because the PS/2 mouse driver conflicts with the touch screen driver. 1. Plug a standard PS/2-type keyboard into the Display Station’s KEYBOARD port. 10-16 2. Press CTRL + ESC to display the Start menu. 3. Press the down cursor key (↓ ↓) until Settings is selected. Press ENTER. The Settings menu will be displayed (Control Panel will be the default selection.) 4. Press ENTER. The Control Panel window will be displayed. 5. Use the cursor keys(→ →, ↓) to select the System icon. Press ENTER. The System Properties window will be displayed. 6. Press the TAB key to select the General tab and then the → key to select the Device Manager tab. A list of hardware devices will be displayed. 7. Press the TAB key twice to highlight the Computer line. 8. Press the ↓ key to move down the list of hardware devices in the Computer folder until Mouse is selected. 9. Press the → key to open the list of Mouse device drivers. CIMPLICITY® Display Station User's Manual – February 1997 GFK-1220B 10 10. Press the ↓ key to select the Standard PS/2 Port Mouse. 11. Press TAB until the Remove option is highlighted. Press ENTER. The Confirm Device Removal dialog box will be displayed. 12. Press ENTER. The Device Manager tab will be displayed. 13. Press TAB to select the Close option. Press ENTER. 14. Set up the Display Station for touch screen operation (see page 10-11). GFK-1220B Chapter 10 Diagnostics and Troubleshooting 10-17 10 Installing the Serial Mouse Driver To install the serial mouse driver from the Utilities disk: 1. To display the Start menu, press CTRL + ESC. 2. Press the down cursor key (↓ ↓) until the Settings option is selected. Press ENTER. 3. Select the Control Panel option and press ENTER. The Control Panel window will be displayed. 4. Use the cursor keys to select the New Hardware icon and press ENTER. The Add New Hardware Wizard window will be displayed. 5. Select the Next button and press ENTER The following dialog box will be displayed. 6. The dialog box shown in step 5 asks you: Do you want Windows to search for your new hardware? Caution Do not select the Yes option. If you select the Yes option, the software will default to the standard PS/2 mouse, which will conflict with the touch screen. If this happens, you will need to delete the PS/2 mouse and restart the Display Station. (See “Deleting the PS/2 Mouse Driver” page 10-14.) 10-18 CIMPLICITY® Display Station User's Manual – February 1997 GFK-1220B 10 If you accidentally select the Yes option and go to the next screen, click the Back button to return to the first Wizard window and select the No option. Press the ↓ key to select the No option. 7. Press ENTER. The following dialog box will be displayed. 8. Press the ↓ key to select Mouse. Press ENTER. The next dialog box in the Add New Hardware Wizard will be displayed. 9. Press the ↓ key to select Logitech in the list of Manufacturers. In the Models list, select Logitech Serial Mouse. 10. When Windows 95 prompts you to restart the computer, press ENTER (Yes). When Windows 95 restarts, you should see the TouchMeter icon next to the clock in the right side of the task bar. GFK-1220B Chapter 10 Diagnostics and Troubleshooting 10-19 10 Enabling Touch Pad Mouse Operation How To Install the Driver Software Making an Installation Floppy Disk Unzip the Synaptics 4.1.10 driver on a formatted floppy drive. You can download the Touch Pad mouse driver from the Synaptics site on the World Wide Web at http://www.synaptics.com 1. Download the compressed driver software file to a convenient temporary directory on your Glide Station unit (for example C:\SYNTOUCH). 2. Uncompress the downloaded file, using an unzip utility. (You can download an unzip utility from the Web site, if you do not already have one.) 3. Follow steps 1 through 7 in “Installing the Driver from Floppy Disk or the Hard Drive.” 4. In the Install From Disk dialog box, type the name of the directory that contains the uncompressed driver files (for example, C:\SYNTOUCH). 5. Follow steps 9 through 11 in “Installing the Driver from Floppy Disk or the Hard Drive.” Installing the Driver from Floppy Disk or the Hard Drive 1. If installing from floppy disk, insert the floppy disk into your disk drive A: 2. Open the Windows 95 Start menu. Select Settings. 3. Select Control Panel. 4. Double-click on the Mouse icon. 5. Select the General tab (along the top of the page). 6. Click the “Change…” button. 7. Click the “Have Disk…” button. 8. Enter A: as the name of the drive if installing from floppy, or enter c:\synaptics as the name of the drive if installing from the hard drive. 9. Select PS/2 as the type of device. 10. Windows will load the new software. 11. Click the Close button at the bottom of the Mouse control panel. 12. When the Windows software asks if you want to restart your computer, select YES. If installing from floppy disk, remove the disk from the A: drive. 13. A Synaptics window will pop up. Click the box to never show this message again and close the window. 14. Set the Touch Pad mouse settings as described in “Touch Pad Mouse Setup.” 10-20 CIMPLICITY® Display Station User's Manual – February 1997 GFK-1220B 10 Touch Pad Mouse Setup Note For definitions of the TouchPad Mouse Properties and Touchpad Enhancements settings, refer to “Touch Pad Mouse Settings” in Chapter 2. GFK-1220B 1. Open the Windows 95 Start menu. Select Settings. 2. Select Control Panel. 3. Double-click on the Mouse icon. 4. Select the TouchPad tab (along the top of the page). 5. Set the settings as follows: 6. Click the Enhancements button and set the setting as follows: Chapter 10 Diagnostics and Troubleshooting 10-21 10 7. Click OK to save the settings. CMOS Checksum Error If the CMOS battery has failed, the following error messages will be displayed on the screen: CMOS checksum error - Defaults loaded CMOS battery failed If you see the above message, you can still operate the Display Station by pressing the DELETE key and manually setting up the system. (You will need to set up the computer each time the system is powered up.) For setup parameters, refer to Appendix B. You must complete all the setup options except “Loading BIOS Defaults.” This battery has a lifetime of up to 10 years under normal operating conditions. The battery is not field replaceable. The Display Station unit must be returned to GE Fanuc to correct the problem. 10-22 CIMPLICITY® Display Station User's Manual – February 1997 GFK-1220B Appendix Port Configuration and Cabling A This appendix provides port configuration and cable assembly information for the CIMPLICITY Display Station computer. The following topics are covered: Ports..........................................................................................................................A-2 Ethernet..............................................................................................................A-2 Coaxial BNC Ethernet ........................................................................................A-3 AC Power ...........................................................................................................A-4 External Display .................................................................................................A-4 External Keyboard ..............................................................................................A-5 Serial Port 2 (RS-422/232)..................................................................................A-6 Serial Port 1 (RS-232)....................................................................................... A-10 Parallel Port...................................................................................................... A-11 Accessory Port .................................................................................................. A-12 Cable Specifications ................................................................................................ A-13 Cable Diagrams....................................................................................................... A-14 Serial Port 2 (RS-422/232)................................................................................ A-14 Serial Port 2 (Configured for RS-232)............................................................... A-15 Serial Port 1 (RS-232)....................................................................................... A-15 Communications Coprocessor Module Interface................................................ A-20 GFK-1220B A-1 A Port Configurations Ethernet The Display Station provides two types of Ethernet ports: an AUI (10Base2 or 10Base5) and an RJ-45 (10BaseT) connector. The AUI connector is a 15-pin female D-type connector, as shown in Figure A-1. A pinout listing is provided in Table A-1. The RJ-45 twisted pair connector is an 8pin MAU MDI connector, as shown in Figure A-2, with pinout listing in Table A-2. a45568 1 9 8 15 Figure A-1. AUI Ethernet Port Connector Configuration Table A-1. Pinout Listing for the AUI Port Pin No. Signal 1 GND Signal Ground 2 CP+ Collision Presence + 3 TX+ Transmit + 4 GND Signal Ground 5 RX+ Receive + 6 GND Signal Ground 7 NC No connection 8 NC No connection 9 CP- Collision Presence - 10 TX- Transmit - 11 GND Signal Ground 12 RX- Receive - 13 +12 +12 volts 14 GND Signal Ground 15 NC Shell A-2 Description No connection Chassis Ground CIMPLICITY® Display Station User's Manual – February 1997 GFK-1220B A a45554 1 2 34 56 78 Figure A-2. 10BaseT (MAU MDI) Port Connector Configuration Table A-2. Pinout Listing for the 10BaseT (MAU MDI) Port Pin No. Signal Description 1 TD+ Transmit Data + 2 TD- Transmit Data - 3 RD+ Receive Data + 4 NC no connection 5 NC no connection 6 RD- Receive Data - 7 NC no connection 8 NC no connection Coaxial BNC Ethernet The Display Station can communicate to thin-wire coaxial TCP/IP Ethernet Interface by using an AUI to BNC transceiver. An AUI to BNC transceiver, IC751BET000 (includes AUI cable) can be purchased GE Fanuc. Note Some transceivers contain washers or springs under their locking posts. With these washers or springs in place, the transceiver will not seat well in the AUI connector while it is latched. Washers or springs should be removed from transceiver locking posts before installing the transceiver. Figure A-3. AUI to BNC Transceiver GFK-1220B Appendix A Port Configuration and Cabling A-3 A AC Power The Display Station has a three-prong AC power receptacle for input power, located on the back panel of the unit. The Display Station requires 90 to 265 VAC at 47 to 63 Hz. For complete input power specifications, refer to Appendix F. Pin No. Signal Name 1 neutral 2 ground 3 hot 1 3 2 External Display The external VGA display port is a highdensity 15-pin, female, D-type connector, shown in Figure A-4. Refer to “External Display” in Chapter 6 for information and recommendations concerning the configuration of this option. Table A-3. Pinout Listing for the External Display Port a45579 5 1 10 15 11 Figure A-4. External Display Port A-4 CIMPLICITY® Display Station User's Manual – February 1997 Pin No. Signal Name 1 Red Analog 2 Green Analog 3 Blue Analog 4 no connection 5 Ground 6 Ground Analog 7 Ground Analog 8 Ground Analog 9 no connection 10 Ground 11 no connection 12 no connection 13 Horizontal Synch 14 Vertical Synch 15 no connection GFK-1220B A External Keyboard The external keyboard port, shown in Figure A-5, is a 6-pin, female DIN-type connector. a44153 6 5 4 3 2 1 Figure A-5. External Keyboard Port Table A-4. Pinout Listing for the Keyboard Port Pin No. GFK-1220B Signal Name 1 Data 2 no connection 3 Ground 4 +5VDC 5 Clock 6 no connection Appendix A Port Configuration and Cabling A-5 A Serial Port 2 (COM2) The Display Station System RS-422/232 serial port (COM2) is a 25-pin D-type male connector. Because this connector has been defined as a dual function connector, standard 25 pin serial devices might not work with this connector. You must create a custom cable to assure that the external device will function properly with this port. The RS-422/232 port is set for RS-422 operation at the factory. On the Display Station’s system board, jumper J23 is used to select RS-232, RS-422, or RS-485 operation. Because the RS-485 setting requires a two wire arrangement, it is not recommended for use with GE Fanuc PLC products. Please refer to “Changing the Serial Port 2 Configuration” for more details. COM2 is normally connected to a GE Fanuc PLC using RS-422. It is not recommended that this setting be changed. Connector Layout Figure A-6 shows the serial port connector layout. Table A-5 lists the pin numbering and signal assignments for the connector. a45557 SHIELD 1 TXD 2 RXD 3 RTS 4 CTS 5 DSR 6 SIGNAL GROUND 7 DCD 8 SD (A) 9 14 15 16 17 18 19 RI 20 DTR 21 SD (B) 22 10 23 11 24 12 25 RD (A') RD (B') 13 Figure A-6. Serial Port 2 (RS-422/232) A-6 CIMPLICITY® Display Station User's Manual – February 1997 GFK-1220B A Table A-5. Pinout Listing for Serial Port 2 Pin No. I/O Description Pin No. I/O Description 1 - SHIELD 14 - no connection 2 O TxD, Transmit Data 15 - no connection 3 I RxD, Receive Data 16 - no connection 4 O RTS, Request To Send 17 - no connection 5 I CTS, Clear To Send 18 - no connection 6 I DSR, Data Set Ready 19 I RI, Ring Indicate 7 GND, signal ground 20 O DTR, Data Terminal Ready 8 I DCD, Data Carry Detect 21 O SD(B) 9 O SD(A) 22 - no connection 10 - no connection 23 - no connection 11 - no connection 24 - no connection 12 - no connection 25 I RD(B’) 13 I RD(A’) Changing the Serial Port 2 Configuration (Touch Display Units Only) The secondary serial port (COM2) on the Display Station system board can be configured to operate in RS-232, RS-422, or RS-485 mode. The board is configured at the factory to operate in RS-422 mode. You can change this configuration by changing the setting of a six-pin jumper, J23, on the system board. Figure A-7 shows the locations and default settings of all the jumpers for reference purposes. However, J23 is the only jumper setting that can be changed. All other jumpers must remain at their default settings. Caution This procedure should be performed in a clean, dust-free environment. Caution Do not change any jumpers other than J23. If you change other jumpers, your Display Station may not work. Caution This procedure is not recommended for Touch Station and Glide Station units. Attempting to remove the ISA port could damage pins on the CPU board. GFK-1220B Appendix A Port Configuration and Cabling A-7 A Table A-6. Mode Selection Jumper Pins Mode 1-2 3-4 5-6 RS-232 ! # # Optional RS-422 # ! # Default RS-485 # # ! Not recommended for connections to GE Fanuc PLCs ! = closed # = open The interrupt request (IRQ) and address range for the serial ports do not need to be changed for normal operation. However if you want to disable the port or change these parameters, you can do so in the system BIOS setup. (See Appendix B.) The table below shows the settings for the serial ports. Table A-7. Serial Port Default Settings Port A-8 Address Range Interrupt Default Setting COM1 2E8—3F8 IRQ4 3F8 COM2 2E8—3F8 IRQ3 2F8 CIMPLICITY® Display Station User's Manual – February 1997 GFK-1220B A a45419 J23 J18 J21 J19 J16 J20 J22 J17 5 6 3 4 1 2 RS-422 (Default) Setting J23 J14 J15 J12 J13 J11 J10 J4 J2 J5 J3 J1 Figure A-7. Default Settings for System Board Jumpers GFK-1220B Appendix A Port Configuration and Cabling A-9 A Serial Port 1 (COM1) Note In Display Station products that have a touch screen and run Windows NT (IC751ATS350 and IC751BTS350), the COM 1 port is used for the touch screen and is not available to connect other devices. The RS-232 serial port is a 9-pin D-type male connector. Figure A-8 shows the serial port connector layout. Table A-6 lists the pin numbering and signal assignments for the connector. a45558 5 9 1 6 Figure A-8. Serial Port 1 (RS-232) Table A-8. Pinout Listing for RS-232 Serial Port A-10 Pin No. I/O Description 1 I DCD 2 I RXD Receive Data 3 O TXD Transmit Data 4 O DTR Data Terminal Ready 5 — GND Signal Ground Data Carrier Detect 6 I DSR Data Set Ready 7 O RTS Request to Send 8 I CTS Clear to Send 9 I RI Ring Indicate CIMPLICITY® Display Station User's Manual – February 1997 GFK-1220B A Parallel Port The parallel port is a 25-pin D-type connector, shown in Figure A-9. Table A-7 lists the pin numbering and signal assignments for the connector. This port can be used for printing, as well as for transferring data from a CD-ROM or between the Display Station and another computer. For data transfer between the Display Station and another computer, a special parallel cable, IC751CBL001A is recommended. This cable can be ordered from GE Fanuc. a45572 STROBE 1 DB0 2 DB1 3 DB2 4 DB3 5 DB4 6 DB5 7 DB6 8 DB7 9 ACK 10 BUSY 11 PEND 12 SEL 13 14 AUTO FD 15 ERROR 16 INIT 17 SEL IN 18 GND 19 GND 20 GND 21 GND 22 GND 23 GND 24 GND 25 GND Figure A-9. Parallel (Printer) Port Configuration Table A-9. Parallel Port Pin Assignments Pin No. GFK-1220B Description Pin No. Description 1 Strobe 11 Busy 2 Data Bit 0 12 P. End (out of paper) 3 Data Bit 0 13 Select 4 Data Bit 0 14 Auto Feed 5 Data Bit 0 15 Error 6 Data Bit 0 16 Initialize Printer 7 Data Bit 0 17 Select Input 8 Data Bit 0 18—25 9 Data Bit 0 10 Ack Appendix A Port Configuration and Cabling Ground A-11 A Accessory Port The accessory port is an 8-pin DIN-type connector, as shown in the figure below. Table A-8 lists pinout assignments for the accessory port. a45574 1 3 2 4 6 5 7 8 Figure A-10. Accessory Port Configuration Table A-10. Accessory Port Pinout Listing Pin No. A-12 Description 1 Reserved 2 Reserved 3 Speaker - 4 Speaker + 5 Watchdog Timer Out 6 GND 7 RESET switch 8 RESET switch + - CIMPLICITY® Display Station User's Manual – February 1997 GFK-1220B A Cable Specifications The cable assembly presents one of the most common causes of communication failure. For best performance, construct cable assemblies according to the recommended connector parts and specifications, listed in the table below. Note To comply with FCC regulations and CE mark requirements, shielded cables must be used for all connections to the Display Station. Table A-11. Recommended Cables and Connectors Item GFK-1220B Description Mating Connector Serial (RS-232 port): 9-pin female, D-Subminiature Type Serial (RS-422/232 port): 25-pin female, D-Subminiature Type Parallel (printer) Port: 25-pin male, D-Subminiature Type Cable 24 AWG (0.22 mm²) minimum — Overall shield Maximum length for data rates up to 19.2 bits per second: RS-232: 50 feet (15 meters) RS-422: 4000 feet (1219 meters) Appendix A Port Configuration and Cabling A-13 A Cable Diagrams Serial Port 2 (RS-422/232) The Display Station System RS-422/232 serial port (COM2) is a 25-pin D-type male connector. This port is configured at the factory for RS-422 communications. The Display Station can communicate, using Series 90 Protocol (SNP), directly to the RS-422/485 port in the Series 90-30 and Series 90-70 PLCs, or to a Communications Coprocessor Module (CMM). This eliminates the need for a special RS-422/485 to RS-232 converter. See the figures below for details. Pin MMI RS-422 Serial Port 2 25- Pin Male D-type connector RD (A') RD (B') SD (A) SD (B) RTS CTS DCD DTR 13 25 9 21 4 5 8 20 GND SHLD 7 1 25- Pin Female D-type connector Shielded Twisted Pairs a45559 Pin * 12 13 10 11 9 6 14 8 15 3 2 7 1 SD (A) SD (B) RD (A') RD (B') RD RTS (A) RTS (B) CTS (B') CTS (A') GND SHLD 15- Pin Male D-type connector 4000 feet (1219 meters) maximum PLC SNP RS-422 Serial Port 15- Pin Female D-type connector Termination resistance for the receive data (RD) signal must be connected only on units at the end of the termination is made on the Series 90 PLC products by connecting a jumper between Pin 9 and * This inside the 15-pin D-shell with the following For Series 90-70 PLCs, catalog numbers IC697CPU731 and IC697CPU771, the RD at the PLC is implemented by a jumper between Pin 9 and Figure A-11. Display Station RS-422 Host to PLC Connection (no handshaking) Pin MMI RS-422 Serial Port 2 25- Pin Male D-type connector SD (A) SD (B) RD (A') RD (B') RTS CTS DCD DTR 9 21 13 25 4 5 8 20 GND SHLD 7 1 25- Pin Female D-type connector Shielded Twisted Pairs 4000 feet (1219 meters) maximum Connection: on the CMM, jumper internal 120 ohm resistor. * Terminate Pin a45560 13 25 9 21 RD (A') RD (B') SD (A) SD (B) 24 10 22 11 23 7 TERM RTS (A) RTS (B) CTS (A') CTS (B') 0V * 25- Pin Male D-type connector Series 90 CMM Port 1 or 2 ** 25- Pin Female D-type connector On the CMM311, only port 2 can support RS-422/RS-485. Figure A-12. Display Station to CMM without Flow Control (RS-422/RS-485) A-14 CIMPLICITY® Display Station User's Manual – February 1997 GFK-1220B A Serial Port 2 (Configured for RS-232) GE Fanuc recommends using RS-422 to communicate to the PLC because the cable can be as long as 4000 feet (1219 meters). GE Fanuc does not recommend changing the jumper on serial port 2 to RS-232 for communicating to the communication module because the cable length can only be 50 feet (15 meters) maximum. However, if your application requires RS-232 to communicate to the PLC, the wiring diagram is shown in Figure A-13. a45564 Pin Pin RS-232 Serial Port TXD RXD RTS CTS DTR DCD 1 2 3 4 5 20 8 1 2 3 4 5 8 20 TXD RXD RTS CTS DCD DTR GND 7 7 GND 25- Pin Male D-type connector 25- Pin Female D-type connector MMI Computer * 50 feet (15 meters) maximum 25- Pin Male D-type connector Series 90 CMM 25- Pin Female D-type connector * Jumper required for CCM interface (versions prior to "C") Figure A-13. RS-232 Serial Port to CMM Interface without Flow Control GFK-1220B Appendix A Port Configuration and Cabling A-15 A Serial Port 1 (RS-232) Note In Display Station products that have a touch screen and run Windows NT (IC751ATS350 and IC751BTS350), the COM 1 port is used for the touch screen and is not available to connect other devices. Serial port 1 (COM1) is a 9-pin D-type connector that is primarily intended for temporary use by an external device such as a mouse or modem. GE Fanuc recommends using serial port 2 for communicating with the PLC because it is configured for RS-422, which allows longer cables (up to 4000 feet — 1219 meters). However, if you want to connect the Display Station to the CMM module using Serial Port 1, the cable wiring diagrams are provided in the figures below. Figure A-14 shows the Display Station RS-232 serial port connection to the PLC Communications Coprocessor Module (CMM). a45561 MMI RS-232 Serial Port 1 9- Pin Male D-type connector Pin Pin DCD RD TD DTR RTS CTS 1 2 3 4 7 8 GND 5 1 2 3 8 5 20 4 7 9- Pin Female D-type connector SHLD TD RD DCD CTS DTR RTS GND 25- Pin Male D-type connector PCM 25- Pin Female D-type connector Figure A-14. PCM, ADC, or CMM to Display Station without Flow Control a45562 MMI RS-422/232 Serial Port 1 Pin Pin DCD RD TD DTR RTS CTS 1 2 3 4 7 8 1 2 3 8 5 20 GND 5 SHLD TD RD DCD CTS DTR 7 GND 9-Pin 9-Pin 25-Pin Male Female Male D-type D-type D-type connector connector connector Figure A-15. PCM, ADC, or CMM to Display Station with Flow Control A-16 CIMPLICITY® Display Station User's Manual – February 1997 PCM 25-Pin Female D-type connector GFK-1220B A Connecting to a PLC Directly Through Serial Port 1 To use this configuration, you must purchase a special RS-422 to RS-232 Converter (IC690ACC900) or Miniconverter Kit (IC690ACC901) through GE Fanuc. The Converter and Miniconverter Kit are described on page A-19. RS -232 S h ie ld e d P a ir s C IM P L IC ITY D is p la y S t a tio n RS -232 S e r ia l P ort 1 9 - P in M a le D - ty p e c o n n e c to r a45582 P in P in 2 3 7 8 1 4 6 5 3 2 5 4 20 RD TD CTS RTS DTR 7 1 GND SHLD RD TD RTS CTS DCD DTR DSR GND 9 - P in F e m a le D - ty p e c o n n e c to r J2 R S -2 3 2 / R S -4 2 2 C o n ve r t e r ( IC 6 9 0 A C C 9 0 0 ) 2 5 - P in F e m a le D - ty p e co nnec tor 2 5 - P in M a le D - ty p e co nnec tor Figure A-16. Display Station to RS-232 Converter R S-232 Sh ie ld ed P airs C IM P L IC IT Y D is p la y S t a tio n R S-232 S erial Po rt 1 9- Pin M a le D -ty p e c o n n e c to r RD TD RTS CTS DCD DTR DSR GND a4 5 5 8 3 Pin P in 2 3 7 8 1 4 6 5 2 3 5 4 20 TD RD CTS RTS DTR 7 1 GND SH LD 9 - Pin Fem a le D -ty p e c o n n e c to r J2 25- P in Fem a le D - ty p e co n n e c to r RS -232/ R S-422 Is o late d R e p e a te r/ C o n v e rte r (IC 6 5 5 C C M 5 6 0 ) 25- P in M ale D - ty p e co n n e c to r ( N o te : S W = O N ) Figure A-17. Display Station to RS-422/RS-232 Isolated Repeater/Converter GFK-1220B Appendix A Port Configuration and Cabling A-17 A a45584 R S -4 2 2 S h ie ld e d T w is te d P a ir s R S -2 3 2 / R S -4 2 2 C onve rter ( IC 6 9 0 A C C 9 0 0 ) 1 5 - P in M a le D - ty p e co nnec tor S D (A ) S D (B ) R D ( A ') R D ( B ') RT C T S ( A ') C T S ( B ') R TS (A) R TS (B) +5 V GND SHLD P in P in 10 11 12 13 9 15 8 6 14 5 7 1 12 13 10 11 9 6 14 15 8 5 7 1 1 5 - P in F e m a le D -type c o n n e c to r S D (A ) S D (B ) R D ( A ') R D ( B ') RT R T S (A ) R T S (B ) C T S ( A ') C T S ( B ') +5 V GND SH LD 1 5 - P in M a le D - ty p e co nnec tor S e r ie s 9 0 CPU R S -4 2 2 P o rt 1 5 - P in F e m a le D - ty p e c o n n e c to r F o r a ll S e r ie s 9 0 P L C s , e xc e p t t h e th e f o llo w in g S e r ie s 9 0 -7 0 s : C a t a lo g N u m b e r IC 6 9 7 C P U 7 7 1 C a t a lo g N u m b e r IC 6 9 7 C P U 7 3 1 Figure A-18. RS-232 Converter to Series 90 CPU Point-to-Point a45585 R S -4 2 2 S h ie ld e d T w is te d P a ir s R S -2 3 2 / R S-422 C onve rter (I C 6 9 0 A C C 9 0 0 ) 1 5 - P in M a le D - ty p e co nnec tor S D (A ) S D (B ) R D (A ') R D (B ') RT C T S ( A ') C T S ( B ') R T S (A ) R T S (B ) GND +5V S H LD 1 5 - P in F e m a le D - ty p e c o n n e c to r P in P in 10 11 12 13 9 15 8 6 14 7 5 1 12 13 10 11 9 6 14 15 8 7 1 +5V E xternal P o w e r S u p p ly GND S D (A ) S D (B ) R D ( A ') R D ( B ') RT R TS (A) R TS (B) C T S (A ') C T S (B ') GND S e rie s 9 0 CPU R S-422 P o rt SHLD 1 5 - P in M a le D - ty p e co nnec tor 1 5 - P in F e m a le D -type c o n n e c to r F o r a ll S e r ie s 9 0 P L C s , e xc e p t th e t h e fo llo w in g S e r ie s 9 0 - 7 0 s : C a t a lo g N u m b e r IC 6 9 7 C P U 7 7 1 C a t a lo g N u m b e r IC 6 9 7 C P U 7 3 1 Figure A-19. RS-232 Converter to Series 90 CPU Point-to-Point (External Supply Required) A-18 CIMPLICITY® Display Station User's Manual – February 1997 GFK-1220B A RS-422/RS-485 to RS-232 Converter The RS-422/RS-485 to RS-232 Converter (IC690ACC900) provides an RS-232 interface to external devices requiring the RS-232 serial interface through conversion of the RS-422/RS-485 signals provided at the RS-422/RS-485 ports in the Series 90-30 PLC. This converter provides a direct serial connection to the standard serial COM port of the host computer used as the programming device for the Series 90-30 PLC. This converter is a small, convenient, self-contained device which requires only a cable connection to the Series 90-30 RS-422/RS-485 port on one end and a cable connection to the RS-232 device on the opposite end. Series 90-30 PLC CIMPLICITY Display Station RS-232 RS-485 COM1 Converter Figure A-20. Example: RS-422/RS-485 to RS-232 Converter in a Series 90 PLC System The converter operates from a +5 VDC source, which is provided from the PLC backplane +5 VDC bus, through the cable connection. The pin assignments for the connections on the cable required for the RS-232 connection are compatible with available Programmable Coprocessor Module (PCM) compatible serial cables (IC690CBL702, PCM to PC-AT). The RS-422/RS-485 connection at the Series 90-30 serial port on the power supply can be made with an available cable (same cable that is used with the Hand-held Programmer), IC693CBL303. The three PCM compatible cables (IC690CBL701/702/705) are 10 feet (3 meters) in length, and the Hand-Held Programmer compatible cable (IC693CBL303) is 6 feet (2 meters) in length. An Isolated Repeater/Converter (IC655CCM590) is also available for applications requiring ground isolation where a common ground cannot be established between components, or to boost signal levels for greater distances or to add more drops. For detailed information, refer to the documentation for your Series 90 PLC. Miniconverter Kit The Miniconverter Kit (IC690ACC901) consists of an RS-422 (SNP) to RS-232 Miniconverter, a 6 foot (2 meter) serial extension cable, and a 9-pin to 25-pin Converter Plug assembly. The 15-pin SNP port connector on the Miniconverter plugs directly into the serial port connector on the Series 90-30 power supply, Series 90-70 CPU or Series 90-20 CPU. The 9-pin RS-232 port connector on the Miniconverter connects to an RS-232 compatible device. When used with an IBM PC-AT, or compatible computer, one end of the extension cable plugs into the Miniconverter’s 9-pin serial port connector, the other end plugs into the 9-pin serial port of the computer. The Converter plug (supplied with kit) is required to convert the 9-pin serial port connector on the Miniconverter to the 25-pin serial port connector on the Display Station. GFK-1220B Appendix A Port Configuration and Cabling A-19 A The Miniconverter is shown in the following figure. For more information on the Miniconverter, refer to the documentation for your Series 90 PLC. a44985 RS-422 PORT RS-232 PORT Figure A-21. Series 90 SNP Port to RS-232 Adapter Communications Coprocessor Module Interface The Communications Coprocessor Module (CMM) is a dedicated communications module. Because the Series 90-70 CMM (IC697CMM711) and the Series 90-30 CMM (IC697CMM311) are very similar in operation, the cable diagram shown in Figure A-15 is used for both. The CMM port configuration is a 25-pin D-type female connector. A-20 CIMPLICITY® Display Station User's Manual – February 1997 GFK-1220B Appendix Computer Setup B This appendix provides listings of the default settings as the CIMPLICITY Display Station is configured at the factory. In addition, instructions for infrequently performed computer setup tasks are provided. Note Refer to the datasheet provided with your Display Station before reading this appendix. Information provided by the datasheet supersedes information in this appendix. Default Settings ......................................................................................................... B-2 Standard CMOS Setup........................................................................................ B-2 BIOS Features Setup........................................................................................... B-4 CHIPSET Features Setup .................................................................................... B-6 Load BIOS Defaults................................................................................................... B-7 Changing the Default Boot Sequence......................................................................... B-8 Setting and Changing Passwords ............................................................................... B-8 Using the Auto Detect Hard Disk Utility .................................................................. B-10 Save & Exit Setup ................................................................................................... B-10 Exit Without Saving ................................................................................................ B-10 GFK-1220B B-1 B Default Settings It is normally not necessary to change the settings in the computer setup files. If settings become corrupted, restore them to the defaults shown on the datasheet provided with your Display Station product and in this Appendix. Information provided by the datasheet supersedes information in this chapter. Most of the computer setup information can be invoked by pressing the DEL key during the computer power up sequence (you will be prompted during power up to press the DEL key). This setup program is built into the Award™ BIOS ROM. Upon invoking setup, the screen shown in Figure B-1 will appear. Note that the bottom line of the screen contains online help information for the option that is selected (highlighted). Also, key functions for the screen are defined in the block that is directly above the online help line. ROM/ISA BIOS (214L2AK1) CMOS SETUP UTILITY AWARD SOFTWARE, INC. STANDARD CMOS SETUP PASSWORD SETTING BIOS FEATURES SETUP IDE HDD AUTO DETECTION CHIPSET FEATURES SETUP SAVE & EXIT SETUP LOAD BIOS DEFAULTS EXIT WITHOUT SAVING ESC:QUIT F10:Save and Exit Setup ↓ → ↑ ← (Shift) F2:Change Color Time, Date, Hard Disk Type .... Figure B-1. Initial Setup Menu B-2 CIMPLICITY® Display Station User's Manual – February 1997 GFK-1220B B Standard CMOS Setup To set the time and date, choose the STANDARD CMOS SETUP option from the initial setup menu. The screen shown in Figure B-2 will be displayed. Set the date and time only. Do not change any other default settings. ROM/ISA BIOS (214L2AK1) STANDARD CMOS SETUP AWARD SOFTWARE, INC. Date (mm:dd:yy) Time (hh:mm:ss) Settings for your system will be different. Refer to the enclosed datasheet for your hard drive size. Wed, Jan 3 1996 :8:20:23 CYLS HEADS PRECOM P LANDZONE SECTORS MODE Drive C= 0 0 0 0 0 NORMAL Drive D= 0 0 0 0 0 Drive A: 1.44M, 3.5 in. Drive B: None Video:EGA/VGA Halt On: All, But Keyboard Base Memory Extended Memory Other Memory Total Memory ESC:QUIT F1:Help ↓ → ↑ ←: Select Item (Shift)F2:Change Color : 640K :27648K : 384K :28672K PU/PD/+/-:Modify Figure B-2. CMOS Setup Screen GFK-1220B Appendix B Computer Setup B-3 B BIOS Features Setup When you select the BIOS FEATURES SETUP option from the initial setup screen menu, the screen shown in Figure B-3 is displayed. Changing these settings is not recommended. Refer to the datasheet provided with your Display Station for the correct settings. Information provided by the datasheet supersedes information in this appendix. ROM/ISA BIOS (214L2AK1) BIOS FEATURES SETUP AWARD SOFTWARE, INC. Virus Warning :Disabled Video BIOS Shadow :Enabled CPU Internal Cache :Enabled C8000-CBFFF Shadow :Enabled Quick Power On Self Test :Enabled CC000-CFFFF Shadow :Enabled Boot Sequence :A,C D0000-D3FFF Shadow :Disabled Swap Floppy Drive :Disabled D4000-D7FFF Shadow :Disabled Boot Up Floppy Seek :Enabled D8000-DBFFF Shadow :Disabled Boot Up NumLock Status :On DC000-DFFFF Shadow :Disabled Boot Up System Speed :High E0000-E3FFF Shadow :Disabled IDE HDD Block Mode :Enabled E4000-E7FFF Shadow :Disabled Gate A20 Option :Fast E8000-EBFFF Shadow :Disabled Memory Parity Check :Disabled EC000-EFFFF Shadow :Disabled Typematic Rate Setting :Disabled Typematic Rate Setting :6 Esc: Quit F1:Help ↓→↑←:Select Item Typematic Delay (Msec) :250 F5:Old Values (Shift) F2:Color F6:Load BIOS Defaults Security Option :Setup F7:Load Setup Defaults PU/PD/+/-:Modify Figure B-3. BIOS Features Default Settings B-4 CIMPLICITY® Display Station User's Manual – February 1997 GFK-1220B B GFK-1220B Appendix B Computer Setup B-5 B CHIPSET Features Setup When you select the CHIPSET FEATURES SETUP option from the initial setup screen menu, the screen shown in Figure B-4 is displayed. Do not change these default settings. Refer to the datasheet provided with your Display Station for the correct settings. Information provided by the datasheet supersedes information in this appendix. ROM/ISA BIOS (214L2AK1) CHIPSET FEATURES SETUP AWARD SOFTWARE, INC. Decoupled Refresh Enabled Onboard FDC Controller Enabled Relocate 256k/384k Disabled Onboard IDE Controller Enabled Memory Hole At 15Mb Addr. Disabled Onboard Serial Port 1 COM1(3F8h) DRAM Timing Control Fast Onboard Serial Port 2 COM2(2F8h) Fast DRAM Enabled COM3 & COM4 Address 486 Streaming Enabled Onboard Parallel Port 378H 3E8H,2E8H Onboard Parallel Mode Printer Solid State Disk Disabled Esc: Quit F1:Help ↓→↑←:Select Item PU/PD/+/-:Modify F5:Old Values (Shift) F2:Color F6:Load BIOS Defaults F7:Load Setup Defaults Figure B-4. Chipset Features Default B-6 CIMPLICITY® Display Station User's Manual – February 1997 GFK-1220B B Loading BIOS Defaults The LOAD BIOS DEFAULTS option loads the default system values directly from ROM, which are not the same as the values recommended by GE Fanuc. If the stored record created by the Setup program becomes corrupted (and therefore unusable), these defaults will load automatically when you turn the PCM-4860 on. Caution Do not use this option. BIOS settings must be restored to the values provided on the datasheet provided with your Display Station. ROM/ISA BIOS (214L2AK1) CMOS SETUP UTILITY AWARD SOFTWARE, INC. STANDARD CMOS SETUP PASSWORD SETTING BIOS FEATURES SETUP IDE HDD AUTO DETECTION CHIPSET FEATURES SETUP SAVE & EXIT SETUP LOAD BIOS DEFAULTS EXIT WITHOUT SAVING Load BIOS Default (Y/N)? N ESC:QUIT F10:Save and Exit Setup ↓ → ↑ ← (Shift) F2:Change Color Time, Date, Hard Disk Type.... Figure B-5. Load BIOS Defaults Screen GFK-1220B Appendix B Computer Setup B-7 B Changing the Default Boot Sequence The Display Station can be set up to boot from the hard disk instead of the floppy disk. The default boot sequence is changed by editing the BIOS Features Setup default settings, shown on page B-4 To make this change, perform the following steps: 1. When prompted during the power on self test, press the DEL key. The CMOS SETUP UTILITY main menu will appear. 2. Press the down (↓ ↓) cursor key to select BIOS FEATURES SETUP and press ENTER. The BIOS FEATURES SETUP screen will appear. 3. Press the ↓ cursor key to select the Boot Sequence parameter. 4. Press the PAGE UP or PAGE DOWN key to change the setting to C, A. 5. Press the ESC (Cancel) key to return to the CMOS Setup Utility main menu. 6. Press the ↓ cursor key to select the SAVE & EXIT SETUP option. 7. When prompted, press SHIFT + F9 (for Yes) and then press ENTER. Setting and Changing the Setup Password This password protects the BIOS settings. To set a network password, see “Passwords” in the index. Note A keyboard is required to set a password. If you select the System setting, a keyboard will be required for powerup. For Touch Display systems, connect a PS/2 keyboard to the KEYBD connector. To change the BIOS settings password, choose the PASSWORD SETTING option from the CMOS SETUP UTILITY main menu and press ENTER. To enable this feature, you must first set the Security Option in the BIOS FEATURES SETUP to either Setup or System. The default is set to Setup, which protects setup information from being accessed without typing the password. When PASSWORD SETTING is set to System, the password must be entered every time the unit is cold booted, or when you want to change the setup information. GE Fanuc chose to use the Setup option as the default because this will protect your setup information from being changed by the operator. The system will power up normally. However, if you use the System setting, the password, which will be the same for setup, must be entered during powerup. The operator may be required to know the powerup password in case of a power outage. Thus, the operator would also know the password to change the setup. You must decide which security method is best for you. 8. If the CMOS is bad, or if this option has never been used, a default password is stored in the ROM. The screen will display the following message: Enter Password: Press the ENTER key and continue to change the password. B-8 CIMPLICITY® Display Station User's Manual – February 1997 GFK-1220B B 9. If the CMOS is good, or if this option has been used to change the default password, you will be prompted for the password stored in the CMOS. The screen will display the following message: Confirm Password: Type the correct password and continue to change the password. 10. After pressing the Enter key (ROM password) or current password (user-defined password), you can change the password stored in the CMOS. The password can be no more than eight characters long. 11. Be sure to record the password and put it in a secure place. Note If the operator who set the password forgets it, the password can be cleared by changing a jumper inside the Display Station unit. Contact GE Fanuc for details and assistance. Disabling the Setup Password To disable the password: GFK-1220B 1. Press the Del key when prompted during the power on self test and then enter the password. The CMOS SETUP UTILITY main menu will appear. 2. Press the down (↓ ↓) cursor key to select the PASSWORD SETTING option and press ENTER. 3. When prompted to enter a password, press the ENTER key. This disables the password. 4. Press ESC (Cancel) to return to the main menu. 5. Press the ↓ cursor key to select the SAVE & EXIT SETUP option and press the ENTER key. 6. When prompted, press SHIFT + F9 (Yes) and press ENTER. Appendix B Computer Setup B-9 B Using the Hard Disk Configuration Utility This utility (IDE HDD AUTO DETECTION) can detect the IDE hard disk installed in your system. You can use this utility to self-detect and/or correct the hard disk type configuration. To access this utility, choose IDE HDD AUTO DETECTION from the CMOS Setup Utility main menu. Note After you run this utility, the hard disk settings should be the same as those listed on the datasheet provided with your Display Station. Information provided by the datasheet supersedes information in this appendix. These are sample values. Settings for your system may be different. HARD DISK TYPE SIZE CYLS HEADS PRECOMP LANDZ SECTORS Drive C= (MB) 790 15 65535 789 57 MODE Select Secondary Slave Option (N=Skip):N OPTIONS SIZE CYLS HEADS PRECOMP LANDZ SECTORS 1(Y) 0 0 0 0 0 0 MODE NORMAL ESC=SKIP Figure B-6. Hard Disk Drive Autodetection Utility Save & Exit Setup If you select the SAVE & EXIT SETUP option in the initial setup menu and press ENTER, the values entered in the setup utilities will be recorded in the CMOS memory of the Chip Set. The microprocessor will check this every time you turn your system on and compare this to what it finds as it checks the system. This record is required for the system to operate. Exit Without Saving To exit the setup program without changing any values in the setup tables, select this option in the initial setup menu and press the ENTER key. This option is useful if you accidentally change a parameter and you don’t remember what the default is. B-10 CIMPLICITY® Display Station User's Manual – February 1997 GFK-1220B Appendix Customizing Network Settings C Your CIMPLICITY Display Station has been configured with networking components that enable you to establish new networks or connect to existing networks easily. If you intend to use Microsoft NetBEUI, TCP/IP, or Direct Cable Connection, some minimal setup changes are required before you can use the system for network applications. This appendix describes the network components that are installed and configured on your system and provides instructions for making necessary changes to network settings. Installed Network Components .................................................................................. C-2 Using Microsoft NetBEUI.......................................................................................... C-3 Using TCP/IP Communications ................................................................................. C-6 Setting Up Direct Cable Connection (Windows 95 Systems) ...................................... C-9 GFK-1220B C-1 C Installed Network Components Network Component Comments NE2000 Adapter Settings are IRQ 10; I/O address 300-310H. Do not change NE2000 settings. Dial-Up Adapter Dial-up Adapter is installed with default settings TCP/IP Default settings must be changed before connecting to an existing network. Contact your network administrator for appropriate settings. NetBEUI Default settings must be changed before connecting to an existing network. Contact your network administrator for appropriate settings. System Identification Computer Name: Each system is uniquely identified and should be renamed before adding it to an existing network Workgroup: The default workgroup is “Workgroup”. This should be renamed before adding it to an existing network. Default Settings Computer Name: Workgroup: IP Address: Subnet Mask: CIM_MMI Workgroup 1.1.1.1 255.255.255.0 Caution The IP Address must be changed to a unique adress. If it is not changed, conflicts could occur on your network. In both Windows 95 and Windows NT systems, these settings must be changed using the Network application in the Control Panel program group. C-2 • In Windows 95 systems, you can access the Control Panel from the Start menu by clicking the Settings icon. • In Windows NT systems, the Control Panel is accessed from the Main program group. CIMPLICITY® Display Station User's Manual – February 1997 GFK-1220B C Using Microsoft NetBEUI Before using Microsoft NetBEUI to communicate between your Display Station and other systems you should change the System Identification and Workgroup settings. See your network administrator for appropriate values. If you have a Windows 95 system, use the procedure below. If your have a Windows NT system, continue on page C-5. Windows 95 Systems GFK-1220B 1. In the Control Panel, click the Network icon. The Network Properties dialog box will be displayed: 2. Click the Identification tab. The Identification dialog box will be displayed: Appendix C Customizing Network Settings C-3 C 3. C-4 Modify the Computer name and Workgroup fields as desired for your installation and click OK CIMPLICITY® Display Station User's Manual – February 1997 GFK-1220B C Windows NT Systems GFK-1220B 1. In the Control Panel, double click the Network icon. The Network Settings dialog box will be displayed: 2. Click the Change ... button for the Computer Name. 3. Modify the Computer Name as needed for your installation. Appendix C Customizing Network Settings C-5 C Using TCP/IP Communications Before using TCP/IP to communicate between your Display Station and GE Fanuc Automation PLCs or other systems, you should change the IP Address and Subnet Mask. If you have a Windows 95 system, use the procedure below. If you have a Windows NT system, continue on page C-8. Windows 95 Systems 1. In the Control Panel window, click the Network icon. The Network properties dialog box will be displayed: 2. C-6 Scroll down to and highlight TCP/IP −> NE2000 Compatible, then click Properties. CIMPLICITY® Display Station User's Manual – February 1997 GFK-1220B C 3. GFK-1220B In the TCP/IP Properties dialog box, modify the IP Address and Subnet Mask fields as desired for your installation and click OK. Appendix C Customizing Network Settings C-7 C Windows NT Systems C-8 1. In the Control Panel window, double click the Network icon. The Network Settings dialog box will appear. 2. Select TCP/IP Driver and click Configure ... The TCP/IP Configuration dialog box will appear. 3. Edit the IP Address and Subnet Mask settings as required for your installation. 4. To apply the changes and exit this dialog box, click OK. CIMPLICITY® Display Station User's Manual – February 1997 GFK-1220B C Setting Up Direct Cable Connection (Windows 95 Systems) Setting Up Direct Cable Connection on a CIMPLICITY Development System The Windows 95 Direct Cable Connection utility provides a means to establish a network connection between two Windows 95 systems via parallel and serial cables. To copy a project using Ethernet, use the Direct Cable Connection utility on the Display Station. This utility is installed and configured for use on your CIMPLICITY Display Station. This utility is also installed on most laptops running Windows 95. However, it may be necessary to install and configure it on your CIMPLICITY Development System before you can use it to transfer a project to your runtime system. 1. Click the Start button on the task bar, click Settings, and select Control Panel: The Control Panel window will be displayed. GFK-1220B Appendix C Customizing Network Settings C-9 C 2. C-10 In the Control Panel window, double click the Network icon to display the Network Configuration dialog box: 3. If Dial-Up Adapter is listed as one of the network components installed, click Cancel and proceed to page C-12. 4. Click Add... The Select Network Component Type dialog box will be displayed. Select Adapter. CIMPLICITY® Display Station User's Manual – February 1997 GFK-1220B C 5. Click Add... The Select Network adapters dialog box will be displayed: 6. Scroll down to Microsoft under the Manufacturers column and click Microsoft and DialUp Adapter to highlight them. Then click OK. 7. Click OK to save. The software will display the following message; Do you want to restart your computer now? 8. Click the Windows Start button and click Shutdown in the Start menu. The Microsoft Dial-up Adapter is now configured. GFK-1220B Appendix C Customizing Network Settings C-11 C Installing Direct Cable Connection in Windows 95 To install Direct Cable Connection on a Windows 95 System: 1. In the Windows 95 Control Panel window, double click the Add/Remove Programs icon. The Add/Remove Programs dialog box will be displayed: C-12 CIMPLICITY® Display Station User's Manual – February 1997 GFK-1220B C 2. Click the Windows Setup tab. The Windows Setup options will be displayed: 3. Highlight Communications and click Details. The Communications dialog box will be displayed: 4. Click a check into the Dial-Up Networking and Direct Cable Connection options. Then click OK in this dialog box. Also click OK in the Windows Setup dialog box. Depending upon the configuration of your system, you may be prompted to insert the Windows 95 CD-ROM or floppy disk. However, the software is included on the Display Station’s hard disk. GFK-1220B Appendix C Customizing Network Settings C-13 Appendix Interrupt Requests D CAUTION For most applications an IRQ cannot be shared by more than one resource. If more than one resource is set to the same interrupt, the application may not respond properly and could cause your machine to lock up. Note We strongly recommend that you use only the interrupts that are marked available and use them as suggested. Table D-1. Contents of IRQ Table IRQ0 Tick Timer (Cannot be disabled or changed.) IRQ1 Keyboard (Cannot be disabled or changed.) IRQ2* Cascade of the second interrupt controller (Cannot be disabled or changed.) IRQ3 COM2 (Can use IRQ3 if COM2 is disabled.) IRQ4 COM1 (Can use IRQ4 if COM1 is disabled.) IRQ5 Available, suggested for COM3 or secondary parallel port IRQ6 Floppy disk drive (Cannot be changed.) IRQ7 Parallel port (Can use IRQ7 if the parallel port is disabled.) IRQ8 RTC interrupt (Cannot be changed.) IRQ9* Available,(Suggested for COM4.) IRQ10 Ethernet (Do not change.) IRQ11 Available IRQ12 PS/2 MOUSE (Cannot be changed.) IRQ13 Coprocessor (Cannot be changed.) IRQ14 Primary hard drive (Cannot be changed.) IRQ15 Available (Suggested for secondary hard drive or IDE CD drive.) * Some third party boards have IRQ2 as a possible selection. If you choose IRQ2, the interrupt that will actually be used is IRQ9. GFK-1220B D-1 Appendix Software System Overview E This chapter describes the software that is bundled with the CIMPLICITY Display Station products. Instructions are provided for installing or removing software programs that are included with the Display Station product. Windows Software Components ................................................................................ E-2 Enabling/Disabling Automatic Logon in Windows NT .............................................. E-3 CIMPLICITY Software Components ......................................................................... E-4 Utilities Disk (Display Station products with Windows 95 software) .......................... E-5 Installing Logicmaster 90 Software............................................................................ E-5 GFK-1220B E-1 E Windows Software Components Windows 95 Software Components The following table lists all Windows 95 components and indicates whether they have been installed on the CIMPLICITY Display Station. Component Installed? Component Installed? Accessibility Options Yes Microsoft Fax Services Yes Accessories Yes Microsoft Fax Viewer Yes Additional Screen Savers Yes Microsoft Mail Services Yes Audio Compression No Mouse Pointers Yes Backup Yes Multimedia No Briefcase Yes Musica Sound Scheme No Calculator Yes Net Watcher No CD Player No Online User's Guide Yes Character Map Yes Paint Yes Communications Yes Phone Dialer Yes Defrag Yes Quick View Yes Desktop Wallpaper Yes Robotz Sound Scheme No Dial-Up Networking Yes Sample Sounds No Direct Cable Connection Yes Screen Savers Yes Disk compression tools Yes Sound Recorder No Disk Tools Yes System Monitor Yes Document Templates Yes System Resource Meter Yes Flying Windows Yes The Microsoft Network Yes Games Yes Utopia Sound Scheme No HyperTerminal Yes Video Compression Yes Jungle Sound Scheme No Volume Control No Media Player Yes Windows 95 Tour Yes Microsoft Exchange Yes WordPad Yes Microsoft Fax Yes To install additional Windows 95 components or remove installed components double click on Add/Remove Programs from the Control Panel. Click on the Windows Setup tab. Under the Components section, select a group (such as Accessories) and click on Details... to change individual components. Click on OK when you have completed the changes you wish to make. For more information, refer to the Microsoft Windows 95 documentation. Windows NT Software Components To add additional Windows NT components (such as a printer driver or an additional Network protocol), enter C:\I386NT as the path for the Windows NT distribution files. For more information, refer to the Microsoft Windows NT documentation. E-2 CIMPLICITY® Display Station User's Manual – February 1997 GFK-1220B E Enabling/Disabling Automatic Login in Windows NT You can set up Windows NT to automatically log on by storing a default User and Password into the Registry database. Use the Registry Editor (REGEDT32) to set up the automatic login as follows: • Start REGEDT32 and locate the following key: HKEY_LOCAL_MACHINE\SOFTWARE\MICROSOFT\WINDOWS NT\CURRENTVERSION\WINLOGIN • Establish your domain name, account name and password by adding the following values using the Add Value option under the Edit menu: DefaultDomainName DefaultUserName DefaultPassword • For each of the above, the Data Type selected must be REG_SZ. Note that the default password may not be blank. • Add the additional value AutoAdminLogon with a Data Type of REG_SZ and a value of 1. • To disable automatic logon, set the AutoAdminLogon value to 0. Note If the user defined for automatic logon does not have administrative privileges, you must plan to make administrative changes to the Display Station for another system over a network connection. Windows NT does not allow unauthorized users to modify the registry to disable automatic logon. Likewise, other administrative changes, such as setting the CIMPLICITY startup parameters, will be unavailable. To disable the automatic logon, log on to the remote system, run REGEDT32, and pick Select Computer... from the Registry menu. GFK-1220B Appendix E Software System Overview E-3 E CIMPLICITY Software Components The following table lists all CIMPLICITY components and indicates whether they have been installed on the CIMPLICITY Display Station. Component Installed? Base System - HMI Yes Base System - Viewer No Base System - Server No Base System - Demo Yes SNP Communications Yes TCP/IP Communications Yes MODBUS RTU Communications Yes Data Logging Yes Trending Yes Basic Control Engine No Point Management API No Alarm Management API No Device Communications Toolkit No To install additional CIMPLICITY components, click on Setup in the C:\I386 directory. Refer to the CIMPLICITY Base System user’s manual (GFK-1180) for more information. Note Your CIMPLICITY Display station is licensed to run the options provided with the systems. You should not install or run the Server option since it cannot be run without installing the appropriate license. E-4 CIMPLICITY® Display Station User's Manual – February 1997 GFK-1220B E Utilities Disk A utilities disk that contains the following files is provided with Display Station products: CRT.COM and STN.COM Touch Screen Driver Glide Station Mouse Drivers Executable files that allow you to switch between the internal Flat Panel display and an external CRT monitor. (Only one of these displays can be active at a time.) For instructions on the use of these files, refer to “Setting Up External Display Operation” in Chapter 6. (A:\GEFUTIL directory) If you are unable to reload the touch screen driver from the hard disk, you will need this file to restore touch screen operation. For installation instructions, refer to “Enabling Touch Screen Operation” in Chapter 10. (A:TOUCH directory) If you are unable to reload the Touch Pad mouse driver from the hard disk, you will need this file to restore operation. For installation instructions, refer to “Enabling Touch Pad Mouse Operation” in Chapter 10. (A:\GLIDE directory) Installing Logicmaster 90 Software To install Logicmaster 90 software on the Display Station, first reboot under MS-DOS: GFK-1220B 1. In the Start menu, click the Shutdown icon. The Shut Down Windows dialog box will appear. 2. Select Restart the computer in MS-DOS mode and click Yes. 3. Remove write protection from the Logicmaster 90 disk. 4. Insert the Logicmaster 90 disk into the Display Station’s floppy disk drive. 5. Type a:\install and press ENTER. Follow the installation instructions provided by the software. For more information, refer to the Logicmaster 90 documentation. 6. When the software asks if you want it to automatically modify CONFIG.SYS and AUTOEXEC.BAT files, type N (no). Appendix E Software System Overview E-5 Appendix Specifications F This appendix summarizes the design, electrical, and physical specifications for the CIMPLICITY Display Station. Specifications for the touch screen, keypad, and Touch Pad mouse are also provided. Physical Specifications .............................................................................................. F-2 Functional Specifications........................................................................................... F-3 Environmental Specifications .................................................................................... F-4 Touch Screen Specifications ...................................................................................... F-5 Touch Pad Mouse Specifications................................................................................ F-6 Keypad Specifications................................................................................................ F-8 GFK-1220B F-1 F Physical Specifications Table F-1. Touch Display Physical Characteristics Front bezel Enclosure Height Width 11.88 in./30.18cm 13.00 in./33.02cm Thickness 0.25 in./0.63cm Height Width Depth 10.88 in./27.64cm 12.00 in./30.48cm 5.06 in./12.85cm 14 pounds/6.4 kg Weight, entire unit Table F-2. Touch Station/Glide Station Physical Characteristics Front bezel Height Width Thickness 14.00 in./35.56cm 17.00 in./43.182cm 0.25 in./0.63cm Enclosure Height Width Depth 13.00 in./33.02cm 16.00 in./40.64cm 5.06 in./12.85cm Weight, entire unit 18.5 pounds/8.4kg Note For installation, allow 2 inches (5.1 cm) depth for the power cord that is provided with the Display Station. If you don’t have this amount of space, a lower profile power cord that requires less space can be purchased. F-2 CIMPLICITY® Display Station User's Manual – February 1997 GFK-1220B F Functional Specifications Table F-3. Display Station Functional Specifications Item Specification CPU 486DX2-66 Memory Depending on configuration, either one 16MB SIMM or two 16MB SIMMs Color Display 10.4 inch flat panel, High Brightness Color Display Display backlights two Display Contrast Adjustable Display - misc. Anti-glare screen, choice of 16 or 256 colors via Windows utilities (16 colors only on 32MB units) Display memory 512KB DRAM Real Time clock Yes - with included battery Hard Disk > 500MB, IDE Floppy drive 1.44MB 3.5 inch - access as defined below Communications ports COM1 = RS-232, COM2 = RS-232 / RS-422 / RS-485, 115 KBPS max. (COM1 port is not available for use on the following models: IC751ATS350, IC751BTS350.) Parallel port Standard bi-directional LPT1 port Keyboard port Yes — AT compatible (PS/2 type, 6-pin Mini DIN connector) Ethernet port Yes — NE2000 compatible, 10 base T, and AUI VGA port Yes — on board, use optional Mouse port PS/2 compatible mouse port built-in ISA boards (Glide Station and Touch Station units only) ISA boards installed in Glide Station and Touch Station units cannot exceed the following power draws: 1.0A at +5V 0.64A at +12V 0.43A at -12V Power requirements, general 90—265VAC 47—63Hz 1A rms input current at 120VAC 0.5A rms input current at 240VAC 20A max. inrush current at 120VAC (full load) 40A max. inrush current at 240VAC (full load) Power consumption Touch Display Touch Station/Glide Station GFK-1220B light operation: 25W full load: 40W light operation: 25W full load: 40W Appendix F Specifications F-3 F Environmental Specifications Note The unit’s nonoperating and shipping temperature range exceeds the operating temperature range. If the product is at a temperature outside the operating range, you should allow the unit to stabilize at the operating temperature for eight hours before applying power to the Display Station system. Table F-4. Display Station Environmental Specifications F-4 Shock Operating: Nonoperating: 10G, 11ms, half-sine 50G, 11ms, half-sine Vibration Operating: Nonoperating: 0.25G 1G Relative humidity requirements Operating (non-condensing): Nonoperating: 10%-85% 10%-85% (40oC maximum wet bulb) Temperature requirements Operating: Nonoperating: Maximum temperature rise 0—45oC -20—60oC 20°C (68°F) per hour Maximum unpressurized altitude Operating: Nonoperating: 10,000ft (3,048 m) 30,000ft (9,144 m) CIMPLICITY® Display Station User's Manual – February 1997 GFK-1220B F Touch Screen Specifications General Features • • • • • • • Adjustable filtering for noisy environments Adjustable sampling rates from 60 to 180 points per second 10 bit A/D, for resolution of 1024x1024 points for both X and Y axis Low power operation Scratch resistant surface finish Anti glare surface EMI/RFI shields Protective Film The Touch Screen is covered by a polyester film that provides protection against solvents, dust, and moisture. Caution The protective film covering on the Touch Screen is not resistant to the following chemicals: Concentrated mineral acids Benzyl alcohol Concentrated caustic solution Methylene chloride High pressure steam at over 100°C Caution The protective film covering on the Touch Screen is not suitable for use in conditions of prolonged exposure to direct sunlight. (Exposure to sunlight through window glass will not harm the protective film.) Caution Do not use abrasive products to clean the Touch Screen. Do not allow cleaning agents that contain ammonia to remain on the Touch Screen. These products could damage the protective film on the Touch Screen. Table F-5. Touch Screen Protective Film Specifications Property GFK-1220B Characteristics Chemical Resistant to: Alcohols Dilute acids Esters Hydrocarbons Ketones Household cleaning agents Mechanical Switch life More that 5 million flexes Physical Pencil hardness 2H Appendix F Specifications F-5 F Touch Pad Mouse Specifications Operating Specifications X/Y position resolution 500 points/inch (20 points/mm) graphics tablet mode Interface PS/2 (compatible with Microsoft mouse driver) Cleaning To clean the surface of the Touch Pad Mouse, use rubbing alcohol or ammonia-based glass cleaners. Dampen a cloth with one of these solvents, and wipe it across the Touch Pad Mouse surface. Remove any solvent left on the surface of the Touch Pad mouse using a dry cloth. Protective Film The Touch Pad Mouse is covered by a polyester film that that provides protection against solvents, dust, and moisture. Caution The protective film covering on the Touch Pad Mouse is not resistant to the following chemicals: Concentrated mineral acids Benzyl alcohol Concentrated caustic solution Methylene chloride High pressure steam at over 100°C Caution The protective film covering on the Touch Pad mouse is not suitable for use in conditions of prolonged exposure to direct sunlight. (Exposure to sunlight through window glass will not harm the protective film.) F-6 CIMPLICITY® Display Station User's Manual – July 1996 GFK-1220A F The overlay withstands exposure of more than 24 hours duration under DIN 42 115 Part 2 to the following chemicals without visible change. Ethanol Cyclohexanol Formaldehyde 37%–42% Acetaldehyde 1.1.1. Trichloroethane (Genklene) Diacetone alcohol Glycol Aliphatic hydrocarbons Toluene Ethylacetate Diethyl ether Isopropanol Glycerine Methanol Xylene White spirit N-Butyl acetate Amylacetate Butylcellosolve Triacetin Dowanol DRM/PM Ether Acetone Methyl ethyl ketone Formic acid <50% Acetic acid <50% Sodium hypochlorite <20% (Bleach) Dioxan Cyclohaxanone MIBK Phosphoric acid <30% Hydrochloric acid <36% Nitric acid <10% Hydrogen peroxide <%25 Potassium carbonate Washing powders Isophorone Trichloracetic acid <50% Sulfuric acid <10% Fabric conditioner Ferric chloride Ammonia <%40 Caustic soda <%40 Cutting oil Diesel oil Ferrous chloride Dibutyl phthalate Potassium hydroxide <%30 Alkalicarbonate Bichromate Potassium ferrocyanide/ferricyanide Linseed oil Paraffin oil Blown castor oil Silicone oil Dioctyl phthalate Sodium carbonate Acetonitrile Sodium bisulfate Turpentine substitute Universal brake fluid Decon Aviation fuel Petrol Teepol Water Sea water GFK-1220A Appendix F Specifications F-7 F Keypad Specifications Keyboard technology double dome membrane switches with Autotex 2 overlay Overlay Overlay is significantly better in terms of solvent resistance, strength, durability, and toughness compared with polycarbonate and vinyl. Overlay chemical resistance tested to DIN 42 115 Part 2. Performance specifications (based on manufacturer’s test results) > 1 million cycles before dome failure > 1 million cycles before Autotex 2 overlay failure > 1 million cycles before actuator failure. Caution The overlay is not resistant to: Concentrated mineral acids Concentrated caustic solution High pressure steam at over 100 degrees C Benzyl alcohol Methylene chloride The overlay is resistant to the following substances (24 hours under DIN 42 115 part 2): Ethanol Cyclohexanol Glycol Isopropanol Glyperine Methanol Acetaldehyde Aliphatic hydrocarbons Gasoline Toluene Xylene Benzene Flurochlorohydrocarbons Perchloroethylene 1.1.1 Trichloroethane Trichlorethylene Ethylacetate Diethyl ether Acetone Methyl ethyl ketone Dioxan Ammonia, < 2% Caustic soda, < 2% Formic acid, < 50% Acetic acid, < 8% Phosphoric acid, < 30% Hydrochloric acid, < 10% Nitric acid, < 10% Sodium hypochlorite, < 20% Hydrogen peroxide, < 25% Potassium carbonate Washing powders Fabric conditioner Alkalaicarbonate Bichromate Potassium ferrocyanide/ferricyanide Cutting oil Diesel oil Linseed oil Paraffin oil Blown castor oil Silicone oil Turpentine substitute The overlay also withstands DIN42 115 part 2 exposure of 1 hour to glacial acetic acid. F-8 CIMPLICITY® Display Station User's Manual – July 1996 GFK-1220A Index CIMPLICITY software A AC power receptacle, A-4 AC power requirements, F-3 Access plate, 1-9 removing, 5-10 Accessories, 1-4 Accessory port, A-12 Application Configuration MODBUS RTU communications, 9-7 SNP communications, 7-6 TCP/IP communications, 8-10 Application options for Display Station products, 1-6 Auto Detect utility, B-9 B Backup utility, 3-8 BIOS defaults loading, B-6 BIOS Features Setup, B-4 BIOS settings for memory, 5-4 Boot drive changing, B-7 Button selector window enabling for touch screen, 2-19 C Cable Diagrams, A-14 Cable Specifications, A-13 Calibrating the touch screen, 2-19, 10-14 Catalog numbers accessories, 1-4 AUI to BNC transceiver, A-3 cables, A-19 cables, 1-4 converters, A-19 Display Station products, 1-3 LAN software, 8-3 options, 1-6 parallel cable, A-11 TC/IP Ethernet communications module, 8-3 Changing the Computer Name, 4-22 Changing the default boot sequence, B-7 CHIPSET Features Setup, B-5 CimEdit Command Line Options, 4-15 Installing A Screen for CimView, 4-15 CIMPLICITY Display Station Products, 1-2 GFK-1220B components, E-4 Creating a new project, 4-16 Installing a project, 4-20 keyboard shortcuts, 6-3 New project options, 4-16 project structure, 3-2 Setting project properties, 4-17 Setting Startup Options, 4-2 Using the Project Wizard, 4-19 CimView command line options, 4-12 starting automatically, 4-7 Cleaning Touch Pad mouse, F-6 touch screen, F-5 CMOS battery, 10-3, 10-22 CMOS checksum error, 10-22 CMOS settings, 10-2, B-2, B-3 Coaxial BNC Ethernet, A-3 COM1 port, A-10 COM2 port, A-6 Command Line Options Installing Screens, 4-15 Communications troubleshooting, 10-8 Communications Coprocessor Module, A-20 Communications options for Display Station products, 1-6 Computer name changing, 4-22 Configuring Your System Using the Dial-Up Adapter, C-9 Contrast control, 2-10 setting, 2-12, 10-4 Control functions, 2-10 Converter, A-19 RS-422 to RS-322, A-17 Copying a project from the Configuration Cabinet, 3-3 onto floppy disks, 3-7 options, 3-1 Corner Taps enabling, 2-24 Corrective Actions, 10-11 Creating a New Project, 4-16 Options, 4-16 Customer Support, 1-12 D Data sheet, 1-2 Default Device Properties SNP, 7-9 Index-1 Index Default settings, B-2 for network connections, C-2 for serial ports, A-8 Demo project, 4-21 Device configuration for TCP/IP communications, 8-12 SNP communications, 7-8 Device point configuration for TCP/IP communications, 8-13 Diagnostics bootup sequence, 10-2 MODBUS RTU, 9-6 Self-test, 2-11, 10-2 system configuration verification, 10-2 system test and initialization, 10-2 Dimensions Touch Display, F-2 Touch Station/Glide Station, F-2 Direct Cable Connection, 3-4 CMOS Setup Utility, 10-3 Conflicting Address, 8-11 Disk Error, 10-3 Insufficient memory, 10-5 non-fatal, 10-2 Non-system disk, 10-3 Out of Memory, 10-5 Safe Recovery, 10-3 Ethernet copying a project using, C-9 port configuration, A-2 Exit Without Saving, B-9 External display port configuration, A-4 switching to, 6-4 External Keyboard, 6-2 port configuration, A-5 External mouse(Windows 95 systems only), 64 installing, C-12 setting up, C-9 Disabling the setup password, B-8 Display port, A-4 troubleshooting, 10-4 F Floppy disk eject, 2-10 Functional specifications, F-3 Display settings changing for 32 MB memory upgrades, 5-5 H Display types switching, 6-4 DOS prompt appears instead of software screen, 10-3 E Edge Finder operation, 2-21 settings, 2-22 Edge Motion enabling, 2-24 Edge-motion on Touch Pad mouse, 2-20 Eject button for floppy disk, 2-10 Enabling Touch Pad mouse operation, 10-20 Enabling touch screen operation, 10-11 Enabling/Disabling Automatic Login in Windows NT, E-3 Enhanced features Touch Pad mouse, 2-21 Environmental specifications, F-4 Equipment panel cutout, 2-4 Error messages AUTOCONFIG/DEFAULT I/O, 10-8, 10-9 CMOS checksum error, 10-3, 10-22 Index-2 Hard disk booting from, B-7 IDE HDD auto detection, B-9 Hard Disk indicator, 2-11 Hardware for installation, 2-4 Hardware Description, 1-9 Hardware Installation MODBUS RTU communications, 9-5 SNP communications, 7-5 Hardware setup procedure, 2-3 Host Communication Toolkit, 8-1 Hotline, 1-12 How to Operate the Keypad, 2-25 How to Use the Touch Pad Mouse, 2-20 How to Use the Touch Screen, 2-17 I Indicator functions, 2-11 Installation Display Station products, 2-3 memory upgrades, 5-4 Installation Procedure ISA board, 5-9 CIMPLICITY® Display Station User's Manual–February 1997 GFK-1220B Index memory upgrade, 5-5 Installation Verification Procedures TCP/IP communications, 8-4 Installed Network Components, C-2 Installing a CimView Screen, 4-15 Command Line Options, 4-15 Installing a Project, 4-20 Installing Direct Cable Installing Direct Cable Connection in Windows 95, C-12 Installing Logicmaster 90 Software, E-5 Installing Printer Drivers, 6-5 Interrupt requests, D-1 IP address, 8-11 IPI, 1-2 IRQ assignments, D-1 for serial port settings, A-8 ISA board, 1-9 installation, 5-9 maximum power requirements, F-3 specifications, 5-9 J Microsoft NetBEUI, C-3 Miniconverter, A-17 Miniconverter kit, A-19 MODBUS RTU application configuration, 9-7 hardware installation, 9-5 validating communications, 9-6 MODBUS RTU communications troubleshooting, 10-9 MODBUS RTU protocol, 9-1 Mounting hole dimensions Touch Display, 2-5 Touch Station/Glide Station, 2-6 Mounting location selecting, 2-3 Mounting studs, 2-4 Mouse external (Windows 95 systems only), 6-4 PS/2, deleting, 10-16 Mouse cursor operating with numeric keypad, 6-2 operating with touch screen, 2-17 Moving the Display Station, 2-28 N Jumper settings on system board, A-7 K Keyboard operation, 6-2 required, B-7 shortcuts, 6-3 troubleshooting, 10-7 Keypad Specifications, F-8 L Licenses, 1-5, 5-4 Loading BIOS Defaults, B-6 Logicmaster 90 software installing, E-5 Login, 2-14 as Administrator, 4-7 M Memory amount of usable memory, 2-11, 5-6 installing, 5-4 troubleshooting, 10-5 Memory upgrades 32MB, 5-5 GFK-1220B Index NetBEU. See Microsoft NetBEUI Network setting up, 3-4, C-1 Network communications troubleshooting, 10-9 Network Components installed, C-2 Network connections default settings, C-2 Network passwords, 2-14 New Project Options, 4-16 O Options for Display Station products, 1-6 Options and Upgrades, 1-6 Overtemperature indicator, 2-11 Overview MODBUS RTU communications, 9-2 SNP communications, 7-2 TCP/IP communications, 8-2 P Parallel cable, A-11 Parallel port, A-11 Index-3 Index Parity, 5-4 Password setup forgotten, B-8 Passwords network, 2-14 setup, B-7 Performance impact of SNP communications, 7-10 Phone numbers CIMPLICITY hotline, 1-12 GE Fanuc distributors, 1-6 Physical specifications, F-2 Plate for TCP/IP communications, 8-7 Removable cover plate, 1-9 Removal procedure ISA board, 5-11 Reset accidental, 10-3 button, 2-10 Right Mouse button function on Touch Pad mouse, 2-24 RS-232/RS-422 selecting, A-7 RS-422/RS-485 to RS-232 converter, A-19 Running the Demo Project, 4-21 access, 1-9 removing, 5-10 PLC/CPU connection troubleshooting, 10-8 Point configuration MODBUS RTU communications, 9-10 SNP communications, 7-9 TCP/IP communications, 8-13 Point-to-point configuration, 7-5 Port configuration MODBUS RTU communications, 9-5 SNP communications, 7-6 TCP/IP communications, 8-10 Port Configurations, A-2 Power AC input, A-4 Power indicator, 2-11 Power requirements, F-3 Powering Up the Display Station, 2-10 Powerup troubleshooting, 10-3 Printer drivers installing, 6-5 Printing troubleshooting, 10-10 Project, 4-18 Project Properties Enable Project Broadcast, 4-19 General, 4-18 Options, 4-18, 4-19 Protocols, 4-18 Setting, 4-17 Project Wizard Using, 4-19 PS/2 mouse deleting, 10-16 R Read load test Index-4 S Save & Exit Setup, B-9 Self-test diagnostics, 2-11, 10-2 Serial mouse connection, 2-8 driver, installing, 10-18 troubleshooting, 10-7 Serial ports RS-232, A-10 RS-232 cabling diagram for connection to CMM, A-16 RS-422/232, A-6 RS-422/232 cabling diagram, A-14 Serial Port 2 configuration, A-7 Series 90 TCP/IP application configuration, 8-10 checking PLC status, 8-7 device configuration, 8-12 device point configuration, 8-13 Hardware Configuration Requirements, 8-3 installation verification, 8-4 performing a read load test, 8-7 performing a write load test, 8-9 port configuration, 8-10 general properties, 8-10, 8-12 TCP/IP properties, 8-13 Related Documents, 8-3 requesting manual reads of domain data, 8-6 supported devices, 8-2 supported memory types, 8-2 toggling between data update modes, 8-6 writing test data to the PLC, 8-6 Setting Project Properties, 4-17 Setting Startup Options, 4-2 Setting Up Direct Cable Connection, C-9 Setting Up External Display, 6-4 Setup password, B-7 Shutting Down the Computer, 2-27 SIMMs CIMPLICITY® Display Station User's Manual–February 1997 GFK-1220B Index installation, 5-5 removal, 5-8 specifications, 5-4 SNP Default Device Properties, 7-9 SNP communications, 7-1, A-14 disabling protocol level debugging, 7-12 enabling protocol level debugging, 7-12 number of retries, 7-11 SNP Performance, 7-10 Software components CIMPLICITY, E-4 Windows 95, E-2 Windows NT, E-2 Specifications environmental, F-4 equipment panel cutout, 2-4 functional, F-3 ISA board, 5-9 Keypad, F-8 memory upgrade, 5-4 physical, F-2 touch pad mouse, F-6 Touch screen, F-5 Standard CMOS Setup, B-3 Starting CIMPLICITY Automatically at Bootup, 4-7 Starting CimView Manually, 4-12 Summary Getting Started, 2-28 Supported devices for MODBUS RTU communications, 9-2 for SNP communications, 7-2 for TCP/IP communications, 8-2 Supported memory types for SNP communications, 7-2 Switching Display Types, 6-4 System Architecture, 1-7 System Configuration Verification, 10-2 System Test and Initialization, 10-2 T TCP/IP Communications, C-6 TCP/IP Ethernet interface, A-3 TCP/IP properties, 8-11 Technical support, 1-12 Temperature effect on contrast setting, 2-12, 10-4 effect on touch screen calibration, 10-5 monitoring, 2-3, 2-10 Temperature requirements, F-4 Touch Pad mouse enhancements, 2-22 operation, 2-20 settings, 2-22, 10-21 special features, 2-21 specifications, F-6 troubleshooting, 10-6 Touch Pad mouse driver acquiring from World Wide Web, 10-20 installing, 10-20 Touch screen calibrating, 2-19, 10-14 cleaning, F-5 operation, 2-17 specifications, F-5 troubleshooting, 10-5 Touch screen driver reloading, 10-11 Touch Threshold how to change setting, 2-24 TouchMeter icon for Touch Pad mouse, 2-21 Transceiver AUI to BNC, A-3 Troubleshooting communications, 10-8 display, 10-4 keyboard, 10-7 memory, 10-5 MODBUS RTU communications, 10-9 network communications, 10-9 PLC/CPU connection, 10-8 powerup, 10-3 printing, 10-10 serial mouse, 10-7 Touch Pad mouse, 10-6 touch screen, 10-5 TSRs, 10-5 Tutorial for Virtual Scroll Bar, 2-23 U Unpacking the Display Station Products, 2-2 Using Microsoft NetBEU, C-3 Using TCP/IP Communications, C-6 Using the Hard Disk Configuration Utility, B9 Using the Project Wizard, 4-19 Utilities disk contents, E-5 CRT.COM and STN.COM, 6-4 touch screen driver, 10-13 cleaning, F-6 GFK-1220B Index Index-5 Index V Validating Communications MODBUS RTU communications, 9-6 VGA display port, A-4 Virtual Scroll Bar operation, 2-21 settings, 2-22 W What You Receive, 1-2 Windows keyboard shortcuts, 6-3 Windows 95 backup utility, 3-8 enabling/disabling the network login, 4-7 options for copying projects, 3-1 reloading the touch screen driver, 10-11 setting up Direct Cable Connection, C-9 shutting down, 2-27 software components, E-2 starting CimView, 4-14 switching display types, 6-4 Touch screen settings, 2-18 Windows 95 Software Components, E-2 Windows NT enabling/disabling automatic login, E-3 options for copying projects, 3-1 reloading the touch screen driver, 10-14 shutting down, 2-27 software components, E-2 starting CimView, 4-15 Touch screen settings, 2-19 Windows NT Software Components, E-2 Write load test for TCP/IP communications, 8-9 Index-6 CIMPLICITY® Display Station User's Manual–February 1997 GFK-1220B