1
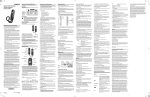
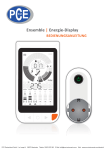
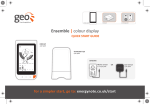
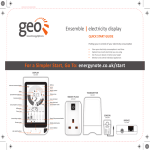
Ensemble | electricity display
USER MANUAL
Making energy engaging
In-home | mobile | online
Welcome
Welcome to Ensemble and greater control
over your energy consumption
We would like to thank you for choosing the
Ensemble electricity monitor. This user
manual explains how to set up and use your
Ensemble, but if you have any questions or
problems then please contact us (see back
page of this manual for details) we will be
happy to help.
The Ensemble is designed to help you learn
about how you use electricity and to recognise
when you might be wasting it. Making energy
visible will help you to reduce your CO₂ output
and save money by giving you real-time, visual
feedback on your power consumption (if you
switch your kettle on you will see what we
mean!). It also helps you to set targets and
track whether you are using more or less than
your daily allowance.
Please bear in mind that the Ensemble is not a
billing meter, so do not use this as a reference
point for how much your bill will be.
The next few pages will tell you how to install
and get the best out of your Ensemble system.
Safety Notice
It is important to observe some simple
safety precautions when using this product.
Please read this important information before
continuing. Safe operation of the Ensemble is
impaired if used in a manner not specified by
the manufacturer.
Do not fit rechargeable batteries.
Keep the Ensemble away from water and
other liquids. Clean only with a dry, soft cloth.
Do not immerse in water or other liquids.
Please contact the helpline number if any
components appear damaged or faulty,
details of which are at the back of this manual.
For use in dry indoor environments only.
The Ensemble is designed so that it can
be easily installed. It is not necessary to
connect or disconnect any cabling. You can do
the installation yourself but if you are unsure,
then do not take any risks and consult a
qualified electrician.
When fitting the Sensor, if the cables
going into your electricity meter look perished
(cracked, burned or you can see bare copper)
are loose, wet, or you have any doubts about
their condition - do NOT install the Sensor.
Contact a qualified electrician or your utility
provider. Do not force the Sensor onto the cable
if the cable diameter appears to be too large.
The Smart Plugs must not be used to
isolate connected equipment from the mains
supply during servicing or any activity which
requires connected equipment to be safely
isolated from the mains supply. This
equipment should be physically disconnected
from the Smart Plug prior to such activity.
This product carries a protective earth
symbol meaning that it should only be
connected to and used with earthed mains
sockets.
To protect the environment, these
products and batteries must be disposed of
safely at the end of their life. Please take to a
recycling centre for safe disposal.
RoHS compliant. This product complies
with RoHS regulations.
CE approved. For use within the EU.
Contents
Ensemble Installed
4
What’s in the Box
Power Supply
Ensemble Display
Smart Plug(s)
Transmitter
Bridge
Sensor
AA Batteries
5
5
5
5
5
5
5
5
What Your Display Shows You
Speedometer
Individual Appliances
Milometer: Daily Usage
Fuel Tanks
6-7
6
6
6
7
Quick Start Guide
Step 1 - Display
Step 2 - Transmitter
Step 3 - Sensor
Step 4 - Smart Plugs
Step 5 - Online Service
8 - 10
8
8
9
9
10
Settings
Setting the Time, Year, Month & Day
Setting the Currency
Setting the Units
Setting your Target Consumption
Setting the Tariff
11 - 12
11
12
12
12
12
Display Overview
13 - 15
Smart Plugs: Track & Control Appliances
The Basics
Turning appliances on/off via Smart Plugs
Grouping Smart Plugs
Adding Smart Plugs
Replacing a Smart Plug
16 - 18
16
16
17
18
18
Online Services
19
Frequently Asked Questions
20 - 22
Technical Specifications
23
Legal Information
23
Contact Us
24
ENSE-A-USG_002
Ensemble Installed
The Ensemble enables you to see how much
electricity your house is consuming. The
Sensor and Transmitter measure the
consumption at your meter and transmits it to
the Display wirelessly. The Smart Plugs
measure the consumption of individual
appliances and also transmit this to the Display
wirelessly. As well as seeing your consumption
on your Display, you can also view your
consumption history and control appliances
online with an additional Web Pack.
*
* Web Pack not included with the Ensemble Display pack
page 4
Ensemble Electricity Monitor, User Manual
For a Simpler Start, Go To: energynote.co.uk/start
What’s in the Box
DISPLAY
(one supplied)
TRANSMITTER
SMART PLUGS
(one supplied)
(one supplied)
Power Supply
(one supplied)
BRIDGE
(one supplied)
SENSOR
(one supplied)
Alkaline AA/LR6 1.5V batteries
(inside the Transmitter)
Power Supply
To power the Display.
Ensemble Display
The Display (receiver) will provide you with all
the information you need to know about your
electricity usage (including broken down to
appliance level). It also gives you control over
appliances. It receives a wireless signal from the
Transmitter unit and is mains powered.
Smart Plug
These are referred to as ‘Plugbug’ on the Display.
These measure the energy consumption of
whatever appliance is plugged into them and also
allows you to control the appliance (ON/OFF)
manually and remotely from the Display.
Warning:
Risk of electric shock
Refer to User Manual
Part No. MS01 1042
Measuring CAT III
Max voltage 264V~
Max current 75A
Green Energy
Options Ltd.
Transmitter
The Transmitter unit will sit next to your existing
electricity meter. Along with the Sensor, it
measures the consumption of your entire house
and transmits this information to the Display.
Bridge
The Bridge that connects wirelessly to your
Display. The Bridge connects to the internet via
an Ethernet connection to your broadband
router.
Sensor
The Sensor clip onto the mains cable coming out of
the meter and measure the energy consumption
of the house.
Alkaline AA/LR6 1.5V batteries
3 x Alkaline AA batteries to power the Transmitter;
these are already inside the Transmitter.
Ensemble Electricity Monitor, User Manual
page 5
What Your Display Shows You
Your Display has four main elements as
described below.
Speedometer
The Speedometer gives an up to date graphical
view of the amount of electricity you are using
in your house. In normal usage, the
Speedometer shows power (kW) up to 22kW
and will update every three seconds.
Milometer: Daily Usage
The Milometer shows how much electricity
you have used in kWh, CO₂ or £ for today, each
of the last seven days or the last four weeks.
Here are what the segments represent:
Segment
index
Step per
segment (kW)
Number of
segments
1 to 25
0.05
25
26 to 31
0.50
6
32 to 35
1.5
4
36 to 38
4.0
3
6kW
Kettle &
power shower
3kW
Kettle
Individual Appliances:
10kW
Kettle, shower,
space heater
22kW
Max
750W
Watching
TV
200W
Base load
The numbers in the middle of the
Speedometer tell you the exact value in energy
terms (kW), in cost terms (£/h) or in CO₂ (kg
CO₂/h)
page 6
Ensemble Electricity Monitor, User Manual
The bottom part of the Display shows you up
to date data on how much electricity up to six
individual appliances are using at that point in
time. You can also switch them on and off
from the Display if you wish. When your
Speedometer is reading high you can glance at
the Display to see if one of these appliances is
on, or check as you leave your house or go to
bed to see if you have inadvertently left
anything on.
Fuel Tanks:
This function will help you to keep track of
your expenditure. To do this you need to
enter your budget as described in the settings
part of this manual.
take account of this, and adapts to the
different patterns for each day of the week.
You are therefore able to compare your daily
consumption with your target.
The fuel tank works like a fuel gauge of a car.
Every night your fuel tank is filled up with your
daily allowance. Over the course of the day
your tank will empty.
You can tell at a glance if you are on track to
use your target amount from these symbols:
It is predicted that you will use less
than your target amount.
It is predicted that you are on track to
use your target amount.
It is predicted that you will use more
than your target amount.
The outer fuel tank shows how much
electricity you have used.
The inner fuel tank shows your target
consumption (in a similar way to a
“pacemaker” in a long distance race).
At first the target fuel tank empties at a steady
rate throughout the day. As it learns your
pattern of electricity usage, it adjusts this
steady rate to one that matches your usage
pattern. For example, it will remember that
you do not use much electricity over night and
Ensemble Electricity Monitor, User Manual
page 7
Quick Start Guide
The instructions below show you how to set
up your Ensemble, which has already been
paired to the Transmitter at the factory.
2
Step 1 - Display
1. Power the Display using the power
supply provided.
2. Whenever the Display is turned ON,
you will see the ‘set clock’ screen.
1
3. Use the left and right buttons on the
front of the Display to adjust the time
and date – then press the Middle (Set)
button when you have finished.
3
If your system has been supplied with a
Web Pack please set this up now. This will
then simplify the setting up of your Display.
To purchase the webpack please contact
your supplier.
Step 2 - Transmitter
1. Open the unit by pressing the plastic
tab on the back of the Transmitter
and pulling the outer cover away
from the bottom.
2. Remove the battery tab from
the Transmitter.
3. The red light will flash to show that
the batteries are working.
4. After a few seconds, the will
light on the Display to show that it
is communicating with the Transmitter.
2
1
page 8
Ensemble Electricity Monitor, User Manual
3
Step 3 - Sensors
Single Phase Pack (one Sensor):
1. At your electricity meter, clip the Sensor
around a cable. You should hear a ‘click’
to indicate that the Sensor has been
tightly closed.
2. Plug the Sensor cable into the bottom of
the Transmitter.
The Display will now start to show the energy
you are consuming.
2
1
L
L
It does not matter which cable
you choose
Step 4 - Smart Plugs
1. Plug your Smart Plug(s) into any
available socket(s).
2. The button on the front of the Smart
Plug will show one of two colours:
Green: power will be provided to
the appliance.
Red: the Smart Plug is isolated and no
power will be provided to the appliance.
1
3. The
,
, or
on the Display will
stop flashing to show that the Smart Plug
is in range and active. If it does not,
please refer to page 18 ‘Adding Smart
Plugs’ in this manual.
Your Display can communicate with up to 6
Smart Plugs. To purchase additional units,
please contact your supplier.
2
manual on/off
button
Ensemble Electricity Monitor, User Manual
page 9
Step 5 - Online Service
1. Plug the power supply into a mains
socket and insert the other end into the
power socket at the back of the bridge.
1
2. Using the Ethernet cable provided,
connect the bridge to your broadband
router. (The bridge uses DHCP and will
get an IP address automatically from
your router) You will now be able to
view your usage and control your
devices online. Go to: energynote.co.uk
2
Congratulations, the Display is
successfully set up and ready to use.
You may now wish to enter your own settings if you have not used
the Web Pack.
page 10
Ensemble Electricity Monitor, User Manual
Settings
To enter your personal settings, with the
Display showing its normal consumption
screen (as seen on page 5), press and hold the
‘Set’ (centre) button. The following
subsections explain how to change all the
settings on the Ensemble Display, taking you
through them in the order in which they
appear in the menu. To skip any of the
settings, press the ‘Set’ (centre) button.
Setting the Time:
Set desired time using the left and right
buttons. Press set to continue.
Setting the Year:
Set Time
Set desired year using the left and right
buttons. Press set to continue.
Set Year
Setting the Month:
Set desired month using the left and right
buttons. Press set to continue.
Set Month
Setting the Day:
Set desired day using the left and right
buttons. Press set to continue.
Set Day
Ensemble Electricity Monitor, User Manual
page 11
Setting the Currency:
Set desired currency using the left and right
buttons. Press set to continue.
Set Currency
Setting the Units:
Set desired unit to set your target against
using the left and right buttons. Press set to
continue.
Set Unit
Setting your Target Consumption:
Set desired target using the left and right
buttons. Press set to continue.
See page 22 for a rough guide to the
average household usage.
Target Consumption
Setting the Tariff:
A tariff is the amount you pay per unit of
electricity excluding any standing charge.
Set desired tariff using the left and right
buttons. Press set to continue.
You must as a minimum set up Tariff 1.
There is an option to add Tariff 2 and Tariff
3 if you have more than one tariff. You can
also set the times that these additional
tariffs turn on/off.
Your tariff can be found on a recent utility
bill or you can get the information from
your utility provider.
page 12
Ensemble Electricity Monitor, User Manual
Set Tariff
Set Tariff times
Display Overview
Left button
Use this to move back in time and decrease values.
Middle (Set) button
This changes the view options, e.g. use this to move
through £. kWh and Kg/CO₂.
Right button
Use this to move forwards through lists or increase values.
Control button
This turns Smart Plugs on and off (or groups of Smart Plugs).
Ensemble Electricity Monitor, User Manual
page 13
Internet comms signal
This indicates that the Display is paired and connected to
the Bridge. (It will flash if you do not have a Web Pack
connected)
Battery
This alerts you if the batteries need replacing in the
Transmitter.
Tariff
If you have more than one tariff, this indicates which tariff
you are currently on.
Units of measurements
This shows you whether you are currently viewing
readings in kW, £ or CO₂.
Speedometer (figures)
This shows you how much electricity you are using in your
house right now. The Speedometer updates approximately every three seconds.
Target symbol
This shows your target for today.
Today arrow
This shows how much electricity you have used so
far today.
Inner & Outer fuel tank
The ‘outer gauge’ shows how much electricity you have
used so far today.
The ‘inner gauge’ represents your consumption for the
same day of the previous week.
Communication symbol
This indicates that the Display is paired and connected to
the Transmitter.
page 14
Ensemble Electricity Monitor, User Manual
Milometer
The Milometer shows how much electricity you have used
in kWh, CO₂ or € for today, each of the last seven days or
the last four weeks.
Timer Icon
This will indicate if a Smart Plug has a schedule set
(requires a Web Pack).
Smart Plug on/off
This indicates whether a Smart Plug is on or off.
is on
is off.
Smart Plug Power
This shows the consumption of a particular appliance.
Smart Plug Comms
This indicates that the Display is paired and connected to
a particular Smart Plug.
Group Arrow
This shows you if a particular Smart Plug is in a group.
The Horizontal
If the two gauges are equal, (which they will be when you
first switch on) you will see this icon. You are on track to
meet your Target Consumption.
The Cross
If you have used more electricity than the Inner reference
gauge for this time of day and you will exceed your Target
Consumption.
The Tick
If you have used less electricity than the Inner reference
gauge for this time of day and you are using less than your
Target Consumption.
Ensemble Electricity Monitor, User Manual
page 15
Smart Plugs: Track & Control Appliances
Speedometer. On the Display, the ‘Smart
Plugs’ are referred to as ‘Plugbugs’.
The Basics
The button on the front of the Smart Plug will
show one of two colours:
Green: power will be provided to the
appliance.
Red: the Smart Plug is isolated and no power
will be provided to the appliance.
You can have up to six Smart Plugs paired to
your Ensemble Display. The Smart Plugs send
information to the Display on specific
appliances so you can see their individual
consumption. You can also communicate with
the Smart Plugs via the Display to switch them
on or off, which gives you control over any
appliance plugged into a Smart Plug.
The Smart Plugs provided with your Ensemble
are already paired (ready to talk) to the
Display; simply plug the provided Smart Plugs
into individual sockets and plug in the
appliance you want to monitor. Your Display
can communicate with up to 6 Smart Plugs. To
purchase additional units, please contact your
supplier.
Along the bottom of the Display you can see
the energy being used by that appliance. To
see this in more detail scroll to the specific
Smart Plugs using the right button. The
information will then be displayed on the
page 16
Ensemble Electricity Monitor, User Manual
Turning appliances on/off
via Smart Plugs
There are three ways to control your Smart
Plug(s):
1. Pressing the switch on the front of the
Smart Plug itself.
2. Use the right button on the Display to
navigate to the Smart Plug that you want
to control.
A short press on the Control button turns
the appliance off.
3. If you have a ‘Web Pack’ which contains
an Ethernet Bridge, you can login online
to switch on/off any Smart Plug paired to
your Ensemble. This online facility also
allows you to name your Smart Plugs and
set automatic timers so they are able to
switch on/off automatically at the times
you choose. For further information on
this service please see the ‘Online
Services’ section on page 19.
Grouping Smart Plugs
Smart Plugs can be grouped to allow control of
more than one appliance at once:
3. A
symbol shows that a Smart Plug is
part of group.
1. Press the right button to scroll through
each Smart Plug in turn to get to the one
you want to group.
4. With the Display showing its normal
consumption screen, press the Control
button to turn off all of the Smart Plug in
the group. Press and hold the Control
button (for more than four seconds) to
turn the Smart Plugs in the group on.
2. Hold the centre button and then press
and release the Control button to include
or exclude the Smart Plug from the group.
Not Grouped
Grouped
Grouped
Ensemble Electricity Monitor, User Manual
page 17
Adding Smart Plugs
Up to six Smart Plugs can be paired (talk to)
your Ensemble at any one time. If you buy
additional Smart Plugs you will need to pair
them with your Ensemble.
1. Plug the Smart Plug into a socket. Do not
attach an appliance until pairing is
complete.
2. On your Display press the left and right
buttons simultaneously for a few seconds.
The Display will show 'PAIRMODE'.
4. While this is shown, press and hold the
button on front of the Smart Plug you are
pairing for 10 seconds. The light on the
Smart Plug will then turn amber and the
Display will change to 'PLUGBUG' a few
seconds later.
Tip: If you buy a number of additional Smart
Plugs, plug them in and pair them one at a time.
Replacing a Smart Plug
If you want to replace a Smart Plug, you will
need to unpair the old Smart Plug before
pairing a new one.
1. Put the Display into ‘PAIRMODE’ by
pressing the left and right buttons
simultaneously for a few seconds.
2. Go to the Smart Plug you wish to replace
using the right button to scroll through
the screens.
3. Select an empty Smart Plug slot using
the Right button to scroll through the
screens. An empty slot is shown by the
number of the Smart Plug flashing while
the Display shows 'PAIR?'
3. When you have the Smart Plug you want
to remove, press and hold the centre
button until the Display changes from
'PLUGBUG' (or the name of the Smart
Plug) to 'PAIR?'
4. Add the new Smart Plugs using the
instructions in 'Adding Smart Plugs'.
page 18
Ensemble Electricity Monitor, User Manual
Online Services
Go to: energynote.co.uk
The Ensemble Pack contains a Bridge that
connects wirelessly to your Display. The Bridge
connects to the internet via an Ethernet
connection to your broadband router.
• Name each of your Smart Plugs for easy
reference (even down to which room
they are in). This way you are less likely
to turn off the wrong appliance!
• Set timers for your Smart Plugs.
The online service allows you to:
• Personalise the Display on your website you can view your energy use in lots of
different ways so you can choose the one
that suits you best.
• View your entire consumption history the Ensemble holds up to four weeks of
information, but your website keeps a
complete record
• Switch individual Smart Plugs on/off.
• You can group your Smart Plugs so
you can turn more than one on/off
at a time.
• Do all of the above from anywhere in the
world! You can also use your smart
phone to do all of this too.
Ensemble Electricity Monitor, User Manual
page 19
Frequently Asked Questions
Here are the answers to some popular
questions, but should you require any further
information please do contact us (see page 24
for details).
Q. How does the Ensemble work?
A. Your Ensemble has a Sensor which is fitted
around the cable connecting your meter with
your fuse box or consumer unit. The Sensor
measures the amount of electrical current
passing through the cable and the Transmitter
sends this information wirelessly to your
Display in real time, providing you with an
indication of your energy consumption.
Q. How far does the device transmit?
A. The Ensemble is designed to operate in a
home environment over a range of 30 meters
with two walls in between the Transmitter and
Display unit. The 868MHz range is well suited
L
L
for in-home use. This can cover three floors,
and is also well suited to properties where
meters are outside the main building.
Q. Why will my Display and
Transmitter not communicate?
A. There are three reasons why the units will
have problems communicating:
page 20
Ensemble Electricity Monitor, User Manual
• Range – Try moving the Display to a closer
location to the Transmitter (see previous
question).
• Metal objects close to the Display or
Transmitter – The devices cannot
communicate through metal. Try moving
the units away from any metal objects.
• Interference – Some household devices
can interfere with the Ensemble devices
(light dimmers, hair dryers, Heating
thermostats, etc). Try and locate the
source of interference and either isolate
it or move the Ensemble away from the
source.
Q. Why is the symbol flashing?
A. The communication symbol will flash if:
• The Display and Transmitter are unable
to communicate (see above).
• The Display is receiving data from two
sources simultaneously. This can be solved by
pairing the Display with the Transmitter again.
This will eliminate the other Transmitter.
Q. Why is the battery symbol flashing?
A. The batteries provided should last for at
least one year. Toward the end of their life the
battery symbol will flash to let you know to
replace them. Make sure you use Alkaline AA
batteries (LR6). Do not use rechargeable
batteries.
Q. Why is the internet comms
symbol flashing?
A. This symbol will flash if:
• You do not have a Bridge connected to
your system.
If you do have a Bridge:
• The outer rings will flash if the Display
cannot talk to your Bridge – so try
moving them closer.
The Display will first ask if you want to erase
the memory, ‘RSR?’. Select ‘Y’ (left button) to
erase the memory, or ‘N’ (right button) to keep
the data. Next the Display will ask ‘N/W?’. If
you want to unpair all connected devices
(Smart Plug, Transmitter and Bridge if you have
a Web Pack) select ‘Y’, or ’N’ to keep them
paired. Finally the Display will ask if it should
be a Master (MST) or a Slave (SLV). Select MST
using the left button. The Display will then ask
you to reconfirm the date and time.
• The inner dot will flash if you do not have
a connection to the internet.
• Try checking that the ethernet cable is
connected.
Bridge
Router
If you chose to reset N/W, you will have to pair
the Sensor, Bridge and Smart Plugs again, one
by one.
Resetting the network is what you'll have to do
in the very rare event that two neighbouring
Ensemble systems have chosen the same
network ID.
Q. How do I reset the Display (clear the data
and start again)?
A. There are two options for resetting the
Display. You can either erase the memory or
reset the network.
For either option, first unplug the Display's
power cable. Then press and hold the left and
right buttons while reinserting the power
cable.
Ensemble Electricity Monitor, User Manual
page 21
Q. What do the Smart Plug columns show me?
A. The Smart Plug columns on the Display light
up from the bottom on the following scale:
1001W-3680W
Top Segment
251W-1000W
26W-250W
5W-25W
Bottom Segment
Q. How much electricity does the Ensemble
Display use?
A. The Display uses less than 0.35 watt hours
(or approximately €0.07) a month to run (tariff
dependent) - that's less than making a single
slice of toast!
Q. Why does the Display show a different
reading to my electricity bill?
A. The Ensemble system is a good indicator of
your approximate electricity consumption, but
it is only intended as a guide. The Sensor does
not communicate with your meter directly and
will not send your readings to your supplier.
If your supplier asks for a reading, or if you are
checking your bills, always look at the readings
on your meter (NOT your Ensemble Display or
website) as these will continue to be used for
billing purposes.
Q. Where do I find my tariff information?
A. You can find tariff information on your
electricity bill. If not, you will need to contact
you energy supplier.
Q. What target consumption should I set?
A. The target consumption is best set by
working out your daily average from your most
recent electricity bill.
page 22
Ensemble Electricity Monitor, User Manual
You could also use this rough guide to what the
average household uses:
• Single person – 5kWh/day
• A Couple – 10kWh/day
• A family of four – 16kWh/day.
Please note that the Ensemble system only
acts as a guide. It does not communicate
directly with your meter and cannot be used to
provide meter readings to your supplier.
Technical Specifications
Model
Monitor Display
Transmitter
Sensor
Smart Plug
Rated voltage
230Vac 50Hz
3 x AA size 1.5V batteries
N/A
230Vac 50Hz
Input power
0.35W
0.2W
N/A
1W
Operation
0 to 40°C
-20 to 50°C
-20 to 50°C
0 to 40°C
Humidity
85% non-condensing
85% non-condensing
85% non-condensing
85% non-condensing
Usage
N/A
N/A
Cat III
Class I
Legal Information
GEO is a registered trademark of Green Energy
Options Ltd. Copyright 2010 Green Energy
Options Ltd. All rights reserved.
Green Energy Options Limited (GEO) makes no
representations and gives no warranties of
any kind in relation to the contents of this
document and all warranties, conditions and
other terms implied by statute or common
law are, to the fullest extent permitted by law,
hereby excluded.
are provided by GEO and for no other purpose.
All content, text, graphics and all other
materials contained in this document are
owned by GEO (or its licensors), and all
proprietary and intellectual property rights
(including copyright, design rights, trade
secrets, trade names, logos and trade marks)
wherever arising in relation to this document
vest in GEO (or its licensors) and all such rights
are reserved.
Conforming Standards:
In particular, GEO assumes no responsibility
for any errors or omissions that may appear in
this document and makes no commitment to
neither update nor keep current the
information contained in this document.
Radio Device RF Performance (UK & Europe)
EN300 220-1
Emissions EMC (UK & Europe)
EN301 489-3
Safety Requirements (UK & Europe)
EN61010-1, EN60950
Europe standards
CE
Max Voltage 264 Vac
Cat III
Max Current 75A
GEO retains the right to make changes to this
document (including any specifications
contained herein) at any time without notice.
No part of this document may be modified,
copied, reproduced, republished, published,
transmitted or distributed in any form or by
any means without the prior written consent
of GEO. The contents of this document are to
be used solely for the purpose for which they
Ensemble Electricity Monitor, User Manual
page 23
Contact Us
UK Office:
T:
+44 (0)8450 941 508
E:
[email protected]
W: www.greenenergyoptions.co.uk/ensemble
The Ensemble is designed and manufactured by
Green Energy Options Ltd. For details of further
products, accessories or enhancements go to
www.greenenergyoptions.co.uk
Other GEO Products
Solo II
page 24
Ensemble Electricity Monitor, User Manual
Ensemble Water
Solo II PV