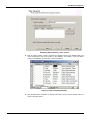
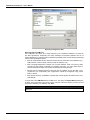
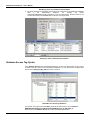
1
Data Mining Configurator
First in Fieldbus
smar
-
Data Mining
Configurator
USER’S MANUAL
MAY / 06
DATA MINING
CONFIGURATOR
VERSION 8
TM
FOUNDATION
P V I
E WD M C M E
www.smar.com
Specifications and information are subject to change without notice.
Up-to-date address information is available on our website.
web: www.smar.com/contactus.asp
Table of Contents
TABLE OF CONTENTS
DATA MINING CONFIGURATOR .................................................................................................................. 5
INTRODUCTION.............................................................................................................................................................5
CONFIGURING THE DATA MINING OPC SERVER.....................................................................................................6
DATA MINING CONFIGURATION QUICK START........................................................................................................7
DATA MINING CONFIGURATION DEMO .....................................................................................................................7
STARTING THE DATA MINING CONFIGURATOR.....................................................................................................16
CREATING A NEW CONFIGURATION DATABASE ...................................................................................................17
DATA MINING CONFIGURATION WIZARD ................................................................................................................18
EXAMPLE CONFIGURATION USING DATA MINING CONFIGURATION WIZARD.............................................................. 19
BASIC STEPS IN THE DATA MINING CONFIGURATION WIZARD...................................................................................... 30
MICROSOFT ACCESS WIZARD ............................................................................................................................................ 34
MICROSOFT EXCEL WIZARD ............................................................................................................................................... 34
MICROSOFT SQL SERVER WIZARD .................................................................................................................................... 35
ORACLE WIZARD................................................................................................................................................................... 36
ODBC WIZARD ....................................................................................................................................................................... 36
DATA SOURCE WIZARD: DATABASE TABLE ...................................................................................................................... 37
DATA SOURCE WIZARD: SQL COMMAND .......................................................................................................................... 41
DATA MANIPULATOR WIZARD: SQL COMMAND ................................................................................................................ 42
DATA MANIPULATOR WIZARD: STORED PROCEDURE .................................................................................................... 44
TOOLBAR .....................................................................................................................................................................49
MENUS .........................................................................................................................................................................51
FILE MENU ............................................................................................................................................................................. 51
ACTIVATING THE DATABASE............................................................................................................................................... 56
EDIT MENU............................................................................................................................................................................. 57
VIEW MENU............................................................................................................................................................................ 58
GO MENU ............................................................................................................................................................................... 59
TOOLS MENU......................................................................................................................................................................... 59
OPTIONS ................................................................................................................................................................................ 59
COMPACTING AND REPAIRING MICROSOFT ACCESS DATABASES .............................................................................. 60
HELP MENU............................................................................................................................................................................ 61
DATABASE CONNECTIONS .......................................................................................................................................61
CREATING A NEW DATABASE CONNECTION .................................................................................................................... 61
DATABASE CONNECTION PROPERTIES ............................................................................................................................ 62
MICROSOFT ACCESS CONNECTION .................................................................................................................................. 63
MICROSOFT EXCEL CONNECTION ..................................................................................................................................... 63
MICROSOFT SQL SERVER CONNECTION .......................................................................................................................... 64
ORACLE CONNECTION......................................................................................................................................................... 64
ODBC CONNECTION ............................................................................................................................................................. 65
DATA SOURCES AND DATA MANIPULATORS.........................................................................................................65
DATA SOURCES .................................................................................................................................................................... 65
DATA MANIPULATORS.......................................................................................................................................................... 65
DO’S AND DON’TS FOR DATA MINING ................................................................................................................................ 65
TROUBLESHOOTING DATA SOURCES AND DATA MANIPULATORS ............................................................................... 66
III
Data Mining Configurator – User’s Manual
CREATING A NEW DATA SOURCE ...................................................................................................................................... 67
DATA SOURCE PROPERTIES............................................................................................................................................... 68
DATABASE TABLES............................................................................................................................................................... 69
SQL COMMAND ..................................................................................................................................................................... 71
CREATING A NEW DATA MANIPULATOR .................................................................................................................73
DATA MANIPULATOR PROPERTIES .........................................................................................................................74
SQL COMMANDS ................................................................................................................................................................... 74
STORED PROCEDURE.......................................................................................................................................................... 77
DATA ITEMS.................................................................................................................................................................78
DATA ITEMS FOR DATA SOURCES ..................................................................................................................................... 78
STATIC DATA ITEMS ............................................................................................................................................................. 78
DYNAMIC DATA ITEMS ......................................................................................................................................................... 78
EXAMPLES ............................................................................................................................................................................. 79
DATA ITEMS FOR DATA MANIPULATORS........................................................................................................................... 80
CREATING A NEW DATA ITEM ..................................................................................................................................80
DATA ITEM PROPERTIES...........................................................................................................................................81
TESTING YOUR DATA TAGS......................................................................................................................................83
VISUALIZING DATA IN GRAPHWORX .......................................................................................................................84
DATABASE ACCESS TAG SYNTAX ...........................................................................................................................87
DATA MINING EXAMPLES ..........................................................................................................................................88
EXAMPLE 1: DATA MINING CONFIGURATION DEMO ........................................................................................................ 88
EXAMPLE 2: DATA SOURCE CONFIGURATION EXAMPLES.............................................................................................. 88
EXAMPLE 3: DATA MINING LOGGING EXAMPLES ............................................................................................................. 91
IV
Data Mining Configurator
DATA MINING CONFIGURATOR
Introduction
The basic purpose of PROCESSVIEW data mining is to visualize data from various data sources,
such as a Microsoft Access database, in a customizable, user-friendly display format that enables
users to interact with and manipulate the data. The Data Mining Configurator establishes
connections with data sources that can be mined from PROCESSVIEW applications, such as
GraphWorX, where users can visualize data. In general, the Data Mining Configurator enables you
to:
•
Connect to databases (i.e. where to get the data).
•
Select data sets to mine within the connected databases (i.e. which group of data within the
connected database).
•
Specify data items to monitor within the chosen data sets (i.e. which values to read from the
selected group of data).
Once you have configured your database connections using the Data Mining Configurator, you can
configure a GraphWorX display in order to visualize the data. In GraphWorX, the Unified Data
Browser enables you to create process points using data items from your data mining configuration
database. Thus, the data mining configuration database serves as a medium through which data
can be channeled from multiple data sources (e.g. Microsoft Access, Microsoft SQL Server,
Microsoft Excel, Oracle, and ODBC data sources) to a visualization medium (i.e. GraphWorX) where
you can view or manipulate the data.
Key features of data mining include:
•
Brings database access to any OPC client.
•
Supports many data sources, including Microsoft Access, Microsoft SQL Server, Microsoft
Excel, MSDE, and Oracle.
•
Easy-to use dataset support includes database table access (single field read or write, column
read or write, row read or write, and two-dimensional array read or write) as well as simple
SQL commands.
•
Data manipulators enable access to database stored procedures and execution of complex
SQL commands.
•
Database Connection Wizard.
•
Database object browser.
•
Support for aliasing (one data tag can access multiple database fields).
•
Data Mining (grid) ActiveX control.
•
Data Mining Configurator.
•
Integration of data-mining configuration into Unified Data Browser.
5
Data Mining Configurator – User’s Manual
Configuring the Data Mining OPC Server
The data-mining OPC server can be configured using two configuration tools: The first is the standalone Data Mining Configurator, shown in the figure below. This document describes how to use
the Data Mining Configurator.
Stand-Alone Data Mining Configurator
The second tool is embedded in the Unified Data Browser on the Database Access tab, as shown
in the figure below. This tab is available together with OPC Data Access browser. It was designed
for ease of use to allow users to make on-the-fly modifications in the server address space. This
second tool supports a subset of features available in the Data Mining Configurator application. For
more information, please see the Unified Data Browser Help documentation.
Unified Data Browser: Database Access Tab
6
Data Mining Configurator
NOTE
Both data-mining configuration tools are capable of configuring Data Mining OPC Servers on the
local machine only.
When configuring data mining, first you should decide what type of action you want to perform with
databases; there are two basic options:
•
Read the data periodically and display them in an OPC client (e.g. in GraphWorX)
• Manipulate database data upon user request.
The first option is represented by Data Sources; the second option by Data Manipulators. Both of
these objects need to specify a Database Connection. For instruction on how to create each of
these objects in the configuration database, please see the sections below.
Data Mining Configuration Quick Start
Data mining configuration involves the following basic steps:
1. Start the Data Mining Configurator.
2. Connect to a database (i.e. where to get the data).
3. Select a data set or data manipulator to mine within the connected database (i.e. which group of
data within the connected database).
4. Specify which data items to monitor within the chosen data set (i.e. which values to read from
the selected group of data.
5. Create a GraphWorX display that connects to data items in your data mining configuration
database.
6. Visualize and manipulate the data in the GraphWorX display in runtime.
The steps listed above are described throughout this document. The PROCESSVIEW installation
provides a Data Mining Demo configuration that will help you get started with your data mining
configurations. The following section will guide you through the demo.
NOTE
The Data Mining Configurator provides a Data Mining Wizard that helps you create and
configure your data source connections. You can also configure your data mining settings in the
Database Access tab in the Unified Data Browser. For more information, please see the Unified
Data Browser help documentation.
Data Mining Configuration Demo
The PROCESSVIEW installation provides a Data Mining Demo configuration. To view the demo
files, go to the C:\Program Files\Smar ProcessView\Examples\Database Mining Examples
directory in the PROCESSVIEW installation. This directory contains the following files:
•
DBOPCServerConfigurator.mdb: This Microsoft Access file is the default active data mining
configuration database.
•
administration.mdb: This Microsoft Access file is the demo database connection.
•
DBOPC.gdf: This is a GraphWorX display that allows you to view the data sources and data
items specified in the demo database connection.
To view the DBOPCServerConfigurator.mdb demo configuration database:
1. Open the Data Mining Configurator from the Windows Start menu by selecting Programs >
Smar ProcessView > Tools > Data Mining Configurator.
2. This opens the DBOPCServerConfigurator.mdb database in the Configurator, as shown in the
figure below. The main tree control of the Configurator is called Databases. Under this tree
control, you can see the following items:
•
The demo database connection, called AdministrationDB, which connects to the
administration.mdb Microsoft Access database.
•
A demo data source, called Employees_By_PID.
•
Several data items (e.g. Name_1, Name_2, Name_3, PID_1, PID_2, etc.)
7
Data Mining Configurator – User’s Manual
These demo items are described in greater detail in the sections below.
Data Mining Configuration Demo
Demo Database Connection
The Data Mining Configurator default configuration database provides a demo database connection
called AdministrationDB, as shown in the figure below. The example configuration shows a
connection to a Microsoft Access database called administration.mdb, which is located in the
C:\Program Files\SMAR\PROCESSVIEW\Examples\Database Mining Examples directory in the
PROCESSVIEW installation.
Database Connection Demo
Demo Data Source
The Data Mining Configurator demo database connection, called AdministrationDB, contains a
data source called Employees_By_PID, as shown in the figure below. This example configuration
shows a data source connection for the administration.mdb database.
8
Data Mining Configurator
Data Source Demo
As you can see in the Employees_By_PID data source configuration above, the data set specifies
a table in the administration.mdb (Access) database called Employees. To view the tables in the
database:
1. Click on the … button next to the Table Name field, as shown in the figure above.
2. This opens the Unified Data Browser, which displays a list of tables in the database, as shown
in the figure below. As you can see, the database contains two tables: Employees and
ProjectDetails. In this demo data source, the Employees table already has been selected.
Employees Table in Unified Data Browser
3. To view the same the database tables in Microsoft Access, start Microsoft Access (must be installed
through Microsoft Office) and open the administration.mdb file in the C:\Program
Files\SMAR\PROCESSVIEW-\Examples\Database Mining Examples directory in the
9
Data Mining Configurator – User’s Manual
PROCESSVIEW installation. The Employees database table in the database contains several
columns and rows of data about four different employees, as shown in the figure below:
•
Bob
•
Russel
•
Dave
•
Arthor
The columns list the personal data for each employee:
•
PID: Employee's identification number
•
Name: Employee's first name
•
Surname: Employee's last name
•
Title: Employee's job position
•
Department: Company department in which the employee works
•
Salary: Employee's salary
Employees Table in Administration Database
Demo Data Items
As shown in the figure below, the Employees_By_PID data source configuration contains several
data items:
•
•
•
•
•
•
•
•
•
•
10
Name_1
Name_2
Name_3
PID_1
PID_2
PID_3
Salary_1
Salary_2
Salary_3
Surname_1
Data Mining Configurator
•
•
Surname_2
Surname_3
Data Items in Employees Table
The data items correspond to the information in the Employees database table in the Administration
database. For example, the itemID AdministrationDB.Employees_By_PID.Name_2 has the value
Russel, because Russel is the second name listed in the database table, as shown in the figure
below.
Employees Table in Administration Database
How do you determine which value to display for each itemID? This is defined in the data item
properties. For example, click on the Name_2 data item in the tree control under the
Employees_By_PID to view the data item properties, as shown in the figure below.
11
Data Mining Configurator – User’s Manual
Data Item Demo
To select a column name from the database table, choose Specific Column and then click the …
button next to the Column Name field as shown in the figure above. This opens the Unified Data
Browser, which displays a list of columns in the Employees database table, as shown in the figure
below. The columns list the personal data for each employee:
•
PID: Employee's identification number
•
Name: Employee's first name
•
Surname: Employee's last name
•
Title: Employee's job position
•
Department: Company department in which the employee works
•
Salary: Employee's salary
In this example, the Name column is already selected for the Name_2 data item.
Names Column in Unified Browser
Once you have selected a table, you need to specify a data set parameter (i.e. a specific value that
you want to read from the database table). Click the Add button to enter a Parameter Value, as
shown in the figure below.
12
Data Mining Configurator
Specifying Data Set Parameters
The Parameter Value corresponds to the record number in the database table. For data item
Name_2, the Parameter Value is "2," as shown in the figure above. As you can see in the figure
below, in the Name column, record number "2" corresponds to the second value in the column.
Thus, the value for record number "2" is Russel, which is highlighted in the figure below. Thus, the
Parameter Value for data item Name_2 will be resolved as "Russel," as shown in the figure below.
Record Number in Database Table
GraphWorX Data-Visualization Demo
Now that you have seen how the demo database connection, demo data source, and demo data
items are configured in the Data Mining Configurator, the next step is to visualize the data in
GraphWorX. The Data Mining Demo provides an example GraphWorX display that shows how to
configure your data mining connections so you can view data coming from the database.
1. Go to the C:\Program Files\Smar ProcessView\Examples\Database Mining Examples
directory in the PROCESSVIEW installation and open the DBOPC.gdf file.
2. The display opens in GraphWorX configuration mode, as shown in the figure below. The display
contains two different examples of data mining visualization: static and dynamic. A static
display simply displays the data values from the connected database. A dynamic display allows
you to manipulate data values from the connected database.
The table in the static definition section contains some column names from the Employees
database table, as shown in the figure below:
•
Name: Employee's first name
•
Surname: Employee's last name
•
Salary: Employee's salary
13
Data Mining Configurator – User’s Manual
•
PID: Employee's identification number
Each column contains process points that correspond to data items (e.g. Name_1, Name_2,
Name_3, PID_1, PID_2, etc.) in the Employees_By_PID data source from the demo data mining
configuration. A process point must be configured for each data item. We will continue to look at the
Name_2 data item as an example:
3. Under the Name column in the GraphWorX display, double-click the second process point under
the Name column, as shown in the figure below.
Data Mining Demo in GraphWorX: Configuration Mode
4. This opens the Property Inspector for the data item. Click on the PPT/DE tab, as shown in the
figure below. As you can see, the AdministrationDB.Employees_By_PID.Name_2 item ID
has already been specified in the Data Source field.
Property Inspector for Name_2 Data Item
14
Data Mining Configurator
5. Click on the Data Tags button to open the Unified Data Browser. The Unified Data Browser
opens to the Database Access tab, as shown in the figure below. You can see that the browser
tree control is similar to the tree control in the Data Mining Configurator; you can choose from
configured data items from the Employees_By_PID data source connection. The Name_2 item
ID has already been selected. Notice that each ItemID (e.g.
SMAR.DatabaseOPCServer.3\AdministrationDB.Employees_By_PID.Name_2) contains the
following information:
•
Server name (e.g. SMAR.DatabaseOPCServer.3\)
•
Database connection name (e.g. AdministrationDB)
•
Data source name (e.g. Employees_By_PID)
•
Data item name (e.g. Name_2)
Data Item Specified in Unified Browser
6. Close out of the Unified data Browser and the Property Inspector dialog box.
7. Enter the GraphWorX display into runtime mode. You can see the data coming from the
Employee database table, as shown in the figure below. Notice that the Parameter Value for
data item Name_2 is resolved as "Russel" in the visualization display.
Note: The Static definition section simply displays the values from the Employee database table
for the configured data items, but the data cannot be manipulated. The Dynamic definition section
also displays values from the Employee database table, but in this case only one row of data is
displayed at a time, and you change the currently viewed row by clicking the three PID buttons, as
shown in the figure below. The dynamic configuration uses local aliases and global aliases, which
enable you to switch between rows during runtime mode.
15
Data Mining Configurator – User’s Manual
Data Mining Demo in GraphWorX: Runtime Mode
8. The items displayed in GraphWorX correspond to the information in the Employees database
table in the Administration database. For example, the itemID
AdministrationDB.Employees_By_PID.Name_2 has the value Russel, because Russel is
the second name listed in the database table, as shown in the figure below.
Employees Table in Administration Database
Starting the Data Mining Configurator
To start the Data Mining Configurator:
1. From the Windows Start menu, select Programs > Smar ProcessView > Tools > Data Mining
Configurator.
2. This opens the Configurator, as shown in the figure below. The screen consists of a split window
with a tree control view in the left-hand pane and a configuration view in the right-hand pane.
The Configurator provides a standard format for the configuration database, as well as a
16
Data Mining Configurator
sample (default) configuration project. The Configurator also includes a toolbar and menus with
many command functions.
Configurator Screen
Creating a New Configuration Database
To create a new configuration database in the Configurator:
1. Select New from the File menu, as shown in the figure below.
Creating a Configuration Database
2. In the Save New Database dialog box, select the database type from the Save As Type dropdown list, as shown in the figure below. Browse for the target directory, give the file a name, and
then click the Save button.
Saving the New Configuration Database
17
Data Mining Configurator – User’s Manual
Data Mining Configuration Wizard
The Data Mining Configurator provides a Data Mining Configuration Wizard that helps you
create and configure your database connections.
NOTE
You can also configure your data mining settings in the Database Access tab in the Unified Data
Browser. For more information, please see the Unified Data Browser help documentation.
To run the Data Mining Configuration Wizard:
1. Select Configuration Wizard from the File menu, as shown in the figure below.
Starting the Data-Mining Configuration Wizard
2. The introduction screen for the Data Mining Wizard appears. Click the Next button to continue.
Data-Mining Wizard: Welcome Screen
3. You have two options: Create a New Data Source or Create a New Data Manipulator, as shown
in the figure below. A data source can be use to read data from a database. It can access a
specific database table directly or use a SQL read command to get data. A data manipulator,
which is intended for processing data stored in a connected database, manipulates data using a
SQL write command or by executing a stored procedure. Choose an option, and then click the
Next button to continue.
An example wizard configuration is described in the section below.
18
Data Mining Configurator
Data-Mining Wizard: Data Object Options
Example Configuration Using Data Mining Configuration Wizard
The following example walks you through the steps in creating a simple Microsoft Access database
connection using the Data Mining Configuration Wizard.
To run the Data Mining Wizard:
1. Select Configuration Wizard from the File menu, as shown in the figure below.
Starting the Data-Mining Configuration Wizard
2. The introduction screen for the Data Mining Wizard appears. Click the Next button to continue.
19
Data Mining Configurator – User’s Manual
Data-Mining Wizard: Welcome Screen
3. You have two options: Create a New Data Source or Create a New Data Manipulator, as
shown in the figure below. A data source can be use to read data from a database. It can
access a specific database table directly or use a SQL read command to get data. A data
manipulator, which is intended for processing data stored in a connected database,
manipulates data using a SQL write command or by executing a stored procedure. Choose an
option, and then click the Next button to continue.
Data-Mining Wizard: Data Object Options
4. The next step in the Data Mining Wizard is to connect to a database (i.e. where to get the data).
You have two options for database connection: Create a New Connection or Use an Existing
Connection, as shown in the figure below. Choose an option, and then click the Next button to
continue.
20
Data Mining Configurator
Data-Mining Wizard: Database Connection Options
5. In the Connection Name field, enter a name for the new database connection. Then select the
type of database (e.g. Microsoft Access, Microsoft SQL Server, Microsoft Excel, or Oracle) you
would like to use from the drop-down list, as shown in the figure below. Click the Next button to
continue.
Data-Mining Wizard: Creating New Database Connection
6. Specify the database, as shown in the figure below (which shows a Microsoft Access database
connection). The example below uses the Northwind.mdb database, which is installed with
Microsoft Access. Click the Next button to continue.
21
Data Mining Configurator – User’s Manual
Data-Mining Wizard: Specifying Database
7. The Wizard displays the database connection information that you specified, as shown in the
figure below. Click the Next button to complete the database connection.
NOTE
You cannot go back after this step.
Data-Mining Wizard: Confirming Database Connection
8. Now you will configure the data source properties, as shown in the figure below. Select
Database Table or SQL Command. In the example below, Database Table is selected. Click the
Next button.
NOTE
You cannot go back after this step.
22
Data Mining Configurator
Data-Mining Wizard: Data Source Properties
9. In the Table Name field, click the … button, as shown in the figure below.
Data-Mining Wizard: Selecting a Database Table
10. This opens the Unified Data Browser, which lists all the tables in the database, as shown in the
figure below. Select a table (e.g. Employees), and then click OK.
23
Data Mining Configurator – User’s Manual
Selecting a Database Table
11. If you view the database table in Microsoft Access, you can see the column names (e.g.
Employee ID, Last Name, First Name, etc.) in the Employees table, as shown in the figure
below. The next step is to select a column name from which to read the data. For example, we
will use the First Name column, which lists several employee names (e.g. Nancy, Andrew,
Janet, etc.).
Employees Table in Northwind Database
12. Click the Add button in the wizard. This opens the Unified Data Browser, which lists all the
columns in the database table, as shown in the figure below. Select the column name (e.g.
FirstName) from the database table.
24
Data Mining Configurator
Selecting Column From Database Table
13. The Wizard displays the data source information that you specified, as shown in the figure
below. Click the Next button to complete the data source connection. The next step is to define
data items (values) to read from the data source. You have the option of creating a static data
item or a dynamic data item (option depends on the type of database connection). A static data
item simply displays data values from the connected database. A dynamic data item allows you
to manipulate data values from the connected database. To configure a static data item, check
the Create Static Tag Under This Data Source check box.
NOTE
You cannot go back after this step.
Data-Mining Wizard: Confirming Data Source Connection
25
Data Mining Configurator – User’s Manual
14. Now you will define a data item (value) to read from the data source (e.g. the FirstName
column). Give the data item a name (e.g. FirstName_1), as shown in the figure below.
Data-Mining Wizard: Defining a Value to Read
15. Now you need to specify a value to read from the selected column in the database table. The
value corresponds to the record number in the database. For example, in the First Name
column in the database, record number 1 is the value Nancy.
Employees Table in Northwind Database
16. Click the Add button in the Wizard. To read the value Nancy, enter 1 as the Parameter Value, as
shown in the figure below.
26
Data Mining Configurator
Data-Mining Wizard: Defining a Value to Read
17. The value is added to the parameters to bind section, as shown in the figure below. To read the
value Nancy, enter 1 as the Parameter Value, as shown in the figure below.
Data-Mining Wizard: Defining a Value to Read
18. The Wizard displays the data item information that you specified, as shown in the figure below.
You have the option of creating additional data items (tags). In this case, we will click the Finish
button to complete the configuration.
27
Data Mining Configurator – User’s Manual
Data-Mining Wizard: Confirming Data Item Value
19. The new configuration that you created using the Wizard appears in the Data Mining
Configurator, as shown in the figure below.
New Wizard Configuration in Data Mining Configurator
20. The next step is to connect to the new data item and visualize the data in a GraphWorX display.
To a new GraphWorX display, select Start > Programs > Smar ProcessView > ProjectWorX
> GraphWorX.
NOTE
Before you can visualize the data, you must activate the data mining configuration database by
selecting Make Active from the File menu.
21. You need to configure your data mining connections so you can view data coming from the
database. Create a process point in GraphWorX by selecting Intrinsics > Process Point from the
Dynamics menu, as shown in the figure below.
28
Data Mining Configurator
Creating a Process Point in GraphWorX
22. This opens the Property Inspector for the data item. Click on the PPT/DE tab, as shown in the
figure below. Click the Data Tags button.
Property Inspector for FirstName_1 Data Item
23. The Unified Data Browser opens to the Database Access tab, as shown in the figure below.
You can see that the browser tree control is similar to the tree control in the Data Mining
Configurator; you can choose from configured data items from the Employees data source
connection. Select the FirstName_1 data item. Notice that the FirstName_1 item ID (e.g.
SMAR.DatabaseOPCServer.3\New
Database
Connection.Employees.FirstName_1)
contains the following information:
• Server name (e.g. SMAR.DatabaseOPCServer.3\)
• Database connection name (e.g. New Database Connection)
• Data source name (e.g. Employees)'
• Data item name (e.g. FirstName_1)
29
Data Mining Configurator – User’s Manual
New Database Connection Shown in Unified Data Browser
24. Close out of the Unified Data Browser and the Property Inspector dialog box.
25. Enter the GraphWorX display into runtime mode. You can see the data coming from the
Employees database table. The Parameter Value for data item FirstName_1 is resolved as
Nancy in the visualization display.
Basic Steps in the Data Mining Configuration Wizard
Using the Data Mining Configuration Wizard to configure your database connections involves the
following basic steps:
Step 1: Start the Data Mining Configuration Wizard.
Step 2: Choose a data object (data source or data manipulator) you would like to create.
Step 3: Create a new database connection or choose an existing database connection.
Step 4: Configure data source or data manipulator properties.
Step 5: Configure data item properties (for a data source only).
The new configuration that you created using the Wizard appears in the Data Mining Configurator.
Before you can visualize the data, you must activate the data mining configuration database by
selecting Make Active from the File menu.
Step 1: Starting the Data Mining Configuration Wizard
To start the Data Mining Configuration Wizard:
1. Select Configuration Wizard from the File menu, as shown in the figure below.
Starting the Data-Mining Configuration Wizard
30
Data Mining Configurator
2. The introduction screen for the Data Mining Wizard appears. Click the Next button to continue.
Data-Mining Wizard: Welcome Screen
Step 2: Choosing a Data Object
In the Data Mining Configuration Wizard, you have two options for the data object type: Create a
New Data Source or Create a New Data Manipulator, as shown in the figure below. A data source
can be use to read data from a database. It can access a specific database table directly or use a
SQL read command to get data. A data manipulator, which is intended for processing data stored in
a connected database, manipulates data using a SQL write command or by executing a stored
procedure. Choose an option, and then click the Next button to continue.
Data-Mining Wizard: Data Object Options
31
Data Mining Configurator – User’s Manual
Step 3: Connecting to a Database
After you select a data object (data source or data manipulator), the next step in the Data Mining
Wizard is to connect to a database (i.e. where to get the data).
Note: For additional information about configuring database connections, please see the "Database
Connections" section later in this document.
1. You have two options for database connection: Create a New Connection or Use an Existing
Connection, as shown in the figure below. Choose an option, and then click the Next button to
continue.
Data-Mining Wizard: Database Connection Options
2. In the Connection Name field, enter a name for the new database connection. Then select the
type of database (e.g. Microsoft Access, Microsoft SQL Server, Microsoft Excel, or Oracle) you
would like to use from the drop-down list, as shown in the figure below. Click the Next button to
continue.
32
Data Mining Configurator
Data-Mining Wizard: Creating New Database Connection
3. Specify the database, as shown in the figure below (which shows a Microsoft Access database
connection). The example below uses the Northwind.mdb database, which is installed with
Microsoft Access. Click the Next button to continue.
Data-Mining Wizard: Specifying Database
4. The Wizard displays the database connection information that you specified, as shown in the
figure below. Click the Next button to complete the database connection.
NOTE
You cannot go back after this step.
33
Data Mining Configurator – User’s Manual
Data-Mining Wizard: Confirming Database Connection
Microsoft Access Wizard
To create a Microsoft Access database connection in the Data Mining Wizard, click the … button
and select an Access (.mdb) file, as shown in the figure below. Click the Next button to continue.
Data-Mining Wizard: Microsoft Access Connection
Microsoft Excel Wizard
To create a Microsoft Excel database connection in the Data Mining Wizard, click the … button and
select an Excel (.xls) file, as shown in the figure below. Click the Next button to continue. If the first
row of your Excel data source (e.g. spreadsheet) contains column headings, you can choose to use
the column headings as field names by checking the Use First Row as Field Names check box, as
34
Data Mining Configurator
shown in the figure below. Click the Next button to continue.
Data-Mining Wizard: Microsoft Excel Connection
Microsoft SQL Server Wizard
To create a Microsoft SQL Server database connection in the Data Mining Wizard, select a SQL
Server from the drop-down list. The default SQL server is "(local)." Then select the database on the
specified SQL Server file, as shown in the figure below. By default, SQL Server database
connections use Windows integrated security. Click the Next button to continue.
Data-Mining Wizard: Microsoft SQL Server Connection
35
Data Mining Configurator – User’s Manual
Oracle Wizard
To create an Oracle database connection in the Data Mining Wizard, specify an Oracle database
name. Then supply the User Name and Password required to log on to the specified Oracle
database, as shown in the figure below. Click the Next button to continue.
Data-Mining Wizard: Oracle Connection
ODBC Wizard
To create an ODBC database connection in the Data Mining Wizard, click the Advanced button to
establish database connections through the Windows Data Link Properties. Click the Next button
to continue.
36
Data Mining Configurator
Data-Mining Wizard: ODBC Connection
Step 4: Configuring the Data Object
After you connect to a database, the next step in the Data Mining Wizard is to configure the data
source or data manipulator.
Note: For additional information about configuring data sources, please see the "Data Source
Properties" section later in this document. For additional information about configuring data
manipulators, please see the "Data Manipulator Properties" section later in this document.
Data Source Wizard: Database Table
To configure the data source properties in the Data Mining Wizard:
1. Select Database Table, as shown in the figure below. Click the Next button.
NOTE
You cannot go back after this step.
37
Data Mining Configurator – User’s Manual
Data-Mining Wizard: Data Source Properties
2. In the Table Name field, click the … button, as shown in the figure below.
Data-Mining Wizard: Selecting a Database Table
3. This opens the Unified Data Browser, which lists all the tables in the database, as shown in the
figure below. Select a table (e.g. Employees), and then click OK.
38
Data Mining Configurator
Selecting a Database Table
4. If you view the database table in Microsoft Access, you can see the column names (e.g.
Employee ID, Last Name, First Name, etc.) in the Employees table, as shown in the figure
below. The next step is to select a column name from which to read the data. For example, we
will use the First Name column, which lists several employee names (e.g. Nancy, Andrew,
Janet, etc.).
Employees Table in Northwind Database
5. Click the Add button in the wizard. This opens the Unified Data Browser, which lists all the
columns in the database table, as shown in the figure below. Select the column name (e.g.
FirstName) from the database table.
39
Data Mining Configurator – User’s Manual
Selecting Column From Database Table
6. The Wizard displays the data source information that you specified, as shown in the figure
below. Click the Next button to complete the data source connection. The next step is to define
data items (values) to read from the data source. You have the option of creating a static data
item or a dynamic data item (option depends on the type of database connection). A static data
item simply displays data values from the connected database. A dynamic data item allows you
to manipulate data values from the connected database. To configure a static data item, check
the Create Static Tag Under This Data Source check box.
NOTE
You cannot go back after this step.
Data-Mining Wizard: Confirming Data Source Connection
40
Data Mining Configurator
Data Source Wizard: SQL Command
To configure the data source properties in the Data Mining Wizard:
7. Select SQL Command, as shown in the figure below. Click the Next button.
NOTE
You cannot go back after this step.
Data-Mining Wizard: Data Source Properties
In the SQL Command Parameters field, click the Add button. Enter a Parameter Name (i.e. column
name) and choose a Parameter Data Type from the drop-down list. To view or modify the SQL
query, click the Edit button. This opens the SQL Command Editor, which enables you to manually
edit the query string. Click the Next button.
Data-Mining Wizard: SQL Command Parameters
41
Data Mining Configurator – User’s Manual
1. The Wizard displays the data source information that you specified, as shown in the figure
below. Click the Next button to complete the data source connection. The next step is to define
data items (values) to read from the data source. You have the option of creating a static data
item or a dynamic data item (option depends on the type of database connection). A static data
item simply displays data values from the connected database. A dynamic data item allows you
to manipulate data values from the connected database. To configure a static data item, check
the Create Static Tag Under This Data Source check box.
NOTE
You cannot go back after this step.
Data-Mining Wizard: Confirming Data Source Connection
Data Manipulator Wizard: SQL Command
To configure the data manipulator properties in the Data Mining Wizard:
Select SQL Command, as shown in the figure below. Click the Next button.
NOTE
You cannot go back after this step.
42
Data Mining Configurator
Data-Mining Wizard: Data Manipulator Properties
1. In the SQL Command Parameters field, click the Add button. Enter a Parameter Name (i.e.
column name) and choose a Parameter Data Type from the drop-down list. To view or modify
the SQL query, click the Edit button. This opens the SQL Command Editor, which enables you
to manually edit the query string. Click the Next button.
NOTE
When the Bind Results check box is checked, it executes "binding" of a SQL query in the same
transaction and returns its rowset as output parameters. This allows you to read some database
data immediately after executing a data manipulation SQL command (e.g. you can read the ID of
a newly created record).
Data-Mining Wizard: SQL Command Parameters
43
Data Mining Configurator – User’s Manual
2.
The Wizard displays the data manipulator information that you specified, as shown in the figure
below. Click the Finish button to complete the data source connection.
Data-Mining Wizard: Confirming Data Manipulator Connection
Data Manipulator Wizard: Stored Procedure
To configure the data manipulator properties in the Data Mining Wizard:
Select Stored Procedure, as shown in the figure below. Click the Next button.
NOTE
You cannot go back after this step.
Data-Mining Wizard: Data Manipulator Properties
44
Data Mining Configurator
1. In the Stored Procedure Name field, click the … button. This opens the Unified Data Browser,
which lists all the stored procedures in the database. Select a procedure (e.g. "Sales by Year"),
and then click OK.
Data-Mining Wizard: Selecting a Stored Procedure
2. The Wizard displays the data manipulator information that you specified, as shown in the figure
below. Click the Finish button to complete the data manipulator connection.
Data-Mining Wizard: Confirming Data Manipulator Connection
Step 5: Configuring Data Items
When you complete a data source configuration using the Data Mining Wizard, the Wizard displays
the data source information that you specified, as shown in the figure below. Click the Next button to
complete the data source connection. The next step is to define data items (values) to read from the
45
Data Mining Configurator – User’s Manual
data source. You have the option of creating a static data item or a dynamic data item (option
depends on the type of database connection). A static data item simply displays data values from
the connected database. A dynamic data item allows you to manipulate data values from the
connected database. To configure a static data item, check the Create Static Tag Under This Data
Source check box.
NOTE
You cannot go back after this step.
Data-Mining Wizard: Confirming Data Source Connection
NOTE
For additional information about configuring data items, please see the "Data Item Properties"
section later in this document.
1. Now you will define a data item (value) to read from the data source (e.g. the FirstName
column). Give the data item a name (e.g. FirstName_1), as shown in the figure below.
46
Data Mining Configurator
Data-Mining Wizard: Defining a Value to Read
2. Now you need to specify a value to read from the selected column in the database table. The
value corresponds to the record number in the database. For example, in the First Name
column in the database, record number 1 is the value Nancy.
Employees Table in Northwind Database
3. Click the Add button in the Wizard. To read the value Nancy, enter 1 as the Parameter Value, as
shown in the figure below.
47
Data Mining Configurator – User’s Manual
Data-Mining Wizard: Defining a Value to Read
4. The value is added to the parameters to bind section, as shown in the figure below. To read the
value Nancy, enter 1 as the Parameter Value, as shown in the figure below.
Data-Mining Wizard: Defining a Value to Read
5. The Wizard displays the data item information that you specified, as shown in the figure below.
You have the option of creating additional data items (tags). Click the Finish button to complete
the configuration.
48
Data Mining Configurator
Data-Mining Wizard: Confirming Data Item Value
Toolbar
The Configurator toolbar, shown below, contains the following command buttons. To show or hide
the Standard toolbar, select Toolbars > Standard Buttons from the View menu. The Standard
toolbar, shown below, contains the following command buttons.
New: Creates a new configuration database.
Open: Opens an existing configuration database.
Import: Imports configuration data from a text file (.txt) or a Microsoft Excel file
(.csv).
Export: Exports configuration data to a text file (.txt) or a Microsoft Excel file (.csv).
Configuration Wizard: Launches the Data Mining Wizard.
Back: Moves the cursor back to the previously selected item in the tree control.
Next: Moves the cursor to the next item in the tree control.
Up One Level: Moves up one level in the tree control.
Cut: Deletes current selection, sending it to the clipboard.
Copy: Copies the current selection to the clipboard.
Paste: Pastes the current contents of the clipboard.
List: Displays items as a list.
Details: Displays items as a list with details.
Dialog View: Displays additional configuration options.
Global Refresh: Refreshes the data for the entire Configurator screen.
About: Displays information about the application.
Help Topics: Displays help for the selected items.
49
Data Mining Configurator – User’s Manual
Menus
The menu bar of the Configurator contains the following menus:
• File
•
Edit
•
View
•
Go
•
Tools
• Help
Note: You can also access many of the menu commands by right-clicking items in the tree control of
the Configurator and selecting command functions from the pop-up menus.
File Menu
The File menu commands are listed in the table below.
COMMAND
New
Open
SHORTCUT KEY
CTRL+N
CTRL+O
Save As
Connection
Properties
Configuration
Wizard
CSV Export
CSV Import
XML Export
XML
Export
Schema
XML Import
XML Validate
Make Active
Exit
FUNCTION
Creates a new configuration database.
Opens an existing configuration database.
Saves the current database under a different name
as a Microsoft Access (.mdb) file.
Displays the current database connection properties.
Launches the Data Mining Wizard.
CTRL+W
Exports configuration data from your database to a
text file (.txt) or a Microsoft Excel file (.csv). You can
specify the delimiters and what to export.
Imports data into your configuration database from a
text file (.txt) or a Microsoft Excel file (.csv). You can
then specify the delimiters and choose from the
import settings.
Exports configuration data to an XML file.
Exports configuration data to an XML Schema file.
Imports configuration data from an XML file.
This feature does not import an XML data file, but it
will try to validate its structure using stored XML
schema. Once it passes this validation, the XML file
is acceptable for import by the Configurator.
Activates the current database. If this command is
not available, then the current database is already the
active database.
Closes the application.
Database Connection Properties
Selecting Connection Properties from the File menu opens the Database Connection Properties
dialog box, shown below, which lists the initialization properties for the current database connection.
50
Data Mining Configurator
Database Connection Properties Dialog Box
Exporting Configuration Data
Exporting Data to a Text or CSV File
The Configurator offers the flexibility of exporting data from your configuration database to a text
(.txt) file or a Microsoft Excel (.csv) file. To export data, select Export from the File menu. This opens
the Export Configuration Data to File dialog box, as shown in the figure below. You can then specify
the delimiters for exporting the data. Unless you specify delimiters in the Export Configuration Data
to File dialog box, the file uses Commas as delimiters by default. Each group contains headings and
columns that provide information about each item, such as descriptions and associated translations
and expressions. It also provides the "tree" pathway for each item. Choose the directory to which
you want to export the data from your database. In the Save As Type field, choose the file type (.txt
or .csv) that you would like to save.
51
Data Mining Configurator – User’s Manual
Exporting Configuration Data
Exporting Data to an XML File
The Configurator also allows you to export data from your configuration database to an XML file.
The XML export/import functionality was mainly developed for Windows platforms that do not
support databases (e.g. Windows CE and Windows Embedded). XML has the following advantages
over the CSV import/export function:
•
XML has a standardized format, unlike the text/CSV format, which uses various delimiters (e.g.
TAB instead of commas, strings could not accept all characters, etc.)
•
XML is language-independent, whereas CSV converts date/time, floats, and currency fields
according to local settings in Windows. For example, using CSV, you cannot export data on
German Windows and import it on English windows without making changes
•
Windows has an installed automation object that has the capability to work with XML. Thus,
programmers can create/modify their configurations outside the Configurator using Visual
Basic, if desired.
•
XML supports schemas. A schema is a special XML file that specifies the data structure of an
XML data file.
To export data, select XML Export from the File menu. This opens the Export XML File dialog box,
as shown in the figure below. Give the file a name, and then choose the directory to which you want
to export the data from your database. Click Save.
NOTE
You can also export configuration data to an XML Scheme file by selecting XML Export from the
File menu.
52
Data Mining Configurator
Exporting Configuration Data to an XML File
Importing Configuration Data
Importing Data From a Text or CSV File
The Configurator offers the flexibility of importing data from a text (.txt) file or a Microsoft Excel (.csv)
file to your configuration database. To import data, select Import CSV from the File menu. This
opens the Import Configuration Data From File dialog box, shown below. You can then specify the
delimiters and choose from the following import settings:
• Create new items. When the import file contains items that are not yet in the configuration
database, then it creates them. Otherwise it skips these items.
• Update existing items. When the import file contains items that are in the configuration
database, then it updates them using data from the import file. Otherwise it skips these items.
NOTE
Either Create new items or Update existing items must be selected. Otherwise there is nothing
to import.
•
Display errors. When this item is checked, the Configurator shows a dialog box if an error
occurs, and then asks you if you want to proceed with the import. When it is not checked, it
skips all items where an error occurred.
Importing Configuration Data
53
Data Mining Configurator – User’s Manual
When you have selected a file to import, click Open. When the import is completed, the File Import
Results dialog box opens, as shown below. This shows the import settings, including the input file
name. It also provides a summary of the import, including how many items were inserted, updated,
or rejected, and shows how many errors occurred.
Click the ... button to the right of each field to get the details view of the import results, as shown
below. This view shows the specific items that were inserted, updated, or rejected, as well as a
description of any errors that occurred.
File Import Results Dialog Box
Importing Data From an XML File
The Configurator allows you to import data from your configuration database to an XML file. The
XML export/import functionality was mainly developed for Windows platforms that do not support
databases (e.g. Windows CE and Windows Embedded). XML has the following advantages over the
CSV import/export function:
•
XML has a standardized format, unlike the text/CSV format, which uses various delimiters (e.g.
TAB instead of commas, strings could not accept all characters, etc.)
•
XML is language-independent, whereas CSV converts date/time, floats, and currency fields
according to local settings in Windows. For example, using CSV, you cannot export data on
German Windows and import it on English windows without making changes
•
Windows has an installed automation object that has the capability to work with XML. Thus,
programmers can create/modify their configurations outside the Configurator using Visual
Basic, if desired.
•
XML supports schemas. A schema is a special XML file that specifies the data structure of an
XML data file.
To import data, select XML Import from the File menu. This opens the Import XML File dialog box,
as shown in the figure below. Give the file a name, and then choose the directory from which you
want to import the data. You can then specify the delimiters and choose from the following import
settings. Click Open.
54
•
Create new items. When the import file contains items that are not yet in the configuration
database, then it creates them. Otherwise it skips these items.
•
Update existing items. When the import file contains items that are in the configuration
database, then it updates them using data from the import file. Otherwise it skips these items.
Data Mining Configurator
NOTE
Either Create new items or Update existing items must be selected. Otherwise there is nothing
to import.
NOTE
Selecting XML Validate from the File menu does not import an XML data file, but it will try to
validate its structure using stored XML schema. Once it passes this validation, the XML file is
acceptable for import by the Configurator.
Importing Configuration Data From an XML File
Activating the Database
Once your configuration is complete, you need to make sure that it is the active database. The
database that is currently active is the one that the server uses. To make the current database
active, select Make Active… from the File menu. If the Make Active… selection is grayed out, then
the current database is already the active database.
A dialog box appears showing both the current active database and database that is currently being
edited, as shown in the figure below. To set the edited database as the active database, click the
Yes button.
Activating the Database
55
Data Mining Configurator – User’s Manual
Edit Menu
The Edit menu commands are listed in the table below.
Edit Menu Commands
COMMAND
SHORTCUT
KEYS
New
Rename
CTRL+R
Multiply
CTRL+M
Delete
CTRL+DEL
Cut
CTRL+X
Copy
Paste
CTRL+C
CTRL+V
Select All
CTRL+A
Invert
Selection
FUNCTION
Creates a new item depending on what is selected in the
tree control.
Renames the selected item.
Opens the Multiply Item dialog box, which allows you to
multiply an item in the tree control.
Deletes the selected object.
Cuts the selected object from the view and places it on
the clipboard.
Copies the selected object to the clipboard.
Pastes the last object placed on the clipboard.
Selects all objects in a list. The selection is shown in the
upper-right-hand section of the viewer.
Unselects all selected items and selects all unselected
items in a list in the upper-right-hand section of the
viewer.
Multiplying Items
The Configurator allows you to multiply items in the tree control. Multiplication provides a simple way
of developing configurations where there are many similar items in a given category. To multiply an
item:
1. Select the item in the tree control that you wish to multiply.
2. Either right-click the item and select Multiply from the pop-up menu, or select Multiply from the
Edit menu. This opens the Multiply Item dialog box, shown below.
Multiply Item Dialog Box
3. When the items are multiplied, they are all given a base name followed by a number. The default
4.
5.
6.
7.
8.
•
•
•
56
base text is the name of the item selected for multiplication. To modify the base text, change the
Base Text field appropriately.
In the First Number field, specify the number to appear next to the first multiplied item.
In the Number of Items field, specify how many items you wish to create.
In the Numeric Places field, specify the minimum length of each number to append. Values that
take up less space than the specified amount of numeric places will have zeros before the number.
If you want to multiply all subfolders as well, check the Including Subtree check box.
Click the OK button to do the multiplication. The example configuration shown in the Multiply Item
dialog box above creates three new items with the following names:
AdministrationDB001
AdministrationDB002
AdministrationDB003
All subfolders will also be multiplied.
Data Mining Configurator
View Menu
The View menu commands are listed in the table below.
View Menu Commands
COMMAND
SHORTCUT
KEYS
Toolbar
Status Bar
List
F9
Details
F10
Dialog View
F11
Sort By
Show/Hide
Columns
Select
Language
Global Refresh
Subtree
Refresh
F5
CTRL+F5
FUNCTION
Toggles the toolbar.
Toggles the status bar.
Displays items as a list.
Displays items as a list along with detailed information
about the configuration of each item.
Toggles the configuration window (right-hand pane).
Displays a list of options for sorting the columns in the
right-hand pane of the screen. The options listed depend
on the level within the view.
Displays a list of options that you can choose to show or
hide in the view.
Opens the Select Language dialog box (see below).
Choose the language you wish to use for your system
(Unicode version only) and click OK. For navigation
purposes, use the buttons and check boxes in the List
section.
Refreshes the data for the entire Configurator screen.
Refreshes only the data contained in the currently selected
subtree.
Selecting Languages
The Select Language function on the View menu allows you to choose which language to use in
your display. Choosing Select Language from the View menu opens the Select Language dialog
box, shown in the figure below.
NOTE
A language resource .dll is required for language switching.
Select Language Dialog Box
Define the parameters listed in the table below. Then click OK to return to the work area.
57
Data Mining Configurator – User’s Manual
Select Language Parameters
PARAMETER
DESCRIPTION
Lists available languages. Depending on which item you have
selected, the view on the left will change. If English is
checked, the languages will appear as their English name. If
Localized is checked, the languages will appear with the native
country in parentheses (for languages with several dialects
only). When Native is checked, the languages are displayed the
way they would be written in that language.
If this is checked, local languages appear in the box.
Checking this box allows you to choose from available language
translations only.
List
Installed Locales Only
Available Language
Translations Only
Go Menu
The Go menu commands are listed in the table below.
Go Menu Commands
COMMAND
Back
Forward
SHORTCUT
KEYS
CTRL+ALT+ Left
Arrow
CTRL+ALT+
Right Arrow
Up One Level
Previous Item
Expand Item
Collapse Item
Page Up
ALT+Down
Arrow
ALT+Up Arrow
ALT+Left Arrow
ALT+Right Arrow
ALT+PgUp
Page Down
ALT+PgDown
Home
ALT+Home
End
ALT+End
Next Pane
Previous Pane
F6
SHIFT+F6
Next Item
FUNCTION
Moves the cursor back to the previously selected
item in the tree control.
Moves the cursor forward to the previously selected
item in the tree control.
Moves the cursor up one level in the tree control.
Moves the cursor to the next item down in the tree
control.
Moves the cursor to the next item up in the tree view.
Expands an item that contains a submenu.
Collapses an item that contains a submenu.
Moves the cursor up to the first item in the tree.
Moves the cursor down to the last visible item in the
tree.
Moves the cursor up to the first item in the tree.
Moves the cursor down to the last visible item in the
tree.
Moves the cursor to the next pane.
Moves the cursor to the last pane used.
Tools Menu
The Tools menu commands are listed in the table below.
Tools Menu Commands
COMMAND
Options
Compact/Repair MS
Access Database
FUNCTION
Launches the Options dialog box.
Opens the Compact/Repair MS Access Database dialog box.
Options
To choose additional settings, select Options from the Tools menu. This opens the Options dialog
box, as shown in the figure below. The General tab of the Options dialog box contains the following
options:
• Automatically apply changes when selection is changed: Checking this option allows
changes to the configuration database to be saved each time you switch dialogs without clicking
on the Apply button or being shown a message asking if you would like to apply changes.
• Enable hover selection: Checking this option allows you to highlight an item by moving the
mouse pointer over that item and keeping it there for a specified amount of time (in milliseconds).
58
Data Mining Configurator
Options Dialog Box: General Tab
Compacting and Repairing Microsoft Access Databases
You can compact Microsoft Access databases, which can be either configuration databases or
historical databases, using the Compact/Repair MS Access Database dialog box, shown in the
figure below. To open this dialog box, select Compact/Repair MS Access Database from the
Tools menu. Microsoft Access-based databases are subject to database fragmentation over time,
and the support for the database will compact the target database, reclaim unused space, and
drastically improve database performance.
NOTE
It is critical that no users or client applications are connected to the database at the time of
compacting and that, if the Backup Original Database option is selected, there is plenty of
available hard disk space.
Compacting and Repairing Microsoft Access Databases
59
Data Mining Configurator – User’s Manual
Help Menu
The Help menu commands are listed in the table below.
COMMAND
Help Topics
About Application
SHORTCUT KEY
F1
FUNCTION
Launches the online Help for the Configurator.
Launches the About Box, which contains
information about the product version number,
copyright, and available disk space. It also
contains contact information.
Database Connections
The first step in data-mining configuration is to connect to a database (i.e. where to get the data).
The Databases tree control is where you configure your connections to different types of databases,
including Microsoft Access, Microsoft SQL Server, Microsoft Excel, Oracle and other ODBC data
sources. The Database Connection object is equivalent to a physical database connection. To
correctly configure database connection, you need to specify a database type and fill in the
appropriate number of connection parameters.
Creating a New Database Connection
To create a new database connection:
1. Right-click on the Databases tree control of the Configurator and select New > Database
Connection from the pop-up menu, as shown in the figure below.
Creating a New Database Connection
2. The properties dialog box for the new database connection appears in the right-hand pane of
the Configurator, as shown in the figure below.
Setting the Properties for the New Database Connection
3. In the Connection Name field, type a name for the new connection.
60
Data Mining Configurator
4. Select a Connection Type from the drop-down list (Microsoft Access, Microsoft SQL Server,
Microsoft Excel, Oracle, or another ODBC data source).
5. Specify the database or data source to which you want to connect.
6. When you have finished configuring the database connection properties, click the Apply button.
The new connection appears under the Databases tree control.
Database Connection Properties
Establishing a database connection requires the following basic steps, as shown in the figures
below:
7. In the Connection Name field, type a name for the new connection
8. Select a Connection Type from the drop-down list (Microsoft Access, Microsoft SQL Server,
Microsoft Excel, Oracle, or another ODBC data source).
9. Specify the database or data source to which you want to connect.
10. Click the Apply button to save your settings.
NOTE
You can also click the Advanced button to establish database connections through the Windows
Data Link Properties dialog box, as shown in the figure below.
Connecting to Data Source Through the Data Link Properties
The database connection properties vary slightly with each connection type:
• Microsoft Access Connection
• Microsoft Excel Connection
• Microsoft SQL Server Connection
• Oracle Connection
• ODBC Connection
61
Data Mining Configurator – User’s Manual
Microsoft Access Connection
In the Microsoft Access connection properties, click the Browse button and select an Access (.mdb)
file, as shown in the figure below.
Database Connection Properties: Microsoft Access Connection
Microsoft Excel Connection
In the Microsoft Excel connection properties, click the Browse button and select an Excel (.xls) file,
as shown in the figure below. If the first row of your Excel data source (e.g. spreadsheet) contains
column headings, you can choose to use the column headings as field names by checking the Use
First Row as Field Names check box, as shown in the figure below.
Database Connection Properties: Microsoft Excel Connection
62
Data Mining Configurator
Microsoft SQL Server Connection
In the Microsoft SQL Server connection properties, select a SQL Server from the drop-down list. The
default SQL server is "(local)." Then select the database on the specified SQL Server file, as shown
in the figure below. By default, SQL Server database connections use Windows integrated security.
Database Connection Properties: Microsoft SQL Server Connection
Oracle Connection
In the Oracle connection properties, specify an Oracle database name. Then supply the User Name
and Password required to log on to the specified Oracle database, as shown in the figure below.
Database Connection Properties: Oracle Connection
63
Data Mining Configurator – User’s Manual
ODBC Connection
An ODBC connection, shown in the figure below, is a connection to a generic, open data source.
Click the Advanced button to establish database connections through the Windows Data Link
Properties dialog box.
Database Connection Properties: ODBC Connection
Data Sources and Data Manipulators
Once you have established a connection to a database, the next step is to select a data source or
data manipulator to mine within the connected database (i.e. which group of data within the
connected database). Data sources and data manipulators work with the data stored in databases
via read/write operations.
Data Sources
A data source can be use to read data from a database. Every data source is connected to
particular database connection. Data sources are designed to periodically read database tables and
display them in an OPC Data Access client. A data source supports two different ways to read data
from a database:
•
Direct access to database table (view)
•
SQL read command based on SELECT statement
Data Manipulators
A data manipulator, which is intended for processing data stored in a connected database,
manipulates data using a SQL write command or by executing a stored procedure. Every data
manipulator is connected to particular database connection. Data manipulator objects are designed
to manipulate database data and structure using stored procedures or simple SQL commands when
the database server or engine does not support stored procedures. In comparison with data
sources, a data manipulator should not return any cursor variables (row sets). Data manipulation
actions are executed upon user request only (there is no polling mechanism).
NOTE
SQL queries in a data manipulator object should be used only for databases that do not support
stored procedures (e.g. Excel, MS Jet). In all other cases, stored procedures/functions should be
used to manipulate database data. The reason for this is that stored procedures offer wider
functionality, and because they are precompiled on the server, execution is much faster.
Do’s and Don’ts for Data Mining
Do not use:
•
Stored procedures in data manipulators with Microsoft Access databases.
64
Data Mining Configurator
•
Spaces in stored procedures names.
•
CREATE, INSERT, UPDATE statements in data source SQL command.
•
Data manipulator stored procedures to view data.
Do use:
•
Stored procedures in data manipulators with Microsoft SQL and Oracle.
•
SQL queries when connecting to Microsoft Excel or Microsoft Jet connections.
•
Data manipulator stored procedures to manipulate data only.
Troubleshooting Data Sources and Data Manipulators
When I select 'SQL Command' under Data Source, what should it do?
SQL command will behave similarly to a table-based data source; it will send data from a record set
returned by this command. You can parameterize it using data item parameters.
When I select enable 'Multi-rows Dataset,' what should it do (what should I expect as the result)?
You will get multiple rows from a SQL query or table. In the case of a single column, it will return a
single-dimensional array of values where each value represents one row. When you use
@@Recordset, then you will get a two-dimensional array (like table content) - all columns and rows.
Note: One limitation is that 'Multi-rows Datasets' is read-only.
What are SQL Command parameters, and why should I provide more than one of these?
SQL command parameters specify a set of parameters used by a SQL command; the SQL
command can use more than one parameter.
Why and when should I give more than one table parameter?
You may want to locate a table row using different criteria (e.g. if you have an "Employees" table,
you can index it using "name, mid-name, surname," or you can use "personal ID."
When should I check 'Enable Writes'? How are the writes possible (for example, from GraphWorX)?
If you will use a table-based data source with a single-row as output, then every column-oriented
data item will return a single value. In this case, you can request it as a process point and modify it.
After I check 'Enable Writes', when should I check 'Enable Inserts'?
In case the related table row is missing from the table; then after writing it will create this table row
using a combination of known parameters and database default values.
What is a data manipulator?
A data manipulator object allows you to execute stored procedures or stand-alone SQL queries and
get results from them (if there are any). There are two special data items to manipulate it:
•
@@Execute
•
@@Results
You can execute stored procedures by writing into the @@Execute data item, where the value
should be a safe array of VARIANT values. The first value is "request identification," and the rest of
the values are input parameters for this procedure. You will get results from @@Result data item.
The values have a structure similar to the execute data item. It is again an array of VARIANT values
where the very first value is the "request identification" and the rest of the values are output
parameters.
What does 'Bind Results' for SQL Command do, and why is the 'Edit' button available? What
should I be able to do with this button?
The SQL Command section in the data manipulator configuration was designed for databases
(such as Microsoft Access) that do not have stored procedures support implemented (or have very
poor support). Then the only way to manipulate the data is to use SQL commands. One command is
used to do specific action, and a resulting SQL command is used to get output values in the same
database transaction. For example, when you insert a new table row into a Microsoft Access
database, you can then read an auto-generated value from the table using the SELECT
@@identity command. Another example is if you will insert/update something; then you can get
back a sum of certain column(s). The range of its use is very wide and depends on specific
implementation.
Where should stored procedures be written? (For example if I connect to SQL Server, should
65
Data Mining Configurator – User’s Manual
the stored procedure be written in SQL and already available for us to use it?)
Stored procedures are stored in the database server and allow you to manipulate database content.
They are usually faster than using SQL commands from the client side. To get more information,
you will need to study the documentation for the specific database server.
What should I expect when I check 'Complete Rowset'?
When you check the Complete Rowset (returned as an array) check box, it will return a single row
of data (all columns) in a single-dimensional array. When "Enable Multi-rows Dataset" is checked,
you will get a multi-dimensional array as a result (similar to the @@Recordset data item).
Creating a New Data Source
To create a new data source:
1. Right-click on a database connection in the tree control of the Configurator and select New >
Data Source from the pop-up menu, as shown in the figure below.
Creating a New Data Source
2. The properties dialog box for the new data source appears in the right-hand pane of the
Configurator, as shown in the figure below.
Setting the Properties for the New Data Source
3. In the Name field, type a name for the new data source.
4. Specify a Data Set (Database Table or SQL Command/Stored Procedure) to mine within the
connected database.
5. Specify an Update Rate (in seconds) to poll for updates from the database.
66
Data Mining Configurator
6. When you have finished configuring the data source properties, click the Apply button. The new
data source appears under the database connection in the tree control.
Data Source Properties
A data source can be use to read data from a database. It can access a specific database table
directly or use a SQL read command to get data. Configuring a data source requires the following
basic steps, as shown in the figures below:
7. In the Name field, type a name for the new data source.
8. Specify a Data Set (Database Table or SQL Command) to mine within the connected database.
9. Database polling properties should be specified for any data source object. Specify an Update
Rate (in seconds) to poll for updates from the database. The Enable Update check box must
also be checked in order to specify an updated rate. When updates are disabled, then the data
mining server scans the database only once when the first data item is requested or on the user
request invoked by refreshing the data item.
10. When you have finished configuring the data source properties, click the Apply button. The new
data source appears under the database connection in the tree control.
Data Source Properties
67
Data Mining Configurator – User’s Manual
Database Tables
To configure a data source object with direct table access, you must fill in the fully qualified database
table name (or view). To locate specific table row(s), table parameters can be used. Parameters
define a subset of table columns used together as a filter for returned table row(s). Parameter values
are specified by data items.
To get data from a specific table in the database:
11. Select the Database Table option under the Specify Data Set section, as shown in the figure
below.
Data Source Properties: Database Table
1. In the Table Name field, click the … button. This opens the Unified Data Browser, which lists all
the tables in the database, as shown in the figure below. Select a table (e.g. "Employees"), and
then click OK.
Selecting a Database Table
68
Data Mining Configurator
1. In the Table Parameters field, click the Add button. This opens the Unified Data Browser, which
lists all columns in the selected table. Select the desired columns from the specified table as
shown in the figure below, and then clickf OK.
NOTE
If you want to read more than one row from the selected database table, check the Enable Multirows Dataset check box. This way you do not need to add individual rows to the Table
Parameters field.
NOTE
You can also change the column ordering in the data source configuration by selecting a column
and clicking the Move Up or Move Down buttons. Click the Remove button to delete the
selected column(s).
Selecting a Database Column
Enable Writes
Direct database access allows users to make modifications in the specified database table (may
work for views with limitations given by the connected database server or engine). When the Enable
Writes check box is checked, you can write a value to OPC tags and it will update related records in
the database table. This works for table-based data sources only.
Note: Writes are disabled for multi-row datasets.
Enable Inserts
The Enable Inserts check box is available only when the Enable Writes check box is checked. In
case the record is missing in the database table (data tags return VT_EMPTY and Bad quality) then
writing to this tag will create a new record in the database table. Since the table may have more
columns than just the one requested in the data tag, it uses the following criteria to fill in other
values:
•
It uses tag parameters and the actual value to create the record; the rest of the
columns use database defaults.
•
If the data tag is record-based, then it uses all the values passed during the write.
Enable Deletes
The Enable Deletes (on VT_EMPTY value) check box is available only when the Enable Writes
check box is checked. It works for record-based data tags only. If you write VT_EMPTY value, then
it will delete related records from the database table.
69
Data Mining Configurator – User’s Manual
SQL Command
The SQL Command data source is designed to access database data using SQL commands based
on SELECT statements. The SQL command can be parameterized by SQL command parameters.
Parameters in a SQL command are represented by question marks (?) and they are filled in the
same order as configured in SQL Command Parameters section of the configuration dialog.
Database stored procedures returning cursor variables (row sets) can be also accessed using a
SQL command based on EXECUTE or CALL statements.
To enter a SQL command to read from the database:
1. Select the SQL Command/Stored Procedure option under the Specify Data Set section, as
shown in the figure below.
Data Source Properties: SQL Command
2. In the SQL Command Parameters field, click the Add button. Enter a Parameter Name (i.e.
column name) and choose one of the following Parameter Data Types from the drop-down list,
as shown in the figure below. Click OK.
NOTE
You can also click the Get Params button to select a parameter from the database.
70
•
VT_I4: 4-byte integer
•
VT_R8: 8-byte floating-point number (double)
•
VT_DATE: Date in OleDateTime format; the DATE type is implemented using an 8-byte
floating-point number. Days are represented by whole number increments starting with 30
December 1899, midnight as time zero. Hour values are expressed as the absolute value of
the fractional part of the number.
•
VT_BSTR: String
•
VT_BOOL: Boolean
Data Mining Configurator
Specifying SQL Parameter Name
3. To view or modify the SQL query, click the Edit button. This opens the SQL Command Editor,
which enables you to manually edit the query string, as shown in the figure below. Click OK.
NOTE
If you want to read more than one row from the selected database table, check the Enable Multirows Dataset check box. This way you do not need to add individual rows to the Table
Parameters field.
SQL Command Editor
NOTE
You can also change the column ordering in the data source configuration by selecting a column
and clicking the Move Up or Move Down buttons. Click the Remove button to delete the
selected column(s).
71
Data Mining Configurator – User’s Manual
Creating a New Data Manipulator
Data manipulators allow you to create and edit custom SQL queries as well as use stored
procedures to modify data in a connected database.
To create a new data manipulator:
1. Right-click on a database connection in the tree control of the Configurator and select New >
Data Manipulator from the pop-up menu, as shown in the figure below.
Creating a New Data Manipulator
2. The properties dialog box for the new data manipulator appears in the right-hand pane of the
Configurator, as shown in the figure below.
Setting the Properties for the New Data Manipulator
3. In the Name field, type a name for the new data manipulator.
4. Specify the type of data manipulator to use (SQL Command or Stored Procedure). If you use a
SQL command, click the Edit buttons to create/edit your SQL queries. If you choose stored
procedure, click the … button to select a stored procedure.
NOTE
SQL queries in a data manipulator object should be used only for databases that do not support
stored procedures (e.g. Excel, MS Jet). In all other cases, stored procedures/functions should be
used to manipulate database data. The reason for this is that stored procedures offer wider
functionality, and because they are precompiled on the server, execution is much faster.
72
Data Mining Configurator
5. When you have finished configuring the data manipulator properties, click the Apply button. The
new data manipulator appears under the database connection in the tree control.
Data Manipulator Properties
A data manipulator, which is intended for processing data stored in a connected database,
manipulates data using a SQL write command or by executing a stored procedure. Configuring a
data manipulator requires the following basic steps, as shown in the figures below:
1. In the Name field, type a name for the new data manipulator.
2. Specify the type of data manipulator to use (SQL Command or Stored Procedure). If you use a
SQL command, click the Edit buttons to create/edit your SQL queries. If you choose stored
procedure, click the … button to select a stored procedure.
NOTE
SQL queries in a data manipulator object should be used only for databases that do not support
stored procedures (e.g. Excel, MS Jet). In all other cases, stored procedures/functions should be
used to manipulate database data. The reason for this is that stored procedures offer wider
functionality, and because they are precompiled on the server, execution is much faster.
3. When you have finished configuring the data manipulator properties, click the Apply button. The
new data manipulator appears under the database connection in the tree control.
SQL Commands
The SQL command data manipulators are mainly designed for databases that don’t support stored
procedures (MS Excel, partly MS Access, etc.). It allows configuring two SQL commands – one for
actual data manipulation action, the second for getting results (if needed). Setting the parameters is
similar to SQL commands in the data source configuration. Result SQL command is using the same
set of parameters as Execute SQL command in data manipulation action.
SQL queries/commands in a data manipulator object are mainly designed for databases that do not
support stored procedures (e.g. Excel, MS Jet). You can configure two SQL commands: one for the
actual data manipulation action; the second for getting results (if needed). Setting the parameters is
similar to SQL commands in the data source configuration. The Result SQL command uses the
same set of parameters as the Execute SQL command in a data manipulation action. In all other
cases, stored procedures/functions should be used to manipulate database data. The reason for this
is that stored procedures offer wider functionality; and because they are precompiled on the server,
execution is much faster.
To enter a SQL command to read from the database:
1. Select the SQL Command option under the Specify Data Manipulator section, as shown in
the figure below.
73
Data Mining Configurator – User’s Manual
Data Manipulator Properties: SQL Command
2.
In the SQL Command Parameters field, click the Add button. Enter a Parameter Name (i.e.
column name) and choose one of the following Parameter Data Types from the drop-down list, as
shown in the figure below. Click OK.
NOTE
If you have multiple values (parameters) you can bind them by checking the Bind Results check
box.
74
•
VT_I4: 4-byte integer
•
VT_R8: 8-byte floating-point number (double)
•
VT_DATE: Date in OleDateTime format; the DATE type is implemented using an 8-byte
floating-point number. Days are represented by whole number increments starting with 30
December 1899, midnight as time zero. Hour values are expressed as the absolute value of
the fractional part of the number.
•
VT_BSTR: String
•
VT_BOOL: Boolean
Data Mining Configurator
Specifying SQL Parameter Name
3. To view or modify the SQL query, click the Edit button. This opens the SQL Command Editor,
which enables you to manually edit the query string, as shown in the figure below. Click OK.
SQL Command Editor
75
Data Mining Configurator – User’s Manual
NOTE
You can also change the column ordering in the data source configuration by selecting a column
and clicking the Move Up or Move Down buttons. Click the Remove button to delete the
selected column(s).
Bind Results
When the Bind Results check box is checked, it executes "binding" of a SQL query in the same
transaction and returns its rowset as output parameters. This allows you to read some database
data immediately after executing a data manipulation SQL command (e.g. you can read the ID of a
newly created record).
Stored Procedure
Stored procedures are the preferred way of using data manipulators. They are much more flexible
than SQL commands and usually are faster in processing. Their wide range of capabilities allows for
complex database data manipulation.
To get data from a stored procedure in the database:
1. Select the Stored Procedure option under the Specify Data Manipulator section, as shown in
the figure below.
Data Manipulator Properties: Stored Procedure
2. In the Procedure Name field, click the … button. This opens the Unified Data Browser, which
lists all the stored procedures in the database, as shown in the figure below. Select a procedure
(e.g. "Sales by Year"), and then click OK.
76
Data Mining Configurator
Selecting a Stored Procedure
Data Items
Once you have selected a data set or data manipulator to mine within the connected database, the
next step is to specify which data items to monitor within the chosen data set (i.e. which values to
read from the selected group of data). A data item represents a single value in a data set. There are
two general types of data items:
•
Data items for data sources
•
Data items for data manipulators
Data Items for Data Sources
Two types of data items are used for data sources:
•
Statically defined (preconfigured)
•
Dynamically requested (parameter values are set in runtime)
NOTE
Data items are also accessible as OPC Data Access tags; i.e. they are visible in OPC DA
browsers as ordinary OPC DA tags. The ProgID of the Data Mining server is
SMAR.DatabaseOPCServer.3.
Static Data Items
Static data items must be preconfigured and cannot be changed in runtime mode. Basically there
are used two types of static data items:
•
Column-oriented data item: Gets value(s) from the table column specified in the configuration
•
Record-set oriented data item: Gets the whole table row(s) as an array of VARIANT values
(single or multi-dimensional array).
Dynamic Data Items
Dynamic data items are available under every data source object without being configured. The
syntax of a fully qualified OPC DA tag ID is as follows:
SMAR.DatabaseOPCServer.3\DataSourceName<ParameterValues>.DataItemName
where
•
DataSourceName is the name of the data source object in the server configuration.
77
Data Mining Configurator – User’s Manual
•
ParameterValues are values for data source parameters delimited with semicolons (see the
tables below).
•
DataItemName can be one of
“<Column Name>”, “@@Recordset”, “@@Refresh”,
“@@LastScanTime” (see the tables below).
DATA TYPE
String (VT_BSTR)
DESCRIPTION
VALUE SYNTAX
String
“text”
123
Boolean (VT_BOOL)
4-bytes integer
8-bytes floating-point number
(double)
Boolean
VT_DATE
8-byte floating-point number
DATETIME(date value)
Integer (VT_I4)
Real (VT_R8)
3.14 or -1.82E-3
BOOL (True) or BOOL (False)
NOTE
The DATE type is implemented using double-precision numbers. Days are represented by whole
number increments starting with 30 December 1899, midnight as time zero. Hour values are
expressed as the absolute value of the fractional part of the number.
DATA ITEM NAME
ACCESS
RIGHTS
@@Column
Read/Write
@@Recordset
Read/Write
@@Refresh
Write
@@LastScanTime
Read
DESCRIPTION
Can address the only one table column identified
by its name placed into the last section of OPC DA
tag name; delimited by <>.
Addresses the whole table row.
Any write forces the data source to re-read data
from connected data source.
Returns time of the last data source update.
Dynamic data items can be indexed by parameters configured at the data source level. It allows
changing parameter values dynamically in runtime, e.g. using aliases, variables or scripting.
Note: Alias names should have quotation marks around them. If you are using aliases, the aliases
and quotes should use the following syntax:
<”<<Alias1>>”;”<<Alias2>>”;”<<Alias3>>”>
Examples
Suppose you have a database table “Sample” with columns “PID,” “Name,” “Description” and data
source with name “Sample_by_PID,” referring to this table with one parameter “PID.” The table
does not contain any rows with PID greater than 5.
1. The OPC DA tag "SMAR.DatabaseOPCServer.3\Sample_by_PID<1>.<Name>” accesses the
“Name” column for row with PID = 1.
2. The OPC DA tag SMAR.DatabaseOPCServer.3\Sample_by_PID<1>.@@Recordset” accesses
the whole table row with PID = 1. Table row(s) values are returned in array of VARIANT values
(one or two dimensional - depends on data source configuration).
3. Inserts into column-oriented data item configured to access table column “Name” with PID set
10:Writing string “John” into this data item will create a new table row with the following values:
PID = 10, Name = “John,” Description = database default value.
4. Inserts into record set oriented OPC tag with PID set 11:Writing array of VARIANTs will create a
new table row using all values from passed array (overrides database default values and
parameter values).
5. Deletes table row with PID = 11:
Writing VT_EMPTY value into data item used in previous example will delete row with PID = 11.
78
Data Mining Configurator
Data Items for Data Manipulators
There are two types of data items that can access data manipulator objects:
•
Execute data item
•
Result data item
The data manipulator object executes its action asynchronously; unique request identification is
needed to pair requests and responses, as shown in the table below.
NOTE
ProcessView includes two components for accessing data manipulator objects synchronously:
DBOPCManipulatorWrapper and the Data Manipulator ActiveX control.
DATA ITEM
NAME
ACCESS
RIGHTS
@@Execute
Write
@@Result
Read
DESCRIPTION
Writing to this data item executes a data manipulator action
(stored procedure or SQL command). The actual value written to
this tag must conform to the following rules:
It must be an arrary of VARIANTs.
The first value in this array is the unique request identification.
The rest of the values are used as input parameters for data
manipulator.
Returned values represent responses for execute requests. All
the returned values are stored in an array of VARIANTs.
Similar to the @@Execute data item, the first value in this array
is the unique request identification used in execute data item. The
rest of the values are output parameters (if there are any).
Creating a New Data Item
To create a new data item:
1. Right-click on a data source in the tree control of the Configurator and select New > Data Item
from the pop-up menu, as shown in the figure below.
Creating a New Data Item
2. The properties dialog box for the new data item appears in the right-hand pane of the
Configurator, as shown in the figure below.
79
Data Mining Configurator – User’s Manual
Setting the Properties for the New Data Item
3. In the Name field, type a name for the new data item.
4. Click the Add button to enter data set parameter values.
5. Select the data set columns (table) for the data item. You can select a Specific Column, or use a
Complete Rowset.
6. When you have finished configuring the data item properties, click the Apply button. The new
data item appears under the data source in the tree control.
Data Item Properties
Configuring a data source requires the following basic steps, as shown in the figure below:
1. In the Name field, type a name for the new data item.
Data Item Properties
80
Data Mining Configurator
1. In the Bind Data Set Parameters field, click the Add button to enter data set parameter values,
•
•
•
•
•
as shown in the figure below. Enter a Parameter Value (i.e. column name) and choose one of
the following Value Data Types from the drop-down list.
VT_I4: 4-byte integer
VT_R8: 8-byte floating-point number (double)
VT_DATE: Date in OleDateTime format; the DATE type is implemented using an 8-byte floatingpoint number. Days are represented by whole number increments starting with 30 December
1899, midnight as time zero. Hour values are expressed as the absolute value of the fractional
part of the number.
VT_BSTR: String
VT_BOOL: Boolean
Entering Parameter Value for Data Item
2. Select the data set columns (table) for the data item. You can select a Specific Column, or use a
Complete Rowset. To choose a specific column, click the … button and browse for a column
name (e.g. "Name") from the list of columns in the database table, as shown in the figure below.
Specifying Column Name in Data Item
81
Data Mining Configurator – User’s Manual
3. The Parameter Value corresponds to the record number in the database table. For data item
Name_2, the Parameter Value is "2," as shown in the figure above. As you can see in the figure
below, in the Name column, record number "2" corresponds to the second value in the column.
Thus, the value for record number "2" is Russel, which is highlighted in the figure below. Thus,
the Parameter Value for data item Name_2 is resolved as "Russel."
Record Number in Database Table
4. When you have finished configuring the data item properties, click the Apply button. The new
data item appears under the data source in the tree control.
Testing Your Data Tags
Before you try to connect to data sources and view your data tags, it is highly recommended that
you verify if the tags present inside the display are well configured from the server side. To do that
you have to check the quality of your data tags using OPC DataSpy:
1. Start OPC DataSpy from the Windows Start menu by selecting Programs > Smar
ProcessView > OPC DataSpy.
2. In OPC DataSpy, expand the tree control and browse to your data tag. Right-click on the data
tag(s) and select Monitor from the pop-up menu, as shown in the figure below.
Browsing for Data Tags in OPC DataSpy
3. The data tag(s) now appear in under the Data Monitor tree control, as shown in the figure below.
The tag quality is indicated in the right-hand pane. If the tag quality is good, then the tag is
ready for data mining. If the tag quality is bad, go back to the Data Mining Configurator and
check your data source and data item configurations.
82
Data Mining Configurator
Data Tag Quality Indicated in DataSpy Data Monitor
Visualizing Data in GraphWorX
Once you have configured and tested your database connection, data sources, and data items in the
Data Mining Configurator, the next step is to visualize the data in GraphWorX. You also can view
data in the Data Mining ActiveX, which displays one-dimensional and multidimensional arrays of
data from database connections inside a grid display, which is embedded in an ActiveX container.
For more information, please see the Data Mining ActiveX help documentation.
The Data Mining Demo provides an example GraphWorX display that shows how to configure your
data mining connections so you can view data coming from the database.
1. Go to the C:\Program Files\Smar\Processview\Examples\Database Mining Examples
directory in the PROCESSVIEW installation and open the DBOPC.gdf file.
2. The display opens in GraphWorX configuration mode, as shown in the figure below. The display
contains two different examples of data mining visualization: static and dynamic. A static display
simply displays the data values from the connected database. A dynamic display allows you to
manipulate data values from the connected database.
The table in the static definition section contains some column names from the Employees
database table, as shown in the figure below:
• Name: Employee's first name
• Surname: Employee's last name
• Salary: Employee's salary
• PID: Employee's identification number
Each column contains process points that correspond to data items (e.g. Name_1, Name_2,
Name_3, PID_1, PID_2, etc.) in the Employees_By_PID data source from the demo data mining
configuration. A process point must be configured for each data item. We will continue to look at
the Name_2 data item as an example:
Under the Name column in the GraphWorX display, double-click the second process point under
the Name column, as shown in the figure below.
83
Data Mining Configurator – User’s Manual
Data Mining Demo in GraphWorX: Configuration Mode
3. This opens the Property Inspector for the data item. Click on the PPT/DE tab, as shown in the
figure below. As you can see, the AdministrationDB.Employees_By_PID.Name_2 item ID has
already been specified in the Data Source field.
Property Inspector for Name_2 Data Item
4. Click on the Data Tags button to open the Unified Data Browser. The Unified Data Browser
•
•
•
84
opens to the Database Access tab, as shown in the figure below. You can see that the browser
tree control is similar to the tree control in the Data Mining Configurator; you can choose from
configured data items from the Employees_By_PID data source connection. The Name_2 item
ID
has
already
been
selected.
Notice
that
each
ItemID
(e.g.
SMAR.DatabaseOPCServer.3\AdministrationDB.Employees_By_PID.Name_2) contains the
following information:
Server name (e.g. SMAR.DatabaseOPCServer.3\)
Database connection name (e.g. AdministrationDB)
Data source name (e.g. Employees_By_PID)
Data Mining Configurator
•
Data item name (e.g. Name_2)
Data Item Specified in Unified Browser
5. Close out of the Unified data Browser and the Property Inspector dialog box.
6. Enter the GraphWorX display into runtime mode. You can see the data coming from the
Employee database table, as shown in the figure below. Notice that the Parameter Value for
data item Name_2 is resolved as "Russel" in the visualization display.
NOTE
The Static definition section simply displays the values from the Employee database table for
the configured data items, but the data cannot be manipulated. The Dynamic definition section
also displays values from the Employee database table, but in this case only one row of data is
displayed at a time, and you change the currently viewed row by clicking the three PID buttons,
as shown in the figure below. The dynamic configuration uses local aliases and global aliases,
which enable you to switch between rows during runtime mode.
85
Data Mining Configurator – User’s Manual
Data Mining Demo in GraphWorX: Runtime Mode
7. The items displayed in GraphWorX correspond to the information in the Employees database
table
in
the
Administration
database.
For
example,
the
itemID
AdministrationDB.Employees_By_PID.Name_2 has the value Russel, because Russel is the
second name listed in the database table, as shown in the figure below.
Employees Table in Administration Database
Database Access Tag Syntax
In the Database Access tab of the Unified Data Browser, shown in the figure below, the tree control
is similar to the tree control in the Data Mining Configurator; you can choose from configured data
items from the Employees_By_PID data source connection.
Unified Browser: Browsing Databases
For example, in the figure above the Name_2 item ID has been selected. The full ItemID is:
SMAR.DatabaseOPCServer.3\AdministrationDB.Employees_By_PID.Name_2)
Each item ID in the Database Access tab contains the following information:
86
Data Mining Configurator
•
•
•
•
Server name (e.g. SMAR.DatabaseOPCServer.3\)
Database connection name (e.g. AdministrationDB)
Data source name (e.g. Employees_By_PID)
Data item name (e.g. Name_2)
Data Mining Examples
The ProcessView installation includes several data mining example files in the \Program
Files\Smar\ProcessView\Examples\Database Mining Examples directory.
Example 1: Data Mining Configuration Demo
The ProcessView installation provides a default Data Mining Demo configuration. To view the demo
files, go to the C:\Program Files\SMAR\PROCESSVIEW-\Examples\Database Mining Examples
directory in the ProcessView installation. This directory contains the following files:
• DBOPCServerConfigurator.mdb: This Microsoft Access file is the default active data mining
configuration database.
• administration.mdb: This Microsoft Access file is the demo database connection.
• DBOPC.gdf: This is a GraphWorX display that allows you to view the data sources and
data items specified in the demo database connection.
To view the DBOPCServerConfigurator.mdb demo configuration database:
• Open the Data Mining Configurator from the Windows Start menu by selecting Programs >
Smar ProcessView > Tools > Data Mining Configurator.
• This opens the DBOPCServerConfigurator.mdb database in the Configurator, as shown in the
figure below. The main tree control of the Configurator is called Databases. Under this tree
control, you can see the following items:
• The demo database connection, called AdministrationDB, which connects to the
administration.mdb Microsoft Access database.
• A demo data source, called Employees_By_PID.
• Several data items (e.g. Name_1, Name_2, Name_3, PID_1, PID_2, etc.)
• These demo items are described in greater detail in the Data Mining Configurator Help
documentation.
Data Mining Configuration Demo
Example 2: Data Source Configuration Examples
The second data mining example provides a data mining configuration database with several
different types of preconfigured data sources. For this example, the PROCESSVIEW installation
includes the following data mining example files in the \Program Files\SMAR\PROCESSVIEW\Examples\Database Mining Examples directory:
87
Data Mining Configurator – User’s Manual
•
DBOPCServerExample.mdb: This is an example data mining configuration database that
contains many example data sources and data tags.
• Northwind.mdb: This is an example Microsoft Access database to which the example data
mining configuration database is connected.
• DBOPC_PainReliefRECIPE.XLS: This is an example Microsoft Excel workbook to which the
example data mining configuration database is connected.
• DBOPC_GlobalAliasCfg.mdb: This is a global aliasing configuration database that is used with
the Excel data source example. In order to use the Excel example, you must open this database
in the Global Aliasing Configurator and activate the database by selecting Make Active from the
File menu.
• DBOPC_Excel.gdf: This GraphWorX display allows you to view and write to Excel cells that are
included in the DBOPC_PainReliefRECIPE.XLS spreadsheet. In order to use the Excel
example, you must open the DBOPC_GlobalAliasCfg.mdb database in the Global Aliasing
Configurator and activate the database by selecting Make Active from the File menu.
• DBOPC_Access1.gdf: This GraphWorX display contains single-value database tags, extended
syntax tags, and writeable tags.
• DBOPC_Access2.gdf: This GraphWorX display contains tags that return a single-dimensional
recordset connecting to a database table in the Data Mining ActiveX.
• DBOPC_Access3.gdf: This GraphWorX display contains tags that return a two-dimensional
recordset connecting to a database table in the Data Mining ActiveX.
• DBOPC_Access4.gdf: This GraphWorX display contains tags that return a single-dimensional
recordset connecting to a database table using a SQL command in the Data Mining ActiveX.
• DBOPC_Access5.gdf: This GraphWorX display contains tags that return a two-dimensional
recordset connecting to a database table using a SQL command in the Data Mining ActiveX.
• DBOPC_GlobalAlias.gdf: This GraphWorX display contains an example of how to use global
aliases as tags in the Data Mining ActiveX.
To view the example configuration database:
1. Open the Data Mining Configurator from the Windows Start menu by selecting Programs >
SMAR PROCESSVIEW > Tools > Data Mining Configurator.
2. Select Open from the File menu, as shown in the figure below.
Opening the Example Configuration
3. Browse to the Program Files\SMAR\PROCESSVIEW-\Examples\Database Mining Examples
directory and select the DBOPCServerExample.mdb file, as shown in the figure below.
88
Data Mining Configurator
Selecting the Data Mining Example Configuration Database
4. The example data mining configuration opens in the Configurator, as shown in the figure below.
The example configuration contains two different database connections. These connections
contain several data sources and data items (tags).
Data Mining Example Configuration Database
The first is a connection to the Northwind.mdb Microsoft Access database, as shown in the figure
below. This database connection reads data from reads data from the Customers table in the
Northwind database. The figure below shows this table as viewed in Microsoft Access. As you can
see, it has several columns of data (e.g. Customer ID, Company Name, Contact Name, Contact
Title, etc.).
89
Data Mining Configurator – User’s Manual
Customers Table in Northwind Database.
The example configuration database contains the following data sources and data tags:
• DataSource01.Tag1: Reads a single value from the CompanyName column in the Customers
table.
• DataSource02.Tag2: Reads a complete rowset from the Customer ID column in the
Customers table.
• DataSource03.Tag3: Reads all values from the Company Name column in the Customers
table.
• DataSource04.Tag4: Reads all values from the Customers table in a multidimensional array.
• DataSource05.Tag5: Reads a complete rowset from the Customer ID column in the
Customers table.
• DataSource06.Tag6: Reads a single value from a list list of parameters.
• DataSource07.Tag7: Reads a single value from the CompanyName column in the Customers
table.
• DataSource07.Tag8: See single value. Reads a single value from the CompanyName column
in the Customers table.
• DataSource09.Tag10: SQL command reads a complete rowset from the Customer ID column
in the Customers table.
• DataSource10.Tag11: SQL command reads a single value from the CompanyName column
in the Customers table.
• DataSource11.Tag12: SQL command reads all values from the Customers table in a
multidimensional array.
• DataSource12.Tag13: SQL Command Example reads multiple rows from the ContactName
column in the Customers table.
• WriteValue.Write1: Writes values to these tags from GraphWorX and displays the changes
online.
• WriteValue.Write2: Writes values to these tags from GraphWorX and displays the changes
online.
It is recommended that you view these data tags in the Data Mining ActiveX in GraphWorX so you
can see how the data are displayed in the Grid ActiveX when connections to data tags are
established for both one-dimensional and multidimensional arrays. For more information, please
see the Data Mining ActiveX help documentation.
Example 3: Data Mining Logging Examples
The third data mining example provides a data mining logging configuration that connects to
different data sources using the Data Mining ActiveX control and Data Manipulator ActiveX control.
90
Data Mining Configurator
For this example, the PROCESSVIEW installation includes the following data mining example files
in the \Program Files\SMAR\PROCESSVIEW-\Examples\Database Mining Examples directory:
• DataLoggerExample.gdf: This is a GraphWorX example display that contains Data Mining
ActiveX controls and Data Manipulator ActiveX controls.
• DBOPCServerDBGridExample.mdb: This is an example data mining configuration database
that contains some preconfigured example data sources and data manipulators that are used
in the logging example.
• DataLogger.mdb: This is a logger database that is used by the Data Mining ActiveX controls
and two Data Mining Manipulator ActiveX controls in the DataLoggerExample.gdf display.
For more information about this example, please see the Data Manipulator Example application
note on the PROCESSVIEW product CD.
91
Data Mining Configurator – User’s Manual
92